Showing 31942 items matching "4-masted"
-
 Ballarat Tramway Museum
Slide - 35mm slide/s, Ben Parle, 8/04/1958 12:00:00 AM
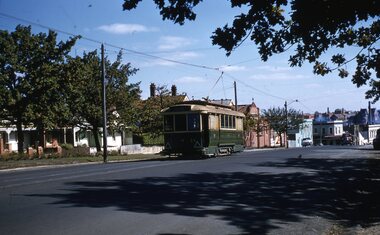
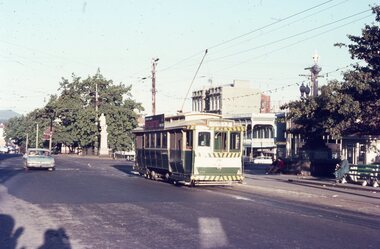
Kodachrome Transparency - 35mm slide - cardboard mount, with one side with red border and words "Kodachrome Transparency / Processed by Kodak" top and bottom. Photo taken by Ben Parle 8/4/1958, date stamped onto slide. Has slide No. "7" stamped in red in top corner. Photo of Ballarat 30, inbound, Victoria St, at Main St intersection. Taken after Reg Item 2878. Buildings in the background are Stones Corner, Caltex and Mtheos Fish Shop. "Victoria St. Line" / "8-4-58"tramways, trams, victoria st, main st, tram 30 -
 Ballarat Tramway Museum
Slide - 35mm slide/s, Ben Parle, 8/04/1958 12:00:00 AM
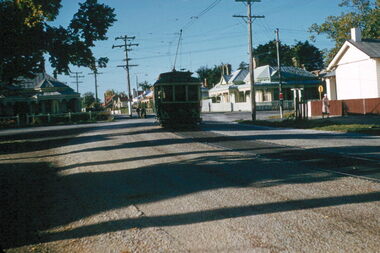
Kodachrome Transparency - 35mm slide - cardboard mount, with one side with red border and words "Kodachrome Transparency / Processed by Kodak" top and bottom. Photo taken by Ben Parle 8/4/1958, date stamped onto slide. Has slide No. "8" stamped in red in top corner. Photo of Ballarat 14, outbound Victoria St, just after intersection with Humffray St. Tram has the destination of Victoria St. For high resolution scan see btm2880.tif"Victoria St. Line" / "8-4-58"tramways, trams, victoria st, tram 14 -
 Flagstaff Hill Maritime Museum and Village
Deadeye, circa 1873
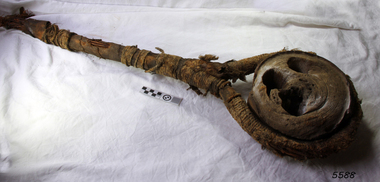
This example of a sailing ship’s ‘dead-eye’ is from the wreck of the LOCH ARD, which sank near Port Campbell in 1878. The vessel was an iron hulled clipper ship constructed for the Loch Line in 1873. It was part of a fleet of similar merchant ships owned by that company, which specialised in bringing passengers and goods from London via the Great Circle route to Melbourne, and returning to Britain via Cape Horn with the colony’s wool clip. Deadeyes were a common feature of sailing ship technology in the nineteenth century. They were a simple, cheap, and hard-wearing device that, in conjunction with another deadeye, provided an effective means of levering, or tightening, attached ropes and stays. Lower deadeyes were fixed to the sides of the ship by an encircling metal collar (inset in a flattish groove chiselled around the outer circumference of the disc), which was bolted to iron bars attached to the hull (called chain-plates). Upper deadeyes were looped by a strong hemp or wire rope (inset in a rounded groove carved around the outer circumference of the disc), which was joined to the bottom ends of the rigging which reached up to secure the masts into position (called shrouds or stays). Connecting a Lower deadeye to its corresponding Upper deadeye was a rope (called a lanyard) which looped up and down through the three “eyes” of each disc, to form a pulley system. The hitching of the two deadeyes with a looped lanyard provided the means of tightening, or loosening, the tension on the mast rigging ― essentially by pulling against the chain-plates bolted to the outside of the hull. It was a procedure that could be performed by sailors at sea and in emergencies. For example, after a gale the stays may have stretched and the masts worked loose, requiring retightening. Or, in the extreme circumstance of shipwreck, the lanyards might need to be released on the weather side, so that the masts fall away from the stricken vessel. HISTORY OF THE LOCH ARD The LOCH ARD belonged to the famous Loch Line which sailed many ships from England to Australia. Built in Glasgow by Barclay, Curdle and Co. in 1873, the LOCH ARD was a three-masted square rigged iron sailing ship. The ship measured 262ft 7" (79.87m) in length, 38ft (11.58m) in width, 23ft (7m) in depth and had a gross tonnage of 1693 tons. The LOCH ARD's main mast measured a massive 150ft (45.7m) in height. LOCH ARD made three trips to Australia and one trip to Calcutta before its final voyage. LOCH ARD left England on March 2, 1878, under the command of Captain Gibbs, a newly married, 29 year old. She was bound for Melbourne with a crew of 37, plus 17 passengers and a load of cargo. The general cargo reflected the affluence of Melbourne at the time. On board were straw hats, umbrella, perfumes, clay pipes, pianos, clocks, confectionary, linen and candles, as well as a heavier load of railway irons, cement, lead and copper. There were items included that intended for display in the Melbourne International Exhibition in 1880. The voyage to Port Phillip was long but uneventful. At 3am on June 1, 1878, Captain Gibbs was expecting to see land and the passengers were becoming excited as they prepared to view their new homeland in the early morning. But LOCH ARD was running into a fog which greatly reduced visibility. Captain Gibbs was becoming anxious as there was no sign of land or the Cape Otway lighthouse. At 4am the fog lifted. A man aloft announced that he could see breakers. The sheer cliffs of Victoria's west coast came into view, and Captain Gibbs realised that the ship was much closer to them than expected. He ordered as much sail to be set as time would permit and then attempted to steer the vessel out to sea. On coming head on into the wind, the ship lost momentum, the sails fell limp and LOCH ARD's bow swung back. Gibbs then ordered the anchors to be released in an attempt to hold its position. The anchors sank some 50 fathoms - but did not hold. By this time LOCH ARD was among the breakers and the tall cliffs of Mutton Bird Island rose behind the ship. Just half a mile from the coast, the ship's bow was suddenly pulled around by the anchor. The captain tried to tack out to sea, but the ship struck a reef at the base of Mutton Bird Island, near Port Campbell. Waves broke over the ship and the top deck was loosened from the hull. The masts and rigging came crashing down knocking passengers and crew overboard. When a lifeboat was finally launched, it crashed into the side of LOCH ARD and capsized. Tom Pearce, who had launched the boat, managed to cling to its overturned hull and shelter beneath it. He drifted out to sea and then on the flood tide came into what is now known as LOCH ARD Gorge. He swam to shore, bruised and dazed, and found a cave in which to shelter. Some of the crew stayed below deck to shelter from the falling rigging but drowned when the ship slipped off the reef into deeper water. Eva Carmichael had raced onto deck to find out what was happening only to be confronted by towering cliffs looming above the stricken ship. In all the chaos, Captain Gibbs grabbed Eva and said, "If you are saved Eva, let my dear wife know that I died like a sailor". That was the last Eva Carmichael saw of the captain. She was swept off the ship by a huge wave. Eva saw Tom Pearce on a small rocky beach and yelled to attract his attention. He dived in and swam to the exhausted woman and dragged her to shore. He took her to the cave and broke open case of brandy which had washed up on the beach. He opened a bottle to revive the unconscious woman. A few hours later Tom scaled a cliff in search of help. He followed hoof prints and came by chance upon two men from nearby Glenample Station three and a half miles away. In a state of exhaustion, he told the men of the tragedy. Tom returned to the gorge while the two men rode back to the station to get help. By the time they reached LOCH ARD Gorge, it was cold and dark. The two shipwreck survivors were taken to Glenample Station to recover. Eva stayed at the station for six weeks before returning to Ireland, this time by steamship. In Melbourne, Tom Pearce received a hero's welcome. He was presented with the first gold medal of the Royal Humane Society of Victoria and a £1000 cheque from the Victorian Government. Concerts were performed to honour the young man's bravery and to raise money for those who lost family in the LOCH ARD disaster. Of the 54 crew members and passengers on board, only two survived: the apprentice, Tom Pearce and the young woman passenger, Eva Carmichael, who lost all of her family in the tragedy. Ten days after the LOCH ARD tragedy, salvage rights to the wreck were sold at auction for £2,120. Cargo valued at £3,000 was salvaged and placed on the beach, but most washed back into the sea when another storm developed. The wreck of LOCH ARD still lies at the base of Mutton Bird Island. Much of the cargo has now been salvaged and some was washed up into what is now known as LOCH ARD Gorge. Cargo and artefacts have also been illegally salvaged over many years before protective legislation was introduced. One of the most unlikely pieces of cargo to have survived the shipwreck was a Minton porcelain peacock - one of only nine in the world. The peacock was destined for the Melbourne International Exhibition in 1880. It had been well packed, which gave it adequate protection during the violent storm. Today, the Minton peacock can be seen at the Flagstaff Hill Maritime Museum in Warrnambool. From Australia's most dramatic shipwreck it has now become Australia's most valuable shipwreck artefact and is one of very few 'objects' on the Victorian State Heritage Register. The shipwreck of the LOCH ARD is of State significance. Victorian Heritage Register S417. Flagstaff Hill’s collection of artefacts from LOCH ARD is significant for being one of the largest collections of artefacts from this shipwreck in Victoria. It is significant for its association with the shipwreck, which is on the Victorian Heritage Register (VHR S417). The collection is significant because of the relationship between the objects, as together they have a high potential to interpret the story of the LOCH ARD. The LOCH ARD collection is archaeologically significant as the remains of a large international passenger and cargo ship. The LOCH ARD collection is historically significant for representing aspects of Victoria’s shipping history and its potential to interpret sub-theme 1.5 of Victoria’s Framework of Historical Themes (living with natural processes). The collection is also historically significant for its association with the LOCH ARD, which was one of the worst and best known shipwrecks in Victoria’s history. A reasonably well-preserved ship’s deadeye with rust-stained wire loop-rope still attached. It retains portions of its original hemp cord and hessian wrapping. The flat sides of this thick wooden disc have three holes drilled through in a triangular configuration. The artefact is from the shipwreck of the LOCH ARD (1878). The survival of the loop-rope (wire cable) indicates it was an Upper Deadeye, connected to the shrouds (mast rigging).flagstaff hill, warrnambool, shipwrecked coast, flagstaff hill maritime museum, maritime museum, shipwreck coast, flagstaff hill maritime village, great ocean road, loch line, loch ard, captain gibbs, eva carmichael, tom pearce, glenample station, mutton bird island, loch ard gorge, deadeye, rigging -
 Melbourne Legacy
Journal - Newsletter, Legacy Newsletter 1967-1969 (For the members of the Melbourne Legacy Widows' Club), 1966 to 1969
Early examples of Melbourne Legacy Club newsletters, covering the activities of Melbourne Legacy Widows' Club. Information includes a notice from the Chairman of the Widows' Committee, dates of meetings, possible day trips and theatre outings, and cruises. The ladies were welcome to attend monthly meetings, card afternoons, indoor bowls competitions, outings and tours, plus the annual fete and Christmas concert. There was 5 editions per 1967 and 6 issues in 1968 and 1969. The Senior Widows Club coordinator was F R G Strickland and the editor was Mrs B E Shephard. There were so many widows that the meetings were held at the Melbourne Town Hall to accomodate the numbers. November's meeting was a picnic in the Botanical Gardens and January the widows met in Fitzroy Gardens. In November or December there were calls for nominations for the committee members for the following year. Committee comprised of a President, 2 Vice presidents, Hon. Secretary, Hon. Treasurer, Hon. Assistant Secretary and 14 members of the committee. The first edition in the new format was in 1960, previously there had been a quarterly magazine but the distribution was limited, they changed to a 4 page newsletter format to reach more of the widows. The newsletter was priced at 1D a copy until decimal currency was introduced and it became 2c. Various pages of interest have been added to show different news items. Other editions haven't been scanned.Brings to life the activities provided for the widows and the work of Melbourne Legacy in the early years.Black typed newsletter x 17 editions from 1967 to 1969, each edition 4 foolscap pages. No 42, 9 Feb 1967, 2 pages plus 2 pages of Firewood application form No 43, 20 April 1967, 4 pages No 44, 13 July 1967, 4 pages No 45, 12 October 1967, 4 pages No 46, 30 November 1967, 4 pages plus 2 pages of nominations for Senior Widows Club Committee plus 2 pages Firewood application form No 47, 15 February 1968, 4 pages No 48, 18 April 1968, 4 pages No 49, 27 June 1968, 4 pages No 50, 29 August 1968, 4 pages No 51, 24 October 1968, 4 pages No 52, 28 November 1968, 4 pages plus 2 pages Firewood application form. No 53, 14 February 1969, 2 pages plus 2 pages of programme of the Senior Widows Club Committee meeting No 54, 10 April 1969, 4 pages No 55, 25 June 1969, 4 pages No 56, 4 September 1969, 4 pages No 57 16 October 1969, 4 pages No 58, 4 December 1969, 2 pages plus 1 page of nominations for Senior Widows Club Committee plus 2 pages Firewood application form.newsletter, activities -
 Eltham District Historical Society Inc
Negative - Photograph, St Mary's Catholic Church, cnr Main Road and Henry Street, Eltham, c.1912
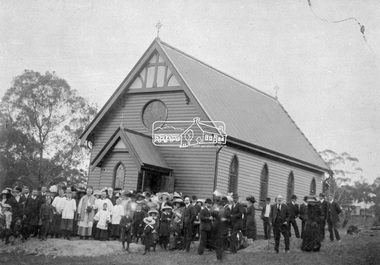
St Mary's Catholic Church, cnr Main Road and Henry Street, Eltham was opened/blessed October 13, 1912. The wooden church was built to replace an earlier brick church also known as St Mary's (1865-1912), which had been situated on the main road near present day Wingrove Park. The church and land cost £1,400 (Evelyn Observer). The wooden church was destroyed by fire in 1961. Record includes a photo print copy of image as illustrated in the 'Diamond Valley News', 4 Feb 1998, p 31.This photo forms part of a collection of photographs gathered by the Shire of Eltham for their centenary project book,"Pioneers and Painters: 100 years of the Shire of Eltham" by Alan Marshall (1971). The collection of over 500 images is held in partnership between Eltham District Historical Society and Yarra Plenty Regional Library (Eltham Library) and is now formally known as the 'The Shire of Eltham Pioneers Photograph Collection.' It is significant in being the first community sourced collection representing the places and people of the Shire's first one hundred years.Digital image 4 x 5 inch B&W Negsepp, shire of eltham pioneers photograph collection, eltham, church, catholic church, henry street, main road, st marys catholic church -
 Queenscliffe Maritime Museum
Letter - Letter ex Borough of Queenscliffe re WANGARA rescue 4 Dec 1961, Letter of commendation, 4-12-1961
Commendation to Queenscliff Lifeboat Crew re WANGARA 1961Queenscliff Lifeboat Crew Letter ex Borough of Queenscliffe re WANGARA rescue 4 Dec 1961Reverse " NIL "lifeboat resue -
 Melbourne Tram Museum
Newspaper, Herald Sun, "Tramline 'eye' plan slammed", 5-4-1989
Provides information about a proposal "speed camera" style camera for use in Fairways to detect motorists who should have not have been using the lane. Proposed by the Minister for Transport Jim Kennan, opposed by the Opposition Transport spokesman Alan Brown. Gave some proposed locations. Article written by Rosanne Michie. Yields information about a proposal to monitor compliance of Fairways,Newspaper clipping - "Tramline 'eye' plan slammed" - The Sun 5-4-1989tramways, trams, melbourne, public transport, fairways -
 Melbourne Tram Museum
Document, Public Transport Corporation (PTC), "Upgrade of Z1 and Z2 class trams", 22-4-1995
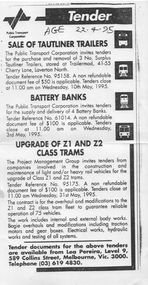
The document is a copy of an advertisement in the Age newspaper calling tenders for PTC - "Upgrade of Z1 and Z2 class trams" and other items. Tenders were to close on 31/5/1995. This was for a mid-life refit of the trams and was for 75 vehicles.Yields information about the timing of a mid-life refit of Z1 and Z2 class tramcars.Document - single A4 sheet with date of 22-4-95 from The Age tramcars, tenders, ptc, z1 class, z2 class, tramcar maintenance -
 8th/13th Victorian Mounted Rifles Regimental Collection
Photograph - TST working
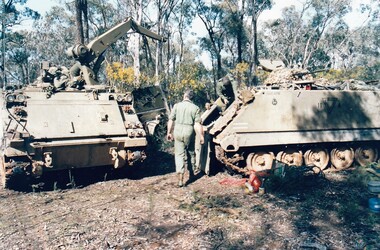
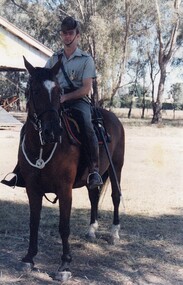
On 1 April 1991, ‘A’ Squadron 8/13 Victorian Mounted Rifles linked with 4/19 Prince of Wales’s Light Horse Regiment to form a new regiment of two squadrons: VMR Squadron and PWLH Squadron. The 4/19 Prince of Wales’s Light Horse title was retained, but the VMR Squadron continued to wear the VMR hat badge.Colour photograph of Technical Support Troop (TST) of VMR Squadron 4/19 Prince of Wales's Light Horse carrying out major repair to disabled M113 Carrier during Annual Camp, Puckapunyal, September 19992.military, vmr, puckapunyal, repair, carrier, training -
 Melbourne Tram Museum
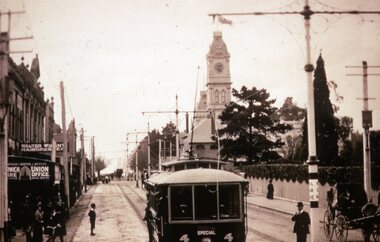
Slide - Black and white reproduction photograph - PMTT tram 4 Glenferrie Road 1910
Photograph - PMTT tram 4 Glenferrie Road 1910, possibly undertaking testing prior to the official opening on 30/5/1910. Photo shows the centre of the road overhead support poles in Glenferrie Road and a "Hail Cars Here" sign. In the background is the Malvern Town Hall, signs for Norwich Union and Walter Wright Hairdresser.Yields information about the opening of the tram lines built by the PMTTKodachrome cardboard duplicate slide - Black and white reproduction photograph - PMTT tram 4 Glenferrie Road 1910 "MP5" in penciltrams, tramways, opening, tram 4, pmtt, glenferrie road, tram stop -
 Flagstaff Hill Maritime Museum and Village
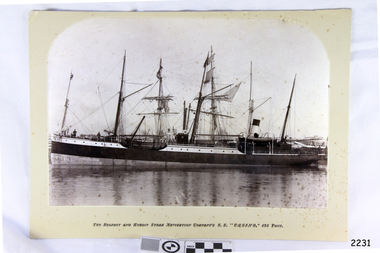
Photograph - Vessels, Sailing Ships, The Belfast and Koroit Steam Navigation Company's S.S. "Casino, 425 Ton, Late 19th to early 20th centuries
This black and white photograph shows the image of the coastal trading vessel S.S. Casino, with both sail masts and steam funnel. Men in hats are clearly visible on deck. The ship is in calm water and only light rigging is on the masts. Other vessels are in the background. Photograph is taken 1882-1932. The S.S. Casino was a passenger and freight steamer built in Dundee, Scotland, in 1882 for the Newcastle and Hunter River Steam Navigation Company of N.S.W. She weighed 425 tons gross with a length of 160.4 feet, beam of 24.1 feet and depth of 10.2 feet. She had saloon accommodation for 35 people, forecabin for 25 more people, and she carried 300 tons of cargo. While on her delivery journey on May 30th 1882 the S.S. Casino called in at the Port of Warrnambool for coal ., narrowly escaping going ashore in gale force winds due to the quick action of the pilot. At that time, still at anchor, she impressed the directors of the Belfast and Koroit Steam Navigation Company so much that they bought her immediately; she was ideal for trade in along the West Coast of Victoria. (Belfast is the original name for Port Fairy, South West Victoria. The Belfast and Koroit Steam Navigation Company was first managed by Messers. Saltau and Osburne and after the passing of Mr. Osburne, by produce merchants Messers H. Sautau and Sons, whose had a hay and corn store and shipping agency was on the corner of Liebig and Koroit Streets in Warrnambool. ) The S.S. Casino became “the most famous steamer to operate in Victorian waters along the West Coast” by author Jack Loney. Captain Boyd was her first Master, followed by Captain Chapman, who stayed with her 1890 until 1924. Captain W. Robertson followed for a short term, then Captain Middleton then took command 1925 - 1932. The S.S. Casino had several mishaps during her life. One was on 3rd January 1898 when she collided with the S.S. Flinders in Apollo Bay with minor damage. Another was on 24th October 1924 when she grounded on a reef at Point Hawdon near Grey River and most of her cargo (of Christmas goods) had to be dumped into the sea. Then in February 1929 she was ‘holed’ when she struck a submerged object as she entered Lady Bay, Warrnambool. On the morning of 10th July 1932, after attempting to berth at Apollo Bay jetty in heavy seas, Captain Middleton decided to take her out into the bay and wait until the seas abated. It was not realised that the anchor used to steady her as she manoeuvred to her berth had pierced her hull. She put about and headed for the beach but sank. Captain Middleton and nine others lost their lives; nine people were rescued including the two female passengers . Captain Middleton had been in charge of the S.S. Casino for seven years. He was the first ship’s Master to lose his life through shipwreck in the West Coast trade. In the years following the turn of the century the S.S. Casino remained the only regular trader with normal passenger accommodation along the West Coast. From 1882 she had made at least 2,500 voyages on the one run. Flagstaff Hill’s collection has a photograph of a portrait of Captain Chapman, , a ship model of the S.S. Casino that shows both forms of power under which she sailed, steam and sail. The ship is painted green and flies three flags. The inscription across the case of the ship model, incorrectly dated, tells the sad story of the wreck of the ship and the loss of lives on July 10th 1932 at Apollo Bay. A print in the Collection show S.S. Casino underway in heavy sea off Point Lonsdale, another two photographs show her at the Port of Warrnambool, leaving from the Breakwater in Lady Bay and another identifies the S.S. Casino as a ship from the Belfast and Koroit Steam Navigation Company. (Belfast is the original name for the township of Port Fairy). This photograph is significant because of its association with the coastal trader S.S. Casino and its significance to trade along Victoria's West Coast in the late 19th and early 20th century. It was taken 1882-1932 The wreck of the S.S. Casino is considered an important part of Victorian and Australian cultural heritage and as such has been declared and protected as an Historic Shipwreck under State and Commonwealth Law in the Commonwealth Historic Shipwrecks Act (1976). Photograph, black and white, taken 1882-1932. Foreground is vessel SS Casino, the Belfast and Koroit Steam Navigation Company's coastal trading ship. The ship, in calm water, has light rigging on its masts and also a steam funnel. One lifeboat is visible. People are on the deck. The background shows other vessels.Under the photograph "The Belfast and Koroit Steam Navigation Company's S.S. "Casino," 425 Tons"flagstaff hill, warrnambool, shipwrecked coast, flagstaff hill maritime museum, maritime museum, shipwreck coast, flagstaff hill maritime village, great ocean road, newcastle and hunter river steam navigation company, belfast and koroit steam navigation company, h. sautau and sons, s.s. casino, west coast trader s.s. casino, victorian coastal trader, captain boyd, captain w. robertson, captain chapman, captain middleton, apollo bay shipwreck, s.s. casino at lady bay warrnambool, saltau and osburne -
 Bendigo Military Museum
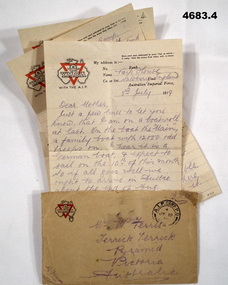
Letter - LETTER AND ENVELOPE, 1) 3.7.1919, .3).4) 14.7.1919
Letters from Alfred Ferris to his family in Terrick Terrick Victoria. Ferris collection refer Cat No 4183.3P.1) letter “YMCA” logo rectangular shape off white colour, all print in red & Black, ruled lines hand written in black pencil & dated. .2) Envelope “YMCA” Logo rectangular shape fawn colour, print in red & black, hand written in black pencil & dated, P.O stamp in black dated. .3).4) Letter “YMCA” logo rectangular shape off white colour, print in red & black, ruled lines hand written in black pencil and dated..1) Letter, “Park House Salisbury England, 3rd July 1919” .2) Envelope P.O stamp, “AIF Camp P.O JY 19, 19” (July 19th 1919) .3).4) Letter dated, “14.7.1919”envelopes, letters ymca, -
 Warrnambool and District Historical Society Inc.
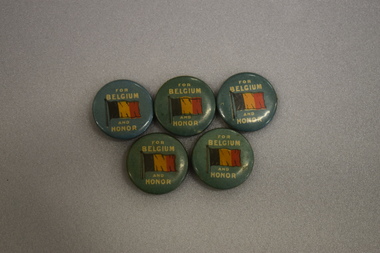
Badges, For Belgium and Honor
Britain was bound by treaty to assist Belgium in times of war and in August 1914 came to Belgium's aid when that country was invaded by Germany. Great sympathy for the Belgians was engendered as news came of their plight and suffering under attack and in Australia this sympathy was reflected by the issuing of badges such as this to aid the war effort and to alleviate the suffering of the Belgians .These badges are of interest as a reminder of the interest of Australia of the war in 1999914-18 as it affected Belgiium..1 circular concave metal badge featuring the Belgian flag and text on a pale green background. There is a pin clip on the reverse. .2 As above .3 As above .4 As above .5 As above.1 FOR BELGIUM AND HONOUR .2 FOR BELGIUM AND HONOUR .3 FOR BELGIUM AND HONOUR .4 FOR BELGIUM AND HONOUR .5 FOR BELGIUM AND HONOUR -
 Stawell Historical Society Inc
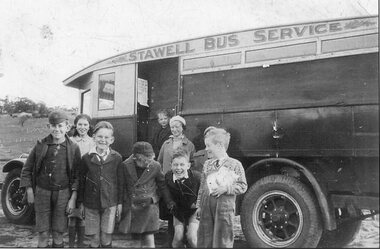
Photograph, Our school Bus
Early school bus 4 boys in short pants, 1 in overalls with patterned jumper holding (unidentified), middle boy with cap and buttoned coat has mittens B/W Landscape Group Portrait 8 Children 6 Boyys, 2 Girls ( 4 Boys in uniform 2 with caps) In front of School bus Paddock behind bus Stawell Bus Servicetransport, education, stawell bus service -
 Melbourne Tram Museum
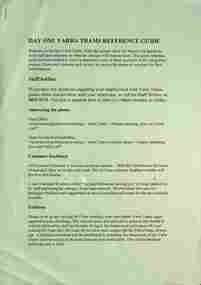
Document, Yarra Trams, "Day one Yarra Trams reference guide", April 2004
Document issued to all former M>Tram employees on the formal absorption or the reunification of the two networks into Yarra Trams on 18/4/2004 - see reference. Covers telephone, customer contact, uniforms, website, operations, media, cleaning, passenger information, depots, infrastructure, maintenance, fleet refurbishment, reliability and frequency, policies, advertising and the interim advertising campaign based around the covering up of the name M>tram.Yields information about the formal absorption of M>Tram into Yarra Trams in April 2004.Document - 4 A4 pages stapled in top left hand corner printed on green paper.yarra trams, national express, m>tram, tramways -
 Ringwood and District Historical Society
Books - Red Cross, Australian Red Cross Society, Books from Ringwood Red Cross including membership rolls - 1945 to 1980, 1945 to 1980
The books were used by the Ringwood branch of the Red Cross Society. They include many local names, addresses and achievements.Books from Ringwood Red Cross including membership rolls. Eight books.; 1. One book no cover; 2. Embassy exercise book. Green spine.; 3. Grey cover. Red spine.; 4 to 8. Membership Rolls showing Red Cross emblem on the covers. Buff coloured covers with red printing.Items 4 to 8: 'Membership Roll' with Red Cross emblem above. -
 Bendigo Military Museum
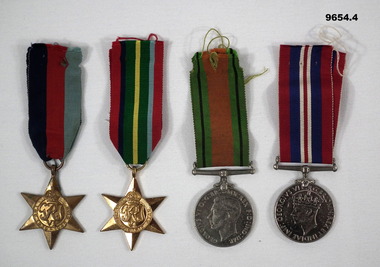
Award - MEDALS WW2, Post 1945
Part of the Coates collection covering several members of the family involved in WW2. Medals regarding"Thomas Coates" VX18443, Enlisted 29 May 1940 in 2/2 Pioneers. Died 5 March 1942. Other items also refer to "Leonard John Clark Coates" V2791 and possibly brother "John Coates" VX18448.Four WW2 medals unmounted. 1. The 1939-45 Star. 2. Pacific Star. 3. Defence Medal. 4. War Medal 1939-45.1. On back, “VX18443 T. Coates” 2. On back, “VX18443 T. Coates” 3. 4. Both have the same on the rim as 1. & 2.2/2 pioneers, war medals, coates family 1 -
Glenelg Shire Council Cultural Collection
Postcard - Postcard - Casterton War Memorial, c. 1960
Sourced from Casterton Town Hall (former Shire of Glenelg)Postcard, black and white, white border, view of War Memorial at Casterton. No. 4 in a series by 'Latimers'Front: 'Latimers THE WAR MEMORIAL, CASTERTON VIC. NO.4' Back: 'POSTCARD' 'A real photograph. Produced in Australia Blue biro line , arrowed each end drawn across width of card. 3" written above linecasterton war memorial -
 Ballarat Tramway Museum
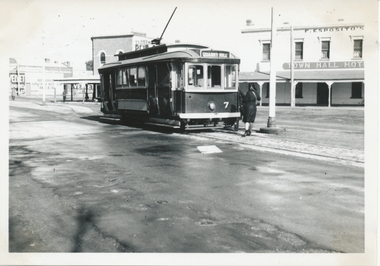
Photograph - Black & White Photograph/s, Wal Jack, 4/08/1943 12:00:00 AM
Black and White print contained within the Wal Jack Bendigo and Geelong Album, see Reg Item 5003 for more details. Photo of No. 7 at Eaglehawk terminus with a conductress completing the turning of the trolley pole. The F. Esposito's Town Hall hotel in the background along with advertisements for Velvet soap. Photo taken 4-8-1943 by Wal Jack. The tram has the destination of Quarry Hill, has white bumpers and white steps. i1 - scan of print in the album i2 - rear of image i3 - scan of negative at 3200dpi added 6/6/2020. On rear in ink "SEC Bendigo, 2nd No. 7, (ex PMTT), Eaglehawk (heavy snow storms) 4-8-43" with the Wal Jack copyright stamp in the top right hand corner and the number "T208" written in.trams, tramways, eaglehawk, world war i, conductresses, tram 7 -
 8th/13th Victorian Mounted Rifles Regimental Collection
Photograph - Major Annett
Major Annett later commanded 4/19 Prince of Wales's Light Horse and later again 4th Brigade, 2nd Division.Three colour photographs of Major Michael Annett, Officer Commanding VMR Squadron 4/19 Prince of Wales's Light Horse Regiment at Australia Day Parade, Corowa NSW 23 January 1994.military, parade, light horse, sword, corowa, australia day -
 Ballarat Tramway Museum
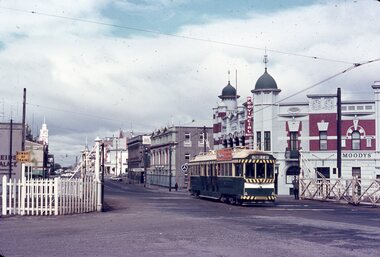
Slide - SECV Ballarat tram 36 at the Railway Station, Graeme Cleak, 5-4-1969
The photo shows SECV Ballarat No. 36 northbound in Lydiard St North crossing the railway level crossing. Taken during the AETA Easter tour to Ballarat - see reference. In the background are Reid's Coffee Palace, Union Trustees, a Mercedes-Benz sign, and the Provincial Hotel. The tram has a SEC Electric Cooking roof advert.Yields information about the AETA 1969 Ballarat tour and tram 36.Colour slide - AGFA Cardboard mount with handwritten notes.In ink "No. 36 Rly Stn 5-4-69, EK13"tramways, tramcars, aeta tours, lydiard st nth, level crossing, tram 36 -
 Ballarat Tramway Museum
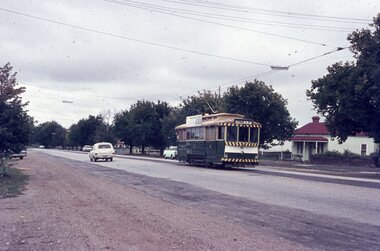
Slide - SECV Ballarat tram 32 at Bell St, Graeme Cleak, 5-4-1969
Photo shows SECV Ballarat No. 32 northbound in Drummond St South at Bell St with the destination of Lydiard St Nth. A man is holding his arm out of the rear door - conductor? The tram has a roof advert for ANA Mutual fund.Yields information about Ballarat tram services and tram 32 in 1969.Colour slide - AGFA Cardboard mount with handwritten notes.In ink "No. 32 Bell St 5-4-69, EK12"tramways, tramcars, drummond st sth, bell st, tram 32 -
 Ballarat Tramway Museum
Slide - SECV Ballarat trams 21 and 34 King St loop - Victoria St, Graeme Cleak, 5-4-1969
The photo shows SECV Ballarat trams 21 and 34 crossing at the King St loop in Victoria Stm with the flower garden beds in the foreground. Taken during the AETA Easter tour to Ballarat - see reference. Yields information about the AETA 1969 Ballarat tour and trams 21 & 34.Colour slide - AGFA Cardboard mount with handwritten notes.In ink "Nos.Victoria St line 5-4-69, EK18"tramways, tramcars, aeta tours, tram 21, decorated tram, tram 34, king st loop, victoria st. -
 Ballarat Tramway Museum
Slide - SECV Ballarat tram 26 Sturt St City terminus, Graeme Cleak, 5-4-1969
The photo shows SECV Ballarat tram 26 at the City terminus, Sturt and Lydiard Sts. Tram 26 has the destination of Victoria St. Taken during the AETA Easter tour to Ballarat - see reference. In the background is the Robert Burns statue and the Mechanics' Institute building.Yields information about the AETA 1969 Ballarat tour and tram 26.Colour slide - AGFA Cardboard mount with handwritten notes.In ink "No 26 Sturt St 5-4-69, EK19"tramways, tramcars, aeta tours, tram 26, sturt st -
 Flagstaff Hill Maritime Museum and Village
Plaque - Insignia, Bank of Australasia, 16-10-1980
This plaque displays the Bank of Australia's Coat of Arms and is significant because is ts the symbol printed on the Bank Notes of the Bank of Australasia. The bank of Australasia was incorporated by Royal Charter of England in March 1834. It had its Australian beginning on 14th December 1835, opening in Sydney. The Acting Superintendent of the bank at that time was David Charters McArthur. He was Superintendent from 1867-to 1876. The Melbourne branch opened on 28th August 1838 in a two-roomed brick cottage on the north side of Little Collins Street, where two huge mastiff dogs were used at night to guard the bank. The government also provided an armed military sentinel. Due to the bank's rapid growth, a new building for the Melbourne branch was opened in 1840 at 75 Collins Street West. By 1879 the bank had been upgraded to a magnificent two-storey building on the corners of Collins and Queens Streets, with the entry on Collins Street. In 1951 the Bank of Australasia amalgamated with the Union Bank to form the Australia and New Zealand Bank, now known as the ANZ. Then in 1970, the ANZ merged with both the ES&A and the London Bank of Australia to form the ANZ Banking Group Limited. The ANZ Banking Group Ltd kindly donated a variety of historic items from the Bank of Australasia. BANK of AUSTRALASIA, WARRNAMBOOL – In 1854 Warrnambool had two banks, the Union Bank and the Bank of Australasia. Later, completely different bank businesses opened; in 1867 the National Bank of Australasia, then in 1875 the Colonial Bank of Australasia. The original Warrnambool branch of the Bank of Australasia was established in July 1854, and operated from a leased cottage on Merri Street, close to Liebig Street. The bank next bought a stone building previously erected by drapers Cramond & Dickson on the corner of Timor and Gibson Streets. Samuel Hannaford was a teller and then Manager at the Warrnambool branch from 1855 to 1856 and the Warrnambool Council chose that bank for its dealings during 1856-57. In 1859 Roberts & Co. was awarded the contract to build the new Bank of Australasia branch for the sum of £3,000; the firm built the Warrnambool Post Office in 1856 and purchased land in Timor Street in 1858. The land was on a sand hill on the northeast corner of Timor and Kepler Streets and had been bought in 1855 from investor James Cust. The new building opened on May 21, 1860. The bank continued to operate there until 1951 when it merged with the Union Bank to form the ANZ Bank, which continued operating from its Liebig Street building. Warrnambool City Council purchased the former Bank of Australasia building in 1971 and renovated it, then on 3rd December 1973 it was officially opened as the Art Gallery by Cr. Harold Stephenson and Gallery Director John Welsh. The Gallery transferred to the purpose-built building in Liebig Street in 1986 and the old bank building is now the Gallery club. Staff at the Bank of Australasia in Warrnambool included the following men but others were also involved: Samuel Hannaford, Teller then Manager from 1855-1856; Hawkins, Manager in 1856, W H Palmer, Manager from January 1857 until November 1869 when the Teller Basil Spence was promoted to Manager; H B Chomley, Manager from April 1873 and still there in 1886; A Butt, Manager in 1895-1904; J R McCleary Accountant and Acting Manager for 12 months, until 1900; A Kirk, Manager 1904; J Moore, staff until his transfer to Bendigo in December 1908; J S Bath was Manager until 1915; C C Cox, Manager until April 1923; Richard C Stanley, Manager 1923 to April 1928. The plaque with the insignia has significance through its association with the Bank of Australasia. The early Australian bank was established in 1834 by Royal Charter and opened in Sydney, Australia, in Sydney in 1835. The bank had many Australian offices in November 1877, particularly on the east and south coasts. Victoria had 45 per cent of all Offices. The plaque is locally significant for its association with the Warrnambool Bank of Australasia, which was established in 1854. It was Warrnambool Council’s first bank. The bank continued to operate until the organisation's merger in 1951 when it became the ANZ Bank Group today. The Bank was an integral part of the growth of local commerce and the community.Insignia of the Bank of Australasia. Cast metal coat of arms within a gold, shield-shaped border, painted gold and red, with blue, black and white details. Decals in each corner; upper left and lower right have a white sheep suspended by a blue ribbon, upper right and lower left have a 3-masted, square-rigged sailing ship with a black hull and red flags flying on each mast, sailing on waves with storm clouds in the sky. Between the emblems are gold stars.Decals; ships, sheep, starsflagstaff hill, warrnambool, shipwrecked coast, flagstaff hill maritime museum, maritime museum, shipwreck coast, flagstaff hill maritime village, great ocean road, bank of australasia, boa, union bank, australia & new zealand bank, anz bank, david charters mcarthur, d c mcarthur, currency, banknote, commerce, banking, heraldic shield, insignia, samuel hannaford -
 Bendigo Military Museum
Administrative record - CERTIFICATE OF DISCHARGE, Australian Military Forces, Jan 1946
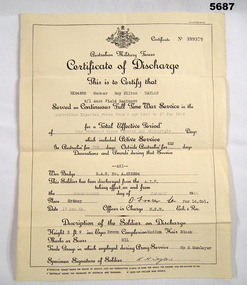
Certificate of Discharge No. 399379 for Gunner Roy Hilton Taylor NX94268 from 2/1 Aust Field Regiment. Date of Effect 17th Jan 1946. Date of joining AIF 2/4/1942. Certificate issued to Service Personnel to prove that discharge is legitimate.Yellow paper folded into 4. Certificate of Discharge contains identification of Soldier, length of Service and details of discharge. Conditions of Discharge itemised on the back.headed with Aust Govt Forces and Certificate includes details of Discharge.discharge certificate, 2/1 aust field regiment, ww2 -
 Ballarat Tramway Museum
Slide - 35mm slide/s, Ben Parle, 5/04/1958 12:00:00 AM
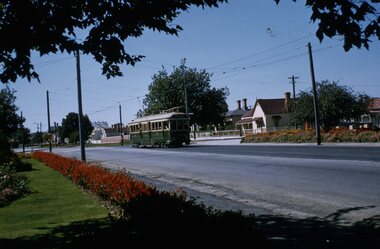
Kodachrome Transparency - 35mm slide - cardboard mount, with one side with red border and words "Kodachrome Transparency / Processed by Kodak" top and bottom. Photo taken by Ben Parle 5/4/1958. Has slide No. "18" stamped in red in top corner. Photo of Ballarat No. 41, pass through the King St. Loop, Victoria St., inbound to the City. Tram has the destination of Special and has the AETA special tram sign. Note the garden beds. For high resolution scan see btm2851h.tif"Victoria St line" "5-4-58"tramways, trams, victoria st, king st, aeta, tram 41 -
 Ballarat Tramway Museum
Slide - 35mm slide/s, Ben Parle, 8/04/1958 12:00:00 AM
Kodachrome Transparency - 35mm slide - cardboard mount, with one side with red border and words "Kodachrome Transparency / Processed by Kodak" top and bottom. Photo taken by Ben Parle 8/4/1958. Has slide No. "9" stamped in black in top corner. Photo of Ballarat No. 19 between the Depot Loop and Martin Ave Loop, in Wendouree Parade, tram appears to have destination of Victoria St. Warning oncoming tramcar sign in the background at a tram stop. For high resolution scan see btm2868.tif"Lake Wendouree Ballarat" / "8-4-58"tramways, trams, wendouree parade, martin ave, lake wendouree, tram 19 -
 Ballarat Tramway Museum
Slide - 35mm slide/s, Ben Parle, 8/04/1958 12:00:00 AM
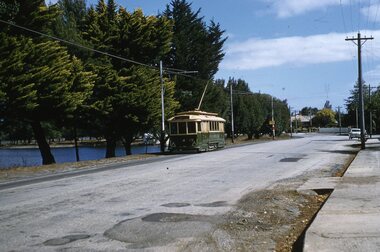
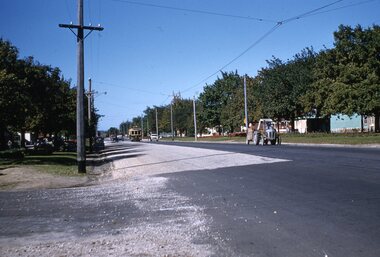
Kodachrome Transparency - 35mm slide - cardboard mount, with one side with red border and words "Kodachrome Transparency / Processed by Kodak" top and bottom. Photo taken by Ben Parle 8/4/1958, date stamped onto slide. Has slide No. "9" stamped in red in top corner. Photo of Ballarat 14, outbound Victoria St, just after top of hill with St. Alipius church in the background. Tram has the destination of Victoria St. Note the gravel condition of the outbound side of Victoria St. - roadworks? "Victoria St. Line" / "8-4-58"tramways, trams, victoria st, tram 14 -
 Ballarat Tramway Museum
Slide - 35mm slide/s, Ben Parle, 8/04/1958 12:00:00 AM
Kodachrome Transparency - 35mm slide - cardboard mount, with one side with red border and words "Kodachrome Transparency / Processed by Kodak" top and bottom. Photo taken by Ben Parle 8/4/1958, date stamped onto slide. Has slide No. "21" stamped in red in top corner. Photo of Ballarat 12, Ripon St, about to cross Mair St. inbound from View Point. Photo taken after tram has passed photographer. Note gravel surface either side of tram track. "View Point line" / "8-4-58"tramways, trams, view point, ripon st, tram 12