Showing 27 items matching " north wattle gully"
-
 Bendigo Historical Society Inc.
Map - MINING REPORTS - PLAN OF CHEWTON GOLDFIELD 1937
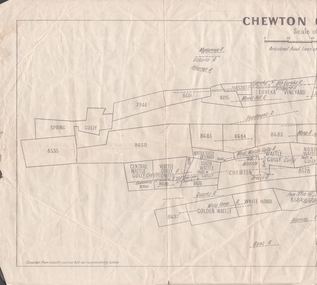
... Wattle Gully... Wattle Gully United... Wattle Gully Extended... South Wattle Gully... Golden Wattle... Chewton... White Horse... Wattle Gully... North...Leases named are: Central Wattle Gully, Wattle Gully United, Wattle Gully Extended, South Wattle Gully, Golden Wattle, Chewton, White Horse, Wattle Gully, North Wattle Gully, North Chewton, Upper Barkly, Post Office Hill, Misima United, Argus Hill, Chapmans, Chewton Prospecting Co, Fiji Gold & Gold Mines of Fiji and Nimrod. ...Leases named are: Central Wattle Gully, Wattle Gully United, Wattle Gully Extended, South Wattle Gully, Golden Wattle, Chewton, White Horse, Wattle Gully, North Wattle Gully, North Chewton, Upper Barkly, Post Office Hill, Misima United, Argus Hill, Chapmans, Chewton Prospecting Co, Fiji Gold & Gold Mines of Fiji and Nimrod. ...Plan of the Chewton Goldfield with Scale Measurement in chains. Plan shows the township of Chewton with the reefs and leases, the railway line and the Main Castlemaine - Melbourne Road. Also, the Eureka Vineyard. Issued by The Stock Exchange of Melbourne, April 1937. Leases named are: Central Wattle Gully, Wattle Gully United, Wattle Gully Extended, South Wattle Gully, Golden Wattle, Chewton, White Horse, Wattle Gully, North Wattle Gully, North Chewton, Upper Barkly, Post Office Hill, Misima United, Argus Hill, Chapmans, Chewton Prospecting Co, Fiji Gold & Gold Mines of Fiji and Nimrod. Stamp in the top right corner: Edward Dyason & Co. - Queen St. Melbourne. Sharebrokers.map, mining reports, plan of chewton goldfield, edward dyason & co, the stock exchange of melbourne, central wattle gully, wattle gully united, wattle gully extended, south wattle gully, golden wattle, chewton, white horse, wattle gully, north wattle gully, north chewton, upper barkly, post office hill, misima united, argus hill, chapmans, chewton prospecting co, fiji gold & gold mines of fiji, nimrod -
 Bendigo Historical Society Inc.
Document - VICTORIA HILL - MINING EQUIPMENT, MACHINERY, ETC
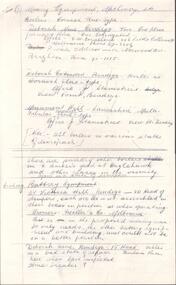
... ... North Hustlers...Wattle Gully...Barker's Yard, Victoria Hill, Maldon State Battery, Liddle's Bendigo, Devonshire Sands, North Deborah, The Great Southern, South Deborah, North Hustlers and Wattle Gully. Notes prepared by Albert Richardson....Barker's Yard, Victoria Hill, Maldon State Battery, Liddle's Bendigo, Devonshire Sands, North Deborah, The Great Southern, South Deborah, North Hustlers and Wattle Gully. Notes prepared by Albert Richardson. ...BHS CollectionHandwritten, carbon copy of a list of boilers, crushing equipment, burners, Cyanide plants and rails at various locations.Locations include: Deborah Mine, Deborah Extended, Monument Hill, R. Barker's Yard, Victoria Hill, Maldon State Battery, Liddle's Bendigo, Devonshire Sands, North Deborah, The Great Southern, South Deborah, North Hustlers and Wattle Gully. Notes prepared by Albert Richardson.mine, gold, victoria hill, victoria hill, mining equipment machinery etc, deborah mine, deborah extended, monument hill, r barker's yard, victoria hill, miller & co melb, maldon state battery, john cocks, mr l picken, liddle's bendigo, g holt, devonshire sands, graham bedford, central deborah, north deborah, great southern, south deborah, north hustlers, wattle gully -
 Bendigo Historical Society Inc.
Document - MCCOLL, RANKIN AND STANISTREET COLLECTION: NOTES RE GOVERNMENT GAZETTES AND LIST OF PLANT
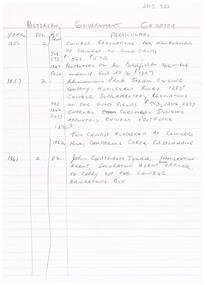
... Includes Chinese regulations for management of Chinese on Gold fields (1856) , Chinamans Flat Steam Engine company (1857), two Chinese murdered at Clinkers Hill, Castlemaine (1862) Charles Chromley Dowling appointed Chinese Protector (1857), John Chatfield Tyler Immigration agent, to carry out the Chinese Emigrations Act (1861) Back page dated 1947 lists "stocktake list of plant" On list - Deborah United 1946; North Hustlers; New Monument GMC, North Virginia, South Wattle Gully, Central Napoleon, Red, White and Blue Extended, Deborah Extended, New Don, East Clarence, Napoleon Reef, New Monument Battery, Deborah Extended. ...Includes Chinese regulations for management of Chinese on Gold fields (1856) , Chinamans Flat Steam Engine company (1857), two Chinese murdered at Clinkers Hill, Castlemaine (1862) Charles Chromley Dowling appointed Chinese Protector (1857), John Chatfield Tyler Immigration agent, to carry out the Chinese Emigrations Act (1861) Back page dated 1947 lists "stocktake list of plant" On list - Deborah United 1946; North Hustlers; New Monument GMC, North Virginia, South Wattle Gully, Central Napoleon, Red, White and Blue Extended, Deborah Extended, New Don, East Clarence, Napoleon Reef, New Monument Battery, Deborah Extended. ...Two page, handwritten document on lined paper - front page reference to Victorian Government Gazettes and Chinese regulations, where listed in the gazettes and dates. Includes Chinese regulations for management of Chinese on Gold fields (1856) , Chinamans Flat Steam Engine company (1857), two Chinese murdered at Clinkers Hill, Castlemaine (1862) Charles Chromley Dowling appointed Chinese Protector (1857), John Chatfield Tyler Immigration agent, to carry out the Chinese Emigrations Act (1861) Back page dated 1947 lists "stocktake list of plant" On list - Deborah United 1946; North Hustlers; New Monument GMC, North Virginia, South Wattle Gully, Central Napoleon, Red, White and Blue Extended, Deborah Extended, New Don, East Clarence, Napoleon Reef, New Monument Battery, Deborah Extended. Possibly written by Albert Richardson.bendigo, mining, mccoll rankin & stanistreet -
 Eltham District Historical Society Inc
Newspaper - Newspaper articles, Sun News-Pictorial, Fire Kills 3, The Sun News-Pictorial, Thursday, March 4, p1, 1965
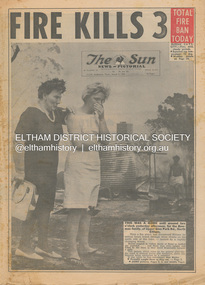
... North...Sunny Pine...Bushfire damage – buildings...Back Gully...Gippsland...Glenmaggie...Briagolong...George John Crowe...John Lawrence Coleman...William John Elwers...Creek Road...Wattle...Tom Fielding Collection Victorian Bushfires - 1965 Victorian Bushfires – 1965 Glen Park Road Eltham North Sunny Pine Bushfire damage – buildings Back Gully Gippsland Glenmaggie Briagolong George John Crowe John Lawrence Coleman William John Elwers Creek Road Wattle Glen Bill Guy Digital scan of original pages from newspaper Fire Kills 3, The Sun News-Pictorial, Thursday, March 4, p1 Newspaper Newspaper articles Sun News-Pictorial ...Various news articles pertaining to the January 1965 Victorian bushfires specifically with a focus on fires at Eltham North. Specific Eltham Shire districts mentioned include Eltham North on page 1, 2, 3, 28-29 • Fire Kills 3, p1 (Illust.) • Fire on their heel, p2 (Illust.) • Flames catch, kill 3 as they run: 12 house go, p3 (Illust.) • It doubled back, p3 • Helpers highly praised, p3 • Blaze kills 100 puppies, p3 (Illust.) • Scenes from Eltham’s Black Wednesday, pp28-29 (Illust.) tom fielding collection, victorian bushfires - 1965, victorian bushfires – 1965, glen park road, eltham north, sunny pine, bushfire damage – buildings, back gully, gippsland, glenmaggie, briagolong, george john crowe, john lawrence coleman, william john elwers, creek road, wattle glen, bill guy -
 Eltham District Historical Society Inc
Photograph, Fay Bridge, Ruins beside the Diamond Creek at Wattle Glen, 13 October 2016
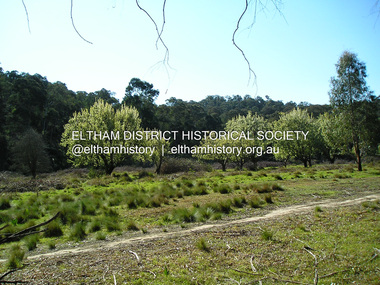
... north up the gully. The path that comes down the gully and runs into the trail goes past the mine site which was on the west side of the gully a couple of hundred metres up from the flats. Heritage Victoria link for the site - https://vhd.heritagecouncil.vic.gov.au/places/12203 Fay Bridge Collection 2016-10-13 Diamond Creek diamond creek trail Ruins Wattle Glen William Wandless Herbert greenhills Elizabeth Wilson 7 images - born digital Ruins beside the Diamond Creek at Wattle Glen Photograph Photograph Fay Bridge ...The newly constructed Diamond Creek Trail from Diamond Creek to Wattle Glen completed in February 2021 winds around these ruins just pass the high transmission power lines near Herberts Lane and Collard Drive From Jean Verso, Nillumbik Historical Society, 15 April 2021 William Wandless Herbert bought the surrounding 100 acres in 1852. He was a native of Northumberland and the Scottish Borders who arrived in Melbourne in 1847. The house on the top of the mound would have been built not long after he bought the land; the farm was named "Greenhills". He married Elizabeth Wilson, daughter of John Wilson who had been in Diamond Creek since about 1846. Their first child was born in 1854 so there would be some form of dwelling from about that time. They had eight children who all survived to a good age. His will describes the house as part stone and part wood and of four rooms. Nillumbik Historical Society (NHS) believe it was one of the earliest if not the earliest house, in this part of the district. The remains of the stone house foundations are on top of the mound (photos on the VHD page) and the barn walls are on the north and to the east side of the mound. NHS is not sure how much or which part of the surrounding area was covered by the barns but they were large enough to hold dances after the race meetings that were held in the late 1880's on the adjacent creek flats. It would make sense with the lay of the land that they covered some of the ground to the north and east and used for farm storage, packing sheds for their apple and pear orchards and also for supporting the Nillumbik Gold Mine the family worked to the north up the gully. The path that comes down the gully and runs into the trail goes past the mine site which was on the west side of the gully a couple of hundred metres up from the flats. Heritage Victoria link for the site - https://vhd.heritagecouncil.vic.gov.au/places/12203fay bridge collection, 2016-10-13, diamond creek, diamond creek trail, ruins, wattle glen, william wandless herbert, greenhills, elizabeth wilson -
 Eltham District Historical Society Inc
Photograph, Fay Bridge, Remains of apple orchard near the Diamond Creek, Wattle Glen, 11 October 2018
... north up the gully. The path that comes down the gully and runs into the trail goes past the mine site which was on the west side of the gully a couple of hundred metres up from the flats. Heritage Victoria link for the site - https://vhd.heritagecouncil.vic.gov.au/places/12203 Fay Bridge Collection 2018-10-11 Diamond Creek diamond creek trail Elizabeth Wilson Greenhills Wattle Glen William Wandless Herbert Apple Trees 6 images - born digital Remains of apple orchard near the Diamond Creek, Wattle Glen Photograph Photograph Fay Bridge ...The newly constructed Diamond Creek Trail from Diamond Creek to Wattle Glen completed in February 2021 winds past these apple trees that possibly lined the entrance to the Greenhills property From Jean Verso, Nillumbik Historical Society, 15 April 2021 William Wandless Herbert bought the surrounding 100 acres in 1852. He was a native of Northumberland and the Scottish Borders who arrived in Melbourne in 1847. The house on the top of the mound would have been built not long after he bought the land; the farm was named "Greenhills". He married Elizabeth Wilson, daughter of John Wilson who had been in Diamond Creek since about 1846. Their first child was born in 1854 so there would be some form of dwelling from about that time. They had eight children who all survived to a good age. His will describes the house as part stone and part wood and of four rooms. Nillumbik Historical Society (NHS) believe it was one of the earliest if not the earliest house, in this part of the district. The remains of the stone house foundations are on top of the mound (photos on the VHD page) and the barn walls are on the north and to the east side of the mound. NHS is not sure how much or which part of the surrounding area was covered by the barns but they were large enough to hold dances after the race meetings that were held in the late 1880's on the adjacent creek flats. It would make sense with the lay of the land that they covered some of the ground to the north and east and used for farm storage, packing sheds for their apple and pear orchards and also for supporting the Nillumbik Gold Mine the family worked to the north up the gully. The path that comes down the gully and runs into the trail goes past the mine site which was on the west side of the gully a couple of hundred metres up from the flats. Heritage Victoria link for the site - https://vhd.heritagecouncil.vic.gov.au/places/12203fay bridge collection, 2018-10-11, diamond creek, diamond creek trail, elizabeth wilson, greenhills, wattle glen, william wandless herbert, apple trees -
 Bendigo Historical Society Inc.
Document - LONG GULLY HISTORY GROUP COLLECTION: THE BENDIGO GOLDFIELD … INTRODUCTION TO FIELD
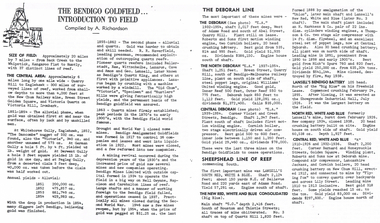
... North Red White and Blue... Central Red White and Blue... Little 180... John Brown Knitwear Factory... South Ironbark... Victoria Consols East Shaft... Ironbark... Manchester Arms Hotel... Unity Mine... Wattle Gully...History House 11 Mackenzie Street Bendigo goldfields BENDIGO History long gully history group The Long Gully History Group - The Bendigo Goldfield...Introduction to Field A Richardson New Chum Railway Mine The Dascombe Nugget The Victoria Nugget R R Haverfield Ballerstadt Rae Wittscheibe Lazarus Cave and Amos Geo Lansell The Old Chum Victoria Specimen Hustlers Bendigo Amalgamated Goldfields Bendigo Mines Limited Nell Gwynne Napoleon Carshalton The Deborah Roberts & Sons The North Deborah Williams' United Central Deborah Lansell's South Red White & Blue The New Red White and Blue Consolidated (Big Blue) Union H Harkness & Co Thompson & Co Lansell's Bendigo Battery Showgrounds Industrial Hall North Red White and Blue Central Red White and Blue Little 180 John Brown Knitwear Factory South Ironbark Victoria Consols East Shaft Ironbark Manchester Arms Hotel Unity Mine Wattle Gully Mine Chewton Hercules Hercules and Energetic Bendigo Amalgamated Goldfields Coy Long Gully Post Office The Old Wheal Owl Central Nell Gwynne Gold Mines Hotel Bendigo City Council Mr Jack Barker Bendigo and District Tourist Association The New Chum Syncline Courier of the Mines newspaper Camp Hill School Sandhurst East Post Office Bendigo Cemetery White Hills Cemetery Eaglehawk Cemetery Kangaroo Flat Cemetery Albert Richardson The Bendigo Goldfield ...Introduction to Field. ...The Bendigo Goldfield ...Introduction to Field. Compiled by A. Richardson. Mentioned are the Deborah Line of Reef, The Sheepshead Line, The Nell Gwynne Line and The Carshalton Line of Reef. Mines mentioned are: The Deborah, The North Deborah, Central Deborah, The New Red White and Blue Consolidated (Big Blue), North Red White and Blue, Central Red white and Blue, Little 180, South Ironbark, Ironbark, Hercules, Central Nell Gwynne and The New Chum Syncline. Lansell's Bendigo Battery is also mentioned. There is a short description of each mine, depth. location, machinery, Gold yield, Dividends and Calls. Closing date of some (some closed as a result of fire). Also mentioned is the postal service and the establishment of cemeteries at Bendigo, White Hills, Eaglehawk and Kangaroo Flat.Albert Richardsonbendigo, history, long gully history group, the long gully history group - the bendigo goldfield...introduction to field, a richardson, new chum railway mine, the dascombe nugget, the victoria nugget, r r haverfield, ballerstadt, rae, wittscheibe, lazarus, cave and amos, geo lansell, the old chum, victoria, specimen, hustlers, bendigo amalgamated goldfields, bendigo mines limited, nell gwynne, napoleon, carshalton, the deborah, roberts & sons, the north deborah, williams' united, central deborah, lansell's south red white & blue, the new red white and blue consolidated (big blue), union, h harkness & co, thompson & co, lansell's bendigo battery, showgrounds industrial hall, north red white and blue, central red white and blue, little 180, john brown knitwear factory, south ironbark, victoria consols east shaft, ironbark, manchester arms hotel, unity mine, wattle gully mine chewton, hercules, hercules and energetic, bendigo amalgamated goldfields coy, long gully post office, the old wheal owl, central nell gwynne, gold mines hotel, bendigo city council, mr jack barker, bendigo and district tourist association, the new chum syncline, courier of the mines newspaper, camp hill school, sandhurst east post office, bendigo cemetery, white hills cemetery, eaglehawk cemetery, kangaroo flat cemetery -
 Bendigo Historical Society Inc.
Document - LONG GULLY HISTORY GROUP COLLECTION: HISTORICAL GUIDE TO BENDIGO
... North Red White and Blue... Central Red White and Blue... Roberts and Sons... Little 180 (originally Lansell's 180 No 2 shaft)... John Brown Knitwear Factory... South Ironbark originally Victoria Consols East Shaft... Ironbark (originally Ironbark East shaft)... Manchester Arms Hotel... Wattle Gully...History House 11 Mackenzie Street Bendigo goldfields BENDIGO History long gully history group The Long Gully History Group - Historical Guide to Bendigo The Royal Historical Society of Victoria Bendigo Branch Historical and Mining Museum Mechanic's Institute Eaglehawk Librarian Mechanic's Institute Miss J Parry John Hattam H Biggs A Richardson L C Bennetts Edith Checcucci Bendigo Advertiser Cambridge Press Mines DEpartment (Bendigo) J R W Purves Mr A O'Keefe Shire of Marong The Sandhurst and Eaglehawk Tramway Company Mr J Taylor Mr J Hanson The Bendigo Tramway Company Electric Supply Company Coliban Water Suply Juvenile Industrial Exhibition Geo Lansell Cr A harkness Salvation Army Vine and Fruitgrowers Association Decentralisation League Constable Thomas Ryan Miners Association Art Gallery Post Office Miss Broadfoot Bendigo Hospital Opera Company Bendigo Development League Victorian Women's Franchise League ANA Hall The Bendigonian Law Courts Temperance Hall Trades Hall (Old Wardens Court) Roman Catholic Cathedral Shamrock Hotel Bendigo Philosophical Society Old Bendigonian Society Bendigo Fire Brigade Bendigo Volunteers to South African War Hawkins Porcupine Inn Criterion Hotel Royal Hotel Bendigo Hotel Black Swan Hotel Gillies Bakery Hibernian Hotel Sandhurst Hotel Freemasons Hotel Courthouse Hotel Shamrock Hotel Governor Hotham Heffernan & Crowley New Chum Railway Victoria Quartz Shenandoah Shamrock Mine Hercules No 1 (originally Pearl East) Hercules New Chum (Late Pearl) Carlisle Mine Mr Arblaster Meurer Sandhurst Bee Benevolent Asylum Bendigo Gas Company A Lloyd Coliban Water Supply Scheme Cr W V Simons Eaglehawk Council J Mouat Sir Henry Barkly Agricultural and Horticultural Exhibition Sandhurst and Eaglehawk Boroughs Cr John McIntyre Latham and Watson's Mine Galatea (model ship) St Paul's Church of England Rev G P Despard Fine Arts Exhibition and Exposition Bendigo Rifle Association Strathfieldsaye Shire Hall Corporate High School Bendigonian Society Richard Andrews Easter Fair G Aspinall J Burnsides Sir H Manners Sutton Beehive Stores Mining Exchanges Bendigo Water Works City Family Hotel Bendigo United Friendly Society Medical Institute and Dispensary Benevolent Asylum Jewish Synagogue Masonic Hall School of Mines Mr J H Abbott Australian Natives Association Royal Princess Theatre Albion Hall Central State School High School Gravel Hill State School Electricity Commission James Mouat Warring Natives The Rocks Joseph Crook Gold Discovery Marong district Roads Board Camp Hotel Mr Charles Sherratt City of Bendigo Mt Alexander North Run Grice and Heape Ravenswood Gibson and Fenton Mrs John Kennedy Mrs Patrick Farrel Mr J A Paton Mr Lachlan McLachlan Theatre Royal Sir Charles and Lady Hotham Harney's Bridge E J Ennor Sandhurst Fire Brigade The Health of Towns Act Mr Townsend Cornish & Co Bendigo Pottery Bendigo Agricultural Society Pike or Pyke Baby Health Centre Sandhurst Post Office Government Survey Office Sandhurst Trustees Company Mr H B Briston Savings Bank Telegraph Office Sir Henry Brougham Lock Hon Sir John Nimmo Sandhurst Public Offices The New Prince of Wales Mine New Prince of Wales No 2 The Whip and Jersey Lansell's Big 180 New Chum and Victoria Mine and Battery New chum Railway Koch's Pioneer South New Moon Catherine Reef United New Moon Virginia Mine South Belle Vue New Chum Railway Central Nell Gwynne North Nell Gwynne Ironbark Mine New Chum Syncline Hercules Herculesl Energetic Roberts & Sons Harkness & Co Horwoods Great Southern Ulster Carlisle Cornish New St Mungo Duchess Tribute South Devonshire Hopewell Mine Saxby Mine McNair & Co Mr King Bourke and Wills Sandhurst Hotel The Dascombe Nugget Victoria Nugget R R Haverfield Ballerstedt Rae Wittscheibe Lazarus Cave and Amos Bendigo Amalgamated Goldfields Bendigo Mines Limited The Deborah North Deborah Central Deborah The New Red White and Blue Consolidated (Big Blue) Union Lansell's New REd White and Blue 9later No 3 shaft) H Harkness & Co Thompson & Co Central DEborah Lansell's Bendigo Battery North Red White and Blue Central Red White and Blue Roberts and Sons Little 180 (originally Lansell's 180 No 2 shaft) John Brown Knitwear Factory South Ironbark originally Victoria Consols East Shaft Ironbark (originally Ironbark East shaft) Manchester Arms Hotel Wattle Gully Mine Chewton Hercules Old Wheal-Owl Central Nell Gwynne Gold Mines Hotel Bendigo City Council Jack Barker The New Chum Syncline The Courier of the Mines Telegraph Office Bendigo Cemetery White Hills Cemetery Eaglehawk Cemetery Kangaroo Flat Cemetery New Moon Suffolk United North New Moon Fortuna Hustlers Buckell & Jeffrey's Royal Hustlers Reserve No 2 (City and Park shafts) Jonathan Harris Latham and Watson Great Hustlers Great Extended Hustlers J Hustler Latham Watson Tribute or Pups Shaft Bendigo's Worst Mining Disaster Hustlers Reef (Old Hustlers) Hustlers Reef No 1 Lansell's Comet The Old Comet (Cooper's Claim) United Hustlers and Redan Comet Hill State SChool K K Shaft North or New Hustlers (Agnew Hustler) Johnson's No 3 South Johnson's Lansell's Sandhurst Needle Cleopatra Needle top British American Collman and Tacchi South Virginia Saddle Reefs and Spurs Pall Mall Bendigo Ravenswood Homestead An Early Battery at Kangaroo Flat Historic High Street Golden Square The Lonely Grave Battery Tram c1888 Steam Tram c1892 Electric Tram c1903 Teh New Chum Railway Golden Square United Hustlers and Redan Mine Sandhurst Road Central Deborah Violet Street Deborah Mine Quarry Hill Deborah Mine 1000 ft level First Motion Winding Engine at Central Deborah Victoria Hill Area Looking south from New Chum Hill in 1890's Brochure with an invitation to visit Historical and Mining Museum in Mechanic's Institute, Eaglehawk. ...Brochure with an invitation to visit Historical and Mining Museum in Mechanic's Institute, Eaglehawk. Drawing of poppet legs on the front with The Royal Historical Society of Victoria Bendigo Branch. Historical Guide to Bendigo including Self Tours of Bendigo's Famous Goldfields. Forward by John Hattam. Contributors are: H Biggs, Miss L J Parry, A Richardson, L C Bennetts and Edith Checcucci. Credits - The Bendigo Advertiser, Cambridge Press, Mines Department (Bendigo) and J R W Purves. Items include Bendigo Tramways Compiled by H Biggs, Early Bendigo Hotels Compiled by L C Bennetts, Eaglehawk Compiled by H Biggs, Noted Events Compiled by June Parry, The Bendigo Post Office Compiled by LC Bennetts, The Bendigo Goldfield. Introduction to Field and Guide to Some Famous Mines Compiled by A Richardson. Photos include: Pall Mall Bendigo, Ravenswood Homestead, An Early Battery at Kangaroo Flat, Historic High Street Golden Square, The Lonely Grave, Battery Tram c1888, Steam Tram c1892, Electric Tram c1903, The New Chum Railway Golden Square, United Hustlers and Redan Mine Sandhurst Road, Central Deborah Violet Street, Deborah Mine Quarry Hill, Deborah Mine 1000 ft level, First Motion Winding Engine at Central Deborah, Victoria Hill Area, and Looking south from New Chum Hill in 1890's. Also 11010.254, 255, 268, 288a, 288b, and 289.bendigo, history, long gully history group, the long gully history group - historical guide to bendigo, the royal historical society of victoria bendigo branch, historical and mining museum, mechanic's institute eaglehawk, librarian mechanic's institute, miss j parry, john hattam, h biggs, a richardson, l c bennetts, edith checcucci, bendigo advertiser, cambridge press, mines department (bendigo), j r w purves, mr a o'keefe, shire of marong, the sandhurst and eaglehawk tramway company, mr j taylor, mr j hanson, the bendigo tramway company, electric supply company, coliban water suply, juvenile industrial exhibition, geo lansell, cr a harkness, salvation army, vine and fruitgrowers association, decentralisation league, constable thomas ryan, miners association, art gallery, post office, miss broadfoot, bendigo hospital, opera company, bendigo development league, victorian women's franchise league, ana hall, the bendigonian, law courts, temperance hall, trades hall (old wardens court), roman catholic cathedral, shamrock hotel, bendigo philosophical society, old bendigonian society, bendigo fire brigade, bendigo volunteers to south african war, hawkins, porcupine inn, criterion hotel, royal hotel, bendigo hotel, black swan hotel, gillies bakery, hibernian hotel, sandhurst hotel, freemasons hotel, courthouse hotel, shamrock hotel, governor hotham, heffernan & crowley, new chum railway, victoria quartz, shenandoah, shamrock mine, hercules no 1 (originally pearl east), hercules new chum (late pearl), carlisle mine, mr arblaster, meurer, sandhurst bee, benevolent asylum, bendigo gas company, a lloyd, coliban water supply scheme, cr w v simons, eaglehawk council, j mouat, sir henry barkly, agricultural and horticultural exhibition, sandhurst and eaglehawk boroughs, cr john mcintyre, latham and watson's mine, galatea (model ship), st paul's church of england, rev g p despard, fine arts exhibition and exposition, bendigo rifle association, strathfieldsaye shire hall, corporate high school, bendigonian society, richard andrews, easter fair, g aspinall, j burnsides, sir h manners sutton, beehive stores, mining exchanges, bendigo water works, city family hotel, bendigo united friendly society medical institute and dispensary, benevolent asylum, jewish synagogue, masonic hall, school of mines, mr j h abbott, australian natives association, royal princess theatre, albion hall, central state school, high school, gravel hill state school, electricity commission, james mouat, warring natives, the rocks, joseph crook, gold discovery, marong district roads board, camp hotel, mr charles sherratt, city of bendigo, mt alexander north run, grice and heape, ravenswood, gibson and fenton, mrs john kennedy, mrs patrick farrel, mr j a paton, mr lachlan mclachlan, theatre royal, sir charles and lady hotham, harney's bridge, e j ennor, sandhurst fire brigade, the health of towns act, mr townsend, cornish & co, bendigo pottery, bendigo agricultural society, pike or pyke, baby health centre, sandhurst post office, government survey office, sandhurst trustees company, mr h b briston, savings bank, telegraph office, sir henry brougham lock, hon sir john nimmo, sandhurst public offices, the new prince of wales mine, new prince of wales no 2, the whip and jersey, lansell's big 180, new chum and victoria mine and battery, new chum railway, koch's pioneer, south new moon, catherine reef united, new moon, virginia mine, south belle vue, new chum railway, central nell gwynne, north nell gwynne, ironbark mine, new chum syncline, hercules, herculesl energetic, roberts & sons, harkness & co, horwoods, great southern, ulster, carlisle, cornish, new st mungo, duchess tribute, south devonshire, hopewell mine, saxby mine, mcnair & co, mr king, bourke and wills, sandhurst hotel, the dascombe nugget, victoria nugget, r r haverfield, ballerstedt, rae, wittscheibe, lazarus, cave and amos, bendigo amalgamated goldfields, bendigo mines limited, the deborah, north deborah, central deborah, the new red white and blue consolidated (big blue), union, lansell's new red white and blue 9later no 3 shaft), h harkness & co, thompson & co, central deborah, lansell's bendigo battery, north red white and blue, central red white and blue, roberts and sons, little 180 (originally lansell's 180 no 2 shaft), john brown knitwear factory, south ironbark originally victoria consols east shaft, ironbark (originally ironbark east shaft), manchester arms hotel, wattle gully mine chewton, hercules, old wheal-owl, central nell gwynne, gold mines hotel, bendigo city council, jack barker, the new chum syncline, the courier of the mines, telegraph office, bendigo cemetery, white hills cemetery, eaglehawk cemetery, kangaroo flat cemetery, new moon, suffolk united, north new moon, fortuna hustlers, buckell & jeffrey's, royal hustlers reserve no 2 (city and park shafts), jonathan harris, latham and watson, great hustlers, great extended hustlers, j hustler, latham, watson, tribute or pups shaft, bendigo's worst mining disaster, hustlers reef (old hustlers), hustlers reef no 1, lansell's comet, the old comet (cooper's claim), united hustlers and redan, comet hill state school, k k shaft, north or new hustlers (agnew hustler), johnson's no 3, south johnson's, lansell's sandhurst needle, cleopatra needle top, british american, collman and tacchi, south virginia, saddle reefs and spurs, pall mall bendigo, ravenswood homestead, an early battery at kangaroo flat, historic high street golden square, the lonely grave, battery tram c1888, steam tram c1892, electric tram c1903, teh new chum railway golden square, united hustlers and redan mine sandhurst road, central deborah violet street, deborah mine quarry hill, deborah mine 1000 ft level, first motion winding engine at central deborah, victoria hill area, looking south from new chum hill in 1890's -
 Bendigo Historical Society Inc.
Document - LONG GULLY HISTORY GROUP COLLECTION: HUSTLERS LINE OF REEF
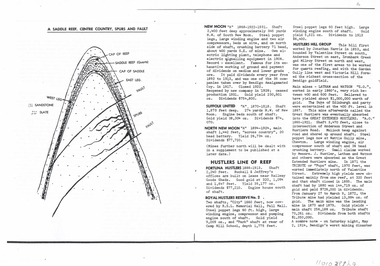
... Wattle Gully Mine...Messrs J Hustler Latham and Watson... Tribute or Pups Shaft... Bendigo's Worst Mining Disaster... Hustlers Reef (Old Hustlers) and Hustlers Reef No 1... Lansell's Comet... The Old Comet (Cooper's Claim... United Hustlers and Redan... K K Shaft... North...History House 11 Mackenzie Street Bendigo goldfields BENDIGO History long gully history group The Long Gully History Group - Hustlers Line of Reef Fortuna Hustlers Buckell & Jeffrey's Railway Goods Sheds RSL Memorial Hall Camp Hill School Royal Hustlers Reserve No 2 - City and Park Shafts Jonathan Harris Latham and Watson Great Hustlers Great Extended Hustlers Wattle Gully Mine Messrs J Hustler Latham and Watson Tribute or Pups Shaft Bendigo's Worst Mining Disaster Hustlers Reef (Old Hustlers) and Hustlers Reef No 1 Lansell's Comet The Old Comet (Cooper's Claim United Hustlers and Redan K K Shaft North or New Hustlers (once known as Agnew Hustlers) Derby Line - Johnson's No 3 Pa ddy's Gully Line Lansell's 'Sandhurst' (Needle) Needle Loops Cleopatra Needle top British American Collman and Tacchi South Virginia Saddle Reefs and Spurs New Moon Suffolk United South New Moon North New Moon Page mentioning mines on the Hustlers Line of Reef. ...Page mentioning mines on the Hustlers Line of Reef. The are: Fortuna Hustlers, Royal Hustlers Reserve No 2 - City and Park Shafts, Great Hustlers, Latham, Watson, Great Extended Hustlers, Tribute or Pups Shaft, Bendigo's Worst Mining Disaster May 2 1914, Hustlers Reef (Old Hustlers) and Hustlers Reef No 1, Lansell's Comet Lightening Hill Line, The Old Comet (Cooper's Claim), United Hustlers and Redan, K K Shaft, North or New Hustlers (once known as Agnew Hustlers), Derby Line - Johnson's No 3, Paddy's Gully Line, Lansell's 'Sandhurst' (Needle), Needle Loops, Cleopatra Needle top, British American, Collman and Tacchi and South Virginia. Also mentioned is Total Gold Yield, Main Shafts on Field, Price of Gold (Old Currency) and Saddle Reefs and Spurs. Also mentioned are New Moon, Suffolk United, South New Moon and North New Moon. There is a diagram of a Saddle Reef, Centre Country, Spurs and Fault. Depth of shaft, machinery, location, dividends and yields are also mentioned. Price of Gold (Old Currency): 1851-1930, Price varied from Approx. £3/17/6 to £4 per ounce. 1938, from £6/19/10 to £7/8/10 per ounce. 1946/47/48 £10/15/3 per ounce, May 1, 1954 £15/12/6 per ounce.bendigo, history, long gully history group, the long gully history group - hustlers line of reef, fortuna hustlers, buckell & jeffrey's, railway goods sheds, rsl memorial hall, camp hill school, royal hustlers reserve no 2 - city and park shafts, jonathan harris, latham and watson, great hustlers, great extended hustlers, wattle gully mine, messrs j hustler latham and watson, tribute or pups shaft, bendigo's worst mining disaster, hustlers reef (old hustlers) and hustlers reef no 1, lansell's comet, the old comet (cooper's claim, united hustlers and redan, k k shaft, north or new hustlers (once known as agnew hustlers), derby line - johnson's no 3, pa ddy's gully line, lansell's 'sandhurst' (needle), needle loops, cleopatra needle top, british american, collman and tacchi, south virginia, saddle reefs and spurs, new moon, suffolk united, south new moon, north new moon -
 Bendigo Historical Society Inc.
Photograph - AUSTIN COLLECTION: Wattle Gully Gold Mine, Chewton, Not dated but possibly 1980's
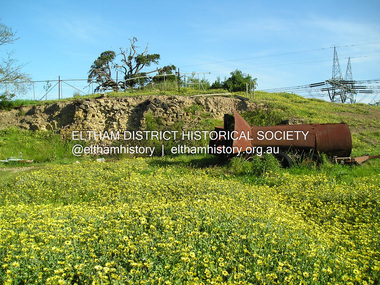
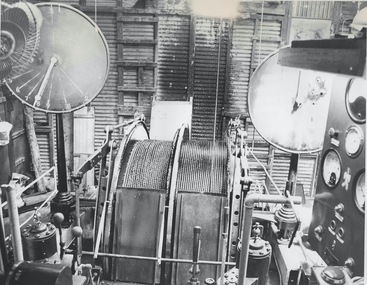
... Wattle Gully Mine holds a pivotal position in the history of the State's quartz mining industry. The rich strike at Wattle Gully mine in 1937 helped revive the State's gold mining industry that had been in the doldrums since the First World War. Wattle Gully, and a handful of other 'new' companies - the Maude and Yellow Girl, Morning Star, A 1, and North...Wattle Gully Mine holds a pivotal position in the history of the State's quartz mining industry. The rich strike at Wattle Gully mine in 1937 helped revive the State's gold mining industry that had been in the doldrums since the First World War. Wattle Gully, and a handful of other 'new' companies - the Maude and Yellow Girl, Morning Star, A 1, and North ...Wattle Gully Mine holds a pivotal position in the history of the State's quartz mining industry. The rich strike at Wattle Gully mine in 1937 helped revive the State's gold mining industry that had been in the doldrums since the First World War. Wattle Gully, and a handful of other 'new' companies - the Maude and Yellow Girl, Morning Star, A 1, and North Deborah - were the flagships of the revived industry and sustained the State's gold production for some 30 years. Wattle Gully mine, with a yield of 350,000 ounces, was the richest mine of its era. By 1940, the Wattle Gully Company had paid out £207,000 in dividends to its shareholders. The company continued to mine profitably through the Second World War, though it struggled due to a shortage of manpower. After the war, the mine continued to develop - in the early 1950s new plant including a winding engine, steel poppet head, and twenty-head battery was added. The plant was obtained from the Central Nell Gwynne Company, Bendigo. On 13 March 1969, the Wattle Gully Company closed down the mine, laying off 62 men. Since 1970 Wattle Gully mine has worked intermittently. Recent additions to the mine's infrastructure has been a new ore processing plant and a decline tunnel. The ore processing plant was operated by Newmont mining from 1987 to 1990 and subsequently operated by Consolidated Victorian Mines and Duketon Goldfields. The mine site has retained evidence of its development since 1937 with its most recent periods of equipment upgrades in the 1950s and 1980s being documented by buildings, structures and intact and working machinery. Heritage Council Victoria: https://vhd.heritagecouncil.vic.gov.au/places/2380 Black and white photograph: view of engine room. Wattle Gully Gold Mine winding gear, two winding wheels in centre of image.gold mining, underground, wattle gully gold mine, chewton, winding gear -
 Bendigo Historical Society Inc.
Photograph - AUSTIN COLLECTION: Winding Gear, Wattle Gully Gold Mine, Chewton, 1982
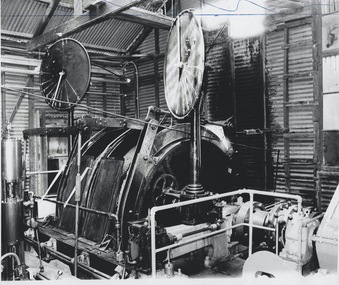
... Wattle Gully Mine holds a pivotal position in the history of the State's quartz mining industry. The rich strike at Wattle Gully mine in 1937 helped revive the State's gold mining industry that had been in the doldrums since the First World War. Wattle Gully, and a handful of other 'new' companies - the Maude and Yellow Girl, Morning Star, A 1, and North...Wattle Gully Mine holds a pivotal position in the history of the State's quartz mining industry. The rich strike at Wattle Gully mine in 1937 helped revive the State's gold mining industry that had been in the doldrums since the First World War. Wattle Gully, and a handful of other 'new' companies - the Maude and Yellow Girl, Morning Star, A 1, and North ...Wattle Gully Mine holds a pivotal position in the history of the State's quartz mining industry. The rich strike at Wattle Gully mine in 1937 helped revive the State's gold mining industry that had been in the doldrums since the First World War. Wattle Gully, and a handful of other 'new' companies - the Maude and Yellow Girl, Morning Star, A 1, and North Deborah - were the flagships of the revived industry and sustained the State's gold production for some 30 years. Wattle Gully mine, with a yield of 350,000 ounces, was the richest mine of its era. By 1940, the Wattle Gully Company had paid out £207,000 in dividends to its shareholders. The company continued to mine profitably through the Second World War, though it struggled due to a shortage of manpower. After the war, the mine continued to develop - in the early 1950s new plant including a winding engine, steel poppet head, and twenty-head battery was added. The plant was obtained from the Central Nell Gwynne Company, Bendigo. On 13 March 1969, the Wattle Gully Company closed down the mine, laying off 62 men. Since 1970 Wattle Gully mine has worked intermittently. Recent additions to the mine's infrastructure has been a new ore processing plant and a decline tunnel. The ore processing plant was operated by Newmont mining from 1987 to 1990 and subsequently operated by Consolidated Victorian Mines and Duketon Goldfields. The mine site has retained evidence of its development since 1937 with its most recent periods of equipment upgrades in the 1950s and 1980s being documented by buildings, structures and intact and working machinery. Heritage Council Victoria: https://vhd.heritagecouncil.vic.gov.au/places/2380 Black and white photograph: view of engine room. Wattle Gully Gold Mine winding gear, two winding wheels in centre of image.gold mining, underground, wattle gully gold mine, chewton, winding gear -
 Bendigo Historical Society Inc.
Photograph - AUSTIN COLLECTION: Wattle Gully Gold Mine, Chewton, 1982
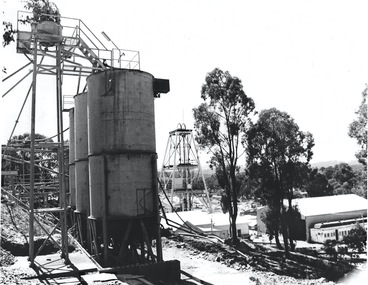
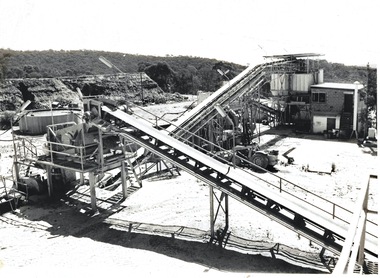
... Wattle Gully Mine holds a pivotal position in the history of the State's quartz mining industry. The rich strike at Wattle Gully mine in 1937 helped revive the State's gold mining industry that had been in the doldrums since the First World War. Wattle Gully, and a handful of other 'new' companies - the Maude and Yellow Girl, Morning Star, A 1, and North...Wattle Gully Mine holds a pivotal position in the history of the State's quartz mining industry. The rich strike at Wattle Gully mine in 1937 helped revive the State's gold mining industry that had been in the doldrums since the First World War. Wattle Gully, and a handful of other 'new' companies - the Maude and Yellow Girl, Morning Star, A 1, and North ...Wattle Gully Mine holds a pivotal position in the history of the State's quartz mining industry. The rich strike at Wattle Gully mine in 1937 helped revive the State's gold mining industry that had been in the doldrums since the First World War. Wattle Gully, and a handful of other 'new' companies - the Maude and Yellow Girl, Morning Star, A 1, and North Deborah - were the flagships of the revived industry and sustained the State's gold production for some 30 years. Wattle Gully mine, with a yield of 350,000 ounces, was the richest mine of its era. By 1940, the Wattle Gully Company had paid out £207,000 in dividends to its shareholders. The company continued to mine profitably through the Second World War, though it struggled due to a shortage of manpower. After the war, the mine continued to develop - in the early 1950s new plant including a winding engine, steel poppet head, and twenty-head battery was added. The plant was obtained from the Central Nell Gwynne Company, Bendigo. On 13 March 1969, the Wattle Gully Company closed down the mine, laying off 62 men. Since 1970 Wattle Gully mine has worked intermittently. Recent additions to the mine's infrastructure has been a new ore processing plant and a decline tunnel. The ore processing plant was operated by Newmont mining from 1987 to 1990 and subsequently operated by Consolidated Victorian Mines and Duketon Goldfields. The mine site has retained evidence of its development since 1937 with its most recent periods of equipment upgrades in the 1950s and 1980s being documented by buildings, structures and intact and working machinery. Heritage Council Victoria: https://vhd.heritagecouncil.vic.gov.au/places/2380 Black and white photograph: view of Wattle Gully mine site with ore bins, poppet head and mining sheds. Eucalypt trees in centre of image. gold mining, underground, wattle gully gold mine, chewton, ore bins, poppet head, mine sheds -
 Bendigo Historical Society Inc.
Photograph - AUSTIN COLLECTION: Wattle Gully Gold Mine, Chewton, 1980's
... Wattle Gully Mine holds a pivotal position in the history of the State's quartz mining industry. The rich strike at Wattle Gully mine in 1937 helped revive the State's gold mining industry that had been in the doldrums since the First World War. Wattle Gully, and a handful of other 'new' companies - the Maude and Yellow Girl, Morning Star, A 1, and North...Wattle Gully Mine holds a pivotal position in the history of the State's quartz mining industry. The rich strike at Wattle Gully mine in 1937 helped revive the State's gold mining industry that had been in the doldrums since the First World War. Wattle Gully, and a handful of other 'new' companies - the Maude and Yellow Girl, Morning Star, A 1, and North ...Wattle Gully Mine holds a pivotal position in the history of the State's quartz mining industry. The rich strike at Wattle Gully mine in 1937 helped revive the State's gold mining industry that had been in the doldrums since the First World War. Wattle Gully, and a handful of other 'new' companies - the Maude and Yellow Girl, Morning Star, A 1, and North Deborah - were the flagships of the revived industry and sustained the State's gold production for some 30 years. Wattle Gully mine, with a yield of 350,000 ounces, was the richest mine of its era. By 1940, the Wattle Gully Company had paid out £207,000 in dividends to its shareholders. The company continued to mine profitably through the Second World War, though it struggled due to a shortage of manpower. After the war, the mine continued to develop - in the early 1950s new plant including a winding engine, steel poppet head, and twenty-head battery was added. The plant was obtained from the Central Nell Gwynne Company, Bendigo. On 13 March 1969, the Wattle Gully Company closed down the mine, laying off 62 men. Since 1970 Wattle Gully mine has worked intermittently. Recent additions to the mine's infrastructure has been a new ore processing plant and a decline tunnel. The ore processing plant was operated by Newmont mining from 1987 to 1990 and subsequently operated by Consolidated Victorian Mines and Duketon Goldfields. The mine site has retained evidence of its development since 1937 with its most recent periods of equipment upgrades in the 1950s and 1980s being documented by buildings, structures and intact and working machinery. Heritage Council Victoria: https://vhd.heritagecouncil.vic.gov.au/places/2380 Black and white photograph: view of Wattle Gully mine site with two elevators, centre of image. gold mining, underground, wattle gully gold mine, ore elevators -
 Bendigo Historical Society Inc.
Photograph - AUSTIN COLLECTION: Wattle Gully Gold Mine, Chewton, 1980's
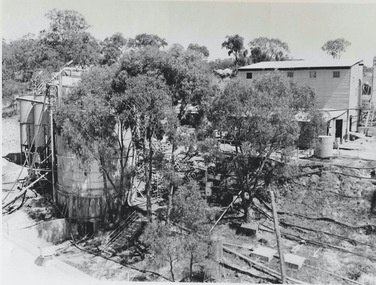
... Wattle Gully Mine holds a pivotal position in the history of the State's quartz mining industry. The rich strike at Wattle Gully mine in 1937 helped revive the State's gold mining industry that had been in the doldrums since the First World War. Wattle Gully, and a handful of other 'new' companies - the Maude and Yellow Girl, Morning Star, A 1, and North...Wattle Gully Mine holds a pivotal position in the history of the State's quartz mining industry. The rich strike at Wattle Gully mine in 1937 helped revive the State's gold mining industry that had been in the doldrums since the First World War. Wattle Gully, and a handful of other 'new' companies - the Maude and Yellow Girl, Morning Star, A 1, and North ...Wattle Gully Mine holds a pivotal position in the history of the State's quartz mining industry. The rich strike at Wattle Gully mine in 1937 helped revive the State's gold mining industry that had been in the doldrums since the First World War. Wattle Gully, and a handful of other 'new' companies - the Maude and Yellow Girl, Morning Star, A 1, and North Deborah - were the flagships of the revived industry and sustained the State's gold production for some 30 years. Wattle Gully mine, with a yield of 350,000 ounces, was the richest mine of its era. By 1940, the Wattle Gully Company had paid out £207,000 in dividends to its shareholders. The company continued to mine profitably through the Second World War, though it struggled due to a shortage of manpower. After the war, the mine continued to develop - in the early 1950s new plant including a winding engine, steel poppet head, and twenty-head battery was added. The plant was obtained from the Central Nell Gwynne Company, Bendigo. On 13 March 1969, the Wattle Gully Company closed down the mine, laying off 62 men. Since 1970 Wattle Gully mine has worked intermittently. Recent additions to the mine's infrastructure has been a new ore processing plant and a decline tunnel. The ore processing plant was operated by Newmont mining from 1987 to 1990 and subsequently operated by Consolidated Victorian Mines and Duketon Goldfields. The mine site has retained evidence of its development since 1937 with its most recent periods of equipment upgrades in the 1950s and 1980s being documented by buildings, structures and intact and working machinery. Heritage Council Victoria: https://vhd.heritagecouncil.vic.gov.au/places/2380 Black and white photograph: landscape view of Wattle Gully mine site. Eucalypt trees in foreground, mining sheds in background. Ore bins on left hand side of image.gold mining, underground, wattle gully gold mine, mine sheds, ore bins -
 Bendigo Historical Society Inc.
Photograph - AUSTIN COLLECTION: Bill Williamson, 1980's
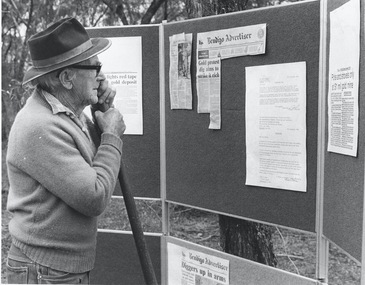
... Wattle Gully Mine holds a pivotal position in the history of the State's quartz mining industry. The rich strike at Wattle Gully mine in 1937 helped revive the State's gold mining industry that had been in the doldrums since the First World War. Wattle Gully, and a handful of other 'new' companies - the Maude and Yellow Girl, Morning Star, A 1, and North...Wattle Gully Mine holds a pivotal position in the history of the State's quartz mining industry. The rich strike at Wattle Gully mine in 1937 helped revive the State's gold mining industry that had been in the doldrums since the First World War. Wattle Gully, and a handful of other 'new' companies - the Maude and Yellow Girl, Morning Star, A 1, and North ...Wattle Gully Mine holds a pivotal position in the history of the State's quartz mining industry. The rich strike at Wattle Gully mine in 1937 helped revive the State's gold mining industry that had been in the doldrums since the First World War. Wattle Gully, and a handful of other 'new' companies - the Maude and Yellow Girl, Morning Star, A 1, and North Deborah - were the flagships of the revived industry and sustained the State's gold production for some 30 years. Wattle Gully mine, with a yield of 350,000 ounces, was the richest mine of its era. By 1940, the Wattle Gully Company had paid out £207,000 in dividends to its shareholders. The company continued to mine profitably through the Second World War, though it struggled due to a shortage of manpower. After the war, the mine continued to develop - in the early 1950s new plant including a winding engine, steel poppet head, and twenty-head battery was added. The plant was obtained from the Central Nell Gwynne Company, Bendigo. On 13 March 1969, the Wattle Gully Company closed down the mine, laying off 62 men. Since 1970 Wattle Gully mine has worked intermittently. Recent additions to the mine's infrastructure has been a new ore processing plant and a decline tunnel. The ore processing plant was operated by Newmont mining from 1987 to 1990 and subsequently operated by Consolidated Victorian Mines and Duketon Goldfields. The mine site has retained evidence of its development since 1937 with its most recent periods of equipment upgrades in the 1950s and 1980s being documented by buildings, structures and intact and working machinery. Heritage Council Victoria: https://vhd.heritagecouncil.vic.gov.au/places/2380 Black and white photograph: former miner from Castlemaine, Bill Williamson, leaning on a shovel, reading newspaper clippings pinned on trifold noticeboard. One notice ' Bendigo Advertiser, 'Gold protest dig aims to strike it rich'. Photo probably taken near Chewton.Written on back of photo in blue pen: Bill Williamson, old miner from Castlemaine, (mined through depression yrs) gold mining, underground, wattle gully gold mine, mine sheds, ore bins -
 Bendigo Historical Society Inc.
Photograph - NICHOLAS CAIRE VIEWS OF BENDIGO
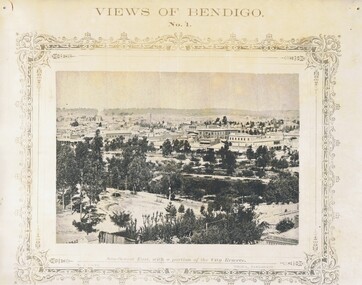
... north - east 26) View of Charing Cross, Sandhurst. 27) View of Sandhurst as seen from Knipe's Castle. 28) Township of Long Gully. 29) View taken from St. Paul's tower. 30) View of the Sandhurst cemetery at back creek. 31) Kock's pioneer quartz crushing plant, Long Gully. 32) The New Masonic Hall, Sandhurst. 33) The Bendigo benevolent asylum and industrial school. 34) Bendigo flat as seen from Wattle Hill. 35) View of Old Chum Hill. 36) New Chum Gully as seen from Specimen Hill. 37) Township of Eaglehawk. 38) View from St. ...north - east 26) View of Charing Cross, Sandhurst. 27) View of Sandhurst as seen from Knipe's Castle. 28) Township of Long Gully. 29) View taken from St. Paul's tower. 30) View of the Sandhurst cemetery at back creek. 31) Kock's pioneer quartz crushing plant, Long Gully. 32) The New Masonic Hall, Sandhurst. 33) The Bendigo benevolent asylum and industrial school. 34) Bendigo flat as seen from Wattle Hill. 35) View of Old Chum Hill. 36) New Chum Gully as seen from Specimen Hill. 37) Township of Eaglehawk. 38) View from St. ...Full set (52 photos) of Nicholas Caire ''Views of Bendigo'' photographs. 1) Sandhurst East with a portion of the City Reserve. 2) New Chum line of reef. 3) Sandhurst-North part as seen from the top of the Masonic Hall. 4) The Hustler's line of reef seen from Redan Hill. 5) Battery of stampers for crushing quartz 6) View of Sandhurst as seen from the top of the New Masonic Hall. 7) Excavation of quartz reef near Ironbark Hill. 8) St. Paul's Church, tower and belfry. 9) View of the Camp Reserve as seen from the Court House. 10) View of North Old Chum showing surface excavations. 11) View as seen from the Camp Hill near the lodge. 12) Garden Gully amalgamated claims. 13) Shamrock Hotel, Sandhurst. 14) View as seen from Court House showing the willows & East Pall Mall. 15) Wesleyan Church, Golden Square. 16) Savings bank, Sandhurst. 17) The Bendigo district hospital. 18) Interior of the Wesleyan Church, Golden Square. 19) View of Golden Square township. 20) The Town Hall, City of Sandhurst. 21) The City Hotel, Sandhurst. 22) Pall Mall, Sandhurst. 23) Sandhurst City Market. 24) Pall Mall, Sandhurst looking west. 25) View from Camp Hill looking north - east 26) View of Charing Cross, Sandhurst. 27) View of Sandhurst as seen from Knipe's Castle. 28) Township of Long Gully. 29) View taken from St. Paul's tower. 30) View of the Sandhurst cemetery at back creek. 31) Kock's pioneer quartz crushing plant, Long Gully. 32) The New Masonic Hall, Sandhurst. 33) The Bendigo benevolent asylum and industrial school. 34) Bendigo flat as seen from Wattle Hill. 35) View of Old Chum Hill. 36) New Chum Gully as seen from Specimen Hill. 37) Township of Eaglehawk. 38) View from St. Paul's tower looking south west. 39) View of the railway tunnel through the Big Hill, near Mt. Herbert. 40) View taken from St. Paul's looking south. 41) Scene taken from St. Paul's tower looking eastward. 42) View of Sandhurst from St. Paul's tower looking north-west. 43) The great extended Hustler's co's. quartz mining claim. 44) View from the Big Hill showing the line of railway to Melbourne. 45) View from St. Paul's Church tower looking westward. 46) View from St. Paul's Church tower looking north-west. 47) Scene near the Big Hill ranges taken from Mr. Buick's residence. 48) View from St. Paul's Church tower looking north eastward. 49) Township of Eaglehawk 50) View of Mitchell Street, Sandhurst. 51) Botanical gardens near the White Hills. 52) View Point, Sandhurst.bendigo, streetscape, various views, nicholas cairne -
 Bendigo Historical Society Inc.
Document - Hustlers, Sheepshead and Deborah lines of reef
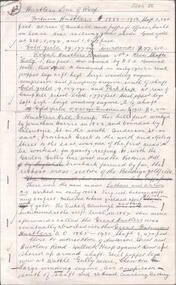
... north and Milroy Street to the east, one of first areas worked for quartz reefing. It with Garden Gully line west and Victoria Hill Ironbark, formed by far the richest cross section of the Bendigo Goldfield. Great Extended Hustlers (1865-1921) close to intersection of Anderson Street and Hustlers Road, mullock heap against road and shored up around shaft, steel poppet legs now at Wattle Gully mine, Chewton, large winding machine, air compressor south of shaft and 36 head crushing battery. ...north and Milroy Street to the east, one of first areas worked for quartz reefing. It with Garden Gully line west and Victoria Hill Ironbark, formed by far the richest cross section of the Bendigo Goldfield. Great Extended Hustlers (1865-1921) close to intersection of Anderson Street and Hustlers Road, mullock heap against road and shored up around shaft, steel poppet legs now at Wattle Gully mine, Chewton, large winding machine, air compressor south of shaft and 36 head crushing battery. ...Albert Richardson was a mining historian who wrote widely on the mines of the Bendigo Goldfield. The park opposite the Goldmines Hotel in Marong Road, is named in his honour. Five page document, hand written by Albert Richardson on lined foolscap and edited with cross-outs and insertions, . The mines along the Hustlers line of reef and the Sheepshead line of reef are described. Mines listed on Hustlers line of reef: Fortuna Hustlers (1888 - 1913), shaft 2,240 feet at rear of Buckell and Jeffrey's offices; Royal Hustlers Reserve No. 2 - two shafts 'City" 860 feet, now covered by R.S.L. building Pall Mall, steel poppet legs 60 ft high and 'Park Shaft" at rear of Camp Hill School, 1,775 feet, steel poppet legs 60 feet high; Hustlers Hill Group first worked by Jonathan Harris in 1853 and bounded by Valentine, Anderson and Ironbark Creek to the north and Milroy Street to the east, one of first areas worked for quartz reefing. It with Garden Gully line west and Victoria Hill Ironbark, formed by far the richest cross section of the Bendigo Goldfield. Great Extended Hustlers (1865-1921) close to intersection of Anderson Street and Hustlers Road, mullock heap against road and shored up around shaft, steel poppet legs now at Wattle Gully mine, Chewton, large winding machine, air compressor south of shaft and 36 head crushing battery. Hustlers Reef (Old Hustlers) and Hustlers Reef No. 1, two shafts, main 2,210 feet, about 220 yards east of Moran Street and against Fenton Street. , No. 1 shaft 1,140 feet and about 155 yards east of Moran Street. Lansell's Comet, Lightining Hill line, 2.100 feet, on Comet Hill approx 70 yards west of Holmes Road, near Comet Creek, steel poppet legs. United Hustlers and Redan (1876-1918), main Redan, 1,830 feet about 155 yards west of Sandhurst Roead, in line with Comet Hill State School, this hill known as Redan Hill. North, or New Hustlers, once known as Agnew Hustlers, wooden poppet legs, south side, Kneebone Street, Eaglehawk. Derby line, Johnson's No. 3, South Johnson's (east shaft of Collman and Tacchi) 439 feet on west wide of Woods Street, south of Wetherall Street. Paddy's Gully Line, south to north, some shafts - Lansell's 'Sandhurst" ('Needle") Eaglehawk Road shaft 2,425 feet, about 50 yards east of Needle Loops, a brick square sided chimney with Cleopatra Needle top. British American, 789 feet, just south of Holdsworth Road. Collman and Tacchi, main shaft 2,588 feet, 60 yards west of Eaglehawk Road, California Gully. Deborah Line of Reef, The Deborah (1932-1954) shaft 2.017 feet, west of Adams Road and south of Abel Street, Quarry Hill. North Deborah (1937 - 1954) shaft 1,151 feet, Breen Street, Quarry Hill, steel poppet legs. Central Deborah (1939-1954) shaft 1,347 feet Sheepshead line of reef, Lansell's South Red, White and Blue, shaft 2,124 feet, north east of Bellevue Road and 220 yards east of Adams Road. The New Red, White and Blue Consolidated (Big Blue) main shaft 2,416 feet. Lansell's Bendigo Battery 105 head, north of 'Big Blue" on his freehold lease, commenced crushing on 24th February 1895. After closing was erected as the Showground's Industrial Hall, July 1926. North Red, White and Blue, burnt down February 1926, new company 1934, closed 1938. Document is part of the Albert Richardson Collection of Bendigo mining history. bendigo, gold mining, deborah line of reef, sheepshead line of reef, hustlers line of reef, royal hustlers reserve mine, hustlers hill group of mines, great extended hustlers, hustlers reef no. 1, lightning hill line, old comet, collman and tacchi, lansell's comet, north deborah, central deborah, dhrrpdhrsf linr og trrg, new red, white and blue consolidated mine, big blue, lansell's bendigo battery, north red, white and blue mine, albert richardson collection -
 Bendigo Historical Society Inc.
Document - MCCOLL, RANKIN AND STANISTREET COLLECTION: SUSPENSION OF LABOUR COVENANTS
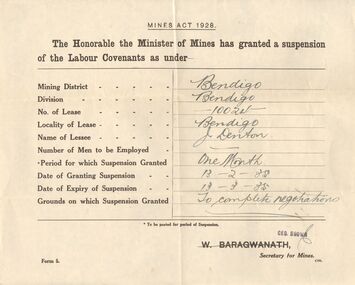
... Some of the places to which these apply are; Bendigo, South Wattle Gully Coy N.L. Castlemaine Vic 3450, Central Wattle Gully Coy N.L., North Hustlers G. ...Some of the places to which these apply are; Bendigo, South Wattle Gully Coy N.L. Castlemaine Vic 3450, Central Wattle Gully Coy N.L., North Hustlers G. ...18 large forms (form 5) headed: Mines Act 1928, The Honorable the Minister of Mines has granted a Suspension of the Labour Covenants as under - . These were granted to various companies for a period of 1 to 3 months, some of the reasons being - to complete negotiations, to raise capital, to re-organise, and the lease is held on behalf of a London Company. Items date range from 1941 to 1942. Some of the places to which these apply are; Bendigo, South Wattle Gully Coy N.L. Castlemaine Vic 3450, Central Wattle Gully Coy N.L., North Hustlers G. M. Coy N.L., Elphinstone, Chewton, South Wattle GullyCoy N.L.,Sandhurst, Forbes Carshalton Gold Mining Coy N.L., Gold Dumps Pty Ltd, Huntly & Nerring.Government Printergold, mining, suspension of labour covenants, gold mining, suspension of labour covenants -
 Bendigo Historical Society Inc.
Document - POPPET LEGS AND ENGINES -WHERE SHIFTED TO
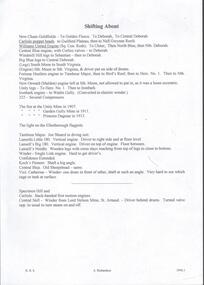
... North Blue... Nth Deborah... Central Blue... Windmill Hill... Sebastian... Big Blue... South Moon... South Virginia... Fortuna Hustlers... Tambour Major... Bird's Reef... Herc No 1... Nth Virginia... New Oswald (Maldon)... Unity... Ironbark... Wattle Gully...North Blue, then Nth Deborah. Central Blue Engine, with Corliss valves, to Deborah. Windmill Hill Legs to Sebastian, then to Deborah. Big Blue Legs - to Central Deborah. (Legs) South Moon to South Virginia. (Engine) Sth Moon to South Virginia, & driver put on side of drums. Fortuna Hustlers Engine - to ? ?, then to Bird's Reef, then to Herc No 1. Then to Nth Virginia. New Oswald (Malson) Engine left at Sth Moon, not allowed to put in, as it was a loose eccentric. Unity Legs - to Herc. No 1. Then to Ironbark. Ironbark Engine - To Wattle Gully...History House 11 Mackenzie Street Bendigo goldfields DOCUMENT Gold poppet legs and engines Shifting About - Poppet Legs and Engines New Chum Goldfields Golden Fleece Deborah Central Deborah Carlisle Guilford Plateau Nell Gwynne Reefs Williams United Ulster North Blue Nth Deborah Central Blue Windmill Hill Sebastian Big Blue South Moon South Virginia Fortuna Hustlers Tambour Major Bird's Reef Herc No 1 Nth Virginia New Oswald (Maldon) Unity Ironbark Wattle Gully 222 Garden Gully Princess Dagmar Ellenborough Joe Sheard Lansell's Little 180 Lansell's Big 180 Lansell's Needle Confidence Extended Koch's Pioneer Central Blue Old Sheepshead Vict Catherine Specimen Hill Carlisle Central Nell Lord Nelson Mine (St Arnaud) Handwritten notes where poppet legs and engines were taken. ...Handwritten notes where poppet legs and engines were taken. New Chum Goldfields - To Golden Fleece. To Deborah. To Central Deb. Carlisle Poppet Heads - to Guilford Plateau, then to Nell Gwynne Reefs. Williams United Engine (Sq Con Reds) - To Ulster then North Blue, then Nth Deborah. Central Blue Engine, with Corliss valves, to Deborah. Windmill Hill Legs to Sebastian, then to Deborah. Big Blue Legs - to Central Deborah. (Legs) South Moon to South Virginia. (Engine) Sth Moon to South Virginia, & driver put on side of drums. Fortuna Hustlers Engine - to ? ?, then to Bird's Reef, then to Herc No 1. Then to Nth Virginia. New Oswald (Malson) Engine left at Sth Moon, not allowed to put in, as it was a loose eccentric. Unity Legs - to Herc. No 1. Then to Ironbark. Ironbark Engine - To Wattle Gully. (Converted to electric winder). 222 - Several Compressors. The fire at the Unity mine in 1907. The fire at the Garden Gully mine in 1911. The fire at the Princess Dagmar in 1913. The light on the Ellenborough flagpole. Tambour Major. Joe Sheard in diving suit. Lansell's Little 180 - Vertical engine. Driver to right side and at floor level. Lansell's bit 180 - Vertical engine. Driver on top of engine. Floor between. Lansell's Needle. - Wooden legs with crossstays reaching from top of legs to close to bottom. Winder - Single Link engine. Hard to get drivers. Confidence Extended. Koch's Pioneer. - Shaft a big angle. Central Blue - Old Sheepshead - same. Vict Catherine - Winder - one drum in front of other, shaft at such an angle. Very hard to see which cage or tank at surface. Specimen Hill and Carlisle - Back-handed first motion engines. Central Nell - Winder from Lord Nelson mine, St Arnaud - Driver behind drums. Turned valve opp. To usual to turn steam on and off.document, gold, poppet legs and engines, shifting about - poppet legs and engines, new chum goldfields, golden fleece, deborah, central deborah, carlisle, guilford plateau, nell gwynne reefs, williams united, ulster, north blue, nth deborah, central blue, windmill hill, sebastian, big blue, south moon, south virginia, fortuna hustlers, tambour major, bird's reef, herc no 1, nth virginia, new oswald (maldon), unity, ironbark, wattle gully, 222, garden gully, princess dagmar, ellenborough, joe sheard, lansell's little 180, lansell's big 180, lansell's needle, confidence extended, koch's pioneer, central blue, old sheepshead, vict catherine, specimen hill, carlisle, central nell, lord nelson mine (st arnaud) -
 Bendigo Historical Society Inc.
Document - VICTORIA HILL - SELF TOUR OF GOLDFIELDS NO 1
... North Old Chum... The Ironbark... The Hercules... The Carlisle United... The Mungo Group... The Ellenborough... The St. Mungo... The Lady Barkly... South St. Mungo... Hustlers Hill... New Chum Hill... Jonathan Harris... J Hustler... Messrs Latham and Watson... Buckell & Jeffrey... Camp Hill School... Mechanics Institute Eaglehawk... Duke of Edinborough... Geo Lansell... The K K Shaft... Williamsons... Little's Claim... Rosalind Park... Mr Pryor... Gold Mines Hotel... Burrowes and Sterry... Bonatti... Menzies... Hildebrant and Koch's... Ellesmere... P M G Repeater Station... Mr Lazarus... Mt Alvernia Hospital... Mr Clarke Magee... Rae's... Jeweller's Shop... Hopetoun Band Room... Manchester Arms Hotel...Wattle Gully...North Old Chum The Ironbark The Hercules The Carlisle United The Mungo Group The Ellenborough The St. Mungo The Lady Barkly South St. Mungo Hustlers Hill New Chum Hill Jonathan Harris J Hustler Messrs Latham and Watson Buckell & Jeffrey Camp Hill School Mechanics Institute Eaglehawk Duke of Edinborough Geo Lansell The K K Shaft Williamsons Little's Claim Rosalind Park Mr Pryor Gold Mines Hotel Burrowes and Sterry Bonatti Menzies Hildebrant and Koch's Ellesmere P M G Repeater Station Mr Lazarus Mt Alvernia Hospital Mr Clarke Magee Rae's Jeweller's Shop Hopetoun Band Room Manchester Arms Hotel Wattle Gully Mine Chewton Long Gully Post Office 'Pope Pius' Roman Catholic Church Kentish Mr J B Watson California Gully State School Duke of Edinborough New St Mungo Duchess Tribute South Devonshire Duchess of Edinborough West United Devonshire United Devonshire Princess Alexandra Hopewell Miners' Phthisis Bendigo Goldfields Mr A Richardson Two copies (a & b) of a Royal Historical Society of Victoria, Bendigo Branch Self Tour of Goldfields No 1. ...Two copies (a & b) of a Royal Historical Society of Victoria, Bendigo Branch Self Tour of Goldfields No 1. The guide is to enable the tourist to locate and see for himself some of the gold mining area of Bendigo. Mines mentioned are: Deborah, North Deborah, Central Deborah, The Fortuna Hustlers, Hustlers Royal Reserve (City Mine), Great Extended Hustlers, The Hustlers Reef, Lansell's Comet, The United Hustlers and Redan, Garden Gully United, Central Nell Gwynne, The Old Chum, The New Chum and Victoria, The Lazarus, The New Chum United, The New Chum Consolidated, The Garibaldi, Advance, Lansell's 180, The Victoria Quartz, North Old Chum, The Ironbark, The Hercules, The Carlisle United, The Mungo Group, The Ellenborough, The St. Mungo, The Lady Barkly, South St. Mungo. Notes also include wages at the Fortuna Hustlers in 1906 and 1907, gold yield, depth of shaft, Dividends and Calls. Notes compiled by Mr. A. Richardson.document, gold, victoria hill, self tour of goldfields no 1, deborah (big deborah), north deborah, central deborah, the fortuna hustlers, hustlers royal reserve (city mine), great extended hustlers, the hustlers reef, lansell's comet, the united hustlers and redan, garden gully united, central nell gwynne, the old chum, the new chum and victoria, the lazarus, the new chum united, the new chum consolidated, the garibaldi, advance, lansell's 180, the victoria quartz, north old chum, the ironbark, the hercules, the carlisle united, the mungo group, the ellenborough, the st. mungo, the lady barkly, south st. mungo, hustlers hill, new chum hill, jonathan harris, j hustler, messrs latham and watson, buckell & jeffrey, camp hill school, mechanics institute eaglehawk, duke of edinborough, geo lansell, the k k shaft, williamsons, little's claim, rosalind park, mr pryor, gold mines hotel, burrowes and sterry, bonatti, menzies, hildebrant and koch's, ellesmere, p m g repeater station, mr lazarus, mt alvernia hospital, mr clarke magee, rae's, jeweller's shop, hopetoun band room, manchester arms hotel, wattle gully mine chewton, long gully post office, 'pope pius' roman catholic church, kentish, mr j b watson, california gully state school, duke of edinborough, new st mungo, duchess tribute, south devonshire, duchess of edinborough, west united devonshire, united devonshire, princess alexandra, hopewell, miners' phthisis, bendigo goldfields, mr a richardson -
 Bendigo Historical Society Inc.
Book - MCCOLL, RANKIN AND STANISTREET COLLECTION: SHARE REGISTER - VARIOUS MINES LISTED BELOW, 1952
... Wattle Gully Co. N.L. 1st 7 final distribution. 5. East Clarence G.M. Co. N.L. 1st 7 final distribution. 6. Golden Carshalton G.M. N.L. 1st 7 final distribution. 7. South Nell Gwynne G. M. N.L. 1st 7 final distribution. 8. North...Wattle Gully Co. N.L. 1st 7 final distribution. 5. East Clarence G.M. Co. N.L. 1st 7 final distribution. 6. Golden Carshalton G.M. N.L. 1st 7 final distribution. 7. South Nell Gwynne G. M. N.L. 1st 7 final distribution. 8. North ...Book; Hard cover with paper pages listing shares held by shareholders and funds distributed. 1. South Deborah G.M. N.L. - 1st & final distribution. 2. Monument Hill Cons. N.L. 1st & final distribution. 3. Napoleon Reef G.M. N.L. 1st & final distribution. 4. South Wattle Gully Co. N.L. 1st 7 final distribution. 5. East Clarence G.M. Co. N.L. 1st 7 final distribution. 6. Golden Carshalton G.M. N.L. 1st 7 final distribution. 7. South Nell Gwynne G. M. N.L. 1st 7 final distribution. 8. North Virginia G.M. N.L. 1st 7 final distribution. 9. Central Napoleon G.M. N.L. 1st & final distribution. 10. Red White & Blue Extended G.M. N.L. 1st & final distribution. 11. South Costerfield Antimony G.M. Co. N.L. 1st & final distribution. Graphic Analysis Book 13 Sets on front cover.MCCOLL RANKIN & STANISTREETorganisation, industry, shares, mccoll rankin & stanistreet -
 Bendigo Historical Society Inc.
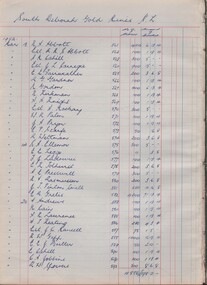
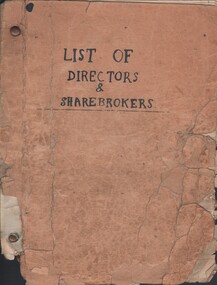
Document - MCCOLL, RANKIN AND STANISTREET COLLECTION: LIST OF DIRECTORS AND SHAREHOLDERS, 1950/61
... North Hustlers...Napoleon Reef...Deborah Extended...Deborah United...South Wattle Gully...Documents: paper bag contains - well-worn booklet 21x16cm 'List of Directors & sharebrokers' for goldmines, meeting times, reports to press, company report recipients for Monument Hill Consolidated, Central Nell Gwynne, East Clarence, New Don, South Nell Gwynne, Deborah Gold Mine, South Deborah, North Virginia, Central Deborah, North Deborah Mining, Nell Gwynne Reef, Central Napoleon, New Monument, North Hustlers, Napoleon Reef, Deborah Extended, Deborah United, South Wattle Gully Company, Red, White & Blue Extended, Golden Carshalton, poor condition, also several company change of address notices....History House 11 Mackenzie Street Bendigo goldfields gold mining - legal MCCOLL RANKIN AND STANSISTREET Monument Hill Consolidated Central Nell Gwynne East Clarence New Don South Nell Gwynne Deborah Gold Mine South Deborah North Virginia Central Deborah North Deborah Mining Nell Gwynne Reef Central Napoleon New Monument North Hustlers Napoleon Reef Deborah Extended Deborah United South Wattle Gully Company Red White & Blue Extended Golden Carshalton MCCOLL RANKIN AND STANSISTREET Documents: paper bag contains - well-worn booklet 21x16cm 'List of Directors & sharebrokers' for goldmines, meeting times, reports to press, company report recipients for Monument Hill Consolidated, Central Nell Gwynne, East Clarence, New Don, South Nell Gwynne, Deborah Gold Mine, South Deborah, North Virginia, Central Deborah, North Deborah Mining, Nell Gwynne Reef, Central Napoleon, New Monument, North Hustlers, Napoleon Reef, Deborah Extended, Deborah United, South Wattle Gully Company, Red, White & Blue Extended, Golden Carshalton, poor condition, also several company change of address notices. ...Documents: paper bag contains - well-worn booklet 21x16cm 'List of Directors & sharebrokers' for goldmines, meeting times, reports to press, company report recipients for Monument Hill Consolidated, Central Nell Gwynne, East Clarence, New Don, South Nell Gwynne, Deborah Gold Mine, South Deborah, North Virginia, Central Deborah, North Deborah Mining, Nell Gwynne Reef, Central Napoleon, New Monument, North Hustlers, Napoleon Reef, Deborah Extended, Deborah United, South Wattle Gully Company, Red, White & Blue Extended, Golden Carshalton, poor condition, also several company change of address notices.MCCOLL RANKIN AND STANSISTREETgold mining - legal, mccoll rankin and stansistreet, monument hill consolidated, central nell gwynne, east clarence, new don, south nell gwynne, deborah gold mine, south deborah, north virginia, central deborah, north deborah mining, nell gwynne reef, central napoleon, new monument, north hustlers, napoleon reef, deborah extended, deborah united, south wattle gully company, red, white & blue extended, golden carshalton -
 Bendigo Historical Society Inc.
Document - MCCOLL, RANKIN AND STANISTREET COLLECTION: CENTRAL WATTLE GULLY, 1936/37
... Documents: folder contains documents - Lease No. 8769 Castlemaine, No. 8770 Castlemaine, application for lease - Thomas Thomson - Wattle Gully Extended, prospectus - of the South Frederick the Great Company, prospectus - North Hustlers Lease No. 9077 Castlemaine, draft prospectus for Central Wattle Gully Company, shares listing, report on Chewton Goldfield 1937, prospectus - Lansells Concord, Maxwell Consolidated Central Napoleon....History House 11 Mackenzie Street Bendigo goldfields ORGANIZATION Business gold mining - legal MCCOLL RANKIN AND STANSISTREET Central White Gully MCCOLL RANKIN AND STANSISTREET Documents: folder contains documents - Lease No. 8769 Castlemaine, No. 8770 Castlemaine, application for lease - Thomas Thomson - Wattle Gully Extended, prospectus - of the South Frederick the Great Company, prospectus - North Hustlers Lease No. 9077 Castlemaine, draft prospectus for Central Wattle Gully Company, shares listing, report on Chewton Goldfield 1937, prospectus - Lansells Concord, Maxwell Consolidated Central Napoleon. ...Documents: folder contains documents - Lease No. 8769 Castlemaine, No. 8770 Castlemaine, application for lease - Thomas Thomson - Wattle Gully Extended, prospectus - of the South Frederick the Great Company, prospectus - North Hustlers Lease No. 9077 Castlemaine, draft prospectus for Central Wattle Gully Company, shares listing, report on Chewton Goldfield 1937, prospectus - Lansells Concord, Maxwell Consolidated Central Napoleon.MCCOLL RANKIN AND STANSISTREETorganization, business, gold mining - legal, mccoll rankin and stansistreet, central white gully -
 Bendigo Historical Society Inc.
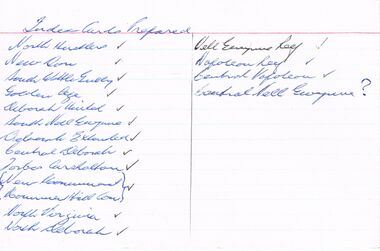
Document - SET OF INDEX CARDS - MINING
... Set of Index Cards prepared (white lined) containing information on various mines - North Hustlers, New Don, South Wattle Gully, Golden Age, Deborah United, South Nell Gwynne, Deborah Extended, Central Deborah, Forbes Carshalton, New Monument, Monument Hill Consolidated, North Virginia, North Deborah, Nell Gwynne Reef, Napoleon Reef, Central Napoleon, Central Nell Gwynne. ...History House 11 Mackenzie Street Bendigo goldfields TOPIC Mining companies Set of Index Cards prepared (white lined) containing information on various mines - North Hustlers, New Don, South Wattle Gully, Golden Age, Deborah United, South Nell Gwynne, Deborah Extended, Central Deborah, Forbes Carshalton, New Monument, Monument Hill Consolidated, North Virginia, North Deborah, Nell Gwynne Reef, Napoleon Reef, Central Napoleon, Central Nell Gwynne. ...Set of Index Cards prepared (white lined) containing information on various mines - North Hustlers, New Don, South Wattle Gully, Golden Age, Deborah United, South Nell Gwynne, Deborah Extended, Central Deborah, Forbes Carshalton, New Monument, Monument Hill Consolidated, North Virginia, North Deborah, Nell Gwynne Reef, Napoleon Reef, Central Napoleon, Central Nell Gwynne. McColl, Rankin & Stanistreet Collection.topic, mining, companies -
 Federation University Historical Collection
Book - Scrapbook, Mining articles and notices, 1932 - 1936, 1934-1936
... Dyason) 30 June 1936 - Lamplough Mine 27 June 1936 - Gold Dredging Company for Newstead 30 May 1935, The Herald - Gordon Battery in Production 19 September 1936 - Wattle Gully reef - Payable Values at 655 Feet 30 June 1936 - Avoca Developments NL 16 July 1934 - Westralia Renown Mines NL Prospectus 07 November 1936 - Ballarat East Gold Field - English Company's Deal (Victoria United, Britania United, First Chance, Last Chance, Llanberris No 1, Llanberris No 2, Sulieman No. 1, Sulieman No. 2, Sulieman No. 4, North Normanby, North Woah Hawp, Woah Hawp Canton, Tinworth's, Prince Regent Consolidated) 07 November 1936 - Large Scale Operations at Ballarat (image of A.E. ...Dyason) 30 June 1936 - Lamplough Mine 27 June 1936 - Gold Dredging Company for Newstead 30 May 1935, The Herald - Gordon Battery in Production 19 September 1936 - Wattle Gully reef - Payable Values at 655 Feet 30 June 1936 - Avoca Developments NL 16 July 1934 - Westralia Renown Mines NL Prospectus 07 November 1936 - Ballarat East Gold Field - English Company's Deal (Victoria United, Britania United, First Chance, Last Chance, Llanberris No 1, Llanberris No 2, Sulieman No. 1, Sulieman No. 2, Sulieman No. 4, North Normanby, North Woah Hawp, Woah Hawp Canton, Tinworth's, Prince Regent Consolidated) 07 November 1936 - Large Scale Operations at Ballarat (image of A.E. ...Hardcover minute book with charcoal green cover and red spine. Numerous newspaper clipping have been pasted onto the pages, most related to mining. The clippings include: 26 September 1932 - Castlemaine Goldmines - Best Prospects for Years 12 October 1932 - South New Chum Syncline Goldmines NL 30 November 1932 - New Morning Star Co. 19 February 1934 - Berringa Gold Syndicate NL 12 September 1934 - Murchison Goldfield - Triton Gold Mine 1935 - Great Poseidon 1935 1935 - Golden Age Amalgamated 11 February 1935 - Loloma Gold Mines NL 19 May 1936 - Beaconsfield Gold Mine in Tasmania 02 July 1936 - Fletchers Gold Mine 17 August 1936 - Lasseter's Reef. Kalgoorlie 17 November 1836 - Large Scale Operations at Ballarat 16 January 1937 - New Charlton Gold Area 19 January 1937 Golden Jacket Mine 26 January 1937 - Rich Quartz at Avoca April 1934 - Bendigo Mines Limited May 1934 - Church Centenary - St Luke's Campbell Town Interesting History (image) Tasmania 1932 - Evolution of Auto-Car - Cugnot's Steam Trolley (image) 1932 - Evolution of Auto-Car - Push Foot Schemes (image) 1933 - Evolution of Auto-Car - Hancock's Steam Omnibus (image) 1933 - Evolution of Auto-Car - First Petrol Car (image) 1934 - The Gold Standard - How Australia Forsook It August 1934 - Bolwarrah and Gordon's Amalgamated NL 23 August 1934 - Dunolly Gold Mines NL 12 September 1934 - Murchison Goldfield - Triton Gold Mine 08 September, Adelaide Advertiser - Australia's Heritage of Golden Days by Ernestine Hill 28 November 1934 - Chronicles of Early Melbourne by Garyowen 05 May 1936 - Bendigo Mines Director's Policy (image of E.C. Dyason) 30 June 1936 - Lamplough Mine 27 June 1936 - Gold Dredging Company for Newstead 30 May 1935, The Herald - Gordon Battery in Production 19 September 1936 - Wattle Gully reef - Payable Values at 655 Feet 30 June 1936 - Avoca Developments NL 16 July 1934 - Westralia Renown Mines NL Prospectus 07 November 1936 - Ballarat East Gold Field - English Company's Deal (Victoria United, Britania United, First Chance, Last Chance, Llanberris No 1, Llanberris No 2, Sulieman No. 1, Sulieman No. 2, Sulieman No. 4, North Normanby, North Woah Hawp, Woah Hawp Canton, Tinworth's, Prince Regent Consolidated) 07 November 1936 - Large Scale Operations at Ballarat (image of A.E. Llewellyn) * How an Australian Discovered the World's Greatest Goldfield -The Beginning of The Rand. bendigo mines, coolgardie discovery, melbourne - chronicles of early melbourne, ballarat gold field, mining, lasseter's reef, squatter, emperor mine, cassilis gold mining, granite, bendigo mines ltd, campbell town st luke's centenary, car evolution, dartmore, harcourt granite, murchison goldfield, ballarat mines, fanny bay, mail, rand, alex allan, raymond cahalin, mary dyer, robert fordham, a. garsand, augustus f. heseltine, j. owen james, william latham, k palmer, tinworth, theosanous, c. tompkin, castlemaine goldmines, coolgardie -
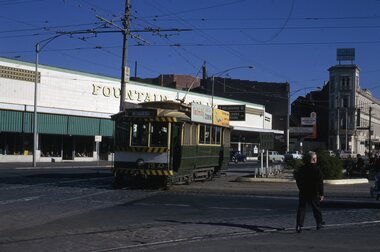 Ballarat Tramway Museum
Slide - 35mm slide/s - set of 24, Noel Simons, 20/05/1971 12:00:00 AM
... Passengers are boarding the tramcar. 1195.12 - No. 30 in High St, bound for North Bendigo between Vine and Wattle Streets. 1195.13 - No. 5 bound for Eaglehawk waits at Iron Bark Gully Loop, at Hayes St. 1195.14 - No. 5 and No. 2 crossing at Iron Bark Gully Loop. 1195.15 - No. 5 bound for Eaglehawk leaving the Manchester Loop, Long gully. 1195.16 - No. 5 passing William Street, Long Gully en route to Eaglehawk. 1195.17 - No. 5 just before the California Gully Crossing Loop. 1195.18 - Nos. 5 and 26 crossing at California Gully crossing Loop. ...North Bendigo service and No. 25 on Quarry Hill run await departure at Charing Cross" 1195.5 - "No. 5 at Eaglehawk terminus" 1195.6 - "No. 5 at Eaglehawk terminus" 1195.7 - "Nos. 5 and 25 crossing at Thorpe St. Loop, California". 1195.8 - "Nos. 25 and 5 crossing Thorpe St. Loop, California Gully". 1195.9 - "No. 5 descending Mt Korong Rd. towards Bamard St." 1195.10 - "Birney car No. 30 at Golden Square terminus" 1195.11 - "Birney car No. 30 in High Street near Thistle Street (Fire Station Loop)" 1195.12 - "No. 30 in High St. between vine and Wattle Streets" 1195.13 - "No. 25 at Hayes Street Loop Iron Bark". 1195.14 - "Nos. 2 and 5 crossing at Hayes Street Loop Iron Bark" 1195.15 - "No. 5 at Manchester Loop opposite Havilah Road, Long Gully" 1195.16 - "No. 5 passing William Street, Long Gully". 1195.17 - "No. 5 at California Gully" 1195,18 - "Nos. 26 and 5 at Thorpe St. ...Passengers are boarding the tramcar. 1195.12 - No. 30 in High St, bound for North Bendigo between Vine and Wattle Streets. 1195.13 - No. 5 bound for Eaglehawk waits at Iron Bark Gully Loop, at Hayes St. 1195.14 - No. 5 and No. 2 crossing at Iron Bark Gully Loop. 1195.15 - No. 5 bound for Eaglehawk leaving the Manchester Loop, Long gully. 1195.16 - No. 5 passing William Street, Long Gully en route to Eaglehawk. 1195.17 - No. 5 just before the California Gully Crossing Loop. 1195.18 - Nos. 5 and 26 crossing at California Gully crossing Loop. ...Set of 24 transparencies taken on 20/5/1971 on Kodak mounts. 1195.1 - Bendigo 19 arriving at Charing Cross en route to North Bendigo with Fountain Plaza and the City Family Hotel in the background. No. 19 has two roof ads for the SEC. -'Electricity better for cooking' and 'Everything's under control in my all electric kitchen' 1195.2 - as above, but standing at the Charing cross stop, with the Beehive Stores and other buildings along the east side of Pall Mall in the background. 1195.3 - No 21 ex Golden Square crossing View St. trackwork in front of No. 25 waiting to depart for Quarry Hill. No.21 has two roof ads (as for No.19 in 1195.1) and No.25 has one SEC roof ad and another. Ezywalkin sign in the background, and Fountain Plaza. 1195.4 - as for 1195.3, but after 21 has arrived and 25 left for Quarry Hill. Has Ezywalkin store and the Beehive store in the background. 1195.5 - No. 5 at the Eaglehawk terminus. Photo taken with a cannon in foreground looking along High St. Eaglehawk. Has shops on the west side of High St. in the background. 1195.6 - No. 5 at the Eaglehawk terminus, close up of the rear of the tram - note tow bar arrangement. Has destination of Quarry Hill. 1195.7-Nos.25 and 5 crossing at the Thorpe St. Loop, California Gully. No. 25 bound for Eaglehawk (has SEC Briquette and electric cooking roof ads) and 5 en route for Quarry Hill with a SEC and Cinzano roof ad. 1195.8 - as for 1195.7, but after trams have passed each other. Has Borough Auto Service building in the background. 1195.9 - No. 5 in Mt Korong Road, towards Bamard Street, photo taken after tram has passed photographer. 1195.10 - No. 30 at the Golden Square terminus with the Milk Bar on the right hand side of the photograph. 1195.11 - No. 30 inbound at Fire Station Loop, High St. Golden Square. Has old fire station in the background. Passengers are boarding the tramcar. 1195.12 - No. 30 in High St, bound for North Bendigo between Vine and Wattle Streets. 1195.13 - No. 5 bound for Eaglehawk waits at Iron Bark Gully Loop, at Hayes St. 1195.14 - No. 5 and No. 2 crossing at Iron Bark Gully Loop. 1195.15 - No. 5 bound for Eaglehawk leaving the Manchester Loop, Long gully. 1195.16 - No. 5 passing William Street, Long Gully en route to Eaglehawk. 1195.17 - No. 5 just before the California Gully Crossing Loop. 1195.18 - Nos. 5 and 26 crossing at California Gully crossing Loop. No. 5 heading to Eaglehawk, 26, Quarry Hill. 1195.19 - No. 5 in High St. Eaglehawk with Bob Moyle's Victoria Hotel and the TAB in the background. 1195.20 - No. 5 in High St. Eaglehawk approaching the terminus. Photo taken after the tram has passed the photographer. Has Foodland store and J. Best Fruit supply in the background, along with Eaglehawk Town Hall. 1195.21 - No. 5 at the Eaglehawk terminus, photo taken along seldom used track along High St. 1195.22 - as for 1195.22 - but at the very end of the track. 1195.23 - No. 5 en route for Quarry Hill climbs High St. Eaglehawk with the Victoria Hotel and Eaglehawk Town Hall in the background. 1195.24 - No. 5 and 25 crossing at Jobs Gully Loop. Note 25 has a black on white destination roll, while No. 5 has a white on black destination roll. Information written on in black ink and date stamped on purple ink. 1195.1 - "No. 19 arrives at Charing Cross Bendigo from Golden Square" 1195.2 - "No. 19 about to leave Charing Cross for North Bendigo" 1195.3 - "No. 25 awaiting departure for Quarry Hill, watches No. 21 arrive at Charring Cross from Golden Square" 1195.4 - "No. 21 on North Bendigo service and No. 25 on Quarry Hill run await departure at Charing Cross" 1195.5 - "No. 5 at Eaglehawk terminus" 1195.6 - "No. 5 at Eaglehawk terminus" 1195.7 - "Nos. 5 and 25 crossing at Thorpe St. Loop, California". 1195.8 - "Nos. 25 and 5 crossing Thorpe St. Loop, California Gully". 1195.9 - "No. 5 descending Mt Korong Rd. towards Bamard St." 1195.10 - "Birney car No. 30 at Golden Square terminus" 1195.11 - "Birney car No. 30 in High Street near Thistle Street (Fire Station Loop)" 1195.12 - "No. 30 in High St. between vine and Wattle Streets" 1195.13 - "No. 25 at Hayes Street Loop Iron Bark". 1195.14 - "Nos. 2 and 5 crossing at Hayes Street Loop Iron Bark" 1195.15 - "No. 5 at Manchester Loop opposite Havilah Road, Long Gully" 1195.16 - "No. 5 passing William Street, Long Gully". 1195.17 - "No. 5 at California Gully" 1195,18 - "Nos. 26 and 5 at Thorpe St. Loop, California Gully". 1195.19 - "No. 5 in High St. Eaglehawk". 1195.20 - "No. 5 approaching Eaglehawk terminus" 1195.21 - "No. 5 at Eaglehawk terminus" 1195.22 - "No. 5 at Eaglehawk terminus" 1195.23 - "No. 5 in High St. Eaglehawk" tramways, trams, bendigo, charing cross, eaglehawk, california gully, golden square, iron bark gully, jobs gully, tram 2, tram 5, tram 19, tram 21, tram 25, tram 26, tram 30 -
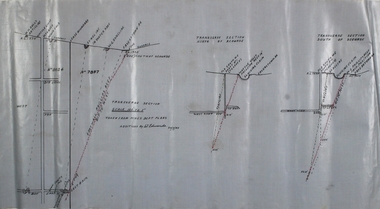 Bendigo Historical Society Inc.
Plan - W.W. Gully and Footwall
... Wattle Gully Gold Mine was at Chewton. A footwall in mining is the underlying rock mass beneath an inclined fault, vein, or mineral deposit. It is named because miners typically walk on this lower surface while the hanging wall lies above them. In mining operations, it serves as a crucial, stable reference point, often housing underground drives and shafts. Margaret Roberts gold Chewton shaft gold mine Phillips Reef W.W. Gully footwall Transverse section showing W.W. Gully and Phillips Reef. Seperate transverse diagrams of north ...Wattle Gully Gold Mine was at Chewton. A footwall in mining is the underlying rock mass beneath an inclined fault, vein, or mineral deposit. It is named because miners typically walk on this lower surface while the hanging wall lies above them. In mining operations, it serves as a crucial, stable reference point, often housing underground drives and shafts. Transverse section showing W.W. Gully and Phillips Reef. Seperate transverse diagrams of north and south of xcut. Additions by W. Edwards, 30.7.45, Plan forms part of the Margaret Roberts Collection of mining records. margaret roberts, gold, chewton, shaft, gold mine, phillips reef, w.w. gully, footwall