
Showing 310 items matching " tramway square"
-
 Bendigo Historical Society Inc.
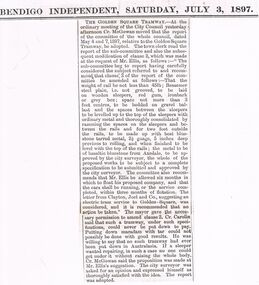
Newspaper - RANDALL COLLECTION: THE GOLDEN SQUARE TRAMWAY, 3 July 1897
... RANDALL COLLECTION: THE GOLDEN SQUARE TRAMWAY...Newspaper Cutting, The Golden Square Tramway, as printed in the Bendigo Independent Newspaper, Saturday, July 3, 1897....Newspaper RANDALL COLLECTION: THE GOLDEN SQUARE TRAMWAY ...Newspaper Cutting, The Golden Square Tramway, as printed in the Bendigo Independent Newspaper, Saturday, July 3, 1897.newspaper, bendigo, bendigo independent -
 Melbourne Tram Museum
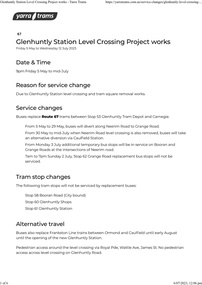
Document - Project Notice, Yarra Trams, "Glenhuntly Station Level Crossing Project works", May 2023
... ...tramway square...Project notice for - "Glenhuntly Station Level Crossing Project works" - tramway square. Gives details of alternative bus arrangements, maps and timing for the works. ...Project notice for - "Glenhuntly Station Level Crossing Project works" - tramway square. Gives details of alternative bus arrangements, maps and timing for the works. ...Project notice for - "Glenhuntly Station Level Crossing Project works" - tramway square. Gives details of alternative bus arrangements, maps and timing for the works. Work scheduled 5/5/2023 to mid July 2023.Yields information about the removal of the Glen Huntly station/road level crossing and the associated trackwork.Notice - 6 A4 page document - pdf version downloaded and printed version.tramways, public transport, level crossing, glen huntly road, glenhuntly, railway square, tramway square, trackworks -
 Bendigo Historical Society Inc.
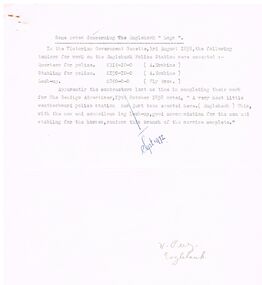
Document - RESEARCH NOTES: ONE TREE HILL, STORMWATER CHANNEL, ANTHONY TROILLOPE, HORSE TRAMWAY TO GOLDEN SQUARE
... RESEARCH NOTES: ONE TREE HILL, STORMWATER CHANNEL, ANTHONY TROILLOPE, HORSE TRAMWAY TO GOLDEN SQUARE...Mentioned are: - Some Notes Concerning The Eaglehawk Logs, Damaging the Stormwater Channel, where some Chinese were digging away the Creek, the cutting down of the giant gum tree which gave One Tree Hill its name, How Anthony Trollope saw Bendigo in the 1870's, A Proposed Horse Tramway to Golden Square, Society’s' Trip to Bridgewater Flour Mill, A talk on a trip to Malaya by Mr D Hester, Society News and Happenings, Old Bendigonians and Safety Cages,...Mentioned are: - Some Notes Concerning The Eaglehawk Logs, Damaging the Stormwater Channel, where some Chinese were digging away the Creek, the cutting down of the giant gum tree which gave One Tree Hill its name, How Anthony Trollope saw Bendigo in the 1870's, A Proposed Horse Tramway to Golden Square, Society’s' Trip to Bridgewater Flour Mill, A talk on a trip to Malaya by Mr D Hester, Society News and Happenings, Old Bendigonians and Safety Cages, Document RESEARCH NOTES: ONE TREE HILL, STORMWATER CHANNEL, ANTHONY TROILLOPE, HORSE TRAMWAY TO GOLDEN SQUARE ...Typed and handwritten notes. Mentioned are: - Some Notes Concerning The Eaglehawk Logs, Damaging the Stormwater Channel, where some Chinese were digging away the Creek, the cutting down of the giant gum tree which gave One Tree Hill its name, How Anthony Trollope saw Bendigo in the 1870's, A Proposed Horse Tramway to Golden Square, Society’s' Trip to Bridgewater Flour Mill, A talk on a trip to Malaya by Mr D Hester, Society News and Happenings, Old Bendigonians and Safety Cages,document, various notes, eaglehawk logs, bendigo advertiser 19/10/1858, damaging the stormwater channel, bendigo advertiser 11/8/1872, harneys bridge, gas works, constable rogers, constable james bradley, joch, john o'c hattam, one tree hill, ryan, trollope's fabulous bendigo, anthony trollope, 'trollope’s australia', nelson press, alex h stone, bendigo advertiser 5/7/1897, mr peter ellis, cr hoskins, horse tramway, historical society, water wheel flour mill, june parry, mr pat wodetzki, mr leo wodetzki, neil murray, mr k hester, mr wes harry, mr i hendry, mr henry jackson, mr connelly, mr irons, mr harney, dr smith, dr hoyle, rev dr bachaus, rev dr nish, rev joseph dare, hon angus mackay, mr haverfield, mr j k robshaw, w p neal, mr george lansell, hon j h abbott, m l c, mr j casey, dr james boyd, dr atkinson, dr easie, mr t h henderson, old beehive, francis brothers, mr john crowley, mr jacob cohn, art gallery, mr hugh mcdevitt, mr alexander bayne, mr f sciallero, camp reserve, hon w i winter-irvine, mr george avery fletcher, great central goldfield of victoria, safety cages, bendigo advertiser, j h seymour, mr horwood, new chum and victoria tribute company, james watson, seymour's patent safety cage, londerry tribute, national show sandhurst, h banfield, mr a llewllyn, 'dear old bendigo', thomas bracken, mr william heffernan, mr edward (ned) ryan, mr samuel bastard, mr charles bird, mcpherson and co, fern hill club, mr george tolhurst, tolhurst brothers, union bank, mr lawrence ryan, mr shadrack jones, charley armstrong, armstrong brothers, mr abraham solomen, mr bladiere mr r t wheeler -
 Melbourne Tram Museum
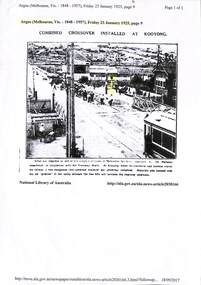
Newspaper, The Argus, "Combined Crossover installed at Kooyong", 23/01/1925 12:00:00 AM
... ... Tramway Square...Photocopy of an article from The Argus, 23/1/1925, page 9 extracted through Trove, titled "Combined Crossover installed at Kooyong" with a photograph of the level crossing, replacement of track leading up to the Tramway or Railway Square. The disc signal for trams has been highlighted in yellow. ...Trams tramways Victorian Railways Glenferrie Road Level Crossings Tramway Square Trackwork Photocopy of an article from The Argus, 23/1/1925, page 9 extracted through Trove, titled "Combined Crossover installed at Kooyong" with a photograph of the level crossing, replacement of track leading up to the Tramway or Railway Square. ...Photocopy of an article from The Argus, 23/1/1925, page 9 extracted through Trove, titled "Combined Crossover installed at Kooyong" with a photograph of the level crossing, replacement of track leading up to the Tramway or Railway Square. The disc signal for trams has been highlighted in yellow. Item made by Robert Green 18/9/2017trams, tramways, victorian railways, glenferrie road, level crossings, tramway square, trackwork -
 Melbourne Tram Museum
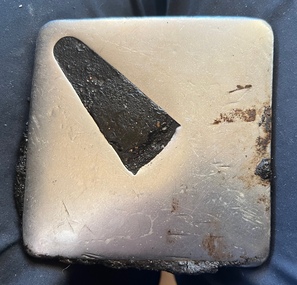
Functional object - Square tramway ground indicator roadway stud
... Square tramway ground indicator roadway stud...Functional object Square tramway ground indicator roadway stud ...Used by Melbourne tramways to assist tram drivers in driving through critical areas, such as providing clearance marks at turnouts, cross-overs, and stopping points. See item 1188 for a guidebook. Demonstrates the method of providing road marking systems to drivers.Stainless steel object square shape with a machine punched and formed prong to enable it to be placed and secured into the ground. Item has been used and has bitumen road materials attached to it.signs, tramways, drivers, stud markings, instructions -
 Melbourne Tram Museum
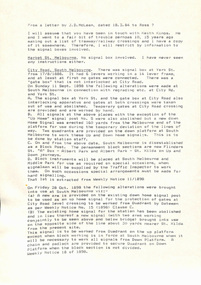
Document - Personal Papers, Jack McLean, Keith Kings, "Tramway / Railway level crossings", 1954
... ... Tramway Square...Trams tramways Level Crossings Railway squares Tramway Square Cable Trams Set pf personal papers concerning tramway / railway level crossings in Melbourne. ...Set pf personal papers concerning tramway / railway level crossings in Melbourne. Consist of .1 - letter to Ross dated 19/3/1984, carbon copy from Jack McLean, printed on computer paper perforated computer paper torn into strips - has hand written notes. Three separate sheets. Covers Market St Melbourne (Queensbridge) South Melbourne (City Road) St George Road - North Fitzroy Queens Parade Clifton Hill Epsom Road Showgrounds Glenferrie Road Hawthorn Glenferrie Road Malvern Burke Road Camberwell, Glenferrie Rd Kooyong, Burke Road Gardiner Glenhuntly Road Glenhuntly Glenhuntly Road Elsternwick, Whitehorse Road (Deepdene), Riversdale Road, Riversdale Lygon St North Carlton Nicholson St Footscray Nicholson St North Fitzroy, .2 - six pages - retype of above document on A4 computer printing paper - covers the same material. .3 - Hand drawing of the Melbourne rail system with crossing dates including bridges noted on it for cable and electric tramways. Has initials KK 12/54 in bottom right hand corner. drawn on lined double width foolscap paper.trams, tramways, level crossings, railway squares, tramway square, cable trams -
 Melbourne Tram Museum
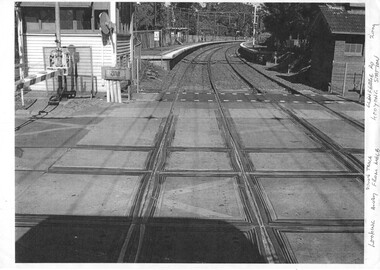
Photograph - Black & White Photograph/s, 2009
... ... Tramway Square...Trams tramways Kooyong Level Crossings Glenferrie Road Tramway Square Railway squares 1 - "Looking away down track from Melbourne - Glenferrie Rd Kooyong Station - 2009" 2 - "Looking towards Melbourne up track - Glenferrie Rd Kooyong Station - 2009" Set of two Photographs printed on A4 sheet, photocopy - of the rail tram level crossing at Glenferrie Road, Kooyong showing the rubber inserts and the level crossing - taken from the cab of a train in either direction. ...Set of two Photographs printed on A4 sheet, photocopy - of the rail tram level crossing at Glenferrie Road, Kooyong showing the rubber inserts and the level crossing - taken from the cab of a train in either direction. Shows the level crossing, platform and track, along with part of the signal box and boom barriers.1 - "Looking away down track from Melbourne - Glenferrie Rd Kooyong Station - 2009" 2 - "Looking towards Melbourne up track - Glenferrie Rd Kooyong Station - 2009"trams, tramways, kooyong, level crossings, glenferrie road, tramway square, railway squares -
 Melbourne Tram Museum
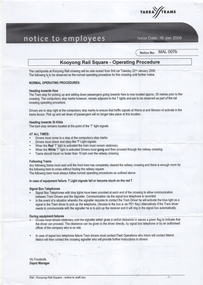
Document - Notice to Employees, Yarra Trams, "Kooyong Rail Square - Operating Procedure", Jan 2008
... ...tramway square...Demonstrates an instruction into the operation of the Kooyong rail square trams tramway square rail square railway square Glenferrie Road Kooyong level crossing operations Instructions Single A4 sheet, printed double sided, with a coloured site plan. ...Document provides information on the operation of the rail square (also known as a tram square, railway Square) at the Kooyong Glenferrie Road level crossing. Provides a site plan, signal information and operational procedures including when items fail. Dated 16/1/2008.Demonstrates an instruction into the operation of the Kooyong rail squareSingle A4 sheet, printed double sided, with a coloured site plan.trams, tramway square, rail square, railway square, glenferrie road, kooyong level crossing, operations, instructions -
 Melbourne Tram Museum
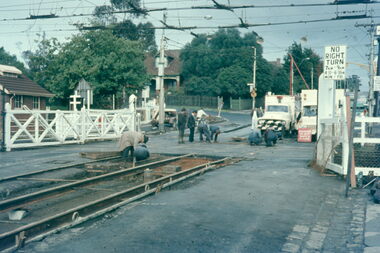
Slide - Kooyong level crossing track work, Warren Doubleday, 22/5/1970
... Photograph shows the welding of new rail into the existing level crossing rails in Glenferrie Road Kooyong following a track relay on either side of the tramway/railway square 22/5/1970....Photograph shows the welding of new rail into the existing level crossing rails in Glenferrie Road Kooyong following a track relay on either side of the tramway/railway square 22/5/1970. Yields information about the track relay in Glenferrie Road in May 1970. tramways trackwork Kooyong level crossing Glenferrie Road Colour slide - GAF Anscochrome plastic mount Slide Kooyong level crossing track work Warren Doubleday ...Photograph shows the welding of new rail into the existing level crossing rails in Glenferrie Road Kooyong following a track relay on either side of the tramway/railway square 22/5/1970.Yields information about the track relay in Glenferrie Road in May 1970.Colour slide - GAF Anscochrome plastic mounttramways, trackwork, kooyong level crossing, glenferrie road -
 Bendigo Historical Society Inc.
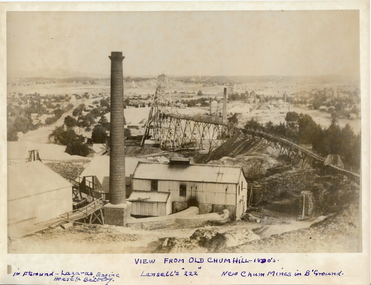
Photograph - LAZARUS ENGINE, HORSE AND BATTERY, c.1890
... Brick chimney, C.I building, poppet head with tramway, square chimney in centre. Chimneys and poppet heads in distance. ...Brick chimney, C.I building, poppet head with tramway, square chimney in centre. Chimneys and poppet heads in distance. ...Black and white photograph. Brick chimney, C.I building, poppet head with tramway, square chimney in centre. Chimneys and poppet heads in distance. Inscriptions: Hand written in ink in bottom margin 'View from Old Chum Hill - 1890's. In foreground 'Lazarus Engine, Horse & Battery', ' Lansell's '222' '. 'New Chum Mines in background'. History of object: James Lerk 18.2.2000 'Correctly labelled on front of photo'.place, mining site -
 Melbourne Tram Museum
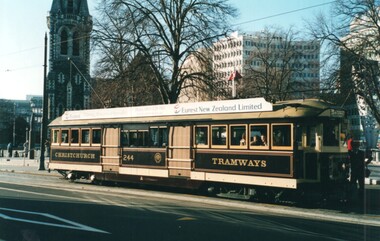
Photograph - W2 244 as the Christchurch NZ Restaurant tram, David Frost, c2005
... The photo shows former Melbourne W2 class tram 244 modified by the Sydney Tramway Museum to be a Restaurant tram in Christchurch NZ. Photo taken at Cathedral Square c2005....Colour print of Christchurch Tramways W2 244 Cathedral Square printed on Kodak Royal paper....Trams tramways W2 class tram 244 Christchurch Restaurant tram Colour print of Christchurch Tramways W2 244 Cathedral Square printed on Kodak Royal paper. ...The photo shows former Melbourne W2 class tram 244 modified by the Sydney Tramway Museum to be a Restaurant tram in Christchurch NZ. Photo taken at Cathedral Square c2005.Provides details of a Melbourne W2 class tram used as a Restaurant tram in Christchurch.Colour print of Christchurch Tramways W2 244 Cathedral Square printed on Kodak Royal paper.trams, tramways, w2 class, tram 244, christchurch, restaurant tram -
 Bendigo Historical Society Inc.
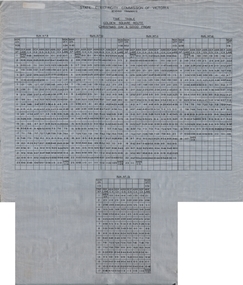
Document - BASIL MILLER COLLECTION: TRAMS, TIME TABLE
... State Electricity Commission of Victoria, Bendigo Tramways Time Table. Golden Square Route Christmas Day and Good Friday, runs No9 to No13....State Electricity Commission of Victoria, Bendigo Tramways Time Table. Golden Square Route Christmas Day and Good Friday, runs No9 to No13. ...Transparent blueprint paper. State Electricity Commission of Victoria, Bendigo Tramways Time Table. Golden Square Route Christmas Day and Good Friday, runs No9 to No13.organization, business, bendigo trams, basil miller -
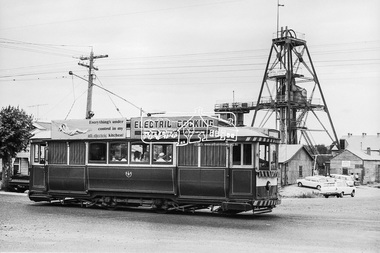 Eltham District Historical Society Inc
Photograph, Bendigo Tramways No. 7 en route to Golden Square passes the Central Deborah Gold Mining Co, High Street (Midland Highway) and Violet Street, Bendigo, January 1972, Jan 1972
... Looking east from Midland Highway at intersection of Violet Street Bendigo, Bendigo Tramways No. 7, Central Deborah Gold Mining Co. N.L., Eaglehawk, George Coop Collection, Golden Square, High Street, Midland Highway, Tram, Violet Street Digital TIFF file Scan of 35mm Ilford FP3 black and white negative transparency Bendigo Tramways No. 7 en route to Golden Square passes the Central Deborah Gold Mining Co, High Street (Midland Highway) and Violet Street, Bendigo, January 1972 Photograph George Coop George Coop ...Looking east from Midland Highway at intersection of Violet StreetDigital TIFF file Scan of 35mm Ilford FP3 black and white negative transparencybendigo, bendigo tramways no. 7, central deborah gold mining co. n.l., eaglehawk, george coop collection, golden square, high street, midland highway, tram, violet street -
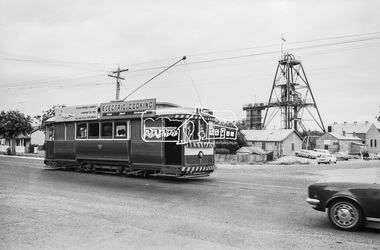 Eltham District Historical Society Inc
Photograph, Bendigo Tramways No. 7 en route to Golden Square passes the Central Deborah Gold Mining Co, High Street (Midland Highway) and Violet Street, Bendigo, January 1972, Jan 1972
... Looking east from Midland Highway at intersection of Violet Street bendigo, bendigo tramways no. 7, central deborah gold mining co. n.l., eaglehawk, george coop collection, golden square, high street, midland highway, tram, violet street Digital TIFF file Scan of 35mm Ilford FP3 black and white negative transparency Bendigo Tramways No. 7 en route to Golden Square passes the Central Deborah Gold Mining Co, High Street (Midland Highway) and Violet Street, Bendigo, January 1972 Photograph George Coop George Coop ...Looking east from Midland Highway at intersection of Violet StreetDigital TIFF file Scan of 35mm Ilford FP3 black and white negative transparencybendigo, bendigo tramways no. 7, central deborah gold mining co. n.l., eaglehawk, george coop collection, golden square, high street, midland highway, tram, violet street -
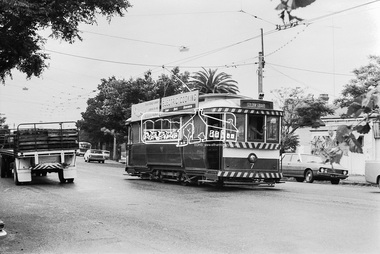 Eltham District Historical Society Inc
Photograph, Bendigo Tramways No. 7 en route to Golden Square, January 1972, Jan 1972
... Most likely High Street, Golden Square Bendigo, Bendigo Tramways No. 7, Eaglehawk, George Coop Collection, Golden Square, High Street, Tram Digital TIFF file Scan of 35mm Ilford FP3 black and white negative transparency Bendigo Tramways No. 7 en route to Golden Square, January 1972 Photograph George Coop George Coop ...Most likely High Street, Golden SquareDigital TIFF file Scan of 35mm Ilford FP3 black and white negative transparencybendigo, bendigo tramways no. 7, eaglehawk, george coop collection, golden square, high street, tram -
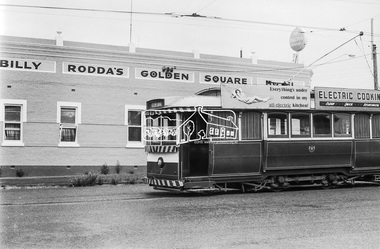 Eltham District Historical Society Inc
Photograph, Bendigo Tramways No. 7 en route to Golden Square on High Street near the intersection of Maple Street, Golden Square, January 1972, Jan 1972
... Billy Rodda's Golden Square Hotel now known as the Golden Square Hotel Bendigo, Bendigo Tramways No. 7, Billy Rodda's Golden Square Hotel, Eaglehawk, George Coop Collection, Golden Square, High Street, Maple Street, Tram Digital TIFF file Scan of 35mm Ilford FP3 black and white negative transparency Bendigo Tramways No. 7 en route to Golden Square on High Street near the intersection of Maple Street, Golden Square, January 1972 Photograph George Coop George Coop ...Billy Rodda's Golden Square Hotel now known as the Golden Square HotelDigital TIFF file Scan of 35mm Ilford FP3 black and white negative transparencybendigo, bendigo tramways no. 7, billy rodda's golden square hotel, eaglehawk, george coop collection, golden square, high street, maple street, tram -
 Eltham District Historical Society Inc
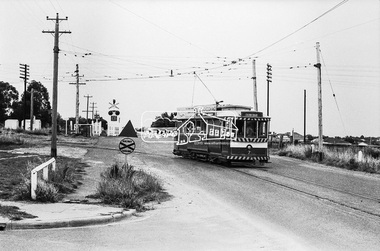
Photograph, Bendigo Tramways No. 7 departs from Thunder Street in North Bendigo en route to Golden Square, Bendigo, January 1972, Jan 1972
... The tram line proceeds up to the left just pass Moray Crescent where it terminated alongside the railway line in North Bendigo in 1972 bendigo, bendigo tramways no. 7, george coop collection, moray crescent, north bendigo, railway crossing, railway line, thunder street, tram Digital TIFF file Scan of 35mm Ilford FP3 black and white negative transparency Bendigo Tramways No. 7 departs from Thunder Street in North Bendigo en route to Golden Square, Bendigo, January 1972 Photograph George Coop George Coop ...The tram line proceeds up to the left just pass Moray Crescent where it terminated alongside the railway line in North Bendigo in 1972Digital TIFF file Scan of 35mm Ilford FP3 black and white negative transparencybendigo, bendigo tramways no. 7, george coop collection, moray crescent, north bendigo, railway crossing, railway line, thunder street, tram -
 Eltham District Historical Society Inc
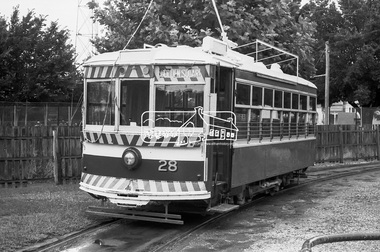
Photograph, Golden Square route Bendigo Tramways No. 28 parked, possibly near the Arnold Street Tram Depot, Bendigo, January 1972, Jan 1972
... Birney (USA manufacture) tram car arnold street depot, bendigo, bendigo tramways no. 28, eaglehawk, george coop collection, golden square, tram, Birney (USA) tram car Digital TIFF file Scan of 35mm Ilford FP3 black and white negative transparency Golden Square route Bendigo Tramways No. 28 parked, possibly near the Arnold Street Tram Depot, Bendigo, January 1972 Photograph Photograph George Coop George Coop ...Birney (USA manufacture) tram carDigital TIFF file Scan of 35mm Ilford FP3 black and white negative transparencyarnold street depot, bendigo, bendigo tramways no. 28, eaglehawk, george coop collection, golden square, tram, birney (usa) tram car -
 Bendigo Historical Society Inc.
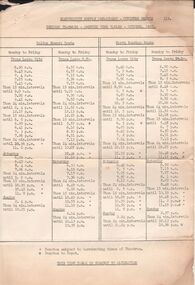
Document - ELECTRICITY SUPPLY DEPARTMENT NORTHERN BRANCH , BENDIGO TRAMWAYS, AMENDED TIMETABLES, OCTOBER 1955, PAGES 113 & 114 ONLY
... Two pages 113 & 114 only Electricity Supply Department Northern Branch Bendigo Tramways - Amended timetables - October 1955 Page 113 Golden Square route & North Bendigo route Page 114 Eaglehawk route & Quarry Hill route paper showing age / yellowed...Bendigo Trams Tram timetables Two pages 113 & 114 only Electricity Supply Department Northern Branch Bendigo Tramways - Amended timetables - October 1955 Page 113 Golden Square route & North Bendigo route Page 114 Eaglehawk route & Quarry Hill route paper showing age / yellowed Document ELECTRICITY SUPPLY DEPARTMENT NORTHERN BRANCH , BENDIGO TRAMWAYS, AMENDED TIMETABLES, OCTOBER 1955, PAGES 113 & 114 ONLY ...Two pages 113 & 114 only Electricity Supply Department Northern Branch Bendigo Tramways - Amended timetables - October 1955 Page 113 Golden Square route & North Bendigo route Page 114 Eaglehawk route & Quarry Hill route paper showing age / yellowedbendigo trams, tram timetables -
 Bendigo Historical Society Inc.
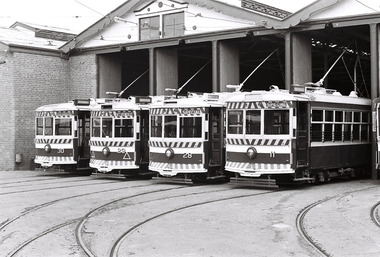
Photograph - Robert Green Collection - Photos of Bendigo Tramways - Sheet 2 of 8, 1960s
... Photos: 11147.2a No 30, 29, 28 and 11 Birney Cars lined up at the Depot 11147.2b No 30, 29, 28 and 11 Birney Cars lined up at the Depot 11147.2c No 30, 29, 28 and 11 Birney Cars lined up at the Depot 11147.2d No 30, 29, 28 and 11 Birney Cars lined up at the Depot 11147.2e No 30, 29, 28 and 11 Birney Cars lined up at the Depot 11147.2f No 30, 29, 28 Birney Cars lined up at the Depot 11147.2g No 30, 29, 28 and 11 Birney Cars lined up at the Depot 11147.2h No 30, 29, 28 and 11 Birney Cars lined up at the Depot 11147.2i No 30, 29, 28 and 11 Birney Cars and No 25 lined up at the Depot 11147.2j No 30, 29, 28 and 11 Birney Cars and No 25 lined up at the Depot 11147.2k No 28 and 11 Birney Cars lined up at the Depot 11147.2l No 30 Special leaves the depot watched by the photographer 11147.2m No 29 Special leaves the depot 11147.2n Driver and passenger inside a Birney Car 11147.2o Driver and passenger inside a Birney Car heading up Pall Mall 11147.2p The four Birney Cars in Carpenter Street, Quarry Hill Terminus at the Cemetery Gates 11147.2q The four Birney Cars in Carpenter Street, Quarry Hill Terminus at the Cemetery Gates 11147.2r The four Birney Cars in Carpenter Street, Quarry Hill Terminus at the Cemetery Gates 11147.2s The four Birney Cars in Carpenter Street, Quarry Hill Terminus at the Cemetery Gates 11147.2t The four Birney Cars at the Carpenter Street, Quarry Hill Loop 11147.2u No 28 Special Birney Car 11147.2v No 30 Special Birney Car 11147.2w The four Birney Cars at the fountain side by side getting reading to depart to Eaglehawk 11147.2x The four Birney Cars at Eaglehawk beside Canterbury Park 11147.2y The four Birney Cars at Eaglehawk beside Canterbury Park with the Drivers and the Inspector 11147.2z The four Birney Cars at Eaglehawk beside Canterbury Park 11147.2aa The four Birney Cars at Eaglehawk beside Canterbury Park 11147.2ab The four Birney Cars at Eaglehawk beside the town hall 11147.2ac Birney Car 28 passes 17 at the Long gully Manchester Arms Hotel Loop 11147.2ad No 21 and two others at the North Bendigo terminus 11147.2af Four trams heading to Golden Square in High Street 11147.2ag Four trams heading to Golden Square in High Street 11147.2ah Four trams heading at the Golden Square Terminus at Maple High Streets Photograph Robert Green Collection - Photos of Bendigo Tramways - Sheet 2 of 8 ...This collection contains eight archive sheets (Sheet 1 to Sheet 8) of strips of original 35mm black and white negatives of photographs taken during the 1960s and early 1970s by Robert Green, of the Bendigo State Electricty Commission of Victoria Tramways prior to their abandonment The collection also includes two archive quality sheets (Sheet A and Sheet B) of original 35mm colour slides taken by Robert Green during the same period. Sheet B also contains one slide taken by Robert's friend Keigh S King (1928-2019) who was the author of the book 'The Bendigo Tramways an illustrated history, published by the Australian Railway Historical Society Victorian Division Melbourne in February 1972; BHS Item no. 5052. The collection also includes one USB stick which contains images of all photographs described above, except for one colour slide taken by Keith S Kings. Sixteen black and white prints from the images are also included.Robert Green Collection, this item contains 34 Black and White Negatives of the trams at various locations around Bendigo. Photos: 11147.2a No 30, 29, 28 and 11 Birney Cars lined up at the Depot 11147.2b No 30, 29, 28 and 11 Birney Cars lined up at the Depot 11147.2c No 30, 29, 28 and 11 Birney Cars lined up at the Depot 11147.2d No 30, 29, 28 and 11 Birney Cars lined up at the Depot 11147.2e No 30, 29, 28 and 11 Birney Cars lined up at the Depot 11147.2f No 30, 29, 28 Birney Cars lined up at the Depot 11147.2g No 30, 29, 28 and 11 Birney Cars lined up at the Depot 11147.2h No 30, 29, 28 and 11 Birney Cars lined up at the Depot 11147.2i No 30, 29, 28 and 11 Birney Cars and No 25 lined up at the Depot 11147.2j No 30, 29, 28 and 11 Birney Cars and No 25 lined up at the Depot 11147.2k No 28 and 11 Birney Cars lined up at the Depot 11147.2l No 30 Special leaves the depot watched by the photographer 11147.2m No 29 Special leaves the depot 11147.2n Driver and passenger inside a Birney Car 11147.2o Driver and passenger inside a Birney Car heading up Pall Mall 11147.2p The four Birney Cars in Carpenter Street, Quarry Hill Terminus at the Cemetery Gates 11147.2q The four Birney Cars in Carpenter Street, Quarry Hill Terminus at the Cemetery Gates 11147.2r The four Birney Cars in Carpenter Street, Quarry Hill Terminus at the Cemetery Gates 11147.2s The four Birney Cars in Carpenter Street, Quarry Hill Terminus at the Cemetery Gates 11147.2t The four Birney Cars at the Carpenter Street, Quarry Hill Loop 11147.2u No 28 Special Birney Car 11147.2v No 30 Special Birney Car 11147.2w The four Birney Cars at the fountain side by side getting reading to depart to Eaglehawk 11147.2x The four Birney Cars at Eaglehawk beside Canterbury Park 11147.2y The four Birney Cars at Eaglehawk beside Canterbury Park with the Drivers and the Inspector 11147.2z The four Birney Cars at Eaglehawk beside Canterbury Park 11147.2aa The four Birney Cars at Eaglehawk beside Canterbury Park 11147.2ab The four Birney Cars at Eaglehawk beside the town hall 11147.2ac Birney Car 28 passes 17 at the Long gully Manchester Arms Hotel Loop 11147.2ad No 21 and two others at the North Bendigo terminus 11147.2af Four trams heading to Golden Square in High Street 11147.2ag Four trams heading to Golden Square in High Street 11147.2ah Four trams heading at the Golden Square Terminus at Maple High Streetskeith s king, bendigo, trams, robert green -
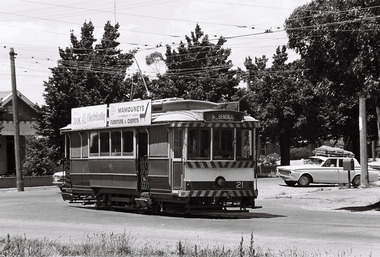 Bendigo Historical Society Inc.
Photograph - Robert Green Collection - Photos of Bendigo Tramways - Sheet 3 of 8, 1960s
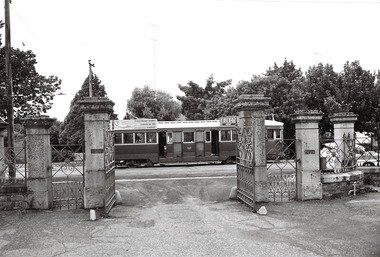
... Photos: 11147.3a No 21 turns out of McRae St into Nolan Street, on its way to North Bendigo 11147.3b No 5 on the way to Eaglehawk 11147.3c No 21 leaves Charing Cross towards North Bendigo, City Family Hotel in the background 11147.3d No 18 completes its run from Eaglehawk at the fountain, and is returning to the depot 11147.3e No 18 turns from McRae St into Tramway Avenue and the depot 11147.3f No 18 turns from McRae St into Tramway Avenue and the depot 11147.3g No 28 at the depot 11147.3h No 6 on its way to Golden Square 11147.3i No 6 at the Golden square Terminus, High and Maple Streets 11147.3j No 25 from Quarry Hill at the intersection of Wills and Mitchell Street 11147.3k No 2 leaves the Mitchell St railway bridge into Carpenter Street on its way to Quarry Hill 11147.3l No 21 comes into the Golden square Terminus, steeple of the Methodist church in the background 11147.3m Tram heading along McRae St in front of the School of Mines 11147.3n Tram heading along McRae St towards Pall Mall in front of the School of Mines 11147.o No 24 heading to Eaglehawk at the corner of Barnard and Forest Streets 11147.3p Three trams lined up in the depot, possible early morning or evening 11147.3q Tram No 21 at the North Bendigo Terminus, possible early morning or evening 11147.3s Tram leaving the Eaglehawk Town Hall in the dark 11147.3t View up Pall Mall towards the fountain from Mundy Street intersection 11147.3u Birney Car No 28 Special leaving the depot, crossing the Back Creek 11147.3w Birney Car No 28 Special at Eaglehawk Canterbury Park 11147.3x No 28 Birney Car Special hading to Eaglehawk at Iron Bark, just past the Marong Road turn-off at Iron Bark 11147.3y No 28 Birney Car Special heading to Eaglehawk at Long Gully, opposite the Manchester Arms Hotel 11147.3z No 28 Birney Car Special 11147aa No 28 Birney Car Special comes into the Eaglehawk Terminus 11147ab No 28 Birney Car Special heads down view St past the Rifle Brigade Hotel 11147ac No 28 Birney Car Special heads down Pall Mall past the Court House Hotel 11147.3ad No 5 to Eaglehawk runs up McCrae St in front of the School of Mines 11147.3ae No 28 Birney Car passes the Mundy St intersection with McRae St heading to the fountain 11147.3af No 3 passes the Mundy St intersection with McRae St heading to Eaglehawk 11147.3ah Tram passes the School of Mines in McRae St heading to the fountain 11147.3ai Birney Car Tram passes the School of Mines in McRae St heading to the fountain 11147.3aj Tramways High Electrical termination box...Photos: 11147.3a No 21 turns out of McRae St into Nolan Street, on its way to North Bendigo 11147.3b No 5 on the way to Eaglehawk 11147.3c No 21 leaves Charing Cross towards North Bendigo, City Family Hotel in the background 11147.3d No 18 completes its run from Eaglehawk at the fountain, and is returning to the depot 11147.3e No 18 turns from McRae St into Tramway Avenue and the depot 11147.3f No 18 turns from McRae St into Tramway Avenue and the depot 11147.3g No 28 at the depot 11147.3h No 6 on its way to Golden Square 11147.3i No 6 at the Golden square Terminus, High and Maple Streets 11147.3j No 25 from Quarry Hill at the intersection of Wills and Mitchell Street 11147.3k No 2 leaves the Mitchell St railway bridge into Carpenter Street on its way to Quarry Hill 11147.3l No 21 comes into the Golden square Terminus, steeple of the Methodist church in the background 11147.3m Tram heading along McRae St in front of the School of Mines 11147.3n Tram heading along McRae St towards Pall Mall in front of the School of Mines 11147.o No 24 heading to Eaglehawk at the corner of Barnard and Forest Streets 11147.3p Three trams lined up in the depot, possible early morning or evening 11147.3q Tram No 21 at the North Bendigo Terminus, possible early morning or evening 11147.3s Tram leaving the Eaglehawk Town Hall in the dark 11147.3t View up Pall Mall towards the fountain from Mundy Street intersection 11147.3u Birney Car No 28 Special leaving the depot, crossing the Back Creek 11147.3w Birney Car No 28 Special at Eaglehawk Canterbury Park 11147.3x No 28 Birney Car Special hading to Eaglehawk at Iron Bark, just past the Marong Road turn-off at Iron Bark 11147.3y No 28 Birney Car Special heading to Eaglehawk at Long Gully, opposite the Manchester Arms Hotel 11147.3z No 28 Birney Car Special 11147aa No 28 Birney Car Special comes into the Eaglehawk Terminus 11147ab No 28 Birney Car Special heads down view St past the Rifle Brigade Hotel 11147ac No 28 Birney Car Special heads down Pall Mall past the Court House Hotel 11147.3ad No 5 to Eaglehawk runs up McCrae St in front of the School of Mines 11147.3ae No 28 Birney Car passes the Mundy St intersection with McRae St heading to the fountain 11147.3af No 3 passes the Mundy St intersection with McRae St heading to Eaglehawk 11147.3ah Tram passes the School of Mines in McRae St heading to the fountain 11147.3ai Birney Car Tram passes the School of Mines in McRae St heading to the fountain 11147.3aj Tramways High Electrical termination box Photograph Robert Green Collection - Photos of Bendigo Tramways - Sheet 3 of 8 ...This collection contains eight archive sheets (Sheet 1 to Sheet 8) of strips of original 35mm black and white negatives of photographs taken during the 1960s and early 1970s by Robert Green, of the Bendigo State Electricty Commission of Victoria Tramways prior to their abandonment The collection also includes two archive quality sheets (Sheet A and Sheet B) of original 35mm colour slides taken by Robert Green during the same period. Sheet B also contains one slide taken by Robert's friend Keigh S King (1928-2019) who was the author of the book 'The Bendigo Tramways an illustrated history, published by the Australian Railway Historical Society Victorian Division Melbourne in February 1972; BHS Item no. 5052. The collection also includes one USB stick which contains images of all photographs described above, except for one colour slide taken by Keith S Kings. Sixteen black and white prints from the images are also included.Robert Green Collection, this item contains 35 Black and White Negatives of the trams at various locations around Bendigo. Photos: 11147.3a No 21 turns out of McRae St into Nolan Street, on its way to North Bendigo 11147.3b No 5 on the way to Eaglehawk 11147.3c No 21 leaves Charing Cross towards North Bendigo, City Family Hotel in the background 11147.3d No 18 completes its run from Eaglehawk at the fountain, and is returning to the depot 11147.3e No 18 turns from McRae St into Tramway Avenue and the depot 11147.3f No 18 turns from McRae St into Tramway Avenue and the depot 11147.3g No 28 at the depot 11147.3h No 6 on its way to Golden Square 11147.3i No 6 at the Golden square Terminus, High and Maple Streets 11147.3j No 25 from Quarry Hill at the intersection of Wills and Mitchell Street 11147.3k No 2 leaves the Mitchell St railway bridge into Carpenter Street on its way to Quarry Hill 11147.3l No 21 comes into the Golden square Terminus, steeple of the Methodist church in the background 11147.3m Tram heading along McRae St in front of the School of Mines 11147.3n Tram heading along McRae St towards Pall Mall in front of the School of Mines 11147.o No 24 heading to Eaglehawk at the corner of Barnard and Forest Streets 11147.3p Three trams lined up in the depot, possible early morning or evening 11147.3q Tram No 21 at the North Bendigo Terminus, possible early morning or evening 11147.3s Tram leaving the Eaglehawk Town Hall in the dark 11147.3t View up Pall Mall towards the fountain from Mundy Street intersection 11147.3u Birney Car No 28 Special leaving the depot, crossing the Back Creek 11147.3w Birney Car No 28 Special at Eaglehawk Canterbury Park 11147.3x No 28 Birney Car Special hading to Eaglehawk at Iron Bark, just past the Marong Road turn-off at Iron Bark 11147.3y No 28 Birney Car Special heading to Eaglehawk at Long Gully, opposite the Manchester Arms Hotel 11147.3z No 28 Birney Car Special 11147aa No 28 Birney Car Special comes into the Eaglehawk Terminus 11147ab No 28 Birney Car Special heads down view St past the Rifle Brigade Hotel 11147ac No 28 Birney Car Special heads down Pall Mall past the Court House Hotel 11147.3ad No 5 to Eaglehawk runs up McCrae St in front of the School of Mines 11147.3ae No 28 Birney Car passes the Mundy St intersection with McRae St heading to the fountain 11147.3af No 3 passes the Mundy St intersection with McRae St heading to Eaglehawk 11147.3ah Tram passes the School of Mines in McRae St heading to the fountain 11147.3ai Birney Car Tram passes the School of Mines in McRae St heading to the fountain 11147.3aj Tramways High Electrical termination boxkeith s king, bendigo, trams, robert green -
 Bendigo Historical Society Inc.
Photograph - Robert Green Collection - Photos of Bendigo Tramways - Sheet 4 of 8, 1960s
... Photos: 11147.4a Tram at Carpenter St Quarry Hill, Cemetery Gates Terminus 11147.4b Tram and Conductor at Carpenter St Quarry Hill, Cemetery Gates Terminus 11147.4c Overhead Pole, wires and tram stop sign; and end of section sign 11147.4d Overhead Pole, wires and tram stop sign; and end of section sign, in View Street 11147.4e Quarry Hill, Eaglehawk and Golden Square Trams meeting at the Fountain, Charing Cross 11147.4f Quarry Hill, Eaglehawk trams and overhead sign at the fountain roundabout 11147.4g Tram line Point at the Fountain 11147.4h All lines cross at the fountain 11147.4i Turning Caution sign at Tramways Avenue (to the depot) and McRae Street 11147.4j Trams stop by request sign 11147.4k No 4 at the intersection of Eaglehawk and Havilah Roads, Long Gully 11147.4l No 4 to Quarry Hill picking up passengers in Eaglehawk Road 11147.4m No 30 Birney Car heading to Golden Square 11147.4n Birney Car crossing the creek 11147.4o Birney Car No 30 leaving Golden Square in High Street 11147.4p No 3 heading to Eaglehawk 11147.4q No 25 heading to Quarry Hill in Carpenter St possibly 11147.4r Three trams at the loop in Carpenter St Quarry Hill 11147.4s Two trams at the Quarry Hill Terminus Carpenter St 11147.4t Two trams at Canterbury Park Eaglehawk 11147.4u Birney Car 29 Special at Eaglehawk Terminus 11147.4v Passing No 26 at Eaglehawk...Photos: 11147.4a Tram at Carpenter St Quarry Hill, Cemetery Gates Terminus 11147.4b Tram and Conductor at Carpenter St Quarry Hill, Cemetery Gates Terminus 11147.4c Overhead Pole, wires and tram stop sign; and end of section sign 11147.4d Overhead Pole, wires and tram stop sign; and end of section sign, in View Street 11147.4e Quarry Hill, Eaglehawk and Golden Square Trams meeting at the Fountain, Charing Cross 11147.4f Quarry Hill, Eaglehawk trams and overhead sign at the fountain roundabout 11147.4g Tram line Point at the Fountain 11147.4h All lines cross at the fountain 11147.4i Turning Caution sign at Tramways Avenue (to the depot) and McRae Street 11147.4j Trams stop by request sign 11147.4k No 4 at the intersection of Eaglehawk and Havilah Roads, Long Gully 11147.4l No 4 to Quarry Hill picking up passengers in Eaglehawk Road 11147.4m No 30 Birney Car heading to Golden Square 11147.4n Birney Car crossing the creek 11147.4o Birney Car No 30 leaving Golden Square in High Street 11147.4p No 3 heading to Eaglehawk 11147.4q No 25 heading to Quarry Hill in Carpenter St possibly 11147.4r Three trams at the loop in Carpenter St Quarry Hill 11147.4s Two trams at the Quarry Hill Terminus Carpenter St 11147.4t Two trams at Canterbury Park Eaglehawk 11147.4u Birney Car 29 Special at Eaglehawk Terminus 11147.4v Passing No 26 at Eaglehawk Photograph Robert Green Collection - Photos of Bendigo Tramways - Sheet 4 of 8 ...This collection contains eight archive sheets (Sheet 1 to Sheet 8) of strips of original 35mm black and white negatives of photographs taken during the 1960s and early 1970s by Robert Green, of the Bendigo State Electricty Commission of Victoria Tramways prior to their abandonment The collection also includes two archive quality sheets (Sheet A and Sheet B) of original 35mm colour slides taken by Robert Green during the same period. Sheet B also contains one slide taken by Robert's friend Keigh S King (1928-2019) who was the author of the book 'The Bendigo Tramways an illustrated history, published by the Australian Railway Historical Society Victorian Division Melbourne in February 1972; BHS Item no. 5052. The collection also includes one USB stick which contains images of all photographs described above, except for one colour slide taken by Keith S Kings. Sixteen black and white prints from the images are also included.Robert Green Collection, this item contains 22 Black and White Negatives of the trams at various locations around Bendigo. Photos: 11147.4a Tram at Carpenter St Quarry Hill, Cemetery Gates Terminus 11147.4b Tram and Conductor at Carpenter St Quarry Hill, Cemetery Gates Terminus 11147.4c Overhead Pole, wires and tram stop sign; and end of section sign 11147.4d Overhead Pole, wires and tram stop sign; and end of section sign, in View Street 11147.4e Quarry Hill, Eaglehawk and Golden Square Trams meeting at the Fountain, Charing Cross 11147.4f Quarry Hill, Eaglehawk trams and overhead sign at the fountain roundabout 11147.4g Tram line Point at the Fountain 11147.4h All lines cross at the fountain 11147.4i Turning Caution sign at Tramways Avenue (to the depot) and McRae Street 11147.4j Trams stop by request sign 11147.4k No 4 at the intersection of Eaglehawk and Havilah Roads, Long Gully 11147.4l No 4 to Quarry Hill picking up passengers in Eaglehawk Road 11147.4m No 30 Birney Car heading to Golden Square 11147.4n Birney Car crossing the creek 11147.4o Birney Car No 30 leaving Golden Square in High Street 11147.4p No 3 heading to Eaglehawk 11147.4q No 25 heading to Quarry Hill in Carpenter St possibly 11147.4r Three trams at the loop in Carpenter St Quarry Hill 11147.4s Two trams at the Quarry Hill Terminus Carpenter St 11147.4t Two trams at Canterbury Park Eaglehawk 11147.4u Birney Car 29 Special at Eaglehawk Terminus 11147.4v Passing No 26 at Eaglehawkkeith s king, bendigo, trams, robert green -
 Bendigo Historical Society Inc.
Photograph - Robert Green Collection - Photos of Bendigo Tramways - Sheet 5 of 8, 1960s
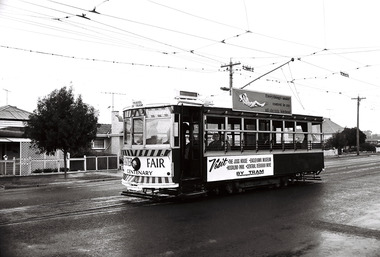
... Photos: 11147.5a Birney car decked out in advertising for the Bendigo Easter Fair 11147.5b Birney car decked out in advertising for the Bendigo Easter Fair heading to North Bendigo in Mcrae St 11147.5c Birney car decked out in advertising for the Bendigo Easter Fair heading to North Bendigo in Mcrae St passing No 17 and another tram approaching from the depot 11147.5d Birney car decked out in advertising for the Bendigo Easter Fair heading into the depot in Tramway Avenue 11147.5e No 18 and old shop front 11147.5f Tram Turning into Tramways Avenue from Mcrae St 11147.5g Three trams at the Golden Square Terminus in High Street 11147.5h No 18 tram in Mcrae Street passing by Tramways Avenue to North Bendigo 11147.5i No 21 returning to the Tramways Avenue Depot off Mcrae Street 11147.5j No 21 returning to the Tramways Avenue Depot off Mcrae Street 11147.5k No 21 returning to the Tramways Avenue Depot crossing the Back Creek 11147.5l No 21 returning to the Tramways Avenue Depot 11147.5m No 21 returning to the Tramways Avenue Depot with the scrubber tram on the left 11147.5n No 21 in the Tramways Avenue Depot 11147.5o Nos 18 and 17 pass at the Golden Square Terminus in High St 11147.5p No 17 on its way to the North Bendigo Terminus 11147.5q No 17 turns from the North Bendigo Terminus into Finn Street 11147.5r No 17 heading to the North Bendigo Terminus along Thunder Street 11147.5s No 17 at the North Bendigo Terminus off Finn Street 11147.5t Train heading from the Swan Hill direction to Bendigo off the Finn Street crossing 11147.5u No 25 heading to Golden Square 11147.5v No 25 turns from Weeroona Avenue into Caledonia Street 11147.5w The Easter Fair, intersection of Pall Mall and Williamson St with Myer Stores in the background...Photos: 11147.5a Birney car decked out in advertising for the Bendigo Easter Fair 11147.5b Birney car decked out in advertising for the Bendigo Easter Fair heading to North Bendigo in Mcrae St 11147.5c Birney car decked out in advertising for the Bendigo Easter Fair heading to North Bendigo in Mcrae St passing No 17 and another tram approaching from the depot 11147.5d Birney car decked out in advertising for the Bendigo Easter Fair heading into the depot in Tramway Avenue 11147.5e No 18 and old shop front 11147.5f Tram Turning into Tramways Avenue from Mcrae St 11147.5g Three trams at the Golden Square Terminus in High Street 11147.5h No 18 tram in Mcrae Street passing by Tramways Avenue to North Bendigo 11147.5i No 21 returning to the Tramways Avenue Depot off Mcrae Street 11147.5j No 21 returning to the Tramways Avenue Depot off Mcrae Street 11147.5k No 21 returning to the Tramways Avenue Depot crossing the Back Creek 11147.5l No 21 returning to the Tramways Avenue Depot 11147.5m No 21 returning to the Tramways Avenue Depot with the scrubber tram on the left 11147.5n No 21 in the Tramways Avenue Depot 11147.5o Nos 18 and 17 pass at the Golden Square Terminus in High St 11147.5p No 17 on its way to the North Bendigo Terminus 11147.5q No 17 turns from the North Bendigo Terminus into Finn Street 11147.5r No 17 heading to the North Bendigo Terminus along Thunder Street 11147.5s No 17 at the North Bendigo Terminus off Finn Street 11147.5t Train heading from the Swan Hill direction to Bendigo off the Finn Street crossing 11147.5u No 25 heading to Golden Square 11147.5v No 25 turns from Weeroona Avenue into Caledonia Street 11147.5w The Easter Fair, intersection of Pall Mall and Williamson St with Myer Stores in the background Photograph Robert Green Collection - Photos of Bendigo Tramways - Sheet 5 of 8 ...This collection contains eight archive sheets (Sheet 1 to Sheet 8) of strips of original 35mm black and white negatives of photographs taken during the 1960s and early 1970s by Robert Green, of the Bendigo State Electricty Commission of Victoria Tramways prior to their abandonment The collection also includes two archive quality sheets (Sheet A and Sheet B) of original 35mm colour slides taken by Robert Green during the same period. Sheet B also contains one slide taken by Robert's friend Keigh S King (1928-2019) who was the author of the book 'The Bendigo Tramways an illustrated history, published by the Australian Railway Historical Society Victorian Division Melbourne in February 1972; BHS Item no. 5052. The collection also includes one USB stick which contains images of all photographs described above, except for one colour slide taken by Keith S Kings. Sixteen black and white prints from the images are also included.Robert Green Collection, this item contains 23 Black and White Negatives of the trams at various locations around Bendigo. Photos: 11147.5a Birney car decked out in advertising for the Bendigo Easter Fair 11147.5b Birney car decked out in advertising for the Bendigo Easter Fair heading to North Bendigo in Mcrae St 11147.5c Birney car decked out in advertising for the Bendigo Easter Fair heading to North Bendigo in Mcrae St passing No 17 and another tram approaching from the depot 11147.5d Birney car decked out in advertising for the Bendigo Easter Fair heading into the depot in Tramway Avenue 11147.5e No 18 and old shop front 11147.5f Tram Turning into Tramways Avenue from Mcrae St 11147.5g Three trams at the Golden Square Terminus in High Street 11147.5h No 18 tram in Mcrae Street passing by Tramways Avenue to North Bendigo 11147.5i No 21 returning to the Tramways Avenue Depot off Mcrae Street 11147.5j No 21 returning to the Tramways Avenue Depot off Mcrae Street 11147.5k No 21 returning to the Tramways Avenue Depot crossing the Back Creek 11147.5l No 21 returning to the Tramways Avenue Depot 11147.5m No 21 returning to the Tramways Avenue Depot with the scrubber tram on the left 11147.5n No 21 in the Tramways Avenue Depot 11147.5o Nos 18 and 17 pass at the Golden Square Terminus in High St 11147.5p No 17 on its way to the North Bendigo Terminus 11147.5q No 17 turns from the North Bendigo Terminus into Finn Street 11147.5r No 17 heading to the North Bendigo Terminus along Thunder Street 11147.5s No 17 at the North Bendigo Terminus off Finn Street 11147.5t Train heading from the Swan Hill direction to Bendigo off the Finn Street crossing 11147.5u No 25 heading to Golden Square 11147.5v No 25 turns from Weeroona Avenue into Caledonia Street 11147.5w The Easter Fair, intersection of Pall Mall and Williamson St with Myer Stores in the backgroundkeith s king, bendigo, trams, robert green -
 Bendigo Historical Society Inc.
Photograph - Robert Green Collection - Photos of Bendigo Tramways - Sheet 7 of 8, 1960s
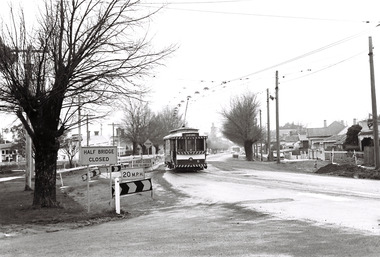
... Tramways an illustrated history, published by the Australian Railway Historical Society Victorian Division Melbourne in February 1972; BHS Item no. 5052. The collection also includes one USB stick which contains images of all photographs described above, except for one colour slide taken by Keith S Kings. Sixteen black and white prints from the images are also included. keith s king bendigo trams robert green Robert Green Collection, this item contains 28 Black and White Negatives of the trams at various locations around Bendigo. Photos: 11147.7a No 6 to Golden Square ...This collection contains eight archive sheets (Sheet 1 to Sheet 8) of strips of original 35mm black and white negatives of photographs taken during the 1960s and early 1970s by Robert Green, of the Bendigo State Electricty Commission of Victoria Tramways prior to their abandonment The collection also includes two archive quality sheets (Sheet A and Sheet B) of original 35mm colour slides taken by Robert Green during the same period. Sheet B also contains one slide taken by Robert's friend Keigh S King (1928-2019) who was the author of the book 'The Bendigo Tramways an illustrated history, published by the Australian Railway Historical Society Victorian Division Melbourne in February 1972; BHS Item no. 5052. The collection also includes one USB stick which contains images of all photographs described above, except for one colour slide taken by Keith S Kings. Sixteen black and white prints from the images are also included.Robert Green Collection, this item contains 28 Black and White Negatives of the trams at various locations around Bendigo. Photos: 11147.7a No 6 to Golden Square in Mcrae Street 11147.7b No 21 to North Bendigo in Mcrae Street 11147.7c No 7 to North Bendigo in Mcrae Street 11147.7d No 7 to North Bendigo in Mcrae Street passes No 21 to Golden Square on the loop 11147.7e The Depot and Back Creek bridge 11147.7f The Depot and Back Creek bridge 11147.7g Nos 25, 23 and 30 in the depot 11147.7h The photographer in Thunder Street North Bendigo, railway line in the background 11147.7i No 21 coming up to the North Bendigo terminus in Thunder or Finn street 11147.7j No 21 leaving the North Bendigo terminus in Thunder or Finn street 11147.7k The Photographer in Thunder Street, North Bendigo 11147.7l No 21 in Thunder or Finn street 11147.7m No 21 in Thunder or Finn street 11147.7n No 17 in Eaglehawk 11147.7o No 17 in Eaglehawk 11147.7p No 26 at the top of Mitchell Street 11147.7q No 26 heading to Eaglehawk in the rain 11147.7r No 2 to Quarry Hill in the rain at the Manchester Arms Loop 11147.7s Passing Trams 11147.7t No 30 Birney Car to Quarry Hill in the rain at the Manchester Arms Loop 11147.7u No 7 to North Bendigo, the rowing Club in the background, Thunder Street 11147.7v No 7 turns into Finn Street from the North Bendigo Terminus 11147.7w The Birney Car turns into the North Bendigo Terminus from Finn Street 11147.7x The Birney Car turns into the North Bendigo Terminus from Finn Street 11147.7y Two trams at the North Bendigo Terminus 11147.7z No 24 approaches the Cemetery gates and horse hitching posts in Quarry Hill 11147.7aa The Cemetery and horse hitching posts in Quarry Hill 11147.7ab No 24 and horse hitching post in Quarry Hillkeith s king, bendigo, trams, robert green -
 Bendigo Historical Society Inc.
Photograph - Robert Green Collection - Photos of Bendigo Tramways - Sheet 8 of 10, 1960s
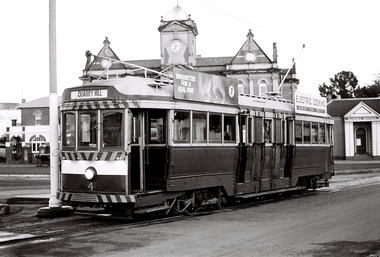
... Photos: 11147.8a No 4 outside the Eaglehawk Town Hall 11147.8b No 7 at the North Bendigo Terminus 11147.8c No 18 passing the View Street and Rowan Street intersection 11147.8d No 24 and driver at the fountain 11147.8e No 7 at the fountain 11147.8f No 24 and at the fountain 11147.8g No 24 and driver at Eaglehawk 11147.8h Picking up passengers at North Bendigo Terminus 11147.8i Birney Car 30 in Finn Street North Bendigo 11147.8j No 30 has just crossed the Bendigo Creek in high St Golden Square 11147.8k No 30 has just crossed the Bendigo Creek in High St Golden Square and is passing No 2 11147.8l Nos 29 and 19 at the depot with two drivers 11147.8m No 29 comes up Pall Mall past the Williamson St intersection 11147.8n No 29 comes up Pall Mall 11147.8o No 29 at the Golden Square Terminus loop 11147.8p No 29 and another at the Golden Square Terminus 11147.8q The Pahran and Malvern Tramways Trust Logo 11147.8r Passing No 6 on the High St Loop 11147.8s Passing No 6 on the High St Loop, Sacred Heart Cathedral Spire being buit in the background 11147.8t At the Cemetery Gate Quarry Hill 11147.8u No 25 at the Bendigo Cemetery Terminus 11147.8v At the Quarry Hill Gates in Carpenter Street...Photos: 11147.8a No 4 outside the Eaglehawk Town Hall 11147.8b No 7 at the North Bendigo Terminus 11147.8c No 18 passing the View Street and Rowan Street intersection 11147.8d No 24 and driver at the fountain 11147.8e No 7 at the fountain 11147.8f No 24 and at the fountain 11147.8g No 24 and driver at Eaglehawk 11147.8h Picking up passengers at North Bendigo Terminus 11147.8i Birney Car 30 in Finn Street North Bendigo 11147.8j No 30 has just crossed the Bendigo Creek in high St Golden Square 11147.8k No 30 has just crossed the Bendigo Creek in High St Golden Square and is passing No 2 11147.8l Nos 29 and 19 at the depot with two drivers 11147.8m No 29 comes up Pall Mall past the Williamson St intersection 11147.8n No 29 comes up Pall Mall 11147.8o No 29 at the Golden Square Terminus loop 11147.8p No 29 and another at the Golden Square Terminus 11147.8q The Pahran and Malvern Tramways Trust Logo 11147.8r Passing No 6 on the High St Loop 11147.8s Passing No 6 on the High St Loop, Sacred Heart Cathedral Spire being buit in the background 11147.8t At the Cemetery Gate Quarry Hill 11147.8u No 25 at the Bendigo Cemetery Terminus 11147.8v At the Quarry Hill Gates in Carpenter Street Photograph Robert Green Collection - Photos of Bendigo Tramways - Sheet 8 of 10 ...This collection contains eight archive sheets (Sheet 1 to Sheet 8) of strips of original 35mm black and white negatives of photographs taken during the 1960s and early 1970s by Robert Green, of the Bendigo State Electricty Commission of Victoria Tramways prior to their abandonment The collection also includes two archive quality sheets (Sheet A and Sheet B) of original 35mm colour slides taken by Robert Green during the same period. Sheet B also contains one slide taken by Robert's friend Keigh S King (1928-2019) who was the author of the book 'The Bendigo Tramways an illustrated history, published by the Australian Railway Historical Society Victorian Division Melbourne in February 1972; BHS Item no. 5052. The collection also includes one USB stick which contains images of all photographs described above, except for one colour slide taken by Keith S Kings. Sixteen black and white prints from the images are also included.Robert Green Collection, this item contains 22 Black and White Negatives of the trams at various locations around Bendigo. Photos: 11147.8a No 4 outside the Eaglehawk Town Hall 11147.8b No 7 at the North Bendigo Terminus 11147.8c No 18 passing the View Street and Rowan Street intersection 11147.8d No 24 and driver at the fountain 11147.8e No 7 at the fountain 11147.8f No 24 and at the fountain 11147.8g No 24 and driver at Eaglehawk 11147.8h Picking up passengers at North Bendigo Terminus 11147.8i Birney Car 30 in Finn Street North Bendigo 11147.8j No 30 has just crossed the Bendigo Creek in high St Golden Square 11147.8k No 30 has just crossed the Bendigo Creek in High St Golden Square and is passing No 2 11147.8l Nos 29 and 19 at the depot with two drivers 11147.8m No 29 comes up Pall Mall past the Williamson St intersection 11147.8n No 29 comes up Pall Mall 11147.8o No 29 at the Golden Square Terminus loop 11147.8p No 29 and another at the Golden Square Terminus 11147.8q The Pahran and Malvern Tramways Trust Logo 11147.8r Passing No 6 on the High St Loop 11147.8s Passing No 6 on the High St Loop, Sacred Heart Cathedral Spire being buit in the background 11147.8t At the Cemetery Gate Quarry Hill 11147.8u No 25 at the Bendigo Cemetery Terminus 11147.8v At the Quarry Hill Gates in Carpenter Streetkeith s king, bendigo, trams, robert green -
 Bendigo Historical Society Inc.
Photograph - DEBORAH GOLD MINE, GOLDEN SQUARE
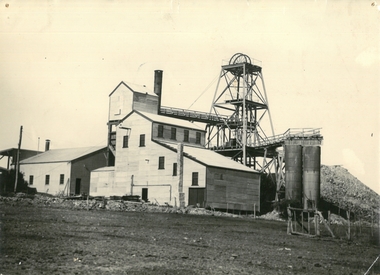
... Square. Image shows large mining sheds (engine house, boiler room) with tramway and poppet head at rear. ...Square. Image shows large mining sheds (engine house, boiler room) with tramway and poppet head at rear. ...Black and white photograph of Deborah Gold Mine, Abel Street, Golden Square. Image shows large mining sheds (engine house, boiler room) with tramway and poppet head at rear. Two ore bins on RH side. Large mullock hills at RH rear of ore bins. Written on back of photo 'Deborah Reef Gold Mines NL 20.3.37' Paper with photo states:' The Deborah Gold Mine, Abel Street. The poppet head was moved from the Windmill Hill mine Long Gully. This photograph was taken in March 1937 after a further 10 heads had been added to the battery'bendigo, mining, deborah gold mines -
 Bendigo Historical Society Inc.
Photograph - KEN HESSE COLLECTION: SET OF FOUR BLACK AND WHITE PHOTOS
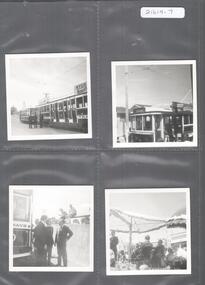
... TRAMWAYS History bendigotramway Set of four black and white photographs. First of two Bendigo trams parked on the street, there are three drivers/conductors standing near advertising sign on the closer tram for Myer and Gas the good flame. The second of the No 19 tram - Golden Square ...Set of four black and white photographs. First of two Bendigo trams parked on the street, there are three drivers/conductors standing near advertising sign on the closer tram for Myer and Gas the good flame. The second of the No 19 tram - Golden Square with Cohn advertising sign. Third of four men standing next to Bendigo tram talking to each other, two others are sitting on a rail. The last photo several people sitting on chairs under a canopy listening to a men speechtramways, history, bendigotramway -
 Bendigo Historical Society Inc.
Document - Bendigo Tramways Brochure, abt 1950s
... tramway battery-electric carriages operated between Sanhurst and Eaglehawk. In 1892 Battery-electrics were replaced by steam tram cars on the Bendigo Railway Station track to Eaglehawk. In 1903 Electric traction overhead was inaugurated extending to Quarry Hill, Golden Square...tramway battery-electric carriages operated between Sanhurst and Eaglehawk. In 1892 Battery-electrics were replaced by steam tram cars on the Bendigo Railway Station track to Eaglehawk. In 1903 Electric traction overhead was inaugurated extending to Quarry Hill, Golden Square ...In 1890 Bendigo's first tramway battery-electric carriages operated between Sanhurst and Eaglehawk. In 1892 Battery-electrics were replaced by steam tram cars on the Bendigo Railway Station track to Eaglehawk. In 1903 Electric traction overhead was inaugurated extending to Quarry Hill, Golden Square and Lake Weeroona. In 1913 Open cross-seat cars added for the service Quarry Hill to Eaglehawk. In 1945 Traction bogie cars replaced older cars. In 1947 Birney safety cars (dead man controllers) replaced older carsBrochure, a "Welcome to Bendigo, and "Evolution of Bendigo Tramways." 8668.1 Brochure is titled "Welcome to Bendigo," on the front a photo of Charing Cross and Trams, also the Bendigo City Coat of Arms. Inside two pages and descriptions of six tram showing the "Evolution of Bendigo tramways." On the rear is a map of the tramways and places of interest to visit. The brochure was "Printed for the preservation committee in co-operation with the Royal Historical Society of Victoria (Bendigo and District Branch) All donations for a preservation fund."history, bendigo tramways, evolution of bendigo tramways -
Bendigo Historical Society Inc.
Programme - Program and Toast list, 1951
... tramway battery-electric carriages operated between Sanhurst and Eaglehawk. In 1892 Battery-electrics were replaced by steam tram cars on the Bendigo Railway Station track to Eaglehawk. In 1903 Electric traction overhead was inaugurated extending to Quarry Hill, Golden Square...tramway battery-electric carriages operated between Sanhurst and Eaglehawk. In 1892 Battery-electrics were replaced by steam tram cars on the Bendigo Railway Station track to Eaglehawk. In 1903 Electric traction overhead was inaugurated extending to Quarry Hill, Golden Square ...In 1890 Bendigo's first tramway battery-electric carriages operated between Sanhurst and Eaglehawk. In 1892 Battery-electrics were replaced by steam tram cars on the Bendigo Railway Station track to Eaglehawk. In 1903 Electric traction overhead was inaugurated extending to Quarry Hill, Golden Square and Lake Weeroona. In 1913 Open cross-seat cars added for the service Quarry Hill to Eaglehawk. In 1945 Traction bogie cars replaced older cars. In 1947 Birney safety cars (dead man controllers) replaced older carsToast list for a Bendigo Tramways Division Retirement Dinner - A complimentary Dinner tendered to Mr Arthur Douglas on his retirement after 31 years as Secretary of The Australian Tramway and Motor Omnibus Employees' Association. Held at the Shamrock Hotel, Bendigo Saturday 29th September 1951. Inside are two tramways photos, one of the Bendigo Steam trams 1902, and the other of trams passing through Charing Cross in 1951. On the last page is a program and menu for the event.history, bendigo tramways, evolution of bendigo tramways, arthur douglas, australian tramway and motor omnibus employees association -
 Glen Eira Historical Society
Album - Album page, Balaclava Road Tram Shelter, Circa 1972
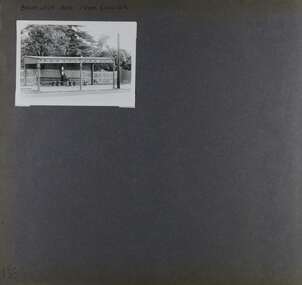
... Tramways Trust and is one of only three remaining tram shelters in Melbourne designed in the form of a verandah. The shelter has a corrugated iron roof fixed to an angle iron roof frame. The roof, which extends in the form of a skillion over the pavement, is supported on three squared...Tramways Trust and is one of only three remaining tram shelters in Melbourne designed in the form of a verandah. The shelter has a corrugated iron roof fixed to an angle iron roof frame. The roof, which extends in the form of a skillion over the pavement, is supported on three squared ...This photograph is part of the Caulfield Historical Album 1972. This album was created in approximately 1972 as part of a project by the Caulfield Historical Society to assist in identifying buildings worthy of preservation. The album is related to a Survey the Caulfield Historical Society developed in collaboration with the National Trust of Australia (Victoria) and Caulfield City Council to identify historic buildings within the City of Caulfield that warranted the protection of a National Trust Classification. Principal photographer thought to be Trevor Hart, member of Caulfield Historical Society. Most photographs were taken between 1966-1972 with a small number of photographs being older and from unknown sources. All photographs are black and white except where stated, with 386 photographs over 198 pages. From Victorian Heritage Database citation H0174 TRAM VERANDAH SHELTER CORNER BALACLAVA AND ORRONG ROADS CAULFIELD NORTH - Vic Heritage Register https://vhd.heritagecouncil.vic.gov.au/places/2721 (as at 28/10/2020) The waiting shelter at the corner of Balaclava Road and Orrong Road, Caulfield was constructed in 1916/17 for the Prahran and Malvern Tramways Trust and is one of only three remaining tram shelters in Melbourne designed in the form of a verandah. The shelter has a corrugated iron roof fixed to an angle iron roof frame. The roof, which extends in the form of a skillion over the pavement, is supported on three squared, chamfered timber posts at the rear and three cast iron reeded columns with round bases and Corinthian capitals at the front. (The columns are hollow and function as downpipes, with rainwater discharging from the verandah roof, through the columns and under the ground). The shelter has a rinceau pattern frieze along the road frontage with centrally placed shield motif (which does not contain a coat of arms). The side and rear panels are lined with ripple iron and the upper panel at the rear is lattice work. The shelter has two timber slatted bench seats.From Victorian Heritage Database citation for H0174 TRAM VERANDAH SHELTER CORNER BALACLAVA AND ORRONG ROADS CAULFIELD NORTH - Vic Heritage Register https://vhd.heritagecouncil.vic.gov.au/places/2721 (as at 28/10/2020) How is it significant? The waiting shelter at the corner of Balaclava Road and Orrong Road, Caulfield is of historical and architectural significance to the State of Victoria. Why is it significant? The waiting shelter is of historical significance for its association with the development of the suburban (electric) tram network which assisted the expansion of Melbourne as a suburban metropolis. It is also of historical significance for its connection with the Prahran & Malvern Tramways Trust. The Prahran & Malvern Tramways Trust (1907-1920) was the first municipal electric tramway in Melbourne, becoming the largest and most successful of all the municipal tramway trusts. Its services played a key role in facilitating suburban expansion and the development of the southern and eastern suburbs. The growth of tramways was one of the greatest municipal developments in Victoria during the first decade of the twentieth century. The waiting shelter is an important remnant of this period of Melbourne's transport history and a tangible reminder of the Prahran & Malvern Tramways Trust. The shelter indicates the extent of the Prahran & Malvern tram network. The waiting shelter at corner of Balaclava Road and Orrong Road, Caulfield is one of only three remaining tram shelters in Melbourne designed in the form of a verandah. The waiting shelter is of architectural significance for the distinctive design and construction which is unique to the Prahran & Malvern Tramway Trust tram network. The shelter was designed by notable Melbourne architect Leonard J. Flannagan (1864-1946). Flannagan was responsible for a number of buildings for the Prahran and Malvern Tramways Trust including the early waiting shelter at the junction of Dandenong Road and Hawthorn Road, Caulfield, and sections of the tram depot at Malvern, and also designed a depot for the Hawthorn Tramways Trust. The waiting shelter, a conservative design influenced by Victorian architecture, is based on the Melbourne City Council late 19th century standard cast iron verandah. It is of significance as an intact example of the cast iron type shelter and for its detail, including Corinthian columns and a 'rinceau' pattern cast-iron frieze. The shelter is largely in keeping with the original design and retains its integrity. The cast iron waiting shelter is also of significance as an unusual example of early twentieth century street architecture. Page 155 of Photograph Album with one landscape photograph of a tram shelter on Balaclava Road.Handwritten: BALACLAVA ROAD TRAM SHELTER [top] / 155 [bottom left]trevor hart, verandah, garden, grimwade house, grimwade, orrong road, balaclava road, melbourne grammar, melbourne grammar junior school, mgs, m.g.s, school, tram shelter, waiting shelter, prahran & malvern tramway trust, leonard j. flannagan, cast iron verandah, cast iron type shelter, corinthian columns, 'rinceau' pattern cast-iron frieze, rinceau, cast iron frieze, victorian style, caulfield north, leonard flanagan, cast iron work, prahran and malvern tramways trust, trams
