Showing 13 items matching "attack in the desert"
-
 Tatura Irrigation & Wartime Camps Museum
Magazine, World War 2 No 19, 1970's
... ...attack in the desert...Issue 19 features "The Attack in the Desert" articles....Issue 19 features "The Attack in the Desert" articles. world war 2 magazine eddy bauer p. d. lazarus attack in the desert P. ...Issued after WW2. Issue 19 features "The Attack in the Desert" articles.Pictorial magazine Vol 2 Part 19 featuring black and white and colour pictures. Price UK 40 p Australia, NZ, SA 98 c.P. D. Lazarusworld war 2 magazine, eddy bauer, p. d. lazarus, attack in the desert -
 Waverley RSL Sub Branch
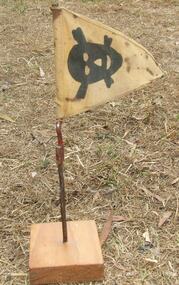
Minefield Warning Flag
... Desert Campaign of the Second World War. It was the first battle of the war in which an Australian Army formation took part, the first to be commanded by an Australian general and the first to be planned by an Australian staff. Major General Iven Mackay's 6th Division assaulted the strongly held Italian fortress of Bardia, Libya, assisted by air support and naval gunfire, and under the cover of an artillery barrage. The 16th Infantry Brigade attacked ...German Luftwaffe (Land Forces) minefield warning flag from WWII.originally intended to be gas markers, rather than mines, but as it turned out, the use changed .they were mounted on a red metal pole & there were 12 to a set in a leather pack. This Flag was presented to the Treasurer of Waverley RSL. It is a souvenir from Bardia in Libya The Battle of Bardia was fought over three days between 3 and 5 January 1941, as part of Operation Compass, the first military operation of the Western Desert Campaign of the Second World War. It was the first battle of the war in which an Australian Army formation took part, the first to be commanded by an Australian general and the first to be planned by an Australian staff. Major General Iven Mackay's 6th Division assaulted the strongly held Italian fortress of Bardia, Libya, assisted by air support and naval gunfire, and under the cover of an artillery barrage. The 16th Infantry Brigade attacked at dawn from the west, where the defences were known to be weak. Sappers blew gaps in the barbed wire with Bangalore torpedoes and filled in and broke down the sides of the anti-tank ditch with picks and shovels. This allowed the infantry and 23 Matilda II tanks of the 7th Royal Tank Regiment to enter the fortress and capture all their objectives, along with 8,000 prisoners. In the second phase of the operation, the 17th Infantry Brigade exploited the breach made in the perimeter, and pressed south as far as a secondary line of defences known as the Switch Line. On the second day, the 16th Infantry Brigade captured the township of Bardia, cutting the fortress in two. Thousands of prisoners were taken, and the Italian garrison now held out only in the northern and southernmost parts of the fortress. On the third day, the 19th Infantry Brigade advanced south from Bardia, supported by artillery and the Matilda tanks, now reduced in number to just six. Its advance allowed the 17th Infantry Brigade to make progress as well, and the two brigades reduced the southern sector of the fortress. Meanwhile, the Italian garrisons in the north surrendered to the 16th Infantry Brigade and the Support Group of the British 7th Armoured Division outside the fortress. In all, some 36,000 Italian prisoners were taken. The victory at Bardia enabled the Allied forces to continue the advance into Libya and ultimately capture almost all of Cyrenaica. In turn this would lead to German intervention in the fighting in North Africa, changing the nature of the war in that theatre. Bardia boosted the competence and reputation of the Australian Army. Perhaps most important of all, it raised confidence in the possibility of an ultimate Allied victory around the world, which would lead to the Lend-Lease Act being passed in the United States http://en.wikipedia.org/wiki/Battle_of_BardiaCloth Flag bearing a skull and cross Bones on a metal spike mounted on a square varnished wooden basebardia, land mine, marker flag, minefield, mustard gas -
 Australian Commando Association - Victoria
Book - 6th Div, Shawn OLeary, To The Green Fields Beyond:The story of the 6th Division Cavalry Commandos
... By 21 December British forces had captured Sidi Barrrani and the desert was now open for the 6th Division’s advance along the Libyan coast. On 3 January 1941 the division attacked and captured the Italian fort of Bardia. ...The comprehensive history of the 6th Australian Division Cavalry Commandos – a (now out of print) reprint of one of the rarer Armoured unit history books. This is the story of one of Australia’s most famous fighting regiments during World War II. As an armoured cavalry unit it fought the Italians and Germans in the sands of the African desert and the Vichy French in the mountains of Syria. Later as a dismounted commando unit it fought the Japanese in the terrifying jungles of New Guinea. The heroism of the men in its ranks and the actions in which they engaged are portrayed in a way which makes battle deeds leap realistically from the pages. “To The Green Fields Beyond” is a documented and detailed book which is of value to everyone who is interested in Australia’s story. Seldom before has such a contribution been made to record of our national history. The book has been approved and sponsored by the Australian War Memorial. The 6th Division Cavalry Regiment was formed in November 1939 and, just two months later, was sent overseas to the Middle East in January 1940. Arriving in Egypt, the regiment immediately went to Palestine, where it joined the rest of the 6th Division and trained using machine-gun carriers and, from October, six old Vickers light tanks. At the end of the year the regiment moved into the Western Desert, where it joined British forces ready for the major offensive to commence on 9 December. Two days later the regiment became the first unit of the 2nd Australian Imperial Force (AIF) to go into action when one of its squadron fought a sharp action against the Italians holding Garn el Grein and Fort Maddalina on 11 and 12 December. By 21 December British forces had captured Sidi Barrrani and the desert was now open for the 6th Division’s advance along the Libyan coast. On 3 January 1941 the division attacked and captured the Italian fort of Bardia. The regiment’s A Squadron, under the command of Major Denzil Macarthur-Onslow, who went on to command the 4th Armoured Brigade, supported the attack. Tobruk was the next Italian fort to be captured, with the regiment again in support and covering the 19th Brigade’s advance. The regiment, though, was under-equipped and without its full compliment of vehicles, using only machine gun carriers. To compensate for this, A Squadron was parity re-equipped with captured Italian light tanks, which had large kangaroos painted on the hulls and turrets to distinguish them from enemy vehicles. After Tobruk, the regiment was used as part of the advance guard in the capture of Derna and then Benghazi. In April the unit moved to Helwan, where it was equipped with Vickers light tanks and machine-gun carriers, and operated with British troops in capturing Sollum. Towards the end of May the regiment moved to Palestine, where it came under the command of the 7th Division for the imminent invasion of Syria. The regiment experienced its heaviest fighting during the Syrian campaign, which began on 7 June. A Squadron was attached to the 21st Brigade and advanced along the coast, where the rugged hills made it difficult to manoeuvre the tanks and carriers. The squadron was relieved by one of the 9th Division Cavalry Regiment’s squadrons on 13 and 14 June. C Squadron, meanwhile, was with the 25th Brigade, and advanced along the Rosh Pinna road, engaging strong enemy defences at Fort Khirbe. C Squadron was relieved by B Squadron, which was later attacked by Vichy French tanks that were supported by heavy artillery and machine-gun fire, which forced the Australians to withdrawal. Always willing or needing to improvise during the campaign, A and B Squadrons both operated three captured French R35 Renault light tanks, while C Squadron provided personnel for a horse troop, quickly nicknamed the “Kelly Gang”, to patrol the high, rugged hills near the Mardjayoun–Banis Road. The regiment remained in Syria as part of the occupation force and returned to Australia in March 1942. It was sent to the Adelaide River, in the Northern Territory, and then later to Murgon, in Queensland. In 1943 and 1944 divisional cavalry regiments were reorganised into cavalry (commando) regiments. In January 1944 the 6th Division Cavalry Regiment became the 2/6th Cavalry (Commando) Regiment. The regiment lost its vehicles and became the administrative headquarters for the 2/7th, 2/9th, and 2/10th Commando Squadrons. The regiment remained with the 6th Division and participated in the Aitpae–Wewak campaign, in New Guinea, during 1945. Includes Nominal Rollnon-fictionThe comprehensive history of the 6th Australian Division Cavalry Commandos – a (now out of print) reprint of one of the rarer Armoured unit history books. This is the story of one of Australia’s most famous fighting regiments during World War II. As an armoured cavalry unit it fought the Italians and Germans in the sands of the African desert and the Vichy French in the mountains of Syria. Later as a dismounted commando unit it fought the Japanese in the terrifying jungles of New Guinea. The heroism of the men in its ranks and the actions in which they engaged are portrayed in a way which makes battle deeds leap realistically from the pages. “To The Green Fields Beyond” is a documented and detailed book which is of value to everyone who is interested in Australia’s story. Seldom before has such a contribution been made to record of our national history. The book has been approved and sponsored by the Australian War Memorial. The 6th Division Cavalry Regiment was formed in November 1939 and, just two months later, was sent overseas to the Middle East in January 1940. Arriving in Egypt, the regiment immediately went to Palestine, where it joined the rest of the 6th Division and trained using machine-gun carriers and, from October, six old Vickers light tanks. At the end of the year the regiment moved into the Western Desert, where it joined British forces ready for the major offensive to commence on 9 December. Two days later the regiment became the first unit of the 2nd Australian Imperial Force (AIF) to go into action when one of its squadron fought a sharp action against the Italians holding Garn el Grein and Fort Maddalina on 11 and 12 December. By 21 December British forces had captured Sidi Barrrani and the desert was now open for the 6th Division’s advance along the Libyan coast. On 3 January 1941 the division attacked and captured the Italian fort of Bardia. The regiment’s A Squadron, under the command of Major Denzil Macarthur-Onslow, who went on to command the 4th Armoured Brigade, supported the attack. Tobruk was the next Italian fort to be captured, with the regiment again in support and covering the 19th Brigade’s advance. The regiment, though, was under-equipped and without its full compliment of vehicles, using only machine gun carriers. To compensate for this, A Squadron was parity re-equipped with captured Italian light tanks, which had large kangaroos painted on the hulls and turrets to distinguish them from enemy vehicles. After Tobruk, the regiment was used as part of the advance guard in the capture of Derna and then Benghazi. In April the unit moved to Helwan, where it was equipped with Vickers light tanks and machine-gun carriers, and operated with British troops in capturing Sollum. Towards the end of May the regiment moved to Palestine, where it came under the command of the 7th Division for the imminent invasion of Syria. The regiment experienced its heaviest fighting during the Syrian campaign, which began on 7 June. A Squadron was attached to the 21st Brigade and advanced along the coast, where the rugged hills made it difficult to manoeuvre the tanks and carriers. The squadron was relieved by one of the 9th Division Cavalry Regiment’s squadrons on 13 and 14 June. C Squadron, meanwhile, was with the 25th Brigade, and advanced along the Rosh Pinna road, engaging strong enemy defences at Fort Khirbe. C Squadron was relieved by B Squadron, which was later attacked by Vichy French tanks that were supported by heavy artillery and machine-gun fire, which forced the Australians to withdrawal. Always willing or needing to improvise during the campaign, A and B Squadrons both operated three captured French R35 Renault light tanks, while C Squadron provided personnel for a horse troop, quickly nicknamed the “Kelly Gang”, to patrol the high, rugged hills near the Mardjayoun–Banis Road. The regiment remained in Syria as part of the occupation force and returned to Australia in March 1942. It was sent to the Adelaide River, in the Northern Territory, and then later to Murgon, in Queensland. In 1943 and 1944 divisional cavalry regiments were reorganised into cavalry (commando) regiments. In January 1944 the 6th Division Cavalry Regiment became the 2/6th Cavalry (Commando) Regiment. The regiment lost its vehicles and became the administrative headquarters for the 2/7th, 2/9th, and 2/10th Commando Squadrons. The regiment remained with the 6th Division and participated in the Aitpae–Wewak campaign, in New Guinea, during 1945. Includes Nominal Rollww2, australian commandos, australian special forces, world war 2 -
 Wangaratta RSL Sub Branch
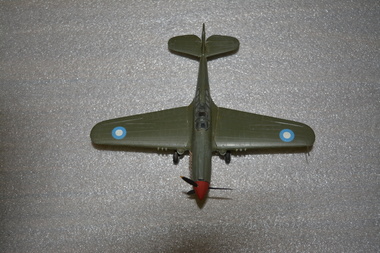
Model - Minature Model Aircraft
... attack aircraft that first flew in 1938. The British Commonwealth air forces used the name Kittyhawk for models equivalent to the P-40D and all later variants.The Kittyhawk was the main fighter used by the RAAF in World War II, in greater numbers than the Spitfire. Two RAAF squadrons serving with the Desert ...Kittyhawk Fighter. One of a collection of 25 model aircraft made by Brian Anthony DOWD The Curtiss P-40 Warhawk is an American single-engined, single-seat, all-metal fighter and ground-attack aircraft that first flew in 1938. The British Commonwealth air forces used the name Kittyhawk for models equivalent to the P-40D and all later variants.The Kittyhawk was the main fighter used by the RAAF in World War II, in greater numbers than the Spitfire. Two RAAF squadrons serving with the Desert Air Force, No. 3 and No. 450 Squadrons, were the first Australian units to be assigned P-40s. Small khaki plane with blue & white spots on top and sides, red nose.model airplanes, kittyhawk fighter. -
 Sunshine and District Historical Society Incorporated
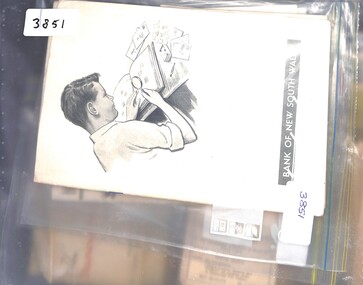
Education kit - Teaching aides for primary school students
... 3851.01 - Teaching Aides For Primary School Students - Card 01 John McDonald Stuart 1815 - 1866 3851.01 - Teaching Aides For Primary School Students - Card 02 Before Them Lay A Vast Silent Land 3851.01 - Teaching Aides For Primary School Students - Card 03 The First Man To Reach The Centre 3851.01 - Teaching Aides For Primary School Students - Card 04 Three Cheers For The Flag 3851.01 - Teaching Aides For Primary School Students - Card 05 The Desert Drove Them Back 3851.01 - Teaching Aides For Primary School Students - Card 06 A Savage Attack By Aborgines 3851.01 - Teaching Aides For Primary School Students - Card 07 They Discovered Newcastle Waters 3851.01 - Teaching Aides For Primary School Students - Card 08 The Thick Scrub Was Impassable 3851.01 - Teaching Aides For Primary School Students - Card 09 They Were Forced To Return 3851.01 - Teaching Aides For Primary School Students - Card 10 Stuart Set Out For A Third Time 3851.01 - Teaching Aides For Primary School Students - Card 11 Beyond The Ropers Was Beauttiful Country 3851.01 - Teaching Aides For Primary School Students - Card 12 Then At Last They Reached The Sra 3851.01 - Teaching Aides For Primary School Students - Card 13 Hostile Natives attacked Again And Again 3851.01 - Teaching Aides For Primary School Students - Card 14 Sick And Exhausted They Struggled On 3851.01 - Teaching Aides For Primary School Students - Card 15 Week And Weary He Had Won Through 3851.02 - Teaching Aides For Primary School Students - Card 01 Captain Charles Stuart Plans To Solve The Riddle Of The Rivers 3851.02 - Teaching Aides For Primary School Students - Card 02 Stuart's Expedition Sets Out From Sydney In 1829 3851.02 - Teaching Aides For Primary School Students - Card 03 An Upturned Dray In Devil's Pass 3851.02 - Teaching Aides For Primary School Students - Card 04 Stuart's Party Follows The Murrumbridgee 3851.02 - Teaching Aides For Primary School Students - Card 05 First Stage Of The River Journey 3851.02 - Teaching Aides For Primary School Students - Card 06 Building The Whaleboat On The Banks Of The Murrumbidgee 3851.02 - Teaching Aides For Primary School Students - Card 07 The Lachlan Enters The Murrumbidgee River 3851.02 - Teaching Aides For Primary School Students - Card 08 Stuart Discovers The Murray River 3851.02 - Teaching Aides For Primary School Students - Card 09 A Narrow Escape From Hostile Natives 3851.02 - Teaching Aides For Primary School Students - Card 10 Hoisting The Union Jack On The Banks Of The Darling 3851.02 - Teaching Aides For Primary School Students - Card 11 Stuart Discovers Lake Alexandrina 3851.02 - Teaching Aides For Primary School Students - Card 12 Across The Sandhills To Encounter Bay 3851.02 - Teaching Aides For Primary School Students - Card 13 A Disappointment 3851.02 - Teaching Aides For Primary School Students - Card 14 The Nightmare Return 3851.02 - Teaching Aides For Primary School Students - Card 15 Relief 3851.03 - Teaching Aides For Primary School Students - Fourteen Explorers Of Australia 3851.04 - Teaching Aides For Primary School Students - Sixteen Explorers Of Australia 3851.05 - Teaching Aides For Primary School Students - Australian Commorative Stamps Published 1955 3851.05 - Teaching Aides For Primary School Students - Australian Commorative Stamps Published 1961 3851.06 - Teaching Aides For Primary School Students - Carded Roving Wool Sample 3851.06 - Teaching Aides For Primary School Students - Carded Silver Wool Sample 3851.06 - Teaching Aides For Primary School Students - Davies Coop & Co Limited Raw Cotton Sample 3851.06 - Teaching Aides For Primary School Students - Davies Coop & Co Limited Sized Cotton Yard Sample 3851.06 - Teaching Aides For Primary School Students - Finished Cloth Wool Sample 3851.06 - Teaching Aides For Primary School Students - Greasy Cloth Wool Sample 3851.06 - Teaching Aides For Primary School Students - Greasy Wool Sample 3851.06 - Teaching Aides For Primary School Students - Scoured And Carbonized Wool Sample 3851.06 - Teaching Aides For Primary School Students - Scoured And Milled Cloth Wool Sample 3851.07 - Teaching Aides For Primary School Students - From The Sheep's Back To You Book 01 3851.07 - Teaching Aides For Primary School Students - From The Sheep's Back To You Book 02 3851.08 - Teaching Aides For Primary School Students - How To Wash Physician Blankets 3851.09 - Teaching Aides For Primary School Students - What Members Of The A.I.F. ...Primary School State School 3851.01 - Teaching Aides For Primary School Students - Card 01 John McDonald Stuart 1815 - 1866 3851.01 - Teaching Aides For Primary School Students - Card 02 Before Them Lay A Vast Silent Land 3851.01 - Teaching Aides For Primary School Students - Card 03 The First Man To Reach The Centre 3851.01 - Teaching Aides For Primary School Students - Card 04 Three Cheers For The Flag 3851.01 - Teaching Aides For Primary School Students - Card 05 The Desert Drove Them Back 3851.01 - Teaching Aides For Primary School Students - Card 06 A Savage Attack By Aborgines 3851.01 - Teaching Aides For Primary School Students - Card 07 They Discovered Newcastle Waters 3851.01 - Teaching Aides For Primary School Students - Card 08 The Thick Scrub Was Impassable 3851.01 - Teaching Aides For Primary School Students - Card 09 They Were Forced To Return 3851.01 - Teaching Aides For Primary School Students - Card 10 Stuart Set Out For A Third Time 3851.01 - Teaching Aides For Primary School Students - Card 11 Beyond The Ropers Was Beauttiful Country 3851.01 - Teaching Aides For Primary School Students - Card 12 Then At Last They Reached The Sra 3851.01 - Teaching Aides For Primary School Students - Card 13 Hostile Natives attacked Again And Again 3851.01 - Teaching Aides For Primary School Students - Card 14 Sick And Exhausted They Struggled On 3851.01 - Teaching Aides For Primary School Students - Card 15 Week And Weary He Had Won Through 3851.02 - Teaching Aides For Primary School Students - Card 01 Captain Charles Stuart Plans To Solve The Riddle Of The Rivers 3851.02 - Teaching Aides For Primary School Students - Card 02 Stuart's Expedition Sets Out From Sydney In 1829 3851.02 - Teaching Aides For Primary School Students - Card 03 An Upturned Dray In Devil's Pass 3851.02 - Teaching Aides For Primary School Students - Card 04 Stuart's Party Follows The Murrumbridgee 3851.02 - Teaching Aides For Primary School Students - Card 05 First Stage Of The River Journey 3851.02 - Teaching Aides For Primary School Students - Card 06 Building The Whaleboat On The Banks Of The Murrumbidgee 3851.02 - Teaching Aides For Primary School Students - Card 07 The Lachlan Enters The Murrumbidgee River 3851.02 - Teaching Aides For Primary School Students - Card 08 Stuart Discovers The Murray River 3851.02 - Teaching Aides For Primary School Students - Card 09 A Narrow Escape From Hostile Natives 3851.02 - Teaching Aides For Primary School Students - Card 10 Hoisting The Union Jack On The Banks Of The Darling 3851.02 - Teaching Aides For Primary School Students - Card 11 Stuart Discovers Lake Alexandrina 3851.02 - Teaching Aides For Primary School Students - Card 12 Across The Sandhills To Encounter Bay 3851.02 - Teaching Aides For Primary School Students - Card 13 A Disappointment 3851.02 - Teaching Aides For Primary School Students - Card 14 The Nightmare Return 3851.02 - Teaching Aides For Primary School Students - Card 15 Relief 3851.03 - Teaching Aides For Primary School Students - Fourteen Explorers Of Australia 3851.04 - Teaching Aides For Primary School Students - Sixteen Explorers Of Australia 3851.05 - Teaching Aides For Primary School Students - Australian Commorative Stamps Published 1955 3851.05 - Teaching Aides For Primary School Students - Australian Commorative Stamps Published 1961 3851.06 - Teaching Aides For Primary School Students - Carded Roving Wool Sample 3851.06 - Teaching Aides For Primary School Students - Carded Silver Wool Sample 3851.06 - Teaching Aides For Primary School Students - Davies Coop & Co Limited Raw Cotton Sample 3851.06 - Teaching Aides For Primary School Students - Davies Coop & Co Limited Sized Cotton Yard Sample 3851.06 - Teaching Aides For Primary School Students - Finished Cloth Wool Sample 3851.06 - Teaching Aides For Primary School Students - Greasy Cloth Wool Sample 3851.06 - Teaching Aides For Primary School Students - Greasy Wool Sample 3851.06 - Teaching Aides For Primary School Students - Scoured And Carbonized Wool Sample 3851.06 - Teaching Aides For Primary School Students - Scoured And Milled Cloth Wool Sample 3851.07 - Teaching Aides For Primary School Students - From The Sheep's Back To You Book 01 3851.07 - Teaching Aides For Primary School Students - From The Sheep's Back To You Book 02 3851.08 - Teaching Aides For Primary School Students - How To Wash Physician Blankets 3851.09 - Teaching Aides For Primary School Students - What Members Of The A.I.F. ...3851.01 - Teaching Aides For Primary School Students - Card 01 John McDonald Stuart 1815 - 1866 3851.01 - Teaching Aides For Primary School Students - Card 02 Before Them Lay A Vast Silent Land 3851.01 - Teaching Aides For Primary School Students - Card 03 The First Man To Reach The Centre 3851.01 - Teaching Aides For Primary School Students - Card 04 Three Cheers For The Flag 3851.01 - Teaching Aides For Primary School Students - Card 05 The Desert Drove Them Back 3851.01 - Teaching Aides For Primary School Students - Card 06 A Savage Attack By Aborgines 3851.01 - Teaching Aides For Primary School Students - Card 07 They Discovered Newcastle Waters 3851.01 - Teaching Aides For Primary School Students - Card 08 The Thick Scrub Was Impassable 3851.01 - Teaching Aides For Primary School Students - Card 09 They Were Forced To Return 3851.01 - Teaching Aides For Primary School Students - Card 10 Stuart Set Out For A Third Time 3851.01 - Teaching Aides For Primary School Students - Card 11 Beyond The Ropers Was Beauttiful Country 3851.01 - Teaching Aides For Primary School Students - Card 12 Then At Last They Reached The Sra 3851.01 - Teaching Aides For Primary School Students - Card 13 Hostile Natives attacked Again And Again 3851.01 - Teaching Aides For Primary School Students - Card 14 Sick And Exhausted They Struggled On 3851.01 - Teaching Aides For Primary School Students - Card 15 Week And Weary He Had Won Through 3851.02 - Teaching Aides For Primary School Students - Card 01 Captain Charles Stuart Plans To Solve The Riddle Of The Rivers 3851.02 - Teaching Aides For Primary School Students - Card 02 Stuart's Expedition Sets Out From Sydney In 1829 3851.02 - Teaching Aides For Primary School Students - Card 03 An Upturned Dray In Devil's Pass 3851.02 - Teaching Aides For Primary School Students - Card 04 Stuart's Party Follows The Murrumbridgee 3851.02 - Teaching Aides For Primary School Students - Card 05 First Stage Of The River Journey 3851.02 - Teaching Aides For Primary School Students - Card 06 Building The Whaleboat On The Banks Of The Murrumbidgee 3851.02 - Teaching Aides For Primary School Students - Card 07 The Lachlan Enters The Murrumbidgee River 3851.02 - Teaching Aides For Primary School Students - Card 08 Stuart Discovers The Murray River 3851.02 - Teaching Aides For Primary School Students - Card 09 A Narrow Escape From Hostile Natives 3851.02 - Teaching Aides For Primary School Students - Card 10 Hoisting The Union Jack On The Banks Of The Darling 3851.02 - Teaching Aides For Primary School Students - Card 11 Stuart Discovers Lake Alexandrina 3851.02 - Teaching Aides For Primary School Students - Card 12 Across The Sandhills To Encounter Bay 3851.02 - Teaching Aides For Primary School Students - Card 13 A Disappointment 3851.02 - Teaching Aides For Primary School Students - Card 14 The Nightmare Return 3851.02 - Teaching Aides For Primary School Students - Card 15 Relief 3851.03 - Teaching Aides For Primary School Students - Fourteen Explorers Of Australia 3851.04 - Teaching Aides For Primary School Students - Sixteen Explorers Of Australia 3851.05 - Teaching Aides For Primary School Students - Australian Commorative Stamps Published 1955 3851.05 - Teaching Aides For Primary School Students - Australian Commorative Stamps Published 1961 3851.06 - Teaching Aides For Primary School Students - Carded Roving Wool Sample 3851.06 - Teaching Aides For Primary School Students - Carded Silver Wool Sample 3851.06 - Teaching Aides For Primary School Students - Davies Coop & Co Limited Raw Cotton Sample 3851.06 - Teaching Aides For Primary School Students - Davies Coop & Co Limited Sized Cotton Yard Sample 3851.06 - Teaching Aides For Primary School Students - Finished Cloth Wool Sample 3851.06 - Teaching Aides For Primary School Students - Greasy Cloth Wool Sample 3851.06 - Teaching Aides For Primary School Students - Greasy Wool Sample 3851.06 - Teaching Aides For Primary School Students - Scoured And Carbonized Wool Sample 3851.06 - Teaching Aides For Primary School Students - Scoured And Milled Cloth Wool Sample 3851.07 - Teaching Aides For Primary School Students - From The Sheep's Back To You Book 01 3851.07 - Teaching Aides For Primary School Students - From The Sheep's Back To You Book 02 3851.08 - Teaching Aides For Primary School Students - How To Wash Physician Blankets 3851.09 - Teaching Aides For Primary School Students - What Members Of The A.I.F. Thought Of Physician Chillproof Blackets Leter By Lieut W. Martin 3851.10 - Teaching Aides For Primary School Students - Card 01 The Beginning Of The Story Of Crusader Cloth 3851.10 - Teaching Aides For Primary School Students - Card 02 Shearing Merinos For The Crusader Mills 3851.10 - Teaching Aides For Primary School Students - Card 03 Buying The Golden Fleece For The Crusader Mills 3851.10 - Teaching Aides For Primary School Students - Card 04 Wool Sorting At The Crusader Mills 3851.10 - Teaching Aides For Primary School Students - Card 05 Wool Scouring At The Crusader Mills 3851.10 - Teaching Aides For Primary School Students - Card 06 Carding The Scoured Wool At The Crusader Mills 3851.10 - Teaching Aides For Primary School Students - Card 07 Combing The Carded Slivers At The Crusader Mills 3851.10 - Teaching Aides For Primary School Students - Card 08 Top Making At The Crusader Mills 3851.10 - Teaching Aides For Primary School Students - Card 09 Drawing Out The Top Prior To Spinning At The Crusader Mills 3851.10 - Teaching Aides For Primary School Students - Card 10 Spinning The Rovings Into Yard At The Crusader Mills 3851.10 - Teaching Aides For Primary School Students - Card 11 Warping The Tow Fold Yard At The Crusader Mills 3851.10 - Teaching Aides For Primary School Students - Card 12 Weaving The Famous Crusader Cloth 3851.10 - Teaching Aides For Primary School Students - Card 13 Inpsecting And Mendings Any Slight Imprefections 3851.10 - Teaching Aides For Primary School Students - Card 14 Dyeing The Famous Crusader Blues That Never Fade 3851.10 - Teaching Aides For Primary School Students - Card 15 Dry Blowing At The Crusader Mills 3851.10 - Teaching Aides For Primary School Students - Card 16 An Experience Tailor Proudly Displays The Crusader Trade Make 3851.11 - Teaching Aides For Primary School Students - Card 01 Sewing Machine Inverted By Elias Howe 3851.11 - Teaching Aides For Primary School Students - Card 02 Experts Cutting Out Stamina Trousers 3851.11 - Teaching Aides For Primary School Students - Card 03 Serging The Seams To Make Fraying Impossible 3851.11 - Teaching Aides For Primary School Students - Card 04 Making The Side Straps By Precision Machinery 3851.11 - Teaching Aides For Primary School Students - Card 05 Attaching The Chromium Planted Buckles To Side Straps 3851.11 - Teaching Aides For Primary School Students - Card 06 The Wonder Machine That Makes Five Buttonholes In 19 Seconds 3851.11 - Teaching Aides For Primary School Students - Card 07 A Pocket That Won't Wear Out 3851.11 - Teaching Aides For Primary School Students - Card 08 Putting The Pcokets Into The Trousers 3851.11 - Teaching Aides For Primary School Students - Card 09 Assembling Stamina Trousers 3851.11 - Teaching Aides For Primary School Students - Card 10 A Generous Roomy Hip Pocket Is Made 3851.11 - Teaching Aides For Primary School Students - Card 11 Joining The Waistband To The Trouser 3851.11 - Teaching Aides For Primary School Students - Card 12 Reinforcing The End Of Every Pocket 3851.11 - Teaching Aides For Primary School Students - Card 13 Millions Of Buttons That Don't Come Off 3851.11 - Teaching Aides For Primary School Students - Card 14 Hemming Up The Cuffs Of Stamina Trousers 3851.11 - Teaching Aides For Primary School Students - Card 15 Pressing Stamina Trousers 3851.11 - Teaching Aides For Primary School Students - Card 16 Inspecting The Completed Works 3851.11 - Teaching Aides For Primary School Students - Card 17 look For The Label On The Pocket Stamina Clothes 3851.11 - Teaching Aides For Primary School Students - Card 18 The Story Of Cloth Making 3851.12 - Teaching Aides For Primary School Students - Davies Coop & Co Limited Knitted & Woven Materials After Dyeing Sample 3851.13 - Teaching Aides For Primary School Students - ACTIL Sample No 2 Cotton After First Cleaning 3851.13 - Teaching Aides For Primary School Students - ACTIL Sample No 3 Carded Silver 3851.13 - Teaching Aides For Primary School Students - ACTIL Sample No 4 Drawing Silver 3851.13 - Teaching Aides For Primary School Students - ACTIL Sample No 6 Spun Yarn 3851.13 - Teaching Aides For Primary School Students - ACTIL Sample No 7 Woven Cloth 3851.13 - Teaching Aides For Primary School Students - ACTIL Sample No 8 Cloth After Bleaching 3851.13 - Teaching Aides For Primary School Students - ACTIL Sample No 9 Cloth After Dyeing 3851.14 - Teaching Aides For Primary School Students - Card Tricks With A Borrowed Pack By Weirdo 3851.15 - Teaching Aides For Primary School Students - Fifty One Impromtu Conjuring Tricks That You Can Do 3851.16 - Teaching Aides For Primary School Students - Mirco sCope Sunshine Inspectorate Science Bulletin Number 5 September 3851.17 - Teaching Aides For Primary School Students - Digit Sunshine Inspectorate Mathematics Bulletin September 1970 3851.18 - Teaching Aides For Primary School Students - Scouring Yarra Falls Limitedprimary school, state school -
 8th/13th Victorian Mounted Rifles Regimental Collection
Book - Scrap book 8LH Assoc
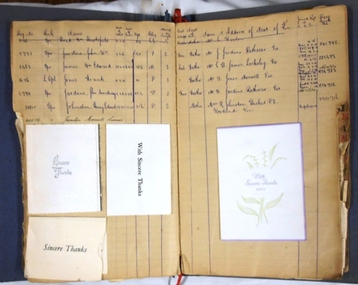
... Following the evacuation the regiment was brought up to full strength under the command of Lieutenant Colonel Leslie Maygar VC and went on the participate in all the major actions of the desert campaign culminating in the capitulation of Turkey in October 1918. The regiment was in reserve at Beersheba and came under air attack resulting in the death of Lieutenant Colonel Maygar. ...Following the evacuation the regiment was brought up to full strength under the command of Lieutenant Colonel Leslie Maygar VC and went on the participate in all the major actions of the desert campaign culminating in the capitulation of Turkey in October 1918. The regiment was in reserve at Beersheba and came under air attack resulting in the death of Lieutenant Colonel Maygar. ...The 8th Light Horse Regiment was raised at Broadmeadows Camp in 1914 and served at Gallipoli, Sinai, Palestine, Transjordan and Syria. At Gallipoli the regiment took part in the ill-fated charge at the Nek on 7 August 1915 and suffered horrendous casualties including the Commanding Officer Lieutenant Colonel Alexander White. Following the evacuation the regiment was brought up to full strength under the command of Lieutenant Colonel Leslie Maygar VC and went on the participate in all the major actions of the desert campaign culminating in the capitulation of Turkey in October 1918. The regiment was in reserve at Beersheba and came under air attack resulting in the death of Lieutenant Colonel Maygar. The post-war regimental association met regularly until the late 1970s when dwindling numbers brought about its closure.A rare document relating to a Victorian mounted regiment of World War 1 (1914-1918) with the thank-you cards providing a unique method of recording the passing of this proud regiment into history.Blue hardback scrap book containing a roll of members of the 8th Light Horse Regiment AIF Association, some newspaper clippings about Light Horse in the Middle East campaign, collection of return-thanks cards for deceased members of the regiment pasted in, and hand written letter to Matthew (Matt) Maynes thanking him for his sterling service as secretary of the association.8th light horse, association, wwi, world war one -
 8th/13th Victorian Mounted Rifles Regimental Collection
Photograph - WWI LH resting, November 1917
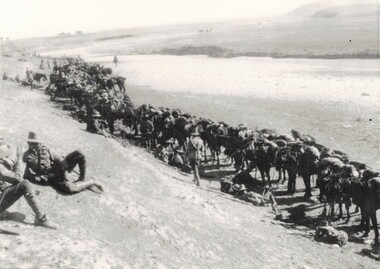
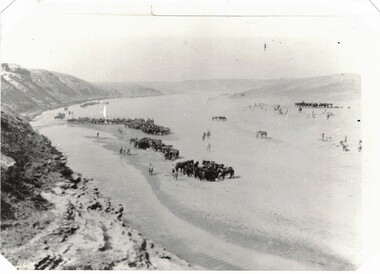
... attacked by enemy aircraft while waiting to follow up the successful charge of the 4th LH Brigade on 30 October 1917. The 8th Light Horse AIF was disbanded in 1919, but soon after re-raised as the 8th (Indi) Light Horse in the Citizen Military Forces, superseding 16th (Indi) Light Horse. Comparatively rare collection of photographs of 8th Light Horse (AIF) on operations in Egypt and Sinai 1916-1918. beersheba light horse wwi world war one egypt wadi ghuzie "Resting in Wadi Ghuzzie outside Beershaba (slopes of Tel el Saba top right)" Black and White photograph of column of horsemen, dismounted, in desert landscape. ...The 8th Light Horse Regiment AIF was raised at Broadmeadows Victoria in September 1914 under the command of Lieutenant Colonel Alexander White and formed part of the 3rd Light Horse Brigade. The regiment served at Gallipoli where in a courageous but ill-fated charge at the Nek on 7 August 1915 it suffered horrendous casualties including Lieutenant Colonel White. Rebuilt in Egypt under the command of Lieutenant Colonel Leslie Maygar VC the regiment went on the serve throughout the Middle East Campaign. Colonel Maygar died of wounds at Beersheba when the regiment was attacked by enemy aircraft while waiting to follow up the successful charge of the 4th LH Brigade on 30 October 1917. The 8th Light Horse AIF was disbanded in 1919, but soon after re-raised as the 8th (Indi) Light Horse in the Citizen Military Forces, superseding 16th (Indi) Light Horse.Comparatively rare collection of photographs of 8th Light Horse (AIF) on operations in Egypt and Sinai 1916-1918.Black and White photograph of column of horsemen, dismounted, in desert landscape. Two figures reclining at left foreground. Part of a collection of photographs of 8th Light Horse (AIF) on operations in Egypt and Sinai 1916-1918."Resting in Wadi Ghuzzie outside Beershaba (slopes of Tel el Saba top right)"beersheba, light horse, wwi, world war one, egypt, wadi ghuzie -
 8th/13th Victorian Mounted Rifles Regimental Collection
Photograph - 8th LH outpost, 1918 circa
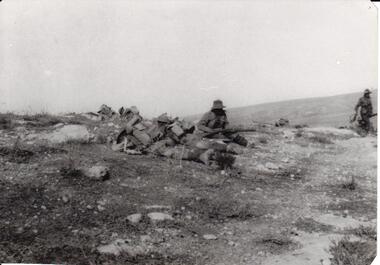
... attacked by enemy aircraft while waiting to follow up the successful charge of the 4th LH Brigade on 30 October 1917. The 8th Light Horse AIF was disbanded in 1919, but soon after re-raised as the 8th (Indi) Light Horse in the Citizen Military Forces, superseding 16th (Indi) Light Horse. Part of a rare collection of photographs of 8th Light Horse Regiment AIF during WWI (1914-1918). tel el khuweifle 8th light horse World War One WWI Below photograph "Stony desert ...The 8th Light Horse Regiment was engaged in the battle to capture Turkish defences at Tel El Khuweifle 16 Kilometres north of Beersheba from 1 to 6 November 1917. Other units were drawn from Imperial Camel Corps, British Yeomanry Division, New Zealand Mounted Rifles and 53 Welsh Division. The 8th Light Horse Regiment AIF was raised at Broadmeadows Victoria in September 1914 under the command of Lieutenant Colonel Alexander White and formed part of the 3rd Light Horse Brigade. The regiment served at Gallipoli where in a courageous but ill-fated charge at the Nek on 7 August 1915 it suffered horrendous casualties including Lieutenant Colonel White. Rebuilt in Egypt under the command of Lieutenant Colonel Leslie Maygar VC the regiment went on the serve throughout the Middle East Campaign. Colonel Maygar died of wounds at Beersheba when the regiment was attacked by enemy aircraft while waiting to follow up the successful charge of the 4th LH Brigade on 30 October 1917. The 8th Light Horse AIF was disbanded in 1919, but soon after re-raised as the 8th (Indi) Light Horse in the Citizen Military Forces, superseding 16th (Indi) Light Horse.Part of a rare collection of photographs of 8th Light Horse Regiment AIF during WWI (1914-1918).Black and white photograph of two soldiers of the 8th Light Horse Regiment AIF wearing slouch hats and armed with rifles. They are near three figures wearing helmets lying on the ground, possibly men of the Imperial Camel Corps or British infantry. Below photograph "Stony desert landscape known as Khuweilfe ( Thirsty Ridge ), 8 miles north of Beersheba. Only had a little water hence the name",tel el khuweifle, 8th, light horse, world war one, wwi -
 8th/13th Victorian Mounted Rifles Regimental Collection
Book, Into the saddles again
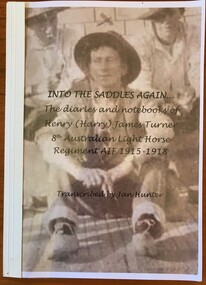
... attacked by enemy aircraft while waiting to follow up the successful charge of the 4th LH Brigade on 30 October 1917. The 8th Light Horse AIF was disbanded in 1919, but soon after re-raised as the 8th (Indi) Light Horse in the Citizen Military Forces, superseding 16th (Indi) Light Horse. World War One WWI Egypt Palestine light horse Turner Transcription of diaries and notebooks of Trooper Harry Turner, 8th Australian Light Horse 1915-18 give a vivid account of a light horseman participating in the battles on the desert campaign 1916-1918. ...Transcription of diaries and notebooks of Trooper Harry Turner, 8th Australian Light Horse 1915-18 give a vivid account of a light horseman participating in the battles on the desert campaign 1916-1918.non-fictionTranscription of diaries and notebooks of Trooper Harry Turner, 8th Australian Light Horse 1915-18 give a vivid account of a light horseman participating in the battles on the desert campaign 1916-1918.world war one, wwi, egypt, palestine, light horse, turner -
 8th/13th Victorian Mounted Rifles Regimental Collection
Photograph - 8th LH in desert
... attacked by enemy aircraft while waiting to follow up the successful charge of the 4th LH Brigade on 30 October 1917. The 8th Light Horse AIF was disbanded in 1919, but soon after re-raised as the 8th (Indi) Light Horse in the Citizen Military Forces, superseding 16th (Indi) Light Horse. 8th light horse world war one wwi middle east Aerial black and white photograph of light horse regiment in desert. ...The 8th Light Horse Regiment AIF was raised at Broadmeadows Victoria in September 1914 under the command of Lieutenant Colonel Alexander White and formed part of the 3rd Light Horse Brigade. The regiment served at Gallipoli where in a courageous but ill-fated charge at the Nek on 7 August 1915 it suffered horrendous casualties including Lieutenant Colonel White. Rebuilt in Egypt under the command of Lieutenant Colonel Leslie Maygar VC the regiment went on the serve throughout the Middle East Campaign. Colonel Maygar died of wounds at Beersheba when the regiment was attacked by enemy aircraft while waiting to follow up the successful charge of the 4th LH Brigade on 30 October 1917. The 8th Light Horse AIF was disbanded in 1919, but soon after re-raised as the 8th (Indi) Light Horse in the Citizen Military Forces, superseding 16th (Indi) Light Horse. Aerial black and white photograph of light horse regiment in desert. Thought to be 8th Australian Light Horse (AIF) c.1917.8th, light horse, world war one, wwi, middle east -
 8th/13th Victorian Mounted Rifles Regimental Collection
Photograph - 8th LH in desert
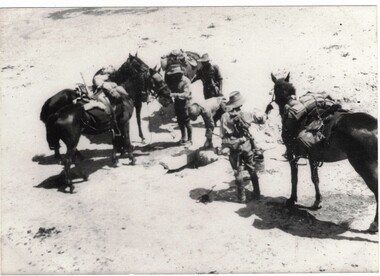
... attacked by enemy aircraft while waiting to follow up the successful charge of the 4th LH Brigade on 30 October 1917. The 8th Light Horse AIF was disbanded in 1919, but soon after re-raised as the 8th (Indi) Light Horse in the Citizen Military Forces, superseding 16th (Indi) Light Horse. World War One WWI AIF light horse 8th Black and white photograph of light horsemen of 8th Australian Light Horse with horses fully load with campaign kit; in desert ...The 8th Light Horse Regiment AIF was raised at Broadmeadows Victoria in September 1914 under the command of Lieutenant Colonel Alexander White and formed part of the 3rd Light Horse Brigade. The regiment served at Gallipoli where in a courageous but ill-fated charge at the Nek on 7 August 1915 it suffered horrendous casualties including Lieutenant Colonel White. Rebuilt in Egypt under the command of Lieutenant Colonel Leslie Maygar VC the regiment went on the serve throughout the Middle East Campaign. Colonel Maygar died of wounds at Beersheba when the regiment was attacked by enemy aircraft while waiting to follow up the successful charge of the 4th LH Brigade on 30 October 1917. The 8th Light Horse AIF was disbanded in 1919, but soon after re-raised as the 8th (Indi) Light Horse in the Citizen Military Forces, superseding 16th (Indi) Light Horse. Black and white photograph of light horsemen of 8th Australian Light Horse with horses fully load with campaign kit; in desert setting c.1917.world war one, wwi, aif, light horse, 8th -
 8th/13th Victorian Mounted Rifles Regimental Collection
Photograph - WWI aircraft in desert
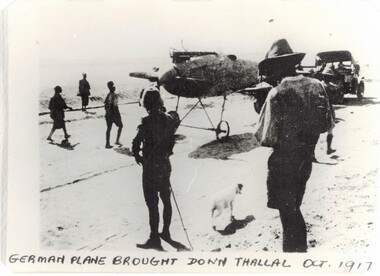
... attacked by enemy aircraft while waiting to follow up the successful charge of the 4th LH Brigade on 30 October 1917. The 8th Light Horse AIF was disbanded in 1919, but soon after re-raised as the 8th (Indi) Light Horse in the Citizen Military Forces, superseding 16th (Indi) Light Horse. World War One WWI Aircraft plane Thallal German plane brought down Thallal Oct 1917 Black and white photograph of spectators round a downed German aircraft October 1917. Photograph WWI aircraft in desert ...The 8th Light Horse Regiment AIF was raised at Broadmeadows Victoria in September 1914 under the command of Lieutenant Colonel Alexander White and formed part of the 3rd Light Horse Brigade. The regiment served at Gallipoli where in a courageous but ill-fated charge at the Nek on 7 August 1915 it suffered horrendous casualties including Lieutenant Colonel White. Rebuilt in Egypt under the command of Lieutenant Colonel Leslie Maygar VC the regiment went on the serve throughout the Middle East Campaign. Colonel Maygar died of wounds at Beersheba when the regiment was attacked by enemy aircraft while waiting to follow up the successful charge of the 4th LH Brigade on 30 October 1917. The 8th Light Horse AIF was disbanded in 1919, but soon after re-raised as the 8th (Indi) Light Horse in the Citizen Military Forces, superseding 16th (Indi) Light Horse. Black and white photograph of spectators round a downed German aircraft October 1917.German plane brought down Thallal Oct 1917world war one, wwi, aircraft, plane, thallal -
 Moorabbin Air Museum
Book (item) - (SP) World Air Power Journal 38 Autumn 1999
... News feature: Desert Fox – attack on Iraq...Moorabbin Air Museum Moorabbin Airport 12 First Street Moorabbin melbourne News feature: Operation Allied Force – the first 30 days News feature: Desert Fox – attack on Iraq Kawasaki OH-1 battlefield helicopter feature CEAM French test centre feature Spanish Air Force photo feature Focus Aircraft: Lockheed Martin F-22 Raptor (34 pages) Variant Briefing: Boeing CH-47 Chinook California ANG and Army National Guard feature Air Power Analysis: Australia Book (SP) World Air Power Journal 38 Autumn 1999 ...news feature: operation allied force – the first 30 days, news feature: desert fox – attack on iraq, kawasaki oh-1 battlefield helicopter feature, ceam french test centre feature, spanish air force photo feature, focus aircraft: lockheed martin f-22 raptor (34 pages), variant briefing: boeing ch-47 chinook, california ang and army national guard feature, air power analysis: australia