Showing 114 items matching "british colony"
-
 Victorian Aboriginal Corporation for Languages
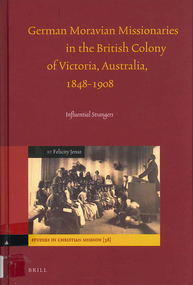
Book, Felicity Jensz, German Moravian missionaries in the British colony of Victoria, Australia, 1848-1908 : influential strangers, 2010
... German Moravian missionaries in the British colony of Victoria, Australia, 1848-1908 : influential strangers...Contents: God's lot : Moravians and missions "The most wretched and bleakest" : Moravian desire to work amongst the Australian Aborigines "Ein fauler Fleck" : Lake Boga, a putrid stain "I is done no more" : the first converts "Alles geht seinen schleppenden Gang" expansion, movement and sluggish progress "Every triumphant death" closure in a British colony....Victorian Aboriginal Corporation for Languages 33 Saxon Street Brunswick melbourne Djadja Wurrung Dja dja wurrung Gunai Wati Wati Wemba Wemba Woi wurrung Wurundjeri Wotjobaluk Wergaia Wotjubalak Wotjibolik Wudjubalug Kulin Nation Victorian history Moravian missions colonisation Port Phillip Protectorate Maps, b&w illustrations Contents: God's lot : Moravians and missions "The most wretched and bleakest" : Moravian desire to work amongst the Australian Aborigines "Ein fauler Fleck" : Lake Boga, a putrid stain "I is done no more" : the first converts "Alles geht seinen schleppenden Gang" expansion, movement and sluggish progress "Every triumphant death" closure in a British colony. German Moravian missionaries in the British colony of Victoria, Australia, 1848-1908 : influential strangers Book Felicity Jensz ...Contents: God's lot : Moravians and missions "The most wretched and bleakest" : Moravian desire to work amongst the Australian Aborigines "Ein fauler Fleck" : Lake Boga, a putrid stain "I is done no more" : the first converts "Alles geht seinen schleppenden Gang" expansion, movement and sluggish progress "Every triumphant death" closure in a British colony.Maps, b&w illustrationsdjadja wurrung, dja dja wurrung, gunai, wati wati, wemba wemba, woi wurrung, wurundjeri, wotjobaluk, wergaia, wotjubalak, wotjibolik, wudjubalug, kulin nation, victorian history, moravian missions, colonisation, port phillip protectorate -
 University of Melbourne, Burnley Campus Archives
Certificate - Award Certificates, R.V.Waldheim, Artistische Anstalt, World Exhibition 1873 in Vienna - Merit Medal awarded to Horticultural Society in Victoria, 1873
... ...British Colony...University of Melbourne, Burnley Campus Archives 500 Yarra Boulevard Richmond melbourne certificate r.v.waldheim vienna austria World Exhibition 1873 Merit Medal Horticultural Society of Victoria British Colony Weltausstellung 1873 in Wien Die Internationale Jury Hat Der Gartenbau - Gesellschaft in Victoria (Britische Colonien) Die Verdienst - Medaille zuerkannt der prasident der kaiserlichen auststellungs-commission Translated as "World Exhibition 1873 in Vienna The International Jury awarded the Horticultural Society in Victoria (British Colonies) the Merit Medal awarded by the President of the Imperial Exhibition Commission" Original - cardboard certificate designed by R.V.Waldheim, Artistische Anstalt, Wien awarded in Vienna on 18.08.1873. ...Original - cardboard certificate designed by R.V.Waldheim, Artistische Anstalt, Wien awarded in Vienna on 18.08.1873. (Framed copy B92.0538). Also black & white photocopy B92.0537. Weltausstellung 1873 in Wien Die Internationale Jury Hat Der Gartenbau - Gesellschaft in Victoria (Britische Colonien) Die Verdienst - Medaille zuerkannt der prasident der kaiserlichen auststellungs-commission Translated as "World Exhibition 1873 in Vienna The International Jury awarded the Horticultural Society in Victoria (British Colonies) the Merit Medal awarded by the President of the Imperial Exhibition Commission"certificate, r.v.waldheim, vienna, austria, world exhibition 1873, merit medal, horticultural society of victoria, british colony -
 Federation University Historical Collection
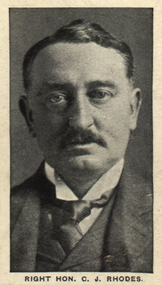
Photograph (black & White), Right Honorable Cecil John Rhodes - South Africa
... Colony...british south africa company...Cecil Rhodes was a British businessman, mining magnate and politician in South Africa. He was Prime Minister of the Cape Colony from 1890 to 1896. ...Barker Library (top floor) Mount Helen goldfields Cecil Rhodes was a British businessman, mining magnate and politician in South Africa. He was Prime Minister of the Cape Colony from 1890 to 1896. ...Cecil Rhodes was a British businessman, mining magnate and politician in South Africa. He was Prime Minister of the Cape Colony from 1890 to 1896. He believed in British Imperialism and he and his British South Africa Company formed the territory of Rhodesia in the early 1890s. He was forced to resign as Prime Minister in 1896 after the disastrous Jameson Raid, an unauthorised attack on Paul Kruger's South African Republic (Transvaal), which sent his brother to prison convicted of high treason and nearly sentenced to death. This event contributed to the outbreak of the Second Boer War. Rhodes went to Kimberley in a political move. During the war the military felt he was more of a liability than an asset and found him intolerable. The officer commanding the garrison of Kimberley, Lieutenant Colonel Robert Kekewich, experienced serious personal difficulties with Rhodes because of the latter's inability to co-operate. However, he still remained a leading figure in the politics of southern Africa. Rhodes was dogged by ill health his whole life. He died in 1902, aged 48, at his seaside cottage in Muizenberg. He was cared for by Leander Starr Jameson during his illness, becoming a trustee of his estate and residuary beneficiary of his will, which allowed him to continue living in Rhode's mansion after his death. His final will left a large area of land on the slopes of Table Mountain. Part of the estate became the upper campus of the University of Cape Town, another part became the Kirstenbosch National Botanical Garden. The rest was spared development and is now an important conservation area. His will also provided for the establishment of the Rhodes Scholarship. Individual image from photographed poster of tobacco and cigarette cards.cecil rhodes, mining magnate south africa, politician south africa, prime minister cape colony, british south africa company, rhodesia, jameson raid, paul kruger, south africa republic, transvaal, second boer war, kimberley, robert kekewich, leander starr jameson, muizenberg, table mountain, university of cape town, kirstenbosch national garden -
 Port Fairy Historical Society Museum and Archives
Photograph
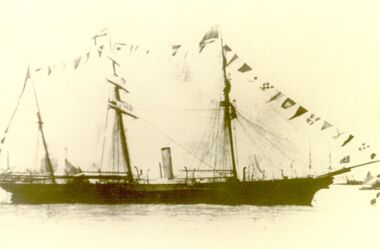
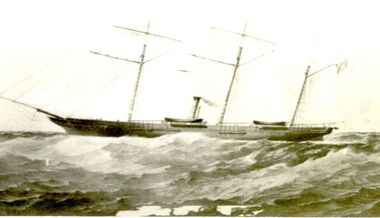
... Victoria (580 tons) was the first warship to be built in England for a British colony. Designed by the British naval architect Oliver Lang she was launched in London on 30 June 1855 by Lady Constance Talbot. ...Port Fairy Historical Society Museum and Archives 30 Gipps Street Port Fairy great-ocean-road Victoria (580 tons) was the first warship to be built in England for a British colony. Designed by the British naval architect Oliver Lang she was launched in London on 30 June 1855 by Lady Constance Talbot. ...Victoria (580 tons) was the first warship to be built in England for a British colony. Designed by the British naval architect Oliver Lang she was launched in London on 30 June 1855 by Lady Constance Talbot. Arrived in Australia 1856. Out of service 1882 and broken up in 1895 Visited Port Fairy 1859, 1862 and 1873 (twice) Black & white photographvictoria, war ship, ship, navy, lady constance talbot -
 Port Fairy Historical Society Museum and Archives
Photograph
... Victoria (580 tons) was the first warship to be built in England for a British colony. Designed by the British naval architect Oliver Lang she was launched in London on 30 June 1855 by Lady Constance Talbot. ...Port Fairy Historical Society Museum and Archives 30 Gipps Street Port Fairy great-ocean-road Victoria (580 tons) was the first warship to be built in England for a British colony. Designed by the British naval architect Oliver Lang she was launched in London on 30 June 1855 by Lady Constance Talbot. ...Victoria (580 tons) was the first warship to be built in England for a British colony. Designed by the British naval architect Oliver Lang she was launched in London on 30 June 1855 by Lady Constance Talbot. Arrived in Australia 1856. Out of service 1882 and broken up in 1895 Visited Port Fairy 1859, 1862 and 1873 (twice) First warship to be built in England for a British colony. Black & white photographwarship, hmvs victoria -
 Flagstaff Hill Maritime Museum and Village
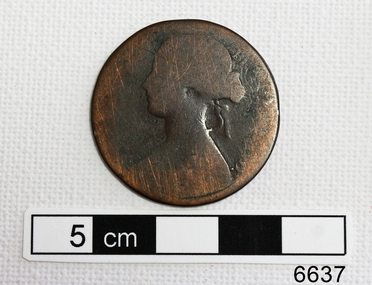
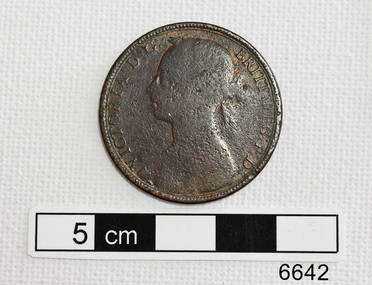
Currency - Coin, 1870
... The image on this coin shows a British monarch, the young Queen Victoria, at a time when Australia was a Colony of Britain....Flagstaff Hill Maritime Museum and Village 89 Merri Street Warrnambool great-ocean-road The image on this coin shows a British monarch, the young Queen Victoria, at a time when Australia was a Colony of Britain. ...The image on this coin shows a British monarch, the young Queen Victoria, at a time when Australia was a Colony of Britain.This coin represents the currency used in Australia in the 19th century.Coin, Queen Victorian Penny, 1870. Obverse shows the "Young Head" of Queen Victoria, Reverse shows Britannia. Coin well worn.Reverse: "1870"flagstaff hill, flagstaff hill maritime museum and village, warrnambool, maritime museum, maritime village, great ocean road, shipwreck coast, coin, british coin, currency, penny, 19th century, queen victoria, young queen victoria, 1870 -
 Flagstaff Hill Maritime Museum and Village
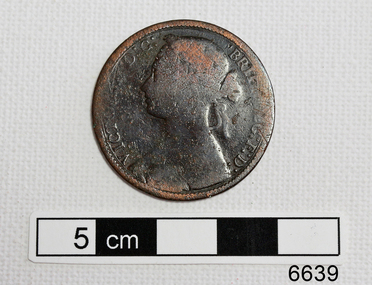
Currency - Coin, 1874
... The image on this coin shows a British monarch, the young Queen Victoria, at a time when Australia was a Colony of Britain....Flagstaff Hill Maritime Museum and Village 89 Merri Street Warrnambool great-ocean-road The image on this coin shows a British monarch, the young Queen Victoria, at a time when Australia was a Colony of Britain. ...The image on this coin shows a British monarch, the young Queen Victoria, at a time when Australia was a Colony of Britain.This coin represents the currency used in Australia in the 19th century.Coin, Queen Victorian Penny, 1874, Obverse shows the "Young Head" of Queen Victoria. Reverse shows Britannia. Coin well worn. Obverse: "VICT ----- D G " "BRIT - - - - G : F : D: " Reverse: "----- -NNY" 1874"flagstaff hill, flagstaff hill maritime museum and village, warrnambool, maritime museum, maritime village, great ocean road, shipwreck coast, coin, british coin, currency, penny, 19th century, queen victoria, young queen victoria, brittania, 1874 -
 Flagstaff Hill Maritime Museum and Village
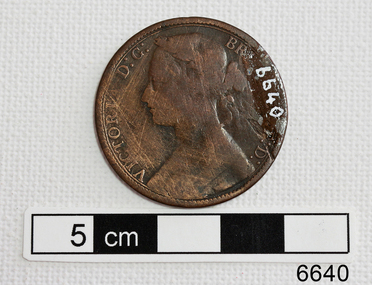
Currency - Coin, 1877
... The image on this coin shows a British monarch, the young Queen Victoria, at a time when Australia was a Colony of Britain....Flagstaff Hill Maritime Museum and Village 89 Merri Street Warrnambool great-ocean-road The image on this coin shows a British monarch, the young Queen Victoria, at a time when Australia was a Colony of Britain. ...The image on this coin shows a British monarch, the young Queen Victoria, at a time when Australia was a Colony of Britain.This coin represents the currency used in Australia in the 19th century.Coin, Queen Victorian Penny, 1877, Obverse shows the "Young Head" of Queen Victoria. Reverse shows Britannia. Coin well worn. Obverse: "VICTORIA : D: G:" "BRIT - - - - -F : D :" Reverse: "ONE PENNY" "1877"flagstaff hill, flagstaff hill maritime museum and village, warrnambool, maritime museum, maritime village, great ocean road, shipwreck coast, coin, british coin, currency, penny, 19th century, queen victoria, young queen victoria, brittania, 1877 -
 Flagstaff Hill Maritime Museum and Village
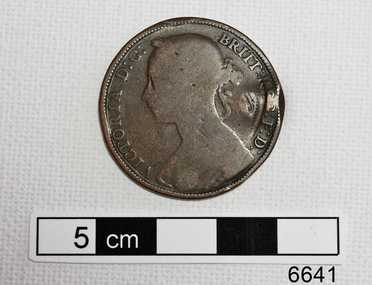
Currency - Coin, 1888
... The image on this coin shows a British monarch, the young Queen Victoria, at a time when Australia was a Colony of Britain....Flagstaff Hill Maritime Museum and Village 89 Merri Street Warrnambool great-ocean-road The image on this coin shows a British monarch, the young Queen Victoria, at a time when Australia was a Colony of Britain. ...The image on this coin shows a British monarch, the young Queen Victoria, at a time when Australia was a Colony of Britain.This coin represents the currency used in Australia in the 19th century.Coin, Queen Victorian Penny, 1888, Obverse shows the "Young Head" of Queen Victoria. Reverse shows Britannia. Coin well worn. Obverse has an unknown imprint and the border is inconsistent.Obverse: "VICTORIA : D : G :" "BRITT : RE- : F : D :" Reverse: "ONE --- Y" "1888"flagstaff hill, flagstaff hill maritime museum and village, warrnambool, maritime museum, maritime village, great ocean road, shipwreck coast, coin, british coin, currency, penny, 19th century, queen victoria, young queen victoria, brittania, 1888 -
 Flagstaff Hill Maritime Museum and Village
Currency - Coin, 1890
... The image on this coin shows a British monarch, the young Queen Victoria, at a time when Australia was a Colony of Britain....Flagstaff Hill Maritime Museum and Village 89 Merri Street Warrnambool great-ocean-road The image on this coin shows a British monarch, the young Queen Victoria, at a time when Australia was a Colony of Britain. ...The image on this coin shows a British monarch, the young Queen Victoria, at a time when Australia was a Colony of Britain.This coin represents the currency used in Australia in the 19th century.Coin, Queen Victorian Penny, 1890, Obverse shows the "Young Head" of Queen Victoria. Reverse shows Britannia. Coin well worn. Obverse: "VICTORIA : D : G :" "BRITT : REG : F : D :" Reverse: "PENNY" "1890"flagstaff hill, flagstaff hill maritime museum and village, warrnambool, maritime museum, maritime village, great ocean road, shipwreck coast, coin, british coin, currency, penny, 19th century, queen victoria, young queen victoria, brittania, 1890 -
 Flagstaff Hill Maritime Museum and Village
Currency - Coin, 1884
... The image on this coin shows a British monarch, the young Queen Victoria, at a time when Australia was a Colony of Britain....Flagstaff Hill Maritime Museum and Village 89 Merri Street Warrnambool great-ocean-road The image on this coin shows a British monarch, the young Queen Victoria, at a time when Australia was a Colony of Britain. ...The image on this coin shows a British monarch, the young Queen Victoria, at a time when Australia was a Colony of Britain.This coin represents the currency used in Australia in the 19th century.Coin, Queen Victorian Halfpenny, 1864, Obverse shows the "Young Head" of Queen Victoria. Reverse shows Britannia. Coin well worn. Obverse: "VICTORIA : D : G :" "BRITT " REG : F : D :" Reverse: "HALF PENNY" "1864"flagstaff hill, flagstaff hill maritime museum and village, warrnambool, maritime museum, maritime village, great ocean road, shipwreck coast, coin, british coin, currency, half penny, 19th century, queen victoria, young queen victoria, brittania, 1864 -
 Flagstaff Hill Maritime Museum and Village
Currency - Coin, 1882
... The image on this coin shows a British monarch, the young Queen Victoria, at a time when Australia was a Colony of Britain....Flagstaff Hill Maritime Museum and Village 89 Merri Street Warrnambool great-ocean-road The image on this coin shows a British monarch, the young Queen Victoria, at a time when Australia was a Colony of Britain. ...The image on this coin shows a British monarch, the young Queen Victoria, at a time when Australia was a Colony of Britain.This coin represents the currency used in Australia in the 19th century.Coin, Queen Victorian Halfpenny, 1882, Obverse shows the "Young Head" of Queen Victoria. Reverse shows Britannia. Coin well worn.Obverse: "VICTORIA : D: G :" "BRITT : REG : F : D :" Reverse: "HALF PENNY" "1882"flagstaff hill, flagstaff hill maritime museum and village, warrnambool, maritime museum, maritime village, great ocean road, shipwreck coast, coin, british coin, currency, half penny, 19th century, queen victoria, young queen victoria, brittania, 1882 -
 Flagstaff Hill Maritime Museum and Village
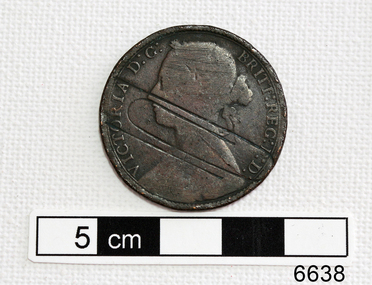
Currency - Coin, 1872
... The image on this coin shows a British monarch, the young Queen Victoria, at a time when Australia was a Colony of Britain. ...Flagstaff Hill Maritime Museum and Village 89 Merri Street Warrnambool great-ocean-road The image on this coin shows a British monarch, the young Queen Victoria, at a time when Australia was a Colony of Britain. ...The image on this coin shows a British monarch, the young Queen Victoria, at a time when Australia was a Colony of Britain. This coin has be cancelled from circulation.This coin represents the currency used in Australia in the 19th century.Coin, Queen Victorian Penny, 1872, Obverse shows the "Young Head" of Queen Victoria. Reverse shows Britannia. Coin well worn. Obverse has a cancellation stamp.Obverse: "VICTORIA D.G." BRITT : REG : F D " Reverse: "one - - - - - - -" "18 - - " Stamp: (paperclip shape)flagstaff hill, flagstaff hill maritime museum and village, warrnambool, maritime museum, maritime village, great ocean road, shipwreck coast, coin, british coin, currency, penny, 19th century, queen victoria, young queen victoria, 1872, blank, cancellation stamp, cancelled coin, brittania -
 Victorian Aboriginal Corporation for Languages
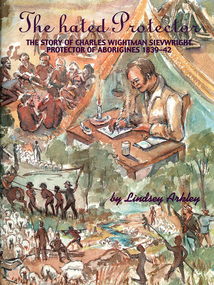
Book, Lindsey Arkley, The hated protector : the story of Charles Wightman Sievwright, protector of Aborigines 1839-42, 2000
... "The hated Protector" tells for the first time the real story behind the extraordinary experiences of Charles Sievwright, Assistant Aboriginal Protector from 1839-42 in what was then part of the British colony of New South Wales, but is now the Western District of the Australian state of Victoria. ...Victorian Aboriginal Corporation for Languages 33 Saxon Street Brunswick melbourne Charles Wightman Sievwright racial policies British colonial history race relations Victorian history maps, document reproductions, b&w photographs, colour photographs, b&w illustrations "The hated Protector" tells for the first time the real story behind the extraordinary experiences of Charles Sievwright, Assistant Aboriginal Protector from 1839-42 in what was then part of the British colony of New South Wales, but is now the Western District of the Australian state of Victoria. ..."The hated Protector" tells for the first time the real story behind the extraordinary experiences of Charles Sievwright, Assistant Aboriginal Protector from 1839-42 in what was then part of the British colony of New South Wales, but is now the Western District of the Australian state of Victoria. Sievwright, an Edinburgh-born former British army officer, lived in the bush with his young family as he tried to save the Aborigines of the District from extinction. In doing so, he would isolate himself from the rest of his fellow whites. The hated Protector tells of this process. The book should appeal to anyone interested in British colonial and Australian history, particularly in the years of first contact between British settlers and the Aborigines. More broadly, it should also appeal to anyone interested a story of one man's battle against overwhelming odds, where the price of failure was numerous deaths. It is a story of hatred, prejudice, courage, determination, and hope. In telling Sievwright's story, Lindsey Arkley draws largely on original archival material, including official reports, journals and letters, found in Melbourne, Sydney, Hobart, Edinburgh and London. Most has never before been published. The archival material is supplemented by contemporary newspaper accounts, and some oral history. Full notes are given to all sources, and the book is indexed and lavishly illustrated with drawings by Joan Bognuda, as well as about 80 paintings and samples of documents. Contents: 1. In the bush 2. "Equal and indiscriminate justice" 3. "A few doses of lead" 4. "A curse to the land" 5. "The most unpopular man" 6. Retaliation 7. A hostage debate 8. Hallucinations 9. A mass escape 10. Possessors of the soil 11. Move to Keilambete 12. Bureaucratic 13. "A hideous pandemonium" 14. Divine visitations 15. Pay backs 16. Explanations 17. A squatter on trial 18. Claptrap and deceit 19. The black cap - 20. To Mt Rouse 21. "The impending evil" 22. In the balance 23. An arrest at Mt Rouse 24. A fair moral name 25. Roger's trial 16. Intensified evidence 27. A declaration of war 28. Mr Cold Morning 29. Holding ranks 30. To rags 31. Fightback 32. Return to London 33. The inquiry 34. Judgement 35. And what remains.maps, document reproductions, b&w photographs, colour photographs, b&w illustrationscharles wightman sievwright, racial policies, british colonial history, race relations, victorian history -
 Flagstaff Hill Maritime Museum and Village
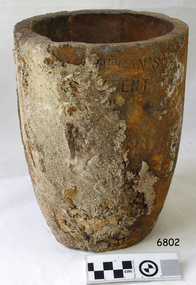
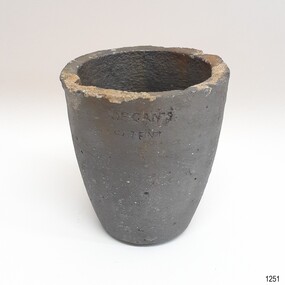
Functional object - Crucible, The Patent Plumbago Crucible Company, circa 1873
... The Morgans imported crystalline graphite in 4-5 cwt casks from the British colony of Ceylon (now Sri Lanka) and mixed it with conventional English (Stourbridge) clays to be fired in kilns. ...The Morgans imported crystalline graphite in 4-5 cwt casks from the British colony of Ceylon (now Sri Lanka) and mixed it with conventional English (Stourbridge) clays to be fired in kilns. ...This crucible was raised from the wreck of the Loch Ard. It is one of six similar relics, in a range of sizes, now in the Flagstaff Hill collection. All were manufactured by the Morgan brothers who founded the Patent Plumbago Crucible Company in 1856, making crucibles in a small factory in Battersea London. A crucible is a container used for purifying and melting metals so that they can be cast in a mold to a predetermined shape and use. They must withstand extremely high temperatures, abrupt cooling, and shed their contents with minimal adherence. The addition of graphite to the traditional firing clays greatly enhanced the durability of industrial crucibles this technique was pioneered by the Morgan Bros thereby making a significant technological advance in foundry technology and metallurgy. The Morgans first noticed the advantages of graphite crucibles at the Great Exhibition held in London in 1851. Initially, they contracted to be sole selling agents for the American-made products of Joseph Dixon and Co. from New Jersey, but in 1856 they obtained that firm's manufacturing rights and began producing their graphite crucibles from the South London site. The Morgans imported crystalline graphite in 4-5 cwt casks from the British colony of Ceylon (now Sri Lanka) and mixed it with conventional English (Stourbridge) clays to be fired in kilns. Their products were purchased by the Royal Mints in London and India and exported to official mints in France and Germany. They were successful exhibitors of their crucibles and furnaces at the London Exhibition held in 1861 (Class 1, Mining, quarrying, metallurgy and mineral products, Exhibit 265, Patent Plumbago Crucible Co). The range of sizes represented by the six crucibles retrieved from the Loch Ard suggests they may have been part of a sample shipment intended for similar promotion in the Australian colonies or at Melbourne's International Exhibition to be held in 1880. A newspaper account of an 1864 tour of the Morgan brothers' 'Black Potteries' at Battersea indicates: "All the pots were numbered according to their contents, each number standing for one kilogram, or a little over two pounds; a No. 2 crucible contains two kilograms; a No. 3, three kilograms, and so on." These numbers are obscured by marine sediment on three of the crucibles in the Flagstaff Hill collection, but those legible on the remaining three are 5, 6, and 8. None of the six is of the same size. (For more information on the Loch Ard wreck see note sec this document) The shipwreck of the Loch Ard is of significance for Victoria and is registered on the Victorian Heritage Register ( S 417). Flagstaff Hill has a varied collection of artefacts from Loch Ard and its collection is significant for being one of the largest accumulation of artefacts from this notable Victorian shipwreck of which the crucible is a small part. The collections objects give us a snapshot of how we can interpret the story of this tragic event. The collection is also archaeologically significant as it represents aspects of Victoria's shipping history that allows us to interpret Victoria's social and historical themes of the time. Through is associated with the worst and best-known shipwreck in Victoria's history.A medium size crucible, or fluxing pot, for heating and pouring molten metal. The container rises in a slight curve from a smaller flat base to a wider open top with a lip for pouring. It was recovered from the wreck of the LOCH ARD. The crucible has a coating of sediment that obscures its numerical specifications of size and capacity. The markings that remain visible indicate it is a Morgan’s crucible, made with graphite to prevent cracking and provide a smooth non-adhesive inner surface. .On base: “…ORGAN’S …ENT”flagstaff hill, warrnambool, flagstaff-hill-maritime-museum, shipwreck-coast, flagstaff-hill-maritime-village, graphite crucible, plumbago crucible, morgan's crucible company, loch ard, morgan potteries, crucible, fluxing pot -
 Flagstaff Hill Maritime Museum and Village
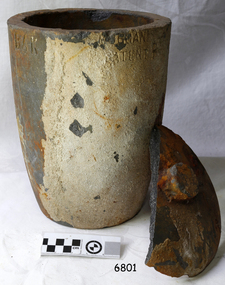
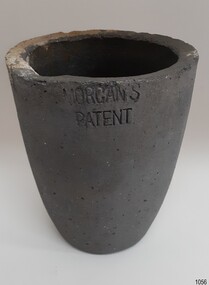
Functional object - Crucible, The Patent Plumbago Crucible Company, circa 1878
... The Morgans imported crystalline graphite in 4-5 cwt casks from the British colony of Ceylon (now Sri Lanka) and mixed it with conventional English (Stourbridge) clays to be fired in kilns. ...The Morgans imported crystalline graphite in 4-5 cwt casks from the British colony of Ceylon (now Sri Lanka) and mixed it with conventional English (Stourbridge) clays to be fired in kilns. ...This crucible was raised from the wreck of the LOCH ARD. It is one of six similar relics, in a range of sizes, now in the Flagstaff Hill collection. All bear markings to indicate their manufacture by the Morgan brothers of Battersea, trading as the Patent Plumbago Crucible Co. A crucible is a container used for purifying and melting metals so that they can be cast in a mould to a predetermined shape and use. They must withstand extremely high temperatures, abrupt cooling, and shed their contents with minimal adherence. The addition of graphite to the traditional firing clays greatly enhanced the durability of industrial crucibles in mid-Victorian Britain, a significant technological advance at a time of great activity in foundries and expansion of demand for refined metals. The Morgans first noticed the advantages of graphite crucibles at the Great Exhibition held in London in 1851. Initially they contracted to be sole selling agents for the American-made products of Joseph Dixon and Co. from New Jersey, but in 1856 they obtained that firm’s manufacturing rights and began producing their own graphite crucibles from the South London site. The Morgans imported crystalline graphite in 4-5 cwt casks from the British colony of Ceylon (now Sri Lanka) and mixed it with conventional English (Stourbridge) clays to be fired in kilns. Their products were purchased by the Royal Mints in London and India, and exported to official mints in France and Germany. They were successful exhibitors of their crucibles and furnaces at the London Exhibition held in 1861 (Class 1, Mining, quarrying, metallurgy and mineral products, Exhibit 265, Patent Plumbago Crucible Co). The range of sizes represented by the six crucibles retrieved from the LOCH ARD, suggest they may have been part of a sample shipment intended for similar promotion in the Australian colonies ― at Melbourne’s International Exhibition to be held in 1880. The summary of cargo manifest, by Don Charlwood in ‘Wrecks and Reputations’ does not mention any crucibles, implying that they were not a large consignment of uniform items. A newspaper account of an 1864 tour of the Morgan brothers’ ‘Black Potteries’ at Battersea indicates: “All the pots were numbered according to their contents, each number standing for one kilogram, or a little over two pounds; a No. 2 crucible contains two kilogrammes; a No. 3, three kilogrammes, and so on.” These numbers are obscured by marine sediment on three of the crucibles in the Flagstaff Hill collection, but those legible on the remaining three are 5, 6, and 8. None of the six are of the same size from a visual appraisal.The shipwreck of the LOCH ARD is of State significance ― Victorian Heritage Register S417A large crucible, or fluxing pot, for heating and pouring molten metal. It was recovered from the wreck of the LOCH ARD. The clay fired vessel rises from circular flat base to a larger rim with pouring lip. It is stained a rust colour and bears some sedimentary accretion. Half of its loose fitting lid with central knob has also survived. Markings on the artefact indicate it is a Morgan’s crucible, made with graphite to prevent cracking in the furnace and provide a smooth (non-adhesive) inner surface. On base: “…RGAN’S PATENT CRUCIBLE”. On rim: “MORGAN’S PATENT P…” Below top edge "BAK"flagstaff hill, warrnambool, shipwrecked-coast, flagstaff-hill, flagstaff-hill-maritime-museum, maritime-museum, shipwreck-coast, flagstaff-hill-maritime-village, graphite crucible, plumbago crucible, morgans crucible company, loch ard, fluxing pot, crucible -
 Flagstaff Hill Maritime Museum and Village
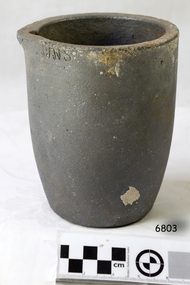
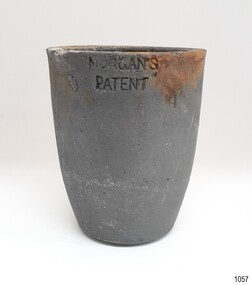
Functional object - Crucible, The Patent Plumbago Crucible Company, circa 1878
... The Morgans imported crystalline graphite in 4-5 cwt casks from the British colony of Ceylon (now Sri Lanka) and mixed it with conventional English (Stourbridge) clays to be fired in kilns. ...The Morgans imported crystalline graphite in 4-5 cwt casks from the British colony of Ceylon (now Sri Lanka) and mixed it with conventional English (Stourbridge) clays to be fired in kilns. ...This crucible was raised from the wreck of the LOCH ARD. It is one of six similar relics, in a range of sizes, now in the Flagstaff Hill collection. All bear markings to indicate their manufacture by the Morgan brothers of Battersea, trading as the Patent Plumbago Crucible Co. A crucible is a container used for purifying and melting metals so that they can be cast in a mould to a predetermined shape and use. They must withstand extremely high temperatures, abrupt cooling, and shed their contents with minimal adherence. The addition of graphite to the traditional firing clays greatly enhanced the durability of industrial crucibles in mid-Victorian Britain, a significant technological advance at a time of great activity and expansion in foundries and demand for refined metals. The Morgans first noticed the advantages of graphite crucibles at the Great Exhibition held in London in 1851. Initially they contracted to be sole selling agents for the American-made products of Joseph Dixon and Co. from New Jersey, but in 1856 they obtained that firm’s manufacturing rights and began producing their own graphite crucibles from the South London site. The Morgans imported crystalline graphite in 4-5 cwt casks from the British colony of Ceylon (now Sri Lanka) and mixed it with conventional English (Stourbridge) clays to be fired in kilns. Their products were purchased by the Royal Mints in London and India, and exported to official mints in France and Germany. They were successful exhibitors of their crucibles and furnaces at the London Exhibition held in 1861 (Class 1, Mining, quarrying, metallurgy and mineral products, Exhibit 265, Patent Plumbago Crucible Co). The range of sizes represented by the six crucibles retrieved from the LOCH ARD, suggest they may have been part of a sample shipment intended for similar promotion in the Australian colonies ― at Melbourne’s International Exhibition to be held in 1880. A summary of the LOCH ARD cargo manifest, by Don Charlwood in ‘Wrecks and Reputations’ does not mention any crucibles, implying that they were not part of a larger consignment of uniform items. A newspaper account of an 1864 tour of the Morgan brothers’ ‘Black Potteries’ at Battersea indicates: “All the pots were numbered according to their contents, each number standing for one kilogram, or a little over two pounds; a No. 2 crucible contains two kilogrammes; a No. 3, three kilogrammes, and so on.” These numbers are obscured by marine sediment on three of the crucibles in the Flagstaff Hill collection, but those legible on the remaining three are 5, 6, and 8. None of the six are of the same size from a visual appraisal. The shipwreck of the LOCH ARD is of State significance ― Victorian Heritage Register S417A No. 6 size Morgan’s graphite crucible (i.e. 6kgs capacity). The crucible rises in a slight curve from a smaller flat base up to a wider top with a (chipped) pouring lip. It was recovered from the wreck of the LOCH ARD. The artefact is largely accretion free despite its long period of submersion at the wreck site. It has a number of visible maker’s markings which identify the manufacturer and the smelting capacity of the pot. The graphite crucible is in fair and stable condition. The number “6” which is framed in a square. The letters “THE PATENT PLUMBAGO CRUCIBLE COMPANY” and “BATTERSEA WORKS COMPANY”. Below rim "... GNS"flagstaff hill, warrnambool, shipwrecked-coast, flagstaff-hill, flagstaff-hill-maritime-museum, maritime-museum, shipwreck-coast, flagstaff-hill-maritime-village, graphite crucible, plumbago crucible, morgan's crucible company, loch ard, crucible, fluxing pot -
 Flagstaff Hill Maritime Museum and Village
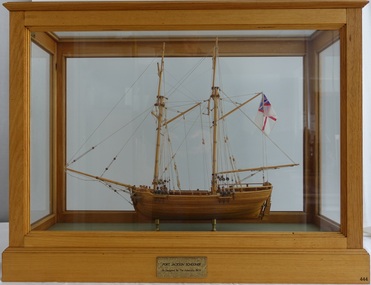
Craft - Ship Model, Port Jackson Schooner
... In 1785 the First Fleet arrived in the new British colony of Port Jackson (now Sydney Harbour) in New South Wales and Arthur Phillip was appointed as the first Governor. ...In 1785 the First Fleet arrived in the new British colony of Port Jackson (now Sydney Harbour) in New South Wales and Arthur Phillip was appointed as the first Governor. ...This ship model is of a Colonial Port Jackson schooner, originally designed by the British Admiralty in 1803 as a response to the request of New South Wales' Governor Arthur Phillip. The drafts for the original plans are in Greenwich, UK, in the National Maritime Museum. The model is a Ledition edition, number 2 of 5, modelled by Bill Leonard. The model is rigged and decked in the manner of David McGregor. The flag on model of Port Jackson schooner is that of the British White Ensign which was used as the flag design of the Royal Australian Navy from 1911 - 1967. In 1785 the First Fleet arrived in the new British colony of Port Jackson (now Sydney Harbour) in New South Wales and Arthur Phillip was appointed as the first Governor. The following year Governor Phillip asked the English Royal Navy to provide drafts and materials for two ships for use in the Port Jackson colony for exploring and surveying rivers. The vessels needed a shallow draught and to be made from local cedar timber. He asked for the frames of the schooners to be provided along with shipwrights to assemble them. Many years later, in 1803, Governor Phillip’s request was fulfilled but he had already resigned from his post. The drafts titled ‘Schooner for Port Jackson’ were despatched by the Royal Navy from England to Australia. The original draft is still in the National Maritime Museum in Greenwich, UK. Meanwhile, the NSW Government had already built various other ships before 1803. In 1797 His Majesty’s Dockyard was opened at Port Jackson for building larger vessels. The Royal Navy’s 1803 design of a ‘Schooner for Port Jackson’ has been recognised on the obverse of Australia’s twenty dollar banknote since 1994. A sketch of the schooner is beside the portrait of Mrs Mary Reibey, who arrived as a convict and rose to become a respected and successful owner of a cargo shipping business. Her fleet included the Mercury, a schooner similar to the 1803 design for the Port Jackson schooner. Although the 1803 plans for a ‘Schooner for Port Jackson’ are commonly believed to be used for the first ship built in Australia, no records have been found of any ships being built according to these plans. However, it can be claimed that the plans were the ‘first Royal Navy plans made for a ship for use at Port Jackson, and to be built at Port Jackson, in Australia’. William (Bill) Leonard passed away on March 1st 1995.This ship model is significant for its representation of an early Australian colonial schooner. The 1803 Royal Navy’s plans for the colonial ‘Schooner for Port Jackson, were for the first ship specifically designed by the Royal Navy to be built and used in Port Jackson, for use in exploration and surveying of Australian ports and rivers. The plans are associated with Australia’s colonial settlement in the late 1700s. This ship model is significant for its association with the emblems of Australia’s history on the twenty dollar banknote. The colonial Port Jackson schooner is considered significant to Australian history, and represented on the 1994 twenty dollar banknote and its new version being rolled out in October 2019.Ship model of a colonial Port Jackson Schooner. Two-masted sailing ship displaying the flag named The British White Ensign. Mode of light coloured stained timberl is mounted on brass legs inside a glass case with timber frame and base. Metal engraved plaque states that the model is as designed by The Admiralty in 1803. Model is a number 2 of 5 in a limited edition, made by Bill Leonard.Engraved on metal plaque "PORT JACKSON SCHOONER / As Designed By The Admiralty. 1803"flagstaff hill, warrnambool, shipwrecked-coast, flagstaff-hill, flagstaff-hill-maritime-museum, maritime-museum, shipwreck-coast, flagstaff-hill-maritime-village, ship model port jackson schooner, sailing ship, limited edition model, model maker bill leonard, david mcgregor design, maritime trade, maritime vessel, colonial port jackson schooner, pacific island trade in early 1800s, sydney cove, governor arthur phillip, governor philip gidley king, a schooner for port jackson, national maritime museum greenwich, australian $20 banknote -
 Flagstaff Hill Maritime Museum and Village
Functional object - Crucible, The Patent Plumbago Crucible Company, circa 1873
... The Morgans imported crystalline graphite in 4-5 cwt casks from the British colony of Ceylon (now Sri Lanka) and mixed it with conventional English (Stourbridge) clays to be fired in kilns. ...The Morgans imported crystalline graphite in 4-5 cwt casks from the British colony of Ceylon (now Sri Lanka) and mixed it with conventional English (Stourbridge) clays to be fired in kilns. ...Crucibles are used for heating and pouring molten metal. The set of six crucibles was raised from the wreck of the Loch Ard and includes a range of sizes, now in the Flagstaff Hill collection. All were manufactured by the Morgan brothers who founded the Patent Plumbago Crucible Company in 1856, making crucibles in a small factory in Battersea London. A crucible is a container used for purifying and melting metals so that they can be cast in a mould to a predetermined shape and use. They must withstand extremely high temperatures, and abrupt cooling, and shed their contents with minimal adherence. The addition of graphite to the traditional firing clays greatly enhanced the durability of industrial crucibles this technique was pioneered by the Morgan Bros thereby making a significant technological advance in foundry technology and metallurgy. The Morgans first noticed the advantages of graphite crucibles at the Great Exhibition held in London in 1851. Initially, they contracted to be sole selling agents for the American-made products of Joseph Dixon and Co. from New Jersey, but in 1856 they obtained that firm's manufacturing rights and began producing their graphite crucibles from the South London site. The Morgans imported crystalline graphite in 4-5 cwt casks from the British colony of Ceylon (now Sri Lanka) and mixed it with conventional English (Stourbridge) clays to be fired in kilns. Their products were purchased by the Royal Mints in London and India and exported to official mints in France and Germany. They were successful exhibitors of their crucibles and furnaces at the London Exhibition held in 1861 (Class 1, Mining, quarrying, metallurgy and mineral products, Exhibit 265, Patent Plumbago Crucible Co). The range of sizes represented by the six crucibles retrieved from the Loch Ard suggests they may have been part of a sample shipment intended for similar promotion in the Australian colonies or at Melbourne's International Exhibition to be held in 1880. A newspaper account of an 1864 tour of the Morgan brothers' 'Black Potteries' at Battersea indicates: "All the pots were numbered according to their contents, each number standing for one kilogram or a little over two pounds; a No. 2 crucible contains two kilograms; a No. 3, three kilograms, and so on." These numbers are obscured by marine sediment on three of the crucibles in the Flagstaff Hill collection, but those legible on the remaining three are 5, 6, and 8. None of the six is of the same size. A brief history of the Loch Ard (1873-1878): - The sailing ship Loch Ard was one of the famous Loch Line of ships that sailed the long voyage from England to Australia. Barclay, Curdle and Co. built the three-masted iron vessel in Glasgow in 1873. It had sailed three trips to Australia and one trip to Calcutta before its fateful voyage. Loch Ard left England on March 2, 1878, under the command of recently married, 29-year-old Captain Gibbs. It was bound for Melbourne with a crew of 37, plus 17 passengers. The general cargo reflected the affluence of Melbourne at the time. Onboard were straw hats, umbrellas, perfumes, clay pipes, pianos, clocks, confectionery, linen and candles, and a heavier load of railway irons, cement, lead and copper. Other cargo included items intended for display in the Melbourne International Exhibition of 1880. The Loch Ard had been sailing for three months and was close to its destination on June 1, 1878. Captain Gibbs had expected to see land at about 3 am but the Loch Ard ran into a fog that greatly reduced visibility and there was no sign of land or the Cape Otway lighthouse. The fog lifted at 4 am and the sheer cliffs of Victoria's west coast were much closer to them than Captain Gibbs expected. He tried to manage the vessel but failed and the ship struck a reef at the base of Mutton Bird Island, near Port Campbell. The top deck loosened from the hull, and the masts and rigging crashed down, knocking passengers and crew overboard. The lifeboat was launched by Tom Pearce but crashed into the side of Loch Ard and capsized. He clung onto its overturned hull and sheltered under it. He drifted out to sea and the tide brought him back to what is now called Loch Ard Gorge. He swam to shore and found a cave for shelter. A passenger, Eva Carmichael, had raced onto the deck to find out what was happening and was confronted by towering cliffs above the ship. She was soon swept off the ship by a huge wave. Eva saw Tom Pearce on a small rocky beach and yelled to attract his attention. He swam out and dragged her to the shelter of the cave. He revived her with a bottle of brandy from a case that had washed up on the beach. Tom scaled a cliff in search of help and followed some horse hoof prints. He came from two men from Glenample Station, three and a half miles away. He told the men of the tragedy and then returned to the gorge while the two men rode back to the station to get help. They reached Loch Ard Gorge and took the two shipwreck survivors to Glenample Station to recover. Eva stayed at the station for six weeks before returning to Ireland by steamship. In Melbourne, Tom Pearce received a hero's welcome and was presented with a medal and some money. Of the 54 crew members and passengers on board, only two survived: the apprentice, Tom Pearce and the young woman passenger, Eva Carmichael, who lost her family in the tragedy. The shipwreck of the Loch Ard is of significance for Victoria and is registered on the Victorian Heritage Register ( S 417). Flagstaff Hill has a varied collection of artefacts from Loch Ard and its collection is significant for being one of the largest accumulation of artefacts from this notable Victorian shipwreck of which the subject items are a small part. The collection's objects give us a snapshot of how we can interpret the story of this tragic event. The collection is also archaeologically significant as it represents aspects of Victoria's shipping history that allows us to interpret Victoria's social and historical themes of the time. Through is associated with the worst and best-known shipwreck in Victoria's history.This crucible is the smallest of three nested crucibles, or fluxing pots, numbered according to their size. These containers rise slightly from a smaller flat base to a wider open top with a lip for pouring. They were recovered from the wreck of the Loch Ard. The crucibles have a coating of sediment that obscures some of their numerical specifications of size and capacity. Made by the Patent Plumbago Crucible Company at the Battersea Works in London. The number on this crucible is obscured by the sticker.Stamped into side "MORGAN'S PATENT" Stemped into base "MORGAN'S PATENT" "THE PATENT PLUMBAGO CRUCIBLE COMPANY" Sticker "L 96"flagstaff hill, warrnambool, graphite crucible, plumbago crucible, morgan's crucible company, loch ard, morgan potteries, crucible, fluxing pot, nested crucibles, heat proof container, metal worker, maritime museum, shipwreck coast, flagstaff hill maritime village, great ocean road, loch line, morgans crucible company, flagstaff hill maritime museum and village, fluxing pots, morgan’s patent, morgan brothers, patent plumbago crucible co, battersea works, london, loch ard gorge, port campbell -
 Flagstaff Hill Maritime Museum and Village
Functional object - Crucible, The Patent Plumbago Crucible Company, circa 1878
... The Morgans imported crystalline graphite in 4-5 cwt casks from the British colony of Ceylon (now Sri Lanka) and mixed it with conventional English (Stourbridge) clays to be fired in kilns. ...The Morgans imported crystalline graphite in 4-5 cwt casks from the British colony of Ceylon (now Sri Lanka) and mixed it with conventional English (Stourbridge) clays to be fired in kilns. ...This crucible was raised from the wreck of the LOCH ARD. It is one of six similar relics, in a range of sizes, now in the Flagstaff Hill collection. All bear markings to indicate their manufacture by the Morgan brothers of Battersea, trading as the Patent Plumbago Crucible Co. A crucible is a container used for purifying and melting metals so that they can be cast in a mould to a predetermined shape and use. They must withstand extremely high temperatures, and abrupt cooling, and shed their contents with minimal adherence. The addition of graphite to the traditional firing clays greatly enhanced the durability of industrial crucibles in mid-Victorian Britain, a significant technological advance at a time of great activity in foundries and expansion of demand for refined metals. The Morgans first noticed the advantages of graphite crucibles at the Great Exhibition held in London in 1851. Initially, they contracted to be sole selling agents for the American-made products of Joseph Dixon and Co. from New Jersey, but in 1856 they obtained that firm’s manufacturing rights and began producing their own graphite crucibles from the South London site. The Morgans imported crystalline graphite in 4-5 cwt casks from the British colony of Ceylon (now Sri Lanka) and mixed it with conventional English (Stourbridge) clays to be fired in kilns. Their products were purchased by the Royal Mints in London and India, and exported to official mints in France and Germany. They were successful exhibitors of their crucibles and furnaces at the London Exhibition held in 1861 (Class 1, Mining, quarrying, metallurgy and mineral products, Exhibit 265, Patent Plumbago Crucible Co). The range of sizes represented by the six crucibles retrieved from the LOCH ARD, suggests they may have been part of a sample shipment intended for similar promotion in the Australian colonies ― at Melbourne’s International Exhibition to be held in 1880. The summary of the LOCH ARD cargo manifest, by Don Charlwood in ‘Wrecks and Reputations’, does not mention any crucibles, implying that they were not a large consignment of uniform items. A newspaper account of an 1864 tour of the Morgan brothers’ ‘Black Potteries’ at Battersea indicates: “All the pots were numbered according to their contents, each number standing for one kilogram, or a little over two pounds; a No. 2 crucible contains two kilogrammes; a No. 3, three kilogrammes, and so on.” These numbers are obscured by marine sediment on three of the crucibles in the Flagstaff Hill collection, but those legible on the remaining three are 5, 6, and 8. None of the six is of the same size from a visual appraisal. A brief history of the Loch Ard (1873-1878): - The sailing ship Loch Ard was one of the famous Loch Line of ships that sailed the long voyage from England to Australia. Barclay, Curdle and Co. built the three-masted iron vessel in Glasgow in 1873. It had sailed three trips to Australia and one trip to Calcutta before its fateful voyage. Loch Ard left England on March 2, 1878, under the command of recently married, 29-year-old Captain Gibbs. It was bound for Melbourne with a crew of 37, plus 17 passengers. The general cargo reflected the affluence of Melbourne at the time. Onboard were straw hats, umbrellas, perfumes, clay pipes, pianos, clocks, confectionery, linen and candles, and a heavier load of railway irons, cement, lead and copper. Other cargo included items intended for display in the Melbourne International Exhibition of 1880. The Loch Ard had been sailing for three months and was close to its destination on June 1, 1878. Captain Gibbs had expected to see land at about 3 am but the Loch Ard ran into a fog that greatly reduced visibility and there was no sign of land or the Cape Otway lighthouse. The fog lifted at 4 am and the sheer cliffs of Victoria's west coast were much closer to them than Captain Gibbs expected. He tried to manage the vessel but failed and the ship struck a reef at the base of Mutton Bird Island, near Port Campbell. The top deck loosened from the hull, and the masts and rigging crashed down, knocking passengers and crew overboard. The lifeboat was launched by Tom Pearce but crashed into the side of Loch Ard and capsized. He clung onto its overturned hull and sheltered under it. He drifted out to sea and the tide brought him back to what is now called Loch Ard Gorge. He swam to shore and found a cave for shelter. A passenger, Eva Carmichael, had raced onto the deck to find out what was happening and was confronted by towering cliffs above the ship. She was soon swept off the ship by a huge wave. Eva saw Tom Pearce on a small rocky beach and yelled to attract his attention. He swam out and dragged her to the shelter of the cave. He revived her with a bottle of brandy from a case that had washed up on the beach. Tom scaled a cliff in search of help and followed some horse hoof prints. He came from two men from Glenample Station, three and a half miles away. He told the men of the tragedy and then returned to the gorge while the two men rode back to the station to get help. They reached Loch Ard Gorge and took the two shipwreck survivors to Glenample Station to recover. Eva stayed at the station for six weeks before returning to Ireland by steamship. In Melbourne, Tom Pearce received a hero's welcome and was presented with a medal and some money. Of the 54 crew members and passengers on board, only two survived: the apprentice, Tom Pearce and the young woman passenger, Eva Carmichael, who lost her family in the tragedy. The shipwreck of the LOCH ARD is of State significance ― Victorian Heritage Register S417. Flagstaff Hill’s collection of artefacts from LOCH ARD is significant for being one of the largest collections of artefacts from this shipwreck in Victoria. It is significant for its association with the shipwreck, which is on the Victorian Heritage Register (VHR S417). The collection is significant because of the relationship between the objects, as together they have a high potential to interpret the story of the LOCH ARD. The LOCH ARD collection is archaeologically significant as the remains of a large international passenger and cargo ship. The LOCH ARD collection is historically significant for representing aspects of Victoria’s shipping history and its potential to interpret sub-theme 1.5 of Victoria’s Framework of Historical Themes (living with natural processes). The collection is also historically significant for its association with the LOCH ARD, which was one of the worst and best-known shipwrecks in Victoria’s history.A Morgan’s Patent graphite crucible No.8 (i.e. 8kgs capacity), one of a set. It was recovered from the wreck of the LOCH ARD. It is in its original grey colouring with minimal sediment accretion on the top rim. It rises in a slight curve from a flat circular base to a wider rim with a pouring lip. Maker’s marks on the side of the container clearly identify the manufacturer. The maker's details are stamped into the base around and within a circle. A white sticker is attached. Made by the Patent Plumbago Crucible Company at the Battersea Works in London. Number “8”. Letters “MORGAN’S PATENT”. Details on the base "MORGAN'S PATENT" "THE PATENT PLUMBAGO CRUCIBLE COMPANY" Symbol [8] above "BATTERSEA WORKS LONDON" Handwritten on a white sticker in black pen "LA/89"flagstaff hill, warrnambool, maritime museum, shipwreck coast, great ocean road, loch line, loch ard, captain gibbs, eva carmichael, tom pearce, glenample station, mutton bird island, loch ard gorge, graphite crucible, plumbago crucible, morgans crucible company, flagstaff hill maritime museum and village, fluxing pots, crucible, morgan’s patent, morgan brothers, patent plumbago crucible co, battersea works, london, port campbell -
 Flagstaff Hill Maritime Museum and Village
Functional object - Crucible, The Patent Plumbago Crucible Company, circa 1878
... The Morgans imported crystalline graphite in 4-5 cwt casks from the British colony of Ceylon (now Sri Lanka) and mixed it with conventional English (Stourbridge) clays to be fired in kilns. ...The Morgans imported crystalline graphite in 4-5 cwt casks from the British colony of Ceylon (now Sri Lanka) and mixed it with conventional English (Stourbridge) clays to be fired in kilns. ...This crucible was raised from the wreck of the LOCH ARD. It is one of six similar relics, in a range of sizes, now in the Flagstaff Hill collection. All bear markings to indicate their manufacture by the Morgan brothers of Battersea, trading as the Patent Plumbago Crucible Co. A crucible is a container used for purifying and melting metals so that they can be cast in a mould to a predetermined shape and use. They must withstand extremely high temperatures, and abrupt cooling, and shed their contents with minimal adherence. The addition of graphite to the traditional firing clays greatly enhanced the durability of industrial crucibles in mid-Victorian Britain, a significant technological advance at a time of great activity in foundries and expansion of demand for refined metals. The Morgans first noticed the advantages of graphite crucibles at the Great Exhibition held in London in 1851. Initially, they contracted to be sole selling agents for the American-made products of Joseph Dixon and Co. from New Jersey, but in 1856 they obtained that firm’s manufacturing rights and began producing their own graphite crucibles from the South London site. The Morgans imported crystalline graphite in 4-5 cwt casks from the British colony of Ceylon (now Sri Lanka) and mixed it with conventional English (Stourbridge) clays to be fired in kilns. Their products were purchased by the Royal Mints in London and India, and exported to official mints in France and Germany. They were successful exhibitors of their crucibles and furnaces at the London Exhibition held in 1861 (Class 1, Mining, quarrying, metallurgy and mineral products, Exhibit 265, Patent Plumbago Crucible Co). The range of sizes represented by the six crucibles retrieved from the LOCH ARD, suggests they may have been part of a sample shipment intended for similar promotion in the Australian colonies ― at Melbourne’s International Exhibition to be held in 1880. The summary of the LOCH ARD cargo manifest, by Don Charlwood in ‘Wrecks and Reputations’, does not mention any crucibles, implying that they were not a large consignment of uniform items. A newspaper account of an 1864 tour of the Morgan brothers’ ‘Black Potteries’ at Battersea indicates: “All the pots were numbered according to their contents, each number standing for one kilogram, or a little over two pounds; a No. 2 crucible contains two kilogrammes; a No. 3, three kilogrammes, and so on.” These numbers are obscured by marine sediment on three of the crucibles in the Flagstaff Hill collection, but those legible on the remaining three are 5, 6, and 8. None of the six is of the same size from a visual appraisal. A brief history of the Loch Ard (1873-1878): - The sailing ship Loch Ard was one of the famous Loch Line of ships that sailed the long voyage from England to Australia. Barclay, Curdle and Co. built the three-masted iron vessel in Glasgow in 1873. It had sailed three trips to Australia and one trip to Calcutta before its fateful voyage. Loch Ard left England on March 2, 1878, under the command of recently married, 29-year-old Captain Gibbs. It was bound for Melbourne with a crew of 37, plus 17 passengers. The general cargo reflected the affluence of Melbourne at the time. Onboard were straw hats, umbrellas, perfumes, clay pipes, pianos, clocks, confectionery, linen and candles, and a heavier load of railway irons, cement, lead and copper. Other cargo included items intended for display in the Melbourne International Exhibition of 1880. The Loch Ard had been sailing for three months and was close to its destination on June 1, 1878. Captain Gibbs had expected to see land at about 3 am but the Loch Ard ran into a fog that greatly reduced visibility and there was no sign of land or the Cape Otway lighthouse. The fog lifted at 4 am and the sheer cliffs of Victoria's west coast were much closer to them than Captain Gibbs expected. He tried to manage the vessel but failed and the ship struck a reef at the base of Mutton Bird Island, near Port Campbell. The top deck loosened from the hull, and the masts and rigging crashed down, knocking passengers and crew overboard. The lifeboat was launched by Tom Pearce but crashed into the side of Loch Ard and capsized. He clung onto its overturned hull and sheltered under it. He drifted out to sea and the tide brought him back to what is now called Loch Ard Gorge. He swam to shore and found a cave for shelter. A passenger, Eva Carmichael, had raced onto the deck to find out what was happening and was confronted by towering cliffs above the ship. She was soon swept off the ship by a huge wave. Eva saw Tom Pearce on a small rocky beach and yelled to attract his attention. He swam out and dragged her to the shelter of the cave. He revived her with a bottle of brandy from a case that had washed up on the beach. Tom scaled a cliff in search of help and followed some horse hoof prints. He came from two men from Glenample Station, three and a half miles away. He told the men of the tragedy and then returned to the gorge while the two men rode back to the station to get help. They reached Loch Ard Gorge and took the two shipwreck survivors to Glenample Station to recover. Eva stayed at the station for six weeks before returning to Ireland by steamship. In Melbourne, Tom Pearce received a hero's welcome and was presented with a medal and some money. Of the 54 crew members and passengers on board, only two survived: the apprentice, Tom Pearce and the young woman passenger, Eva Carmichael, who lost her family in the tragedy. The shipwreck of the LOCH ARD is of State significance ― Victorian Heritage Register S417 Flagstaff Hill’s collection of artefacts from LOCH ARD is significant for being one of the largest collections of artefacts from this shipwreck in Victoria. It is significant for its association with the shipwreck, which is on the Victorian Heritage Register (VHR S417). The collection is significant because of the relationship between the objects, as together they have a high potential to interpret the story of the LOCH ARD. The LOCH ARD collection is archaeologically significant as the remains of a large international passenger and cargo ship. The LOCH ARD collection is historically significant for representing aspects of Victoria’s shipping history and its potential to interpret sub-theme 1.5 of Victoria’s Framework of Historical Themes (living with natural processes). The collection is also historically significant for its association with the LOCH ARD, which was one of the worst and best-known ahipwrecks in Victoria’s history.A Morgan’s Patent graphite crucible No.4 (i.e. 4kgs capacity), one of a set of three. It was recovered from the wreck of the LOCH ARD. It is in its original grey colouring with minimal sediment accretion on the top rim. It rises in a slight curve from a flat circular base to a wider rim with a pouring lip. Maker’s marks on the side of the container clearly identify the manufacturer. The maker's details are stamped into the base around and within a circle. A white sticker is attached. Made by the Patent Plumbago Crucible Company at the Battersea Works in London.Number or. Letters “MORGAN’S PATENT”. Details on the base "MORGAN'S PATENT" "THE PATENT PLUMBAGO CRUCIBLE COMPANY" Symbol [4] above "BATTERSEA WORKS LONDON" Handwritten on a white sticker in black pen "L89"flagstaff hill, warrnambool, flagstaff hill maritime museum, maritime museum, shipwreck coast, flagstaff hill maritime village, great ocean road, loch line, loch ard, captain gibbs, eva carmichael, tom pearce, glenample station, mutton bird island, loch ard gorge, graphite crucible, plumbago crucible, morgan's crucible company, flagstaff hill maritime museum and village, fluxing pots, crucible, morgan’s patent, morgan brothers, patent plumbago crucible co, battersea works, london, port campbell -
 City of Melbourne Libraries
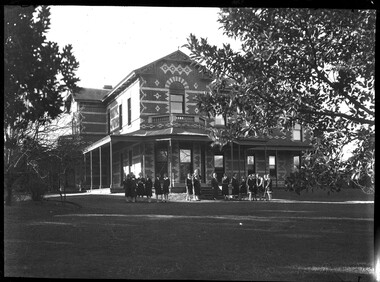
Photograph, Bull, Hugh Jones, 1897-1993, Ruyton Girls School 1933
... The family had a focussed commitment to creating thriving businesses in Australia, despite being regularly thwarted by legislative pushbacks and law changes, instigated in Britain as the Australian colony developed. Areas of greatest influence were merino sheep, beef and horse breeding, whaling, farm establishment, membership of the legal and political fraternities, sporting prowess, and board directorships in banking and railways. ...The family had a focussed commitment to creating thriving businesses in Australia, despite being regularly thwarted by legislative pushbacks and law changes, instigated in Britain as the Australian colony developed. Areas of greatest influence were merino sheep, beef and horse breeding, whaling, farm establishment, membership of the legal and political fraternities, sporting prowess, and board directorships in banking and railways. ...Published: Age (Melbourne, Vic.: 1854- ), 4 August 1933, page 3 Published title: GIRLS’ SCHOOLS – MODEL YACHTING - FOOTBALL Published caption: The headmistress, Miss H. Daniell, and girls at Ruyton, Selbourne Road, Kew, snapped after school hours. Trove article identifier: http://nla.gov.au/nla.news-article204381763 Research by Project Volunteer, Louise McKenzie: Rather than the people, this charming building takes the eye! Originally named “Tarring”, it was built in 1872 by Mr Henry Henty and his wife Mrs Marion Anne Henty (nee McKellar) for their family. Located at 82 Selbourne Road, Kew, it is described by Melbourne’s Open House organisation as “… a two-storey, polychrome brick mansion built for them by prominent Melbourne architect Albert Purchas. The house and nearly four acres of grounds served as their family home until the death of Marian Henty in 1919. “ (See below for further information on Albert Purchas.) In 1920 it was sold to Ruyton Girls School. Ruyton was established in 1878 by its first principal, Charlotte Anderson (1838-1906), who named it in honour of the parish in Shropshire, England, Ruyton-XI-Towns, where her great-great-grandfather David Evans had been vicar. Its motto is Recte et Fideliter, meaning "Upright and Faithful", which is also the name of the school song. The original school, one of Victoria’s oldest independent schools for girls, was located at the home of Mrs Anderson at 63 High Street South, Kew. In 1882 she moved the school to Edgecombe in Studley Park Road. Mrs Anderson retired due to ill health and sold the school to her friend Miss Eliza Bromby. One of Ruyton's four Houses, Anderson, is named for Charlotte Anderson. When Ruyton Girls School was moved to the site in 1920 it established the building as a Boarding House, and renamed the building “Henty House” in honour of its original owners. Today the school remains an all girls’ school, and pays tribute to its founder and the historic significance of Henty House and its magnificent Moreton Bay Fig tree, which still stands today. The building retains many original, Victorian-era features, while also showing the layers of change, made over the decades in order to meet the evolving needs of one of Melbourne’s leading schools. The headmistress mentioned in the caption for MCK016 is Miss Hilda Daniell, shown standing in front of Henty House in the midst of a group of Ruyton girls in their school uniforms, some holding hockey sticks. Miss Daniell was the longest serving Principal of Ruyton 1913-1952. She was originally a student in 1893, then joined the teaching staff in 1898. It was under her leadership that the School purchased and moved to “Tarring”. The boarding house included a flat for Hilda to live onsite. An article in the Ruyton Heritage Collection – Bedford Series, dated 21 May 2021 cites that Miss Daniell “was affectionately known as “Dream” by Ruytonians of her era” apparently due to a tendency to quiet reflection. The article continues, “After her retirement in 1952 Miss Daniell was awarded an Order of the British Empire for her many services to education, an award she received from the hands of the Queen during the 1954 Royal Tour. Also in 1952, the Kew Council honoured her by renaming Brougham Place as ‘Daniell Place’.” Arthur Purchas, architect: The architect responsible for the design of “Tarring”. Arthur Purchas, was extremely active and highly regarded at this time. Born in Wales in 1825, he emigrated to Melbourne in 1851 and soon established a private practice as a surveyor and architect, with offices variously in Little Collins, Queen Street, Chancery Lane, and finally 462 Little Collins Street. Wikipedia notes in an early reference to Purchas that “An early story is that one of his first jobs, when he would have been about 25 years old, was a position under Surveyor-General Robert Hoddle, and disagreeing with him over the line for St Kilda Road, appealed to Governor La Trobe, and successfully got the road diverted around the hill which eventually became the site of the Shrine of Remembrance. There may not be much truth to this, since by 1851 St Kilda Road was already a well worn track running around the hill, the top of which La Trobe had reserved for a Government House in 1840.” The timing of Purchas’s arrival in Melbourne was perfect. The Victorian gold rush of the 1850’s generated enormous wealth in Melbourne, and a building boom followed. The Wikipedia entry continues … that alone, or with his brother in law Charles R Swyer, “Purchas is said to have designed over 140 houses, offices, churches, banks and cemetery buildings in Victoria in his long career. Berkely Hall, St Kilda dating from 1854 is one of his first buildings, and still exists, though the original house is obscured by an early C20th verandah. Another notable early design was the head office of the Melbourne Savings Bank, built on the corner Flinders Lane and Market Street in 1857-58, in an elaborately detailed Renaissance Revival style. His churches were mostly Gothic Revival, built for the Anglican Church, along with some parsonages, while most of the bank buildings were Renaissance Revival designs for the Bank of Australasia. He also designed city buildings in the 1860s and 70s, such as the Mutual Insurance Co, Northern Insurance Co, and the first premises for George & George, destroyed by fire in 1889. One of his most outstanding designs is St George's Presbyterian Church in Chapel Street, St Kilda (1877–80), in a striking polychrome brick Gothic Revival style, unusually carried on through to the interior. Purchas produced one of the few published maps and compilations of the early pastoral settlers runs in Victoria in 1853. In the same year he designed the layout of the Melbourne General Cemetery, the first 'garden' cemetery in Victoria, a curvilinear layout with extensive plantings, as well as the gate lodge and gates (the gates lodge were demolished and the gates relocated to their present position in the 1930s). He was a long time member of the Cemetery Trust, serving as secretary from 1876-1886. He was also Chairman of the Boroondara General Cemetery Board of Trustees 1867 to 1909, and designed many aspects of the cemetery, including the landscape, the cast iron entrance gates (1889), the rotunda (1890) and the surrounding brick wall (1895–6). Purchas was a keen inventor having applied for a patent for an invention for lighting a railway carriage with gas in 1861, and won a competition for a model farm complex, in 1862. This unusual design had the dairy either underground or half underground, to keep it cool, with a 'dry lining' around the outside of the sunken portions. In 1883, with fellow architect Alfred Smith, he took out a patent for fire-proof floors, arches, staircases and other parts of buildings.” Purchas died in his home in Kew in 1909 and, not surprisingly, was buried at Boroondara Cemetery. Henty family history in Australia: Henry Henty (b.1833-d.1912) was a successful businessman, and briefly a MLA for the seat of Grenville, Victoria in 1866. He was one of three sons of James Henty, and nephew of Edward Henty who is considered to be the first permanent European colonist to take up residence in Victoria. The Australian Dictionary of Biography provides a riveting overview of the complex and enthusiastic activities of the Henty family, and its entanglement in the development of mercantile life in WA, Tasmania, SA and Victoria from 1828 onwards. The family had a focussed commitment to creating thriving businesses in Australia, despite being regularly thwarted by legislative pushbacks and law changes, instigated in Britain as the Australian colony developed. Areas of greatest influence were merino sheep, beef and horse breeding, whaling, farm establishment, membership of the legal and political fraternities, sporting prowess, and board directorships in banking and railways. The Dictionary of Biography summarises: “As settlers the Henty men were notable not merely for being the first to settle in Victoria but also for their number and quality: a father and seven educated sons experienced in farming and trading, occupations of prime importance to a new colony, and importers of unusually substantial capital in money, skilled workers and thoroughbred stock.” As well as Tarring, the Henty family Melbourne residences included Findon (in Kew, overlooking Studley Park), Offington (St Kilda Road overlooking Albert Park) and Field Place (Henty Court, Kew), and descriptions of the houses in Wikipedia –Melbourne Architecture 1870s - reflect the development of Melbourne society. References RUYTON (1934, December 15). The Argus (Melbourne, Vic. : 1848 - 1957), p. 18. Retrieved March 12, 2025, from http://nla.gov.au/nla.news-article11001092 https://en.wikipedia.org/wiki/Ruyton_Girls%27_School#:~:text=Ruyton%20Girls'%20School%2C%20commonly%20referred,of%20Melbourne%2C%20Victoria%2C%20Australia. https://www.ruyton.vic.edu.au/our-school#:~:text=With%20an%20international%20reputation%20as,opportunity%20and%20challenge%20for%20girls. https://victoriancollections.net.au/items/5bea06b121ea690bf4eb08ed https://www.ruyton.vic.edu.au/our-school/campus-and-facilities Biography of Edward Henty and family: https://adb.anu.edu.au/biography/henty-edward-2247 Article on Offington House: http://nla.gov.au/nla.news-article196554993 Article on Field Place House : https://vhd.heritagecouncil.vic.gov.au/places/64881 Article on Findon: https://www.facebook.com/KewHistoryGroup/posts/in-the-book-jubilee-history-of-kew-1803-1910-by-fga-barnard-there-is-a-photo-of-/4389837914376555/ Charlotte Anderson/Ruyton: https://victoriancollections.net.au/items/5be4b8c821ea6a039c7a13e3 https://victoriancollections.net.au/items/6179e90da912eb195970bdf8 https://victoriancollections.net.au/items/5bea06b121ea690bf4eb08ed https://victoriancollections.net.au/items/65d3e05c5b5e5c61346420a2 Photo of Charlotte Anderson: https://viewer.slv.vic.gov.au/?entity=IE1515776&mode=browse Photo of Charlotte Anderson: https://victoriancollections.net.au/items/6179e90da912eb195970bdf8 https://victoriancollections.net.au/items/5be4b8c821ea6a039c7a13e3 Wikipedia: Architecture of Melbourne: https://en.wikipedia.org/wiki/Architecture_of_Melbourne Open House Melbourne: Henty House: https://www.universe.com/events/henty-house-ruyton-girls-school-tickets-Z45LYH Albert Purchas: https://en.wikipedia.org/wiki/Albert_Purchas Leader (Melbourne, Vic. : 1862 - 1918, 1935), Saturday 3 June 1876, page 9 – Article on Offington http://www.ohta.org.au/organs/organs/BoxHillUC.html Melb Architecture 1870s - Wikipedia Victorian Collections: Letters of Hilda Daniell https://victoriancollections.net.au/items/65d3e05c5b5e5c61346420a2 Photographer notations on slide: "Ruyton Girls School 1933".schools, 1930-1939, architecture, victorian architecture, trees, architects -
 Warrnambool and District Historical Society Inc.
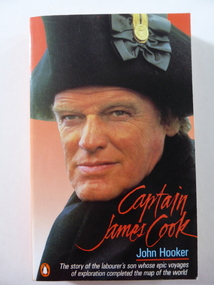
Book, Penguin Books, Captain James Cook, 1987
... The voyages of Captain Cook are of prime importance in Australia’s history as his discoveries and positive reports of the east coast of Australia led eventually to Britain’s decision to establish a penal colony in New South Wales....The voyages of Captain Cook are of prime importance in Australia’s history as his discoveries and positive reports of the east coast of Australia led eventually to Britain’s decision to establish a penal colony in New South Wales. ...The story of Captain Cook based on the screenplay by Peter Yeldham.This is a soft cover book of 258 pages. The cover is mainly red and blue and features on the front cover a colour photograph of Keith Michell, the actor portraying Captain Cook in the A.B.C. film production. The back cover has a summary of the life of Captain Cook and a small colour photograph of a film scene of Captain Cook with some Pacific Islanders. The book has a Prologue, three chapters and an Epiloguenon-fictionThe story of Captain Cook based on the screenplay by Peter Yeldham.john hooker, captain james cook, history of australia, warrnambool history -
 Warrnambool and District Historical Society Inc.
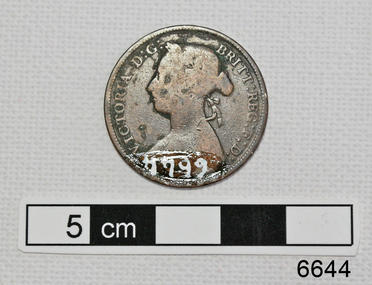
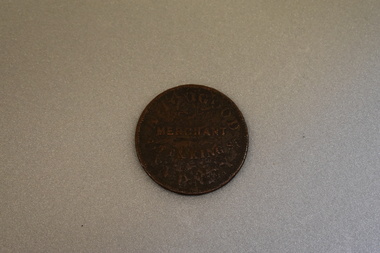
Coin, English Coin 1851, 1851
... This coin has no known local provenance but would have used in the colony of Victoria including Warrnambool in 1851 and beyond. It will be useful for display. british coins Obverse VICTORIA. ...This coin was minted in England in 1851 and is believed to be a penny.This coin has no known local provenance but would have used in the colony of Victoria including Warrnambool in 1851 and beyond. It will be useful for display.Circular copper coin. The obverse features a slightly raised profile of Queen Victoria and text. The reverse features a slightly raised profile of Britannia and text.Obverse VICTORIA. DEI. GRATIA 1851 Reverse BRITANNIAR; REG; FID; DEFbritish coins -
 Warrnambool and District Historical Society Inc.
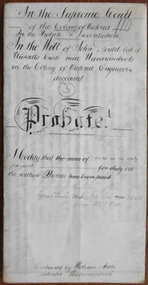
Document - John Gould Probate 1891, 1891
... British Empire. Tait collection: item 10 of 62 This document is of interest in that it includes information on a resident of Russells Creek in the Warrnambool area, and also the lawyer concerned is William Ardlie, one of the best-known identities in Warrnambool in the late 19th and early 20th centuries. john gould william ardlie warrnambool ‘In the Supreme Court of the Colony of Victoria in the probate jurisdiction in the Will of John Gould, late of Russells Creek near Warrnambool in the Colony of Victoria, Engineer, deceased, Probate. ...This 1891 document contains the information on the Will and Probate of John Gould, an engineer from Russells Creek. No information has been found on John Gould except that he died in October 1890 at the age of 67. The solicitor, William Ardlie was a well-known Warrnambool lawyer, commencing a practice in 1865 and continuing well into the 20th century making him at the time one of the longest-serving lawyers in the British Empire. Tait collection: item 10 of 62This document is of interest in that it includes information on a resident of Russells Creek in the Warrnambool area, and also the lawyer concerned is William Ardlie, one of the best-known identities in Warrnambool in the late 19th and early 20th centuries.This is an 1891 piece of parchment folded in half to give four pages of written material. This material is handwritten in black ink. A seal of the Supreme Court of the Colony of Victoria is attached with a green ribbon. The document is somewhat discoloured. ‘In the Supreme Court of the Colony of Victoria in the probate jurisdiction in the Will of John Gould, late of Russells Creek near Warrnambool in the Colony of Victoria, Engineer, deceased, Probate. I certify that there is no duty payable. J. F. Poole, Officer under Section 96, Act 1060, June 23rd 1891. Extracted by William Ardlie, Solicitor, Warrnambool’. john gould, william ardlie, warrnambool -
 Bendigo Military Museum
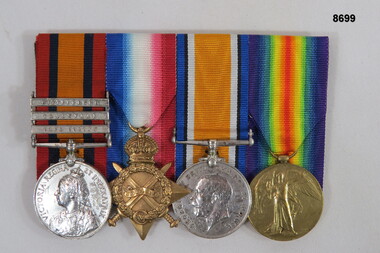
Award - MEDAL SET BOER WAR, WW1, Post 1902, Post 1919
... Colony". On the other 3 medals, "9822 PTE J. CLARKE, S.STAFF.R." Medals, set of four (4) mounted. Queen's South Africa Medal with three (3) clasps, 1914-15 Star, British War Medal 1914-18 Victory Medal 1914-19. ...Medals, set of four (4) mounted. Queen's South Africa Medal with three (3) clasps, 1914-15 Star, British War Medal 1914-18 Victory Medal 1914-19.On the Queen's South Africa Medal, "2540 Cpl J. CLARKE, S.STAFFORD RGT", On the three clasps, "Witterbergen", "Transvaal", "Cape Colony". On the other 3 medals, "9822 PTE J. CLARKE, S.STAFF.R."pte j. clarke, bob english collection, medals, boer war, ww1, pbt92to93, passchendaele barracks trust -
 Kiewa Valley Historical Society
Mincer Meat, early to mid 1900's
... This was before World War II and the "growing up" of a colony to an independent member of "the British Commonwealth". It was a period when most appliances (be they household) where manufactured in England and shipped to Australian ports. ...This was before World War II and the "growing up" of a colony to an independent member of "the British Commonwealth". It was a period when most appliances (be they household) where manufactured in England and shipped to Australian ports. ...This cast iron kitchen appliance was made in England in the early 1900's and shipped to the "colony" Australia. This was before World War II and the "growing up" of a colony to an independent member of "the British Commonwealth". It was a period when most appliances (be they household) where manufactured in England and shipped to Australian ports. It was not until the late 1960's that the Asian manufacturing giant woke up and started to dominate the market palce.This domestic kitchen appliance is very significant to the Kiewa Valley because it highlights the "made at home" period when food processing was made "in house" due to inability to source food from specialised shops e.g. the butcher or slaughter houses. It was a period before mass food processing factories were established and roads constructed up to the standard for distribution to semi remote regions such as Kiewa Valley was in the beginning of the 1900's.This cast iron (malleable iron) mincer for meat products has a large "funnel" to direct "chunks" of meat to the grinding "wheels". These "star" shaped wheels with "teeth" of three different cutting surfaces (fine, medium and coarse) provide for texture types of the final meat product. The meat is placed into the "loading" funnel and push downwards(gravity feed) through the mincing chamber and out through the front side. There is a long "screw worm" which is rotated by turning the handle. The appliance is table mounted by a vice "G" screw on clamp (hand operated). "BEATRICE No. 3" and "MADE IN ENGLAND", "P 3181"household cast iron appliances, food processors -
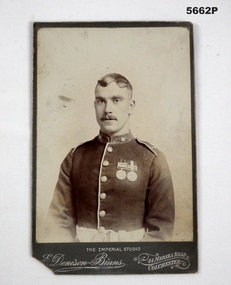 Bendigo Military Museum
Photograph - PHOTOGRAPH, BRITISH SOLDIER, POST BOER WAR, E. Dennison- Binns, c1899-1903
... British Army Boer, South Africa. He was NR 4886 Suffolk Regiment DOB c1878. POB White Chapel, London. Served 1899-1902 Cape Colony, Colesberg, Transvaal - with the Mounted Infantry. ...British Army Boer, South Africa. He was NR 4886 Suffolk Regiment DOB c1878. POB White Chapel, London. Served 1899-1902 Cape Colony, Colesberg, Transvaal - with the Mounted Infantry. ...Believed to be "George Goulding No. 4886" Britain. The collar badge is that of the Suffolk Regiment. Service of George Frederick Goulding, British Army Boer, South Africa. He was NR 4886 Suffolk Regiment DOB c1878. POB White Chapel, London. Served 1899-1902 Cape Colony, Colesberg, Transvaal - with the Mounted Infantry. WW1 - DOE 11 Dec 15, Middlesex Regiment 5 Bm. (A Reserve Bn). Discharged from Middlesex 19 Apr 1916. M.U. Number 1710 Pte. The British I.W.M. also shows he served in the Royal Field Artillery in WW1. That info is not available. Rank Gunner NR L/10626.This is a black and white portrait of a British soldier waist upwards. He is in uniform, wearing two medals. One medal on the soldier has 3 bars, the other has 2 bars. His belt is probably white. The badges on his collar appear to be a Castle with gate. The soldier is hatless. The photo is glued onto a cardboard surround.The bottom of the cardboard backing has written in white ink "The Imperial Studio - E. Dennison. Binns, 44 Measea Road, Colchester"boer war, south africa, british soldier -
 Kiewa Valley Historical Society
Box Starch, Pre decimal currency date(14th February 1966)
... British values and norms lingered on well beyond the changes happening in city fashion. Tradition and English "ties" were the backbone of early colonies and it was only after World War II that these "ties" were becoming irrelevant. Early traditions lingered well past the independence sought by Federation, colony ...This brand of starch was first manufactured before 1966 and covered the period when Australian made was the preferred clothing due to limited imports from England. This was a period when the demand for "home grown" produce was at its peak. This was in a time when by necessity and ease of supply and not by the "Buy Australian" campaign (of later years), was the major factor for the demand of these type of laundry goods. It was in a time when starch was used in formal clothing to put a "crisp" or fresh new appearance for clothes. This product was in the era and importantly the social more of "clothes make the person" in which starched shirts and dresses was the fashion vogue. Formality of dress was a strictly British "class" up-man-ship which from the 1950's onwards became less and less visible. The Australian "Ocker" or fair "dink'm" bloke became more entrenched after World War II. The national identity was slowly developing.This box of starch is very relevant to the Kiewa Valley because this box highlights the differences ,in this period, between city and rural social standards. Rural areas were deeply entrenched into colonial and the pioneer family structure viz- a-vie social and dress fashion standards. British values and norms lingered on well beyond the changes happening in city fashion. Tradition and English "ties" were the backbone of early colonies and it was only after World War II that these "ties" were becoming irrelevant. Early traditions lingered well past the independence sought by Federation, colony to statehood and trade with other nations eg. USA and Asia. The idea that a change in "status" would automatically change the social mores of Australians, especially in rural ares, was not fully grasped by the "law makers" and those wanting change.This box (capacity 12 ozs) has white(aged into cream) and blue printing and a "white star" on five sides, the sixth side has a laundry scene with two ladies, in early 1900's fashion. The package is made from 200 gsm thick cardboard. As manufacture was made before and during the two World Wars 1914 to 1945 the promotion was heavily focused on Australian made and Australian grown maize. One side of the box has instructions of use and all the other sides are promotional, detailing "the best in the world and won't stick to the iron""SILVER STAR", "THE BEST IN THE WORLD", "WON'T STICK TO THE IRON", "REQUIRES NO BOILING", INSTRUCTIONS FOR USE", "ROBERT HARPER AND COMPANY LIMITED", "INCORPORATED IN VICTORIA, AUSTRALIA", "NET WEIGHT 12 OUNCES", "LARGE BOX 12 OZS"domestic laundry essentials, cotton clothing preparations, household starch "crisp and neat appearances. -
 Kiewa Valley Historical Society
Necklace Silver Lover's Knot, circa late 1800's
... Colony" before the Australian Federation was enacted. This was a time when very close "bondage" between Australia and England was shown by the amount of "quality" products that were purchased, and the motto "Best of British" was truly still entwined in all aspects of rural live, from "British" mores and values "inherited from the "colonial days". ...Colony" before the Australian Federation was enacted. This was a time when very close "bondage" between Australia and England was shown by the amount of "quality" products that were purchased, and the motto "Best of British" was truly still entwined in all aspects of rural live, from "British" mores and values "inherited from the "colonial days". ...This "lovers" necklace is made from Sterling Silver and was imported into "the Colony" before the Australian Federation was enacted. This was a time when very close "bondage" between Australia and England was shown by the amount of "quality" products that were purchased, and the motto "Best of British" was truly still entwined in all aspects of rural live, from "British" mores and values "inherited from the "colonial days". It was only after World War II (when Britain could not help to defend Australia from the Japanese) that these long held mores were, through generations and generations, that the USA and Asian markets and goods replaced the "old" ties.This ladies silver necklace is very significant to the Kiewa Valley because it demonstrates the "rural" mores and values at a time(1800's to mid 1900's) when the "gap" between city and rural mores was very pronounced. That gap was maintain only through the degree of "isolation" (communication and physical interactions) between the two major types of "communities" and the evolving mores which each of them were going through. The social structure was just as pronounced in rural areas as it was in the cities. Fine jewelry was a "sparkling" affirmation of status and "wealth". The rural sectors had very wealthy sectors before the World Wars, when "Australia" was riding "on the sheep's back", but the increased mineral wealth exports and "big" industry of the cities started to forge ahead.This necklace is made from sterling silver and has four double bar and six lover's knots coupled to a silver chain. There is one silver double bar missing and may have been removed to reduce the length of the necklace. Sterling silver Hallmarks and Makers marks are stamped on the links and the clasp. The meaning of the horizontal twin bars have not yet been interpreted .Hall marks "PWC" and "AA"necklace, jewellery, sterling silver, lovers knot