
Showing 50 items matching "colour ease"
-
 Federation University Historical Collection
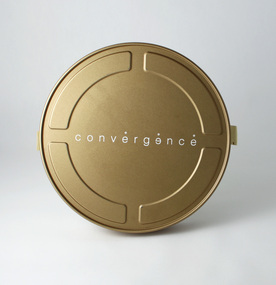
Container - Film canister, Convergence, 1998
... ...Colour ease...Bronze-gold circular metal "film canister" with the word "convergence" applied to lid using "Colour Ease" system available at university at the time. ..."Convergence" wording hand applied using Colour Ease method. Small white labels holding lid on (no tack remains)....University of Ballarat Federation University Graphic Design Helmut Stenzel Colour ease Bronze-gold metal film canister. "Convergence" wording hand applied using Colour Ease method. ...Bronze-gold circular metal "film canister" with the word "convergence" applied to lid using "Colour Ease" system available at university at the time. This was essentially a way for Ballarat design students to produce their own transferable graphics and was often applied to packaging. The metal canister is filled with coffee beans, CD Rom, brochure, a coaster and poster. Some invitees received gold-bronze canisters, some received silver.Bronze-gold metal film canister. "Convergence" wording hand applied using Colour Ease method. Small white labels holding lid on (no tack remains).university of ballarat, federation university, graphic design, helmut stenzel, colour ease -
 Federation University Historical Collection
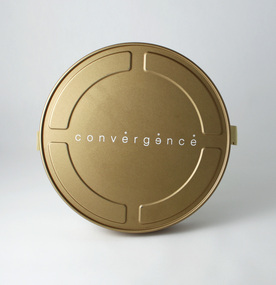
Container - Invitation gift, Convergence, 1998
... Bronze-gold circular metal "film canister" with the word "convergence" applied to lid using "Colour Ease" system available at university at the time. ...Bronze-gold circular metal "film canister" with the word "convergence" applied to lid using "Colour Ease" system available at university at the time. ...Bronze-gold circular metal "film canister" with the word "convergence" applied to lid using "Colour Ease" system available at university at the time. This was essentially a way for Ballarat design students to produce their own transferable graphics and was often applied to packaging. The metal canister is filled with coffee beans (a theme continued on the accompanying CD Rom). Some invitees received gold-bronze canisters, some received silver. A silver plastic sleeve, printed one colour white, holds a Macintosh and Windows compatible (at the time) CD Rom, itself printed two colours (white and black). Also in the plastic sleeve is a ten page roll-fold brochure, printed in two colours (black and a metallic silver-blue). Refer item 29164.2 for screen captures from CD Rom. In addition, the canister contains a coaster, printed in single colour brown, with the appearance of a coffee cup stain, and the word "convergence". This provides the actual exhibition details, including sponsors. Also included is an exhibition poster, single colour (black) offset print on newsprint. Opening held Thursday 12 November 1998, 6.00pm at Chapel Off Chapel, 12 Little Chapel Street, Prahran (Melbourne). Exhibition was then open daily until 23 November 1998. The exhibition was opened by Jonathan Barnbrook, UK type designer, who was also external assessor for the graduating students that year.Limited run, complete pack sent as invitation to graphic design community to attend the opening of the third year Graphic Design graduate exhibition, 1998. Bronze-gold metal film canister containing invitation coaster, event poster, CD Rom catalogue of student work, brochure and coffee beans.university of ballarat, federation university, graphic design, helmut stenzel -
 Bendigo Military Museum
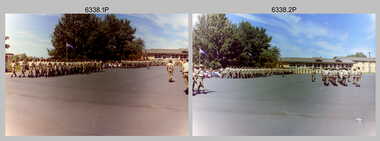
Photograph - Army Survey Regiment – CO’s Parade and Defence Force Service Medal Presentations, c1987
... RSM WO1 Jeff Lynch delivering orders. .5) - Photo, colour, c1987. Officers at ease in readiness to take posts. .6) - Photo, colour, c1987. ...RSM WO1 Jeff Lynch delivering orders. .5) - Photo, colour, c1987. Officers at ease in readiness to take posts. .6) - Photo, colour, c1987. ...These 34 photographs were taken at a CO’s parade at the Army Survey Regiment, Bendigo in c1987. The Colonel Commandant (honorary appointment) of the Survey Corps - COL Clem Sargent (Retd), presented the Defence Force Service Medal to four personnel in recognition of 15 years of efficient remunerated service, or the Clasp for 5 years of additional service. Recipients were WO1 Neville Stone and three unidentified support staff from the Australian Army Catering Corps, Royal Australian Electrical and Mechanical Engineers and the Royal Australian Corps of Transport. This is a set of 34 photographs of a CO’s parade and the presentation of the Defence Force Service Medal, at the Army Survey Regiment, Bendigo in c1987. The colour photographs are on 35mm negative film and are part of the Army Survey Regiment’s Collection. The photographs were scanned at 96 dpi. .1) to 2) - Photo, colour, c1987. Squadrons marching on parade ground. .3) to .4) - Photo, colour, c1987. Squadrons formed up on parade ground. RSM WO1 Jeff Lynch delivering orders. .5) - Photo, colour, c1987. Officers at ease in readiness to take posts. .6) - Photo, colour, c1987. Squadrons formed up on parade ground. RSM WO1 Jeff Lynch delivering orders. .7) - Photo, colour, c1987. RSM WO1 Jeff Lynch handing over to 2IC MAJ Terry Edwards. .8) - Photo, colour, c1987. Officers marching on to take posts. .9) - Photo, colour, c1987. L to R: CPL Paul Richards, SPR Todd Reynolds, SPR Eric Nicholson, MAJ Roger Rix, CPL Steve Hill, unidentified, CPL Russ Mollenhauer, remainder. .10) - Photo, colour, c1987. Guest of Honour - COL COMDT COL Clem Sargent arrives on parade ground, remainder unidentified. .11) - Photo, colour, c1987. Army Survey Regiment ready to salute Guest of Honour - COL COMDT COL Clem Sargent. .12) - Photo, colour, c1987, Guest of Honour - COL COMDT COL Clem Sargent returns salute. .13) - Photo, colour, c1987, L to R: 2IC MAJ Terry Edwards, SPR Eric Nicholson, COL COMDT COL Clem Sargent, SGT John ‘Stormy’ Tempest, unidentified (x2), SGT Mal Paterson, SGT Kevin Boehm, SSGT Peter Mustart, CPL Trevor Poll, SGT Terry Danger. .14) - Photo, colour, c1987, In left foreground MAJ Bob McHenry, unidentified personnel, unidentified officer, 2IC MAJ Terry Edwards, COL COMDT COL Clem Sargent, 3rd from right CAPT Graeme Wastell, CPL John Martin, SGT Martin Evans. .15) - Photo, colour, c1987, L to R: unidentified personnel, unidentified officer, 2IC MAJ Terry Edwards, COL COMDT COL Clem Sargent, SSGT Rick Van der Bom, CPL Paul Hunter, unidentified personnel, CAPT Graeme Wastell, SGT Paul Leskovec CSM, CPL John Martin, SGT Paul Cheater, SGT Martin Evans. .16) - Photo, colour, c1987, L to R: SGT Martin Evans. 2IC MAJ Terry Edwards, unidentified officer, COL COMDT COL Clem Sargent, unidentified personnel, SGT Paul Leskovec CSM, SGT Paul Cheater, SSGT Brian Collings, SSGT Ian ‘Rock’ Thistleton, WO1 Stevo Hinic. .17) - Photo, colour, c1987, L to R: unidentified personnel, 2IC MAJ Terry Edwards, COL COMDT COL Clem Sargent, SGT Roger Rees, unidentified female officer, SGT Phil Smalley, CPL Steve Coulsen, SPR Toni Wright, SGT Steve Gloster, SSGT Ken Talbot-Smith, CPL Darren Wilkinson, unidentified, SGT Paul Hopes. .18) - Photo, colour, c1987, L to R: unidentified female officer, COL COMDT COL Clem Sargent, unidentified, SGT Phil Smalley, CPL Steve Coulsen, SPR Toni Wright, CPL Steve Gloster, SSGT Ken Talbot-Smith, CPL Darren Wilkinson, SGT Paul Hopes. .19) - Photo, colour, c1987, L to R: unidentified personnel, CPL Peter ‘Jack’ Elverd, 2IC MAJ Terry Edwards, COL COMDT COL Clem Sargent, unidentified, SGT Stuart Hibbert, unidentified, Ted Burgess. .20) - Photo, colour, c1987, L to R: unidentified officer, COL COMDT COL Clem Sargent, 2IC MAJ Terry Edwards. .21) - Photo, colour, c1987, L to R: unidentified (x3), WO1 Neville Stone, COL COMDT COL Clem Sargent, SSGT Greg Anderson, unidentified officer, CAPT Graeme Wastell. .22) to .24) - Photo, colour, c1987, L to R: unidentified (x3), WO1 Neville Stone, COL COMDT COL Clem Sargent, SSGT Greg Anderson, unidentified officer. .25) to .26) - Photo, colour, c1987, L to R: unidentified, WO1 Neville Stone, unidentified, COL COMDT COL Clem Sargent, SSGT Greg Anderson, unidentified officer. .26) to 30) - Photo, colour, c1987, L to R: unidentified (x2), WO1 Neville Stone, COL COMDT COL Clem Sargent, SSGT Greg Anderson, unidentified officer. .31) to .34) - Photo, colour, c1987, L to R: unidentified, WO1 Neville Stone, COL COMDT COL Clem Sargent, unidentified officer..1P to .34P – There are no personnel identified.royal australian survey corps, rasvy, army survey regiment, army svy regt, fortuna, asr -
 Flagstaff Hill Maritime Museum and Village
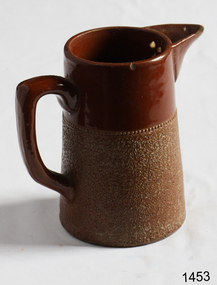
Domestic object - Jug
... We use commercial Mayco glazes on purpose – for their huge range of colour possibilities, stability, cool interactions, artistic freedom with the ability to easily brush the glazes on and ease of use. ...We use commercial Mayco glazes on purpose – for their huge range of colour possibilities, stability, cool interactions, artistic freedom with the ability to easily brush the glazes on and ease of use. ...The Process of Making Pottery Decorating, Firing, Glazing, Making, Technical There is a rhythm and flow to clay. It can’t be done all at once! Even the making process! It can take weeks to get everything done, especially if you can only work on your pottery once a week! Even though we have three hour classes, it’s often just not enough time! Here is an overview of some of the processes so you have a bit more grasp on some of the technical stuff! Step One – Design There are SO many ideas out there for making stuff in clay! From delicate porcelain jewellery, through to heavy sculptural work and everything in between. Deciding your direction is sometimes not that easy – when you first start, try everything, you will naturally gravitate to the style that you enjoy! The options and variations are endless and can get a wee bit overwhelming too! Check in with me before you start to ensure your ideas will work, what order you might do things, how you could achieve the look you are seeking and any other technical data required! Step Two – Making Clay is thixotropic. This means that as you work with it, the clay first gets sloppier and wetter, before is begins to dry in the atmosphere. For most things, you simply can’t do all parts of the project at once. An example of work order might look like: Get last weeks work out from the shelves Prepare clay for today’s work – roll your clay, prepare balls for throwing, make the first stage of a pinch pot) Clean up last week’s work and put it on the shelf for bisque firing Check that you have any glazing to do – and do enough of it that you will have time to finish your main project Do the next step of your next project – there might be a further step that can’t be complete immediately, in that case, wrap your work well and put onto the shelves. Letting your work rest for a while can really help keep your work clean and professional looking. Many things require bagging under plastic to keep it ready for work the next week – put your name on the outside of the bag so you can find your work easily. We have stickers and markers. Consider how you want to decorate your work – coloured slip can be applied at a fairly wet stage (remembering that it will make your work even wetter!). Trying to apply slip to dry clay won’t work! If you want to do sgraffito – you will need to keep the work leather hard (a state of dryness where you can still work the clay with a little effort and a little water and care). Step Three – Drying Most of the time your work can go into the rack uncovered to let it dry out for the following week. If you want to continue forming or shaping you will need to double bag your work – put your work on a suitable sized bat and put the bat in a bag so the base of the bag is under the bat, then put another bag over the top of the work and tuck the top of the bag under the bat. If you want to trim (or turn) your thrown work the following week, it should also be double bagged. If your work is large, delicate, or of uneven thicknesses, you should lightly cover your work for drying. When considering the drying process, bare in mind the weather, humidity and wind! The hotter and dryer, the faster things dry and work can dry unevenly in the shelves – this can lead to cracking – another time to lightly cover your work for drying. Step Four – Trimming and Cleaning Up Your work is dry! It is called greenware now and it is at it’s most fragile! Handle everything with two hands. I often refer to soft hands – keep everything gentle and with your fingers spread as much as possible. Try to not pick up things like plates too much, and always with both hands! Before your work can be bisque fired it should be “cleaned up”. You work won’t go into the kiln if it has sharp edges – when glazed, sharp edges turn into razor blades! Use a piece of fly wire to rub the work all over – this will scratch a little so be light handed. Use a knife or metal kidney to scrape any areas that require a bit more dynamic treatment than the fly wire offers! Finally, a very light wipe over with a slightly damp sponge can help soften and soothe all of your edges and dags! Trimming thrown work: If you are planning to trim (or turn) your thrown work (and you should be), make sure you bag it well – your work should be leather hard to almost dry for easiest trimming. Use this step to finish the work completely – use a metal kidney to polish the surface, or a slightly damp sponge to give a freshly thrown look. Wipe the sponge around the rim after trimming, and check the inside of the pot for dags! Trimming slip cast work: Usually I will trim the rims of your work on the wheel the following day to make that stage easier, however you will still need to check your work for lumps and bumps. Last but not least – check that your name is still clearly on the bottom of your work. Step Five – Bisque Firing When the work is completely dry it can go into the bisque kiln. The bisque kiln is fired to 1000°C. This process burns off the water in the clay as well as some of the chemically bound water. The structure of the clay is not altered that much at this temperature. Inside the bisque kiln, the work is stacked a little, small bowl inside a larger bowl and onto a heavy plate. Smaller items like decorations or drink coasters might get stacked several high. Consideration is paid to the weight of the stack and shape of the work. A bisque kiln can fire about one and a half times the amount of work that the glaze kiln can fire. The firing takes about 10 hours to complete the cycle and about two days to cool down. Once it has been emptied the work is placed in the glaze room ready for you to decorate! Step Six – Glazing Decorating your work with colour can be a lot of fun – and time consuming! There are three main options for surface treatment at this stage: Oxide Washes Underglazes Glazes Washes and underglazes do not “glaze” the work – It will still need a layer of glaze to fully seal the clay (washes don’t need glaze on surfaces not designed for food or liquid as they can gloss up a little on their own). Underglazes are stable colourants that turn out pretty much how they look in the jar. They can be mixed with each other to form other colours and can be used like water colours to paint onto your work. Mostly they should have a clear glaze on top to seal them. Oxides are a different species – the pink oxide (cobalt) wash turns out bright blue for instance. They don’t always need a glaze on top, and some glazes can change the colour of the wash! The glazes need no other “glaze” on top! Be careful of unknown glaze interactions – you can put any combination of glaze in a bowl or on a plate, but only a single glaze on the outside of any vertical surface! Glazes are a chemical reaction under heat. We don’t know the exact chemicals in the Mayco glazes we use. I can guess by the way they interact with each other, however, on the whole, you need to test every idea you have, and not run the test on a vertical surface! Simply put, glaze is a layer of glass like substance that bonds with the clay underneath. Clay is made of silica, alumina and water. Glaze is made of mostly silica. Silica has a melting point of 1700°C and we fire to 1240°C. The silica requires a “flux” to help it melt at the lower temperature. Fluxes can be all sorts of chemicals – a common one is calcium – calcium has a melting point of 2500°C, however, together they both melt at a much lower temperature! Colourants are metal oxides like cobalt (blue), chrome (green through black), copper (green, blue, even red!), manganese (black, purple and pink) iron (red brown), etc. Different chemicals in the glaze can have dramatic effects. for example, barium carbonate (which we don’t use) turns manganese bright pink! Other elements can turn manganese dioxide brown, blue, purple and reddish brown. Manganese dioxide is a flux in and of itself as well. So, glazes that get their black and purple colours, often interact with other glazes and RUN! Our mirror black is a good example – it mixes really well with many glazes because it fluxes them – causes them to melt faster. It will also bring out many beautiful colours in the glazes because it’s black colouring most definitely comes from manganese dioxide! Glaze chemistry is a whole subject on it’s own! We use commercial Mayco glazes on purpose – for their huge range of colour possibilities, stability, cool interactions, artistic freedom with the ability to easily brush the glazes on and ease of use. We currently have almost 50 glazes on hand! A major project is to test the interactions of all glazes with each other. That is 2,500 test tiles!!!! I’m going to make the wall behind the wheels the feature wall of pretty colours! Step Seven – Glaze (Gloss or sometimes called “Glost”) Firing Most of the time this is the final stage of making your creation (but not always!) The glaze kiln goes to 1240°C. This is called cone 6, or midrange. It is the low end of stoneware temperatures. Stoneware clays and glazes are typically fired at cone 8 – 10, that is 1260 – 1290°C. The energy requirement to go from 1240°C to 1280°C is almost a 30% more! Our clay is formulated to vitrify (mature, turn “glass-like”) at 1240°, as are our glazes. A glaze kiln take around 12 hours to reach temperature and two to three days to cool down. Sometimes a third firing process is required – this is for decoration that is added to work after the glaze firing. For example – adding precious metals and lustres. this firing temperature is usually around 600 – 800°C depending upon the techniques being used. There are many students interested in gold and silver trims – we will be doing this third type of firing soon! After firing your work will be in the student finished work shelves. Remember to pay for it before you head out the door! There is a small extra charge for using porcelain clay (it’s more than twice the price of regular clay), and for any third firing process! Once your work has been fired it can not turn back into clay for millennia – so don’t fire it if you don’t like it! Put it in the bucket for recycling. https://firebirdstudios.com.au/the-process-of-making-pottery/The form of the jug has been in use for many centuries.Stoneware jug. Two tone brown glaze with pierced lip behind spout. Spout chipped.None.flagstaff hill, warrnambool, shipwrecked-coast, flagstaff-hill, flagstaff-hill-maritime-museum, maritime-museum, shipwreck-coast, flagstaff-hill-maritime-village, jug, ceramic jug -
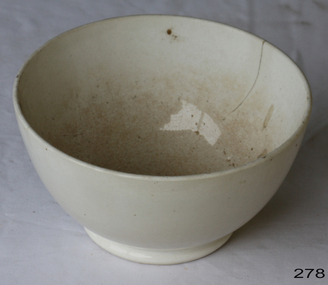 Flagstaff Hill Maritime Museum and Village
Domestic object - Bowl, Late 19th or early 20th Century
... We use commercial Mayco glazes on purpose – for their huge range of colour possibilities, stability, cool interactions, artistic freedom with the ability to easily brush the glazes on and ease of use. ...We use commercial Mayco glazes on purpose – for their huge range of colour possibilities, stability, cool interactions, artistic freedom with the ability to easily brush the glazes on and ease of use. ...The Process of Making Pottery Decorating, Firing, Glazing, Making, Technical There is a rhythm and flow to clay. It can’t be done all at once! Even the making process! It can take weeks to get everything done, especially if you can only work on your pottery once a week! Even though we have three hour classes, it’s often just not enough time! Here is an overview of some of the processes so you have a bit more grasp on some of the technical stuff! Step One – Design There are SO many ideas out there for making stuff in clay! From delicate porcelain jewellery, through to heavy sculptural work and everything in between. Deciding your direction is sometimes not that easy – when you first start, try everything, you will naturally gravitate to the style that you enjoy! The options and variations are endless and can get a wee bit overwhelming too! Check in with me before you start to ensure your ideas will work, what order you might do things, how you could achieve the look you are seeking and any other technical data required! Step Two – Making Clay is thixotropic. This means that as you work with it, the clay first gets sloppier and wetter, before is begins to dry in the atmosphere. For most things, you simply can’t do all parts of the project at once. An example of work order might look like: Get last weeks work out from the shelves Prepare clay for today’s work – roll your clay, prepare balls for throwing, make the first stage of a pinch pot) Clean up last week’s work and put it on the shelf for bisque firing Check that you have any glazing to do – and do enough of it that you will have time to finish your main project Do the next step of your next project – there might be a further step that can’t be complete immediately, in that case, wrap your work well and put onto the shelves. Letting your work rest for a while can really help keep your work clean and professional looking. Many things require bagging under plastic to keep it ready for work the next week – put your name on the outside of the bag so you can find your work easily. We have stickers and markers. Consider how you want to decorate your work – coloured slip can be applied at a fairly wet stage (remembering that it will make your work even wetter!). Trying to apply slip to dry clay won’t work! If you want to do sgraffito – you will need to keep the work leather hard (a state of dryness where you can still work the clay with a little effort and a little water and care). Step Three – Drying Most of the time your work can go into the rack uncovered to let it dry out for the following week. If you want to continue forming or shaping you will need to double bag your work – put your work on a suitable sized bat and put the bat in a bag so the base of the bag is under the bat, then put another bag over the top of the work and tuck the top of the bag under the bat. If you want to trim (or turn) your thrown work the following week, it should also be double bagged. If your work is large, delicate, or of uneven thicknesses, you should lightly cover your work for drying. When considering the drying process, bare in mind the weather, humidity and wind! The hotter and dryer, the faster things dry and work can dry unevenly in the shelves – this can lead to cracking – another time to lightly cover your work for drying. Step Four – Trimming and Cleaning Up Your work is dry! It is called greenware now and it is at it’s most fragile! Handle everything with two hands. I often refer to soft hands – keep everything gentle and with your fingers spread as much as possible. Try to not pick up things like plates too much, and always with both hands! Before your work can be bisque fired it should be “cleaned up”. You work won’t go into the kiln if it has sharp edges – when glazed, sharp edges turn into razor blades! Use a piece of fly wire to rub the work all over – this will scratch a little so be light handed. Use a knife or metal kidney to scrape any areas that require a bit more dynamic treatment than the fly wire offers! Finally, a very light wipe over with a slightly damp sponge can help soften and soothe all of your edges and dags! Trimming thrown work: If you are planning to trim (or turn) your thrown work (and you should be), make sure you bag it well – your work should be leather hard to almost dry for easiest trimming. Use this step to finish the work completely – use a metal kidney to polish the surface, or a slightly damp sponge to give a freshly thrown look. Wipe the sponge around the rim after trimming, and check the inside of the pot for dags! Trimming slip cast work: Usually I will trim the rims of your work on the wheel the following day to make that stage easier, however you will still need to check your work for lumps and bumps. Last but not least – check that your name is still clearly on the bottom of your work. Step Five – Bisque Firing When the work is completely dry it can go into the bisque kiln. The bisque kiln is fired to 1000°C. This process burns off the water in the clay as well as some of the chemically bound water. The structure of the clay is not altered that much at this temperature. Inside the bisque kiln, the work is stacked a little, small bowl inside a larger bowl and onto a heavy plate. Smaller items like decorations or drink coasters might get stacked several high. Consideration is paid to the weight of the stack and shape of the work. A bisque kiln can fire about one and a half times the amount of work that the glaze kiln can fire. The firing takes about 10 hours to complete the cycle and about two days to cool down. Once it has been emptied the work is placed in the glaze room ready for you to decorate! Step Six – Glazing Decorating your work with colour can be a lot of fun – and time consuming! There are three main options for surface treatment at this stage: Oxide Washes Underglazes Glazes Washes and underglazes do not “glaze” the work – It will still need a layer of glaze to fully seal the clay (washes don’t need glaze on surfaces not designed for food or liquid as they can gloss up a little on their own). Underglazes are stable colourants that turn out pretty much how they look in the jar. They can be mixed with each other to form other colours and can be used like water colours to paint onto your work. Mostly they should have a clear glaze on top to seal them. Oxides are a different species – the pink oxide (cobalt) wash turns out bright blue for instance. They don’t always need a glaze on top, and some glazes can change the colour of the wash! The glazes need no other “glaze” on top! Be careful of unknown glaze interactions – you can put any combination of glaze in a bowl or on a plate, but only a single glaze on the outside of any vertical surface! Glazes are a chemical reaction under heat. We don’t know the exact chemicals in the Mayco glazes we use. I can guess by the way they interact with each other, however, on the whole, you need to test every idea you have, and not run the test on a vertical surface! Simply put, glaze is a layer of glass like substance that bonds with the clay underneath. Clay is made of silica, alumina and water. Glaze is made of mostly silica. Silica has a melting point of 1700°C and we fire to 1240°C. The silica requires a “flux” to help it melt at the lower temperature. Fluxes can be all sorts of chemicals – a common one is calcium – calcium has a melting point of 2500°C, however, together they both melt at a much lower temperature! Colourants are metal oxides like cobalt (blue), chrome (green through black), copper (green, blue, even red!), manganese (black, purple and pink) iron (red brown), etc. Different chemicals in the glaze can have dramatic effects. for example, barium carbonate (which we don’t use) turns manganese bright pink! Other elements can turn manganese dioxide brown, blue, purple and reddish brown. Manganese dioxide is a flux in and of itself as well. So, glazes that get their black and purple colours, often interact with other glazes and RUN! Our mirror black is a good example – it mixes really well with many glazes because it fluxes them – causes them to melt faster. It will also bring out many beautiful colours in the glazes because it’s black colouring most definitely comes from manganese dioxide! Glaze chemistry is a whole subject on it’s own! We use commercial Mayco glazes on purpose – for their huge range of colour possibilities, stability, cool interactions, artistic freedom with the ability to easily brush the glazes on and ease of use. We currently have almost 50 glazes on hand! A major project is to test the interactions of all glazes with each other. That is 2,500 test tiles!!!! I’m going to make the wall behind the wheels the feature wall of pretty colours! Step Seven – Glaze (Gloss or sometimes called “Glost”) Firing Most of the time this is the final stage of making your creation (but not always!) The glaze kiln goes to 1240°C. This is called cone 6, or midrange. It is the low end of stoneware temperatures. Stoneware clays and glazes are typically fired at cone 8 – 10, that is 1260 – 1290°C. The energy requirement to go from 1240°C to 1280°C is almost a 30% more! Our clay is formulated to vitrify (mature, turn “glass-like”) at 1240°, as are our glazes. A glaze kiln take around 12 hours to reach temperature and two to three days to cool down. Sometimes a third firing process is required – this is for decoration that is added to work after the glaze firing. For example – adding precious metals and lustres. this firing temperature is usually around 600 – 800°C depending upon the techniques being used. There are many students interested in gold and silver trims – we will be doing this third type of firing soon! After firing your work will be in the student finished work shelves. Remember to pay for it before you head out the door! There is a small extra charge for using porcelain clay (it’s more than twice the price of regular clay), and for any third firing process! Once your work has been fired it can not turn back into clay for millennia – so don’t fire it if you don’t like it! Put it in the bucket for recycling. https://firebirdstudios.com.au/the-process-of-making-pottery/ The bowl is an example of kitchenware used in the 19th century and still in use today.Bowl white ceramic. Crack on side. Badly stained.Backstamp very faint and unable to be read.flagstaff hill, warrnambool, shipwrecked-coast, flagstaff-hill, flagstaff-hill-maritime-museum, maritime-museum, shipwreck-coast, flagstaff-hill-maritime-village, mixing bowl, food preparation, kitchen equipment, ceramic -
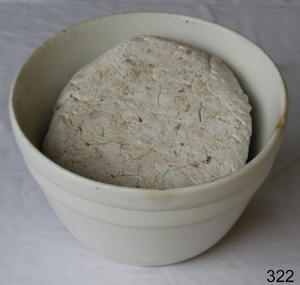 Flagstaff Hill Maritime Museum and Village
Domestic object - Bowl
... We use commercial Mayco glazes on purpose – for their huge range of colour possibilities, stability, cool interactions, artistic freedom with the ability to easily brush the glazes on and ease of use. ...We use commercial Mayco glazes on purpose – for their huge range of colour possibilities, stability, cool interactions, artistic freedom with the ability to easily brush the glazes on and ease of use. ...The Process of Making Pottery Decorating, Firing, Glazing, Making, Technical There is a rhythm and flow to clay. It can’t be done all at once! Even the making process! It can take weeks to get everything done, especially if you can only work on your pottery once a week! Even though we have three hour classes, it’s often just not enough time! Here is an overview of some of the processes so you have a bit more grasp on some of the technical stuff! Step One – Design There are SO many ideas out there for making stuff in clay! From delicate porcelain jewellery, through to heavy sculptural work and everything in between. Deciding your direction is sometimes not that easy – when you first start, try everything, you will naturally gravitate to the style that you enjoy! The options and variations are endless and can get a wee bit overwhelming too! Check in with me before you start to ensure your ideas will work, what order you might do things, how you could achieve the look you are seeking and any other technical data required! Step Two – Making Clay is thixotropic. This means that as you work with it, the clay first gets sloppier and wetter, before is begins to dry in the atmosphere. For most things, you simply can’t do all parts of the project at once. An example of work order might look like: Get last weeks work out from the shelves Prepare clay for today’s work – roll your clay, prepare balls for throwing, make the first stage of a pinch pot) Clean up last week’s work and put it on the shelf for bisque firing Check that you have any glazing to do – and do enough of it that you will have time to finish your main project Do the next step of your next project – there might be a further step that can’t be complete immediately, in that case, wrap your work well and put onto the shelves. Letting your work rest for a while can really help keep your work clean and professional looking. Many things require bagging under plastic to keep it ready for work the next week – put your name on the outside of the bag so you can find your work easily. We have stickers and markers. Consider how you want to decorate your work – coloured slip can be applied at a fairly wet stage (remembering that it will make your work even wetter!). Trying to apply slip to dry clay won’t work! If you want to do sgraffito – you will need to keep the work leather hard (a state of dryness where you can still work the clay with a little effort and a little water and care). Step Three – Drying Most of the time your work can go into the rack uncovered to let it dry out for the following week. If you want to continue forming or shaping you will need to double bag your work – put your work on a suitable sized bat and put the bat in a bag so the base of the bag is under the bat, then put another bag over the top of the work and tuck the top of the bag under the bat. If you want to trim (or turn) your thrown work the following week, it should also be double bagged. If your work is large, delicate, or of uneven thicknesses, you should lightly cover your work for drying. When considering the drying process, bare in mind the weather, humidity and wind! The hotter and dryer, the faster things dry and work can dry unevenly in the shelves – this can lead to cracking – another time to lightly cover your work for drying. Step Four – Trimming and Cleaning Up Your work is dry! It is called greenware now and it is at it’s most fragile! Handle everything with two hands. I often refer to soft hands – keep everything gentle and with your fingers spread as much as possible. Try to not pick up things like plates too much, and always with both hands! Before your work can be bisque fired it should be “cleaned up”. You work won’t go into the kiln if it has sharp edges – when glazed, sharp edges turn into razor blades! Use a piece of fly wire to rub the work all over – this will scratch a little so be light handed. Use a knife or metal kidney to scrape any areas that require a bit more dynamic treatment than the fly wire offers! Finally, a very light wipe over with a slightly damp sponge can help soften and soothe all of your edges and dags! Trimming thrown work: If you are planning to trim (or turn) your thrown work (and you should be), make sure you bag it well – your work should be leather hard to almost dry for easiest trimming. Use this step to finish the work completely – use a metal kidney to polish the surface, or a slightly damp sponge to give a freshly thrown look. Wipe the sponge around the rim after trimming, and check the inside of the pot for dags! Trimming slip cast work: Usually I will trim the rims of your work on the wheel the following day to make that stage easier, however you will still need to check your work for lumps and bumps. Last but not least – check that your name is still clearly on the bottom of your work. Step Five – Bisque Firing When the work is completely dry it can go into the bisque kiln. The bisque kiln is fired to 1000°C. This process burns off the water in the clay as well as some of the chemically bound water. The structure of the clay is not altered that much at this temperature. Inside the bisque kiln, the work is stacked a little, small bowl inside a larger bowl and onto a heavy plate. Smaller items like decorations or drink coasters might get stacked several high. Consideration is paid to the weight of the stack and shape of the work. A bisque kiln can fire about one and a half times the amount of work that the glaze kiln can fire. The firing takes about 10 hours to complete the cycle and about two days to cool down. Once it has been emptied the work is placed in the glaze room ready for you to decorate! Step Six – Glazing Decorating your work with colour can be a lot of fun – and time consuming! There are three main options for surface treatment at this stage: Oxide Washes Underglazes Glazes Washes and underglazes do not “glaze” the work – It will still need a layer of glaze to fully seal the clay (washes don’t need glaze on surfaces not designed for food or liquid as they can gloss up a little on their own). Underglazes are stable colourants that turn out pretty much how they look in the jar. They can be mixed with each other to form other colours and can be used like water colours to paint onto your work. Mostly they should have a clear glaze on top to seal them. Oxides are a different species – the pink oxide (cobalt) wash turns out bright blue for instance. They don’t always need a glaze on top, and some glazes can change the colour of the wash! The glazes need no other “glaze” on top! Be careful of unknown glaze interactions – you can put any combination of glaze in a bowl or on a plate, but only a single glaze on the outside of any vertical surface! Glazes are a chemical reaction under heat. We don’t know the exact chemicals in the Mayco glazes we use. I can guess by the way they interact with each other, however, on the whole, you need to test every idea you have, and not run the test on a vertical surface! Simply put, glaze is a layer of glass like substance that bonds with the clay underneath. Clay is made of silica, alumina and water. Glaze is made of mostly silica. Silica has a melting point of 1700°C and we fire to 1240°C. The silica requires a “flux” to help it melt at the lower temperature. Fluxes can be all sorts of chemicals – a common one is calcium – calcium has a melting point of 2500°C, however, together they both melt at a much lower temperature! Colourants are metal oxides like cobalt (blue), chrome (green through black), copper (green, blue, even red!), manganese (black, purple and pink) iron (red brown), etc. Different chemicals in the glaze can have dramatic effects. for example, barium carbonate (which we don’t use) turns manganese bright pink! Other elements can turn manganese dioxide brown, blue, purple and reddish brown. Manganese dioxide is a flux in and of itself as well. So, glazes that get their black and purple colours, often interact with other glazes and RUN! Our mirror black is a good example – it mixes really well with many glazes because it fluxes them – causes them to melt faster. It will also bring out many beautiful colours in the glazes because it’s black colouring most definitely comes from manganese dioxide! Glaze chemistry is a whole subject on it’s own! We use commercial Mayco glazes on purpose – for their huge range of colour possibilities, stability, cool interactions, artistic freedom with the ability to easily brush the glazes on and ease of use. We currently have almost 50 glazes on hand! A major project is to test the interactions of all glazes with each other. That is 2,500 test tiles!!!! I’m going to make the wall behind the wheels the feature wall of pretty colours! Step Seven – Glaze (Gloss or sometimes called “Glost”) Firing Most of the time this is the final stage of making your creation (but not always!) The glaze kiln goes to 1240°C. This is called cone 6, or midrange. It is the low end of stoneware temperatures. Stoneware clays and glazes are typically fired at cone 8 – 10, that is 1260 – 1290°C. The energy requirement to go from 1240°C to 1280°C is almost a 30% more! Our clay is formulated to vitrify (mature, turn “glass-like”) at 1240°, as are our glazes. A glaze kiln take around 12 hours to reach temperature and two to three days to cool down. Sometimes a third firing process is required – this is for decoration that is added to work after the glaze firing. For example – adding precious metals and lustres. this firing temperature is usually around 600 – 800°C depending upon the techniques being used. There are many students interested in gold and silver trims – we will be doing this third type of firing soon! After firing your work will be in the student finished work shelves. Remember to pay for it before you head out the door! There is a small extra charge for using porcelain clay (it’s more than twice the price of regular clay), and for any third firing process! Once your work has been fired it can not turn back into clay for millennia – so don’t fire it if you don’t like it! Put it in the bucket for recycling. https://firebirdstudios.com.au/the-process-of-making-pottery/ This bowl is an example of kitchenware used in the 19th century and still in use today.Bowl white ceramic plain that has two sets of edging around lip. Inside bowl has plaster designed to look like cooking mixture.flagstaff hill, warrnambool, shipwrecked-coast, flagstaff-hill, flagstaff-hill-maritime-museum, maritime-museum, shipwreck-coast, flagstaff-hill-maritime-village, kitchen equipment, ceramic -
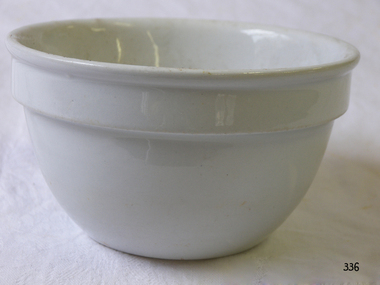 Flagstaff Hill Maritime Museum and Village
Domestic object - Bowl, J & G Meakin, Late 19th or early 20th Century
... We use commercial Mayco glazes on purpose – for their huge range of colour possibilities, stability, cool interactions, artistic freedom with the ability to easily brush the glazes on and ease of use. ...We use commercial Mayco glazes on purpose – for their huge range of colour possibilities, stability, cool interactions, artistic freedom with the ability to easily brush the glazes on and ease of use. ...The Process of Making Pottery Decorating, Firing, Glazing, Making, Technical There is a rhythm and flow to clay. It can’t be done all at once! Even the making process! It can take weeks to get everything done, especially if you can only work on your pottery once a week! Even though we have three hour classes, it’s often just not enough time! Here is an overview of some of the processes so you have a bit more grasp on some of the technical stuff! Step One – Design There are SO many ideas out there for making stuff in clay! From delicate porcelain jewellery, through to heavy sculptural work and everything in between. Deciding your direction is sometimes not that easy – when you first start, try everything, you will naturally gravitate to the style that you enjoy! The options and variations are endless and can get a wee bit overwhelming too! Check in with me before you start to ensure your ideas will work, what order you might do things, how you could achieve the look you are seeking and any other technical data required! Step Two – Making Clay is thixotropic. This means that as you work with it, the clay first gets sloppier and wetter, before is begins to dry in the atmosphere. For most things, you simply can’t do all parts of the project at once. An example of work order might look like: Get last weeks work out from the shelves Prepare clay for today’s work – roll your clay, prepare balls for throwing, make the first stage of a pinch pot) Clean up last week’s work and put it on the shelf for bisque firing Check that you have any glazing to do – and do enough of it that you will have time to finish your main project Do the next step of your next project – there might be a further step that can’t be complete immediately, in that case, wrap your work well and put onto the shelves. Letting your work rest for a while can really help keep your work clean and professional looking. Many things require bagging under plastic to keep it ready for work the next week – put your name on the outside of the bag so you can find your work easily. We have stickers and markers. Consider how you want to decorate your work – coloured slip can be applied at a fairly wet stage (remembering that it will make your work even wetter!). Trying to apply slip to dry clay won’t work! If you want to do sgraffito – you will need to keep the work leather hard (a state of dryness where you can still work the clay with a little effort and a little water and care). Step Three – Drying Most of the time your work can go into the rack uncovered to let it dry out for the following week. If you want to continue forming or shaping you will need to double bag your work – put your work on a suitable sized bat and put the bat in a bag so the base of the bag is under the bat, then put another bag over the top of the work and tuck the top of the bag under the bat. If you want to trim (or turn) your thrown work the following week, it should also be double bagged. If your work is large, delicate, or of uneven thicknesses, you should lightly cover your work for drying. When considering the drying process, bare in mind the weather, humidity and wind! The hotter and dryer, the faster things dry and work can dry unevenly in the shelves – this can lead to cracking – another time to lightly cover your work for drying. Step Four – Trimming and Cleaning Up Your work is dry! It is called greenware now and it is at it’s most fragile! Handle everything with two hands. I often refer to soft hands – keep everything gentle and with your fingers spread as much as possible. Try to not pick up things like plates too much, and always with both hands! Before your work can be bisque fired it should be “cleaned up”. You work won’t go into the kiln if it has sharp edges – when glazed, sharp edges turn into razor blades! Use a piece of fly wire to rub the work all over – this will scratch a little so be light handed. Use a knife or metal kidney to scrape any areas that require a bit more dynamic treatment than the fly wire offers! Finally, a very light wipe over with a slightly damp sponge can help soften and soothe all of your edges and dags! Trimming thrown work: If you are planning to trim (or turn) your thrown work (and you should be), make sure you bag it well – your work should be leather hard to almost dry for easiest trimming. Use this step to finish the work completely – use a metal kidney to polish the surface, or a slightly damp sponge to give a freshly thrown look. Wipe the sponge around the rim after trimming, and check the inside of the pot for dags! Trimming slip cast work: Usually I will trim the rims of your work on the wheel the following day to make that stage easier, however you will still need to check your work for lumps and bumps. Last but not least – check that your name is still clearly on the bottom of your work. Step Five – Bisque Firing When the work is completely dry it can go into the bisque kiln. The bisque kiln is fired to 1000°C. This process burns off the water in the clay as well as some of the chemically bound water. The structure of the clay is not altered that much at this temperature. Inside the bisque kiln, the work is stacked a little, small bowl inside a larger bowl and onto a heavy plate. Smaller items like decorations or drink coasters might get stacked several high. Consideration is paid to the weight of the stack and shape of the work. A bisque kiln can fire about one and a half times the amount of work that the glaze kiln can fire. The firing takes about 10 hours to complete the cycle and about two days to cool down. Once it has been emptied the work is placed in the glaze room ready for you to decorate! Step Six – Glazing Decorating your work with colour can be a lot of fun – and time consuming! There are three main options for surface treatment at this stage: Oxide Washes Underglazes Glazes Washes and underglazes do not “glaze” the work – It will still need a layer of glaze to fully seal the clay (washes don’t need glaze on surfaces not designed for food or liquid as they can gloss up a little on their own). Underglazes are stable colourants that turn out pretty much how they look in the jar. They can be mixed with each other to form other colours and can be used like water colours to paint onto your work. Mostly they should have a clear glaze on top to seal them. Oxides are a different species – the pink oxide (cobalt) wash turns out bright blue for instance. They don’t always need a glaze on top, and some glazes can change the colour of the wash! The glazes need no other “glaze” on top! Be careful of unknown glaze interactions – you can put any combination of glaze in a bowl or on a plate, but only a single glaze on the outside of any vertical surface! Glazes are a chemical reaction under heat. We don’t know the exact chemicals in the Mayco glazes we use. I can guess by the way they interact with each other, however, on the whole, you need to test every idea you have, and not run the test on a vertical surface! Simply put, glaze is a layer of glass like substance that bonds with the clay underneath. Clay is made of silica, alumina and water. Glaze is made of mostly silica. Silica has a melting point of 1700°C and we fire to 1240°C. The silica requires a “flux” to help it melt at the lower temperature. Fluxes can be all sorts of chemicals – a common one is calcium – calcium has a melting point of 2500°C, however, together they both melt at a much lower temperature! Colourants are metal oxides like cobalt (blue), chrome (green through black), copper (green, blue, even red!), manganese (black, purple and pink) iron (red brown), etc. Different chemicals in the glaze can have dramatic effects. for example, barium carbonate (which we don’t use) turns manganese bright pink! Other elements can turn manganese dioxide brown, blue, purple and reddish brown. Manganese dioxide is a flux in and of itself as well. So, glazes that get their black and purple colours, often interact with other glazes and RUN! Our mirror black is a good example – it mixes really well with many glazes because it fluxes them – causes them to melt faster. It will also bring out many beautiful colours in the glazes because it’s black colouring most definitely comes from manganese dioxide! Glaze chemistry is a whole subject on it’s own! We use commercial Mayco glazes on purpose – for their huge range of colour possibilities, stability, cool interactions, artistic freedom with the ability to easily brush the glazes on and ease of use. We currently have almost 50 glazes on hand! A major project is to test the interactions of all glazes with each other. That is 2,500 test tiles!!!! I’m going to make the wall behind the wheels the feature wall of pretty colours! Step Seven – Glaze (Gloss or sometimes called “Glost”) Firing Most of the time this is the final stage of making your creation (but not always!) The glaze kiln goes to 1240°C. This is called cone 6, or midrange. It is the low end of stoneware temperatures. Stoneware clays and glazes are typically fired at cone 8 – 10, that is 1260 – 1290°C. The energy requirement to go from 1240°C to 1280°C is almost a 30% more! Our clay is formulated to vitrify (mature, turn “glass-like”) at 1240°, as are our glazes. A glaze kiln take around 12 hours to reach temperature and two to three days to cool down. Sometimes a third firing process is required – this is for decoration that is added to work after the glaze firing. For example – adding precious metals and lustres. this firing temperature is usually around 600 – 800°C depending upon the techniques being used. There are many students interested in gold and silver trims – we will be doing this third type of firing soon! After firing your work will be in the student finished work shelves. Remember to pay for it before you head out the door! There is a small extra charge for using porcelain clay (it’s more than twice the price of regular clay), and for any third firing process! Once your work has been fired it can not turn back into clay for millennia – so don’t fire it if you don’t like it! Put it in the bucket for recycling. https://firebirdstudios.com.au/the-process-of-making-pottery/This bowl was made by renowned pottery company J & G Meakin of England. The firm was established in the mid-1800's. The bowl is an example of kitchenware used in the 19th century and still in use today.Bowl; white ceramic, round and tapering inwards towards base. Made by J and G Meakin England.On base, 'Ironstone China Reg SOL 391413' with symbolflagstaff hill, flagstaff hill maritime museum and village, warrnambool, maritime museum, maritime village, great ocean road, shipwreck coast, mixing bowl, food preparation, j & g meakin, pottery, stoke-on-trent, kitchen equipment, ceramic -
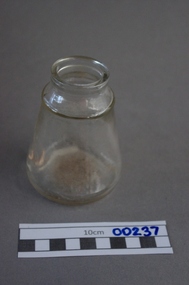 Upper Yarra Museum
Glass container, 1898 (exact); before 1898, product was trademarked in 1898
... ease of use. The bottle includes a brush recessed into the lid that children find relatively easy to handle, and the packaging does not contain any small components that children might swallow. The main ingredient of Clag is wheat starch dissolved in a water base, meaning that children can safely swallow the glue without incident It feels cold to touch and when applied to paper, it sometimes alters the colour of what is on it and causes paper to warp, owing to the high water content of the glue. ...ease of use. The bottle includes a brush recessed into the lid that children find relatively easy to handle, and the packaging does not contain any small components that children might swallow. The main ingredient of Clag is wheat starch dissolved in a water base, meaning that children can safely swallow the glue without incident It feels cold to touch and when applied to paper, it sometimes alters the colour of what is on it and causes paper to warp, owing to the high water content of the glue. ...http://www.clag.com.au/about/about.htm http://en.wikipedia.org/wiki/Clag_(glue) Clag was first trademarked in 1898 by Joseph Angus, manufacturer, of 216 Nicholson Street, North Fitzroy, Melbourne. The National Archives of Australia holds the original trademark application - a digitised version is available online (see References). The exact composition of the original paste is unknown but is thought to have been starch-based. Australian schools commonly request that parents purchase Clag paste for their children as part of the stationery lists that are circulated before each school year. The main reason for this is Clag's reputation for safety and ease of use. The bottle includes a brush recessed into the lid that children find relatively easy to handle, and the packaging does not contain any small components that children might swallow. The main ingredient of Clag is wheat starch dissolved in a water base, meaning that children can safely swallow the glue without incident It feels cold to touch and when applied to paper, it sometimes alters the colour of what is on it and causes paper to warp, owing to the high water content of the glue. There is an Australian slang usage of the word "clagged" derived from the characteristic of Clag Paste and can be used in place of the words, "clogged", "congested", "restricted" or "stuck". Bottle used for clag. The bottle has the original marking made by Angus P/l who trademarked the glue in 1898.Angus & Co Pty Ltd, ISM 12school, bottle, glue, clag, trademark, wheat starch -
 City of Moorabbin Historical Society (Operating the Box Cottage Museum)
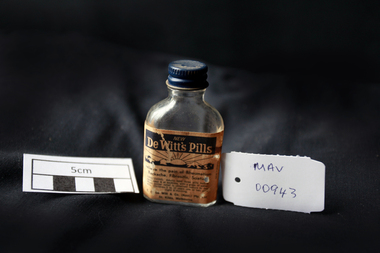
Manufactured Glass, bottle of 'De Witts Pills', mid 20thC
... ease backache, aches and pains in the muscles, and kidney problems. They are typical of a huge range of treatments that were available ‘over the counter’ at pharmacists for many years. It is not known how effective the pills were but the label assures people not to be alarmed if their urine takes on a bluish colour after taking a dose. ...ease backache, aches and pains in the muscles, and kidney problems. They are typical of a huge range of treatments that were available ‘over the counter’ at pharmacists for many years. It is not known how effective the pills were but the label assures people not to be alarmed if their urine takes on a bluish colour after taking a dose. ...De Witt's Kidney and Bladder Pills were produced by a firm founded in 1912 by E C De Witt, Cheshire UK, with branches in New Zealand, Chicago and New York. It became part of the CB Fleet Group in 1990, whose UK operation is currently based in Runcorn, Cheshire where they still manufacture toiletries, skin care products and pharmaceutical products. Aimed at adults and children above the age of eight, De Witt’s Kidney and Bladder Pills were intended to ease backache, aches and pains in the muscles, and kidney problems. They are typical of a huge range of treatments that were available ‘over the counter’ at pharmacists for many years. It is not known how effective the pills were but the label assures people not to be alarmed if their urine takes on a bluish colour after taking a dose. The indications or uses for this product as provided by the manufacturer are: A diuretic stimulant for the kidneys to promote the flow of urine, combined with analgesic action. Aids in alleviating muscular aches and pains, restlessness, dizziness, backache, headache, getting up at nights, loss of energy if caused by sluggish kidneys. An empty clear glass bottle with a metal screw top lid that contained De Witts Pills Front Label : NEW / DE WITT'S PILLS / rising sun trade mark / Relieve the pain of Rheumatism / Backache, Fibrositis, Sciatica / DIRECTIONS ......../ R.C.De Witt & Co (Aust) Pty Ltd. / St. Kilda Melbournepharmacy, medicines, glassware, bottles, moorabbin, bentleigh, cheltenham, de witt company ltd, cheshire england, cb fleet group ltd, glass manufacturers -
 Greensborough Historical Society
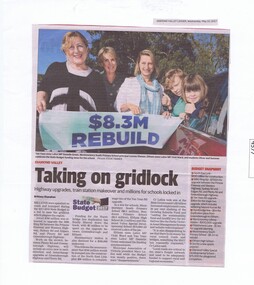
Newspaper Clipping, Diamond Valley Leader, Taking on gridlock, 10/05/2017
... ease the gridlock which plagues the region. Including improvements to the Greensborough end of the Western (Metropolitan) Ring Road. transport metropolitan ring road News article 1 page, black text, colour image. ...Millions were splashed on roads and transport during the 2017-2018 State Budget in a bid to ease the gridlock which plagues the region. Including improvements to the Greensborough end of the Western (Metropolitan) Ring Road.News article 1 page, black text, colour image.transport, metropolitan ring road -
 Flagstaff Hill Maritime Museum and Village
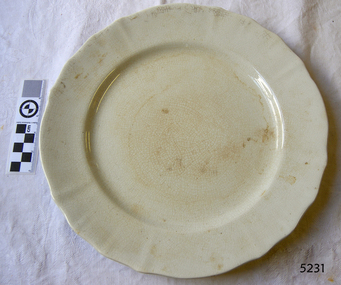
Domestic object - Plate
... We use commercial Mayco glazes on purpose – for their huge range of colour possibilities, stability, cool interactions, artistic freedom with the ability to easily brush the glazes on and ease of use. ...We use commercial Mayco glazes on purpose – for their huge range of colour possibilities, stability, cool interactions, artistic freedom with the ability to easily brush the glazes on and ease of use. ...The Process of Making Pottery Decorating, Firing, Glazing, Making, Technical There is a rhythm and flow to clay. It can’t be done all at once! Even the making process! It can take weeks to get everything done, especially if you can only work on your pottery once a week! Even though we have three hour classes, it’s often just not enough time! Here is an overview of some of the processes so you have a bit more grasp on some of the technical stuff! Step One – Design There are SO many ideas out there for making stuff in clay! From delicate porcelain jewellery, through to heavy sculptural work and everything in between. Deciding your direction is sometimes not that easy – when you first start, try everything, you will naturally gravitate to the style that you enjoy! The options and variations are endless and can get a wee bit overwhelming too! Check in with me before you start to ensure your ideas will work, what order you might do things, how you could achieve the look you are seeking and any other technical data required! Step Two – Making Clay is thixotropic. This means that as you work with it, the clay first gets sloppier and wetter, before is begins to dry in the atmosphere. For most things, you simply can’t do all parts of the project at once. An example of work order might look like: Get last weeks work out from the shelves Prepare clay for today’s work – roll your clay, prepare balls for throwing, make the first stage of a pinch pot) Clean up last week’s work and put it on the shelf for bisque firing Check that you have any glazing to do – and do enough of it that you will have time to finish your main project Do the next step of your next project – there might be a further step that can’t be complete immediately, in that case, wrap your work well and put onto the shelves. Letting your work rest for a while can really help keep your work clean and professional looking. Many things require bagging under plastic to keep it ready for work the next week – put your name on the outside of the bag so you can find your work easily. We have stickers and markers. Consider how you want to decorate your work – coloured slip can be applied at a fairly wet stage (remembering that it will make your work even wetter!). Trying to apply slip to dry clay won’t work! If you want to do sgraffito – you will need to keep the work leather hard (a state of dryness where you can still work the clay with a little effort and a little water and care). Step Three – Drying Most of the time your work can go into the rack uncovered to let it dry out for the following week. If you want to continue forming or shaping you will need to double bag your work – put your work on a suitable sized bat and put the bat in a bag so the base of the bag is under the bat, then put another bag over the top of the work and tuck the top of the bag under the bat. If you want to trim (or turn) your thrown work the following week, it should also be double bagged. If your work is large, delicate, or of uneven thicknesses, you should lightly cover your work for drying. When considering the drying process, bare in mind the weather, humidity and wind! The hotter and dryer, the faster things dry and work can dry unevenly in the shelves – this can lead to cracking – another time to lightly cover your work for drying. Step Four – Trimming and Cleaning Up Your work is dry! It is called greenware now and it is at it’s most fragile! Handle everything with two hands. I often refer to soft hands – keep everything gentle and with your fingers spread as much as possible. Try to not pick up things like plates too much, and always with both hands! Before your work can be bisque fired it should be “cleaned up”. You work won’t go into the kiln if it has sharp edges – when glazed, sharp edges turn into razor blades! Use a piece of fly wire to rub the work all over – this will scratch a little so be light handed. Use a knife or metal kidney to scrape any areas that require a bit more dynamic treatment than the fly wire offers! Finally, a very light wipe over with a slightly damp sponge can help soften and soothe all of your edges and dags! Trimming thrown work: If you are planning to trim (or turn) your thrown work (and you should be), make sure you bag it well – your work should be leather hard to almost dry for easiest trimming. Use this step to finish the work completely – use a metal kidney to polish the surface, or a slightly damp sponge to give a freshly thrown look. Wipe the sponge around the rim after trimming, and check the inside of the pot for dags! Trimming slip cast work: Usually I will trim the rims of your work on the wheel the following day to make that stage easier, however you will still need to check your work for lumps and bumps. Last but not least – check that your name is still clearly on the bottom of your work. Step Five – Bisque Firing When the work is completely dry it can go into the bisque kiln. The bisque kiln is fired to 1000°C. This process burns off the water in the clay as well as some of the chemically bound water. The structure of the clay is not altered that much at this temperature. Inside the bisque kiln, the work is stacked a little, small bowl inside a larger bowl and onto a heavy plate. Smaller items like decorations or drink coasters might get stacked several high. Consideration is paid to the weight of the stack and shape of the work. A bisque kiln can fire about one and a half times the amount of work that the glaze kiln can fire. The firing takes about 10 hours to complete the cycle and about two days to cool down. Once it has been emptied the work is placed in the glaze room ready for you to decorate! Step Six – Glazing Decorating your work with colour can be a lot of fun – and time consuming! There are three main options for surface treatment at this stage: Oxide Washes Underglazes Glazes Washes and underglazes do not “glaze” the work – It will still need a layer of glaze to fully seal the clay (washes don’t need glaze on surfaces not designed for food or liquid as they can gloss up a little on their own). Underglazes are stable colourants that turn out pretty much how they look in the jar. They can be mixed with each other to form other colours and can be used like water colours to paint onto your work. Mostly they should have a clear glaze on top to seal them. Oxides are a different species – the pink oxide (cobalt) wash turns out bright blue for instance. They don’t always need a glaze on top, and some glazes can change the colour of the wash! The glazes need no other “glaze” on top! Be careful of unknown glaze interactions – you can put any combination of glaze in a bowl or on a plate, but only a single glaze on the outside of any vertical surface! Glazes are a chemical reaction under heat. We don’t know the exact chemicals in the Mayco glazes we use. I can guess by the way they interact with each other, however, on the whole, you need to test every idea you have, and not run the test on a vertical surface! Simply put, glaze is a layer of glass like substance that bonds with the clay underneath. Clay is made of silica, alumina and water. Glaze is made of mostly silica. Silica has a melting point of 1700°C and we fire to 1240°C. The silica requires a “flux” to help it melt at the lower temperature. Fluxes can be all sorts of chemicals – a common one is calcium – calcium has a melting point of 2500°C, however, together they both melt at a much lower temperature! Colourants are metal oxides like cobalt (blue), chrome (green through black), copper (green, blue, even red!), manganese (black, purple and pink) iron (red brown), etc. Different chemicals in the glaze can have dramatic effects. for example, barium carbonate (which we don’t use) turns manganese bright pink! Other elements can turn manganese dioxide brown, blue, purple and reddish brown. Manganese dioxide is a flux in and of itself as well. So, glazes that get their black and purple colours, often interact with other glazes and RUN! Our mirror black is a good example – it mixes really well with many glazes because it fluxes them – causes them to melt faster. It will also bring out many beautiful colours in the glazes because it’s black colouring most definitely comes from manganese dioxide! Glaze chemistry is a whole subject on it’s own! We use commercial Mayco glazes on purpose – for their huge range of colour possibilities, stability, cool interactions, artistic freedom with the ability to easily brush the glazes on and ease of use. We currently have almost 50 glazes on hand! A major project is to test the interactions of all glazes with each other. That is 2,500 test tiles!!!! I’m going to make the wall behind the wheels the feature wall of pretty colours! Step Seven – Glaze (Gloss or sometimes called “Glost”) Firing Most of the time this is the final stage of making your creation (but not always!) The glaze kiln goes to 1240°C. This is called cone 6, or midrange. It is the low end of stoneware temperatures. Stoneware clays and glazes are typically fired at cone 8 – 10, that is 1260 – 1290°C. The energy requirement to go from 1240°C to 1280°C is almost a 30% more! Our clay is formulated to vitrify (mature, turn “glass-like”) at 1240°, as are our glazes. A glaze kiln take around 12 hours to reach temperature and two to three days to cool down. Sometimes a third firing process is required – this is for decoration that is added to work after the glaze firing. For example – adding precious metals and lustres. this firing temperature is usually around 600 – 800°C depending upon the techniques being used. There are many students interested in gold and silver trims – we will be doing this third type of firing soon! After firing your work will be in the student finished work shelves. Remember to pay for it before you head out the door! There is a small extra charge for using porcelain clay (it’s more than twice the price of regular clay), and for any third firing process! Once your work has been fired it can not turn back into clay for millennia – so don’t fire it if you don’t like it! Put it in the bucket for recycling. https://firebirdstudios.com.au/the-process-of-making-pottery/Ceramics have evolved over thousands of years.White earthenware dinner plate. Crazing evident all over.Backstamped ‘Made in England S LTD’flagstaff hill, warrnambool, shipwrecked-coast, flagstaff-hill, flagstaff-hill-maritime-museum, maritime-museum, shipwreck-coast, flagstaff-hill-maritime-village, ceramics, tableware -
 Flagstaff Hill Maritime Museum and Village
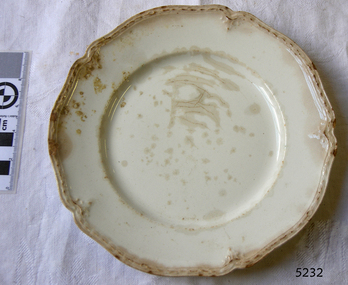
Domestic object - Plate, Johnson Bros
... We use commercial Mayco glazes on purpose – for their huge range of colour possibilities, stability, cool interactions, artistic freedom with the ability to easily brush the glazes on and ease of use. ...We use commercial Mayco glazes on purpose – for their huge range of colour possibilities, stability, cool interactions, artistic freedom with the ability to easily brush the glazes on and ease of use. ...The Process of Making Pottery Decorating, Firing, Glazing, Making, Technical There is a rhythm and flow to clay. It can’t be done all at once! Even the making process! It can take weeks to get everything done, especially if you can only work on your pottery once a week! Even though we have three hour classes, it’s often just not enough time! Here is an overview of some of the processes so you have a bit more grasp on some of the technical stuff! Step One – Design There are SO many ideas out there for making stuff in clay! From delicate porcelain jewellery, through to heavy sculptural work and everything in between. Deciding your direction is sometimes not that easy – when you first start, try everything, you will naturally gravitate to the style that you enjoy! The options and variations are endless and can get a wee bit overwhelming too! Check in with me before you start to ensure your ideas will work, what order you might do things, how you could achieve the look you are seeking and any other technical data required! Step Two – Making Clay is thixotropic. This means that as you work with it, the clay first gets sloppier and wetter, before is begins to dry in the atmosphere. For most things, you simply can’t do all parts of the project at once. An example of work order might look like: Get last weeks work out from the shelves Prepare clay for today’s work – roll your clay, prepare balls for throwing, make the first stage of a pinch pot) Clean up last week’s work and put it on the shelf for bisque firing Check that you have any glazing to do – and do enough of it that you will have time to finish your main project Do the next step of your next project – there might be a further step that can’t be complete immediately, in that case, wrap your work well and put onto the shelves. Letting your work rest for a while can really help keep your work clean and professional looking. Many things require bagging under plastic to keep it ready for work the next week – put your name on the outside of the bag so you can find your work easily. We have stickers and markers. Consider how you want to decorate your work – coloured slip can be applied at a fairly wet stage (remembering that it will make your work even wetter!). Trying to apply slip to dry clay won’t work! If you want to do sgraffito – you will need to keep the work leather hard (a state of dryness where you can still work the clay with a little effort and a little water and care). Step Three – Drying Most of the time your work can go into the rack uncovered to let it dry out for the following week. If you want to continue forming or shaping you will need to double bag your work – put your work on a suitable sized bat and put the bat in a bag so the base of the bag is under the bat, then put another bag over the top of the work and tuck the top of the bag under the bat. If you want to trim (or turn) your thrown work the following week, it should also be double bagged. If your work is large, delicate, or of uneven thicknesses, you should lightly cover your work for drying. When considering the drying process, bare in mind the weather, humidity and wind! The hotter and dryer, the faster things dry and work can dry unevenly in the shelves – this can lead to cracking – another time to lightly cover your work for drying. Step Four – Trimming and Cleaning Up Your work is dry! It is called greenware now and it is at it’s most fragile! Handle everything with two hands. I often refer to soft hands – keep everything gentle and with your fingers spread as much as possible. Try to not pick up things like plates too much, and always with both hands! Before your work can be bisque fired it should be “cleaned up”. You work won’t go into the kiln if it has sharp edges – when glazed, sharp edges turn into razor blades! Use a piece of fly wire to rub the work all over – this will scratch a little so be light handed. Use a knife or metal kidney to scrape any areas that require a bit more dynamic treatment than the fly wire offers! Finally, a very light wipe over with a slightly damp sponge can help soften and soothe all of your edges and dags! Trimming thrown work: If you are planning to trim (or turn) your thrown work (and you should be), make sure you bag it well – your work should be leather hard to almost dry for easiest trimming. Use this step to finish the work completely – use a metal kidney to polish the surface, or a slightly damp sponge to give a freshly thrown look. Wipe the sponge around the rim after trimming, and check the inside of the pot for dags! Trimming slip cast work: Usually I will trim the rims of your work on the wheel the following day to make that stage easier, however you will still need to check your work for lumps and bumps. Last but not least – check that your name is still clearly on the bottom of your work. Step Five – Bisque Firing When the work is completely dry it can go into the bisque kiln. The bisque kiln is fired to 1000°C. This process burns off the water in the clay as well as some of the chemically bound water. The structure of the clay is not altered that much at this temperature. Inside the bisque kiln, the work is stacked a little, small bowl inside a larger bowl and onto a heavy plate. Smaller items like decorations or drink coasters might get stacked several high. Consideration is paid to the weight of the stack and shape of the work. A bisque kiln can fire about one and a half times the amount of work that the glaze kiln can fire. The firing takes about 10 hours to complete the cycle and about two days to cool down. Once it has been emptied the work is placed in the glaze room ready for you to decorate! Step Six – Glazing Decorating your work with colour can be a lot of fun – and time consuming! There are three main options for surface treatment at this stage: Oxide Washes Underglazes Glazes Washes and underglazes do not “glaze” the work – It will still need a layer of glaze to fully seal the clay (washes don’t need glaze on surfaces not designed for food or liquid as they can gloss up a little on their own). Underglazes are stable colourants that turn out pretty much how they look in the jar. They can be mixed with each other to form other colours and can be used like water colours to paint onto your work. Mostly they should have a clear glaze on top to seal them. Oxides are a different species – the pink oxide (cobalt) wash turns out bright blue for instance. They don’t always need a glaze on top, and some glazes can change the colour of the wash! The glazes need no other “glaze” on top! Be careful of unknown glaze interactions – you can put any combination of glaze in a bowl or on a plate, but only a single glaze on the outside of any vertical surface! Glazes are a chemical reaction under heat. We don’t know the exact chemicals in the Mayco glazes we use. I can guess by the way they interact with each other, however, on the whole, you need to test every idea you have, and not run the test on a vertical surface! Simply put, glaze is a layer of glass like substance that bonds with the clay underneath. Clay is made of silica, alumina and water. Glaze is made of mostly silica. Silica has a melting point of 1700°C and we fire to 1240°C. The silica requires a “flux” to help it melt at the lower temperature. Fluxes can be all sorts of chemicals – a common one is calcium – calcium has a melting point of 2500°C, however, together they both melt at a much lower temperature! Colourants are metal oxides like cobalt (blue), chrome (green through black), copper (green, blue, even red!), manganese (black, purple and pink) iron (red brown), etc. Different chemicals in the glaze can have dramatic effects. for example, barium carbonate (which we don’t use) turns manganese bright pink! Other elements can turn manganese dioxide brown, blue, purple and reddish brown. Manganese dioxide is a flux in and of itself as well. So, glazes that get their black and purple colours, often interact with other glazes and RUN! Our mirror black is a good example – it mixes really well with many glazes because it fluxes them – causes them to melt faster. It will also bring out many beautiful colours in the glazes because it’s black colouring most definitely comes from manganese dioxide! Glaze chemistry is a whole subject on it’s own! We use commercial Mayco glazes on purpose – for their huge range of colour possibilities, stability, cool interactions, artistic freedom with the ability to easily brush the glazes on and ease of use. We currently have almost 50 glazes on hand! A major project is to test the interactions of all glazes with each other. That is 2,500 test tiles!!!! I’m going to make the wall behind the wheels the feature wall of pretty colours! Step Seven – Glaze (Gloss or sometimes called “Glost”) Firing Most of the time this is the final stage of making your creation (but not always!) The glaze kiln goes to 1240°C. This is called cone 6, or midrange. It is the low end of stoneware temperatures. Stoneware clays and glazes are typically fired at cone 8 – 10, that is 1260 – 1290°C. The energy requirement to go from 1240°C to 1280°C is almost a 30% more! Our clay is formulated to vitrify (mature, turn “glass-like”) at 1240°, as are our glazes. A glaze kiln take around 12 hours to reach temperature and two to three days to cool down. Sometimes a third firing process is required – this is for decoration that is added to work after the glaze firing. For example – adding precious metals and lustres. this firing temperature is usually around 600 – 800°C depending upon the techniques being used. There are many students interested in gold and silver trims – we will be doing this third type of firing soon! After firing your work will be in the student finished work shelves. Remember to pay for it before you head out the door! There is a small extra charge for using porcelain clay (it’s more than twice the price of regular clay), and for any third firing process! Once your work has been fired it can not turn back into clay for millennia – so don’t fire it if you don’t like it! Put it in the bucket for recycling. https://firebirdstudios.com.au/the-process-of-making-pottery/Ceramics have evolved over thousands of years.A white earthenware side plate with a gadroon edge. Has water marks and chips on front.‘Johnson Bros England Reg No 15587’flagstaff hill, warrnambool, shipwrecked-coast, flagstaff-hill, flagstaff-hill-maritime-museum, maritime-museum, shipwreck-coast, flagstaff-hill-maritime-village, johnson bros, ceramics, tableware -
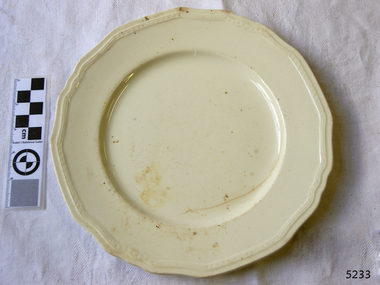 Flagstaff Hill Maritime Museum and Village
Domestic object - Plate, Alfred Meakin
... We use commercial Mayco glazes on purpose – for their huge range of colour possibilities, stability, cool interactions, artistic freedom with the ability to easily brush the glazes on and ease of use. ...We use commercial Mayco glazes on purpose – for their huge range of colour possibilities, stability, cool interactions, artistic freedom with the ability to easily brush the glazes on and ease of use. ...The Process of Making Pottery Decorating, Firing, Glazing, Making, Technical There is a rhythm and flow to clay. It can’t be done all at once! Even the making process! It can take weeks to get everything done, especially if you can only work on your pottery once a week! Even though we have three hour classes, it’s often just not enough time! Here is an overview of some of the processes so you have a bit more grasp on some of the technical stuff! Step One – Design There are SO many ideas out there for making stuff in clay! From delicate porcelain jewellery, through to heavy sculptural work and everything in between. Deciding your direction is sometimes not that easy – when you first start, try everything, you will naturally gravitate to the style that you enjoy! The options and variations are endless and can get a wee bit overwhelming too! Check in with me before you start to ensure your ideas will work, what order you might do things, how you could achieve the look you are seeking and any other technical data required! Step Two – Making Clay is thixotropic. This means that as you work with it, the clay first gets sloppier and wetter, before is begins to dry in the atmosphere. For most things, you simply can’t do all parts of the project at once. An example of work order might look like: Get last weeks work out from the shelves Prepare clay for today’s work – roll your clay, prepare balls for throwing, make the first stage of a pinch pot) Clean up last week’s work and put it on the shelf for bisque firing Check that you have any glazing to do – and do enough of it that you will have time to finish your main project Do the next step of your next project – there might be a further step that can’t be complete immediately, in that case, wrap your work well and put onto the shelves. Letting your work rest for a while can really help keep your work clean and professional looking. Many things require bagging under plastic to keep it ready for work the next week – put your name on the outside of the bag so you can find your work easily. We have stickers and markers. Consider how you want to decorate your work – coloured slip can be applied at a fairly wet stage (remembering that it will make your work even wetter!). Trying to apply slip to dry clay won’t work! If you want to do sgraffito – you will need to keep the work leather hard (a state of dryness where you can still work the clay with a little effort and a little water and care). Step Three – Drying Most of the time your work can go into the rack uncovered to let it dry out for the following week. If you want to continue forming or shaping you will need to double bag your work – put your work on a suitable sized bat and put the bat in a bag so the base of the bag is under the bat, then put another bag over the top of the work and tuck the top of the bag under the bat. If you want to trim (or turn) your thrown work the following week, it should also be double bagged. If your work is large, delicate, or of uneven thicknesses, you should lightly cover your work for drying. When considering the drying process, bare in mind the weather, humidity and wind! The hotter and dryer, the faster things dry and work can dry unevenly in the shelves – this can lead to cracking – another time to lightly cover your work for drying. Step Four – Trimming and Cleaning Up Your work is dry! It is called greenware now and it is at it’s most fragile! Handle everything with two hands. I often refer to soft hands – keep everything gentle and with your fingers spread as much as possible. Try to not pick up things like plates too much, and always with both hands! Before your work can be bisque fired it should be “cleaned up”. You work won’t go into the kiln if it has sharp edges – when glazed, sharp edges turn into razor blades! Use a piece of fly wire to rub the work all over – this will scratch a little so be light handed. Use a knife or metal kidney to scrape any areas that require a bit more dynamic treatment than the fly wire offers! Finally, a very light wipe over with a slightly damp sponge can help soften and soothe all of your edges and dags! Trimming thrown work: If you are planning to trim (or turn) your thrown work (and you should be), make sure you bag it well – your work should be leather hard to almost dry for easiest trimming. Use this step to finish the work completely – use a metal kidney to polish the surface, or a slightly damp sponge to give a freshly thrown look. Wipe the sponge around the rim after trimming, and check the inside of the pot for dags! Trimming slip cast work: Usually I will trim the rims of your work on the wheel the following day to make that stage easier, however you will still need to check your work for lumps and bumps. Last but not least – check that your name is still clearly on the bottom of your work. Step Five – Bisque Firing When the work is completely dry it can go into the bisque kiln. The bisque kiln is fired to 1000°C. This process burns off the water in the clay as well as some of the chemically bound water. The structure of the clay is not altered that much at this temperature. Inside the bisque kiln, the work is stacked a little, small bowl inside a larger bowl and onto a heavy plate. Smaller items like decorations or drink coasters might get stacked several high. Consideration is paid to the weight of the stack and shape of the work. A bisque kiln can fire about one and a half times the amount of work that the glaze kiln can fire. The firing takes about 10 hours to complete the cycle and about two days to cool down. Once it has been emptied the work is placed in the glaze room ready for you to decorate! Step Six – Glazing Decorating your work with colour can be a lot of fun – and time consuming! There are three main options for surface treatment at this stage: Oxide Washes Underglazes Glazes Washes and underglazes do not “glaze” the work – It will still need a layer of glaze to fully seal the clay (washes don’t need glaze on surfaces not designed for food or liquid as they can gloss up a little on their own). Underglazes are stable colourants that turn out pretty much how they look in the jar. They can be mixed with each other to form other colours and can be used like water colours to paint onto your work. Mostly they should have a clear glaze on top to seal them. Oxides are a different species – the pink oxide (cobalt) wash turns out bright blue for instance. They don’t always need a glaze on top, and some glazes can change the colour of the wash! The glazes need no other “glaze” on top! Be careful of unknown glaze interactions – you can put any combination of glaze in a bowl or on a plate, but only a single glaze on the outside of any vertical surface! Glazes are a chemical reaction under heat. We don’t know the exact chemicals in the Mayco glazes we use. I can guess by the way they interact with each other, however, on the whole, you need to test every idea you have, and not run the test on a vertical surface! Simply put, glaze is a layer of glass like substance that bonds with the clay underneath. Clay is made of silica, alumina and water. Glaze is made of mostly silica. Silica has a melting point of 1700°C and we fire to 1240°C. The silica requires a “flux” to help it melt at the lower temperature. Fluxes can be all sorts of chemicals – a common one is calcium – calcium has a melting point of 2500°C, however, together they both melt at a much lower temperature! Colourants are metal oxides like cobalt (blue), chrome (green through black), copper (green, blue, even red!), manganese (black, purple and pink) iron (red brown), etc. Different chemicals in the glaze can have dramatic effects. for example, barium carbonate (which we don’t use) turns manganese bright pink! Other elements can turn manganese dioxide brown, blue, purple and reddish brown. Manganese dioxide is a flux in and of itself as well. So, glazes that get their black and purple colours, often interact with other glazes and RUN! Our mirror black is a good example – it mixes really well with many glazes because it fluxes them – causes them to melt faster. It will also bring out many beautiful colours in the glazes because it’s black colouring most definitely comes from manganese dioxide! Glaze chemistry is a whole subject on it’s own! We use commercial Mayco glazes on purpose – for their huge range of colour possibilities, stability, cool interactions, artistic freedom with the ability to easily brush the glazes on and ease of use. We currently have almost 50 glazes on hand! A major project is to test the interactions of all glazes with each other. That is 2,500 test tiles!!!! I’m going to make the wall behind the wheels the feature wall of pretty colours! Step Seven – Glaze (Gloss or sometimes called “Glost”) Firing Most of the time this is the final stage of making your creation (but not always!) The glaze kiln goes to 1240°C. This is called cone 6, or midrange. It is the low end of stoneware temperatures. Stoneware clays and glazes are typically fired at cone 8 – 10, that is 1260 – 1290°C. The energy requirement to go from 1240°C to 1280°C is almost a 30% more! Our clay is formulated to vitrify (mature, turn “glass-like”) at 1240°, as are our glazes. A glaze kiln take around 12 hours to reach temperature and two to three days to cool down. Sometimes a third firing process is required – this is for decoration that is added to work after the glaze firing. For example – adding precious metals and lustres. this firing temperature is usually around 600 – 800°C depending upon the techniques being used. There are many students interested in gold and silver trims – we will be doing this third type of firing soon! After firing your work will be in the student finished work shelves. Remember to pay for it before you head out the door! There is a small extra charge for using porcelain clay (it’s more than twice the price of regular clay), and for any third firing process! Once your work has been fired it can not turn back into clay for millennia – so don’t fire it if you don’t like it! Put it in the bucket for recycling. https://firebirdstudios.com.au/the-process-of-making-pottery/Ceramics have evolved over thousands of years.Earthenware dessert plate, cream colour. Made by Alfred Meakin, England. Backstamped ‘Alfred Meakin England’. flagstaff hill, warrnambool, shipwrecked-coast, flagstaff-hill, flagstaff-hill-maritime-museum, maritime-museum, shipwreck-coast, flagstaff-hill-maritime-village, alfred meakin, ceramics, earthenware, kitchenware -
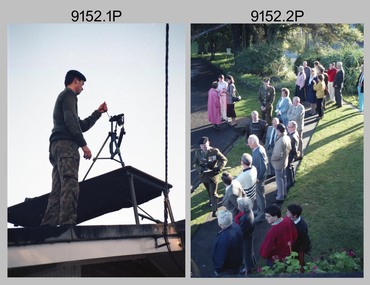 Bendigo Military Museum
Photograph - Army Survey Regiment – Corps Day Parade Set 1, Fortuna Villa, Bendigo, 1991
... RSM WO1 Graham Ragless is in the foreground. .19) to .21) - Photo, colour, 1991. Army Survey Regiment stands at ease during RSM WO1 Graham Ragless’s handover to ADJT CAPT Geoff Ford. .22) to .24) - Photo, colour, 1991. ...RSM WO1 Graham Ragless is in the foreground. .19) to .21) - Photo, colour, 1991. Army Survey Regiment stands at ease during RSM WO1 Graham Ragless’s handover to ADJT CAPT Geoff Ford. .22) to .24) - Photo, colour, 1991. ...This set of 31 photographs was taken at the Corps Day Parade held at the Army Survey Regiment, Bendigo on the 26th of June 1991.The Corps Day Parade was held to commemorate the 76th anniversary of the formation of the Royal Australian Survey Corps. The Reviewing officer was the Commander of the 3rd Military District BRIG P. Davies AM ADC and the Parade Host was D-SVY COL Simon Lemon. Refer to items 9154.37P for more photographs taken during the parade; and 9155.27P for photographs taken afterwards during the tour of the unit and the family BBQ.This is a set of 31 photographs of the Corps Day Parade held at the Army Survey Regiment, Fortuna, Bendigo on the 26th of June 1991. The colour photographs are on 35mm negative film and scanned at 2400 dpi. They are part of the Army Survey Regiment’s Collection. .1) - Photo, colour, 1991. Photographer on the roof of the SGTS Mess Accommodation building. .2) - Photo, colour, 1991. Guests gather at the edge of the parade ground. The RSM in the foreground and the WO1 in the background are unidentified. .3) & .4) - Photo, colour, 1991. SGT Chris ‘Charlie’ Brown stands at one corner of the parade ground behind a Wild T2 theodolite mounted with a RED2L Electric Distance Measurement (EDM) instrument. .5) & .6) - Photo, colour, 1991. CPL Steve Wegener stands at one corner of the parade ground behind a Wild T2 theodolite. .7) & .8) - Photo, colour, 1991. The right markers of each squadron take their positions under RSM WO1 Graham Ragless’s commands. .9) - Photo, colour, 1991. The Officers move to the edge of the parade ground before taking posts. SGT Chris ‘Charlie’ Brown is in the foreground behind a Wild T2 theodolite .10) to .15) - Photo, colour, 1991. Army Survey Regiment follows the 3rd MD marches onto the parade ground. RSM WO1 Graham Ragless is in the foreground. .16) - Photo, colour, 1991. Army Survey Regiment at the halt. RSM WO1 Graham Ragless is in the foreground. .17) - Photo, colour, 1991. Headquarters Squadron performs the ‘Right Dress’. .18) - Photo, colour, 1991. Cartographic Squadron performs the ‘Right Dress’. RSM WO1 Graham Ragless is in the foreground. .19) to .21) - Photo, colour, 1991. Army Survey Regiment stands at ease during RSM WO1 Graham Ragless’s handover to ADJT CAPT Geoff Ford. .22) to .24) - Photo, colour, 1991. Army Survey Regiment fixes bayonets under ADJT CAPT Geoff Ford’s commands. .25) - Photo, colour, 1991. Army Survey Regiment stands at ease during ADJT CAPT Geoff Ford’s handover to 2IC MAJ Ray Redman .26) & .27) - Photo, colour, 1991. Army Survey Regiment Officers take posts under 2IC MAJ Ray Redman’s commands. .28) & .29) - Photo, colour, 1991. Army Survey Regiment stands at attention during 2IC MAJ Ray Redman’s handover to CO LTCOL Rene van den Tol. .30) & .31) - Photo, colour, 1991. Army Survey Regiment under CO LTCOL Rene van den Tol’s command awaits arrival of the official guests.There are no personnel identified. ‘Corps Day 26 Jun 1991’ annotated on negative sleeves.royal australian survey corps, rasvy, army survey regiment, army svy regt, fortuna -
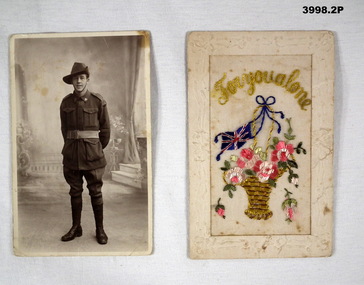 Bendigo Military Museum
Postcard - POSTCARDS, (.1) 29.3.1918
... (.1) Post card photo, B & W, soldier standing at ease with studio back ground, on rear handwritten in black and blue pen addressed to “Dear Lena”. (.2) Post card, silk, colour with vase of flowers, bows and flag. ...colour. Alf Rogers had not enlisted at this point. The contents of the letter relate to German POW’s in England so the date would be more likely to be 1917. Refer Cat No 3996P re “Lena” and other cards. 38th Battalion WWI Alfred ROGERS (.1) Post card photo, B & W, soldier standing at ease with studio back ground, on rear handwritten in black and blue pen addressed to “Dear Lena”. (.2) Post card, silk, colour with vase of flowers, bows and flag. ...Both letters to “Lena” are from "Alfred ROGERS" believed to be Regt No 2390, born Bendigo, enlisted in 4th reinforcements 38th Bn AIF age 18 years. Embarked for England 20.10.1916, embark for France 6.5.1918, WIA 9.8.1918 Concussion, hospital aboard ship 19.2.1919 “Albuminuria” discharged from the AIF 11.8.1919. (.2) On the rear a date 22.2.1916 has been written in darker pen colour. Alf Rogers had not enlisted at this point. The contents of the letter relate to German POW’s in England so the date would be more likely to be 1917. Refer Cat No 3996P re “Lena” and other cards.(.1) Post card photo, B & W, soldier standing at ease with studio back ground, on rear handwritten in black and blue pen addressed to “Dear Lena”. (.2) Post card, silk, colour with vase of flowers, bows and flag. Across the top in yellow sewn in “For you alone”. Letter on the rear is in black pen and addressed to “Dear Lena”.38th battalion, wwi, alfred rogers -
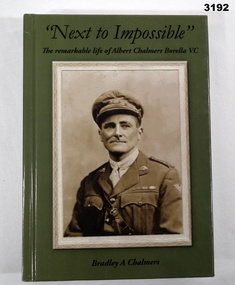 Bendigo Military Museum
Book - BOOK, AUTOBIOGRAPHY, Bradley A Chalmers, Next to Impossible, 2015
... ease in the company of the King or the common man, Albert Chalmers Borella VC did it all. This is his remarkable story. books - biography/military VC Hard cardboard cover, black print over mid green background on front, spine & back. Sepia portrait photo on front. Colour ...Biography. Next To Impossible - The remarkable life of Albert Chalmers Borella VC. Bushman, farm hand, artist, metropolitan fireman, decorated soldier, soldier settler, POW Commandant. At ease in the company of the King or the common man, Albert Chalmers Borella VC did it all. This is his remarkable story. Hard cardboard cover, black print over mid green background on front, spine & back. Sepia portrait photo on front. Colour portrait photo & colour photo of service medals on back. End pages illustrated in black & white battle maps. 510 pages, cut plain paper, illustrated with black & white photos & maps. books - biography/military, vc -
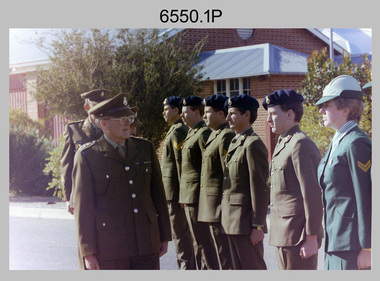 Bendigo Military Museum
Photograph - 4th Field Survey Squadron OC’s Parades and Defence Force Service Medal Presentations, Keswick Barracks, Adelaide SA, 1988
... L to R: SPR Owen Jones, SPR Cheryl Deluca-Cardillo, CPL Ken Peters, SPR Steve Ellis, 2IC CAPT Terry Lord, CPL Michelle Griffith, SPR Steve Nokes, WO2 Bob Rogister, SGT Gill Park, unidentified. .8) - Photo, colour, 1988. 4 Fd Svy Sqn OC’s Parade ‘standing at ease’....L to R: SPR Owen Jones, SPR Cheryl Deluca-Cardillo, CPL Ken Peters, SPR Steve Ellis, 2IC CAPT Terry Lord, CPL Michelle Griffith, SPR Steve Nokes, WO2 Bob Rogister, SGT Gill Park, unidentified. .8) - Photo, colour, 1988. 4 Fd Svy Sqn OC’s Parade ‘standing at ease’. 4th Field Survey Squadron OC’s Parades and Defence Force Service Medal Presentations, Keswick Barracks, Adelaide SA Photograph 4th Field Survey Squadron OC’s Parades and Defence Force Service Medal Presentations, Keswick Barracks, Adelaide SA Army Survey Regiment ...This is a set of eight photographs of a 4th Field Survey Squadron OC’s parade at Keswick Barracks, Adelaide SA in 1988. The Colonel Commandant (honorary appointment) of the Survey Corps - COL Clem Sargent (retired) presented the Defence Force Service Medal to personnel in recognition of 15 years of efficient remunerated service, or the Clasp for 5 years of additional service. This is a set of eight photographs of a 4th Field Survey Squadron OC’s parade and the presentation of the Defence Force Service Medal, at Keswick Barracks, Adelaide SA in 1987. The colour photographs are on 35mm negative film and are part of the Army Survey Regiment’s Collection. The photographs were scanned at 96 dpi. .1) - Photo, colour, 1988. L to R: COL Clem Sargent (retired), SSM WO1 Bill Griggs & OC MAJ Peter Cates (obscured), SGT Stu Symonds, SPR Wally Twidale, CPL Jamie McRae, SPR Owen Jones, SPR Steve Ellis, CPL Michelle Griffith. .2) - Photo, colour, 1988. L to R: CPL Peter Tuddenham, COL Clem Sargent (retired), CPL Peter Hardy, SGT Wally Chilcott, CPL Terry ‘TJ’ Wicker (foreground), SPR Steve Nokes, SSGT R. Marsh. .3) - Photo, colour, 1988. L to R: SSM WO1 Bill Griggs (obscured), COL Clem Sargent (retired), CPL Jim Humphrey, unidentified, CPL John Ratcliffe, SGT Wally Chilcott, SPR Cheryl Deluca-Cardillo, SSGT R. Marsh, unidentified. .4) - Photo, colour, 1988. L to R: CAPT Danny Galbraith, COL Clem Sargent (retired), OC MAJ Peter Cates. .5) - Photo, colour, 1988. L to R: SGT Derek Stanmore, COL Clem Sargent (retired), OC MAJ Peter Cates. .6) - Photo, colour, 1988. COL Clem Sargent (retired) at the flagpole. L to R: SPR Cheryl Deluca-Cardillo, CPL Ken Peters, SPR Steve Ellis, SSGT R. Marsh, 2IC CAPT Terry Lord, CPL Michelle Griffith, SPR Steve Nokes, SSGT Dennis Learmonth, SGT Gill Park, unidentified. .7) - Photo, colour, 1988. COL Clem Sargent (retired) at the flagpole. L to R: SPR Owen Jones, SPR Cheryl Deluca-Cardillo, CPL Ken Peters, SPR Steve Ellis, 2IC CAPT Terry Lord, CPL Michelle Griffith, SPR Steve Nokes, WO2 Bob Rogister, SGT Gill Park, unidentified. .8) - Photo, colour, 1988. 4 Fd Svy Sqn OC’s Parade ‘standing at ease’..1P to .8P – There are no personnel identified. ‘1988 Presentations’ annotated on negatives sleeve.royal australian survey corps, rasvy, 4 fd svy sqn -
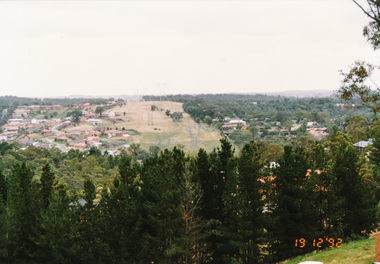 Eltham District Historical Society Inc
Photograph, Power line easement between Eltham and Research viewed from Afton Street, Research, 19 December 1992, 19/12/1992
... The Eltham Horse Trail: Research and Warrandyte to Kinglake: Survey of proposed route, December 1992: (4) Connecting trail to Eltham eltham horse trail (1992 survey) Afton Street Eltham research (vic.) transmission lines Colour photograph Power line easement between Eltham and Research viewed from Afton Street, Research, 19 December 1992 Photograph ...The Eltham Horse Trail: Research and Warrandyte to Kinglake: Survey of proposed route, December 1992: (4) Connecting trail to ElthamColour photographeltham horse trail (1992 survey), afton street, eltham, research (vic.), transmission lines -
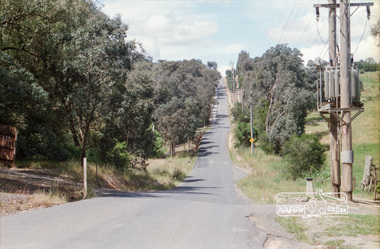 Eltham District Historical Society Inc
Photograph, Reynolds Road, Research and the power transmission line easement running between Diosma Road and Main Road, Eltham
... research (vic.) eltham diosma road main road reynolds road Kodak CL 200 5093 Roll of 35mm colour negative film, 7 strips Reynolds Road, Research and the power transmission line easement running between Diosma Road and Main Road, Eltham Photograph ...Roll of 35mm colour negative film, 7 stripsKodak CL 200 5093research (vic.), eltham, diosma road, main road, reynolds road -
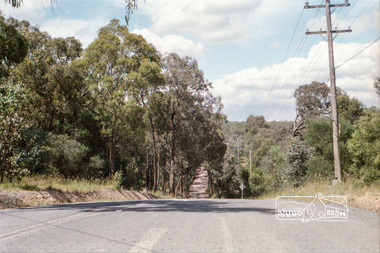 Eltham District Historical Society Inc
Photograph, Reynolds Road, Research and the power transmission line easement running between Diosma Road and Main Road, Eltham
... research (vic.) eltham diosma road main road reynolds road Kodak CL 200 5093 Roll of 35mm colour negative film, 7 strips Reynolds Road, Research and the power transmission line easement running between Diosma Road and Main Road, Eltham Photograph ...Roll of 35mm colour negative film, 7 stripsKodak CL 200 5093research (vic.), eltham, diosma road, main road, reynolds road -
 Eltham District Historical Society Inc
Photograph, Reynolds Road, Research and the power transmission line easement running between Diosma Road and Main Road, Eltham
... research (vic.) eltham diosma road main road reynolds road Kodak CL 200 5093 Roll of 35mm colour negative film, 7 strips Reynolds Road, Research and the power transmission line easement running between Diosma Road and Main Road, Eltham Photograph ...Roll of 35mm colour negative film, 7 stripsKodak CL 200 5093research (vic.), eltham, diosma road, main road, reynolds road -
 Eltham District Historical Society Inc
Photograph, Reynolds Road, Research and the power transmission line easement running between Diosma Road and Main Road, Eltham
... research (vic.) eltham diosma road main road reynolds road Kodak CL 200 5093 Roll of 35mm colour negative film, 7 strips Reynolds Road, Research and the power transmission line easement running between Diosma Road and Main Road, Eltham Photograph ...Roll of 35mm colour negative film, 7 stripsKodak CL 200 5093research (vic.), eltham, diosma road, main road, reynolds road -
 Eltham District Historical Society Inc
Photograph, Reynolds Road, Research and the power transmission line easement running between Diosma Road and Main Road, Eltham
... research (vic.) eltham diosma road main road reynolds road Kodak CL 200 5093 Roll of 35mm colour negative film, 7 strips Reynolds Road, Research and the power transmission line easement running between Diosma Road and Main Road, Eltham Photograph ...Roll of 35mm colour negative film, 7 stripsKodak CL 200 5093research (vic.), eltham, diosma road, main road, reynolds road -
 Eltham District Historical Society Inc
Photograph, Reynolds Road, Research and the power transmission line easement running between Diosma Road and Main Road, Eltham
... research (vic.) eltham diosma road main road reynolds road Kodak CL 200 5093 Roll of 35mm colour negative film, 7 strips Reynolds Road, Research and the power transmission line easement running between Diosma Road and Main Road, Eltham Photograph ...Roll of 35mm colour negative film, 7 stripsKodak CL 200 5093research (vic.), eltham, diosma road, main road, reynolds road -
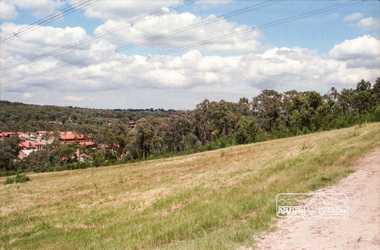 Eltham District Historical Society Inc
Photograph, Reynolds Road, Research and the power transmission line easement running between Diosma Road and Main Road, Eltham
... research (vic.) eltham diosma road main road reynolds road Kodak CL 200 5093 Roll of 35mm colour negative film, 7 strips Reynolds Road, Research and the power transmission line easement running between Diosma Road and Main Road, Eltham Photograph ...Roll of 35mm colour negative film, 7 stripsKodak CL 200 5093research (vic.), eltham, diosma road, main road, reynolds road -
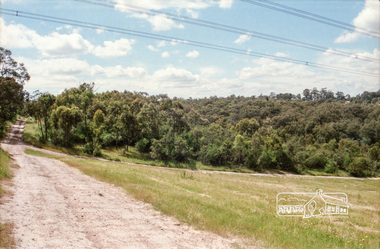 Eltham District Historical Society Inc
Photograph, Reynolds Road, Research and the power transmission line easement running between Diosma Road and Main Road, Eltham
... research (vic.) eltham diosma road main road reynolds road Kodak CL 200 5093 Roll of 35mm colour negative film, 7 strips Reynolds Road, Research and the power transmission line easement running between Diosma Road and Main Road, Eltham Photograph ...Roll of 35mm colour negative film, 7 stripsKodak CL 200 5093research (vic.), eltham, diosma road, main road, reynolds road -
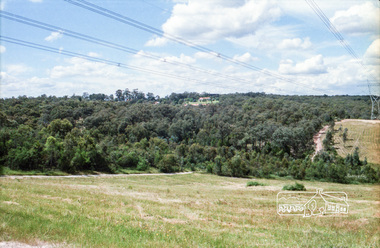 Eltham District Historical Society Inc
Photograph, Reynolds Road, Research and the power transmission line easement running between Diosma Road and Main Road, Eltham
... research (vic.) eltham diosma road main road reynolds road Kodak CL 200 5093 Roll of 35mm colour negative film, 7 strips Reynolds Road, Research and the power transmission line easement running between Diosma Road and Main Road, Eltham Photograph ...Roll of 35mm colour negative film, 7 stripsKodak CL 200 5093research (vic.), eltham, diosma road, main road, reynolds road -
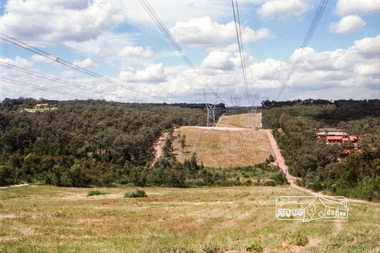 Eltham District Historical Society Inc
Photograph, Reynolds Road, Research and the power transmission line easement running between Diosma Road and Main Road, Eltham
... research (vic.) eltham diosma road main road reynolds road Kodak CL 200 5093 Roll of 35mm colour negative film, 7 strips Reynolds Road, Research and the power transmission line easement running between Diosma Road and Main Road, Eltham Photograph ...Roll of 35mm colour negative film, 7 stripsKodak CL 200 5093research (vic.), eltham, diosma road, main road, reynolds road -
 Eltham District Historical Society Inc
Photograph, Reynolds Road, Research and the power transmission line easement running between Diosma Road and Main Road, Eltham
... research (vic.) eltham diosma road main road reynolds road Kodak CL 200 5093 Roll of 35mm colour negative film, 7 strips Reynolds Road, Research and the power transmission line easement running between Diosma Road and Main Road, Eltham Photograph ...Roll of 35mm colour negative film, 7 stripsKodak CL 200 5093research (vic.), eltham, diosma road, main road, reynolds road -
 Eltham District Historical Society Inc
Photograph, Reynolds Road, Research and the power transmission line easement running between Diosma Road and Main Road, Eltham
... research (vic.) eltham diosma road main road reynolds road Kodak CL 200 5093 Roll of 35mm colour negative film, 7 strips Reynolds Road, Research and the power transmission line easement running between Diosma Road and Main Road, Eltham Photograph ...Roll of 35mm colour negative film, 7 stripsKodak CL 200 5093research (vic.), eltham, diosma road, main road, reynolds road
