
Showing 36 items matching "command of troops"
-
 National Vietnam Veterans Museum (NVVM)
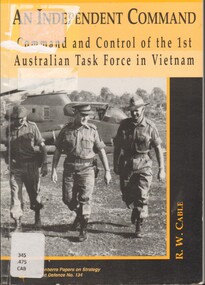
Book, Cable. R.W, An Independent Command: Command & Control of the 1st Australian Task Force in Vietnam
... ...Command of troops...Australian Task Force (Vietnam) Command of troops 1 ATF Cold War The commander f the 1st Australian Task Force in Vietnam held the key operational command in Australia's largest military commitment of the Cold War period. ...The commander f the 1st Australian Task Force in Vietnam held the key operational command in Australia's largest military commitment of the Cold War period. Although the Vietnam War has been written on at length, the brigade level of command, held in Vietnam by the commander of 1 ATF, has received comparatively little attention. This is the more remarkable given the Australian Army's recently renewed interest in a "task force' structure and the modern trend away from large scale conventional warfare.The commander f the 1st Australian Task Force in Vietnam held the key operational command in Australia's largest military commitment of the Cold War period. Although the Vietnam War has been written on at length, the brigade level of command, held in Vietnam by the commander of 1 ATF, has received comparatively little attention. This is the more remarkable given the Australian Army's recently renewed interest in a "task force' structure and the modern trend away from large scale conventional warfare. australia. army. australian task force (vietnam), command of troops, 1 atf, cold war -
 Montmorency–Eltham RSL Sub Branch
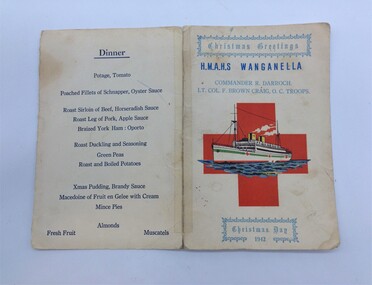
Functional object - Christmas Day Menu H.M.A.H.S. Wanganella
... The Christmas greetings and the names of the commander and officer in command of the troops are printed in light blue ink. ...The Christmas greetings and the names of the commander and officer in command of the troops are printed in light blue ink. ...During World War II, Wanganella was converted to serve as an Australian Hospital Ship (AHS). Between 19 May 1941 and 1946, AHS Wanganella carried wounded and sick evacuees from the Middle East, New Guinea, Solomon Islands, Borneo and the South Pacific, travelling over 251,011 nautical miles (464,872 km) and transporting 13,385 wounded. A.H.S Wanganella 2/2nd Australian Hospital ship. Ref: "Hospital Ships" Rupert Goodman SLV LT 359.8364 0994 G62H Trip 8 Depart 12th Nov 1942 Melbourne Fremantle Aden 10th - 11th Dec 1942 Port Tewfik, Egypt 21st - 22nd Dec 1942 Colombo, Sri Lanka 01 Jan 1943 Fremantle Adelaide Melbourne Sydney Arrived 13th Jan 1943 Brisbane Wanganella left Colombo 22nd December 1942 for Fremantle, with patients who boarded at Port Tewfik in Egypt arriving on New Year's day 1943. The menu is printed on fawn cardboard. The menu has been torn along the spine and rearranged at some time to put on display. There is evidence of glue or tape damage at the back of each corner of the card. Some grease and finger marks are evident on the front and back of the card. The printing is very legible. The heading 'Christmas Greetings' is at the top of the front page and 'Christmas Day 1942' at the bottom of the page. Originally the menu was assembled as a leaflet with the menu on the inside of the second sheet. Since this time, the menu has been torn along the middle fold and the second page sheet taped to the first page. There is a red cross on the front page with a printed illustration of the Wanganella superimposed over the top. H.M.A.H.S. Wanganella and the dinner menu are printed in dark blue ink. The Christmas greetings and the names of the commander and officer in command of the troops are printed in light blue ink. h.m.a.h.s. wanganella, w.w.ii hospital ship -
 Flagstaff Hill Maritime Museum and Village
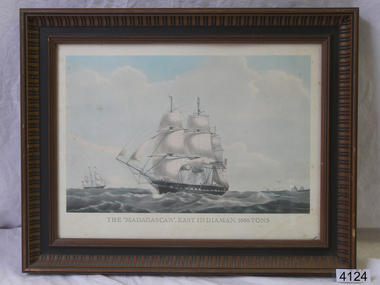
Print - Lithograph Picture, Madagascar Indiaman, Unknown
... troops between England and India until the end of 1852. In addition to her normal crew, she also carried many boys being trained as officers for the merchant marine. Known as midshipmen from naval practice, their parents or guardians paid for their training, and they only received a nominal wage of usually a shilling a month. Due to the Victorian Gold Rush, Madagascar, under the command...troops between England and India until the end of 1852. In addition to her normal crew, she also carried many boys being trained as officers for the merchant marine. Known as midshipmen from naval practice, their parents or guardians paid for their training, and they only received a nominal wage of usually a shilling a month. Due to the Victorian Gold Rush, Madagascar, under the command ...Madagascar was a large British merchant ship built for the trade to India and China in 1837 that disappeared on a voyage from Melbourne to London in 1853. The disappearance of Madagascar was one of the great maritime mysteries of the 19th century and has probably been the subject of more speculation than any other 19th-century maritime puzzle, except for the Mary Celeste. Madagascar, the second Blackwall Frigate, was built for George and Henry Green at the Blackwall Yard, London, a shipyard that they co-owned with the Wigram family. A one-eighth share in the vessel was held throughout her 16-year career by her first master Captain William Harrison Walker Walker. Madagascar carried freight, passengers, and troops between England and India until the end of 1852. In addition to her normal crew, she also carried many boys being trained as officers for the merchant marine. Known as midshipmen from naval practice, their parents or guardians paid for their training, and they only received a nominal wage of usually a shilling a month. Due to the Victorian Gold Rush, Madagascar, under the command of Captain Fortescue William Harris, was sent to Melbourne with emigrants. She left Plymouth on 11 March 1853 and, after an uneventful passage of 87 days, reached Melbourne on 10 June. Fourteen of her 60 crew jumped ship for the diggings, and it is believed only about three replacements were signed on. She then loaded a cargo that included wool, rice, and about two tonnes of gold valued at £240,000, and took on board about 110 passengers for London. On Wednesday 10 August, just as she was preparing to sail, police went on board and arrested a bushranger John Francis, who was later found to have been one of those responsible for robbing on 20th July the Melbourne Private Escort between the McIvor goldfield at Heathcote, Victoria and Kyneton. On the following day, the police arrested two others, one on board the ship and the other as he was preparing to board. As a result of these arrests, Madagascar did not leave Melbourne until Friday 12 August 1853. After she left Port Phillip Heads Madagascar was never seen again. When the ship became overdue many theories were floated, including spontaneous combustion of the wool cargo, hitting an iceberg and, most controversially, being seized by criminal elements of the passengers and/or crew and scuttled, with the gold being stolen and the remaining passengers and crew murdered. There have been many rumors as to what happened to Madagascar over the years but what really happened is still a mystery. The lithograph was made around 1950 from an original painting of Madagascar a Vessel with a notorious past and is interesting and a significant item for the ships part in early Victorian history. The picture is it’s self not valuable or can be associated with a significant person in history. The interest lies in the events that are linked to the ship in the mid 19th century.Lithograph of the ship Madagascar, in a wooden frameThe Madagascar East Indiaman 1000 tonsflagstaff hill, warrnambool, shipwrecked-coast, flagstaff-hill, flagstaff-hill-maritime-museum, maritime-museum, shipwreck-coast, flagstaff-hill-maritime-village, lithograph, the madagascar, east indiaman -
 Federation University Historical Collection
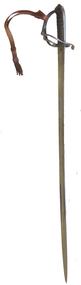
Weapon - Object, Sword, 1877
... Troops were based at various times at Geelong, Ballarat, Kyneton, Bendigo, Castlemaine and Dandenong, as well as metropolitan Melbourne. In 1885, most of the Cavalry were incorporated into a newly formed Victorian Mounted Rifles. (http://www.awm.gov.au/collection/REL/18070.001) "It is notified in the Gazette that Lieutenant Laurence Whyte, Ballarat troop Prince of Wales Light Horse, has been appointed captain, seniority to date from January 31. " (The Argus, 17 February 1883) "An official inspection of the P.W.L.H. took place in the Royal Park last evening by the colonel-commandant, assisted by Colonel Rede; Captain Medealf in command of the, troop. ...Troops were based at various times at Geelong, Ballarat, Kyneton, Bendigo, Castlemaine and Dandenong, as well as metropolitan Melbourne. In 1885, most of the Cavalry were incorporated into a newly formed Victorian Mounted Rifles. (http://www.awm.gov.au/collection/REL/18070.001) "It is notified in the Gazette that Lieutenant Laurence Whyte, Ballarat troop Prince of Wales Light Horse, has been appointed captain, seniority to date from January 31. " (The Argus, 17 February 1883) "An official inspection of the P.W.L.H. took place in the Royal Park last evening by the colonel-commandant, assisted by Colonel Rede; Captain Medealf in command of the, troop. ...In 1862, the units of the Mounted Volunteer Corps in Victoria were formed into a single regiment known as the Victorian Volunteer Light Horse. This title changed again in 1863, to the Prince of Wales Victorian Volunteer Light Horse ( Hussars ). In 1870 a uniform was adopted that was based on the British 19th Hussars. Troops were based at various times at Geelong, Ballarat, Kyneton, Bendigo, Castlemaine and Dandenong, as well as metropolitan Melbourne. In 1885, most of the Cavalry were incorporated into a newly formed Victorian Mounted Rifles. (http://www.awm.gov.au/collection/REL/18070.001) "It is notified in the Gazette that Lieutenant Laurence Whyte, Ballarat troop Prince of Wales Light Horse, has been appointed captain, seniority to date from January 31. " (The Argus, 17 February 1883) "An official inspection of the P.W.L.H. took place in the Royal Park last evening by the colonel-commandant, assisted by Colonel Rede; Captain Medealf in command of the, troop. After bring exercised in field movements, a sword competition took place, toe first prize bring awarded to Trooper L. Whyte ; the "second to Sergeant Blight; the third, to Trooper Jenkins; and the fourth, to Trooper Orr, of Creswick. Major Sleep officiated as timekeeper. The colonel commandant complimented Captain Med-calf upon the efficiency of the troop, and officers and men afterwards dined together at Craig's hotel. (Ballarat Courier, 09 March 1877.)Silver coloured sword and scabbard with leather hand grip within the hilt. The sword was awarded to Trooper Whyte of the Prince of Wales Victorian Volunteer Light Horse (Ballarat) in 1877.. Engraved into handle "Ballarat Troop P.W.V.V.L.H Officers Trophy FIRST PRIZE WON BY Trooper Whyte AT SWORD Competition 8th March 1877" volunteer forces, sword, trooper whyte, prince of wales victorian volunteer light horse (ballarat), l. whyte, laurence whyte -
 Lara RSL Sub Branch
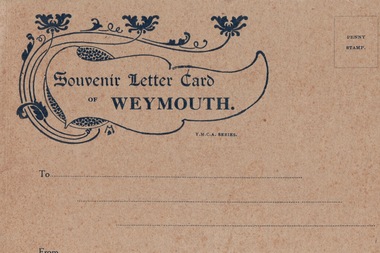
Postcards Booklet, Souvenir Letter Card of Weymouth
... Here the troops found that there was no Australian base to which they could report once they had been discharged from hospital; what was needed urgently was a base in England where troops could be sent to convalesce. So on 31st May 1915 a command depot was set up at Monte Video House in Chickerell, some two miles from Weymouth. ...Here the troops found that there was no Australian base to which they could report once they had been discharged from hospital; what was needed urgently was a base in England where troops could be sent to convalesce. So on 31st May 1915 a command depot was set up at Monte Video House in Chickerell, some two miles from Weymouth. ...Following the landing of Australian & New Zealand troops, the Anzacs, at Gallipoli on 25th April 1915, casualties mounted rapidly and were initially transported to their base in Egypt, which was soon unable to cope, with wounded being sent to England. Here the troops found that there was no Australian base to which they could report once they had been discharged from hospital; what was needed urgently was a base in England where troops could be sent to convalesce. So on 31st May 1915 a command depot was set up at Monte Video House in Chickerell, some two miles from Weymouth. Weymouth then became the Australian Imperial Forces (AIF) Command Depot No.2 which accommodated those men not expected to be fit for duty within six months, therefore, most of the Diggers repatriated as a result of wounds or sickness passed through Weymouth. During the years 1915-1919 over 120,000 Australian and New Zealand troops passed through Weymouth. In Spring & Summer, Weymouth Esplanade would be full of Anzac soldiers in wheelchairs, being wheeled along by their more able mates. The first contingent of 200 wounded men arrived in the first week of June 1915, and two weeks later a group of local ladies organised a cream tea for the newcomers, followed by a concert party 'The Frolics' at the camp. So began the close connection that was to grow between the soldiers and the villagers of Chickerell. The ANZAC Memorial on Weymouth seafront commemorates the Australian and New Zealand troops who were accommodated in three camps in the town during WW1: Monte Video, Westham and Littlemoor. In Weymouth and Melcombe Regis Cemetery there are about eighty-six graves of those Anzacs who were never to return to their homelands. Also in memory of these troops, there a number of roads close to the camps named after Australian cities and states.A World War 1 Letter Card sent home by Australian troops repatriated in Weymouth, UK containing images of Weymouth and a picture of the Australian Base Camp.Front cover (see image) Souvenir Letter Card of Weymouth Inside are eight pictures of the Weymouth area including the YMCA Hut - Australian Base Campymca, uk, australian base camp, world war 1, ww1, aif, army, australian army, westham, littemoor, weymouth, melcombe regis cemetery, anzac -
 Federation University Historical Collection
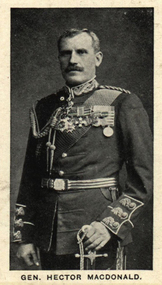
Photograph (black & White), Major General, Sir Hector Archibald MacDonald - South Africa
... command of the Highland Brigade stationed at Modder River with rank of Major-general. He took part in the Battle of Paardeberg and later operations in Bloemfontein and Pretoria. In 1901 he was knighted as Knight Commander of the Order of the Bath In1902 he was appointed Commander-in-Chief of British Troops in Ceylon with the temporary rank of major-general...command of the Highland Brigade stationed at Modder River with rank of Major-general. He took part in the Battle of Paardeberg and later operations in Bloemfontein and Pretoria. In 1901 he was knighted as Knight Commander of the Order of the Bath In1902 he was appointed Commander-in-Chief of British Troops in Ceylon with the temporary rank of major-general hector macdonald highland rifle volunteers gordon highlanders noncommissioned second afghan war victoria cross first boer war battle of majuba hill battle of omdurman lord kitchener lord roberts aide-de-camp queen victoria dervishes cape town highland brigade modder river battle of paardeburg bloemfontein pretoria knight commander of the order of the bath commander-in-chief ceylon Individual image taken from photographed poster of tobacco and cigarette cards. ...In 1870 MacDonald joined the Inverness-shire Highland Rifle Volunteers and in 1871 enlisted in the 92nd Gordon Highlanders. He rose rapidly through the noncommissioned ranks. His distinguished conduct in the presence of the enemy during the Second Afghan War led to him being offered either a Victoria Cross or a commission with his regiment. He chose the latter. He served in the First Boer War and at the Battle of Majuba Hill made prisoner. At the Battle of Omdurman (1898), the British commander Lord Kitchener was assisted by the skillful manoeuvring of MacDonald and his men in overcoming the Dervishes. Due to this MacDonald was promoted to colonel, appointed an aide-de-camp to Queen Victoria and received a cash reward. In Scotland MacDonald was regarded the true hero of Omdurman, not Kitchener. In 1899 he was seconded to command a military district in India but with the outbreak of war in South Africa, he was ordered to command the Highland Brigade, under Lord Roberts and his Chief of Staff, Lord Kitchener. MacDonald arrived in Cape Town and assumed command of the Highland Brigade stationed at Modder River with rank of Major-general. He took part in the Battle of Paardeberg and later operations in Bloemfontein and Pretoria. In 1901 he was knighted as Knight Commander of the Order of the Bath In1902 he was appointed Commander-in-Chief of British Troops in Ceylon with the temporary rank of major-generalIndividual image taken from photographed poster of tobacco and cigarette cards.hector macdonald, highland rifle volunteers, gordon highlanders, noncommissioned, second afghan war, victoria cross, first boer war, battle of majuba hill, battle of omdurman, lord kitchener, lord roberts, aide-de-camp, queen victoria, dervishes, cape town, highland brigade, modder river, battle of paardeburg, bloemfontein, pretoria, knight commander of the order of the bath, commander-in-chief, ceylon -
 Montmorency–Eltham RSL Sub Branch
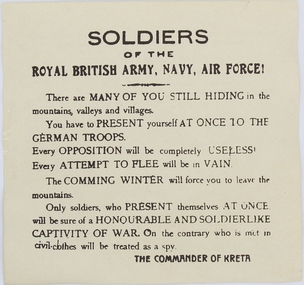
Pamphlet - German Propaganda Leaflet dropped on Crete, May 1941, World War 2. 1941
... TROOPS. Every opposition will be completely USELESS. Every ATTEMPT TO FLEE will be in vain. The COMING WINTER will force you to leave the mountains. Only soldiers, who present themselves AT ONCE will be sure of a HONOURABLE AND SOLDIERLIKE CAPTIVITY OF WAR. On the cntrary who is met in civil-clothes will be treated as a spy. THE COMMANDER OF CRETE On the reverse side of the leaflet is writing in the Greek language and also writing in English indicating that the leaflet was issued by the “GERMAN HIGH COMMAND...TROOPS. Every opposition will be completely USELESS. Every ATTEMPT TO FLEE will be in vain. The COMING WINTER will force you to leave the mountains. Only soldiers, who present themselves AT ONCE will be sure of a HONOURABLE AND SOLDIERLIKE CAPTIVITY OF WAR. On the cntrary who is met in civil-clothes will be treated as a spy. THE COMMANDER OF CRETE On the reverse side of the leaflet is writing in the Greek language and also writing in English indicating that the leaflet was issued by the “GERMAN HIGH COMMAND ...Leaflet dropped from German aircraft on to troops of the Royal army in Crete in May - June 1941 The propaganda leaflets were designed to lower moral of defending troops.Printed LeafletPrinted on leaflet “Soldiers of the ROYAL BRITISH ARMY, NAVY, AIR FORCE! There are MANY OF YOU STILL HIDING in the mountains, valleys and villages. You have to PRESENT yourself AT ONCE TO THE GERMAN TROOPS. Every opposition will be completely USELESS. Every ATTEMPT TO FLEE will be in vain. The COMING WINTER will force you to leave the mountains. Only soldiers, who present themselves AT ONCE will be sure of a HONOURABLE AND SOLDIERLIKE CAPTIVITY OF WAR. On the cntrary who is met in civil-clothes will be treated as a spy. THE COMMANDER OF CRETE On the reverse side of the leaflet is writing in the Greek language and also writing in English indicating that the leaflet was issued by the “GERMAN HIGH COMMAND OF CRETE”, MAY - JUNE 1941world war two, leaflet, propaganda, air drop -
 Australian Commando Association - Victoria
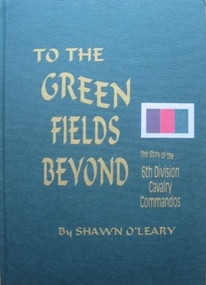
Book - 6th Div, Shawn OLeary, To The Green Fields Beyond:The story of the 6th Division Cavalry Commandos
... troops in capturing Sollum. Towards the end of May the regiment moved to Palestine, where it came under the command of the 7th Division for the imminent invasion of Syria. ...The comprehensive history of the 6th Australian Division Cavalry Commandos – a (now out of print) reprint of one of the rarer Armoured unit history books. This is the story of one of Australia’s most famous fighting regiments during World War II. As an armoured cavalry unit it fought the Italians and Germans in the sands of the African desert and the Vichy French in the mountains of Syria. Later as a dismounted commando unit it fought the Japanese in the terrifying jungles of New Guinea. The heroism of the men in its ranks and the actions in which they engaged are portrayed in a way which makes battle deeds leap realistically from the pages. “To The Green Fields Beyond” is a documented and detailed book which is of value to everyone who is interested in Australia’s story. Seldom before has such a contribution been made to record of our national history. The book has been approved and sponsored by the Australian War Memorial. The 6th Division Cavalry Regiment was formed in November 1939 and, just two months later, was sent overseas to the Middle East in January 1940. Arriving in Egypt, the regiment immediately went to Palestine, where it joined the rest of the 6th Division and trained using machine-gun carriers and, from October, six old Vickers light tanks. At the end of the year the regiment moved into the Western Desert, where it joined British forces ready for the major offensive to commence on 9 December. Two days later the regiment became the first unit of the 2nd Australian Imperial Force (AIF) to go into action when one of its squadron fought a sharp action against the Italians holding Garn el Grein and Fort Maddalina on 11 and 12 December. By 21 December British forces had captured Sidi Barrrani and the desert was now open for the 6th Division’s advance along the Libyan coast. On 3 January 1941 the division attacked and captured the Italian fort of Bardia. The regiment’s A Squadron, under the command of Major Denzil Macarthur-Onslow, who went on to command the 4th Armoured Brigade, supported the attack. Tobruk was the next Italian fort to be captured, with the regiment again in support and covering the 19th Brigade’s advance. The regiment, though, was under-equipped and without its full compliment of vehicles, using only machine gun carriers. To compensate for this, A Squadron was parity re-equipped with captured Italian light tanks, which had large kangaroos painted on the hulls and turrets to distinguish them from enemy vehicles. After Tobruk, the regiment was used as part of the advance guard in the capture of Derna and then Benghazi. In April the unit moved to Helwan, where it was equipped with Vickers light tanks and machine-gun carriers, and operated with British troops in capturing Sollum. Towards the end of May the regiment moved to Palestine, where it came under the command of the 7th Division for the imminent invasion of Syria. The regiment experienced its heaviest fighting during the Syrian campaign, which began on 7 June. A Squadron was attached to the 21st Brigade and advanced along the coast, where the rugged hills made it difficult to manoeuvre the tanks and carriers. The squadron was relieved by one of the 9th Division Cavalry Regiment’s squadrons on 13 and 14 June. C Squadron, meanwhile, was with the 25th Brigade, and advanced along the Rosh Pinna road, engaging strong enemy defences at Fort Khirbe. C Squadron was relieved by B Squadron, which was later attacked by Vichy French tanks that were supported by heavy artillery and machine-gun fire, which forced the Australians to withdrawal. Always willing or needing to improvise during the campaign, A and B Squadrons both operated three captured French R35 Renault light tanks, while C Squadron provided personnel for a horse troop, quickly nicknamed the “Kelly Gang”, to patrol the high, rugged hills near the Mardjayoun–Banis Road. The regiment remained in Syria as part of the occupation force and returned to Australia in March 1942. It was sent to the Adelaide River, in the Northern Territory, and then later to Murgon, in Queensland. In 1943 and 1944 divisional cavalry regiments were reorganised into cavalry (commando) regiments. In January 1944 the 6th Division Cavalry Regiment became the 2/6th Cavalry (Commando) Regiment. The regiment lost its vehicles and became the administrative headquarters for the 2/7th, 2/9th, and 2/10th Commando Squadrons. The regiment remained with the 6th Division and participated in the Aitpae–Wewak campaign, in New Guinea, during 1945. Includes Nominal Rollnon-fictionThe comprehensive history of the 6th Australian Division Cavalry Commandos – a (now out of print) reprint of one of the rarer Armoured unit history books. This is the story of one of Australia’s most famous fighting regiments during World War II. As an armoured cavalry unit it fought the Italians and Germans in the sands of the African desert and the Vichy French in the mountains of Syria. Later as a dismounted commando unit it fought the Japanese in the terrifying jungles of New Guinea. The heroism of the men in its ranks and the actions in which they engaged are portrayed in a way which makes battle deeds leap realistically from the pages. “To The Green Fields Beyond” is a documented and detailed book which is of value to everyone who is interested in Australia’s story. Seldom before has such a contribution been made to record of our national history. The book has been approved and sponsored by the Australian War Memorial. The 6th Division Cavalry Regiment was formed in November 1939 and, just two months later, was sent overseas to the Middle East in January 1940. Arriving in Egypt, the regiment immediately went to Palestine, where it joined the rest of the 6th Division and trained using machine-gun carriers and, from October, six old Vickers light tanks. At the end of the year the regiment moved into the Western Desert, where it joined British forces ready for the major offensive to commence on 9 December. Two days later the regiment became the first unit of the 2nd Australian Imperial Force (AIF) to go into action when one of its squadron fought a sharp action against the Italians holding Garn el Grein and Fort Maddalina on 11 and 12 December. By 21 December British forces had captured Sidi Barrrani and the desert was now open for the 6th Division’s advance along the Libyan coast. On 3 January 1941 the division attacked and captured the Italian fort of Bardia. The regiment’s A Squadron, under the command of Major Denzil Macarthur-Onslow, who went on to command the 4th Armoured Brigade, supported the attack. Tobruk was the next Italian fort to be captured, with the regiment again in support and covering the 19th Brigade’s advance. The regiment, though, was under-equipped and without its full compliment of vehicles, using only machine gun carriers. To compensate for this, A Squadron was parity re-equipped with captured Italian light tanks, which had large kangaroos painted on the hulls and turrets to distinguish them from enemy vehicles. After Tobruk, the regiment was used as part of the advance guard in the capture of Derna and then Benghazi. In April the unit moved to Helwan, where it was equipped with Vickers light tanks and machine-gun carriers, and operated with British troops in capturing Sollum. Towards the end of May the regiment moved to Palestine, where it came under the command of the 7th Division for the imminent invasion of Syria. The regiment experienced its heaviest fighting during the Syrian campaign, which began on 7 June. A Squadron was attached to the 21st Brigade and advanced along the coast, where the rugged hills made it difficult to manoeuvre the tanks and carriers. The squadron was relieved by one of the 9th Division Cavalry Regiment’s squadrons on 13 and 14 June. C Squadron, meanwhile, was with the 25th Brigade, and advanced along the Rosh Pinna road, engaging strong enemy defences at Fort Khirbe. C Squadron was relieved by B Squadron, which was later attacked by Vichy French tanks that were supported by heavy artillery and machine-gun fire, which forced the Australians to withdrawal. Always willing or needing to improvise during the campaign, A and B Squadrons both operated three captured French R35 Renault light tanks, while C Squadron provided personnel for a horse troop, quickly nicknamed the “Kelly Gang”, to patrol the high, rugged hills near the Mardjayoun–Banis Road. The regiment remained in Syria as part of the occupation force and returned to Australia in March 1942. It was sent to the Adelaide River, in the Northern Territory, and then later to Murgon, in Queensland. In 1943 and 1944 divisional cavalry regiments were reorganised into cavalry (commando) regiments. In January 1944 the 6th Division Cavalry Regiment became the 2/6th Cavalry (Commando) Regiment. The regiment lost its vehicles and became the administrative headquarters for the 2/7th, 2/9th, and 2/10th Commando Squadrons. The regiment remained with the 6th Division and participated in the Aitpae–Wewak campaign, in New Guinea, during 1945. Includes Nominal Rollww2, australian commandos, australian special forces, world war 2 -
 Waverley RSL Sub Branch
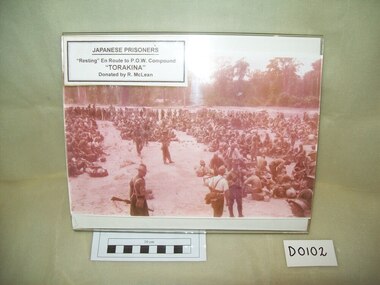
Print Torakina, Torakina
... Command. For a month Major Brockway concentrated on transporting the Japanese out and returning the area, as far as possible, to a pre-war condition. "The Japanese were in a bad way, saying no ship had resupplied them since 1942. They had lived off fish from the sea and what they could grow. Many were sick and they had few medicines. "Our job was basically to evacuate the Japanese and ship the troops...Command. For a month Major Brockway concentrated on transporting the Japanese out and returning the area, as far as possible, to a pre-war condition. "The Japanese were in a bad way, saying no ship had resupplied them since 1942. They had lived off fish from the sea and what they could grow. Many were sick and they had few medicines. "Our job was basically to evacuate the Japanese and ship the troops ...August 1945 saw Major Hugh St Clair Brockway accepting the surrender of a Marine Brigade of Japanese, at Bonis Northern Bougainville, from Naval Commander Takahashi the representative of the Japanese High Command. For a month Major Brockway concentrated on transporting the Japanese out and returning the area, as far as possible, to a pre-war condition. "The Japanese were in a bad way, saying no ship had resupplied them since 1942. They had lived off fish from the sea and what they could grow. Many were sick and they had few medicines. "Our job was basically to evacuate the Japanese and ship the troops out to a POW compound at Torakina, on the mid-eastern coast of Bougainville." Major Brockway had a small group of about 30 to execute the operation, which included destroying all Japanese arms and ammunition of the 3000 strong naval brigade. "They had been cut off since about 1942 and we had to clean the place up for civilian occupation again." Source "the Wargin Argus" BY VEANA SCOTT 27 Apr, 2005 09:36 AM Wagin Argus cnr Tavistock and Ranford Streets Wagin WA 6315 [email protected] Phone: 08 9861 1200Photograph in very faded colour (mainly pale pink with a square of colour visible under label) of Japanese P.O.W's resting en-route to compound at Torakina Digitally rescanned in greyscale -
 4th/19th Prince of Wales's Light Horse Regiment Unit History Room
Booklet, Arbuckle Waddell Pty Ltd, Operations Military Training Pamphlet No 23 Part 1 General Principles, Fighting Troops & Their Characteristics, 1939
... Soft covered booklet, covering the principles of war, tactics, planning, command & control etc and the fighting troops and their characteristics. ...tactics training world war 2 Soft covered booklet, covering the principles of war, tactics, planning, command & control etc and the fighting troops and their characteristics. ...Soft covered booklet, covering the principles of war, tactics, planning, command & control etc and the fighting troops and their characteristics. tactics, training, world war 2 -
 Monbulk RSL Sub Branch
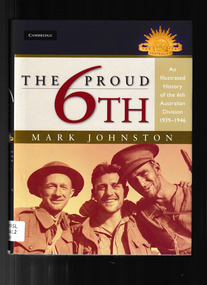
Book, Cambridge University Press, The proud 6th : an illustrated history of the 6th Australian Division, 1939-45, 2008
... Through photographs and an authoritative text, this book tells their story and the story of the proud, independent and tough troops they commanded. Index, bib, ill, maps, p.269. ...Following Mark Johnston's acclaimed illustrated histories of the 7th and 9th Australian Divisions, this is his long-awaited history of the 6th Australian Division: the first such history ever published. The 6th was a household name during World War II. It was the first division raised in the Second Australian Imperial Force, the first division to go overseas and the first to fight. Its success in that fight, in Libya in 1941, indicated that the standard established in the Great War would be continued. General Blamey and nearly every other officer who became wartime army, corps and divisional commanders were once members of the 6th Division. Through photographs and an authoritative text, this book tells their story and the story of the proud, independent and tough troops they commanded.Index, bib, ill, maps, p.269.non-fictionFollowing Mark Johnston's acclaimed illustrated histories of the 7th and 9th Australian Divisions, this is his long-awaited history of the 6th Australian Division: the first such history ever published. The 6th was a household name during World War II. It was the first division raised in the Second Australian Imperial Force, the first division to go overseas and the first to fight. Its success in that fight, in Libya in 1941, indicated that the standard established in the Great War would be continued. General Blamey and nearly every other officer who became wartime army, corps and divisional commanders were once members of the 6th Division. Through photographs and an authoritative text, this book tells their story and the story of the proud, independent and tough troops they commanded. australia - army - 6th division - history, divisional histories -
 Monbulk RSL Sub Branch
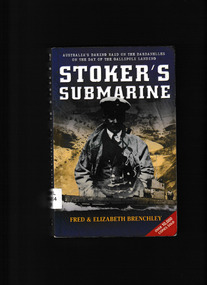
Book, Harper Collins et al, Stoker's submarine, 2003
... troops staying on the beachhead for eight months." "Now, finally, Stoker's Submarine tells the story of a remarkable naval hero and the men under his command. ...On 25 April 1915 - the day the Anzacs landed at Gallipoli - Lieutenant Commander Dacre Stoker set out as captain of the Australian submarine AE2 on a mission to breach the treacherous Dardanelles Strait with the intention of disrupting Turkish supply lines to the isolated Gallipoli peninsula. Facing dangerous currents, mines and withering enemy fire, Stoker and his men succeeded where British and French submarines had come to grief." "Stoker's achievement meant much in military terms, and even more emotionally in boosting the morale of embattled Allied troops. But what was proclaimed at the time as 'the finest feat in submarine history' has since sunk into oblivion. Few Australians even know their country had a submarine at Gallipoli, much less that it achieved daring feats, sank an enemy craft, and possibly played a pivotal role in Anzac troops staying on the beachhead for eight months." "Now, finally, Stoker's Submarine tells the story of a remarkable naval hero and the men under his command. And the AE2 itself, still lying intact on the floor of the Sea of Marmara, is celebrated as the most tangible relic of Australia's role at Gallipoli, the crucible of nationhood.Index, bibliography, notes, ill. (some col.), maps, ports, p.318.non-fictionOn 25 April 1915 - the day the Anzacs landed at Gallipoli - Lieutenant Commander Dacre Stoker set out as captain of the Australian submarine AE2 on a mission to breach the treacherous Dardanelles Strait with the intention of disrupting Turkish supply lines to the isolated Gallipoli peninsula. Facing dangerous currents, mines and withering enemy fire, Stoker and his men succeeded where British and French submarines had come to grief." "Stoker's achievement meant much in military terms, and even more emotionally in boosting the morale of embattled Allied troops. But what was proclaimed at the time as 'the finest feat in submarine history' has since sunk into oblivion. Few Australians even know their country had a submarine at Gallipoli, much less that it achieved daring feats, sank an enemy craft, and possibly played a pivotal role in Anzac troops staying on the beachhead for eight months." "Now, finally, Stoker's Submarine tells the story of a remarkable naval hero and the men under his command. And the AE2 itself, still lying intact on the floor of the Sea of Marmara, is celebrated as the most tangible relic of Australia's role at Gallipoli, the crucible of nationhood.world war 1914-1918 - campaigns - gallipoli, gallipoli campaign - naval operations, submarine ae2 -
 Monbulk RSL Sub Branch
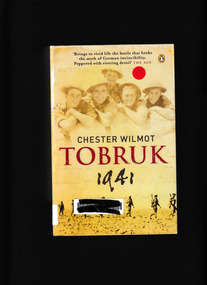
Book, Penguin, Tobruk 1941, 2009
... Under the command of General Morshead, the troops used unorthodox methods and sheer grit to withstand the superior might of General Rommel's elite 'Afrika Korps Index, maps, p.414. ...March 1941. The Allied forces have suffered one brutal defeat after another. For Hitler's forces the conquest of Egypt, and the rich oil fields of the Middle East, lie next on the horizon. All that stand in their way are a few Australian brigades defending a town called Tobruk. For eight months the Australian Imperial Forces defended the North African coastal fortress, battling almost unbeatable odds in the dust and the heat of the Libran desert. Under the command of General Morshead, the troops used unorthodox methods and sheer grit to withstand the superior might of General Rommel's elite 'Afrika KorpsIndex, maps, p.414.non-fictionMarch 1941. The Allied forces have suffered one brutal defeat after another. For Hitler's forces the conquest of Egypt, and the rich oil fields of the Middle East, lie next on the horizon. All that stand in their way are a few Australian brigades defending a town called Tobruk. For eight months the Australian Imperial Forces defended the North African coastal fortress, battling almost unbeatable odds in the dust and the heat of the Libran desert. Under the command of General Morshead, the troops used unorthodox methods and sheer grit to withstand the superior might of General Rommel's elite 'Afrika Korpsworld war 1939 – 1945 – campaigns – north africa, siege of tobruk 1941 -
 National Vietnam Veterans Museum (NVVM)
Slide - Sims Image Collection
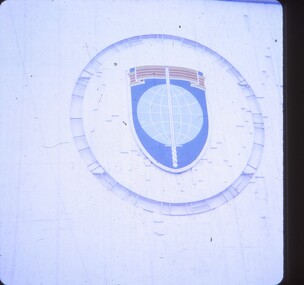
... command for the allied forces assisting South Vietnam. It was located on Tran Quoc Toan Street in the Cholon district of Saigon and housed representatives from various nations contributing troops to the war effort. ...command for the allied forces assisting South Vietnam. It was located on Tran Quoc Toan Street in the Cholon district of Saigon and housed representatives from various nations contributing troops to the war effort. ...The "Free World Headquarters" in Saigon during the Vietnam War refers to the Free World Military Assistance Forces (FWMAF) Headquarters, which served as the central command for the allied forces assisting South Vietnam. It was located on Tran Quoc Toan Street in the Cholon district of Saigon and housed representatives from various nations contributing troops to the war effort. From a collection of 253 images on slides taken while on deployment in Vietnam by Corporal Peter Stanley Sims (No: 44304). He served in the Royal Australian Army Medical Corps, 1969 - 1970.Badge of the Free World Forces at the Free world headquarters in Saigon, Vietnam 1969/70.peter stanley sims, 44304, slides, royal australian army medical corps, vietnam war, sims, australian force vietnam, saigon, free world forces -
 National Vietnam Veterans Museum (NVVM)
Book, Casey, Michael. Dougan, Clark, Lipsman, Samuel. Sweetman, Jack and Weiss, Stephen, The Vietnam Experience: Flags Into Battle
... Troops Pentagon Like much of American policy in Vietnam the decisions that established the relationships that commanded, controlled and supported the U.S. combat troops in Vietnam evolved as much from uppredictable events inside South Vietnam as from careful Pentagon planning. ...Like much of American policy in Vietnam the decisions that established the relationships that commanded, controlled and supported the U.S. combat troops in Vietnam evolved as much from uppredictable events inside South Vietnam as from careful Pentagon planning.Like much of American policy in Vietnam the decisions that established the relationships that commanded, controlled and supported the U.S. combat troops in Vietnam evolved as much from uppredictable events inside South Vietnam as from careful Pentagon planning.vietnam war, 1961 - 1975, u.s. troops, pentagon -
 Bendigo Military Museum
Administrative record - Australian Survey Corps - Outbreak of WWII through to 1945, Australian Survey Corps, August 1945
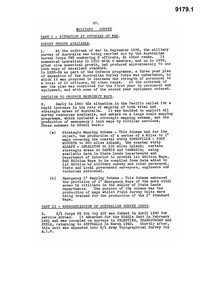
... Troops available. Part 2 Reorganisation of Australian Survey Corps, Liaison with American Forces, Training and Equipment. Part 3 Map Situation at 31 August 1945, Maps published by Australian Units, Distribution of Maps, Map Records and Air Photos. Part 4 New Guinea and Borneo Campaigns, Formations and Survey Units Under Command...Troops available. Part 2 Reorganisation of Australian Survey Corps, Liaison with American Forces, Training and Equipment. Part 3 Map Situation at 31 August 1945, Maps published by Australian Units, Distribution of Maps, Map Records and Air Photos. Part 4 New Guinea and Borneo Campaigns, Formations and Survey Units Under Command ...This is an important record detailing the Military Survey Situation in Australia before and after WWII. Because of its importance, the entire five page document has been reproduced. The document is written in four parts: Part 1 Situation at the start of War and Survey Troops available. Part 2 Reorganisation of Australian Survey Corps, Liaison with American Forces, Training and Equipment. Part 3 Map Situation at 31 August 1945, Maps published by Australian Units, Distribution of Maps, Map Records and Air Photos. Part 4 New Guinea and Borneo Campaigns, Formations and Survey Units Under Command. 5 x A4 photocopied pages of typed text, stapled top LH corner. Pages are numbered 87 to 91. The entire document has been reproduced.royal australian survey corps, rasvy, fortuna, army survey regiment, army svy regt, asr -
 Bendigo Military Museum
Photograph - Army Survey Regiment Freedom of Entry Parade, Bendigo CBD, 1990
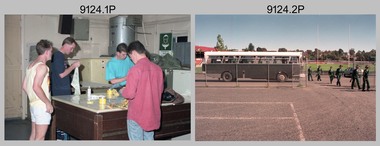
... The RAAF Central Command Band provided the music at the parade. After formal inspections of the troops, the Army Survey Regiment saluted as it marched past the Reviewing Officer - Mayor of Bendigo Councillor James Douglass, military dignitaries and guests. ...The RAAF Central Command Band provided the music at the parade. After formal inspections of the troops, the Army Survey Regiment saluted as it marched past the Reviewing Officer - Mayor of Bendigo Councillor James Douglass, military dignitaries and guests. ...The Freedom of Entry to the City on the 26th of October 1990 was an honour first conferred by the Bendigo City Council to the Army Survey Regiment in 1970. This was the fifth time the unit exercised its freedom of marching into the city with swords drawn, bayonets fixed and drums beating. The honour is usually bestowed upon local regiments, in recognition of their dedicated service, and it is common for military units to periodically exercise their freedom by arranging a parade through the city. The event began with a ceremonial parade at the Queen Elizabeth II Oval. The RAAF Central Command Band provided the music at the parade. After formal inspections of the troops, the Army Survey Regiment saluted as it marched past the Reviewing Officer - Mayor of Bendigo Councillor James Douglass, military dignitaries and guests. Led by the Regiment’s CO – LTCOL Rene van den Tol, the unit marched down View St, along Pall Mall and to Gaol Rd. Regiment members were treated to a civic reception at the City Hall after the ceremony. The Regiment also exercised its Freedom of Entry with anniversary parades in 1977, 1980, 1985, 1992 and 1996. See items 9125.54P and 9126.24P for additional sets of photos taken at the event. The formal booklet covering the event is catalogued under item 9123.This set of 28 photographs of the Army Survey Regiment were taken at the beginning of the Freedom of Entry parade, held at the City of Bendigo’s Queen Elizabeth Oval (QEO) on the 26th of October 1990. The colour photographs are on 35mm negative film and scanned at 2400 dpi. They are part of the Army Survey Regiment’s Collection. .1) - Photo, colour, 1990. Lithographic Squadron personnel at Fortuna Villa prepare for the parade. L to R: CPL Daryl South, SGT Steve Burke, SPR Tony Hilbig, unidentified. .2) - Photo, colour, 1990. Female personnel arrive at the QEO. .3) - Photo, colour, 1990, Personnel prepare for the parade at the QEO. L to R: SGT John Phillips, SPR Steve Linane, CPL Mark Lander 4th from right, remainder unidentified. .4) - Photo, colour, 1990, Personnel prepare for the parade at the QEO. In foreground L to R: WO1 Colin Cuskelly, SSGT Paul Leskovec CSM, unidentified, SGT Brendon McKinless, SSGT Paul Cheater, CPL Damian Killeen, SGT Greg Else, SGT Chris Edwards, SGT Wolfgang Thun, WO2 Mick Flynn, WO1 Ken ‘Sluggo’ Slater, unidentified, WO2 Steve Hansen. .5) & .6) - Photo, colour, 1990. Support personnel at the QEO. L to R: unidentified (x2), SPR Steve Wright, LCPL Ross Anza. .7) - Photo, colour, 1990. Officers prepare for the parade at the QEO L to R: LT Derek Bell, CAPT Dave McLachlan. .8) - Photo, colour, 1990. Officers prepare for the parade at the QEO L to R: CO LTCOL Rene van den Tol, CAPT Dave McLachlan, MAJ Peter Clark, MAJ Neil Taylor. .9) - Photo, colour, 1990. Officers prepare for the parade at the QEO L to R: Unidentified partners, LT Craig Hersant, LT Steve Hledik, LT Marty Lyons. .10) - Photo, colour, 1990. View of the QEO’s grandstand prior to the parade. .11) - Photo, colour, 1990. Spectators arriving at QEO are directed by Army Survey Regiment marshalls. L to R: CPL Graeme Priestley, unidentified (x2). .12) - Photo, colour, 1990. Personnel from the four squadrons await orders to form up. .13) & .14) - Photo, colour, 1990. Right markers for the four squadrons await orders to take posts. Front to back: Headquarters Squadron’s SGT Chris Edwards, Air Survey Squadron’s SGT Max Watson, Cartographic Squadron’s SSGT Graham Johnston and Lithographic Squadron’s SPR Doug Whiteside. .15) to .19) - Photo, colour, 1990. The RAAF Central Command Band marches through the car park to the QEO’s entrance led by Drum Major Warrant Officer E. Hayward (in front) and Deputy Music Director Flying Officer S. Wright. .20) - Photo, colour, 1990. Headquarters Squadron commanded by SSM WO1 Colin Cuskelly marches through the QEO’s car park. L to R: SGT Wolfgang Thun, unidentified, CPL John ‘Flash’ Anderson, SGT Rick Gerhardt, unidentified. .21) - Photo, colour, 1990. Headquarters Squadron commanded by SSM WO1 Colin Cuskelly (with sword) marches through the QEO’s car park. .22) & .23) - Photo, colour, 1990. Air Survey Squadron commanded by SSM WO1 Russell ‘Rusty’ Williams (with sword) march through the QEO’s car park. .24) - Photo, colour, 1990. Air Survey Squadron commanded by SSM WO1 Russell ‘Rusty’ Williams (with sword) march through the QEO’s car park. L to R: unidentified, SPR Allan Blake, SPR Bob Bousfield, unidentified, SPR Harris Lee, SPR Andy Love. .25) - Photo, colour, 1990. Cartographic Squadron commanded by SSM WO1 Gary Warnest (with sword) march through the QEO’s car park. L to R: SGT Doug Carswell, CPL Geunther Ebenwaldner, SPR Leigh Palfrey, SGT Bob Garritty, unidentified, SSGT Dennis Learmonth. .26) - Photo, colour, 1990. Cartographic Squadron commanded by SSM WO1 Gary Warnest (with sword) march through the QEO’s car park. L to R: SGT Doug Carswell, CPL Geunther Ebenwaldner, SGT Bob Garritty, SPR Leigh Palfrey, SSGT Dennis Learmonth, unidentified. .27) - Photo, colour, 1990. Lithographic Squadron commanded by SSM WO1 Bill Jones (with sword) march through the QEO’s car park. .28) - Photo, colour, 1990. Lithographic Squadron commanded by SSM WO1 Bill Jones (with sword) march through the QEO’s car park. L to R: SSGT Peter Imeson, SGT Brian Paul, SGT Steve Burke, SPR Scott Cameron, SPR Shane Campbell. No personnel or civilians are identified. ‘Freedom of Entry Parade ‘90’ is annotated on plastic negative sleeve.royal australian survey corps, rasvy, army survey regiment, army svy regt, fortuna -
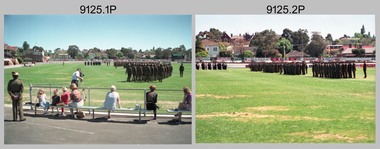 Bendigo Military Museum
Photograph - Army Survey Regiment Freedom of Entry Parade, Bendigo CBD, 1990
... The RAAF Central Command Band provided the music at the parade. After formal inspections of the troops, the Army Survey Regiment saluted as it marched past the Reviewing Officer - Mayor of Bendigo Councillor James Douglass, military dignitaries and guests. ...The RAAF Central Command Band provided the music at the parade. After formal inspections of the troops, the Army Survey Regiment saluted as it marched past the Reviewing Officer - Mayor of Bendigo Councillor James Douglass, military dignitaries and guests. ...The Freedom of Entry to the City on the 26th of October 1990 was an honour first conferred by the Bendigo City Council to the Army Survey Regiment in 1970. This was the fifth time the unit exercised its freedom of marching into the city with swords drawn, bayonets fixed and drums beating. The honour is usually bestowed upon local regiments, in recognition of their dedicated service, and it is common for military units to periodically exercise their freedom by arranging a parade through the city. The event began with a ceremonial parade at the Queen Elizabeth II Oval. The RAAF Central Command Band provided the music at the parade. After formal inspections of the troops, the Army Survey Regiment saluted as it marched past the Reviewing Officer - Mayor of Bendigo Councillor James Douglass, military dignitaries and guests. Led by the Regiment’s CO – LTCOL Rene van den Tol, the unit marched down View St, along Pall Mall and to Gaol Rd. Regiment members were treated to a civic reception at the City Hall after the ceremony. The Regiment also exercised its Freedom of Entry with anniversary parades in 1977, 1980, 1985, 1992 and 1996. See items 9124.28P and 9126.24P for additional sets of photos taken at the event. The formal booklet covering the event is catalogued under item 9123.This set of 54 photographs of the Army Survey Regiment were taken at the Freedom of Entry parade, held at the City of Bendigo’s Queen Elizabeth Oval (QEO) on the 26th of October 1990. The colour photographs are on 35mm negative film and scanned at 2400 dpi. They are part of the Army Survey Regiment’s Collection. .1) - Photo, colour, 1990. Army Survey Regiment marches on to the QEO. .2) - Photo, colour, 1990. Army Survey Regiment formed up at the start of the parade. .3) & .4) - Photo, colour, 1990. Lithographic Squadron fixes bayonets. Centre rank: LCPL Damien Cole, remainder unidentified. Rear rank R to L: CPL Peter Swandale, SPR Andrew Arman, remainder unidentified. SSM WO1 Bill Jones at far right. .5) - Photo, colour, 1990. Army Survey Regiment await the order to take posts. .6) - Photo, colour, 1990. Army Survey Regiment standing at ease await the arrival of the Parade Host. .7) - Photo, colour, 1990. Arrival of the Parade Host - D-SVY COL Don Swiney MBE. L to R: CPL Mick McConnell, CPL Warren ‘Waldo’ Shirley, unidentified. .8) - Photo, colour, 1990. The Parade Host - D-SVY COL Don Swiney MBE and MAJ John South at his right returns the Regiment’s salute. .9) - Photo, colour, 1990. Arrival of dignitaries: L to R: CPL Mick McConnell, City of Bendigo Mayor - Councillor James Douglass, City of Bendigo Chief Executive Officer - Mr. R. J. Burton, CPL Warren ‘Waldo’ Shirley, unidentified. .10) - Photo, colour, 1990. Arrival of dignitaries: L to R: CPL Mick McConnell, Chief Superintendent F. Fox (presumed), unidentified, D-SVY COL Don Swiney MBE, CPL Warren ‘Waldo’ Shirley, unidentified. .11) - Photo, colour, 1990. Arrival of dignitaries: L to R: CPL Mick McConnell, Bishop of Sandhurst most Reverend N. Daly DD, unidentified padre, CPL Warren ‘Waldo’ Shirley, unidentified, D-SVY COL Don Swiney MBE. .12) - Photo, colour, 1990. L to R: City of Bendigo Mayor - Councillor James Douglass, City of Bendigo Chief Executive Officer - Mr. R. J. Burton view the parade from the dias. .13) - Photo, colour, 1990. CO of the Army Survey Regiment greets the parade dignitaries. L to R: CO LTCOL Rene van den Tol, D-SVY COL Don Swiney MBE, City of Bendigo Mayor - Councillor James Douglass, City of Bendigo Chief Executive Officer - Mr. R. J. Burton. .14) - Photo, colour, 1990. Headquarters Squadron inspection L to R: CO LTCOL Rene van den Tol, Chief Executive Officer - Mr. R. J. Burton, D-SVY COL Don Swiney MBE, Mayor - Councillor James Douglass, 2nd from right SGT Brendan McKinless, supernumerary WO2 Steve Hansen in background, remainder unidentified. .15) - Photo, colour, 1990. Unidentified squadron inspection L to R: D-SVY COL Don Swiney MBE, Chief Executive Officer - Mr. R. J. Burton, Mayor - Councillor James Douglass, CO LTCOL Rene van den Tol. .16) - Photo, colour, 1990. Air Survey Squadron inspection L to R: unidentified, SSGT Bob Garritty, CPL Craig Kellet, CPL Raelene (Munting) Brodie, unidentified, SPR Jodi Seath, remainder ranks unidentified, Mayor - Councillor James Douglass, Chief Executive Officer - Mr. R. J. Burton, CO LTCOL Rene van den Tol. .17) - Photo, colour, 1990. Lithographic Squadron inspection L to R: CO LTCOL Rene van den Tol, SGT Brian Paul, Mayor - Councillor James Douglass, SGT Steve Burke, D-SVY COL Don Swiney MBE. .18) - Photo, colour, 1990. The official party pass behind Headquarters Squadron and head towards the RAAF Central Command Band. L to R: Chief Executive Officer - Mr. R. J. Burton, Mayor - Councillor James Douglass, D-SVY COL Don Swiney MBE. .19) - Photo, colour, 1990. RAAF Central Command Band inspection L to R: Deputy Music Director Flying Officer S. Wright, Mayor - Councillor James Douglass, remainder unidentified. .20) - Photo, colour, 1990. RAAF Central Command Band inspection L to R: Chief Executive Officer - Mr. R. J. Burton, Deputy Music Director Flying Officer S. Wright, Mayor - Councillor James Douglass, remainder unidentified. .21) - Photo, colour, 1990. Cartographic Squadron commanded by OC MAJ Neil Taylor performs left form in slow time. .22) - Photo, colour, 1990. RAAF Central Command Band performs drill manoeuvre. .23) - Photo, colour, 1990. Air Survey Squadron commanded by OC MAJ Peter Clark performs left form. .24) - Photo, colour, 1990. Headquarters Squadron commanded by OC MAJ Ray Redman marches forward in slow time. .25) - Photo, colour, 1990. Army Survey Regiment in formation commanded by CO LTCOL Rene van den Tol advances in slow time. 2IC MAJ Duncan Burns at left. MAJ Bob Williams at right. .26) - Photo, colour, 1990. Air Survey 2IC MAJ Duncan Burns at left Squadron commanded by OC MAJ Peter Clark advances in quick time. WO1 Graham Ragless is closest to camera. .27) & .28) - Photo, colour, 1990. Lithographic Squadron commanded by OC MAJ Bob Coote advances before left form. LT Marty Lyons at left. LT Derek Bell at right. .29) - Photo, colour, 1990. Army Survey Regiment salutes as it marches past the Reviewing Officer Mayor - Councillor James Douglass, Chief Executive Officer - Mr. R. J. Burton and D-SVY COL Don Swiney MBE at the dias. .30) - Photo, colour, 1990. Parade official guests L to R: unidentified, MAJ John South, unidentified (x5), MAJ B.J. Donaldson – US Exchange, unidentified, unidentified padres (x2), Bishop of Sandhurst most Reverend N. Daly DD. .31) - Photo, colour, 1990. Army Survey Regiment salutes as it marches past the dias. .32) - Photo, colour, 1990. Lithographic Squadron commanded by OC MAJ Bob Coote performs left form. .33) - Photo, colour, 1990. Deputy Music Director Flying Officer S. Wright conducts the RAAF Central Command Band. .34) - Photo, colour, 1990. The RAAF Central Command Band performs during the parade. All musicians are unidentified. .35) - Photo, colour, 1990. Lithographic Squadron commanded by OC MAJ Bob Coote marches forward in quick time. .36) - Photo, colour, 1990. Cartographic Squadron commanded by OC MAJ Neil Taylor marches forward in quick time. .37) - Photo, colour, 1990. Lithographic Squadron commanded by OC MAJ Bob Coote marches forward in quick time. .38) - Photo, colour, 1990. Army Survey Regiment salutes as it marches past the dias. .39) - Photo, colour, 1990. L to R: Reviewing Officer Mayor - Councillor James Douglass, Chief Executive Officer - D-SVY COL Don Swiney MBE, Mr. R. J. Burton and at the dias. Parade official guests L to R: unidentified (x2), MAJ John South, unidentified (x5), MAJ B.J. Donaldson – US Exchange, unidentified, unidentified padres (x2), Bishop of Sandhurst most Reverend N. Daly DD. .40) - Photo, colour, 1990. Army Survey Regiment salutes as it marches past the Reviewing Officer Mayor - Councillor James Douglass, Chief Executive Officer - Mr. R. J. Burton and D-SVY COL Don Swiney MBE at the dias. MAJ P.G. Dinwiddie – UK Exchange is seen among the guests. .41) - Photo, colour, 1990. Air Survey Squadron commanded by OC MAJ Peter Clark stands at attention. .42) - Photo, colour, 1990. Headquarters Squadron commanded by OC MAJ Ray Redman stands at ease. 2IC MAJ Duncan Burns at far left. .43) - Photo, colour, 1990. Cartographic Squadron commanded by OC MAJ Neil Taylor stands at ease. CO LTCOL Rene van den Tol in foreground. .44) & .45) - Photo, colour, 1990. The Parade Host: D-SVY COL Don Swiney MBE addresses the Parade. .46) - Photo, colour, 1990. The Reviewing Officer: Mayor - Councillor James Douglass addresses the Parade. .47) - Photo, colour, 1990. L to R: City of Bendigo Chief Executive Officer - Mr. R. J. Burton, Reviewing Officer Bendigo Mayor - Councillor James Douglass. .48) - Photo, colour, 1990. Parade official guests Middle row L to R: MAJ P.G. Dinwiddie – UK Exchange, Chief Superintendent F. Fox, unidentified MAJ B.J. Donaldson – US Exchange, remainder unidentified. Front row L to R: unidentified (x2), MAJ John South, unidentified (x4). .49) - Photo, colour, 1990. Unidentified padre addresses the Parade. On his left: City of Bendigo Chief Executive Officer - Mr. R. J. Burton, Bishop of Sandhurst most Reverend N. Daly DD. .50) - Photo, colour, 1990. Unidentified padre addresses the Parade. On his right: Bishop of Sandhurst most Reverend N. Daly DD, City of Bendigo Chief Executive Officer - Mr. R. J. Burton, Reviewing Officer Bendigo Mayor - Councillor James Douglass. .51) - Photo, colour, 1990. Departure of Chief Superintendent F. Fox at conclusion of Parade. .52) - Photo, colour, 1990. Departure of unidentified padres (x2), Bishop of Sandhurst most Reverend N. Daly DD at conclusion of Parade. .53) & .54) - Photo, colour, 1990. Departure of Parade Host - D-SVY COL Don Swiney MBE at conclusion of Parade. No personnel or civilians are identified. ‘Freedom of Entry Parade ‘90’ is annotated on plastic negative sleeve.royal australian survey corps, rasvy, army survey regiment, army svy regt, fortuna -
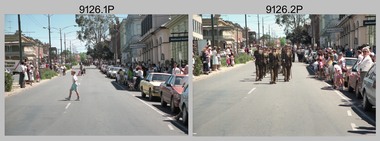 Bendigo Military Museum
Photograph - Army Survey Regiment Freedom of Entry Parade, Bendigo CBD, 1990
... The RAAF Central Command Band provided the music at the parade. After formal inspections of the troops, the Army Survey Regiment saluted as it marched past the Reviewing Officer - Mayor of Bendigo Councillor James Douglass, military dignitaries and guests. ...The RAAF Central Command Band provided the music at the parade. After formal inspections of the troops, the Army Survey Regiment saluted as it marched past the Reviewing Officer - Mayor of Bendigo Councillor James Douglass, military dignitaries and guests. ...The Freedom of Entry to the City on the 26th of October 1990 was an honour first conferred by the Bendigo City Council to the Army Survey Regiment in 1970. This was the fifth time the unit exercised its freedom of marching into the city with swords drawn, bayonets fixed and drums beating. The honour is usually bestowed upon local regiments, in recognition of their dedicated service, and it is common for military units to periodically exercise their freedom by arranging a parade through the city. The event began with a ceremonial parade at the Queen Elizabeth II Oval. The RAAF Central Command Band provided the music at the parade. After formal inspections of the troops, the Army Survey Regiment saluted as it marched past the Reviewing Officer - Mayor of Bendigo Councillor James Douglass, military dignitaries and guests. Led by the Regiment’s CO – LTCOL Rene van den Tol, the unit marched down View St, along Pall Mall and to Gaol Rd. Regiment members were treated to a civic reception at the City Hall after the ceremony. The Regiment also exercised its Freedom of Entry with anniversary parades in 1977, 1980, 1985, 1992 and 1996. See items 9124.28P and 9125.54P for additional sets of photos taken at the event. The formal booklet covering the event is catalogued under item 9123.This set of 24 photographs of the Army Survey Regiment were taken at the Freedom of Entry parade, held at the City of Bendigo’s Queen Elizabeth Oval (QEO) on the 26th of October 1990. The colour photographs are on 35mm negative film and scanned at 2400 dpi. They are part of the Army Survey Regiment’s Collection. .1) - Photo, colour, 1990. The Army Survey Regiment marches down View St towards Pall Mall. .2) - Photo, colour, 1990. The Army Survey Regiment marches down View St towards Pall Mall. L to R: 2IC MAJ Duncan Burns, CO LTCOL Rene van den Tol, MAJ Bob Williams. .3) - Photo, colour, 1990. The Army Survey Regiment marches down View St towards Pall Mall. L to R: 2IC MAJ Duncan Burns, CO LTCOL Rene van den Tol, MAJ Bob Williams, RSM WO1 Neville Stone. .4) - Photo, colour, 1990. The RAAF Central Command Band marches down View St towards Pall Mall led by L to R: Drum Major Warrant Officer E. Hayward and Deputy Music Director Flying Officer S. Wright. WO1 Rowan Gillies at fat left. .5) - Photo, colour, 1990. City Marshall – Superintendent D.R. Mansell standing at the ready in Charing Cross, to challenge the entry of the Army Survey Regiment at the bottom of View St. .6) - Photo, colour, 1990. The Army Survey Regiment at the halt in View St ready to exercise its right to pass through the City of Bendigo. L to R: 2IC MAJ Duncan Burns, CO LTCOL Rene van den Tol, ADJT CAPT Peter Parkes. .7) - Photo, colour, 1990. The Army Survey Regiment salutes parade dignitaries as it marches down Pall Mall past the dias. L to R: CO LTCOL Rene van den Tol, 2IC MAJ Duncan Burns, MAJ Bob Williams. At the dias L to R: City of Bendigo Chief Executive Officer - Mr. R. J. Burton, Reviewing Officer: City of Bendigo Mayor - Councillor James Douglass, Parade Host -D-SVY COL Don Swiney MBE. .8) - Photo, colour, 1990. The RAAF Central Command Band salutes parade dignitaries as it marches down Pall Mall past the dias. L to R: Drum Major Warrant Officer E. Hayward and Deputy Music Director Flying Officer S. Wright. .9) - Photo, colour, 1990. Air Survey Squadron salutes parade dignitaries as it marches down Pall Mall past the dias. L to R: LT Craig Hersant, OC MAJ Peter Clark, LT Simon Buckpitt, WO1 Allan Hancox, SGT Max Watson, remainder unidentified. .10) - Photo, colour, 1990. Cartographic Squadron salutes parade dignitaries as it marches down Pall Mall past the dias. L to R: LT Garret Addison, OC MAJ Neil Taylor, CAPT Dave McLachlan, LT Steve Hledik, WO1 Graham Ragless, SSGT Graham Johnston, SSGT Dennis Learmoth, SPR Cam Bramich, remainder unidentified. .11) - Photo, colour, 1990. Lithographic Squadron salutes parade dignitaries as it marches down Pall Mall past the dias. L to R: LT Marty Lyons, OC MAJ Bob Coote, SGT Steve Burke, SGT Brian Paul, LT Derek Bell, WO2 Rob Bogumil, SPR Doug Whiteside, remainder unidentified. .12) - Photo, colour, 1990. Air Survey Squadron marches down Pall Mall towards Gaol Rd. L to R: LT Craig Hersant, OC MAJ Peter Clark, LT Simon Buckpitt, WO1 Allan Hancox, SGT Max Watson, remainder unidentified. .13) to .15) - Photo, colour, 1990. The RAAF Central Command Band marches down Gaol Rd. L to R: Drum Major Warrant Officer E. Hayward and Deputy Music Director Flying Officer S. Wright. .16) - Photo, colour, 1990. Air Survey Squadron marches down Gaol Rd. L to R: LT Craig Hersant, OC MAJ Peter Clark, SPR Ian Baldwin, LT Simon Buckpitt, WO1 Allan Hancox, SGT Max Watson, remainder unidentified. .17) - Photo, colour, 1990. Cartographic Squadron marches down Gaol Rd. L to R: LT Garret Addison, OC MAJ Neil Taylor, CAPT Dave McLachlan, CPL Guenther Ebenwaldner, SGT Doug Carswell, LT Steve Hledik, WO1 Graham Ragless, SSGT Graham Johnston, SSGT Dennis Learmoth, SPR Cam Bramich, remainder unidentified. .18) - Photo, colour, 1990. Lithographic Squadron marches down Gaol Rd. L to R: OC MAJ Bob Coote, LT Marty Lyons, SGT Steve Burke, SGT Brian Paul, SSGT Peter Imeson, SPR Shane Campbell, LT Derek Bell, WO2 Rob Bogumil, SPR Doug Whiteside, SPR Scott Cameron, remainder unidentified. .19) - Photo, colour, 1990. Headquarters Squadron in Gaol Rd stands at ease. Right marker SGT Chris Edwards 6th from left, OC MAJ Ray Redman at far right, remainder unidentified. .20) - Photo, colour, 1990. Army Survey Regiment in transit. L to R: unidentified, CAPT Noel ‘Nesty’ Coulthard, unidentified, LT Simon Buckpitt. .21) - Photo, colour, 1990. Civic reception at the City Hall after the ceremony. .22) - Photo, colour, 1990. Civic reception at the City Hall after the ceremony. L to R: unidentified (x2), WO2 Mick Flynn, WO2 Steve Hansen, MAJ Neil Taylor, remainder unidentified. .23) - Photo, colour, 1990. Civic reception at the City Hall after the ceremony. L to R: WO2 Steve Hansen, WO2 Rhys De Laine, unidentified (x4), WO2 Alan Virtue. .24) - Photo, colour, 1990. Civic reception at the City Hall after the ceremony. L to R: unidentified, CO LTCOL Rene van den Tol, Chief Superintendent F. Fox.No personnel or civilians are identified. ‘Freedom of Entry Parade ‘90’ is annotated on plastic negative sleeve.royal australian survey corps, rasvy, army survey regiment, army svy regt, fortuna -
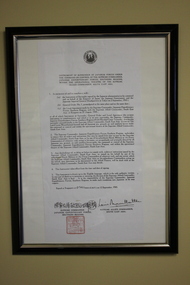 Wangaratta RSL Sub Branch
Document - Framed photocopy of Instrument of Surrender of Japanese Forces Singapore
... command oversaw the recapture of Burma. A personal high point was the receipt of the Japanese surrender in Singapore when British troops returned to the island to receive the formal surrender of Japanese forces in the region led by General Itagaki on 12 September 1945, codenamed Operation Tiderace. ...command oversaw the recapture of Burma. A personal high point was the receipt of the Japanese surrender in Singapore when British troops returned to the island to receive the formal surrender of Japanese forces in the region led by General Itagaki on 12 September 1945, codenamed Operation Tiderace. ...The Instrument of Surrender signed at Singapore by Admiral Lord Louis Mountbatten for the Allies and General Itagaki for the Japanese. During his time as Supreme Allied Commander of the Southeast Asia Theatre, Lord Mountbatten's command oversaw the recapture of Burma. A personal high point was the receipt of the Japanese surrender in Singapore when British troops returned to the island to receive the formal surrender of Japanese forces in the region led by General Itagaki on 12 September 1945, codenamed Operation Tiderace. General Itagaki was convicted of war crimes and executed inn 1948.The surrender of Imperial Japan was announced on August 15 and formally signed on September 2, 1945, bringing the hostilities of World War II to a close.Following the war, Mountbatten was known to have largely shunned the Japanese for the rest of his life out of respect for his men killed during the war, and as per his will, Japan was not invited to send diplomatic representatives to his funeral in 1979,Black frame with silver insert with glass of a photocopy of the Instrument of Surrender of the Japanese Forces. Script is in black on white paper with a red square seal at the bottom left, mounted on cream board.Instrument of surrender of Japanese Forces under the command or control of the Supreme Commander, Japanese Expeditionary forces, southern regions within the operational theatre of the Supreme Allied Commander, South East Asia. Signed at Singapore at 0341 hours (G.M.T.) on 12 September, 1945.wwii, world war 2, imperial japanese forces, surrender, singapore, japanese army -
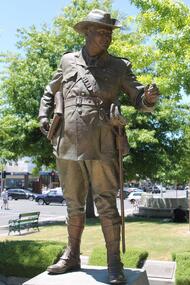 City of Ballarat
Public Artwork, Harold Edward Pompey Elliot Memorial by Louis Laumen, 2011
... troops. This contemporary bronze sculpture has detailed elements of the uniform and posture of the military of the time and stance of a man sure of his own strength and willing to command in the harshest of conditions. ...troops. This contemporary bronze sculpture has detailed elements of the uniform and posture of the military of the time and stance of a man sure of his own strength and willing to command in the harshest of conditions. ...Harold Edward 'Pompey' Elliot was first and foremost a soldier. Schooled in Ballarat, he spoke often of his love of battle, and the sheer beauty of the fighting troops. This contemporary bronze sculpture has detailed elements of the uniform and posture of the military of the time and stance of a man sure of his own strength and willing to command in the harshest of conditions. Signed by the artist along the sword scabbard. Stamp of foundry marking on the boot edging. The four plaques surround the sculpture and plinth detail part of the story of the Major-General and Senator. The memorial is of historic and aesthetic significance to the people of BallaratBronze soldier statue of General Harold Edward "Pompey" Elliott on bluestone & granite base.Signed by the artist along the sword scabbard. Stamp of foundry marking on the boot edging. Four plaques surround the sculpture and plinth. Each is mounted and details part of the story of the Major-General and Senator. pompey elliott -
 Melbourne Legacy
Document, Honours and Awards - DSO for Captain Stanley Savige 1919, 1919
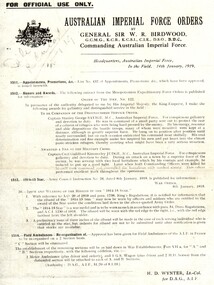
... He was in command of a small party sent out to protect the rear of a column of refugees who were being hard pressed by the enemy. By his energy, resource and able dispositions the hostile troops, many of whom were mounted, were kept at a distance, although in greatly superior force. ...He was in command of a small party sent out to protect the rear of a column of refugees who were being hard pressed by the enemy. By his energy, resource and able dispositions the hostile troops, many of whom were mounted, were kept at a distance, although in greatly superior force. ...A photocopy of the Honours and Awards published in 1919 that included Legatee Stan Savige receiving his DSO from General Sir W R Birdwood. It refers to his work protecting the Assyrian refugees in Persia from the Turks. Text includes: "In pursuance of the authority delegated to me by His Imperial Majesty, the King Emperor, I make the following awards for gallantry and distinguished service in the field:- To be Companion of the Distinguished Service Order. Captain Stanley George SAVIGE, MC, Australian Imperial Force. For conspicuous gallantry and devotion to duty. He was in command of a small party sent out to protect the rear of a column of refugees who were being hard pressed by the enemy. By his energy, resource and able dispositions the hostile troops, many of whom were mounted, were kept at a distance, although in greatly superior force. He hung on to position after position until nearly surrounded, but on each occasion extricated his command most skilfully. His cool determination and fine example under fire inspired his men and put heart into the almost panic-stricken refugees, thereby averting what might have been a very serious situation."A record of the war service of Legatee Stan Savige and the recognition he received.White foolscap photocopy of General Sir Birdwood awarding the DSO to Legatee Savigestan savige, service award -
 Ringwood RSL Sub-Branch
Souvenir Morotai WW2, C 1945
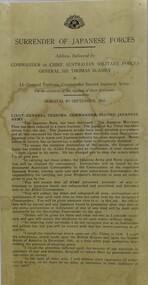
... troops in Morotai 9th September 1945. Address by General Thomas Blamey marking the surrender of Japanese forces under the command of Lieut. ...troops in Morotai 9th September 1945. Address by General Thomas Blamey marking the surrender of Japanese forces under the command of Lieut. ...Surrender leaflet given to Australian troops in Morotai 9th September 1945. Address by General Thomas Blamey marking the surrender of Japanese forces under the command of Lieut. Colonel Teshima Commanding Officer of the 2nd. Japanese Army. -
 Harcourt Valley Heritage & Tourist Centre
Field maps in case, 1914
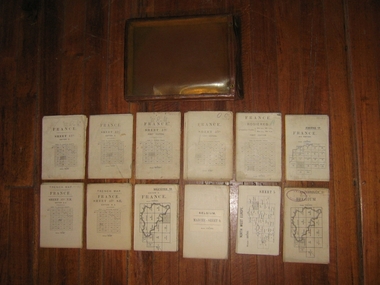
... Maps used in World War I by Col W E James Part of a large collection of items belonging to Col, W E James, of Harcourt, who after a career in the Militia, commanded Australian troops in WW1, both at Gallipoli and on the western Front. ...Maps used in World War I by Col W E JamesPart of a large collection of items belonging to Col, W E James, of Harcourt, who after a career in the Militia, commanded Australian troops in WW1, both at Gallipoli and on the western Front. The entire collection includes books on military law and maps. Essential part of the commanding officer’s kit. Collection of 12 fold up war maps from Europe used during World War I; on linen backing. Brown leather case, transparent front cover, brass fastenings and loop for attaching to the belt -
 8th/13th Victorian Mounted Rifles Regimental Collection
Photograph - Light horse escort for GG Cowan, 1982 circa
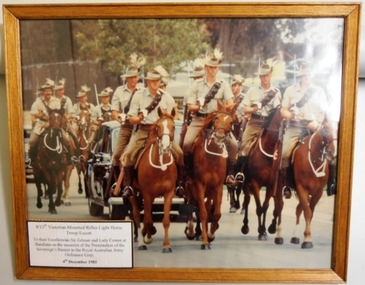
... Framed coloured photograph of mounted troops with drawn sabres being an escort from 8/13th Victorian Mounted Rifles Heritage Troop escorting the Governor General Sir Zelman and Lady Cowan at Bandiana 4 December 1981. Escort is commanded...Representative example of activities of a Heritage Troop of a serving Royal Australian Armoured Corps regiment providing a vice regal escort at a rare and historic event for the Royal Australian Army Ordnance Corps (RAAOC) and the Australian Army. cowan zelman sir 8/13 vmr heritage troop morrison robert captain Royal Australian Army Ordnance Corps (RAAOC) Sovereign's Banner RAAOC Card panel " 8/13 VMR Light Horse / Troop Escort / to their Excellencies Sir Zelman and Lady Cowan at / Bandiana on the occasion of the / Presentation of the Sovereign's Banner to the Royal Australian Army / Ordnance Corps / 4 Dec 1981" Framed coloured photograph of mounted troops with drawn sabres being an escort from 8/13th Victorian Mounted Rifles Heritage Troop escorting the Governor General Sir Zelman and Lady Cowan at Bandiana 4 December 1981. Escort is commanded ...Sir Zelman Cowan was Governor General of Australia, December 1977-July 1982. The 8/13 VMR Light Horse Heritage Troop was an extra curricular activity of the 8/13th VMR. Captain (later Major) Robert Morrison, a keen horseman, was the prime mover in raising the troop. All riders were serving soldiers.Representative example of activities of a Heritage Troop of a serving Royal Australian Armoured Corps regiment providing a vice regal escort at a rare and historic event for the Royal Australian Army Ordnance Corps (RAAOC) and the Australian Army.Framed coloured photograph of mounted troops with drawn sabres being an escort from 8/13th Victorian Mounted Rifles Heritage Troop escorting the Governor General Sir Zelman and Lady Cowan at Bandiana 4 December 1981. Escort is commanded by Captain Robert Morrison riding to the right of the official car..Card panel " 8/13 VMR Light Horse / Troop Escort / to their Excellencies Sir Zelman and Lady Cowan at / Bandiana on the occasion of the / Presentation of the Sovereign's Banner to the Royal Australian Army / Ordnance Corps / 4 Dec 1981"cowan zelman sir, 8/13 vmr, heritage troop, morrison robert captain, royal australian army ordnance corps (raaoc), sovereign's banner, raaoc -
 8th/13th Victorian Mounted Rifles Regimental Collection
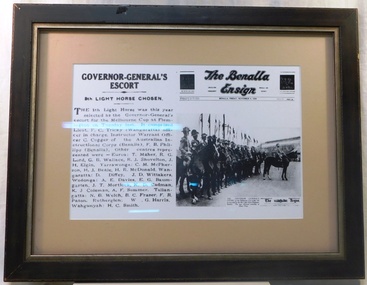
Newspaper - Benalla Ensign
... Their escort on that occasion was drawn from 8th (Indi) Light Horse Regiment and commanded by Lieutenant FC Trickey with soldiers drawn from Benalla, Euroa, Wangaratta, Tallangatta, Wahgunyah, Wodonga and Rutherglen Troops. ...Their escort on that occasion was drawn from 8th (Indi) Light Horse Regiment and commanded by Lieutenant FC Trickey with soldiers drawn from Benalla, Euroa, Wangaratta, Tallangatta, Wahgunyah, Wodonga and Rutherglen Troops. ...Lord and Lady Gowrie attended the Melbourne Cup 1 November 1938. Their escort on that occasion was drawn from 8th (Indi) Light Horse Regiment and commanded by Lieutenant FC Trickey with soldiers drawn from Benalla, Euroa, Wangaratta, Tallangatta, Wahgunyah, Wodonga and Rutherglen Troops. The 8th Light Horse (Indi) Regiment superseded the 16th Light Horse in 1919. It had its headquarters at Benalla with sub-units throughout the Upper Murray and Northeast Victoria. In December 1941, the regiment converted from horse to mechanised, initially as 8th Reconnaissance Battalion then in July 1942 it became 8th Cavalry Regiment and served in Northern Territory. As Japanese threat to the mainland declined the regiment was disbanded. Well prepared memento of vice-regal visit to regional centre and escort duty by the local regiment.Framed photograph of an extract from "The Benalla Ensign" of Friday November 4 1938 reporting on the Governor General's escort to the Melbourne Cup drawn from the 8th Light Horse Regiment. The frame is black painted wood with gold trim.8th light horse regiment, benalla ensign, governor general, gowrie, flemington, cup -
 8th/13th Victorian Mounted Rifles Regimental Collection
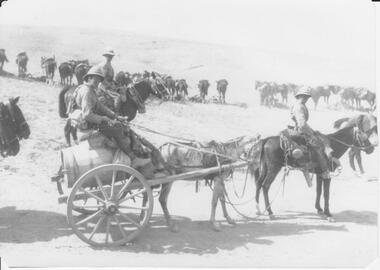
Photograph - 8thLH water cart
... The 8th Light Horse Regiment was engaged in the battle to capture Turkish defences in and around Beersheba in early November 1917 in conjunction with other Light Horse units and troops from the Imperial Camel Corps, British Yeomanry Division, New Mounted Rifles and 53 Welsh Division. The 8th Light Horse Regiment AIF was raised at Broadmeadows Victoria in September 1914 under the command of Lieutenant Colonel Alexander White and formed part of the 3rd Light Horse Brigade. ...The 8th Light Horse Regiment was engaged in the battle to capture Turkish defences in and around Beersheba in early November 1917 in conjunction with other Light Horse units and troops from the Imperial Camel Corps, British Yeomanry Division, New Mounted Rifles and 53 Welsh Division. The 8th Light Horse Regiment AIF was raised at Broadmeadows Victoria in September 1914 under the command of Lieutenant Colonel Alexander White and formed part of the 3rd Light Horse Brigade. ...The 8th Light Horse Regiment was engaged in the battle to capture Turkish defences in and around Beersheba in early November 1917 in conjunction with other Light Horse units and troops from the Imperial Camel Corps, British Yeomanry Division, New Mounted Rifles and 53 Welsh Division. The 8th Light Horse Regiment AIF was raised at Broadmeadows Victoria in September 1914 under the command of Lieutenant Colonel Alexander White and formed part of the 3rd Light Horse Brigade. The regiment served at Gallipoli where in a courageous but ill-fated charge at the Nek on 7 August 1915 it suffered horrendous casualties including Lieutenant Colonel White. Rebuilt in Egypt under the command of Lieutenant Colonel Leslie Maygar VC the regiment went on the serve throughout the Middle East Campaign. Colonel Maygar died of wounds at Beersheba when the regiment was attacked by enemy aircraft while waiting to follow up the successful charge of the 4th LH Brigade on 30 October 1917. The 8th Light Horse AIF was disbanded in 1919, but soon after re-raised as the 8th (Indi) Light Horse in the Citizen Military Forces, superseding 16th (Indi) Light Horse.Comparatively rare collection of photographs of 8th Light Horse (AIF) on operations in Egypt and Sinai 1916-1918.Black and White photograph of two-wheeled water cart drawn by donkey, also two mounted men who are wearing sun toppees and one has a rifle in rifle bucket."Captured Turkish water cart at Beersheba with British Yeomanry"beersheba, turkish, world war one, wwi, 8th, light horse -
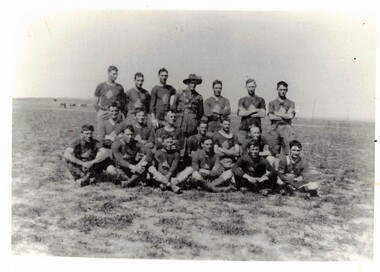 8th/13th Victorian Mounted Rifles Regimental Collection
Photograph - Photograph of football team 8 ALH
... troops while training or resting behind the lines. The 8th Light Horse Regiment AIF was raised at Broadmeadows Victoria in September 1914 under the command of Lieutenant Colonel Alexander White and formed part of the 3rd Light Horse Brigade. ...troops while training or resting behind the lines. The 8th Light Horse Regiment AIF was raised at Broadmeadows Victoria in September 1914 under the command of Lieutenant Colonel Alexander White and formed part of the 3rd Light Horse Brigade. ...Sport was encourage among troops while training or resting behind the lines. The 8th Light Horse Regiment AIF was raised at Broadmeadows Victoria in September 1914 under the command of Lieutenant Colonel Alexander White and formed part of the 3rd Light Horse Brigade. The regiment served at Gallipoli where in a courageous but ill-fated charge at the Nek on 7 August 1915 it suffered horrendous casualties including Lieutenant Colonel White. Rebuilt in Egypt under the command of Lieutenant Colonel Leslie Maygar VC the regiment went on the serve throughout the Middle East Campaign. Colonel Maygar died of wounds at Beersheba when the regiment was attacked by enemy aircraft while waiting to follow up the successful charge of the 4th LH Brigade on 30 October 1917. The 8th Light Horse AIF was disbanded in 1919, but soon after re-raised as the 8th (Indi) Light Horse in the Citizen Military Forces, superseding 16th (Indi) Light Horse. It had its headquarters at Benalla with sub-units throughout the Upper Murray and Northeast Victoria. In December 1941, the regiment converted from horse to mechanised, initially as 8th Reconnaissance Battalion then in July 1942 it became 8th Cavalry Regiment and served in Northern Territory. As Japanese threat to the mainland declined the regiment was disbanded.Rare photograph of football team in Middle East WWIBlack and White photograph of soldiers in football gear with one officer being AFL team of 8th Light Horse Regimentmilitary, football, 8 alh, world war one, wwi, middle east -
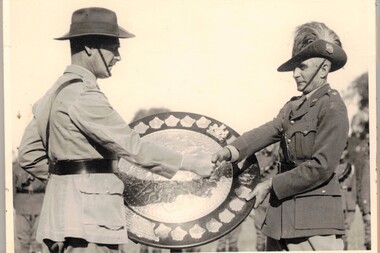 8th/13th Victorian Mounted Rifles Regimental Collection
Photograph
... The Tocumwal Troop 20th LH commanded by Sgt HG (Bob) Fyffe were the winners in 1937/38 and the Tallangatta Troop 8th LH led by Lt L Wildsmith, in 1938/39. Other competitors in 1938/39 were the York Troop, 10th Light Horse (WA), Burnie Troop 22nd LH (Tas) and Orroroo Troop 9th/23rd LH (SA). Troops...The Tocumwal Troop 20th LH commanded by Sgt HG (Bob) Fyffe were the winners in 1937/38 and the Tallangatta Troop 8th LH led by Lt L Wildsmith, in 1938/39. Other competitors in 1938/39 were the York Troop, 10th Light Horse (WA), Burnie Troop 22nd LH (Tas) and Orroroo Troop 9th/23rd LH (SA). Troops ...The Hutton Trophy or Shield was awarded annually to the best Light Horse Troop in Australia. The trophy is now held at the Armoured Centre Puckapunyal. Inter-regimental competition was strong in the years between WWI and WWII. Annually, the best troop in the regiments of the 3rd (Vic), 4th (SA), 5th (WA) and 6th (Tas) Military Districts competed for the Hutton Trophy and the Lord Forster Cup. The Tocumwal Troop 20th LH commanded by Sgt HG (Bob) Fyffe were the winners in 1937/38 and the Tallangatta Troop 8th LH led by Lt L Wildsmith, in 1938/39. Other competitors in 1938/39 were the York Troop, 10th Light Horse (WA), Burnie Troop 22nd LH (Tas) and Orroroo Troop 9th/23rd LH (SA). Troops were marked on Personnel, Horses (type & turnout), Saddlery, Hotchkiss Gun (turnout), Horsemanship, Fire control, Shooting (rifle & H gun), Sword action and Time. VX 42774 Captain Robert (Bob) Fyffe, a grazier from Tocumwal, NSW, served with the Tocumwal troop of the 20th Light Horse prior to WWII (1939-46). He enlisted at the outbreak of war and served with the 9th Division Cavalry Regiment in North Africa. During the attack on Trig 22 on 17 July 1942 Captain Fyffe commanding a composite squadron manoeuvred his tanks to knock out machine guns and anti-tank guns enabling 2/32 Battalion to capture the objective. Captain Fyffe was awarded the Military Cross for his leadership and courage in the action. This was 9th Division Cavalry's first tank action of the war. Complement other images in collectionBlack and white photograph glued to corrugated plastic backing card showing two officers with large silver shield. Occasion is the presentation of the Hutton Trophy to the troop leader of the Tocumwal Troop 20th Light Horse Regiment, Lieutenant H G (Bob) Fyffe, 1938.hutton trophy, tocumwal, fyffe, light horse, competition, victoria -
Woodend RSL
Slouch Hat, 1988
... It was originally worn with the right side looped up to make it easier for marching troops to perform the “eyes right” command in parades but as more states adopted the slouch hat, it became more common to wear the left side turned up. ...It was originally worn with the right side looped up to make it easier for marching troops to perform the “eyes right” command in parades but as more states adopted the slouch hat, it became more common to wear the left side turned up. ...Slouch hats were first worn by the Victorian Mounted Rifles in 1885. It was originally worn with the right side looped up to make it easier for marching troops to perform the “eyes right” command in parades but as more states adopted the slouch hat, it became more common to wear the left side turned up. The slouch hat was widely worn by Australian soldiers during the Boer War and it was universally adopted for the Australian Army after Federation. It was usually worn with a khaki hatband, known as a puggaree, and a Rising Sun badge on the left-hand side. The word ‘slouch’ refers to the sloping brim. The brim is made from rabbit-fur felt or wool felt and is always worn with a puggaree. The majority of the Australian Army wear the light khaki coloured puggaree, with a unit colour patch sewn on the right side, however, there are slight variations. The seven pleats in the standard puggaree represent each state and one for the Australian Territories.The slouch hat is an object strongly associated with Australian identity.Australian Army standard issue khaki fur felt slouch hat with leather chinstrap, commonly worn as part of a military uniform. Wide-brimmed with snap up latch on left-hand-side. Without Rising Sun badge or unit colour patch. 7 fold/pleat khaki cloth band puggaree around the hat. Dark brown leather sweatband, embossed with a gold stamp identifying manufacture as Akubra, date of manufacture as 1988, size 58, and a broad arrow to signify the hat is owned by the Australian Department of Defence. The slouch hat is also known as a hat KFF, or hat khaki fur felt.headdress
