Showing 13320 items matching digital
-
 Eltham District Historical Society Inc
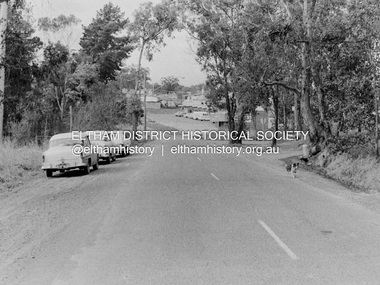
Photograph, Barry Philp, Eltham-Yarra Glen Road, Research, Vic, c.1967
View looking north along Eltham-Yarra Glen Road towards intersection with Research-Warrandyte Road and Research shops, c.1967. Three cars on the left, two FC Holden sedans (1958-1960) and a Holden HD Station Sedan (1965-1966)In digital metadata "My beautiful picture"cars, eltham-yarra glen road, holden fc, holden hd, main road, research (vic.), research shops, research-warrandyte road -
 Eltham District Historical Society Inc
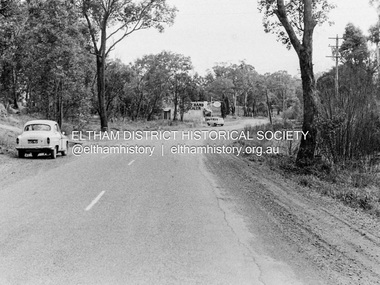
Photograph, Barry Philp, Eltham-Yarra Glen Road, Research, Vic, c.1967
View looking south along Eltham-Yarra Glen Road towards intersection with Reynolds Road and Dodkins Second Hand Dealer store on corner, c.1967.In digital metadata "My beautiful picture"cars, eltham-yarra glen road, main road, research (vic.), reynolds road, dodkins family, second hand dealer store, second hand dealer -
 Ballarat Tramway Museum
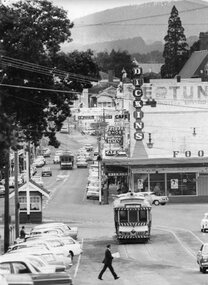
Photograph - Black & White Photograph/s, Peter Bruce, Digital image - "City Loop and Bridge St", 1971
Yields information about the buildings and trams in view from Lydiard St looking east along Bridge St.Black and white photograph of SEC No. 31 and two other single truckers in the City Loop at the bottom end of Sturt St. near Grenville St and another single trucker in Bridge St. heading west, just after leaving the junction with Main and Victoria Sts. Has the Grenville St. tramway shelter. Telephoto lens used from about the intersection with Lydiard St. looking east. Has "Dickins" store and other shops in the background. Tram 31 shows the destination of City and has a Twin Lakes sign as well. Photograph by Peter Bruce, 1971. Digital image added 7/7/10. Peter Bruce title "City Loop and Bridge St"trams, tramways, sturt st, city loop, bridge st, dickins, tram 31 -
 Melbourne Tram Museum
Ephemera - Timetable/s, Yarra Trams, Public Transport Victoria (PTV), Set of 25 digital timetables, 2018
Set of 25 digital timetables generally applicable from 20-05-2018 following the introduction of more frequent services on many routes. Image files are htd2860iRx - x being the route number. Route 1 - East Coburg - South Melbourne Beach Route 3 and 3A - Melbourne University - East Malvern - and via St Kilda Beach Route 5 - Melbourne University - Malvern Route 6 - Melbourne University - Glen Iris Route 8 - Moreland - Toorak Route 11 - West Preston - Victoria Harbour Docklands Route 12 - Victoria Gardens - St Kilda Route 16 - Melbourne University - Kew Via St Kilda Route 19 - North Coburg - Flinders St Route 30 - St Vincent's Plaza - Etihad Stadium Docklands Route 35 - City Circle Route 48 - North Balwyn - Victoria Harbour Docklands Route 55 - West Coburg - Domain Interchange Route 57 - West Maribyrnong - Flinders St Route 59 - Airport West - Flinders St Route 64 - East Brighton - Melbourne University Route 67 - Carnegie - Melbourne University Route 70 - Wattle Park - Waterfront City Docklands Route 72 - Camberwell - Melbourne University Route 75 - Vermont South - Etihad Stadium Docklands Route 78 - North Richmond - Balaclava via Prahran Route 82 - Footscray - Moonee Ponds Route 86 - Bundoora RMIT - Waterfront City Docklands Route 96 - East Brunswick - St Kilda Beach Route 109 - Box Hill - Port Melbournetrams, tramways, timetables, yarra trams, route 1, route 3, route 5, route 6, route 8, route 11, route 12, route 16, route 19, route 30, route 35, route 48, route 55, route 57, route 59, route 64, route 67, route 70, route 72, route 75, route 78, route 82, route 86, route 96, route 109 -
 Melbourne Tram Museum
Ephemera - Timetable/s, Yarra Trams, Public Transport Victoria (PTV), Set of 25 digital timetables - Yarra Trams, 2016
Set of 25 digital timetables generally applicable 2016 to 13/4/2017. Similar timetables ran during 13/4/2017 and 1/5/2017 over the Easter Holiday period up to when Route 58 (from route 8 and route 55) introduced and route 6 modified - see Reg item 2212 for details. List major stops only. All downloaded from the PTV website 9-4-17 as pdf files. Image files are htd2211iRx - x being the route number. Route 1 - East Coburg - South Melbourne Beach Route 3 and 3A - Melbourne University - East Malvern - and via St Kilda Beach Route 5 - Melbourne University - Malvern Route 6 - Melbourne University - Glen Iris Route 8 - Moreland - Toorak Route 11 - West Preston - Victoria Harbour Docklands Route 12 - Victoria Gardens - St Kilda Route 16 - Melbourne University - Kew Via St Kilda Route 19 - North Coburg - Flinders St Route 30 - St Vincent's Plaza - Etihad Stadium Docklands Route 35 - City Circle Route 48 - North Balwyn - Victoria Harbour Docklands Route 55 - West Coburg - Domain Interchange Route 57 - West Maribyrnong - Flinders St Route 59 - Airport West - Flinders St Route 64 - East Brighton - Melbourne University Route 67 - Carnegie - Melbourne University Route 70 - Wattle Park - Waterfront City Docklands Route 72 - Camberwell - Melbourne University Route 75 - Vermont South - Etihad Stadium Docklands Route 78 - North Richmond - Balaclava via Prahran Route 82 - Footscray - Moonee Ponds Route 86 - Bundoora RMIT - Waterfront City Docklands Route 96 - East Brunswick - St Kilda Beach Route 109 - Box Hill - Port Melbournetrams, tramways, timetables, yarra trams, route 1, route 3, route 5, route 6, route 8, route 11, route 12, route 16, route 19, route 30, route 35, route 48, route 55, route 57, route 59, route 64, route 67, route 70, route 72, route 75, route 78, route 82, route 86, route 96, route 109 -
 Melbourne Tram Museum
Ephemera - Timetable/s, Yarra Trams, Public Transport Victoria (PTV), Set of 24 digital timetables - Yarra trams, 2016
Set of 24 digital timetables generally applicable 1/4/2017 to end 2017 Introduced when Route 58 (from route 8 and route 55) amalgamated and route 6 modified - see Reg item 2212 for details. All downloaded from the PTV website 9-4-17 as pdf files, except for routes 6 and 58 which had not been published as of that date. Timetables list major stops. Routes 6 and 58 files added 6-6-2017. Image files are htd2213iRx - x being the route number. Route 1 - East Coburg - South Melbourne Beach Route 3 and 3A - Melbourne University - East Malvern - and via St Kilda Beach Route 5 - Melbourne University - Malvern Route 6 - Moreland - Glen Iris Route 11 - West Preston - Victoria Harbour Docklands Route 12 - Victoria Gardens - St Kilda Route 16 - Melbourne University - Kew Via St Kilda Route 19 - North Coburg - Flinders St Route 30 - St Vincent's Plaza - Etihad Stadium Docklands Route 35 - City Circle Route 48 - North Balwyn - Victoria Harbour Docklands Route 57 - West Maribyrnong - Flinders St Route 58 - Toorak - West Coburg via William St. Route 59 - Airport West - Flinders St Route 64 - East Brighton - Melbourne University Route 67 - Carnegie - Melbourne University Route 70 - Wattle Park - Waterfront City Docklands Route 72 - Camberwell - Melbourne University Route 75 - Vermont South - Etihad Stadium Docklands Route 78 - North Richmond - Balaclava via Prahran Route 82 - Footscray - Moonee Ponds Route 86 - Bundoora RMIT - Waterfront City Docklands Route 96 - East Brunswick - St Kilda Beach Route 109 - Box Hill - Port Melbournetrams, tramways, timetables, yarra trams, route 1, route 3, route 5, route 6, route 11, route 12, route 16, route 19, route 30, route 35, route 48, route 57, route 58, route 59, route 64, route 67, route 70, route 72, route 75, route 78, route 82, route 86, route 96, route 109 -
 Federation University Historical Collection
Certificate, Award for Innovation Development - Indigenous Learners in the Digital Age: Recognising Skills and Knowledge, 2004
In 2004 the Australian Flexible Learning framework awarded University of Ballarat (TAFE Division) with an award of excellence for innovation developmentFramed certificate in a light brown mount with black edgeuniversity of ballarat tafe, indigenous, aboriginal, australian flexible learning framework, australian national training authority, stuart young, paul byrne, phil de garis -
 Ringwood and District Historical Society
Research Folder, Collection of Sands MacDougall Directories (Digital), Ringwood area: Uncatalogued
Directory containing images of Sands & MacDougall Directories pages for Ringwood, Croydon, Ringwood east etc.: 1947, 1958, 1968, 1971, 1972, 1973, 1974 -
 Ringwood and District Historical Society
Photograph, Samuel & Elizabeth Cutts- year and place unknown (Refer also Digital copies of Cutts Family - EM0001 to EM0014)
Sepia photograph"Written on back of photograph" Samuel & Elizabeth Cutts Additional Note - Samual Cutts was the owner of Burnt Bridge Hotel. -
Inverloch Historical Society
004354 Document - Inverloch Community Newsletter - October 1973 - from Nina Banks - Digital Copy only
-
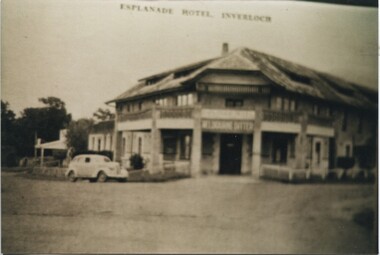
 Inverloch Historical Society
004332 Photograph - Esplanade Hotel, Inverloch - from Nina Banks - Digital Copy only
-
 Inverloch Historical Society
004333 Photograph - Esplanade Hotel Front View, Inverloch - from Nina Banks - Digital Copy only
-
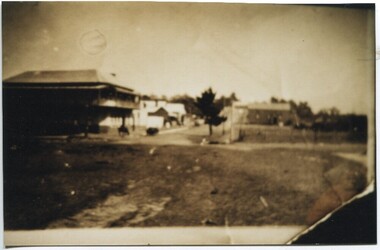
 Inverloch Historical Society
004334 Photograph - Possibly 1930's - Esplanade Hotel, Inverloch - from Nina Banks - Digital Copy only
-
 Inverloch Historical Society
004335 Photograph - circa 1920 - Esplanade Hotel & Mechanics Institute, Inverloch - from Nina Banks - Digital Copy only
-
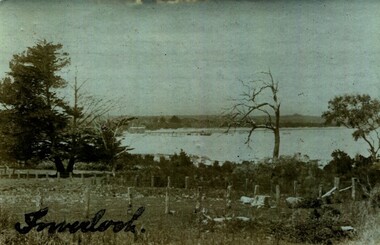 Inverloch Historical Society
004336 Postcard Photograph - Inverloch - from Nina Banks - Digital Copy only
-
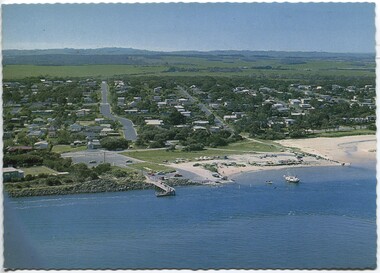 Inverloch Historical Society
Postcard, Inverloch Jetty & from the air looking towards the jetty - from Nina Banks - Digital Copy only
-
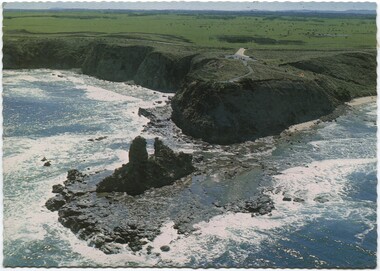
 Inverloch Historical Society
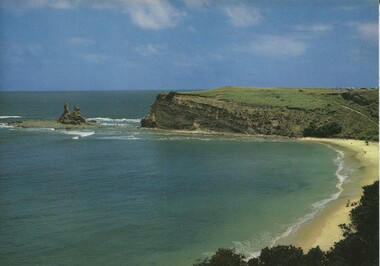
Postcard, Eagles Nest Rock, Inverloch - Photo by Neil Cutts - from Nina Banks - Digital Copy only
-
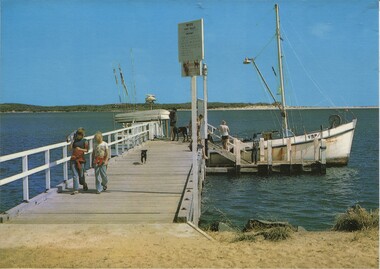
 Inverloch Historical Society
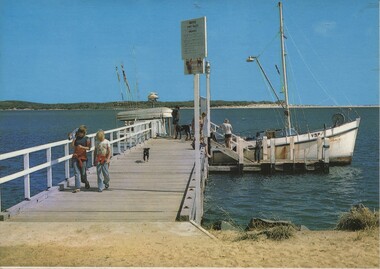
004343 Postcard Photograph - The Jetty and Boat Ramp Area, Inverloch - Photo by Neil Cutts - from Nina Banks - Digital Copy only
-
 Inverloch Historical Society
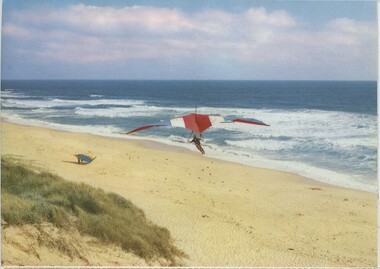
004344 Postcard Photograph - Hang Gliding near Inverloch - Photo by Neil Cutts - from Nina Banks - Digital Copy only
-
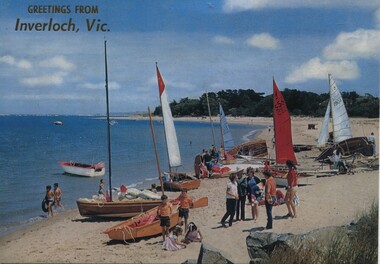
 Inverloch Historical Society
004345 Postcard Photograph - Sailing Club, Jetty Beach, Inverloch - Photo by Neil Cutts - from Nina Banks - Digital Copy only
-
 Inverloch Historical Society
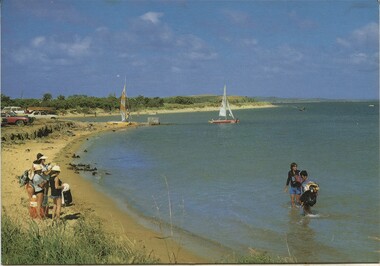
004346 Postcard Photograph - On the beach, Inverloch - from Nina Banks - Digital Copy only (Same as 000221)
-
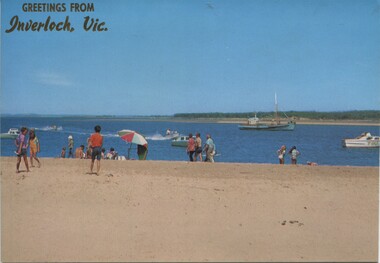 Inverloch Historical Society
004347 Postcard Photograph - The Beach and Andersons Inlet, Inverloch - from Nina Banks - Digital Copy only
-
 Inverloch Historical Society
004348 Postcard Photograph - The Jetty and Boat Ramp Area, Inverloch - Photo by Neil Cutts - from Nina Banks - Digital Copy only
-
 Inverloch Historical Society
004349 Postcard Photograph - Aerial View of Eagles Nest, Inverloch - from Nina Banks - Digital Copy only
-
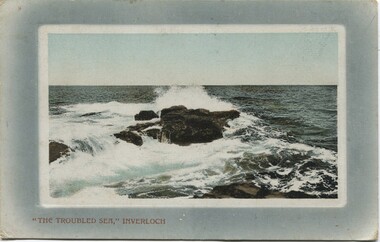 Inverloch Historical Society
004350 Postcard Photograph - The Troubled Sea, Inverloch - from Nina Banks - Digital Copy only
-
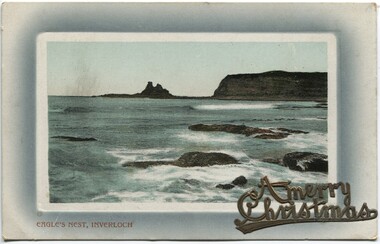 Inverloch Historical Society
004351 Postcard Photograph - Eagles Nest, Inverloch - from Nina Banks - Digital Copy only
-
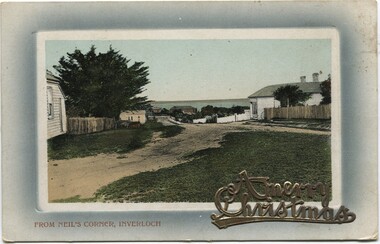 Inverloch Historical Society
004352 Postcard Photograph - From Neil's Corner, Inverloch - from Nina Banks - Digital Copy only
-
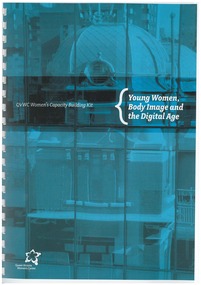 Queen Victoria Women's Centre
Booklet, QVWC Women's Capacity Building Kit - Young Women, Body Image and the Digital Age, c.2011
10 pages A4 white paper. teal accents throughout. Colour photographs. workshops, mass media, vocational guidance -
 Greensborough Historical Society
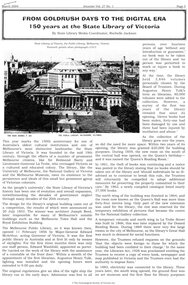
Article - Article, Journal, Rochelle Jackson, From goldrush days to the digital era: 150 years at the State Library of Victoria, by Rochelle Jackson, 2004_03
Brief history of the State Library of Victoria since its establishment as the Melbourne Public Library in 1856. Details the expansion of the site, its buildings and services.3 p, black and white text and photographsstate library of victoria, melbourne - history -
Moorabbin Air Museum
Manual (Item) - RAAF VHF Commiuications Transceiver, Royal Australiaj Air Force VHF Commuications Transceiver 618-2 680T VHF Digital Synthesiser Planar Assembly
RAAF