
Showing 110 items matching "eaglehawk terminus"
-
 Ballarat Tramway Museum
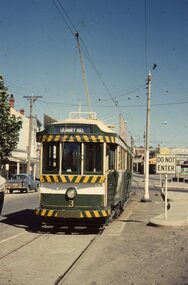
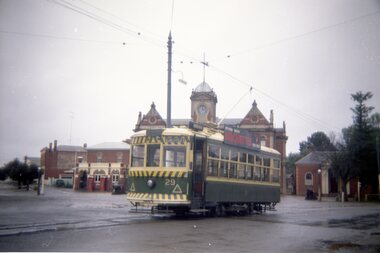
Photograph - Bendigo Tram 3, Tram at the Eaglehawk terminus, 10 January 1971
... Tram at the Eaglehawk terminus, 10 January 1971......eaglehawk terminus...Tram 3 at the terminus at Eaglehawk. Photograph taken by Campbell Duncan, 10 January, 1971....Tram 3 at the terminus at Eaglehawk. Photograph taken by Campbell Duncan, 10 January, 1971. bendigo tram 3 first tram 1890 electric 1903 duncan and fraser 82 years eaglehawk terminus campbell duncan photographer Handwritten notation in ink on mount Colour image in C/B Ferraniacolor - 35mm slide Tram at the Eaglehawk terminus, 10 January 1971 Photograph Bendigo Tram 3 ...The first trams in Bendigo were battery-operated and started running in June 1890. These were replaced when the electric network opened in 1903 with a fleet of twelve trams manufactured by Duncan and Fraser of Adelaide. Bendigo Tramways ceased operating in 1972 after 82 years. Tram 3 at the terminus at Eaglehawk. Photograph taken by Campbell Duncan, 10 January, 1971.Colour image in C/B Ferraniacolor - 35mm slideHandwritten notation in ink on mountbendigo tram 3, first tram 1890, electric 1903, duncan and fraser, 82 years, eaglehawk terminus, campbell duncan, photographer -
 Ballarat Tramway Museum
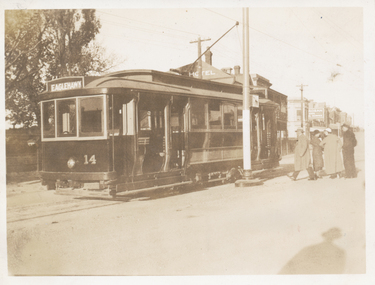
Photograph - SECV Bendigo 14 at the Eaglehawk terminus, late 1930's
... SECV Bendigo 14 at the Eaglehawk terminus...Photo of Bendigo No. 14 at the Eaglehawk terminus, late 1930's? Has a group of people standing at the rear of the tram....Photo of Bendigo No. 14 at the Eaglehawk terminus, late 1930's? Has a group of people standing at the rear of the tram. ...Photo of Bendigo No. 14 at the Eaglehawk terminus, late 1930's? Has a group of people standing at the rear of the tram.Yields information about Bendigo 14 at Eaglehawk.Black and White print contained within the Wal Jack Bendigo and Geelong Album, see Reg Item 5003 for more details. Printed on Kodak Velox paper. Two prints held and negative. On the rear in ink "Bendigo Tram Co, 14, ex Melb&M.T.B"trams, tramways, eaglehawk, bendigo, tram 14 -
 Ballarat Tramway Museum
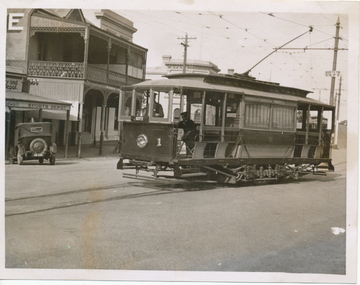
Photograph - ESCo Bendigo No. 1 arriving at Eaglehawk terminus, Wal Jack, 12/4/1941
... ESCo Bendigo No. 1 arriving at Eaglehawk terminus...Photograph of ESCo tram No. 1 arriving at the Eaglehawk terminus. The tram has been modified with bracing and open saloon seats changed from cross bench to longitudinal. ...Photograph ESCo Bendigo No. 1 arriving at Eaglehawk terminus Wal Jack ...Photograph of ESCo tram No. 1 arriving at the Eaglehawk terminus. The tram has been modified with bracing and open saloon seats changed from cross bench to longitudinal. The conductor is sitting in the front saloon. The tram has the destination of "City". In the background is the Park Hotel, and Sports Depot business. Photo notes that it was taken on Easter Saturday 1941. Print ex the Ken McCarthy collection added 3/5/2026. i1 - scan of print in the album i2 - rear of image i3 - scan of negative at 3200dpi added 6/6/2020.Yields information about the operation of Bendigo tram 1 during Easter 1941.Black and White print contained within the Wal Jack Bendigo and Geelong Album, see Reg Item 5003 for more details.On rear in ink "T193, Bendigo Tramways, State Electricity Commission, / No. 1 (Original type), High St Eaglehawk, Easter Saturday 1941. W. Jack photo. On rear of second print ex Ken McCarthy "20 K Mc"trams, tramways, bendigo, esco, secv, eaglehawk, high st, tram 1 -
 Ballarat Tramway Museum
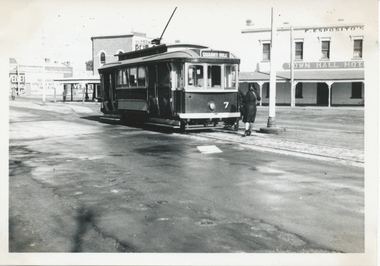
Photograph - SECV Bendigo No. 7 at Eaglehawk terminus, Wal Jack, 4/08/1943
... SECV Bendigo No. 7 at Eaglehawk terminus...Photo of No. 7 at Eaglehawk terminus with a conductress completing the turning of the trolley pole. ...Photo of No. 7 at Eaglehawk terminus with a conductress completing the turning of the trolley pole. ...Photo of No. 7 at Eaglehawk terminus with a conductress completing the turning of the trolley pole. The F. Esposito's Town Hall hotel in the background along with advertisements for Velvet soap. Photo taken 4-8-1943 by Wal Jack. The tram has the destination of Quarry Hill, has white bumpers and white steps. Black and White print contained within the Wal Jack Bendigo and Geelong Album, see Reg Item 5003 for more details. i1 - scan of print in the album i2 - rear of image i3 - scan of negative at 3200dpi added 6/6/2020.Yields information about Bendigo No. 7 and use of conductresses during WW2Black and white print with photographer’s notes on the rear.On rear in ink "SEC Bendigo, 2nd No. 7, (ex PMTT), Eaglehawk (heavy snow storms) 4-8-43" with the Wal Jack copyright stamp in the top right hand corner and the number "T208" written in.trams, tramways, eaglehawk, conductresses, tram 7, second world war -
 Ballarat Tramway Museum
Photograph - Bendigo Tram 3, Tram at the Eaglehawk terminus, 10 January 1971
... Tram at the Eaglehawk terminus, 10 January 1971...Tram at the Eaglehawk terminus, 10 January 1971 Photograph Bendigo Tram 3 ... -
 Ballarat Tramway Museum
Slide - 35mm slide/s, Noel Simons, Dec. 1971
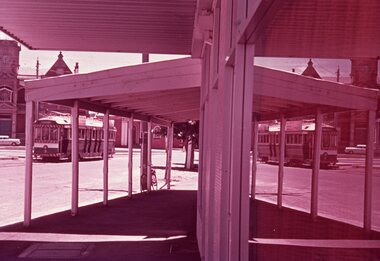
... One slide on a Kodak Ready Mount made from the Association of Railway Enthusiast Provincial Tramways film strip, during December 1971 of Bendigo No. 3 at Eaglehawk terminus with its reflection in a shop window looking through a multi post verandah. ..."No. 3 and its reflection at Eaglehawk terminus" and "Dec 1971" in purple ink using a hand stamp....Tramways trams Eaglehawk Bendigo tram 3 "No. 3 and its reflection at Eaglehawk terminus" and "Dec 1971" in purple ink using a hand stamp. ...One slide on a Kodak Ready Mount made from the Association of Railway Enthusiast Provincial Tramways film strip, during December 1971 of Bendigo No. 3 at Eaglehawk terminus with its reflection in a shop window looking through a multi post verandah. Has the Eaglehawk Town Hall in the background."No. 3 and its reflection at Eaglehawk terminus" and "Dec 1971" in purple ink using a hand stamp.tramways, trams, eaglehawk, bendigo, tram 3 -
 Ballarat Tramway Museum
Slide - 35mm slide/s, Peter Moses, Jan. 1969
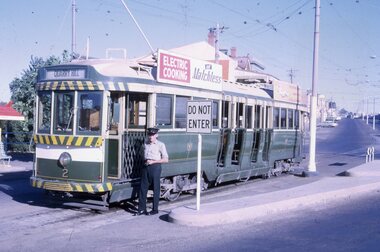
... Photo of SEC Bendigo No. 2 at Eaglehawk terminus. Tram has a crew member (driver) standing by the rear door and has SEC roof advertisements "Electric Cooking is Matchless" and "Everything's under control in my all-electric kitchen". ...On the rear of the slide "Jan 1969 Eaglehawk terminus", "P.Moses" and on the other side of the slide, in red ink “2”....Tramways trams Bendigo Eaglehawk tram 2 On the rear of the slide "Jan 1969 Eaglehawk terminus", "P.Moses" and on the other side of the slide, in red ink “2”. ...Photo of SEC Bendigo No. 2 at Eaglehawk terminus. Tram has a crew member (driver) standing by the rear door and has SEC roof advertisements "Electric Cooking is Matchless" and "Everything's under control in my all-electric kitchen". Kodak cardboard mount slide, taken by Peter Moses, Jan. 1969.On the rear of the slide "Jan 1969 Eaglehawk terminus", "P.Moses" and on the other side of the slide, in red ink “2”.tramways, trams, bendigo, eaglehawk, tram 2 -
 Ballarat Tramway Museum
Slide - SECV Bendigo 7 at Eaglehawk, Wal Jack, 6/01/1963
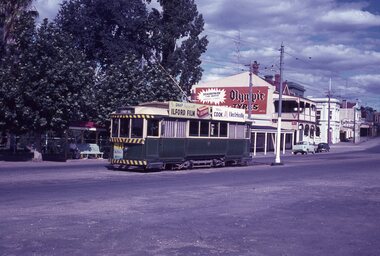
... Bendigo No. 7 at Eaglehawk tram terminus, 6-1-1963. Tram has been fitted with lights and warning stripes. ...'Ex Ballarat 19, SEC Bendigo No. 7, at Eaglehawk terminus, 6-1-63'...Bendigo No. 7 at Eaglehawk tram terminus, 6-1-1963. Tram has been fitted with lights and warning stripes. ...Bendigo No. 7 at Eaglehawk tram terminus, 6-1-1963. Tram has been fitted with lights and warning stripes. On front panel is Hutton's hams, and roof ads for Ilford film and 'Cook with electricity'. In background is park, shops on the north side of the terminus, including a large 'Olympic' tyres advertisement. Tram has destination of 'Quarry Hill'Yields information about Bendigo tram 7 and High St Eaglehawk.Kodak slide with handwritten notes.'Ex Ballarat 19, SEC Bendigo No. 7, at Eaglehawk terminus, 6-1-63'tramways, trams, bendigo, eaglehawk, tram 7 -
 Ballarat Tramway Museum
Slide - 35mm slide/s, Keith Kings, 20/04/1962 12:00:00 AM
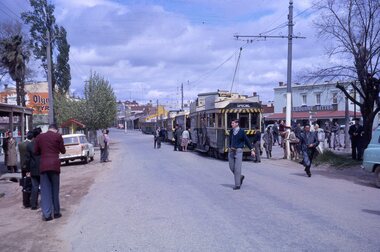
... Bendigo trams 26,18,29,11, & 5 at Eaglehawk terminus on a special tour for the ARHS Vic. ...Stamped on 'K.S.Kings etc' and in blue ink 'K(k)(381) 1/250, f5.6, 20/4/62, ARHS, trams 26,18,29,11 & 5 as specials at Eaglehawk terminus during Bendigo Centenarian trip.'...Bendigo trams 26,18,29,11, & 5 at Eaglehawk terminus on a special tour for the ARHS Vic. ...Bendigo trams 26,18,29,11, & 5 at Eaglehawk terminus on a special tour for the ARHS Vic. Div on day of Bendigo Centenarian tour, on 20/4/1962. Trams have arrived at terminus and many passengers around, taking photos etc. Trams fitted with safety stripes etc. Leading tram showing 'SPECIAL'. Photo by Keith Kings.Stamped on 'K.S.Kings etc' and in blue ink 'K(k)(381) 1/250, f5.6, 20/4/62, ARHS, trams 26,18,29,11 & 5 as specials at Eaglehawk terminus during Bendigo Centenarian trip.'tramways, trams, bendigo, eaglehawk, tram 26, tram 18, tram 29, tram 11, tram 5 -
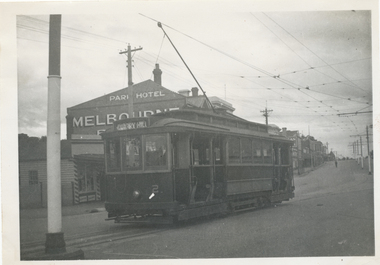 Ballarat Tramway Museum
Photograph - SECV Bendigo tram 2 at Eaglehawk, Wal Jack, 7/10/1939
... Photo of Bendigo No. 2 at the Eaglehawk terminus, 7-10-1939, High St, with the Park Hotel in the background. ...On the rear in blue ink "SEC Bendigo No 2 (ex MMTB 115 M class) in High St Eaglehawk (terminus) 7th Oct. 1939." with Wal Jack copyright stamp in the top right hand corner and the number "T194" written in....Photo of Bendigo No. 2 at the Eaglehawk terminus, 7-10-1939, High St, with the Park Hotel in the background. ...Photo of Bendigo No. 2 at the Eaglehawk terminus, 7-10-1939, High St, with the Park Hotel in the background. Photo by Wal Jack. Tram has the destination of Quarry Hill. Photo contained within the Wal Jack Bendigo and Geelong Album, see Reg Item 5003 for more details. Printed on Ilford paper. i1 - scan of print in the album i2 - rear of image i3 - scan of negative at 3200dpi added 7/6/2020. Yields information about Bendigo tram No. 2 and the Eaglehawk terminus.Black and White print with photographer's notes on the rear.On the rear in blue ink "SEC Bendigo No 2 (ex MMTB 115 M class) in High St Eaglehawk (terminus) 7th Oct. 1939." with Wal Jack copyright stamp in the top right hand corner and the number "T194" written in.trams, tramways, bendigo, high st, eaglehawk, tram 2 -
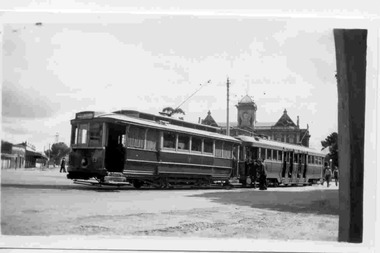 Ballarat Tramway Museum
Photograph - Black & White Photograph/s, Keith Kings, Apr. 1950
... Photograph of SEC Bendigo trams No.13 and 26 at the Eaglehawk terminus, Easter Saturday, April 1950. .... / No. 26 / Eaglehawk terminus / Easter Saturday, 4/50"..... / No. 26 / Eaglehawk terminus / Easter Saturday, 4/50". Black and White photograph contained with Reg. ...Black and White photograph contained with Reg. Item 1902 - Photo Album from Keith Kings to Les Denmead 1970. Photograph of SEC Bendigo trams No.13 and 26 at the Eaglehawk terminus, Easter Saturday, April 1950. Has Eaglehawk town hall in the background. Keith Kings No. D(k)(5) Scanning: i - image file, p - presentation file, b - back of photograph.Stamp in top left hand corner and handwritten number with "K.S. Kings No. D(k)(5)) Copyright reserved". In blue ink "Bendigo / No.13 - converted for "one Man" operation on the "Ballarat " style. / No. 26 / Eaglehawk terminus / Easter Saturday, 4/50".trams, tramways, bendigo, eaglehawk, tram 13, tram 26 -
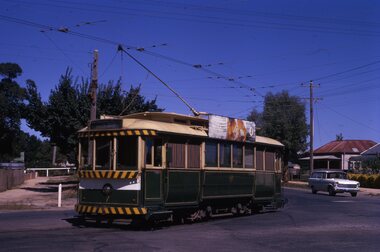 Ballarat Tramway Museum
Slide - 35mm slide/s - set of 13, Noel Simons, 24/05/1971 12:00:00 AM
... Eaglehawk. 1200.8 - No. 5 at Eaglehawk terminus showing "Depot" with Leo A Hughes Photographer advertisement on building in background. 1200.9 - No. 5 at Eaglehawk terminus. ...Eaglehawk at start of double track." 1200.8 - "No. 5 at Eaglehawk terminus" 1200.9 - "No. 5 at Eaglehawk terminus" 1200.10 - "No. 5 at Eaglehawk terminus...Eaglehawk at start of double track." 1200.8 - "No. 5 at Eaglehawk terminus" 1200.9 - "No. 5 at Eaglehawk terminus" 1200.10 - "No. 5 at Eaglehawk terminus ...Set of 13 transparencies taken on 24/5/1971 on Kodak mounts. 1200.1 - No. 7 en route to Golden Square turning from Bridge St. into Nolan St. Photo taken after tram has passed photographer. Tram has a briquettes roof ad. 1200.2 - No. 21 in McCrae St. just before Nolan St. Photo taken after tram has passed photographer. 1200.3 - No. 7 in Nolan St at corner with McCrae St. Passenger boarding tram at a tram stop. 1200.4 - No 7 turning from Nolan into McCrae St. with Golden Fleece service station in background. 1200.5 - No. 7 in Thunder St en route to North Bendigo. Photo taken after tram has passed photographer. 1200.6 - No. 5 en route to Eaglehawk just after leaving Needle Loop between Long Gully and California Gully. 1200.7 - No. 5 at the start of the double track in High St. Eaglehawk. 1200.8 - No. 5 at Eaglehawk terminus showing "Depot" with Leo A Hughes Photographer advertisement on building in background. 1200.9 - No. 5 at Eaglehawk terminus. Has two SEC roof ads 'Everything's fine in my all electric kitchen' and 'Electricity best for cooking'. 1200.10 - No. 5 at Eaglehawk terminus, with canon, war memorial outside Town Hall and Leo A Hughes Photographer advertisement on building in background. 1200.11 - No. 5 in McCrae St. about to enter Arnold St. and depot. Tram showing depot, has driver changing points. 1200.12 - No. 5 in Arnold St. Photo taken looking up the centre of the access track - shows the overhead at depot junction. 1200.13 - Depot entrance with signage at depot entrance and depot building in background.Information written on in black ink and date stamped on purple ink. 1200.1 - "No. 7 entering Nolan St. from Bridge St." 1200.2 -"No. 21 in McRae St. about to turn into Nolan St." 1200.3 - "No. 7 in Nolan St. at corner of McRae St." 1200.4 - "No. 7 turning from Nolan St. into McRae St." 1200.5 - "No. 7 in Thunder St. just after turning from Caledonia St." 1200.6 - "No. 5 just after leaving Needle Loop between Long Gully and California Gully. 1200.7 - "No. 5 in High St. Eaglehawk at start of double track." 1200.8 - "No. 5 at Eaglehawk terminus" 1200.9 - "No. 5 at Eaglehawk terminus" 1200.10 - "No. 5 at Eaglehawk terminus."\ 1200.11 - "No. 5 in McCrae St. about to enter Arnold St." 1200.12 - "No. 5 in Arnold St." 1200.13 - "Entrance to Bendigo Tram Depot, No. 5 running into shed."tramways, trams, bendigo, mccrae st, north bendigo, california gully, eaglehawk, depot, tram 5, tram 7, tram 21 -
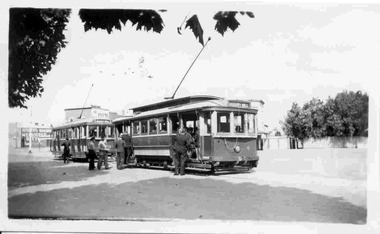 Ballarat Tramway Museum
Photograph - Black & White Photograph/s, Keith Kings, Apr. 1949
... Photograph of SEC Bendigo trams 22 and 4 at the Eaglehawk terminus, Easter Monday April 1949. Notes as both cars in "unaltered" condition. ...In blue ink "Bendigo / No. 22 - unaltered closed combination car / No. 4 - unaltered open combination car. / Eaglehawk terminus / Easter Monday, 4/49"...Photograph of SEC Bendigo trams 22 and 4 at the Eaglehawk terminus, Easter Monday April 1949. Notes as both cars in "unaltered" condition. ...Black and White photograph contained with Reg. Item 1902 - Photo Album from Keith Kings to Les Denmead 1970. Photograph of SEC Bendigo trams 22 and 4 at the Eaglehawk terminus, Easter Monday April 1949. Notes as both cars in "unaltered" condition. Keith Kings No. B(z)(1) Scanning: i - image file, p - presentation file, b - back of photograph. Has buildings at terminus in background, with Plume and Melbourne Bitter beer signs.Stamp in top left hand corner and handwritten number with "K.S. Kings No. B(z)(1) Copyright reserved". In blue ink "Bendigo / No. 22 - unaltered closed combination car / No. 4 - unaltered open combination car. / Eaglehawk terminus / Easter Monday, 4/49"trams, tramways, eaglehawk, bendigo, tram 22, tram 4 -
 Ballarat Tramway Museum
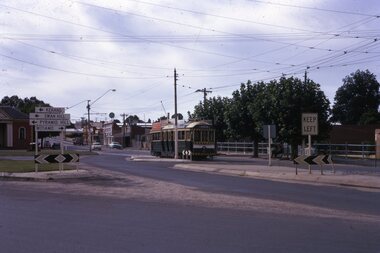
Slide - 35mm slide/s - set of 19, Noel Simons, 26/02/1972 12:00:00 AM
... Set of 18 transparencies taken on 26/2/1972 on Kodak mounts. 1203.1 - Bendigo 5 at Eaglehawk terminus - with new traffic works. 1203.2 - No. 5 climbing the High St. hill Eaglehawk with the buildings on the east side in the photo. 1203.3 - No 2 descending the road over rail bridge at Job's Gully, heading for Quarry Hill. 1203.4 - as for 1202.3, but more side on. ...Information written on in blue ink and date stamped on purple ink. 1203.1 - "No. 5 at Eaglehawk terminus" 1203.1 - "No. 5 in High St. Eaglehawk" 1203.3 - "No. 2" 1203.4 - "No. 2" 1203.5 - "No. 2" 1203.6 - "No. 26 at Garden Gully Loop Mt Korong Rd., Ironbark" 1203.7 - "No. 2" 1203.8 - "No. 2" 1203.9 - "No. 5 at Eaglehawk terminus" 1203.10 - "No. 5 at Eaglehawk terminus" 1203.11 - "No. 26 in View St. ...Tramways trams Bendigo Eaglehawk Bridges Iron Bark Gully Night Photo Quarry Hill Golden Square tram 2 tram 5 tram 7 tram 26 Information written on in blue ink and date stamped on purple ink. 1203.1 - "No. 5 at Eaglehawk terminus" 1203.1 - "No. 5 in High St. Eaglehawk" 1203.3 - "No. 2" 1203.4 - "No. 2" 1203.5 - "No. 2" 1203.6 - "No. 26 at Garden Gully Loop Mt Korong Rd., Ironbark" 1203.7 - "No. 2" 1203.8 - "No. 2" 1203.9 - "No. 5 at Eaglehawk terminus" 1203.10 - "No. 5 at Eaglehawk terminus" 1203.11 - "No. 26 in View St. ...Set of 18 transparencies taken on 26/2/1972 on Kodak mounts. 1203.1 - Bendigo 5 at Eaglehawk terminus - with new traffic works. 1203.2 - No. 5 climbing the High St. hill Eaglehawk with the buildings on the east side in the photo. 1203.3 - No 2 descending the road over rail bridge at Job's Gully, heading for Quarry Hill. 1203.4 - as for 1202.3, but more side on. Tram has two SEC roof ads. 1203.5 - as for 1202.4 1203.6 - No. 26 entering Garden Gully Loop, Mt. Korong Road, Ironbark. Tram en route to Eaglehawk. Water column on right hand side of photograph. 1203.7 - No. 2 on the Eaglehawk route, Iron Bark area?, bound for Quarry Hill. 1203.8 - as for 1202.7, but photo taken after tram has past photographer. 1203.9 - No. 5 at Eaglehawk terminus, night photo. Tram has arrived at terminus, showing Quarry Hill, pole turned, but the tram lights have yet to be turned around. 1203.10 - as for 1202.9, but lights have been turned around. 1203.11 - No. 26 climbing the View St. Hill near the Commodore Hotel. Has Campbells Electrical Services building in the background. Photo taken after the tram has passed the photographer. 1203.12 - No. 7 end on photograph, at Golden Square, destination showing Golden Square - night photo. 1203.13 - number not used. 1203.14 - as for 1202.12, but partially side on, has a passenger looking out the tram. 1203.15 - as for 1202.12, but with hotel in the background. 1203.16 - No. 26 and 2 at Charing Cross, night photo. Tram 26 en route to Quarry Hill, 2 to Eaglehawk. 1203.17 - Interior photo of No. 26, at night. 1203.18 - No. 26 at the Quarry Hill terminus as night. 1203.19 - as for 1202.18, but central portion of the tramcar.Information written on in blue ink and date stamped on purple ink. 1203.1 - "No. 5 at Eaglehawk terminus" 1203.1 - "No. 5 in High St. Eaglehawk" 1203.3 - "No. 2" 1203.4 - "No. 2" 1203.5 - "No. 2" 1203.6 - "No. 26 at Garden Gully Loop Mt Korong Rd., Ironbark" 1203.7 - "No. 2" 1203.8 - "No. 2" 1203.9 - "No. 5 at Eaglehawk terminus" 1203.10 - "No. 5 at Eaglehawk terminus" 1203.11 - "No. 26 in View St. Near the Commodore Motel" 1203.12 - "No. 7 at Golden Square Terminus" 1203.14 - "No. 7 at Golden Square Terminus" 1203.15 - "No. 7 at Golden Square Terminus" 1203.16 - "Nos. 26 and 2 at Charing Cross" 1203.17 - "Interior of No. 26" 1203.18 - "No. 26 at the Quarry Hill terminus" 1203.19 - "No. 26 at the Quarry Hill terminus "tramways, trams, bendigo, eaglehawk, bridges, iron bark gully, night photo, quarry hill, golden square, tram 2, tram 5, tram 7, tram 26 -
 Melbourne Tram Museum
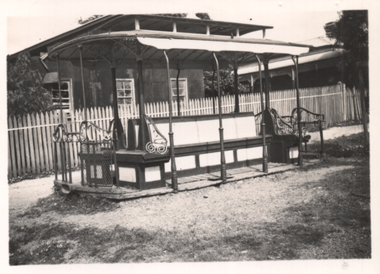
Photograph - Old cable tram dummy - Eaglehawk, Ken Train, 9/2/1941
... Photograph shows a former Melbourne cable tram dummy or grip car placed on the ground without its wheels and in use as a shelter, near the Eaglehawk tram terminus, Feb. 1941. Photo by Ken Train....Old cable tram dummy, near Eaglehawk tram terminus, Bendigo." Ken Magor stamp with "per K Train"....Old cable tram dummy, near Eaglehawk tram terminus, Bendigo." Ken Magor stamp with "per K Train". ...Photograph shows a former Melbourne cable tram dummy or grip car placed on the ground without its wheels and in use as a shelter, near the Eaglehawk tram terminus, Feb. 1941. Photo by Ken Train.Demonstrates the use of former Melbourne cable tram dummy or grip cars as a low cost shelter.Photograph - black and white with typed notes on rear.9/2 4I. Old cable tram dummy, near Eaglehawk tram terminus, Bendigo." Ken Magor stamp with "per K Train".cable trams, grip car, dummy, shelters, eaglehawk, bendigo -
 Ballarat Tramway Museum
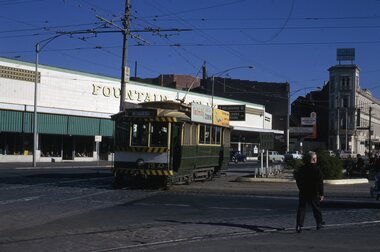
Slide - 35mm slide/s - set of 24, Noel Simons, 20/05/1971 12:00:00 AM
... Has shops on the west side of High St. in the background. 1195.6 - No. 5 at the Eaglehawk terminus, close up of the rear of the tram - note tow bar arrangement. ...". 1195.20 - "No. 5 approaching Eaglehawk terminus" 1195.21 - "No. 5 at Eaglehawk terminus" 1195.22 - "No. 5 at Eaglehawk terminus" 1195.23 - "No. 5 in High St. ...". 1195.20 - "No. 5 approaching Eaglehawk terminus" 1195.21 - "No. 5 at Eaglehawk terminus" 1195.22 - "No. 5 at Eaglehawk terminus" 1195.23 - "No. 5 in High St. ...Set of 24 transparencies taken on 20/5/1971 on Kodak mounts. 1195.1 - Bendigo 19 arriving at Charing Cross en route to North Bendigo with Fountain Plaza and the City Family Hotel in the background. No. 19 has two roof ads for the SEC. -'Electricity better for cooking' and 'Everything's under control in my all electric kitchen' 1195.2 - as above, but standing at the Charing cross stop, with the Beehive Stores and other buildings along the east side of Pall Mall in the background. 1195.3 - No 21 ex Golden Square crossing View St. trackwork in front of No. 25 waiting to depart for Quarry Hill. No.21 has two roof ads (as for No.19 in 1195.1) and No.25 has one SEC roof ad and another. Ezywalkin sign in the background, and Fountain Plaza. 1195.4 - as for 1195.3, but after 21 has arrived and 25 left for Quarry Hill. Has Ezywalkin store and the Beehive store in the background. 1195.5 - No. 5 at the Eaglehawk terminus. Photo taken with a cannon in foreground looking along High St. Eaglehawk. Has shops on the west side of High St. in the background. 1195.6 - No. 5 at the Eaglehawk terminus, close up of the rear of the tram - note tow bar arrangement. Has destination of Quarry Hill. 1195.7-Nos.25 and 5 crossing at the Thorpe St. Loop, California Gully. No. 25 bound for Eaglehawk (has SEC Briquette and electric cooking roof ads) and 5 en route for Quarry Hill with a SEC and Cinzano roof ad. 1195.8 - as for 1195.7, but after trams have passed each other. Has Borough Auto Service building in the background. 1195.9 - No. 5 in Mt Korong Road, towards Bamard Street, photo taken after tram has passed photographer. 1195.10 - No. 30 at the Golden Square terminus with the Milk Bar on the right hand side of the photograph. 1195.11 - No. 30 inbound at Fire Station Loop, High St. Golden Square. Has old fire station in the background. Passengers are boarding the tramcar. 1195.12 - No. 30 in High St, bound for North Bendigo between Vine and Wattle Streets. 1195.13 - No. 5 bound for Eaglehawk waits at Iron Bark Gully Loop, at Hayes St. 1195.14 - No. 5 and No. 2 crossing at Iron Bark Gully Loop. 1195.15 - No. 5 bound for Eaglehawk leaving the Manchester Loop, Long gully. 1195.16 - No. 5 passing William Street, Long Gully en route to Eaglehawk. 1195.17 - No. 5 just before the California Gully Crossing Loop. 1195.18 - Nos. 5 and 26 crossing at California Gully crossing Loop. No. 5 heading to Eaglehawk, 26, Quarry Hill. 1195.19 - No. 5 in High St. Eaglehawk with Bob Moyle's Victoria Hotel and the TAB in the background. 1195.20 - No. 5 in High St. Eaglehawk approaching the terminus. Photo taken after the tram has passed the photographer. Has Foodland store and J. Best Fruit supply in the background, along with Eaglehawk Town Hall. 1195.21 - No. 5 at the Eaglehawk terminus, photo taken along seldom used track along High St. 1195.22 - as for 1195.22 - but at the very end of the track. 1195.23 - No. 5 en route for Quarry Hill climbs High St. Eaglehawk with the Victoria Hotel and Eaglehawk Town Hall in the background. 1195.24 - No. 5 and 25 crossing at Jobs Gully Loop. Note 25 has a black on white destination roll, while No. 5 has a white on black destination roll. Information written on in black ink and date stamped on purple ink. 1195.1 - "No. 19 arrives at Charing Cross Bendigo from Golden Square" 1195.2 - "No. 19 about to leave Charing Cross for North Bendigo" 1195.3 - "No. 25 awaiting departure for Quarry Hill, watches No. 21 arrive at Charring Cross from Golden Square" 1195.4 - "No. 21 on North Bendigo service and No. 25 on Quarry Hill run await departure at Charing Cross" 1195.5 - "No. 5 at Eaglehawk terminus" 1195.6 - "No. 5 at Eaglehawk terminus" 1195.7 - "Nos. 5 and 25 crossing at Thorpe St. Loop, California". 1195.8 - "Nos. 25 and 5 crossing Thorpe St. Loop, California Gully". 1195.9 - "No. 5 descending Mt Korong Rd. towards Bamard St." 1195.10 - "Birney car No. 30 at Golden Square terminus" 1195.11 - "Birney car No. 30 in High Street near Thistle Street (Fire Station Loop)" 1195.12 - "No. 30 in High St. between vine and Wattle Streets" 1195.13 - "No. 25 at Hayes Street Loop Iron Bark". 1195.14 - "Nos. 2 and 5 crossing at Hayes Street Loop Iron Bark" 1195.15 - "No. 5 at Manchester Loop opposite Havilah Road, Long Gully" 1195.16 - "No. 5 passing William Street, Long Gully". 1195.17 - "No. 5 at California Gully" 1195,18 - "Nos. 26 and 5 at Thorpe St. Loop, California Gully". 1195.19 - "No. 5 in High St. Eaglehawk". 1195.20 - "No. 5 approaching Eaglehawk terminus" 1195.21 - "No. 5 at Eaglehawk terminus" 1195.22 - "No. 5 at Eaglehawk terminus" 1195.23 - "No. 5 in High St. Eaglehawk" tramways, trams, bendigo, charing cross, eaglehawk, california gully, golden square, iron bark gully, jobs gully, tram 2, tram 5, tram 19, tram 21, tram 25, tram 26, tram 30 -
 Ballarat Tramway Museum
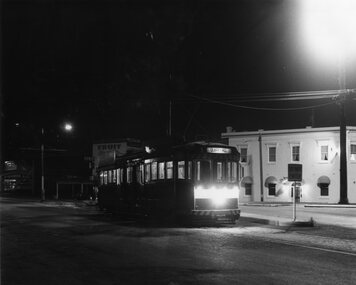
Photograph - Black & White Photograph/s, Chris Wurr, Jan. 1971
... In top left hand corner, in ink "71)" and "Bendigo (SEC) Tramways / 1.1971 / Eaglehawk Terminus"...In top left hand corner, in ink "71)" and "Bendigo (SEC) Tramways / 1.1971 / Eaglehawk Terminus" Black and White Photograph of Bendigo No. 2 at the Eagle Hawk terminus, Jan. 1971, night photograph. ...Black and White Photograph of Bendigo No. 2 at the Eagle Hawk terminus, Jan. 1971, night photograph. Tram has the destination of Quarry Hill. In the background is the Foodland Store, a Milk bar. The tram has arrived at the terminus, the trolley pole has been turned, but the headlights and dash canopy lights have yet to be turned. Tram has the destination of Quarry Hill. Photo Chris Wurr, early 1970's. "Photo by Chris Wurr" stamped on the rear. In top left hand corner, in ink "71)" and "Bendigo (SEC) Tramways / 1.1971 / Eaglehawk Terminus"trams, tramways, bendigo, eaglehawk, night photo, tram 2 -
 Ballarat Tramway Museum
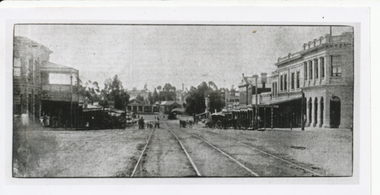
Photograph - looking west along High St Eaglehawk, The Bendigonian, Dec. 1896
... Photograph of looking west along High St Eaglehawk, Dec 1896, shows steam tram track, buildings and vehicles. A steam tram and trailer is parked at the terminus. ...trailer at Eaglehawk terminus. Copied ex "The Bendigonian 24/12/1896."...trailer at Eaglehawk terminus. Copied ex "The Bendigonian 24/12/1896." ...Photograph of looking west along High St Eaglehawk, Dec 1896, shows steam tram track, buildings and vehicles. A steam tram and trailer is parked at the terminus. Copied by Keith Kings from The Bendigonian 24/12/1896. Black and White copy print contained within the Wal Jack Bendigo and Geelong Album, see Reg Item 5003 for more details. See Reg Item 5735 for a similar photograph.Yields information about High St Eaglehawk in Dec. 1986Black and white print with source notes on the rear.On rear in ink " S-A962, Bendigo, Steam Motor and 4 wheel (?) trailer at Eaglehawk terminus. Copied ex "The Bendigonian 24/12/1896."trams, tramways, bendigo, steam trams, eaglehawk -
 Melbourne Tram Museum
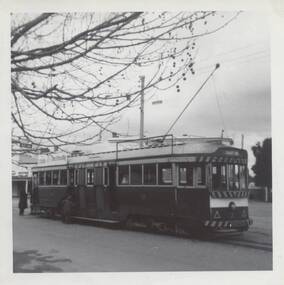
Photograph - Black & White Photograph/s, late 1960's
... Black and white photograph of Bendigo No. 3 at the Eaglehawk terminus late 1960's or early 1970's. Has passengers boarding the tram. ...Trams tramways Maximum Traction SECV Bendigo tram 3 On rear in pencil "Max Tract Ex Geelong, Ex MMTB ex Hawthorn TT" Black and white photograph of Bendigo No. 3 at the Eaglehawk terminus late 1960's or early 1970's. Has passengers boarding the tram. ...Black and white photograph of Bendigo No. 3 at the Eaglehawk terminus late 1960's or early 1970's. Has passengers boarding the tram. The tram has the destination of Quarry Hill.On rear in pencil "Max Tract Ex Geelong, Ex MMTB ex Hawthorn TT"trams, tramways, maximum traction, secv, bendigo, tram 3 -
 Ballarat Tramway Museum
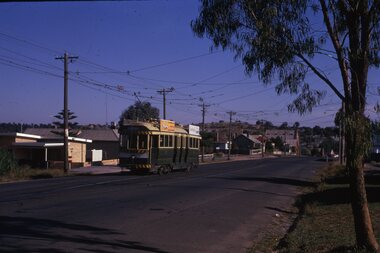
Slide - 35mm slide/s - set of 25, Noel Simons, 26/02/1972 12:00:00 AM
... Photo taken after tram has passed photographer. 1204.10 - No. 2 at Eaglehawk terminus with the Eaglehawk Town Hall and Post Office in the background. ...No. 5 cresting hill in distance." 1204.8 - "No. 5 at California Gully Loop." 1204.9 - "No. 5 in Long Gully" 1204.10 - "No. 2 at Eaglehawk terminus." 1204.11 - "No. 2 at Eaglehawk terminus." 1204.12 - "No. 2 at Eaglehawk terminus." 1204.13 - "No. 2 at Eaglehawk terminus." 1204.14 - "No. 2 in Mt. ...No. 5 cresting hill in distance." 1204.8 - "No. 5 at California Gully Loop." 1204.9 - "No. 5 in Long Gully" 1204.10 - "No. 2 at Eaglehawk terminus." 1204.11 - "No. 2 at Eaglehawk terminus." 1204.12 - "No. 2 at Eaglehawk terminus." 1204.13 - "No. 2 at Eaglehawk terminus." 1204.14 - "No. 2 in Mt. ...Set of 25 transparencies taken on 26/2/1972 on Kodak mounts. 1204.1 - Bendigo No. 5 - just arrived at Manchester Loop near Havilah Road, Long Gully. Photo taken after tram has passed photographer. 1204.2 - No. 26 in Backhaus St. Long Gully passing William St, en route to Quarry Hill. Photo taken after tram has passed photographer. 1204.3 - No. 5 climbing the High St. Hill Eaglehawk, heading for Quarry Hill with the buildings on the West side of High St. in the background, including the Eaglehawk Town Hall. 1204.4 - as for 1204.3, but tram close up. 1204.5 - as for 1204.3, but after tram has passed photographer. 1204.6 - No. 5 at intersection of Mt Korong Road Ironbark and Calder Highway, with the AMPOL service 'station in the background. Photo taken after tram has passed photographer. 1204.7 - No. 26 en route to Quarry Hill shortly after leaving Needle Loop, passing William St., Long Gully. 1204.8 - No. 5 at California Gully Loop, picking up a passenger, with the shops at Long Gully in the background. Photo taken after tram has passed photographer. 1204.9 - No. 5 in Long Gully, en route to Quarry Hill. Photo taken after tram has passed photographer. 1204.10 - No. 2 at Eaglehawk terminus with the Eaglehawk Town Hall and Post Office in the background. Tram has two SEC roof ads. 1204.11 - No. 2 at Eaglehawk terminus, close up. 1204.12 - as for 1204.11, but through the park gates. 1204.13 - as for 1204.11, but with tram stop shelters in the foreground and buildings on the West side of High St in the background. 1204.14 - No. 2 in Mt. Korong Rd, midway between California Gully Loop and Needle Loop. Photo taken after tram has passed photographer. 1204.15 - No. 5 in Long Gully, en route to Quarry Hill. 1204.16 - as for 1204.15, but with trams departed loop. Has an ESSO service station in the background. 1204.17 - No. 26 leaves Charing Cross up View St.. Photo taken after tram has passed photographer. Has Armstrong Tyre Service, Cohns Drinks ad on a building and the T&G building in the background. Also Firestone ads on the tyre service building. 1204.18 - No. 5 waits at Charing Cross with the Alexandra Fountain in the background. Tram has two SEC roof ads, 'Everything s fine in my all electric kitchen' and 'Electricity Best for Cooking'. Has RACV, Colonial Mutual Life buildings in the background and the planting areas around Charing Cross gardens in the foreground. 1204.19 - No. 21 en route to North Bendigo arrives at Charing Cross, with passengers waiting to board. No. 5 in the background. In the background is the Fountain Gate Plaza building and the City Family Hotel. 1204.20 - as for 1204.19, but with No. 7 en route to Golden Square. 1204.21 - as for 1204.19, but closer up. 1204.22 - as for 1204.18 1204.23 - No. 25 in Nolan St. near the crossing of Bendigo Creek, running a special tram tour. 1204.24 - No. 25 on a special charter, in Weeroona Ave. at Cnr of Caledonia St. passing the Gas works. 1204.25 - Nos. 25 (showing Golden Square), 7 and 26 at Charing Cross. Has fountain in the background.Information written on in blue ink and date stamped on purple ink. 1204.1 - "No. 5 at Manchester Loop, near Havilah Rd. Long Gully." 1204.2 - "No. 26 in Backhaus St. Long Gully passing William St." 1204.3 - "No. 5 in High St. Eaglehawk." 1204.4 - "No. 5 in High St. Eaglehawk." 1204.5 - "No. 5 in High St. Eaglehawk." 1204.6 - "No. 5 in Mt. Korong Rd., Ironbark, passing Calder Highway Junctn." 1204.7 - "No. 26 shortly after leaving Needle Loop, passing William St., Long Gully. No. 5 cresting hill in distance." 1204.8 - "No. 5 at California Gully Loop." 1204.9 - "No. 5 in Long Gully" 1204.10 - "No. 2 at Eaglehawk terminus." 1204.11 - "No. 2 at Eaglehawk terminus." 1204.12 - "No. 2 at Eaglehawk terminus." 1204.13 - "No. 2 at Eaglehawk terminus." 1204.14 - "No. 2 in Mt. Korong Rd, midway between California Gully Loop and Needle Loop. 1204.15 - "Nos. 2 and 26 crossing at Long Gully." 1204.16 - "No. 26 leaves Long Gully loop for Eaglehawk as No. 2 pulls out of the far end towards Bendigo" 1204.17 - "No. 26 beginning the climb up View St. from Charing Cross." 1204.18 - "No. 5 at Charing Cross." 1204.19 - "No 21 arrives at Charing Cross from Golden Square while No. 5 awaits departure time for Eaglehawk." 1204.20 - "Nos. 7, 21, and 2 (behind which is No. 5) at Charing Cross." 1204.21 - "Nos. 7, 21, and 2 at Charing Cross." 1204.22 - "No. 5 at Charing Cross." 1204.23 - "No. 25 in Nolan St. near Bendigo creek crossing" 1204.24 - "No. 25 in Weeroona Ave. at cnr of Caledonia St." 1204.25 - "Nos. 25, 7, 26 and 2 (behind 26) at Charing Cross."tramways, trams, bendigo, eaglehawk, long gully, california gully, charing cross, north bendigo, tram 2, tram 5, tram 7, tram 21, tram 25, tram 26 -
 Ballarat Tramway Museum
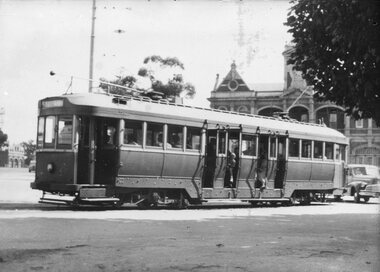
Photograph - Glass plate - Bendigo tram 26 Eaglehawk, Keith Kings, 8/04/1950
... Photograph of No. 26 the Eaglehawk terminus, 8-4-1950, photo by Keith Kings. ...Photograph of No. 26 the Eaglehawk terminus, 8-4-1950, photo by Keith Kings. ...Photograph of No. 26 the Eaglehawk terminus, 8-4-1950, photo by Keith Kings. Has the Eaglehawk Town Hall in the background. Same as item 5783.Yields information about tram 26 and the Eaglehawk Destination.Glass plate negative.trams, tramways, bendigo, bogie trams, tram 26 -
 Bendigo Historical Society Inc.
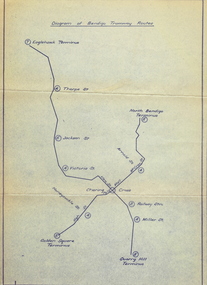
Document - BASIL MILLER COLLECTION: MAP: BENDIGO TRAMWAY ROUTES
... Diagram of Bendigo Tramway Routes. Showing Eaglehawk terminus through to Quarry Hill Terminus and North Bendigo Terminus to Golden Square Terminus. ...PERSON Individual baby portrait Diagram of Bendigo Tramway Routes. Showing Eaglehawk terminus through to Quarry Hill Terminus and North Bendigo Terminus to Golden Square Terminus. ...Diagram of Bendigo Tramway Routes. Showing Eaglehawk terminus through to Quarry Hill Terminus and North Bendigo Terminus to Golden Square Terminus. Printed on pale bluish paper with dark blue print.person, individual, baby portrait -
 Ballarat Tramway Museum
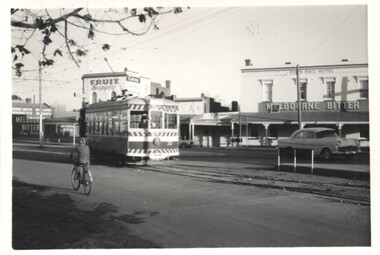
Photograph - Black & White Photograph/s, Neville Gower, Jun. 1967
... Black & white photo of SEC No. 30, arriving Eaglehawk terminus - long shadows. Town Hall Hotel in background. ...Trams Tramways Bendigo Eaglehawk Tram 30 On rear in blue ink 'Eaglehawk Sunday pm, June weekend 1967' Black & white photo of SEC No. 30, arriving Eaglehawk terminus - long shadows. Town Hall Hotel in background. ...Black & white photo of SEC No. 30, arriving Eaglehawk terminus - long shadows. Town Hall Hotel in background. Sunday afternoon, June 1967 - Queens birthday weekend. Photo on Ilford paper.On rear in blue ink 'Eaglehawk Sunday pm, June weekend 1967'trams, tramways, bendigo, eaglehawk , tram 30 -
 Ballarat Tramway Museum
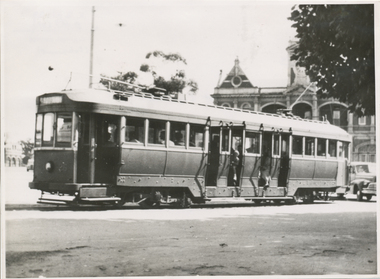
Photograph - SECV Bendigo tram 26 Eaglehawk, Keith Kings, 8/04/1950
... Photograph of No. 26 the Eaglehawk terminus, 8-4-1950, photo by Keith Kings. ...Photograph of No. 26 the Eaglehawk terminus, 8-4-1950, photo by Keith Kings. ...Photograph of No. 26 the Eaglehawk terminus, 8-4-1950, photo by Keith Kings. Has the Eaglehawk Town Hall in the background. See item 9463 for a glass plate negative.Yields information about tram 26 and the Eaglehawk Destination.Black and White print contained within the Wal Jack Bendigo and Geelong Album, see Reg Item 5003 for more details.In ink on rear "SEC Victoria, Bendigo, Bogie car No.26 at Eaglehawk". Date "8/4/1950" in bottom right hand corner. Keith Kings copyright stamp in top left hand corner with "D(k)(vi)" and "enlargement" written in.trams, tramways, bendigo, bogie trams, tram 26 -
 Ballarat Tramway Museum
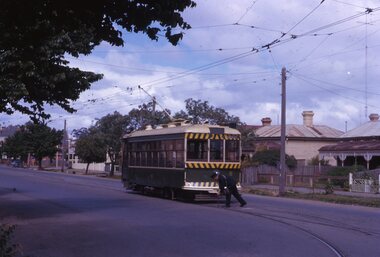
Slide - 35mm slide/s, Noel Simons, 21/11/1962 12:00:00 AM
... Has butchers shop in background. 1188.9 - Bendigo 17 at the Eaglehawk terminus. Has destination of Quarry Hill. ...Loop, California Gully (Eaglehawk Route)" 1188.9 - "No. 17 at Eaglehawk terminus" 1188.10 - "No. 17 at Eaglehawk terminus" 1188.11 - "No. 3 in High St. ...Loop, California Gully (Eaglehawk Route)" 1188.9 - "No. 17 at Eaglehawk terminus" 1188.10 - "No. 17 at Eaglehawk terminus" 1188.11 - "No. 3 in High St. ...Set of 17 transparencies taken on 21/11/1962 on Kodak mounts. 1188.1 - Bendigo No. 11 at Depot Junction McCrae and Arnold St. with driver/conductor changing points. 1188.2 - Bendigo No. 4 at Charing Cross, side on photo, with City Club Hotel and Alexandra Fountain in the background. Tram has Castrol and SEC 'Electric Cooking' ads. 1188.3 - Bendigo No. 4 climbing View St. after tram has passed photographer. Tram has Streets Ice Cream and Cohns Soft Drinks ad on rear dash panel. In the background are the buildings in View St., including the Princess Theatre. Tram has destination of Eaglehawk. 1188.4 - Trams 2 and 4 crossing at the California Gully or Thorpe St Loop. 1188.5 - Bendigo 4 in Mt Korong Road. Tram inbound with destination of Quarry Hill, just leaving Garden Gully Loop. 1188.6 - Bendigo 4 and 17 crossing at the Hayes St. or Iron Bark Gully Loop. No. 17 bound for Eaglehawk, No. 4, Quarry Hill. 17 has two SEC roof ads and a white horse whiskey ad. 1188.7 - No. 17 bound for Eaglehawk, soon after leaving California Gully. Has large mullock heap in background. 1188.8 - Bendigo 2 and 17 crossing at the Thorpe St. or California Gully Loop. Has butchers shop in background. 1188.9 - Bendigo 17 at the Eaglehawk terminus. Has destination of Quarry Hill. In background is the hotel and shops at the terminus, showing ads for "Melbourne Bitter". Tram has two SEC 'Electric Cooking' ads. Driver and conductor about to assist two lady passengers with a pram and baby. 1188.10 - No. 17 at Eaglehawk terminus, awaiting departure. Has Eaglehawk Town Hall and Post Office in background. Tram has a Whitehorse Whiskey ad on the front dash panel. 1188.11 - No. 3 in High St. Eaglehawk, with destination of Eaglehawk. Has the shops on the south side of High St. in the background, including the Eaglehawk fish shop. Tram has two roof ads, one an SEC roof ad, and Cohns Drinks and Streets Ice cream ads on front dash panel. 1188.12 - as above, but after tram has passed photographer. Note the centre of the road poles. 1188.13 - No. 2 outbound for Eaglehawk at the intersection of Mt. Korong Road and the Calder Highway. Photo taken after the tram has passed the photographer. Has an Ampol service station in the background. 1188.14 - No. 11 leaving the Bendigo depot, crossing the bridge, with the Scrubber car in the background. 1188.15 - No. 21 at the North Bendigo terminus. Tram has destination of Golden Square and Cohns drink ad on front dash and two roof ads on side. 1188.16 - No. 11 on Golden Square route, in High St. at intersection with Old High St. 1188.17 - No. 11 at the Golden Square terminus, conductor turning the pole. Hotel on the left side of the photo. Note the road works barrier and red flag behind the tram. Slide has an end of roll mark on the right hand side of the image.Information written on in black ink and date stamped on purple ink. 1188.1 - "Birney car No. 11 in McCrae St. at Cnr of Arnold about to run into depot, Bendigo" 1188.2 - "No. 4 at Alexandra Fountain, Charing Cross Bendigo" 1188.3 - "No. 4 climbing the View St. Hill from Charing Cross, Bendigo (Eaglehawk Route)" 1188.4 - "No. 4 and 2 at Thorpe St. Loop, California Gully" 1188.5 - "No. 4 in Mt Korong Rd., Long Gully, Near Havilah Rd. (Bendigo) (Eaglehawk Route)" 1188.6 - "Nos. 17 and 4 crossing on Hayes St. Loop, Ironbark, Bendigo" 1188.7 - "No. 17 soon after leaving California Gully (Eaglehawk Route)" 1188.8 - "No.2 and 17 crossing on Thorpe St. Loop, California Gully (Eaglehawk Route)" 1188.9 - "No. 17 at Eaglehawk terminus" 1188.10 - "No. 17 at Eaglehawk terminus" 1188.11 - "No. 3 in High St. Eaglehawk" 1188.12 - "No. 3 nearing Eaglehawk terminus" 1188.13 - "No. 2 in Mt. Korong Rd., Ironbark. Calder highway on left (Eaglehawk route) 1188.14 - "Birney car No. 11 leaving Bendigo depot. Scrubber car at rear" 1188.15 - "No. 21 at North Bendigo Terminus" 1188.16 - "Birney car No. 11 in High St. Bendigo at intersection with Old High Street (Golden Square Route)" 1188.17 - "Birney Car No. 11 at Golden Square terminus, High St., Bendigo". tramways, trams, bendigo, depot junction, charing cross, view st., eaglehawk, north bendigo, golden square, tram 2, tram 3, tram 4, tram 11, tram 17, tram 21, tram scrubber -
 Ballarat Tramway Museum
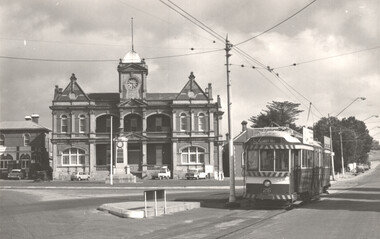
Photograph - SECV Bendigo tram 26 Eaglehawk, c1970
... The photograph shows SECV Bendigo tram 26 at the Eaglehawk terminus with the Eaglehawk Town Hall and Post Office in the background. ...The photograph shows SECV Bendigo tram 26 at the Eaglehawk terminus with the Eaglehawk Town Hall and Post Office in the background. ...The photograph shows SECV Bendigo tram 26 at the Eaglehawk terminus with the Eaglehawk Town Hall and Post Office in the background. The tram has the return destination of Quarry Hill - white on black roll. Photographer unknown.Yields information re Eaglehawk tram terminus in Bendigo and tram 26.A black and white print on papertramways, tramcars, bendigo, tram 26, eaglehawk -
 Ballarat Tramway Museum
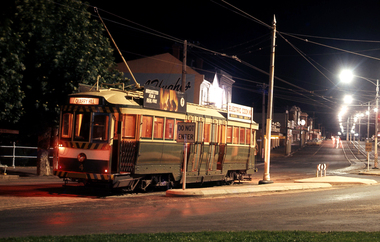
Photograph - Digital image, John Ward, 1/02/1971 12:00:00 AM
... Digital image of Bendigo 4 at the Eaglehawk terminus at night. Tram has the destination of Quarry Hill and has two SEC roof adverts, including one for briquettes. ...Trams tramways Bendigo Eaglehawk High St Night Photo tram 4 Digital image of Bendigo 4 at the Eaglehawk terminus at night. Tram has the destination of Quarry Hill and has two SEC roof adverts, including one for briquettes. ...Digital image of Bendigo 4 at the Eaglehawk terminus at night. Tram has the destination of Quarry Hill and has two SEC roof adverts, including one for briquettes. Photo is looking along High St Eaglehawk. Photo by John Ward 1 February 1971 Slide title "00816 010271 SEC bogie tram 4 night time at terminus Eaglehawk Bendigo"trams, tramways, bendigo, eaglehawk, high st, night photo, tram 4 -
 Ballarat Tramway Museum
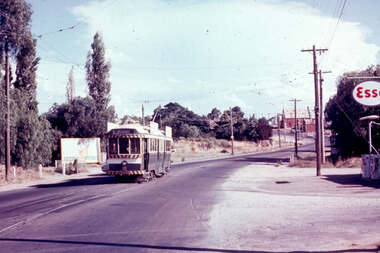
Slide - 35mm slide/s set of 7, Noel Simons, 1972
... 1212.4 - "No 6 showing 'SPECIAL' at Eaglehawk terminus. Has the Foodland store and Fruit shop in the background. 1212.5 - No. 19 at Eaglehawk terminus, on the extension to the normal Eaglehawk terminus. ...1212.4 - "No 6 showing 'SPECIAL' at Eaglehawk terminus. Has the Foodland store and Fruit shop in the background. 1212.5 - No. 19 at Eaglehawk terminus, on the extension to the normal Eaglehawk terminus. ...Set of 7 transparencies undated on PAKON mounts - appear to be early 1970's. 1212.1 - No. 18 about to enter the Long Gully loop with ESSO service station on the right hand side. 1212.2 - No. 6 in Mitchell Street bound for Charing Cross. Tram has destination of "Rly Station". Has buildings on the east side of Mitchell St. in the background. 1212.3 - No. 7 (North Bendigo) and 29 (Golden Square) crossing. Actual location? 1212.4 - "No 6 showing 'SPECIAL' at Eaglehawk terminus. Has the Foodland store and Fruit shop in the background. 1212.5 - No. 19 at Eaglehawk terminus, on the extension to the normal Eaglehawk terminus. Tram has showing 'Eaglehawk'. Tram has two SEC roof ads. 1212.6 - No. 25 and another Bogie car at Quarry Hill terminus on last day. 1212.7 - No. 18 and 29 at Quarry Hill terminus. No.. 18 showing 'Quarry Hill' - has two SEC roof ads 'Electric Cooking - Matchless' and 'Everything's fine in my all electric kitchen' and No. 29 has a briquettes roof ad.Information typed onto a white label stuck on the slide. 1212.1 - "No. 18 at Long Gully" 1212.2 - "No. 6 in Mitchell Street." 1212.3 - "7 and 29 Lake View Hotel" 1212.4 - "No. 6 at Eaglehawk" 1212.5 - "No. 19 at Eaglehawk Term." 1212.6 - "Last cars Quarry Hill." 1212.7 - "18 & 29 Quarry Hill"tramways, trams, bendigo, long gully, mitchell st., eaglehawk, quarry hill, last tram, tram 6, tram 7, tram 18, tram 19, tram 25, tram 29 -
 Ballarat Tramway Museum
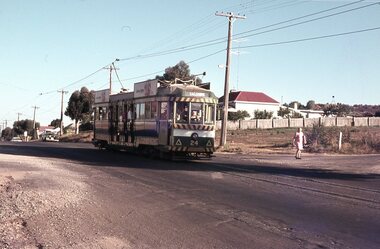
Photograph - Digital image Set of 20, 16/04/1972 12:00:00 AM
... - Circus" at Eaglehawk and dates. .13 - No. 3 inbound on the Eaglehawk line. .14 - No. 18 outbound to Eaglehawk .15 - ditto .16 - No. 18 at Eaglehawk terminus with the Mechanics Institute in the background. .17 - No. 24 at the Eaglehawk terminus .18 - No 24 at the intersection with Taylor St .19 - No. 24 at the Eaglehawk terminus .20 - ditto...- Circus" at Eaglehawk and dates. .13 - No. 3 inbound on the Eaglehawk line. .14 - No. 18 outbound to Eaglehawk .15 - ditto .16 - No. 18 at Eaglehawk terminus with the Mechanics Institute in the background. .17 - No. 24 at the Eaglehawk terminus .18 - No 24 at the intersection with Taylor St .19 - No. 24 at the Eaglehawk terminus .20 - ditto Photograph Digital image Set of 20 ...Set of 20 digital images of Bendigo Tramways, of the last running day of the Eaglehawk to Quarry Hill line 16 April 1972, .1 - No. 24 outbound to Eaglehawk .2 - No. 3? at Manchester Loop .3 - No. 24 outbound to Eaglehawk .4 - bogie tram crossing the rail over bridge from Eaglehawk .5 - No. 18 in View St .6 - No. 24 outbound to Eaglehawk .7 - No 18 at Eaglehawk with destination roll being changed, and shopping centre in the background. .8 - No. 24 crossing the railway overbridge, going to Eaglehawk .9 - No. 3 outbound to Eaglehawk .10 - No. 24 crossing the railway overbridge, going to Eaglehawk .11 - No. 3 and 24 crossing at Long Gully .12 - No. 18 at Eaglehawk with Leo A Hughes photographer building in the background and a CFA truck passing the tram. Tram SEC roof advertisement and a banner for "German -?- Circus" at Eaglehawk and dates. .13 - No. 3 inbound on the Eaglehawk line. .14 - No. 18 outbound to Eaglehawk .15 - ditto .16 - No. 18 at Eaglehawk terminus with the Mechanics Institute in the background. .17 - No. 24 at the Eaglehawk terminus .18 - No 24 at the intersection with Taylor St .19 - No. 24 at the Eaglehawk terminus .20 - dittotrams, tramways, bendigo, eaglehawk, long gully, manchester loop, tram 24, tram 18, tram 3 -
 Ballarat Tramway Museum
Negative, Travis Jeffrey, 17/06/1962 12:00:00 AM
... N397, of Bendigo Birney No. 29 at the Eaglehawk terminus, with the Eaglehawk Town Hall in the background. ...N397, of Bendigo Birney No. 29 at the Eaglehawk terminus, with the Eaglehawk Town Hall in the background. ...Colour Negative No. N397, of Bendigo Birney No. 29 at the Eaglehawk terminus, with the Eaglehawk Town Hall in the background. Tram has a Briquettes roof advertisement. Photo possibly 17/6/1962. Colour laser printed copy of image stored in box 73. Image scanned at hi res 27/5/2020 and image updated.In red pen on folder that contained negative, "NR68B" and "17 Jun 62". trams, tramways, bendigo, eaglehawk, tram 29
