
Showing 268 items matching "food preparation"
-
 Department of Health and Human Services
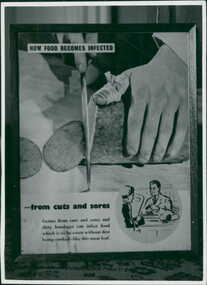
Photograph, "How Food Becomes Infected" from cuts and sores - promotional display highlighting hygiene and hands in food preparation - Department of Health - Publicity material
... "How Food Becomes Infected" from cuts and sores - promotional display highlighting hygiene and hands in food preparation - Department of Health - Publicity material...Department of Health and Human Services 50 Lonsdale St Melbourne melbourne "How Food Becomes Infected" from cuts and sores - promotional display highlighting hygiene and hands in food preparation - Department of Health - Publicity material Photograph ... -
 Blacksmith's Cottage and Forge
Whisk-egg, Early 20th Century
... ...food preparation...Item used for food preparation....Blacksmith's Cottage and Forge 100 Main Street Bacchus Marsh goldfields Item used for food preparation. Local history. domestic wire food preparation egg whisk Spiral hand held egg whisk, made with wire. ...Item used for food preparation.Local history.Spiral hand held egg whisk, made with wire.domestic, wire, food preparation, egg whisk -
Blacksmith's Cottage and Forge
Boiler pot, Early 20th Century
... ...food preparation...Domestic item used in cooking and food preparation....Blacksmith's Cottage and Forge 100 Main Street Bacchus Marsh goldfields Domestic item used in cooking and food preparation. Local history domestic cooking kitchen food preparation iron pot Kendrick ??? ...Domestic item used in cooking and food preparation.Local historyRound pot with long handle and tin lid with handle.Kendrick ??? 6 pints No 6domestic, cooking, kitchen, food preparation, iron pot -
Blacksmith's Cottage and Forge
Boiler, Early 20th Century
... ...food preparation...Domestic item used for cooking and food preparation...Blacksmith's Cottage and Forge 100 Main Street Bacchus Marsh goldfields Domestic item used for cooking and food preparation Local history domestic cast iron clark food preparation iron pot Clark & Co 2 1/2 G embossed on side of pot. ...Domestic item used for cooking and food preparationLocal historyCast iron oval cooking pot. Hooked handle attached to lugs on side of pot. Tin lid has central handle.Clark & Co 2 1/2 G embossed on side of pot. domestic, cast iron, clark, food preparation, iron pot -
 Flagstaff Hill Maritime Museum and Village
Domestic object - Knife
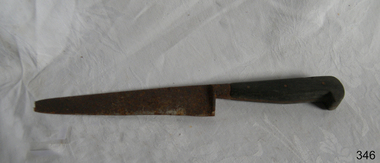
... ...Food preparation...This knife would have been used for food preparation....Flagstaff Hill Maritime Museum and Village 89 Merri Street Warrnambool great-ocean-road This knife would have been used for food preparation. Flagstaff Hill Warrnambool Shipwrecked-coast Flagstaff-Hill Flagstaff-Hill-Maritime-Museum Maritime-Museum Shipwreck-coast Flagstaff-Hill-Maritime-Village Kitchen knife Food preparation Knife; wooden handle and shaped metal blade with serrated cutting edge. ...This knife would have been used for food preparation.Knife; wooden handle and shaped metal blade with serrated cutting edge.flagstaff hill, warrnambool, shipwrecked-coast, flagstaff-hill, flagstaff-hill-maritime-museum, maritime-museum, shipwreck-coast, flagstaff-hill-maritime-village, kitchen knife, food preparation -
 Tatura Irrigation & Wartime Camps Museum
Vegetable Peeler, c1940
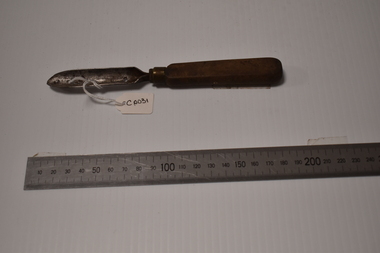
... food...preparation...handmade and used in food preparation in Camp 3 Tatura during WW2 by internees...domestic items food preparation hand made vegetable peeler with wooden handle and metal blade Vegetable Peeler ...handmade and used in food preparation in Camp 3 Tatura during WW2 by interneeshand made vegetable peeler with wooden handle and metal bladevegetable peeler, camp 3, tatura, !, domestic, items, food, preparation -
Clunes Museum
Functional object - CORK SCREW
... ...food preparation...THIS CORK SCREW BELONGED TO ANDREW McLENNAN'S FAMILY USED BY KITCHEN HANDS IN FOOD PREPARATION...Clunes Museum 36 Fraser Street enter building through Collins Place Clunes goldfields THIS CORK SCREW BELONGED TO ANDREW McLENNAN'S FAMILY USED BY KITCHEN HANDS IN FOOD PREPARATION local history domestic food preparation SMALL WOODEN HANDLE CORK SCREW WITH METAL TO REMOVE CORK FROM BOTTLES WITH POINTED PUNCH TO PUNCTURE CANS OR LIDS. ...THIS CORK SCREW BELONGED TO ANDREW McLENNAN'S FAMILY USED BY KITCHEN HANDS IN FOOD PREPARATIONSMALL WOODEN HANDLE CORK SCREW WITH METAL TO REMOVE CORK FROM BOTTLES WITH POINTED PUNCH TO PUNCTURE CANS OR LIDS.local history, domestic, food preparation -
Blacksmith's Cottage and Forge
Egg slice, Early 20th Century
... ...food preparation...Possibly home made utensil used in food preparation. Diamond shaped holes to allow drainage of oil/liquid....Local history domestic kitchen food preparation sheet tin egg slice Roughly made from sheet tin and steel. ...Possibly home made utensil used in food preparation. Diamond shaped holes to allow drainage of oil/liquid.Local historyRoughly made from sheet tin and steel. Long handle made from a steel rod which has been beaten flat. Slice has diamond pattern of holes and is rivetted to handle. domestic, kitchen, food preparation, sheet tin, egg slice -
 Mont De Lancey
Domestic object - Egg Slicer, Early C 20th
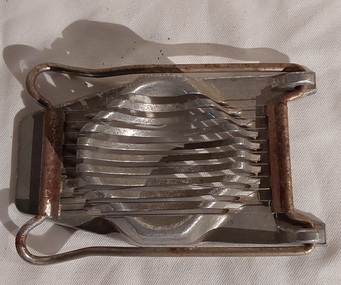
... Food preparation...An egg slicer is a food preparation utensil used to slice peeled, hard-boiled eggs quickly and evenly. ...Mont De Lancey 71 Wellington Road Wandin North yarra-valley-and-dandenong-ranges An egg slicer is a food preparation utensil used to slice peeled, hard-boiled eggs quickly and evenly. ...An egg slicer is a food preparation utensil used to slice peeled, hard-boiled eggs quickly and evenly. It consists of a slotted dish for holding the egg and a hinged plate of wires or blades that can be closed to slice. It was invented at the beginning of the 20th century.A stainless steel egg slicer with a base which has a raised stand or support with slats to hold the cooked, shelled egg. There is a fold-down lever with fine wire cutters which slice the egg into rounds. 'Germany'food preparation, food press, egg slicer -
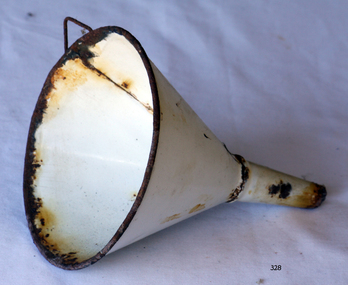 Flagstaff Hill Maritime Museum and Village
Domestic object - Funnel, Late 19th or early 20th Century
... ...food preparation...An item like this could be commonly used in households for food preparation, cooking and soap making. It could also be used for pouring fuel, and medicinal purposes. ...Flagstaff Hill Flagstaff Hill Maritime Museum and Village Warrnambool Maritime Museum Maritime Village Great Ocean Road Shipwreck Coast funnel food preparation beverage laundry fuel food preservation medicinal preparation decanting pouring None. ...A funnel such as this is used to assist in pouring liquids into a narrow container such as a bottle or jar. An item like this could be commonly used in households for food preparation, cooking and soap making. It could also be used for pouring fuel, and medicinal purposes. Enamelware dates back to 1760 in Germany.This object is significant as an example of a type of item in common use in the 19th Century and that is still in use today.Funnel, white enamel with dark rusty metal rim. It has a triangular shaped hook on the top lip for hanging. The metal has been joined down one side.None.flagstaff hill, flagstaff hill maritime museum and village, warrnambool, maritime museum, maritime village, great ocean road, shipwreck coast, funnel, food preparation, beverage, laundry, fuel, food preservation, medicinal preparation, decanting, pouring -
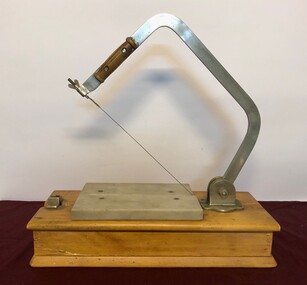 Emerald Museum & Nobelius Heritage Park
Functional object - Commercial Cheese Slicer, 1900s
... ...food preparation...This cheese slicer is an excellent example of food processing equipment used in local businesses over the past 100 years. cheese slicer food preparation Upwey Cockatoo 1900s commercial food preparation Cheese slicer comprising rectangular wooden base and a handle with cutting wire at the base. ...This cheese slicer was gifted to the donor at their wedding in 1969. It was used in a health food shop in Upwey until 2008. It is believed to date from 1900s and to have been originally used in a local shop, possibly in Cockatoo.This cheese slicer is an excellent example of food processing equipment used in local businesses over the past 100 years.Cheese slicer comprising rectangular wooden base and a handle with cutting wire at the base. Handle can be lifted up and down to cut the slice which is laid on two marble blocks. cheese slicer, food preparation, upwey, cockatoo, 1900s, commercial food preparation -
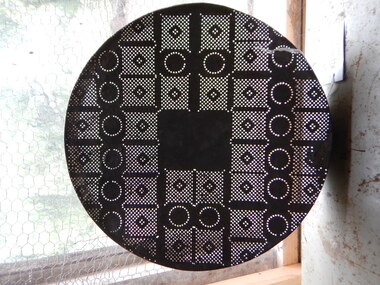 Parks Victoria - Days Mill and Farm
Domestic object - Cover, fly proof
... food preparation, food protection...Parks Victoria - Days Mill and Farm Days Mill Historic Area Days Road Murchison South the-murray Probably used in the diary or in the kitchen. food preparation, food protection CIRCULAR cover WITH PATTERNED PERFORATIONS - Tinned sheet metal shaped to form a shallow lid with punched design to allow ventilation and prevent flies. ...Probably used in the diary or in the kitchen.CIRCULAR cover WITH PATTERNED PERFORATIONS - Tinned sheet metal shaped to form a shallow lid with punched design to allow ventilation and prevent flies. Fits neatly over a small milk or cream can or dish.food preparation, food protection -
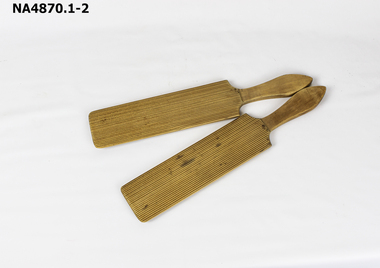 Whitehorse Historical Society Inc.
Domestic object - Butter pats
... ...food preparation...Whitehorse Historical Society Inc. 2-10 Deep Creek Road Mitcham melbourne Butter pats used by aunt Loris Peggie- Nancy Jane (peggie) Cooke B1914-1987 Lived 27 Wolsley Cres, Blackburn Butter pats used to make butter domestic items food preparation food technology dairying A pair of wooden butter pats rectangle in shape with handles Domestic object Butter pats ...Butter pats used by aunt Loris Peggie- Nancy Jane (peggie) Cooke B1914-1987 Lived 27 Wolsley Cres, BlackburnButter pats used to make butterA pair of wooden butter pats rectangle in shape with handlesdomestic items, food preparation, food technology, dairying -
 Whitehorse Historical Society Inc.
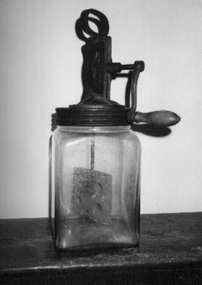
Domestic object - Butter Churn
... ...food preparation...Whitehorse Historical Society Inc. 2-10 Deep Creek Road Mitcham melbourne domestic items food preparation food technology dairying Solid square glass jar with metal top and gear wheel, wooden handle and wooden paddle. ...Solid square glass jar with metal top and gear wheel, wooden handle and wooden paddle.domestic items, food preparation, food technology, dairying -
 Mont De Lancey
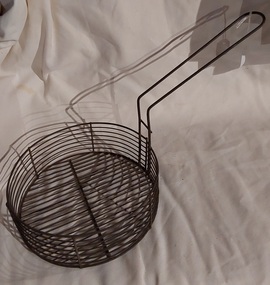
Domestic object - Deep Fryer Basket, 1950's
... Food preparation...Mont De Lancey 71 Wellington Road Wandin North yarra-valley-and-dandenong-ranges Deep fryer baskets are typically made of wire mesh or stainless steel, and they allow for both efficient frying and draining of excess oil from cooked food. Food preparation Food processing equipment Deep fryer basket 1940s A medium sized vintage wire fish and chip fryer from the 1950's. ...Deep fryer baskets are typically made of wire mesh or stainless steel, and they allow for both efficient frying and draining of excess oil from cooked food. A medium sized vintage wire fish and chip fryer from the 1950's. The basket holds the cut chips or fish and has a long thick curved open wire formed handle which can hang on the side of the saucepan for draining the cooking oil.food preparation, food processing equipment, deep fryer basket, 1940s -
 Friends of Westgarthtown
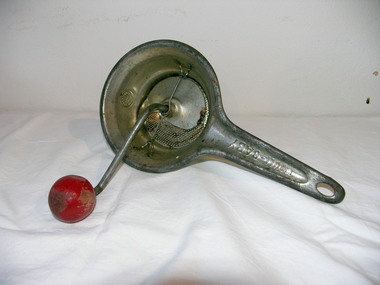
Domestic object - Mouli
... ...food preparation...domestic items food storage and preparation mouli food preparation Mouli Baby' embossed on handle, 'made in France, Brevete.sgdg' on front opposites handle. ...Small round metal mouli with handle, and winding mechanism with red wooden knob. Perforated base, and paddle. Hole at end of handle for hanging.Mouli Baby' embossed on handle, 'made in France, Brevete.sgdg' on front opposites handle.domestic items, food storage and preparation, mouli, food preparation -
 Flagstaff Hill Maritime Museum and Village
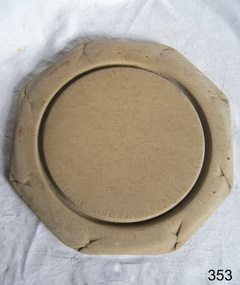
Domestic object - Bread Board
... ...food preparation...Wood throughout the ages Since the dawn of time, wood has been one of the most available materials used by mankind to build tools and lodgings, so it’s not really surprising to know that wood has been used in the preparation of food since the prehistoric ages. Of course, back then, cavemen probably used an unpolished slab of tree trunk to cut the kill of the day on and they probably didn’t think twice about saving it once the meal was over. ...Flagstaff Hill Warrnambool Shipwrecked-coast Flagstaff-Hill Flagstaff-Hill-Maritime-Museum Maritime-Museum Shipwreck-coast Flagstaff-Hill-Maritime-Village bread board cutting board pastry board kitchen utensil kitchen equipment baking equipment food preparation None. Bread board. Wooden, octagonal, plain sanded light wood. ...In the high tech, fast paced society that we live in, it’s easy to take some things for granted. Case in point: the wood cutting board on which you’ll probably be preparing the evening’s dinner. Have you ever taken the time to think about the history of the cutting board? Where did it come from, and what did ancient civilizations use to cut their meats, fruits and vegetables? Wood throughout the ages Since the dawn of time, wood has been one of the most available materials used by mankind to build tools and lodgings, so it’s not really surprising to know that wood has been used in the preparation of food since the prehistoric ages. Of course, back then, cavemen probably used an unpolished slab of tree trunk to cut the kill of the day on and they probably didn’t think twice about saving it once the meal was over. Chances are they probably threw it in the fire with the rest of the wood needed to kindle it. Advances in technology Throughout the centuries, mankind evolved and started creating machines from steam, electricity and metal. When the circular saw was invented, nicer, cleaner slabs of wood were cut and used as cutting boards. Since soft wood was the most available type of wood at the time, it was the material of choice for to be used for cutting boards. Boards were made smaller since the slab of wood could now be cut to any desired size. Since they were made smaller, they were also used to eat off of and some people referred to them as trenchers. Trenchers were originally pieces of stale hard bread that were used as substitute plates. Wood trenchers quickly became the replacements of the eatable dinnerware. The butcher block: the cutting board’s larger cousin In the industrial ages, many industries rapidly developed, and the butchery industry followed this trend as well. Before the invention of the cutting board, butchers used tree rounds to carve their meat on. The rounds were often too soft and they rapidly became unsanitary. Hard maple wood butcher blocks were the preferred choice of the industry. They were made to be extremely thick and durable, so durable in fact, that a butcher could use the same block for almost his entire career. Cutting boards around the world As cutting boards began to be more and more used in kitchens around North America, the rest of the world crafted such boards from different materials. The East used thick bamboo as their material of choice. Despite its frail appearance, bamboo is quite strong and made durable cutting boards and butcher blocks. Europe used maple in the crafting of their cutting boards while Persia used flat pieces of polished wood in their kitchens. The world then saw cutting boards that were being made from other materials like plastic and they came in all shapes and sizes, but they always served the same purpose, to provide a household with a safe, clean surface on which to prepare meals for their friends and family members. https://www.woodcuttingboards.com/news/quick-history-of-the-cutting-board-47.aspxThe bread board is an example of kitchen equipment used during Victorian times and similar to those used today.Bread board. Wooden, octagonal, plain sanded light wood. Has decoration around edge and indented circular line to delineate round cutting board section.None.flagstaff hill, warrnambool, shipwrecked-coast, flagstaff-hill, flagstaff-hill-maritime-museum, maritime-museum, shipwreck-coast, flagstaff-hill-maritime-village, bread board, cutting board, pastry board, kitchen utensil, kitchen equipment, baking equipment, food preparation -
 Kiewa Valley Historical Society
Mix Master
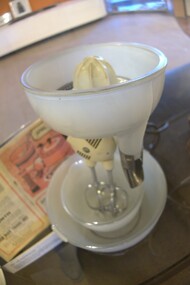
... sunbeam mix master; kitchen appliance; cooking; ron white; kiewa hydro electric scheme; food preparation...Ron was later appointed General Superintendent and then in 1974 to principal Hydro Engineer of the recently titled Hydro Division. sunbeam mix master; kitchen appliance; cooking; ron white; kiewa hydro electric scheme; food preparation 'Sunbeam' (in red) / 'Mix Master' in (black) on gold oblong 'emblem' White electrical food mixer with six parts. 1. ...The Kiewa Hydro Electric Scheme (KHES) produced electricity for the people living in the Kiewa Valley and beyond to many parts of Victoria. The people and their families working on the scheme were encouraged by their employer the State Electricity Commission of Victoria to purchase and use electrical appliances. The mix master was popular for mixing food for baking and for making juice drinks. Ron White owned this 1950s vintage Sunbeam model 9 mixer with stand, milk glass bowls and complete juicer. Ron was a senior member of staff during the construction and operation of the KHES.This mix master was owned by Ron White who was appointed Area Operations Engineer Kiewa in June 1956. Ron was later appointed General Superintendent and then in 1974 to principal Hydro Engineer of the recently titled Hydro Division.White electrical food mixer with six parts. 1. Motor upright - white, on black stand horizontal. Black dial at back with speeds numbered and type of mix eg. mash. Front switch on/off. Black electric cord attached. Long black handle on one side. 2 Two beaters, silver 3. Bowls, white one small and one large. The small one has a spout. 4. Squeezer, white - fits on top for juicing. Parts as with orange juicer and with funnel at the front for juice to flow into a bowl.'Sunbeam' (in red) / 'Mix Master' in (black) on gold oblong 'emblem' sunbeam mix master; kitchen appliance; cooking; ron white; kiewa hydro electric scheme; food preparation -
 Kiewa Valley Historical Society
Churn Butter - Wooden
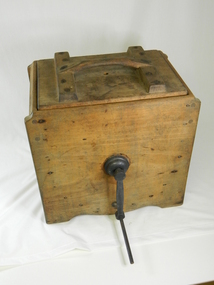
... food...preparation...This has very good interpretation significance as it adds to the history of dairy industry in the Kiewa Valley. butter dairy milk manual domestic item food preparation dairying technology Wooden box with a metal handle for turning the blades /paddles /slats inside the box.These blades churn the cream when the handle is turned. ...This type of butter churn was used around the early to mid 20 century by household and small farms of the Kiewa Valley who kept cows for Milk. The buy product of the milk was cream and butter. Once the cows had been milked, often by hand, women would place the milk in shallow dish, and next morning the cream would be separated from the milk. Or a cream separator machine would be used. The cream would then be churned by the paddles in the butter churner until it formed in butter clumps. Butter Pats would be used to take the butter out and press into triangle butter blocksThis butter churner is significant due to its historical value which explains how butter was made by hand before this process became mechanistically made. Many houses or small farms in the Kiewa Valley had these butter churns to make their own butter for their household or to sell. This has very good interpretation significance as it adds to the history of dairy industry in the Kiewa Valley. Wooden box with a metal handle for turning the blades /paddles /slats inside the box.These blades churn the cream when the handle is turned. There is also a wooden handle and a wooden lid.butter, dairy, milk, manual, domestic, item, food, preparation, dairying, technology -
 Kiewa Valley Historical Society
Mould Butter, unknown, post 1967
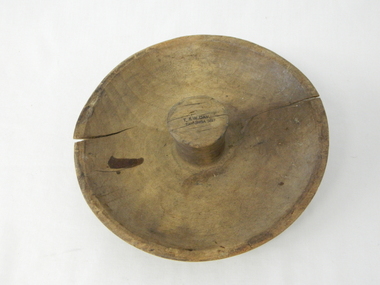
... domestic food preparation...Although this method of production was phased out by better access to goods from nearby cities the revival of the good organic home grown produce in the 1980s saw a greater demand of this type of farm based produce. domestic food preparation wooden butter pat butter mould circular dairy industry The top of the handle has an ink stamp "T. & W. ...This butter mould/pat may have been manufactured post 1967(year post codes appeared in Australia) however the post code was only stamped on after it was machined. This type of butter mould was used by rural families to fashion home/farm made butter. This period was in most rural regions a time of self sufficiency where any domestic type implement which could be fashioned by the family would be crafted with skill. Shopping for goods required catalogues from stores located in major rural towns and cities and involved lengthy waiting times. Travelling to and from these specialised stores was not pleasant due to the relatively poor quality of the roads and the lengthy times taken. The small general stores in the Kiewa Valley could not cater for all the needs of the valley. The 1960's was a time when facilities especially goods and services started to improve drastically. The S.E.C. of Victoria with its Kiewa Hydro Electricity Scheme provided not only an improvement of facilities in the valley but also a increase in the population. This increase resulted in a greater demand for local produce. This item is one of many domestic food processing implements used by Kiewa Valley households in the mid 1900s, whether on the farm or in the small towns and hamlets. Self sufficiency was the key to survival during these early times. Where ever possible supplies from within the valley were preferred to that brought in by travelling salesmen or traders. This butter mould and butter pat was commonly used to fashion "home" made butter throughout the valley and in some cases supplied to "outside" regional towns. Although this method of production was phased out by better access to goods from nearby cities the revival of the good organic home grown produce in the 1980s saw a greater demand of this type of farm based produce.This well crafted circular wooden butter mould could also be used as a butter pat.The handle in the middle of the mould was not added after the crafting but has been fashioned from the initial block of wood when the bowl was crafted. The bowl structure has a rim around the edge.The top of the handle has an ink stamp "T. & W. Dav" on the top line and "Tawonga 3697" underneath.domestic food preparation, wooden butter pat, butter mould circular, dairy industry -
 Kiewa Valley Historical Society
Pat Butter Profiler, Circa 1950s
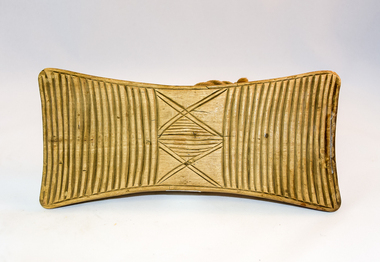
... domestic food preparation...Although this method of production was phased out by better access to goods from nearby cities the revival of the good organic home grown produce in the 1980s saw a greater demand of this type of farm based produce. domestic food preparation wooden butter pat butter mould circular dairy industry On the top of the hand grip is stamped in black print"T. & W. ...This butter pat profiler may have been manufactured post 1967(year post codes appeared in Australia) however the post code was only stamped on after it was machined. This type of butter mould was used by rural families to fashion home/farm made butter. This period was in most rural regions a time of self sufficiency where any domestic type implement which could be fashioned by the family would be crafted with skill. Shopping for goods required catalogues from stores located in major rural towns and cities and involved lengthy waiting times. Travelling to and from these specialised stores was not pleasant due to the relatively poor quality of the roads and the lengthy times taken. The small general stores in the Kiewa Valley could not cater for all the needs of the valley. The 1960's was a time when facilities especially goods and services started to improve drastically. The S.E.C. of Victoria with its Kiewa Hydro Electricity Scheme provided not only an improvement of facilities in the valley but also a increase in the population. This increase resulted in a greater demand for local produce.This item is one of many domestic food processing implements used by Kiewa Valley households in the mid 1900s, whether on the farm or in the small towns and hamlets. Self sufficiency was the key to survival during these early times. Where ever possible supplies from within the valley were preferred to that brought in by travelling salesmen or traders. This butter mould and butter pat was commonly used to fashion "home" made butter throughout the valley and in some cases supplied to "outside" regional towns. Although this method of production was phased out by better access to goods from nearby cities the revival of the good organic home grown produce in the 1980s saw a greater demand of this type of farm based produce.This butter Pat/Profiler has on its base two patterns. On each end it has horizontal grooves cut into the wood which produce distinct lines onto the surface of the butter. between these grooves there is a section of two double lines crossing in the middle and separated by eleven horizontal lines The base has an elongated rectangular shape. The upper body has been sanded into a smooth convex shaped form where a wooden circular hand grip has been fashioned.On the top of the hand grip is stamped in black print"T. & W. Davies" and under this"TAWONGA 3697"domestic food preparation, wooden butter pat, butter mould circular, dairy industry -
 Kiewa Valley Historical Society
Pat Butter, Circa 1950
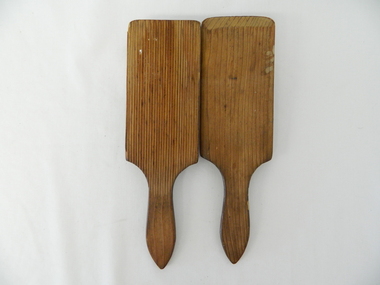
... domestic food preparation...Although this method of production was phased out by better access to goods from nearby cities the revival of the good organic home grown produce in the 1980s saw a greater demand of this type of farm based produce. domestic food preparation wooden butter pat butter mould circular dairy industry butter This butter pat is one of two,see KVHS 0071 (B). ...This butter pat profiler may have been manufactured post 1967 (year post codes appeared in Australia) however the post code was only stamped on after it was machined. This type of butter mould was used by rural families to fashion home/farm made butter. This period was in most rural regions a time of self sufficiency where any domestic type implement which could be fashioned by the family would be crafted with skill. Shopping for goods required catalogues from stores located in major rural towns and cities and involved lengthy waiting times. Travelling to and from these specialised stores was not pleasant due to the relatively poor quality of the roads and the lengthy times taken. The small general stores in the Kiewa Valley could not cater for all the needs of the valley. The 1960's was a time when facilities especially goods and services started to improve drastically. The S.E.C. of Victoria with its Kiewa Hydro Electricity Scheme provided not only an improvement of facilities in the valley but also a increase in the population. This increase resulted in a greater demand for local produce.This item is one of many domestic food processing implements used by Kiewa Valley households in the mid 1900s, whether on the farm or in the small towns and hamlets. Self sufficiency was the key to survival during these early times. Where ever possible supplies from within the valley were preferred to that brought in by travelling salesmen or traders. This butter mould and butter pat was commonly used to fashion "home" made butter throughout the valley and in some cases supplied to "outside" regional towns. Although this method of production was phased out by better access to goods from nearby cities the revival of the good organic home grown produce in the 1980s saw a greater demand of this type of farm based produce.This butter pat is one of two,see KVHS 0071 (B). It has been crafted from wood. One side has grooves running from the handle to the square shaped bottom. These grooves would stop the wet butter from clinging to the pat. The top side of the pat has been bevelled on both sides and the bottom edge. The hand grip is flat and curved to allow for a comfortable hold.domestic food preparation, wooden butter pat, butter mould circular, dairy industry, butter -
 Kiewa Valley Historical Society
Pat Butter Profiler, Circa 1950
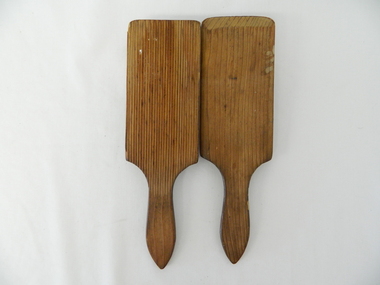
... domestic food preparation...Although this method of production was phased out by better access to goods from nearby cities the revival of the good organic home grown produce in the 1980s saw a greater demand of this type of farm based produce. domestic food preparation wooden butter pat butter mould circular dairy industry This butter pat is one of two,see KVHS 0071 (A). ...This butter pat profiler may have been manufactured post 1967(year post codes appeared in Australia) however the post code was only stamped on after it was machined. This type of butter mould was used by rural families to fashion home/farm made butter. This period was in most rural regions a time of self sufficiency where any domestic type implement which could be fashioned by the family would be crafted with skill. Shopping for goods required catalogues from stores located in major rural towns and cities and involved lengthy waiting times. Travelling to and from these specialised stores was not pleasant due to the relatively poor quality of the roads and the lengthy times taken. The small general stores in the Kiewa Valley could not cater for all the needs of the valley. The 1960's was a time when facilities especially goods and services started to improve drastically. The S.E.C. of Victoria with its Kiewa Hydro Electricity Scheme provided not only an improvement of facilities in the valley but also a increase in the population. This increase resulted in a greater demand for local produce.This item is one of many domestic food processing implements used by Kiewa Valley households in the mid 1900s, whether on the farm or in the small towns and hamlets. Self sufficiency was the key to survival during these early times. Where ever possible supplies from within the valley were preferred to that brought in by travelling salesmen or traders. This butter mould and butter pat was commonly used to fashion "home" made butter throughout the valley and in some cases supplied to "outside" regional towns. Although this method of production was phased out by better access to goods from nearby cities the revival of the good organic home grown produce in the 1980s saw a greater demand of this type of farm based produce.This butter pat is one of two,see KVHS 0071 (A). It has been crafted from wood. One side has grooves running from the handle to the square shaped bottom. These grooves would stop the wet butter from clinging to the pat. The top side of the pat has been bevelled on both sides and the bottom edge. The hand grip is flat and curved to allow for a comfortable hold.domestic food preparation, wooden butter pat, butter mould circular, dairy industry -
 Kiewa Valley Historical Society
Shaker Spices, after 1895
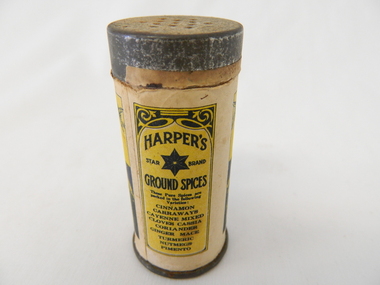
... ...food preparation...This rural valley had a greater interaction with people from other nation's cuisines and by association became more infused with a broader range of spices and food preparations. kitchen spices spice shakers food preparation On the front side of the printed label outside of the label boundary is "To make a shaker of this tin - take the lid off and remove the paper from inside the lid" Within the marked horse shoe shaped boundary is" HARPER'S ground spices star brand" underneath "CINNAMON" underneath this is printed "1 oz. ...This item was used at a time when there was a limited range of spices available and sought after by domestic and commercial kitchens. The taste buds of the average Australian diner were limited to the basic English style dishes which had been delivered by the early colonial days. Rural areas where slower in experimenting with Asian and European cuisine. The influx of European cuisine from refugees fleeing both World War I and world War II brought a different appreciation of gourmet food. The increase in Asian spices was brought about by Australians becoming more aware of the Asian "scene" through the conflicts of Korean and Vietnam military action. The "standard" type spices such as Cinnamon, nutmeg and similar spices offered by Robert Harper and later other Food and Spices whole sellers and processors where a direct result of a greater influx of migrants from spices rich societies and resulted in a greater range of "Asian" spices This became more visible after demise of the "White Australian Policy" on immigration and the great media revolution of Televised cooking shows from the 1950s on. The sustainability of containers such as this re-useable tin and cardboard spice holder, which could be replenished and not thrown away after it was empty was it a time period well before the "throw away" society had crept into the Valley.This spice container was used mainly in domestic kitchen within the Kiewa Valley. Those European construction workers of the SEC Kiewa Hydro Electricity Scheme had brought their continental cuisine into the valley and that was the beginning of a new era in highlighting different tastes. This rural valley had a greater interaction with people from other nation's cuisines and by association became more infused with a broader range of spices and food preparations.This item (spice shaker) is constructed by using a thick cardboard cylinder with both ends closed by tin plated light steel lids. The bottom lid is not removable however the top lid is removable to allow the contents (Cinnamon Spice) to be refilled. The lid has thirteen small holes which allow the contents to be shaken out. The outer side of the cylinder has been covered (glued on) by a printed black and yellow label detailing contents , weight, and supplier.On the front side of the printed label outside of the label boundary is "To make a shaker of this tin - take the lid off and remove the paper from inside the lid" Within the marked horse shoe shaped boundary is" HARPER'S ground spices star brand" underneath "CINNAMON" underneath this is printed "1 oz. NET WEIGHT" and under this, within its own frame " ROBERT HARPER COMPANY LIMITED (incorporated in Victoria) AUSTRALIA." On the back within its own box is "HARPER'S star brand GROUND SPICES" and underneath "These Pure Spices are packed in the following Varieties". Below this is a list (going down) "CINNAMON CARRAWAYS CAYENNE MIXED CLOVES CASSIA CORIANDER GINGER MACE TURMERIC NUTMEGS PIMENTO"kitchen spices, spice shakers, food preparation -
 Kiewa Valley Historical Society
Bottle - Phenyle, Circa 1920
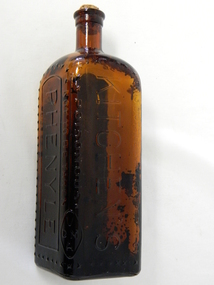
... ...food preparation area...This was a time that family members grouped together in the kitchen to find out "the latest news". kitchen cleaners food preparation area ablutions On one side "THIS BOTTLE IS THE PROPERTY OF" and in large print underneath "KITCHEN'S" and below this and underlined "POISONOUS". ...Bottled Phenyle cleaner was used throughout the 1900's in domestic kitchens, toilets and other "clean, germ free" environments. Some of these environments would encompass dairying milk handling rooms and hospital kitchens and ablution areas. It is a product which has resulted in the poisoning of some unwitting users (newspaper accounts of a woman in 1928 who drank some phenyle mistakenly for wine and died). The reliance of effective poisonous cleaning products in kitchens, especially in the 1900's was and is still a very hazardous element that the "most pivotal place in a house" contains. In the era when this particular bottle was used (1920's) the main means where consumed around the kitchen table, and this was especially so in rural areas. Keeping this area "germ" free was a mandatory requirement.This bottle is significant to the Kiewa Valley because this area was mostly rural with "out houses" and milk collection areas that required that "extra attention" of sanitation. Rural areas also where more prone to have the kitchen area as a general meeting place for the family before dinner and other meals. Sanitation was of greater importance in rural areas, due to the greater distances to hospitals and doctors if contamination occurred. City homes at this time frame had lounge rooms for the daily get together of the family unit. This was an era before the television and computer age fragmented and isolated family members from one another. This was a time that family members grouped together in the kitchen to find out "the latest news".This amber glass, diamond shaped bottle with cork stopper once contained Phenyle. Phenyle is a highly poisonous liquid. The amber opaque glass was used and not a clear glass to highlight it's content. It has a cork stopper at the top of a slender neck. All the glass embossed writing is highlighted by a string of crosses. The cross was used to enforce a visual danger sign.On one side "THIS BOTTLE IS THE PROPERTY OF" and in large print underneath "KITCHEN'S" and below this and underlined "POISONOUS". On the next side "NOT TO BE TAKEN" and next side in very large print and surrounded by a border "PHENYLE" with crosses enclosing it. On the bottom of a "blank side is "REGd. No. 2140" On the base is M 959 and Mkitchen cleaners, food preparation area, ablutions -
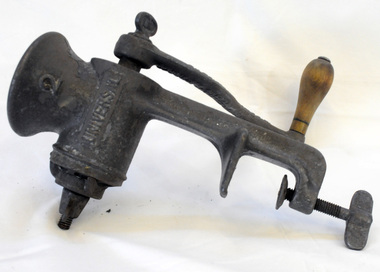 Orbost & District Historical Society
mincer, 1890's
... mincer chopper food-preparation...Many of these gadgets were imported from the United States. mincer chopper food-preparation "Universal No. 2 brand; L.F. & C., New Britain, Conn., U.S.A." ...This item was used by Helena Warren (nee McKeown), a well known photographer and local press correspondent. She lived at Newmerella. The meat mincer was a particularly popular kitchen gadget. By means of the mincer left overs and off cuts could be transformed into shepherd's pie or mince steak. Gadgets like this Universal food chopper are typical of domestic inventions designed to reinforce the principles of thrift and labour-saving. Many of these gadgets were imported from the United States. A cast iron metal hand mincer with a long metal body with an opening at one end, inside which is a circular spiral blade and a screw clamp attachment at the other end. On one side of the mincer is a curved metal handle held in place by a metal nut and a wooden bulb shaped knob at the end. There is a metal circular webbed blade held in place by a metal nut and bolt."Universal No. 2 brand; L.F. & C., New Britain, Conn., U.S.A."mincer chopper food-preparation -
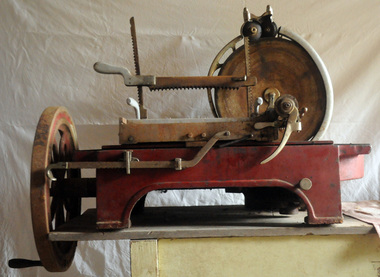 Orbost & District Historical Society
meat slicer, Early 20th century
... food-preparation dicken-store meat-slicer...In Times Gone By - Deborah Hall) food-preparation dicken-store meat-slicer INVICTA Model No 302 21 HENRY BERRY PTY LTD MELB A heavy commercial meat slicer which sits on bench. ...This item was used in Dicken's Store. Originally the Pardew Brothers store in Nicholson Street, Orbost, Frank Dicken purchased the shop business. It was a bakery and general store and was known as F.B. Dicken and Son. In 1948 they bought the shop freehold . The store remains today converted into two separate shops. The meat slicer was purchased from Henry Berry and Company a large wholesale grocers and general merchant company, first established in Melbourne in 1859.The Dicken store is a prominent Orbost building. Frank and May Dicken moved to Orbost in 1936 where Frank became manager of Pardew Brothers store in Nicholson Street. In 1945, Frank purchased the business and in 1947, formed a partnership with his son, Selwyn. The store was then called F.B. Dicken and Son. The premises are still retained by the Dicken family although the shop business was sold in 1981. (ref. In Times Gone By - Deborah Hall)A heavy commercial meat slicer which sits on bench. Frame is painted red. The tray moves as the handle turns. The main structure is cast iron. It has a circular steel blade. The chrome output tray is detachable. The movable carriage has a cast aluminium tray with spikes to hold the meat and there is an adjustable clamp to secure the meat.INVICTA Model No 302 21 HENRY BERRY PTY LTD MELBfood-preparation dicken-store meat-slicer -
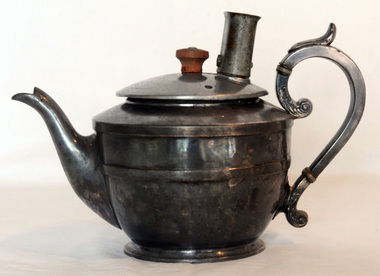 Orbost & District Historical Society
electric teapot, Chesters Trading Company, mid 20th century
... teapot electro-plated-britannia-metal appliances water-heating drink-food-preparation...This item reflects the importance of tea drinking in 19th and 20th century Australia. teapot electro-plated-britannia-metal appliances water-heating drink-food-preparation On the bottom of the teapot - EPBM James Dixon & Sons a trumpet symbol Sheffield 8578 4 A teapot of EPBM - electroplated britannia metal with an aluminium lid that has an electric plug connection. ...This item wasdonated to the Slab Hut, the Orbost Visitor Information Centre. This item reflects the importance of tea drinking in 19th and 20th century Australia. A teapot of EPBM - electroplated britannia metal with an aluminium lid that has an electric plug connection. The lid is an Alanware, 240 volt 100 watt immersion heater with a coil suspended from it. The lid does not match the teapot.On the bottom of the teapot - EPBM James Dixon & Sons a trumpet symbol Sheffield 8578 4teapot electro-plated-britannia-metal appliances water-heating drink-food-preparation -
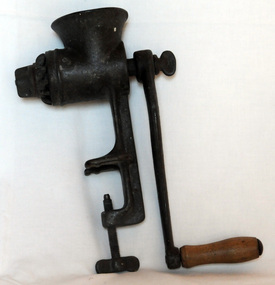 Orbost & District Historical Society
meat mincer, mid 1900's
... food-preparation mincer appliance kitchen domestic...It would have been before the time of mass food processing factories. food-preparation mincer appliance kitchen domestic MODEL No 2 A cast iron food mincer with a wooden handle. ...This mincer was donated to the Slab Hut (Visitor Information Centre) as a display item.This domestic kitchen appliance is typical of the period when food processing was done at home. It would have been before the time of mass food processing factories.A cast iron food mincer with a wooden handle. It has a funnel shaped cup at the top through which the pieces of meat are pushed to come out of the side. The wooden handle is turned to help this action. It has one blade. The mincer clamps to a flat surface by a hand operated vice/screw. MODEL No 2food-preparation mincer appliance kitchen domestic -
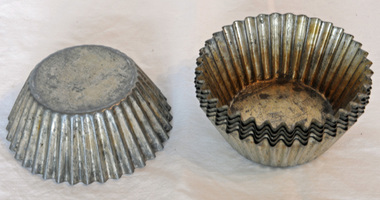 Orbost & District Historical Society
cake tins, C- 1920's - 1950's
... cake-tins domestic food-preparation kitchen...Orbost & District Historical Society Ruskin Street Orbost gippsland cake-tins domestic food-preparation kitchen Six small tin metal cake tins which have fluted edges. cake tins ...Six small tin metal cake tins which have fluted edges.cake-tins domestic food-preparation kitchen
