
Showing 96 items matching "hand brush"
-
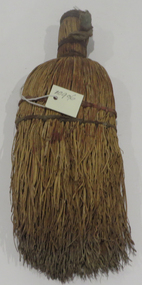 Federation University Historical Collection
Object, (Probably) Straw hand brush
... (Probably) Straw hand brush......hand brush...Small straw hand brush with handle bound wit fine wire and two laps of double twine binding around body of brush. ...straw brush hand brush small brush small broom Small straw hand brush with handle bound wit fine wire and two laps of double twine binding around body of brush. ...Small straw hand brush with handle bound wit fine wire and two laps of double twine binding around body of brush. Manufacture method clearly different to 'modern' machine made brushes.straw brush, hand brush, small brush, small broom -
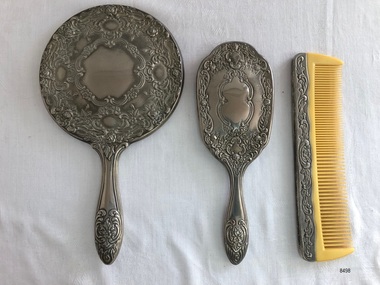 Flagstaff Hill Maritime Museum and Village
Accessory - Vanity Set, Circa late 1800s or early 1900s
... ...Hand mirror...Brush...A pewter (or possibly silver-plated) three-piece vanity set that includes a hand mirror, hair brush and comb. All pieces feature a beautiful ornate moulded rose/flower design on the back, handles and edge of the comb. ...Flagstaff Hill Warrnambool Flagstaff Hill Maritime Museum and Village Maritime Village Maritime Museum Shipwreck Coast Great Ocean Road Vanity Set Hand mirror Brush Comb Pewter Celluloid Silver Plate Toilet Set Harbours Master's house Staffordshire House Hair Brush Hairbrush A pewter (or possibly silver-plated) three-piece vanity set that includes a hand mirror, hair brush and comb. ...The vanity set was owned by a local woman who lived in the Harbour Master's house at Warrnambool after it was decommissioned. The set was possibly a wedding gift from her mother-in-law, Caroline Edwards, a local business woman who was an importer of 'china and fancy goods' along with her husband Thomas Myers Edwards. The Edwards owned Staffordshire House, a business in Timor St (and later Liebig St) from 1876. The vanity set is an example of a valued possession of women at the time and could signify social standing. It was also a functional accessory used on a daily basis.The item is significant socially as an example of accessories available to and used by women in the late 1800s and early 1900s. Historically, it is linked to a local import business ‘Staffordshire House’ in Timor and later Liebig St Warrnambool, where it most likely came from. A pewter (or possibly silver-plated) three-piece vanity set that includes a hand mirror, hair brush and comb. All pieces feature a beautiful ornate moulded rose/flower design on the back, handles and edge of the comb. The hair brush no longer has bristles and is purely ornamental. The comb teeth and hair brush insert are most likely made of celluloid.flagstaff hill, warrnambool, flagstaff hill maritime museum and village, maritime village, maritime museum, shipwreck coast, great ocean road, vanity set, hand mirror, brush, comb, pewter, celluloid, silver plate, toilet set, harbours master's house, staffordshire house, hair brush, hairbrush -
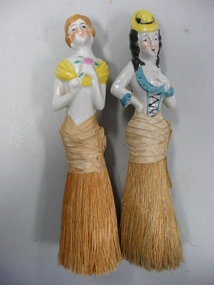 Bendigo Historical Society Inc.
Leisure object - Porcelain half dolls with brush skirt
... Two ladies hand brushes with porcelain 'doll' tops (handles). ...DOMESTIC EQUIPMENT Cleaning brush Two ladies hand brushes with porcelain 'doll' tops (handles). ...Two ladies hand brushes with porcelain 'doll' tops (handles). Figurines are different but both have lace (silk?) ribbon wound around 'hips' and 'dress' of fine brush material (hemp?). Both figurines are female in different poses with arms and head positions and varying coloured attire. Inscribed catalog number in ink - U2671 and U2672.domestic equipment, cleaning, brush -
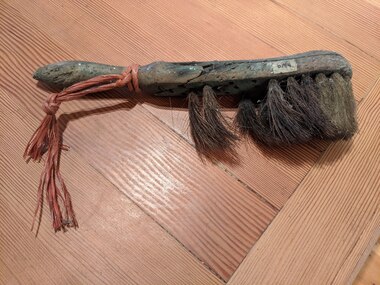 Friends of Westgarthtown
Functional object - Hearth Brush
... Wooden handled brush, hand crafted from sundry miscellaneous wooden parts....domestic items cleaning brush bristle craft No visible markings Wooden handled brush, hand crafted from sundry miscellaneous wooden parts. ...Wooden handled brush, hand crafted from sundry miscellaneous wooden parts.No visible markingsdomestic items, cleaning, brush, bristle, craft -
 Bendigo Historical Society Inc.
Accessory - FAVALORO COLLECTION: DRESSING TABLE SET
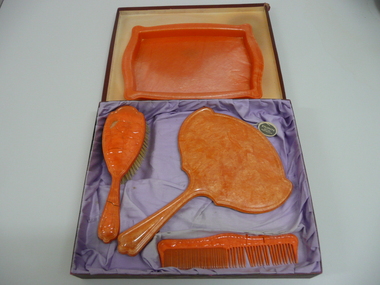
... Orange Xylonite dressing table set, retailed by Prescott & Dawe Bendigo in a burgundy coloured cardboard box with lilac lining, contents consist of a hand mirror, brush, comb and tray....PERSONAL EFFECTS Hairdressing dressing table set Xylonite British Manufacture - Xylopearl made in England Orange Xylonite dressing table set, retailed by Prescott & Dawe Bendigo in a burgundy coloured cardboard box with lilac lining, contents consist of a hand mirror, brush, comb and tray. Accessory FAVALORO COLLECTION: DRESSING TABLE SET ...Orange Xylonite dressing table set, retailed by Prescott & Dawe Bendigo in a burgundy coloured cardboard box with lilac lining, contents consist of a hand mirror, brush, comb and tray.Xylonite British Manufacture - Xylopearl made in Englandpersonal effects, hairdressing, dressing table set -
 Orbost & District Historical Society
knitted collar, Burton, Marjorie, 1940's
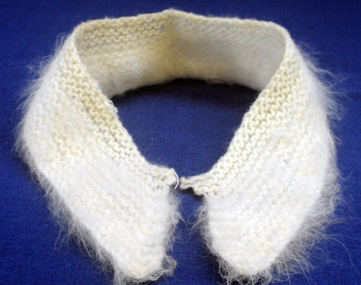
... It is hand-knitted in white brushed wool....It is hand-knitted in white brushed wool. knitted collar Burton, Marjorie ...This was knitted by Marjorie Burton during WW11 in England. She used to knit while in an air raid shelter escaping the bombing with her young daughter. Marjorie Burton ( nee Whiteman), born 12 June, in Birmingham, England came to Orbost in 1995. In England she did office work – typing, shorthand and secretarial work - in accountants’ offices and also trained as a comptometrist with Burroughs in London. She came from a middle-class, working, church-going family. Her mother was a milliner who mademany of Marjorie’s clothes, hats and outfits. Marjorie married in 1938 to a salesman who later became a mechanic in the R.A.F. during WW11. Her father served in Civil Defence during the war. Marjorie was in Birmingham during the war and remembered sheltering with her young daughter, Anne (Quaadgras) in the air raid shelter during bombing. This item is an example of a handcrafted item and reflects the handcraft skills of women necessary during WW11 when clothing became scarce. Clothes rationing began on June 1, 1941, two years after food rationing started. Clothes rationing ended on 15 March 1949.A narrow, detachable hand-knitted lady's collar. It is hand-knitted in white brushed wool.women's -clothing accessory burton-marjorie -
 Bendigo Historical Society Inc.
Mixed media - ERROL BOVAIRD COLLECTION:GRAMOPHONE CYLINDER ROLLS
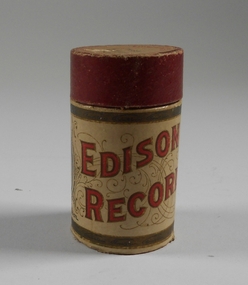
... Thomas Edison Cylinder rolls and one broken one plus a brush and hand winder. Thomas A Edison Amberola Mark 30 Gramophone. 7396.1...Thomas Edison Cylinder rolls and one broken one plus a brush and hand winder. Thomas A Edison Amberola Mark 30 Gramophone. 7396.1 Mixed media ERROL BOVAIRD COLLECTION:GRAMOPHONE CYLINDER ROLLS ...? Thomas Edison Cylinder rolls and one broken one plus a brush and hand winder. Thomas A Edison Amberola Mark 30 Gramophone. 7396.1gramophone, edison, cylinder roll -
 Melbourne Tram Museum
Photograph - "Varnisher" - Preston Workshops?
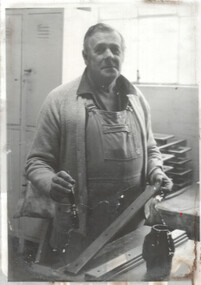
... The photo shows a man with a paint brush in hand varnishing timber work in a workshop with lockers and other wooden parts in the background. ...The photo shows a man with a paint brush in hand varnishing timber work in a workshop with lockers and other wooden parts in the background. ...The photo shows a man with a paint brush in hand varnishing timber work in a workshop with lockers and other wooden parts in the background. Possibly Mr. Reg Penrose, though no name given or date of photograph.Yields information about the varnishing of timberwork.Black and white photograph, partially glued to a sheet of glass.On the envelope that was received with the item "Varnisher" in ink and "Glass handle with care"tramways, preston workshops, staff, hand painting -
 Bendigo Historical Society Inc.
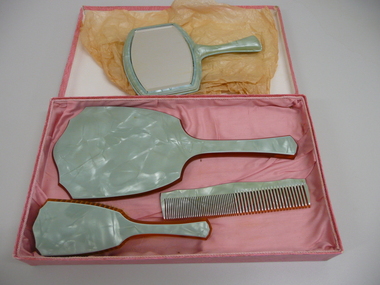
Accessory - FAVALORO COLLECTION: DRESSING TABLE SET
... Boxed Xylonite dressing table set in pink cardboard box with pink silk lining, contains a hand mirror, a brush, a comb all in green xylonite with amber coloured edging, also an extra mirror in same colour but with out the amber edging ( most likely does not belong with the set)....PERSONAL EFFECTS Hairdressing dressing table set Boxed Xylonite dressing table set in pink cardboard box with pink silk lining, contains a hand mirror, a brush, a comb all in green xylonite with amber coloured edging, also an extra mirror in same colour but with out the amber edging ( most likely does not belong with the set). ...Boxed Xylonite dressing table set in pink cardboard box with pink silk lining, contains a hand mirror, a brush, a comb all in green xylonite with amber coloured edging, also an extra mirror in same colour but with out the amber edging ( most likely does not belong with the set).personal effects, hairdressing, dressing table set -
 Whitehorse Historical Society Inc.
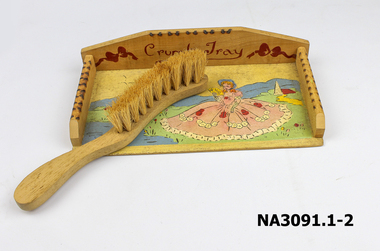
Domestic object - Crumb Tray & Brush
... Wooden crumb tray & brush. Both hand painted. Tray has a girl in a crinoline frock painted on it with mountains in the background and poker work around the edges with 'Crumb Tray' painted on it. ...domestic items trays Crumb Tray Wooden crumb tray & brush. Both hand painted. Tray has a girl in a crinoline frock painted on it with mountains in the background and poker work around the edges with 'Crumb Tray' painted on it. ...Wooden crumb tray & brush. Both hand painted. Tray has a girl in a crinoline frock painted on it with mountains in the background and poker work around the edges with 'Crumb Tray' painted on it. Wooden brush is shaped and has straw bristles. Toy.Crumb Traydomestic items, trays -
 Flagstaff Hill Maritime Museum and Village
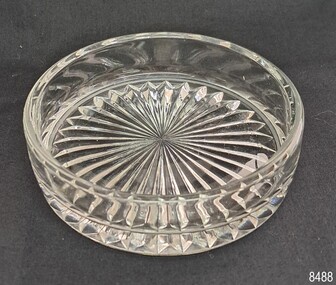
Domestic object - Pin Dish, Mid 20th century
... Dressing tables often featured a variety of objects such as combs, brushes, hand mirrors, perfume bottles, cosmetics, nail buffers, ring holders, jewellery trinket boxes, trays and pin bowls or pin trays. ...Dressing tables often featured a variety of objects such as combs, brushes, hand mirrors, perfume bottles, cosmetics, nail buffers, ring holders, jewellery trinket boxes, trays and pin bowls or pin trays. ...Dressing tables have been around since the beginning of the seventeenth century. However, it wasn't until the early to mid-20th century that middle-class homes included them in their furniture. They were often a matching part of a bedroom suite. Dressing tables often featured a variety of objects such as combs, brushes, hand mirrors, perfume bottles, cosmetics, nail buffers, ring holders, jewellery trinket boxes, trays and pin bowls or pin trays. The latter were small shallow containers used for storing hat pins, hair pins, safety pins, and perhaps earrings. They were made of various materials including glass, metal and ceramic.This pin bowl represents an era in the early-to-mid 20th century when matching dressing table accessories were popular and affordable to middle-class women. They were marketed as gifts and sometimes included perfumed soap and powder.Pin dish, round, cut glass, slightly convex sides without a pattern. Thick heavy, concave base with a concertina fold pattern.flagstaff hill maritime village, shipwreck coast, flagstaff hill, warrnambool, flagstaff hill museum and village, domestic object, dressing table, dressing table tray, glass tray, pin tray, pin bowl, dressing table accessory -
 Flagstaff Hill Maritime Museum and Village
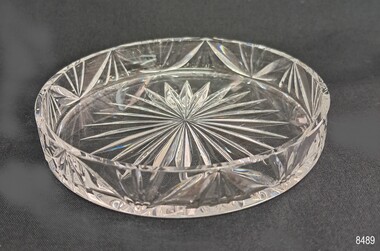
Domestic object - Pin Bowl, Mid 20th century
... Dressing tables often featured a variety of objects such as combs, brushes, hand mirrors, perfume bottles, cosmetics, nail buffers, ring holders, jewellery trinket boxes, trays and pin bowls or pin trays. ...Dressing tables often featured a variety of objects such as combs, brushes, hand mirrors, perfume bottles, cosmetics, nail buffers, ring holders, jewellery trinket boxes, trays and pin bowls or pin trays. ...Dressing tables have been around since the beginning of the seventeenth century. However, it wasn't until the early to mid-20th century that middle-class homes included them in their furniture. They were often a matching part of a bedroom suite. Dressing tables often featured a variety of objects such as combs, brushes, hand mirrors, perfume bottles, cosmetics, nail buffers, ring holders, jewellery trinket boxes, trays and pin bowls or pin trays. The latter were small shallow containers used for storing hat pins, hair pins, safety pins, and perhaps earrings. They were made of various materials including glass, metal and ceramic.This pin bowl represents an era in the early-to-mid 20th century when matching dressing table accessories were popular and affordable to middle-class women. They were marketed as gifts and sometimes included perfumed soap and powder.Pin bowl; a light weight, round bowl with straight sides featuring a cut glass pattern, and a flat base with a star design.flagstaff hill maritime village, shipwreck coast, flagstaff hill, warrnambool, flagstaff hill museum and village, domestic object, dressing table, dressing table tray, glass tray, pin tray, pin bowl, dressing table accessory -
 Bendigo Historical Society Inc.
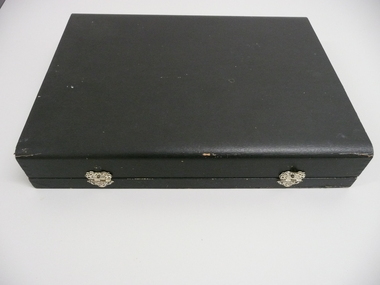
Accessory - BOXED DRESSING TABLE SET
... Black wooden case silk lined with diamond shape bevelled edge mirror set in li, compartments for grooming aids including wooden hand mirror, wooden brush with handle, comb, nail buffer, nail cleaner & boot button hook, all have black wooden handles and nickel plated decoration. ...PERSONAL EFFECTS Hairdressing dressing table set Made In United States Black wooden case silk lined with diamond shape bevelled edge mirror set in li, compartments for grooming aids including wooden hand mirror, wooden brush with handle, comb, nail buffer, nail cleaner & boot button hook, all have black wooden handles and nickel plated decoration. ...Black wooden case silk lined with diamond shape bevelled edge mirror set in li, compartments for grooming aids including wooden hand mirror, wooden brush with handle, comb, nail buffer, nail cleaner & boot button hook, all have black wooden handles and nickel plated decoration. Contains small card reading Andrew.G.Williamson Jewellery, Fancy Goods, and Stationery. 186-192 York Street Belfast Private Address 32 Cedar Avenue Belfast.Made In United Statespersonal effects, hairdressing, dressing table set -
 Flagstaff Hill Maritime Museum and Village
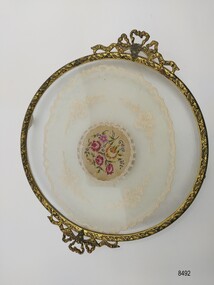
Domestic object - Dressing table tray, Mid 20th century
... Dressing tables often featured a variety of objects such as combs, brushes, hand mirrors, perfume bottles, cosmetics, nail buffers, ring holders, jewellery and trinket boxes and trays. ...Dressing tables often featured a variety of objects such as combs, brushes, hand mirrors, perfume bottles, cosmetics, nail buffers, ring holders, jewellery and trinket boxes and trays. ...Dressing tables (also known as Vanity Tables in the U.S.A.) have been around since the beginning of the seventeenth century, however it wasn't until the early to mid 20th century that they began to be found in the homes of the middle class and they were often a matching part of a bedroom suite. Dressing tables often featured a variety of objects such as combs, brushes, hand mirrors, perfume bottles, cosmetics, nail buffers, ring holders, jewellery and trinket boxes and trays. The origins of this tray are unknown however its design is reminiscent of trays (and Dressing Table Sets) produced by two English firms in the mid 20th century - "Delina" and "Regent of London". A paper (written by the Warwickshire Industrial Archeology Society) notes that the products items produced by "Regent of London" in the 1940's "satisfied a demand for previously unattainable items, offered to the general public aching for change after wartime privations, post war austerity and years of having to 'make do and mend'." This tray is composed of several decorative elements and materials. The metal border is gilt brass with two filigree bow handles, the main part of the tray is two pieces of circular glass and the encased doily is a mix of embroidered net and petit point. It was suggested in the paper written by the Warwickshire Industrial Archeological Society that the different pieces would have probably been produced elsewhere and brought to the factory to be assembled into the finished product. This vanity or dressing table tray is significant as it is a rare example of an accessory available to and used by women in the mid 20th century. It is also significant as an example of an everyday household item which would have been a valued possession and was made in a style that reflected the importance placed on it to be decorative as well as functional.Round footed dressing table tray with a gilt brass border, filigree bow handles and an embroidered net and petit point doily encased in glass. The gilt border is decorated with a stylized leaf design on the side and a floral design on the top. The petit point embroidery in the center is of five flowers in pink, mauve and yellow surrounded by buds and leaves.vanity tray, dressing table tray, glass tray, gilt brass, petit point, embroidery, net embroidery, doily, filigree, brass tray, flagstaff hill maritime village, shipwreck coast, flagstaff hill, warrnambool, flagstaff hill museum and village, domestic object, dressing table -
 Royal District Nursing Service (now known as Bolton Clarke)
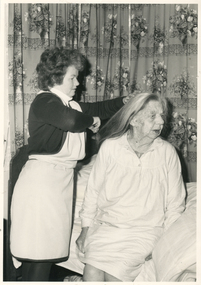
Photograph - Photograph, black and white, 1982
... Dorothy's right hand is holding a brush and is at the bottom section of Mrs. ...Dorothy's right hand is holding a brush and is at the bottom section of Mrs. ...RDNS Home Health Aide, Dorothy Byrne, is visiting Mrs. Mann in her home and is assisting her with General care which enables her to remain there independently. Dorothy is wearing an RDNS light blue, with dark blue edging, apron over her RDNS Home Health Aide uniform of a royal blue dress with white piping on the collar and pockets. In 1980, a Home Health Aide ‘Pilot study’, funded by the Federal Government, the Brotherhood of St. Laurence and RDNS, with the program written and taught by RDNS Principal Nurse Educator. Pat (Paddy) Rowley was evaluated as successful. Following this Pilot study, Home Health Aides were employed by RDNS, and after instruction in the RDNS Education department, joined RDNS Centres and worked under the supervision of the RDNS Sisters. The Sister assessed each client, then introduced and supervised the Health Aide in the client procedure required. The Sister wrote out clear, concise procedural instructions on a work card which the Health Aid followed each visit. If the Health Aide noticed any change in the patient’s condition, this was reported immediately and the Sister visited. The Sister made routine visits to the patient for review at least monthly. On the left of the black and white photograph is the side on view of Royal District Nursing Service (RDNS), Home Health Aide, Dorothy Byrne, brushing the long grey hair of Mrs. Gertrude Mann who is on Dorothy's right. Dorothy, who has short curly hair, is wearing a light coloured apron over her RDNS uniform; part of a white skivvie under her dark dress can be seen; she has her left hand on the top section of Mrs. Mann's head. Dorothy's right hand is holding a brush and is at the bottom section of Mrs. Mann's hair. Mrs Mann is wearing a white nightdress and is sitting on the left hand side of her bed with her face turned away from Dorothy.. Long,closed flower patterned curtains can be seen in the background.royal district nursing service, rdns, rdns home health aides, rdns patient care, rdns home health aide dorothy byrne, mrs gertrude mann -
 Flagstaff Hill Maritime Museum and Village
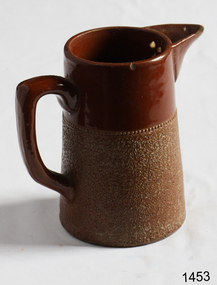
Domestic object - Jug
... We use commercial Mayco glazes on purpose – for their huge range of colour possibilities, stability, cool interactions, artistic freedom with the ability to easily brush the glazes on and ease of use. We currently have almost 50 glazes on hand! ...We use commercial Mayco glazes on purpose – for their huge range of colour possibilities, stability, cool interactions, artistic freedom with the ability to easily brush the glazes on and ease of use. We currently have almost 50 glazes on hand! ...The Process of Making Pottery Decorating, Firing, Glazing, Making, Technical There is a rhythm and flow to clay. It can’t be done all at once! Even the making process! It can take weeks to get everything done, especially if you can only work on your pottery once a week! Even though we have three hour classes, it’s often just not enough time! Here is an overview of some of the processes so you have a bit more grasp on some of the technical stuff! Step One – Design There are SO many ideas out there for making stuff in clay! From delicate porcelain jewellery, through to heavy sculptural work and everything in between. Deciding your direction is sometimes not that easy – when you first start, try everything, you will naturally gravitate to the style that you enjoy! The options and variations are endless and can get a wee bit overwhelming too! Check in with me before you start to ensure your ideas will work, what order you might do things, how you could achieve the look you are seeking and any other technical data required! Step Two – Making Clay is thixotropic. This means that as you work with it, the clay first gets sloppier and wetter, before is begins to dry in the atmosphere. For most things, you simply can’t do all parts of the project at once. An example of work order might look like: Get last weeks work out from the shelves Prepare clay for today’s work – roll your clay, prepare balls for throwing, make the first stage of a pinch pot) Clean up last week’s work and put it on the shelf for bisque firing Check that you have any glazing to do – and do enough of it that you will have time to finish your main project Do the next step of your next project – there might be a further step that can’t be complete immediately, in that case, wrap your work well and put onto the shelves. Letting your work rest for a while can really help keep your work clean and professional looking. Many things require bagging under plastic to keep it ready for work the next week – put your name on the outside of the bag so you can find your work easily. We have stickers and markers. Consider how you want to decorate your work – coloured slip can be applied at a fairly wet stage (remembering that it will make your work even wetter!). Trying to apply slip to dry clay won’t work! If you want to do sgraffito – you will need to keep the work leather hard (a state of dryness where you can still work the clay with a little effort and a little water and care). Step Three – Drying Most of the time your work can go into the rack uncovered to let it dry out for the following week. If you want to continue forming or shaping you will need to double bag your work – put your work on a suitable sized bat and put the bat in a bag so the base of the bag is under the bat, then put another bag over the top of the work and tuck the top of the bag under the bat. If you want to trim (or turn) your thrown work the following week, it should also be double bagged. If your work is large, delicate, or of uneven thicknesses, you should lightly cover your work for drying. When considering the drying process, bare in mind the weather, humidity and wind! The hotter and dryer, the faster things dry and work can dry unevenly in the shelves – this can lead to cracking – another time to lightly cover your work for drying. Step Four – Trimming and Cleaning Up Your work is dry! It is called greenware now and it is at it’s most fragile! Handle everything with two hands. I often refer to soft hands – keep everything gentle and with your fingers spread as much as possible. Try to not pick up things like plates too much, and always with both hands! Before your work can be bisque fired it should be “cleaned up”. You work won’t go into the kiln if it has sharp edges – when glazed, sharp edges turn into razor blades! Use a piece of fly wire to rub the work all over – this will scratch a little so be light handed. Use a knife or metal kidney to scrape any areas that require a bit more dynamic treatment than the fly wire offers! Finally, a very light wipe over with a slightly damp sponge can help soften and soothe all of your edges and dags! Trimming thrown work: If you are planning to trim (or turn) your thrown work (and you should be), make sure you bag it well – your work should be leather hard to almost dry for easiest trimming. Use this step to finish the work completely – use a metal kidney to polish the surface, or a slightly damp sponge to give a freshly thrown look. Wipe the sponge around the rim after trimming, and check the inside of the pot for dags! Trimming slip cast work: Usually I will trim the rims of your work on the wheel the following day to make that stage easier, however you will still need to check your work for lumps and bumps. Last but not least – check that your name is still clearly on the bottom of your work. Step Five – Bisque Firing When the work is completely dry it can go into the bisque kiln. The bisque kiln is fired to 1000°C. This process burns off the water in the clay as well as some of the chemically bound water. The structure of the clay is not altered that much at this temperature. Inside the bisque kiln, the work is stacked a little, small bowl inside a larger bowl and onto a heavy plate. Smaller items like decorations or drink coasters might get stacked several high. Consideration is paid to the weight of the stack and shape of the work. A bisque kiln can fire about one and a half times the amount of work that the glaze kiln can fire. The firing takes about 10 hours to complete the cycle and about two days to cool down. Once it has been emptied the work is placed in the glaze room ready for you to decorate! Step Six – Glazing Decorating your work with colour can be a lot of fun – and time consuming! There are three main options for surface treatment at this stage: Oxide Washes Underglazes Glazes Washes and underglazes do not “glaze” the work – It will still need a layer of glaze to fully seal the clay (washes don’t need glaze on surfaces not designed for food or liquid as they can gloss up a little on their own). Underglazes are stable colourants that turn out pretty much how they look in the jar. They can be mixed with each other to form other colours and can be used like water colours to paint onto your work. Mostly they should have a clear glaze on top to seal them. Oxides are a different species – the pink oxide (cobalt) wash turns out bright blue for instance. They don’t always need a glaze on top, and some glazes can change the colour of the wash! The glazes need no other “glaze” on top! Be careful of unknown glaze interactions – you can put any combination of glaze in a bowl or on a plate, but only a single glaze on the outside of any vertical surface! Glazes are a chemical reaction under heat. We don’t know the exact chemicals in the Mayco glazes we use. I can guess by the way they interact with each other, however, on the whole, you need to test every idea you have, and not run the test on a vertical surface! Simply put, glaze is a layer of glass like substance that bonds with the clay underneath. Clay is made of silica, alumina and water. Glaze is made of mostly silica. Silica has a melting point of 1700°C and we fire to 1240°C. The silica requires a “flux” to help it melt at the lower temperature. Fluxes can be all sorts of chemicals – a common one is calcium – calcium has a melting point of 2500°C, however, together they both melt at a much lower temperature! Colourants are metal oxides like cobalt (blue), chrome (green through black), copper (green, blue, even red!), manganese (black, purple and pink) iron (red brown), etc. Different chemicals in the glaze can have dramatic effects. for example, barium carbonate (which we don’t use) turns manganese bright pink! Other elements can turn manganese dioxide brown, blue, purple and reddish brown. Manganese dioxide is a flux in and of itself as well. So, glazes that get their black and purple colours, often interact with other glazes and RUN! Our mirror black is a good example – it mixes really well with many glazes because it fluxes them – causes them to melt faster. It will also bring out many beautiful colours in the glazes because it’s black colouring most definitely comes from manganese dioxide! Glaze chemistry is a whole subject on it’s own! We use commercial Mayco glazes on purpose – for their huge range of colour possibilities, stability, cool interactions, artistic freedom with the ability to easily brush the glazes on and ease of use. We currently have almost 50 glazes on hand! A major project is to test the interactions of all glazes with each other. That is 2,500 test tiles!!!! I’m going to make the wall behind the wheels the feature wall of pretty colours! Step Seven – Glaze (Gloss or sometimes called “Glost”) Firing Most of the time this is the final stage of making your creation (but not always!) The glaze kiln goes to 1240°C. This is called cone 6, or midrange. It is the low end of stoneware temperatures. Stoneware clays and glazes are typically fired at cone 8 – 10, that is 1260 – 1290°C. The energy requirement to go from 1240°C to 1280°C is almost a 30% more! Our clay is formulated to vitrify (mature, turn “glass-like”) at 1240°, as are our glazes. A glaze kiln take around 12 hours to reach temperature and two to three days to cool down. Sometimes a third firing process is required – this is for decoration that is added to work after the glaze firing. For example – adding precious metals and lustres. this firing temperature is usually around 600 – 800°C depending upon the techniques being used. There are many students interested in gold and silver trims – we will be doing this third type of firing soon! After firing your work will be in the student finished work shelves. Remember to pay for it before you head out the door! There is a small extra charge for using porcelain clay (it’s more than twice the price of regular clay), and for any third firing process! Once your work has been fired it can not turn back into clay for millennia – so don’t fire it if you don’t like it! Put it in the bucket for recycling. https://firebirdstudios.com.au/the-process-of-making-pottery/The form of the jug has been in use for many centuries.Stoneware jug. Two tone brown glaze with pierced lip behind spout. Spout chipped.None.flagstaff hill, warrnambool, shipwrecked-coast, flagstaff-hill, flagstaff-hill-maritime-museum, maritime-museum, shipwreck-coast, flagstaff-hill-maritime-village, jug, ceramic jug -
 Flagstaff Hill Maritime Museum and Village
Accessory - Grooming Set, T R Cadman, ca. 1924
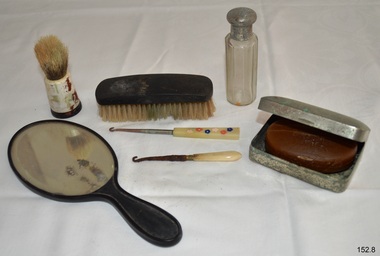
... brush...button hook...hand...Men's grooming set; metal soap container with star decoration, oval soap cake, oval hand mirror in a black frame ten-sided clear glass cologne bottle with silver metal lid, yellow bristle clothes brush with brown wooden hand grip, yellow bristle shaving brush with black base and white body, and two button hooks with white handles; the larger one has floral motifs. ...Men's grooming set; metal soap container with star decoration, oval soap cake, oval hand mirror in a black frame ten-sided clear glass cologne bottle with silver metal lid, yellow bristle clothes brush with brown wooden hand grip, yellow bristle shaving brush with black base and white body, and two button hooks with white handles; the larger one has floral motifs. ...This men's grooming set of personal care equipment and toiletries is an example of items packaged in attractive cases and sold as gifts in Australian chemist outlets and department stores in the 1920s to 1940s. This set was originally packaged in a leather-covered, lined and fitted case, with a comb, hair brush, and razor included as well. as the items shown here. The razor, once included with the set, had the inscription "T.R. Cadman and Sons, Sheffield England". The family business began with Luke Cadman in 1748. Thomas Radley Cadmen (1833 - 1917) took over the business in 1871, by which time it was operating in Sheffield. The business became incorporated as T.R. Cadman & Sons in 1924 but shortly afterwards the straight razors manufactured by them were stamped T.R. Cadman & Sons Ltd. The company specialised in pocket knives and razors from 1933 and supplied the British Royal Navy with razors in WWII. Over 80 per cent of sales were for the overseas market including Australia. Some of their razors were sold in stores in Victoria. The business traded in 1965. This grooming set was donated for exhibit in Flagstaff Hill Maritime Museum and Village's exhibit of the vessel 'Reginald M', a two-masted coastal trading ketch built in Port Adelaide in 1922. These items are examples of personal objects sold in Victoria in the 1920s as gifts for men, cased or packaged for special occasions and sold in retail stores. The items are associated with the historic coastal trading ketch 'Reginald M', listed on the Australian Register of Historic Vessels; and active from 1922 until 1975. The items were displayed in the Master's Quarters of the Reginald M exhibit at Flagstaff Hill Maritime Museum and Village until 2016 when the ship was decommissioned from Flagstaff Hill's fleet.Men's grooming set; metal soap container with star decoration, oval soap cake, oval hand mirror in a black frame ten-sided clear glass cologne bottle with silver metal lid, yellow bristle clothes brush with brown wooden hand grip, yellow bristle shaving brush with black base and white body, and two button hooks with white handles; the larger one has floral motifs. Inscriptions were on the razor originally included in the grooming set.Soap container once had star motifs.flagstaff hill, warrnambool, shipwrecked coast, flagstaff hill maritime museum, maritime museum, shipwreck coast, flagstaff hill maritime village, great ocean road, grooming set, men's grooming set, personal grooming, toiletry set, personal care, soap box, soap container, cologne bottle, clothes brush, shaving brush, button hook, hand mirror, personal efects, toiletries, t.r. cadman & sons, reginald m, soap dish -
 Flagstaff Hill Maritime Museum and Village
Domestic object - Bowl, Late 19th or early 20th Century
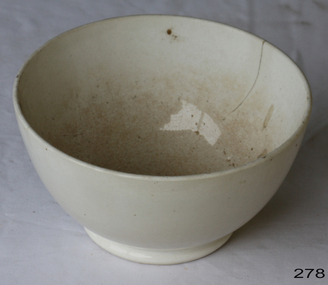
... We use commercial Mayco glazes on purpose – for their huge range of colour possibilities, stability, cool interactions, artistic freedom with the ability to easily brush the glazes on and ease of use. We currently have almost 50 glazes on hand! ...We use commercial Mayco glazes on purpose – for their huge range of colour possibilities, stability, cool interactions, artistic freedom with the ability to easily brush the glazes on and ease of use. We currently have almost 50 glazes on hand! ...The Process of Making Pottery Decorating, Firing, Glazing, Making, Technical There is a rhythm and flow to clay. It can’t be done all at once! Even the making process! It can take weeks to get everything done, especially if you can only work on your pottery once a week! Even though we have three hour classes, it’s often just not enough time! Here is an overview of some of the processes so you have a bit more grasp on some of the technical stuff! Step One – Design There are SO many ideas out there for making stuff in clay! From delicate porcelain jewellery, through to heavy sculptural work and everything in between. Deciding your direction is sometimes not that easy – when you first start, try everything, you will naturally gravitate to the style that you enjoy! The options and variations are endless and can get a wee bit overwhelming too! Check in with me before you start to ensure your ideas will work, what order you might do things, how you could achieve the look you are seeking and any other technical data required! Step Two – Making Clay is thixotropic. This means that as you work with it, the clay first gets sloppier and wetter, before is begins to dry in the atmosphere. For most things, you simply can’t do all parts of the project at once. An example of work order might look like: Get last weeks work out from the shelves Prepare clay for today’s work – roll your clay, prepare balls for throwing, make the first stage of a pinch pot) Clean up last week’s work and put it on the shelf for bisque firing Check that you have any glazing to do – and do enough of it that you will have time to finish your main project Do the next step of your next project – there might be a further step that can’t be complete immediately, in that case, wrap your work well and put onto the shelves. Letting your work rest for a while can really help keep your work clean and professional looking. Many things require bagging under plastic to keep it ready for work the next week – put your name on the outside of the bag so you can find your work easily. We have stickers and markers. Consider how you want to decorate your work – coloured slip can be applied at a fairly wet stage (remembering that it will make your work even wetter!). Trying to apply slip to dry clay won’t work! If you want to do sgraffito – you will need to keep the work leather hard (a state of dryness where you can still work the clay with a little effort and a little water and care). Step Three – Drying Most of the time your work can go into the rack uncovered to let it dry out for the following week. If you want to continue forming or shaping you will need to double bag your work – put your work on a suitable sized bat and put the bat in a bag so the base of the bag is under the bat, then put another bag over the top of the work and tuck the top of the bag under the bat. If you want to trim (or turn) your thrown work the following week, it should also be double bagged. If your work is large, delicate, or of uneven thicknesses, you should lightly cover your work for drying. When considering the drying process, bare in mind the weather, humidity and wind! The hotter and dryer, the faster things dry and work can dry unevenly in the shelves – this can lead to cracking – another time to lightly cover your work for drying. Step Four – Trimming and Cleaning Up Your work is dry! It is called greenware now and it is at it’s most fragile! Handle everything with two hands. I often refer to soft hands – keep everything gentle and with your fingers spread as much as possible. Try to not pick up things like plates too much, and always with both hands! Before your work can be bisque fired it should be “cleaned up”. You work won’t go into the kiln if it has sharp edges – when glazed, sharp edges turn into razor blades! Use a piece of fly wire to rub the work all over – this will scratch a little so be light handed. Use a knife or metal kidney to scrape any areas that require a bit more dynamic treatment than the fly wire offers! Finally, a very light wipe over with a slightly damp sponge can help soften and soothe all of your edges and dags! Trimming thrown work: If you are planning to trim (or turn) your thrown work (and you should be), make sure you bag it well – your work should be leather hard to almost dry for easiest trimming. Use this step to finish the work completely – use a metal kidney to polish the surface, or a slightly damp sponge to give a freshly thrown look. Wipe the sponge around the rim after trimming, and check the inside of the pot for dags! Trimming slip cast work: Usually I will trim the rims of your work on the wheel the following day to make that stage easier, however you will still need to check your work for lumps and bumps. Last but not least – check that your name is still clearly on the bottom of your work. Step Five – Bisque Firing When the work is completely dry it can go into the bisque kiln. The bisque kiln is fired to 1000°C. This process burns off the water in the clay as well as some of the chemically bound water. The structure of the clay is not altered that much at this temperature. Inside the bisque kiln, the work is stacked a little, small bowl inside a larger bowl and onto a heavy plate. Smaller items like decorations or drink coasters might get stacked several high. Consideration is paid to the weight of the stack and shape of the work. A bisque kiln can fire about one and a half times the amount of work that the glaze kiln can fire. The firing takes about 10 hours to complete the cycle and about two days to cool down. Once it has been emptied the work is placed in the glaze room ready for you to decorate! Step Six – Glazing Decorating your work with colour can be a lot of fun – and time consuming! There are three main options for surface treatment at this stage: Oxide Washes Underglazes Glazes Washes and underglazes do not “glaze” the work – It will still need a layer of glaze to fully seal the clay (washes don’t need glaze on surfaces not designed for food or liquid as they can gloss up a little on their own). Underglazes are stable colourants that turn out pretty much how they look in the jar. They can be mixed with each other to form other colours and can be used like water colours to paint onto your work. Mostly they should have a clear glaze on top to seal them. Oxides are a different species – the pink oxide (cobalt) wash turns out bright blue for instance. They don’t always need a glaze on top, and some glazes can change the colour of the wash! The glazes need no other “glaze” on top! Be careful of unknown glaze interactions – you can put any combination of glaze in a bowl or on a plate, but only a single glaze on the outside of any vertical surface! Glazes are a chemical reaction under heat. We don’t know the exact chemicals in the Mayco glazes we use. I can guess by the way they interact with each other, however, on the whole, you need to test every idea you have, and not run the test on a vertical surface! Simply put, glaze is a layer of glass like substance that bonds with the clay underneath. Clay is made of silica, alumina and water. Glaze is made of mostly silica. Silica has a melting point of 1700°C and we fire to 1240°C. The silica requires a “flux” to help it melt at the lower temperature. Fluxes can be all sorts of chemicals – a common one is calcium – calcium has a melting point of 2500°C, however, together they both melt at a much lower temperature! Colourants are metal oxides like cobalt (blue), chrome (green through black), copper (green, blue, even red!), manganese (black, purple and pink) iron (red brown), etc. Different chemicals in the glaze can have dramatic effects. for example, barium carbonate (which we don’t use) turns manganese bright pink! Other elements can turn manganese dioxide brown, blue, purple and reddish brown. Manganese dioxide is a flux in and of itself as well. So, glazes that get their black and purple colours, often interact with other glazes and RUN! Our mirror black is a good example – it mixes really well with many glazes because it fluxes them – causes them to melt faster. It will also bring out many beautiful colours in the glazes because it’s black colouring most definitely comes from manganese dioxide! Glaze chemistry is a whole subject on it’s own! We use commercial Mayco glazes on purpose – for their huge range of colour possibilities, stability, cool interactions, artistic freedom with the ability to easily brush the glazes on and ease of use. We currently have almost 50 glazes on hand! A major project is to test the interactions of all glazes with each other. That is 2,500 test tiles!!!! I’m going to make the wall behind the wheels the feature wall of pretty colours! Step Seven – Glaze (Gloss or sometimes called “Glost”) Firing Most of the time this is the final stage of making your creation (but not always!) The glaze kiln goes to 1240°C. This is called cone 6, or midrange. It is the low end of stoneware temperatures. Stoneware clays and glazes are typically fired at cone 8 – 10, that is 1260 – 1290°C. The energy requirement to go from 1240°C to 1280°C is almost a 30% more! Our clay is formulated to vitrify (mature, turn “glass-like”) at 1240°, as are our glazes. A glaze kiln take around 12 hours to reach temperature and two to three days to cool down. Sometimes a third firing process is required – this is for decoration that is added to work after the glaze firing. For example – adding precious metals and lustres. this firing temperature is usually around 600 – 800°C depending upon the techniques being used. There are many students interested in gold and silver trims – we will be doing this third type of firing soon! After firing your work will be in the student finished work shelves. Remember to pay for it before you head out the door! There is a small extra charge for using porcelain clay (it’s more than twice the price of regular clay), and for any third firing process! Once your work has been fired it can not turn back into clay for millennia – so don’t fire it if you don’t like it! Put it in the bucket for recycling. https://firebirdstudios.com.au/the-process-of-making-pottery/ The bowl is an example of kitchenware used in the 19th century and still in use today.Bowl white ceramic. Crack on side. Badly stained.Backstamp very faint and unable to be read.flagstaff hill, warrnambool, shipwrecked-coast, flagstaff-hill, flagstaff-hill-maritime-museum, maritime-museum, shipwreck-coast, flagstaff-hill-maritime-village, mixing bowl, food preparation, kitchen equipment, ceramic -
 Flagstaff Hill Maritime Museum and Village
Domestic object - Bowl
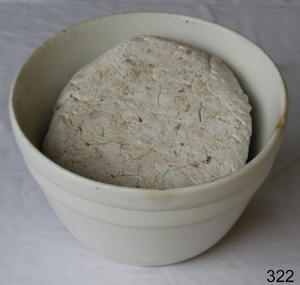
... We use commercial Mayco glazes on purpose – for their huge range of colour possibilities, stability, cool interactions, artistic freedom with the ability to easily brush the glazes on and ease of use. We currently have almost 50 glazes on hand! ...We use commercial Mayco glazes on purpose – for their huge range of colour possibilities, stability, cool interactions, artistic freedom with the ability to easily brush the glazes on and ease of use. We currently have almost 50 glazes on hand! ...The Process of Making Pottery Decorating, Firing, Glazing, Making, Technical There is a rhythm and flow to clay. It can’t be done all at once! Even the making process! It can take weeks to get everything done, especially if you can only work on your pottery once a week! Even though we have three hour classes, it’s often just not enough time! Here is an overview of some of the processes so you have a bit more grasp on some of the technical stuff! Step One – Design There are SO many ideas out there for making stuff in clay! From delicate porcelain jewellery, through to heavy sculptural work and everything in between. Deciding your direction is sometimes not that easy – when you first start, try everything, you will naturally gravitate to the style that you enjoy! The options and variations are endless and can get a wee bit overwhelming too! Check in with me before you start to ensure your ideas will work, what order you might do things, how you could achieve the look you are seeking and any other technical data required! Step Two – Making Clay is thixotropic. This means that as you work with it, the clay first gets sloppier and wetter, before is begins to dry in the atmosphere. For most things, you simply can’t do all parts of the project at once. An example of work order might look like: Get last weeks work out from the shelves Prepare clay for today’s work – roll your clay, prepare balls for throwing, make the first stage of a pinch pot) Clean up last week’s work and put it on the shelf for bisque firing Check that you have any glazing to do – and do enough of it that you will have time to finish your main project Do the next step of your next project – there might be a further step that can’t be complete immediately, in that case, wrap your work well and put onto the shelves. Letting your work rest for a while can really help keep your work clean and professional looking. Many things require bagging under plastic to keep it ready for work the next week – put your name on the outside of the bag so you can find your work easily. We have stickers and markers. Consider how you want to decorate your work – coloured slip can be applied at a fairly wet stage (remembering that it will make your work even wetter!). Trying to apply slip to dry clay won’t work! If you want to do sgraffito – you will need to keep the work leather hard (a state of dryness where you can still work the clay with a little effort and a little water and care). Step Three – Drying Most of the time your work can go into the rack uncovered to let it dry out for the following week. If you want to continue forming or shaping you will need to double bag your work – put your work on a suitable sized bat and put the bat in a bag so the base of the bag is under the bat, then put another bag over the top of the work and tuck the top of the bag under the bat. If you want to trim (or turn) your thrown work the following week, it should also be double bagged. If your work is large, delicate, or of uneven thicknesses, you should lightly cover your work for drying. When considering the drying process, bare in mind the weather, humidity and wind! The hotter and dryer, the faster things dry and work can dry unevenly in the shelves – this can lead to cracking – another time to lightly cover your work for drying. Step Four – Trimming and Cleaning Up Your work is dry! It is called greenware now and it is at it’s most fragile! Handle everything with two hands. I often refer to soft hands – keep everything gentle and with your fingers spread as much as possible. Try to not pick up things like plates too much, and always with both hands! Before your work can be bisque fired it should be “cleaned up”. You work won’t go into the kiln if it has sharp edges – when glazed, sharp edges turn into razor blades! Use a piece of fly wire to rub the work all over – this will scratch a little so be light handed. Use a knife or metal kidney to scrape any areas that require a bit more dynamic treatment than the fly wire offers! Finally, a very light wipe over with a slightly damp sponge can help soften and soothe all of your edges and dags! Trimming thrown work: If you are planning to trim (or turn) your thrown work (and you should be), make sure you bag it well – your work should be leather hard to almost dry for easiest trimming. Use this step to finish the work completely – use a metal kidney to polish the surface, or a slightly damp sponge to give a freshly thrown look. Wipe the sponge around the rim after trimming, and check the inside of the pot for dags! Trimming slip cast work: Usually I will trim the rims of your work on the wheel the following day to make that stage easier, however you will still need to check your work for lumps and bumps. Last but not least – check that your name is still clearly on the bottom of your work. Step Five – Bisque Firing When the work is completely dry it can go into the bisque kiln. The bisque kiln is fired to 1000°C. This process burns off the water in the clay as well as some of the chemically bound water. The structure of the clay is not altered that much at this temperature. Inside the bisque kiln, the work is stacked a little, small bowl inside a larger bowl and onto a heavy plate. Smaller items like decorations or drink coasters might get stacked several high. Consideration is paid to the weight of the stack and shape of the work. A bisque kiln can fire about one and a half times the amount of work that the glaze kiln can fire. The firing takes about 10 hours to complete the cycle and about two days to cool down. Once it has been emptied the work is placed in the glaze room ready for you to decorate! Step Six – Glazing Decorating your work with colour can be a lot of fun – and time consuming! There are three main options for surface treatment at this stage: Oxide Washes Underglazes Glazes Washes and underglazes do not “glaze” the work – It will still need a layer of glaze to fully seal the clay (washes don’t need glaze on surfaces not designed for food or liquid as they can gloss up a little on their own). Underglazes are stable colourants that turn out pretty much how they look in the jar. They can be mixed with each other to form other colours and can be used like water colours to paint onto your work. Mostly they should have a clear glaze on top to seal them. Oxides are a different species – the pink oxide (cobalt) wash turns out bright blue for instance. They don’t always need a glaze on top, and some glazes can change the colour of the wash! The glazes need no other “glaze” on top! Be careful of unknown glaze interactions – you can put any combination of glaze in a bowl or on a plate, but only a single glaze on the outside of any vertical surface! Glazes are a chemical reaction under heat. We don’t know the exact chemicals in the Mayco glazes we use. I can guess by the way they interact with each other, however, on the whole, you need to test every idea you have, and not run the test on a vertical surface! Simply put, glaze is a layer of glass like substance that bonds with the clay underneath. Clay is made of silica, alumina and water. Glaze is made of mostly silica. Silica has a melting point of 1700°C and we fire to 1240°C. The silica requires a “flux” to help it melt at the lower temperature. Fluxes can be all sorts of chemicals – a common one is calcium – calcium has a melting point of 2500°C, however, together they both melt at a much lower temperature! Colourants are metal oxides like cobalt (blue), chrome (green through black), copper (green, blue, even red!), manganese (black, purple and pink) iron (red brown), etc. Different chemicals in the glaze can have dramatic effects. for example, barium carbonate (which we don’t use) turns manganese bright pink! Other elements can turn manganese dioxide brown, blue, purple and reddish brown. Manganese dioxide is a flux in and of itself as well. So, glazes that get their black and purple colours, often interact with other glazes and RUN! Our mirror black is a good example – it mixes really well with many glazes because it fluxes them – causes them to melt faster. It will also bring out many beautiful colours in the glazes because it’s black colouring most definitely comes from manganese dioxide! Glaze chemistry is a whole subject on it’s own! We use commercial Mayco glazes on purpose – for their huge range of colour possibilities, stability, cool interactions, artistic freedom with the ability to easily brush the glazes on and ease of use. We currently have almost 50 glazes on hand! A major project is to test the interactions of all glazes with each other. That is 2,500 test tiles!!!! I’m going to make the wall behind the wheels the feature wall of pretty colours! Step Seven – Glaze (Gloss or sometimes called “Glost”) Firing Most of the time this is the final stage of making your creation (but not always!) The glaze kiln goes to 1240°C. This is called cone 6, or midrange. It is the low end of stoneware temperatures. Stoneware clays and glazes are typically fired at cone 8 – 10, that is 1260 – 1290°C. The energy requirement to go from 1240°C to 1280°C is almost a 30% more! Our clay is formulated to vitrify (mature, turn “glass-like”) at 1240°, as are our glazes. A glaze kiln take around 12 hours to reach temperature and two to three days to cool down. Sometimes a third firing process is required – this is for decoration that is added to work after the glaze firing. For example – adding precious metals and lustres. this firing temperature is usually around 600 – 800°C depending upon the techniques being used. There are many students interested in gold and silver trims – we will be doing this third type of firing soon! After firing your work will be in the student finished work shelves. Remember to pay for it before you head out the door! There is a small extra charge for using porcelain clay (it’s more than twice the price of regular clay), and for any third firing process! Once your work has been fired it can not turn back into clay for millennia – so don’t fire it if you don’t like it! Put it in the bucket for recycling. https://firebirdstudios.com.au/the-process-of-making-pottery/ This bowl is an example of kitchenware used in the 19th century and still in use today.Bowl white ceramic plain that has two sets of edging around lip. Inside bowl has plaster designed to look like cooking mixture.flagstaff hill, warrnambool, shipwrecked-coast, flagstaff-hill, flagstaff-hill-maritime-museum, maritime-museum, shipwreck-coast, flagstaff-hill-maritime-village, kitchen equipment, ceramic -
 Flagstaff Hill Maritime Museum and Village
Domestic object - Bowl, J & G Meakin, Late 19th or early 20th Century
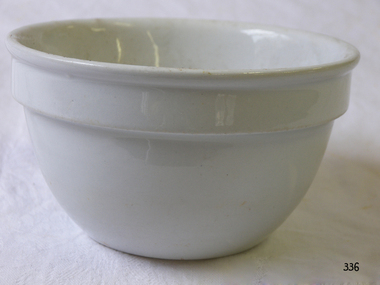
... We use commercial Mayco glazes on purpose – for their huge range of colour possibilities, stability, cool interactions, artistic freedom with the ability to easily brush the glazes on and ease of use. We currently have almost 50 glazes on hand! ...We use commercial Mayco glazes on purpose – for their huge range of colour possibilities, stability, cool interactions, artistic freedom with the ability to easily brush the glazes on and ease of use. We currently have almost 50 glazes on hand! ...The Process of Making Pottery Decorating, Firing, Glazing, Making, Technical There is a rhythm and flow to clay. It can’t be done all at once! Even the making process! It can take weeks to get everything done, especially if you can only work on your pottery once a week! Even though we have three hour classes, it’s often just not enough time! Here is an overview of some of the processes so you have a bit more grasp on some of the technical stuff! Step One – Design There are SO many ideas out there for making stuff in clay! From delicate porcelain jewellery, through to heavy sculptural work and everything in between. Deciding your direction is sometimes not that easy – when you first start, try everything, you will naturally gravitate to the style that you enjoy! The options and variations are endless and can get a wee bit overwhelming too! Check in with me before you start to ensure your ideas will work, what order you might do things, how you could achieve the look you are seeking and any other technical data required! Step Two – Making Clay is thixotropic. This means that as you work with it, the clay first gets sloppier and wetter, before is begins to dry in the atmosphere. For most things, you simply can’t do all parts of the project at once. An example of work order might look like: Get last weeks work out from the shelves Prepare clay for today’s work – roll your clay, prepare balls for throwing, make the first stage of a pinch pot) Clean up last week’s work and put it on the shelf for bisque firing Check that you have any glazing to do – and do enough of it that you will have time to finish your main project Do the next step of your next project – there might be a further step that can’t be complete immediately, in that case, wrap your work well and put onto the shelves. Letting your work rest for a while can really help keep your work clean and professional looking. Many things require bagging under plastic to keep it ready for work the next week – put your name on the outside of the bag so you can find your work easily. We have stickers and markers. Consider how you want to decorate your work – coloured slip can be applied at a fairly wet stage (remembering that it will make your work even wetter!). Trying to apply slip to dry clay won’t work! If you want to do sgraffito – you will need to keep the work leather hard (a state of dryness where you can still work the clay with a little effort and a little water and care). Step Three – Drying Most of the time your work can go into the rack uncovered to let it dry out for the following week. If you want to continue forming or shaping you will need to double bag your work – put your work on a suitable sized bat and put the bat in a bag so the base of the bag is under the bat, then put another bag over the top of the work and tuck the top of the bag under the bat. If you want to trim (or turn) your thrown work the following week, it should also be double bagged. If your work is large, delicate, or of uneven thicknesses, you should lightly cover your work for drying. When considering the drying process, bare in mind the weather, humidity and wind! The hotter and dryer, the faster things dry and work can dry unevenly in the shelves – this can lead to cracking – another time to lightly cover your work for drying. Step Four – Trimming and Cleaning Up Your work is dry! It is called greenware now and it is at it’s most fragile! Handle everything with two hands. I often refer to soft hands – keep everything gentle and with your fingers spread as much as possible. Try to not pick up things like plates too much, and always with both hands! Before your work can be bisque fired it should be “cleaned up”. You work won’t go into the kiln if it has sharp edges – when glazed, sharp edges turn into razor blades! Use a piece of fly wire to rub the work all over – this will scratch a little so be light handed. Use a knife or metal kidney to scrape any areas that require a bit more dynamic treatment than the fly wire offers! Finally, a very light wipe over with a slightly damp sponge can help soften and soothe all of your edges and dags! Trimming thrown work: If you are planning to trim (or turn) your thrown work (and you should be), make sure you bag it well – your work should be leather hard to almost dry for easiest trimming. Use this step to finish the work completely – use a metal kidney to polish the surface, or a slightly damp sponge to give a freshly thrown look. Wipe the sponge around the rim after trimming, and check the inside of the pot for dags! Trimming slip cast work: Usually I will trim the rims of your work on the wheel the following day to make that stage easier, however you will still need to check your work for lumps and bumps. Last but not least – check that your name is still clearly on the bottom of your work. Step Five – Bisque Firing When the work is completely dry it can go into the bisque kiln. The bisque kiln is fired to 1000°C. This process burns off the water in the clay as well as some of the chemically bound water. The structure of the clay is not altered that much at this temperature. Inside the bisque kiln, the work is stacked a little, small bowl inside a larger bowl and onto a heavy plate. Smaller items like decorations or drink coasters might get stacked several high. Consideration is paid to the weight of the stack and shape of the work. A bisque kiln can fire about one and a half times the amount of work that the glaze kiln can fire. The firing takes about 10 hours to complete the cycle and about two days to cool down. Once it has been emptied the work is placed in the glaze room ready for you to decorate! Step Six – Glazing Decorating your work with colour can be a lot of fun – and time consuming! There are three main options for surface treatment at this stage: Oxide Washes Underglazes Glazes Washes and underglazes do not “glaze” the work – It will still need a layer of glaze to fully seal the clay (washes don’t need glaze on surfaces not designed for food or liquid as they can gloss up a little on their own). Underglazes are stable colourants that turn out pretty much how they look in the jar. They can be mixed with each other to form other colours and can be used like water colours to paint onto your work. Mostly they should have a clear glaze on top to seal them. Oxides are a different species – the pink oxide (cobalt) wash turns out bright blue for instance. They don’t always need a glaze on top, and some glazes can change the colour of the wash! The glazes need no other “glaze” on top! Be careful of unknown glaze interactions – you can put any combination of glaze in a bowl or on a plate, but only a single glaze on the outside of any vertical surface! Glazes are a chemical reaction under heat. We don’t know the exact chemicals in the Mayco glazes we use. I can guess by the way they interact with each other, however, on the whole, you need to test every idea you have, and not run the test on a vertical surface! Simply put, glaze is a layer of glass like substance that bonds with the clay underneath. Clay is made of silica, alumina and water. Glaze is made of mostly silica. Silica has a melting point of 1700°C and we fire to 1240°C. The silica requires a “flux” to help it melt at the lower temperature. Fluxes can be all sorts of chemicals – a common one is calcium – calcium has a melting point of 2500°C, however, together they both melt at a much lower temperature! Colourants are metal oxides like cobalt (blue), chrome (green through black), copper (green, blue, even red!), manganese (black, purple and pink) iron (red brown), etc. Different chemicals in the glaze can have dramatic effects. for example, barium carbonate (which we don’t use) turns manganese bright pink! Other elements can turn manganese dioxide brown, blue, purple and reddish brown. Manganese dioxide is a flux in and of itself as well. So, glazes that get their black and purple colours, often interact with other glazes and RUN! Our mirror black is a good example – it mixes really well with many glazes because it fluxes them – causes them to melt faster. It will also bring out many beautiful colours in the glazes because it’s black colouring most definitely comes from manganese dioxide! Glaze chemistry is a whole subject on it’s own! We use commercial Mayco glazes on purpose – for their huge range of colour possibilities, stability, cool interactions, artistic freedom with the ability to easily brush the glazes on and ease of use. We currently have almost 50 glazes on hand! A major project is to test the interactions of all glazes with each other. That is 2,500 test tiles!!!! I’m going to make the wall behind the wheels the feature wall of pretty colours! Step Seven – Glaze (Gloss or sometimes called “Glost”) Firing Most of the time this is the final stage of making your creation (but not always!) The glaze kiln goes to 1240°C. This is called cone 6, or midrange. It is the low end of stoneware temperatures. Stoneware clays and glazes are typically fired at cone 8 – 10, that is 1260 – 1290°C. The energy requirement to go from 1240°C to 1280°C is almost a 30% more! Our clay is formulated to vitrify (mature, turn “glass-like”) at 1240°, as are our glazes. A glaze kiln take around 12 hours to reach temperature and two to three days to cool down. Sometimes a third firing process is required – this is for decoration that is added to work after the glaze firing. For example – adding precious metals and lustres. this firing temperature is usually around 600 – 800°C depending upon the techniques being used. There are many students interested in gold and silver trims – we will be doing this third type of firing soon! After firing your work will be in the student finished work shelves. Remember to pay for it before you head out the door! There is a small extra charge for using porcelain clay (it’s more than twice the price of regular clay), and for any third firing process! Once your work has been fired it can not turn back into clay for millennia – so don’t fire it if you don’t like it! Put it in the bucket for recycling. https://firebirdstudios.com.au/the-process-of-making-pottery/This bowl was made by renowned pottery company J & G Meakin of England. The firm was established in the mid-1800's. The bowl is an example of kitchenware used in the 19th century and still in use today.Bowl; white ceramic, round and tapering inwards towards base. Made by J and G Meakin England.On base, 'Ironstone China Reg SOL 391413' with symbolflagstaff hill, flagstaff hill maritime museum and village, warrnambool, maritime museum, maritime village, great ocean road, shipwreck coast, mixing bowl, food preparation, j & g meakin, pottery, stoke-on-trent, kitchen equipment, ceramic -
 Flagstaff Hill Maritime Museum and Village
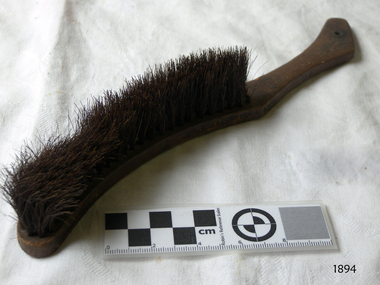
Brush
... Used for brushing crumbs from table. Left hand use. ...Used for brushing crumbs from table. Left hand use. Brush ...Table Brush wooden curved handle with hole and thin layer of bristles. Used for brushing crumbs from table. Left hand use. flagstaff hill, warrnambool, shipwrecked-coast, flagstaff-hill, flagstaff-hill-maritime-museum, maritime-museum, shipwreck-coast, flagstaff-hill-maritime-village, table brush -
 Federation University Historical Collection
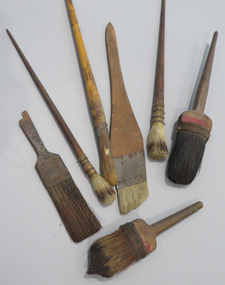
Tool - Brushes, Keith Rash's Sign writing Brushes
... hand lettering applied to long-term signage and short-term promotional materials. At the Ballarat Technical Art School, sign writing, ticket writing, and house decoration were overseen by Thomas Raisbeck (1884-1970) from 1915. Classes were then successively taught by former students William Kenneth (Ken) Moss (1889-1921) from 1920 until his untimely death, Albert E. Williams (1899-1986) until 1928, followed by experienced, practising sign writer, Charles Emrys (Angus) Henderson (1899-1976), who had trained under Raisbeck. signwriting keith rash ballarat school of mines brushes ...Commercial artist, Keith Edwin Rash (1910-1985), studied at the Ballarat Technical Art School between 1923 and 1929. These artefacts are from his professional practice. Sign writing and ticket-writing bridged art and trade, with hand lettering applied to long-term signage and short-term promotional materials. At the Ballarat Technical Art School, sign writing, ticket writing, and house decoration were overseen by Thomas Raisbeck (1884-1970) from 1915. Classes were then successively taught by former students William Kenneth (Ken) Moss (1889-1921) from 1920 until his untimely death, Albert E. Williams (1899-1986) until 1928, followed by experienced, practising sign writer, Charles Emrys (Angus) Henderson (1899-1976), who had trained under Raisbeck. A number of brushes and sponges used by Ballarat sign writer, Keith Rash, who studied sign writing at the Ballarat School of Mines. signwriting, keith rash, ballarat school of mines, brushes, ballarat technical art school, sign writing, ticket writing -
 Flagstaff Hill Maritime Museum and Village
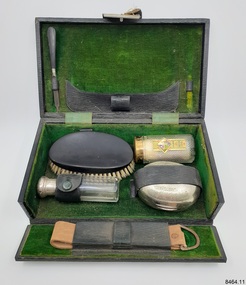
Accessory - Grooming set, F.H. FAULDING & CO. LTD, 1930s to 1940s
... The set contains men's toiletries and grooming items; a nail file with ebonised handle, an oval bristle brush with shaped ebonised hand grip, and a twelve-sided textured glass bottle with a gold metal lid and a shave stick with silver foil around the base, wrapped in waxed paper. ...The set contains men's toiletries and grooming items; a nail file with ebonised handle, an oval bristle brush with shaped ebonised hand grip, and a twelve-sided textured glass bottle with a gold metal lid and a shave stick with silver foil around the base, wrapped in waxed paper. ...This gift-boxed grooming set contains men's toiletry and grooming items in a lined and fitted case. The set was made by Fauldings from 193o to 1940 and sold by chemists and department stores throughout Australia. An advertisement promotes a variety of sets as 'Toilet Treasures by Faulding' and pictures several sets called 'caskets', and gives the different combinations a set number. Another advertisement promotes the sets as 'Gifts of Rare Discernment'. The items on offer include After-shave Lotion, a bottle of Brilliantine for hair, and an Old English Lavender shaving stick in a glass container. Some sets have Complexion Soap, a good quality sterilised Shaving Brush and Talcum Powder. A grooming set similar to the one in our collection was priced at 11 shillings in 1936 and would cost approximately AU $90 in 2022. This boxed grooming set is an example of men's toiletries sold from the 1920s to the 1940s in Australia. The supplier, Faulding, brand products have been available since 1845 when Francis Hardy Faulding opened a pharmacy in Adelaide, South Australia. The company has built a reputation for being a trustworthy supplier of pharmacy and healthcare needs for 175 years.Male grooming set; black leather-covered case with green velvet lining and strap with a metal button closure. The lid and front of the base fold out. The case is fitted with straps and a compartment to secure items inside. The set contains men's toiletries and grooming items; a nail file with ebonised handle, an oval bristle brush with shaped ebonised hand grip, and a twelve-sided textured glass bottle with a gold metal lid and a shave stick with silver foil around the base, wrapped in waxed paper. There is also a ten-sided plain glass bottle with silver metal lid, an oval metal soap container with hinged lid and an unused round cake of soap. A light brown leather stropping strap with a metal 'D' ring one end and a punched hole in the other end is fitted onto the folded down side of the case. The shaving stick is Old English Lavender by Faulding and the soap is Christy's. Inscriptions on the shaving stick wrapper, bottle base, label and lid. Shaving stick; "Faulding Old English Lavender Shaving Stick", "Faulding", "Faulding AUSTRALIA" and moulded inscriptions on the base [undecipherable]. Moulded in the soap; 'CHRISTY'S"flagstaff hill, flagstaff hill maritime museum and village, warrnambool, maritime museum, maritime village, great ocean road, shipwreck coast, male grooming set, male toiletries, male accessories, faulding, toilet treasures, gift box, casket, shaving toiletries, hair toiletries, christy's, complexion soap, ebonised handles -
 Flagstaff Hill Maritime Museum and Village
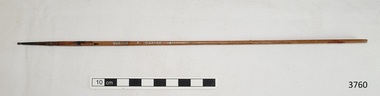
Functional object - Brush, 1930-1955's
... hand crafted using tools designed and made by Jim. Outstanding details include functional rigging and moving cannons. Please see our record 3732 of the mode Sovereign of the Seas for further details of the ship and the maker. This brush ...This fine Reeves paint brush was used in the making of components for the ship model Sovereign of the Seas. It is part of a collection of objects used by Jim Williams, maker of fine ship models from about 1930-1955. Most of the components for the models, as well as many of the tools, were handmade by Jim Williams. Jim’s family has donated the ship model “Sovereign of the Seas” and many tools, accessories and documents used in the making of this and other ship models have been donated to Flagstaff Hill Maritime Village. REEVES - Reeves & Sons Ltd, makers of fine art supplies, operated under this name in London, England, 1891-1976. The company was founded as Thomas Reeves and Son in 1784. SOVEREIGN OF THE SEAS - Ship model of HMS Sovereign of the Seas, scale model of 17th Century English war ship, was handmade and carved from plans, enclosed in airtight glass case. All components of that model, including even the smallest pulleys, were hand crafted using tools designed and made by Jim. Outstanding details include functional rigging and moving cannons. Please see our record 3732 of the mode Sovereign of the Seas for further details of the ship and the maker. This brush is connected with the hobby and skill of ship model making that has been crafted as a leisure activity for many generations. The hobby is often chosen by serving and retired mariners who appreciate the connection with maritime history. This brush was used by local Warrnambool man, Jim Williams, who was employed at Cramond and Dickson clothing store, and then at Fletcher Jones menswear for 27 years. It was used in making components for the model of the historic ship, the Sovereign of the Seas. The Sovereign of the Seas was a historic 17th century English war ship with important maritime heritage. Paint brush, narrow ‘0’ size, Reeves brand, no. 157, made in England. Inscription printed in silver paint. This paint brush is part of a collection of tools and accessories once used by Jim Williams, maker of a series of ship models 1930-1955 including “HMS Sovereign of the Seas”. Printed on handle -“MADE IN / ENGLAND” , “REEVES”, “157”, “0”flagstaff hill, warrnambool, flagstaff hill maritime museum, maritime museum, shipwreck coast, flagstaff hill maritime village, great ocean road, jim williams, james bernard williams, ship model hobby, ship model tools, ship model making equipment, ship model making accessories, paint brush, reeves of england, sovereign of the sea, ship model, hobby, ship model tool, brush -
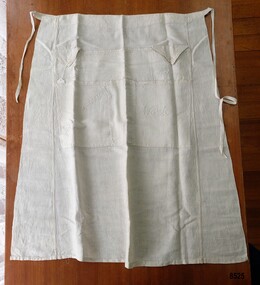 Flagstaff Hill Maritime Museum and Village
Clothing - Traveller's Apron, Eliza Towns, Circa 1915
... Underneath are two larger pockets labelled "Brush & Comb" and "Work" and two unlabelled narrow pockets. The seams are machine stitched and the pockets are outlined with hand embroidered feather stitch. ...Underneath are two larger pockets labelled "Brush & Comb" and "Work" and two unlabelled narrow pockets. The seams are machine stitched and the pockets are outlined with hand embroidered feather stitch. ...This apron is one of several linen and clothing items that were made and belonged to Mrs. Eliza Towns and donated to Flagstaff Hill Maritime Museum and Village. Eliza was born Eliza Gould in 1857 in South Melbourne (Emerald Hill) and in 1879 married Charles Towns. In the early 1880's they moved to Nhill in western Victoria and remained there for the rest of their married life. Charles was a jeweller and later became an accountant and for many years was involved with the Shire Council, the local show committee (A & P Society), the Hospital Committee and the Board of the local newspaper (the Nhill Free Press). They had three children and lived a life that would be regarded as comfortably "middle class". Eliza probably had a treadle sewing machine and would have made many of her own clothes - adding her own handmade embroidered or crocheted decorative trim. In March 1915 Eliza travelled to San Francisco to visit her son, James. She went by train to Melbourne ("a pleasant journey on the up express') and the next day caught the express train to Sydney. She noted in her letters home that a " number of young men were going to Sydney to enlist but they had to stop in the corridors most of the way as there was no room for them to sit down". She spent the night on the train and arrived in Sydney the next morning and on the following day she boarded the R.M.S. "Moana" (a steamer which took about twenty-four days to reach San Francisco). She returned from Vancouver about five months later on board the "Manuka". It is very likely Eliza took this "Travelling Apron" with her on her travels. Eliza was travelling by herself and had no one to help her with her dress or her hair. "Travelling Aprons" (also known as Toilet Aprons or Tourist Aprons) were designed with different sized pockets for holding a lady's toiletries - hairbrush, hair pins, comb and sometimes even soap and a powder puff. This allowed the owner, when travelling and getting dressed in small places such as an overnight train compartment or a ship's cabin, to have all her requirements at hand without needing to search for them or have them roll onto the floor. Some of the pockets are finished with buttoned flaps to keep the items in place and when not in use, the apron could be hung up or rolled up and put away. Articles about the "Traveller's Apron" appeared in numerous Women's columns in Australian newspapers in the early 20th century - often with instructions and sometimes a pattern. In the "Age" on Sat 5th October 1907 in a column titled "Feminine Facts and Fancies" the author wrote "No man can appreciate the difficulties of dressing in a "wobbly" train or trying to do one's hair while a ship is weathering a storm". A year earlier (Saturday 24th March 1906) in the same column, the author wrote "... you have to spend nights in a train... forever struggling to dress yourself in a wretched little lavatory. You know how your hairpins and combs jump all over the place ... a train is always at its liveliest when you're trying to do your hair. My travelling apron saved me many a rage."This item is an example of the needlework skills of women in the early 20th century - combining machine stitching with hand embroidery to personalise and embellish a practical domestic object. It is also an excellent (and rare) example of an early 20th century innovation that helped solve the difficulties of privacy and convenience that many women experienced at a time when travel was becoming more accessible to them. A half apron, made of ivory linen with two waist ties and seven pockets. Along the top are two smaller pockets with triangular, buttoned flaps labelled "Hairpins" and "Nailbrush" and one larger unlabelled pocket. Underneath are two larger pockets labelled "Brush & Comb" and "Work" and two unlabelled narrow pockets. The seams are machine stitched and the pockets are outlined with hand embroidered feather stitch. The labels on the pockets are embroidered in stem stitch."Hairpins" / "Nailbrush" / "Brush and Comb" / "Work"flagstaff hill maritime museum and village, nhill, eliza towns, apron, travelling apron, tourist apron, textiles, toilet apron, sewing, embroidery, travel, warrnambool, great ocean road, trains, ships, moana, manuka, feather stitch, stem stitch, fashion, handmade, clothing, charles towns, needlework -
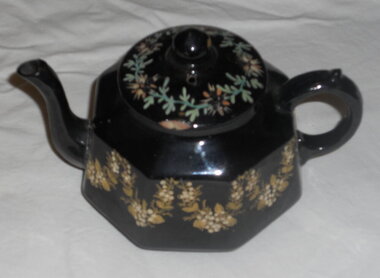 City of Moorabbin Historical Society (Operating the Box Cottage Museum)
Domestic object - Kitchen Equipment, Tea Pot, Between 1885 and 1905 after which the backstamp changed to G & S LTD
... hand -painted with green leaves and flowers. This floral pattern is named "Garland" The lid is not of the same pattern as the base. The spout was broken when brush...hand -painted with green leaves and flowers. This floral pattern is named "Garland" The lid is not of the same pattern as the base. The spout was broken when brush ...Earthenware is lightly fired, readily absorbs water if not glazed, and does not allow light to pass through it. Coarse earthenware is made from clay and grog (ground up fired pot). There are two main types of glazed earthenware: One is covered with a transparent lead glaze; when the earthenware body to which this glaze is applied has a cream colour, the product is called creamware. The second type, covered with an opaque white .in glaze, is variously called tin-enamelled, or tin-glazed, earthenware, majolica, faience, or delft. G&S marking could be Grove & Stark, Longton, England (1871-1884). In the 19th century, J. & G. Meakin ,1851 based in Hanley, Stoke-on-Trent, Staffordshire, was known for the vast quantities of cheap ironstone china it produced for the domestic English market and for export to Australia, Canada, New Zealand and the United States. Grove & Stark were taken over by Meakin early 20thC The Mark could also be Gibson & Sons (Ltd), were notably manufacturers of earthenware Burslem, Stoke-on-Trent. Founded around 1885 and traded until the mid 1970's. They were previously Gibson, Sudlow & Co. Manufactured between 1885 to 1905. Small earthen-ware, black-glazed tea-pot. 8 sided. The body of the tea-pot is decorated with hand-painted gold flowers and raised cream flowers. The lid is also hand -painted with green leaves and flowers. This floral pattern is named "Garland" The lid is not of the same pattern as the base. The spout was broken when brush tailed possum entered Cottage via chimney 27/4/2014. Can be repairedOn the base of the tea-pot. Makers Mark is G & S. "Garland". (Pattern), Rg. No. 175153. Also 'Made in England'. Under glaze there is the word: England.crockery, earthenwarre, gibson & son ltd, grove & stark ltd, pioneers, early settlers, bentleigh, market gardeners, moorabbin, cheltenham, pottery, stoke- on - trent, england, longton, burslem, wedgwood -
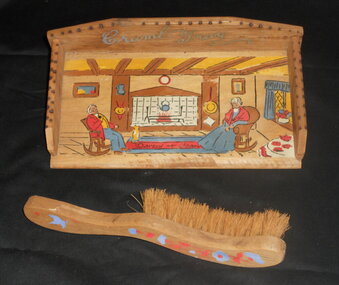 City of Moorabbin Historical Society (Operating the Box Cottage Museum)
Domestic object - Kitchen Equipment, poker-work crumb tray and brush, c1900
... Small timber poker-work crumb tray and brush. Both also have hand-painted decoration, and wording. ...Small timber poker-work crumb tray and brush. Both also have hand-painted decoration, and wording. ...This crumb tray with brush was used to clear crumbs spilt during meal times from the tableSmall timber poker-work crumb tray and brush. Both also have hand-painted decoration, and wording. There is a colourful painted scene of a couple seated in front of a fire-place, with the words "Darby and Joan".At the back of the tray base the words " Crumb Tray" are painted. The words "Darby and Joan" are painted on the tray. At the rear of the tray there is the price 1/6 in lead pencil.pioneers, early settlers, moorabbin, brighton, bentleigh, craftwork -
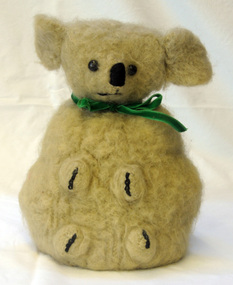 Orbost & District Historical Society
Koala tea cosy, Early 1900's
... Fawn coloured hand-knitted tea cosy. The wool has been brushed to resemble the fur. ...This item is an excellent local example of the type of hand made tea cosies which were used in an Australian domestic setting during the 1920's through to the 1960's. tea-cosy domestic-item tableware handcraft knitting powell-selena Fawn coloured hand-knitted tea cosy. The wool has been brushed to resemble the fur. ...This was probably used by the Powell family. Selena Powell came from Eden to Orbost at the age of 18. She met and married Henry James Powell in Orbost.This item is an excellent local example of the type of hand made tea cosies which were used in an Australian domestic setting during the 1920's through to the 1960's. Fawn coloured hand-knitted tea cosy. The wool has been brushed to resemble the fur. It has brown button eyes and the nose and mouth are sewn in black yarn. The feet are embroidered in black and it has a narrow green velvet ribbon around the neck.tea-cosy domestic-item tableware handcraft knitting powell-selena -
 Flagstaff Hill Maritime Museum and Village
Domestic object - Hearth Brush, ca 1878
... This hearth brush section would have had a handle at the top and bristles protruding from the base. It has been hand-crafted, likely by a blacksmith. ...Hearth brush section, copper alloy, bullet-head shaped; bristles and handle are missing. It is covered in verdigris. The metal is hand...This hearth brush section would have had a handle at the top and bristles protruding from the base. It has been hand-crafted, likely by a blacksmith. ...This hearth brush section would have had a handle at the top and bristles protruding from the base. It has been hand-crafted, likely by a blacksmith. A hearth brush is used to clean away fine ash from brick, iron and stone fireplaces and stoves after the fire has died. The hearth brush section was recovered from the wreck of the sailing ship Loch Ard, which was wrecked on June 1st 1878 at Mutton Bird Island near Port Campbell, Victoria. There were 54 people on board and only two survived. The cargo included items for Melbourne's International Exhibition.The hearth brush is an example of domestic cleaning equipment from the late 19th century. The brush is significant for its connection to the Loch Ard sailing ship, which is listed on the Victorian Heritage database. Hearth brush section, copper alloy, bullet-head shaped; bristles and handle are missing. It is covered in verdigris. The metal is hand-beaten. Recovered from the wreck of the Loch Ard. flagstaff hill, warrnambool, shipwrecked-coast, flagstaff-hill, flagstaff-hill-maritime-museum, maritime-museum, shipwreck-coast, flagstaff-hill-maritime-village, hearth brush, loch ard, cleaning, fireplace, domestic fireplace, domestic oven, ash, brush, 19th century, victorian era, 1878 -
 Red Cliffs Military Museum
Gift Box, Australian Red Cross Box WW11, 1944 (estimated)
... ./ Below this is the contents list: Chocolate/Chewing Gum/ Dentifrice/ 4 hankerchiefs/ mail brush/ pullover/ pencil/ razor blades/ 2 safety pins/ shirts/ soap/ 3 prs sox/ shaving soap/ towel/mending wool. Left hand..../ Below this is the contents list: Chocolate/Chewing Gum/ Dentifrice/ 4 hankerchiefs/ mail brush/ pullover/ pencil/ razor blades/ 2 safety pins/ shirts/ soap/ 3 prs sox/ shaving soap/ towel/mending wool. Left hand ...A cardboard Red Cross Gift Box used by Australian Red Cross in WW11 to send comfort parcel to POW in Germany. This particular box belonged to VX34767 Private T.H. AndersonLeft top of Box: POW Food Parcel/Germany/same size 8lbs. Centre: Red Cross Symbol/A Gift/on behalf of your Next-of-Kin with the best/ wishes of the London Committee/ Australian Red Cross Society. Top right of Box: Postage label/Mrs (torn)?olls/149 (torn off) Street Geelong West Australia./ Below this is the contents list: Chocolate/Chewing Gum/ Dentifrice/ 4 hankerchiefs/ mail brush/ pullover/ pencil/ razor blades/ 2 safety pins/ shirts/ soap/ 3 prs sox/ shaving soap/ towel/mending wool. Left hand side lower down: Despatched 18/5/44/ VX 34767 Private T.H. Anderson/ Australian Prisoner Of War No 125514/ Stalag V11 A Germany/ C/O International Red Cross Society/ Geneva Switzerland.australian, cross, ww11, red, pow, t h, anderson
