
Showing 5 items matching "mutinies - great britain"
-
 Mrs Aeneas Gunn Memorial Library
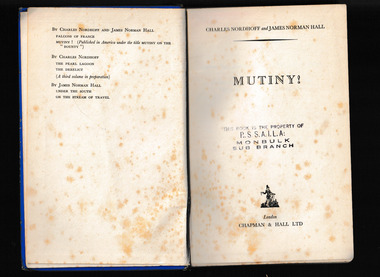
Book, Charles Nordhoff et al, Mutiny, 1933
... ...Mutinies - Great Britain...Bounty - Ship Mutinies - Great Britain A fictional account of the Mutiny on the Bounty Maps, p.415. ...A fictional account of the Mutiny on the BountyMaps, p.415.fictionA fictional account of the Mutiny on the Bountybounty - ship, mutinies - great britain -
 Bendigo Historical Society Inc.
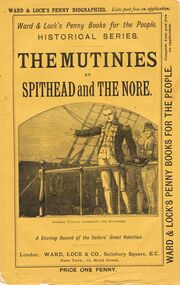
Book - LYDIA CHANCELLOR COLLECTION: THE MUTINIES AT SPITHEAD AND THE NORE
... BOOKS Biography british history Lydia Chancellor collection Ward & Lock's Penny Biographies Ward & Lock's Penny Books for the People Historical Series English Fleet English History British history England penny books book books advertisements Rebellions European history A book titled ' The Mutinies at Spithead and The Nore. A Stirring record of the Sailors' Great ...A book titled ' The Mutinies at Spithead and The Nore. A Stirring record of the Sailors' Great Rebellion.' London : Ward, Lock & Co., Salisbury Square, E.C. New York : 10 Bond Street. 385 - 400 pgs. (ill.). This booklet is one of a series of 37 ' Ward & Lock's Penny Books for the People.' 'Historical Series.' Price one penny.books, biography, british history, lydia chancellor, collection, ward & lock's penny biographies, ward & lock's penny books for the people, historical series, english fleet, english history, british history, england, penny books, book, books, advertisements, rebellions, european history -
 Mrs Aeneas Gunn Memorial Library
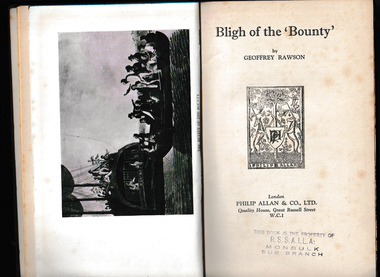
Book, Phillip Allan & Co, Bligh of the 'Bounty', 1930
... Great Britain - Royal Navy New South Wales - History - 19th century The story of the mutiny on the Bounty Index, bib, p.244. ...The story of the mutiny on the BountyIndex, bib, p.244.non-fictionThe story of the mutiny on the Bountygreat britain - royal navy, new south wales - history - 19th century -
 The Beechworth Burke Museum
Photograph, c. 1917
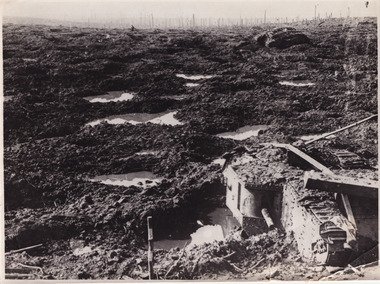
... mutinies in the over-strained French Army, the British Forces had to assume an even greater role in the war on the Western Front. For Field Marshal Sir Douglas Haig, the British commander-in-chief, this provided an opportunity to launch an offensive that he had long wanted. Attacking from Ypres in Belgium, he planned to drive the Germans from the surrounding dominant ridges and even hoped to reach the Belgian coast. Following on the success at Messines in June, he unleashed his great ...This photograph depicts the third battle of Ypres (Battle of Passchendaele). Depicted is a trench battlefield that has been turned to mud. Two army tank vehicles have been buried in the mud of the trenches. A single soldier stands in the background surveying the battlefield.After mid-1917, and following mutinies in the over-strained French Army, the British Forces had to assume an even greater role in the war on the Western Front. For Field Marshal Sir Douglas Haig, the British commander-in-chief, this provided an opportunity to launch an offensive that he had long wanted. Attacking from Ypres in Belgium, he planned to drive the Germans from the surrounding dominant ridges and even hoped to reach the Belgian coast. Following on the success at Messines in June, he unleashed his great attack on 31 July 1917. Fighting went on, often in appalling weather and despite crippling losses, until November. Finally, with the army stuck in muddy fields churned up by the artillery fire, the bloody offensive came to an untidy close. Many would afterwards call this offensive, actually a series of battles, after the name of the village that had become the last objective – 'Passchendaele'. In the Battle off Passchendaele, the 1st, 2nd and 3rd Australian Divisions captured Broodseinde Ridge on 4 October 1917. It was a vital victory. But, then it began to rain. Five days later the 2nd Australian Division suffered heavily in a further attack in the mud. Finally, on 12 October, another attack, involving the 3rd Division assisted by the 4th, was made against the village of Passchendaele atop the main ridge. In the face of heavy fire, the men fought in the mire while struggling to keep up with their artillery barrages. Ground was taken but it could not be held. In wretched conditions, with casualties mounting at an appalling rate, the Australians had to fall back. The troops were finally exhausted and could do no more; by 15 November they handed over to the Canadians.Black and white rectangular reproduced photograph printed on mate photographic paperReverse: 6523/ (A copyright and reproduction notice from the Australian War Museum, printed upside-down in blue ink)/military album, burke museum, beechworth, military vehicle, trenches, trench warfare, wwi, world war one, world war 1, ypres, belgium -
 The Beechworth Burke Museum
Photograph
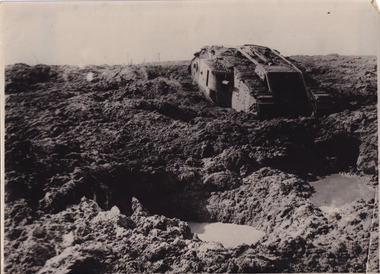
... mutinies in the over-strained French Army, the British Forces had to assume an even greater role in the war on the Western Front. For Field Marshal Sir Douglas Haig, the British commander-in-chief, this provided an opportunity to launch an offensive that he had long wanted. Attacking from Ypres in Belgium, he planned to drive the Germans from the surrounding dominant ridges and even hoped to reach the Belgian coast. Following on the success at Messines in June, he unleashed his great ...This photograph depicts the third battle of Ypres (Battle of Passchendaele). Depicted is a trench battlefield that has been turned to mud. One army tank vehicle has become stuck in the mud of the battlefield.After mid-1917, and following mutinies in the over-strained French Army, the British Forces had to assume an even greater role in the war on the Western Front. For Field Marshal Sir Douglas Haig, the British commander-in-chief, this provided an opportunity to launch an offensive that he had long wanted. Attacking from Ypres in Belgium, he planned to drive the Germans from the surrounding dominant ridges and even hoped to reach the Belgian coast. Following on the success at Messines in June, he unleashed his great attack on 31 July 1917. Fighting went on, often in appalling weather and despite crippling losses, until November. Finally, with the army stuck in muddy fields churned up by the artillery fire, the bloody offensive came to an untidy close. Many would afterwards call this offensive, actually a series of battles, after the name of the village that had become the last objective – 'Passchendaele'. In the Battle off Passchendaele, the 1st, 2nd and 3rd Australian Divisions captured Broodseinde Ridge on 4 October 1917. It was a vital victory. But, then it began to rain. Five days later the 2nd Australian Division suffered heavily in a further attack in the mud. Finally, on 12 October, another attack, involving the 3rd Division assisted by the 4th, was made against the village of Passchendaele atop the main ridge. In the face of heavy fire, the men fought in the mire while struggling to keep up with their artillery barrages. Ground was taken but it could not be held. In wretched conditions, with casualties mounting at an appalling rate, the Australians had to fall back. The troops were finally exhausted and could do no more; by 15 November they handed over to the Canadians.Black and white rectangular reproduced photograph printed on mate photographic paperReverse: 6524/ (A copyright and reproduction notice from the Australian War Museum, printed upside-down in blue ink)/military album, burke museum, beechworth, military vehicle, trenches, trench warfare, wwi, world war one, world war 1, ypres, belgium
