
Showing 189 items matching "pottery design"
-
 Federation University Historical Collection
Article - Article - Women, Ballarat Technical Art School: Women of Note; Amalie Feild (later Colquhoun), (1894-1974)
... ...pottery design...Upon returning to Ballarat she established a pottery school, and designed stained glass windows for churches in Ballarat. ...Upon returning to Ballarat she established a pottery school, and designed stained glass windows for churches in Ballarat. ...Amalie Feild studied at the Ballarat Technical Art School, and was appointed Instructor in Stained Glass and Pottery. Amalie Feild was the first recipient of a scholarship to study stained glass and pottery design at the Sydney Technical School After marrying Archibald Colquhoun She became better known as Amalie Colquhoun. Upon returning to Ballarat she established a pottery school, and designed stained glass windows for churches in Ballarat. The Uniting Church in Lydiard Street Ballarat has four panels and the Ballarat High School has World War 1 memorial windows by Amalie. More than 100 old students, teachers and others associated with the Ballarat Technical Art School assembled at a gathering at the Alexandria on Saturday night in honor of Mr. H. H. Smith, who has retired from the school after 35 years as principal. Mr. D. Johnston, acting principal, and a former student, handed over a portrait in oils of Mr. Smith painted by Mrs. Amalie Colquhoun, of Melbourne, another former student, who was also among the visitors. The portrait will be hung in the Ballarat Fine Art Gallery. amalie colquhoun, amalie feild, ballarat technical art school, scholarship, stained glass, pottery design, sydney technical school, h h smith retirement, portrait by amalie, ballarat fine art gallery, student and teacher, pottery school, stained glass design, uniting church windows, ballarat high school, world war 1 memorial windows -
 Whitehorse Historical Society Inc.
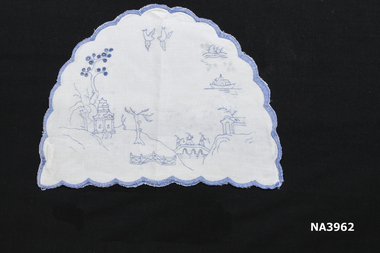
Domestic object - Tea Cosy, c1920
... White linen tea cosy edge scalloped and embroidered in blue. Blue Willow pottery design embroidered on back and front of cosy....Bought at church fete manchester table linen White linen tea cosy edge scalloped and embroidered in blue. Blue Willow pottery design embroidered on back and front of cosy. ...Made for Glory Box in 1920s. Bought at church feteWhite linen tea cosy edge scalloped and embroidered in blue. Blue Willow pottery design embroidered on back and front of cosy.manchester, table linen -
 Ballarat Heritage Services
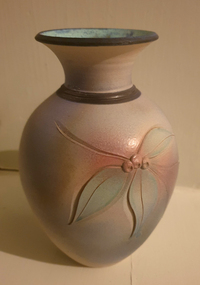
Ceramic, Ceramic Vase, c2000
... Pottery with flower design....ceramics Australian Studio Pottery Pottery with flower design. Ceramic Vase Ceramic ...Pottery with flower design.ceramics, australian studio pottery -
 Ballarat Diocesan Historical Commission
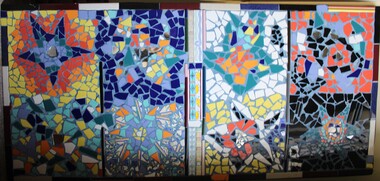
mosaic panel, Mosaic, 1985
... A single large mosaic of glass, porcelain and pottery fragments designed to represent stars and life....This Mosaic art work was created by unemployed youth involved in the program 1986-87 and featured on the wall of the organisation's office at Ballarat's St Patrick's Hall. mosaic, artwork, unemployed, youth, sofuy ballarat A single large mosaic of glass, porcelain and pottery fragments designed to represent stars and life. ...In 1986 SOFUY (Servicing Opportunities for Unemployed Youth) was established by Ballarat Diocesan Family Services (later Centacare). This Mosaic art work was created by unemployed youth involved in the program 1986-87 and featured on the wall of the organisation's office at Ballarat's St Patrick's Hall. A single large mosaic of glass, porcelain and pottery fragments designed to represent stars and life.mosaic, artwork, unemployed, youth, sofuy, ballarat -
 Bendigo Historical Society Inc.
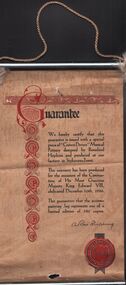
Ephemera - LYDIA CHANCELLOR COLLECTION: GUARANTEE ''CROWN DEVON'' POTTERY
... A guarantee in the form of a wall hanging which would have been issued with a special piece of 'Crown Devon' musical pottery designed by Beresford Hopkins and produced at the factory in Stoke-on-Trent. ...HANDCRAFTS ceramics Lydia Chancellor collection scroll guarantee 'Crown Devon Musical Pottery King Edward VIII royalty Royal Coronation ceramics pottery A guarantee in the form of a wall hanging which would have been issued with a special piece of 'Crown Devon' musical pottery designed by Beresford Hopkins and produced at the factory in Stoke-on-Trent. ...A guarantee in the form of a wall hanging which would have been issued with a special piece of 'Crown Devon' musical pottery designed by Beresford Hopkins and produced at the factory in Stoke-on-Trent. It is in the form of a scroll with a decorative red and black design. Produced for the Coronation of King Edward VIII who abdicated in 1936.handcrafts, ceramics, lydia chancellor, collection, scroll, guarantee, 'crown devon musical pottery, king edward viii, royalty, royal coronation, ceramics, pottery -
 Whitehorse Historical Society Inc.
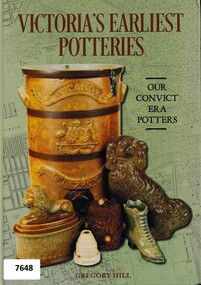
Book - Manufacturing History, 19th century, Victoria's Earliest Potteries (Our Convict Era Potters), 2019
... The study includes photographs of a range of pottery products and design styles of the time and maps locating the pottery location. ...The study includes photographs of a range of pottery products and design styles of the time and maps locating the pottery location. ...This book covers the formative years of Victoria's pottery industry during the second half of the 19th Century. It includes a section on Nunawading's Dahle's Filter and Pottery Works operating between 1870 and1876.This book covers the formative years of Victoria's pottery industry during the second half of the 19th Century. It includes a section on Nunawading's Dahlke's Filter and Pottery Works operating between 1870 and1876. The White Bros acquired the pottery in 1888 and called it Springfield Pottery (1888-1911).non-fictionThis book covers the formative years of Victoria's pottery industry during the second half of the 19th Century. It includes a section on Nunawading's Dahle's Filter and Pottery Works operating between 1870 and1876.potteries, dahlke's filter and pottery works, geal's pottery, daniel robertson, australian tesselated tile company, wunderlich, 1800's -
 Flagstaff Hill Maritime Museum and Village
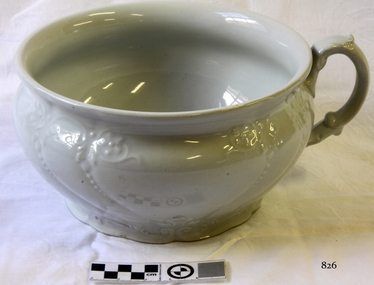
Ceramic - Chamber Pot, 1912
... The company was amongst the first British pottery firms to experiment with modernist designs associated with the art deco period. The Moderne' range was introduced in 1929 consisting of an angular shape decorated design with geometric patterns and often highlighted with silver or gold. ...pottery have told much about the beliefs, lifestyles and lives of the people who bought them and used them. In other words it gives us today a snapshot of society from the past and how people used these items in their daily lives, their likes as well as societal and design trends. warrnambool flagstaff-hill flagstaff-hill-maritime-museum shipwreck-coast flagstaff-hill-maritime-village pottery earthenware iron stone alfred meakin james meakin george meakin earthenware manufactures Chamber Pot J & G Meakin Hanley England stamped to base, with white flora design Earthenware white glazed ironstone Ceramic Chamber Pot J & G Meakin ...In the 19th and early 20th centuries, J. & G. Meakin were important, large-scale producers of good quality, ironstone tableware (‘White Granite’ ware) that met a ready market in the United States, South America, Australia, and other traditional British markets. By the 1890s the company was one of the world’s largest earthenware manufacturers. Although export teaware and tableware was the factory’s staple commodity, Meakin also manufactured toilet ware, kitchen ware and a wide range of fancy earthenware. The company was amongst the first British pottery firms to experiment with modernist designs associated with the art deco period. The Moderne' range was introduced in 1929 consisting of an angular shape decorated design with geometric patterns and often highlighted with silver or gold. This range remained in production through the 1930s. Post 1945 the company introduced the streamlined Studio shape (1953) and Horizon shape (1955) both heavily influenced by the Russell Wright ‘American Modern’ tableware. In 1964 a new Studio shape was released with tall streamlined coffee pots used as the background for many contemporary patterns now associated with the 1950s and 1960s. Designs by Jessie Tate and Eve Midwinter, some originally found on Midwinter shapes, also appear on 1970s Studio ware. The Studio range was one of Meakin’s most successful and continued in production until the late-1970s. The enormous range of floral, geometric, and abstract designs make Studio Ware collectible in its own right. In the 1970s and 1980s as part of the Wedgwood Group Meakin produced contemporary products under the ‘Bull in a China Shop’ and ‘Creative Tableware’ names. ‘Sol’ (c.1912-1963), ‘Studio’ (1953 on) and ‘Royal Staffordshire’ (post 1968) were important J. & G. Meakin Ltd trade names. Meakin marks are numerous, but all include the J. & G. Meakin name. The significance of this item and pottery generally is that often earthenware is portrayed as being a landmark in the evolution of humanity. This is because these items are the few things from the past that have survived in a tangible form. Pottery is an important functional part of society and it has a critical role to play as it helps archaeologists to date other artefacts of the same time period. Also, the decorations on pottery have told much about the beliefs, lifestyles and lives of the people who bought them and used them. In other words it gives us today a snapshot of society from the past and how people used these items in their daily lives, their likes as well as societal and design trends. Earthenware white glazed ironstoneJ & G Meakin Hanley England stamped to base, with white flora designwarrnambool, flagstaff-hill, flagstaff-hill-maritime-museum, shipwreck-coast, flagstaff-hill-maritime-village, pottery, earthenware, iron stone, alfred meakin, james meakin, george meakin, earthenware manufactures, chamber pot -
 Flagstaff Hill Maritime Museum and Village
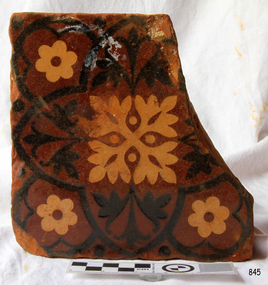
Ceramic - Tile, circa 1878
... Pottery at Stoke upon Trent, were their new range of colourfully patterned but very durable floor tiles – ideal for the high-traffic spaces in the large civic buildings then being constructed in Australia and America. These new floor tiles were “encaustic”, meaning that their designs and colours were encased “within” the depth of the tile. Rather than their decorative patterns being glazed onto the surface of the tile, their inlaid designs were created during the manufacturing process, as “coloured slips” (or liquid clay) were poured into a deep pre-moulded casting. When fired, the resulting tile was colour-fast and design...Pottery at Stoke upon Trent, were their new range of colourfully patterned but very durable floor tiles – ideal for the high-traffic spaces in the large civic buildings then being constructed in Australia and America. These new floor tiles were “encaustic”, meaning that their designs and colours were encased “within” the depth of the tile. Rather than their decorative patterns being glazed onto the surface of the tile, their inlaid designs were created during the manufacturing process, as “coloured slips” (or liquid clay) were poured into a deep pre-moulded casting. When fired, the resulting tile was colour-fast and design ...This Minton floor tile is from the wreck of the LOCH ARD along with other examples of this manufacture recovered from the wreck site and form part of the collection at Flagstaff Hill. The iron-hulled clipper ship from the Loch Line was heading for Port Phillip from London when it ran into the cliffs of Mutton Bird Island near Port Campbell and was wrecked on June 1st, 1878. The LOCH ARD was laden with high-value cargo including luxury goods intended for display at the Melbourne International Exhibition in 1880. One notable survivor from the ship’s freight manifest was the well-packed Minton porcelain peacock, a two-metre-high ceramic masterpiece of vivid glazed colours. The almost total loss of life and property from the LOCH ARD registered as a shocking tragedy for the Colony of Victoria, at a time when social confidence and economic optimism were otherwise high. The wealth generated from Gold and Wool was increasingly being spent on grandiose private residences and imposing public buildings. The demand for quality furnishings and fittings was therefore strong. Among the products consigned to burgeoning colonial markets by the Milton Pottery at Stoke upon Trent, were their new range of colourfully patterned but very durable floor tiles – ideal for the high-traffic spaces in the large civic buildings then being constructed in Australia and America. These new floor tiles were “encaustic”, meaning that their designs and colours were encased “within” the depth of the tile. Rather than their decorative patterns being glazed onto the surface of the tile, their inlaid designs were created during the manufacturing process, as “coloured slips” (or liquid clay) were poured into a deep pre-moulded casting. When fired, the resulting tile was colour-fast and design-fast. A brief history of the Loch Ard (1873-1878): - The sailing ship Loch Ard was one of the famous Loch Line ships that sailed from England to Australia. Barclay, Curdle and Co. built the three-masted iron vessel in Glasgow in 1873. It had sailed three trips to Australia and one trip to Calcutta before its fateful voyage. Loch Ard left England on March 2, 1878, under the command of recently married, 29-year-old Captain Gibbs. It was bound for Melbourne with a crew of 37, plus 17 passengers. The general cargo reflected the affluence of Melbourne at the time. Onboard were straw hats, umbrellas, perfumes, clay pipes, pianos, clocks, confectionery, linen and candles, and a heavier load of railway irons, cement, lead and copper. Other cargo included items intended for display in the Melbourne International Exhibition of 1880. The Loch Ard had been sailing for three months and was close to its destination on June 1, 1878. Captain Gibbs had expected to see land at about 3 am but the Loch Ard ran into a fog that greatly reduced visibility and there was no sign of land or the Cape Otway lighthouse. The fog lifted at 4 am and the sheer cliffs of Victoria's west coast were much closer to them than Captain Gibbs expected. He tried to manage the vessel but failed and the ship struck a reef at the base of Mutton Bird Island, near Port Campbell. The top deck loosened from the hull, and the masts and rigging crashed down, knocking passengers and crew overboard. The lifeboat was launched by Tom Pearce but crashed into the side of Loch Ard and capsized. He clung onto its overturned hull and sheltered under it. He drifted out to sea and the tide brought him back to what is now called Loch Ard Gorge. He swam to shore and found a cave for shelter. A passenger, Eva Carmichael, had raced onto the deck to find out what was happening and was confronted by towering cliffs above the ship. She was soon swept off the ship by a huge wave. Eva saw Tom Pearce on a small rocky beach and yelled to attract his attention. He swam out and dragged her to the shelter of the cave. He revived her with a bottle of brandy from a case that had washed up on the beach. Tom scaled a cliff in search of help and followed some horse hoof prints. He came from two men from Glenample Station, three and a half miles away. He told the men of the tragedy and then returned to the gorge while the two men rode back to the station to get help. They reached Loch Ard Gorge and took the two shipwreck survivors to Glenample Station to recover. Eva stayed at the station for six weeks before returning to Ireland by steamship. In Melbourne, Tom Pearce received a hero's welcome and was presented with a medal and some money. Of the 54 crew members and passengers on board, only two survived: the apprentice, Tom Pearce and the young woman passenger, Eva Carmichael, who lost her family in the tragedy. One of the most unlikely pieces of cargo to have survived the shipwreck was a Minton porcelain peacock - one of only nine in the world. The peacock was destined for the Melbourne International Exhibition in 1880. It had been well packed, which gave it adequate protection during the violent storm. Today, the Minton peacock can be seen at the Flagstaff Hill Maritime Museum in Warrnambool. From Australia's most dramatic shipwreck, it has now become Australia's most valuable shipwreck artefact and is one of very few 'objects' on the Victorian State Heritage Register. The Minton floor tile is significant for its hard-wearing yet attractive design. The shipwreck of the LOCH ARD is of State significance. Victorian Heritage Register S417. Flagstaff Hill’s collection of artefacts from LOCH ARD is significant for being one of the largest collections of artefacts from this shipwreck in Victoria. It is significant for its association with the shipwreck, which is on the Victorian Heritage Register (VHR S417). The collection is significant because of the relationship between the objects, as together they have a high potential to interpret the story of the LOCH ARD. The LOCH ARD collection is archaeologically significant as the remains of a large international passenger and cargo ship. The LOCH ARD collection is historically significant for representing aspects of Victoria’s shipping history and its potential to interpret sub-theme 1.5 of Victoria’s Framework of Historical Themes (living with natural processes). The collection is also historically significant for its association with the LOCH ARD, which was one of the worst and best-known shipwrecks in Victoria’s history. A square Minton floor tile with a black and apricot pattern against a chocolate brown background. There is a large chip missing. This decorative floor tile was recovered from the shipwreck of the LOCH ARD. On the back, or base, of the tile is inscribed the number “46” and the letters “Minton & Co Patent Stoke upon Trent”.flagstaff hill, warrnambool, shipwrecked coast, flagstaff hill maritime museum, maritime museum, shipwreck coast, flagstaff hill maritime village, great ocean road, loch line, loch ard, captain gibbs, eva carmichael, tom pearce, glenample station, mutton bird island, loch ard gorge, encaustic tile, melbourne international exhibition, floor tile, minton floor tile -
 Flagstaff Hill Maritime Museum and Village
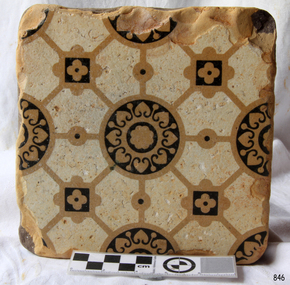
Ceramic - Tile, circa 1878
... Pottery at Stoke upon Trent were their new range of colourfully patterned but very durable floor tiles – ideal for the high-traffic spaces in the large civic buildings then being constructed in Australia and America. These new floor tiles were “encaustic”, meaning that their designs and colours were encased within the depth of the tile. Rather than their decorative patterns being glazed onto the surface of the tile, their inlaid designs were created during the manufacturing process, as “coloured slips” (or liquid clay) that were poured into a deep pre-moulded casting. When fired, the resulting tile was colour-fast and design...Pottery at Stoke upon Trent were their new range of colourfully patterned but very durable floor tiles – ideal for the high-traffic spaces in the large civic buildings then being constructed in Australia and America. These new floor tiles were “encaustic”, meaning that their designs and colours were encased within the depth of the tile. Rather than their decorative patterns being glazed onto the surface of the tile, their inlaid designs were created during the manufacturing process, as “coloured slips” (or liquid clay) that were poured into a deep pre-moulded casting. When fired, the resulting tile was colour-fast and design ...This Minton floor tile is from the wreck of the LOCH ARD. Other examples of this manufacture have been recovered from the wreck site and form part of the collection at Flagstaff Hill. The iron-hulled clipper ship from the Loch Line was heading for Port Phillip from London when it ran into the cliffs of Mutton Bird Island near Port Campbell and was wrecked on the early morning of June 1, 1878. The LOCH ARD was laden with high-value cargo including luxury goods intended for display at the Melbourne International Exhibition in 1880. One notable survivor from the ship’s freight manifest was the well-packed Minton porcelain peacock, a two-metre-high ceramic masterpiece of vivid glazed colours. The almost total loss of life and property from the LOCH ARD registered as a shocking tragedy for the Colony of Victoria, at a time when social confidence and economic optimism were otherwise high. The wealth generated from gold and wool was increasingly being spent on magnificent private residences and imposing public buildings. The demand for quality furnishings and fittings was therefore strong. Among the products consigned to burgeoning colonial markets by the Milton Pottery at Stoke upon Trent were their new range of colourfully patterned but very durable floor tiles – ideal for the high-traffic spaces in the large civic buildings then being constructed in Australia and America. These new floor tiles were “encaustic”, meaning that their designs and colours were encased within the depth of the tile. Rather than their decorative patterns being glazed onto the surface of the tile, their inlaid designs were created during the manufacturing process, as “coloured slips” (or liquid clay) that were poured into a deep pre-moulded casting. When fired, the resulting tile was colour-fast and design-fast.The Minton encaustic floor tile is significant for its method of manufacture which makes it durable as well as decorative. The shipwreck of the LOCH ARD is of State significance. Victorian Heritage Register S417. Flagstaff Hill’s collection of artefacts from LOCH ARD is significant for being one of the largest collections of artefacts from this shipwreck in Victoria. It is significant for its association with the shipwreck, which is on the Victorian Heritage Register (VHR S417). The collection is significant because of the relationship between the objects, as together they have a high potential to interpret the story of the LOCH ARD. The LOCH ARD collection is archaeologically significant as the remains of a large international passenger and cargo ship. The LOCH ARD collection is historically significant for representing aspects of Victoria’s shipping history and its potential to interpret sub-theme 1.5 of Victoria’s Framework of Historical Themes (living with natural processes). The collection is also historically significant for its association with the LOCH ARD, which was one of the worst and best-known shipwrecks in Victoria’s history.A square Minton floor tile with a black and beige pattern against a white base. This encaustic floor tile was recovered from the shipwreck of the LOCH ARD. On the back, or base, of the tile is inscribed the number “46” and the letters “Minton & Co Patent Stoke upon Trent”.flagstaff hill, warrnambool, shipwrecked coast, flagstaff hill maritime museum, maritime museum, shipwreck coast, flagstaff hill maritime village, great ocean road, loch line, loch ard, mutton bird island, loch ard gorge, minton floor tile, encaustic tile, melbourne international exhibition, floor tile -
 Flagstaff Hill Maritime Museum and Village
Container - Ink Bottle, Royal Doulton, 1853-1878
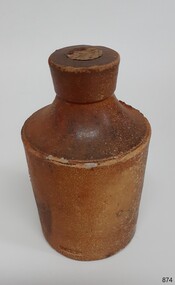
... The company always made some more decorative items, initially still mostly stoneware, and from the 1860s the firm made considerable efforts to get a reputation for design, in which it was largely successful, as one of the first British makers of art pottery. ...The company always made some more decorative items, initially still mostly stoneware, and from the 1860s the firm made considerable efforts to get a reputation for design, in which it was largely successful, as one of the first British makers of art pottery. ...The ink bottle was made by the Royal Doulton company which began as a partnership between John Doulton, Martha Jones, and John Wattis an English ceramic and home accessories manufacturer founded in 1815. Operating initially in Vauxhall, London, it later moved to Lambeth, In1882 it opened a factory in Burslem, Stoke on Trent, in the centre of English pottery. The business specialised in making salt-glazed stoneware articles, including utilitarian or decorative bottles, jugs and jars, much of it intended for inns and pubs. The backbone of the business was a wide range of utilitarian wares, mostly stoneware's, including storage jars, tankards and the like, and later extending to pipes for drains, lavatories and other bathroom ceramics. From 1853 to 1902 its wares were marked Doulton & Co., then from 1902, when a royal warrant was given, wares were marked Royal Doulton. The company always made some more decorative items, initially still mostly stoneware, and from the 1860s the firm made considerable efforts to get a reputation for design, in which it was largely successful, as one of the first British makers of art pottery. Initially, this was done through artistic stoneware made in Lambeth, but in 1882 the firm bought a Burslem factory, which was mainly intended for making bone china table wares and decorative items. History of the Loch Ard: The Loch Ard got its name from ”Loch Ard” a loch that lies to the west of Aberfoyle, and the east of Loch Lomond. It means "high lake" in Scottish Gaelic. The vessel belonged to the famous Loch Line which sailed many vessels from England to Australia. The Loch Ard was built in Glasgow by Barclay, Curdle and Co. in 1873, the vessel was a three-masted square-rigged iron sailing ship that measured 79.87 meters in length, 11.58 m in width, and 7 m in depth with a gross tonnage of 1693 tons with a mainmast that measured a massive 45.7 m in height. Loch Ard made three trips to Australia and one trip to Calcutta before its fateful voyage. Loch Ard left England on March 2, 1878, under the command of 29-year-old Captain Gibbs, who was newly married. The ship was bound for Melbourne with a crew of 37, plus 17 passengers. The general cargo reflected the affluence of Melbourne at the time. Onboard were straw hats, umbrellas, perfumes, clay pipes, pianos, clocks, confectionery, linen and candles, as well as a heavier load of railway irons, cement, lead and copper. There were other items included that were intended for display in the Melbourne International Exhibition of 1880. The voyage to Port Phillip was long but uneventful. Then at 3 am on June 1, 1878, Captain Gibbs was expecting to see land. But the Loch Ard was running into a fog which greatly reduced visibility. Captain Gibbs was becoming anxious as there was no sign of land or the Cape Otway lighthouse. At 4 am the fog lifted and a lookout aloft announced that he could see breakers. The sheer cliffs of Victoria's west coast came into view, and Captain Gibbs realised that the ship was much closer to them than expected. He ordered as much sail to be set as time would permit and then attempted to steer the vessel out to sea. On coming head-on into the wind, the ship lost momentum, the sails fell limp and Loch Ard's bow swung back towards land. Gibbs then ordered the anchors to be released in an attempt to hold their position. The anchors sank some 50 fathoms - but did not hold. By this time the ship was among the breakers and the tall cliffs of Mutton Bird Island rose behind. Just half a mile from the coast, the ship's bow was suddenly pulled around by the anchor. The captain tried to tack out to sea, but the ship struck a reef at the base of Mutton Bird Island, near Port Campbell. Waves subsequently broke over the ship and the top deck became loosened from the hull. The masts and rigging came crashing down knocking passengers and crew overboard. When a lifeboat was finally launched, it crashed into the side of Loch Ard and capsized. Tom Pearce, who had launched the boat, managed to cling to its overturned hull and shelter beneath it. He drifted out to sea and then on the flood tide came into what is now known as Lochard Gorge. He swam to shore, bruised and dazed, and found a cave in which to shelter. Some of the crew stayed below deck to shelter from the falling rigging but drowned when the ship slipped off the reef into deeper water. Eva Carmichael a passenger had raced onto the deck to find out what was happening only to be confronted by towering cliffs looming above the stricken ship. In all the chaos, Captain Gibbs grabbed Eva and said, "If you are saved Eva, let my dear wife know that I died like a sailor". That was the last Eva Carmichael saw of the captain. She was swept off the ship by a huge wave. Eva saw Tom Pearce on a small rocky beach and yelled to attract his attention. He dived in and swam to the exhausted woman and dragged her to shore. He took her to the cave and broke the open case of brandy which had washed up on the beach. He opened a bottle to revive the unconscious woman. A few hours later Tom scaled a cliff in search of help. He followed hoof prints and came by chance upon two men from nearby Glenample Station three and a half miles away. In a complete state of exhaustion, he told the men of the tragedy. Tom then returned to the gorge while the two men rode back to the station to get help. By the time they reached Loch Ard Gorge, it was cold and dark. The two shipwreck survivors were taken to Glenample Station to recover. Eva stayed at the station for six weeks before returning to Ireland by steamship. In Melbourne, Tom Pearce received a hero's welcome. He was presented with the first gold medal of the Royal Humane Society of Victoria and a £1000 cheque from the Victorian Government. Concerts were performed to honour the young man's bravery and to raise money for those who lost family in the disaster. Of the 54 crew members and passengers on board, only two survived: the apprentice, Tom Pearce and the young woman passenger, Eva Carmichael, who lost her family in the tragedy. Ten days after the Lochard tragedy, salvage rights to the wreck were sold at auction for £2,120. Cargo valued at £3,000 was salvaged and placed on the beach, but most washed back into the sea when another storm developed. The wreck of Lochard still lies at the base of Mutton Bird Island. Much of the cargo has now been salvaged and some items were washed up into Lochard Gorge. Cargo and artefacts have also been illegally salvaged over many years before protective legislation was introduced in March 1982. One of the most unlikely pieces of cargo to have survived the shipwreck was a Minton majolica peacock- one of only nine in the world. The peacock was destined for the Melbourne 1880 International Exhibition. It had been well packed, which gave it adequate protection during the violent storm. Today the Minton peacock can be seen at the Flagstaff Hill Maritime Museum in Warrnambool. From Australia's most dramatic shipwreck, it has now become Australia's most valuable shipwreck artifact and is one of very few 'objects' on the Victorian State Heritage Register.An early utilitarian stoneware item made by a well-known company that specialised in making salt-glazed items that later earned a reputation for making stoneware art objects. Of additional significance is that it was recovered from the wreck of the Loch Ard. A shipwreck that is of additional significance as it is registered on the Victorian Heritage Register ( S 417). Flagstaff Hill has a varied collection of artefacts from Loch Ard and its collection is significant for being one of the largest accumulations of artefacts from this notable Victorian shipwreck of which the subject items are a small part. The collections objects give us a snapshot of how we can interpret the story of this tragic event. The collection is also archaeologically significant as it represents aspects of Victoria's shipping history that allows us to interpret Victoria's social and historical themes of the time. Through is associated with the worst and best-known shipwreck in Victoria's history. Salt glazed stoneware ink bottle, large capacity, tapered lip and body, two-tone brown with some encrustation on surface, still sealed with cork. Inscription in clay. Recovered from the wreck of the LOCH ARD.Stamped into clay "DOULTON LAMBETH"flagstaff hill, warrnambool, flagstaff hill maritime museum, shipwreck coast, flagstaff hill maritime village, great ocean road, loch line, loch ard, captain gibbs, eva carmichael, tom pearce, glenample station, mutton bird island, loch ard gorge, ink bottle, bulk ink bottle, writing accessory, stationery, stoneware, doulton lambeth, royal doulton, writing equipment -
 Flagstaff Hill Maritime Museum and Village
Ceramic - Floor Tile, circa 1878
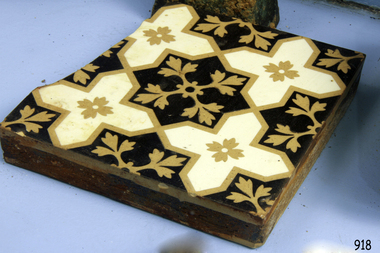
... pottery at Stoke upon Trent, were their new range of colourfully patterned but very durable floor tiles ideal for the high-traffic spaces in the large civic buildings then being constructed in Australia and America. These new floor tiles were “encaustic”, meaning that their designs and colours were encased “within” the depth of the tile. Rather than their decorative patterns being glazed onto the surface of the tile, their inlaid designs were created during the manufacturing process, as “coloured slips” (or liquid clay) were poured into a deep pre-molded casting. When fired, the resulting tile was colours-fast and design...pottery at Stoke upon Trent, were their new range of colourfully patterned but very durable floor tiles ideal for the high-traffic spaces in the large civic buildings then being constructed in Australia and America. These new floor tiles were “encaustic”, meaning that their designs and colours were encased “within” the depth of the tile. Rather than their decorative patterns being glazed onto the surface of the tile, their inlaid designs were created during the manufacturing process, as “coloured slips” (or liquid clay) were poured into a deep pre-molded casting. When fired, the resulting tile was colours-fast and design ...This Minton floor tile is from the wreck of the Loch Ard and is currently on display in the Great Circle Gallery at Flagstaff Hill. The iron hulled clipper ship from the Loch Line was heading for Port Phillip from London, when it ran into the cliffs of Mutton Bird Island near Port Campbell. The Loch Ard was laden with a high value cargo including luxury goods intended for display at the Melbourne International Exhibition in 1880. One notable survivor from the ship’s freight manifest was the well packed Minton porcelain peacock, a two meter high ceramic masterpiece of vivid glazed colours. (This is also on display in the Great Circle Gallery). The almost total loss of life and property from the Loch Ard registered as a shocking tragedy for the Colony of Victoria, at a time when social confidence and economic optimism were otherwise high. Wealth generated from Gold and Wool was increasingly being spent on grandiose private residences and imposing public buildings. The demand for quality furnishings and fittings was therefore strong. Among the products consigned to burgeoning colonial markets by the Milton pottery at Stoke upon Trent, were their new range of colourfully patterned but very durable floor tiles ideal for the high-traffic spaces in the large civic buildings then being constructed in Australia and America. These new floor tiles were “encaustic”, meaning that their designs and colours were encased “within” the depth of the tile. Rather than their decorative patterns being glazed onto the surface of the tile, their inlaid designs were created during the manufacturing process, as “coloured slips” (or liquid clay) were poured into a deep pre-molded casting. When fired, the resulting tile was colours-fast and design-fast. The Minton floor tile is significant for its hard-wearing yet attractive design. The shipwreck of the Loch Ard is of significance for Victoria and is registered on the Victorian Heritage Register ( S 417). Flagstaff Hill has a varied collection of artefacts from Loch Ard and its collection is significant for being one of the largest accumulations of artefacts from this notable Victorian shipwreck of which the subject items are a small part. The collections of objects give us a snapshot of how we can interpret the story of this tragic event. The collection is also archaeologically significant as it represents aspects of Victoria's shipping history that allows us to interpret Victoria's social and historical themes of the time. Through is associated with the worst and best-known shipwreck in Victoria's history. A square Minton floor tile with a dark brown, beige and white pattern. The tile has a piece broken off along one side and some chipping along the edges. This ‘encaustic’ floor tile was recovered from the shipwreck of the LOCH ARD. Branded "... MINTON&CO Patent ..."flagstaff hill, warrnambool, flagstaff hill maritime museum, shipwreck coast, flagstaff hill maritime village, great ocean road, loch line, loch ard, captain gibbs, eva carmichael, tom pearce, glenample station, mutton bird island, minton floor tile, encaustic tile, melbourne international exhibition, floor tile -
 Flagstaff Hill Maritime Museum and Village
Functional object - Floor ash Tray, 1900 to 1960s
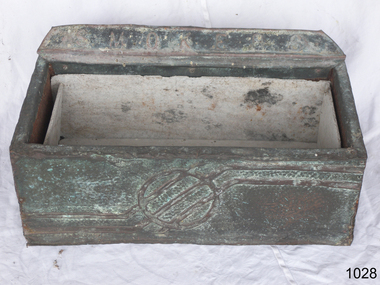
... The word ashtray came into use around the 1920 and is a receptacle for ash from cigarettes and cigars and are typically made of fire retardant material such as glass, heat resistant plastic, pottery, metal, or stone. The most common ashtray design is a shallow cylinder with a flat base, designed to rest on a table. ...The word ashtray came into use around the 1920 and is a receptacle for ash from cigarettes and cigars and are typically made of fire retardant material such as glass, heat resistant plastic, pottery, metal, or stone. The most common ashtray design is a shallow cylinder with a flat base, designed to rest on a table. ...The word ashtray came into use around the 1920 and is a receptacle for ash from cigarettes and cigars and are typically made of fire retardant material such as glass, heat resistant plastic, pottery, metal, or stone. The most common ashtray design is a shallow cylinder with a flat base, designed to rest on a table. Other ashtrays, particularly in public places, are either wall or floor mounted. While simple, utilitarian forms of ashtrays existed long before the 19th century, it was during the start of the 20th century that the design, aesthetics and their popularity took off. As more women began to smoke. in the early 1900s, the ashtray went closer to being an art form as many women avoided the use of the traditional ashtray as it failed to reflect their feminine values, regarded as an item rather basic in design the general societal through of the time was that smoking was an activity exclusive to men. What emerged were detailed, often very fancy ashtrays acceptable to women depicting either pastoral scenes or vibrantly coloured landscapes. As time went on, and the onset of women smoking both cigars and cigarettes became less of a departure from the average person, ashtrays saw a decline in design and aesthetics beginning more of a shift towards practicality. The subject item is a primitive form of ashtray used in public spaces any time from the 1920-1960s and is not associated with an historic person or event. However the item could have come from the Warrnambool Town Hall given the inscription on the base of the item.Ash tray-large rectangular floor model with cement sheet lining. Made from a wooden box covered with textured metal on the outsideThe metal has a relief design embossed at the top back "smokers" and "Town Hall" printed on bottom.flagstaff hill, warrnambool, flagstaff-hill-maritime-museum, maritime-museum, shipwreck-coast, flagstaff-hill-maritime-village, ash tray, town hall, cigarette tray, smoker's ash tray -
 Flagstaff Hill Maritime Museum and Village
Domestic object - Dinner plate, William Adams, before 1863-1875
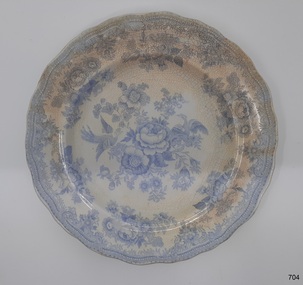
... design was produced as high quality, decorative dinnerware by the potters in the Staffordshire area of England, from the late 1830’s, but no-one is sure exactly who the original designer was. This particular example was made by William Adams of Tunstall, Stoke-on-Trent, Staffordshire at the Greengates Potteries probably after or around 1863 and is believed to have been part of a passengers goods. The Adams family have a long line of making pottery...design was produced as high quality, decorative dinnerware by the potters in the Staffordshire area of England, from the late 1830’s, but no-one is sure exactly who the original designer was. This particular example was made by William Adams of Tunstall, Stoke-on-Trent, Staffordshire at the Greengates Potteries probably after or around 1863 and is believed to have been part of a passengers goods. The Adams family have a long line of making pottery ...The Asiatic Pheasant pattern is a transfer design and was the most popular design of the 18th & 19th centuries and is still being produced today. The design was produced as high quality, decorative dinnerware by the potters in the Staffordshire area of England, from the late 1830’s, but no-one is sure exactly who the original designer was. This particular example was made by William Adams of Tunstall, Stoke-on-Trent, Staffordshire at the Greengates Potteries probably after or around 1863 and is believed to have been part of a passengers goods. The Adams family have a long line of making pottery since 1584 until 1966 when they were acquired by the Wedgewood group of companies. But this items pattern is attributed to the Adams potteries. History of the Loch Ard: The Loch Ard got its name from ”Loch Ard” a loch which lies to the west of Aberfoyle, and the east of Loch Lomond. It means "high lake" in Scottish Gaelic. The vessel belonged to the famous Loch Line which sailed many vessels from England to Australia. The Loch Ard was built in Glasgow by Barclay, Curle & Co. in 1873, the vessel was a three-masted square-rigged iron sailing ship that measured 79.87 meters in length, 11.58 m in width, and 7 m in depth with a gross tonnage of 1693 tons with a mainmast that measured a massive 45.7 m in height. Loch Ard made three trips to Australia and one trip to Calcutta before its fateful voyage. Loch Ard left England on March 2, 1878, under the command of 29-year-old Captain Gibbs, who was newly married. The ship was bound for Melbourne with a crew of 37, plus 17 passengers. The general cargo reflected the affluence of Melbourne at the time. Onboard were straw hats, umbrella, perfumes, clay pipes, pianos, clocks, confectionery, linen and candles, as well as a heavier load of railway irons, cement, lead and copper. There were other items included that were intended for display in the Melbourne International Exhibition of 1880. The voyage to Port Phillip was long but uneventful. Then at 3 am on June 1, 1878, Captain Gibbs was expecting to see land. But the Loch Ard was running into a fog which greatly reduced visibility. Captain Gibbs was becoming anxious as there was no sign of land or the Cape Otway lighthouse. At 4 am the fog lifted and a lookout aloft announced that he could see breakers. The sheer cliffs of Victoria's west coast came into view, and Captain Gibbs realised that the ship was much closer to them than expected. He ordered as much sail to be set as time would permit and then attempted to steer the vessel out to sea. On coming head-on into the wind, the ship lost momentum, the sails fell limp and Loch Ard's bow swung back towards land. Gibbs then ordered the anchors to be released in an attempt to hold its position. The anchors sank some 50 fathoms - but did not hold. By this time the ship was among the breakers and the tall cliffs of Mutton Bird Island rose behind. Just half a mile from the coast, the ship's bow was suddenly pulled around by the anchor. The captain tried to tack out to sea, but the ship struck a reef at the base of Mutton Bird Island, near Port Campbell. Waves subsequently broke over the ship and the top deck became loosened from the hull. The masts and rigging came crashing down knocking passengers and crew overboard. When a lifeboat was finally launched, it crashed into the side of Loch Ard and capsized. Tom Pearce, who had launched the boat, managed to cling to its overturned hull and shelter beneath it. He drifted out to sea and then on the flood tide came into what is now known as Lochard Gorge. He swam to shore, bruised and dazed, and found a cave in which to shelter. Some of the crew stayed below deck to shelter from the falling rigging but drowned when the ship slipped off the reef into deeper water. Eva Carmichael a passenger had raced onto the deck to find out what was happening only to be confronted by towering cliffs looming above the stricken ship. In all the chaos, Captain Gibbs grabbed Eva and said, "If you are saved Eva, let my dear wife know that I died like a sailor". That was the last Eva Carmichael saw of the captain. She was swept off the ship by a huge wave. Eva saw Tom Pearce on a small rocky beach and yelled to attract his attention. He dived in and swam to the exhausted woman and dragged her to shore. He took her to the cave and broke the open case of brandy which had washed up on the beach. He opened a bottle to revive the unconscious woman. A few hours later Tom scaled a cliff in search of help. He followed hoof prints and came by chance upon two men from nearby Glenample Station three and a half miles away. In a complete state of exhaustion, he told the men of the tragedy. Tom then returned to the gorge while the two men rode back to the station to get help. By the time they reached Loch Ard Gorge, it was cold and dark. The two shipwreck survivors were taken to Glenample Station to recover. Eva stayed at the station for six weeks before returning to Ireland by steamship. In Melbourne, Tom Pearce received a hero's welcome. He was presented with the first gold medal of the Royal Humane Society of Victoria and a £1000 cheque from the Victorian Government. Concerts were performed to honour the young man's bravery and to raise money for those who lost family in the disaster. Of the 54 crew members and passengers on board, only two survived: the apprentice, Tom Pearce and the young woman passenger, Eva Carmichael, who lost her family in the tragedy. Ten days after the Lochard tragedy, salvage rights to the wreck were sold at auction for £2,120. Cargo valued at £3,000 was salvaged and placed on the beach, but most washed back into the sea when another storm developed. The wreck of Lochard still lies at the base of Mutton Bird Island. Much of the cargo has now been salvaged and some items were washed up into Lochard Gorge. Cargo and artefacts have also been illegally salvaged over many years before protective legislation was introduced in March 1982. One of the most unlikely pieces of cargo to have survived the shipwreck was a Minton majolica peacock- one of only nine in the world. The peacock was destined for the Melbourne 1880 International Exhibition in. It had been well packed, which gave it adequate protection during the violent storm. Today the Minton peacock can be seen at the Flagstaff Hill Maritime Museum in Warrnambool. From Australia's most dramatic shipwreck it has now become Australia's most valuable shipwreck artifact and is one of very few 'objects' on the Victorian State Heritage Register. The shipwreck of the Loch Ard is of significance for Victoria and is registered on the Victorian Heritage Register ( S 417). Flagstaff Hill has a varied collection of artefacts from Loch Ard and its collection is significant for being one of the largest accumulation of artefacts from this notable Victorian shipwreck of which the subject items are a small part. The collections objects give us a snapshot of how we can interpret the story of this tragic event. The collection is also archaeologically significant as it represents aspects of Victoria's shipping history that allows us to interpret Victoria's social and historical themes of the time. Through is associated with the worst and best-known shipwreck in Victoria's history. Plate recovered from the wreck of the Loch Ard. Earthenware dinner plate with blue and white transfer design (Asiatic Pheasant) with a clear over-glaze. The outer rim is scalloped. Stickers with inscriptions "Rec 373 A" "L 102" "From Loch Ard Wreck (1878) - - -" Design logo [Floral wreath with ribbon and text "Asiatic Pheasant" and text below "- - - -"}flagstaff hill, warrnambool, flagstaff hill maritime museum, shipwreck coast, flagstaff hill maritime village, great ocean road, loch line, loch ard, captain gibbs, eva carmichael, tom pearce, glenample station, mutton bird island, loch ard gorge, asiatic pheasant, china dinner plate, earthenware plate, w adams potteries -
 Flagstaff Hill Maritime Museum and Village
Ceramic - Serving Plate, Edward Challinor, Circa1862-1891
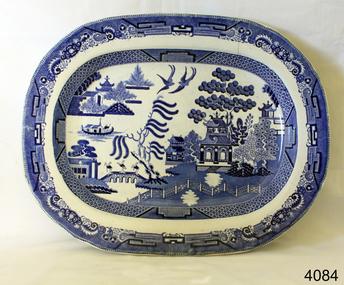
... An early piece of earthenware pottery made in England for the Australian colonial market around the mid to late 19th century. warrnambool shipwrecked-coast flagstaff-hill flagstaff-hill-maritime-museum shipwreck-coast flagstaff-hill-maritime-village Earthenware Ceramic Willow Pattern Serving Plate E & C Challinor Potteries Rope knot motif printed on back in blue with letters EC Serving plate white body, smooth rim, and blue oriental design Ceramic Serving Plate Edward Challinor ...The pottery was at Fenton, Stoke on Trent, Staffordshire UK and was established in 1825, by C J & GM Mason, they were succeeded by Mr. Samuel Boyle from whom the works passed into the hands of E & C Challinor, formally E Challinor & Co. Of Sandyford and Tunstall. The partners in Sandyford and Tunstall works are recorded as Edward Challinor Jnr and Charles Challinor Jnr and is presumably they are the sons of the partners of the Fenton pottery business. They produced china of white granite, printed sponged common earthenware for the American, Australian, and other foreign and colonial markets. The main goods produced were tea, coffee, breakfast, dinner, and toilet ceramic sets as well as other earthenware goods. Their pottery marks were the Staffordshire rope knot with or without E & C Challinor or just E C. An early piece of earthenware pottery made in England for the Australian colonial market around the mid to late 19th century.Serving plate white body, smooth rim, and blue oriental designRope knot motif printed on back in blue with letters EC warrnambool, shipwrecked-coast, flagstaff-hill, flagstaff-hill-maritime-museum, shipwreck-coast, flagstaff-hill-maritime-village, earthenware, ceramic, willow pattern, serving plate, e & c challinor, potteries -
 Flagstaff Hill Maritime Museum and Village
Ceramic - Gravy Boat and Saucer, Burleigh Pottery, 1930
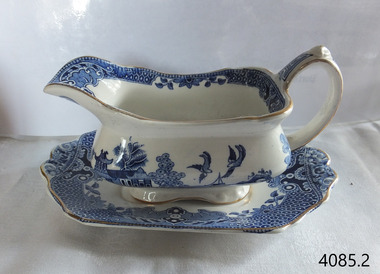
... design...Burleigh Pottery...pottery over many generations and exporting their products all over the world. Its designs are still in use today, demonstrating the longevity and significance of the Burleigh Ware trade mark. Flagstaff Hill Flagstaff Hill Maritime Museum and Village Warrnambool Maritime Museum Maritime Village Great Ocean Road Shipwreck Coast Willow pattern Willow Ware Burleigh Ware made in England blue and white china gravy boat gravy jug gravy saucer serving ware domestic object matching jug and saucer oriental design Burleigh Pottery Burgess & Leigh Burleigh Ware: "WILLOW" within a floral decoration, and "Made in England" Gravy boat with curved handle, and a matching saucer. ...Burleigh Pottery, also known as Burgess & Leigh, is the name of a pottery manufacturer in Middleport, Stoke-on-Trent. The business specialises in traditionally shaped and patterned domestic earthenware of high quality. The business was established in 1851 at the Central Pottery in Burslem as Hulme and Booth. The pottery was taken over in 1862 by William Leigh and Frederick Rathbone Burgess, and traded from that date as Burgess & Leigh. The trademark "Burleigh", used from the 1930s, is a combination of the two names. Burgess and Leigh moved to different works, first in 1868 to the Hill Pottery in Burslem and then in 1889 to the present factory at Middleport, which at the time was regarded as a model pottery. Its scale and linear organisation was in contrast to other potteries' constricted sites and haphazard layout of their working spaces. In 1887, Davenport Pottery was acquired by Burleigh primarily for its moulds. These historic moulds are still used today in the production of Burleigh ware. Leigh and Burgess died in 1889 and 1895, respectively, and were succeeded by their sons, Edmund Leigh and Richard Burgess. On Richard's death in 1912, the business passed entirely into the ownership of the Leigh family. In 1919, it became a private limited company, Burgess & Leigh Ltd. The years between the wars are often regarded as the company's "golden age", with many extremely talented designers and artists such as Harold Bennett, Charles Wilkes and Ernest Bailey. Perhaps the best known was Charlotte Rhead, who worked between 1926 and 1931, noted particularly for her work in tubelining. By 1939, the factory was employing over 500 people. The business took great pains, from as early as 1897, to build up a thriving export network, concentrating primarily on the Empire, later becoming the Commonwealth and American markets, and focusing later on Europe. After a run of financial difficulty, the company was sold in 1999 to the Dorling family, Rosemary and William Dorling, and traded as Burgess Dorling & Leigh. In 2010, it was acquired by Denby Holdings Ltd, the parent company of Denby Pottery.Burleigh was a significant company producing pottery over many generations and exporting their products all over the world. Its designs are still in use today, demonstrating the longevity and significance of the Burleigh Ware trade mark.Gravy boat with curved handle, and a matching saucer. The set has an overall rectangular design, with blue and white willow pattern on both pieces. The edges of the boat and saucer have gold line trim. The undersides of both pieces have a blue maker's mark stamp. The Willow pattern Burleigh Ware pieces were made in England.Burleigh Ware: "WILLOW" within a floral decoration, and "Made in England"flagstaff hill, flagstaff hill maritime museum and village, warrnambool, maritime museum, maritime village, great ocean road, shipwreck coast, willow pattern, willow ware, burleigh ware, made in england, blue and white china, gravy boat, gravy jug, gravy saucer, serving ware, domestic object, matching jug and saucer, oriental design, burleigh pottery, burgess & leigh -
 Federation University Historical Collection
Document, Waller and Chester, Ballarat School of Mines and Industries Ballarat: The Art School, c1948, c1948
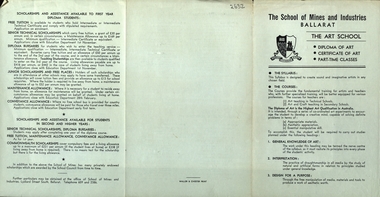
... design...scholarships...diploma of art in pottery...Evening: Dressmaking, Weaving, Leatherwork, pottery, Metalwork, Painting, Sculpture, Ticket Writing, Lettering, Figure Drawing. ballarat technical art school art diploma of art certificate of art part-time classes syllabus design scholarships diploma of art in pottery diploma of art in advertising art education Dressmaking Weaving Leatherwork Pottery Metalwork Painting Sculpture Junior Art Dressmaking Weaving Leatherwork pottery Metalwork Painting Sculpture Ticket Writing Lettering Figure Drawing Two fold, 6 page information flyer on classes held at the Ballarat Technical Art School. ...Entrance requirements for a full-course student was an Intermediate Certificate of equivalent. The Certificate of Art was a two year course of basic study to enable students to undertake a further two years of specialised training in a chosen field of art. The Diploma of Art was a two-year course of specialised training available to students, who have passed the Certificate of Art Examination or its equivalent. Candidates of the examination must be at least 19 years of age, must have completed two years' full -time training or not less than three years' part-time training, and must present for the Matriculation examination for English Expression. Part-Time classes at the Ballarat Technical Art School c1948 were: Day: Dressmaking, Weaving, Leatherwork, Pottery, Metalwork, Painting, Sculpture, Junior Art. Evening: Dressmaking, Weaving, Leatherwork, pottery, Metalwork, Painting, Sculpture, Ticket Writing, Lettering, Figure Drawing. Two fold, 6 page information flyer on classes held at the Ballarat Technical Art School. The Art school offered Diploma of Art, Certificate of Art and Part-time classes.ballarat technical art school, art, diploma of art, certificate of art, part-time classes, syllabus, design, scholarships, diploma of art in pottery, diploma of art in advertising, art education, dressmaking, weaving, leatherwork, pottery, metalwork, painting, sculpture, junior art, dressmaking, weaving, leatherwork, pottery, metalwork, painting, sculpture, ticket writing, lettering, figure drawing -
 Flagstaff Hill Maritime Museum and Village
Domestic object - Jug
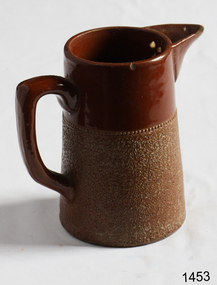
... pottery once a week! Even though we have three hour classes, it’s often just not enough time! Here is an overview of some of the processes so you have a bit more grasp on some of the technical stuff! Step One – Design...pottery once a week! Even though we have three hour classes, it’s often just not enough time! Here is an overview of some of the processes so you have a bit more grasp on some of the technical stuff! Step One – Design ...The Process of Making Pottery Decorating, Firing, Glazing, Making, Technical There is a rhythm and flow to clay. It can’t be done all at once! Even the making process! It can take weeks to get everything done, especially if you can only work on your pottery once a week! Even though we have three hour classes, it’s often just not enough time! Here is an overview of some of the processes so you have a bit more grasp on some of the technical stuff! Step One – Design There are SO many ideas out there for making stuff in clay! From delicate porcelain jewellery, through to heavy sculptural work and everything in between. Deciding your direction is sometimes not that easy – when you first start, try everything, you will naturally gravitate to the style that you enjoy! The options and variations are endless and can get a wee bit overwhelming too! Check in with me before you start to ensure your ideas will work, what order you might do things, how you could achieve the look you are seeking and any other technical data required! Step Two – Making Clay is thixotropic. This means that as you work with it, the clay first gets sloppier and wetter, before is begins to dry in the atmosphere. For most things, you simply can’t do all parts of the project at once. An example of work order might look like: Get last weeks work out from the shelves Prepare clay for today’s work – roll your clay, prepare balls for throwing, make the first stage of a pinch pot) Clean up last week’s work and put it on the shelf for bisque firing Check that you have any glazing to do – and do enough of it that you will have time to finish your main project Do the next step of your next project – there might be a further step that can’t be complete immediately, in that case, wrap your work well and put onto the shelves. Letting your work rest for a while can really help keep your work clean and professional looking. Many things require bagging under plastic to keep it ready for work the next week – put your name on the outside of the bag so you can find your work easily. We have stickers and markers. Consider how you want to decorate your work – coloured slip can be applied at a fairly wet stage (remembering that it will make your work even wetter!). Trying to apply slip to dry clay won’t work! If you want to do sgraffito – you will need to keep the work leather hard (a state of dryness where you can still work the clay with a little effort and a little water and care). Step Three – Drying Most of the time your work can go into the rack uncovered to let it dry out for the following week. If you want to continue forming or shaping you will need to double bag your work – put your work on a suitable sized bat and put the bat in a bag so the base of the bag is under the bat, then put another bag over the top of the work and tuck the top of the bag under the bat. If you want to trim (or turn) your thrown work the following week, it should also be double bagged. If your work is large, delicate, or of uneven thicknesses, you should lightly cover your work for drying. When considering the drying process, bare in mind the weather, humidity and wind! The hotter and dryer, the faster things dry and work can dry unevenly in the shelves – this can lead to cracking – another time to lightly cover your work for drying. Step Four – Trimming and Cleaning Up Your work is dry! It is called greenware now and it is at it’s most fragile! Handle everything with two hands. I often refer to soft hands – keep everything gentle and with your fingers spread as much as possible. Try to not pick up things like plates too much, and always with both hands! Before your work can be bisque fired it should be “cleaned up”. You work won’t go into the kiln if it has sharp edges – when glazed, sharp edges turn into razor blades! Use a piece of fly wire to rub the work all over – this will scratch a little so be light handed. Use a knife or metal kidney to scrape any areas that require a bit more dynamic treatment than the fly wire offers! Finally, a very light wipe over with a slightly damp sponge can help soften and soothe all of your edges and dags! Trimming thrown work: If you are planning to trim (or turn) your thrown work (and you should be), make sure you bag it well – your work should be leather hard to almost dry for easiest trimming. Use this step to finish the work completely – use a metal kidney to polish the surface, or a slightly damp sponge to give a freshly thrown look. Wipe the sponge around the rim after trimming, and check the inside of the pot for dags! Trimming slip cast work: Usually I will trim the rims of your work on the wheel the following day to make that stage easier, however you will still need to check your work for lumps and bumps. Last but not least – check that your name is still clearly on the bottom of your work. Step Five – Bisque Firing When the work is completely dry it can go into the bisque kiln. The bisque kiln is fired to 1000°C. This process burns off the water in the clay as well as some of the chemically bound water. The structure of the clay is not altered that much at this temperature. Inside the bisque kiln, the work is stacked a little, small bowl inside a larger bowl and onto a heavy plate. Smaller items like decorations or drink coasters might get stacked several high. Consideration is paid to the weight of the stack and shape of the work. A bisque kiln can fire about one and a half times the amount of work that the glaze kiln can fire. The firing takes about 10 hours to complete the cycle and about two days to cool down. Once it has been emptied the work is placed in the glaze room ready for you to decorate! Step Six – Glazing Decorating your work with colour can be a lot of fun – and time consuming! There are three main options for surface treatment at this stage: Oxide Washes Underglazes Glazes Washes and underglazes do not “glaze” the work – It will still need a layer of glaze to fully seal the clay (washes don’t need glaze on surfaces not designed for food or liquid as they can gloss up a little on their own). Underglazes are stable colourants that turn out pretty much how they look in the jar. They can be mixed with each other to form other colours and can be used like water colours to paint onto your work. Mostly they should have a clear glaze on top to seal them. Oxides are a different species – the pink oxide (cobalt) wash turns out bright blue for instance. They don’t always need a glaze on top, and some glazes can change the colour of the wash! The glazes need no other “glaze” on top! Be careful of unknown glaze interactions – you can put any combination of glaze in a bowl or on a plate, but only a single glaze on the outside of any vertical surface! Glazes are a chemical reaction under heat. We don’t know the exact chemicals in the Mayco glazes we use. I can guess by the way they interact with each other, however, on the whole, you need to test every idea you have, and not run the test on a vertical surface! Simply put, glaze is a layer of glass like substance that bonds with the clay underneath. Clay is made of silica, alumina and water. Glaze is made of mostly silica. Silica has a melting point of 1700°C and we fire to 1240°C. The silica requires a “flux” to help it melt at the lower temperature. Fluxes can be all sorts of chemicals – a common one is calcium – calcium has a melting point of 2500°C, however, together they both melt at a much lower temperature! Colourants are metal oxides like cobalt (blue), chrome (green through black), copper (green, blue, even red!), manganese (black, purple and pink) iron (red brown), etc. Different chemicals in the glaze can have dramatic effects. for example, barium carbonate (which we don’t use) turns manganese bright pink! Other elements can turn manganese dioxide brown, blue, purple and reddish brown. Manganese dioxide is a flux in and of itself as well. So, glazes that get their black and purple colours, often interact with other glazes and RUN! Our mirror black is a good example – it mixes really well with many glazes because it fluxes them – causes them to melt faster. It will also bring out many beautiful colours in the glazes because it’s black colouring most definitely comes from manganese dioxide! Glaze chemistry is a whole subject on it’s own! We use commercial Mayco glazes on purpose – for their huge range of colour possibilities, stability, cool interactions, artistic freedom with the ability to easily brush the glazes on and ease of use. We currently have almost 50 glazes on hand! A major project is to test the interactions of all glazes with each other. That is 2,500 test tiles!!!! I’m going to make the wall behind the wheels the feature wall of pretty colours! Step Seven – Glaze (Gloss or sometimes called “Glost”) Firing Most of the time this is the final stage of making your creation (but not always!) The glaze kiln goes to 1240°C. This is called cone 6, or midrange. It is the low end of stoneware temperatures. Stoneware clays and glazes are typically fired at cone 8 – 10, that is 1260 – 1290°C. The energy requirement to go from 1240°C to 1280°C is almost a 30% more! Our clay is formulated to vitrify (mature, turn “glass-like”) at 1240°, as are our glazes. A glaze kiln take around 12 hours to reach temperature and two to three days to cool down. Sometimes a third firing process is required – this is for decoration that is added to work after the glaze firing. For example – adding precious metals and lustres. this firing temperature is usually around 600 – 800°C depending upon the techniques being used. There are many students interested in gold and silver trims – we will be doing this third type of firing soon! After firing your work will be in the student finished work shelves. Remember to pay for it before you head out the door! There is a small extra charge for using porcelain clay (it’s more than twice the price of regular clay), and for any third firing process! Once your work has been fired it can not turn back into clay for millennia – so don’t fire it if you don’t like it! Put it in the bucket for recycling. https://firebirdstudios.com.au/the-process-of-making-pottery/The form of the jug has been in use for many centuries.Stoneware jug. Two tone brown glaze with pierced lip behind spout. Spout chipped.None.flagstaff hill, warrnambool, shipwrecked-coast, flagstaff-hill, flagstaff-hill-maritime-museum, maritime-museum, shipwreck-coast, flagstaff-hill-maritime-village, jug, ceramic jug -
 Flagstaff Hill Maritime Museum and Village
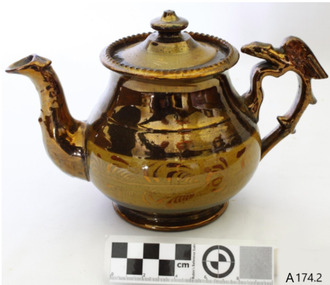
Ceramic - Teapot, First half of the 20th century
... The teapot at this time cannot be associated with a historical event, person, or place, provenance regards manufacture is unknown, item assessed as a collection asset given it was produced before 1950. warrnambool flagstaff-hill flagstaff-hill-maritime-museum maritime-museum shipwreck-coast flagstaff-hill-maritime-village teapot tea set kitchen ware ceramic Lusterware Pottery Staffordshire UK Pottery Finishes None Teapot ceramic ornate copper lusterware abstract floral design handle has a protruding sculptured bird for thumb grip. ...Lusterware is a type of pottery or porcelain with a metallic glaze that gives the effect of iridescence. The technique on pottery was first developed in Mesopotamia (modern Iraq) in the early 9th century. It is produced by metallic oxides in an overglaze finish, which is given a second firing at a lower temperature in a "muffle kiln", or a reduction kiln, excluding oxygen. The Lusterware effect is a final coating applied over the ceramic glaze, and fixed by a light second firing, applying small amounts of metallic compounds (generally of silver or copper) mixed with something to make it paintable (clay or ochre). This is then fired in a reducing atmosphere at a temperature high enough to "soften" the glaze from the first firing, and break down the metallic compounds, leaving a very thin ("perhaps 10 or 20 atoms thick") layer that is fused with the main glaze, but is mainly metal. Lusterware normally only uses one colour per piece, and the range is limited a "gold" derived from silver compounds was historically the most common. The process has always been expensive and rather unpredictable, always requiring two firings, and often the use of expensive materials such as silver and platinum. The very thin layer of luster is often delicate, and many types of Lusterware are easily damaged by scratching removing the metallic layer, or by contact with acids. Lusterware has therefore always been for display and occasional use, although by the 19th century it could be relatively cheap. Many pieces show the luster effect only working correctly on parts of the surface, or not at all. An item probably made in Staffordshire UK where this type of pottery was popular in the late 19th century by unknown pottery as the subject item has no marks. The teapot at this time cannot be associated with a historical event, person, or place, provenance regards manufacture is unknown, item assessed as a collection asset given it was produced before 1950.Teapot ceramic ornate copper lusterware abstract floral design handle has a protruding sculptured bird for thumb grip. Nonewarrnambool, flagstaff-hill, flagstaff-hill-maritime-museum, maritime-museum, shipwreck-coast, flagstaff-hill-maritime-village, teapot, tea set, kitchen ware, ceramic, lusterware, pottery, staffordshire uk, pottery finishes -
 Flagstaff Hill Maritime Museum and Village
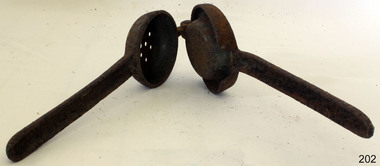
Domestic object - Fruit Press, 1890-1900
... designed to separate and crush the pulp of the fruit in a way that is easy to operate. Lemon squeezers can be made from any solid, acid-resistant material, such as plastic, glass, metal (usually aluminum) or ceramic. The oldest known lemon squeezers were found in Kütahya, Turkey and date to the first quarter of the 18th century. These ceramic presses are in the traditional style of Turkish pottery...designed to separate and crush the pulp of the fruit in a way that is easy to operate. Lemon squeezers can be made from any solid, acid-resistant material, such as plastic, glass, metal (usually aluminum) or ceramic. The oldest known lemon squeezers were found in Kütahya, Turkey and date to the first quarter of the 18th century. These ceramic presses are in the traditional style of Turkish pottery ...The fruit juice or lemon squeezer is a small kitchen utensil designed to extract juice from lemons or other citrus fruit such as oranges, grapefruit, or lime. It is designed to separate and crush the pulp of the fruit in a way that is easy to operate. Lemon squeezers can be made from any solid, acid-resistant material, such as plastic, glass, metal (usually aluminum) or ceramic. The oldest known lemon squeezers were found in Kütahya, Turkey and date to the first quarter of the 18th century. These ceramic presses are in the traditional style of Turkish pottery of the 18th century and have a superficial resemblance to today's press equipment with cones, though they are designed differently. These examples were individually made, and specially designed for making the then popular citrus drink sorbet. Lemons are not native to northern Turkey, though during the 17th and 18th centuries they were imported in bulk to Constantinople.The fruit juice press is an example of early 20th century kitchen utensils and is not associated with an historical event, person or place, provenance is unable to be determined at this time and the item is believed to have been made around 1900. This item is currently being used in Flagstaffs Hill village display and regarded as significant as it demonstrates domestic kitchen utensils used around the turn of the 19th century and today is a collectable item. Vintage lemon/citrus fruits squeezer cast iron juicer with two sections hinged together strainer on one section has holes for letting liquid escape.Noneflagstaff hill, warrnambool, shipwrecked coast, flagstaff hill maritime museum, flagstaff hill maritime village, great ocean road, food press, food preparation, fruit juice press, kitchen utensil -
 Flagstaff Hill Maritime Museum and Village
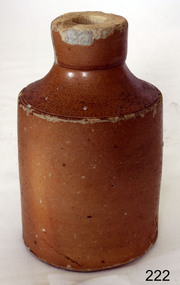
Ceramic - Stoneware Bottle, Doulton Lambeth, Circa 1870 - 1890
... The company always made some more decorative items, initially still mostly stoneware, and from the 1860s the firm made considerable efforts to get a reputation for design, in which it was largely successful, as one of the first British makers of art pottery. ...The company always made some more decorative items, initially still mostly stoneware, and from the 1860s the firm made considerable efforts to get a reputation for design, in which it was largely successful, as one of the first British makers of art pottery. ...The Royal Doulton company began as a partnership between John Doulton, Martha Jones, and John Wattis an English ceramic and home accessories manufacturer founded in 1815. Operating originally in Vauxhall, London, later moving to Lambeth, in 1882 it opened a factory in Burslem, Stoke-on-Trent, in the centre of English pottery. The business was specialised in making salt-glazed stoneware articles, including utilitarian or decorative bottles, jugs and jars, much of it intended for inns and pubs. The backbone of the business was a wide range of utilitarian wares, mostly stone wares, including storage jars, tankards and the like, and later extending to pipes for drains, lavatories and other bathroom ceramics. From 1853 to 1902 its wares were marked Doulton & Co., then from 1902, when a royal warrant was given, Royal Doulton. The company always made some more decorative items, initially still mostly stoneware, and from the 1860s the firm made considerable efforts to get a reputation for design, in which it was largely successful, as one of the first British makers of art pottery. Initially, this was done through artistic stoneware's made in Lambeth, but in 1882 the firm bought a Burslem factory, which was mainly intended for making bone china table wares and decorative items. An early utilitarian stoneware item made by a well-known company that specialised in making salt-glazed items that later earned a reputation for making stoneware art objects.Ink bottle, brown salt glazed stoneware with narrow mouth tamped Doulton Lambeth cork missing. Stamp impressed into clay on edge "(2)32 / Doulton / Lambeth" flagstaff hill, warrnambool, shipwrecked coast, flagstaff hill maritime museum, flagstaff hill maritime village, great ocean road, stoneware, stoneware jar, doulton lambeth, kitchen ware, salt glazed -
 Flagstaff Hill Maritime Museum and Village
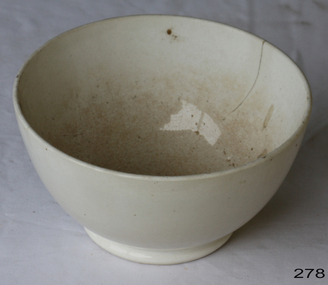
Domestic object - Bowl, Late 19th or early 20th Century
... pottery once a week! Even though we have three hour classes, it’s often just not enough time! Here is an overview of some of the processes so you have a bit more grasp on some of the technical stuff! Step One – Design...pottery once a week! Even though we have three hour classes, it’s often just not enough time! Here is an overview of some of the processes so you have a bit more grasp on some of the technical stuff! Step One – Design ...The Process of Making Pottery Decorating, Firing, Glazing, Making, Technical There is a rhythm and flow to clay. It can’t be done all at once! Even the making process! It can take weeks to get everything done, especially if you can only work on your pottery once a week! Even though we have three hour classes, it’s often just not enough time! Here is an overview of some of the processes so you have a bit more grasp on some of the technical stuff! Step One – Design There are SO many ideas out there for making stuff in clay! From delicate porcelain jewellery, through to heavy sculptural work and everything in between. Deciding your direction is sometimes not that easy – when you first start, try everything, you will naturally gravitate to the style that you enjoy! The options and variations are endless and can get a wee bit overwhelming too! Check in with me before you start to ensure your ideas will work, what order you might do things, how you could achieve the look you are seeking and any other technical data required! Step Two – Making Clay is thixotropic. This means that as you work with it, the clay first gets sloppier and wetter, before is begins to dry in the atmosphere. For most things, you simply can’t do all parts of the project at once. An example of work order might look like: Get last weeks work out from the shelves Prepare clay for today’s work – roll your clay, prepare balls for throwing, make the first stage of a pinch pot) Clean up last week’s work and put it on the shelf for bisque firing Check that you have any glazing to do – and do enough of it that you will have time to finish your main project Do the next step of your next project – there might be a further step that can’t be complete immediately, in that case, wrap your work well and put onto the shelves. Letting your work rest for a while can really help keep your work clean and professional looking. Many things require bagging under plastic to keep it ready for work the next week – put your name on the outside of the bag so you can find your work easily. We have stickers and markers. Consider how you want to decorate your work – coloured slip can be applied at a fairly wet stage (remembering that it will make your work even wetter!). Trying to apply slip to dry clay won’t work! If you want to do sgraffito – you will need to keep the work leather hard (a state of dryness where you can still work the clay with a little effort and a little water and care). Step Three – Drying Most of the time your work can go into the rack uncovered to let it dry out for the following week. If you want to continue forming or shaping you will need to double bag your work – put your work on a suitable sized bat and put the bat in a bag so the base of the bag is under the bat, then put another bag over the top of the work and tuck the top of the bag under the bat. If you want to trim (or turn) your thrown work the following week, it should also be double bagged. If your work is large, delicate, or of uneven thicknesses, you should lightly cover your work for drying. When considering the drying process, bare in mind the weather, humidity and wind! The hotter and dryer, the faster things dry and work can dry unevenly in the shelves – this can lead to cracking – another time to lightly cover your work for drying. Step Four – Trimming and Cleaning Up Your work is dry! It is called greenware now and it is at it’s most fragile! Handle everything with two hands. I often refer to soft hands – keep everything gentle and with your fingers spread as much as possible. Try to not pick up things like plates too much, and always with both hands! Before your work can be bisque fired it should be “cleaned up”. You work won’t go into the kiln if it has sharp edges – when glazed, sharp edges turn into razor blades! Use a piece of fly wire to rub the work all over – this will scratch a little so be light handed. Use a knife or metal kidney to scrape any areas that require a bit more dynamic treatment than the fly wire offers! Finally, a very light wipe over with a slightly damp sponge can help soften and soothe all of your edges and dags! Trimming thrown work: If you are planning to trim (or turn) your thrown work (and you should be), make sure you bag it well – your work should be leather hard to almost dry for easiest trimming. Use this step to finish the work completely – use a metal kidney to polish the surface, or a slightly damp sponge to give a freshly thrown look. Wipe the sponge around the rim after trimming, and check the inside of the pot for dags! Trimming slip cast work: Usually I will trim the rims of your work on the wheel the following day to make that stage easier, however you will still need to check your work for lumps and bumps. Last but not least – check that your name is still clearly on the bottom of your work. Step Five – Bisque Firing When the work is completely dry it can go into the bisque kiln. The bisque kiln is fired to 1000°C. This process burns off the water in the clay as well as some of the chemically bound water. The structure of the clay is not altered that much at this temperature. Inside the bisque kiln, the work is stacked a little, small bowl inside a larger bowl and onto a heavy plate. Smaller items like decorations or drink coasters might get stacked several high. Consideration is paid to the weight of the stack and shape of the work. A bisque kiln can fire about one and a half times the amount of work that the glaze kiln can fire. The firing takes about 10 hours to complete the cycle and about two days to cool down. Once it has been emptied the work is placed in the glaze room ready for you to decorate! Step Six – Glazing Decorating your work with colour can be a lot of fun – and time consuming! There are three main options for surface treatment at this stage: Oxide Washes Underglazes Glazes Washes and underglazes do not “glaze” the work – It will still need a layer of glaze to fully seal the clay (washes don’t need glaze on surfaces not designed for food or liquid as they can gloss up a little on their own). Underglazes are stable colourants that turn out pretty much how they look in the jar. They can be mixed with each other to form other colours and can be used like water colours to paint onto your work. Mostly they should have a clear glaze on top to seal them. Oxides are a different species – the pink oxide (cobalt) wash turns out bright blue for instance. They don’t always need a glaze on top, and some glazes can change the colour of the wash! The glazes need no other “glaze” on top! Be careful of unknown glaze interactions – you can put any combination of glaze in a bowl or on a plate, but only a single glaze on the outside of any vertical surface! Glazes are a chemical reaction under heat. We don’t know the exact chemicals in the Mayco glazes we use. I can guess by the way they interact with each other, however, on the whole, you need to test every idea you have, and not run the test on a vertical surface! Simply put, glaze is a layer of glass like substance that bonds with the clay underneath. Clay is made of silica, alumina and water. Glaze is made of mostly silica. Silica has a melting point of 1700°C and we fire to 1240°C. The silica requires a “flux” to help it melt at the lower temperature. Fluxes can be all sorts of chemicals – a common one is calcium – calcium has a melting point of 2500°C, however, together they both melt at a much lower temperature! Colourants are metal oxides like cobalt (blue), chrome (green through black), copper (green, blue, even red!), manganese (black, purple and pink) iron (red brown), etc. Different chemicals in the glaze can have dramatic effects. for example, barium carbonate (which we don’t use) turns manganese bright pink! Other elements can turn manganese dioxide brown, blue, purple and reddish brown. Manganese dioxide is a flux in and of itself as well. So, glazes that get their black and purple colours, often interact with other glazes and RUN! Our mirror black is a good example – it mixes really well with many glazes because it fluxes them – causes them to melt faster. It will also bring out many beautiful colours in the glazes because it’s black colouring most definitely comes from manganese dioxide! Glaze chemistry is a whole subject on it’s own! We use commercial Mayco glazes on purpose – for their huge range of colour possibilities, stability, cool interactions, artistic freedom with the ability to easily brush the glazes on and ease of use. We currently have almost 50 glazes on hand! A major project is to test the interactions of all glazes with each other. That is 2,500 test tiles!!!! I’m going to make the wall behind the wheels the feature wall of pretty colours! Step Seven – Glaze (Gloss or sometimes called “Glost”) Firing Most of the time this is the final stage of making your creation (but not always!) The glaze kiln goes to 1240°C. This is called cone 6, or midrange. It is the low end of stoneware temperatures. Stoneware clays and glazes are typically fired at cone 8 – 10, that is 1260 – 1290°C. The energy requirement to go from 1240°C to 1280°C is almost a 30% more! Our clay is formulated to vitrify (mature, turn “glass-like”) at 1240°, as are our glazes. A glaze kiln take around 12 hours to reach temperature and two to three days to cool down. Sometimes a third firing process is required – this is for decoration that is added to work after the glaze firing. For example – adding precious metals and lustres. this firing temperature is usually around 600 – 800°C depending upon the techniques being used. There are many students interested in gold and silver trims – we will be doing this third type of firing soon! After firing your work will be in the student finished work shelves. Remember to pay for it before you head out the door! There is a small extra charge for using porcelain clay (it’s more than twice the price of regular clay), and for any third firing process! Once your work has been fired it can not turn back into clay for millennia – so don’t fire it if you don’t like it! Put it in the bucket for recycling. https://firebirdstudios.com.au/the-process-of-making-pottery/ The bowl is an example of kitchenware used in the 19th century and still in use today.Bowl white ceramic. Crack on side. Badly stained.Backstamp very faint and unable to be read.flagstaff hill, warrnambool, shipwrecked-coast, flagstaff-hill, flagstaff-hill-maritime-museum, maritime-museum, shipwreck-coast, flagstaff-hill-maritime-village, mixing bowl, food preparation, kitchen equipment, ceramic -
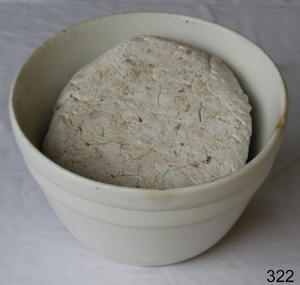 Flagstaff Hill Maritime Museum and Village
Domestic object - Bowl
... pottery once a week! Even though we have three hour classes, it’s often just not enough time! Here is an overview of some of the processes so you have a bit more grasp on some of the technical stuff! Step One – Design...pottery once a week! Even though we have three hour classes, it’s often just not enough time! Here is an overview of some of the processes so you have a bit more grasp on some of the technical stuff! Step One – Design ...The Process of Making Pottery Decorating, Firing, Glazing, Making, Technical There is a rhythm and flow to clay. It can’t be done all at once! Even the making process! It can take weeks to get everything done, especially if you can only work on your pottery once a week! Even though we have three hour classes, it’s often just not enough time! Here is an overview of some of the processes so you have a bit more grasp on some of the technical stuff! Step One – Design There are SO many ideas out there for making stuff in clay! From delicate porcelain jewellery, through to heavy sculptural work and everything in between. Deciding your direction is sometimes not that easy – when you first start, try everything, you will naturally gravitate to the style that you enjoy! The options and variations are endless and can get a wee bit overwhelming too! Check in with me before you start to ensure your ideas will work, what order you might do things, how you could achieve the look you are seeking and any other technical data required! Step Two – Making Clay is thixotropic. This means that as you work with it, the clay first gets sloppier and wetter, before is begins to dry in the atmosphere. For most things, you simply can’t do all parts of the project at once. An example of work order might look like: Get last weeks work out from the shelves Prepare clay for today’s work – roll your clay, prepare balls for throwing, make the first stage of a pinch pot) Clean up last week’s work and put it on the shelf for bisque firing Check that you have any glazing to do – and do enough of it that you will have time to finish your main project Do the next step of your next project – there might be a further step that can’t be complete immediately, in that case, wrap your work well and put onto the shelves. Letting your work rest for a while can really help keep your work clean and professional looking. Many things require bagging under plastic to keep it ready for work the next week – put your name on the outside of the bag so you can find your work easily. We have stickers and markers. Consider how you want to decorate your work – coloured slip can be applied at a fairly wet stage (remembering that it will make your work even wetter!). Trying to apply slip to dry clay won’t work! If you want to do sgraffito – you will need to keep the work leather hard (a state of dryness where you can still work the clay with a little effort and a little water and care). Step Three – Drying Most of the time your work can go into the rack uncovered to let it dry out for the following week. If you want to continue forming or shaping you will need to double bag your work – put your work on a suitable sized bat and put the bat in a bag so the base of the bag is under the bat, then put another bag over the top of the work and tuck the top of the bag under the bat. If you want to trim (or turn) your thrown work the following week, it should also be double bagged. If your work is large, delicate, or of uneven thicknesses, you should lightly cover your work for drying. When considering the drying process, bare in mind the weather, humidity and wind! The hotter and dryer, the faster things dry and work can dry unevenly in the shelves – this can lead to cracking – another time to lightly cover your work for drying. Step Four – Trimming and Cleaning Up Your work is dry! It is called greenware now and it is at it’s most fragile! Handle everything with two hands. I often refer to soft hands – keep everything gentle and with your fingers spread as much as possible. Try to not pick up things like plates too much, and always with both hands! Before your work can be bisque fired it should be “cleaned up”. You work won’t go into the kiln if it has sharp edges – when glazed, sharp edges turn into razor blades! Use a piece of fly wire to rub the work all over – this will scratch a little so be light handed. Use a knife or metal kidney to scrape any areas that require a bit more dynamic treatment than the fly wire offers! Finally, a very light wipe over with a slightly damp sponge can help soften and soothe all of your edges and dags! Trimming thrown work: If you are planning to trim (or turn) your thrown work (and you should be), make sure you bag it well – your work should be leather hard to almost dry for easiest trimming. Use this step to finish the work completely – use a metal kidney to polish the surface, or a slightly damp sponge to give a freshly thrown look. Wipe the sponge around the rim after trimming, and check the inside of the pot for dags! Trimming slip cast work: Usually I will trim the rims of your work on the wheel the following day to make that stage easier, however you will still need to check your work for lumps and bumps. Last but not least – check that your name is still clearly on the bottom of your work. Step Five – Bisque Firing When the work is completely dry it can go into the bisque kiln. The bisque kiln is fired to 1000°C. This process burns off the water in the clay as well as some of the chemically bound water. The structure of the clay is not altered that much at this temperature. Inside the bisque kiln, the work is stacked a little, small bowl inside a larger bowl and onto a heavy plate. Smaller items like decorations or drink coasters might get stacked several high. Consideration is paid to the weight of the stack and shape of the work. A bisque kiln can fire about one and a half times the amount of work that the glaze kiln can fire. The firing takes about 10 hours to complete the cycle and about two days to cool down. Once it has been emptied the work is placed in the glaze room ready for you to decorate! Step Six – Glazing Decorating your work with colour can be a lot of fun – and time consuming! There are three main options for surface treatment at this stage: Oxide Washes Underglazes Glazes Washes and underglazes do not “glaze” the work – It will still need a layer of glaze to fully seal the clay (washes don’t need glaze on surfaces not designed for food or liquid as they can gloss up a little on their own). Underglazes are stable colourants that turn out pretty much how they look in the jar. They can be mixed with each other to form other colours and can be used like water colours to paint onto your work. Mostly they should have a clear glaze on top to seal them. Oxides are a different species – the pink oxide (cobalt) wash turns out bright blue for instance. They don’t always need a glaze on top, and some glazes can change the colour of the wash! The glazes need no other “glaze” on top! Be careful of unknown glaze interactions – you can put any combination of glaze in a bowl or on a plate, but only a single glaze on the outside of any vertical surface! Glazes are a chemical reaction under heat. We don’t know the exact chemicals in the Mayco glazes we use. I can guess by the way they interact with each other, however, on the whole, you need to test every idea you have, and not run the test on a vertical surface! Simply put, glaze is a layer of glass like substance that bonds with the clay underneath. Clay is made of silica, alumina and water. Glaze is made of mostly silica. Silica has a melting point of 1700°C and we fire to 1240°C. The silica requires a “flux” to help it melt at the lower temperature. Fluxes can be all sorts of chemicals – a common one is calcium – calcium has a melting point of 2500°C, however, together they both melt at a much lower temperature! Colourants are metal oxides like cobalt (blue), chrome (green through black), copper (green, blue, even red!), manganese (black, purple and pink) iron (red brown), etc. Different chemicals in the glaze can have dramatic effects. for example, barium carbonate (which we don’t use) turns manganese bright pink! Other elements can turn manganese dioxide brown, blue, purple and reddish brown. Manganese dioxide is a flux in and of itself as well. So, glazes that get their black and purple colours, often interact with other glazes and RUN! Our mirror black is a good example – it mixes really well with many glazes because it fluxes them – causes them to melt faster. It will also bring out many beautiful colours in the glazes because it’s black colouring most definitely comes from manganese dioxide! Glaze chemistry is a whole subject on it’s own! We use commercial Mayco glazes on purpose – for their huge range of colour possibilities, stability, cool interactions, artistic freedom with the ability to easily brush the glazes on and ease of use. We currently have almost 50 glazes on hand! A major project is to test the interactions of all glazes with each other. That is 2,500 test tiles!!!! I’m going to make the wall behind the wheels the feature wall of pretty colours! Step Seven – Glaze (Gloss or sometimes called “Glost”) Firing Most of the time this is the final stage of making your creation (but not always!) The glaze kiln goes to 1240°C. This is called cone 6, or midrange. It is the low end of stoneware temperatures. Stoneware clays and glazes are typically fired at cone 8 – 10, that is 1260 – 1290°C. The energy requirement to go from 1240°C to 1280°C is almost a 30% more! Our clay is formulated to vitrify (mature, turn “glass-like”) at 1240°, as are our glazes. A glaze kiln take around 12 hours to reach temperature and two to three days to cool down. Sometimes a third firing process is required – this is for decoration that is added to work after the glaze firing. For example – adding precious metals and lustres. this firing temperature is usually around 600 – 800°C depending upon the techniques being used. There are many students interested in gold and silver trims – we will be doing this third type of firing soon! After firing your work will be in the student finished work shelves. Remember to pay for it before you head out the door! There is a small extra charge for using porcelain clay (it’s more than twice the price of regular clay), and for any third firing process! Once your work has been fired it can not turn back into clay for millennia – so don’t fire it if you don’t like it! Put it in the bucket for recycling. https://firebirdstudios.com.au/the-process-of-making-pottery/ This bowl is an example of kitchenware used in the 19th century and still in use today.Bowl white ceramic plain that has two sets of edging around lip. Inside bowl has plaster designed to look like cooking mixture.flagstaff hill, warrnambool, shipwrecked-coast, flagstaff-hill, flagstaff-hill-maritime-museum, maritime-museum, shipwreck-coast, flagstaff-hill-maritime-village, kitchen equipment, ceramic -
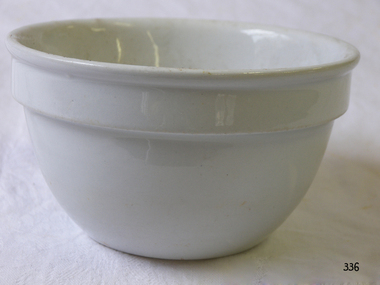 Flagstaff Hill Maritime Museum and Village
Domestic object - Bowl, J & G Meakin, Late 19th or early 20th Century
... pottery once a week! Even though we have three hour classes, it’s often just not enough time! Here is an overview of some of the processes so you have a bit more grasp on some of the technical stuff! Step One – Design...pottery once a week! Even though we have three hour classes, it’s often just not enough time! Here is an overview of some of the processes so you have a bit more grasp on some of the technical stuff! Step One – Design ...The Process of Making Pottery Decorating, Firing, Glazing, Making, Technical There is a rhythm and flow to clay. It can’t be done all at once! Even the making process! It can take weeks to get everything done, especially if you can only work on your pottery once a week! Even though we have three hour classes, it’s often just not enough time! Here is an overview of some of the processes so you have a bit more grasp on some of the technical stuff! Step One – Design There are SO many ideas out there for making stuff in clay! From delicate porcelain jewellery, through to heavy sculptural work and everything in between. Deciding your direction is sometimes not that easy – when you first start, try everything, you will naturally gravitate to the style that you enjoy! The options and variations are endless and can get a wee bit overwhelming too! Check in with me before you start to ensure your ideas will work, what order you might do things, how you could achieve the look you are seeking and any other technical data required! Step Two – Making Clay is thixotropic. This means that as you work with it, the clay first gets sloppier and wetter, before is begins to dry in the atmosphere. For most things, you simply can’t do all parts of the project at once. An example of work order might look like: Get last weeks work out from the shelves Prepare clay for today’s work – roll your clay, prepare balls for throwing, make the first stage of a pinch pot) Clean up last week’s work and put it on the shelf for bisque firing Check that you have any glazing to do – and do enough of it that you will have time to finish your main project Do the next step of your next project – there might be a further step that can’t be complete immediately, in that case, wrap your work well and put onto the shelves. Letting your work rest for a while can really help keep your work clean and professional looking. Many things require bagging under plastic to keep it ready for work the next week – put your name on the outside of the bag so you can find your work easily. We have stickers and markers. Consider how you want to decorate your work – coloured slip can be applied at a fairly wet stage (remembering that it will make your work even wetter!). Trying to apply slip to dry clay won’t work! If you want to do sgraffito – you will need to keep the work leather hard (a state of dryness where you can still work the clay with a little effort and a little water and care). Step Three – Drying Most of the time your work can go into the rack uncovered to let it dry out for the following week. If you want to continue forming or shaping you will need to double bag your work – put your work on a suitable sized bat and put the bat in a bag so the base of the bag is under the bat, then put another bag over the top of the work and tuck the top of the bag under the bat. If you want to trim (or turn) your thrown work the following week, it should also be double bagged. If your work is large, delicate, or of uneven thicknesses, you should lightly cover your work for drying. When considering the drying process, bare in mind the weather, humidity and wind! The hotter and dryer, the faster things dry and work can dry unevenly in the shelves – this can lead to cracking – another time to lightly cover your work for drying. Step Four – Trimming and Cleaning Up Your work is dry! It is called greenware now and it is at it’s most fragile! Handle everything with two hands. I often refer to soft hands – keep everything gentle and with your fingers spread as much as possible. Try to not pick up things like plates too much, and always with both hands! Before your work can be bisque fired it should be “cleaned up”. You work won’t go into the kiln if it has sharp edges – when glazed, sharp edges turn into razor blades! Use a piece of fly wire to rub the work all over – this will scratch a little so be light handed. Use a knife or metal kidney to scrape any areas that require a bit more dynamic treatment than the fly wire offers! Finally, a very light wipe over with a slightly damp sponge can help soften and soothe all of your edges and dags! Trimming thrown work: If you are planning to trim (or turn) your thrown work (and you should be), make sure you bag it well – your work should be leather hard to almost dry for easiest trimming. Use this step to finish the work completely – use a metal kidney to polish the surface, or a slightly damp sponge to give a freshly thrown look. Wipe the sponge around the rim after trimming, and check the inside of the pot for dags! Trimming slip cast work: Usually I will trim the rims of your work on the wheel the following day to make that stage easier, however you will still need to check your work for lumps and bumps. Last but not least – check that your name is still clearly on the bottom of your work. Step Five – Bisque Firing When the work is completely dry it can go into the bisque kiln. The bisque kiln is fired to 1000°C. This process burns off the water in the clay as well as some of the chemically bound water. The structure of the clay is not altered that much at this temperature. Inside the bisque kiln, the work is stacked a little, small bowl inside a larger bowl and onto a heavy plate. Smaller items like decorations or drink coasters might get stacked several high. Consideration is paid to the weight of the stack and shape of the work. A bisque kiln can fire about one and a half times the amount of work that the glaze kiln can fire. The firing takes about 10 hours to complete the cycle and about two days to cool down. Once it has been emptied the work is placed in the glaze room ready for you to decorate! Step Six – Glazing Decorating your work with colour can be a lot of fun – and time consuming! There are three main options for surface treatment at this stage: Oxide Washes Underglazes Glazes Washes and underglazes do not “glaze” the work – It will still need a layer of glaze to fully seal the clay (washes don’t need glaze on surfaces not designed for food or liquid as they can gloss up a little on their own). Underglazes are stable colourants that turn out pretty much how they look in the jar. They can be mixed with each other to form other colours and can be used like water colours to paint onto your work. Mostly they should have a clear glaze on top to seal them. Oxides are a different species – the pink oxide (cobalt) wash turns out bright blue for instance. They don’t always need a glaze on top, and some glazes can change the colour of the wash! The glazes need no other “glaze” on top! Be careful of unknown glaze interactions – you can put any combination of glaze in a bowl or on a plate, but only a single glaze on the outside of any vertical surface! Glazes are a chemical reaction under heat. We don’t know the exact chemicals in the Mayco glazes we use. I can guess by the way they interact with each other, however, on the whole, you need to test every idea you have, and not run the test on a vertical surface! Simply put, glaze is a layer of glass like substance that bonds with the clay underneath. Clay is made of silica, alumina and water. Glaze is made of mostly silica. Silica has a melting point of 1700°C and we fire to 1240°C. The silica requires a “flux” to help it melt at the lower temperature. Fluxes can be all sorts of chemicals – a common one is calcium – calcium has a melting point of 2500°C, however, together they both melt at a much lower temperature! Colourants are metal oxides like cobalt (blue), chrome (green through black), copper (green, blue, even red!), manganese (black, purple and pink) iron (red brown), etc. Different chemicals in the glaze can have dramatic effects. for example, barium carbonate (which we don’t use) turns manganese bright pink! Other elements can turn manganese dioxide brown, blue, purple and reddish brown. Manganese dioxide is a flux in and of itself as well. So, glazes that get their black and purple colours, often interact with other glazes and RUN! Our mirror black is a good example – it mixes really well with many glazes because it fluxes them – causes them to melt faster. It will also bring out many beautiful colours in the glazes because it’s black colouring most definitely comes from manganese dioxide! Glaze chemistry is a whole subject on it’s own! We use commercial Mayco glazes on purpose – for their huge range of colour possibilities, stability, cool interactions, artistic freedom with the ability to easily brush the glazes on and ease of use. We currently have almost 50 glazes on hand! A major project is to test the interactions of all glazes with each other. That is 2,500 test tiles!!!! I’m going to make the wall behind the wheels the feature wall of pretty colours! Step Seven – Glaze (Gloss or sometimes called “Glost”) Firing Most of the time this is the final stage of making your creation (but not always!) The glaze kiln goes to 1240°C. This is called cone 6, or midrange. It is the low end of stoneware temperatures. Stoneware clays and glazes are typically fired at cone 8 – 10, that is 1260 – 1290°C. The energy requirement to go from 1240°C to 1280°C is almost a 30% more! Our clay is formulated to vitrify (mature, turn “glass-like”) at 1240°, as are our glazes. A glaze kiln take around 12 hours to reach temperature and two to three days to cool down. Sometimes a third firing process is required – this is for decoration that is added to work after the glaze firing. For example – adding precious metals and lustres. this firing temperature is usually around 600 – 800°C depending upon the techniques being used. There are many students interested in gold and silver trims – we will be doing this third type of firing soon! After firing your work will be in the student finished work shelves. Remember to pay for it before you head out the door! There is a small extra charge for using porcelain clay (it’s more than twice the price of regular clay), and for any third firing process! Once your work has been fired it can not turn back into clay for millennia – so don’t fire it if you don’t like it! Put it in the bucket for recycling. https://firebirdstudios.com.au/the-process-of-making-pottery/This bowl was made by renowned pottery company J & G Meakin of England. The firm was established in the mid-1800's. The bowl is an example of kitchenware used in the 19th century and still in use today.Bowl; white ceramic, round and tapering inwards towards base. Made by J and G Meakin England.On base, 'Ironstone China Reg SOL 391413' with symbolflagstaff hill, flagstaff hill maritime museum and village, warrnambool, maritime museum, maritime village, great ocean road, shipwreck coast, mixing bowl, food preparation, j & g meakin, pottery, stoke-on-trent, kitchen equipment, ceramic -
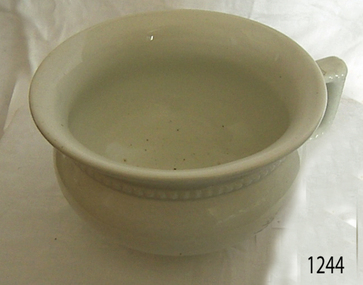 Flagstaff Hill Maritime Museum and Village
Ceramic - Chamber Pot, J & G Meakin, Early to mid 20th century
... The company was amongst the first British pottery firms to experiment with modernist designs associated with the art deco period. The Moderne' range was introduced in 1929 consisting of an angular shape decorated design with geometric patterns and often highlighted with silver or gold. ...The company was amongst the first British pottery firms to experiment with modernist designs associated with the art deco period. The Moderne' range was introduced in 1929 consisting of an angular shape decorated design with geometric patterns and often highlighted with silver or gold. ...In the 19th and early 20th centuries, J. & G. Meakin were important, large-scale producers of good quality, ironstone tableware (‘White Granite’ ware) that met a ready market in the United States, South America, Australia, and other traditional British markets. By the 1890s the company was one of the world’s largest earthenware manufacturers. Although export teaware and tableware was the factory’s staple commodity, Meakin also manufactured toilet ware, kitchenware and a wide range of fancy earthenware. The company was amongst the first British pottery firms to experiment with modernist designs associated with the art deco period. The Moderne' range was introduced in 1929 consisting of an angular shape decorated design with geometric patterns and often highlighted with silver or gold. This range remained in production through the 1930s. Post 1945 the company introduced the streamlined Studio shape (1953) and Horizon shape (1955) both heavily influenced by the Russell Wright ‘American Modern’ tableware. In 1964 a new Studio shape was released with tall streamlined coffee pots used as the background for many contemporary patterns now associated with the 1950s and 1960s. Designs by Jessie Tate and Eve Midwinter, some originally found on Midwinter shapes, also appear on 1970s Studio ware. The Studio range was one of Meakin’s most successful and continued in production until the late-1970s. The enormous range of floral, geometric, and abstract designs make Studio Ware collectible in its own right. In the 1970s and 1980s as part of the Wedgwood Group Meakin produced contemporary products under the 'Bull in a China Shop' and 'Creative Tableware' names. 'Sol' (c.1912-1963), 'Studio' (1953 on) and 'Royal Staffordshire' (post-1968) were important J. & G. Meakin Ltd trade names. Meakin marks are numerous, but all include the J. & G. Meakin name. The significance of this item and pottery generally is that often earthenware is portrayed as being a landmark in the evolution of humanity. This is because these items are the few things from the past that have survived in a tangible form. Pottery is an important functional part of society and it has a critical role to play as it helps archaeologists to date other artefacts of the same time period. Also, the decorations on pottery have told much about the beliefs, lifestyles and lives of the people who bought them and used them. In other words it gives us today a snapshot of society from the past and how people used these items in their daily lives, their likes as well as societal and design trends. Chamber pot ceramic white with handle at side and decoration around top. Unclearwarrnambool, shipwrecked-coast, flagstaff-hill, flagstaff-hill-maritime-museum, shipwreck-coast, flagstaff-hill-maritime-village, champer pot, personal hygiene, personal item, ceramic pot, domestic object -
 Marysville & District Historical Society
Ephemera (Item) - Advertising brochure, Country Touch, Unknown
... Country Touch was established in 1995 in a mud brick building designed for a pottery studio and gallery on the main street of Marysville in Victoria. ...An advertising brochure for Country Touch in Marysville in Victoria.An advertising brochure for Country Touch in Marysville in Victoria. Country Touch was established in 1995 in a mud brick building designed for a pottery studio and gallery on the main street of Marysville in Victoria. By 2003 the pottery kilns were removed and the retail space expanded, however, this was destroyed in the Black Saturday bushfires. In July 2011 the new shop was officially opened and is still trading to this day. marysville, victoria, country touch, 2009 black saturday bushfires -
 Marysville & District Historical Society
Ephemera (Item) - Advertising brochure, Country Touch, Unknown
... Country Touch was established in 1995 in a mud brick building designed for a pottery studio and gallery on the main street of Marysville in Victoria. ...An advertising brochure for Country Touch in Marysville in Victoria.An advertising brochure for Country Touch in Marysville in Victoria. Country Touch was established in 1995 in a mud brick building designed for a pottery studio and gallery on the main street of Marysville in Victoria. By 2003 the pottery kilns were removed and the retail space expanded, however, this was destroyed in the Black Saturday bushfires. In July 2011 the new shop was officially opened and is still trading to this day. marysville, victoria, country touch, 2009 black saturday bushfires -
 Marysville & District Historical Society
Photograph (Item) - Colour photograph, Unknown
... Country Touch was established in 1995 in a mud brick building designed for a pottery studio and gallery on the main street of Marysville in Victoria. ...A colour photograph of Country Touch in Marysville in Victoria.A colour photograph of Country Touch in Marysville in Victoria. Country Touch was established in 1995 in a mud brick building designed for a pottery studio and gallery on the main street of Marysville in Victoria. By 2003 the pottery kilns were removed and the retail space expanded, however, this was destroyed in the Black Saturday bushfires. In July 2011 the new shop was officially opened and is still trading to this day. marysville, victoria, country touch, 2009 black saturday bushfires -
 Marysville & District Historical Society
Photograph (Item) - Colour photograph, Unknown
... Country Touch was established in 1995 in a mud brick building designed for a pottery studio and gallery on the main street of Marysville in Victoria. ...A colour photograph of Country Touch in Marysville in Victoria.A colour photograph of Country Touch in Marysville in Victoria. Country Touch was established in 1995 in a mud brick building designed for a pottery studio and gallery on the main street of Marysville in Victoria. By 2003 the pottery kilns were removed and the retail space expanded, however, this was destroyed in the Black Saturday bushfires. In July 2011 the new shop was officially opened and is still trading to this day. marysville, victoria, country touch, 2009 black saturday bushfires -
 Marysville & District Historical Society
Photograph (Item) - Colour photograph, Unknown
... Country Touch was established in 1995 in a mud brick building designed for a pottery studio and gallery on the main street of Marysville in Victoria. ...A digital copy of a colour photograph of Country Touch in Marysville in Victoria.A digital copy of a colour photograph of Country Touch in Marysville in Victoria. Country Touch was established in 1995 in a mud brick building designed for a pottery studio and gallery on the main street of Marysville in Victoria. By 2003 the pottery kilns were removed and the retail space expanded, however, this was destroyed in the Black Saturday bushfires. In July 2011 the new shop was officially opened and is still trading to this day. marysville, victoria, country touch, 2009 black saturday bushfires -
 Federation University Historical Collection
Booklet - Ceramics promotion, Ben Tiley, From under the Southern Cross, c1997
... Design, Ben Tiley. Sponsored by Walkers Ceramics; Delclay Pty Ltd Ballarat; and Northcote Pottery....Design, Ben Tiley. Sponsored by Walkers Ceramics; Delclay Pty Ltd Ballarat; and Northcote Pottery. ...A5 landscape booklet to accompany an exhibition of ceramics by "current students, recent graduates and staff of the School of Arts - University of Ballarat". Ceramics Studio Coordinator, Peter Pilven. Head, School of Arts, Robert Allan. Ms Sandy Caldow, Lecturer. Mr Barry Wemmys [sic] Technician. Professor David James, Vice Chancellor. Thanks to Nat Karacsay. Design, Ben Tiley. Sponsored by Walkers Ceramics; Delclay Pty Ltd Ballarat; and Northcote Pottery.Booklet promoting Ceramics at the University of Ballarat. A5 landscape, 8pp saddle-stitched booklet, printed single colour blue throughout.university of ballarat, federation university, ceramics, pottery, mt helen campus, school of arts, peter pilven, robert allan, barry wemyss, sandy caldow, david james, nat karacsay, ben tiley, walkers ceramics, delclay pty ltd ballarat, northcote pottery
