
Showing 107 items matching "route 31"
-
 Melbourne Tram Museum
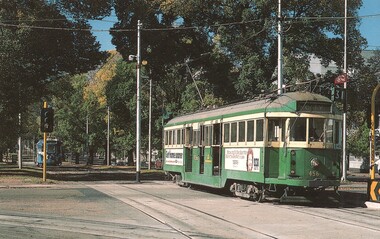
Postcard - W2 456 Victoria Parade, Mary Jayne's Railroad Specialties Inc, c1986
... ...route 31...Colour postcard of W2 456 (City Route 31) crossing Brunswick Street in Victoria Parade. ...Colour postcard of W2 456 (City Route 31) crossing Brunswick Street in Victoria Parade. ...Colour postcard of W2 456 (City Route 31) crossing Brunswick Street in Victoria Parade. Card back has details of the photographer, Ray Marsh, the tram operated by the Public Transport Corporation, details of the tram and the publisher - Mary Jayne's Railroad Specialtiess Inc. Has an advertisement for the ABC News. Card notes that the tram was photographed prior to its withdrawal in April 1987Yields information about W2 456Postcard colour - W2 456 Victoria Parade - Photo Ray Marsh, c1987, divided back.trams, tramways, w2 class tram, tram 456, victoria parade, brunswick street, route 31 -
 Melbourne Tram Museum
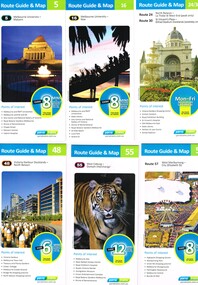
Ephemera - Tram Route Guides, Public Transport Victoria (PTV), "Tram Route Guide", Oct. 2011 to Oct 2012
... ... Route 31...Each comprises a vertical DL folded sheet, full colour for the nominated routes, with Yarra Trams, Myki and TramTracker logos, listing the stops, interchanges with bus and other tram services, ticketing zones, estimated frequencies with adverts for Night tram services, TramTracker and Myki tickets. .1 - Route 5 - Melbourne University to Malvern .2 - Route 16 - Melbourne University to Kew .3 - Route 24 and 30 - North Balwyn - Latrobe St and St Vincent's Plaza - Etihad Stadium .4 - Route 48 - North Balwyn - Victoria Harbour Docklands .5 - Route 55 - West Coburg - Domain Interchange .6 - Route 57 - West Maribyrnong to Flinders St Station .7 - Route 59 - Airport West - City .8 - Route 75 - City - Vermont South .9 - Route 78 and 79 - North Richmond - Prahran or St Kilda Beach .10 - Route 82 - Footscray to Moonee Ponds .11 - Route 96 - East Brunswick - St Kilda Beach .12 - ditto .13 - Route 112/11 - West Preston - St Kilda, West Preston - Victoria Harbour Docklands .14 - Route 70 - Wattle Park - Waterfront City Docklands .15 - Route 86/95 - Bundoora - Waterfront City Docklands and Melbourne Museum - City .16 - Route 1 - East Coburg - South Melbourne Beach .17 - Route 3/3a - Melbourne University to East Malvern .18 - Route 6 - Melbourne University to - Glen Iris .19 - Route 8 - Moreland to Toorak .20 - Route 64 - Melbourne University to East Brighton .21 - Route 67 - Melbourne University to Carnegie .22 - Route 72 - Melbourne University to Camberwell .23 - Route 109 - Box Hill - Port Melbourne and Route 31 - Hoddle St - Victoria Harbour - Docklands .24 - Route 75 - Vermont South - dated 10/2011 See Reg Item 2278 for 2016 versions...Trams tramways Timetables Maps Route 1 Route 3/3a Route 5 Route 6 Route 8 Route 11 Route 16 Route 24 Route 30 Route 31 Route 48 Route 55 Route 57 Route 59 Route 64 Route 67 Route 70 Route 72 Route 75 Route 78 Route 79 Route 82 Route 86 Route 95 Route 96 Route 109 Route 112 East Coburg South Melbourne Malvern West Maribyrnong Airport West Docklands North Balwyn West Coburg Domain Interchange North Richmond Prahran East Brunswick St Kilda Vermont South Footscray Moonee Ponds Kew St Vincent's Plaza Preston Wattle Park Bundoora Museum South Melbourne Beach East Coburg East Malvern Glen Iris Toorak Moreland East Brighton Carnegie Camberwell Box Hill Port Melbourne Set of 23 Tram Route Guides, published during 2011 or 2012. ...Set of 23 Tram Route Guides, published during 2011 or 2012. Each comprises a vertical DL folded sheet, full colour for the nominated routes, with Yarra Trams, Myki and TramTracker logos, listing the stops, interchanges with bus and other tram services, ticketing zones, estimated frequencies with adverts for Night tram services, TramTracker and Myki tickets. .1 - Route 5 - Melbourne University to Malvern .2 - Route 16 - Melbourne University to Kew .3 - Route 24 and 30 - North Balwyn - Latrobe St and St Vincent's Plaza - Etihad Stadium .4 - Route 48 - North Balwyn - Victoria Harbour Docklands .5 - Route 55 - West Coburg - Domain Interchange .6 - Route 57 - West Maribyrnong to Flinders St Station .7 - Route 59 - Airport West - City .8 - Route 75 - City - Vermont South .9 - Route 78 and 79 - North Richmond - Prahran or St Kilda Beach .10 - Route 82 - Footscray to Moonee Ponds .11 - Route 96 - East Brunswick - St Kilda Beach .12 - ditto .13 - Route 112/11 - West Preston - St Kilda, West Preston - Victoria Harbour Docklands .14 - Route 70 - Wattle Park - Waterfront City Docklands .15 - Route 86/95 - Bundoora - Waterfront City Docklands and Melbourne Museum - City .16 - Route 1 - East Coburg - South Melbourne Beach .17 - Route 3/3a - Melbourne University to East Malvern .18 - Route 6 - Melbourne University to - Glen Iris .19 - Route 8 - Moreland to Toorak .20 - Route 64 - Melbourne University to East Brighton .21 - Route 67 - Melbourne University to Carnegie .22 - Route 72 - Melbourne University to Camberwell .23 - Route 109 - Box Hill - Port Melbourne and Route 31 - Hoddle St - Victoria Harbour - Docklands .24 - Route 75 - Vermont South - dated 10/2011 See Reg Item 2278 for 2016 versionstrams, tramways, timetables, maps, route 1, route 3/3a, route 5, route 6, route 8, route 11, route 16, route 24, route 30, route 31, route 48, route 55, route 57, route 59, route 64, route 67, route 70, route 72, route 75, route 78, route 79, route 82, route 86, route 95, route 96, route 109, route 112, east coburg, south melbourne, malvern, west maribyrnong, airport west, docklands, north balwyn, west coburg, domain interchange, north richmond, prahran, east brunswick, st kilda, vermont south, footscray, moonee ponds, kew, st vincent's plaza, preston, wattle park, bundoora, museum, south melbourne beach, east coburg, east malvern, glen iris, toorak, moreland, east brighton, carnegie, camberwell, box hill, port melbourne -
 Ballarat Tramway Museum
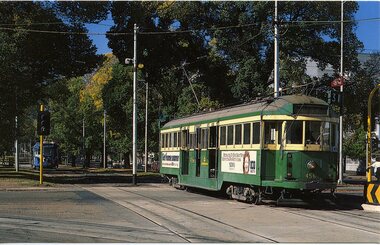
Postcard, Mary Jayne's Railroad Specialities Inc, Melbourne W2 456
... Colour postcard of Melbourne W2 456 inbound to the City on route 31 at the intersection of Brunswick St and Victoria Parade c1986. ...Trams tramways Melbourne Victoria Parade tram 27 tram 38 Colour postcard of Melbourne W2 456 inbound to the City on route 31 at the intersection of Brunswick St and Victoria Parade c1986. ...Colour postcard of Melbourne W2 456 inbound to the City on route 31 at the intersection of Brunswick St and Victoria Parade c1986. Tram has advertisements for the ABC News and another company. On rear of photograph are details of the postcard, photographer (Raymond J. Marsh), stamp location with two card numbers and a copyright note "Mary Jayne's Railroad Specialities, Inc." Not known when actual postcard was produced.trams, tramways, melbourne, victoria parade, tram 27, tram 38 -
 Melbourne Tram Museum
Pamphlet, Yarra Trams, Times Change, Jul. 2014
... Changes for routes 1, 11, 24, 31, 48, 78, 79, 95, 109 and 112. ...Changes for routes 1, 11, 24, 31, 48, 78, 79, 95, 109 and 112. ...Pamphlet, A4 white paper, titled "Times Change" advising new timetables and route changes for 27/7/2014. Changes for routes 1, 11, 24, 31, 48, 78, 79, 95, 109 and 112. Has the Yarra Trams and PTV logos and the tramTracker logo.trams, tramways, yarra trams, timetables, tram routes -
 Melbourne Tram Museum
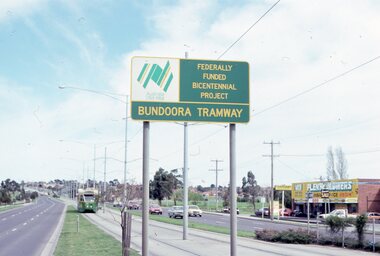
Album - Robert Thomson Slide Collection, "9.9.1988 to 16.9.1988"
... -route05 RT070 St Kilda - tram 272 - "East Brunswick" - route 96 RT071 Elizabeth St Terminus - tram 80 - "Ascot Vale" - route 9 RT072 West Coburg Reserved Track - tram 78 - "Domain & St Kilda Rds" - route 56 RT073 West Coburg Terminus - tram 66 - "Domain & St Kilda Rds" - route 56 RT074 West Coburg Terminus - tram 87 - "Domain & St Kilda Rds" - route 56 RT075 Batman Ave Terminus - tram 118 - "Wattle Park" - route 70 RT076 Collins St Terminus - tram 1022 - "West Preston" - route 11 RT077 North Balwyn Terminus - tram 255 - "City - Lonsdale St" - route 48 RT078 Kew Cotham Rd Terminus - tram 865 - "St Kilda Beach via Balaclava Rd" - route 69 RT079 St Kilda esplanade - Carlisle - tram 946 - "Kew Cotham Rd" - route 69 - tram 295 - "East Brunswick" - route 96 RT080 West Preston Terminus - tram 943 - "St Kilda Beach" - route 10 RT081 Mont Albert Terminus - tram 250 - "Mont Albert" - route 42 RT082 Carnegie Single Line - tram 998 - "City" - route 67 RT083 Carnegie Single Line - tram 736 - "Carnegie" - route 67 RT084 Carnegie terminus - tram 736 - "City" - route 67 RT085 East Brighton Terminus - tram 914 - "City" - route 64 RT086 St Kilda Jct - tram 998 - "East Malvern Darling Rd" - route 3 & tram 969 - "City" route 3 RT087 Bourke St Spencer St - tram 271 - "St Kilda Beach" - route 96 RT088 Preston Railway Overbridge - "Northcote via St Georges Rd" - route 9 RT089 Victoria Parade - tram 906 - "Mont Albert" - route 42 & tram 252 - "City" - route 42 RT090 Victoria Parade - tram 1025 - "City Spencer St" - route 31...-route05 RT070 St Kilda - tram 272 - "East Brunswick" - route 96 RT071 Elizabeth St Terminus - tram 80 - "Ascot Vale" - route 9 RT072 West Coburg Reserved Track - tram 78 - "Domain & St Kilda Rds" - route 56 RT073 West Coburg Terminus - tram 66 - "Domain & St Kilda Rds" - route 56 RT074 West Coburg Terminus - tram 87 - "Domain & St Kilda Rds" - route 56 RT075 Batman Ave Terminus - tram 118 - "Wattle Park" - route 70 RT076 Collins St Terminus - tram 1022 - "West Preston" - route 11 RT077 North Balwyn Terminus - tram 255 - "City - Lonsdale St" - route 48 RT078 Kew Cotham Rd Terminus - tram 865 - "St Kilda Beach via Balaclava Rd" - route 69 RT079 St Kilda esplanade - Carlisle - tram 946 - "Kew Cotham Rd" - route 69 - tram 295 - "East Brunswick" - route 96 RT080 West Preston Terminus - tram 943 - "St Kilda Beach" - route 10 RT081 Mont Albert Terminus - tram 250 - "Mont Albert" - route 42 RT082 Carnegie Single Line - tram 998 - "City" - route 67 RT083 Carnegie Single Line - tram 736 - "Carnegie" - route 67 RT084 Carnegie terminus - tram 736 - "City" - route 67 RT085 East Brighton Terminus - tram 914 - "City" - route 64 RT086 St Kilda Jct - tram 998 - "East Malvern Darling Rd" - route 3 & tram 969 - "City" route 3 RT087 Bourke St Spencer St - tram 271 - "St Kilda Beach" - route 96 RT088 Preston Railway Overbridge - "Northcote via St Georges Rd" - route 9 RT089 Victoria Parade - tram 906 - "Mont Albert" - route 42 & tram 252 - "City" - route 42 RT090 Victoria Parade - tram 1025 - "City Spencer St" - route 31 Demonstrates the work of Robert Thomson in photography, collection and/or production of slides Melbourne tramways trams Track Construction Assembled album in a black presentation folder of 36 colour slides, collected or produced by Robert Thomson. ...Photo - see pdf file for further information. Number Brief Description RT055 Bundoora Extension - RT056 Bundoora Extension - tram 261 - "Special" route 00 RT057 Bundoora Extension - tram 86 - "Bundoora" route 86 RT058 St Kilda - Esplanade - Carlisle RT059 Relay - Danks St RT060 "City Brunswick St" - route 12 RT061 tram 1003 - "City Brunswick St"- route 12 RT062 track work on route 12 RT063 tram 774 - "City Brunswick St"- route 12 RT064 track work RT065 light rail - tram 2005 - "Depot" RT066 light rail - tram 273 - "Port Melbourne" - route 111 RT067 St Kilda Light Rail Station -tram 291- "St Kilkda Beach - route 06 RT068 St Kilda Rd - tram 830 - "City" - route 6 RT069 StKildaRd-tram928-"??"-route05 RT070 St Kilda - tram 272 - "East Brunswick" - route 96 RT071 Elizabeth St Terminus - tram 80 - "Ascot Vale" - route 9 RT072 West Coburg Reserved Track - tram 78 - "Domain & St Kilda Rds" - route 56 RT073 West Coburg Terminus - tram 66 - "Domain & St Kilda Rds" - route 56 RT074 West Coburg Terminus - tram 87 - "Domain & St Kilda Rds" - route 56 RT075 Batman Ave Terminus - tram 118 - "Wattle Park" - route 70 RT076 Collins St Terminus - tram 1022 - "West Preston" - route 11 RT077 North Balwyn Terminus - tram 255 - "City - Lonsdale St" - route 48 RT078 Kew Cotham Rd Terminus - tram 865 - "St Kilda Beach via Balaclava Rd" - route 69 RT079 St Kilda esplanade - Carlisle - tram 946 - "Kew Cotham Rd" - route 69 - tram 295 - "East Brunswick" - route 96 RT080 West Preston Terminus - tram 943 - "St Kilda Beach" - route 10 RT081 Mont Albert Terminus - tram 250 - "Mont Albert" - route 42 RT082 Carnegie Single Line - tram 998 - "City" - route 67 RT083 Carnegie Single Line - tram 736 - "Carnegie" - route 67 RT084 Carnegie terminus - tram 736 - "City" - route 67 RT085 East Brighton Terminus - tram 914 - "City" - route 64 RT086 St Kilda Jct - tram 998 - "East Malvern Darling Rd" - route 3 & tram 969 - "City" route 3 RT087 Bourke St Spencer St - tram 271 - "St Kilda Beach" - route 96 RT088 Preston Railway Overbridge - "Northcote via St Georges Rd" - route 9 RT089 Victoria Parade - tram 906 - "Mont Albert" - route 42 & tram 252 - "City" - route 42 RT090 Victoria Parade - tram 1025 - "City Spencer St" - route 31Demonstrates the work of Robert Thomson in photography, collection and/or production of slidesAssembled album in a black presentation folder of 36 colour slides, collected or produced by Robert Thomson. All photographs have been scanned and placed on the Museum's G drive. A list of all photographs with details has been compiled. melbourne, tramways, trams, track construction -
 Melbourne Tram Museum
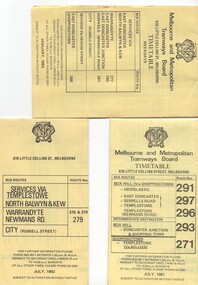
Ephemera - Timetable/s, Melbourne & Metropolitan Tramways Board (MMTB), "MMTB Bus Timetables", 1981 - 1984
... All printed on yellow paper. .1 - Timetable for Box Hill via Shoppingtown and Templestowe, Doncaster bus services, dated July 1981 - routes 291, 297, 296, 293 and 271. .2 - Services via Templestowe, North Balwyn and Kew, Warrandyte and Newmans Rd - routes 276, 278 and 279 - July 1982 .3 - Services via East Doncaster, North Balwyn, Kew, Warrandyte, City, Shoppingtown - routes 277, 280, 281 and 268 - dated Jan. 1983 .4 - ditto as above, including Park Orchards and Donvale - routes 265, 262, 261, 260, 266 and 264 - dated Feb. 1983 .5 - North Altona - City Route 232 - April 1984 - issued by Metropolitan Transit with their logo. 6 - Garden City, Port Melbourne - City - Sept 1982 - routes 201, 202 7 - Sunshine - Footscray - City - Routes 230 and 231 - Jan. 1982 8 - North Altona - City - MMTB logo, route 232 - Nov. 1982 9 - East Kew, Box Hill, Doncaster - Express bus - Box Hill to City - routes 284, 270, 300 - April 1982 10 - Ringwood - Warrandyte, Park Orchards, Mitcham - routes 313, 31, 315 and 316 - Jan. 1983...All printed on yellow paper. .1 - Timetable for Box Hill via Shoppingtown and Templestowe, Doncaster bus services, dated July 1981 - routes 291, 297, 296, 293 and 271. .2 - Services via Templestowe, North Balwyn and Kew, Warrandyte and Newmans Rd - routes 276, 278 and 279 - July 1982 .3 - Services via East Doncaster, North Balwyn, Kew, Warrandyte, City, Shoppingtown - routes 277, 280, 281 and 268 - dated Jan. 1983 .4 - ditto as above, including Park Orchards and Donvale - routes 265, 262, 261, 260, 266 and 264 - dated Feb. 1983 .5 - North Altona - City Route 232 - April 1984 - issued by Metropolitan Transit with their logo. 6 - Garden City, Port Melbourne - City - Sept 1982 - routes 201, 202 7 - Sunshine - Footscray - City - Routes 230 and 231 - Jan. 1982 8 - North Altona - City - MMTB logo, route 232 - Nov. 1982 9 - East Kew, Box Hill, Doncaster - Express bus - Box Hill to City - routes 284, 270, 300 - April 1982 10 - Ringwood - Warrandyte, Park Orchards, Mitcham - routes 313, 31, 315 and 316 - Jan. 1983 Yields information about MMTB Bus services early 1980s and 1 The Met badged item. ...Timetables for specific routes, day of week giving information on tram times at specific time points, route map, sections and fares and organisation address - 616 Little Collins St. Melbourne. All printed on yellow paper. .1 - Timetable for Box Hill via Shoppingtown and Templestowe, Doncaster bus services, dated July 1981 - routes 291, 297, 296, 293 and 271. .2 - Services via Templestowe, North Balwyn and Kew, Warrandyte and Newmans Rd - routes 276, 278 and 279 - July 1982 .3 - Services via East Doncaster, North Balwyn, Kew, Warrandyte, City, Shoppingtown - routes 277, 280, 281 and 268 - dated Jan. 1983 .4 - ditto as above, including Park Orchards and Donvale - routes 265, 262, 261, 260, 266 and 264 - dated Feb. 1983 .5 - North Altona - City Route 232 - April 1984 - issued by Metropolitan Transit with their logo. 6 - Garden City, Port Melbourne - City - Sept 1982 - routes 201, 202 7 - Sunshine - Footscray - City - Routes 230 and 231 - Jan. 1982 8 - North Altona - City - MMTB logo, route 232 - Nov. 1982 9 - East Kew, Box Hill, Doncaster - Express bus - Box Hill to City - routes 284, 270, 300 - April 1982 10 - Ringwood - Warrandyte, Park Orchards, Mitcham - routes 313, 31, 315 and 316 - Jan. 1983Yields information about MMTB Bus services early 1980s and 1 The Met badged item.Set of 9 MMTB and 1 MTA Bus timetables, folded sheets, 8 sections.trams, tramways, mmtb, timetables, melbourne, fares, east kew, box hill, doncaster, north altona, route 232, route 201, route 202, route 220, route 231, route 284, route 270, route 300, route 313, route 314, route 315, route 316 -
 Melbourne Tram Museum
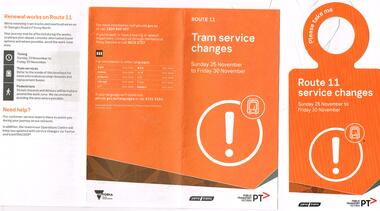
Pamphlet, Public Transport Victoria (PTV), Yarra trams for tramways works during 2017 and early 2019, 2017 to 2018
... Route 11 - 2 copies held .2 - hanging strip type notice for the above work - cut to fit around a strap hanger bar for the St Georges Rd work - 2 copies held. .3 - as for .1 - work in Toorak Road, Camberwell, 3/1/19 to 12/1/19 - route 75. .4 - hanging strip type notice for the above work - cut to fit around a strap hanger bar. for the Toorak Rd. work. .5 - hanging strip type notice for the above work - cut to fit around a strap hanger bar - routes 96 and 109 for Claredon St junction work 9/8/2017 to 14/8/2017. .6 - ditto for routes 11, 12, 48, 109 - Queens Birthday weekend 10/6/17 to 12/6/17. .7 - ditto for routes 86 and 96 - 31/8/2018 to 16/9/2018 for work in Nicholson St Fitzroy. ...Route 11 - 2 copies held .2 - hanging strip type notice for the above work - cut to fit around a strap hanger bar for the St Georges Rd work - 2 copies held. .3 - as for .1 - work in Toorak Road, Camberwell, 3/1/19 to 12/1/19 - route 75. .4 - hanging strip type notice for the above work - cut to fit around a strap hanger bar. for the Toorak Rd. work. .5 - hanging strip type notice for the above work - cut to fit around a strap hanger bar - routes 96 and 109 for Claredon St junction work 9/8/2017 to 14/8/2017. .6 - ditto for routes 11, 12, 48, 109 - Queens Birthday weekend 10/6/17 to 12/6/17. .7 - ditto for routes 86 and 96 - 31/8/2018 to 16/9/2018 for work in Nicholson St Fitzroy. ...Set of six pamphlets issued by Yarra trams for tramways works during 2017 and early 2019 .1 - six fold DL - route 11 tram service changes for work in St Georges Road and over the Merri Creek bridge 25/11/2018 to 30/11/2018. Route 11 - 2 copies held .2 - hanging strip type notice for the above work - cut to fit around a strap hanger bar for the St Georges Rd work - 2 copies held. .3 - as for .1 - work in Toorak Road, Camberwell, 3/1/19 to 12/1/19 - route 75. .4 - hanging strip type notice for the above work - cut to fit around a strap hanger bar. for the Toorak Rd. work. .5 - hanging strip type notice for the above work - cut to fit around a strap hanger bar - routes 96 and 109 for Claredon St junction work 9/8/2017 to 14/8/2017. .6 - ditto for routes 11, 12, 48, 109 - Queens Birthday weekend 10/6/17 to 12/6/17. .7 - ditto for routes 86 and 96 - 31/8/2018 to 16/9/2018 for work in Nicholson St Fitzroy. Have Yarra Trams PTV and Vic Govt. logos along with printing dates.trams, tramways, yarra trams, ptv, tramway per way, trackwork, route 11, route 12, route 48, route 75, route 96, route 109 -
 Mission to Seafarers Victoria
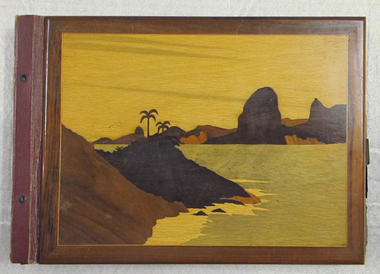
Album - Photographic album, 1948
... route taken by the M/V Fenris. The album provides an insight into the ways of life in many different port cities of North and South America as well as Europe. fenris voyage album photographs allan quinn seamen sailors seafarers Inside front cover contains handwritten itinerary of the voyage. Cover is made of brown wood with inset wooden picture of sea and land. Back cover is plain. Photograph album with wooden covers with 31 ...This item provides a picture of the route taken by the M/V Fenris.The album provides an insight into the ways of life in many different port cities of North and South America as well as Europe. Photograph album with wooden covers with 31 pages of photos, many loose. Depicts journey by Allan Quinn while aboard the M/V Fenris in 1948-1949. Inside front cover contains handwritten itinerary of the voyage. Cover is made of brown wood with inset wooden picture of sea and land. Back cover is plain.fenris, voyage, album, photographs, allan quinn, seamen, sailors, seafarers -
 Bendigo Military Museum
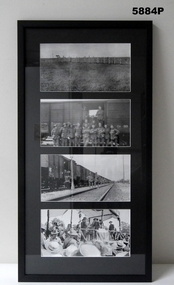
Photograph - THE GRINTON COLLECTION, FRAMED, 2008 - 2009
... route' from Gamaches to Havre in early 1919. From Havre they sailed for England on the "Prince George". Photo 4. Bert Grinton receiving his "DCM" from Lady Denman for actions around Clery on 31/8/1918. ...route' from Gamaches to Havre in early 1919. From Havre they sailed for England on the "Prince George". Photo 4. Bert Grinton receiving his "DCM" from Lady Denman for actions around Clery on 31/8/1918. ...Frame 5. Photo 1. Lonely graves on a battlefield. This has been identified as "Vaire Wood cemetery" just south of the Somme at Vaire-sous-Corbie. Some 28 diggers from Vaire Wood were later reburied at Crucifix Corner Cemetery at Villers Bretonneux. Photo 2 and 3. Two photos, troop train luxury travel. This is possibly 45th quota men 'en route' from Gamaches to Havre in early 1919. From Havre they sailed for England on the "Prince George". Photo 4. Bert Grinton receiving his "DCM" from Lady Denman for actions around Clery on 31/8/1918. His CITATION reads: For conspicuous gallantry and devotion to duty near Clery on 31st August 1918. he became detached from his Company and joined another party in the advance. mainly through his assistance with a Lews Gun, they cleared an enemy trench, killing about 30 and capturing several machine guns. he got on top of the trench and under heavy fire silenced a field gun which was firing over open sights. This is from the official records in his service documents. Refer Cat No. 5880P for exhibition details. Refer Cat No. 1280 for Jack GRINTON Service Records.Photographs - black and white on paper. 4 photographs top to bottom. 1. Graves on a battlefield. 2 x 2. Troops in front of a rail wagon. View of rail wagons and troops. 3. Soldier receiving an award. Frame - timber with black colour paint, glass front, mount black colour cardboard. Backing cardboard with handwritten notation.Backing cardboard - handwritten, blue felt tip pen "5."framed photographs, grinton collection, ww1, 38th -
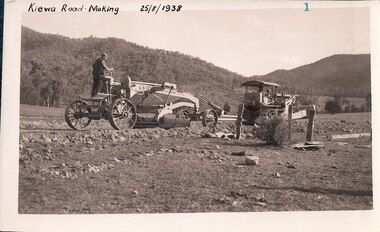 Kiewa Valley Historical Society
Black and White photograph of Road Making Machinery, Kiewa Road Making, 25/08/1938
... From South Tawonga, the route led immediately across the Western Branch of the Kiewa River necessitating the construction of a bridge 100 feet long. By the end of 1939, the excavation had been 'opened up' for a distance of 19 1/2 miles (approx. 31 km) and of this length, 10 miles (approx. 16 km) had been surfaced....From South Tawonga, the route led immediately across the Western Branch of the Kiewa River necessitating the construction of a bridge 100 feet long. By the end of 1939, the excavation had been 'opened up' for a distance of 19 1/2 miles (approx. 31 km) and of this length, 10 miles (approx. 16 km) had been surfaced. ...Construction of the main road from South Tawonga to the Bogong High Plains, to provide access to the construction sites for the new Kiewa Hydro Electric Scheme, was commenced early in 1938, the work being undertaken on behalf of the Commission by the Country Roads Board. For the construction work, the Commission purchased three Caterpillar - model R07 - diesel crawler tractors equipped with Kay Brunerei (Brunner) hydraulically operated trailbuilders (angle dozers). This acquisition resulted from a visit to the United States of America in May, 1937 by the Construction Engineer ( Mr. C.H. Kernot) and Assistant Civil Engineer (Mr. J.F. Douglas) where they saw this relatively new type of equipment in use. With the co-operation of the CRB, the Commission demonstrated the operation of these machines at Fishermen's Bend on 6th April, 1938. They were then sent to Kiewa where they commenced operation towards the end of the month. From South Tawonga, the route led immediately across the Western Branch of the Kiewa River necessitating the construction of a bridge 100 feet long. By the end of 1939, the excavation had been 'opened up' for a distance of 19 1/2 miles (approx. 31 km) and of this length, 10 miles (approx. 16 km) had been surfaced.The purchase and use of this type of mechanical equipment in road making was a huge investment, as prior to this most of the work would have been done manually with the use of picks and shovels. Not only were many months of hard manual labour saved, but a very significant amount of time in providing access to the proposed work sites for the new Kiewa Hydro Scheme. This photo is an excellent reminder of how primitive the early machinery was compared to the present but also represents the forward thinking of the State Electricity Commissions engineers in purchasing such innovative equipment . A black and white photograph showing the type of machinery used for road making in the 1930's. It shows a grader being towed by a caterpillar tractor.On the top left hand corner of the photograph , hand written in black ink is the words 'Kiewa Road Making 25/8/1938'. On the right hand side of the photo has been stamped in blue the Number 1. It has been developed on Velox paper (marked on back of photo) with a gloss finish.road making, state electricity commission, caterpillar tractor, kiewa -
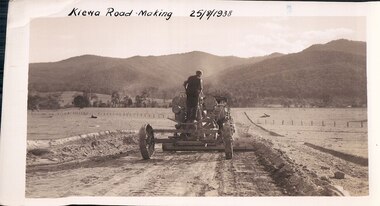 Kiewa Valley Historical Society
Black and White photograph of Road Making Machinery, Kiewa Road Making 25/08/1938 No. 2, 25/08/1938
... From South Tawonga, the route let immediately across the Western Branch of the Kiewa River necessitating the construction of a bridge 100 feet long. By the end of 1939, the excavation had been 'opened up' for a distance of 19 1/2 miles (approx. 31 km.) and of this length, 10 miles (approx. 16 km.) had been surfaced. ...From South Tawonga, the route let immediately across the Western Branch of the Kiewa River necessitating the construction of a bridge 100 feet long. By the end of 1939, the excavation had been 'opened up' for a distance of 19 1/2 miles (approx. 31 km.) and of this length, 10 miles (approx. 16 km.) had been surfaced. ...Construction of the main road from South Tawonga to the Bogong High Plains, to provide access to the construction sites for the new Kiewa Hydro Electric Scheme, was commenced early in 1938, the work being undertaken on behalf of the commission by the Country Roads Board. For the construction work, the Commission purchased three Caterpillar - model R07 - diesel crawler tractors equipped with Kay Brunerei (Brunner) hydraulically operated trailbuilders (angle dozers). This acquisition resulted from a visit to the United States of America in May, 1937 by the Construction Engineer ( Mr. C.H. Kernot) and Assistant Civil Engineer ( Mr. J.F. Douglas) where they saw this relatively new type of equipment in use. With the co-operation of the CRB, the Commission demonstrated the operation of these machines at Fishermen's Bend on 6th April, 1938. They were then sent to Kiewa where they commenced operation towards the end of the month. From South Tawonga, the route let immediately across the Western Branch of the Kiewa River necessitating the construction of a bridge 100 feet long. By the end of 1939, the excavation had been 'opened up' for a distance of 19 1/2 miles (approx. 31 km.) and of this length, 10 miles (approx. 16 km.) had been surfaced. (see KVHS 0328)The purchase of this type of mechanical equipment in road making was a huge investment, as prior to this most of the work would have been done manually with the use of picks and shovels. Not only were many months of hard manual labour saved, but a very significant amount of time in providing access to the proposed work sites for the new Kiewa Hydro Scheme. This photo is an excellent reminder of how primitive the early machinery was compared to the present but also represents the forward thinking of the State Electricity Commissions engineers in purchasing such innovative equipment.A black and white photograph of road making near Mt. Beauty in 1938. Mount Beauty hills can be seen in the background with cleared land for grazing in the fore ground.Hand printed in black ink at the top of the photograph is 'Kiewa Road Making 25/8/1938'. On the right hand corner has been printed the number 2. It has been printed on gloss Velox paper.road making, state electricity commission, caterpillar tractor, kiewa, secv -
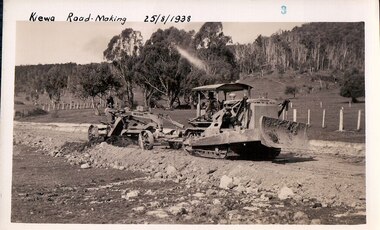 Kiewa Valley Historical Society
Black and White photograph of Road Making Machinery, Kiewa Road Making 25/8/1938(No. 3 in a series of 8), 25/08/1938
... From South Tawonga, the route led immediately across the Western Branch of the Kiewa River necessitating the construction of a bridge 100 feet long. By the end of 1939,the excavation had been 'opened up' for a distance of 19 1/2 miles (approx. 31 km.) and of this length, 10 miles (approx. 16 km) had been surfaced....From South Tawonga, the route led immediately across the Western Branch of the Kiewa River necessitating the construction of a bridge 100 feet long. By the end of 1939,the excavation had been 'opened up' for a distance of 19 1/2 miles (approx. 31 km.) and of this length, 10 miles (approx. 16 km) had been surfaced. ...Construction of the main road from South Tawonga to the Bogong High Plains, to provide access to the construction sites for the new Kiewa Hydro Electric Scheme, was commenced early in 1938, the work being undertaken on behalf of the Commission by the Country Roads Board. For the construction work, the Commission purchased three Caterpillar - model R07 - diesel crawler tractors equipped with Kay Brunerei (Brunner) hydraulically operated trail builders (angle dozers)). This acquisition resulted from a visit to the United States of America in May, 1937 by the Construction Engineer ( Mr. C.H. Kernot) and Assistant Civil Engineer (Mr. J.F. Douglas) where they saw this relatively new type of equipment in use. With the co-operation of the CRB, the Commission demonstrated the operation of these machines at Fishermen's Bend on 6th April, 1938. They were then sent to Kiewa where they commenced operation towards the end of the month. From South Tawonga, the route led immediately across the Western Branch of the Kiewa River necessitating the construction of a bridge 100 feet long. By the end of 1939,the excavation had been 'opened up' for a distance of 19 1/2 miles (approx. 31 km.) and of this length, 10 miles (approx. 16 km) had been surfaced.The purchase and use of this type of mechanical equipment in road making was a huge investment, as prior to this most of the work would have been done manually with the use of picks and shovels. Not only were many months of hard manual labour saved, but a very significant amount of time in providing access to the proposed work sites for the new Kiewa Hydro Scheme. This photo is an excellent reminder of how primitive the early machinery was compared to the present but also represents the forward thinking of the State Electricity Commission's Engineers in purchasing such new and innovative equipment.A black and white photograph of a Caterpillar diesel crawler tractor and a hydraulically operated trailbuilder (angle dozer) making a road in the Mt. Beauty area.Hand written in black ink in the top left hand corner are the words "Kiewa Road Making 25/8/1938". On the upper right hand of the photograph has been stamped the number 3. On the back is stamped the word 'Velox' severaly times, which is the make of the photograhic paper. roadmaking, caterpillar tractor, kiewa, state electricity commission -
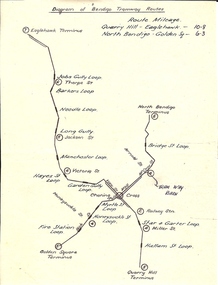 Bendigo Historical Society Inc.
Document - BASIL MILLER COLLECTION: TRAMS - DIAGRAM BENDIGO TRAMWAY ROUTES
... Hand drawn map of Bendigo tramway Routes indicating location of loops and where lines terminated. Reverse: Bottom left corner 31/2 handwritten in blue ink....PERSON Individual basil miller Hand drawn map of Bendigo tramway Routes indicating location of loops and where lines terminated. Reverse: Bottom left corner 31/2 handwritten in blue ink. ...Hand drawn map of Bendigo tramway Routes indicating location of loops and where lines terminated. Reverse: Bottom left corner 31/2 handwritten in blue ink.person, individual, basil miller -
 Otway Districts Historical Society
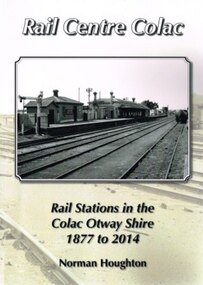
Book, Norman Houghton, Rail Centre Colac, 2014
... The main line through the region was the 35 km rail route from Birregurra (and thence to Geelong) though Colac to Pirron Yallock (and thence to Warrnambool and Port Fairy) from March, 1877, to July, 1883. The first branch line ran from Irrewarra to Beeac in 1889, which then extended in stages to Cressy and on the Ballarat. The second branch line was the 31...The main line through the region was the 35 km rail route from Birregurra (and thence to Geelong) though Colac to Pirron Yallock (and thence to Warrnambool and Port Fairy) from March, 1877, to July, 1883. The first branch line ran from Irrewarra to Beeac in 1889, which then extended in stages to Cressy and on the Ballarat. The second branch line was the 31 ...Colac was the centre of a spidery rail network over which were carted anything and everything by Victorian Railways, the common carrier throughout the area. The main line through the region was the 35 km rail route from Birregurra (and thence to Geelong) though Colac to Pirron Yallock (and thence to Warrnambool and Port Fairy) from March, 1877, to July, 1883. The first branch line ran from Irrewarra to Beeac in 1889, which then extended in stages to Cressy and on the Ballarat. The second branch line was the 31 km long Birregurra to Forrest in 1891. The cost of building railways into mountainous terrain meant the third branch line was a narrow-gauge 2 foot 6 inch line, first of all to Beech Forest in 1902, and then to Crowes in 1911, for a total of 71 km. The final rail connection was the 16 km branch from Colac to Alvie to facilitate the transport of onions, opening in 1923. Each line had its own character and peculiarities derived from its foundation, geography and economic base. As a general rule, the loadings on the branch lines had greater output tonnage than inwards, the reverse of the main line. The lines traversed agricultural and timber areas where inputs like seed, grass, fertiliser and labour were minor, compared with the output, timber, wool, cream, butter, cheese fruit, potatoes, onion, grain and livestock.Rail Centre Colac. Rail stations in the Colac Otway Shire, 1877 to 2014. Norman Houghton. 1st ed. Norman Houghton; Geelong (Vic); 2014. vi, 262 p.; illus., maps, index. Soft cover.colac; cressy; forrest; beech forest; crowes -
 Coal Creek Community Park & Museum
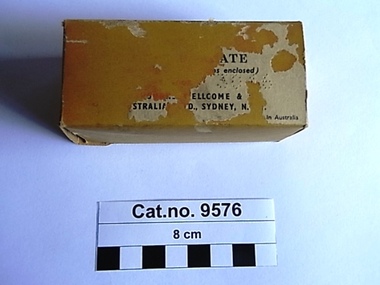
Box, cardboard, c.1937-1960
... 31/2 oz. of the granules should be injected subcutaneously at two or three points in the neck, with the usual aseptic precautions. The granules should be dissolved in 10 fl. oz. of boiling water, the solution allowed to boil for five minutes, then cooled to body temperature before administration. Repetition of the dose is very rarely necessary. Should a more rapid response be desired, the whole of the solution hay be given by slow intravenous injection; alternatively , the greater part of the solution may be injected by this route...31/2 oz. of the granules should be injected subcutaneously at two or three points in the neck, with the usual aseptic precautions. The granules should be dissolved in 10 fl. oz. of boiling water, the solution allowed to boil for five minutes, then cooled to body temperature before administration. Repetition of the dose is very rarely necessary. Should a more rapid response be desired, the whole of the solution hay be given by slow intravenous injection; alternatively , the greater part of the solution may be injected by this route ...Trove : Advertised from 1937-1949 in various publications search under "Wellcome"' Calcium Borogluconate (yes with 2 'l's) . Victorian Government Gazette , no.2 Jan 5, 1960, page 16. List of Registered Stock Medicine. Registered Wholesale Dealer : Burroughs Wellcome and Co. (Aust) Ltd. Cressy Street, Rosebery New South Wales. Manufacturer, if other than the Wholesale Dealer - , Distinguishing Name of Stock Medicine : "Wellcome" Calcium Borogluconate, Approved Use or for the Treatment of : Milk Fever, hypocalcaemia. Rectangular faded pink cardboard box opening at both ends with the remnants of a paper label on one side, containing a folded paper leaflet and a cellophane bag containing white granules.Outer label '.....ATE .s enclosed)..........ELLCOME & .............STRALIA..D., SYDNEY, N....in Australia'. Impressed on one flap of box '132'. Printed leaflet (side one) Illustration of a unicorn, a thick black line under which text 'WELLCOME' brand CALCIUM BOROGLUCONATE (Vetinary)' followed by another thick black line. 'Calcium Borogluconate ia a stable , non-irritant calcium preparation for subcutaneous or intravenous injection in the treatment of milk fever and other forms of acute hypocalcaemia. It is available in the dry state as 'Wellcome' Calcium Borogluconate, a granular product in single dose containers of 2 1/2 oz. Milk Fever In the treatment of milk fever in cows, 21/2 oz. to 31/2 oz. of the granules should be injected subcutaneously at two or three points in the neck, with the usual aseptic precautions. The granules should be dissolved in 10 fl. oz. of boiling water, the solution allowed to boil for five minutes, then cooled to body temperature before administration. Repetition of the dose is very rarely necessary. Should a more rapid response be desired, the whole of the solution hay be given by slow intravenous injection; alternatively , the greater part of the solution may be injected by this route and the remainder given subcutaneously in the manner described above. A convenient apparatus for the controlled administration of large volumes of fluid (leaflet side two) is the 'Wellcome' Flutter Valve Injection Apparatus. Prophylaxis Recurrent attacks at successive parturitions may be prevented by giving calcium borogluconate immediately after calving and again about 20 hours later. Each dose should be from one or two ounces of 'Wellcome' Calcium Borogluconate, dissolved as directed above. Other Indications Certain other conditions have been found to respond readily to calcium borogluconate therapy. These include parturient hypocalcaemia or milk fever in ewes, parturient eclampsia in sows and bitches, so-called "staggers" in lactating dairy cattle suspected to be due to hypocalcaemia, and transit tetany in horses. The dosage for various species is generally within the ranges indicated below : horses and cattle 11/2 to 31/2 oz. Sheep, goats and pigs 1/2 oz. to 1 oz. Dogs 11/2 dr. to 3 dr. 'WELLCOME' brand CALCIUM BOROGLUCONATE A readily-soluble granular product issued in cartons of 21/2 oz.' Illustration of a unicorn, 'BURROUGHS WELLCOME & CO. (AUSTRALIA) LTD. (Incorporated in England) SYDNEY, N.S.W.' A black line 'ref.A5007g 54.1. 25' milk fever, hypocalcaemia, subcutaneous -
 Bendigo Military Museum
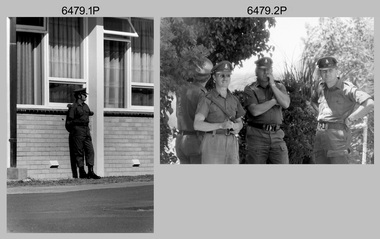
Photograph - Army Survey Regiment Freedom of Entry Parade Rehearsal, Fortuna. Bendigo, 1980
... Rear rank L to R: unidentified (x3), SPR Carla Dell on far right. .31) - Photo, black & white, 1980. Cartographic Squadron marches in column of route. .32) - Photo, black & white, 1980. ...Rear rank L to R: unidentified (x3), SPR Carla Dell on far right. .31) - Photo, black & white, 1980. Cartographic Squadron marches in column of route. .32) - Photo, black & white, 1980. ...This set of 38 black and white photographs were taken at the Army Survey Regiment’s parade rehearsal held at Fortuna, Bendigo in 1980. The rehearsal was for the Freedom of Entry parade held 1-2 weeks later in 1980. The exact date for the Freedom of Entry parade is not known. The Freedom of Entry to the City of Bendigo was an honour first conferred by the Bendigo City Council to the Army Survey Regiment in 1970. The Freedom of Entry parade in 1980 was the third time the unit exercised its right of freedom of entry. The Regiment also exercised its Freedom of Entry with anniversary parades in 1977, 1985, 1990, 1992 and 1996. Refer to items 6020.8P, 6021.25P, 6248P, 6266, 6409.2, 6430.39P, 6490.53P and 6491.21P for more Army Survey Regiment Freedom of Entry photographs, documents and certificates. See item 6471.2P for photos of Lithographic Squadron taken on the same day of this parade rehearsal. This set of 38 black and white photographs of the Army Survey Regiment (Army Svy Regt) were taken in a rehearsal for the Freedom of Entry parade to the City of Bendigo, held 1-2 weeks later in 1980. The photographs are on 35mm negative film and were scanned at 96 dpi. They are part of the Army Survey Regiment’s Collection. .1) - Photo, black & white, 1980. WO1 John McCulloch observes the rehearsal. .2) - Photo, black & white, 1980. RSM WO1 Aub Harvey, WO1 Dave Thomson and WO1 Roger Rix observe the rehearsal. .3) - Photo, black & white, 1980. Under command of SSM WO1 Bob Mason, Air Survey Squadron marches onto the parade ground - Front rank L to R: SPR Peter Jones, SPR Barry Miller, CPL Alan Hawkins. .4) - Photo, black & white, 1980. Air Survey Squadron marches on the parade ground - L to R: SPR Peter Jones, CPL Lyall Camp, SPR Barry Miller, SPR Geoff Havelberg, unidentified, CPL Alan Hawkins, CPL Peter Treble, unidentified (x2), SGT Mick Hogan, SGT Bruce Hammond, unidentified, SPR Steve Linane, SPR Jamie McRae, unidentified (x2). .5) - Photo, black & white, 1980. Air Survey Squadron formed up – CAPT Peter Ralston on far left. .6) - Photo, black & white, 1980. Air Survey Squadron inspection – L to R: CAPT Peter Ralston, CPL Alan Hawkins, CO LTCOL Bob Skitch, SGT Mick Hogan, SGT Bruce Hammond, SPR Jamie McRae. .7) - Photo, black & white, 1980. Air Survey Squadron inspection – L to R: SPR Peter Jones, unidentified, CPL Paul Hopes, unidentified, SGT Rick van der Bom, LTCOL Bob Skitch, SPR Steve Linane, CPL Mick Minchin, unidentified, SPR Gae (Robinson) Amato, unidentified, SPR Chris ‘CPL Peter Treble, Charlie’ Brown, SPR Ginny (Turner) Rowe. .8) - Photo, black & white, 1980. Lithographic Squadron marches onto the parade ground - Front rank L to R: SPR Brian Fauth, SPR Roy Hicks, SPR Per Andersen, commanded by LT Steve Cooper. .9) - Photo, black & white, 1980. Lithographic Squadron marches onto the parade ground - L to R: SSM WO1 Ken Slater, Front rank SPR Brian Fauth, SPR Roy Hicks, SPR Per Andersen, LT Steve Cooper. .10) - Photo, black & white, 1980. Lithographic Squadron inspection - L to R: CAPT Stan Vote, LT Steve Cooper, CO LTCOL Bob Skitch, SPR Neville Carr, SPR Laurie Justin, SPR Keith Quinton. .11) - Photo, black & white, 1980. Lithographic Squadron inspection - L to R: unidentified, LT Steve Cooper, CPL Frank Lenane, CPL Mick ‘Buddha’ Ellis, SPR Martin van de Maele, CO LTCOL Bob Skitch, unidentified (x2), SPR Garry Hudson, remainder unidentified. .12) - Photo, black & white, 1980. Lithographic Squadron inspection - L to R: LT Steve Cooper, CPL Rob Bogumil, unidentified, CO LTCOL Bob Skitch, CPL Bill Jones, CPL John ‘Flash’ Anderson, CPL Warren ‘Waldo’ Shirley, unidentified. .13) - Photo, black & white, 1980. Lithographic Squadron inspection - L to R: unidentified (x4), CO LTCOL Bob Skitch, unidentified, CPL Bill Jones, LT Steve Cooper, CPL Warren ‘Waldo’ Shirley. .14) - Photo, black & white, 1980. Lithographic Squadron performs form - right file L to R: SPR Brian Fauth, SPR Roy Hicks, SPR Per Andersen. .15) - Photo, black & white, 1980. Lithographic Squadron completes form at the halt. .16) - Photo, black & white, 1980. Lithographic Squadron marches in column of route – right file L to R: SPR Keith Quinton, SPR John Whaling, SPR Martin van de Maele, SPR John Whaling, SPR Garry Hudson, unidentified. Centre marker: CPL Warren ‘Waldo’ Shirley, remainder unidentified. .17) - Photo, black & white, 1980. Lithographic Squadron marches in column of route – right file L to R: SPR John Whaling, SPR Martin van de Maele, SPR John Whaling, SPR Garry Hudson, unidentified. Centre marker CPL Warren ‘Waldo’ Shirley, remainder unidentified. .18) - Photo, black & white, 1980. Lithographic Squadron marches in column of route – L to R: SPR Per Andersen, CPL Josh Degroot, SPR Neville Carr, SPR Laurie Justin, SPR Keith Quinton, SPR John Whaling, SPR Martin van de Maele, SPR John Whaling, SPR Garry Hudson, unidentified. .19) - Photo, black & white, 1980. Lithographic Squadron marches in column of route – L to R: SPR Per Andersen, CPL Josh Degroot, SPR Neville Carr, SPR Laurie Justin, SPR Keith Quinton, SPR Martin van de Maele, SPR John Whaling, SPR Garry Hudson, unidentified (x2), CPL Warren ‘Waldo’ Shirley, unidentified. .20) - Photo, black & white, 1980. Lithographic Squadron rehearses ‘rest on arms reverse.’ .21) - Photo, black & white, 1980. Cartographic Squadron marches onto the parade ground in column of route - L to R: SPR Cheryl Lofthouse, unidentified, SSM WO1 Gordon Lowery, unidentified, SPR Megan (McBurney) Reynolds, unidentified (x6), SPR Peter Main, CPL Stu Symonds, SPR Greg Else, SPR Rod Skidmore. .22) - Photo, black & white, 1980. Cartographic Squadron marches onto the parade ground in column of route - L to R: SPR Rod Skidmore, SPR Greg Else, CPL Phil McGuire, CPL Dennis Learmonth, CPL Brad Peppler, CPL Trevor Bottomley, SPR Gina (Coore) Neilson, SPR Carla Dell, CPL Lynn Johnson, commanded by CAPT Bob Williams. .23) - Photo, black & white, 1980. Cartographic Squadron inspection - L to R: unidentified officer, CAPT Bob Williams, SPR Greg Else, CO LTCOL Bob Skitch, CPL Phil McGuire, CPL Dennis Learmonth, CPL Brad Peppler, CPL Trevor Bottomley. .24) - Photo, black & white, 1980. Cartographic Squadron inspection - L to R: RSM WO1 Aub Harvey, unidentified officer, CAPT Bob Williams, CO LTCOL Bob Skitch. Front rank L to R: SPR Rod Skidmore, CPL Phil McGuire, CPL Dennis Learmonth, CPL Brad Peppler, CPL Trevor Bottomley, SPR Gina (Coore) Neilson, SPR Carla Dell, CPL Lynn Johnson. Centre rank L to R: CPL Terry Danger, SPR John Martin, SPR Bob Sheppard. SPR Megan (McBurney) Reynolds. .25) - Photo, black & white, 1980. Cartographic Squadron inspection - Front rank L to R: CPL Phil McGuire, CAPT Bob Williams, CPL Brad Peppler, CO LTCOL Bob Skitch, CPL Trevor Bottomley, SPR Gina (Coore) Neilson, SPR Carla Dell, CPL Lynn Johnson. .26) - Photo, black & white, 1980. Cartographic Squadron inspection - L to R: WO1 Roger Rix, RSM WO1 Aub Harvey, unidentified officer. Front rank L to R: SPR Rod Skidmore, SPR Greg Else, CPL Phil McGuire, CPL Brad Peppler, CPL Trevor Bottomley, SPR Gina (Coore) Neilson, SPR Carla Dell, CPL Lynn Johnson. Centre rank L to R: CPL Terry Danger, SPR John Martin, SPR Bob Sheppard. SPR Megan (McBurney) Reynolds. .27) - Photo, black & white, 1980. Cartographic Squadron inspection - L to R: CPL Dennis Learmonth, CPL Brad Peppler, CO LTCOL Bob Skitch, CPL Trevor Bottomley, SPR Gina (Coore) Neilson, SPR Carla Dell, CPL Lynn Johnson. .28) - Photo, black & white, 1980. Cartographic Squadron inspection - L to R: CAPT Bob Williams, unidentified, CO LTCOL Bob Skitch, SPR John Martin, SPR Bob Sheppard, SPR Megan (McBurney) Reynolds, rear rank L to R: SPR Peter Main, unidentified (x3). .29) - Photo, black & white, 1980. Cartographic Squadron rehearses ‘reverse arms’ - L to R: SPR Peter Main, CPL Stu Symonds, SPR Rod Skidmore, SPR Greg Else, remainder unidentified. .30) - Photo, black & white, 1980. Cartographic Squadron rehearses ‘rest on arms reverse.’ - Front rank L to R: SPR Rod Skidmore, SPR Greg Else, CPL Phil McGuire, CPL Dennis Learmonth, CPL Brad Peppler, CPL Trevor Bottomley. remainder unidentified. Centre rank L to R: unidentified (x2), SPR John Martin, SPR Bob Sheppard, SPR Megan (McBurney) Reynolds. Rear rank L to R: unidentified (x3), SPR Carla Dell on far right. .31) - Photo, black & white, 1980. Cartographic Squadron marches in column of route. .32) - Photo, black & white, 1980. Cartographic Squadron marches in column of route. Left file L to R: SPR Rod Skidmore, SPR Greg Else, CPL Phil McGuire, CPL Dennis Learmonth, CPL Brad Peppler, CPL Trevor Bottomley, SPR Gina (Coore) Neilson, SPR Carla Dell, CPL Lynn Johnson. Centre file L to R: unidentified (x2), SPR Dan Cirsky, SPR Bob Sheppard. Commanded by CAPT Bob Williams (foreground). .33) - Photo, black & white, 1980. Cartographic Squadron rehearses ‘order arms.’ Front rank L to R: SPR Rod Skidmore, SPR Greg Else, CPL Phil McGuire, CPL Dennis Learmonth, CPL Brad Peppler, CPL Trevor Bottomley, SPR Gina (Coore) Neilson, SPR Carla Dell, CPL Lynn Johnson. Centre rank L to R: unidentified (x2), SPR Dan Cirsky, SPR Megan (McBurney) Reynolds, SPR Ilen Isaac. Rear rank L to R: SPR Cathy Regan, unidentified, SPR Cheryl Lofthouse. .34) - Photo, black & white, 1980. Cartographic Squadron rehearses ‘right dress.’ Front rank L to R: SPR Rod Skidmore, SPR Greg Else, CPL Phil McGuire, CPL Dennis Learmonth, CPL Brad Peppler, CPL Trevor Bottomley, SPR Gina (Coore) Neilson, SPR Carla Dell, CPL Lynn Johnson. Centre rank L to R: SPR John Martin, SPR Bob Sheppard. SPR Megan (McBurney) Reynolds, SPR Ilen Isaac. Rear rank L to R: unidentified (x2), SPR Cathy Regan, unidentified, SPR Cheryl Lofthouse. Commanded by CAPT Bob Williams (far left). 35) - Photo, black & white, 1980. Air Survey Squadron section rehearses marching with reverse arms. L to R: SPR Bob Hopper, CPL Rick Downie, CPL Paul Hopes, unidentified (x2, SGT Rick van der Bom, SPR Steve Hilton, CPL Peter Treble, unidentified, SPR John Lane, remainder unidentified. .36) - Photo, black & white, 1980. Air Survey Squadron section rehearses marching with reverse arms. L to R: CPL Alan Hawkins, CPL John Smith, SPR Dave Jobe, unidentified (x2), SGT Mick Hogan, SPR Barry Miller, WO1 Dave Thomson. .37) - Photo, black & white, 1980. Cartographic Squadron sections practice drill. .38) - Photo, black & white, 1980. Air Survey Squadron rest break from drill practice. L to R: unidentified (x2), CPL Noel McNamara, SSGT Peter Warwick, SSGT Greg Buckingham (facing away), SGT Jim Beard, unidentified, SPR Sharon (Jones) Treble (foreground), unidentified, SGT Bruce Gordon, SPR Kristin (Isaac) Skidmore.There are no personnel identified. royal australian survey corps, rasvy, army survey regiment, army svy regt, fortuna, asr -
 Bendigo Military Museum
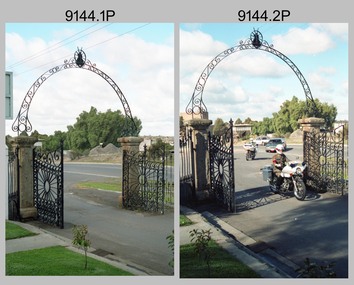
Photograph - CGS LTGEN Coates Visit Parade - Army Survey Regiment, Fortuna, Bendigo, 1990
... route. L to R: SGT Frank Downie, SPR Scott Cameron, MAJ Peter Clark, SPR Mark Linwood. .29) - Photo, colour, 1990. Parade contingent stands at attention. .30) - Photo, colour, 1990. Parade contingent stands at ease. Rear rank L to R: LCPL Stuart Midgley, SPR Marcus Seecamp, CPL Steve Wainwright, SPR Todd Reynolds, SPR Rachel (Stanford) Scott, SPR Gavin Craggs, CPL Raelene (Munting) Brodie, remainder unidentified. .31) - Photo, colour, 1990. ...route. L to R: SGT Frank Downie, SPR Scott Cameron, MAJ Peter Clark, SPR Mark Linwood. .29) - Photo, colour, 1990. Parade contingent stands at attention. .30) - Photo, colour, 1990. Parade contingent stands at ease. Rear rank L to R: LCPL Stuart Midgley, SPR Marcus Seecamp, CPL Steve Wainwright, SPR Todd Reynolds, SPR Rachel (Stanford) Scott, SPR Gavin Craggs, CPL Raelene (Munting) Brodie, remainder unidentified. .31) - Photo, colour, 1990. ...This set of 36 photographs was taken in August 1990 at a parade to welcome the Australian Army Chief of the General Staff (CGS)’s visit to the Army Survey Regiment, Fortuna, Bendigo. Lieutenant General Henry John Coates AC MBE was a senior officer in the Australian Army who served as Chief of the General Staff from 1990 to 1992. The name of the CGS’s aide de camp officer is unknown. The CGS and the RSM-A visit to the Army Survey Regiment is covered on page 145 of Valerie Lovejoy’s book 'Mapmakers of Fortuna – A history of the Army Survey Regiment’ ISBN: 0-646-42120-4. See Item 6154.6P for additional photos taken during the visit.This is a set of 36 photographs taken on the occasion of the Chief of the General Staff (CGS) - Lieutenant General Henry John Coates AC MBE’s visit to the Army Survey Regiment, Bendigo in August 1990. Colour photographs are on 35mm negative film and scanned at 2400 dpi. They are part of the Army Survey Regiment’s Collection. .1) to .4) - Photo, colour, 1990. The CGS motorcade drives through the Army Survey Regiment front gate. .5) - Photo, colour, 1990. The CGS motorcade arrives at the parade ground. L to R: CPL Dave Cook, SPR Gordon Santo. .6) - Photo, colour, 1990. The CGS motorcade arrives at the parade ground. L to R: CPL Dave Cook, CO LTCOL Rene van den Tol. .7) - Photo, colour, 1990. The CGS is greeted. L to R: CGS LTGEN John Coates AC MBE, unidentified aide de camp officer, SPR Gordon Santo, CO LTCOL Rene van den Tol. .8) - Photo, colour, 1990. CGS LTGEN John Coates AC MBE returns the Army Survey Regiment’s salute. Parade host - CO LTCOL Rene van den Tol is on his right. .9) - Photo, colour, 1990. CGS LTGEN John Coates AC MBE returns the Army Survey Regiment’s salute. Parade host - CO LTCOL Rene van den Tol is on his right. Parade commander – MAJ Peter Clark is on his left. .10) - Photo, colour, 1990. Parade Inspection. In foreground L to R: right marker - SSGT Graham Johnston, CGS LTGEN John Coates AC MBE, CO LTCOL Rene van den Tol, unidentified aide de camp officer. .11) to .13) - Photo, colour, 1990. Parade Inspection. L to R: CGS LTGEN John Coates AC MBE, CO LTCOL Rene van den Tol, unidentified personnel. .14) - Photo, colour, 1990. Parade Inspection. CGS LTGEN John Coates AC MBE, unidentified personnel. .15) - Photo, colour, 1990. Parade Inspection. L to R: CGS LTGEN John Coates AC MBE, CO LTCOL Rene van den Tol, unidentified personnel. .16) - Photo, colour, 1990. Parade Inspection. CGS LTGEN John Coates AC MBE, unidentified personnel. .17) - Photo, colour, 1990. Parade Inspection. L to R: CGS LTGEN John Coates AC MBE, unidentified personnel, CPL Steve Coulson, SPR Chris Wynn, SPR Andrew Arman, SPR Grant Davis, SGT Frank Downie. .18) - Photo, colour, 1990. Parade Inspection. L to R: CGS LTGEN John Coates AC MBE, SGT Frank Downie. .19) - Photo, colour, 1990. Parade Inspection. L to R: MAJ Peter Clark, unidentified aide de camp officer, CGS LTGEN John Coates AC MBE, SGT Frank Downie. .20) - Photo, colour, 1990. Parade Inspection. L to R: CGS LTGEN John Coates AC MBE, CO LTCOL Rene van den Tol, MAJ Peter Clark. In foreground left marker - LCPL Stuart Midgley, right marker - SSGT Graham Johnston. .21) - Photo, colour, 1990. Parade Inspection. L to R: CGS LTGEN John Coates AC MBE, CO LTCOL Rene van den Tol, MAJ Peter Clark. Rear rank L to R: unidentified, SPR Todd Reynolds, SPR Rachel (Stanford) Scott, SPR Gavin Craggs, CPL Raelene (Munting) Brodie, SPR John ‘Docc’ Commons, remainder unidentified. Front rank: SSGT Andy Boath, remainder unidentified .22) - Photo, colour, 1990. Parade Inspection. L to R: CO LTCOL Rene van den Tol, LCPL Puch ‘Charlie’ Tran, CGS LTGEN John Coates AC MBE, CPL Eric Nicholson, MAJ Peter Clark. .23) - Photo, colour, 1990. Parade Inspection. L to R: CGS LTGEN John Coates AC MBE, CO LTCOL Rene van den Tol. Rear rank L to R: SPR Rachel (Stanford) Scott, SPR Gavin Craggs, CPL Raelene (Munting) Brodie, SPR Sue (Foote) Bourne, SPR John ‘Docc’ Commons, remainder unidentified. .24) - Photo, colour, 1990. Parade Inspection. L to R: CGS LTGEN John Coates AC MBE, CO LTCOL Rene van den Tol. Rear rank L to R: SPR Gavin Craggs, CPL Raelene (Munting) Brodie, SPR Sue (Foote) Bourne, SPR John ‘Docc’ Commons, remainder unidentified. .25) & .26) - Photo, colour, 1990. Parade Inspection. L to R: CGS LTGEN John Coates AC MBE, CO LTCOL Rene van den Tol. Rear rank L to R: LCPL Stuart Midgley, SPR Marcus Seecamp, CPl Steve Wainwright, SPR Todd Reynolds, SPR Rachel (Stanford) Scott, remainder unidentified. .27) - Photo, colour, 1990. Parade Inspection. L to R: right marker - SSGT Graham Johnston, MAJ Peter Clark. CGS LTGEN John Coates AC MBE. .28) - Photo, colour, 1990. Parade contingent marches forward in column of route. L to R: SGT Frank Downie, SPR Scott Cameron, MAJ Peter Clark, SPR Mark Linwood. .29) - Photo, colour, 1990. Parade contingent stands at attention. .30) - Photo, colour, 1990. Parade contingent stands at ease. Rear rank L to R: LCPL Stuart Midgley, SPR Marcus Seecamp, CPL Steve Wainwright, SPR Todd Reynolds, SPR Rachel (Stanford) Scott, SPR Gavin Craggs, CPL Raelene (Munting) Brodie, remainder unidentified. .31) - Photo, colour, 1990. Parade contingent stands at attention. Front rank L to R: SSGT Graham Johnston, unidentified, SPR Leigh Palfrey, LCPL Ian Brown, CPL Craig Kellet, SPR Greg Howell, unidentified, SPR Jo Otto, remainder unidentified. .32) - Photo, colour, 1990. Parade contingent presents arms. Front rank L to R: SSGT Graham Johnston, unidentified, SPR Leigh Palfrey, LCPL Ian Brown, CPL Craig Kellet, SPR Greg Howell, unidentified, SPR Jo Otto, remainder unidentified. .33) - Photo, colour, 1990. Parade contingent presents arms. Rear rank L to R: LCPL Stuart Midgley, SPR Marcus Seecamp, CPL Steve Wainwright, SPR Todd Reynolds, SPR Rachel (Stanford) Scott, SPR Gavin Craggs, CPL Raelene (Munting) Brodie, remainder unidentified. .34) - Photo, colour, 1990. CGS LTGEN John Coates AC MBE returns the Army Survey Regiment’s salute. Parade host - CO LTCOL Rene van den Tol is on his left. .35) - Photo, colour, 1990. Military police escorts in readiness for departure. .36) - Photo, colour, 1990. Departure of the CGS. L to R: unidentified aide de camp officer, CGS LTGEN John Coates AC MBE, CO LTCOL Rene van den Tol, LT Garrett Addison. In background L to R: SSGT Andy Boath, CPL Mark Lander, SPR Ken Labouchardiere..1P to .36P – Not annotated. Stored with ‘CMDR 3MD Visit Mar 90’ film negative sleeve sets.royal australian survey corps, rasvy, army survey regiment, army svy regt, fortuna -
 Bendigo Historical Society Inc.
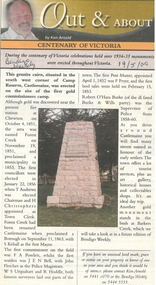
Newspaper - Newspaper articles by Ken Arnold, Out &About, 2000 - 2003
... Route 6.10.00 18. Volcanic Rock Cairn. Woodstock 13.10.00 19. Garfield Water Wheel 20.10.00 20. Anticline. Castlemaine 27.10.00 21. Lawson Bridge 10.11.00 22. Plaque. Sutton Grange area 17.11.00 23. Memorial Cairn. Maryborough 1.12.00 24. Lonely Grave 8.12.00 25. Moonlight Flat Church 5.1.01 26. Historic Church. Near Tullaroop reservoir 12.1.01 27. Granite Statue. Castlemaine 19.1.01 28. Marker. Near Tullaroop reservoir 25.1.01 29. Church Site. Mologa 2.2.01 30. Church Site. Mologa 9.2.01 31...Route 6.10.00 18. Volcanic Rock Cairn. Woodstock 13.10.00 19. Garfield Water Wheel 20.10.00 20. Anticline. Castlemaine 27.10.00 21. Lawson Bridge 10.11.00 22. Plaque. Sutton Grange area 17.11.00 23. Memorial Cairn. Maryborough 1.12.00 24. Lonely Grave 8.12.00 25. Moonlight Flat Church 5.1.01 26. Historic Church. Near Tullaroop reservoir 12.1.01 27. Granite Statue. Castlemaine 19.1.01 28. Marker. Near Tullaroop reservoir 25.1.01 29. Church Site. Mologa 2.2.01 30. Church Site. Mologa 9.2.01 31 ...Ken Arnold is a Bendigo author and publisher.A series of one hundred and thirty-five articles written by Ken Arnold and published in the Bendigo Weekly between 2000 and 2003. Each article has a topic or theme and includes historical information and details. Each article includes a photograph. The articles are stored in a red vinyl covered two ring A5 folder. Index below. Number Article Name Date 1. Centenary of Victoria 19.5.00 2. Storm Water Drain 26.5.00 3. Granite Rollers 2.6.00 4. Poverty Mine 9.6.00 5. Golden Monument. St Arnaud 16.6.00 6. Turner Statue 7.7.00 7. Gold Monument. High St Golden Square 30.6.00 8. Gold Monument. Howard Square Bendigo 14.7.00 9. Lansell Statue 21.7.00 10. Shelbourne West School 18.8.00 11. Mologa’s State Schools 25.8.00 12. Salinity Stone. Pyramid Hill 1.9.00 13. Cairn. Carisbrook 8.9.00 14. Commemorative Markers. Taradale 15.9.00 15. Burke Monument. Castlemaine 22.9.00 16. Cairn. Harcourt area 29.9.00 17. Cairn Marks Gold Route 6.10.00 18. Volcanic Rock Cairn. Woodstock 13.10.00 19. Garfield Water Wheel 20.10.00 20. Anticline. Castlemaine 27.10.00 21. Lawson Bridge 10.11.00 22. Plaque. Sutton Grange area 17.11.00 23. Memorial Cairn. Maryborough 1.12.00 24. Lonely Grave 8.12.00 25. Moonlight Flat Church 5.1.01 26. Historic Church. Near Tullaroop reservoir 12.1.01 27. Granite Statue. Castlemaine 19.1.01 28. Marker. Near Tullaroop reservoir 25.1.01 29. Church Site. Mologa 2.2.01 30. Church Site. Mologa 9.2.01 31. Plaque. Mologa 16.2.01 32. Mincha School 23.2.01 33. Historic Marker. Mincha 2.3.01 34. Expedition Marker. Pyramid Hill 9.3.01 35. Irrigation Marker. Tragowel 16.3.01 36. Mologa School Sites 23.3.01 37. Cairn. Pyramid Hill 30.3.01 38. Plaque. Pyramid Hill 6.4.01 39. Bristol Hill Lookout Tower. Maryborough 12.4.01 40. Eppalock Reservoir 20.4.01 41. Colbinabbin Cairn 27.4.01 42. Mount Macedon Cross 4.5.01 43. Memorial Gateway. Macedon 11.5.01 44. Cairn. Daylesford 18.5.01 45. Grave. Carlsruhe 25.5.01 46. Water Tower. Elmore 1.6.01 47. State School Site. Glenalbyn 8.6.01 48. Cairn. Kanya 15.6.01 49. Lonely Grave. Wedderburn 22.6.01 50. Church Cairn. Glenalbyn 29.6.01 51. Kamarooka School 6.7.01 52. Granite Marker. Moyston 13.7.01 53. Memorial Park. Kerang 20.7.01 54. Water Plaque. Bears Lagoon 27.7.01 55. Cemetery. Bears Lagoon 3.8.01 56. Race Monument 10.8.01 57. Cairn. Pyalong 17.8.01 58. Cairn. In memory of Edward Parker 24.8.01 59. Mt Macedon 31.8.01 60. Mt Macedon Cairn 7.9.01 61. Expedition Pass. Chewton 14.9.01 62. Granite Archway. St Arnaud 21.9.01 63. Stuart Mill School Site 28.9.01 64. School Site. Beazley’s Bridge 5.10.01 65. Fosterville 12.10.01 66. Barnadown 19.10.01 67. Salisbury School Site 26.10.01 68. Cricket History at Wattle Flat 2.11.01 69. School Site. Waterloo Plains 9.11.01 70. Carapooee School Site 11.01 71. Turkish Gun. Maldon 11.01 72. Kooreh 30.11.01 73. Marnoo East School 7.12.01 74. Bulgana Site 14.12.01 75. Emu School 21.12.01 76. Kooroocheang 4.1.02 77. Church Site. Gre Gre North 11.1.02 78. Carmens Tunnel. Maldon 18.1.02 79. Monument. Maldon 25.1.02 80. Woodfull Plaques. Maldon 1.2.02 81. Carapooee. St Peters Anglican Church 8.2.02 82. Cairn. Kingower 15.2.02 83. Cob & Co Stopover. Rheola 22.2.02 84. Flynn Monument 1.3.02 85. The Welcome Stranger. Moliagul 8.3.02 86. Campbell’s Creek Reserve 15.3.02 87. Mine. Fryerstown 22.3.02 88. Escott Grave. Near Chewton 28.3.02 89. School No 808. Kurting area 5.4.02 90. Graves. Bendigo Creek 10.5.02 91. School. Fish Point, Benjeroop North 17.5.02 92. Old Township. Diggora 24.5.02 93. Diggora West (1) 31.5.02 94. Diggora West (2) 7.6.02 95. School No 2735. Gower East 14.6.02 96. Pannoomilloo 21.6.02 97. Kamarooka Settlement 28.6.02 98. Mincha West State School No 1931 5.7.02 99. Bridges. Arnold 12.7.02 100. Woodvale 19.7.02 101. A Famous Son of Raywood. Jack Donaldson 26.7.02 102. Tandarra Area Schools 2.8.02 103. Dingee 9.8.02 104. Avonmore 30.8.02 105. Myola East School 6.9.02 106. Colbinabbin West 13.9.02 107. Colbinabbin West School 20.9.02 108. Runnymede area 27.9.02 109. Wanalta 4.10.02 110. School Sites. Between Wanalta and Carop 11.10.02 111. Burramboot 18.10.02 112. Kangaroo Chair. 25.10.02 113. Mincha South 1.11.02 114. Woodlands Church 8.11.02 115. School site. Sylvaterre 15.11.02 116. Terrick Terrick 22.11.02 117. Leitchville 29.11.02 118. Pennyweight Cemetery. Castlemaine 6.12.02 119. Mincha Area 13.12.02 120. Musk School 20.12.02 121. Dowie Park. Carisbrook 3.1.03 122. Neereman School Site 10.1.03 123. Bald Rock 17.1.03 124. Sylvaterre School Site 24.1.02 125. Carlsruhe 31.1.02 126. Athenaeum. Maldon 7.2.03 127. School. Mincha West 14.2.03 128. Yarraberb 21.2.03 129. Settlement Marker. Ravenswood Estate 28.2.03 130. Comini Reserve. Ravenswood 7.3.03 131. Ironbark and Gold Track. Whroo 14.3.03 132. Burke and Wills Obelisk. Castlemaine 21.3.03 133. James Cook Statue. Myers St Bendigo 28.3.03 134. St Marys Church. Axedale 4 .4.03 135. Butter Factory Site. Warragamba 11.4.03 events, monuments, historical sites, landmarks -
 Sunshine and District Historical Society Incorporated
Photograph - Skaubryn Migrant Ship
... route. It carried more than a thousand migrants per voyage and was considered well‑equipped for post‑war mass migration. The Skaubryn made multiple voyages from European ports to Australia between 1951 and 1958, carrying migrants from Germany, the Netherlands, Malta, and elsewhere. It also made occasional voyages to Canada and troop transport charters. The Skaubryn is best remembered for its catastrophic fire in the Indian Ocean on 31...route. It carried more than a thousand migrants per voyage and was considered well‑equipped for post‑war mass migration. The Skaubryn made multiple voyages from European ports to Australia between 1951 and 1958, carrying migrants from Germany, the Netherlands, Malta, and elsewhere. It also made occasional voyages to Canada and troop transport charters. The Skaubryn is best remembered for its catastrophic fire in the Indian Ocean on 31 ...The MS Skaubryn was a Norwegian passenger liner launched in 1950 and used extensively on the Europe–Australia migrant route. It carried more than a thousand migrants per voyage and was considered well‑equipped for post‑war mass migration. The Skaubryn made multiple voyages from European ports to Australia between 1951 and 1958, carrying migrants from Germany, the Netherlands, Malta, and elsewhere. It also made occasional voyages to Canada and troop transport charters. The Skaubryn is best remembered for its catastrophic fire in the Indian Ocean on 31 March 1958. 5476.01 - Skaubryn Migrant Ship Photograph.jpg 5476.02 - Migrant Ship C1950's Photograph.jpg 5476.03 - Migrant Ship C1950's Photograph.jpg skaubryn migrant ship, migrants, immigration -
 Ballarat Tramway Museum
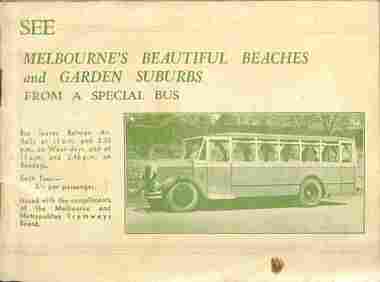
Booklet, Melbourne and Metropolitan Tramways Board (MMTB), "See Melbourne's Beautiful Beaches and Garden Suburbs from a Special Bus", 1938
... route with notes and photographs. Page 14 shows a maximum traction tram on the reserved track in Dandenong road and page 13, W2 488 outbound in Victoria Parade. Page 31has an advertisement for the Round Trip by Tram 1/-. Inside Front cover has details of the departure times and fares and a photo of the Tourist Bus. The supplementary sheet has been prepared for the tours that operated daily from Sun Sept. 18 to Friday May 31...route with notes and photographs. Page 14 shows a maximum traction tram on the reserved track in Dandenong road and page 13, W2 488 outbound in Victoria Parade. Page 31has an advertisement for the Round Trip by Tram 1/-. Inside Front cover has details of the departure times and fares and a photo of the Tourist Bus. The supplementary sheet has been prepared for the tours that operated daily from Sun Sept. 18 to Friday May 31 ...The book advertising MMTB's Special tourist bus, giving overall tour details on page 1, including fares, time of departures and reservations. Each tour has a map showing the route, details of the tour route with notes and photographs. Page 14 shows a maximum traction tram on the reserved track in Dandenong road and page 13, W2 488 outbound in Victoria Parade. Page 31has an advertisement for the Round Trip by Tram 1/-. Inside Front cover has details of the departure times and fares and a photo of the Tourist Bus. The supplementary sheet has been prepared for the tours that operated daily from Sun Sept. 18 to Friday May 31, except Anzac Day. For the 1939-1940 version - different bus on cover. - Reg Item 1838.Demonstrates the work of the MMTB providing sightseeing tours using a special bus and its publicity methods.Thirty two page landscape booklet on semi gloss white paper with off white or cream cover and single supplementary white sheet tipped onto the inside of the front cover titled "See Melbourne's Beautiful Beaches and Garden Suburbs from a Special Bus". Saddle stapled, printed letterpress. Text printed in black and green ink. Cover green ink only.tramways, trams, mmtb, melbourne, bus tours, sightseeing -
 Ballarat Tramway Museum
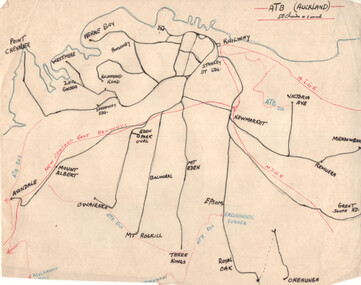
Drawing - Plan and notes, Wal Jack, Auckland NZ tramways, 1945
... The hand written sheets provide opening dates of the various routes and gives the total miles and number of cars as at 31-3-1945. Based on the handwriting, prepared by Wal Jack himself....The hand written sheets provide opening dates of the various routes and gives the total miles and number of cars as at 31-3-1945. Based on the handwriting, prepared by Wal Jack himself. ...Wal Jack had an extensive range of correspondents throughout Australia and the world who often provided him with detailed drawings and notes on various tramway systems. This set of notes on the Auckland tramway system, both the main city, Auckland Tramway Board and the north shore - Takapuna Tramway and Ferry Co shows the various routes, locations and terminals. The hand written sheets provide opening dates of the various routes and gives the total miles and number of cars as at 31-3-1945. Based on the handwriting, prepared by Wal Jack himself.Yields information about Wal Jack's extensive recording and research work.Set of two drawings - black, red and blue ink on quarto size paper and two sheets of notes on the Auckland tramway system c1945.letters, wal jack, drawings, maps, auckland, takapuna nz -
 Ballarat Tramway Museum
Photograph - Tramcar allocation board - Geelong, Laurie Gallop, early 1956
... One of a set of photos was taken between 15/2/1956 and 3/3/1956 when services operated only between Belmont and North before the final closure of the Belmont route on 25/31956 and that bogie tram 31 is not shown on the board, having gone to Ballarat on 15/2/1956 - see item 5554. ...One of a set of photos was taken between 15/2/1956 and 3/3/1956 when services operated only between Belmont and North before the final closure of the Belmont route on 25/31956 and that bogie tram 31 is not shown on the board, having gone to Ballarat on 15/2/1956 - see item 5554. ...Photo shows the Tramcar allocation board - in the Geelong depot. Shows the four bogie cars in operation or available on the day the photograph was taken. Shows that some of the Meadowbank-built trams and bogie trams had already left the depot. One of a set of photos was taken between 15/2/1956 and 3/3/1956 when services operated only between Belmont and North before the final closure of the Belmont route on 25/31956 and that bogie tram 31 is not shown on the board, having gone to Ballarat on 15/2/1956 - see item 5554. See item 8213 for an article on the Geelong system by Keith Kings. Yields information about the Geelong depot allocation board that showed the location and use of the tramcars on the day.Black and white Negative - 120 size. Black & white photograph on a postcard format backing with notes on the rear (see AS Box 84)Extensive notes regarding the tramcars and their sale dates.tramways, geelong, depot, depot allocation, tramcar allocation -
 Ballarat Tramway Museum
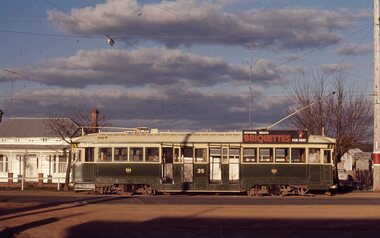
Slide - Ballarat trams - Sebastopol line - set of 9, Ron Hood, 9/1971
... Yields information about tram operations on the Sebastopol line shortly before closure of the route. tramways trams Albert St Sebastopol Urquhart St tram 40 tram 34 tram 35 tram 41 In ink "Sebastopol line Sept. 1971" and slide numbers 19, 29, 30, 31, 32, 33, 34, 35, & 36 Set of 9 Colour slides in plain white cardboard mounts. ...Set of nine colour photographs by Ron Hood in early Sept. 1971 of trams on the Sebastopol line: 1 - side on view of tram 35, in bound in Albert St. Has a briquettes roof advert. 2 - tram 40 northbound at the Urquhart St loop 3 - tram 41, shortly before crossing Albert St. 4 - tram 34 crossing Albert St at Ophir St Anglican Trinity Church in the background. 5 - tram 40 southbound in Albert St shortly before Ophir St 6 - tram 40 northbound in Albert St 7 - ditto 8 - tram 35 northbound with a very empty tram - only the conductor and driver 9 - tram 34 to Sebastopol dropping off passengers at Rubicon St. with the Ford car dealer sign in the background.Yields information about tram operations on the Sebastopol line shortly before closure of the route.Set of 9 Colour slides in plain white cardboard mounts.In ink "Sebastopol line Sept. 1971" and slide numbers 19, 29, 30, 31, 32, 33, 34, 35, & 36tramways, trams, albert st, sebastopol, urquhart st, tram 40, tram 34, tram 35, tram 41 -
 Ballarat Tramway Museum
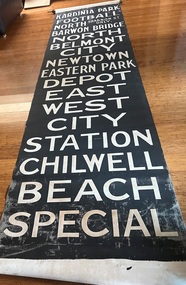
Functional object - Destination Roll, State Electricity Commission of Victoria (SECV), " Geelong" (black background) - Pengelley, 1954
... routing in 1954. The second image shows two rolls side by side showing the set out. This roll is on the right side or is the shorter one. Yields information and demonstrates aspects about Geelong's destination rolls used in trams up to 1956 when the system closed. Tram trams Geelong Destination Roll Pengelley In pencil as base of roll "Pengelley Dest End. B.G.L.M Flat, 31 ...Destination roll used to indicate to passengers the destination or route of the tram. At night the roll was back lit by two light bulbs fitted to the destination box on the tram. Item used in Geelong until 1956. Based on the hand written marking, used on a Pengelley type tram and painted in 1954. This roll is See Reg Item 2906 and 9619 for a smaller side destination roll and 4122 for a wide roll fitted to bogie tram No. 39. The Destinations have a different arrangement to that of item 4122. Item 4122 is an earlier formation based while 9618 is a later format set out to minimize the amount of movement on the roll between the various destinations introduced with changed through routing in 1954. The second image shows two rolls side by side showing the set out. This roll is on the right side or is the shorter one.Yields information and demonstrates aspects about Geelong's destination rolls used in trams up to 1956 when the system closed.Destination roll - white lettering on black background - using black paint leaving the lettering transparent at night. Uses a book binders cloth. Attached to a wooden blind roller, as used in the destination box to keep the blind tight. One loose roller that was attached to the other end of the roll. The wooden roller has a "Hartshorn's" and "Stewart Gladstone" name lables attached to it.In pencil as base of roll "Pengelley Dest End. B.G.L.M Flat, 31/7/54" tram, trams, geelong, destination roll, pengelley -
 Ballarat Tramway Museum
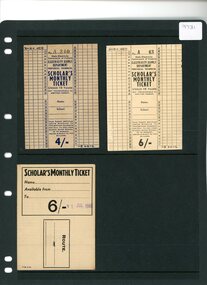
Ephemera - Ticket, Electric Supply Co. of Vic (ESCo), Scholar's Monthly Ticket - State Electricity Commission of Victoria - Provincial Tramways - 4/- and 6/, c19??
... 31 where the box can be nipped for the day's travel. The ticket is not transferable. On the reverse of the ticket, there is space for the Name of the ticket holder, the date "Available from and To" and the Route covered. ...31 where the box can be nipped for the day's travel. The ticket is not transferable. On the reverse of the ticket, there is space for the Name of the ticket holder, the date "Available from and To" and the Route covered. ...ticketDemonstrates the use of a specially printed ticket for students using the Provincial Tramway service.Scholar's Monthly Ticket for Provincial Tramways. The ticket details that it is supplied by the ELICTRICITY SUPPLY DEPARTMENT of the State Electricity Commission of Victoria for use on Provincial Tramways. It gives the conditions and terms of use, stating that it is for passengers under the age of 18. It provides a grid on each long edge for trips in and trips out, with the numbers 1 to 31 where the box can be nipped for the day's travel. The ticket is not transferable. On the reverse of the ticket, there is space for the Name of the ticket holder, the date "Available from and To" and the Route covered. The ticket is printed on white card with black ink.Row 2, ticket 1 has a stamped date of 31 JUL 1946.tickets, tramways, esco -
 Ballarat Tramway Museum
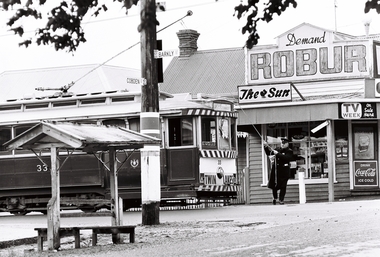
Negative - SECV Ballarat operations set of 6, Robert Green, 1967
... Has the general store in the background - advertising Robur tea, The Sun, TV week and Coca Cola 2 -Tram 31 On Mt Pleasant route with a roof advert for Johnnie Walker whiskey 3 -Tram 33 at Gardens Loop with the return destination of Mt Pleasant. ...Has the general store in the background - advertising Robur tea, The Sun, TV week and Coca Cola 2 -Tram 31 On Mt Pleasant route with a roof advert for Johnnie Walker whiskey 3 -Tram 33 at Gardens Loop with the return destination of Mt Pleasant. ...Set of 6 photographs by Robert Green during 1967, showing the tramcar operations of the SECV system. 1 -Tram 33 swinging the trolley pole at the Mt Pleasant terminus. Has the general store in the background - advertising Robur tea, The Sun, TV week and Coca Cola 2 -Tram 31 On Mt Pleasant route with a roof advert for Johnnie Walker whiskey 3 -Tram 33 at Gardens Loop with the return destination of Mt Pleasant. Tram has a Twin Lakes sign 4 -Tram 33 in Sturt St west at the Parker St loop 5 -Trams 17, 21 Crossing at a Wendouree Parade loop. Tram 17 has a trotting at Bray Raceway Auxiliary board 6 -Trams 21, 31 Crossing at a Wendouree Parade loop, possibly depot loop Yields information about the SECV Ballarat tramways operations during 1967.35mm negative in a film strip - set of 6 - - Black and white prints of item 5 held.tramways, tram 33, tram 31, mt pleasant, gardens loop, tram 17, tram 21, wendoree parade, parker st. loop -
 Ballarat Tramway Museum
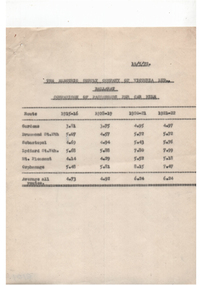
Document - Report, Electric Supply Co. of Vic (ESCo), "Comparisons of Passengers per car Mile", "Revenue per car mile of track", "Year ended 31/3/1922", "Change issued to motormen daily", "Passengers and Revenue per car Mile", 19/05/1922 12:00:00 AM
... Report - 5 quarto or foolscap sheets, carbon copy by ESCo dated 19/5/1922 for Ballarat. 1 - "Comparisons of Passengers per car Mile" - for each route 2 - "Revenue per car mile of track" - for each route and comparisons with Melbourne, Launceston, Adelaide and Wellington 3 - "Year ended 31/3/1922" - Gross Expenditure vs Receipts 4 - "Change issued to motormen daily" - since introduction of Cash Fare System 5 - "Passengers and Revenue per car Mile" - comparison with English and Australian systems. ...Trams tramways Ballarat Reports Operations Finances ESCo Report - 5 quarto or foolscap sheets, carbon copy by ESCo dated 19/5/1922 for Ballarat. 1 - "Comparisons of Passengers per car Mile" - for each route 2 - "Revenue per car mile of track" - for each route and comparisons with Melbourne, Launceston, Adelaide and Wellington 3 - "Year ended 31/3/1922" - Gross Expenditure vs Receipts 4 - "Change issued to motormen daily" - since introduction of Cash Fare System 5 - "Passengers and Revenue per car Mile" - comparison with English and Australian systems. ...Yields information and demonstrates the use of statistical reports for 1922 to management in the UK and comparisons with other systems.Report - 5 quarto or foolscap sheets, carbon copy by ESCo dated 19/5/1922 for Ballarat. 1 - "Comparisons of Passengers per car Mile" - for each route 2 - "Revenue per car mile of track" - for each route and comparisons with Melbourne, Launceston, Adelaide and Wellington 3 - "Year ended 31/3/1922" - Gross Expenditure vs Receipts 4 - "Change issued to motormen daily" - since introduction of Cash Fare System 5 - "Passengers and Revenue per car Mile" - comparison with English and Australian systems. Provides source of information. trams, tramways, ballarat, reports, operations, finances, esco -
 Ballarat Tramway Museum
Memorabilia - Event Materials, The Ballaarat Begonia Festival Association, "1971 Ballaarat Begonia Festival - Official Programme Souvenir Tourist Guide", 25/08/2002
... 31 is a small photo of a bogie tram at Mt. Pleasant and that these trams were 'doomed' and would be replaced by buses. On rear cover is a map of Ballarat in pink ink, showing the tram and bus routes. ...31 is a small photo of a bogie tram at Mt. Pleasant and that these trams were 'doomed' and would be replaced by buses. On rear cover is a map of Ballarat in pink ink, showing the tram and bus routes. ...Twenty 28 page printed program with a four colour cover printed on heavier stock for the 1971 Begonia Festival. Includes details of the organisers, a welcome to the City, Sovereign Hill, Official programme, (26/2 to 8/3), photos and details of the various tourist attractions, statistics about Ballaarat, some details of the facilities, churches, Royal South St and industry. The main text is printed in black ink, the centre 16pp consists of the programme printed in blue ink. Front page has a half full cover photo of the gardens area. All other photos are black and white. On page 31 is a small photo of a bogie tram at Mt. Pleasant and that these trams were 'doomed' and would be replaced by buses. On rear cover is a map of Ballarat in pink ink, showing the tram and bus routes. Second copy held - added 28/12/2002. See Reg Item 5042 for an advertising brochure for the festival. High quality scans added 15-02-2011 following use in the 60 years Begonias web site article - seven images of various pages. trams, tramways, tramways, begonia festival, festival program -
 Ballarat Tramway Museum
Slide - 35mm slide/s - set of 11, May 1979c
... All in Pakington St., Newtown, ex Newtown route. 2268.1 - slide 29 - look south from the north of Retreat Road. .2 - 30 - No. 276 in background, looking south .3 - 31 - City of Newtown Town Hall in background. .4 - 32 - opposite to that of No. 29. .5 - 33 - Looking south .6 - 34 - looking south with Aphrasia St. in the background. .7 - 35 - as for .2 .8 - 36 - Opposite No. 278, looking south .9 - 1 - opposite No. 276/278. .10 - 2 - ditto .11 - 3 - Outside No. 278, looking south. ...All in Pakington St., Newtown, ex Newtown route. 2268.1 - slide 29 - look south from the north of Retreat Road. .2 - 30 - No. 276 in background, looking south .3 - 31 - City of Newtown Town Hall in background. .4 - 32 - opposite to that of No. 29. .5 - 33 - Looking south .6 - 34 - looking south with Aphrasia St. in the background. .7 - 35 - as for .2 .8 - 36 - Opposite No. 278, looking south .9 - 1 - opposite No. 276/278. .10 - 2 - ditto .11 - 3 - Outside No. 278, looking south. ...Set of eleven colour slides (Kodak) showing the removal of tram track in Geelong, c May 1979. All in Pakington St., Newtown, ex Newtown route. 2268.1 - slide 29 - look south from the north of Retreat Road. .2 - 30 - No. 276 in background, looking south .3 - 31 - City of Newtown Town Hall in background. .4 - 32 - opposite to that of No. 29. .5 - 33 - Looking south .6 - 34 - looking south with Aphrasia St. in the background. .7 - 35 - as for .2 .8 - 36 - Opposite No. 278, looking south .9 - 1 - opposite No. 276/278. .10 - 2 - ditto .11 - 3 - Outside No. 278, looking south. Bus stop still in position. See Letter to Dave O'Neil and responses.tramways, trams, geelong, track removal, pakington st, newtown -
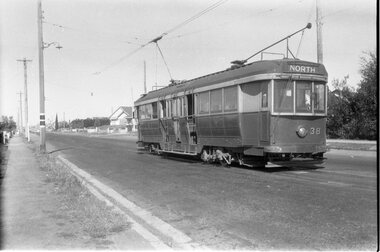 Ballarat Tramway Museum
Negative - Geelong Belmont terminus tram 38, Laurie Gallop, early 1956
... One of a set of photos was taken between 15/2/1956 and 3/3/1956 when services operated only between Belmont and North before the final closure of the Belmont route on 25/31956 and that bogie tram 31 is not shown on the board, having gone to Ballarat on 15/2/1956 - see item 5554. ...One of a set of photos was taken between 15/2/1956 and 3/3/1956 when services operated only between Belmont and North before the final closure of the Belmont route on 25/31956 and that bogie tram 31 is not shown on the board, having gone to Ballarat on 15/2/1956 - see item 5554. ...Photo shows Geelong No. 38 at the Belmont terminus, High Street with the return destination of North. Note the compulsory tram stop on the left-hand pole. One of a set of photos was taken between 15/2/1956 and 3/3/1956 when services operated only between Belmont and North before the final closure of the Belmont route on 25/31956 and that bogie tram 31 is not shown on the board, having gone to Ballarat on 15/2/1956 - see item 5554. See item 8213 for an article on the Geelong system by Keith Kings. Yields information about the Belmont tram terminus prior to closure.Black and white Negative - 120 sizetram stops, tramways, high st, geelong, tram 38, belmont
