Showing 38 items matching "the battle shot"
-
 National Vietnam Veterans Museum (NVVM)
Booklet, Australian Army, Australian Army: Coaching the Battle Shot Rifleman (All arms) (Copy 2), 1970
... Australian Army: Coaching the Battle Shot Rifleman (All arms) (Copy 2)......The Battle Shot...Australian Army: Coaching the Battle Shot Rifleman (All arms) (Copy 2) Booklet Australian Army ...A cream coloured cardboard cover with black information on the front. Top right hand corder reads DSN 7610-66-036-6422. Under the Australian Army insignai are the details of the booklet. There are two rusty metal staples down the spine of the booklet.australian army, coaching, the battle shot, rifleman, booklet -
 National Vietnam Veterans Museum (NVVM)
Booklet, Australian Army, Australian Army: Coaching the Battle Shot Rifleman (All arms) (Copy 1), 1970
... Australian Army: Coaching the Battle Shot Rifleman (All arms) (Copy 1)......The Battle Shot...Australian Army: Coaching the Battle Shot Rifleman (All arms) (Copy 1) Booklet Australian Army ...A cream coloured cardboard cover with black information on the front. Top right hand corder reads DSN 7610-66-036-6422. Under the Australian Army insignai are the details of the booklet. There are two rusty metal staples down the spine of the booklet.australian army, coaching, the battle shot, rifleman, booklet -
 National Vietnam Veterans Museum (NVVM)
Booklet, Australian Army, Australian Army: Infantry Training, Volume 1, Infantry Platoon Weapons, Pamphlet No. 12: Theory of Small Arms Fire and Training the Battle Shot (All Arms), 1967 (Copy 6), 1967
... Australian Army: Infantry Training, Volume 1, Infantry Platoon Weapons, Pamphlet No. 12: Theory of Small Arms Fire and Training the Battle Shot (All Arms), 1967 (Copy 6)......The Battle Shot...Australian Army: Infantry Training, Volume 1, Infantry Platoon Weapons, Pamphlet No. 12: Theory of Small Arms Fire and Training the Battle Shot (All Arms), 1967 (Copy 6) Booklet Australian Army ...A faded blue coloured cardboard cover with black information on the front. Top right hand corner reads 7610-66-026-6594. Under the Australian Coat of Arms inslgnia is the description of the booklet. There are two punch holes and two metal staples down the left hand side.australian army, infantry training, infantry platoon weapons, small arms fire, the battle shot, booklet -
 4th/19th Prince of Wales's Light Horse Regiment Unit History Room
Booklet (4 copies), Infantry Training Vol 1 Infantry Weapons Pam 12 Theory of Small Arms Fire and Training The Battle Shot, 1967
... Infantry Training Vol 1 Infantry Weapons Pam 12 Theory of Small Arms Fire and Training The Battle Shot...4th/19th Prince of Wales's Light Horse Regiment Unit History Room 4/19 PWLH Regiment, Building 78 Simpson Barracks Macleod melbourne Small Arms shooting 7610-66-026-6594 A soft covered booklet for officers and NCO's involved in training and coaching in the use of small arms Infantry Training Vol 1 Infantry Weapons Pam 12 Theory of Small Arms Fire and Training The Battle Shot Booklet (4 copies) ...A soft covered booklet for officers and NCO's involved in training and coaching in the use of small arms 7610-66-026-6594small arms shooting -
4th/19th Prince of Wales's Light Horse Regiment Unit History Room
Booklet, Coaching the Battle Shot Rifleman 1970, 1970
... Coaching the Battle Shot Rifleman 1970...4th/19th Prince of Wales's Light Horse Regiment Unit History Room 4/19 PWLH Regiment, Building 78 Simpson Barracks Macleod melbourne DSN 7610-66-036-6422 A soft covered 8 page booklet to assist coaches on the rifle range in their duties Coaching the Battle Shot Rifleman 1970 Booklet ...A soft covered 8 page booklet to assist coaches on the rifle range in their dutiesDSN 7610-66-036-6422 -
 National Vietnam Veterans Museum (NVVM)
Booklet, Australian Army, Australian Army: Infantry Training, Volume 1, Infantry Platoon Weapons, Pamphlet No. 12: Theory of Small Arms Fire and Training the Battle Shot (All Arms), 1967 (Copy 2), 1967
... Australian Army: Infantry Training, Volume 1, Infantry Platoon Weapons, Pamphlet No. 12: Theory of Small Arms Fire and Training the Battle Shot (All Arms), 1967 (Copy 2)...Australian Army: Infantry Training, Volume 1, Infantry Platoon Weapons, Pamphlet No. 12: Theory of Small Arms Fire and Training the Battle Shot (All Arms), 1967 (Copy 2) Booklet Australian Army ...A bluish coloured booklet with black information on it. There is the Australian Coat of Arms above the title of the booklet. Down the left hand side there are two punch holes and two metal staples, At the top right hand side reads 7610-66-026-6594. Loosely placed on the inside there is an Infantry Training amendment. The booklet is covered with a plastic cover.australia - armed forces - service manuals, infantry platoon weapons, small arms fire -
 National Vietnam Veterans Museum (NVVM)
Booklet, Australian Army, Australian Army: Infantry Training, Volume 1, Infantry Platoon Weapons, Pamphlet No. 12: Theory of Small Arms Fire and Training the Battle Shot (All Arms), 1967 (Copy 3), 1967
... Australian Army: Infantry Training, Volume 1, Infantry Platoon Weapons, Pamphlet No. 12: Theory of Small Arms Fire and Training the Battle Shot (All Arms), 1967 (Copy 3)...Evans Australian Army: Infantry Training, Volume 1, Infantry Platoon Weapons, Pamphlet No. 12: Theory of Small Arms Fire and Training the Battle Shot (All Arms), 1967 (Copy 3) Booklet Australian Army ...A bluish coloured booklet with black information on it. There is the Australian Coat of Arms above the title of the booklet. Down the left hand side there are two punch holes and two metal staples, At the top right hand side reads 7610-66-026-6594. The booklet is covered with a plastic cover. Very top right corner there is the name of Lt. Evansaustralia - armed forces - service manuals, infantry platoon weapons, small arms fire -
 National Vietnam Veterans Museum (NVVM)
Booklet, Australian Army, Australian Army: Infantry Training, Volume 1, Infantry Platoon Weapons, Pamphlet No. 12: Theory of Small Arms Fire and Training the Battle Shot (All Arms), 1967 (Copy 5), 1967
... Australian Army: Infantry Training, Volume 1, Infantry Platoon Weapons, Pamphlet No. 12: Theory of Small Arms Fire and Training the Battle Shot (All Arms), 1967 (Copy 5)...Australian Army: Infantry Training, Volume 1, Infantry Platoon Weapons, Pamphlet No. 12: Theory of Small Arms Fire and Training the Battle Shot (All Arms), 1967 (Copy 5) Booklet Australian Army ...A blue coloured booklet with black information on it. There is the Australian Coat of Arms above the title of the booklet. Down the left hand side there are two metal staples and two punch holes., At the top right hand side reads 7610-66-026-6594. The booklet is covered with a plastic cover. australia - armed forces - service manuals, infantry platoon weapons, small arms fire -
 National Vietnam Veterans Museum (NVVM)
Booklet, Australian Army: Coaching The Battle Shot Rifleman (All Arms) 1970 (Copy 1), 1970
... Australian Army: Coaching The Battle Shot Rifleman (All Arms) 1970 (Copy 1)......Battle Shot...Australian Army: Coaching The Battle Shot Rifleman (All Arms) 1970 (Copy 1) Booklet Australian Army ...A cream coloured cardboard cover with black information on the front. Top right hand corner reads DSN 7610-66-036-6422. Under the Australian Army insignia is the description of the booklet. The booklet is held together with two metal staples. booklet, australian army, rifleman, coaching, battle shot -
 National Vietnam Veterans Museum (NVVM)
Booklet, Australian Army, Australian Army: Infantry Training, Volume 1, Infantry Platoon Weapons, Pamphlet No. 12: Theory of Small Arms Fire and Training the Battle Shot (All Arms), 1967 (Copy 1), 1967
... Australian Army: Infantry Training, Volume 1, Infantry Platoon Weapons, Pamphlet No. 12: Theory of Small Arms Fire and Training the Battle Shot (All Arms), 1967 (Copy 1)...Australian Army: Infantry Training, Volume 1, Infantry Platoon Weapons, Pamphlet No. 12: Theory of Small Arms Fire and Training the Battle Shot (All Arms), 1967 (Copy 1) Booklet Australian Army ...A bluish coloured booklet with black information on it. There is the Australian Coat of Arms above the title of the booklet. At both top and bottom of booklet there is a stamped mark which reads '43 Rly Sqn RAR (SR) ((TN) Down the lef hand side there are two punch holes and two metal staples, At the top right hand side reads 7610-66-026-6594. Some of the pages have been stapled in and the edges of these pages are slighly torn as they are not in the confines of the booklet.australia - armed forces - service manuals, infantry platoon weapons, small arms fire -
 National Vietnam Veterans Museum (NVVM)
Booklet, Australian Army, Australian Army: Coaching the Battle Shot Rifleman (All Arms) 1970 (Copy 3), 1970
... Australian Army: Coaching the Battle Shot Rifleman (All Arms) 1970 (Copy 3)......Battle Shot...Australian Army: Coaching the Battle Shot Rifleman (All Arms) 1970 (Copy 3) Booklet Australian Army ...A cream coloured cardboard cover with black information on the front. Top right hand side reads DSN 7610-66-036-6422. There are two rubber stamp marks on the front which are very faint. Under the Australian Coat of Arms is the information of the booklet. The booklet is held together by two metal staples.australia - armed forces - service manuals, coaching, battle shot, rifleman -
 National Vietnam Veterans Museum (NVVM)
Booklet, Australian Army: Coaching The Battle Shot Rifleman (All Arms) 1970 (Copy 2), 1970
... Australian Army: Coaching The Battle Shot Rifleman (All Arms) 1970 (Copy 2)......Battle Shot...Australian Army: Coaching The Battle Shot Rifleman (All Arms) 1970 (Copy 2) Booklet Australian Army ...A cream coloured cardboard cover with black information on the front. Top right hand corner reads DSN 7610-66-036-6422. Under the Australian Army insignia is the description of the booklet. The booklet is held together with two metal staples. booklet, australian army, rifleman, coaching, battle shot -
 National Vietnam Veterans Museum (NVVM)
Booklet, Infantry Training Volume 1, 01/03/1968 (Exact)
... Theory of small arm fire and training the battle shot (All arms) 1967...Theory of small arm fire and training the battle shot (All arms) 1967 A book with light blue cover about infantry training vol. 1 binded by two small metel screws Infantry Training Volume 1 Booklet ...A book with light blue cover about infantry training vol. 1 binded by two small metel screwsInfantry training volume 1. Pamphlet no 12. Theory of small arm fire and training the battle shot (All arms) 1967training document -
 Lara RSL Sub Branch
booklet Infantry Training, Infantry Training, 1967
... Infantry Training Volume 1 Infantry Platoon Weapons Pamphlet 12 Theory of Small Arms Fire & Training the Battle shot (All Arms) 1967 Two Copies. 8. Infantry Training Volume 1 Infantry Platoon Weapons Pamphlet 13 Gun, Anti-Tank, 84 mm, L14A1 (1966)...Infantry Training Volume 1 Infantry Platoon Weapons Pamphlet 12 Theory of Small Arms Fire & Training the Battle shot (All Arms) 1967 Two Copies. 8. Infantry Training Volume 1 Infantry Platoon Weapons Pamphlet 13 Gun, Anti-Tank, 84 mm, L14A1 (1966) Infantry Training booklet Infantry Training Australian Army ...Australian Military Forces - infantry Training - The Platoon Australian Military Forces - infantry Training - The BattalionPrinted in 1967 Restricted 1. Infantry Training Volume 4 Part 1 The Battalion (1967) 2. Infantry Training Volume 4 Part 2 The Platoon (1967) 3. Elementary Field Defences All Arms (1969) Three copies 4. Infantry Training Volume 1 Fieldcraft and Target Detection (All Arms) 1967 5. Infantry Training Volume 1 Infantry Platoon Weapons Pamphlet 3C The Automatic Rifle - M16 (1966) Two Copies 6. Infantry Training Volume 1 Infantry Platoon Weapons Pamphlet 7 Grenades and Pyrotechnics (All Arms) 1970 7. Infantry Training Volume 1 Infantry Platoon Weapons Pamphlet 12 Theory of Small Arms Fire & Training the Battle shot (All Arms) 1967 Two Copies. 8. Infantry Training Volume 1 Infantry Platoon Weapons Pamphlet 13 Gun, Anti-Tank, 84 mm, L14A1 (1966)noneaustralian military forces, infantry training volume 1 -
 Flagstaff Hill Maritime Museum and Village
Postcard - Vessel, Sailing Ship, after October 1805
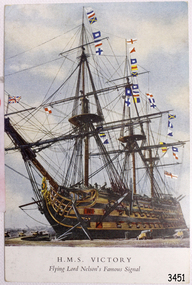
... During the battle, Nelson was shot by a French musketeer and he died shortly before the battle ended. ...During the battle, Nelson was shot by a French musketeer and he died shortly before the battle ended. ...The British Royal Navy’s warship HMS Victory was once Lord Nelson’s flagship. The HMS Victory was built in 1765 and after serving active duty is now, in 2019, still a ship of the Royal Navy, in dry dock undergoing continuous restoration to preserve her for display as a museum ship, due to the vessel’s significant naval history. Battle of Trafalgar: On October 21, 1805, twenty-seven British ships of the line, led by Admiral Lord Nelson aboard HMS Victory, defeated thirty-three French and Spanish ships of the line under French Admiral Villeneuve. The battle took place in the Atlantic Ocean off the southwest coast of Spain, just west of Cape Trafalgar, near the town of Los Caños de Meca. The victory confirmed the naval supremacy Britain had established during the course of the eighteenth century and it was achieved in part through Nelson's departure from the prevailing naval tactical orthodoxy of the day. Conventional practice at the time was for opposing fleets to engage each other in single parallel lines, in order to facilitate signalling and disengagement and to maximise fields of fire and target areas. Nelson instead arranged his ships into two columns to sail perpendicularly into the enemy fleet's line. During the battle, Nelson was shot by a French musketeer and he died shortly before the battle ended. Villeneuve was captured, along with his ship Bucentaure. He later attended Nelson's funeral while a captive on parole in Britain. Admiral Federico Gravina, the senior Spanish flag officer, escaped with the remnant of the fleet. He died five months later from wounds sustained during the battle. It was prior to this battle that Nelson had issued his now-famous final orders to his ships in 12 separate flag-hoists “England expects that every man will do his duty”. This wood sample is historically significant for its association with Admiral Lord Nelson the Battle of Trafalgar. Through Nelson’s leadership and unorthodox battle tactics, he secured not only a victory against the French and Spanish but reaffirmed Britain's naval supremacy opening the way for Britain to continuing the policy of colonisation of many countries including Australia.A coloured postcard of a sailing ship, warship or battleship, deck cannons on the ship and in the foreground, many signal flags flying from the masts. Printed on the front "H.M.S. Victory Flying Lord Nelson Famous Signal". The signal was given by Lord Nelson in 1805.Printed on the front "H.M.S. Victory / Flying Lord Nelson Famous Signal"flagstaff hill, warrnambool, shipwrecked-coast, flagstaff-hill, flagstaff-hill-maritime-museum, maritime-museum, shipwreck-coast, flagstaff-hill-maritime-village, post card, postcard, sailing ship, vice-admiral lord nelson, horatio nelson, lord nelson, oak piece, piece of oak, nelson, battle of trafalgar, maritime technology, ship relics, 18th century warship, british royal navy, sir home popham’s telegraphic code, admiralty official day signal book, october 21, 1805, admiral lord nelson, french and spanish navies, nelson's famous signal, england expects that every man will do his duty, hms victory, nelson collection at lloyd's, lloyd’s of london, lloyd’s patriotic fund, napoleonic battles, british naval history, 18th century warship, 18th century battleship -
 Flagstaff Hill Maritime Museum and Village
Plant specimen - Wood Sample, Herbst, 1759-1765
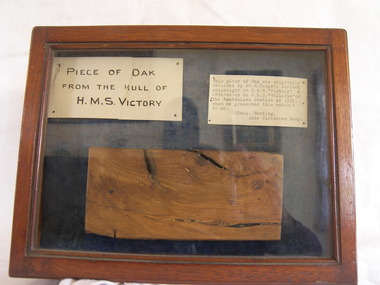
... During the battle, Nelson was shot by a French musketeer and he died shortly before the battle ended. ...During the battle, Nelson was shot by a French musketeer and he died shortly before the battle ended. ...The piece of oak wood sample inside the case was obtained from Mr. H Cooper during the time he served as a shipwright for the British Royal Navy on Nelson’s flagship, HMS Victory, in 1891. By that time the H.M.S. Victory was around 100 years old having been built in 1765 and was currently in dry dock undergoing restoration. Cooper’s skills as a shipwright would have been well employed during this period. HMS Victory was and still does undergoing continuous restoration to preserve her for display as a museum ship, due to the vessel's significant naval history. It was during that time of early restoration that Cooper obtained the piece of Oak from HMS Victory believed to be from the ships hull. Cooper was in Australia in September 1891 serving on the HMS Wallaroo, a British Auxiliary Squadron commissioned to serve as part of the British Royal Navy contingent, tasked to operate in Australian waters. The photograph included with the donation of the wood sample is a portrait of Mr H Cooper taken in 1895 in Sydney. The inscription on the photograph describes him as a skilled shipwright from the H.M.S. Wallaroo, depicting Cooper as a young man in Royal Navy uniform, with the emblem of a petty officer third class. While Cooper was stationed on the H.M.S. Wallaroo in Sydney he presented the display case, containing the wood sample from H.M.S. Victory, as well as the exhibit labels to Charles Harding, ("Chas") late of the Royal Australian Navy. Harding had been based at the H M Naval Torpedo Depot at Williamstown, Victoria. Although not mentioned, it is believed the two men met whilst serving together in Australia in their respective assignments. It could have been a retirement gift from Cooper to Harding with the photograph of Cooper likely included with the case, and gifted to Harding in 1895, as the date on the photograph indicates. One of the exhibits labels indicates that Harding had the item on display whilst serving at the Naval Torpedo Depot in Williamstown. The label indicates: "This piece of Oak is part of the hull of H.M.S. “Victory” Lord Nelson’s renowned Flag Ship, which took such a prominent part in the Battle of Trafalgar. 21st October 1805. Exhibited by Charles Harding, H.M.V. Naval Torpedo Depot, Williamstown.” After Charles Harding died in 1931 the case containing the sample of oak from H.M.S. Victory was donated by his son Reg Harding to Mr. Murphy in 1962. The display case has since become a treasured item at Flagstaff Hill. A newspaper article dated 1905 included with the donation mentions that the city of Hamilton in Victoria was shortly expecting a mounted piece of the H.M.S. Victory, to be included in the city’s commemoration of the centenary of the "Battle of Trafalgar". Battle of Trafalgar: On October 21, 1805, twenty-seven British ships of the line led by Admiral Lord Nelson aboard HMS Victory defeated thirty-three French and Spanish ships of the line under French Admiral Villeneuve. The battle took place in the Atlantic Ocean off the southwest coast of Spain, just west of Cape Trafalgar, near the town of Los Caños de Meca. The victory confirmed the naval supremacy Britain had established during the course of the eighteenth century and it was achieved in part through Nelson's departure from the prevailing naval tactical orthodoxy of the day. Conventional practice at the time was for opposing fleets to engage each other in single parallel lines, in order to facilitate signalling and disengagement, and to maximise fields of fire and target areas. Nelson instead arranged his ships into two columns to sail perpendicularly into the enemy fleet's line. During the battle, Nelson was shot by a French musketeer and he died shortly before the battle ended. Villeneuve was captured, along with his ship Bucentaure. He later attended Nelson's funeral while a captive on parole in Britain. Admiral Federico Gravina, the senior Spanish flag officer, escaped with the remnant of the fleet. He died five months later from wounds sustained during the battle. It was prior to this battle that Nelson had issued his now-famous final orders to his ships in 12 separate flag-hoists “England expects that every man will do his duty”. This wood sample is historically significant for its association with Admiral Lord Nelson the Battle of Trafalgar. Through Nelson’s leadership and unorthodox battle tactics, he secured not only a victory against the French and Spanish but reaffirmed Britain's naval supremacy opening the way for Britain to continuing the policy of colonisation of many countries including Australia.Wood sample adhered to the base of a hinged wood and glass display case. Wood is a sample of oak taken from the hull of Vice-Admiral Lord Nelson's flagship, the HMS Victory, built in 1765. The case also contain two exhibit labels pinned above the wood sample. Other items donated with the display case, and relating to the wood sample: an 1895 photograph, a 1905 newspaper clipping, a 1962 donor's letter (two pages), and a handwritten exhibit label with a border of red lines. Photograph Front: printed- "Herbst" "28 Oxford Street, Hyde Park, Sydney", handwritten - "Mr Cooper", "see back". Back: handwritten - "Mr H Cooper, skilled shipwright, H.M.S. Wallaroo 1895" Exhibit labels still in the case: Left: handwritten- “PIECE OF OAK FROM THE HULL OF H.M.S. VICTORY”, Right: typewritten- “This piece of Oak was originally obtained by Mr. H. Cooper, skilled shipwright on H.M.S. “Victory” & afterwards on H.M.S. “Wallaroo” on the Australian Station in 1895, when he presented this exhibit to me. Chas. Harding, Late Victorian Navy.”flagstaff hill, warrnambool, shipwrecked-coast, flagstaff-hill, flagstaff-hill-maritime-museum, maritime-museum, shipwreck-coast, flagstaff-hill-maritime-village, oak, hms victory, vice-admiral lord nelson, horatio nelson, lord nelson, oak piece, piece of oaknelson, battle of trafalgar, maritime technology, ship relics, 18th century warship, british royal navy, h cooper shipwright, hms wallaroo, herbst hyde park sydney, charles harding, hmv naval orpedo depot williamstown, sir home popham’s telegraphic code, admiralty official day signal book -
 Bendigo Military Museum
Map - BATTLE MAP - SYDNEY EMDEN, Possibly 1928
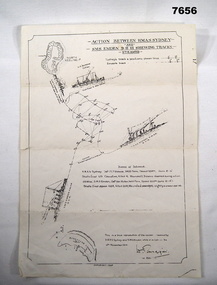
... battle. It shows dotting lines throughout the drawing - possibly indicating when shots were exchanged. ...battle. It shows dotting lines throughout the drawing - possibly indicating when shots were exchanged. ...This is a medium size poster. It is drawn in black ink. It shows an image of HMAS SYDNEY, SS BURESK (Collier) and SMS EMDEN. It shows the tracks the two ships took through the battle. It shows dotting lines throughout the drawing - possibly indicating when shots were exchanged. It shows a list in the centre, showing basic specs of the two warships and their battle casualties. It also shows relative positions of Keeling Island and Direction Island.ww1, sms emden, hmas sydney -
 Bendigo Military Museum
Photograph - ARTHUR GEORGE HOLLEY PHOTOGRAPHIC ALBUM, 10 Photographs HMAS Hobart 1942 Solomons
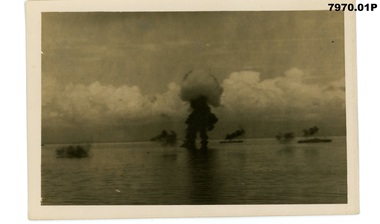
... Each description is preceded by an approximate date e.g.1940 06 is June 1940. 1. 1942 08 Solomons caption torpedo bombers two more on fire.jpg 2. 1942 08 Solomons high level bombers no hits Japs flew one thousand miles for this 054.jpg 3. 1942 08 Solomons caption there is no doubt this one being a Jap note marking.jpg 4. 1942 08 Solomons Dawn entering Guadalcanal Hobart Hoists battle ensign.jpg 5. 1942 08 Solomons fires started by bombing and shell fire.jpg 6. 1942 08 Solomons Fires started by gunfire and dive bombers .jpg 7. 1942 08 Solomons Guadalcanal HMS Exeter evading Japanese bombers February 1942.jpg 8. 1942 08 Solomons US Mugford hit by bomb.jpg 9. 1942 08 Solomons USS Mugford attacked by dive bombers caption shot down one bomber.jpg 10. 1942 08 Solomons USS Mugford attacked by dive bombers.jpg ...HMAS Hobart Arthur George Holley RAN Pacific Theatre Solomons Campaign Guadalcanal Each description is preceded by an approximate date e.g.1940 06 is June 1940. 1. 1942 08 Solomons caption torpedo bombers two more on fire.jpg 2. 1942 08 Solomons high level bombers no hits Japs flew one thousand miles for this 054.jpg 3. 1942 08 Solomons caption there is no doubt this one being a Jap note marking.jpg 4. 1942 08 Solomons Dawn entering Guadalcanal Hobart Hoists battle ensign.jpg 5. 1942 08 Solomons fires started by bombing and shell fire.jpg 6. 1942 08 Solomons Fires started by gunfire and dive bombers .jpg 7. 1942 08 Solomons Guadalcanal HMS Exeter evading Japanese bombers February 1942.jpg 8. 1942 08 Solomons US Mugford hit by bomb.jpg 9. 1942 08 Solomons USS Mugford attacked by dive bombers caption shot down one bomber.jpg 10. 1942 08 Solomons USS Mugford attacked by dive bombers.jpg 10 Photographs HMAS Hobart 1942 Solomons Photograph ARTHUR GEORGE HOLLEY PHOTOGRAPHIC ALBUM ...Items in the collection relating to ARTHUR GEORGE HOLLEY no 13556 RAN Refer cat no 2134 for his service record. The photographs are from his personal album, and are mainly official photographs widely available among the services. The photographs are from Australian , British and American sources. This set coincides with the Hobart's service around the time of the Battle of the Coral Sea, and her involvement in the Solomons and Guadalcanal landings. Whilst not taken personally, these photographs do capture some of the events Holley and his Hobart crewmates would have experienced and witnessed.Each description is preceded by an approximate date e.g.1940 06 is June 1940. 1. 1942 08 Solomons caption torpedo bombers two more on fire.jpg 2. 1942 08 Solomons high level bombers no hits Japs flew one thousand miles for this 054.jpg 3. 1942 08 Solomons caption there is no doubt this one being a Jap note marking.jpg 4. 1942 08 Solomons Dawn entering Guadalcanal Hobart Hoists battle ensign.jpg 5. 1942 08 Solomons fires started by bombing and shell fire.jpg 6. 1942 08 Solomons Fires started by gunfire and dive bombers .jpg 7. 1942 08 Solomons Guadalcanal HMS Exeter evading Japanese bombers February 1942.jpg 8. 1942 08 Solomons US Mugford hit by bomb.jpg 9. 1942 08 Solomons USS Mugford attacked by dive bombers caption shot down one bomber.jpg 10. 1942 08 Solomons USS Mugford attacked by dive bombers.jpg hmas hobart, arthur george holley ran, pacific theatre, solomons campaign, guadalcanal -
 4th/19th Prince of Wales's Light Horse Regiment Unit History Room
Photograph - Framed Photograph, WW1 1st Australian Light Car Patrol
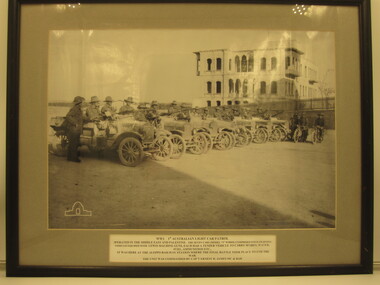
... battle took place to end the war. The unit was commanded by Cap't Ernest H James MC & Bar Framed B&W photo of 7 patrol cars with crews at Aleppo Railway Station, Syria. Two motor cycles are in shot ...See InscriptionFramed B&W photo of 7 patrol cars with crews at Aleppo Railway Station, Syria. Two motor cycles are in shotAWM logo. Caption: WW1 1st Australian Light Car Patrol. Operated in the Middle East and Palestine. The seven cars (Model "T" Fords) comprised four fighting vehicles equipped with Lewis machine guns. Each had a tender vehicle to carry spares, water, fuel, ammunition etc. It was here at Aleppo Railway Station where the final battle took place to end the war. The unit was commanded by Cap't Ernest H James MC & Barww1 1st australian light car patrol, 7 ford model t vehicles fitted with lewis machine guns -
 Lara RSL Sub Branch
Picture Print, Hurricane, Unknown
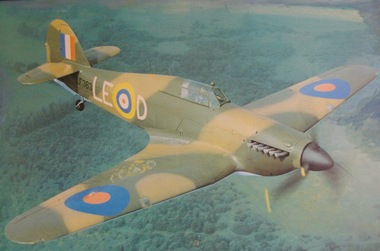
... Upon his recovery he joined 17 squadron and fought through the 'Battle of France' and the 'Battle of Britain' achieving 6 confirmed kills. On 24th September 1940, 'Birdy' was shot down by Adolf Galland, his 40th 'kill', and had to bale out. ...Upon his recovery he joined 17 squadron and fought through the 'Battle of France' and the 'Battle of Britain' achieving 6 confirmed kills. On 24th September 1940, 'Birdy' was shot down by Adolf Galland, his 40th 'kill', and had to bale out. ...The Hawker Hurricane is a British single-seat fighter aircraft of the 1930s–40s that was designed and predominantly built by Hawker Aircraft Ltd. for service with the Royal Air Force (RAF). It was overshadowed in the public consciousness by the Supermarine Spitfire's role during Battle of Britain in 1940, but the Hurricane actually inflicted 60 percent of the losses sustained by the Luftwaffe in the engagement, and it went on to fight in all the major theatres of the Second World War. Url Hurricane.html. The Hawker Hurricane Mk.IIc - LF363, first flew on the 1st January 1944 and is believed to be the last Hurricane to enter service in the RAF. It was in service with 63 squadron and 26 squadron. After hostilities, LF363 was spared the scrap yard and used on various station flights and also appeared in films 'Angels one five', 'Reach for the Sky' and 'The Battle of Britain'. Whilst flying to Jersey in September 1991, LF363 suffered engine problems and had to be diverted to RAF Wittering but on the final approach the aircraft suffered complete engine failure and had to make an emergency landing. The pilot was saved with relative minor injuries (a broken ankle and minor burns) but the aircraft suffered severe damage. Historic Flying Limited completely rebuilt LF363 and by 1998 it was flying again as part of the B.B.M.F. LF363 currently wears the colour scheme of a Mk.I Hurricane of 17 squadron, P3878 'YB-W' which was flown by Flying Office Harold Bird-Wilson at Debden and Tangmere. Harold 'Birdy' Bird-Wilson had previously been badly burned in a pre-war flying accident. Upon his recovery he joined 17 squadron and fought through the 'Battle of France' and the 'Battle of Britain' achieving 6 confirmed kills. On 24th September 1940, 'Birdy' was shot down by Adolf Galland, his 40th 'kill', and had to bale out. 'Birdy' survived the war and when he retired from the RAF he had reached the rank of Vice Marshall and had been awarded the CBE, DSO, DFC & Bar and the AFC & Bar. British single-seat fighter aircraft manufactured by Hawker Aircraft, Ltd., in the 1930s and ’40s. The Hurricane was numerically the most important British fighter during the critical early stages of World War II, sharing victory laurels with the Supermarine Spitfire in the Battle of Britain (1940–41) and the defense of Malta (1941–42). Hurricanes served in all theatres of war where British forces were engaged. https://www.britannica.com/technology/Hurricane-airplane Framed coloured picture print on plastic sheetOn the aircraft are the markings LF 363 -
 Eltham District Historical Society Inc
Photograph, X-ray, left arm of C.S.M. Tyrrell George Evans, Sern. 789, 31st Battalion, AIF, 1916
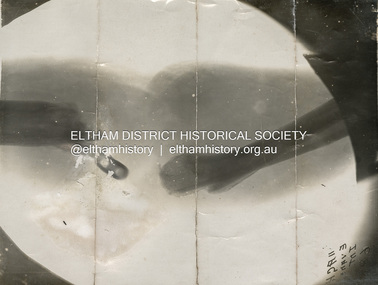
... shot wound to left arm suffered July 1916 in France by C.S.M. Tyrrell George Evans, Sern. 789, 31st Battalion, AIF Tyrrell George Granville Evans was born on 17th August 1892 Enlisted (No. 789) 7 July 1915 as a Private and was assigned to the 31st Battalion. Promoted to Sergeant 1 Nov 1915. Disembarked Suez 7 Feb 1916 Admitted to 32nd Stat. Hospital in France 21 July 1916 with a gunshot wound to the left arm. According to daughter-in-law, Janet Evans, on 19 July 1916, in the battle...shot wound to left arm suffered July 1916 in France by C.S.M. Tyrrell George Evans, Sern. 789, 31st Battalion, AIF Tyrrell George Granville Evans was born on 17th August 1892 Enlisted (No. 789) 7 July 1915 as a Private and was assigned to the 31st Battalion. Promoted to Sergeant 1 Nov 1915. Disembarked Suez 7 Feb 1916 Admitted to 32nd Stat. Hospital in France 21 July 1916 with a gunshot wound to the left arm. According to daughter-in-law, Janet Evans, on 19 July 1916, in the battle ...No. 11 AGH X-Ray Department photo of a gun shot wound to left arm suffered July 1916 in France by C.S.M. Tyrrell George Evans, Sern. 789, 31st Battalion, AIF Tyrrell George Granville Evans was born on 17th August 1892 Enlisted (No. 789) 7 July 1915 as a Private and was assigned to the 31st Battalion. Promoted to Sergeant 1 Nov 1915. Disembarked Suez 7 Feb 1916 Admitted to 32nd Stat. Hospital in France 21 July 1916 with a gunshot wound to the left arm. According to daughter-in-law, Janet Evans, on 19 July 1916, in the battle near Pozieres on the Somme, he was hit by a German high explosive shell and was unconscious and badly wounded. His left arm was shattered, and he had a bullet wound on his leg. Embarked at Boulogne on H.S. Cambria for Middlesex War Hospital, England 24 July 1916. Evans returned to Australia and was discharged medically unfit, 7 April 1917. After months in the Caulfield Hospital his arm could not be saved, and it was amputated 18 July 1917. On July 6, 1918, Tyrrell George Granville Evans married Mary Pitt Withers at Eltham, daughter of artist Walter Herbert Withers (deceased) and wife Fanny (nee Flinn). They had three children, Mary Roberta Evans born February 8, 1921, at Balwyn and twins Shirley and Joyce born June 10, 1922. Mary died 17 days later, June 27, 1922, at Balwyn. Tyrrell had to cope with three children under three years old and a missing left arm. He had been lefthanded before his war injuries. He had help from the family, especially his sister. On August 1, 1924, Tyrrell George Granville Evans married Marian Frances Wilcox and they had two children: Barbara Marian, born 27 July 1925 and Tyrrell Granville, born 3 July 1928. The children were all brought up together in Glen Iris. Tyrrell became renowned as a one-armed golfer and tennis player. He was Senior Vice-President of the Lawn Tennis Association of Victoria and was on the committee of the Metropolitan Golf Club. At the time of his retirement, he was General Manager of the Colonial Meat Company. Tyrrell died September 3, 1962 and was succeeded by sixteen grandchildren. Contributed to by Janet Evans (daughter-in-law), 27 May 2024Many items in this collection have suffered from significant water damage and black mouldjohn withers collection, eltham, 1916, gun shot wound, tyrrell george granville evans, x-ray, mary pitt withers -
 Eltham District Historical Society Inc
Photograph - Medal, Awarded to Spr. W. H. Orford by Shire of Eltham Welcome Home Committee, 1919
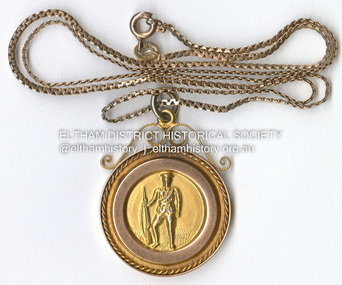
... Battle of Messines in June 1917. 10,000 German soldiers were killed instantly after the detonation of explosives beneath their lines. The story was depicted in the film "The War Below". Doug Orford, William's nephew recalls William saying they could hear the Germans as they tunnelled below them within metres. A month later He was wounded in action with a gun shot...Battle of Messines in June 1917. 10,000 German soldiers were killed instantly after the detonation of explosives beneath their lines. The story was depicted in the film "The War Below". Doug Orford, William's nephew recalls William saying they could hear the Germans as they tunnelled below them within metres. A month later He was wounded in action with a gun shot ...Medal presented for their service to their country and local district to returning local servicemen from the Great War (First World War) by the Shire of Eltham Welcome Home Committee. This medal was presented to W.H. Orford. Spr. W.H. Orford From Eltham We Honour You Great War 1914 - 1919 Whilst the war ended in 1918, many servicemen did not return home till 1919. ORFORD William Henry - Munitions Worker Number 542 William Henry Orford enlisted 1 Feb 1916 and embarked for France 25 May 1916. He was a Tunneler and was part of an operation of a group of British miners (known as "Claykickers" or “Manchester Moles”) recruited during World War I to tunnel underneath no man's land and set bombs below the German front at the Battle of Messines in June 1917. 10,000 German soldiers were killed instantly after the detonation of explosives beneath their lines. The story was depicted in the film "The War Below". Doug Orford, William's nephew recalls William saying they could hear the Germans as they tunnelled below them within metres. A month later He was wounded in action with a gun shot wound to the scalp and face in July 1917. He disembarked back in Melbourne on September 5, 1919.ww1, 1919, aif, battle of messine, great war, medal, shire of eltham, tunneler, welcome home committee, william henry orford -
 Waverley RSL Sub Branch
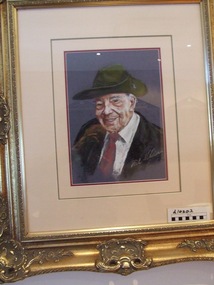
Painting Roy Longmore, RoyLongmore
... Battle of Gallipoli where he was a tunnel digger with the 2nd Division, burrowing underneath the Turkish positions and laying mines. After evacuation from Turkey, he fought at Pozières, Armentières, and Villers-Bretonneux.[1] He was wounded three times in France and was momentarily given up for dead when he was shot as the Armistice in November 1918, approached. ...Battle of Gallipoli where he was a tunnel digger with the 2nd Division, burrowing underneath the Turkish positions and laying mines. After evacuation from Turkey, he fought at Pozières, Armentières, and Villers-Bretonneux.[1] He was wounded three times in France and was momentarily given up for dead when he was shot as the Armistice in November 1918, approached. ...Longmore set aside his life as a farm-hand in Geelong, Victoria, when he enlisted in the Australian Imperial Force at age 21. Private (Pte) Roy Longmore, 3rd Reinforcements, 21st Battalion, of Bannockburn, Victoria enlisted on 13 July 1915; and he embarked from Melbourne aboard HMAT Anchises on 26 August 1915.[2] After training in Egypt, was sent to the Battle of Gallipoli where he was a tunnel digger with the 2nd Division, burrowing underneath the Turkish positions and laying mines. After evacuation from Turkey, he fought at Pozières, Armentières, and Villers-Bretonneux.[1] He was wounded three times in France and was momentarily given up for dead when he was shot as the Armistice in November 1918, approached. He later recalled, "We were patrolling in a gully when suddenly half a dozen Germans appeared over a hill armed with machine guns and opened fire. Jerry riddled me, knocking me flat on my back, and the last I heard was 'Longy's had it, they got him.'" Fortunately, his fellow soldiers saw him move and rescued him.[3] Lance Sergeant (LSgt) and returned to Australia on 16 March 1919 as a member of the 2nd Pioneer Battalion.[2] Civilian life[edit] After returning to Australia in 1919, his injuries made returning to farm work impossible, so he drove a taxi in Melbourne. Another change caused by the war was more telling. Before, he had hunted rabbits; but he later explained that when he returned home, he no longer had an appetite for firing at anything alive.[3] Longmore married and had one son, Eric.[1] The one-time LSgt Longmore died peacefully in his sleep at a Burwood Nursing Home aged 107 on 21 June 2001. He was the second last Anzac to die.[2] At his death, Australia honored him one final time with a state funeral.[3] Australian "legend"[edit] In 2000, Longmore was recognized as one of the "Australian Legends." His name and photograph were honored as part of an annual series of commemorative postage stamps issued by Australia Post since 1997. The stamps commemorate living Australians "who have made lifetime contributions to the development of Australia's national identity and character".[4] Longmore lived to fully enjoy this honor.[3] Longmore's 45-cent Legend stamp displays the soldier's portrait as a young man, photographed just prior to his departure for Gallipoli. Formal photographs of the other two ANZAC centenarians complete this stamp set. In addition, a fourth stamp features the 1914-15 star medal which was presented to all those who fought in campaigns during those war years.[5] These stamps, designed by Cathleen Cram of the Australia Post Design Studio, commemorate the story of events and people shaping contemporary Australia.[6] The Longmore stamp honors him as an individual and as a representative of all 68,000 soldiers at Gallipoli whose actions affected Australia's evolving self-image.[7] http://en.wikipedia.org/wiki/Roy_LongmoreFramed painting of Roy Longmore wooden frame glass fronted -
 Warrnambool RSL Sub Branch
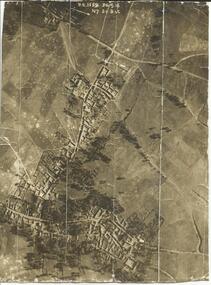
AERIAL PHOTOGRAPH, (Vertical shot of battle field, shelled/bombed out village) 30/9/1916, 3.C.1159, N7. 20.B &C
... AERIAL PHOTOGRAPH, (Vertical shot of battle field, shelled/bombed out village) 30/9/1916...Snape Collection Sepia photograph showing shelled/bombed out village with all roofs blown in. 3.C.1159, N7. 20.B &C AERIAL PHOTOGRAPH, (Vertical shot of battle field, shelled/bombed out village) 30/9/1916 ...Original Item recovered from possibly Australian Corps HQ, probably between the Armistice, 11 November 1918, and June 1919, when the Staff Sergeant R.O.(Bob) Snape was repatriated.Sepia photograph showing shelled/bombed out village with all roofs blown in.snape collection -
 Warrnambool RSL Sub Branch
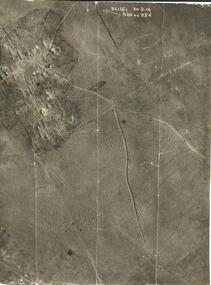
AERIAL PHOTOGRAPH, (Oblique shot of battle field, with shelled/bombed out vilage) 30/9/1916, 3.C.1151, N.26. 6d. 25d
... AERIAL PHOTOGRAPH, (Oblique shot of battle field, with shelled/bombed out vilage) 30/9/1916...Snape Collection 3.C.1151, N.26. 6d. 25d AERIAL PHOTOGRAPH, (Oblique shot of battle field, with shelled/bombed out vilage) 30/9/1916 ...Original Item recovered from possibly Australian Corps HQ, probably between the Armistice, 11 November 1918, and June 1919, when the Staff Sergeant R.O.(Bob) Snape was repatriated.snape collection -
 Monbulk RSL Sub Branch
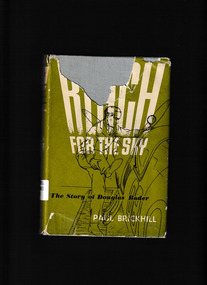
Book, William Collins, Reach for the sky, 1955
... In the Battle of Britain he led his squadron of Spitfires to kill after kill, keeping them going with his unstoppable banter. Shot ...The story of Douglas Bader's life is the stuff of legend. After losing both his legs in a flying accident he returned to the RAF at the beginning the Second World War to become Britain's most famous airman and hero. In the Battle of Britain he led his squadron of Spitfires to kill after kill, keeping them going with his unstoppable banter. Shot down in occupied France, his German captors had to confiscate his tin legs in order to stop him trying to escape. And Bader faced it all, disability, leadership and capture, with a charm and determination that was to become an inspiration to all around himIndex, ill (b/w plates), p.342.non-fictionThe story of Douglas Bader's life is the stuff of legend. After losing both his legs in a flying accident he returned to the RAF at the beginning the Second World War to become Britain's most famous airman and hero. In the Battle of Britain he led his squadron of Spitfires to kill after kill, keeping them going with his unstoppable banter. Shot down in occupied France, his German captors had to confiscate his tin legs in order to stop him trying to escape. And Bader faced it all, disability, leadership and capture, with a charm and determination that was to become an inspiration to all around himbader douglas - biography, battle of britain - history -
 Monbulk RSL Sub Branch
Book, Stephen E Ambrose, D-Day, June 6, 1944 : the climactic battle of World War II, 2004
... shot was fired. Index, notes,ill, maps, p.655. D-Day, June 6, 1944 : the climactic battle of World War II Book Stephen E Ambrose Pocket Books ...On the basis of 1,400 oral histories from the men who were there, Eisenhower biographer and World War II historian Stephen E. Ambrose reveals for the first time anywhere that the intricate plan for the invasion of France in June 1944, had to be abandoned before the first shot was fired.Index, notes,ill, maps, p.655.non-fictionOn the basis of 1,400 oral histories from the men who were there, Eisenhower biographer and World War II historian Stephen E. Ambrose reveals for the first time anywhere that the intricate plan for the invasion of France in June 1944, had to be abandoned before the first shot was fired.operation overlord, world war 1939-1945 - campaigns - france -
 Flagstaff Hill Maritime Museum and Village
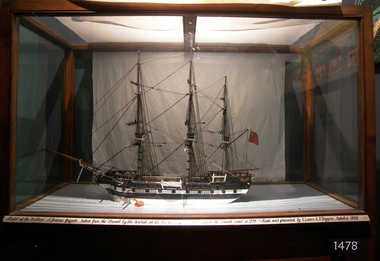
Craft - Ship Model, Arethusa, 1894
... The British fired a warning shot across his ship's bow, to which he responded with a full broadside. This action began a furious, two-hour battle between the two ships that resulted in the deaths of the French second captain and 30 of the crew. ...The British fired a warning shot across his ship's bow, to which he responded with a full broadside. This action began a furious, two-hour battle between the two ships that resulted in the deaths of the French second captain and 30 of the crew. ...Original Ships History: Aréthuse was a French frigate, launched in 1757 during the Seven Years War between England and France. She was captured by the Royal Navy in 1759 and became the fifth-rate HMS Arethusa. She remained in Royal Navy service for twenty years until she was wrecked after being badly damaged in battle. The ship was constructed at Le Havre for privateer warfare as ”Pélerine” and soon after her launch, she was purchased by King Louis XV (1710-1774) and commissioned as Aréthuse on 21 January 1758. In June, under captain Vauquelin, she sailed through the British blockade of Louisbourg helping to defend the site before departing, again forcing the blockade. On 18 May 1759, she was in transit from Rochefort to Brest, under the command of Louis-Philippe de Rigaud, Marquis of Vaudreuil, when she was intercepted near Audierne Bay (Baie d'Audierne) by three Royal Navy ships the Thames, Venus and Chatham. She attempted to escape but after two hours, lost her topmasts and was overtaken by her pursuers. Thames and Venus engaged her with heavy fire, causing 60 casualties before the vessel surrendered. She entered service with the Royal Navy for the rest of the war, and was in service in British home waters and became responsible for the capture of several French privateer cutters. In 1777, a Scotsman James Aitken, widely known as John the Painter, was hanged from her mizzenmast for burning the Rope House at Portsmouth Royal Dockyard on 7 December 1776, to aid the struggle of American independence. The mast was struck from the ship and re-erected at the dockyard entrance so as many people as possible could watch the execution. On 17 June 1778, she fought a famous duel against the French 36-gun frigate, Belle Poule. Belle Poule was on a reconnaissance mission, along with the 26-gun Licorne, the corvette Hirondelle and the smaller Coureur when she encountered a large British squadron that included Arethusa at a point 37 km south of The Lizard. Admiral Keppel, commanding the British fleet ordered that the French ships be pursued. The captain of Belle Poule refused the order to sail back to the British fleet. The British fired a warning shot across his ship's bow, to which he responded with a full broadside. This action began a furious, two-hour battle between the two ships that resulted in the deaths of the French second captain and 30 of the crew. However, Arethusa was crippled by the loss of a mast and withdrew, allowing Belle Poule to escape. This battle was the first between British and French naval forces during the American Revolutionary War and took place around three weeks before France had made a formal declaration of war. The battle was widely celebrated in France as a victory, even inspiring a hair-style in court circles that included a model of Belle Poule. It was also viewed as a victory in Britain and became the subject of a traditional Sea shanty, The Saucy Arethusa. On 18 March 1779, under captain Charles Holmes Everitt, Arethusa engaged the French Aigrette, under Lieutenant Mortemart, sustaining considerable damage in the fight. Arethusa was wrecked the next day off Ushant, It was the fame of this Arethusa which induced the Royal Navy, during the following two centuries, to bestow the name on a further seven consecutive individual ships and two consecutive classes of cruisers. (See Provenance Sec this document for information on the makers of this model). Model ship of the 3 masted frigate the “Arethusa”, model is painted black and white with varnished deck and masts. A British flag is flown at the stern. The ship is displayed in a glass case with timber frame and 4 legged stand.Label at bottom of glass case, printed in black script on a gold strip “Model of the “Arethusa" "A famous frigate, taken from the French by the British, on the 18th of May 1759 and lost on the French coast in 1779. – Made and presented by G. Lance & P. Diggins, October 1894” flagstaff hill, warrnambool, shipwrecked-coast, flagstaff-hill, flagstaff-hill-maritime-museum, maritime-museum, shipwreck-coast, flagstaff-hill-maritime-village, arethusa ship model, george lance, peter diggins, len asling, warrnambool art gallery, warrnambool exhibition, message in a bottle -
 City of Melbourne Libraries
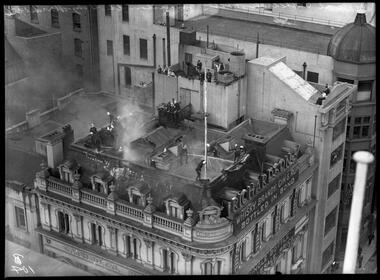
Photograph, Bull, Hugh Jones, 1897-1993, Fire at Cathedral Hotel, Swanston Street, Melbourne
... shot through the roof they ripped off the hot slate tiles and provided an outlet for the flames”. The Cathedral Hotel was built in 1883 and demolished in 1966 to make way for the City Square. Featured in "Newsworthy: Melbourne in photographs 1933-1936" exhibition at East Melbourne Library, October to December 2023. Exhibition caption by project volunteer, Louise McKenzie. Photographer notations on slide: "Fire at Cathedral Hotel Swanston St City March 1936 B104" Description: View looking down on roof of the Cathedral Hotel showing 16 firefighters battling...shot through the roof they ripped off the hot slate tiles and provided an outlet for the flames”. The Cathedral Hotel was built in 1883 and demolished in 1966 to make way for the City Square. Featured in "Newsworthy: Melbourne in photographs 1933-1936" exhibition at East Melbourne Library, October to December 2023. Exhibition caption by project volunteer, Louise McKenzie. Photographer notations on slide: "Fire at Cathedral Hotel Swanston St City March 1936 B104" Description: View looking down on roof of the Cathedral Hotel showing 16 firefighters battling ...Fire at the Cathedral Hotel! Bird’s eye view These firemen on the roof of the Cathedral Hotel are very bold in their approach to firefighting! One heroically aims a firehose at the roof while another holds onto the flagpole with one hand as he walks around the narrow edge, three storeys up! Onlookers from adjacent buildings make the most of their front row view, and The Age reported that on street level, hundreds of people gathered to watch, enthralled by “a thrilling spectacle when three firemen walked along the stone coping on the top floor of the building and, despite the clouds of smoke and sheets of flame which shot through the roof they ripped off the hot slate tiles and provided an outlet for the flames”. The Cathedral Hotel was built in 1883 and demolished in 1966 to make way for the City Square. Featured in "Newsworthy: Melbourne in photographs 1933-1936" exhibition at East Melbourne Library, October to December 2023. Exhibition caption by project volunteer, Louise McKenzie. Photographer notations on slide: "Fire at Cathedral Hotel Swanston St City March 1936 B104" Description: View looking down on roof of the Cathedral Hotel showing 16 firefighters battling a fire. There is smoke coming through the roof. Onlookers watch from adjoining buildings, not perturbed by the proximity of the fire. The firemen look bold and impressive in their brass helmets. Research by project volunteer, Louise McKenzie: The Age reported on 4 March 1936 that the fire broke out in rubbish between the roof space and wooden ceiling of the Cathedral Hotel at 4.30 pm. “The Eastern Hill fire brigade was notified by telephone, and an almost simultaneous call was also received at fire brigade headquarters from a street alarm.” These red fire alarm call boxes were typically installed on street corners, and when the knob was turned, a pulsed electric signal corresponding to the box’s number was received at fire headquarters. A large detachment of firemen with full fire-fighting equipment, including two large extension ladders, were quickly on the scene, pouring vast quantities of water into the hotel, causing several hundred pounds of damage to hotel and guest property, but quickly bringing the fire under control. Lengths of hose had to be carried through the front entrance and up several flights of stairs. On street level hundreds of people gathered to watch, but were controlled by police in order to keep them at a safe distance and ensure that tram and motor traffic was not seriously disorganised. The crowd were enthralled by “a thrilling spectacle when three firemen walked along the stone coping on the top floor of the building and, despite the clouds of smoke and sheets of flame which shot through the roof, they ripped off the hot slate tiles and provided an outlet for the flames”. The firemen are noteworthy for their highly polished brass helmets, known as Merryweather helmets, based on those of French sapeurs-pompiers and introduced to the British Metropolitan Fire Brigade in London in 1868. Metal helmets are conductive, a safety issue as the use of electricity became widespread, so a composite cork and rubber helmet was introduced in London from 1936. In Queensland, traditional brass helmets remained in service until 1970. The firemen are very bold in their actions – one heroically aiming a fire hose at the roof of the building, another holding onto the flagpole with one hand as he walks around the narrow top edge of the roof, three storeys up! The onlookers from adjoining buildings are interested in the spectacle, rather than dismayed by the fire. Lettering around the building exterior reads "Cathedral Hotel - Erected 1883". Prominent signage for “Richardson’s whisky, brandy, gin & rum" sits along the edge of the roof. The Cathedral Hotel was located on the corner of Swanston Street and Flinders Lane. It was built in 1883, and its name derived from St Paul’s Cathedral on the south side of Flinders Lane. It was demolished in 1966 as Melbourne City Council wished to create a City Square. Robyn Annear notes that at the time, the development was referred to as “Whelan’s Square” due to the large number of buildings which needed to be demolished to create the Square. Ironically the Hotel had been the victim of a previous fire in 1917, when its then licensee, also named Whelan, was charged with two failed arson attempts. References: No title (1936, March 4). The Age (Melbourne, Vic. : 1854 - 1954), p. 13. Retrieved February 5, 2024, from http://nla.gov.au/nla.news-article205256255 FIRE AT A CITY HOTEL. (1936, March 4). The Age (Melbourne, Vic. : 1854 - 1954), p. 12. Retrieved February 5, 2024, from http://nla.gov.au/nla.news-article205256231 FIRE IN ROOF OF CITY HOTEL (1936, March 4). The Argus (Melbourne, Vic. : 1848 - 1957), p. 8. Retrieved February 5, 2024, from http://nla.gov.au/nla.news-article11018696 Hotel Roof Fire Draws Crowd (1936, March 4). Examiner (Launceston, Tas. : 1900 - 1954), p. 8 (DAILY). Retrieved February 5, 2024, from http://nla.gov.au/nla.news-article52000751 'Flinders Lane Melbourne 1966', Peter Andrew Barrett, Facebook, 12 June 2020, https://www.facebook.com/120943481324886/photos/a.512123662206864/3025002490918956/?type=3 Fire Alarm Call Box, Wikipedia, https://en.wikipedia.org/wiki/Fire_alarm_call_box Research notes, 'A city lost and found', Robyn Annear, https://robynannear.com/docs/whelan-the-wrecker-notes.pdfPhotographer notations on slide: "Fire at Cathedral Hotel Swanston St City March 1936 B104".fires, hotels, 1930-1939 -
 National Vietnam Veterans Museum (NVVM)
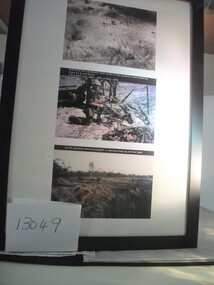
Photograph
... National Vietnam Veterans Museum (NVVM) 25 Veterans Drive Newhaven phillip-island-and-the-bass-coast Tanks Prisoners Photograph Battle of Coral-Balmoral CORAL BALMORAL COLLECTION Framed and glass fronted photograph. Three panel photograph 1. Aerial shot ...Framed and glass fronted photograph. Three panel photograph 1. Aerial shot of battlefield-tanks and soldiers pictured 2. Checking captured weapons. Soldier in kneeling position holding rifle. 3. Troops returning with NVA prisoners. Four pictured.CORAL BALMORAL COLLECTIONtanks, prisoners, photograph, battle of coral-balmoral