Showing 632 items matching "time and tide"
-
 Flagstaff Hill Maritime Museum and Village
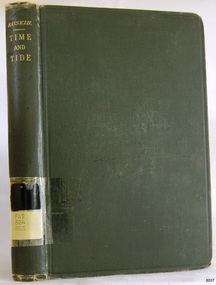
Book, Time and Tide
... Time and Tide...Time and Tide by Weare and Tyne. Twenty - Five Letters to a working man of Sunderland on The Laws of Work Author: John Ruskin Publisher: George Allen Date: 1891...Twenty - Five Letters to a working man of Sunderland on The Laws of Work Author: John Ruskin Publisher: George Allen Date: 1891 Time and Tide Book ...This item is from the ‘Pattison Collection’, a collection of books and records that was originally owned by the Warrnambool Mechanics’ Institute, which was founded in Warrnambool in 1853. By 1886 the Warrnambool Mechanics’ Institute (WMI) had grown to have a Library, Museum and Fine Arts Gallery, with a collection of “… choice productions of art, and valuable specimens in almost every branch and many wonderful national curiosities are now to be seen there, including historic relics of the town and district.” It later included a School of Design. Although it was very well patronised, the lack of financial support led the WMI in 1911 to ask the City Council to take it over. In 1935 Ralph Pattison was appointed as City Librarian to establish and organise the Warrnambool Library as it was then called. When the WMI building was pulled down in 1963 a new civic building was erected on the site and the new Warrnambool Library, on behalf of the City Council, took over all the holdings of the WMI. At this time some of the items were separated and identified as the ‘Pattison Collection’, named after Ralph Pattison. Eventually the components of the WMI were distributed from the Warrnambool Library to various places, including the Art Gallery, Historical Society and Flagstaff Hill. Later some were even distributed to other regional branches of Corangamite Regional Library and passed to and fro. It is difficult now to trace just where all of the items have ended up. The books at Flagstaff Hill Maritime Village generally display stamps and markings from Pattison as well as a variety of other institutions including the Mechanics’ Institute itself. RALPH ERIC PATTISON Ralph Eric Pattison was born in Rockhampton, Queensland, in 1891. He married Maude Swan from Warrnambool in 1920 and they set up home in Warrnambool. In 1935 Pattison accepted a position as City Librarian for the Warrnambool City Council. His huge challenge was to make a functional library within two rooms of the Mechanics’ Institute. He tirelessly cleaned, cleared and sorted a disarrayed collection of old books, jars of preserved specimens and other items reserved for exhibition in the city’s museum. He developed and updated the library with a wide variety of books for all tastes, including reference books for students; a difficult task to fulfil during the years following the Depression. He converted all of the lower area of the building into a library, reference room and reading room for members and the public. The books were sorted and stored using a cataloguing and card index system that he had developed himself. He also prepared the upper floor of the building and established the Art Gallery and later the Museum, a place to exhibit the many old relics that had been stored for years for this purpose. One of the treasures he found was a beautiful ancient clock, which he repaired, restored and enjoyed using in his office during the years of his service there. Ralph Pattison was described as “a meticulous gentleman whose punctuality, floorless courtesy and distinctive neat dress were hallmarks of his character, and ‘his’ clock controlled his daily routine, and his opening and closing of the library’s large heavy doors to the minute.” Pattison took leave during 1942 to 1945 to serve in the Royal Australian Navy, Volunteer Reserve as Lieutenant. A few years later he converted one of the Museum’s rooms into a Children’s Library, stocking it with suitable books for the younger generation. This was an instant success. In the 1950’s he had the honour of being appointed to the Victorian Library Board and received more inspiration from the monthly conferences in Melbourne. He was sadly retired in 1959 after over 23 years of service, due to the fact that he had gone over the working age of council officers. However he continued to take a very keen interest in the continual development of the Library until his death in 1969. WARRNAMBOOL'S MECHANICS' INSTITUTE Warrnambool's Mechanics' Institute (or Institution as it was sometimes called) was one of the earliest in Victoria. On 17th October 1853 a meeting was held where it was resolved to request the Lieutenant Governor of the Colony to grant land for the erection of a Mechanics' Institutes building. A committee was formed at the meeting and Richard Osburne chaired the first meeting of this committee. The land on the North West corner of Banyan and Merri Streets was granted but there were no funds to erect the building. The Formal Rights of the Warrnambool Mechanics' Institute's encompassed its aims and these were officially adopted in1859; "This Institution has for its object the diffusion of literary, scientific, and other useful knowledge amongst its members, excluding all controversial subjects, religious or political. These objects are sought to be obtained by means of a circulating library, a reading room, the establishment of classes, debates, and the occasional delivery of lectures on natural and experimental philosophy, mechanics, astronomy, chemistry, natural history, literature, and the useful and ornamental arts, particularly those which have a more immediate reference to the colony." The Warrnambool Mechanics' Institute opened its first reading room in November1884 in the National School building at the corner of Banyan and Timor Streets. The Institute was funded by member subscription, payable on a quarterly, half yearly or yearly basis. Samuel Hannaford, the Manager of the Warrnambool Bank of Australasia, was the first Honorary Secretary of the Mechanics' Institutes, and an early President and Vice-President. He also gave several of the early lectures in the Reading Room. Another early Secretary, Librarian and lecturer was Marmaduke Fisher, the teacher at the National School. Lecture topics included The Poets and Poetry of Ireland', 'The Birth and Development of the Earth', 'The Vertebrae - with Remarks on the pleasures resulting from the study of Natural History' and 'Architecture'. In 1856 the Reading Room was moved to James Hider's shop in Timor Street, and by 1864 it was located in the bookshop of Davies and Read. In the 1860's the Mechanics' Institute struggled as membership waned but in 1866, after a series of fund raising efforts, the committee was able to purchase land in Liebig Street, on a site then called Market Square, between the weighbridge and the fire station. A Mechanics' Institute building was opened at this site in August 1871. The following year four more rooms were added to the main Reading Room and in 1873 the Artisan School of Design was incorporated into the Institute. The same year Joseph Archibald established a Museum; however it deteriorated when he was transferred to Bendigo in 1877. In 1880, with Archibald's return to Warrnambool, the Museum was re-established, and in 1885 a new building was built at the back of the Institute to accommodate the re-created School of Design, the Art Gallery and the Museum. In 1887 the Museum section was moved to the former court house in Timor Street (for some time the walls of the building formed part of the TAFE cafeteria but all is now demolished)). In 1911 the Museum was transferred back to the original building and the management of the Mechanics' Institute was handed over to the Warrnambool City Council. The Museum and Art Gallery became one and housed many fine works of art, and the Library continued to grow. The building was well patronised, with records showing that at the beginning of the 20th century there were between 500 and 800 visitors. During World War One the monthly figures were in the thousands, with 3,400 people visiting in January 1915. The Museum was a much loved Institution in Warrnambool until the contents of the Museum and Art Gallery were removed to make room for the Warrnambool City Council Engineers' Department. The contents were stored but many of the items were scattered or lost. When the original building was demolished the site became occupied by the Civic Centre, which included the new City Library. (The library was temporarily located in the old Palais building in Koroit Street.) In the process of reorganisation the Collection was distributed amongst the community groups: -The new City Library took some of the historic books and some important documents, historic photographs and newspapers. -The Art Gallery kept the 19th Century art collection and some of the artefacts from the museum. -The Historic Society has some items -The State Museum has some items -Some items were destroyed -Flagstaff Hill Maritime Village has old newspapers, Government Gazettes, most of the Mechanics' Institute Library, ledgers and documents connected to the Mechanics' Institute Library, some framed and unframed art works and some photographs. The Warrnambool Mechanics' Institute Library book collection is deemed to be of great importance because it is one of the few collections in an almost intact state, and many of the books are now very rare and of great value. The Pattison Collection, along with other items at Flagstaff Hill Maritime Village, was originally part of the Warrnambool Mechanics' Institute’s collection. The Warrnambool Mechanics’ Institute Collection is primarily significant in its totality, rather than for the individual objects it contains. Its contents are highly representative of the development of Mechanics' Institute libraries across Australia, particularly Victoria. A diversity of publications and themes has been amassed, and these provide clues to our understanding of the nature of and changes in the reading habits of Victorians from the 1850s to the middle of the 20th century. The collection also highlights the Warrnambool community’s commitment to the Mechanics’ Institute, reading, literacy and learning in the regions, and proves that access to knowledge was not impeded by distance. These items help to provide a more complete picture of our community’s ideals and aspirations. The Warrnambool Mechanics Institute book collection has historical and social significance for its strong association with the Mechanics Institute movement and the important role it played in the intellectual, cultural and social development of people throughout the latter part of the nineteenth century and the early twentieth century. The collection of books is a rare example of an early lending library and its significance is enhanced by the survival of an original collection of many volumes. The Warrnambool Mechanics' Institute’s publication collection is of both local and state significance. Time and Tide by Weare and Tyne. Twenty - Five Letters to a working man of Sunderland on The Laws of Work Author: John Ruskin Publisher: George Allen Date: 1891Label on spine cover with typed text PAT 824 RUS Pastedown front endpaper has sticker from Warrnambool Mechanics Institute and Free Library covered by a sticker from Corangamite Regional Library Service Front loose endpaper has a stamp from Corangamite Regional Library Servicewarrnambool, shipwrecked-coast, flagstaff-hill, flagstaff-hill-maritime-museum, maritime-museum, shipwreck-coast, flagstaff-hill-maritime-village, shipwrecked-artefact, book, pattison collection, warrnambool library, warrnambool mechanics’ institute, ralph eric pattison, corangamite regional library service, warrnambool city librarian, mechanics’ institute library, victorian library board, warrnambool books and records, warrnambool children’s library, great ocean road, time and tide by weare and tyne., time and tide, john ruskin -
 Wycheproof & District Historical Society Inc.
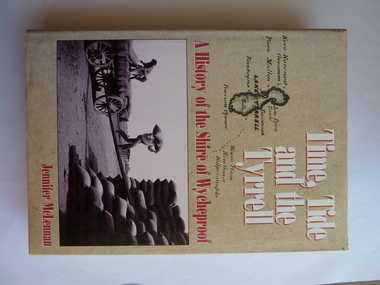
Shire Book, Time,Tide and the Tyrrell, 2004
... Time,Tide and the Tyrrell...Time,Tide and the Tyrrell has 314 pages; first published in 1994. ...In the top right hand corner is a sketch of Lake Tyrrell. Time,Tide and the Tyrrell Shire Book Wycheproof Shire Council Jennifer McLennan ...This book, in short, is our tribute to the Pioneers of the Wycheproof Shire. Their struggle to establish communities against the backdrop of an immense landscape reflects the confidence and hopes placed in the Mallee but times were not always prosperous.The many,many changes in our communities in Mallee life over the past years to 1994 have been drawn together in a competent manner by historian Jennifer McLennan.This book at State level is socially, historically and architectually important.Time,Tide and the Tyrrell has 314 pages; first published in 1994. Its golden jacket pictures 3 wheat lumpers unloading a wagon load of wheat. In the top right hand corner is a sketch of Lake Tyrrell.wycheproof - shire, wycheproof - pioneers, wycheproof shire - early- schools, second world-war. -
 Mission to Seafarers Victoria
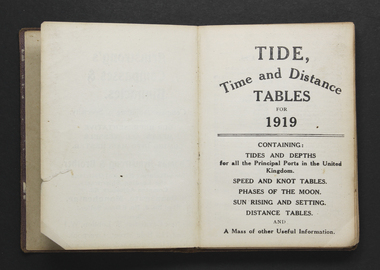
Booklet, Tide, Time and Distance Table for 1919, 1918
... Tide, Time and Distance Table for 1919 ...Tide, Time and Distance Table for 1919 Booklet ...Arthus Oswld Dixon was an Officer on several ships, serving in the Merchant Navy and the Royal Australian Navy during First World War.Dark coloured cloth bound commercially printed book of tide tables.belonging to Arthur Oswald Dixonarthur oswald dixon, tides, sea, seafarers, crew, sailors, seamen, officers, royal australian navy, ran, wwi, first world war, great war, liverpool, red cliffs -
 Ringwood and District Historical Society
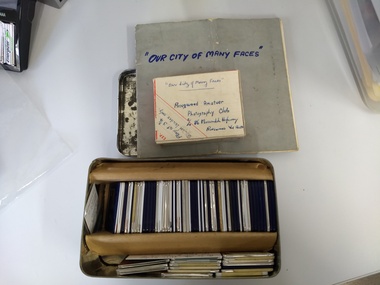
Mixed media, Ringwood Amateur Photography Club 1965 Slide Show "Our City of Many Faces" - Audio, Slides and Video
... Annotation to the Handwritten Booklet: "A record of Time and Tide in Ringwood, Melbourne, Australia". ...Annotation to the Handwritten Booklet: "A record of Time and Tide in Ringwood, Melbourne, Australia". ...This group of items is retained as a record of a typical project of the Ringwood Amateur Photography using multi-media facilities available in 1965 - ie slides and slide projector and an audio tape reocrding to accompany the slideshow. Project by the RIngwood Amateur Photography Club in 1965 - a slideshow entitled "Our City of Many Faces" cvoering Melbourne, the Dandenongs, Bayside beach etc. Originally donated as a tin box of Slides, and audio narration on reel of tape, and a handwritten booklet with the text and notation of slide number for each text comment. The slides were then scanned at RDHS Archives (2024), the audio tape was converted to a digital file by Aidem Media, and the slides and audio file combined into a digital movie by Ken Briscoe and Rob Carter (RDHS) which was subsequently shown to a meeting of RDHS. The speaker on the audio tape is not identified After conversion and cataloguing, the physical slides, audio tape and tin were disposed of. Only the handwritten script booklet is retained (along with the digital files). The final movie is not loaded to Victorian Collections (256Mb) but is available from the RDHS Archives. Attached is a pdf copy of the script booklet, the audio tape digital copy, a pdf table index to images, and images of the tin and each of the slides. Annotation to the Handwritten Booklet: "A record of Time and Tide in Ringwood, Melbourne, Australia". -
 Bendigo Historical Society Inc.
Document - MALONE COLLECTION: GREETING CARDS
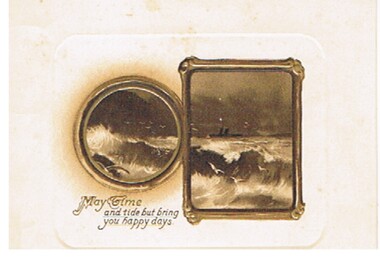
... Both frames have scenes of the sea and seagulls. 'May Time and tide but bring you happy days' is printed under the circular scene. ...Both frames have scenes of the sea and seagulls. 'May Time and tide but bring you happy days' is printed under the circular scene. ...Cream card with 15mm raised border around a rectangularframe on the right and a circular one on the left. Both frames have scenes of the sea and seagulls. 'May Time and tide but bring you happy days' is printed under the circular scene. It is printed in gold and black with some words underlined.Raphael Tuck & Sonsperson, greeting cards, malone collection, malone collection, greeting cards -
 Bendigo Historical Society Inc.
Document - MALONE COLLECTION: GREETING CARDS
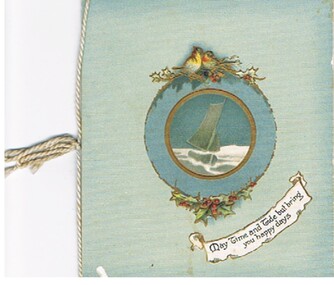
... On an angle in the bottom right corner is a white banner, edged in gold. It has: May Time and Tide but bring you happy days' printed in black on it. ...On an angle in the bottom right corner is a white banner, edged in gold. It has: May Time and Tide but bring you happy days' printed in black on it. ...Pale blue card, darker at the edges. Dark blue circular picture frame edged in gold. Inner edge wider. In the frame is a picture of a sailing boat. At the top of the frame is some holly and two little birds. At the bottom is some more holly. On an angle in the bottom right corner is a white banner, edged in gold. It has: May Time and Tide but bring you happy days' printed in black on it. Card and insert held together with pale blue cord.Raphael Tuck & Sonsperson, greeting cards, malone collection, malone collection, greeting cards -
 Sunshine and District Historical Society Incorporated
Book - Heritage Victoria Industry, National Trust of Australia, 1990
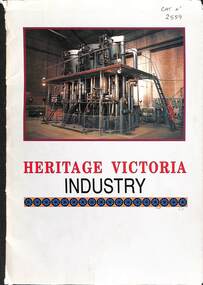
... Heritage Victoria Industry|McKay - Massey Ferguson Site|Avoca Powder Magazine|State Bank Williamstown|Pipemaker's Park|Beechworth Town|Rushworth Chronicle|Powelltown Saw Mill Sites|South Channel Fort|Victoria Brewery|Walkerville Lime Kilns|Williamstown Time Ball Tower and Tide Gauge|Wonthaggi Coal Mine|Mount Difficult Quarry Heatherlie|LaL Lal Blast Furnace|Geelong Telegraph Station|J. ...Heritage Victoria Industry|McKay - Massey Ferguson Site|Avoca Powder Magazine|State Bank Williamstown|Pipemaker's Park|Beechworth Town|Rushworth Chronicle|Powelltown Saw Mill Sites|South Channel Fort|Victoria Brewery|Walkerville Lime Kilns|Williamstown Time Ball Tower and Tide Gauge|Wonthaggi Coal Mine|Mount Difficult Quarry Heatherlie|LaL Lal Blast Furnace|Geelong Telegraph Station|J. ...Collection of information sheets on industries in Victoria -
 Lara RSL Sub Branch
Book, HMAS Mk IV - The RAN's Fourth Book, 1945
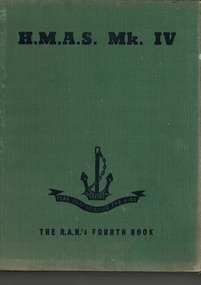
... For the whole of the war the Navy was on the job all over the place all of the time. From the first to the last days of WWII RAN was represented, by ships and personnel in the battle for supremacy in t he battle for supremacy at sea. ...For the whole of the war the Navy was on the job all over the place all of the time. From the first to the last days of WWII RAN was represented, by ships and personnel in the battle for supremacy in t he battle for supremacy at sea. ...This is the last of the series of books chronicling the achievements of the ships and personnel of the Royal Australian Navy in WWII. For the whole of the war the Navy was on the job all over the place all of the time. From the first to the last days of WWII RAN was represented, by ships and personnel in the battle for supremacy in t he battle for supremacy at sea. They took part in every rear-guard action in the days when the tide was against. They participated in the invasions of enemy territory that came with the resurgence of Allied strength right through to the final assaults on the Japanese home islands The last book of the series of which HMAS MK IV, servIng personnel of the RAN have recorded the achievements of their service in WWII HMAS Mk IV - The RAN's Fourth Book. Green front, back and spine hardcover.. Inside front and back cover is a green sepia aerials view illustration of Japanese islands with boats and aeroplane. Illustrations, poems, stories, photographs, prints, cartoons.Dedicated to all those past and present, who 'Fear God, Honour the Kingwwii, royal australian navy, triumph of sea power, amphibian, flying seaman, invasion of borneo, whaler's crew, converted ocean liners, wrans go to sea, balikpapan, frigates, new guinea, indonesia, south east oceania, bougainville, surrender of dutch borneo, world war 2 -
 Flagstaff Hill Maritime Museum and Village
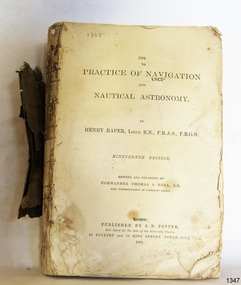
Book - Technical Reference, Henry Raper, Lieut. R.N, The Practice of Navigation and Nautical Astronomy, 1891
... It includes topics on nautical navigation, astronomy, navigation charts, calculations and mathematical tables, time, tides, ships, longitude, and position at sea. ...It includes topics on nautical navigation, astronomy, navigation charts, calculations and mathematical tables, time, tides, ships, longitude, and position at sea. ...This technical textbook is the nineteenth edition of the book by Henry Raper, Lieutenant in the Royal Navy with awards that include F.R.A.S. (Fellow of the Royal Astronomical Society) and F.R.G.S. (Friend of the Royal Geographical Society). The book is dedicated in honour of Rear-Admiral Sir Francis Beaufort K.C.B., Hydrographer to the Admiralty. He was awarded the title K.C.B. (King's Commander) as a Member of the Order of Bath, an order of British Chivalry, The book was first published in 1840 and soon became a resource for navigation students. It includes topics on nautical navigation, astronomy, navigation charts, calculations and mathematical tables, time, tides, ships, longitude, and position at sea. Thomas A. Hull, who revised and expanded this edition, was a Commander in the Royal Navy and had previously been Superintendent of Admiralty Charts used for navigation worldwide by seamen from many walks of life. The publisher, J D Potter of London, was at that time the sole agent for the Admiralty Charts produced by the Royal Navy. Printer Spottswoode and Co.,. was established by William Strachan in 1738. In 1819 his nephews A and R Spottswoode took over the business and bought premises in New-Street Square and Shoe Lane. In 1850 over 200 workers were employed by the firm. and five years later the business became Spottswoode & Co. Andrew Spottswoode invented the Spottswoode Press.This technical book was very popular as a textbook for students of maritime navigation, written and updated by members of the British Royal Navy and relied upon for accurate advice and information. The first edition was published in 1840, this edition was updated, expanded and published in 1891 when ports around the world were filling with travellers, merchants and business people. Title: The Practice of Navigation and Nautical Astronomy Author: Henry Raper, Lieut, R.N., F.R.A.S., F.R.G.S. Nineteenth Edition, revised and enlarged by Commander Thomas A. Hull, R.N., Late Superintendant of Admiralty Charts Dedication: To Rear-Admiral Sir Francis Beaufort K.C.B. Publisher: J D Potter, London, sole agent for the sale of Admiralty Charts Printer: Spottswoode and Co. New-Street Square, London Date: 1891 Small leather hardcover book with gold embossed text and lines on the spine. The Dedication in the book is as follows: - "To Rear-Admiral Sir Francis Beaufort K.C.B. Hydrographer to the Admiralty. Sir, The eminent station which you occupy in the naval scientific world renders it highly gratifying to me to dedicate the following Work to you as a testimony of my regard and esteem; while the general accordance of my views on the subject with those of your more experienced judgement, gives me the greater confidence in laying my labours before the Public. I have the honour to be, Sir, Your obedient servant, HENRY RAPER"flagstaff hill maritime museum, maritime museum, shipwreck coast, flagstaff hill, warrnambool, flagstaff hill maritime village, book, navigation, nautical astronomy, hydrography, nautical charts, nautical navigation, astronomical navigation, admiralty charts, henry raper, thomas a. hull, royal navy, j d potter, royal astronomical society, royal geographical society, calculations, mathematical tables, longitude, latitude, nautical time, location at sea, position at sea, maritime, practical navigation, spottswoode and co., sir francis beaufort, k.c.b., rear-admiral sir francis beaufort, hydrographer to the admiralty, scientific book, naval science -
 Victorian Aboriginal Corporation for Languages
Book, Aboriginal Community Elders Service et al, Aboriginal elders' voices : stories of the "tide of history" : Victorian Indigenous elders' life stories &? oral histories, 2003
... Uncle Brian Kennewell-Taylor Learning from indigenous elders: Keeping the traditions, keeping the culture strong; Since time immemorial; Invasion: the tide ran red; The flood of legislation; Stolen children; Cultural resistance: holding on to children traditions and land; Organised resistance: a movement is born; The 1950s: community resistance to race laws; The price of assimilation; The Aboriginal rights movement; After the flood: self-determination; Turning the tide Bibliography Appendix. ...Uncle Brian Kennewell-Taylor Learning from indigenous elders: Keeping the traditions, keeping the culture strong; Since time immemorial; Invasion: the tide ran red; The flood of legislation; Stolen children; Cultural resistance: holding on to children traditions and land; Organised resistance: a movement is born; The 1950s: community resistance to race laws; The price of assimilation; The Aboriginal rights movement; After the flood: self-determination; Turning the tide Bibliography Appendix. ...This book is a collection of Victorian Indigenous Elders' life stories and oral histories. The Elders share their stories in an attempt to ensure that both sides of Australia's history are finally heard. These stories tell of cultural resistance on missions, of defying assimilation laws, of forever moving around to save children from the welfare. They document the development of both fringe and urban communities and work in the Aboriginal rights movement. They clarify the ways in which these experiences have affected the individual authors along with the indigenous population in general. Also included in the book is a brief history and analysis of the legislation, policies, attitudes and strategies that have affected the lives of the authors and their families since colonisation. This aspect provides an historical perspective, encouraging a deeper understanding of the Elders' stories. Reconciliation can only eventuate with an understanding gained from hearing and including the voices of Indigenous Australians. Contents: The writing team Indigenous elders: keepers of knowledge; custodians of land and culture Aboriginal lands Missions and reserves Growing up running from the welfare /? Aunty Olive Jackson Respecting our Elders /? Aunty Lola James If your mother didn't tell you, then your grandmother did! /? Uncles Les Stewart Don't dwell on trouble /? Aunty Audrey Critch There are my people /? Aunty Gwen Nelson We were all cousins, more or less /? Aunty Iris Lovett-Gardiner Aboriginality is about culture, not colour /? Aunty Dianne Phillips Take up the opportunities we struggled to make /? Aunty Frances Gallagher Home /? Aunty Eileen Alberts We were supposed to forget our Aboriginality /? Aunty Gwen Garoni Not enough heart to say sorry? /? Uncle Brian Kennewell-Taylor Learning from indigenous elders: Keeping the traditions, keeping the culture strong; Since time immemorial; Invasion: the tide ran red; The flood of legislation; Stolen children; Cultural resistance: holding on to children traditions and land; Organised resistance: a movement is born; The 1950s: community resistance to race laws; The price of assimilation; The Aboriginal rights movement; After the flood: self-determination; Turning the tide Bibliography Appendix. Cultural custodianship: developing an indigenous methodology.maps, colour illustrations, b&w photographswiradjuri, victorian indigenous elders, oral histories, yorta yorta, dja dja wurrung, language maps, victorian missions and reserves, lake condah, framlingham, coranderrk, ramahyuck, lake tyers, wahgunyah, cummeragunja, moonahcullah, balranald, ebenezer, maloga, acheron -
 Mission to Seafarers Victoria
Journal (item) - Periodicals-Annual, Shiplovers' Society of Victoria, The Annual Dog Watch
... John Abernethy - 33 Time and Tide - Lynn Sunderland - 38 Explosives in the Port of Melbourne - Cliff Gibson - 39 A Small Misunderstanding - ‘Flinders Bar’ - 51 Mr Bligh’s Bad Health - Ian Campbell - 55 Shipmates - Bernie Sprunt - 64 A Life at Sea - Capt. ...John Abernethy - 33 Time and Tide - Lynn Sunderland - 38 Explosives in the Port of Melbourne - Cliff Gibson - 39 A Small Misunderstanding - ‘Flinders Bar’ - 51 Mr Bligh’s Bad Health - Ian Campbell - 55 Shipmates - Bernie Sprunt - 64 A Life at Sea - Capt. ...This journal provides the reader with glimpses of the adventures and hardships of a seaman's life. Many of the stories are of sailing ships.Contributes to our knowledge of the importance of shipping and places on record those stories of the sea which would otherwise be lost.Contents Editorial - Harrow Morgan - 5 Captain Angel’s Daughter - Anne Morgan - 6 Australia’s Last Lightships - Ross Meredith - 17 Duyfken Sets Sail — 394 years on - Nick Burningham - 25 Episodes in King Sound - Capt. John Abernethy - 33 Time and Tide - Lynn Sunderland - 38 Explosives in the Port of Melbourne - Cliff Gibson - 39 A Small Misunderstanding - ‘Flinders Bar’ - 51 Mr Bligh’s Bad Health - Ian Campbell - 55 Shipmates - Bernie Sprunt - 64 A Life at Sea - Capt. Ted Daubeny -65 Ketch Hands are Impervious - Noel Smith - Noel Smith - 73 The Devil’s Handwork - R N Thiele - 83 The Beginning of Herzogin Cecilie’s Last Round of Voyage — 1935 - Pamela Eriksson - 85 A Scrap of Flotsam - Esther Hardware - 93 The Waning Skills of Shipwrights - Arthur E Woodley - 96 Trouble in Paradise - Capt. R Jolly - 101 History & Heritage HMAS Castlemaine — the first 60 years - Peter J Williams - 104 The Days of ‘Whack’ and ‘Slush’ - Sir James Bissett - 108 An Unusual Lectern - George C Hogben SSV - 111 Book Reviews - - 112sailing ships, steamships, shipping, seafaring life, shiplovers' society of victoria, dog watch -
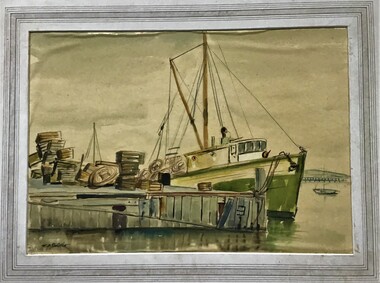 Queenscliffe Maritime Museum
Painting - Framed Watercolour, Fishermen's Pier Queenscliff
... (Freya Mitchell, ‘Queenscliff residents fight a tide of development sweeping the historic town’ ABC radio, 15 April 2005)....(Freya Mitchell, ‘Queenscliff residents fight a tide of development sweeping the historic town’ ABC radio, 15 April 2005). ...Queenscliff’s first pier, then known as the Fishermen’s Pier, was completed in 1857. It was not until some thirty years later that the second Steamer Pier was constructed adjacent to the former and periodically extended from the mid to late 1880s to cope with the demand in pleasure bay steamer services. The last of these extensions was to provide a dog-leg construction and the extant shelter shed. 1960 witnessed the demolition of the original Fishermen’s Pier - by this time having been extended in the late nineteenth and early twentieth centuries to the equivalent length of the Steamer Pier - and saw the relocation of its 1926-29 lifeboat house to the Steamer Pier, now Queenscliff Pier. The mid to late 2000s saw Queenscliff Harbour undergo large-scale redevelopment in order to deepen its waters for pleasure craft and increase its berths to over 300. This was met with strong community opposition, largely with concerns for neighbourhood character and perceived cause for gentrification its stakeholders would impart. With early construction estimates of $20 million dollars, this figure had almost doubled upon realisation. (Lovell Chen Architects. ‘Individual Property Citation’, Queenscliffe Heritage Study, 2009.) (Freya Mitchell, ‘Queenscliff residents fight a tide of development sweeping the historic town’ ABC radio, 15 April 2005).Fishermen's Pier Watercolour painting of Fishermen's Pier in Queenscliffwatercolour, fishermen's pier, queenscliff -
 Melton City Libraries
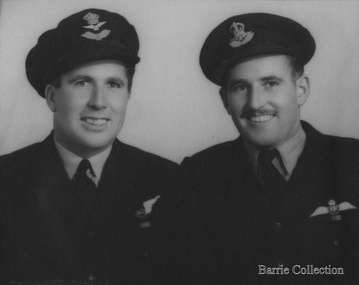
Photograph, Jim (James) and William (Horace) Barrie, Unknown, c.1940
... He lost many of his mates in that Squadron in the Pacific, it was a particularly vital time for the Allies and these boys played a major part in turning the tide against the Japanese. ...He lost many of his mates in that Squadron in the Pacific, it was a particularly vital time for the Allies and these boys played a major part in turning the tide against the Japanese. ...In 1939 when World War 11 erupted Jim and Horace enlisted in the RAAF Jim to become a pilot and Horace a navigator. James Edward Barrie enlisted in the RAAF on 21st June 1941, aged 19 years. He was sent to Canada and then later to England to become a Spitfire Pilot. Half way through the War he returned to Australia to be sent north to fight the Japanese. At one stage he had to bail out over the Pacific after his engine had failed. Fortunately, he had time to radio his position before he abandoned his Spitfire. He dropped his boot out to determine how far below the water was, parachuted down inflated his dinghy and waited to be rescued. He was picked up very quickly by a rescue crew just as a heavy fog descended, or he may never have been found. He lost many of his mates in that Squadron in the Pacific, it was a particularly vital time for the Allies and these boys played a major part in turning the tide against the Japanese. This information has been taken from the writings of Mary Robinson, sister of Jim. My parents Bon and Edna Barrie spoke about this incident leaving a vivid impression in my mind as a young child. Jim is mentioned in the book Two Steps to Tokyo. A Story of the RAAF in the Trobriand and Admiralty Islands by Gordon Powell Chaplain, RAAF. After the war Jim returned to Darlingsford. In 1953 he married Wilma Ryan of Yarram. He continued in the family farming tradition obtaining a Soldier Settlement Block at Shelford. Jim regularly attended the ANZAC day march to the Shrine. He died in August 2004 This account has been compiled by his niece Wendy Barrie Sons of Charles (Ernie) and Jessie Barrie of Darlingsford Meltonlocal identities -
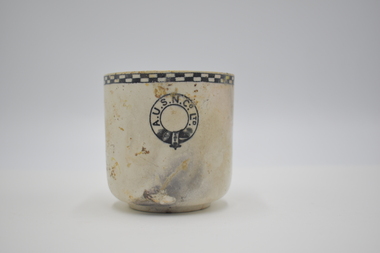 Geelong Naval and Maritime Museum
Teacup
... It was a dramatic time with the ship siren wailing and distress rockets being fired. ...It was a dramatic time with the ship siren wailing and distress rockets being fired. ...The Orungal was originally built in Glasgow in 1923 for the Khedival Mail Steamship & Graving Dock Company of Egypt and named the S.S. Fezara. Due to the effects on steamship companies of the Great Depression including the steep costs of building new ships and increases in running costs and port charges, no new passenger ships had been ordered in Australia since before World War One. To meet demand for passenger berths, the Fezara (5826 tons) along with its sister ship the Famaka (5856 tons, renamed Ormiston), were chartered by the Australasian United Steam Navigation Company Ltd (A.U.S.N.Co.) in 1927. Both the A.U.S.N.Co and the Khedival Mail Steamship Co. were part of the P&O Group. The Orungal operated in this role as an interstate passenger and mail steamer between 1927 and 1940, being used mainly on the Melbourne to Queensland and Western Australian runs, with 240 single class berths. Following the outbreak of World War Two six of the nine large passenger liners servicing mainland Australian passenger and mail trades were requisitioned by the Government to ferry equipment, troops and supplies. Some of them were converted to armed merchant cruisers and used for patrol work and escort duties in the Indian and Pacific Oceans. The Orungal had originally been requisitioned by the government along with the Zealandia on 25 June 1940, to transport troops to Darwin, but was returned to commercial service because "of her unsuitability", perhaps too slow for the demands of the work. Despite being rejected for patrol and convoy duties the Orungal still had a vital role as one of only three passenger liners left to service the mainland Australian trade. Following its requisitioning by the Government shortly after war broke out, it had been fitted out with defensive armament. On its final voyage arriving at Port Phillip Heads from Sydney, Captain Gilling was attempting to enter the Heads ahead of a worsening south-westerly storm and, with a minefield known to have been laid in the area, had been warned by the Navy not to deviate from the swept channel. The captain and crew held fears that in the stormy seas a mine may have been carried away. In the worsening weather a blur of lights at Barwon Heads was mistaken for Port Lonsdale, and the Orungal steamed ashore onto Formby Reef, just east of the entrance of the Barwon River - instead of passing safely through the middle of the Rip. At the Marine Board Inquiry Capt. Gilling - who had been master of the Orungal since 1926 - stated that after becoming uneasy about his position and changing course to starboard one point: " At 10.21 pm I ordered the engine room to stand by and gave instructions for the patent log to be hauled in and for the sounding-gear to be got ready. Approximately two minutes later, in a flash of lightning, I saw land off the port beam. I immediately recognised it as Barwon Heads, and ordered the helm to be put hard to starboard, but the vessel struck before she had time to answer the helm" Barwon Heads and Ocean Grove residents were startled to hear the shrill blast of the ship's whistle, followed by the bright flares and explosions of signal rockets. The Queenscliff lifeboat crew, who had responded to the tragic collision between the Goorangai and another passenger liner the Duntroon in Port Phillip Bay less than 24 hours earlier, were later praised for their efforts in safely taking off all the passengers and crew. Most of the passengers were asleep at the time of the wreck, and were woken up by the commotion, the ship shaking "from stem to stern" and stewards ordering them to lifeboat stations in driving rain. It was a dramatic time with the ship siren wailing and distress rockets being fired. It was reported that "When it was found the ship was safe, the passengers all went to the music room. There they sang and danced for several hours. The ship's orchestra played merrily, and amateur performers among the passengers clowned, danced and sang to keep the laughter going. In the early hours of the morning passengers went to their cabins, most of them to sleep soundly while the keel grated on the rocks". At dawn the Queenscliff lifeboat arrived at the scene having been launched at 2.30am, and cautiously approached the ship which was being "battered by mountainous seas". By 5am oil from a burst oil line was helping to calm seas around the Orungal sufficiently enough for the lifeboat to approach, and all the passengers and crew were taken off in several trips by the lifeboat. A Court of Inquiry later found that the wreck was caused by an abnormal set of current to the north-west and cleared the officers and crew of neglect of duty. The sight of a huge liner almost on the beach saw an unprecedented amount of traffic as people drove an estimated 10,000 cars, using some 60,000 gallons of fuel in a time of strict petrol rationing, to see the spectacle. Salvage operations began in an attempt to refloat the vessel, scheduled for the high tide on 15 December 1940. However, during these operations, at 2.30 am on 13 December 1940, a major fire broke out, believed to have been caused by spontaneous combustion in the boiler room. The ship was soon ablaze, with smoke pouring from its hatches and ventilators, and at mid-morning the magazine exploded fiercely. Of the 60 men working aboard the vessel two were severely burned and had to be taken to Geelong Hospital. The gathered spectators witnessed the eerie sight of the ship's hull glowing red when night fell. The well-known building demolition contractor Whelan the Wrecker bought the salvage rights, and methodically proceeded to dismantle the ship and its fittings. The drama was not yet over for the wreckers when - without warning - the burnt-out hulk was 'attacked' by RAAF for strafing practice. Salvage rights were transferred to another private owner in 1963. By 1945 the combined effects of the exposed location, fire and salvage had seen what was left of the wreck disappear beneath the waves. The site today is marked by two of the four Scotch type boilers sitting upright and exposed at low tide, just north-east of the small boats channel at the entrance to Barwon Heads. Large sections of steel hull plating and framing, and impressively large pieces of ships structure and machinery including masts, booms, deck winches, propeller shaft, flywheel, and a thrust block lie scattered about and make the site an interesting shallow dive. It is interesting to compare the site of the Orungal with the intact remains of similar large passenger ships scuttled in deep water in the Ships' Graveyard, such as the Milora and Malaita. The site is subject to waves and surge, and is best dived on flat calm days The teacup originated from the SS Orungal and was likely used heavily in the ship's life as a passenger, mail and cargo carrier around Australia. The teacup is significant for its connections to SS Orungal and of this ships connected story of being sunk in extraordinary circumstances in the local region. A.U.S.N. Co. Ltd. Teacup salvaged from SS Orungal ss orungal, fezara, world war two, barwon heads, ocean grove -
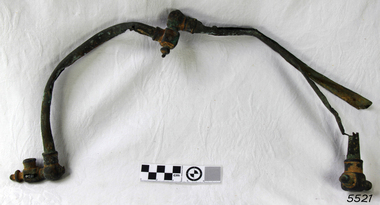 Flagstaff Hill Maritime Museum and Village
Functional object - Gas Fitting
... He drifted out to sea and then on the flood tide came into what is now known as LOCH ARD Gorge. ...He drifted out to sea and then on the flood tide came into what is now known as LOCH ARD Gorge. ...This gas fitting was recovered from the wreck of the Loch Ard circa 1970, at the time of the discovery of the wreck. HISTORY OF THE LOCH ARD: - The LOCH ARD belonged to the famous Loch Line which sailed many ships from England to Australia. Built in Glasgow by Barclay, Curdle and Co. in 1873, the LOCH ARD was a three-masted square rigged iron sailing ship. The ship measured 262ft 7" (79.87m) in length, 38ft (11.58m) in width, 23ft (7m) in depth and had a gross tonnage of 1693 tons. The LOCH ARD's main mast measured a massive 150ft (45.7m) in height. LOCH ARD made three trips to Australia and one trip to Calcutta before its final voyage. LOCH ARD left England on March 2, 1878, under the command of Captain Gibbs, a newly married, 29 year old. She was bound for Melbourne with a crew of 37, plus 17 passengers and a load of cargo. The general cargo reflected the affluence of Melbourne at the time. On board were straw hats, umbrella, perfumes, clay pipes, pianos, clocks, confectionary, linen and candles, as well as a heavier load of railway irons, cement, lead and copper. There were items included that intended for display in the Melbourne International Exhibition in 1880. The voyage to Port Phillip was long but uneventful. At 3am on June 1, 1878, Captain Gibbs was expecting to see land and the passengers were becoming excited as they prepared to view their new homeland in the early morning. But LOCH ARD was running into a fog which greatly reduced visibility. Captain Gibbs was becoming anxious as there was no sign of land or the Cape Otway lighthouse. At 4am the fog lifted. A man aloft announced that he could see breakers. The sheer cliffs of Victoria's west coast came into view, and Captain Gibbs realised that the ship was much closer to them than expected. He ordered as much sail to be set as time would permit and then attempted to steer the vessel out to sea. On coming head on into the wind, the ship lost momentum, the sails fell limp and LOCH ARD's bow swung back. Gibbs then ordered the anchors to be released in an attempt to hold its position. The anchors sank some 50 fathoms - but did not hold. By this time LOCH ARD was among the breakers and the tall cliffs of Mutton Bird Island rose behind the ship. Just half a mile from the coast, the ship's bow was suddenly pulled around by the anchor. The captain tried to tack out to sea, but the ship struck a reef at the base of Mutton Bird Island, near Port Campbell. Waves broke over the ship and the top deck was loosened from the hull. The masts and rigging came crashing down knocking passengers and crew overboard. When a lifeboat was finally launched, it crashed into the side of LOCH ARD and capsized. Tom Pearce, who had launched the boat, managed to cling to its overturned hull and shelter beneath it. He drifted out to sea and then on the flood tide came into what is now known as LOCH ARD Gorge. He swam to shore, bruised and dazed, and found a cave in which to shelter. Some of the crew stayed below deck to shelter from the falling rigging but drowned when the ship slipped off the reef into deeper water. Eva Carmichael had raced onto deck to find out what was happening only to be confronted by towering cliffs looming above the stricken ship. In all the chaos, Captain Gibbs grabbed Eva and said, "If you are saved Eva, let my dear wife know that I died like a sailor". That was the last Eva Carmichael saw of the captain. She was swept off the ship by a huge wave. Eva saw Tom Pearce on a small rocky beach and yelled to attract his attention. He dived in and swam to the exhausted woman and dragged her to shore. He took her to the cave and broke open case of brandy which had washed up on the beach. He opened a bottle to revive the unconscious woman. A few hours later Tom scaled a cliff in search of help. He followed hoof prints and came by chance upon two men from nearby Glenample Station three and a half miles away. In a state of exhaustion, he told the men of the tragedy. Tom returned to the gorge while the two men rode back to the station to get help. By the time they reached LOCH ARD Gorge, it was cold and dark. The two shipwreck survivors were taken to Glenample Station to recover. Eva stayed at the station for six weeks before returning to Ireland, this time by steamship. In Melbourne, Tom Pearce received a hero's welcome. He was presented with the first gold medal of the Royal Humane Society of Victoria and a £1000 cheque from the Victorian Government. Concerts were performed to honour the young man's bravery and to raise money for those who lost family in the LOCH ARD disaster. Of the 54 crew members and passengers on board, only two survived: the apprentice, Tom Pearce and the young woman passenger, Eva Carmichael, who lost all of her family in the tragedy. Ten days after the LOCH ARD tragedy, salvage rights to the wreck were sold at auction for £2,120. Cargo valued at £3,000 was salvaged and placed on the beach, but most washed back into the sea when another storm developed. The wreck of LOCH ARD still lies at the base of Mutton Bird Island. Much of the cargo has now been salvaged and some was washed up into what is now known as LOCH ARD Gorge. Cargo and artefacts have also been illegally salvaged over many years before protective legislation was introduced. One of the most unlikely pieces of cargo to have survived the shipwreck was a Minton porcelain peacock - one of only nine in the world. The peacock was destined for the Melbourne International Exhibition in 1880. It had been well packed, which gave it adequate protection during the violent storm. Today, the Minton peacock can be seen at the Flagstaff Hill Maritime Museum in Warrnambool. From Australia's most dramatic shipwreck it has now become Australia's most valuable shipwreck artefact and is one of very few 'objects' on the Victorian State Heritage Register. Flagstaff Hill’s collection of artefacts from LOCH ARD is significant for being one of the largest collections of artefacts from this shipwreck in Victoria. It is significant for its association with the shipwreck, which is on the Victorian Heritage Register (VHR S417). The collection is significant because of the relationship between the objects, as together they have a high potential to interpret the story of the LOCH ARD. The LOCH ARD collection is archaeologically significant as the remains of a large international passenger and cargo ship. The LOCH ARD collection is historically significant for representing aspects of Victoria’s shipping history and its potential to interpret sub-theme 1.5 of Victoria’s Framework of Historical Themes (living with natural processes). The collection is also historically significant for its association with the LOCH ARD, which was one of the worst and best known shipwrecks in Victoria’s history. Copper gas pipe and fitting. Tow C-shaped pipes with fittings at each end. One end of each pipe is joined to the other pipe, making a U-shape. It was recovered from the 1878 wreck of the ship Loch Ard in the 1970s. flagstaff hill, warrnambool, shipwrecked coast, flagstaff hill maritime museum, maritime museum, shipwreck coast, flagstaff hill maritime village, great ocean road, loch line, loch ard, captain gibbs, eva carmichael, tom pearce, glenample station, mutton bird island, loch ard gorge, copper gas pipe and fitting, copper gas pipe -
 Flagstaff Hill Maritime Museum and Village
Memorabilia - Bullet & Timber, Early 20th century
... At one time, a wild storm destroyed the chute, so they built a stronger replacement chute. ...At one time, a wild storm destroyed the chute, so they built a stronger replacement chute. ...The Reginald M was an early purchase of Flagstaff Hill Maritime Museum and Village, soon after it opened in 1975. It was restored and then used as an exhibit in the maritime Village. The reason for the bullet being within the pieces of timber is unknown. The Reginald M's history does not suggest a time when weapons were used. However, the vessel's construction included used materials from different sources; perhaps the bullet was within these materials, which later became part of the Reginald M. ‘REGINALD M’ 1922 to 1975- The vessel “Reginald M” was a two-masted coastal ketch, owned and built by Mr Jack (John) Murch of Birkenhead, Port of Adelaide, South Australia. Its construction took approximately 6 months, and it launched at Largs Bay in 1922. The Reginald M’s purpose was to serve the coastal trade of South Australia, to carry cargo cheaply and efficiently. Some have said that the keel was, in fact, hewn from two telegraph poles! Its builder frequented all the salvage yards for materials and fittings. Reginald M had a very shallow draft and a flat bottom that enabled it to come close to shore and to sit high and dry at low tide or to be beached on sand. The flat bottom was also to make the ship able to skim over reefs. Wagons could load and unload directly from their sides. Its cargo included Guano, Barley, Wool, Horses, Cattle, Timber, Explosives, Potatoes, Shell Grit, and Gypsum. On April 9th 1931, Reginald M weathered a large storm in St Vincent Gulf, SA. The vessel suffered great damage; the mast snapped, and the crew laboured for four hours to free it by chopping off the mast and rigging. The crew patched it up and slowly returned to Port Adelaide with only a portion of the insured cargo being damaged. The crew members at the time were the owner, Mr John H Murch of Wells Street, Largs Bay; Skipper Mr R Murch, John’s brother; Murray, son of Captain Murch; and Seaman John Smith. Reg Webb purchased Carribie Station, at Marion in the Warooka District, south of Adelaide, in 1921. He cleared the land and farmed sheep and grain. In 1923, he shipped his own wool and grain from Marion Bay, having first carted 300 bags of the barley grain, 12 bags at a time, along the unmade track to the jetty. A photograph donated to Flagstaff Hill, dating about 1929 - 1942, shows two men on the Reginald M, holding between them their fishing catch of a large hammer shark. The photograph is stamped “GRENFELL STUDIO PORT LINCOLN PRINT” and titled “hammer shark caught on Reginald Emm”. The donor’s family lived on the Your Peninsula and dispatched their grain from a chute at Gleeson’s Landing to the awaiting transport vessel. Reg knew the Murch Brothers from Port Adelaide. The brothers had been using their ketch, Reginald M, to ship Guano from the Islands, led by Captain Richard Murch. Reg approached them in 1934 about shipping grain from Marion Bay. The brothers visited the bay and thought it was an ideal place. They showed Reg where to stack his grain, and they measured up the cliffs. When Reg was ready, they brought down and installed a ninety-foot wooden chute. The bags of grain were individually pushed down the chute, landing in a waiting small boat, then rowed to Reginald M with 14 bags at a time. After 10 hours, Reginald M would have a load of 1300 bags of grain to ship to waiting ports. At one time, a wild storm destroyed the chute, so they built a stronger replacement chute. Reginald M engaged in the shipping of grain from there until 1938. In 1940, Able Seaman Allan H Lucas served on the Reginald M between September and December, being engaged and discharged from Port Adelaide. The ship’s Master, W S Murch, signed his Certificate of Discharge. It seems that at the Reginald M was used, at one time, as a Customs vessel, as one photograph in Flagstaff Hill’s collection shows “H.M.C. No. 3, Pt Adelaide” on the bow. In 1969, the last freight left Marion Bay on the ketch Reginald M carrying grain, wool, and explosives. In late 1970, the Mt. Lyell Mining and Railway Company bought the vessel to use as a barge to carry explosives. In 1972, the Navy League of Strahan, Tasmania, purchased it for use by the Strahan Sea Cadet Unit to use at Macquarie Harbour and renamed it T.S. Macquarie. However, this plan for the use of Reginald M did not happen. In 1974, Mr Andrew Rennie, of East Brighton, Melbourne, bought it for a similar purpose, paying $5,000 and donating a ‘Cadet of the Year’ trophy to the Sea Cadets. He sailed it from Strahan to Melbourne, planning to use it for pleasure sailing. Also, in 1975, Reginald M was bought by the Melbourne Ferry Company at auction. Later in 1975, Flagstaff Hill Maritime Museum bought the Reginald M for $20,000. It became a popular exhibit in the Village’s lake. In 2006, using funds from a $4,000 government grant, the restoration of the vessel continued. Flagstaff Hill Maritime Village’s Collection holds other artefacts associated with Reginald M. They include - Photographs of the Reginald M, including one photograph of it in Outer Harbour, S.A., dated 1947, with Skipper- R.F. Dale and Owner- John Murch. Another shows it docked at Port Adelaide, with the lettering H.M.C. No. 3 Pt ADEL (standing for His /Her Majesty’s Customs). There is a black and white photo of it at a wharf and another showing a person on board. - a lifebuoy, made of cork, with the inscription of “Pt Adelaide” on it. - Helm section, removed and replaced during restoration. - a bullet found in pieces of timber when Reginald M was restored in 1979 Reginald M was a much-loved exhibit at the Maritime Village, where many visitors enjoyed boarding and exploring a real ship with a long history. Sadly, the Reginald M was decommissioned in late 2016, due to the continuing prohibitive cost of maintenance and the risk to public safety. Components from the Reginald M are held in Flagstaff Hill's collection as a reminder of the Reginald M’s history. The timber is an example of the materials used to build the Reginald M in 1922. The ship was built from recycled items where possible. The bullet represents a time in the history of the vessel that is currently unknown.Wood from the vessel, Reginald M, and a bullet found within its timbers on June 22nd, 1979, during its restoration. flagstaff hill, flagstaff hill maritime museum and village, warrnambool, maritime museum, maritime village, great ocean road, shipwreck coast, reginald m, ketch, coastal trader, timber, wood, bullet, murch, john murch, 1922 -
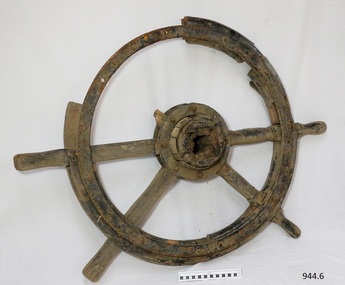 Flagstaff Hill Maritime Museum and Village
Equipment - Ship's Wheel, 1922
... At one time, a wild storm destroyed the chute, so they built a stronger replacement chute. ...At one time, a wild storm destroyed the chute, so they built a stronger replacement chute. ...This ship's wheel was hand-made from wood and metal using a recycled cart wheel. It originally belonged to the "Reginald M", a coastal trading ketch. ‘REGINALD M’ 1922 to 1975- The vessel “Reginald M” was a two-masted coastal ketch, owned and built by Mr Jack (John) Murch of Birkenhead, Port of Adelaide, South Australia. Its construction took approximately 6 months, and it launched at Largs Bay in 1922. The Reginald M’s purpose was to serve the coastal trade of South Australia, to carry cargo cheaply and efficiently. Some have said that the keel was, in fact, hewn from two telegraph poles! Its builder frequented all the salvage yards for materials and fittings. Reginald M had a very shallow draft and a flat bottom that enabled it to come close to shore and to sit high and dry at low tide or to be beached on sand. The flat bottom was also to make the ship able to skim over reefs. Wagons could load and unload direct from their sides. Its cargo included Guano, Barley, Wool, Horses, Cattle, Timber, Explosives, Potatoes, Shell Gritt and Gypsum. On April 9th 1931Reginald M weathered a large storm in St Vincent Gulf, SA. The vessel suffered great damage; the mast snapped, and the crew laboured for four hours to free it by chopping off the mast and rigging. The crew patched it up and slowly returned to Port Adelaide with only a portion of the insured cargo being damaged. The crew members at the time were owner Mr John H Murch of Wells Street, Largs Bay; Skipper Mr R Murch, John’s brother; Murray, son of Captain Murch; and Seaman John Smith. Reg Webb purchased Carribie Station, at Marion in the Warooka District, south of Adelaide, in 1921. He cleared the land and farmed sheep and grain. In 1923, he shipped his own wool and grain from Marion Bay, having first carted 300 bags of the barley grain, 12 bags at a time, along the unmade track to the jetty. A photograph donated to Flagstaff Hill, dating about 1929 - 1942, shows two men on the Reginald M, holding between them their fishing catch of a large hammer shark. The photograph is stamped “GRENFELL STUDIO PORT LINCOLN PRINT” and titled “hammer shark caught on Reginald Emm”. The donor’s family lived on the Your Peninsula and dispatched their grain from a chute at Gleeson’s Landing to the awaiting transport vessel. Reg knew the Murch Brothers from Port Adelaide. The brothers had been using their ketch, Reginald M, to ship Guano from the Islands, led by Captain Richard Murch. Reg approached them in 1934 about shipping grain from Marion Bay. The brothers visited the bay and thought it was an ideal place. They showed Reg where to stack his grain, and they measured up the cliffs. When Reg was ready, they brought down and installed a ninety-foot wooden chute. The bags of grain were individually pushed down the chute, landing in a waiting small boat, then rowed to Reginald M with 14 bags at a time. After 10 hours, Reginald M would have a load of 1300 bags of grain to ship to waiting ports. At one time, a wild storm destroyed the chute, so they built a stronger replacement chute. Reginald M engaged in the shipping of grain from there until 1938. In 1940, Able Seaman Allan H Lucas served on the Reginald M between September and December, being engaged and discharged from Port Adelaide. The ship’s Master, W S Murch, signed his Certificate of Discharge. It seems that at the Reginald M was used, at one time, as a Customs vessel, as one photograph in Flagstaff Hill’s collection shows “H.M.C. No. 3, Pt Adelaide” on the bow. In 1969, the last freight left Marion Bay on the ketch Reginald M carrying grain, wool, and explosives. In late 1970, the Mt. Lyell Mining and Railway Company bought the vessel to use as a barge to carry explosives. In 1972, the Navy League of Strahan, Tasmania, purchased it for use by the Strahan Sea Cadet Unit to use at Macquarie Harbour and renamed it T.S. Macquarie. However, this plan for the use of Reginald M did not happen. In 1974, Mr Andrew Rennie, of East Brighton, Melbourne, bought it for a similar purpose, paying $5,000 and donating a ‘Cadet of the Year’ trophy to the Sea Cadets. He sailed it from Strahan to Melbourne, planning to use it for pleasure sailing. Also, in 1975, Reginald M was bought by the Melbourne Ferry Company at auction. Later in 1975, Flagstaff Hill Maritime Museum bought the Reginald M for $20,000. It became a popular exhibit in the Village’s lake. In 2006, using funds from a $4,000 government grant, the restoration of the vessel continued. Flagstaff Hill Maritime Village’s Collection holds other artefacts associated with Reginald M. They include - Photographs of the Reginald M, including one photograph of it in Outer Harbour, S.A., dated 1947, with Skipper- R.F. Dale and Owner- John Murch. Another shows it docked at Port Adelaide, with the lettering H.M.C. No. 3 Pt ADEL (standing for His /Her Majesty’s Customs). There is a black and white photo of it at a wharf and another showing a person on board. - a lifebuoy, made of cork, with the inscription of “Pt Adelaide” on it. - Helm section, removed and replaced during restoration. - a bullet found in pieces of timber when Reginald M was restored in 1979 Reginald M was a much-loved exhibit at the Maritime Village, where many visitors enjoyed boarding and exploring a real ship with a long history. Sadly, the Reginald M was decommissioned in late 2016, due to the continuing prohibitive cost of maintenance and the risk to public safety. Components from the Reginald M are held in Flagstaff Hill's collection as a reminder of the Reginald M’s history. This ship's wheel is significant because of its association with the REGINALD M. REGNIALD M was a coastal trading ketch from South Australia built in 1922. It is one of very few sailing coastal trading vessels still extant, and its flat bottom, single chine shape illustrates a very simple but robust method of construction, compared to other round bilged examples of trading vessels. She is now listed on the Australian Register of Historic Vessels (ARHV Number: HV000562.)Ship’s wheel, also called a Helm, eight spoke design. Centre of wheel is handmade of wood and has iron rings around each side. The spokes are fitted into this wooden hub. The outer wheel has an iron ring on one side and sections of a wooden ring on the other. There are both original and modern bolt and screw fastenings. The wheel has remnants of black paint. This ship’s wheel was originally fitted to the ketch REGINALD M and removed during its restoration. flagstaff hill, warrnambool, shipwrecked-coast, flagstaff-hill, flagstaff-hill-maritime-museum, maritime-museum, shipwreck-coast, flagstaff-hill-maritime-village, ship's wheel, hand made ship's wheel, coastal trader, reginald m, ketch, john murch, ch murch, reg webb, carribie station, mt lyell copper company, queenstown navy league, andrew rennie, melbourne ferry company, r.f. dale -
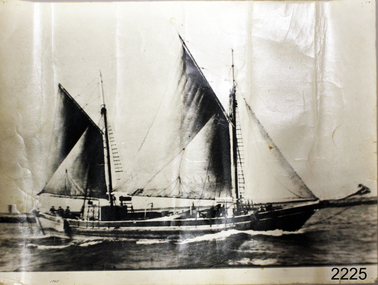 Flagstaff Hill Maritime Museum and Village
Photograph, 1945
... At one time, a wild storm destroyed the chute, so they built a stronger replacement chute. ...At one time, a wild storm destroyed the chute, so they built a stronger replacement chute. ...The donor was a seamen at Port Adelaide, where this photogrpah of the ketch, Reginald M, was taken in 1945. ‘REGINALD M’ 1922 to 1975- The vessel “Reginald M” was a two-masted coastal ketch, owned and built by Mr Jack (John) Murch of Birkenhead, Port of Adelaide, South Australia. Its construction took approximately 6 months, and it launched at Largs Bay in 1922. The Reginald M’s purpose was to serve the coastal trade of South Australia, to carry cargo cheaply and efficiently. Some have said that the keel was, in fact, hewn from two telegraph poles! Its builder frequented all the salvage yards for materials and fittings. Reginald M had a very shallow draft and a flat bottom that enabled it to come close to shore and to sit high and dry at low tide or to be beached on sand. The flat bottom was also to make the ship able to skim over reefs. Wagons could load and unload directly from their sides. Its cargo included Guano, Barley, Wool, Horses, Cattle, Timber, Explosives, Potatoes, Shell Gritt, and Gypsum. On April 9th 1931, Reginald M weathered a large storm in St Vincent Gulf, SA. The vessel suffered great damage; the mast snapped, and the crew laboured for four hours to free it by chopping off the mast and rigging. The crew patched it up and slowly returned to Port Adelaide with only a portion of the insured cargo being damaged. The crew members at the time were the owner, Mr John H Murch of Wells Street, Largs Bay; Skipper Mr R Murch, John’s brother; Murray, son of Captain Murch; and Seaman John Smith. Reg Webb purchased Carribie Station, at Marion in the Warooka District, south of Adelaide, in 1921. He cleared the land and farmed sheep and grain. In 1923, he shipped his own wool and grain from Marion Bay, having first carted 300 bags of the barley grain, 12 bags at a time, along the unmade track to the jetty. A photograph donated to Flagstaff Hill, dating about 1929 - 1942, shows two men on the Reginald M, holding between them their fishing catch of a large hammer shark. The photograph is stamped “GRENFELL STUDIO PORT LINCOLN PRINT” and titled “hammer shark caught on Reginald Emm”. The donor’s family lived on the Your Peninsula and dispatched their grain from a chute at Gleeson’s Landing to the awaiting transport vessel. Reg knew the Murch Brothers from Port Adelaide. The brothers had been using their ketch, Reginald M, to ship Guano from the Islands, led by Captain Richard Murch. Reg approached them in 1934 about shipping grain from Marion Bay. The brothers visited the bay and thought it was an ideal place. They showed Reg where to stack his grain, and they measured up the cliffs. When Reg was ready, they brought down and installed a ninety-foot wooden chute. The bags of grain were individually pushed down the chute, landing in a waiting small boat, then rowed to Reginald M with 14 bags at a time. After 10 hours, Reginald M would have a load of 1300 bags of grain to ship to waiting ports. At one time, a wild storm destroyed the chute, so they built a stronger replacement chute. Reginald M engaged in the shipping of grain from there until 1938. In 1940, Able Seaman Allan H Lucas served on the Reginald M between September and December, being engaged and discharged from Port Adelaide. The ship’s Master, W S Murch, signed his Certificate of Discharge. It seems that at the Reginald M was used, at one time, as a Customs vessel, as one photograph in Flagstaff Hill’s collection shows “H.M.C. No. 3, Pt Adelaide” on the bow. In 1969, the last freight left Marion Bay on the ketch Reginald M carrying grain, wool, and explosives. In late 1970, the Mt. Lyell Mining and Railway Company bought the vessel to use as a barge to carry explosives. In 1972, the Navy League of Strahan, Tasmania, purchased it for use by the Strahan Sea Cadet Unit to use at Macquarie Harbour and renamed it T.S. Macquarie. However, this plan for the use of Reginald M did not happen. In 1974, Mr Andrew Rennie, of East Brighton, Melbourne, bought it for a similar purpose, paying $5,000 and donating a ‘Cadet of the Year’ trophy to the Sea Cadets. He sailed it from Strahan to Melbourne, planning to use it for pleasure sailing. Also, in 1975, Reginald M was bought by the Melbourne Ferry Company at auction. Later in 1975, Flagstaff Hill Maritime Museum bought the Reginald M for $20,000. It became a popular exhibit in the Village’s lake. In 2006, using funds from a $4,000 government grant, the restoration of the vessel continued. Flagstaff Hill Maritime Village’s Collection holds other artefacts associated with Reginald M. They include - Photographs of the Reginald M, including one photograph of it in Outer Harbour, S.A., dated 1947, with Skipper- R.F. Dale and Owner- John Murch. Another shows it docked at Port Adelaide, with the lettering H.M.C. No. 3 Pt ADEL (standing for His /Her Majesty’s Customs). There is a black and white photo of it at a wharf and another showing a person on board. - a lifebuoy, made of cork, with the inscription of “Pt Adelaide” on it. - Helm section, removed and replaced during restoration. - a bullet found in pieces of timber when Reginald M was restored in 1979 Reginald M was a much-loved exhibit at the Maritime Village, where many visitors enjoyed boarding and exploring a real ship with a long history. Sadly, the Reginald M was decommissioned in late 2016, due to the continuing prohibitive cost of maintenance and the risk to public safety. Components from the Reginald M are held in Flagstaff Hill's collection as a reminder of the Reginald M’s history. The photograph represents a time when the Reginald M was in use at the Port of Adelaide. It shows the configuration of the sails at that time. The vessel was active as a coastal trader from Adelaide and along the south east coast of Australia.Photograph: sepia, rectangular image of the two-masted ketch, Reginald M, in Port River, Adelaide, South Australia. A figure is on the bowsprit, and other figures are on the masts and on deck. Photographed at Port River, Adelaide.flagstaff hill, flagstaff hill maritime museum and village, warrnambool, maritime museum, maritime village, great ocean road, shipwreck coast, ships, port river sa, adelaide, reginald m, 2-masted, sailing ship, ketch, port adelaide, 1945 -
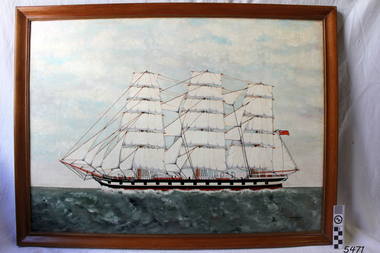 Flagstaff Hill Maritime Museum and Village
Painting - Maritime painting, C. W. Veale, Loch Ard, c. 1978
... This painting is believed to have been created by an amateur artist C W Veale of Colac, who established an early bus service in about 1923, known at the time as the Blue Bus Service, which operated from Colac. ...He drifted out to sea and then on the flood tide came into what is now known as Loch Ard Gorge. ...This painting is believed to have been created by an amateur artist C W Veale of Colac, who established an early bus service in about 1923, known at the time as the Blue Bus Service, which operated from Colac. This service was available for special trips within the Colac region. The Blue Bus Service became very popular with travellers to Lorne via the Deans Marsh Road. The label on the back of the painting comments on whether the ship would be in full sail at the time of the wreck. History of the Loch Ard: The Loch Ard got its name from "Loch Ard" a loch that lies to the west of Aberfoyle, and the east of Loch Lomond. It means "high lake" in Scottish Gaelic. The vessel belonged to the famous Loch Line which sailed many vessels from England to Australia. The Loch Ard was built in Glasgow by Barclay, Curle & Co. in 1873, the vessel was a three-masted square-rigged iron sailing ship that measured 79.87 meters in length, 11.58 m in width, and 7 m in depth with a gross tonnage of 1693 tons with a mainmast that measured a massive 45.7 m in height. Loch Ard made three trips to Australia and one trip to Calcutta before its fateful voyage. Loch Ard left England on March 2, 1878, under the command of 29-year-old Captain Gibbs, who was newly married. The ship was bound for Melbourne with a crew of 37, plus 17 passengers. The general cargo reflected the affluence of Melbourne at the time. Onboard were straw hats, umbrellas, perfumes, clay pipes, pianos, clocks, confectionery, linen, and candles, as well as a heavier load of railway irons, cement, lead, and copper. There were other items included that were intended for display in the Melbourne International Exhibition of 1880. The voyage to Port Phillip was long but uneventful. Then at 3 am on June 1, 1878, Captain Gibbs was expecting to see land. But the Loch Ard was running into a fog which greatly reduced visibility. Captain Gibbs was becoming anxious as there was no sign of land or the Cape Otway lighthouse. At 4 am the fog lifted and a lookout aloft announced that he could see breakers. The sheer cliffs of Victoria's west coast came into view, and Captain Gibbs realised that the ship was much closer to them than expected. He ordered as much sail to be set as time would permit and then attempted to steer the vessel out to sea. On coming head-on into the wind, the ship lost momentum, the sails fell limp and Loch Ard's bow swung back towards land. Gibbs then ordered the anchors to be released in an attempt to hold their position. The anchors sank some 50 fathoms - but did not hold. By this time the ship was among the breakers and the tall cliffs of Mutton Bird Island rose behind. Just half a mile from the coast, the ship's bow was suddenly pulled around by the anchor. The captain tried to tack out to sea, but the ship struck a reef at the base of Mutton Bird Island, near Port Campbell. Waves subsequently broke over the ship and the top deck became loosened from the hull. The masts and rigging came crashing down knocking passengers and crew overboard. When a lifeboat was finally launched, it crashed into the side of Loch Ard and capsized. Tom Pearce, who had launched the boat, managed to cling to its overturned hull and shelter beneath it. He drifted out to sea and then on the flood tide came into what is now known as Loch Ard Gorge. He swam to shore, bruised and dazed, and found a cave in which to shelter. Some of the crew stayed below deck to shelter from the falling rigging but drowned when the ship slipped off the reef into deeper water. Eva Carmichael a passenger had raced onto the deck to find out what was happening only to be confronted by towering cliffs looming above the stricken ship. In all the chaos, Captain Gibbs grabbed Eva and said, "If you are saved Eva, let my dear wife know that I died like a sailor". That was the last Eva Carmichael saw of the captain. She was swept off the ship by a huge wave. Eva saw Tom Pearce on a small rocky beach and yelled to attract his attention. He dived in and swam to the exhausted woman and dragged her to shore. He took her to the cave and broke the open case of brandy that had washed up on the beach. He opened a bottle to revive the unconscious woman. A few hours later Tom scaled a cliff in search of help. He followed hoof prints and came by chance upon two men from nearby Glenample Station three and a half miles away. In a complete state of exhaustion, he told the men of the tragedy. Tom then returned to the gorge while the two men rode back to the station to get help. By the time they reached Loch Ard Gorge, it was cold and dark. The two shipwreck survivors were taken to Glenample Station to recover. Eva stayed at the station for six weeks before returning to Ireland by steamship. In Melbourne, Tom Pearce received a hero's welcome. He was presented with the first gold medal of the Royal Humane Society of Victoria and a £1000 cheque from the Victorian Government. Concerts were performed to honour the young man's bravery and to raise money for those who lost families in the disaster. Of the 54 crew members and passengers on board, only two survived: the apprentice, Tom Pearce, and the young woman passenger, Eva Carmichael, who lost her family in the tragedy. Ten days after the Loch Ard tragedy, salvage rights to the wreck were sold at auction for £2,120. Cargo valued at £3,000 was salvaged and placed on the beach, but most washed back into the sea when another storm developed. The wreck of Loch Ard still lies at the base of Mutton Bird Island. Much of the cargo has now been salvaged and some items were washed up into Loch Ard Gorge. Cargo and artefacts have also been illegally salvaged over many years before protective legislation was introduced in March 1982. One of the most unlikely pieces of cargo to have survived the shipwreck was a Minton majolica peacock- one of only nine in the world. The peacock was destined for the Melbourne 1880 International Exhibition. It had been well packed, which gave it adequate protection during the violent storm. Today the Minton peacock can be seen at the Flagstaff Hill Maritime Museum in Warrnambool. From Australia's most dramatic shipwreck it has now become Australia's most valuable shipwreck artefact and is one of very few 'objects' on the Victorian State Heritage Register.The shipwreck of the Loch Ard is of significance for Victoria and is registered on the Victorian Heritage Register ( S 417). Flagstaff Hill has a varied collection of artefacts from Loch Ard and its collection is significant for being one of the largest accumulation of artefacts from this notable Victorian shipwreck of which the subject items are a small part. The collection's objects give us a snapshot of how we can interpret the story of this tragic event. The collection is also archaeologically significant as it represents aspects of Victoria's shipping history that allows us to interpret Victoria's social and historical themes of the time. Through is associated with the worst and best-known shipwreck in Victoria's history.Painting in brown-stained wooden frame. Depicts three-masted vessel 'Loch Ard' in full sail on moderate seas. Ship has figurehead, figures on board, and a Union Jack flag on red background. Ship's hull is black with white stripe, and is red on waterline. Ship's name is on hull. Artist C. W. Veale, painted in 1978, signed on bottom right. Label on back of painting has typed description of the Loch Ard and a comment.Signature "C W Veale / 1978" Text on hull "LOCH ARD" Label on back; " "LOCH ARD" / The clipper ship Loch Ard was wrecked on the 1st June 1878. / Of 54 people on board only two survived : Eva Carmichael and Tom Pearce. / Pearce became hero of the wreck for saving Miss Carmichael. / This picture shows the Loch Ard in full sail in moderate seas. / When approaching Cape Otway from the west, she would be in rough water and would presumably not be in full sail."flagstaff hill maritime museum, colac bus services, blue bus service, cw veale, loch ard paintings, loch ard, veale, warrnambool, great ocean road, eva carmichael, tom pearce, thomas pearce, cape otway, cargo ship 1878 -
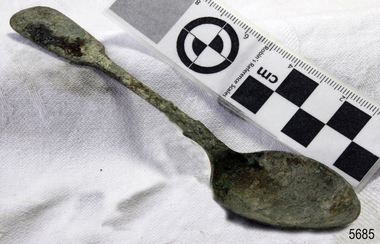 Flagstaff Hill Maritime Museum and Village
Spoon, circa 1878
... He drifted out to sea and then on the flood tide came into what is now known as LOCH ARD Gorge. ...He drifted out to sea and then on the flood tide came into what is now known as LOCH ARD Gorge. ...Tea spoon from the wreck of the LOCH ARD HISTORY OF THE LOCH ARD The LOCH ARD belonged to the famous Loch Line which sailed many ships from England to Australia. Built in Glasgow by Barclay, Curdle and Co. in 1873, the LOCH ARD was a three-masted square rigged iron sailing ship. The ship measured 262ft 7" (79.87m) in length, 38ft (11.58m) in width, 23ft (7m) in depth and had a gross tonnage of 1693 tons. The LOCH ARD's main mast measured a massive 150ft (45.7m) in height. LOCH ARD made three trips to Australia and one trip to Calcutta before its final voyage. LOCH ARD left England on March 2, 1878, under the command of Captain Gibbs, a newly married, 29 year old. She was bound for Melbourne with a crew of 37, plus 17 passengers and a load of cargo. The general cargo reflected the affluence of Melbourne at the time. On board were straw hats, umbrella, perfumes, clay pipes, pianos, clocks, confectionary, linen and candles, as well as a heavier load of railway irons, cement, lead and copper. There were items included that intended for display in the Melbourne International Exhibition in 1880. The voyage to Port Phillip was long but uneventful. At 3am on June 1, 1878, Captain Gibbs was expecting to see land and the passengers were becoming excited as they prepared to view their new homeland in the early morning. But LOCH ARD was running into a fog which greatly reduced visibility. Captain Gibbs was becoming anxious as there was no sign of land or the Cape Otway lighthouse. At 4am the fog lifted. A man aloft announced that he could see breakers. The sheer cliffs of Victoria's west coast came into view, and Captain Gibbs realised that the ship was much closer to them than expected. He ordered as much sail to be set as time would permit and then attempted to steer the vessel out to sea. On coming head on into the wind, the ship lost momentum, the sails fell limp and LOCH ARD's bow swung back. Gibbs then ordered the anchors to be released in an attempt to hold its position. The anchors sank some 50 fathoms - but did not hold. By this time LOCH ARD was among the breakers and the tall cliffs of Mutton Bird Island rose behind the ship. Just half a mile from the coast, the ship's bow was suddenly pulled around by the anchor. The captain tried to tack out to sea, but the ship struck a reef at the base of Mutton Bird Island, near Port Campbell. Waves broke over the ship and the top deck was loosened from the hull. The masts and rigging came crashing down knocking passengers and crew overboard. When a lifeboat was finally launched, it crashed into the side of LOCH ARD and capsized. Tom Pearce, who had launched the boat, managed to cling to its overturned hull and shelter beneath it. He drifted out to sea and then on the flood tide came into what is now known as LOCH ARD Gorge. He swam to shore, bruised and dazed, and found a cave in which to shelter. Some of the crew stayed below deck to shelter from the falling rigging but drowned when the ship slipped off the reef into deeper water. Eva Carmichael had raced onto deck to find out what was happening only to be confronted by towering cliffs looming above the stricken ship. In all the chaos, Captain Gibbs grabbed Eva and said, "If you are saved Eva, let my dear wife know that I died like a sailor". That was the last Eva Carmichael saw of the captain. She was swept off the ship by a huge wave. Eva saw Tom Pearce on a small rocky beach and yelled to attract his attention. He dived in and swam to the exhausted woman and dragged her to shore. He took her to the cave and broke open case of brandy which had washed up on the beach. He opened a bottle to revive the unconscious woman. A few hours later Tom scaled a cliff in search of help. He followed hoof prints and came by chance upon two men from nearby Glenample Station three and a half miles away. In a state of exhaustion, he told the men of the tragedy. Tom returned to the gorge while the two men rode back to the station to get help. By the time they reached LOCH ARD Gorge, it was cold and dark. The two shipwreck survivors were taken to Glenample Station to recover. Eva stayed at the station for six weeks before returning to Ireland, this time by steamship. In Melbourne, Tom Pearce received a hero's welcome. He was presented with the first gold medal of the Royal Humane Society of Victoria and a £1000 cheque from the Victorian Government. Concerts were performed to honour the young man's bravery and to raise money for those who lost family in the LOCH ARD disaster. Of the 54 crew members and passengers on board, only two survived: the apprentice, Tom Pearce and the young woman passenger, Eva Carmichael, who lost all of her family in the tragedy. Ten days after the LOCH ARD tragedy, salvage rights to the wreck were sold at auction for £2,120. Cargo valued at £3,000 was salvaged and placed on the beach, but most washed back into the sea when another storm developed. The wreck of LOCH ARD still lies at the base of Mutton Bird Island. Much of the cargo has now been salvaged and some was washed up into what is now known as LOCH ARD Gorge. Cargo and artefacts have also been illegally salvaged over many years before protective legislation was introduced. One of the most unlikely pieces of cargo to have survived the shipwreck was a Minton porcelain peacock - one of only seven in the world. The peacock was destined for the Melbourne International Exhibition in 1880. It had been well packed, which gave it adequate protection during the violent storm. Today, the Minton peacock can be seen at the Flagstaff Hill Maritime Museum in Warrnambool. From Australia's most dramatic shipwreck it has now become Australia's most valuable shipwreck artefact and is one of very few 'objects' on the Victorian State Heritage Register. The LOCH ARD shipwreck is of State significance – Victorian Heritage Register S 417 Flagstaff Hill’s collection of artefacts from LOCH ARD is significant for being one of the largest collections of artefacts from this shipwreck in Victoria. It is significant for its association with the shipwreck, which is on the Victorian Heritage Register (VHR S417). The collection is significant because of the relationship between the objects, as together they have a high potential to interpret the story of the LOCH ARD. The LOCH ARD collection is archaeologically significant as the remains of a large international passenger and cargo ship. The LOCH ARD collection is historically significant for representing aspects of Victoria’s shipping history and its potential to interpret sub-theme 1.5 of Victoria’s Framework of Historical Themes (living with natural processes). The collection is also historically significant for its association with the LOCH ARD, which was one of the worst and best known shipwrecks in Victoria’s history. Unrestored tea spoon from the wreck of the LOCH ARD. The spoon design has a flattened fiddle-back handle, with a thin stem or shank, flared collar, and elongated bowl. The spoons metallic composition is a thin layer of brass alloy which has partially corroded back to a nickel-silver base metal. flagstaff hill, warrnambool, shipwrecked coast, flagstaff hill maritime museum, maritime museum, shipwreck coast, flagstaff hill maritime village, great ocean road, loch line, loch ard, captain gibbs, eva carmichael, tom pearce, glenample station, mutton bird island, loch ard gorge, tea spoon, spoon -
 Flagstaff Hill Maritime Museum and Village
Lid
... He drifted out to sea and then on the flood tide came into what is now known as LOCH ARD Gorge. ...He drifted out to sea and then on the flood tide came into what is now known as LOCH ARD Gorge. ...Ref: LA 2 29 274 HISTORY OF THE LOCH ARD The LOCH ARD belonged to the famous Loch Line which sailed many ships from England to Australia. Built in Glasgow by Barclay, Curdle and Co. in 1873, the LOCH ARD was a three-masted square rigged iron sailing ship. The ship measured 262ft 7" (79.87m) in length, 38ft (11.58m) in width, 23ft (7m) in depth and had a gross tonnage of 1693 tons. The LOCH ARD's main mast measured a massive 150ft (45.7m) in height. LOCH ARD made three trips to Australia and one trip to Calcutta before its final voyage. LOCH ARD left England on March 2, 1878, under the command of Captain Gibbs, a newly married, 29 year old. She was bound for Melbourne with a crew of 37, plus 17 passengers and a load of cargo. The general cargo reflected the affluence of Melbourne at the time. On board were straw hats, umbrella, perfumes, clay pipes, pianos, clocks, confectionary, linen and candles, as well as a heavier load of railway irons, cement, lead and copper. There were items included that intended for display in the Melbourne International Exhibition in 1880. The voyage to Port Phillip was long but uneventful. At 3am on June 1, 1878, Captain Gibbs was expecting to see land and the passengers were becoming excited as they prepared to view their new homeland in the early morning. But LOCH ARD was running into a fog which greatly reduced visibility. Captain Gibbs was becoming anxious as there was no sign of land or the Cape Otway lighthouse. At 4am the fog lifted. A man aloft announced that he could see breakers. The sheer cliffs of Victoria's west coast came into view, and Captain Gibbs realised that the ship was much closer to them than expected. He ordered as much sail to be set as time would permit and then attempted to steer the vessel out to sea. On coming head on into the wind, the ship lost momentum, the sails fell limp and LOCH ARD's bow swung back. Gibbs then ordered the anchors to be released in an attempt to hold its position. The anchors sank some 50 fathoms - but did not hold. By this time LOCH ARD was among the breakers and the tall cliffs of Mutton Bird Island rose behind the ship. Just half a mile from the coast, the ship's bow was suddenly pulled around by the anchor. The captain tried to tack out to sea, but the ship struck a reef at the base of Mutton Bird Island, near Port Campbell. Waves broke over the ship and the top deck was loosened from the hull. The masts and rigging came crashing down knocking passengers and crew overboard. When a lifeboat was finally launched, it crashed into the side of LOCH ARD and capsized. Tom Pearce, who had launched the boat, managed to cling to its overturned hull and shelter beneath it. He drifted out to sea and then on the flood tide came into what is now known as LOCH ARD Gorge. He swam to shore, bruised and dazed, and found a cave in which to shelter. Some of the crew stayed below deck to shelter from the falling rigging but drowned when the ship slipped off the reef into deeper water. Eva Carmichael had raced onto deck to find out what was happening only to be confronted by towering cliffs looming above the stricken ship. In all the chaos, Captain Gibbs grabbed Eva and said, "If you are saved Eva, let my dear wife know that I died like a sailor". That was the last Eva Carmichael saw of the captain. She was swept off the ship by a huge wave. Eva saw Tom Pearce on a small rocky beach and yelled to attract his attention. He dived in and swam to the exhausted woman and dragged her to shore. He took her to the cave and broke open case of brandy which had washed up on the beach. He opened a bottle to revive the unconscious woman. A few hours later Tom scaled a cliff in search of help. He followed hoof prints and came by chance upon two men from nearby Glenample Station three and a half miles away. In a state of exhaustion, he told the men of the tragedy. Tom returned to the gorge while the two men rode back to the station to get help. By the time they reached LOCH ARD Gorge, it was cold and dark. The two shipwreck survivors were taken to Glenample Station to recover. Eva stayed at the station for six weeks before returning to Ireland, this time by steamship. In Melbourne, Tom Pearce received a hero's welcome. He was presented with the first gold medal of the Royal Humane Society of Victoria and a £1000 cheque from the Victorian Government. Concerts were performed to honour the young man's bravery and to raise money for those who lost family in the LOCH ARD disaster. Of the 54 crew members and passengers on board, only two survived: the apprentice, Tom Pearce and the young woman passenger, Eva Carmichael, who lost all of her family in the tragedy. Ten days after the LOCH ARD tragedy, salvage rights to the wreck were sold at auction for £2,120. Cargo valued at £3,000 was salvaged and placed on the beach, but most washed back into the sea when another storm developed. The wreck of LOCH ARD still lies at the base of Mutton Bird Island. Much of the cargo has now been salvaged and some was washed up into what is now known as LOCH ARD Gorge. Cargo and artefacts have also been illegally salvaged over many years before protective legislation was introduced. One of the most unlikely pieces of cargo to have survived the shipwreck was a Minton porcelain peacock - one of only nine in the world. The peacock was destined for the Melbourne International Exhibition in 1880. It had been well packed, which gave it adequate protection during the violent storm. Today, the Minton peacock can be seen at the Flagstaff Hill Maritime Museum in Warrnambool. From Australia's most dramatic shipwreck it has now become Australia's most valuable shipwreck artefact and is one of very few 'objects' on the Victorian State Heritage Register. Flagstaff Hill’s collection of artefacts from LOCH ARD is significant for being one of the largest collections of artefacts from this shipwreck in Victoria. It is significant for its association with the shipwreck, which is on the Victorian Heritage Register (VHR S417). The collection is significant because of the relationship between the objects, as together they have a high potential to interpret the story of the LOCH ARD. The LOCH ARD collection is archaeologically significant as the remains of a large international passenger and cargo ship. The LOCH ARD collection is historically significant for representing aspects of Victoria’s shipping history and its potential to interpret sub-theme 1.5 of Victoria’s Framework of Historical Themes (living with natural processes). The collection is also historically significant for its association with the LOCH ARD, which was one of the worst and best known shipwrecks in Victoria’s history. Lid from child's tea set. Porcelain. Lid has small chip and some slight iron stains. Recovered from the wreck of the Loch Ard. Artefact reg No LA/16.flagstaff hill, warrnambool, shipwrecked-coast, flagstaff-hill, flagstaff-hill-maritime-museum, maritime-museum, shipwreck-coast, flagstaff-hill-maritime-village -
 Flagstaff Hill Maritime Museum and Village
Deflector
... He drifted out to sea and then on the flood tide came into what is now known as LOCH ARD Gorge. ...He drifted out to sea and then on the flood tide came into what is now known as LOCH ARD Gorge. ...HISTORY OF THE LOCH ARD The LOCH ARD belonged to the famous Loch Line which sailed many ships from England to Australia. Built in Glasgow by Barclay, Curdle and Co. in 1873, the LOCH ARD was a three-masted square rigged iron sailing ship. The ship measured 262ft 7" (79.87m) in length, 38ft (11.58m) in width, 23ft (7m) in depth and had a gross tonnage of 1693 tons. The LOCH ARD's main mast measured a massive 150ft (45.7m) in height. LOCH ARD made three trips to Australia and one trip to Calcutta before its final voyage. LOCH ARD left England on March 2, 1878, under the command of Captain Gibbs, a newly married, 29 year old. She was bound for Melbourne with a crew of 37, plus 17 passengers and a load of cargo. The general cargo reflected the affluence of Melbourne at the time. On board were straw hats, umbrella, perfumes, clay pipes, pianos, clocks, confectionary, linen and candles, as well as a heavier load of railway irons, cement, lead and copper. There were items included that intended for display in the Melbourne International Exhibition in 1880. The voyage to Port Phillip was long but uneventful. At 3am on June 1, 1878, Captain Gibbs was expecting to see land and the passengers were becoming excited as they prepared to view their new homeland in the early morning. But LOCH ARD was running into a fog which greatly reduced visibility. Captain Gibbs was becoming anxious as there was no sign of land or the Cape Otway lighthouse. At 4am the fog lifted. A man aloft announced that he could see breakers. The sheer cliffs of Victoria's west coast came into view, and Captain Gibbs realised that the ship was much closer to them than expected. He ordered as much sail to be set as time would permit and then attempted to steer the vessel out to sea. On coming head on into the wind, the ship lost momentum, the sails fell limp and LOCH ARD's bow swung back. Gibbs then ordered the anchors to be released in an attempt to hold its position. The anchors sank some 50 fathoms - but did not hold. By this time LOCH ARD was among the breakers and the tall cliffs of Mutton Bird Island rose behind the ship. Just half a mile from the coast, the ship's bow was suddenly pulled around by the anchor. The captain tried to tack out to sea, but the ship struck a reef at the base of Mutton Bird Island, near Port Campbell. Waves broke over the ship and the top deck was loosened from the hull. The masts and rigging came crashing down knocking passengers and crew overboard. When a lifeboat was finally launched, it crashed into the side of LOCH ARD and capsized. Tom Pearce, who had launched the boat, managed to cling to its overturned hull and shelter beneath it. He drifted out to sea and then on the flood tide came into what is now known as LOCH ARD Gorge. He swam to shore, bruised and dazed, and found a cave in which to shelter. Some of the crew stayed below deck to shelter from the falling rigging but drowned when the ship slipped off the reef into deeper water. Eva Carmichael had raced onto deck to find out what was happening only to be confronted by towering cliffs looming above the stricken ship. In all the chaos, Captain Gibbs grabbed Eva and said, "If you are saved Eva, let my dear wife know that I died like a sailor". That was the last Eva Carmichael saw of the captain. She was swept off the ship by a huge wave. Eva saw Tom Pearce on a small rocky beach and yelled to attract his attention. He dived in and swam to the exhausted woman and dragged her to shore. He took her to the cave and broke open case of brandy which had washed up on the beach. He opened a bottle to revive the unconscious woman. A few hours later Tom scaled a cliff in search of help. He followed hoof prints and came by chance upon two men from nearby Glenample Station three and a half miles away. In a state of exhaustion, he told the men of the tragedy. Tom returned to the gorge while the two men rode back to the station to get help. By the time they reached LOCH ARD Gorge, it was cold and dark. The two shipwreck survivors were taken to Glenample Station to recover. Eva stayed at the station for six weeks before returning to Ireland, this time by steamship. In Melbourne, Tom Pearce received a hero's welcome. He was presented with the first gold medal of the Royal Humane Society of Victoria and a £1000 cheque from the Victorian Government. Concerts were performed to honour the young man's bravery and to raise money for those who lost family in the LOCH ARD disaster. Of the 54 crew members and passengers on board, only two survived: the apprentice, Tom Pearce and the young woman passenger, Eva Carmichael, who lost all of her family in the tragedy. Ten days after the LOCH ARD tragedy, salvage rights to the wreck were sold at auction for £2,120. Cargo valued at £3,000 was salvaged and placed on the beach, but most washed back into the sea when another storm developed. The wreck of LOCH ARD still lies at the base of Mutton Bird Island. Much of the cargo has now been salvaged and some was washed up into what is now known as LOCH ARD Gorge. Cargo and artefacts have also been illegally salvaged over many years before protective legislation was introduced. One of the most unlikely pieces of cargo to have survived the shipwreck was a Minton porcelain peacock - one of only nine in the world. The peacock was destined for the Melbourne International Exhibition in 1880. It had been well packed, which gave it adequate protection during the violent storm. Today, the Minton peacock can be seen at the Flagstaff Hill Maritime Museum in Warrnambool. From Australia's most dramatic shipwreck it has now become Australia's most valuable shipwreck artefact and is one of very few 'objects' on the Victorian State Heritage Register. Flagstaff Hill’s collection of artefacts from LOCH ARD is significant for being one of the largest collections of artefacts from this shipwreck in Victoria. It is significant for its association with the shipwreck, which is on the Victorian Heritage Register (VHR S417). The collection is significant because of the relationship between the objects, as together they have a high potential to interpret the story of the LOCH ARD. The LOCH ARD collection is archaeologically significant as the remains of a large international passenger and cargo ship. The LOCH ARD collection is historically significant for representing aspects of Victoria’s shipping history and its potential to interpret sub-theme 1.5 of Victoria’s Framework of Historical Themes (living with natural processes). The collection is also historically significant for its association with the LOCH ARD, which was one of the worst and best known shipwrecks in Victoria’s history. Small Porcelain Heat Deflector from a kero lamp,deflector is blue inside. Outside has some encrustation. Artefact reg no LA/15. Recovered from the wreck of the Loch Ard.flagstaff hill, warrnambool, shipwrecked coast, flagstaff hill maritime museum, maritime museum, shipwreck coast, flagstaff hill maritime village, great ocean road, loch line, loch ard, captain gibbs, eva carmichael, tom pearce, glenample station, mutton bird island, loch ard gorge, porcelain heat deflector, heat deflector -
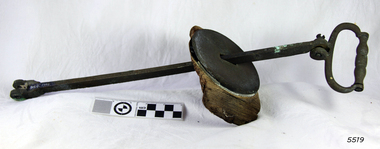 Flagstaff Hill Maritime Museum and Village
Pump
... He drifted out to sea and then on the flood tide came into what is now known as LOCH ARD Gorge. ...He drifted out to sea and then on the flood tide came into what is now known as LOCH ARD Gorge. ...HISTORY OF THE LOCH ARD The LOCH ARD belonged to the famous Loch Line which sailed many ships from England to Australia. Built in Glasgow by Barclay, Curdle and Co. in 1873, the LOCH ARD was a three-masted square rigged iron sailing ship. The ship measured 262ft 7" (79.87m) in length, 38ft (11.58m) in width, 23ft (7m) in depth and had a gross tonnage of 1693 tons. The LOCH ARD's main mast measured a massive 150ft (45.7m) in height. LOCH ARD made three trips to Australia and one trip to Calcutta before its final voyage. LOCH ARD left England on March 2, 1878, under the command of Captain Gibbs, a newly married, 29 year old. She was bound for Melbourne with a crew of 37, plus 17 passengers and a load of cargo. The general cargo reflected the affluence of Melbourne at the time. On board were straw hats, umbrella, perfumes, clay pipes, pianos, clocks, confectionary, linen and candles, as well as a heavier load of railway irons, cement, lead and copper. There were items included that intended for display in the Melbourne International Exhibition in 1880. The voyage to Port Phillip was long but uneventful. At 3am on June 1, 1878, Captain Gibbs was expecting to see land and the passengers were becoming excited as they prepared to view their new homeland in the early morning. But LOCH ARD was running into a fog which greatly reduced visibility. Captain Gibbs was becoming anxious as there was no sign of land or the Cape Otway lighthouse. At 4am the fog lifted. A man aloft announced that he could see breakers. The sheer cliffs of Victoria's west coast came into view, and Captain Gibbs realised that the ship was much closer to them than expected. He ordered as much sail to be set as time would permit and then attempted to steer the vessel out to sea. On coming head on into the wind, the ship lost momentum, the sails fell limp and LOCH ARD's bow swung back. Gibbs then ordered the anchors to be released in an attempt to hold its position. The anchors sank some 50 fathoms - but did not hold. By this time LOCH ARD was among the breakers and the tall cliffs of Mutton Bird Island rose behind the ship. Just half a mile from the coast, the ship's bow was suddenly pulled around by the anchor. The captain tried to tack out to sea, but the ship struck a reef at the base of Mutton Bird Island, near Port Campbell. Waves broke over the ship and the top deck was loosened from the hull. The masts and rigging came crashing down knocking passengers and crew overboard. When a lifeboat was finally launched, it crashed into the side of LOCH ARD and capsized. Tom Pearce, who had launched the boat, managed to cling to its overturned hull and shelter beneath it. He drifted out to sea and then on the flood tide came into what is now known as LOCH ARD Gorge. He swam to shore, bruised and dazed, and found a cave in which to shelter. Some of the crew stayed below deck to shelter from the falling rigging but drowned when the ship slipped off the reef into deeper water. Eva Carmichael had raced onto deck to find out what was happening only to be confronted by towering cliffs looming above the stricken ship. In all the chaos, Captain Gibbs grabbed Eva and said, "If you are saved Eva, let my dear wife know that I died like a sailor". That was the last Eva Carmichael saw of the captain. She was swept off the ship by a huge wave. Eva saw Tom Pearce on a small rocky beach and yelled to attract his attention. He dived in and swam to the exhausted woman and dragged her to shore. He took her to the cave and broke open case of brandy which had washed up on the beach. He opened a bottle to revive the unconscious woman. A few hours later Tom scaled a cliff in search of help. He followed hoof prints and came by chance upon two men from nearby Glenample Station three and a half miles away. In a state of exhaustion, he told the men of the tragedy. Tom returned to the gorge while the two men rode back to the station to get help. By the time they reached LOCH ARD Gorge, it was cold and dark. The two shipwreck survivors were taken to Glenample Station to recover. Eva stayed at the station for six weeks before returning to Ireland, this time by steamship. In Melbourne, Tom Pearce received a hero's welcome. He was presented with the first gold medal of the Royal Humane Society of Victoria and a £1000 cheque from the Victorian Government. Concerts were performed to honour the young man's bravery and to raise money for those who lost family in the LOCH ARD disaster. Of the 54 crew members and passengers on board, only two survived: the apprentice, Tom Pearce and the young woman passenger, Eva Carmichael, who lost all of her family in the tragedy. Ten days after the LOCH ARD tragedy, salvage rights to the wreck were sold at auction for £2,120. Cargo valued at £3,000 was salvaged and placed on the beach, but most washed back into the sea when another storm developed. The wreck of LOCH ARD still lies at the base of Mutton Bird Island. Much of the cargo has now been salvaged and some was washed up into what is now known as LOCH ARD Gorge. Cargo and artefacts have also been illegally salvaged over many years before protective legislation was introduced. One of the most unlikely pieces of cargo to have survived the shipwreck was a Minton porcelain peacock - one of only nine in the world. The peacock was destined for the Melbourne International Exhibition in 1880. It had been well packed, which gave it adequate protection during the violent storm. Today, the Minton peacock can be seen at the Flagstaff Hill Maritime Museum in Warrnambool. From Australia's most dramatic shipwreck it has now become Australia's most valuable shipwreck artefact and is one of very few 'objects' on the Victorian State Heritage Register. Flagstaff Hill’s collection of artefacts from LOCH ARD is significant for being one of the largest collections of artefacts from this shipwreck in Victoria. It is significant for its association with the shipwreck, which is on the Victorian Heritage Register (VHR S417). The collection is significant because of the relationship between the objects, as together they have a high potential to interpret the story of the LOCH ARD. The LOCH ARD collection is archaeologically significant as the remains of a large international passenger and cargo ship. The LOCH ARD collection is historically significant for representing aspects of Victoria’s shipping history and its potential to interpret sub-theme 1.5 of Victoria’s Framework of Historical Themes (living with natural processes). The collection is also historically significant for its association with the LOCH ARD, which was one of the worst and best known shipwrecks in Victoria’s history. Part of a pump system. Has been attached to a piece of wood. Possibly a cistern plunger. From the Loch Ard.flagstaff hill, warrnambool, shipwrecked coast, flagstaff hill maritime museum, maritime museum, shipwreck coast, flagstaff hill maritime village, great ocean road, loch line, loch ard, captain gibbs, eva carmichael, tom pearce, glenample station, mutton bird island, loch ard gorge, pump system, pump -
 Flagstaff Hill Maritime Museum and Village
Handle
... He drifted out to sea and then on the flood tide came into what is now known as LOCH ARD Gorge. ...He drifted out to sea and then on the flood tide came into what is now known as LOCH ARD Gorge. ...Ref: LA 6 67 311 HISTORY OF THE LOCH ARD The LOCH ARD belonged to the famous Loch Line which sailed many ships from England to Australia. Built in Glasgow by Barclay, Curdle and Co. in 1873, the LOCH ARD was a three-masted square rigged iron sailing ship. The ship measured 262ft 7" (79.87m) in length, 38ft (11.58m) in width, 23ft (7m) in depth and had a gross tonnage of 1693 tons. The LOCH ARD's main mast measured a massive 150ft (45.7m) in height. LOCH ARD made three trips to Australia and one trip to Calcutta before its final voyage. LOCH ARD left England on March 2, 1878, under the command of Captain Gibbs, a newly married, 29 year old. She was bound for Melbourne with a crew of 37, plus 17 passengers and a load of cargo. The general cargo reflected the affluence of Melbourne at the time. On board were straw hats, umbrella, perfumes, clay pipes, pianos, clocks, confectionary, linen and candles, as well as a heavier load of railway irons, cement, lead and copper. There were items included that intended for display in the Melbourne International Exhibition in 1880. The voyage to Port Phillip was long but uneventful. At 3am on June 1, 1878, Captain Gibbs was expecting to see land and the passengers were becoming excited as they prepared to view their new homeland in the early morning. But LOCH ARD was running into a fog which greatly reduced visibility. Captain Gibbs was becoming anxious as there was no sign of land or the Cape Otway lighthouse. At 4am the fog lifted. A man aloft announced that he could see breakers. The sheer cliffs of Victoria's west coast came into view, and Captain Gibbs realised that the ship was much closer to them than expected. He ordered as much sail to be set as time would permit and then attempted to steer the vessel out to sea. On coming head on into the wind, the ship lost momentum, the sails fell limp and LOCH ARD's bow swung back. Gibbs then ordered the anchors to be released in an attempt to hold its position. The anchors sank some 50 fathoms - but did not hold. By this time LOCH ARD was among the breakers and the tall cliffs of Mutton Bird Island rose behind the ship. Just half a mile from the coast, the ship's bow was suddenly pulled around by the anchor. The captain tried to tack out to sea, but the ship struck a reef at the base of Mutton Bird Island, near Port Campbell. Waves broke over the ship and the top deck was loosened from the hull. The masts and rigging came crashing down knocking passengers and crew overboard. When a lifeboat was finally launched, it crashed into the side of LOCH ARD and capsized. Tom Pearce, who had launched the boat, managed to cling to its overturned hull and shelter beneath it. He drifted out to sea and then on the flood tide came into what is now known as LOCH ARD Gorge. He swam to shore, bruised and dazed, and found a cave in which to shelter. Some of the crew stayed below deck to shelter from the falling rigging but drowned when the ship slipped off the reef into deeper water. Eva Carmichael had raced onto deck to find out what was happening only to be confronted by towering cliffs looming above the stricken ship. In all the chaos, Captain Gibbs grabbed Eva and said, "If you are saved Eva, let my dear wife know that I died like a sailor". That was the last Eva Carmichael saw of the captain. She was swept off the ship by a huge wave. Eva saw Tom Pearce on a small rocky beach and yelled to attract his attention. He dived in and swam to the exhausted woman and dragged her to shore. He took her to the cave and broke open case of brandy which had washed up on the beach. He opened a bottle to revive the unconscious woman. A few hours later Tom scaled a cliff in search of help. He followed hoof prints and came by chance upon two men from nearby Glenample Station three and a half miles away. In a state of exhaustion, he told the men of the tragedy. Tom returned to the gorge while the two men rode back to the station to get help. By the time they reached LOCH ARD Gorge, it was cold and dark. The two shipwreck survivors were taken to Glenample Station to recover. Eva stayed at the station for six weeks before returning to Ireland, this time by steamship. In Melbourne, Tom Pearce received a hero's welcome. He was presented with the first gold medal of the Royal Humane Society of Victoria and a £1000 cheque from the Victorian Government. Concerts were performed to honour the young man's bravery and to raise money for those who lost family in the LOCH ARD disaster. Of the 54 crew members and passengers on board, only two survived: the apprentice, Tom Pearce and the young woman passenger, Eva Carmichael, who lost all of her family in the tragedy. Ten days after the LOCH ARD tragedy, salvage rights to the wreck were sold at auction for £2,120. Cargo valued at £3,000 was salvaged and placed on the beach, but most washed back into the sea when another storm developed. The wreck of LOCH ARD still lies at the base of Mutton Bird Island. Much of the cargo has now been salvaged and some was washed up into what is now known as LOCH ARD Gorge. Cargo and artefacts have also been illegally salvaged over many years before protective legislation was introduced. One of the most unlikely pieces of cargo to have survived the shipwreck was a Minton porcelain peacock - one of only nine in the world. The peacock was destined for the Melbourne International Exhibition in 1880. It had been well packed, which gave it adequate protection during the violent storm. Today, the Minton peacock can be seen at the Flagstaff Hill Maritime Museum in Warrnambool. From Australia's most dramatic shipwreck it has now become Australia's most valuable shipwreck artefact and is one of very few 'objects' on the Victorian State Heritage Register. Flagstaff Hill’s collection of artefacts from LOCH ARD is significant for being one of the largest collections of artefacts from this shipwreck in Victoria. It is significant for its association with the shipwreck, which is on the Victorian Heritage Register (VHR S417). The collection is significant because of the relationship between the objects, as together they have a high potential to interpret the story of the LOCH ARD. The LOCH ARD collection is archaeologically significant as the remains of a large international passenger and cargo ship. The LOCH ARD collection is historically significant for representing aspects of Victoria’s shipping history and its potential to interpret sub-theme 1.5 of Victoria’s Framework of Historical Themes (living with natural processes). The collection is also historically significant for its association with Shovel handle. Has pieces of iron and concretion visible. Artefact Reg No LA/42. Recovered from the wreck of the Loch Ard.flagstaff hill, warrnambool, shipwrecked coast, flagstaff hill maritime museum, maritime museum, shipwreck coast, flagstaff hill maritime village, great ocean road, loch line, loch ard, captain gibbs, eva carmichael, tom pearce, glenample station, mutton bird island, loch ard gorge, shovel handle -
 Flagstaff Hill Maritime Museum and Village
Flange
... He drifted out to sea and then on the flood tide came into what is now known as LOCH ARD Gorge. ...He drifted out to sea and then on the flood tide came into what is now known as LOCH ARD Gorge. ...Ref LA 3 32 256 HISTORY OF THE LOCH ARD The LOCH ARD belonged to the famous Loch Line which sailed many ships from England to Australia. Built in Glasgow by Barclay, Curdle and Co. in 1873, the LOCH ARD was a three-masted square rigged iron sailing ship. The ship measured 262ft 7" (79.87m) in length, 38ft (11.58m) in width, 23ft (7m) in depth and had a gross tonnage of 1693 tons. The LOCH ARD's main mast measured a massive 150ft (45.7m) in height. LOCH ARD made three trips to Australia and one trip to Calcutta before its final voyage. LOCH ARD left England on March 2, 1878, under the command of Captain Gibbs, a newly married, 29 year old. She was bound for Melbourne with a crew of 37, plus 17 passengers and a load of cargo. The general cargo reflected the affluence of Melbourne at the time. On board were straw hats, umbrella, perfumes, clay pipes, pianos, clocks, confectionary, linen and candles, as well as a heavier load of railway irons, cement, lead and copper. There were items included that intended for display in the Melbourne International Exhibition in 1880. The voyage to Port Phillip was long but uneventful. At 3am on June 1, 1878, Captain Gibbs was expecting to see land and the passengers were becoming excited as they prepared to view their new homeland in the early morning. But LOCH ARD was running into a fog which greatly reduced visibility. Captain Gibbs was becoming anxious as there was no sign of land or the Cape Otway lighthouse. At 4am the fog lifted. A man aloft announced that he could see breakers. The sheer cliffs of Victoria's west coast came into view, and Captain Gibbs realised that the ship was much closer to them than expected. He ordered as much sail to be set as time would permit and then attempted to steer the vessel out to sea. On coming head on into the wind, the ship lost momentum, the sails fell limp and LOCH ARD's bow swung back. Gibbs then ordered the anchors to be released in an attempt to hold its position. The anchors sank some 50 fathoms - but did not hold. By this time LOCH ARD was among the breakers and the tall cliffs of Mutton Bird Island rose behind the ship. Just half a mile from the coast, the ship's bow was suddenly pulled around by the anchor. The captain tried to tack out to sea, but the ship struck a reef at the base of Mutton Bird Island, near Port Campbell. Waves broke over the ship and the top deck was loosened from the hull. The masts and rigging came crashing down knocking passengers and crew overboard. When a lifeboat was finally launched, it crashed into the side of LOCH ARD and capsized. Tom Pearce, who had launched the boat, managed to cling to its overturned hull and shelter beneath it. He drifted out to sea and then on the flood tide came into what is now known as LOCH ARD Gorge. He swam to shore, bruised and dazed, and found a cave in which to shelter. Some of the crew stayed below deck to shelter from the falling rigging but drowned when the ship slipped off the reef into deeper water. Eva Carmichael had raced onto deck to find out what was happening only to be confronted by towering cliffs looming above the stricken ship. In all the chaos, Captain Gibbs grabbed Eva and said, "If you are saved Eva, let my dear wife know that I died like a sailor". That was the last Eva Carmichael saw of the captain. She was swept off the ship by a huge wave. Eva saw Tom Pearce on a small rocky beach and yelled to attract his attention. He dived in and swam to the exhausted woman and dragged her to shore. He took her to the cave and broke open case of brandy which had washed up on the beach. He opened a bottle to revive the unconscious woman. A few hours later Tom scaled a cliff in search of help. He followed hoof prints and came by chance upon two men from nearby Glenample Station three and a half miles away. In a state of exhaustion, he told the men of the tragedy. Tom returned to the gorge while the two men rode back to the station to get help. By the time they reached LOCH ARD Gorge, it was cold and dark. The two shipwreck survivors were taken to Glenample Station to recover. Eva stayed at the station for six weeks before returning to Ireland, this time by steamship. In Melbourne, Tom Pearce received a hero's welcome. He was presented with the first gold medal of the Royal Humane Society of Victoria and a £1000 cheque from the Victorian Government. Concerts were performed to honour the young man's bravery and to raise money for those who lost family in the LOCH ARD disaster. Of the 54 crew members and passengers on board, only two survived: the apprentice, Tom Pearce and the young woman passenger, Eva Carmichael, who lost all of her family in the tragedy. Ten days after the LOCH ARD tragedy, salvage rights to the wreck were sold at auction for £2,120. Cargo valued at £3,000 was salvaged and placed on the beach, but most washed back into the sea when another storm developed. The wreck of LOCH ARD still lies at the base of Mutton Bird Island. Much of the cargo has now been salvaged and some was washed up into what is now known as LOCH ARD Gorge. Cargo and artefacts have also been illegally salvaged over many years before protective legislation was introduced. One of the most unlikely pieces of cargo to have survived the shipwreck was a Minton porcelain peacock - one of only nine in the world. The peacock was destined for the Melbourne International Exhibition in 1880. It had been well packed, which gave it adequate protection during the violent storm. Today, the Minton peacock can be seen at the Flagstaff Hill Maritime Museum in Warrnambool. From Australia's most dramatic shipwreck it has now become Australia's most valuable shipwreck artefact and is one of very few 'objects' on the Victorian State Heritage Register. Flagstaff Hill’s collection of artefacts from LOCH ARD is significant for being one of the largest collections of artefacts from this shipwreck in Victoria. It is significant for its association with the shipwreck, which is on the Victorian Heritage Register (VHR S417). The collection is significant because of the relationship between the objects, as together they have a high potential to interpret the story of the LOCH ARD. The LOCH ARD collection is archaeologically significant as the remains of a large international passenger and cargo ship. The LOCH ARD collection is historically significant for representing aspects of Victoria’s shipping history and its potential to interpret sub-theme 1.5 of Victoria’s Framework of Historical Themes (living with natural processes). The collection is also historically significant for its association with the LOCH ARD, which was one of the worst and best known shipwrecks in Victoria’s history. Small square brass Flange with four corner holes and one larger centre hole. Artefact Reg No LA/25. Recovered from the wreck of the Loch Ard.flagstaff hill, warrnambool, shipwrecked coast, flagstaff hill maritime museum, maritime museum, shipwreck coast, flagstaff hill maritime village, great ocean road, loch line, loch ard, captain gibbs, eva carmichael, tom pearce, glenample station, mutton bird island, loch ard gorge, flange -
 Flagstaff Hill Maritime Museum and Village
Flange
... He drifted out to sea and then on the flood tide came into what is now known as LOCH ARD Gorge. ...He drifted out to sea and then on the flood tide came into what is now known as LOCH ARD Gorge. ...Ref LA 3 32 257 HISTORY OF THE LOCH ARD The LOCH ARD belonged to the famous Loch Line which sailed many ships from England to Australia. Built in Glasgow by Barclay, Curdle and Co. in 1873, the LOCH ARD was a three-masted square rigged iron sailing ship. The ship measured 262ft 7" (79.87m) in length, 38ft (11.58m) in width, 23ft (7m) in depth and had a gross tonnage of 1693 tons. The LOCH ARD's main mast measured a massive 150ft (45.7m) in height. LOCH ARD made three trips to Australia and one trip to Calcutta before its final voyage. LOCH ARD left England on March 2, 1878, under the command of Captain Gibbs, a newly married, 29 year old. She was bound for Melbourne with a crew of 37, plus 17 passengers and a load of cargo. The general cargo reflected the affluence of Melbourne at the time. On board were straw hats, umbrella, perfumes, clay pipes, pianos, clocks, confectionary, linen and candles, as well as a heavier load of railway irons, cement, lead and copper. There were items included that intended for display in the Melbourne International Exhibition in 1880. The voyage to Port Phillip was long but uneventful. At 3am on June 1, 1878, Captain Gibbs was expecting to see land and the passengers were becoming excited as they prepared to view their new homeland in the early morning. But LOCH ARD was running into a fog which greatly reduced visibility. Captain Gibbs was becoming anxious as there was no sign of land or the Cape Otway lighthouse. At 4am the fog lifted. A man aloft announced that he could see breakers. The sheer cliffs of Victoria's west coast came into view, and Captain Gibbs realised that the ship was much closer to them than expected. He ordered as much sail to be set as time would permit and then attempted to steer the vessel out to sea. On coming head on into the wind, the ship lost momentum, the sails fell limp and LOCH ARD's bow swung back. Gibbs then ordered the anchors to be released in an attempt to hold its position. The anchors sank some 50 fathoms - but did not hold. By this time LOCH ARD was among the breakers and the tall cliffs of Mutton Bird Island rose behind the ship. Just half a mile from the coast, the ship's bow was suddenly pulled around by the anchor. The captain tried to tack out to sea, but the ship struck a reef at the base of Mutton Bird Island, near Port Campbell. Waves broke over the ship and the top deck was loosened from the hull. The masts and rigging came crashing down knocking passengers and crew overboard. When a lifeboat was finally launched, it crashed into the side of LOCH ARD and capsized. Tom Pearce, who had launched the boat, managed to cling to its overturned hull and shelter beneath it. He drifted out to sea and then on the flood tide came into what is now known as LOCH ARD Gorge. He swam to shore, bruised and dazed, and found a cave in which to shelter. Some of the crew stayed below deck to shelter from the falling rigging but drowned when the ship slipped off the reef into deeper water. Eva Carmichael had raced onto deck to find out what was happening only to be confronted by towering cliffs looming above the stricken ship. In all the chaos, Captain Gibbs grabbed Eva and said, "If you are saved Eva, let my dear wife know that I died like a sailor". That was the last Eva Carmichael saw of the captain. She was swept off the ship by a huge wave. Eva saw Tom Pearce on a small rocky beach and yelled to attract his attention. He dived in and swam to the exhausted woman and dragged her to shore. He took her to the cave and broke open case of brandy which had washed up on the beach. He opened a bottle to revive the unconscious woman. A few hours later Tom scaled a cliff in search of help. He followed hoof prints and came by chance upon two men from nearby Glenample Station three and a half miles away. In a state of exhaustion, he told the men of the tragedy. Tom returned to the gorge while the two men rode back to the station to get help. By the time they reached LOCH ARD Gorge, it was cold and dark. The two shipwreck survivors were taken to Glenample Station to recover. Eva stayed at the station for six weeks before returning to Ireland, this time by steamship. In Melbourne, Tom Pearce received a hero's welcome. He was presented with the first gold medal of the Royal Humane Society of Victoria and a £1000 cheque from the Victorian Government. Concerts were performed to honour the young man's bravery and to raise money for those who lost family in the LOCH ARD disaster. Of the 54 crew members and passengers on board, only two survived: the apprentice, Tom Pearce and the young woman passenger, Eva Carmichael, who lost all of her family in the tragedy. Ten days after the LOCH ARD tragedy, salvage rights to the wreck were sold at auction for £2,120. Cargo valued at £3,000 was salvaged and placed on the beach, but most washed back into the sea when another storm developed. The wreck of LOCH ARD still lies at the base of Mutton Bird Island. Much of the cargo has now been salvaged and some was washed up into what is now known as LOCH ARD Gorge. Cargo and artefacts have also been illegally salvaged over many years before protective legislation was introduced. One of the most unlikely pieces of cargo to have survived the shipwreck was a Minton porcelain peacock - one of only nine in the world. The peacock was destined for the Melbourne International Exhibition in 1880. It had been well packed, which gave it adequate protection during the violent storm. Today, the Minton peacock can be seen at the Flagstaff Hill Maritime Museum in Warrnambool. From Australia's most dramatic shipwreck it has now become Australia's most valuable shipwreck artefact and is one of very few 'objects' on the Victorian State Heritage Register. Flagstaff Hill’s collection of artefacts from LOCH ARD is significant for being one of the largest collections of artefacts from this shipwreck in Victoria. It is significant for its association with the shipwreck, which is on the Victorian Heritage Register (VHR S417). The collection is significant because of the relationship between the objects, as together they have a high potential to interpret the story of the LOCH ARD. The LOCH ARD collection is archaeologically significant as the remains of a large international passenger and cargo ship. The LOCH ARD collection is historically significant for representing aspects of Victoria’s shipping history and its potential to interpret sub-theme 1.5 of Victoria’s Framework of Historical Themes (living with natural processes). The collection is also historically significant for its association with the LOCH ARD, which was one of the worst and best known shipwrecks in Victoria’s history. Small square brass Flange with four corner holes and one larger centre hole. Artefact Reg No LA/26. Recovered from the wreck of the Loch Ard.flagstaff hill, warrnambool, shipwrecked coast, flagstaff hill maritime museum, maritime museum, shipwreck coast, flagstaff hill maritime village, great ocean road, loch line, loch ard, captain gibbs, eva carmichael, tom pearce, glenample station, mutton bird island, loch ard gorge, flange -
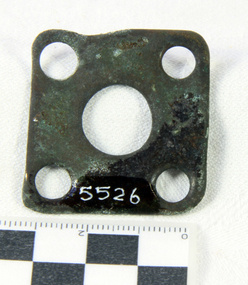 Flagstaff Hill Maritime Museum and Village
Flange
... He drifted out to sea and then on the flood tide came into what is now known as LOCH ARD Gorge. ...He drifted out to sea and then on the flood tide came into what is now known as LOCH ARD Gorge. ...Ref LA 3 32 258 HISTORY OF THE LOCH ARD The LOCH ARD belonged to the famous Loch Line which sailed many ships from England to Australia. Built in Glasgow by Barclay, Curdle and Co. in 1873, the LOCH ARD was a three-masted square rigged iron sailing ship. The ship measured 262ft 7" (79.87m) in length, 38ft (11.58m) in width, 23ft (7m) in depth and had a gross tonnage of 1693 tons. The LOCH ARD's main mast measured a massive 150ft (45.7m) in height. LOCH ARD made three trips to Australia and one trip to Calcutta before its final voyage. LOCH ARD left England on March 2, 1878, under the command of Captain Gibbs, a newly married, 29 year old. She was bound for Melbourne with a crew of 37, plus 17 passengers and a load of cargo. The general cargo reflected the affluence of Melbourne at the time. On board were straw hats, umbrella, perfumes, clay pipes, pianos, clocks, confectionary, linen and candles, as well as a heavier load of railway irons, cement, lead and copper. There were items included that intended for display in the Melbourne International Exhibition in 1880. The voyage to Port Phillip was long but uneventful. At 3am on June 1, 1878, Captain Gibbs was expecting to see land and the passengers were becoming excited as they prepared to view their new homeland in the early morning. But LOCH ARD was running into a fog which greatly reduced visibility. Captain Gibbs was becoming anxious as there was no sign of land or the Cape Otway lighthouse. At 4am the fog lifted. A man aloft announced that he could see breakers. The sheer cliffs of Victoria's west coast came into view, and Captain Gibbs realised that the ship was much closer to them than expected. He ordered as much sail to be set as time would permit and then attempted to steer the vessel out to sea. On coming head on into the wind, the ship lost momentum, the sails fell limp and LOCH ARD's bow swung back. Gibbs then ordered the anchors to be released in an attempt to hold its position. The anchors sank some 50 fathoms - but did not hold. By this time LOCH ARD was among the breakers and the tall cliffs of Mutton Bird Island rose behind the ship. Just half a mile from the coast, the ship's bow was suddenly pulled around by the anchor. The captain tried to tack out to sea, but the ship struck a reef at the base of Mutton Bird Island, near Port Campbell. Waves broke over the ship and the top deck was loosened from the hull. The masts and rigging came crashing down knocking passengers and crew overboard. When a lifeboat was finally launched, it crashed into the side of LOCH ARD and capsized. Tom Pearce, who had launched the boat, managed to cling to its overturned hull and shelter beneath it. He drifted out to sea and then on the flood tide came into what is now known as LOCH ARD Gorge. He swam to shore, bruised and dazed, and found a cave in which to shelter. Some of the crew stayed below deck to shelter from the falling rigging but drowned when the ship slipped off the reef into deeper water. Eva Carmichael had raced onto deck to find out what was happening only to be confronted by towering cliffs looming above the stricken ship. In all the chaos, Captain Gibbs grabbed Eva and said, "If you are saved Eva, let my dear wife know that I died like a sailor". That was the last Eva Carmichael saw of the captain. She was swept off the ship by a huge wave. Eva saw Tom Pearce on a small rocky beach and yelled to attract his attention. He dived in and swam to the exhausted woman and dragged her to shore. He took her to the cave and broke open case of brandy which had washed up on the beach. He opened a bottle to revive the unconscious woman. A few hours later Tom scaled a cliff in search of help. He followed hoof prints and came by chance upon two men from nearby Glenample Station three and a half miles away. In a state of exhaustion, he told the men of the tragedy. Tom returned to the gorge while the two men rode back to the station to get help. By the time they reached LOCH ARD Gorge, it was cold and dark. The two shipwreck survivors were taken to Glenample Station to recover. Eva stayed at the station for six weeks before returning to Ireland, this time by steamship. In Melbourne, Tom Pearce received a hero's welcome. He was presented with the first gold medal of the Royal Humane Society of Victoria and a £1000 cheque from the Victorian Government. Concerts were performed to honour the young man's bravery and to raise money for those who lost family in the LOCH ARD disaster. Of the 54 crew members and passengers on board, only two survived: the apprentice, Tom Pearce and the young woman passenger, Eva Carmichael, who lost all of her family in the tragedy. Ten days after the LOCH ARD tragedy, salvage rights to the wreck were sold at auction for £2,120. Cargo valued at £3,000 was salvaged and placed on the beach, but most washed back into the sea when another storm developed. The wreck of LOCH ARD still lies at the base of Mutton Bird Island. Much of the cargo has now been salvaged and some was washed up into what is now known as LOCH ARD Gorge. Cargo and artefacts have also been illegally salvaged over many years before protective legislation was introduced. One of the most unlikely pieces of cargo to have survived the shipwreck was a Minton porcelain peacock - one of only nine in the world. The peacock was destined for the Melbourne International Exhibition in 1880. It had been well packed, which gave it adequate protection during the violent storm. Today, the Minton peacock can be seen at the Flagstaff Hill Maritime Museum in Warrnambool. From Australia's most dramatic shipwreck it has now become Australia's most valuable shipwreck artefact and is one of very few 'objects' on the Victorian State Heritage Register. Flagstaff Hill’s collection of artefacts from LOCH ARD is significant for being one of the largest collections of artefacts from this shipwreck in Victoria. It is significant for its association with the shipwreck, which is on the Victorian Heritage Register (VHR S417). The collection is significant because of the relationship between the objects, as together they have a high potential to interpret the story of the LOCH ARD. The LOCH ARD collection is archaeologically significant as the remains of a large international passenger and cargo ship. The LOCH ARD collection is historically significant for representing aspects of Victoria’s shipping history and its potential to interpret sub-theme 1.5 of Victoria’s Framework of Historical Themes (living with natural processes). The collection is also historically significant for its association with the LOCH ARD, which was one of the worst and best known shipwrecks in Victoria’s history. Small square brass Flange with four corner holes and one larger centre hole. Has slight bend one side. Artefact Reg No LA/27. Recovered from the wreck of the Loch Ard.flagstaff hill, warrnambool, shipwrecked coast, flagstaff hill maritime museum, maritime museum, shipwreck coast, flagstaff hill maritime village, great ocean road, loch line, loch ard, captain gibbs, eva carmichael, tom pearce, glenample station, mutton bird island, loch ard gorge, flange, brass flange -
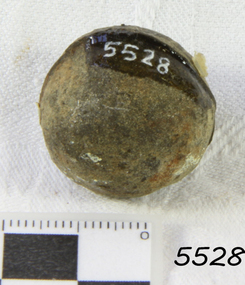 Flagstaff Hill Maritime Museum and Village
Rubber Ball
... He drifted out to sea and then on the flood tide came into what is now known as LOCH ARD Gorge. ...He drifted out to sea and then on the flood tide came into what is now known as LOCH ARD Gorge. ...Ref: LA (417) 4 49 276 HISTORY OF THE LOCH ARD The LOCH ARD belonged to the famous Loch Line which sailed many ships from England to Australia. Built in Glasgow by Barclay, Curdle and Co. in 1873, the LOCH ARD was a three-masted square rigged iron sailing ship. The ship measured 262ft 7" (79.87m) in length, 38ft (11.58m) in width, 23ft (7m) in depth and had a gross tonnage of 1693 tons. The LOCH ARD's main mast measured a massive 150ft (45.7m) in height. LOCH ARD made three trips to Australia and one trip to Calcutta before its final voyage. LOCH ARD left England on March 2, 1878, under the command of Captain Gibbs, a newly married, 29 year old. She was bound for Melbourne with a crew of 37, plus 17 passengers and a load of cargo. The general cargo reflected the affluence of Melbourne at the time. On board were straw hats, umbrella, perfumes, clay pipes, pianos, clocks, confectionary, linen and candles, as well as a heavier load of railway irons, cement, lead and copper. There were items included that intended for display in the Melbourne International Exhibition in 1880. The voyage to Port Phillip was long but uneventful. At 3am on June 1, 1878, Captain Gibbs was expecting to see land and the passengers were becoming excited as they prepared to view their new homeland in the early morning. But LOCH ARD was running into a fog which greatly reduced visibility. Captain Gibbs was becoming anxious as there was no sign of land or the Cape Otway lighthouse. At 4am the fog lifted. A man aloft announced that he could see breakers. The sheer cliffs of Victoria's west coast came into view, and Captain Gibbs realised that the ship was much closer to them than expected. He ordered as much sail to be set as time would permit and then attempted to steer the vessel out to sea. On coming head on into the wind, the ship lost momentum, the sails fell limp and LOCH ARD's bow swung back. Gibbs then ordered the anchors to be released in an attempt to hold its position. The anchors sank some 50 fathoms - but did not hold. By this time LOCH ARD was among the breakers and the tall cliffs of Mutton Bird Island rose behind the ship. Just half a mile from the coast, the ship's bow was suddenly pulled around by the anchor. The captain tried to tack out to sea, but the ship struck a reef at the base of Mutton Bird Island, near Port Campbell. Waves broke over the ship and the top deck was loosened from the hull. The masts and rigging came crashing down knocking passengers and crew overboard. When a lifeboat was finally launched, it crashed into the side of LOCH ARD and capsized. Tom Pearce, who had launched the boat, managed to cling to its overturned hull and shelter beneath it. He drifted out to sea and then on the flood tide came into what is now known as LOCH ARD Gorge. He swam to shore, bruised and dazed, and found a cave in which to shelter. Some of the crew stayed below deck to shelter from the falling rigging but drowned when the ship slipped off the reef into deeper water. Eva Carmichael had raced onto deck to find out what was happening only to be confronted by towering cliffs looming above the stricken ship. In all the chaos, Captain Gibbs grabbed Eva and said, "If you are saved Eva, let my dear wife know that I died like a sailor". That was the last Eva Carmichael saw of the captain. She was swept off the ship by a huge wave. Eva saw Tom Pearce on a small rocky beach and yelled to attract his attention. He dived in and swam to the exhausted woman and dragged her to shore. He took her to the cave and broke open case of brandy which had washed up on the beach. He opened a bottle to revive the unconscious woman. A few hours later Tom scaled a cliff in search of help. He followed hoof prints and came by chance upon two men from nearby Glenample Station three and a half miles away. In a state of exhaustion, he told the men of the tragedy. Tom returned to the gorge while the two men rode back to the station to get help. By the time they reached LOCH ARD Gorge, it was cold and dark. The two shipwreck survivors were taken to Glenample Station to recover. Eva stayed at the station for six weeks before returning to Ireland, this time by steamship. In Melbourne, Tom Pearce received a hero's welcome. He was presented with the first gold medal of the Royal Humane Society of Victoria and a £1000 cheque from the Victorian Government. Concerts were performed to honour the young man's bravery and to raise money for those who lost family in the LOCH ARD disaster. Of the 54 crew members and passengers on board, only two survived: the apprentice, Tom Pearce and the young woman passenger, Eva Carmichael, who lost all of her family in the tragedy. Ten days after the LOCH ARD tragedy, salvage rights to the wreck were sold at auction for £2,120. Cargo valued at £3,000 was salvaged and placed on the beach, but most washed back into the sea when another storm developed. The wreck of LOCH ARD still lies at the base of Mutton Bird Island. Much of the cargo has now been salvaged and some was washed up into what is now known as LOCH ARD Gorge. Cargo and artefacts have also been illegally salvaged over many years before protective legislation was introduced. One of the most unlikely pieces of cargo to have survived the shipwreck was a Minton porcelain peacock - one of only nine in the world. The peacock was destined for the Melbourne International Exhibition in 1880. It had been well packed, which gave it adequate protection during the violent storm. Today, the Minton peacock can be seen at the Flagstaff Hill Maritime Museum in Warrnambool. From Australia's most dramatic shipwreck it has now become Australia's most valuable shipwreck artefact and is one of very few 'objects' on the Victorian State Heritage Register. Flagstaff Hill’s collection of artefacts from LOCH ARD is significant for being one of the largest collections of artefacts from this shipwreck in Victoria. It is significant for its association with the shipwreck, which is on the Victorian Heritage Register (VHR S417). The collection is significant because of the relationship between the objects, as together they have a high potential to interpret the story of the LOCH ARD. The LOCH ARD collection is archaeologically significant as the remains of a large international passenger and cargo ship. The LOCH ARD collection is historically significant for representing aspects of Victoria’s shipping history and its potential to interpret sub-theme 1.5 of Victoria’s Framework of Historical Themes (living with natural processes). The collection is also historically significant for its association with the LOCH ARD, which was one of the worst and best known shipwrecks in Victoria’s history. Small hard, perished rubber ball with a seam visible. Recovered from the wreck of the Loch Ard. Artefact reg No LA/31.flagstaff hill, warrnambool, shipwrecked coast, flagstaff hill maritime museum, maritime museum, shipwreck coast, flagstaff hill maritime village, great ocean road, loch line, loch ard, captain gibbs, eva carmichael, tom pearce, glenample station, mutton bird island, loch ard gorge, rubber ball, ball -
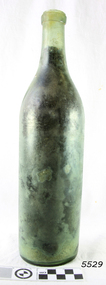 Flagstaff Hill Maritime Museum and Village
Bottle
... He drifted out to sea and then on the flood tide came into what is now known as LOCH ARD Gorge. ...He drifted out to sea and then on the flood tide came into what is now known as LOCH ARD Gorge. ...Ref: LA 4 44 283 HISTORY OF THE LOCH ARD The LOCH ARD belonged to the famous Loch Line which sailed many ships from England to Australia. Built in Glasgow by Barclay, Curdle and Co. in 1873, the LOCH ARD was a three-masted square rigged iron sailing ship. The ship measured 262ft 7" (79.87m) in length, 38ft (11.58m) in width, 23ft (7m) in depth and had a gross tonnage of 1693 tons. The LOCH ARD's main mast measured a massive 150ft (45.7m) in height. LOCH ARD made three trips to Australia and one trip to Calcutta before its final voyage. LOCH ARD left England on March 2, 1878, under the command of Captain Gibbs, a newly married, 29 year old. She was bound for Melbourne with a crew of 37, plus 17 passengers and a load of cargo. The general cargo reflected the affluence of Melbourne at the time. On board were straw hats, umbrella, perfumes, clay pipes, pianos, clocks, confectionary, linen and candles, as well as a heavier load of railway irons, cement, lead and copper. There were items included that intended for display in the Melbourne International Exhibition in 1880. The voyage to Port Phillip was long but uneventful. At 3am on June 1, 1878, Captain Gibbs was expecting to see land and the passengers were becoming excited as they prepared to view their new homeland in the early morning. But LOCH ARD was running into a fog which greatly reduced visibility. Captain Gibbs was becoming anxious as there was no sign of land or the Cape Otway lighthouse. At 4am the fog lifted. A man aloft announced that he could see breakers. The sheer cliffs of Victoria's west coast came into view, and Captain Gibbs realised that the ship was much closer to them than expected. He ordered as much sail to be set as time would permit and then attempted to steer the vessel out to sea. On coming head on into the wind, the ship lost momentum, the sails fell limp and LOCH ARD's bow swung back. Gibbs then ordered the anchors to be released in an attempt to hold its position. The anchors sank some 50 fathoms - but did not hold. By this time LOCH ARD was among the breakers and the tall cliffs of Mutton Bird Island rose behind the ship. Just half a mile from the coast, the ship's bow was suddenly pulled around by the anchor. The captain tried to tack out to sea, but the ship struck a reef at the base of Mutton Bird Island, near Port Campbell. Waves broke over the ship and the top deck was loosened from the hull. The masts and rigging came crashing down knocking passengers and crew overboard. When a lifeboat was finally launched, it crashed into the side of LOCH ARD and capsized. Tom Pearce, who had launched the boat, managed to cling to its overturned hull and shelter beneath it. He drifted out to sea and then on the flood tide came into what is now known as LOCH ARD Gorge. He swam to shore, bruised and dazed, and found a cave in which to shelter. Some of the crew stayed below deck to shelter from the falling rigging but drowned when the ship slipped off the reef into deeper water. Eva Carmichael had raced onto deck to find out what was happening only to be confronted by towering cliffs looming above the stricken ship. In all the chaos, Captain Gibbs grabbed Eva and said, "If you are saved Eva, let my dear wife know that I died like a sailor". That was the last Eva Carmichael saw of the captain. She was swept off the ship by a huge wave. Eva saw Tom Pearce on a small rocky beach and yelled to attract his attention. He dived in and swam to the exhausted woman and dragged her to shore. He took her to the cave and broke open case of brandy which had washed up on the beach. He opened a bottle to revive the unconscious woman. A few hours later Tom scaled a cliff in search of help. He followed hoof prints and came by chance upon two men from nearby Glenample Station three and a half miles away. In a state of exhaustion, he told the men of the tragedy. Tom returned to the gorge while the two men rode back to the station to get help. By the time they reached LOCH ARD Gorge, it was cold and dark. The two shipwreck survivors were taken to Glenample Station to recover. Eva stayed at the station for six weeks before returning to Ireland, this time by steamship. In Melbourne, Tom Pearce received a hero's welcome. He was presented with the first gold medal of the Royal Humane Society of Victoria and a £1000 cheque from the Victorian Government. Concerts were performed to honour the young man's bravery and to raise money for those who lost family in the LOCH ARD disaster. Of the 54 crew members and passengers on board, only two survived: the apprentice, Tom Pearce and the young woman passenger, Eva Carmichael, who lost all of her family in the tragedy. Ten days after the LOCH ARD tragedy, salvage rights to the wreck were sold at auction for £2,120. Cargo valued at £3,000 was salvaged and placed on the beach, but most washed back into the sea when another storm developed. The wreck of LOCH ARD still lies at the base of Mutton Bird Island. Much of the cargo has now been salvaged and some was washed up into what is now known as LOCH ARD Gorge. Cargo and artefacts have also been illegally salvaged over many years before protective legislation was introduced. One of the most unlikely pieces of cargo to have survived the shipwreck was a Minton porcelain peacock - one of only nine in the world. The peacock was destined for the Melbourne International Exhibition in 1880. It had been well packed, which gave it adequate protection during the violent storm. Today, the Minton peacock can be seen at the Flagstaff Hill Maritime Museum in Warrnambool. From Australia's most dramatic shipwreck it has now become Australia's most valuable shipwreck artefact and is one of very few 'objects' on the Victorian State Heritage Register. Flagstaff Hill’s collection of artefacts from LOCH ARD is significant for being one of the largest collections of artefacts from this shipwreck in Victoria. It is significant for its association with the shipwreck, which is on the Victorian Heritage Register (VHR S417). The collection is significant because of the relationship between the objects, as together they have a high potential to interpret the story of the LOCH ARD. The LOCH ARD collection is archaeologically significant as the remains of a large international passenger and cargo ship. The LOCH ARD collection is historically significant for representing aspects of Victoria’s shipping history and its potential to interpret sub-theme 1.5 of Victoria’s Framework of Historical Themes (living with natural processes). The collection is also historically significant for its association with the LOCH ARD, which was one of the worst and best known shipwrecks in Victoria’s history. Glass bottle, light green, bottle is intact with slight chip on lip. Bottle has cork and some sand inside. Recovered from the wreck of the Loch Ard. Artefact Reg No LA/43.flagstaff hill, warrnambool, shipwrecked coast, flagstaff hill maritime museum, maritime museum, shipwreck coast, flagstaff hill maritime village, great ocean road, loch line, loch ard, captain gibbs, eva carmichael, tom pearce, glenample station, mutton bird island, loch ard gorge, bottle -
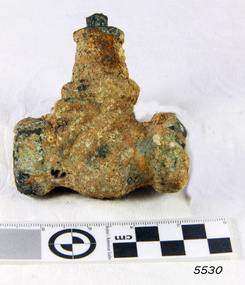 Flagstaff Hill Maritime Museum and Village
Tap
... He drifted out to sea and then on the flood tide came into what is now known as LOCH ARD Gorge. ...He drifted out to sea and then on the flood tide came into what is now known as LOCH ARD Gorge. ...Ref: LA 3 32 273 HISTORY OF THE LOCH ARD The LOCH ARD belonged to the famous Loch Line which sailed many ships from England to Australia. Built in Glasgow by Barclay, Curdle and Co. in 1873, the LOCH ARD was a three-masted square rigged iron sailing ship. The ship measured 262ft 7" (79.87m) in length, 38ft (11.58m) in width, 23ft (7m) in depth and had a gross tonnage of 1693 tons. The LOCH ARD's main mast measured a massive 150ft (45.7m) in height. LOCH ARD made three trips to Australia and one trip to Calcutta before its final voyage. LOCH ARD left England on March 2, 1878, under the command of Captain Gibbs, a newly married, 29 year old. She was bound for Melbourne with a crew of 37, plus 17 passengers and a load of cargo. The general cargo reflected the affluence of Melbourne at the time. On board were straw hats, umbrella, perfumes, clay pipes, pianos, clocks, confectionary, linen and candles, as well as a heavier load of railway irons, cement, lead and copper. There were items included that intended for display in the Melbourne International Exhibition in 1880. The voyage to Port Phillip was long but uneventful. At 3am on June 1, 1878, Captain Gibbs was expecting to see land and the passengers were becoming excited as they prepared to view their new homeland in the early morning. But LOCH ARD was running into a fog which greatly reduced visibility. Captain Gibbs was becoming anxious as there was no sign of land or the Cape Otway lighthouse. At 4am the fog lifted. A man aloft announced that he could see breakers. The sheer cliffs of Victoria's west coast came into view, and Captain Gibbs realised that the ship was much closer to them than expected. He ordered as much sail to be set as time would permit and then attempted to steer the vessel out to sea. On coming head on into the wind, the ship lost momentum, the sails fell limp and LOCH ARD's bow swung back. Gibbs then ordered the anchors to be released in an attempt to hold its position. The anchors sank some 50 fathoms - but did not hold. By this time LOCH ARD was among the breakers and the tall cliffs of Mutton Bird Island rose behind the ship. Just half a mile from the coast, the ship's bow was suddenly pulled around by the anchor. The captain tried to tack out to sea, but the ship struck a reef at the base of Mutton Bird Island, near Port Campbell. Waves broke over the ship and the top deck was loosened from the hull. The masts and rigging came crashing down knocking passengers and crew overboard. When a lifeboat was finally launched, it crashed into the side of LOCH ARD and capsized. Tom Pearce, who had launched the boat, managed to cling to its overturned hull and shelter beneath it. He drifted out to sea and then on the flood tide came into what is now known as LOCH ARD Gorge. He swam to shore, bruised and dazed, and found a cave in which to shelter. Some of the crew stayed below deck to shelter from the falling rigging but drowned when the ship slipped off the reef into deeper water. Eva Carmichael had raced onto deck to find out what was happening only to be confronted by towering cliffs looming above the stricken ship. In all the chaos, Captain Gibbs grabbed Eva and said, "If you are saved Eva, let my dear wife know that I died like a sailor". That was the last Eva Carmichael saw of the captain. She was swept off the ship by a huge wave. Eva saw Tom Pearce on a small rocky beach and yelled to attract his attention. He dived in and swam to the exhausted woman and dragged her to shore. He took her to the cave and broke open case of brandy which had washed up on the beach. He opened a bottle to revive the unconscious woman. A few hours later Tom scaled a cliff in search of help. He followed hoof prints and came by chance upon two men from nearby Glenample Station three and a half miles away. In a state of exhaustion, he told the men of the tragedy. Tom returned to the gorge while the two men rode back to the station to get help. By the time they reached LOCH ARD Gorge, it was cold and dark. The two shipwreck survivors were taken to Glenample Station to recover. Eva stayed at the station for six weeks before returning to Ireland, this time by steamship. In Melbourne, Tom Pearce received a hero's welcome. He was presented with the first gold medal of the Royal Humane Society of Victoria and a £1000 cheque from the Victorian Government. Concerts were performed to honour the young man's bravery and to raise money for those who lost family in the LOCH ARD disaster. Of the 54 crew members and passengers on board, only two survived: the apprentice, Tom Pearce and the young woman passenger, Eva Carmichael, who lost all of her family in the tragedy. Ten days after the LOCH ARD tragedy, salvage rights to the wreck were sold at auction for £2,120. Cargo valued at £3,000 was salvaged and placed on the beach, but most washed back into the sea when another storm developed. The wreck of LOCH ARD still lies at the base of Mutton Bird Island. Much of the cargo has now been salvaged and some was washed up into what is now known as LOCH ARD Gorge. Cargo and artefacts have also been illegally salvaged over many years before protective legislation was introduced. One of the most unlikely pieces of cargo to have survived the shipwreck was a Minton porcelain peacock - one of only nine in the world. The peacock was destined for the Melbourne International Exhibition in 1880. It had been well packed, which gave it adequate protection during the violent storm. Today, the Minton peacock can be seen at the Flagstaff Hill Maritime Museum in Warrnambool. From Australia's most dramatic shipwreck it has now become Australia's most valuable shipwreck artefact and is one of very few 'objects' on the Victorian State Heritage Register. Flagstaff Hill’s collection of artefacts from LOCH ARD is significant for being one of the largest collections of artefacts from this shipwreck in Victoria. It is significant for its association with the shipwreck, which is on the Victorian Heritage Register (VHR S417). The collection is significant because of the relationship between the objects, as together they have a high potential to interpret the story of the LOCH ARD. The LOCH ARD collection is archaeologically significant as the remains of a large international passenger and cargo ship. The LOCH ARD collection is historically significant for representing aspects of Victoria’s shipping history and its potential to interpret sub-theme 1.5 of Victoria’s Framework of Historical Themes (living with natural processes). The collection is also historically significant for its association with the LOCH ARD, which was one of the worst and best known shipwrecks in Victoria’s history. Brass tap. Bronze disease active and heavily concreted. Recovered from the wreck of the Loch Ard. Artefact Reg No LA/12. flagstaff hill, warrnambool, shipwrecked coast, flagstaff hill maritime museum, maritime museum, shipwreck coast, flagstaff hill maritime village, great ocean road, loch line, loch ard, captain gibbs, eva carmichael, tom pearce, glenample station, mutton bird island, loch ard gorge, tap