Showing 35 items matching "tram 140"
-
 Melbourne Tram Museum
Album - Robert Thomson Slide Collection - box 17
... ...tram 140...Number Date Brief Description Box 17 RT396 Nov. 99 A 239 arriving Batman Ave Route 70 RT397 Nov 99 W7 1012 running Special, Clarendon St RT398 Nov 99 A 300, Port Melbourne, Mont Albert route 109 RT399 Nov 99 A 286 Port Melbourne line, route 109 RT400 Nov 99 Z3 223 Carlisle St St Kilda, route 69 – with destination set for return Kew Cotham Road RT401 Nov 99 W7 1005 Swanston St route 8 with Christmas decorations – route 8 RT402 Nov 99 Z3 140 Swanston St route 8 with Christmas decorations – route 11 RT403 Nov 99 Z3 144 Swanston and Bourke with “Give way to passengers ”sign – route 1 RT404 Nov 99 Z3s 144 and 196 Swanston St – with sign “Tram stop ahead” RT405 Nov 99 W6 977 Swanston St – route 8 and Z1 72 RT406 Nov 99 11W and City Circle SW5 723 – Spencer and Collins Sts RT407 Nov 99 SW6 960 University terminus, route 16 RT408 Nov 99 SW6 960 University terminus with Z2 108 and other trams RT409 Nov. 99 A 234 Wattle Park terminus, route 70 RT410 Nov 99 New track docklands with old shipping shed in the view. ...Demonstrates the work of Robert Thomson in photography, collection and/or production of slides Melbourne tramways trams tram 239 route 70 Batman Ave tram 1012 Clarendon St tram 300 Port Melbourne route 109 tram 223 tram 69 tram 1005 route 8 Swanston St tram 140 tram 144 tram 196 tram 977 tram 72 tram 11W tram 723 City Circle tram 960 tram 108 tram 234 wattle park docklands trackwork Flinders St tram 255 tram 954 tram 442 tram 27 tram 1 tram 278 tram 2010 tram 2108 tram 80 tram 137 tram 82 tram 169 Wests Road West Maribyrnong Swanston Trams tram 172 route 82 route 48 Bourke St MTOCo Assembled album in a black presentation folder of 31 colour slides, collected or produced by Robert Thomson. ...Photo - see pdf file for further information. Number Date Brief Description Box 17 RT396 Nov. 99 A 239 arriving Batman Ave Route 70 RT397 Nov 99 W7 1012 running Special, Clarendon St RT398 Nov 99 A 300, Port Melbourne, Mont Albert route 109 RT399 Nov 99 A 286 Port Melbourne line, route 109 RT400 Nov 99 Z3 223 Carlisle St St Kilda, route 69 – with destination set for return Kew Cotham Road RT401 Nov 99 W7 1005 Swanston St route 8 with Christmas decorations – route 8 RT402 Nov 99 Z3 140 Swanston St route 8 with Christmas decorations – route 11 RT403 Nov 99 Z3 144 Swanston and Bourke with “Give way to passengers ”sign – route 1 RT404 Nov 99 Z3s 144 and 196 Swanston St – with sign “Tram stop ahead” RT405 Nov 99 W6 977 Swanston St – route 8 and Z1 72 RT406 Nov 99 11W and City Circle SW5 723 – Spencer and Collins Sts RT407 Nov 99 SW6 960 University terminus, route 16 RT408 Nov 99 SW6 960 University terminus with Z2 108 and other trams RT409 Nov. 99 A 234 Wattle Park terminus, route 70 RT410 Nov 99 New track docklands with old shipping shed in the view. RT411 Nov 99 Flinders St extension Docklands new track RT412 Nov 99 A 255 route 109 Port Melbourne terminus with former station building RT413 Nov 99 SW6 954 Route 16, Acland St terminus with a Z3 behind. RT414 Nov 99 Restraurant tram 442, Esplanade. RT 415 Nov 2000 Z27 and Z1 Balaclava Junction RT416 Nov 2000 A 278 route 109 Port Melbourne terminus with former station building RT417 Nov 2001 B2 2010 in Yarra livery, Bourke St at Spencer St RT418 Nov 2001 B2 2108 turning from Bourke into Spencer St (route 96) followed by another B2 2048? RT 419 Nov 2001 Z 80 and another two Zs in Swanston St RT420 Nov 2001 Z137 and other Z’s in Swanston St RT421 Nov 2001 Z82 Swanston st RT422 Nov 2001 Z3 169 Wests Road, West Maribyrnong terminus with another Z arriving. Route 57 RT423 Nov 2001 West Maribyrnong terminus board with Swanston Trams signage RT424 Nov 2001 Z3 172 route 82, Wests Road RT425 Nov 2001 A class Flinders St extension route 48 in Yarra Trams livery RT426 Nov 2001 11W Bourke St with MTOCco building in the background. Demonstrates the work of Robert Thomson in photography, collection and/or production of slidesAssembled album in a black presentation folder of 31 colour slides, collected or produced by Robert Thomson. A list of all photographs with details has been compiled. All rights reserved for all photos., melbourne, tramways, trams, tram 239, route 70, batman ave, tram 1012, clarendon st, tram 300, port melbourne, route 109, tram 223, tram 69, tram 1005, route 8, swanston st, tram 140, tram 144, tram 196, tram 977, tram 72, tram 11w, tram 723, city circle, tram 960, tram 108, tram 234, wattle park, docklands, trackwork, flinders st, tram 255, tram 954, tram 442, tram 27, tram 1, tram 278, tram 2010, tram 2108, tram 80, tram 137, tram 82, tram 169, wests road, west maribyrnong, swanston trams, tram 172, route 82, route 48, bourke st, mtoco -
 Melbourne Tram Museum
Album - Photo Album, Transit Australia Publishing, "TAP - Part A - Pre MMTB or W class – sheets A1 to A29", 1950's to 1990's
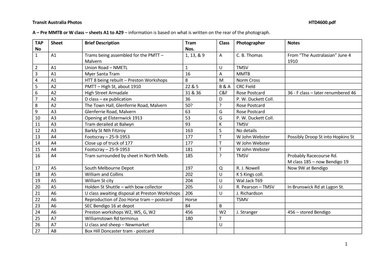
... ... tram 140...Trams tramways Transit Australia Destination City Tramcars Depots PMTT HTT MBCTT NMETL Doncaster Bendigo tram 1 tram 13 tram 9 16 tram 8 tram 22 tram 5 tram 31 tram 36 tram 50 tram 63 tram 53 tram 93 tram 163 tram 177 tram 181 tram 185 tram 197 tram 202 tram 204 tram 205 tram 206 tram 84 tram 456 tram 180 tram 9 tram 26 tram 31 tram 36 tram 47 tram 44 tram 60 tram 83 tram 275 tram 93 tram 99 tram 122 tram 137 tram 138 tram 140 tram 141 tram 150 tram 159 tram 171 tram 174 tram 177 tram 178 tram 179 tram 187 tram 190 tram 191 tram 200 tram 205 tram 214 tram 15 tram 180 Rose Series Photo Album - titled "TAP - Part A - Pre MMTB or W class – sheets A1 to A29 ", from Transit Australia Publishing. ...Photo Album - titled "TAP - Part A - Pre MMTB or W class – sheets A1 to A29 ", from Transit Australia Publishing. Photos used in the Destination City and other publications series. For a detailed list of photographs see htd4600i.pdf. For individual photo images see: \dbtext\hawthtramcoll\photo collections\htd4600-TAP-PartA, images TAP1 to TAP65. TAP01_Malvern Depot-assembling-trams.jpg TAP02_M1_Union Rd. Ascot Vale.jpg TAP03_Myer-Santa-tram_WilliamSt_MMTB.jpg TAP03_Myer-Santa-tram_William St_MMTB-obverse.jpg TAP04_8_Preston WS_Norm Cross.jpg TAP05_22-5_High St-Prahran_1910_CRC Field.jpg TAP06_31-36_High St-Armadale Rose Postcard.jpg TAP07_36_Dandenong Rd_c1917_Duckett Collection.jpg TAP08_Glenferrie Rd. Rose Postcard.jpg TAP09_52_Glenferrie Rd. Rose Postcard.jpg TAP10_53_Glenhuntly Rd_13Nov1913_Duckett Collection.jpg TAP11_93_Balwyn.jpg TAP12_163_Barkly St.jpg TAP13_177_Footscray_25Sep1953_W John Webster.jpg TAP14_177_Radiax Truck_Footscray_25Sep1953_W John Webster.jpg TAP15_181_Footscray_25Sep1953_WJ ohn Webster.jpg TAP16_185_Newmarket.jpg TAP17_197_SouthMelb_RJNowell.jpg TAP18_202_WilliamSt-late1920s.jpg TAP19_204_WilliamSt-late1920s.jpg TAP20_205_BowCollector.jpg TAP21_206_Preston_Mar1948_JackRichardson.jpg TAP22_ZooHorseTRam_TMSV-Postcard.jpg TAP22_ZooHorseTRam_TMSV-Postcard-obverse.jpg TAP23_16_Bendigo.jpg TAP24_456-others_Preston_Jul1947_JackStranger.jpg TAP25_180_WilliamstownRd.jpg TAP26_U_RacecourseRd.jpg TAP27_BoxHill-saloon.jpg TAP28_NMET-9-trailer_MtAlexanderRd.jpg TAP29_16_NicholsonSt-Coburgt_MMTB.jpg TAP30_26_CamberwellDepot_MMTB.jpg TAP32_47_MalvernDepot_MMTB.jpg TAP33_44-18_Bendigo.jpg TAP34_50_.jpg TAP35_60_KewDepot_MMTB.jpg TAP36_83_MalvernDepot_MMTB.jpg TAP37_275-6-93_Preston_RayPearson.jpg TAP38_99_KewDepot_Jan1937_RayPearson.jpg TAP39-122_McCraeSt_NormCross.jpg TAP40_137_HawthornDepot_MMTB.jpg TAP41_138_BourkeSt_20Oct1991_RayMarsh.jpg TAP42_140_PointOrmond.jpg TAP43_141_MalvernDepot_WJohnWebster.jpg TAP44_150_PointOrmond.jpg TAP45B_159_SwanstonSt_KSKings_14Mar1948.jpg TAP45C_159_SwanstonSt_KSKings_14Mar1948.jpg TAP46_171_SouthMelbourneDepot_MMTB.jpg TAP47_174_StGeorgesRd_JohnBeckett_1949.jpg TAP48_177_FootscrayDepot.jpg TAP49_177_FootscrayDepot_WJohnWebster.jpg TAP50_178_PointOrmond.jpg TAP51_178_ElsternwickRS_WJohnWebster.jpg TAP52A_179_LeedsSt-Footscray.jpg TAP52A_179_LeedsSt-Footscray_LCrow.jpg TAP52B_179_LeedsSt-Footscray_LCrow.jpg TAP53_187_SouthMelbourneDepot_MMTB.jpg TAP54_190_CamberwellDepot_GeoffGrant_7May1955.jpg TAP55_191_ElizabethSt-terminus_JohnBeckett.jpg TAP56_192_StKildaSA.jpg TAP57_200_MillerSt.jpg TAP58_205_LygonSt-into-BrunswickRd.jpg TAP59_208_EssendonDepot_MMTB.jpg TAP60_V214_MillerSt_1978_MMTB.jpg TAP61_15_EssendonDepot_MMTB.jpg TAP62_PrinceofWales-decoration_1920.jpg TAP63_EssendonDepot-PowerHouse.jpg TAP64_DoncasterTram_IllustratedAustrlianNews_9Nov1889.jpg TAP65_180_BourkeSt-at-SpencerSt.jpg Transit Australia Photos - Pre W class - sheets A1 to A29 -trams, tramways, transit australia, destination city, tramcars, depots, pmtt, htt, mbctt, nmetl, doncaster, bendigo, tram 1, tram 13, tram 9, 16, tram 8, tram 22, tram 5, tram 31, tram 36, tram 50, tram 63, tram 53, tram 93, tram 163, tram 177, tram 181, tram 185, tram 197, tram 202, tram 204, tram 205, tram 206, tram 84, tram 456, tram 180, tram 9, tram 26, tram 31, tram 36, tram 47, tram 44, tram 60, tram 83, tram 275, tram 93, tram 99, tram 122, tram 137, tram 138, tram 140, tram 141, tram 150, tram 159, tram 171, tram 174, tram 177, tram 178, tram 179, tram 187, tram 190, tram 191, tram 200, tram 205, tram 214, tram 15, tram 180, rose series -
 Melbourne Tram Museum
Document - Report, Melbourne & Metropolitan Tramways Board (MMTB), "Braking Tests - car 140 - March 1952", 2/04/1952 12:00:00 AM
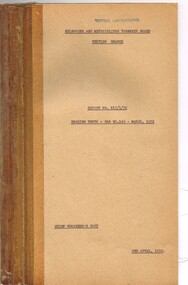
... ... tram 140...140 - March 1952"". Dated 2 April 1952. Report looks at the braking characteristics of the tram under varying conditions.. ...Melbourne Tram Museum 8 Wallen Road Hawthorn melbourne Trams tramways Preston Workshops Reports Tramcars G class Braking tram 140 Report on G class tramcar No. 140, 19 pages including appendices and charts, titled "Braking Tests - car 140 - March 1952"". ...Report on G class tramcar No. 140, 19 pages including appendices and charts, titled "Braking Tests - car 140 - March 1952"". Dated 2 April 1952. Report looks at the braking characteristics of the tram under varying conditions.. Testing done in Miller St Preston. Document bound within a manila cover stapled with adhesive tape binding on the left hand side. Original copy marked "Chief Engineer's Copy"trams, tramways, preston workshops, reports, tramcars, g class, braking, tram 140 -
 Melbourne Tram Museum
Photograph - Set of 6 colour prints of trams at Corner of Flinders and Swanston Streets, George Bishop, c1999
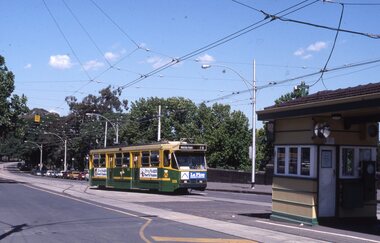
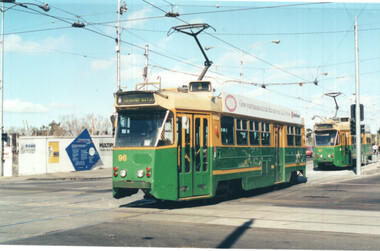
... ...tram 140...trams at the corner of Swanston and Flinders Streets. In the background can be seen the construction of the Federation Square project which commenced in 1999. 1 - Z 96 (Route 3, University) at Flinders and Swanston Streets. 2 - Z 37 (University route 5) 3 - SW6 888, City Circle, westbound. 4 - Z3 140 (East Coburg Route 1) - would appear that the car is not doing their hook turn properly 5 - B2 2037 westbound (Route 70, City Flinders St) 6 - Z 41 (Route 72, University)...trams at the corner of Swanston and Flinders Streets. In the background can be seen the construction of the Federation Square project which commenced in 1999. 1 - Z 96 (Route 3, University) at Flinders and Swanston Streets. 2 - Z 37 (University route 5) 3 - SW6 888, City Circle, westbound. 4 - Z3 140 (East Coburg Route 1) - would appear that the car is not doing their hook turn properly 5 - B2 2037 westbound (Route 70, City Flinders St) 6 - Z 41 (Route 72, University) Yields information about the operation of Melbourne trams during the late 1990s. trams tramways Z3 class Z class tram 96 tram 37 City Circle tram 888 hook turns tram 140 B2 class tram 2037 SW6 class Route 1 Route 70 Route 72 Route 5 Route 3 Flinders St Swanston St tram 41 Details of the photograph and photographer on the rear in ink. ...Set of six colour photographs of trams at the corner of Swanston and Flinders Streets. In the background can be seen the construction of the Federation Square project which commenced in 1999. 1 - Z 96 (Route 3, University) at Flinders and Swanston Streets. 2 - Z 37 (University route 5) 3 - SW6 888, City Circle, westbound. 4 - Z3 140 (East Coburg Route 1) - would appear that the car is not doing their hook turn properly 5 - B2 2037 westbound (Route 70, City Flinders St) 6 - Z 41 (Route 72, University)Yields information about the operation of Melbourne trams during the late 1990s.Set of six Colour prints printed on Kodak paperDetails of the photograph and photographer on the rear in ink.trams, tramways, z3 class, z class, tram 96, tram 37, city circle, tram 888, hook turns, tram 140, b2 class, tram 2037, sw6 class, route 1, route 70, route 72, route 5, route 3, flinders st, swanston st, tram 41 -
 Melbourne Tram Museum
Album - Robert Thomson Slide Collection, "April 1981 (RT291-314)"
... - route 10 RT300 April 1981 Camberwell Depot - tram V214 RT301 W2 with pantograph Preston W'Shops - tram 546 - "Special" RT302 April 1981 Preston W'Shops - tram 170 - "Special" - route 00 & tram 1041 - "Special" - route 987 RT303 April 1981 Tram Over Bridge - tram 1011 - "Sth Melb & St Kilda Beach" - route 10 RT304 April 1981 Bourke St - tram 155 - "City" - route 96 RT305 April 1981 Camberwell Depot - tram 140 - "Camberwell Depot" - route 00 & tram 141 - "City - Lonsdale St" - route 75 RT306 April 1981 Bourke Street - tram 162 - "East Preston" - route 88 RT307 April 1981 Collins Street - tram 848 - "Mont Albert" - route 42 RT308 April 1981 St Kilda Rd Extn - tram ? ...- route 10 RT300 April 1981 Camberwell Depot - tram V214 RT301 W2 with pantograph Preston W'Shops - tram 546 - "Special" RT302 April 1981 Preston W'Shops - tram 170 - "Special" - route 00 & tram 1041 - "Special" - route 987 RT303 April 1981 Tram Over Bridge - tram 1011 - "Sth Melb & St Kilda Beach" - route 10 RT304 April 1981 Bourke St - tram 155 - "City" - route 96 RT305 April 1981 Camberwell Depot - tram 140 - "Camberwell Depot" - route 00 & tram 141 - "City - Lonsdale St" - route 75 RT306 April 1981 Bourke Street - tram 162 - "East Preston" - route 88 RT307 April 1981 Collins Street - tram 848 - "Mont Albert" - route 42 RT308 April 1981 St Kilda Rd Extn - tram ? ...Photo - see pdf file for further information. Number Brief Description RT291 April 1981 Comeng - Z3 class tramcar on trailer at Comeng factory RT292 April 1981 E Burwood Terminus - tram 145 - "City - Lonsdale St" - route 75 RT293 April 1981 Batman Ave - tram 728 - "Prahran" - route 77 RT294 April 1981 Carlisle St - tram 223 - "St Kilda Beach" - route 79 RT295 April 1981 Airport Terminus - tram 1005 - "City" - route 59 RT296 April 1981 St Kilda Rd Extn - tram 311 - "City" - route 67 RT297 April 1981 Swanston St - tram 1018 - "City" RT298 April 1981 Elizabeth St - tram 52 - "North Coburg" - route 9 RT299 April 1981 Collins St - tram 939 - "West Preston?" - route 10 RT300 April 1981 Camberwell Depot - tram V214 RT301 W2 with pantograph Preston W'Shops - tram 546 - "Special" RT302 April 1981 Preston W'Shops - tram 170 - "Special" - route 00 & tram 1041 - "Special" - route 987 RT303 April 1981 Tram Over Bridge - tram 1011 - "Sth Melb & St Kilda Beach" - route 10 RT304 April 1981 Bourke St - tram 155 - "City" - route 96 RT305 April 1981 Camberwell Depot - tram 140 - "Camberwell Depot" - route 00 & tram 141 - "City - Lonsdale St" - route 75 RT306 April 1981 Bourke Street - tram 162 - "East Preston" - route 88 RT307 April 1981 Collins Street - tram 848 - "Mont Albert" - route 42 RT308 April 1981 St Kilda Rd Extn - tram ? - "? Glenferrie Rd" - route ? RT309 April 1981 Spring Street - tram 164 - "East Brunswick" - route 96 RT310 April 1981 Bourke Street - tram 162 - "City" - route 88 RT311 April 1981 east Preston Ter - tram 125 - "City" - route 88 RT312 April 1981 Port Melb Stn - train at station RT313 April 1981 Park St St Kilda - tram 883 - "?" - route 10 RT314 April 1981 Collins Street - tram 1002 - "Northcote via St Georges Rd" - route 9 Demonstrates the work of Robert Thomson in photography, collection and/or production of slidesAssembled album in a black presentation folder of 24 colour slides, collected or produced by Robert Thomson. All photographs have been scanned and placed on the Museum's G drive. A list of all photographs with details has been compiled. melbourne, tramways, trams -
 Victoria Police Museum
Photograph (police car), Kodak
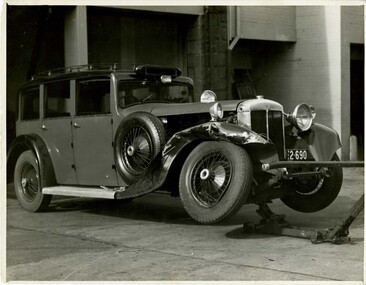
... 140. No. 2 Daimler. Reg No. 2-690. Accident 23.5.35. Driver - H.V. Casey 8770. Struck a tram...140. No. 2 Daimler. Reg No. 2-690. Accident 23.5.35. Driver - H.V. Casey 8770. Struck a tram Daimler registration number 2-690 on hoist with damage to front right hand side mudguard and wheel, circa 1935 Photograph (police car) Kodak ...Daimler registration number 2-690 on hoist with damage to front right hand side mudguard and wheel, circa 1935No 140. No. 2 Daimler. Reg No. 2-690. Accident 23.5.35. Driver - H.V. Casey 8770. Struck a trampolice vehicles; transport; motor police branch; daimler car; wireless patrol -
 Ballarat Tramway Museum
Album - Postcards & Photographs - Vic Solomons and others - Australian Tramways, Vic Solomons, 2023
... Front cover photo of Destination GPO 1921.01.00 Hobart 32 Post Card Cascade Road and Mount Wellington Hobart Unknown Hobart 33 Post Card Elizabeth St Hobart Unknown Hobart 34 Post Card Elizabeth St Hobart Unknown Hobart 35 Post Card Elizabeth St Hobart 1915.04.07 Hobart 36 Post Card Macquarie St Hobart Tas Unknown Hobart 37 Post Card Macquarie St showing Post Office Hobart 1908.03.12 Hobart 38 Post Card Hobart Municipal Tramways 21 Unknown Hobart 39 Post Card Elizabeth St Hobart Tas Unknown Hobart 40 Post Card Liverpool Street Hobart Unknown Hobart 41 Post Card Electric Tram Launceston Tas 446 W J Little Photo 1919.02.08 Launbceston 42 Post Card Launceston Tram no 3 1911.08.30 Launbceston 43 Post Card Launceston Tram no 3 passes tram No 1 Unknown Launbceston 44 Post Card Tram 6 at Trevallyn a popular suburb Launceston Tasmania Unknown Launbceston 45 Post Card Tram 7 at Trevallyn Road Terminus Launceston Tasmania Unknown Launbceston 46 Post Card Tram 4 in Brisbane St Launceston Unknown Launbceston 47 Post Card Tram 9 in Brisbane St Launceston Tasmania Unknown Launbceston 48 Post Card Camerom Street Launceston Tasmania Unknown Launbceston 49 Post Card Murray Views No 15 Jetty Road Glenelg Terminus 1962-02-08 Adelaide 50 Post Card Bay Tram at Jetty Road Terminus Glenelg SA Unknown Adelaide 51 Post Card Tram 3 in King William Street Adelaide S Aust Unknown Adelaide 52 Post Card Valentine Series No 3065 The Old Horse Tram Victor Harbour Unknown Victor Harbour 53 Post Card Bourke Street Melbourne with Cable Car Looking East 1904.04.25 Melbourne 54 Post Card Opening of New Electric Tramway Elsternwick 1913-11-13 Melbourne 55 Post Card Cable trams in Clarendon St Sth Melb Unknown Melbourne 56 Post Card Pall Mall from Charing Cross Bendigo Unknown Bendigo 57 Post Card Tram 4 & 7 pass at The Fountain and Mitchell Street Bendigo Vic Rose Series P 3198 Unknown Bendigo 58 Post Card M&MTB 133 at Charing Cross bound for Eaglehawk Bendigo Vic Murray Views No 45 Unknown Bendigo 59 Post Card Pall Mall Bendigo Vic Unknown Bendigo 60 Post Card Charing Cross & Mitchell St Bendigo Trams passing 1919.00.00 Bendigo 61 Post Card Pall Mall Looking East Unknown Bendigo 62 Post Card Electric Trams and City Hotel Bendigo Vic Unknown Bendigo 63 Post Card Moorabool Street Geelong V 23 Unknown Geelong 64 Post Card Murray Views No 3 Moorabool Street Geelong Vic Unknown Geelong 65 Post Card The Rose Series P 2487 Ryrie Street Geelong Vic Unknown Geelong 66 Post Card Southern Cross Series 2696 Ryrie Stret Geelong Vic Unknown Geelong 67 Post Card The Rose Series P 1490 Ryrie Street Geelong Vic 1920-03-04 Geelong 68 Post Card Valentine Series No 1568 Lower Sturt Street Ballarat Unknown Ballarat 69 Post Card Rose Series P 1710 Sturt Street Ballarat Victoria Unknown Ballarat 70 Post Card Sturt Street Ballarat Victoria Unknown Ballarat 71 Post Card Horse Tram In Sturt Street Ballarat 1905.11.10 Ballarat 72 Post Card Sturt Street Ballarat Looking North-West Unknown Ballarat 73 Post Card Shoppes Square Sturt Street Ballarat Looking North Unknown Ballarat 74 Post Card Junction Sturt and Lydiard Streets Ballarat 1909-09-01 Ballarat 75 Post Card The Electric Supply Co Souvenir Tram Ticket No 3085of the opening of Electric System August 18 1905 1905.08.18 Ballarat 76 Post Card Sturt Street Ballarat Victoria 1907.11.25 Ballarat 77 Post Card Off to the Gardens Electric Tram Ballarat Unknown Ballarat 78 Post Card Sturt Street Ballarat 1907.04.16 Ballarat 79 Post Card Sturt Street Ballarat Looking East Electric tram with Double Deck Trailer 1911.04.17 Ballarat 80 Post Card Sturt Street Ballarat Looking East Unknown Ballarat 81 Post Card Sturt Street Ballarat Looking West 1911.03.01 Ballarat 82 Post Card Town Hall and Sturt Street Ballarat Unknown Ballarat 83 Post Card Lydiard Street Ballarat 1906.11.23 Ballarat 84 Post Card Looking North along Adelaide Street from George Street Brisbane Sidues Series No 764 Unknown Brisbane 85 Post Card Looking South along Queen Street from the Creek Street Intersection Brisbane Qld Sirues Series No 1379 Unknown Brisbane 86 Post Card George Street from near Supreme Court Brisbane Unknown Brisbane 87 Post Card Queen and Eagle Streets Brisbane 1907.07.04 Brisbane 88 Post Card Queen Street showing His Majesty’s Theatre Brisbane Unknown Brisbane 89 Post Card Queen Street Treasury Building 1908.01.20 Brisbane 90 Post Card G P O and Queen Street Brisbane Unknown Brisbane 91 Post Card Queen Street Brisbane Looking from Wharf Street Unknown Brisbane 92 Post Card Customs House Brisbane 1905.02.16 Brisbane 93 Post Card Queen St Brisbane 1905.09.16 Brisbane 94 Post Card Queen St Brisbane 1907.11.19 Brisbane 95 Post Card Treasury Buildings Brisbane Unknown Brisbane 96 Post Card Queen and Eagle Streets Brisbane Unknown Brisbane 97 Post Card The Valley Corner Brisbane Unknown Brisbane 98 Post Card Brisbane Queen Street opposite General Post Office Unknown Brisbane 99 Post Card North Quay and Milton Beach Brisbane Q Unknown Brisbane 100 Post Card Victoria Bridge Brisbane South Side 1907.08.14 Brisbane 101 Post Card Victoria Bridge Brisbane Unknown Brisbane 102 Post Card Breakfast Creek Bridge Brisbane Q Unknown Brisbane 103 Post Card Melbourne Street Station South Brisbane Queensland Unknown Brisbane 104 Post Card General Post Office Queen Street Brisbane 1955.09.23 Brisbane 105 Post Card Customs House Brisbane 1904.11.04 Brisbane 106 Post Card Queen St Brisbane 1919.11.00 Brisbane 107 Post Card Queen St Brisbane Sidues Series No 627 Unknown Brisbane 108 Post Card Creek Street Brisbane Queensland Unknown Brisbane 109 Post Card Customs House and Garden Reach Brisbane Queensland 1910.00.08 Brisbane 110 Post Card Queen and Creek Streets Brisbane 1909.06.07 Brisbane 111 Post Card Queensland National Bank andd Queen Street Brisbane Queensland Unknown Brisbane 112 Post Card Queen Street and Treasury Buildings Brisbane 0000.09.07 Brisbane 113 Post Card Queen Street showing “Courier” Buildings Brisbane Unknown Brisbane 114 Post Card Intersection George & Roma Streets Brisbane Q 1916.05.11 Brisbane 115 Post Card Adelaide Street Brisbane Q Unknown Brisbane 116 Post Card G P O Queen Street Brisbane Q Unknown Brisbane 117 Post Card Treasury Building Brisbane 1906.03-20 Brisbane 118 Post Card Queen and Eagle Streets Brisbane 1907.02.01 Brisbane 119 Post Card Queen St Brisbane Unknown Brisbane 120 Post Card Queen St Brisbane Q Unknown Brisbane 121 Post Card Victoria Bridge Brisbane 1906.07.30 Brisbane 122 Post Card An Unusual View showing Head of Queen Street Victoria Bridge & South SideSuburbs Brisbane Q Unknown Brisbane 123 Post Card Petries Bight Brisbane Q Unknown Brisbane 124 Post Card South End Victoria Bridge Brisbane Q Unknown Brisbane 125 Post Card Customs House Brisbane Unknown Brisbane 126 Post Card Photo of toastrack car circa 1910 Unknown Brisbane 127 Post Card Treasury Buildings Brisbane Unknown Brisbane 128 Post Card East Street Rockhampton with Steam Tram & trailer Unknown Rockhampton 129 Post Card Post Office Rockhampton with steam tram Unknown Rockhampton 130 Post Card East Street Rockhampton with Steam Trams Rose Series P 7154 Unknown Rockhampton 131 Post Card William Street Rockhampton Rose Series P 7156 Unknown Rockhampton 132 Post Card Central East Street Rockhampton Q with Steam Trams Unknown Rockhampton 133 Photo Sturt St Ballarat Unknown Ballarat 134 Photo Bridge Street Ballarat Unknown Ballarat 135 Post Card George St Sydney Unknown Sydney 136 Post Card Elizabeth St Sydney Unknown Sydney 137 Post Card Railway Square Unknown Sydney 138 Post Card Sydney Harbor Bridge - pending receipt 139 Post Card Kings Cross - Mowbray Series with description on rear from C Roy G Field Unknown Sydney 140 Post Card Kings Cross - Mowbray Series with description on rear from C Roy G Field Unknown Sydney 141 Post Card Central Railway Station Sydney - Rose Series P6033 1954-01-26 Sydney 142 Post card William Street Darlinghurst looking towards City - Rose Series P6602 unknown Sydney 143 Post Card Circular Quay Sydney - Rose Series P6680 Unknown Sydney 144 Post Card View at Manly NSW - Rose Series B1003 Unknown Sydney 145 Post Card Hunter St Newcastle NSW - Rose Series P7843 Unknown Newcastle 146 Post Card Bank Corner Newcastle NSW - Mowbray Series No. 155 Unknown Newcastle 147 Post Card Hunter St Newcastle NSW Unknown Newcastle 148 Post Card Criterion Hotel Hunter St Newcastle NSW Unknown Newcastle 149 Photo Horse tram at Newtown Station 1894 to 1898 - PTC photo c1894 Newtown 150 Photo Steam tram motor No 3 at Railway Square 1879 1879 Sydney 151 Photo Railway steam tram c1900 with a horse drawn double deck bus c1900 Sydney 152 Photo Steam motor 5A and doubled deck bus Unknown Sydney 153 Photo Steam motor 53A with detail notes on rear 1922 Sydney 154 Photo Cable tram set at Milsons Point ferry terminal c1900 Sydney 155 Photo Early Sydney electric car - Ocean St - Rose Bay Unknown Sydney 156 Photo George St looking souoth c1905 c1905 Sydney 157 Photo Tram 165 at Circular Quay Unknown Sydney 158 Photo Tramcar ferry or transporter at The Spit Unknown Sydney 159 Photo tram 882 George St at Marti Place, 1937 1937 Sydney 160 Photo Tram 826 Railway Sq area Unknown Sydney 161 Photo Railway Sq in background, Broadway with double decker bus and toastrack car late 1930s Sydney 162 Photo Coupled St Pitt St? ...Front cover photo of Destination GPO 1921.01.00 Hobart 32 Post Card Cascade Road and Mount Wellington Hobart Unknown Hobart 33 Post Card Elizabeth St Hobart Unknown Hobart 34 Post Card Elizabeth St Hobart Unknown Hobart 35 Post Card Elizabeth St Hobart 1915.04.07 Hobart 36 Post Card Macquarie St Hobart Tas Unknown Hobart 37 Post Card Macquarie St showing Post Office Hobart 1908.03.12 Hobart 38 Post Card Hobart Municipal Tramways 21 Unknown Hobart 39 Post Card Elizabeth St Hobart Tas Unknown Hobart 40 Post Card Liverpool Street Hobart Unknown Hobart 41 Post Card Electric Tram Launceston Tas 446 W J Little Photo 1919.02.08 Launbceston 42 Post Card Launceston Tram no 3 1911.08.30 Launbceston 43 Post Card Launceston Tram no 3 passes tram No 1 Unknown Launbceston 44 Post Card Tram 6 at Trevallyn a popular suburb Launceston Tasmania Unknown Launbceston 45 Post Card Tram 7 at Trevallyn Road Terminus Launceston Tasmania Unknown Launbceston 46 Post Card Tram 4 in Brisbane St Launceston Unknown Launbceston 47 Post Card Tram 9 in Brisbane St Launceston Tasmania Unknown Launbceston 48 Post Card Camerom Street Launceston Tasmania Unknown Launbceston 49 Post Card Murray Views No 15 Jetty Road Glenelg Terminus 1962-02-08 Adelaide 50 Post Card Bay Tram at Jetty Road Terminus Glenelg SA Unknown Adelaide 51 Post Card Tram 3 in King William Street Adelaide S Aust Unknown Adelaide 52 Post Card Valentine Series No 3065 The Old Horse Tram Victor Harbour Unknown Victor Harbour 53 Post Card Bourke Street Melbourne with Cable Car Looking East 1904.04.25 Melbourne 54 Post Card Opening of New Electric Tramway Elsternwick 1913-11-13 Melbourne 55 Post Card Cable trams in Clarendon St Sth Melb Unknown Melbourne 56 Post Card Pall Mall from Charing Cross Bendigo Unknown Bendigo 57 Post Card Tram 4 & 7 pass at The Fountain and Mitchell Street Bendigo Vic Rose Series P 3198 Unknown Bendigo 58 Post Card M&MTB 133 at Charing Cross bound for Eaglehawk Bendigo Vic Murray Views No 45 Unknown Bendigo 59 Post Card Pall Mall Bendigo Vic Unknown Bendigo 60 Post Card Charing Cross & Mitchell St Bendigo Trams passing 1919.00.00 Bendigo 61 Post Card Pall Mall Looking East Unknown Bendigo 62 Post Card Electric Trams and City Hotel Bendigo Vic Unknown Bendigo 63 Post Card Moorabool Street Geelong V 23 Unknown Geelong 64 Post Card Murray Views No 3 Moorabool Street Geelong Vic Unknown Geelong 65 Post Card The Rose Series P 2487 Ryrie Street Geelong Vic Unknown Geelong 66 Post Card Southern Cross Series 2696 Ryrie Stret Geelong Vic Unknown Geelong 67 Post Card The Rose Series P 1490 Ryrie Street Geelong Vic 1920-03-04 Geelong 68 Post Card Valentine Series No 1568 Lower Sturt Street Ballarat Unknown Ballarat 69 Post Card Rose Series P 1710 Sturt Street Ballarat Victoria Unknown Ballarat 70 Post Card Sturt Street Ballarat Victoria Unknown Ballarat 71 Post Card Horse Tram In Sturt Street Ballarat 1905.11.10 Ballarat 72 Post Card Sturt Street Ballarat Looking North-West Unknown Ballarat 73 Post Card Shoppes Square Sturt Street Ballarat Looking North Unknown Ballarat 74 Post Card Junction Sturt and Lydiard Streets Ballarat 1909-09-01 Ballarat 75 Post Card The Electric Supply Co Souvenir Tram Ticket No 3085of the opening of Electric System August 18 1905 1905.08.18 Ballarat 76 Post Card Sturt Street Ballarat Victoria 1907.11.25 Ballarat 77 Post Card Off to the Gardens Electric Tram Ballarat Unknown Ballarat 78 Post Card Sturt Street Ballarat 1907.04.16 Ballarat 79 Post Card Sturt Street Ballarat Looking East Electric tram with Double Deck Trailer 1911.04.17 Ballarat 80 Post Card Sturt Street Ballarat Looking East Unknown Ballarat 81 Post Card Sturt Street Ballarat Looking West 1911.03.01 Ballarat 82 Post Card Town Hall and Sturt Street Ballarat Unknown Ballarat 83 Post Card Lydiard Street Ballarat 1906.11.23 Ballarat 84 Post Card Looking North along Adelaide Street from George Street Brisbane Sidues Series No 764 Unknown Brisbane 85 Post Card Looking South along Queen Street from the Creek Street Intersection Brisbane Qld Sirues Series No 1379 Unknown Brisbane 86 Post Card George Street from near Supreme Court Brisbane Unknown Brisbane 87 Post Card Queen and Eagle Streets Brisbane 1907.07.04 Brisbane 88 Post Card Queen Street showing His Majesty’s Theatre Brisbane Unknown Brisbane 89 Post Card Queen Street Treasury Building 1908.01.20 Brisbane 90 Post Card G P O and Queen Street Brisbane Unknown Brisbane 91 Post Card Queen Street Brisbane Looking from Wharf Street Unknown Brisbane 92 Post Card Customs House Brisbane 1905.02.16 Brisbane 93 Post Card Queen St Brisbane 1905.09.16 Brisbane 94 Post Card Queen St Brisbane 1907.11.19 Brisbane 95 Post Card Treasury Buildings Brisbane Unknown Brisbane 96 Post Card Queen and Eagle Streets Brisbane Unknown Brisbane 97 Post Card The Valley Corner Brisbane Unknown Brisbane 98 Post Card Brisbane Queen Street opposite General Post Office Unknown Brisbane 99 Post Card North Quay and Milton Beach Brisbane Q Unknown Brisbane 100 Post Card Victoria Bridge Brisbane South Side 1907.08.14 Brisbane 101 Post Card Victoria Bridge Brisbane Unknown Brisbane 102 Post Card Breakfast Creek Bridge Brisbane Q Unknown Brisbane 103 Post Card Melbourne Street Station South Brisbane Queensland Unknown Brisbane 104 Post Card General Post Office Queen Street Brisbane 1955.09.23 Brisbane 105 Post Card Customs House Brisbane 1904.11.04 Brisbane 106 Post Card Queen St Brisbane 1919.11.00 Brisbane 107 Post Card Queen St Brisbane Sidues Series No 627 Unknown Brisbane 108 Post Card Creek Street Brisbane Queensland Unknown Brisbane 109 Post Card Customs House and Garden Reach Brisbane Queensland 1910.00.08 Brisbane 110 Post Card Queen and Creek Streets Brisbane 1909.06.07 Brisbane 111 Post Card Queensland National Bank andd Queen Street Brisbane Queensland Unknown Brisbane 112 Post Card Queen Street and Treasury Buildings Brisbane 0000.09.07 Brisbane 113 Post Card Queen Street showing “Courier” Buildings Brisbane Unknown Brisbane 114 Post Card Intersection George & Roma Streets Brisbane Q 1916.05.11 Brisbane 115 Post Card Adelaide Street Brisbane Q Unknown Brisbane 116 Post Card G P O Queen Street Brisbane Q Unknown Brisbane 117 Post Card Treasury Building Brisbane 1906.03-20 Brisbane 118 Post Card Queen and Eagle Streets Brisbane 1907.02.01 Brisbane 119 Post Card Queen St Brisbane Unknown Brisbane 120 Post Card Queen St Brisbane Q Unknown Brisbane 121 Post Card Victoria Bridge Brisbane 1906.07.30 Brisbane 122 Post Card An Unusual View showing Head of Queen Street Victoria Bridge & South SideSuburbs Brisbane Q Unknown Brisbane 123 Post Card Petries Bight Brisbane Q Unknown Brisbane 124 Post Card South End Victoria Bridge Brisbane Q Unknown Brisbane 125 Post Card Customs House Brisbane Unknown Brisbane 126 Post Card Photo of toastrack car circa 1910 Unknown Brisbane 127 Post Card Treasury Buildings Brisbane Unknown Brisbane 128 Post Card East Street Rockhampton with Steam Tram & trailer Unknown Rockhampton 129 Post Card Post Office Rockhampton with steam tram Unknown Rockhampton 130 Post Card East Street Rockhampton with Steam Trams Rose Series P 7154 Unknown Rockhampton 131 Post Card William Street Rockhampton Rose Series P 7156 Unknown Rockhampton 132 Post Card Central East Street Rockhampton Q with Steam Trams Unknown Rockhampton 133 Photo Sturt St Ballarat Unknown Ballarat 134 Photo Bridge Street Ballarat Unknown Ballarat 135 Post Card George St Sydney Unknown Sydney 136 Post Card Elizabeth St Sydney Unknown Sydney 137 Post Card Railway Square Unknown Sydney 138 Post Card Sydney Harbor Bridge - pending receipt 139 Post Card Kings Cross - Mowbray Series with description on rear from C Roy G Field Unknown Sydney 140 Post Card Kings Cross - Mowbray Series with description on rear from C Roy G Field Unknown Sydney 141 Post Card Central Railway Station Sydney - Rose Series P6033 1954-01-26 Sydney 142 Post card William Street Darlinghurst looking towards City - Rose Series P6602 unknown Sydney 143 Post Card Circular Quay Sydney - Rose Series P6680 Unknown Sydney 144 Post Card View at Manly NSW - Rose Series B1003 Unknown Sydney 145 Post Card Hunter St Newcastle NSW - Rose Series P7843 Unknown Newcastle 146 Post Card Bank Corner Newcastle NSW - Mowbray Series No. 155 Unknown Newcastle 147 Post Card Hunter St Newcastle NSW Unknown Newcastle 148 Post Card Criterion Hotel Hunter St Newcastle NSW Unknown Newcastle 149 Photo Horse tram at Newtown Station 1894 to 1898 - PTC photo c1894 Newtown 150 Photo Steam tram motor No 3 at Railway Square 1879 1879 Sydney 151 Photo Railway steam tram c1900 with a horse drawn double deck bus c1900 Sydney 152 Photo Steam motor 5A and doubled deck bus Unknown Sydney 153 Photo Steam motor 53A with detail notes on rear 1922 Sydney 154 Photo Cable tram set at Milsons Point ferry terminal c1900 Sydney 155 Photo Early Sydney electric car - Ocean St - Rose Bay Unknown Sydney 156 Photo George St looking souoth c1905 c1905 Sydney 157 Photo Tram 165 at Circular Quay Unknown Sydney 158 Photo Tramcar ferry or transporter at The Spit Unknown Sydney 159 Photo tram 882 George St at Marti Place, 1937 1937 Sydney 160 Photo Tram 826 Railway Sq area Unknown Sydney 161 Photo Railway Sq in background, Broadway with double decker bus and toastrack car late 1930s Sydney 162 Photo Coupled St Pitt St? ...Contains 184 images of postcards and photographs collected primarily by Vic Solomons of Sydney, with others from the collection of Wal Jack and Warren Doubleday. Covers almost all of Australia's tramway systems. 1 Post Card Hay St Perth Looking East No 3 Unknown Perth 2 Post Card Cars 30 & 90 both on Route 19 pass in Barrack St looking South Perth WA 1935.02.18 Perth 3 Post Card Hay St Looking East Perth WA Unknown Perth 4 Post Card William St Perth WA Unknown Perth 5 Post Card Perth from Shaftsbury Hotel Unknown Perth 6 Post Card Hay St Perth WA Looking East Unknown Perth 7 Post Card Barrack St Perth Unknown Perth 8 Post Card Murray Views No 3 High St Showing Town Hall Fremantle WA Unknown Fremantle 9 Post Card High St Fremantle WA Unknown Fremantle 10 Post Card View of Bolder City Golden Mile in the Background (Section No 1) 1908.08.20 Kalgoolie 11 Post Card Hannan St Kalgoolie 1900.08.19 Kalgoolie 12 Post Card Hannan St Kalgoolie WA (No 2) Unknown Kalgoolie 13 Post Card Intersection Hannan & Maritana Sts Kalgoolie WA Unknown Kalgoolie 14 Post Card Hannan St Kalgoolie Unknown Kalgoolie 15 Post Card Lane Street Bolder City Unknown Kalgoolie 16 Post Card Hobart Double Deck Tram Unknown Hobart 17 Post Card Macquarie St Hobart Unknown Hobart 18 Photo Liverpool Street Hobart Unknown Hobart 19 Photo Hobart 21 Unknown Hobart 20 Photo Hobart 14 in Elizabeth St Hobart Unknown Hobart 21 Post Card Macquarie St Hobart Unknown Hobart 22 Post Card Macquarie St Hobart Tas Unknown Hobart 23 Photo Double Decker Tram 3 at G.P.O. Hobart Tas No 31 Unknown Hobart 24 Post Card Double Decker Tram 19 Hobart Tas A B Series No 24 Unknown Hobart 25 Photo Hobart Municipal Tramways Tas No 95 Unknown Hobart 26 Post Card Elizabeth St Hobart Unknown Hobart 27 Post Card Elizabeth St Hobart Unknown Hobart 28 Post Card Elizabeth St Hobart Unknown Hobart 29 Post Card Elizabeth St Hobart Tas Unknown Hobart 30 Post Card HMT 21 with crew at Beach Road Terminus Unknown Hobart 31 Post Card HMT 9 & another with crew at Beach Road Terminus. Front cover photo of Destination GPO 1921.01.00 Hobart 32 Post Card Cascade Road and Mount Wellington Hobart Unknown Hobart 33 Post Card Elizabeth St Hobart Unknown Hobart 34 Post Card Elizabeth St Hobart Unknown Hobart 35 Post Card Elizabeth St Hobart 1915.04.07 Hobart 36 Post Card Macquarie St Hobart Tas Unknown Hobart 37 Post Card Macquarie St showing Post Office Hobart 1908.03.12 Hobart 38 Post Card Hobart Municipal Tramways 21 Unknown Hobart 39 Post Card Elizabeth St Hobart Tas Unknown Hobart 40 Post Card Liverpool Street Hobart Unknown Hobart 41 Post Card Electric Tram Launceston Tas 446 W J Little Photo 1919.02.08 Launbceston 42 Post Card Launceston Tram no 3 1911.08.30 Launbceston 43 Post Card Launceston Tram no 3 passes tram No 1 Unknown Launbceston 44 Post Card Tram 6 at Trevallyn a popular suburb Launceston Tasmania Unknown Launbceston 45 Post Card Tram 7 at Trevallyn Road Terminus Launceston Tasmania Unknown Launbceston 46 Post Card Tram 4 in Brisbane St Launceston Unknown Launbceston 47 Post Card Tram 9 in Brisbane St Launceston Tasmania Unknown Launbceston 48 Post Card Camerom Street Launceston Tasmania Unknown Launbceston 49 Post Card Murray Views No 15 Jetty Road Glenelg Terminus 1962-02-08 Adelaide 50 Post Card Bay Tram at Jetty Road Terminus Glenelg SA Unknown Adelaide 51 Post Card Tram 3 in King William Street Adelaide S Aust Unknown Adelaide 52 Post Card Valentine Series No 3065 The Old Horse Tram Victor Harbour Unknown Victor Harbour 53 Post Card Bourke Street Melbourne with Cable Car Looking East 1904.04.25 Melbourne 54 Post Card Opening of New Electric Tramway Elsternwick 1913-11-13 Melbourne 55 Post Card Cable trams in Clarendon St Sth Melb Unknown Melbourne 56 Post Card Pall Mall from Charing Cross Bendigo Unknown Bendigo 57 Post Card Tram 4 & 7 pass at The Fountain and Mitchell Street Bendigo Vic Rose Series P 3198 Unknown Bendigo 58 Post Card M&MTB 133 at Charing Cross bound for Eaglehawk Bendigo Vic Murray Views No 45 Unknown Bendigo 59 Post Card Pall Mall Bendigo Vic Unknown Bendigo 60 Post Card Charing Cross & Mitchell St Bendigo Trams passing 1919.00.00 Bendigo 61 Post Card Pall Mall Looking East Unknown Bendigo 62 Post Card Electric Trams and City Hotel Bendigo Vic Unknown Bendigo 63 Post Card Moorabool Street Geelong V 23 Unknown Geelong 64 Post Card Murray Views No 3 Moorabool Street Geelong Vic Unknown Geelong 65 Post Card The Rose Series P 2487 Ryrie Street Geelong Vic Unknown Geelong 66 Post Card Southern Cross Series 2696 Ryrie Stret Geelong Vic Unknown Geelong 67 Post Card The Rose Series P 1490 Ryrie Street Geelong Vic 1920-03-04 Geelong 68 Post Card Valentine Series No 1568 Lower Sturt Street Ballarat Unknown Ballarat 69 Post Card Rose Series P 1710 Sturt Street Ballarat Victoria Unknown Ballarat 70 Post Card Sturt Street Ballarat Victoria Unknown Ballarat 71 Post Card Horse Tram In Sturt Street Ballarat 1905.11.10 Ballarat 72 Post Card Sturt Street Ballarat Looking North-West Unknown Ballarat 73 Post Card Shoppes Square Sturt Street Ballarat Looking North Unknown Ballarat 74 Post Card Junction Sturt and Lydiard Streets Ballarat 1909-09-01 Ballarat 75 Post Card The Electric Supply Co Souvenir Tram Ticket No 3085of the opening of Electric System August 18 1905 1905.08.18 Ballarat 76 Post Card Sturt Street Ballarat Victoria 1907.11.25 Ballarat 77 Post Card Off to the Gardens Electric Tram Ballarat Unknown Ballarat 78 Post Card Sturt Street Ballarat 1907.04.16 Ballarat 79 Post Card Sturt Street Ballarat Looking East Electric tram with Double Deck Trailer 1911.04.17 Ballarat 80 Post Card Sturt Street Ballarat Looking East Unknown Ballarat 81 Post Card Sturt Street Ballarat Looking West 1911.03.01 Ballarat 82 Post Card Town Hall and Sturt Street Ballarat Unknown Ballarat 83 Post Card Lydiard Street Ballarat 1906.11.23 Ballarat 84 Post Card Looking North along Adelaide Street from George Street Brisbane Sidues Series No 764 Unknown Brisbane 85 Post Card Looking South along Queen Street from the Creek Street Intersection Brisbane Qld Sirues Series No 1379 Unknown Brisbane 86 Post Card George Street from near Supreme Court Brisbane Unknown Brisbane 87 Post Card Queen and Eagle Streets Brisbane 1907.07.04 Brisbane 88 Post Card Queen Street showing His Majesty’s Theatre Brisbane Unknown Brisbane 89 Post Card Queen Street Treasury Building 1908.01.20 Brisbane 90 Post Card G P O and Queen Street Brisbane Unknown Brisbane 91 Post Card Queen Street Brisbane Looking from Wharf Street Unknown Brisbane 92 Post Card Customs House Brisbane 1905.02.16 Brisbane 93 Post Card Queen St Brisbane 1905.09.16 Brisbane 94 Post Card Queen St Brisbane 1907.11.19 Brisbane 95 Post Card Treasury Buildings Brisbane Unknown Brisbane 96 Post Card Queen and Eagle Streets Brisbane Unknown Brisbane 97 Post Card The Valley Corner Brisbane Unknown Brisbane 98 Post Card Brisbane Queen Street opposite General Post Office Unknown Brisbane 99 Post Card North Quay and Milton Beach Brisbane Q Unknown Brisbane 100 Post Card Victoria Bridge Brisbane South Side 1907.08.14 Brisbane 101 Post Card Victoria Bridge Brisbane Unknown Brisbane 102 Post Card Breakfast Creek Bridge Brisbane Q Unknown Brisbane 103 Post Card Melbourne Street Station South Brisbane Queensland Unknown Brisbane 104 Post Card General Post Office Queen Street Brisbane 1955.09.23 Brisbane 105 Post Card Customs House Brisbane 1904.11.04 Brisbane 106 Post Card Queen St Brisbane 1919.11.00 Brisbane 107 Post Card Queen St Brisbane Sidues Series No 627 Unknown Brisbane 108 Post Card Creek Street Brisbane Queensland Unknown Brisbane 109 Post Card Customs House and Garden Reach Brisbane Queensland 1910.00.08 Brisbane 110 Post Card Queen and Creek Streets Brisbane 1909.06.07 Brisbane 111 Post Card Queensland National Bank andd Queen Street Brisbane Queensland Unknown Brisbane 112 Post Card Queen Street and Treasury Buildings Brisbane 0000.09.07 Brisbane 113 Post Card Queen Street showing “Courier” Buildings Brisbane Unknown Brisbane 114 Post Card Intersection George & Roma Streets Brisbane Q 1916.05.11 Brisbane 115 Post Card Adelaide Street Brisbane Q Unknown Brisbane 116 Post Card G P O Queen Street Brisbane Q Unknown Brisbane 117 Post Card Treasury Building Brisbane 1906.03-20 Brisbane 118 Post Card Queen and Eagle Streets Brisbane 1907.02.01 Brisbane 119 Post Card Queen St Brisbane Unknown Brisbane 120 Post Card Queen St Brisbane Q Unknown Brisbane 121 Post Card Victoria Bridge Brisbane 1906.07.30 Brisbane 122 Post Card An Unusual View showing Head of Queen Street Victoria Bridge & South SideSuburbs Brisbane Q Unknown Brisbane 123 Post Card Petries Bight Brisbane Q Unknown Brisbane 124 Post Card South End Victoria Bridge Brisbane Q Unknown Brisbane 125 Post Card Customs House Brisbane Unknown Brisbane 126 Post Card Photo of toastrack car circa 1910 Unknown Brisbane 127 Post Card Treasury Buildings Brisbane Unknown Brisbane 128 Post Card East Street Rockhampton with Steam Tram & trailer Unknown Rockhampton 129 Post Card Post Office Rockhampton with steam tram Unknown Rockhampton 130 Post Card East Street Rockhampton with Steam Trams Rose Series P 7154 Unknown Rockhampton 131 Post Card William Street Rockhampton Rose Series P 7156 Unknown Rockhampton 132 Post Card Central East Street Rockhampton Q with Steam Trams Unknown Rockhampton 133 Photo Sturt St Ballarat Unknown Ballarat 134 Photo Bridge Street Ballarat Unknown Ballarat 135 Post Card George St Sydney Unknown Sydney 136 Post Card Elizabeth St Sydney Unknown Sydney 137 Post Card Railway Square Unknown Sydney 138 Post Card Sydney Harbor Bridge - pending receipt 139 Post Card Kings Cross - Mowbray Series with description on rear from C Roy G Field Unknown Sydney 140 Post Card Kings Cross - Mowbray Series with description on rear from C Roy G Field Unknown Sydney 141 Post Card Central Railway Station Sydney - Rose Series P6033 1954-01-26 Sydney 142 Post card William Street Darlinghurst looking towards City - Rose Series P6602 unknown Sydney 143 Post Card Circular Quay Sydney - Rose Series P6680 Unknown Sydney 144 Post Card View at Manly NSW - Rose Series B1003 Unknown Sydney 145 Post Card Hunter St Newcastle NSW - Rose Series P7843 Unknown Newcastle 146 Post Card Bank Corner Newcastle NSW - Mowbray Series No. 155 Unknown Newcastle 147 Post Card Hunter St Newcastle NSW Unknown Newcastle 148 Post Card Criterion Hotel Hunter St Newcastle NSW Unknown Newcastle 149 Photo Horse tram at Newtown Station 1894 to 1898 - PTC photo c1894 Newtown 150 Photo Steam tram motor No 3 at Railway Square 1879 1879 Sydney 151 Photo Railway steam tram c1900 with a horse drawn double deck bus c1900 Sydney 152 Photo Steam motor 5A and doubled deck bus Unknown Sydney 153 Photo Steam motor 53A with detail notes on rear 1922 Sydney 154 Photo Cable tram set at Milsons Point ferry terminal c1900 Sydney 155 Photo Early Sydney electric car - Ocean St - Rose Bay Unknown Sydney 156 Photo George St looking souoth c1905 c1905 Sydney 157 Photo Tram 165 at Circular Quay Unknown Sydney 158 Photo Tramcar ferry or transporter at The Spit Unknown Sydney 159 Photo tram 882 George St at Marti Place, 1937 1937 Sydney 160 Photo Tram 826 Railway Sq area Unknown Sydney 161 Photo Railway Sq in background, Broadway with double decker bus and toastrack car late 1930s Sydney 162 Photo Coupled St Pitt St? - photo Ben Parle Feb. 1950 Sydney 163 Photo Electric tram No. 2 - North Sydney with side trolley pole running Unknown Sydney 164 Photo George St - Horden's Corner Unknown Sydney 165 Photo George St at Martin Place c1920 Sydney 166 Photo Castlereagh St Sydney c1928 c1928 Sydney 167 Photo Railway Sqare c1920 c1920 Sydney 168 Photo Darling St Countereweight Unknown Sydney 169 Photo Trolley bus depot Unknown Sydney 170 Photo Trolley bus No. 14 Unknown Sydney 171 Photo Newcastle Railway Station with steam tram - Wharf Road?? Unknown Newcastle 172 Photo High St West Maitland - steam tram Unknown Maitland 173 Photo High St West Maitland - steam tram Unknown Maitland 174 Post Card Argent St near tram terminal Broken Hill NSW c1900 Broken Hill 175 postcard Argent St looking south Broken Hill - with Ken Magor's notes on rear Unknown Broken Hill 176 Photo Toronto - steam tram 61A Unknown Toronto 177 Photo 124A trial run 1911? Sutherland - Cronulla line 1911 Sutherland 178 Photo 103A at a tram stop Unknown Sydney 179 Photo Cable tram set at Crows Nest terminus grip car 12, trailer 22 Unknown Sydney 180 Photo Cable tram Queens Square Sydney 1903 Sydney 181 Photo cars 2078 and 2077 Chatswood late 1950s Sydney 182 Photo car 1877 Balmain area late 1950s Sydney 183 Photo Trolley bus - Rockdale destination Late 1950s Sydney 184 Photo Broken Hill steam tram - motor 18A North Tram Unknown Broken Hill 185 Photo Millars Point Sydney NSW - ferry/tram interchange, unknown Sydney All items imaged including the rear or back where there was writing of information. All files stored on the Museum's Photo Collections directory. Demonstrates through the medium of many images, Australian tramway systems and Ballarat's place in them.Album - heavy card covers, plastic lined with postcard or 6x4 photo sleeves.australia, tramways, postcards, photographs, steam trams, horse trams, cable trams, trolley buses -
 Ballarat Tramway Museum
Photograph - Black & White Photograph/s, 8/04/1903 12:00:00 AM
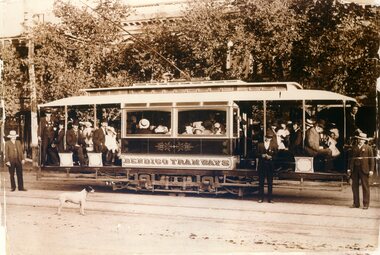
... Ballarat Tramway Museum South Gardens Reserve Wendouree Parade Ballarat Ballarat goldfields trams tramways Bendigo Pall Mall Golden Square Trials ESCo Copy 1 - has "20)" in the top left hand and right hand corners of the front of the photograph. On the rear "140 ...Black and White reproduction (copy by scanning and reprinting) of a sepia toned image of an ESCo Bendigo Electric tramcar at the time of opening trails with many people on board, crews, a dog, in the Ball Mall area. Shows details of the car decoration, painting, crew uniforms, seating arrangements, truck arrangements. Information provided with photographs says "Trial run on route to Golden Square 8.4.1903", copied from Leonard C. Bennetts collection by William Scott. Shows edges and edge damage of original photograph. Two copies held.Copy 1 - has "20)" in the top left hand and right hand corners of the front of the photograph. On the rear "140)" in ink in the top left hand corner. In pencil and ink "Bendigo Tramways (Company electric) / Trial run on route to Golden Square 8.4.1903", "copies from Leonard C. Bennetts Collection" and a "William F Scott" address label in the bottom right hand corner. copy 2- has "12" in a circle on the top left hand front. Back has been covered by a sheet of paper, but has similar notes to copy 1 and cropping instructions.trams, tramways, bendigo, pall mall, golden square, trials, esco -
 Ballarat Tramway Museum
Book, Melbourne and Metropolitan Tramways Board (MMTB), "Melbourne and Metropolitan Tramways /Electric System /Instructions to Drivers in Electric Car Operation", 1966
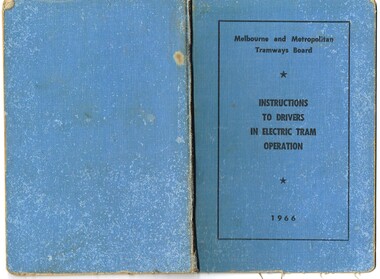
... Ballarat Tramway Museum South Gardens Reserve Wendouree Parade Ballarat Ballarat goldfields Trams tramways MMTB Drivers Training Instructions Motormen has the numbers 139 and 140 circled on inside of front cover. ...Forty Eight page, side staple book within blue Rexene covers. Titled "Melbourne and Metropolitan Tramways /Electric System /Instructions to Drivers in Electric Car Operation" Dated 1966. Printed by Regent Press Pty Ltd, 457 Plenty Road, Preston. Provides in a Q & A format, instructions to drivers in electric car operation, photos of various types of controllers, an A.B.C. for tramways drivers - "always" points to remember and has a reference index. has the numbers 139 and 140 circled on inside of front cover. Has name "McCalee B" as the driver's name the document issued to and "5570" and the driver's number.trams, tramways, mmtb, drivers, training, instructions, motormen -
 Ballarat Tramway Museum
Book, USA Department of Commerce, "Electrolysis and its Mitigation", 1918
... Ballarat Tramway Museum South Gardens Reserve Wendouree Parade Ballarat Ballarat goldfields Trams tramways Tramways Electrolysis On bottom of cover has "Peter G. Tait 90 William St Melbourne" label. and on top edge "Recd 4/10/19" in ink. Book - 9 sections, 140 ...Book - 9 sections, 140 pages + covers, stapled and bound within dark green covers, issues by the USA Department of Commerce, Technological Papers, Bureau of Standards, No. 52, "Electrolysis and its Mitigation", 2nd Edition 1918, price 35 cents. Has index and looks at various aspects of Electrolysis and railway negative returns. Has authors of E. B. Rosa Chief Physicist and Burton McCollum, Electrical Engineer of the Bureau of Standards.On bottom of cover has "Peter G. Tait 90 William St Melbourne" label. and on top edge "Recd 4/10/19" in ink.trams, tramways, tramways, electrolysis -
 Ballarat Tramway Museum
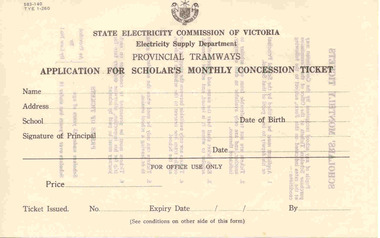
Document - Form/s, State Electricity Commission of Victoria (SECV), "Application for Scholar's Monthly Concession Ticket", 1960's
... Ballarat Tramway Museum South Gardens Reserve Wendouree Parade Ballarat Ballarat goldfields Trams tramways Schools Tickets Tickets Forms Printed form titled "Application for Scholar's Monthly Concession Ticket" of the SEC, Electricity Supply Department, Provincial Tramways, on thin semi transparent semi gloss or waxy paper, printed both sides, with form number 583-140, TYE 1-260. ...Printed form titled "Application for Scholar's Monthly Concession Ticket" of the SEC, Electricity Supply Department, Provincial Tramways, on thin semi transparent semi gloss or waxy paper, printed both sides, with form number 583-140, TYE 1-260. Has SEC logo on top of form. Front of form has space provided for name, address, school, date of birth, signature of principal and date. Underneath this for Office use only is Price, Ticket No. issued, date and who by. On rear of form gives the six conditions of issue and price basis, whether under 15 or between 15 and 18 years of age.trams, tramways, schools tickets, tickets, forms -
 Ballarat Tramway Museum
Functional object - Destination Roll, Melbourne and Metropolitan Tramways Board (MMTB), "Malvern Depot", 1950's
... trams, Melbourne, until the late 1960's. Roll on linen, with white letters on black background. Has stencilled words "STOP" on top and bottom of rolls, stencilled miniature destination on rear to assist driver to locate the destination. Letters approx. 140...trams, Melbourne, until the late 1960's. Roll on linen, with white letters on black background. Has stencilled words "STOP" on top and bottom of rolls, stencilled miniature destination on rear to assist driver to locate the destination. Letters approx. 140 ...Destination roll that was used in Malvern Depot trams, Melbourne, until the late 1960's. Roll on linen, with white letters on black background. Has stencilled words "STOP" on top and bottom of rolls, stencilled miniature destination on rear to assist driver to locate the destination. Letters approx. 140 high. Roll consists of an unpainted section 535 long at top and 360 long unpainted section at base. Painted section approx. 7.2m long. Roll has oil and dirt stains in the middle portion, but the last three destinations are very worn with the black paint in a deteriorated condition. Image information - btm1747i1 to 1747i6 - photos of various sections of roll from top to bottom - shows level of damage and nature of the last three destinations on the roll. For listing of destinations - see images.tram, trams, melbourne, malvern depot, destination roll, mmtb -
 Ballarat Tramway Museum
Functional object - Destination Roll, Melbourne and Metropolitan Tramways Board (MMTB), "Kew Depot", 1950's
... trams, Melbourne, until the late 1960's. Roll on linen, with white letters on black background. Has stencilled words "STOP KEW" on bottom of roll, generally stencilled, though a few handwritten, miniature destination on rear to assist driver to locate the destination. Letters approx. 140...trams, Melbourne, until the late 1960's. Roll on linen, with white letters on black background. Has stencilled words "STOP KEW" on bottom of roll, generally stencilled, though a few handwritten, miniature destination on rear to assist driver to locate the destination. Letters approx. 140 ...Destination roll that was used in Kew Depot trams, Melbourne, until the late 1960's. Roll on linen, with white letters on black background. Has stencilled words "STOP KEW" on bottom of roll, generally stencilled, though a few handwritten, miniature destination on rear to assist driver to locate the destination. Letters approx. 140 high. Roll consists of an unpainted section 140 long at top and 330 long unpainted section at base. Painted section approx. 7.6m long. Image information - btm1748i1 to 1747i7 - photos of various sections of roll from top to bottom - shows level of damage. btm1748i8 shows handwritten and stencilled miniature destination and btm1748i9 - "STOP KEW" at bottom of roll. For listing of destinations - see images.tram, trams, melbourne, kew depot, destination roll, mmtb -
 Ballarat Tramway Museum
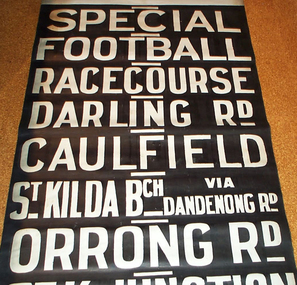
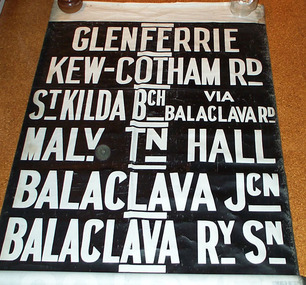
Functional object - Destination Roll, Melbourne and Metropolitan Tramways Board (MMTB), "Camberwell Depot", 1950's
... trams, Melbourne, until the late 1960's. Roll on linen, with white letters on black background. Has stencilled words "STOP CAMB" on bottom of roll, generally stencilled, though a few handwritten, miniature destination on rear to assist driver to locate the destination. Letters approx. 140...trams, Melbourne, until the late 1960's. Roll on linen, with white letters on black background. Has stencilled words "STOP CAMB" on bottom of roll, generally stencilled, though a few handwritten, miniature destination on rear to assist driver to locate the destination. Letters approx. 140 ...Destination roll that was used in Camberwell Depot trams, Melbourne, until the late 1960's. Roll on linen, with white letters on black background. Has stencilled words "STOP CAMB" on bottom of roll, generally stencilled, though a few handwritten, miniature destination on rear to assist driver to locate the destination. Letters approx. 140 high. Roll consists of an unpainted section 525 long at top and 165 long unpainted section at base. Painted section approx. 9.9m long. Has on the bottom of the roll, a section which has been added to the roll or repaired by adding a new section. Some repainting of the old destinations also apparent. The middle of three "CITY" destinations and other parts adjacent have been repaired. Image information - btm1748i1 to 1747i9 - photos of various sections of roll from top to bottom - shows level of damage. btm1749i10, shows repair to the middle of the three "CITY" destinations. btm1749i4 shows the damage from the main side. For listing of destinations - see images.tram, trams, melbourne, camberwell depot, destination roll, mmtb -
 Ballarat Tramway Museum
Magazine, Institute of Engineers Australia, "Transactions of Multi-Disciplinary Engineering - Special Issue Engineering Heritage - Vol GE23 1999", "Conservation Planning and a 1905 Electric Tramcar", Apr. 2000
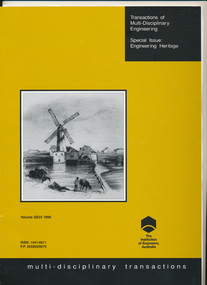
... Ballarat Tramway Museum South Gardens Reserve Wendouree Parade Ballarat Ballarat goldfields Trams tramways ESCo Institute Of Engineers Conservation Planning Papers Level Crossings Lydiard St North Railway Station 140 page paper cover book/magazine published by the Institute of Engineers Australia - Transactions of Multi-Disciplinary Engineering - Special Issue Engineering Heritage - Vol GE23 1999. ...140 page paper cover book/magazine published by the Institute of Engineers Australia - Transactions of Multi-Disciplinary Engineering - Special Issue Engineering Heritage - Vol GE23 1999. Contains on pages 107 - 114 an item presented at the Ballarat Conference on Engineering Heritage during March 1999. Paper written by Warren Doubleday, titled "Conservation Planning and a 1905 Electric Tramcar". Fourteen papers presented at the conference contained within the volume. Paper has photographs of No. 12, recovery, work and other Ballarat photos. Printed on glossy white paper with two colour front cover - brown and black. Also contained is a letter from Ray Martin, the conference organiser, forwarding a copy of the transactions. Actually published early April 2000. Note all photographs were transmitted by email, about Dec. 1999. See image i3 for a pdf of the actual published document. Scanned as well is a paper on the Lydiard St Level crossing gates.trams, tramways, esco, institute of engineers, conservation planning, papers, level crossings, lydiard st north, railway station -
 Ballarat Tramway Museum
Photograph - Black & White Photograph/s, Keith Kings, 26/04/1975 12:00:00 AM
... On rear in stamped blue ink and hand written number "K.S.Kings, 140-15, Copyright reserved and in blue ink "COTMA"/ Delegates arriving at Gardens South by Davis Bus Lines No. 6 HOB 464, with trams 27 (passenger service) and 40 (COTMA special). ...Ballarat Tramway Museum South Gardens Reserve Wendouree Parade Ballarat Ballarat goldfields Trams Tramways COTMA BTPS BTM Davis Bus Lines Wendouree Parade Tram 27 40 On rear in stamped blue ink and hand written number "K.S.Kings, 140-15, Copyright reserved and in blue ink "COTMA"/ Delegates arriving at Gardens South by Davis Bus Lines No. 6 HOB 464, with trams 27 (passenger service) and 40 (COTMA special). ...Black and white photograph of the first Council of Tramways Museums of Australasia ( COTMA ) delegates leaving buses at Carlton St. to board waiting trams (27 & 40) from Davis Bus Lines No. 6. on 26/4/1975. Photo by Keith Kings.On rear in stamped blue ink and hand written number "K.S.Kings, 140-15, Copyright reserved and in blue ink "COTMA"/ Delegates arriving at Gardens South by Davis Bus Lines No. 6 HOB 464, with trams 27 (passenger service) and 40 (COTMA special). First A&NZ Conference, Ballarat, 26/4/75"trams, tramways, cotma, btps, btm, davis bus lines, wendouree parade , tram 27, 40 -
 Ballarat Tramway Museum
Photograph - Black & White Photograph/s, mid 1900's
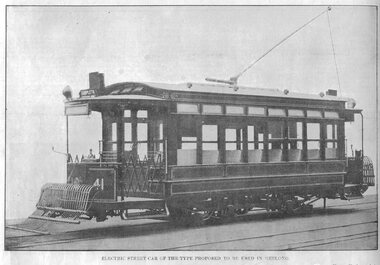
... Ballarat Tramway Museum South Gardens Reserve Wendouree Parade Ballarat Ballarat goldfields Yields information about the streetscape in Geelong prior to the opening of the Geelong Tramway system and in particular the Post Office building in Ryrie St Geelong. trams tramways Geelong Tramcars tram 41 Copy 1 - In ink on the front of the print "Now magazine issue 11.7.1907", number "8)1" and on the rear, a "William Scott" address label. Copy 2 - a yellow label with "8-2 140 ...Yields information about the streetscape in Geelong prior to the opening of the Geelong Tramway system and in particular the Post Office building in Ryrie St Geelong.Black and white (sepia coloured) reproduction of a photograph from the NOW Magazine 11.7.1907 issue of NOW Magazine, of the type of Electric street car proposed to be used in Geelong. this is a typical USA tram, different to what was actual used. Two copies, one copy with more the original magazine and the other, masked. From the Geelong Historical Society. Printed on Hewlett Packard paper - copy 1Copy 1 - In ink on the front of the print "Now magazine issue 11.7.1907", number "8)1" and on the rear, a "William Scott" address label. Copy 2 - a yellow label with "8-2 140%", "8)2" on the front of the sheet, and on the rear, a "William Scott" address label. trams, tramways, geelong, tramcars, tram 41 -
 Melbourne Tram Museum
Album - Charles Craig - part 1 of 2, 1950s to 1970s
... – High St Malvern CC232 Postcard – Empire – Glenferrie Road, Malvern at Wattletree Rd CC233 Postcard Y469, MMTB CC234 Postcard Z2 Spring St CC235 Postcard – Z1 MMTB CC236 Postcard – Stamp Show W1 431 CC237 Postcard – Stamp show B2005 CC238 Postcard – Stamp show W6 982 CC239 Postcard – Valentines 1264 – Johnstone Park with tram in distance CC240 Postcard – Rose 10711 – Swanston and Lonsdale – Hospital and W232 CC241 Postcard – Rose 4827 – Fitzroy St St Kilda W2 362 and 548 CC242 Postcard – Valentines – 939 – St Kilda War Memorial, W and a R? CC243 Postcard – Valentines – 572 – St Kilda War Memorial, W 413 and 140...– High St Malvern CC232 Postcard – Empire – Glenferrie Road, Malvern at Wattletree Rd CC233 Postcard Y469, MMTB CC234 Postcard Z2 Spring St CC235 Postcard – Z1 MMTB CC236 Postcard – Stamp Show W1 431 CC237 Postcard – Stamp show B2005 CC238 Postcard – Stamp show W6 982 CC239 Postcard – Valentines 1264 – Johnstone Park with tram in distance CC240 Postcard – Rose 10711 – Swanston and Lonsdale – Hospital and W232 CC241 Postcard – Rose 4827 – Fitzroy St St Kilda W2 362 and 548 CC242 Postcard – Valentines – 939 – St Kilda War Memorial, W and a R? CC243 Postcard – Valentines – 572 – St Kilda War Memorial, W 413 and 140 ...Photo - see pdf file for further information. Number Brief Description CC1 S178 at Elsternwick level crossing track works CC2 Building East Preston Depot 1955 CC3 Camberwell depot – post WW2 – lots of trams and a black cat CC4 W2 584 and SW6 958 northbound – Chapel St and Brighton Road CC5 W2 357 – southbound, Chapel St Brighton Road CC6 Pascoe Vale Road, Raceday working – note the signal CC7 The Preston Workshops - The Argus, post WW2, 223, 647 et al CC8 923 or is it 922 being built at Preston – The Argus photo - CC8A 832 being positioned onto trucks at Preston after an overhaul – Argus Photo – see also CC306 CC9 Footscray depot` CC10 W5 797 in St Kilda Road during track works – 1950s CC11 W2 457 at Kew Post Office CC12 Wellington Parade – W2 432, 492 and 337 – special event CC13 Swan St line up of trams – football? Or other special event – Sinclair’s bus on the right side. CC14 W2 630 being washed at a depot – The Argus photo CC15 Royal Park line at Flemington Road – W2 355 and W5 786 CC16 Nicholson St track construction from a tram cab CC17 T181 on tour at Gordon St CC18 T181 on Maribyrnong Bridge CC19 Ditto at River St just off bridge CC20 As for CC18 CC21 At Raleigh Rd CC22 T181 at Footscray depot CC23 Track construction, Nicholson, just north of Gertrude CC24 Commissioning overhead Bourke St tram 988 CC25 Queens Parade – 997 and 994 CC26 Swapping trolley wheel to skid – commissioning CC27 Track construction in Gertrude St CC28 985 in Queens Parade running special CC29 997 in Queens Parade CC30 1033 at North Fitzroy – AETA Special CC31 Bourke St at Elizabeth St – has passengers on board CC32 W6 985, 996 Queens Parade, Mk 3 bus 333 CC33 As above CC34 Showing construction at Nicholson & Gertrude – Bourke St CC35 W2 223 on Burnley temporary bridge – VR track expansion CC36 W5 823 – ditto CC37 Tram on old bridge prior to removal CC38 W2 433 on temporary bridge with new bridge beams and old track CC39 Looking down showing temporary single track – Swan St CC40 Tait train passing under tram bridge CC41 SW6 on single line – off loading CC42 W2 547 at City Road Junction CC43 City Road Jtn – 1969 – 596 and 771 CC44 City Road Jtn – 1969 – 596 and 771 (same as CC45 438 in Flinders St CC46 355 somewhere CC47 552 somewhere CC47A 364 at Preston Workshops? CC48 W2 334 on Traverser – Preston Workshops CC49 Wellington pade – large line up of trams, c1950 925, and 611 CC50 W2 493 Franklin st – advertising for Savings Certificates CC51 Possibly 551 with advertising for fund raising for Blind institute CC52 249 at Hawthorn – Riversdale Junction – with a Tally Ho and Village Fair Aux. board CC53 MMTB Postcard of 511 CC54 Wattle Park terminus with Single line warning sign CC55 Wattle Park Duplication CC56 36 at Domain Junction – 833 CC57 36 at Domain Junction CC58 36 at Domain Junction with 810 and 833 CC59 36 in Swanston by Flinders St Station CC60 36 in Spencer St at A’Beckett CC61 36 crossing Collins St CC62 36 crossing Collins St CC63 36 northbound in St Kilda Road with Shrine in background CC64 36 northbound in Swanston St at Flinders St CC65 Postcard – Ballarat 36 in Domain Road CC66 Postcard - Stampshow – Hawthorn Horse tram CC67 Postcard - Stampshow – Peace cable tram CC68 Postcard - 1041 and cable car set 1 at Preston CC69 Postcard - Colins & Elizabeth – greetings from old Melbourne CC70 Postcard - Cable car set at Preston CC71 Postcard - Twentyman’s cable cars CC72 Postcard - Nu-color-vue – horse tram 256 CC73 Cable car set – Market & Flinders CC74 Cable trams at Twentymans’ in their shed CC75 Cable tram track at Bourke & Spencer prior to removal CC76 Cable tram bogie at Preston Workshops – used as a dolly CC77 Cable trams at Twentymans’ CC78 Postcard - Valentines – Bourke looking west from Swanston CC79 Postcard - Rose 3938 – Bourke at Swanston – the Leviathan building CC80 Postcard - Valentines – Elizabeth St looking south from Collins – No. 19 CC81 Postcard - Rose P4765 – Bourke St Melbourne CC82 Postcard - Rose 4090 – cable tram passing Parliament house CC83 Postcard - Valentines – GPO Elizabeth St CC84 Interior of cable trailer with clothing on a set CC85 Elizabeth St looking north CC86 Cigarette card - Collins St No. 41- WD HO Wills CC87 Postcard - Rialto building with cable set CC88 Postcard - Valentines - Swanston at Flinders looking north CC89 CC90 Q 150 Hanna St – dated on rear CC91 176 turning – photo ex Alan Jungworth CC92 161 on Princes Bridge – minimum fare 4d sign and Inspector CC93 459 at Point Ormond CC94 158 at Gordon St – side on view CC95 X 217 in Swanston St CC96 X 217 in Swanston St with an East Brighton destination CC97 T177 CC98 T177 Peel St – no destination roll – being transferred? CC99 X1 462 in Glenhuntly Road to Point Ormond CC100 X1 462 in Glenhuntly Road to Elsternwick Rly Station CC101 X1 462 in Glenhuntly Road to Point Ormond CC102 Q 150 Hanna St CC103 190 at Camberwell Depot CC104 T182 at Footscray CC105 X1 466 and W2 at Footscray CC106 190 at Camberwell Depot CC107 X1 467 Barkly St Footscray CC108 X2 679 turning into William St from La Trobe St CC109 X2 677 Glenhuntly Road with Point Ormond Destination CC110 Postcard T180 CC111 Postcard format – X1 467 on a truck – see also CC178 CC112 Postcard format – X1 467 at Wantirna South CC113 Q200 and SW6 896 at Thornbury – has labels on rear CC114 T177, Ballarat Road – has labels on rear CC115 T178 at Point Ormond CC116 Postcard X1 465 and 466 CC117 Postcard – X2 676 CC118 Postcard – TMSV X2 217 CC119 810 on temporary bridging – 24-12-67 CC120 W2 575 – Queens Parade junction in, still temporary bridging, substation under construction CC121 Forming Queens Parade Junction base slab CC122 W2 596 prior to tramway works – all tracks still in position CC123 It’s a mass of reinforcing – bridging being formed CC124 Looking north with substation being built CC125 Looking east with some rather tight curves, Wellington St still in use CC126 SW6 958 ex Wellington St with all tracks and signal box and buildings. CC127 Victoria Pde at Gisborne looking east – at least 4 cars CC128 SW6 893? With dash canopy lights and SW6 862 and a man with a newspaper CC129 SW6 894 on the S curves, with tram in Wellington St CC130 Similar photo CC131 W2 564 turning into Wellington St – the concrete tracks are not that old CC132 W2 552 running out of Wellington St CC133 W5 732 from Fitzroy St into St Kilda Road with next iteration in position – very wonky CC134 W5 764 turning into Fitzroy St CC135 SW6 947 turning from Wellington St CC136 W2 586 running out of High St CC137 W2 500 turning into Wellington St CC138 W2 543 in Wellington St inbound CC139 L103 with St Kilda Junction destination, and a tower truck on right CC140 Workmen – new track in Queensway in use CC141 Ditto CC142 L103 in Queensway, and another car in bound CC143 Looking east along Wellington St which has been taken out of use. Also a MMTB Roller CC144 W5 824 and a W2 and all types of wobbly temporary track CC145 W2 354 to High St CC146 Sw6 947 on the S bends CC147 W2 500 looking north – tram on the S bends CC148 SW6 896 leaving the S bend CC149 W2 357 and a MMTB City bus with trees/gardens on the side CC150 W5 817 Elliot Ave – see also CC302 CC151 W2 552 – note the large trolley bridge CC152 W2 550 at depot or workshops CC153 1B truck CC154 SW2 432 CC155 W2 155 at Glenhuntly CC156 SW6 937 on AETA tour? CC157 X2 677 on Footscray service – Ballarat Rd? CC158 W2 641 – High St Kew? CC159 SW6 847 – Power St Hawthorn CC160 Simpson St – big line up CC161 W2 546 truck No. 1? CC162 W2s at Glenhuntly depot CC163 No. 15 truck under 899 CC164 206 and other junk at Preston Workshops CC165 W in Swanston St Melbourne – Rose series card CC166 Y1 613 Batman Ave?? or William St at Collins CC167 Tram plans CC168 X 217 Swanston St – see also 95 and 96 CC169 217 in Swanston St – same as 95 CC169A 192 in St Kilda Road at Princes bridge CC170 192 in St Kilda Road at Princes bridge CC171 Bendigo 3 arriving Malvern depot – being unloaded CC172 Ditto CC173 T180 at a depot CC174 X1 463 wheel set CC175 C30 – dog car side view – close up CC176 C30 dog car CC177 206 and 30 at Preston Workshops CC178 X1 467 on a truck – see CC111 also CC179 42 CC180 42 at a depot, no destination box CC181 W2 556 1A type truck CC182 Flinders St Station – Rose Series CC183 W7 1035 Spring – Nicholson St CC184 W7 1022 MMTB Post Card CC185 Adelaide 178 – has on rear – R. Lilburn 4/82 CC186 Adelaide 175 – has on rear – R. Lilburn 4/82 CC187 Y1 610 on AETA tour CC188 Y1 610 on AETA tour with large group – Point Ormond CC189 AETA display – has GH55-32 in pencil on rear CC190 AETA display – has GH55-29 in pencil on rear CC191 Y1 610 on AETA tour with large group – Point Ormond CC192 VR 53 at Footscray CC193 VR cars 40 and 34 at Elwood wash dock CC194 W7 1024 as the 1970 Christmas tram CC195 Geelong – loading a set of 22E trucks CC196 Geelong 10 and 23 running an AETA special CC197 Geelong – AETA special CC198 Geelong 7 at Junction CC199 Geelong 10, in the city CC200 Geelong 33 with Belmont destination CC201 Geelong 15 Eastern Park destination 29-3-1948 CC202 Geelong 23 at Railway Station – 29-3-1948 CC203 Geelong 23 at Railway Station – 29-3-1948 CC204 Geelong – loading a bogie tram CC205 Geelong – loading a bogie tram CC206 Geelong 40 – loaded on truck CC207 Geelong 40 – on jacks CC208 Geelong 40 on jacks – 19 behind CC209 Geelong 38 with two workers on either side CC210 – 214 Australian Historic Tramways stamp folder and set CC215 Bendigo 17 at depot – has dup JBS on rear CC216 Bendigo 20, 29 bogie and straight sill car at Charing Cross CC217 Bendigo one man bogie Pall Mall CC218 Bendigo – Bogie 23, other cars and welding truck at depot CC219 Bendigo 7 with Quarry Hill destination CC220 Bendigo 21 with Lake Weerona destination CC221 ESCo 18 Ballarat CC222 Ballarat bogie 22 on AETA special CC223 Ditto CC224 Ballarat 34 at Stones Corner – R Lilburn CC225 Ballarat 15 in Bridge St – R Lilburn CC226 Ballarat 40 at Gardens – R Lilburn CC227 Ballarat 37 running out of depot – R Lilburn CC228 Postcard – Valentines – Sturt St with loaded horse tram trailer CC229 AETA Geelong tram tour ticket – 29-3-1948 CC230 Postcard – Geelong – Valentine 2114 – T&G building CC231 Postcard – PMTT ! – High St Malvern CC232 Postcard – Empire – Glenferrie Road, Malvern at Wattletree Rd CC233 Postcard Y469, MMTB CC234 Postcard Z2 Spring St CC235 Postcard – Z1 MMTB CC236 Postcard – Stamp Show W1 431 CC237 Postcard – Stamp show B2005 CC238 Postcard – Stamp show W6 982 CC239 Postcard – Valentines 1264 – Johnstone Park with tram in distance CC240 Postcard – Rose 10711 – Swanston and Lonsdale – Hospital and W232 CC241 Postcard – Rose 4827 – Fitzroy St St Kilda W2 362 and 548 CC242 Postcard – Valentines – 939 – St Kilda War Memorial, W and a R? CC243 Postcard – Valentines – 572 – St Kilda War Memorial, W 413 and 140? CC244 Postcard – Valentines – 938 – Uper and Lower Esplanade – L 104 CC245 Postcard – St Kilda Rd at Princes Bridge Y1 and W CC246 Postcard – Biscay BG82 – W5 814 - CC247 Postcard – Biscay 796112 – Bourke St looking west CC248 Postcard – Biscay 796109 – Bourke St looking east CC249 Postcard – Biscay 2AUS58 – Z5 Bourke St CC250 Postcard – Biscay BG 249 – Swanston St CC251 Postcard – National View – St Kilda Rd – shrine and Prince Henrys W2 405 CC252 Postcard – Nu color vue – 11 ML 156 – St Kilda Rd CC253 Postcard – Nu color vue – 11 ML 153 – Swanston St CC254 Postcard – Nu Color vue – Collins St 442 CC255 Postcard – Pitt card – Adelaide – H 364 at Victoria St CC256 Postcard – SPER L/P 154 CC257 Postcard – BTMS – 550 CC258 Postcard – SPER – Brisbane 295 CC259 Adelaide 131 at Burnside – has R Lilburn on card, c1911 CC260 Adelaide 194 CC261 Adelaide 235, with two crew, The News photo CC262 Rockhampton, outside post office – has source of photo details CC263 Sydney – 2086 and 2062 arriving Circular Quay CC264 Sydney – P class – Pitt St? CC265 Sydney – 1610 at Circular Quay CC266 Brisbane 99 and 468 CC267 Sydney with bridge behind CC268 Steam tram Paramatta Park – 103 CC269 Sydney – Museum Station =- Elizabeth St CC270 Sydney – weed burner 137S at a loop Demonstrates the work of Charles Craig in photography and collection of prints.Assembled album in a black presentation folder of 270 photographs from the Charles Craig Collection - 86 sleeves - part 1 of 2. All photographs have been scanned and placed on the Museum's G drive. A list of all photographs with details where possible has been compiled. Victorian Provincial, Launceston, Hobart and Sydney tram photos have been transferred to other Museums, image files retained.melbourne, tramways, tramcars, trams, charles craig, st kilda junction, trackworks -
 Melbourne Tram Museum
Document, Ray Roberts, "Melbourne Tramway Memories", c2000?
... Ray Roberts MMTB South Melbourne Depot memories memoirs trams tramways conductors Black Comb bound volume, approx 140 pages, green covers, clear plastic sheets with many loose photocopied sheets. ...Ray Roberts commenced with the MMTB in 1961 at South Melbourne depot. Born at Reefton NZ. Worked as a connie for 33 years. This volume has many personal notes on his work, his colleagues and events that affected the tramways. Includes many photocopies of newspaper articles. At the rear has a item about the history of the South Melbourne tram depot. See also items 639 and 7272 for other versions and documents.Demonstrates a set of memories or memoirs of a Melbourne tram conductor and his 33 years of service.Black Comb bound volume, approx 140 pages, green covers, clear plastic sheets with many loose photocopied sheets.ray roberts, mmtb, south melbourne depot, memories, memoirs, trams, tramways, conductors -
 Melbourne Tram Museum
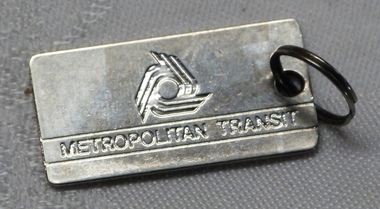
Functional object - Badge, 1980's
... Melbourne Tram Museum 8 Wallen Road Hawthorn melbourne Trams tramways Badges Officers The Met Passes Stamped metal badge, Metropolitan Transit badge with The Met Logo stamp into the metal with a hole at the right hand edge and key ring (12mm) and the number 140 stamped into the rear. ...Stamped metal badge, Metropolitan Transit badge with The Met Logo stamp into the metal with a hole at the right hand edge and key ring (12mm) and the number 140 stamped into the rear. Used as a travel pass by assigned staff. Manufacturer unknown. Badge was used by the Donor as part of his work uniform. See also Reg Item 1233 for other examples.trams, tramways, badges, officers, the met, passes -
 Melbourne Tram Museum
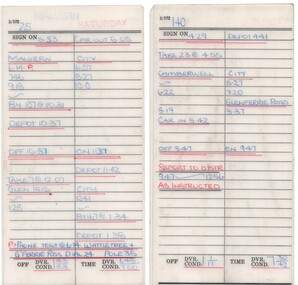
Administrative Record - Table Cards, The Met, Malvern and Camberwell depots, 1980's
... tram from the crew. Not dated - could be either late 1980's. .1 - table 25 - Malvern depot - stamped Saturday - includes a requirement to do a phone test at pole 35. .2 - table 140 - Camberwell depot .3 - table 155 - Malvern depot -weekdays .4 - table 36 - Camberwell depot - weekdays...tram from the crew. Not dated - could be either late 1980's. .1 - table 25 - Malvern depot - stamped Saturday - includes a requirement to do a phone test at pole 35. .2 - table 140 - Camberwell depot .3 - table 155 - Malvern depot -weekdays .4 - table 36 - Camberwell depot - weekdays Malvern and Camberwell depots Administrative Record Table Cards The Met ...Set of four hand written table cards written on paper and laminated. Gives sign on times, car out, trip details and which "run" takes the tram from the crew. Not dated - could be either late 1980's. .1 - table 25 - Malvern depot - stamped Saturday - includes a requirement to do a phone test at pole 35. .2 - table 140 - Camberwell depot .3 - table 155 - Malvern depot -weekdays .4 - table 36 - Camberwell depot - weekdaystrams, tramways, table cards, malvern depot, camberwell depot, drivers -
 Melbourne Tram Museum
Document - Report, Metropolitan Transit Authority (MTA), "MTA Engineering & Maintenance Change Projects", 1987
... Photocopied 140 page document titled "MTA Engineering & Maintenance Change Projects", produced by the MTA, 11/12/1987 setting out the proposal changes to MTA staff, use of contractors, consultation with the unions, consultation with unions, has a table of contents, index. Looks at construction activities, building maintenance and track maintenance, electrical and vehicle maintenance for the rail and tram...Melbourne Tram Museum 8 Wallen Road Hawthorn melbourne Trams tramways PTC Unions Tramways Railways MTA Workshops Photocopied 140 page document titled "MTA Engineering & Maintenance Change Projects", produced by the MTA, 11/12/1987 setting out the proposal changes to MTA staff, use of contractors, consultation with the unions, consultation with unions, has a table of contents, index. ...Photocopied 140 page document titled "MTA Engineering & Maintenance Change Projects", produced by the MTA, 11/12/1987 setting out the proposal changes to MTA staff, use of contractors, consultation with the unions, consultation with unions, has a table of contents, index. Looks at construction activities, building maintenance and track maintenance, electrical and vehicle maintenance for the rail and tram divisions.trams, tramways, ptc, unions, tramways, railways, mta, workshops -
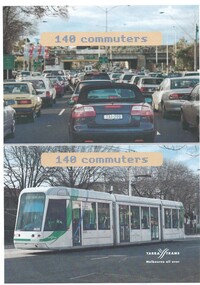 Melbourne Tram Museum
Poster, Yarra Trams, "140 Commuters", c2003
... Poster - full colour on off white paper, A4 single sided, titled "140 Commuters", showing a photograph of a crowded road with a rail bridge in the background (Hoddle St Richmond) and C 3035 with the destination of St Kilda Beach on a route 96. Has the Yarra Trams...Has the Yarra Trams Melbourne all over logo. 2 copies held. See Reg Item 2515.3 for a different version. "140 Commuters" Poster Yarra Trams ...Poster - full colour on off white paper, A4 single sided, titled "140 Commuters", showing a photograph of a crowded road with a rail bridge in the background (Hoddle St Richmond) and C 3035 with the destination of St Kilda Beach on a route 96. Has the Yarra Trams Melbourne all over logo. 2 copies held. See Reg Item 2515.3 for a different version.trams, tramways, yarra trams, hoddle st, richmond, route 96, st kilda beach, c class, tram 3035 -
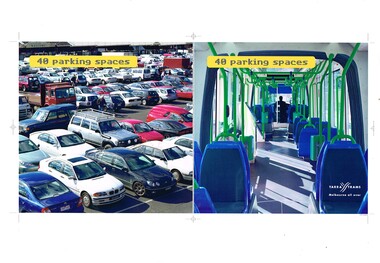 Melbourne Tram Museum
Poster, Yarra Trams, "40 parking spaces", "on your way", "140 Commuters", c2003
... Set of three posters, A3 landscape with motor vehicles or car parks and C class trams, promoting travel by tram. .1 - Titled "40 parking spaces" - show a full car park against the interior of a tram. .2 - titled "In your way" against "on your way" - C class tram - number removed, .3 - titled "140 commuters" = showing Hoddle St Richmond against tram C 3035. ...Have Yarra Trams Melbourne all over logo in the bottom right hand corner "40 parking spaces", "on your way", "140 Commuters" Poster Yarra Trams ...Set of three posters, A3 landscape with motor vehicles or car parks and C class trams, promoting travel by tram. .1 - Titled "40 parking spaces" - show a full car park against the interior of a tram. .2 - titled "In your way" against "on your way" - C class tram - number removed, .3 - titled "140 commuters" = showing Hoddle St Richmond against tram C 3035. Printed by Yarra Trams, possibly as trial posters as have printer registration marks. Have Yarra Trams Melbourne all over logo in the bottom right hand cornerOn rear in ink: .1 - "Brunswick St Melbourne" .2 - "Punt Road Windsor" .4 - "St Kilda Junction"trams, tramways, yarra trams, hoddle st, richmond, route 96, st kilda beach, c class, car parks, tram 3035 -
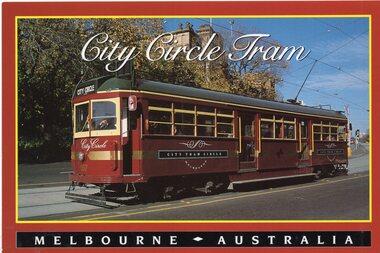 Melbourne Tram Museum
Postcard, Nu-color-Vue, City Circle tram SW6 957 in Spring St with Parliament House, 1995
... Has the words "City Circle Tram" and "Melbourne Australia" Divided back, published by Nu-color-Vue - 140 4800 and NCV 9548...Has the words "City Circle Tram" and "Melbourne Australia" Divided back, published by Nu-color-Vue - 140 4800 and NCV 9548 City Circle tram SW6 957 in Spring St with Parliament House Postcard Nu-color-Vue ...Postcard - 3 panel full colour - by Nu-color-Vue of City Circle tram SW6 957 in Spring St with Parliament House in the background. Has the words "City Circle Tram" and "Melbourne Australia" Divided back, published by Nu-color-Vue - 140 4800 and NCV 9548trams, tramways, city circle, spring st, tram 957 -
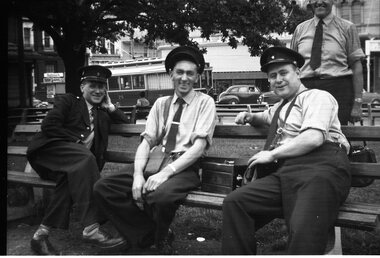 Ballarat Tramway Museum
Photograph - Black and White photograph - laminated, Travis Jeffrey, 1959
... tram 25, Commonwealth bank, (old) and the Newsagent kiosk. Taken during 1959. Additional prints made by John Phillips April 1999. 1x 203H x 254W to Marlene Lorensini 4 Duke St. Ballarat, home 53 317 592 for Norms 80th Birthday. Also 1 x 203H x 254W and 89H x 140...tram 25, Commonwealth bank, (old) and the Newsagent kiosk. Taken during 1959. Additional prints made by John Phillips April 1999. 1x 203H x 254W to Marlene Lorensini 4 Duke St. Ballarat, home 53 317 592 for Norms 80th Birthday. Also 1 x 203H x 254W and 89H x 140 ...Photograph of a group of Ballarat Crew or trammies photographed while waiting for their next trams by Travis Jeffery at the City terminus. Has tram No. 25 in the background. Note the padlock tin between the two Connies.Photograph of four Ballarat trammies, crews, on a seat on the north side of Sturt St waiting to go for next trip. From left to right, Norman Lorensini, Ray Curnow, Maurice Shillington, and Ted Edmonds. Has cash tin on seat. In background is tram 25, Commonwealth bank, (old) and the Newsagent kiosk. Taken during 1959. Additional prints made by John Phillips April 1999. 1x 203H x 254W to Marlene Lorensini 4 Duke St. Ballarat, home 53 317 592 for Norms 80th Birthday. Also 1 x 203H x 254W and 89H x 140 Prints for archives. Negative from Travis Jeffrey donated to Museum at same time. 406 large print - 02-02-04 - small print - 1999 - 01-01-57 large print - 01-01-71 - added 20-07-2006 - 278H x 355W Image revised 9/5/2020 from the negative of the photo held.trams, tramways, ballarat, crews, personnel, 25, tram 25 -
 Melbourne Tram Museum
Document, Melbourne & Metropolitan Tramways Board (MMTB), "Saving to students per term", 12/1966
... Melbourne Tram Museum 8 Wallen Road Hawthorn melbourne Provides details the savings of using a junior or senior scholar's passes per term, based on the number of sections travelled, and that they could be used for 140 trips per term. ...Provides details the savings of using a junior or senior scholar's passes per term, based on the number of sections travelled, and that they could be used for 140 trips per term. Dated Dec. 1966. Demonstrates the provision of information about the savings using Scholar's passes.Document titled - "Saving to students per term" quarto sheet, printed.mmtb, tickets, scholar's tickets, public transport -
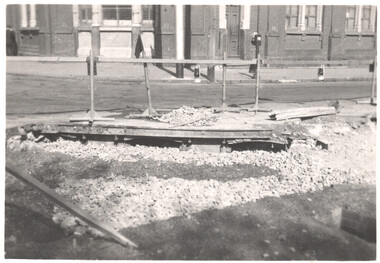 Melbourne Tram Museum
Photograph - Set of 2 - demolition of cable tram track, c1954
... Tramways cable trams Nicholson St Gertrude St Track Removal Has the number "140" and "142" in pencil in top right-hand corner. ...The photographs show the removal or demolition of cable tram track in c1954 at the intersection of Gertrude and Nicholson St. Shows the temporary barrier system and the hurricane red lamps. Has the Royal Terrrace buildings in the background and the engine house. Photographer unknown.Yields information about the removal of the cable tram track at the intersection of Gertrude and Nicholson Sts. Set of two Black and white photographs with notes on the rear. Has the number "140" and "142" in pencil in top right-hand corner. tramways, cable trams, nicholson st, gertrude st, track removal -
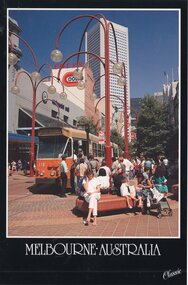 Melbourne Tram Museum
Postcard, Nu-color-Vue, Z110 in the Bourke St Mall, late 1980's
... Tram has the destination of Route 87, LaTrobe University. Back has space for name and address, stamp and a message and details of the postcard. Produced by Nu-Color-Vue, number 140...Tram has the destination of Route 87, LaTrobe University. Back has space for name and address, stamp and a message and details of the postcard. Produced by Nu-Color-Vue, number 140 ...Colour postcard divided back, black border, - Nu-Color-Vue, The Classic Collection of Z110 in the Bourke St Mall, at the Swanston St tram stop, late 1980s. Has the Coles store in the background. Tram has the destination of Route 87, LaTrobe University. Back has space for name and address, stamp and a message and details of the postcard. Produced by Nu-Color-Vue, number 140 117, NCV 6340. Has "Melbourne Australia" along the bottom edge.trams, tramways, bourke st, route 87, mall, z class, tram 110 -
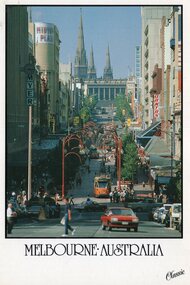 Melbourne Tram Museum
Postcard, Nu-color-Vue, Bourke St Mall from Queen St, late 1980's
... trams in the view, including Parliament house. Has Myer, Midtown Plaza and a sign for Qantas. Back has space for name and address, stamp and a message and details of the postcard. Produced by Nu-Color-Vue, number 140...trams in the view, including Parliament house. Has Myer, Midtown Plaza and a sign for Qantas. Back has space for name and address, stamp and a message and details of the postcard. Produced by Nu-Color-Vue, number 140 ...Colour postcard divided back, white border, - Nu-Color-Vue, The Classic Collection of Bourke St Mall from Queen St looking east, with a number of trams in the view, including Parliament house. Has Myer, Midtown Plaza and a sign for Qantas. Back has space for name and address, stamp and a message and details of the postcard. Produced by Nu-Color-Vue, number 140 078 NCV 7027 Has "Melbourne Australia" along the bottom edge.trams, tramways, bourke st, parliament, mall, z class