Showing 167 items matching " the fountain pall mall"
-
 Bendigo Historical Society Inc.
Souvenir - Medallion: Double sided
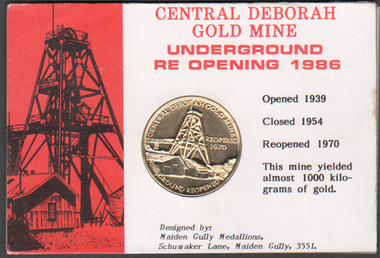
... icons including Pall Mall Fountain, the Post Office, Talking... including Pall Mall Fountain, the Post Office, Talking Tram ...BHS CollectionDouble sided commemorative round gold medallion: - One side commemorates the re-opening in 1986 of the Central Deborah Gold Mine with image of Central Deborah Mine & Poppet Head. - Reverse side commemorates The Bendigo Talking Tram Tour with four images of Bendigo icons including Pall Mall Fountain, the Post Office, Talking Tram & Cathedral - Medallion is set into a cardboard cut-out with printed paper descriptions for each side of the medal. - Medallion is designed by Maiden Gully Medallions. memorabilia, central deborah, medallion -
 Bendigo Historical Society Inc.
Book - BENDIGO PHOTO ALBUM
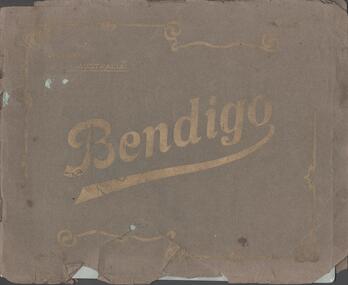
... . The fountain Charing cross, Pall Mall. Chinese procession on Easter..., White Hills. The fountain Charing cross, Pall Mall. Chinese ...Small booklet, green cover with golden writing. Bendigo in large letters, Victoria Australia square ornate around. Photos inside: Charing Cross and Pall Mall. Conservatory grounds. Post office and Law courts. Botanical gardens, White Hills. The fountain Charing cross, Pall Mall. Chinese procession on Easter Monday. School of mines and industries. A group of Bendigo mines. View Point. Boring on a gold bearing reef. New chum railway gold mine. Queen statue, Rosalind park. Soldiers 'statue near post office. Conservatory, Rosalind park. Gold Jubilee statue, Pall Mall. on the back cover in pen: Miss E. Briggs, Locksly P.O N.E. Lina(?)bendigo, tourism, various photos -
 Ballarat Tramway Museum
Photograph - Black & White Photograph/s, State Electricity Commission of Victoria (SECV), late 1940's
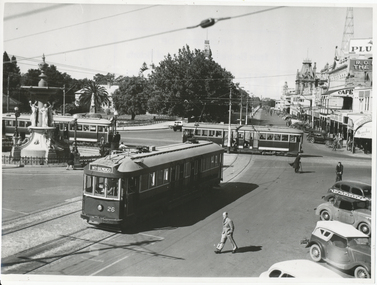
... the doorway. In the background is the fountain, the Gardens and Pall..., the Gardens and Pall Mall. SEC Publicity Photo, see Inscriptions ...Black and White print contained within the Wal Jack Bendigo and Geelong Album, see Reg Item 5003 for more details. Photo of the Charing Cross with three bogie trams at the intersection, SEC publicity photo c1950. Two of the bogies crossing on the Eaglehawk - Quarry Hill line have white or cream strips on the lower edge of the body. No 26 has the destination of North Bendigo, though it is on Golden Square line with the driver standing just inside the doorway. In the background is the fountain, the Gardens and Pall Mall. SEC Publicity Photo, see Inscriptions for notes re photo. On the rear is the SEC Publicity Photo stamp, with negative number 21.1 written in, "Yallourn" in pencil and a typed piece of paper taped to the rear of the photo noting the Provincial tramways owned by the SEC, but that it is loss making.trams, tramways, bendigo, charing cross, secv, pall mall, tram 26 -
 Bendigo Historical Society Inc.
Souvenir - Views of Bendigo, 1902
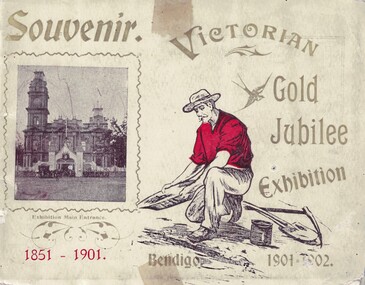
... Exhibition - Page 2 of 29 Procession Passing the Fountain, Pall Mall... Exhibition - Page 2 of 29 Procession Passing the Fountain, Pall Mall ...The Victorian Gold Jubilee Exhibition, held at Bendigo from 13 November 1901 to 14 May 1902. The courts were numbered from one, or had titles like “Machinery”, “Agricultural”, “Naval & Military Court” and “Art”. The female visitors to the Exhibition were able to view exhibits deemed suitable for the fairer sex and located within their own “Women’s Court”. There were exhibits such as “Parasols & Umbrellas”, cotton and haberdashery from Manchester and Staffordshire, “Corsets & Embroideries” from Paris. The most valuable exhibits were mining machinery such as Taylor Horsfield’s £850 “Air Compressor & Rock Borer”. “Bohemian Glassware” brought down from Sydney was valued at £600. The profits from this Exhibition were used to fund the sculpture known as the Gold Monument, which still gazes along Pall Mall (from the McCrae Street end). The Exhibition’s Cash Book shows payments, which totalled £1160, were made to then up and coming sculptor C.D.Richardson. Recently a City of Greater Bendigo staff member used both these volumes to write a detailed report about this monument, for Heritage Victoria.Carol Holsworth Collection: Small book Souvenir, 29 pages plus cover; each page. has a photo of the exhibit. Exhibition was held on the site of the present Bendigo Library between Hargreaves St and Lyttleton Terrace. * 8662.1a Victorian Gold Jubilee Exhibition - Front Cover: Printed 'Souvenir', 'Bendigo 1901-1902'; a photo of the Entrance to the exhibition beside the Town Hall. * 8662.1b Victorian Gold Jubilee Exhibition - Inside Front Cover - Page 1 of 29. Portraits of Exhibition President S.H. Cowen esq.; and G.V. Allen esc., General Secretary. Photos by W.H. Robinson publisher. Printed by T. Cambridge, Market Square Bendigo. * 8662.1c Victorian Gold Jubilee Exhibition - Page 1 of 29 The Governor General at the Exhibition. Photo of the crowd, police, trooper and horse drawn vehicles. * 8662.1d Victorian Gold Jubilee Exhibition - Page 2 of 29 Procession Passing the Fountain, Pall Mall. The crowd and horse drawn vehicles. *8662.1e Victorian Gold Jubilee Exhibition - Page 3 of 29 James Martin and Co's Exhibit. James Martin & Co was an Australian engineering company which progressed from making agricultural equipment to making railway locomotives. * 8662.1f Victorian Gold Jubilee Exhibition - Page 4 of 29 Old Pioneers. Elderly gentlemen on foot and carriage - at the Bendigo Railway Station. * 8662.1g Victorian Gold Jubilee Exhibition - Page 5 of 29 Robert Harper and Company's Exhibit. From Trove - The Brisbane Courier 25 Aug 1891: One of the best known firms in the Southern hemisphere is Messrs. Robert Harper and Co , tea importers, coffee, rice, and spice merchants and manufacturers Then productions circle this continent, and every thrifty housewife is familiar with their Empire tens, their Star' brand of goods, then oatmeal, wheatmeal, and other breakfast table luxuries The headquarters of the firm are placed at Port Melbourne, and the manufactory there occupies over an acre of ground, while the mills at Sydney and Adelaide are as great in proportion It is eight cars since the firm opened business in this colony. The step was taken with much confidence, the principals the firm being quite attracted. * 8662.1h Victorian Gold Jubilee Exhibition - Page 6 of 29 The Electric Tram * 8662.1i Victorian Gold Jubilee Exhibition - Page 7 of 29 G. Weymouth Proprietary Ltd. The business of G. Weymouth & Co was founded in 1898 by George Andrew Philip Weymouth, who began operating from a small workshop on City Road, South Melbourne (opposite Princes Bridge). An early advertisement describes the firm's activities at this time as being 'makers of dynamos, (electric) motors, x-ray apparatus and electrical instruments, &c' together with 'repairs to every class of electrical work'. * 8662.1j Victorian Gold Jubilee Exhibition - Page 8 of 29 The Exhibition Fernery * 8662.1k Victorian Gold Jubilee Exhibition - Page 9 of 29 Cohn Bros'. Exhibit. In 1857 at the height of the gold rush, with people pouring into Central Victoria from all over the world, three brothers from Denmark – Moritz, Julius and Jacob Cohn – founded a small cordial factory in the booming town of Bendigo. They went on to build an empire and, through introducing lager, which is served cold, to the country, changed the drinking preferences of Australians. * 8662.1l Victorian Gold Jubilee Exhibition - Page 10 of 29 Ornamental Lake in the Exhibition Grounds * 8662.1m Victorian Gold Jubilee Exhibition - Page 11 of 29 Australian Explosives and Chemical Co.'s Exhibit. The Australian Explosives and Chemical Company began manufacturing explosives in Melbourne's outskirts (the area now known as Deer Park) in 1875. In 1897 the Company was purchased by Nobel, forming Nobel (Australasia) Ltd. * 8662.1n Victorian Gold Jubilee Exhibition - Page 12 of 29 Tasmanian Court * 8662.1o Victorian Gold Jubilee Exhibition - Page 13 of 29 N. Guthridge's Limited Exhibit. Guthridge sold a variety of mining supplies and equipment; also 'Rackarock' which was used to fill the mining drill holes before blasting. * 8662.1p Victorian Gold Jubilee Exhibition - Page 14 of 29 Navel and Military Court (LARGE File) * 8662.1q Victorian Gold Jubilee Exhibition - Page 15 of 29 Women's Court * 8662.1r Victorian Gold Jubilee Exhibition - Page 16 of 29 T. J. Connelly and Co's Exhibit. T.J. Connelly an American immigrant came to the Bendigo goldfields where he later established Connelly’s Tin Shop on the corner of High and Forest Streets 1853. Connelly was named after Thomas Jefferson the famous statesman who wrote much of the American Declaration of Independence in 1776 and became the third United States President. Connelly, along with other prominent citizens of the time established Bendigo’s first Fire Brigade, Mechanics Institute. * 8662.1s Victorian Gold Jubilee Exhibition - Page 17 of 29 The Potter's Wheel * 8662.1t Victorian Gold Jubilee Exhibition - Page 18 of 29 G. D. Guthrie and Co.'s Exhibit. In 1863 the Bendigo Pottery was set up by Guthrie. * 8662.1u Victorian Gold Jubilee Exhibition - Page 19 of 29 The Ladies' Committee * 8662.1v Victorian Gold Jubilee Exhibition - Page 20 of 29 J. Kitchen and Sons Exhibit. In Port Melbourne since the 1850s they made such products as Velvet Soap and Electrine Candles from the tallow and other animal fats from the nearby slaughter yards. In recent decades the company has become Kitchen & Lever then Unilever and most recently Unichema. * 8662.1w Victorian Gold Jubilee Exhibition - Page 21 1of 29 The Executive Committee * 8662.1x Victorian Gold Jubilee Exhibition - Page 22 of 29 Taylor Horsfield Exhibit. The most valuable exhibits were mining machinery such as Taylor Horsfield’s £850 “Air Compressor & Rock Borer” * 8662.1y Victorian Gold Jubilee Exhibition - Page 23 of 29 A Peep at the Education Department 8662.1z Victorian Gold Jubilee Exhibition - Page 24 of 29 John Danks and Co's Exhibit. John Danks & Son was a major manufacturing company in Melbourne, Victoria and Sydney, New South Wales. * 8662.1aa Victorian Gold Jubilee Exhibition - Page 25 of 29 Glance at the Agricultural Department's Court * 8662.1bb Victorian Gold Jubilee Exhibition - Page 26 of 29 T. York's Exhibit. Thomas York was an instrument repairer and brass instrument maker that resided in Melbourne in the late 19th to the early 20th century. While old newspaper advertisements suggested he repaired all instruments, it appears the focus of his business were military and brass band instruments. (BrassandWoodWind.com) * 8662.1cc Victorian Gold Jubilee Exhibition - Page 27 of 29 T. McPherson and Son's Exhibit. Possibly monumental masons. * 8662.1dd Victorian Gold Jubilee Exhibition - Page 28 of 29 T. Lewis and Whitty's Exhibit - Inside Back Cover. Lewis & Whitty were prominent boot blacking manufacturers as well as a number of other chemical products such as “Odourbane" disinfectant. * 8662.1ee Victorian Gold Jubilee Exhibition - Page 29 of 29 Singer Manufacturing Coy's Exhibithistory, bendigo, victorian gold jubilee exhibition bendigo, carol holsworth collection -
 Bendigo Military Museum
Photograph - PHOTOGRAPH, WW2, C. WW2 (ORIGINAL PHOTOGRAPH)
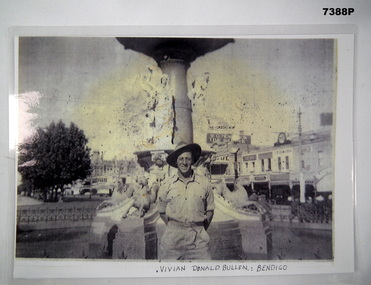
Item in the collection re Vivian BULLEN, refer Cat No 7386 for his AIF & RAAF service details.PHOTOCOPY OF AN ORIGINAL PHOTOGRAPH. PHOTOGRAPH - BLACK AND WHITE ON PHOTOGRAPHIC PAPER WHICH HAS BEEN LAMINATED. Depicts "VIVIAN DONALD BULLEN", Bendigo - Soldier in uniform and slouch hat standing in front of a fountain with streetscape of buildings in the background. Handwritten information below photograph.Below photograph - handwritten, black ink. "VIVIAN DONALD BULLEN: BENDIGO"photograhs, ww2, army, bendigo, vivian donald bullen -
 Bendigo Military Museum
Photograph - Army Survey Regiment Summer Ball - Civilians and Guests Arrival, 1995
This is a set of 23 photographs taken at the combined Officer, Warrant Officer and Sergeant’s Mess Summer Ball held at the Army Survey Regiment (ASR), Fortuna Villa on the 25th of February, 1995. The Summer Ball was one of the last large scale formal functions held at Fortuna Villa before ASR’s closure the following year. Photos of personnel and their guests was taken on their arrival near the Pompeii Fountain in the gardens at the front of the main building. The Ball and Dinner was held at the rear of Fortuna Villa in temporary 20’ x 30’ Army tents set up on the roadway in front of the transport compound. SERCO contract staff provided the catering and the ASR’s Other Ranks performed stewarding and kitchen hand duties. Refer to item 6347 for information on the administrative file held in the collection and items 6371.33P, 6372.25P and 6373.36P for additional photographs taken at the Summer Ball.This is a set of 23 photographs taken at the Officer, Warrant Officer and Sergeant’s Summer Ball held at the Army Survey Regiment, Fortuna Villa on the 25th of February, 1995. The colour photographs are on 35mm negative film and are part of the Army Survey Regiment’s Collection. The photographs were scanned at 96 dpi. .1) - Photo, colour, 1995. Wolfgang and Ros Effenberg .2) to .4) - Photo, colour, 1995. Unidentified civilian guests. .5) - Photo, colour, 1995. Jan and Kevin Doyle. .6) - Photo, colour, 1995. Unidentified civilian guests. .7) - Photo, colour, 1995. Dennis and Cheryl Learmonth. .8) - Photo, colour, 1995. Unidentified civilian guests. .9) - Photo, colour, 1995. Unidentified civilian guests. .10) - Photo, colour, 1995. John and Glenda Stear. .11) - Photo, colour, 1995. Carol and Maurie Sharkey. .12) - Photo, colour, 1995. Vik and Julia Sabaliauskas. .13) - Photo, colour, 1995. Glenys and Patrick Thwaites. .14) - Photo, colour, 1995. Unidentified civilian guests. .15) - Photo, colour, 1995. L to R: Glenys and Patrick Thwaites, unidentified civilian guests. .16) - Photo, colour, 1995. Unidentified civilian guests. .17) - Photo, colour, 1995. Bruce and Jenny Reid. .18) - Photo, colour, 1995. Bob and Kath Rogister. .19) - Photo, colour, 1995. L to R: Tony and Rhonda Spurling, unidentified civilian guests. .20) - Photo, colour, 1995. Ken Crouch and partner. .21) - Photo, colour, 1995. L to R: Andrew Balsillie MBE and partner Greta, unidentified civilian guests. .22) - Photo, colour, 1995. Colin Proud and partner. .23) - Photo, colour, 1995. Unidentified civilian guests..1P to .23P There are no personnel or civilians identified.royal australian survey corps, rasvy, army survey regiment, army svy regt, fortuna, asr -
 Bendigo Military Museum
Photograph - Army Survey Regiment Summer Ball – Officers and Guests Arrival, 1995
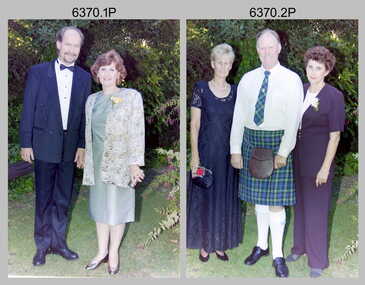
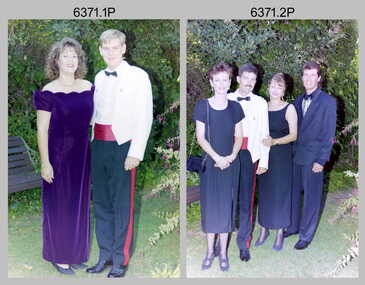
This is a set of 33 photographs taken at the combined Officer, Warrant Officer and Sergeant’s Mess Summer Ball held at the Army Survey Regiment (ASR), Fortuna Villa on the 25th of February, 1995. The Summer Ball was one of the last large scale formal functions held at Fortuna Villa before ASR’s closure the following year. Photos of personnel and their guests was taken on their arrival near the Pompeii Fountain in the gardens at the front of the main building. The Ball and Dinner was held at the rear of Fortuna Villa in temporary 20’ x 30’ Army tents set up on the roadway in front of the transport compound. SERCO contract staff provided the catering and the ASR’s Other Ranks performed stewarding and kitchen hand duties. Refer to item 6347 for information on the administrative file held in the collection and items 6370.23P, 6372.25P and 6373.36P for additional photographs taken at the Summer Ball.This is a set of 33 photographs taken at the Officer, Warrant Officer and Sergeant’s Summer Ball held at the Army Survey Regiment, Fortuna Villa on the 25th of February, 1995. The colour photographs are on 35mm negative film and are part of the Army Survey Regiment’s Collection. The photographs were scanned at 96 dpi. .1) - Photo, colour, 1995. Darren Radford and partner. .2) - Photo, colour, 1995. L to R: Craig Hersant and partner, Mrs & Mr Foster. .3) - Photo, colour, 1995. Stan and Maureen Vote. .4) - Photo, colour, 1995. Gordon (Muddle) Muir and partner. .5) - Photo, colour, 1995. John South and partner. .6) - Photo, colour, 1995. Bill and Jan Griggs. .7) - Photo, colour, 1995. John Bath and partner. .8) - Photo, colour, 1995. John Bath and Tara Bucknall. .9) - Photo, colour, 1995. Roger Grose and partner. .10) - Photo, colour, 1995. L to R: John Bath and partner, Roger Grose and partner. .11) - Photo, colour, 1995. Peter Crabbe and Jodi Cuskelly. .12) - Photo, colour, 1995. Marianne and Colin Cuskelly. .13) - Photo, colour, 1995. L to R: Peter Crabbe and Jodi Cuskelly, Marianne and Colin Cuskelly. .14) - Photo, colour, 1995. L to R: Maria and Tony Harder with daughter. .15) - Photo, colour, 1995. Brenton and Marg McDonald. .16) - Photo, colour, 1995, L to R: unidentified guests, Brenton McDonald and partner. .17) - Photo, colour, 1995. Frank Franceschini and partner. .18) - Photo, colour, 1995. Mick and Cathy Banham. .19) - Photo, colour, 1995. Ross Jenkins and partner. .20) - Photo, colour, 1995. L to R: Vik and Julia Sabaliauskas, Ross Jenkins and partner. .21) - Photo, colour, 1995. L to R: Noel and Jenny Coulthard. .22) - Photo, colour, 1995. A. Carrol-Keys (RACT) and partner. .23) - Photo, colour, 1995. Peter Cates and partner. .24) - Photo, colour, 1995. Terry and Sharon Lord. .25) - Photo, colour, 1995. Dave and Sue Stephenson. .26) - Photo, colour, 1995. Unidentified member and partner. .27) - Photo, colour, 1995. Simon Lemon and partner. .28) - Photo, colour, 1995. Glen Swiney and Don Swiney MBE. .29) & .30) - Photo, colour, 1995. Sandra and Duncan Burns. .31) - Photo, colour, 1995. L to R: Duncan and Sandra Burns, unidentified member and partner. .32) - Photo, colour, 1995. L to R: Unidentified member and partner, Matt Jackson and partner. .33) - Photo, colour, 1995. L to R: Glen Swiney, Simon Lemon, Dave Stephenson and partner, Simon Lemon’s partner, Andy Cordova (USA Exchange), Don Swiney MBE.1P to .33P There are no personnel or civilians identified.royal australian survey corps, rasvy, army survey regiment, army svy regt, fortuna, asr -
 Bendigo Military Museum
Photograph - Army Survey Regiment Summer Ball - Dinner, Staff and Entertainment, 1995
This is a set of 36 photographs taken at the combined Officer, Warrant Officer and Sergeant’s Mess Summer Ball held at the Army Survey Regiment (ASR), Fortuna Villa on the 25th of February 1995. The Summer Ball was one of the last large scale formal functions held at Fortuna Villa before ASR’s closure the following year. Photos of personnel and their guests was taken on their arrival near the Pompeii Fountain in the gardens at the front of the main building. The Ball and Dinner was held at the rear of Fortuna Villa in temporary 20’ x 30’ Army tents set up on the roadway in front of the transport compound. SERCO contract staff provided the catering and the ASR’s Other Ranks performed stewarding and kitchen hand duties. Refer to item 6347 for information on the administrative file held in the collection and items 6370.23P, 6371.33P and 6372.25P for additional photographs taken at the Summer Ball.This is a set of 36 photographs taken at the Officer, Warrant Officer and Sergeant’s Summer Ball held at the Army Survey Regiment, Fortuna Villa on the 25th of February 1995. The colour photographs are on 35mm negative film and are part of the Army Survey Regiment’s Collection. The photographs were scanned at 96 dpi. .1) - Photo, colour, 1995. L to R: Rod Skidmore, Bob Thrower. .2) - Photo, colour, 1995. L to R: Jim Ash, unidentified SERCO-GM staff. .3) - Photo, colour, 1995. L to R: Helen Drummond, Stan Vote, Steve Drummond. .4) - Photo, colour, 1995. L to R: Helen Drummond, Steve Drummond, unidentified, Stan Vote, .5) - Photo, colour, 1995. Sherri and Steve Burke .6) - Photo, colour, 1995. L to R: Dale Hudson and partner. .7) - Photo, colour, 1995. L to R: Alan Dudley, Glenda Stear, Doug Carswell, unidentified, Chris Carswell, John Stear, Angela Dudley, Tony Harder (background). .8) - Photo, colour, 1995. L to R: John Phillips, Maria Harder. .9) - Photo, colour, 1995. L to R: Tracey Phillips, Peter Peterson. .10) - Photo, colour, 1995. L to R: John South, Tracey Phillips, Peter Peterson, John Bath (background), Miss Delfine. .11) - Photo, colour, 1995. Jo and Peter Peterson. .12) - Photo, colour, 1995. Colin Davidson, Jason Selman, Martin Evans (background). .13) - Photo, colour, 1995. L to R: Bill Griggs (background), Colin Cuskelly. .14) - Photo, colour, 1995. Marzipan sculpture of Australia’s Coat of Arms animals surround RA Svy Corps badge. ‘53’ denoted the number of years of RA Svy occupancy since 1942. .15) - Photo, colour, 1995. L to R: unidentified (x3), Sandra Burns, Brianna Burgin (steward in background). .16) - Photo, colour, 1995. L to R: Mrs Willis, Dave and Sue Stephenson, Corey Hill (steward in background), unidentified, Ros and Wolfgang Effenberg, Doug Willis, unidentified, Simon Lemon (background). .17) - Photo, colour, 1995. unidentified SERCO-GM staff. .18) - Photo, colour, 1995. L to R: Hayden Beer, Duncan Burns (background), Simon Lemon, unidentified SERCO staff (x2). .19) & .20) - Photo, colour, 1995. L to R: Duncan Burns, unidentified SERCO-GM staff. .21) - Photo, colour, 1995. L to R: Mrs Willis, Greg Byers. .22) - Photo, colour, 1995. L to R: Brian Sloan, unidentified. .23) - Photo, colour, 1995. Justine (Sachs) Rainey - steward. .24) - Photo, colour, 1995. Marty Stradbrook- steward. .25) - Photo, colour, 1995. Unidentified guests, Corey Hill - steward. .26) - Photo, colour, 1995. L to R: Troy Larkins, Ken Labouchardiere, Marty Stradbrook, Lance Hillier, unidentified. .27) - Photo, colour, 1995. L to R: Glen Norrell, Trevor King, Troy Larkins. .28) to .31) - Photo, colour. 1995. Unidentified string quartet musicians. .32) to .36P) - Photo, colour. 1995, Fortuna Pipes and Drums musicians..1P to .36P There are no personnel or civilians identified.royal australian survey corps, rasvy, army survey regiment, army svy regt, fortuna, asr -
 Bendigo Military Museum
Photograph - PHOTOGRAPHS, 38TH REGIMENTAL COLOURS, Bendigo Advertiser, 1950
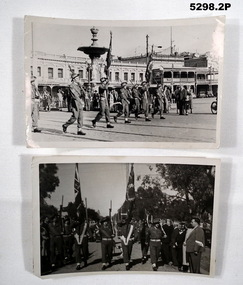
The 38 Bn AIF was raised in Bendigo 1916. After WW1 the local C.M.F. ZUnit became the 38 Bn Northern Victorian Regiment. It was shut down in 1962.1. B & W Photo of 38 Bn Colours, being marched with a colour party past the fountain at Charing Cross, Bendigo. The soldier's uniform is battledress, slouch hat, and black boots. They have .303 rifles at the slope. 2. B & W photo taken in front of the 38 Bn colour party. There are civilians lining the march. The soldiers are in battle dress slouch hats with .303 rifles at the slope arms position.1. Rear - "38th B colour party. Colours represent the dead and are guarded and carried by escort. 1 WO, 1 set 2 Officers. Queens colours carried by Senior Officer and Junior carries Battalion Colours. ANZAC 1950" 38 bn, anzac day 1950 -
 Bendigo Military Museum
Photograph - Silver Service Morning Tea – Army Survey Regiment, Fortuna, Bendigo, 1991
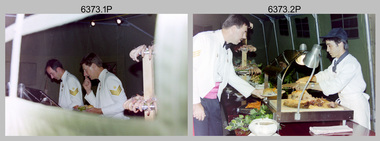
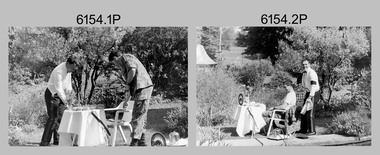
These six photos were taken in the grounds of the Army Survey Regiment, Fortuna in spring 1991. MAJ Ray Redman appears in his mess dress by the Roman fountain, serving a silver service morning tea to CPL Pat Drury, as a result of a losing bet on the 1991 Rugby League Grand Final. Pat Drury was a very keen rugby league supporter and followed Penrith, who lost its first Grand Final appearance to the Canberra Raiders in 1990. Penrith reversed the result the following year against Canberra winning their first premiership. This occasion is covered on page 152 of Valerie Lovejoy’s book 'Mapmakers of Fortuna – A history of the Army Survey Regiment’ ISBN: 0-646-42120-4.This is a set of six photographs of two Army Survey Regiment personnel in the grounds of Fortuna, Bendigo, 1991. The photographs were on 35mm negative film and were scanned at 96 dpi. They are part of the Army Survey Regiment’s Collection. .1) to .6) - Photo, black & white, 1991, MAJ Ray Redman and CPL Pat Drury. No personnel are identified.royal australian survey corps, rasvy, army survey regiment, army svy regt, fortuna, asr -
 Bendigo Military Museum
Book - BOOK, VIETNAM VETERANS MUSEUM, ANDERSON Ken, "Soldiers are Persons", 2011
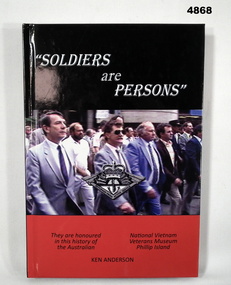
"Soldiers are Persons: A short history of the National Vietnam Veterans Museum 1994 - 2011" Phillip Island, VictoriaHard cover book Hardcover - cardboard with glossy cover, white and black print on front, spine and back. Front cover illustrated with photograph in colour of a group of men marching, with copy of badge over photograph. Background colour - black and red. 204 pages, cut, plain, white. Illustrated black and white and colour photographs.books, vietnam war, veterans, museums -
 Bendigo Military Museum
Artwork, other - TAPESTRY, FRAMED, Post 1998
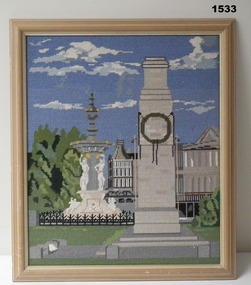
The Bendigo cenotaph is a scaled down version of the Cenotaph in London England.Framed tapestry showing the Cenotaph and fountain in Central Bendigo Victoria.brsl, smirsl, cenotaph, tapestry -
 Bendigo Historical Society Inc.
Newspaper - JENNY FOLEY COLLECTION: PARADE
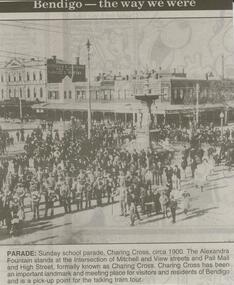
Bendigo Advertiser ''The way we were'' from 2000. Parade: Sunday school parade, Charing Cross, circa 1900. The Alexandra Fountain stands at the intersection of Mitchell and View streets and Pall Mall and High street, formally known as Charing Cross. Charing Cross has been an important landmark and meeting place for visitors and residents of Bendigo and is a pick-up point for the talking tram tour. The clip is in a folder.newspaper, bendigo advertiser, the way we were -
 Bendigo Historical Society Inc.
Postcard - ELAINE ROBB COLLECTION: COOPER'S CITY CLUB HOTEL, BENDIGO
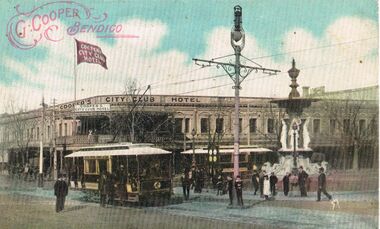
Hand coloured postcard. Cooper's City Club Hotel, on the corner of Pall Mall and Mitchell Street in background. Alexandra Fountain on RH side, two trams in foreground,. On top of hotel a flagpole, with red and white flag, 'Cooper's City Club Hotel' Red stamp on top LH side of postcard, 'G. Cooper, Bendigo' surrounded by flourishes. Possibly late 1890's ? On back of postcard: Printed in Melbourne F.W.N. & Co, enclosed in laurel wreath print. Postcard, stamp, correspondence here, the address only here.bendigo, streetscape, pall mall, mitchell -
 Bendigo Historical Society Inc.
Photograph - ALEXANDRA FOUNTAIN, BENDIGO
Sepia image: image, mounted on board, Alexandra Fountain at Charing Cross, looking north up Pall Mall. On LH side of image, Post Office tower visible, hansom cabs in forefront. Shops along Pall Mall on RH side: Emery & Gibson, Henderson & Goodisson, Beehive, Furniture and Drapery. People in image - women wearing long dresses, hats, men in suits.bendigo, streetscape, alexandra fountain, bendigo, sandhurst, alexandra fountain, hansom cab, post office, henderson & dodisson -
 Bendigo Historical Society Inc.
Document - ARTICLE: BENDIGO MONUMENT AND HORSE TROUGHS (''FEW LEFT'')
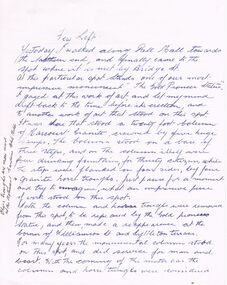
Handwritten 2-paged article about a monumental column and horse trough's (''Few Left'') - no author. Originally a 20 foot column of Harcourt granite crowned with five lamps and four drinking fountains at the base along with four horse troughs - at the intersection of Bridge St and Pall Mall. (site of present Gold Pioneers statue). Column moved to corner of Williamson and Lyttleton Terrace,initially with troughs and fountain. Position of four troughs is given by author but this has been crossed out subsequently with the note that the troughs are at the Botanical Gardens, White Hills. Probably Vahland designed fountain, William Beebe stonemason.bendigo, history, city history, monumental column, horse troughs, bridge street, pall mall, botanical gardens white hills, vahland, william beebe. -
 Bendigo Historical Society Inc.
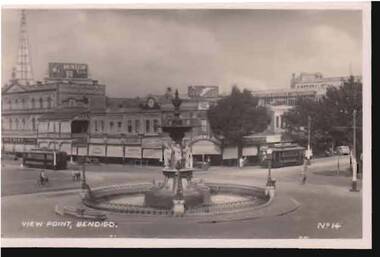
Photograph - VIEW POINT, BENDIGO
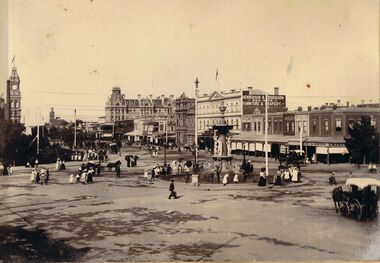
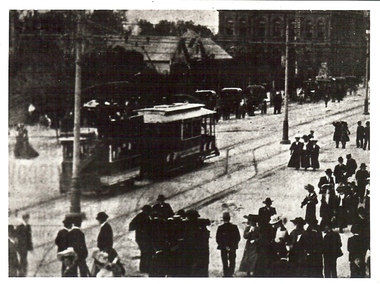
black and white photograph: View Point, Bendigo. Alexandra Fountain in middle of photo, tram in Pall Mall on LH side, tram in Mitchell Street facing fountain. Cyclists and pedestrians visible, no motor vehicles.place, bendigo, view point, sandhurst -
 Bendigo Historical Society Inc.
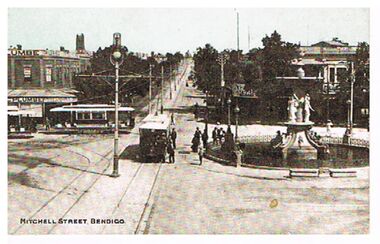
Postcard - MITCHELL STREET, BENDIGO, C1907
Postcard, hand tinted. Image shows Charing Cross Bendigo, looking up Mitchell Street towards Railway line. Alexandra Fountain on RH side of image, tram heading up View Street in foreground. Two trams in Pall Mall, one a 'toast-rack' tram. Men standing near fountain and tram, woman in long dress in background behind fountain. Man on horseback coming down Mitchell Street. On north corner of Pall Mall and Mitchell ' C. Plumbe, Tailor' on top and verandah of brick building. On south side of road, on front of building ' City Club' On bottom of card: Mitchell Street, Bendigo. On rear of postcard ' Cole's Sunny Australian Series, 102 View. E.W. Cole, Book Arcade, Melbourne, Sydney, Adelaide. Wriitten on card in pen and addressed to ' Mrs. Russell, Post Office, Patho.' Message reads: A very happy Xmas to all at Patho P.O., arrived home safely, did not miss the train. Leaving on Sat. for Queenscliff. Kindest regards to all. A. Morcom.'bendigo, streetscape, mitchell street, charing cross, mitchell street, bendigo, trams, alexandra fountain -
 Bendigo Historical Society Inc.
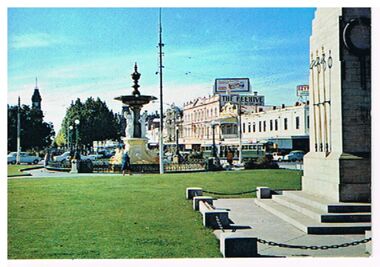
Postcard - ALEXANDRA FOUNTAIN AND WAR MEMORIAL, CHARING CROSS, BENDIGO
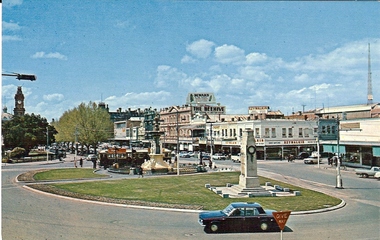
Postcard: image shows War Memorial on RH side, Alexandra Fountain in centre, tram in bakcground, cars on street. The Beehive building and Ezywalkin are on RH side of Pall Mall. . Postcard is stuck fast to backing board from album, unable to determine maker.bendigo, streetscape, charing cross, bendigo, pall mall, beehive, ezywalkin, war memorial, alexandra fountain -
 Bendigo Historical Society Inc.
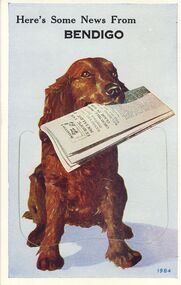
Postcard - NOVELTY POSTCARD BENDIGO VIEWS 1984
14.5cm X 9.2cm Postcard of Retriever dog holding paper with 9 fold-out Bendigo Views. Printed 1984 City Hall, Civic Buildings, Central Deborah Mine, Alexandra Fountain, Look-out Tower, Conservatory Gardens, Soldiers Memorial Hall, Post-Office. Pall Mall, The Lake Upper Reserve.Valentine's Mail Postcard.bendigo, buildings, heritage buildings -
 Bendigo Historical Society Inc.
Document - INFORMATION RELATING TO: THE CONSTRUCTION OF THE ALEXANDRA FOUNTAIN, 5th July, 1881
Information relating to the construction of the Alexandra Fountain (no date or origin for these two pages - headed 'Alexandra Fountain'). Details of committee discussions from 1880 and 1881. Reference to the involvement of W C Vahland, funding sources; opening (5th July 1881). Also contains reference to a horse drinking fountain at the eastern end of Pall Mall, approximately where the Gold Monument now stands.bendigo, streetscape, alexandra fountain -
 Bendigo Historical Society Inc.
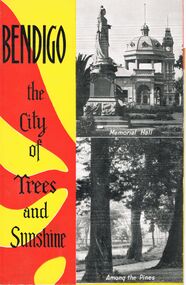
Document - FOLD-OUT: BENDIGO THE CITY OF TREES AND SUNSHINE
... Rosalind Park. Allans Walk Pall Mall Alexandra Fountain Memorial ...Fold-out - ''Bendigo - the City of trees and sunshine''. Eight B&W photographs of Bendigo attractions; issued by the Advance Bendigo and the North League (in conjunction with the Victorian Railways). Includes back page information about Bendigo in summary and fares by rail from Melbourne.Boltons Print Bendigobendigo, tourism, brochure, post office, lake weeroona, the fernery, rosalind park. allans walk, pall mall, alexandra fountain, memorial hall. -
 Bendigo Historical Society Inc.
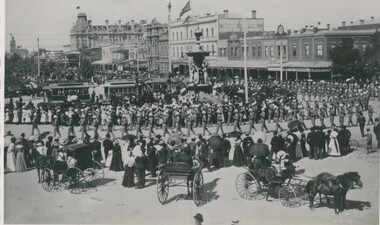
Photograph - PALL MALL WITH ALEXANDRA FOUNTAIN IN CENTRE, c.1901
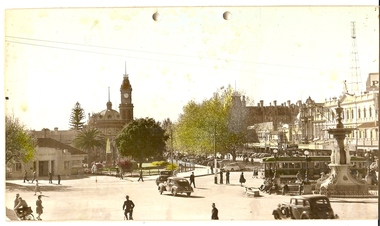
... PALL MALL WITH ALEXANDRA FOUNTAIN IN CENTRE... following parade. Photograph PALL MALL WITH ALEXANDRA FOUNTAIN ...Black and white photograph showing Pall Mall with Beehive Building, Shamrock Hotel, Alexandra Fountain, Parade (military?). Crowd watching, some in horse drawn vehicles. Trams at Fountain. Flags at half mast. Inscriptions on back 'MP 254'. Circular rubber stamp 'Royal Historical Society of Victoria, Bendigo Branch'. History of object: Commemorative service for death of Queen Victoria, early 1901, which was held in Rosalind Park following parade.Bendigo Advertiserplace, streetscape, pall mall, see also 2000.539.01 -
 Bendigo Historical Society Inc.
Photograph - BENDIGO CENTENARY COLLECTION: PARADE, 1951
... Mall. Alexandra Fountain at far L. Queen Victoria Gardens... of people in Pall Mall. Alexandra Fountain at far L. Queen Victoria ...Black and white photograph, large crowd of people in Pall Mall. Alexandra Fountain at far L. Queen Victoria Gardens at background. In C of crowd - horse drawn carriage, mounted soldier & policeman. Inscriptions: On back circular stamp 'Royal Historical Society of Victoris, Bendigo Branch', '1960', '97', '12'. History of object - previous Acc. No. 'MP 182'. Ian Wild - August 2--- 'Captain Starlight - Chap Hummer from California Gully played this part. In robbery of gold bullion re-enactment'.Bendigo Advertiserperson, group, centenary, see also 2000.511.01, 2000.512.01, 2000.514.01, 2000.515.01, 2000.516.01, 2000.517.01, 2000.518.01, 2000.519.01, 2000.520.01, 2000.521.01, 2000.522.01, 2000.523.01, 2000.524.01 -
 Bendigo Historical Society Inc.
Photograph - BENDIGO LOOKING EAST ALONG PALL MALL, c1915
Black and white photograph taken from the City Family Hotel Tower, looking along Pall Mall towards White Hills, Showing Alexandra fountain, toast rack tram, 1903 tram, Hustler's Royal Reserve Mine, Post Office, Law Courts behind, tram track, School of Mines tower, Shamrock Hotel and other businesses, The Beehive, Pikes Building and verandah of building in foreground. Inscriptions: 'Bendigo, looking East' in TLH corner. History: photographic copy in black and white of a colour tinted postcard, printed c1915. Copied c1970place, streetscape, pall mall, photograph, photography, bendigo, alexandra fountain, toast rack tram, bendigo law courts, bendigo post office, bendigo school of mines, beehive building, hustler's royal reserve mine -
 Bendigo Historical Society Inc.
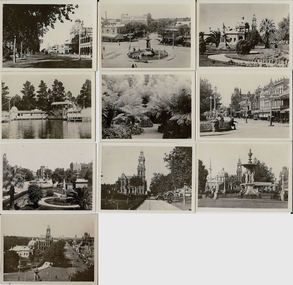
Photograph - BEAUTY SPOTS VICTORIA
... , Armadale, Victoria. (a) Pall Mall and the PO. Bendigo, (b) Queens..., Armadale, Victoria. (a) Pall Mall and the PO. Bendigo, (b) Queens ...black and white photos: small grey envelope containing black and white photographs of beauty spots in Victoria. Envelope contains photos of Bendigo. Produced in Australia by 'The Rose' Stereograph Co. Printers and Photographic publishers, Armadale, Victoria. (a) Pall Mall and the PO. Bendigo, (b) Queens Gardens, Bendigo ©Pall Mall and the P.O. Bendigo. (d) Alexandra Fountain, Bendigo. (e) The Upper Reserve, Bendigo (f) The Fernery, Bendigo (g) Pall Mall, Bendigo (h) Pall, Mall Bendigo (I) Alexandra Fountain, Bendigo (j) Queens Gardens, Bendigo.place, bendigo -
 Bendigo Historical Society Inc.
Photograph - BASIL MILLER COLLECTION: TRAM TOWING DOUBLE DECK HORSE TRAM
... tram on Pall Mall, near fountain. Description written in pen...-Ballarat double decked horse tram on Pall Mall, near fountain ...Electric tram towing an ex-Ballarat double decked horse tram on Pall Mall, near fountain. Description written in pen on reverse S-A. 778. Copied from 'The Bendigonian', 19/09/1905.person, individual, basil miller -
 Bendigo Historical Society Inc.
Photograph - BASIL MILLER COLLECTION: CHARING CROSS LOOKING DOWN PALL MALL
Colour postcard of Charing Cross, Pall Mall Bendigo. Tram stopped at fountain.Nucolorvue Productions Pty Ltdperson, individual, basil miller -
 Bendigo Historical Society Inc.
Photograph - CHARING CROSS: BENDIGO, 1995
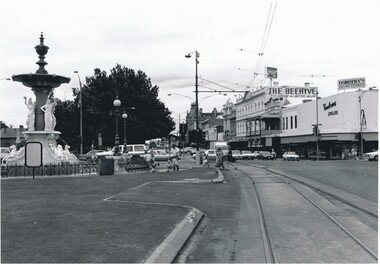
Black and white photograph of Charing Cross, High St., to Pall Mall. ( Noelene Wild July 2000 ) Alexandra Fountain on left Shamrock Hotel in background. In image ' The Beehive, the store for better value' ' Dorothy's Home stores ' 'Treloar's Jeweller' Santini's ' On back in grey lead pencil 'A5'place, streetscape, charing cross -
 Bendigo Historical Society Inc.
Photograph - BASIL MILLER COLLECTION: HANDCOLOURED CHARRING CROSS, Possibly 1930/1940s
Hand coloured photograph of Charring Cross looking towards Pall Mall, Bendigo. Baby Health Centre on left, and Alexandra Fountain on right in foreground with numerous cars, people and a tram visible.person, individual, basil miller