Showing 91 items
matching water colours
-
 Bendigo Historical Society Inc.
Slide - Glass Slide Photos of Bendigo Cinema Advertising, Mid 1900s
... annual exhibitions of his oils and water colours, a number of his... annual exhibitions of his oils and water colours, a number of his ...Bendigo followed much the same pattern as Ballarat, and was not ready for an up-to-date studio until 1880 when the Bartlett Bros. (Francis and Henry) who bad conducted a successful business in Melbourne for many years opened a small studio there. It was such a success that they decided to build large modern premises, and Francis made two trips to England and the Continent for the latest ideas. In 1884 Henry died, and to replace him, Francis secured the services of Robert W. Bugg, then employed by Foster & Martin (both pupils of Batchelder's) in Collins Street, Melbourne. In that studio Bugg made some fine portraits of Anthony Trollope during the novelist's long tour of Australia. Francis Bartlett was a keen business man, and Robert Bugg was a great operator and a fine painter. Together, their success was quite outstanding. Fifteen years later Bartlett retired with a fortune, and Bugg took over the studio. Robert William Bugg, one of our leading Painter-Photographers, was born in London in 1853, and came to Melbourne when he was five years old. He became a pupil of Louis Buvelot and, in 1879, a member of the Victorian Academy of Arts. In Bendigo he gave annual exhibitions of his oils and water colours, a number of his exhibitions being officially opened by his friend Alfred Deakin. There are a number of Bugg's Paintings in the Bendigo Art Gallery. All the portraits, landscapes, buildings, and city views illustrated in "Bendigo and Vicinity, 1897", are from photographs taken by Robert Bugg. He was a clever, genial and popular soul, and his influence on the cultural life of his adopted city was considerable. He retired in 1932 and died in his early eighties.Nine Photos of vehicles from Glass Plate Negatives Slides are ex Bartlett Brother Bendigo. The Slides were used for advertising prior to the shows and during intervals; possibly at either of the three picture theatres, the Lyric, the Plaza, or the Princes Theatre. history, bendigo, bartlett brothers bendigo, bendigo theatre advertising -
 Bendigo Historical Society Inc.
Slide - Glass Slide Photos of Bendigo Cinema Advertising, Mid 1900s
... annual exhibitions of his oils and water colours, a number of his... annual exhibitions of his oils and water colours, a number of his ...Bendigo followed much the same pattern as Ballarat, and was not ready for an up-to-date studio until 1880 when the Bartlett Bros. (Francis and Henry) who bad conducted a successful business in Melbourne for many years opened a small studio there. It was such a success that they decided to build large modern premises, and Francis made two trips to England and the Continent for the latest ideas. In 1884 Henry died, and to replace him, Francis secured the services of Robert W. Bugg, then employed by Foster & Martin (both pupils of Batchelder's) in Collins Street, Melbourne. In that studio Bugg made some fine portraits of Anthony Trollope during the novelist's long tour of Australia. Francis Bartlett was a keen business man, and Robert Bugg was a great operator and a fine painter. Together, their success was quite outstanding. Fifteen years later Bartlett retired with a fortune, and Bugg took over the studio. Robert William Bugg, one of our leading Painter-Photographers, was born in London in 1853, and came to Melbourne when he was five years old. He became a pupil of Louis Buvelot and, in 1879, a member of the Victorian Academy of Arts. In Bendigo he gave annual exhibitions of his oils and water colours, a number of his exhibitions being officially opened by his friend Alfred Deakin. There are a number of Bugg's Paintings in the Bendigo Art Gallery. All the portraits, landscapes, buildings, and city views illustrated in "Bendigo and Vicinity, 1897", are from photographs taken by Robert Bugg. He was a clever, genial and popular soul, and his influence on the cultural life of his adopted city was considerable. He retired in 1932 and died in his early eighties.Seven Photos of vehicles from Glass Plate Negatives. Slides are ex Bartlett Brother Bendigo, photographers. The Slides were used for advertising prior to the shows and during intervals; possibly at either of the three picture theatres, the Lyric, the Plaza, or the Princess Theatre. history, bendigo, bartlett brothers bendigo, bendigo theatre advertising -
 Mission to Seafarers Victoria
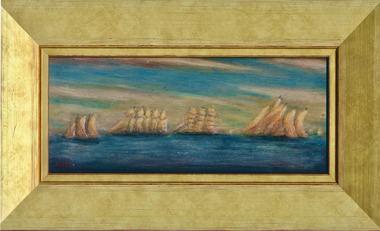
Painting, Kimberley Dunstan, Port Phillip Bay Bicentennial Fleet Departure, 1988
... pencil and crayon sketches, lino cuts, oil colours - and water... pencil and crayon sketches, lino cuts, oil colours - and water ...I was born in Guildford W.A. on 12 November 1940 and at an early age took an interest in painting. Over the years (between lapses) I have completed several hundred pieces of work including pencil and crayon sketches, lino cuts, oil colours - and water colours which have been my main focus. As painting has always been a hobby I’ve never bothered with selling my work through an art gallery - but have donated a good deal of work to fundraisers and charity auctions with some paintings attracting large prices, I’ve also sold quite a number (some years ago) via Joels Auctions before they went up-market, others have gone to friends and family. My pleasure has been in completing painting, I’ve never bothered about recovering costs (including framing) but happy when people take an interest in my work - and I know pictures have gone to a happy home – additional pleasure comes when people remind me they love the painting, sometimes I’ve forgotten what they have and other occasions have been able to see them in their homes and loved they way they have fitted-in. Regarding the little painting of the Bicentennial sailing ships – I did it as a quick sketch at the time (1988) when the ships departed Melbourne sailing down Port Phillip Bay - with the view to doing a larger painting which never eventuated and it has remained in my possession until recently when I decided to dispose of my remaining work/s as I have to move and ‘down-size’. As you will appreciate it is a very simple sketch but it captures a notable moment in time and would be very happy if the MTS could find a place for it in their collection. As it happens I spent 9 years in the Royal Australian Navy and feel a close connection to seafarers and would be honoured that you might wish to include the picture in your collection. Marine art, Maritime artKimberley Dunstan, Mission to Seafarers CollectionSmall rectangular oil painting (landscape format) depicting sailing shipsSigntaure of the artist bottom left corner: KHD At the back in black ink: 1988 / Kim Dunstan / Port Phillip Bay / Bicentennial Fleet Departure / From End Of Martin St Brightonbicentennial, 1988, fleet, kim dunstan, kimberley dunstan -
 4th/19th Prince of Wales's Light Horse Regiment Unit History Room
Medal, Atlantic Star, abt 1945
... of blue, white and sea green, shaded and watered. The colours... stripes of blue, white and sea green, shaded and watered ...The Atlantic Star was awarded to commemorate the Battle of the Atlantic between 3 September 1939 and 8 May 1945. It was designed primarily for convoys and their escorts and anti-submarine forces, as well as for crews of fast merchant ships that sailed alone. Eligibility Awarded for six months service afloat, in the Navy, the Merchant Navy and by Army and Air Force personnel serving on HM Ships, in the Atlantic and Home Waters. Awarded to aircrew who have taken part in operations against the enemy at sea within the qualifying areas for Naval personnel, subject to two months service in an operational unit after earning the 1939-1945 Star. Qualifying dates are 3 September 1939 to 8 May 1945. The Medal The Atlantic Star is a six–pointed star of yellow copper zinc alloy. The obverse has a central design of the Royal and Imperial cypher, surmounted by a crown. The cypher is surrounded by a circlet containing the words ‘The Atlantic Star'. Stars issued to Australian personnel have recipient names engraved on the plain reverse. The Ribbon The Atlantic Star ribbon has three vertical stripes of blue, white and sea green, shaded and watered. The colours represent the colours of the Atlantic Ocean. Clasps Two clasps were issued for the Atlantic Star: Air Crew Europe France and Germany Regulations only allow one clasp to be worn with the Star. When the ribbon is worn alone a silver rosette ribbon emblem is worn to denote the award of a clasp.Medal, Atlantic Star, miniature, with clasps- Air Crew Europe & France and Germanymedal, atlantic star -
Bendigo Historical Society Inc.
Accessory - F. G. JONES COLLECTION: MASONIC DECORATIONS X 2, 1940's
... Fidelitas Benevolentia.' 2 - Water silk ribbon in colours... Fraterieus Honos Fidelitas Benevolentia.' 2 - Water silk ribbon ...Object. 1 - Cream ribbed silk ribbon with 3 gold bars top, bottom and central bar is shaped like a buckle. Gold medallion at bottom 6 pointed star in a circle with stylized ribbon motifs top and bottom engraved with inscription 'Deo Regi Fraterieus Honos Fidelitas Benevolentia.' 2 - Water silk ribbon in colours of the rainbow, 3 brass horizontal bars top, middle & bottom small enamel rainbow of blue, sky blue, red, yellow & green, small brass dove clutching a laurel mounted centrally in arc of rainbows.societies, freemasons, regalia, f. g. jones collection, masonic decorations x 2 -
 Bendigo Historical Society Inc.
Document - PETER ELLIS COLLECTION: A GUIDE FOR DRIVERS ON THE WHIPSTICK TOUR
... (shown in different colours) Water Reserve and Roads. Noted... (shown in different colours) Water Reserve and Roads. Noted ...A Guide for Drivers on the Whipstick Tour. First page gives assembly area, driving in convoy and negotiating water or boggy patches across the road. Amended written at the end of the page. Directions with mileage and items of interest for the tour on Sunday September 9th (no year). A Whipstick Map 1971 showing State Forest, Crown Lands, Uncleared Mallee - Private (shown in different colours) Water Reserve and Roads. Noted are Flora and Fauna - Plants, Birds & Mammals, and areas of State Forest and Southern State Forest with Mallee Scrub area noted. Also State Forest & Crown Lands Total Area and a map scale. The Bendigo Whipstick mentions area, suggestions of where the name Whipstick came from, shrubs and flowers with their flowering times, descriptions of some of them and some information on the Mallee Fowl. The Eucalyptus Oil Industry paragraph mentions the beginnings of the industry. Mentioned are the different uses of oils (perfumery, industrial and medicinal) and the different species of eucalypt used for each and various products. Also notes on the growing, harvesting and refining of eucalyptus. P Ellis at the end of the page. The next two and a half pages mentions reserves, and at the end acknowledgements. Includes a spare copy of 'The Bendigo Whipstick' by P Ellis.bendigo, history, early bendigo, peter ellis collection, a guide for drivers on the whipstick tour, the whipstick 1971 map, shire of marong, shire of east loddon, shire of huntly, borough of eaglehawk, city of bendigo, shire of strathfieldsaye, the bendigo whipstick, eucalyptus oil industry, eaglehawk town hall, lightning hill lookout, eaglehawk rifle range, new moon mines, blue jacket reservoir, maggetti's wine hall, camp hotel (ex), skylark dam, eucalyptus oil production, eucalyptus factory, whipstick eucalyptus farm, ruedin's eucalyptus factory, dutch bowls, governor philip, sir joseph banks, john white, baron von mueller, joseph bosisto, commonwealth government, perfumery oils, industrial oils, medicinal oils, p ellis, dr frith, csiro wildlife division, harley webster, forests commission, vincent serventy, victorian national parks association, bendigo field naturalists club -
 Flagstaff Hill Maritime Museum and Village
Domestic object - Bowl, Late 19th or early 20th Century
... and can be used like water colours to paint onto your work. Mostly... other to form other colours and can be used like water colours ...The Process of Making Pottery Decorating, Firing, Glazing, Making, Technical There is a rhythm and flow to clay. It can’t be done all at once! Even the making process! It can take weeks to get everything done, especially if you can only work on your pottery once a week! Even though we have three hour classes, it’s often just not enough time! Here is an overview of some of the processes so you have a bit more grasp on some of the technical stuff! Step One – Design There are SO many ideas out there for making stuff in clay! From delicate porcelain jewellery, through to heavy sculptural work and everything in between. Deciding your direction is sometimes not that easy – when you first start, try everything, you will naturally gravitate to the style that you enjoy! The options and variations are endless and can get a wee bit overwhelming too! Check in with me before you start to ensure your ideas will work, what order you might do things, how you could achieve the look you are seeking and any other technical data required! Step Two – Making Clay is thixotropic. This means that as you work with it, the clay first gets sloppier and wetter, before is begins to dry in the atmosphere. For most things, you simply can’t do all parts of the project at once. An example of work order might look like: Get last weeks work out from the shelves Prepare clay for today’s work – roll your clay, prepare balls for throwing, make the first stage of a pinch pot) Clean up last week’s work and put it on the shelf for bisque firing Check that you have any glazing to do – and do enough of it that you will have time to finish your main project Do the next step of your next project – there might be a further step that can’t be complete immediately, in that case, wrap your work well and put onto the shelves. Letting your work rest for a while can really help keep your work clean and professional looking. Many things require bagging under plastic to keep it ready for work the next week – put your name on the outside of the bag so you can find your work easily. We have stickers and markers. Consider how you want to decorate your work – coloured slip can be applied at a fairly wet stage (remembering that it will make your work even wetter!). Trying to apply slip to dry clay won’t work! If you want to do sgraffito – you will need to keep the work leather hard (a state of dryness where you can still work the clay with a little effort and a little water and care). Step Three – Drying Most of the time your work can go into the rack uncovered to let it dry out for the following week. If you want to continue forming or shaping you will need to double bag your work – put your work on a suitable sized bat and put the bat in a bag so the base of the bag is under the bat, then put another bag over the top of the work and tuck the top of the bag under the bat. If you want to trim (or turn) your thrown work the following week, it should also be double bagged. If your work is large, delicate, or of uneven thicknesses, you should lightly cover your work for drying. When considering the drying process, bare in mind the weather, humidity and wind! The hotter and dryer, the faster things dry and work can dry unevenly in the shelves – this can lead to cracking – another time to lightly cover your work for drying. Step Four – Trimming and Cleaning Up Your work is dry! It is called greenware now and it is at it’s most fragile! Handle everything with two hands. I often refer to soft hands – keep everything gentle and with your fingers spread as much as possible. Try to not pick up things like plates too much, and always with both hands! Before your work can be bisque fired it should be “cleaned up”. You work won’t go into the kiln if it has sharp edges – when glazed, sharp edges turn into razor blades! Use a piece of fly wire to rub the work all over – this will scratch a little so be light handed. Use a knife or metal kidney to scrape any areas that require a bit more dynamic treatment than the fly wire offers! Finally, a very light wipe over with a slightly damp sponge can help soften and soothe all of your edges and dags! Trimming thrown work: If you are planning to trim (or turn) your thrown work (and you should be), make sure you bag it well – your work should be leather hard to almost dry for easiest trimming. Use this step to finish the work completely – use a metal kidney to polish the surface, or a slightly damp sponge to give a freshly thrown look. Wipe the sponge around the rim after trimming, and check the inside of the pot for dags! Trimming slip cast work: Usually I will trim the rims of your work on the wheel the following day to make that stage easier, however you will still need to check your work for lumps and bumps. Last but not least – check that your name is still clearly on the bottom of your work. Step Five – Bisque Firing When the work is completely dry it can go into the bisque kiln. The bisque kiln is fired to 1000°C. This process burns off the water in the clay as well as some of the chemically bound water. The structure of the clay is not altered that much at this temperature. Inside the bisque kiln, the work is stacked a little, small bowl inside a larger bowl and onto a heavy plate. Smaller items like decorations or drink coasters might get stacked several high. Consideration is paid to the weight of the stack and shape of the work. A bisque kiln can fire about one and a half times the amount of work that the glaze kiln can fire. The firing takes about 10 hours to complete the cycle and about two days to cool down. Once it has been emptied the work is placed in the glaze room ready for you to decorate! Step Six – Glazing Decorating your work with colour can be a lot of fun – and time consuming! There are three main options for surface treatment at this stage: Oxide Washes Underglazes Glazes Washes and underglazes do not “glaze” the work – It will still need a layer of glaze to fully seal the clay (washes don’t need glaze on surfaces not designed for food or liquid as they can gloss up a little on their own). Underglazes are stable colourants that turn out pretty much how they look in the jar. They can be mixed with each other to form other colours and can be used like water colours to paint onto your work. Mostly they should have a clear glaze on top to seal them. Oxides are a different species – the pink oxide (cobalt) wash turns out bright blue for instance. They don’t always need a glaze on top, and some glazes can change the colour of the wash! The glazes need no other “glaze” on top! Be careful of unknown glaze interactions – you can put any combination of glaze in a bowl or on a plate, but only a single glaze on the outside of any vertical surface! Glazes are a chemical reaction under heat. We don’t know the exact chemicals in the Mayco glazes we use. I can guess by the way they interact with each other, however, on the whole, you need to test every idea you have, and not run the test on a vertical surface! Simply put, glaze is a layer of glass like substance that bonds with the clay underneath. Clay is made of silica, alumina and water. Glaze is made of mostly silica. Silica has a melting point of 1700°C and we fire to 1240°C. The silica requires a “flux” to help it melt at the lower temperature. Fluxes can be all sorts of chemicals – a common one is calcium – calcium has a melting point of 2500°C, however, together they both melt at a much lower temperature! Colourants are metal oxides like cobalt (blue), chrome (green through black), copper (green, blue, even red!), manganese (black, purple and pink) iron (red brown), etc. Different chemicals in the glaze can have dramatic effects. for example, barium carbonate (which we don’t use) turns manganese bright pink! Other elements can turn manganese dioxide brown, blue, purple and reddish brown. Manganese dioxide is a flux in and of itself as well. So, glazes that get their black and purple colours, often interact with other glazes and RUN! Our mirror black is a good example – it mixes really well with many glazes because it fluxes them – causes them to melt faster. It will also bring out many beautiful colours in the glazes because it’s black colouring most definitely comes from manganese dioxide! Glaze chemistry is a whole subject on it’s own! We use commercial Mayco glazes on purpose – for their huge range of colour possibilities, stability, cool interactions, artistic freedom with the ability to easily brush the glazes on and ease of use. We currently have almost 50 glazes on hand! A major project is to test the interactions of all glazes with each other. That is 2,500 test tiles!!!! I’m going to make the wall behind the wheels the feature wall of pretty colours! Step Seven – Glaze (Gloss or sometimes called “Glost”) Firing Most of the time this is the final stage of making your creation (but not always!) The glaze kiln goes to 1240°C. This is called cone 6, or midrange. It is the low end of stoneware temperatures. Stoneware clays and glazes are typically fired at cone 8 – 10, that is 1260 – 1290°C. The energy requirement to go from 1240°C to 1280°C is almost a 30% more! Our clay is formulated to vitrify (mature, turn “glass-like”) at 1240°, as are our glazes. A glaze kiln take around 12 hours to reach temperature and two to three days to cool down. Sometimes a third firing process is required – this is for decoration that is added to work after the glaze firing. For example – adding precious metals and lustres. this firing temperature is usually around 600 – 800°C depending upon the techniques being used. There are many students interested in gold and silver trims – we will be doing this third type of firing soon! After firing your work will be in the student finished work shelves. Remember to pay for it before you head out the door! There is a small extra charge for using porcelain clay (it’s more than twice the price of regular clay), and for any third firing process! Once your work has been fired it can not turn back into clay for millennia – so don’t fire it if you don’t like it! Put it in the bucket for recycling. https://firebirdstudios.com.au/the-process-of-making-pottery/ The bowl is an example of kitchenware used in the 19th century and still in use today.Bowl white ceramic. Crack on side. Badly stained.Backstamp very faint and unable to be read.flagstaff hill, warrnambool, shipwrecked-coast, flagstaff-hill, flagstaff-hill-maritime-museum, maritime-museum, shipwreck-coast, flagstaff-hill-maritime-village, mixing bowl, food preparation, kitchen equipment, ceramic -
 Flagstaff Hill Maritime Museum and Village
Domestic object - Bowl
... and can be used like water colours to paint onto your work. Mostly... other to form other colours and can be used like water colours ...The Process of Making Pottery Decorating, Firing, Glazing, Making, Technical There is a rhythm and flow to clay. It can’t be done all at once! Even the making process! It can take weeks to get everything done, especially if you can only work on your pottery once a week! Even though we have three hour classes, it’s often just not enough time! Here is an overview of some of the processes so you have a bit more grasp on some of the technical stuff! Step One – Design There are SO many ideas out there for making stuff in clay! From delicate porcelain jewellery, through to heavy sculptural work and everything in between. Deciding your direction is sometimes not that easy – when you first start, try everything, you will naturally gravitate to the style that you enjoy! The options and variations are endless and can get a wee bit overwhelming too! Check in with me before you start to ensure your ideas will work, what order you might do things, how you could achieve the look you are seeking and any other technical data required! Step Two – Making Clay is thixotropic. This means that as you work with it, the clay first gets sloppier and wetter, before is begins to dry in the atmosphere. For most things, you simply can’t do all parts of the project at once. An example of work order might look like: Get last weeks work out from the shelves Prepare clay for today’s work – roll your clay, prepare balls for throwing, make the first stage of a pinch pot) Clean up last week’s work and put it on the shelf for bisque firing Check that you have any glazing to do – and do enough of it that you will have time to finish your main project Do the next step of your next project – there might be a further step that can’t be complete immediately, in that case, wrap your work well and put onto the shelves. Letting your work rest for a while can really help keep your work clean and professional looking. Many things require bagging under plastic to keep it ready for work the next week – put your name on the outside of the bag so you can find your work easily. We have stickers and markers. Consider how you want to decorate your work – coloured slip can be applied at a fairly wet stage (remembering that it will make your work even wetter!). Trying to apply slip to dry clay won’t work! If you want to do sgraffito – you will need to keep the work leather hard (a state of dryness where you can still work the clay with a little effort and a little water and care). Step Three – Drying Most of the time your work can go into the rack uncovered to let it dry out for the following week. If you want to continue forming or shaping you will need to double bag your work – put your work on a suitable sized bat and put the bat in a bag so the base of the bag is under the bat, then put another bag over the top of the work and tuck the top of the bag under the bat. If you want to trim (or turn) your thrown work the following week, it should also be double bagged. If your work is large, delicate, or of uneven thicknesses, you should lightly cover your work for drying. When considering the drying process, bare in mind the weather, humidity and wind! The hotter and dryer, the faster things dry and work can dry unevenly in the shelves – this can lead to cracking – another time to lightly cover your work for drying. Step Four – Trimming and Cleaning Up Your work is dry! It is called greenware now and it is at it’s most fragile! Handle everything with two hands. I often refer to soft hands – keep everything gentle and with your fingers spread as much as possible. Try to not pick up things like plates too much, and always with both hands! Before your work can be bisque fired it should be “cleaned up”. You work won’t go into the kiln if it has sharp edges – when glazed, sharp edges turn into razor blades! Use a piece of fly wire to rub the work all over – this will scratch a little so be light handed. Use a knife or metal kidney to scrape any areas that require a bit more dynamic treatment than the fly wire offers! Finally, a very light wipe over with a slightly damp sponge can help soften and soothe all of your edges and dags! Trimming thrown work: If you are planning to trim (or turn) your thrown work (and you should be), make sure you bag it well – your work should be leather hard to almost dry for easiest trimming. Use this step to finish the work completely – use a metal kidney to polish the surface, or a slightly damp sponge to give a freshly thrown look. Wipe the sponge around the rim after trimming, and check the inside of the pot for dags! Trimming slip cast work: Usually I will trim the rims of your work on the wheel the following day to make that stage easier, however you will still need to check your work for lumps and bumps. Last but not least – check that your name is still clearly on the bottom of your work. Step Five – Bisque Firing When the work is completely dry it can go into the bisque kiln. The bisque kiln is fired to 1000°C. This process burns off the water in the clay as well as some of the chemically bound water. The structure of the clay is not altered that much at this temperature. Inside the bisque kiln, the work is stacked a little, small bowl inside a larger bowl and onto a heavy plate. Smaller items like decorations or drink coasters might get stacked several high. Consideration is paid to the weight of the stack and shape of the work. A bisque kiln can fire about one and a half times the amount of work that the glaze kiln can fire. The firing takes about 10 hours to complete the cycle and about two days to cool down. Once it has been emptied the work is placed in the glaze room ready for you to decorate! Step Six – Glazing Decorating your work with colour can be a lot of fun – and time consuming! There are three main options for surface treatment at this stage: Oxide Washes Underglazes Glazes Washes and underglazes do not “glaze” the work – It will still need a layer of glaze to fully seal the clay (washes don’t need glaze on surfaces not designed for food or liquid as they can gloss up a little on their own). Underglazes are stable colourants that turn out pretty much how they look in the jar. They can be mixed with each other to form other colours and can be used like water colours to paint onto your work. Mostly they should have a clear glaze on top to seal them. Oxides are a different species – the pink oxide (cobalt) wash turns out bright blue for instance. They don’t always need a glaze on top, and some glazes can change the colour of the wash! The glazes need no other “glaze” on top! Be careful of unknown glaze interactions – you can put any combination of glaze in a bowl or on a plate, but only a single glaze on the outside of any vertical surface! Glazes are a chemical reaction under heat. We don’t know the exact chemicals in the Mayco glazes we use. I can guess by the way they interact with each other, however, on the whole, you need to test every idea you have, and not run the test on a vertical surface! Simply put, glaze is a layer of glass like substance that bonds with the clay underneath. Clay is made of silica, alumina and water. Glaze is made of mostly silica. Silica has a melting point of 1700°C and we fire to 1240°C. The silica requires a “flux” to help it melt at the lower temperature. Fluxes can be all sorts of chemicals – a common one is calcium – calcium has a melting point of 2500°C, however, together they both melt at a much lower temperature! Colourants are metal oxides like cobalt (blue), chrome (green through black), copper (green, blue, even red!), manganese (black, purple and pink) iron (red brown), etc. Different chemicals in the glaze can have dramatic effects. for example, barium carbonate (which we don’t use) turns manganese bright pink! Other elements can turn manganese dioxide brown, blue, purple and reddish brown. Manganese dioxide is a flux in and of itself as well. So, glazes that get their black and purple colours, often interact with other glazes and RUN! Our mirror black is a good example – it mixes really well with many glazes because it fluxes them – causes them to melt faster. It will also bring out many beautiful colours in the glazes because it’s black colouring most definitely comes from manganese dioxide! Glaze chemistry is a whole subject on it’s own! We use commercial Mayco glazes on purpose – for their huge range of colour possibilities, stability, cool interactions, artistic freedom with the ability to easily brush the glazes on and ease of use. We currently have almost 50 glazes on hand! A major project is to test the interactions of all glazes with each other. That is 2,500 test tiles!!!! I’m going to make the wall behind the wheels the feature wall of pretty colours! Step Seven – Glaze (Gloss or sometimes called “Glost”) Firing Most of the time this is the final stage of making your creation (but not always!) The glaze kiln goes to 1240°C. This is called cone 6, or midrange. It is the low end of stoneware temperatures. Stoneware clays and glazes are typically fired at cone 8 – 10, that is 1260 – 1290°C. The energy requirement to go from 1240°C to 1280°C is almost a 30% more! Our clay is formulated to vitrify (mature, turn “glass-like”) at 1240°, as are our glazes. A glaze kiln take around 12 hours to reach temperature and two to three days to cool down. Sometimes a third firing process is required – this is for decoration that is added to work after the glaze firing. For example – adding precious metals and lustres. this firing temperature is usually around 600 – 800°C depending upon the techniques being used. There are many students interested in gold and silver trims – we will be doing this third type of firing soon! After firing your work will be in the student finished work shelves. Remember to pay for it before you head out the door! There is a small extra charge for using porcelain clay (it’s more than twice the price of regular clay), and for any third firing process! Once your work has been fired it can not turn back into clay for millennia – so don’t fire it if you don’t like it! Put it in the bucket for recycling. https://firebirdstudios.com.au/the-process-of-making-pottery/ This bowl is an example of kitchenware used in the 19th century and still in use today.Bowl white ceramic plain that has two sets of edging around lip. Inside bowl has plaster designed to look like cooking mixture.flagstaff hill, warrnambool, shipwrecked-coast, flagstaff-hill, flagstaff-hill-maritime-museum, maritime-museum, shipwreck-coast, flagstaff-hill-maritime-village, kitchen equipment, ceramic -
 Flagstaff Hill Maritime Museum and Village
Domestic object - Bowl, J & G Meakin, Late 19th or early 20th Century
... and can be used like water colours to paint onto your work. Mostly... other to form other colours and can be used like water colours ...The Process of Making Pottery Decorating, Firing, Glazing, Making, Technical There is a rhythm and flow to clay. It can’t be done all at once! Even the making process! It can take weeks to get everything done, especially if you can only work on your pottery once a week! Even though we have three hour classes, it’s often just not enough time! Here is an overview of some of the processes so you have a bit more grasp on some of the technical stuff! Step One – Design There are SO many ideas out there for making stuff in clay! From delicate porcelain jewellery, through to heavy sculptural work and everything in between. Deciding your direction is sometimes not that easy – when you first start, try everything, you will naturally gravitate to the style that you enjoy! The options and variations are endless and can get a wee bit overwhelming too! Check in with me before you start to ensure your ideas will work, what order you might do things, how you could achieve the look you are seeking and any other technical data required! Step Two – Making Clay is thixotropic. This means that as you work with it, the clay first gets sloppier and wetter, before is begins to dry in the atmosphere. For most things, you simply can’t do all parts of the project at once. An example of work order might look like: Get last weeks work out from the shelves Prepare clay for today’s work – roll your clay, prepare balls for throwing, make the first stage of a pinch pot) Clean up last week’s work and put it on the shelf for bisque firing Check that you have any glazing to do – and do enough of it that you will have time to finish your main project Do the next step of your next project – there might be a further step that can’t be complete immediately, in that case, wrap your work well and put onto the shelves. Letting your work rest for a while can really help keep your work clean and professional looking. Many things require bagging under plastic to keep it ready for work the next week – put your name on the outside of the bag so you can find your work easily. We have stickers and markers. Consider how you want to decorate your work – coloured slip can be applied at a fairly wet stage (remembering that it will make your work even wetter!). Trying to apply slip to dry clay won’t work! If you want to do sgraffito – you will need to keep the work leather hard (a state of dryness where you can still work the clay with a little effort and a little water and care). Step Three – Drying Most of the time your work can go into the rack uncovered to let it dry out for the following week. If you want to continue forming or shaping you will need to double bag your work – put your work on a suitable sized bat and put the bat in a bag so the base of the bag is under the bat, then put another bag over the top of the work and tuck the top of the bag under the bat. If you want to trim (or turn) your thrown work the following week, it should also be double bagged. If your work is large, delicate, or of uneven thicknesses, you should lightly cover your work for drying. When considering the drying process, bare in mind the weather, humidity and wind! The hotter and dryer, the faster things dry and work can dry unevenly in the shelves – this can lead to cracking – another time to lightly cover your work for drying. Step Four – Trimming and Cleaning Up Your work is dry! It is called greenware now and it is at it’s most fragile! Handle everything with two hands. I often refer to soft hands – keep everything gentle and with your fingers spread as much as possible. Try to not pick up things like plates too much, and always with both hands! Before your work can be bisque fired it should be “cleaned up”. You work won’t go into the kiln if it has sharp edges – when glazed, sharp edges turn into razor blades! Use a piece of fly wire to rub the work all over – this will scratch a little so be light handed. Use a knife or metal kidney to scrape any areas that require a bit more dynamic treatment than the fly wire offers! Finally, a very light wipe over with a slightly damp sponge can help soften and soothe all of your edges and dags! Trimming thrown work: If you are planning to trim (or turn) your thrown work (and you should be), make sure you bag it well – your work should be leather hard to almost dry for easiest trimming. Use this step to finish the work completely – use a metal kidney to polish the surface, or a slightly damp sponge to give a freshly thrown look. Wipe the sponge around the rim after trimming, and check the inside of the pot for dags! Trimming slip cast work: Usually I will trim the rims of your work on the wheel the following day to make that stage easier, however you will still need to check your work for lumps and bumps. Last but not least – check that your name is still clearly on the bottom of your work. Step Five – Bisque Firing When the work is completely dry it can go into the bisque kiln. The bisque kiln is fired to 1000°C. This process burns off the water in the clay as well as some of the chemically bound water. The structure of the clay is not altered that much at this temperature. Inside the bisque kiln, the work is stacked a little, small bowl inside a larger bowl and onto a heavy plate. Smaller items like decorations or drink coasters might get stacked several high. Consideration is paid to the weight of the stack and shape of the work. A bisque kiln can fire about one and a half times the amount of work that the glaze kiln can fire. The firing takes about 10 hours to complete the cycle and about two days to cool down. Once it has been emptied the work is placed in the glaze room ready for you to decorate! Step Six – Glazing Decorating your work with colour can be a lot of fun – and time consuming! There are three main options for surface treatment at this stage: Oxide Washes Underglazes Glazes Washes and underglazes do not “glaze” the work – It will still need a layer of glaze to fully seal the clay (washes don’t need glaze on surfaces not designed for food or liquid as they can gloss up a little on their own). Underglazes are stable colourants that turn out pretty much how they look in the jar. They can be mixed with each other to form other colours and can be used like water colours to paint onto your work. Mostly they should have a clear glaze on top to seal them. Oxides are a different species – the pink oxide (cobalt) wash turns out bright blue for instance. They don’t always need a glaze on top, and some glazes can change the colour of the wash! The glazes need no other “glaze” on top! Be careful of unknown glaze interactions – you can put any combination of glaze in a bowl or on a plate, but only a single glaze on the outside of any vertical surface! Glazes are a chemical reaction under heat. We don’t know the exact chemicals in the Mayco glazes we use. I can guess by the way they interact with each other, however, on the whole, you need to test every idea you have, and not run the test on a vertical surface! Simply put, glaze is a layer of glass like substance that bonds with the clay underneath. Clay is made of silica, alumina and water. Glaze is made of mostly silica. Silica has a melting point of 1700°C and we fire to 1240°C. The silica requires a “flux” to help it melt at the lower temperature. Fluxes can be all sorts of chemicals – a common one is calcium – calcium has a melting point of 2500°C, however, together they both melt at a much lower temperature! Colourants are metal oxides like cobalt (blue), chrome (green through black), copper (green, blue, even red!), manganese (black, purple and pink) iron (red brown), etc. Different chemicals in the glaze can have dramatic effects. for example, barium carbonate (which we don’t use) turns manganese bright pink! Other elements can turn manganese dioxide brown, blue, purple and reddish brown. Manganese dioxide is a flux in and of itself as well. So, glazes that get their black and purple colours, often interact with other glazes and RUN! Our mirror black is a good example – it mixes really well with many glazes because it fluxes them – causes them to melt faster. It will also bring out many beautiful colours in the glazes because it’s black colouring most definitely comes from manganese dioxide! Glaze chemistry is a whole subject on it’s own! We use commercial Mayco glazes on purpose – for their huge range of colour possibilities, stability, cool interactions, artistic freedom with the ability to easily brush the glazes on and ease of use. We currently have almost 50 glazes on hand! A major project is to test the interactions of all glazes with each other. That is 2,500 test tiles!!!! I’m going to make the wall behind the wheels the feature wall of pretty colours! Step Seven – Glaze (Gloss or sometimes called “Glost”) Firing Most of the time this is the final stage of making your creation (but not always!) The glaze kiln goes to 1240°C. This is called cone 6, or midrange. It is the low end of stoneware temperatures. Stoneware clays and glazes are typically fired at cone 8 – 10, that is 1260 – 1290°C. The energy requirement to go from 1240°C to 1280°C is almost a 30% more! Our clay is formulated to vitrify (mature, turn “glass-like”) at 1240°, as are our glazes. A glaze kiln take around 12 hours to reach temperature and two to three days to cool down. Sometimes a third firing process is required – this is for decoration that is added to work after the glaze firing. For example – adding precious metals and lustres. this firing temperature is usually around 600 – 800°C depending upon the techniques being used. There are many students interested in gold and silver trims – we will be doing this third type of firing soon! After firing your work will be in the student finished work shelves. Remember to pay for it before you head out the door! There is a small extra charge for using porcelain clay (it’s more than twice the price of regular clay), and for any third firing process! Once your work has been fired it can not turn back into clay for millennia – so don’t fire it if you don’t like it! Put it in the bucket for recycling. https://firebirdstudios.com.au/the-process-of-making-pottery/This bowl was made by renowned pottery company J & G Meakin of England. The firm was established in the mid-1800's. The bowl is an example of kitchenware used in the 19th century and still in use today.Bowl; white ceramic, round and tapering inwards towards base. Made by J and G Meakin England.On base, 'Ironstone China Reg SOL 391413' with symbolflagstaff hill, flagstaff hill maritime museum and village, warrnambool, maritime museum, maritime village, great ocean road, shipwreck coast, mixing bowl, food preparation, j & g meakin, pottery, stoke-on-trent, kitchen equipment, ceramic -
 Flagstaff Hill Maritime Museum and Village
Domestic object - Plate
... and can be used like water colours to paint onto your work. Mostly... other to form other colours and can be used like water colours ...The Process of Making Pottery Decorating, Firing, Glazing, Making, Technical There is a rhythm and flow to clay. It can’t be done all at once! Even the making process! It can take weeks to get everything done, especially if you can only work on your pottery once a week! Even though we have three hour classes, it’s often just not enough time! Here is an overview of some of the processes so you have a bit more grasp on some of the technical stuff! Step One – Design There are SO many ideas out there for making stuff in clay! From delicate porcelain jewellery, through to heavy sculptural work and everything in between. Deciding your direction is sometimes not that easy – when you first start, try everything, you will naturally gravitate to the style that you enjoy! The options and variations are endless and can get a wee bit overwhelming too! Check in with me before you start to ensure your ideas will work, what order you might do things, how you could achieve the look you are seeking and any other technical data required! Step Two – Making Clay is thixotropic. This means that as you work with it, the clay first gets sloppier and wetter, before is begins to dry in the atmosphere. For most things, you simply can’t do all parts of the project at once. An example of work order might look like: Get last weeks work out from the shelves Prepare clay for today’s work – roll your clay, prepare balls for throwing, make the first stage of a pinch pot) Clean up last week’s work and put it on the shelf for bisque firing Check that you have any glazing to do – and do enough of it that you will have time to finish your main project Do the next step of your next project – there might be a further step that can’t be complete immediately, in that case, wrap your work well and put onto the shelves. Letting your work rest for a while can really help keep your work clean and professional looking. Many things require bagging under plastic to keep it ready for work the next week – put your name on the outside of the bag so you can find your work easily. We have stickers and markers. Consider how you want to decorate your work – coloured slip can be applied at a fairly wet stage (remembering that it will make your work even wetter!). Trying to apply slip to dry clay won’t work! If you want to do sgraffito – you will need to keep the work leather hard (a state of dryness where you can still work the clay with a little effort and a little water and care). Step Three – Drying Most of the time your work can go into the rack uncovered to let it dry out for the following week. If you want to continue forming or shaping you will need to double bag your work – put your work on a suitable sized bat and put the bat in a bag so the base of the bag is under the bat, then put another bag over the top of the work and tuck the top of the bag under the bat. If you want to trim (or turn) your thrown work the following week, it should also be double bagged. If your work is large, delicate, or of uneven thicknesses, you should lightly cover your work for drying. When considering the drying process, bare in mind the weather, humidity and wind! The hotter and dryer, the faster things dry and work can dry unevenly in the shelves – this can lead to cracking – another time to lightly cover your work for drying. Step Four – Trimming and Cleaning Up Your work is dry! It is called greenware now and it is at it’s most fragile! Handle everything with two hands. I often refer to soft hands – keep everything gentle and with your fingers spread as much as possible. Try to not pick up things like plates too much, and always with both hands! Before your work can be bisque fired it should be “cleaned up”. You work won’t go into the kiln if it has sharp edges – when glazed, sharp edges turn into razor blades! Use a piece of fly wire to rub the work all over – this will scratch a little so be light handed. Use a knife or metal kidney to scrape any areas that require a bit more dynamic treatment than the fly wire offers! Finally, a very light wipe over with a slightly damp sponge can help soften and soothe all of your edges and dags! Trimming thrown work: If you are planning to trim (or turn) your thrown work (and you should be), make sure you bag it well – your work should be leather hard to almost dry for easiest trimming. Use this step to finish the work completely – use a metal kidney to polish the surface, or a slightly damp sponge to give a freshly thrown look. Wipe the sponge around the rim after trimming, and check the inside of the pot for dags! Trimming slip cast work: Usually I will trim the rims of your work on the wheel the following day to make that stage easier, however you will still need to check your work for lumps and bumps. Last but not least – check that your name is still clearly on the bottom of your work. Step Five – Bisque Firing When the work is completely dry it can go into the bisque kiln. The bisque kiln is fired to 1000°C. This process burns off the water in the clay as well as some of the chemically bound water. The structure of the clay is not altered that much at this temperature. Inside the bisque kiln, the work is stacked a little, small bowl inside a larger bowl and onto a heavy plate. Smaller items like decorations or drink coasters might get stacked several high. Consideration is paid to the weight of the stack and shape of the work. A bisque kiln can fire about one and a half times the amount of work that the glaze kiln can fire. The firing takes about 10 hours to complete the cycle and about two days to cool down. Once it has been emptied the work is placed in the glaze room ready for you to decorate! Step Six – Glazing Decorating your work with colour can be a lot of fun – and time consuming! There are three main options for surface treatment at this stage: Oxide Washes Underglazes Glazes Washes and underglazes do not “glaze” the work – It will still need a layer of glaze to fully seal the clay (washes don’t need glaze on surfaces not designed for food or liquid as they can gloss up a little on their own). Underglazes are stable colourants that turn out pretty much how they look in the jar. They can be mixed with each other to form other colours and can be used like water colours to paint onto your work. Mostly they should have a clear glaze on top to seal them. Oxides are a different species – the pink oxide (cobalt) wash turns out bright blue for instance. They don’t always need a glaze on top, and some glazes can change the colour of the wash! The glazes need no other “glaze” on top! Be careful of unknown glaze interactions – you can put any combination of glaze in a bowl or on a plate, but only a single glaze on the outside of any vertical surface! Glazes are a chemical reaction under heat. We don’t know the exact chemicals in the Mayco glazes we use. I can guess by the way they interact with each other, however, on the whole, you need to test every idea you have, and not run the test on a vertical surface! Simply put, glaze is a layer of glass like substance that bonds with the clay underneath. Clay is made of silica, alumina and water. Glaze is made of mostly silica. Silica has a melting point of 1700°C and we fire to 1240°C. The silica requires a “flux” to help it melt at the lower temperature. Fluxes can be all sorts of chemicals – a common one is calcium – calcium has a melting point of 2500°C, however, together they both melt at a much lower temperature! Colourants are metal oxides like cobalt (blue), chrome (green through black), copper (green, blue, even red!), manganese (black, purple and pink) iron (red brown), etc. Different chemicals in the glaze can have dramatic effects. for example, barium carbonate (which we don’t use) turns manganese bright pink! Other elements can turn manganese dioxide brown, blue, purple and reddish brown. Manganese dioxide is a flux in and of itself as well. So, glazes that get their black and purple colours, often interact with other glazes and RUN! Our mirror black is a good example – it mixes really well with many glazes because it fluxes them – causes them to melt faster. It will also bring out many beautiful colours in the glazes because it’s black colouring most definitely comes from manganese dioxide! Glaze chemistry is a whole subject on it’s own! We use commercial Mayco glazes on purpose – for their huge range of colour possibilities, stability, cool interactions, artistic freedom with the ability to easily brush the glazes on and ease of use. We currently have almost 50 glazes on hand! A major project is to test the interactions of all glazes with each other. That is 2,500 test tiles!!!! I’m going to make the wall behind the wheels the feature wall of pretty colours! Step Seven – Glaze (Gloss or sometimes called “Glost”) Firing Most of the time this is the final stage of making your creation (but not always!) The glaze kiln goes to 1240°C. This is called cone 6, or midrange. It is the low end of stoneware temperatures. Stoneware clays and glazes are typically fired at cone 8 – 10, that is 1260 – 1290°C. The energy requirement to go from 1240°C to 1280°C is almost a 30% more! Our clay is formulated to vitrify (mature, turn “glass-like”) at 1240°, as are our glazes. A glaze kiln take around 12 hours to reach temperature and two to three days to cool down. Sometimes a third firing process is required – this is for decoration that is added to work after the glaze firing. For example – adding precious metals and lustres. this firing temperature is usually around 600 – 800°C depending upon the techniques being used. There are many students interested in gold and silver trims – we will be doing this third type of firing soon! After firing your work will be in the student finished work shelves. Remember to pay for it before you head out the door! There is a small extra charge for using porcelain clay (it’s more than twice the price of regular clay), and for any third firing process! Once your work has been fired it can not turn back into clay for millennia – so don’t fire it if you don’t like it! Put it in the bucket for recycling. https://firebirdstudios.com.au/the-process-of-making-pottery/Ceramics have evolved over thousands of years.White earthenware dinner plate. Crazing evident all over.Backstamped ‘Made in England S LTD’flagstaff hill, warrnambool, shipwrecked-coast, flagstaff-hill, flagstaff-hill-maritime-museum, maritime-museum, shipwreck-coast, flagstaff-hill-maritime-village, ceramics, tableware -
 Flagstaff Hill Maritime Museum and Village
Domestic object - Plate, Johnson Bros
... and can be used like water colours to paint onto your work. Mostly... other to form other colours and can be used like water colours ...The Process of Making Pottery Decorating, Firing, Glazing, Making, Technical There is a rhythm and flow to clay. It can’t be done all at once! Even the making process! It can take weeks to get everything done, especially if you can only work on your pottery once a week! Even though we have three hour classes, it’s often just not enough time! Here is an overview of some of the processes so you have a bit more grasp on some of the technical stuff! Step One – Design There are SO many ideas out there for making stuff in clay! From delicate porcelain jewellery, through to heavy sculptural work and everything in between. Deciding your direction is sometimes not that easy – when you first start, try everything, you will naturally gravitate to the style that you enjoy! The options and variations are endless and can get a wee bit overwhelming too! Check in with me before you start to ensure your ideas will work, what order you might do things, how you could achieve the look you are seeking and any other technical data required! Step Two – Making Clay is thixotropic. This means that as you work with it, the clay first gets sloppier and wetter, before is begins to dry in the atmosphere. For most things, you simply can’t do all parts of the project at once. An example of work order might look like: Get last weeks work out from the shelves Prepare clay for today’s work – roll your clay, prepare balls for throwing, make the first stage of a pinch pot) Clean up last week’s work and put it on the shelf for bisque firing Check that you have any glazing to do – and do enough of it that you will have time to finish your main project Do the next step of your next project – there might be a further step that can’t be complete immediately, in that case, wrap your work well and put onto the shelves. Letting your work rest for a while can really help keep your work clean and professional looking. Many things require bagging under plastic to keep it ready for work the next week – put your name on the outside of the bag so you can find your work easily. We have stickers and markers. Consider how you want to decorate your work – coloured slip can be applied at a fairly wet stage (remembering that it will make your work even wetter!). Trying to apply slip to dry clay won’t work! If you want to do sgraffito – you will need to keep the work leather hard (a state of dryness where you can still work the clay with a little effort and a little water and care). Step Three – Drying Most of the time your work can go into the rack uncovered to let it dry out for the following week. If you want to continue forming or shaping you will need to double bag your work – put your work on a suitable sized bat and put the bat in a bag so the base of the bag is under the bat, then put another bag over the top of the work and tuck the top of the bag under the bat. If you want to trim (or turn) your thrown work the following week, it should also be double bagged. If your work is large, delicate, or of uneven thicknesses, you should lightly cover your work for drying. When considering the drying process, bare in mind the weather, humidity and wind! The hotter and dryer, the faster things dry and work can dry unevenly in the shelves – this can lead to cracking – another time to lightly cover your work for drying. Step Four – Trimming and Cleaning Up Your work is dry! It is called greenware now and it is at it’s most fragile! Handle everything with two hands. I often refer to soft hands – keep everything gentle and with your fingers spread as much as possible. Try to not pick up things like plates too much, and always with both hands! Before your work can be bisque fired it should be “cleaned up”. You work won’t go into the kiln if it has sharp edges – when glazed, sharp edges turn into razor blades! Use a piece of fly wire to rub the work all over – this will scratch a little so be light handed. Use a knife or metal kidney to scrape any areas that require a bit more dynamic treatment than the fly wire offers! Finally, a very light wipe over with a slightly damp sponge can help soften and soothe all of your edges and dags! Trimming thrown work: If you are planning to trim (or turn) your thrown work (and you should be), make sure you bag it well – your work should be leather hard to almost dry for easiest trimming. Use this step to finish the work completely – use a metal kidney to polish the surface, or a slightly damp sponge to give a freshly thrown look. Wipe the sponge around the rim after trimming, and check the inside of the pot for dags! Trimming slip cast work: Usually I will trim the rims of your work on the wheel the following day to make that stage easier, however you will still need to check your work for lumps and bumps. Last but not least – check that your name is still clearly on the bottom of your work. Step Five – Bisque Firing When the work is completely dry it can go into the bisque kiln. The bisque kiln is fired to 1000°C. This process burns off the water in the clay as well as some of the chemically bound water. The structure of the clay is not altered that much at this temperature. Inside the bisque kiln, the work is stacked a little, small bowl inside a larger bowl and onto a heavy plate. Smaller items like decorations or drink coasters might get stacked several high. Consideration is paid to the weight of the stack and shape of the work. A bisque kiln can fire about one and a half times the amount of work that the glaze kiln can fire. The firing takes about 10 hours to complete the cycle and about two days to cool down. Once it has been emptied the work is placed in the glaze room ready for you to decorate! Step Six – Glazing Decorating your work with colour can be a lot of fun – and time consuming! There are three main options for surface treatment at this stage: Oxide Washes Underglazes Glazes Washes and underglazes do not “glaze” the work – It will still need a layer of glaze to fully seal the clay (washes don’t need glaze on surfaces not designed for food or liquid as they can gloss up a little on their own). Underglazes are stable colourants that turn out pretty much how they look in the jar. They can be mixed with each other to form other colours and can be used like water colours to paint onto your work. Mostly they should have a clear glaze on top to seal them. Oxides are a different species – the pink oxide (cobalt) wash turns out bright blue for instance. They don’t always need a glaze on top, and some glazes can change the colour of the wash! The glazes need no other “glaze” on top! Be careful of unknown glaze interactions – you can put any combination of glaze in a bowl or on a plate, but only a single glaze on the outside of any vertical surface! Glazes are a chemical reaction under heat. We don’t know the exact chemicals in the Mayco glazes we use. I can guess by the way they interact with each other, however, on the whole, you need to test every idea you have, and not run the test on a vertical surface! Simply put, glaze is a layer of glass like substance that bonds with the clay underneath. Clay is made of silica, alumina and water. Glaze is made of mostly silica. Silica has a melting point of 1700°C and we fire to 1240°C. The silica requires a “flux” to help it melt at the lower temperature. Fluxes can be all sorts of chemicals – a common one is calcium – calcium has a melting point of 2500°C, however, together they both melt at a much lower temperature! Colourants are metal oxides like cobalt (blue), chrome (green through black), copper (green, blue, even red!), manganese (black, purple and pink) iron (red brown), etc. Different chemicals in the glaze can have dramatic effects. for example, barium carbonate (which we don’t use) turns manganese bright pink! Other elements can turn manganese dioxide brown, blue, purple and reddish brown. Manganese dioxide is a flux in and of itself as well. So, glazes that get their black and purple colours, often interact with other glazes and RUN! Our mirror black is a good example – it mixes really well with many glazes because it fluxes them – causes them to melt faster. It will also bring out many beautiful colours in the glazes because it’s black colouring most definitely comes from manganese dioxide! Glaze chemistry is a whole subject on it’s own! We use commercial Mayco glazes on purpose – for their huge range of colour possibilities, stability, cool interactions, artistic freedom with the ability to easily brush the glazes on and ease of use. We currently have almost 50 glazes on hand! A major project is to test the interactions of all glazes with each other. That is 2,500 test tiles!!!! I’m going to make the wall behind the wheels the feature wall of pretty colours! Step Seven – Glaze (Gloss or sometimes called “Glost”) Firing Most of the time this is the final stage of making your creation (but not always!) The glaze kiln goes to 1240°C. This is called cone 6, or midrange. It is the low end of stoneware temperatures. Stoneware clays and glazes are typically fired at cone 8 – 10, that is 1260 – 1290°C. The energy requirement to go from 1240°C to 1280°C is almost a 30% more! Our clay is formulated to vitrify (mature, turn “glass-like”) at 1240°, as are our glazes. A glaze kiln take around 12 hours to reach temperature and two to three days to cool down. Sometimes a third firing process is required – this is for decoration that is added to work after the glaze firing. For example – adding precious metals and lustres. this firing temperature is usually around 600 – 800°C depending upon the techniques being used. There are many students interested in gold and silver trims – we will be doing this third type of firing soon! After firing your work will be in the student finished work shelves. Remember to pay for it before you head out the door! There is a small extra charge for using porcelain clay (it’s more than twice the price of regular clay), and for any third firing process! Once your work has been fired it can not turn back into clay for millennia – so don’t fire it if you don’t like it! Put it in the bucket for recycling. https://firebirdstudios.com.au/the-process-of-making-pottery/Ceramics have evolved over thousands of years.A white earthenware side plate with a gadroon edge. Has water marks and chips on front.‘Johnson Bros England Reg No 15587’flagstaff hill, warrnambool, shipwrecked-coast, flagstaff-hill, flagstaff-hill-maritime-museum, maritime-museum, shipwreck-coast, flagstaff-hill-maritime-village, johnson bros, ceramics, tableware -
 Flagstaff Hill Maritime Museum and Village
Domestic object - Plate, Alfred Meakin
... and can be used like water colours to paint onto your work. Mostly... other to form other colours and can be used like water colours ...The Process of Making Pottery Decorating, Firing, Glazing, Making, Technical There is a rhythm and flow to clay. It can’t be done all at once! Even the making process! It can take weeks to get everything done, especially if you can only work on your pottery once a week! Even though we have three hour classes, it’s often just not enough time! Here is an overview of some of the processes so you have a bit more grasp on some of the technical stuff! Step One – Design There are SO many ideas out there for making stuff in clay! From delicate porcelain jewellery, through to heavy sculptural work and everything in between. Deciding your direction is sometimes not that easy – when you first start, try everything, you will naturally gravitate to the style that you enjoy! The options and variations are endless and can get a wee bit overwhelming too! Check in with me before you start to ensure your ideas will work, what order you might do things, how you could achieve the look you are seeking and any other technical data required! Step Two – Making Clay is thixotropic. This means that as you work with it, the clay first gets sloppier and wetter, before is begins to dry in the atmosphere. For most things, you simply can’t do all parts of the project at once. An example of work order might look like: Get last weeks work out from the shelves Prepare clay for today’s work – roll your clay, prepare balls for throwing, make the first stage of a pinch pot) Clean up last week’s work and put it on the shelf for bisque firing Check that you have any glazing to do – and do enough of it that you will have time to finish your main project Do the next step of your next project – there might be a further step that can’t be complete immediately, in that case, wrap your work well and put onto the shelves. Letting your work rest for a while can really help keep your work clean and professional looking. Many things require bagging under plastic to keep it ready for work the next week – put your name on the outside of the bag so you can find your work easily. We have stickers and markers. Consider how you want to decorate your work – coloured slip can be applied at a fairly wet stage (remembering that it will make your work even wetter!). Trying to apply slip to dry clay won’t work! If you want to do sgraffito – you will need to keep the work leather hard (a state of dryness where you can still work the clay with a little effort and a little water and care). Step Three – Drying Most of the time your work can go into the rack uncovered to let it dry out for the following week. If you want to continue forming or shaping you will need to double bag your work – put your work on a suitable sized bat and put the bat in a bag so the base of the bag is under the bat, then put another bag over the top of the work and tuck the top of the bag under the bat. If you want to trim (or turn) your thrown work the following week, it should also be double bagged. If your work is large, delicate, or of uneven thicknesses, you should lightly cover your work for drying. When considering the drying process, bare in mind the weather, humidity and wind! The hotter and dryer, the faster things dry and work can dry unevenly in the shelves – this can lead to cracking – another time to lightly cover your work for drying. Step Four – Trimming and Cleaning Up Your work is dry! It is called greenware now and it is at it’s most fragile! Handle everything with two hands. I often refer to soft hands – keep everything gentle and with your fingers spread as much as possible. Try to not pick up things like plates too much, and always with both hands! Before your work can be bisque fired it should be “cleaned up”. You work won’t go into the kiln if it has sharp edges – when glazed, sharp edges turn into razor blades! Use a piece of fly wire to rub the work all over – this will scratch a little so be light handed. Use a knife or metal kidney to scrape any areas that require a bit more dynamic treatment than the fly wire offers! Finally, a very light wipe over with a slightly damp sponge can help soften and soothe all of your edges and dags! Trimming thrown work: If you are planning to trim (or turn) your thrown work (and you should be), make sure you bag it well – your work should be leather hard to almost dry for easiest trimming. Use this step to finish the work completely – use a metal kidney to polish the surface, or a slightly damp sponge to give a freshly thrown look. Wipe the sponge around the rim after trimming, and check the inside of the pot for dags! Trimming slip cast work: Usually I will trim the rims of your work on the wheel the following day to make that stage easier, however you will still need to check your work for lumps and bumps. Last but not least – check that your name is still clearly on the bottom of your work. Step Five – Bisque Firing When the work is completely dry it can go into the bisque kiln. The bisque kiln is fired to 1000°C. This process burns off the water in the clay as well as some of the chemically bound water. The structure of the clay is not altered that much at this temperature. Inside the bisque kiln, the work is stacked a little, small bowl inside a larger bowl and onto a heavy plate. Smaller items like decorations or drink coasters might get stacked several high. Consideration is paid to the weight of the stack and shape of the work. A bisque kiln can fire about one and a half times the amount of work that the glaze kiln can fire. The firing takes about 10 hours to complete the cycle and about two days to cool down. Once it has been emptied the work is placed in the glaze room ready for you to decorate! Step Six – Glazing Decorating your work with colour can be a lot of fun – and time consuming! There are three main options for surface treatment at this stage: Oxide Washes Underglazes Glazes Washes and underglazes do not “glaze” the work – It will still need a layer of glaze to fully seal the clay (washes don’t need glaze on surfaces not designed for food or liquid as they can gloss up a little on their own). Underglazes are stable colourants that turn out pretty much how they look in the jar. They can be mixed with each other to form other colours and can be used like water colours to paint onto your work. Mostly they should have a clear glaze on top to seal them. Oxides are a different species – the pink oxide (cobalt) wash turns out bright blue for instance. They don’t always need a glaze on top, and some glazes can change the colour of the wash! The glazes need no other “glaze” on top! Be careful of unknown glaze interactions – you can put any combination of glaze in a bowl or on a plate, but only a single glaze on the outside of any vertical surface! Glazes are a chemical reaction under heat. We don’t know the exact chemicals in the Mayco glazes we use. I can guess by the way they interact with each other, however, on the whole, you need to test every idea you have, and not run the test on a vertical surface! Simply put, glaze is a layer of glass like substance that bonds with the clay underneath. Clay is made of silica, alumina and water. Glaze is made of mostly silica. Silica has a melting point of 1700°C and we fire to 1240°C. The silica requires a “flux” to help it melt at the lower temperature. Fluxes can be all sorts of chemicals – a common one is calcium – calcium has a melting point of 2500°C, however, together they both melt at a much lower temperature! Colourants are metal oxides like cobalt (blue), chrome (green through black), copper (green, blue, even red!), manganese (black, purple and pink) iron (red brown), etc. Different chemicals in the glaze can have dramatic effects. for example, barium carbonate (which we don’t use) turns manganese bright pink! Other elements can turn manganese dioxide brown, blue, purple and reddish brown. Manganese dioxide is a flux in and of itself as well. So, glazes that get their black and purple colours, often interact with other glazes and RUN! Our mirror black is a good example – it mixes really well with many glazes because it fluxes them – causes them to melt faster. It will also bring out many beautiful colours in the glazes because it’s black colouring most definitely comes from manganese dioxide! Glaze chemistry is a whole subject on it’s own! We use commercial Mayco glazes on purpose – for their huge range of colour possibilities, stability, cool interactions, artistic freedom with the ability to easily brush the glazes on and ease of use. We currently have almost 50 glazes on hand! A major project is to test the interactions of all glazes with each other. That is 2,500 test tiles!!!! I’m going to make the wall behind the wheels the feature wall of pretty colours! Step Seven – Glaze (Gloss or sometimes called “Glost”) Firing Most of the time this is the final stage of making your creation (but not always!) The glaze kiln goes to 1240°C. This is called cone 6, or midrange. It is the low end of stoneware temperatures. Stoneware clays and glazes are typically fired at cone 8 – 10, that is 1260 – 1290°C. The energy requirement to go from 1240°C to 1280°C is almost a 30% more! Our clay is formulated to vitrify (mature, turn “glass-like”) at 1240°, as are our glazes. A glaze kiln take around 12 hours to reach temperature and two to three days to cool down. Sometimes a third firing process is required – this is for decoration that is added to work after the glaze firing. For example – adding precious metals and lustres. this firing temperature is usually around 600 – 800°C depending upon the techniques being used. There are many students interested in gold and silver trims – we will be doing this third type of firing soon! After firing your work will be in the student finished work shelves. Remember to pay for it before you head out the door! There is a small extra charge for using porcelain clay (it’s more than twice the price of regular clay), and for any third firing process! Once your work has been fired it can not turn back into clay for millennia – so don’t fire it if you don’t like it! Put it in the bucket for recycling. https://firebirdstudios.com.au/the-process-of-making-pottery/Ceramics have evolved over thousands of years.Earthenware dessert plate, cream colour. Made by Alfred Meakin, England. Backstamped ‘Alfred Meakin England’. flagstaff hill, warrnambool, shipwrecked-coast, flagstaff-hill, flagstaff-hill-maritime-museum, maritime-museum, shipwreck-coast, flagstaff-hill-maritime-village, alfred meakin, ceramics, earthenware, kitchenware -
 Flagstaff Hill Maritime Museum and Village
Domestic object - Jug
... and can be used like water colours to paint onto your work. Mostly... other to form other colours and can be used like water colours ...The Process of Making Pottery Decorating, Firing, Glazing, Making, Technical There is a rhythm and flow to clay. It can’t be done all at once! Even the making process! It can take weeks to get everything done, especially if you can only work on your pottery once a week! Even though we have three hour classes, it’s often just not enough time! Here is an overview of some of the processes so you have a bit more grasp on some of the technical stuff! Step One – Design There are SO many ideas out there for making stuff in clay! From delicate porcelain jewellery, through to heavy sculptural work and everything in between. Deciding your direction is sometimes not that easy – when you first start, try everything, you will naturally gravitate to the style that you enjoy! The options and variations are endless and can get a wee bit overwhelming too! Check in with me before you start to ensure your ideas will work, what order you might do things, how you could achieve the look you are seeking and any other technical data required! Step Two – Making Clay is thixotropic. This means that as you work with it, the clay first gets sloppier and wetter, before is begins to dry in the atmosphere. For most things, you simply can’t do all parts of the project at once. An example of work order might look like: Get last weeks work out from the shelves Prepare clay for today’s work – roll your clay, prepare balls for throwing, make the first stage of a pinch pot) Clean up last week’s work and put it on the shelf for bisque firing Check that you have any glazing to do – and do enough of it that you will have time to finish your main project Do the next step of your next project – there might be a further step that can’t be complete immediately, in that case, wrap your work well and put onto the shelves. Letting your work rest for a while can really help keep your work clean and professional looking. Many things require bagging under plastic to keep it ready for work the next week – put your name on the outside of the bag so you can find your work easily. We have stickers and markers. Consider how you want to decorate your work – coloured slip can be applied at a fairly wet stage (remembering that it will make your work even wetter!). Trying to apply slip to dry clay won’t work! If you want to do sgraffito – you will need to keep the work leather hard (a state of dryness where you can still work the clay with a little effort and a little water and care). Step Three – Drying Most of the time your work can go into the rack uncovered to let it dry out for the following week. If you want to continue forming or shaping you will need to double bag your work – put your work on a suitable sized bat and put the bat in a bag so the base of the bag is under the bat, then put another bag over the top of the work and tuck the top of the bag under the bat. If you want to trim (or turn) your thrown work the following week, it should also be double bagged. If your work is large, delicate, or of uneven thicknesses, you should lightly cover your work for drying. When considering the drying process, bare in mind the weather, humidity and wind! The hotter and dryer, the faster things dry and work can dry unevenly in the shelves – this can lead to cracking – another time to lightly cover your work for drying. Step Four – Trimming and Cleaning Up Your work is dry! It is called greenware now and it is at it’s most fragile! Handle everything with two hands. I often refer to soft hands – keep everything gentle and with your fingers spread as much as possible. Try to not pick up things like plates too much, and always with both hands! Before your work can be bisque fired it should be “cleaned up”. You work won’t go into the kiln if it has sharp edges – when glazed, sharp edges turn into razor blades! Use a piece of fly wire to rub the work all over – this will scratch a little so be light handed. Use a knife or metal kidney to scrape any areas that require a bit more dynamic treatment than the fly wire offers! Finally, a very light wipe over with a slightly damp sponge can help soften and soothe all of your edges and dags! Trimming thrown work: If you are planning to trim (or turn) your thrown work (and you should be), make sure you bag it well – your work should be leather hard to almost dry for easiest trimming. Use this step to finish the work completely – use a metal kidney to polish the surface, or a slightly damp sponge to give a freshly thrown look. Wipe the sponge around the rim after trimming, and check the inside of the pot for dags! Trimming slip cast work: Usually I will trim the rims of your work on the wheel the following day to make that stage easier, however you will still need to check your work for lumps and bumps. Last but not least – check that your name is still clearly on the bottom of your work. Step Five – Bisque Firing When the work is completely dry it can go into the bisque kiln. The bisque kiln is fired to 1000°C. This process burns off the water in the clay as well as some of the chemically bound water. The structure of the clay is not altered that much at this temperature. Inside the bisque kiln, the work is stacked a little, small bowl inside a larger bowl and onto a heavy plate. Smaller items like decorations or drink coasters might get stacked several high. Consideration is paid to the weight of the stack and shape of the work. A bisque kiln can fire about one and a half times the amount of work that the glaze kiln can fire. The firing takes about 10 hours to complete the cycle and about two days to cool down. Once it has been emptied the work is placed in the glaze room ready for you to decorate! Step Six – Glazing Decorating your work with colour can be a lot of fun – and time consuming! There are three main options for surface treatment at this stage: Oxide Washes Underglazes Glazes Washes and underglazes do not “glaze” the work – It will still need a layer of glaze to fully seal the clay (washes don’t need glaze on surfaces not designed for food or liquid as they can gloss up a little on their own). Underglazes are stable colourants that turn out pretty much how they look in the jar. They can be mixed with each other to form other colours and can be used like water colours to paint onto your work. Mostly they should have a clear glaze on top to seal them. Oxides are a different species – the pink oxide (cobalt) wash turns out bright blue for instance. They don’t always need a glaze on top, and some glazes can change the colour of the wash! The glazes need no other “glaze” on top! Be careful of unknown glaze interactions – you can put any combination of glaze in a bowl or on a plate, but only a single glaze on the outside of any vertical surface! Glazes are a chemical reaction under heat. We don’t know the exact chemicals in the Mayco glazes we use. I can guess by the way they interact with each other, however, on the whole, you need to test every idea you have, and not run the test on a vertical surface! Simply put, glaze is a layer of glass like substance that bonds with the clay underneath. Clay is made of silica, alumina and water. Glaze is made of mostly silica. Silica has a melting point of 1700°C and we fire to 1240°C. The silica requires a “flux” to help it melt at the lower temperature. Fluxes can be all sorts of chemicals – a common one is calcium – calcium has a melting point of 2500°C, however, together they both melt at a much lower temperature! Colourants are metal oxides like cobalt (blue), chrome (green through black), copper (green, blue, even red!), manganese (black, purple and pink) iron (red brown), etc. Different chemicals in the glaze can have dramatic effects. for example, barium carbonate (which we don’t use) turns manganese bright pink! Other elements can turn manganese dioxide brown, blue, purple and reddish brown. Manganese dioxide is a flux in and of itself as well. So, glazes that get their black and purple colours, often interact with other glazes and RUN! Our mirror black is a good example – it mixes really well with many glazes because it fluxes them – causes them to melt faster. It will also bring out many beautiful colours in the glazes because it’s black colouring most definitely comes from manganese dioxide! Glaze chemistry is a whole subject on it’s own! We use commercial Mayco glazes on purpose – for their huge range of colour possibilities, stability, cool interactions, artistic freedom with the ability to easily brush the glazes on and ease of use. We currently have almost 50 glazes on hand! A major project is to test the interactions of all glazes with each other. That is 2,500 test tiles!!!! I’m going to make the wall behind the wheels the feature wall of pretty colours! Step Seven – Glaze (Gloss or sometimes called “Glost”) Firing Most of the time this is the final stage of making your creation (but not always!) The glaze kiln goes to 1240°C. This is called cone 6, or midrange. It is the low end of stoneware temperatures. Stoneware clays and glazes are typically fired at cone 8 – 10, that is 1260 – 1290°C. The energy requirement to go from 1240°C to 1280°C is almost a 30% more! Our clay is formulated to vitrify (mature, turn “glass-like”) at 1240°, as are our glazes. A glaze kiln take around 12 hours to reach temperature and two to three days to cool down. Sometimes a third firing process is required – this is for decoration that is added to work after the glaze firing. For example – adding precious metals and lustres. this firing temperature is usually around 600 – 800°C depending upon the techniques being used. There are many students interested in gold and silver trims – we will be doing this third type of firing soon! After firing your work will be in the student finished work shelves. Remember to pay for it before you head out the door! There is a small extra charge for using porcelain clay (it’s more than twice the price of regular clay), and for any third firing process! Once your work has been fired it can not turn back into clay for millennia – so don’t fire it if you don’t like it! Put it in the bucket for recycling. https://firebirdstudios.com.au/the-process-of-making-pottery/The form of the jug has been in use for many centuries.Stoneware jug. Two tone brown glaze with pierced lip behind spout. Spout chipped.None.flagstaff hill, warrnambool, shipwrecked-coast, flagstaff-hill, flagstaff-hill-maritime-museum, maritime-museum, shipwreck-coast, flagstaff-hill-maritime-village, jug, ceramic jug -
 The Beechworth Burke Museum
Geological specimen - Precious Opal
In Australia, precious opal is found in Cretaceous age sandstones and mudstones. These sedimentary rocks were deeply weathered and this weathering released silica into the groundwater.Australia is the only part of the world where opalised animal and plant fossils have been found. Opal artefacts several thousands of years old have been discovered in East Africa. As early as 250 BC the Romans prized opals, thought to have come from mines in Eastern Europe, the ancient world's main source of opals. There are many aboriginal dreamtime stories that feature opal. Australian opals discovered during the late 1800's found little favour with European markets but their commercial value increased in the 1900's and in 1932 Australia took over as the major producer of opals in the world and remains the largest producer to this day. Opal is found around the world (Brazil, Mexico, Honduras and the western US) however Australia produces 95% of the world's precious opal and it is our official national gemstone. Opal was first mined commercially at Listowel Downs in Queensland in 1875 and later at White Cliffs in NSW. Today, Coober Pedy (SA) is the main producer of white opal, though in recent years this field has expanded and all types of opals are found. Other centres in SA include Andamooka and Mintabe. Lightning Ridge (NSW) is renowned for black opal and formerly White Cliffs was a large producer of high quality opal. Boulder opals (opals in concretionary ironstone) are mined in Queensland from numerous localities in a zone extending from the Eulo and Cunnamulla district in the south and northwest for a distance of over 700 km to Kynuna in the north. The towns of Quilpie, Yowah and Winton are the main opal mining and wholesale centres. Opals are considered gemstones and have been used in jewellery for thousands of years.Throughout much of history, opals were actually believed to be good luck. The Romans thought that opals were one of the luckiest gemstones and a symbol of hope. In the Middle Ages, opals were believed to be bestowed with all the positive properties of coloured gemstones due to its rainbow-like play of colour. Finally, there is a superstition that you should not wear an opal unless it is your birthstone otherwise misfortune will befall you. This, of course, is far-fetched, but the notion could have been promoted in the late 19th and early 20th Centuries by diamond traders who were trying to increase sales of diamonds and deter people from buying opals. Possibly related to this is the thought that you should set opal jewellery with diamonds as their powers of good fortune will override any negativity held by the opal. The great majority of opal does not show play of colour and is called common opal or potch however this is not the case with a precious opal. Opal is a precious gemstone, like rubies, emeralds or diamonds. Opal is rare, and it is expensive to prospect and mine for.Silica is one of the most common minerals on the planet, but precious opal is very rare – far more rare than diamonds. Precious opal is rare because the natural processes that create it rarely occur.Most (at least 95%) of the opal found by miners is common opal without gem colour. In Australia we call it potch. It can be white, grey, black or amber coloured. Even when a miner finds gem-coloured opal, most of it can’t be cut into gemstones because it’s too thin, or sandy. This specimen is part of a larger collection of geological and mineral specimens collected from around Australia (and some parts of the world) and donated to the Burke Museum between 1868-1880. A large percentage of these specimens were collected in Victoria as part of the Geological Survey of Victoria that begun in 1852 (in response to the Gold Rush) to study and map the geology of Victoria. Collecting geological specimens was an important part of mapping and understanding the scientific makeup of the earth. Many of these specimens were sent to research and collecting organisations across Australia, including the Burke Museum, to educate and encourage further study.It is not known where this opal originated, except that it is probably from Victoria, as it has been recorded from many localities in the State. Common Opal is formed from silica-rich water circulating through rocks near the Earth’s surface. It consists of minute spheres of silica arranged in different ways. In common opal, the spheres are of different sizes and randomly arranged, unlike in precious opal where the spheres are of similar size and uniformly arranged in three dimensions. These differences account for common opal generally being translucent to opaque and without the play of colours, or opalescence, displayed by precious opal. Common opal is found in many localities and different geological environments throughout Australia and the world. Precious opal requires special conditions to form and is much less common. Australia produces most to the world’s precious opal. burke museum, beechworth, indigo shire, beechworth museum, geological, geological specimen, precious opal, opal, brazil, mexico, honduras, queensland, coober pedy, gemstones, jewellery, play-of-colour, light blue -
 The Beechworth Burke Museum
Geological specimen - Common Opal, Unknown
It is not known where this opal originated. Common Opal is formed from silica-rich water entering the earths crust and hardening into a gel of water and silica-spheres, layered through the specimen. Common opal differs from precious opal in colouration and appearance, with precious opal including more colours, and having a translucent or glossy appearance, where common opal shows less colour and is typically opaque. It scores high on the Mohs hardness scale, and is common throughout the world, especially in Australia, where it is far more prevalent than the highly-prized precious opal. Australia is also the highest producer of opals in the modern world. This specimen is part of a larger collection of geological and mineral specimens collected from around Australia (and some parts of the world) and donated to the Burke Museum between 1868-1880. A large percentage of these specimens were collected in Victoria as part of the Geological Survey of Victoria that begun in 1852 (in response to the Gold Rush) to study and map the geology of Victoria. Collecting geological specimens was an important part of mapping and understanding the scientific makeup of the earth. Many of these specimens were sent to research and collecting organisations across Australia, including the Burke Museum, to educate and encourage further study.A solid, silica-based mineral specimen of Common Opal in shades of grey, green, and yellow, with a thick grey vein running through the centre. geological specimen, geology, geology collection, burke museum, beechworth, opal, common opal, gemstone, mining -
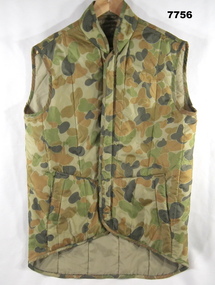 Bendigo Military Museum
Uniform - VEST, WORK DRESS - ARMY, Australian Defence Industries
Vest used by Artillery.DCPU (Disruptive Pattern Camouflage Uniform) Work Dress vest. Colours - light to dark green through to light to dark brown, nylon fabric. Stand up collar, two front pockets, front fastening - nylon and plastic zipper. Vest lining - light green nylon fabric.Manufacturers Information on label - black ink print. "WALKABOUT/ TRADITIONALLY AUSTRALIAN/ NSN 8415-66-136-4647/ 94/ SIZE 105 CM CHEST/ NAME/ SERVICE NO./ MACH. WASHABLE WARM WATER ONLY/ DO NOT BLEACH/ DO NOT IRON/ DO NOT STEAM PRESS/ NYLON INNER/ OUTER - POLYESTER FILLED/ MADE IN AUSTRALIA." uniform, army, work dress, dpcu, vest -
 Warrnambool and District Historical Society Inc.
Hat & Neck Tie, Warrnambool Technical School, 1970s
These two hats and school tie were once part of the uniform for girls at Warrnambool Technical School. This school was established in 1913 in Timor Street, Warrnambool with the first Principal being John King. From this school evolved the Warrnambool Institute of Advanced Education which itself was subsumed into the present day Deakin University campus at Sherwood Park in Warrnambool. The Timor Street site is now the location of South West College of TAFE. The WarrnamboolTechnical School moved from Timor Street to its present-day site in Caramut Road Warrnambool in 1973 and was re-named Brauer College in 1990 after Alfred Brauer, a Warrnambool doctor and a prominent school patron. It is believed that the owners of the hats, Jeannie and Sandra Cole were sisters.These two hats and the tie are interesting reminders of the uniform of a local school some 40 or 50 years ago..1 This is a girl’s boater-shape straw hat. It has a ribbon band in grey, brown, yellow, red and green colours with a bow at the back with overhanging ends of the band. The hat has a cloth lining with a tag. The owner’s name is inside the hat. .2 This is a girl’s boater-shape straw hat. It has the same band as the one above but the crown on this hat is semi-detached. The owner’s name is on the inside of the hat. .3 This is a school tie. It is brown with gold, dark green and red diagonal stripes. .1 Jeannie Cole Made of straw fibre .2 Sandra Cole Made of straw fibre Created by Effie Jay showerproof with water repellent formula KO/3420 warrnambool technical school, history of warrnambool -
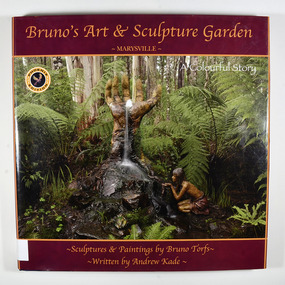 Marysville & District Historical Society
Book - Hardback book, Bruno Torfs et al, Bruno's Art and Sculpture Garden-Phoenix Edition, Post 2009
A pictorial journey through Bruno's sculpture garden in Marysville with an additional section of photographs taken post-2009 Black Saturday bushfires.A pictorial journey through Bruno's sculpture garden in Marysville with an additional section of photographs taken post-2009 Black Saturday bushfires. Bruno's Sculpture Garden is one of Marysville's popular attractions. There is a sculpture garden as well as a gallery of artworks. Both the garden and gallery were destroyed during the 2009 Black Saturday bushfires. Some of the sculptures were totally destroyed though a few did survive the fires. Bruno made the decision to re-sculpt the lost sculptures and re-built his gallery and re-open his garden to visitors to Marysville. This book is a new edition of a book that has been published as a symbol of the re-birth of both Marysville and Bruno's Sculpture Garden. Hardback. Front cover has a photograph of a sculpture of a large hand with a waterfall flowing from it. There is also a sculpture of a girl kneeling by the waterfall capturing water in her hands. The back cover has a photograph of a sculpture of two figures holding hands, one of whom is carrying a water jug.To this wonderful planet Earth/ Our experiences and stories are the colours of our life Acknowledgement/ I would like to express my gratitude to Iris and Andrew for their great work and enthusiasm toward this project/ and to all the people who have inspired me, especially my wife Marleen. Also many thanks to Jerome and Linda/ for all their generous support and to Ron Patterson for making it possible./ Bruno Torfsbruno torfs, bruno's art and sculpture garden, gardens-design, marysville, victoria, sculpture, australia, sculpture garden, sculptors, 2009 black saturday bushfires -
 Ballarat Clarendon College
Medal, The 1914-15 Star, 12/1918
The 1914–15 Star was authorised in 1918 and was awarded for service in specified theatres of war between 5 August 1914 and 31 December 1915. A recipient of the 1914 Star could not also be awarded the 1914–15 Star. The medal is accompanied by its original box. The Holgate medals were the first war medals held by BCC archives. They have historical and social significance for the College.The 1914-15 Star is a four pointed star of bright bronze, ensigned with a crown. The obverse has crossed gladius, overlaid with an oak wreath that is ensigned with the cypher of King George V. A scroll bearing the legend 1914-15 is centrally placed across the crossed blades. The 1914-15 Star ribbon has the red white and blue colours of the Empire, in shaded and watered stripes. The medal is accompanied by its original box.Engraved on a scroll in the centre of the medal front: '1914-15' The oak wreath is ensigned with the cypher of King George V. The back of the medal is engraved: '3193 / Pte E. S. HOLGATE / 6/F AMB. A.I.F. The box lid is inscribed: 'AMC/13 / 3193 / Pte. E. S. Holgate / 6/F.Amb,A.I.F. / 9350/Decd.'world war one, medal, 1914, the 1914 15 star, w w 1, private e s holgate, holgate, a i f, australian imperial force, holgate medal -
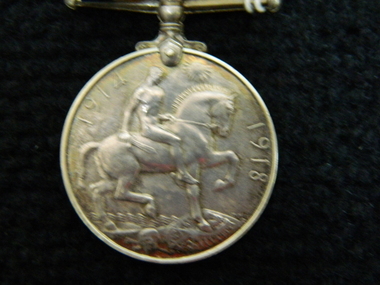 Ballarat Clarendon College
Medal, British War Medal, 1918
The British War Medal 1914-20 was iInstituted by King George V in 1919 to mark the end of World War I and record the service given. The qualification period was later extended to cover post-war mine clearance and service in Russia during 1919 and 1920. The British War Medal was awarded for service in a theatre of war between 5 August 1914 and 11 November 1918. Those eligible included members of women's organisations; persons on the staffs of military hospitals and members of recognised organisations who handled sick and wounded; and members of other duly recognised or other authorised organisations as specified in medal regulations. The qualification period was later extended to cover post-war mine clearance and service in Russia during 1919 and 1920. Lieut E. S. Holgate was mentioned in despatches for Gallantry in the Field 24/25 April 1918. He was killed in action at Villers-Bretonneux, 27 April, 1918. The British War Medal completes a trio of medals awarded to Lieut. E. S. Holgate, including the 1914-15 Star and the Victory Medal. The Holgate medals were the first war medals held by BCC archives. They have historical and social significance for the College.The British War Medal is round and made of cupro-nickel. It features the effigy of George V on the obverse. The reverse has an image of St George on horseback trampling underfoot the eagle shield of the Central Powers, and a skull and cross-bones, the emblems of death. Above this is the risen sun of victory. The British War Medal has a wide central watered stripe of orange, flanked by two narrow white stripes, which are in turn flanked by two black pin-stripes, further flanked by two outer stripes of purple. The colours have no particular significance. Impressed around edge are the recipient's details. Inscribed around outer edge of obverse: 'GEORGEIVS V BRITT. OMN:REX ET IND:IMP:' Impressed around edge of medal: 'LIEUT.E.S.HOLGATE. A.I.F.' Inscribed on the reverse '1914 1918'medal, 1918, world war 1, british war medal, w w 1, holgate, a i f, australian imperial force, holgate e s, holgate medal -
Lara RSL Sub Branch
1914 Star ribbon, World War I, unknown
WWI service medal ribbon. The ribbon has the red white and blue colours of the Empire, in shaded and watered stripes. The same ribbon is used for the 1914 Star and the 1914–15 Star. The 1914–15 Star was authorised in 1918 and was awarded for service in specified theatres of war between 5 August 1914 and 31 December 1915. This is a brand new ribbon for mounting a 1914-15 WWI star medal. The ribbon has the red white and blue colours of the Empire, in shaded and watered stripes. The same ribbon is used for the 1914 Star and the 1914–15 Star. Nilwwi, wwi medals, wwi cross -
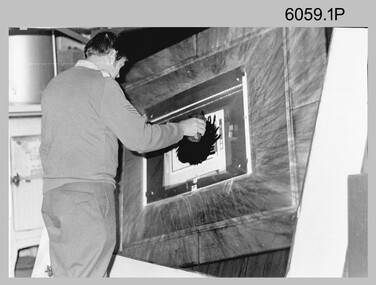 Bendigo Military Museum
Photograph - Photographic Technicians performing tasks at the Army Survey Regiment, c1960s, c1970s
These five photographs were most likely taken in the 1970s in Lithographic Squadron at the Army Survey Regiment, Fortuna, Bendigo. Photos .1P to .3P are annotated with the name of the technicians written on the back. Although Photo .4P is not annotated the technician is positively identified. In these five photos the technician is applying a UV-sensitive pigmented dye emulating one of the print colours to a white opaque polyester sheet mounted on a rotating table in a whirler. The coated sheet was dried before placement in a vacuum light frame beneath a stud registered map negative. They were then exposed to a carbon arc lamp. If there was more than one negative – typical for a type impression or 1st proof, the process was repeated for the other negatives of that print colour. There was a single exposure for composite negatives which was typical for the 2nd and final proof - the pre-press proof. The sheet was removed and washed with water and dried leaving the exposed colour impression. The technician repeated this process using process or spot dyes for remaining publication colours. Type impressions were a combination of the map grid and the topographic features in their correct print colours, forming a base for the cartographer to accurately position map names and symbols on a clear film overlay. The pre-press proof was a cost-effective way of producing a one-off visual copy of the map or chart product. It enabled cartographers to perform a quality inspection and correct any faults before publication. The pre-press proof was deemed authoritative before its release to Print Troop for bulk printing and distribution.This is a set of photographs of lithographic technicians preparing map proofs at the Army Survey Regiment, Bendigo c1960s c1970s. The photographs were printed on photographic paper and are part of the Army Survey Regiment’s Collection. The photographs were scanned at 300 dpi. .1) - Photo, black & white, c1970s, SGT Graham Jeffers, Lithographic Squadron .2) - Photo, black & white, c1970s, SGT Ken Slater Lithographic Squadron .3) - Photo, black & white, c1970s, Ian ‘Loft’ Turner, Lithographic Squadron .4) - Photo, black & white, c1970s, Gary Kerr, Lithographic Squadron .5) - Photo, black & white, c1960s, unidentified, Lithographic Squadron.1 to .3 – personnel names (less rank) annotated on back. .4 to .5P – no annotationroyal australian survey corps, rasvy, army survey regiment, army svy regt, fortuna, asr, litho -
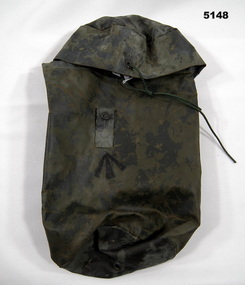 Bendigo Military Museum
Equipment - HUTCHIE COVER
Items in collection of K.W. Peatling. Refer to Cat 5140.2, Box 173 for his service details.Pouch - water proof, green and black camouflage colours, lid flap cover has a stud hole and green cord to attach to a section on the pouch with a stud hole, rear has a metal sliding keeper to attach to a military webbing belt.equipment, camouflage, pouch -
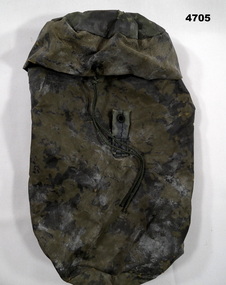 Bendigo Military Museum
Equipment - POUCH, CAMOUFLAGED, C.1970’s
Item was used to carry a Hutchie or other items. Peter Ball collection, refer Cat No 4704Pouch water proof green and black camouflage colours, lid flap cover has a stud hole and green cord to attach to a section on the pouch with a stud hole, rear has a metal sliding keeper to attach to a military webbing belt.On the inside in black pen, “P Ball”equipment, camouflage, pouches -
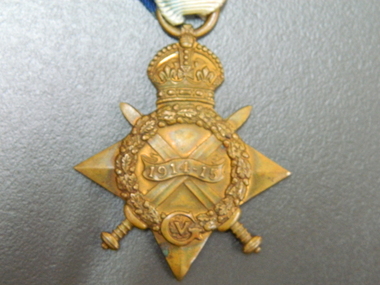 Ballarat Clarendon College
Medal, 1914-15 Star
The 1914–15 Star was authorised in 1918 and was awarded for service in specified theatres of war between 5 August 1914 and 31 December 1915. A recipient of the 1914 Star could not also be awarded the 1914–15 Star. Albert was born 29 June 1897 at his home 'Ashford Vale" farm, Cuthbert's Road, Cardigan. Albert, a second generation Australian, was the fourth son and sixth of eleven children born to dairy farmer John White and his wife Elizabeth, nee Douglas. Albert attended Bunker's Hill State School prior to enrolling at Ballarat College. After College he obtained employment with the engineering firm Ronaldson and Tippett in Ballarat. Following his eighteenth birthday Albert enlisted in the AIF in Ballarat with the rank of Private, No 2012. He embarked for the Middle East with 23rd Battalion on 26 August 1915 and was 'taken on strength at the Gallipoli Peninsular 25 October 1915". On 10 January 1916 Albert was posted to Alexandria, Egypt and during this time he was able to meet with his aunt Rose Douglas, an Australian Army Nursing Sister. This was a great comfort to his family. Albert was sent to France 19 March 1916 and transferred to the 22nd Battalion. He was mentioned in dispatches for 'good and gallant conduct' 5 August (1917?). Albert was hospitalised 30 March 1918, rejoined 22nd Battalion 3 June 1918, wounded in action 3 October 1918 but died of wounds at Rouen 10 October 1918. news of his death was received by his family in Australia just prior to the armistice. Albert Telfer White's sacrifice is commemorated at Ballarat College, Avenue of Honour Ballarat (Tree 1214), Ballarat Shire Honour Avenue Learmonth (Tree 163) and the Australian War Memorial Canberra. (These notes provided by family November 2016)Part of a greater A T White CollectionThe 1914-15 Star is a four pointed star of bright bronze, ensigned with a crown. The obverse has crossed gladius, overlaid with an oak wreath that is ensigned with the cypher of King George V. A scroll bearing the legend 1914-15 is centrally placed across the crossed blades. The 1914-15 Star ribbon has the red white and blue colours of the Empire, in shaded and watered stripes.Engraved on a scroll in the centre of the medal front: '1914-15' The oak wreath is ensigned with the cypher of King George V. The back of the medal is engraved: 2012 / Pte A T White / 23/BN. A.I.F. albert-telfer-white, medal, world war one, 1914-15 star -
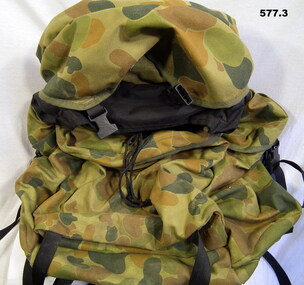 Bendigo Military Museum
Equipment - EQUIPMENT CAMOUFLAGED, C.1990 -91
.1) Basic webbing. .2) Torch. .3) Backpack, Australian issue. Sniper bag, camouflage colours. .4) Alice back pack. .5) Water bottle, khaki colour plastic with screw lid, aluminium holder inside pouch. .6) Water bottle, khaki colour plastic with screw lid. .7) Millbank filter, khaki canvas, 2 metal eyelets. .8) Multi tool. Dole K.3) Auscam NSN No. 8465-66-135-0685. Written in red circle on back lower left corner: DOL 312 . Blue and white patch painted on back lower right corner. .7) 7 Aug 1991 ↑ NSC-8465-99-873-6663. .8) Victorinox.military equipment, containers - drink consumption -
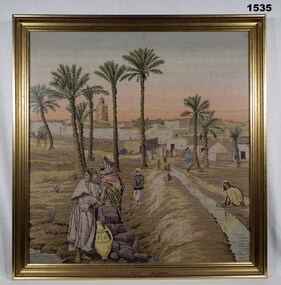 Bendigo Military Museum
Memorabilia - TAPESTRY, FRAMED, Post WW1
Timber frame, gold with black highlights, glass front. Egyptian scene tapestry with 3 civilians collecting & using water in foreground, palm trees mid ground, buildings & a number of civilians in background. Colours - browns, yellows, black, pale blue, white & greens. handcrafts-tapestry, frame accessories, eygpt -
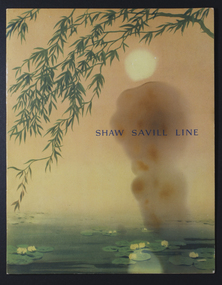 Mission to Seafarers Victoria
Souvenir - Menu, Shaw Savill Line, Shaw Savill Line SS Athenic, Maiden Voyage, 30/8/1947
This menu appears to have been produced for the 1947 Maiden Voyage of the S.S. Athenic travelling between London and New Zealand via Curacao and Panama. This was possibly the first voyage on this vessel early in his career for engineer G. W. Duncan and therefore a souvenir. The commander of the vessel was D. Aitchinson. Also of interest given that the UK was still very much governed by post WW2 rationing, is the range of food available for the farewell dinner listed.Mariner Duncan had a particular regard for the Mission to Seafarers. This plate for display on a commissioned new table at the MTSV chapel acknowledges his bequest and the material donated. Collectively the G W Duncan material includes: photographs, professional data memorabilia and written and commercially printed resources. The memorabilia relates to his career at sea and in particular the role of an engineer, including a handwritten manual of notes and references relating to the mechanical and engineering aspects and areas of responsibility for maintenance. Single fold card menu cover with typed paper menu listing adhered to inside cover. The cover features an imaginary asian design featuring water lilies , willow leaves and a misty sun, colours are gold green pink.see images 1 and 2 attachedmenu, ss athenic, shaw savill line, george winfield duncan (1922-2017), sailors, seafarers, passenger ships, ship engineer -
 Montmorency–Eltham RSL Sub Branch
Medal - British War Medal WW1 2246 Pte Clive Terril Rowe 46-BN. AIF, British War Medal WW1
2246 Pte, Clive Terril Rowe Born Melbourne. Enlisted 17th March 1916 in Sale Victoria, aged 18 years 5 months Pte. Rowe went from the 19th Depot Battalion to the 46th Battalion AIF. Departed Australia 16th August 1916 and returned to Australia 8th April 1919. He was discharged 15th June 1919. While overseas Pte. Rowe suffered trench feet, was wounded (shellshock) and chronic eczema. Pte. Rowe was awarded the British War Medal and the Victory Medal.British War Medal 1914-1920 Instituted by King George V in 1919 to mark the end of WW1 and record the service given.The circular medal is made of cupro nickel with the effigy of George V on the obverse. Around this are the words GEORGIVS V BRITT. OMN:REX ET IND:IMP: The reverse image has St. George on horseback trampling underfoot the eagle shield of the Central Powers and a skull and crossbones, the emblem of death. Above this is the risen sun of victory. The years 1914 and 1918 are contained on the outside edge of the medal. The ribbon has a wide central watered stripe of orange, flanked by two narrow white stripes which are in turn flanked by two black pinstripes, flanked by two outer stripes of blue. The colours have no particular significance. Along the rim of the medal is stamped 2245 PTE.C.T. ROWE. 46-BN. A.I.F. -
 Glenelg Shire Council Cultural Collection
Print - Print - She-Oaks, 1983-1984
CEMA Art Collection Part of "A Community View" 150 years in Portland Screenprint Exhibition Part of Angela Gee Residency 1983 and 1984Laminated screenprint of a seascape with water and trees (she-oaks) in the foreground. The background illustrates a calm ocean meeting a cloudy sky. Only two colours have been used within the print, a light blue and a dark green.Front: 8/20 (lower left) She-oak (lower centre) Signature (lower right) (pencil) Back: 6