Showing 93 items matching "footscray park"
-
 Ballarat RSL Sub-Branch Inc.
No item alloted
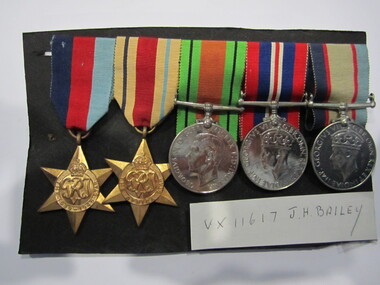
This object relates to Jack Henderson BAILEY. He was born on 26/11/1914 in Footscray, VIC. Jack Henderson served in the Army (VX11617) enlisting on, 29/02/1940 in East Melbourne, VIC before being discharged from duties with the 2/6 AUST INF BATTN as a Army Non-Commissioned Private (PTE) on 16/11/1945. Jack Henderson BAILEY was a prisoner of war. His next of kin is Ida BAILEY. Jack Bailey was awarded the 1939-1945 Star, Africa Star, Australia Service Medal 1939-1946, Defence Medal, War Medal 1939-1945.ballarat rsl, ballarat -
 Ballarat RSL Sub-Branch Inc.
Australian Defence Medal
This object relates to Jack Henderson BAILEY. He was born on 26/11/1914 in Footscray, VIC. Jack Henderson served in the Army (VX11617) enlisting on, 29/02/1940 in East Melbourne, VIC before being discharged from duties with the 2/6 AUST INF BATTN as a Army Non-Commissioned Private (PTE) on 16/11/1945. Jack Henderson BAILEY was a prisoner of war. His next of kin is Ida BAILEY. Jack Bailey was awarded the 1939-1945 Star, Africa Star, Australia Service Medal 1939-1946, Austalian Defence Medal, War Medal 1939-1945.second world war (ww2), 1939 - 1945, medals, ballarat rsl, ballarat -
 Ballarat RSL Sub-Branch Inc.
War Medal 1939-1945
This object relates to Jack Henderson BAILEY. He was born on 26/11/1914 in Footscray, VIC. Jack Henderson served in the Army (VX11617) enlisting on, 29/02/1940 in East Melbourne, VIC before being discharged from duties with the 2/6 AUST INF BATTN as a Army Non-Commissioned Private (PTE) on 16/11/1945. Jack Henderson BAILEY was a prisoner of war. His next of kin is Ida BAILEY. Jack Bailey was awarded the 1939-1945 Star, Africa Star, Australia Service Medal 1939-1946, Defence Medal, War Medal 1939-1945.second world war (ww2), 1939 - 1945, medals, ballarat rsl, ballarat -
 Ballarat RSL Sub-Branch Inc.
Australia Service Medal 1939-1946
This object relates to Jack Henderson BAILEY. He was born on 26/11/1914 in Footscray, VIC. Jack Henderson served in the Army (VX11617) enlisting on, 29/02/1940 in East Melbourne, VIC before being discharged from duties with the 2/6 AUST INF BATTN as a Army Non-Commissioned Private (PTE) on 16/11/1945. Jack Henderson BAILEY was a prisoner of war. His next of kin is Ida BAILEY. Jack Bailey was awarded the 1939-1945 Star, Africa Star, Australia Service Medal 1939-1946, Defence Medal, War Medal 1939-1945.second world war (ww2), 1939 - 1945, medals, ballarat rsl, ballarat -
 Ballarat RSL Sub-Branch Inc.
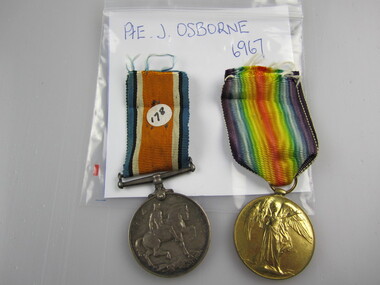
British War Medal 1914-20
This object relates to Jack Henderson BAILEY. He was born on 26/11/1914 in Footscray, VIC. Jack Henderson served in the Army (VX11617) enlisting on, 29/02/1940 in East Melbourne, VIC before being discharged from duties with the 2/6 AUST INF BATTN as a Army Non-Commissioned Private (PTE) on 16/11/1945. Jack Henderson BAILEY was a prisoner of war. His next of kin is Ida BAILEY. Jack Bailey was awarded the 1939-1945 Star, Africa Star, Australia Service Medal 1939-1946, Defence Medal, War Medal 1939-1945.first world war (ww1), 1914 - 1918, medals, ballarat rsl, ballarat -
 Ballarat RSL Sub-Branch Inc.
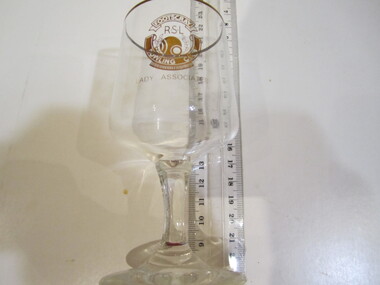
Glass - "Footscray RSL Bowling Club"
souvenirs, ballarat rsl, ballarat -
 Ballarat Tramway Museum
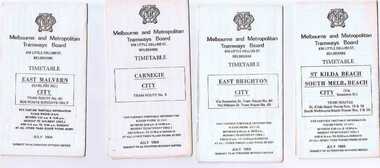
Ephemera - Timetable/s, Melbourne and Metropolitan Tramways Board (MMTB), Set of 24 MMTB Melbourne tram timetables, 1969
Set of 24 MMTB timetables for various routes, dated July 1969. Generally includes Sat and Suns, Good Friday and Christmas day as well as weekdays, unless noted otherwise. Also includes a map of the route, detailed time points, sections, connecting services, fares, and organisation address - 616 Little Collins St. Melbourne. Have been folded into ten portions. All on white paper unless noted otherwise. Items shown with an # - have a sticker modifying timetable information details on the front page. 1154.1 - Route 4 - Carnegie - City .2 - Route 4D - East Malvern (Darling Road) - City # .3 - Route 5 - Malvern Burk Road, - City # .4 - Route 6 - Glen Iris - City # .5 - Route 7 - Camberwell - City # .6 - Route 8 - Toorak - City # .7 - Routes 9, 10 and 12 - South Melbourne and St Kilda Beach - City (Brunswick St.) - via Collins St. .8 - Routes 10, 11 - West Preston and routes 9 & 9A Northcote .9 - Routes 15 & 22 - Moreland and 1 & 21 - East Coburg .10 - Route - 15 & 16 - St Kilda Beach and 1 & 2A - South Melbourne Beach - via Swanston St. .11 - Route 19 - North Coburg - City # .12 - Route 42 - Mont Albert - City # .13 - Routes 48 - North Balwyn and Burwood - City .14 - as above, but for Saturdays and Sundays on pink paper .15 - Routes 55 & 56, West Coburg - City - (William St.) - Domain Road. .16 - Route 57 - West Maribyrnong - City .17 - Route 59 - Essendon (Aerodrome) - City .18 - Route 64 & 65 - East Brighton - City .19 - Route 69 - Kew Cotham Road - St. Kilda Beach # .20 - Route 70 - Wattle Park - City # .21 - Routes 77 - Prahran - City, 78 - North Richmond - Prahran, 79 - North Richmond - St Kilda Beach .22 - Route 82 - Footscray to Moonee Ponds .23 - Route 88 - East Preston - City and Route 96, East Brunswick - City .24 - as above but for Saturdays and Sundays on pink paper. Images of a sample of documents added 16-11-2013.mmtb, timetables, melbourne -
 Ballarat Tramway Museum
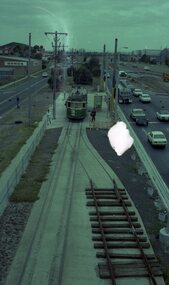
Photograph - Colour print of donated negatives - set of 8, Ron E. Fluck, 27/01/1979 12:00:00 AM
... Princes Bridge Footscray East Burwood Wattle Park Transporting Art ...Set of 8 colour laser printed copies of colour 35mm negatives featuring photographs of trams taken by Ron Fluck in Melbourne on 27/1/1979 and 28/1/1979 (1758.6 and 1758.7). 1758.1 - (Negative No. 251) - W2 340 at Airport West terminus. Sleepered track section on inbound track - must have been running single line at the time, following changeover to new terminus from Essendon Airport to Airport west. 1758.2 - NN253 - Z16 at Wattle Park terminus. 1758.3 - NN252 - VR 700 at Footscray terminus. 1758.4 - NN250 - W2 340 enroute to the Airport West terminus. New freeway arrangement being constructed on the left hand side of the tramway. 1758.5 - NN254 - Z1 11 at East Burwood Terminus 1758.6 - NN255 - W2 234 at Batman Ave terminus - one of the trams painted in "Transporting Art Program" 1758.7 - NN256 - W2 234 and SW6 912 at Batman Ave terminus. 1758.8 - NN257 - Z1 88 and W5 726 at corner of Bourke and Spencer St. Melbourne, with the Mail Exchange in the background. See Destination City 5th Editionmelbourne, essendon airport, princes bridge, footscray, east burwood, wattle park, transporting art, tram 11, tram 234, tram 340, tram 700, tram 16, tram 726, tram 88, tram 912 -
 Ballarat Tramway Museum
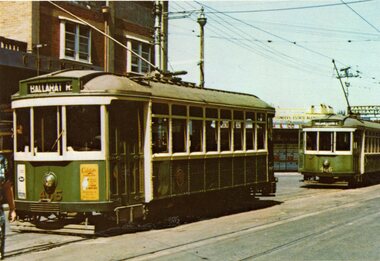
Postcard - Illustration/s, McCarron Bird, MMTB tram postcards
Set of nine of printed illustrations - postcard size of Melbourne and Metropolitan Tramways Board Tramcars produced in 1978. Separate card for each class of tramcar featured, with notes, statistics, MMTB name. Each card also has printers name and date on back. Not a formal postcard, no place for a stamp. 1810.1 - X1 - 465 with 466 in background. Photographed at Footscray station terminus, c1962. 465 has destination of "Ballarat Rd." 1810.2 - Z7 in Victoria Parade, c1975 - has destination of "West Preston - Regent St." and route number "13". 1810.3 - Cable car set (No. 1) - photographed at Preston Workshops 1810.4 - L104 - showing destination of Carnegie and route number 67. 1810.5 - Y469 - showing destination of "Wattle Park - Elgar Road", possibly with Wattle Park in background. 1810.6 - T180 - showing "Special", while on a charter. 1810.7 - W7 1022 - showing destination "West Preston", route 11, freshly painted. 1810.8 - X2676 - freshly painted. 1810.9 - W2511 - fitted with marker lights, freshly painted, showing "City" - route 11. Cards 8 and 9 added 9/3/2018 from Donation of John Ruyg. trams, tramways, melbourne, mmtb, tramcars -
 Ballarat Tramway Museum
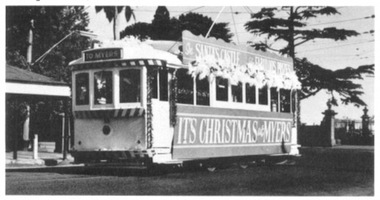
Magazine, Tramway Museum Society of Victoria (TMSV), "Running Journal Vol. 7 No. 6 December 1970 ", Jan. 1971
Cover page for the December 1970 issue of the TMSV's "Running Journal" featuring W7 1024 decorated for Christmas on the front cover. (see btm989i3) On page 2 - two photos of horse buses, Northcote and Clifton Hill, and Royal Park and Brunswick, 676 and Y at Footscray (L.Millar Photo). On rear inside cover photos of W7 1010 decorated for Holeproof, W7 1024 decorated for newspaper, Newsday, models of X1 and W5 (A Howlett's) and two photo montages. On rear cover, Ballarat tram 14 decorated for Christmas by Myer's (btm989i1) and Bendigo Birney 28, also decorated for Christmas (btm989i2) for Myers. Then two photos of work at Bylands and one at Bayswater working on Geelong Pengelly No. 22. Printed on glossy white paper. Printed early Jan. 1971 as includes a photo taken on 27/12/1970. See Reg Item 3567 for full copy of this issue of the magazine.trams, tramways, horse buses, decorated trams, myers, christmas -
 Ballarat Tramway Museum
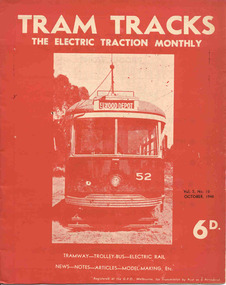
Magazine, Jack Richardson, "Tram Tracks - The Electric Traction Monthly", July to Dec 1948
Three issues of "Tram Tracks - The Electric Traction Monthly" of the Australian Electric Traction Association. Each issue has a standard cover, of the magazine name etc, and featuring a front end photo of Victorian Railways tram No. 52 with the destination of Elwood but are in different colours, all have been saddled stapled with a single staple. The Volume and date details have been over printed. Back covers inside covers have the same advertisements. The three issues contain advertisements for the Wee Folks productions, Wattle Park, G&R model railway parts, Richard Noble model electric motors, Hobbyco, Fleet scale model railway equipment, Masseys Sports, Lloyd's Hobbycraft, John Martin Ltd, Johnson's Variety Store, the ARLHS, Barnes Tennis Centre, The Model Dockyard, the American Subscription Agency, Robilt Models, Meadmore Model Engineering and Austral Bronze Pty Ltd, Hearns Hobbies, Christie Scale Model Railway Products and Traction Publications. 2466.1 - Vol. 3 No. 10 - 20 pages, Oct. 1948, with cover printed in red ink. Has articles on anti-tram propaganda, Alphington - Heidelberg duplication and Sydney's early electric trams - C and D class. Also has news items on Brisbane, Newcastle, Sydney, Melbourne, Sandringham - Black Rock, Hobart, Launceston, Perth, Sydney and Melbourne electric trains, Launceston Trolley Buses, AETA notes, and a caricature of the Editor, Jack Richardson. 2466.2 - Vol. 3 No. 11 - 24 pages, Nov. 1948, with cover printed in blue ink. Has articles on construction of tram track in Melbourne (Victoria Parade), Bourke St., tram-bus controversy, (Reg Ansett, Noel Gipps and USNR Commander Quinby), Sydney's early electric trams - C and D class continued. Also news items on Last tram to Mayfield, Sydney, Latrobe St. Melbourne, Adelaide, opening to Alamein, Melbourne show traffic, VR Trams and AETA notes. 2466.3 - Vol. 3 No. 12 - 16 pages, Dec. 1948, with cover printed in green ink. Has articles on Sydney's electric railways, Brisbane Tramways and an AETA Melbourne tour. News items cover Sydney, Newcastle, Melbourne, Geelong, Bendigo, Kalgoorlie, Melbourne and Sydney trains and AETA news. 2466.4 - Vol 3 - No. 7 - 20 pages - July 1948 with cover printed in red ink. Has articles on cost of building trams for Brisbane, Sydney and Melbourne, abandonment of VR trams, Newcastle, Sydney, centre page photo of Y1 611, Sydney Electric train system including map and AETA news. 2466.5 - Vol 3 - No. 9 - 20 pages - Sep 1948 with cover printed in blue ink. Has articles on Mr. T. G. Patterson, Acting Director of Commonwealth Road Transport and Chairman of Federal Road Safety Council (very anti tram), news from Brisbane, Launceston, Sydney, Newcastle, Burwood, cost of trams, impressions of transport in Europe and North America, Melbourne and Sydney electric trains, tramways of Newcastle and model notes and AETA news. 2466.6 - Vol. 3, No. 1 - Jan 1948 - 16 pages with photo of Brisbane 407, political news, direct Melbourne to Footscray line proposal, new trams, bogie trams in Ballarat, article on Melbourne cable trams, electric trains, AETA outing in Melbourne and various adverts for model railways. 2466.7 - Vol 3 No. 2 - Feb. 1948 - 16 pages - political news, Ballarat news, traffic in Sturt St and new bogie cars, Christchurch closure, cartoon by Mercier on Sydney Honesty box, Brisbane suburban electrification, general tramway and electric railway news and various adverts for model railways. 2466.8 - Vol. 3 No. 3 - March 1948, with photo of VR 52 on front cover, 16 pages, political news, closures, Reg Ansett offer to buy the Melbourne bus system, Newcastle News, SEC Transfer of cars between the three systems, tramways in the Maribyrnong area, map of Melbourne trams, cartoon by Mercier, Brisbane train electrification and general news. 2466.9 - Vol. 3 No. 6 - June 1948 - 12 pages - MMTB political news, new trams for Sydney, tramways of Newcastle, Invercargill, Sydney Suburban trains, and AETA General news. .6 to .9 added 24-3-18 - from consolidation of Melbourne Tram Museum and BTM collections - ex AETA. trams, tramways, electric traction, aeta, models, australian tramways, melbourne, sydney, brisbane, newcastle, costs, ballarat, footscray -
 Ballarat Tramway Museum
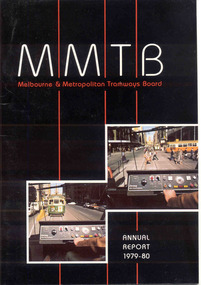
Document - Report, Melbourne and Metropolitan Tramways Board (MMTB), MMTB Reports 1979 to 1981, 1980 to 1982
Three copies of the Annual report of the MMTB for the years end 1980, 1981 and 1982 3953.1 - "Annual Report 1979-80" - white gloss paper with colour card covers with 36 pages, gloss, on inside giving details of the MMTB Board, Officers, Operations report, schedule of debenture, investments, Auditors reports, record of Annual traffic receipts, passengers, miles etc, tram and bus routes operated, statistical information, graphs and photographs. Photos include; Z 117 in Bourke St, Z 31 Burwood terminus, new safety tower wagon, Z118 in Bourke St, W2 528 High St Kew, reconstruction of High St Kew, Z3 120, cable and electric trams at Flemington Bridge, Z3 117, fitting trams to bogies at Preston workshops, Queens Bridge roundabout, MAN bus, Burwood substation, Z111 in Bourke St and Z's enter Elizabeth St service and Z3 129 on rear cover at night. 3953.2 - "Annual Report 1980-81" - white gloss paper with colour card covers with 36 pages, on inside giving details of the MMTB Board, Officers, Operations report, schedule of debenture, investments, Auditors reports, record of Annual traffic receipts, passengers, miles etc, tram and bus routes operated, statistical information, graphs and photographs. Photos include; image of Park St, Domain Road Jtn before changes, Museum station entrance, Flinders and Swanston St, CDB City Ring bus service, Swanston St, Westgate bus route, Park St, new substation, Swanston and Flinders St, Flinders land, and give way to buses pulling out of stops. 3953.2 - "Annual Report 1981-82" - white gloss paper with colour card covers with 36 pages, on inside giving details of the MMTB Board, Officers, Operations report, schedule of debenture, investments, Auditors reports, record of Annual traffic receipts, passengers, miles etc, tram and bus routes operated, statistical information, graphs and photographs. Photos include images of a z class crossing the Maribyrnong bridge, Footscray bus workshops, track renewals, a wedding at Wattle Park, a W2 arriving at Museum Station, Clifton Hill interchange, buses, Z class in Elizabeth St (Nos 158 and 43), Z89 in Mt Alexander Road North Essendon and a W2 loaded on a truck for New Zealand.3951.1 - has Graeme Breydon's address stamp on front cover., 3951.2 - ditto, 3951.3 - ditto and on inside of front cover., 3951.6 - "G. Breydon" in pencil on front cover and pencil comments on balance sheet., 3951.7 - dittotrams, tramways, mmtb, melbourne, annual reports, operations, trackwork -
 Ballarat Tramway Museum
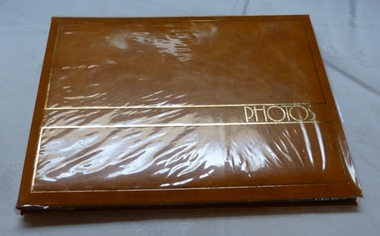
Album - Photo Album, Ron Scholten, Yapper Tours, c1990
Yields information about the use of a Museum tramcar for tours in Melbourne during 1989 and has a strong association with one of the people who arranged and drove the tours. Also has a strong association with the Transporting Art project in Melbourne.Photo Album - NCL - consisting of heavy card brown cover with gold blocking and the word "PHOTOS" in gold with 8 black card board leaves, each covered in a plastic sheet or transparent film that covers the photos and bound together with screws. Assembled by Ron Scholten and others for the record of the 1989 visit to Melbourne by BTM tramcar W3 661 arranged by Yapper Tours - Ron Scholten, Peter Bardho and Bob and Monica Campbell. Page 1 - Ron Scholten and Peter Bardho W3 661 - as No. 44 at the BTM depot Three photos at Camberwell Depot Page 2 6 views of 661 at Bundoora terminus and on the "hump" by Preston workshops. Transporting Art - tram launch tickets - trams 1 to 4 Page 3 6 views of 661 at Malvern Depot, and termini that Malvern depot services. MMTB and SEC 8c/10d ticket. (possibly a tour ticket - see Reg Item 8369) Page 4 6 views of 661 - Carnegie, St Kilda, Footscray Transporting Art - tram launch tickets - trams 5 to 7 Page 5 6 photos of 661 - Albert Park, Brunswick, Thornbury? with 676, 612. Transporting Art - tram launch tickets - tram 8 Page 5 6 photos of 661 - Domain Interchange, Essendon, South Melbourne depots and South Melbourne loop. Transporting Art - tram launch tickets - tram 9. Page 6 4 photos of 661 - Essendon, airport, Essendon depot. Transporting Art - tram launch tickets - trams 10,11, and 13. page 7 Yapper Tours - advertising the tours circular with photos by John Belot. Tickets - MMTB, SEC, reproductions of some tickets, 2 hour scratch ticket, zone 1 daily. Page 8 Night photo of B1 2001 and Souvenir Ticket for Melbourne St Kilda - light rail opening 20-21, November 1987. FOHTD collection Reg Item 560 has copies of tickets issued for trams 1 to 17.trams, tramways, yapper tours, melbourne, tickets, transporting art -
 Brimbank City Council Art Collection
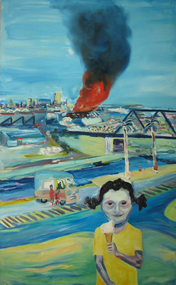
Painting, United Transport Fire, 1989
Social realism pertaining to the Western SuburbsView of United Transport Fire from Moreland Street Studio. More people viewed the fire than showed up for the Footscray parade a fews earlier. The Mr Whippy van made an economical killing, while the atmosphere was suffering the same results. AR0099social realism, western suburbs -
 Brimbank City Council Art Collection
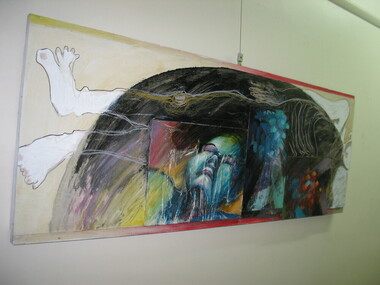
Mixed Media, Lillian Carland, Gallipoli, 1986-88
Purchased from exhibition at Footscray Arts Community CentreArtist lived in Western Suburbs (Melton)Mixed media artwork -
 Carlton Football Club
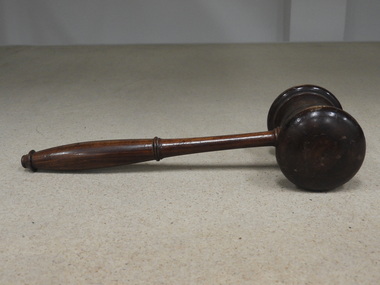
Wooden Gavel, Wooden Gavel Made From the wood of S S Edina, 1957
Made from the wood from the S S EdinaThe ship the wood gavel is made from had the distinction of being "the longest Serving Screw Steamer in the World" She was built by Barclay & Curle in Galsgow in 1854 and was scrapped in Australia at Coode Island Footscray in 1957. The same wood was used to make the Chairman's chair in Carlton's Board room.Double headed wood gavel used to control Carlton FC board meetingsSmall brass plaque with the words " Made From The Wood From the S S Edina". -
 Carlton Football Club
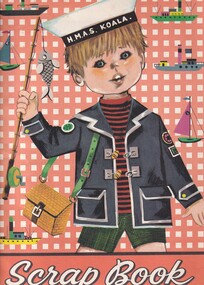
Scrap Book, Dedicated to Carlton Player John Goold
John Goold double Premiership PlayerA scrap Book dedicated to twice Premiership Player 1968 - 1970 John Goold Career : 1963 - 1970 Debut : Round 7, 1963 vs Footscray, aged 21 years, 338 days Carlton Player No. 754 Games : 108 Goals : 3 Last Game : Grand Final, 1970 vs Collingwood, aged 29 years, 90 days Guernsey No. 11 Height : 184 cm (6 ft ½ in.) Weight : 76 kg (12 stone, 0 lbs.) DOB : June 27, 1941 Premiership Player 1968, 1970 Carlton Hall of Fame All Australian 1966 A brilliant, flamboyant, two-time Premiership player for Carlton during the Barassi years in the ‘swingin’ sixties,’ John William Crosbie Goold became almost as famous for his dapper appearance off the field, as for his exploits on it. At the height of his football career, he was also a prominent ladies fashion designer – which led to him being dubbed ‘Mr Elegance’ by leading football commentator Lou Richards. Supporters and team-mates however, called him ‘Rags’ or ‘Ragsy,’ because of his involvement in the clothing, or ‘rag’ trade. Goold first came under notice as an outstanding junior athlete at Melbourne Grammar School. A true all-round sportsman, he shone at tennis, athletics, football and cricket. He was also a keen horseman who loved the game of polo and the rough and tumble of fox hunting. While at school he was a fervent Melbourne supporter, but strangely, never had much confidence in his football ability. “If I thought I was good enough, I would certainly have gone to Melbourne,” he said many years later. “But I honestly didn’t think I would ever amount to anything in this game. Cricket and tennis were the games that really interested me.’ However, after graduating from MGS, Goold went home to Healesville to star in the Bloods’ 1962 Yarra Valley Football Association Premiership team – an achievement that brought tempting offers from more than one VFL club. “Incentives were offered elsewhere,” he recalled, “but I gravitated to Carlton – partly because the deep blue of their guernsey attracted me, but mostly because of the good advice I got from people who even then were longsighted enough to predict that big things were ahead for this club.” The Blues were confident enough in Goold’s potential to offer him the guernsey number 11 previously worn with distinction by the likes of Jack Hale, Jim Knight, Ron Hines and Laurie Kerr, and his first senior game came in round 7, 1963 against Footscray at the Western Oval. He played on a half-forward flank alongside Brownlow Medallists Gordon Collis and John James on that Saturday afternoon, and kicked his first career goal in an 8-point win. Little did he know though, that it would be another six seasons before he would again experience the thrill of sending a football spinning between the big posts, because his future lay in defence. By his own admission, Goold struggled to find his feet in VFL football during his first two seasons, until the shock appointment of Ron Barassi as captain-coach of Carlton in 1965 began steering his career back on track. “I think you could say that 1965 was my first year of League football,” he said, “That’s the way I felt - that’s the way I reacted to Barassi.” Under Barassi, Goold rapidly developed into a superb running half-back flanker. Tenacious, and an often freakish high mark, he was unmistakable on the field thanks to his mane of dark hair, his loping running style and somewhat awkward kicking action. Furthermore, he had boundless courage. There is no doubt that he would have played many more games had he not been regularly pole-axed under the high ball – a fact he later freely admitted. “I was always getting knocked out,” he said, “and spent half my bloody time in hospital.” In the second half of 1965, an injury to centre half-back Gordon Collis forced Barassi to use Goold in the key defensive post. While it curtailed his rebounding instincts somewhat, ‘Ragsy’ rose to the challenge and rarely lowered his colours. Testament to his improvement, he finished third behind John Nicholls and Sergio Silvagni in Carlton’s 1965 Best and Fairest award, and followed up by being selected in the Victorian team for the 1966 Hobart Carnival. There, he had a superb series in which he was runner-up to West Australian Barry Cable in voting for the Tassie Medal, and capped it off by being named on a half-back flank in the All Australian team. Barassi’s influence at Carlton bore fruit in his third year, when the Blues returned to finals football at last. Richmond, Carlton, Geelong and Collingwood fought out the 1967 Premiership, and Ragsy Goold won the hearts of the Carlton faithful with two lion-hearted performances. Although Carlton was knocked out of contention by successive losses to Richmond and Geelong, Goold was tireless throughout both games, and it was obvious that he thrived on the added pressure of finals football. Precisely twelve months later, the bitter taste of those defeats was washed away when Barassi’s Blues edged out Essendon by 3 points in the 1968 Grand Final, and ended 21 years of despair at Princes Park. To win Carlton’s ninth VFL flag, the Blues had had to defeat the minor premier Bombers twice during the finals – and did so, thanks to a watertight defence led by Goold, and a dominant ruck division headed by John Nicholls. In round 5, 1969, Carlton hosted South Melbourne at Princes Park in a match significant for a number of reasons. As he regularly did, Ron Barassi swung his team around prior to the opening bounce, and Goold found himself in the unaccustomed role of ruck-rover. While the Blues set about establishing a good break on the scoreboard, Ragsy relished the freedom to kick two first half goals - his first majors for 78 games. Just before half-time however, he was flattened in a pack, concussed again, and replaced during the long break by Barry Gill. Alex Jesaulenko was substituted at the same time – by a shy, ambitious youngster named Bruce Doull, making his senior debut for Carlton in guernsey number 4. In September, 1969 the Navy Blues began their third straight finals campaign with an impressive 6-goal Semi Final win over Collingwood in front of more than 108,000 fans at the MCG. A fortnight later, Richmond stunned the flag favourites with a withering last quarter in the Grand Final, and knocked Carlton out of the Premiership race again at the last hurdle. Half-way through the year, Carlton's club doctor discovered that Goold had been playing with shin splints in both of his lower legs. The pain they caused was considerable, but Ragsy soldiered on and held down centre half-back throughout the season. John Goold’s VFL career at Carlton culminated in the fabled 1970 Grand Final triumph over Collingwood. What is not so well known is that Ragsy was only cleared to play in that game on the morning of the match. After narrowly losing to Collingwood in the second Semi Final, the Navy Blues destroyed St Kilda by 62 points in the Preliminary Final, and earned another shot at the Magpies in the decider. But one of Carlton’s problems was that Goold had been kicked on a shin against St Kilda, causing a burst blood vessel and serious swelling. Despite the best efforts of the club medical staff, Ragsy had only a slim chance of playing in the Grand Final right up until game day, when his worried coach reluctantly allowed him to take his place in the side. Later, Barassi justified his decision by saying that in his opinion, a less than fully fit Goold was still worth his place in the team. By half time in the Grand Final however, he was probably questioning that judgement - because Carlton had been totally outplayed, and trailed an impressive, cohesive Collingwood by 44 points. Therefore, Carlton’s magnificent comeback – orchestrated by Barassi, and sparked by the fairytale exploits of 19th man Ted Hopkins – is one of the greatest of all football stories. Against enormous odds, the Navy Blues fought their way back into the contest, and eventually, rolled over the top of the frantic Magpies to snatch victory by 10 points in the last few minutes of the match. Hopkins ended up with four goals, Barassi was hailed a genius, and Ragsy Goold was carted off to hospital immediately after the game to have further urgent treatment. While there, he decided that there was no better time to end his VFL career – especially because his burgeoning business interests were demanding more and more of his time. In the years after his football career ended, John Goold created a remarkably successful business empire. In 1971 he sold his fashion label and took up farming at Mortlake in western Victoria, where he coached the local football team for three seasons. Later, he formed a diversified pastoral company, and purchased a magnificent complex called Ballangeich Run at nearby Ellerslie. While his passion for farming and livestock grew, he began breeding top quality polo ponies, and represented Australia in international competition. During the 1997 and 1998 seasons, John's son Ed Goold played reserve grade football for Carlton. MEMORIES.... Ragsy Goold; the name stirs memories form my long ago childhood. Ragsy, with his unique kicking style, where he'd hold the ball (always a drop punt - in a time when the drop kick and the torpedo punt still reigned supreme) at the point of the ball, elbows bent and he'd lavishly drop the ball, his right arm then flinging back and up dramatically. That was the thing about Ragsy (so named because he worked in the clothing, or 'rag' trade), he was always dramatic. He always ensured his ankle guards and wrist guard were glowing white to match the great white CFC monogram he wore proudly on his chest, and with his long flowing locks, cut a dynamic figure through a young boy's mind. Ragsy was my idol. I loved his dashes from half back, his long accurate drop punts, most of all I loved his flair for the game. Ragsy played the game as an entertainer as well as a sportsman - he leapt high to punch or mark, and always seemed to have a bit of the thoroughbred about him - which is probably why after he retired, he took up fox chasing, polo, and riding his beloved thoroughbreds across the paddocks and over the fences of his property, I think he may have even represented Australia at the sport – really, that’s sort of how he played as a footballer. All sinewy muscle, long legs and famous leaps for the saving punch. Ragsy was part of the great backline that helped revive Carlton's fortunes. Legendary players Wes Lofts, Ian Collins, Kevin 'Racehorse' Hall, Vinnie Waite among them. All great teams have a great defence and the defence that Ragsy was an integral part of was no different. Where others provided the biffo, the muscle or the defensive pressure, Ragsy provided the dash, the flair, the sense of adventure that all great backlines must have. AND MORE.... I have had many favourite players while following the Blues, but there will always be a special spot for Ragsy Goold - running the lines, all long hair and flashing white guards. As a young man I moved to Carlton and began acting in a place called one-c-one. One night after a play, I was walking home. It was winter, and I was wearing my favouritte overcoat, a genuine ankle length tweed affair I had picked up in an Op Shop in Oakleigh for three dollars. As I strutted across Lygon Street, a deep male voice behind me called, 'hey laddie, how much for the overcoat?' I turned, and there was my childhood idol, Ragsy Goold, two beautiful women in tow, smiling and waiting for my answer. I loved that coat too much to part with it, even to Ragsy, so I shook my head - and he smiled, then walked off. I stood for a moment in the middle of the street shaking my head in disbelief. Ragsy bloody Goold had just offered to buy my overcoat! I knew at that point, as a young man of about twenty three, that life was going to be full of surprises and very entertaining - a bit like John ‘Ragsy’ Goold. ONE MORE.... A cold, wet day in the mid 1960's at the MCG and Victoria were playing South Australia (?) The ball that day was like a piece of soap, with players finding it impossible to mark. Just before half time a long kick sailed toward the mud heap that was the centre of the ground, and the pack rose to meet it. From this group of players an arm shot straight up, and the ball instantly came to a dead stop. The footy stuck in the player's palm as if the hand was coated in Tarzan's Grip. After all these years, it's the only recollection I have of that match, and that player was 'Mr. Elegance' John Goold. HUMOROUS HUNGRY.... Former opponent Richmond's Kevin Bartlett on Radio SEN in 2012 received a phone call from John. After the call Kevin told his listeners how "Mr Elegance" would always be dressed in a nice suit, shirt-tie and highly polished shoes. He then cracked a joke saying something like; "You know, John was so 'posh' that he used to play football wearing a cravat!" Milestones 50 Games: Round 15, 1967 vs Melbourne 100 Games: Round 13, 1970 vs Geelong Career Highlights 1965 - Percy Bentley Trophy - 3rd Best & Fairest 1966 - 5th Best & Fairest 1967 - Maurie Sankey Memorial Trophy - 4th Best & Fairest (on count back) 1968 - Premiership Player 1970 - 7th Best & Fairest 1970 - Premiership PlayerFoolscap Scrap Book -
 Carlton Football Club
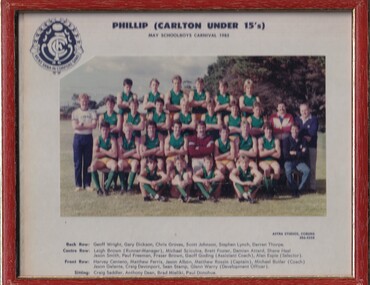
Framed Colour Team Photo, ASTRA STUDIOS, Phillip Carlton Under 15s May Schoolboys Carnival 1985, 1985
Carlton FC U15 Squad for 1985 Schoolboy CarnivalPhoto of Players & Officials thate represented Carlton FC at 1985 Schoolboy Carnival. Notable individuals; Shane Heal basket baller represented Australia played NBA, Craig Devonport represented St Kilda & Carlton at senior level, Fraser BrownCareer : 1989 - 2000 Debut : Round 1, 1989 vs Footscray, aged 18 years, 226 days Carlton Player No. 954 Games : 177 Goals : 99 Last Game: Preliminary Final, 2000 vs Essendon, aged 30 years, 8 days Guernsey No. 20 Height : 181 cm (5 ft. 11 in.) Weight : 90 kg (14 stone, 0 lbs.) DOB : 18 August, 1970 Premiership Player 1995 Best and Fairest 1998 Carlton Hall of Fame (2006) Photo Location unknownTimber, Glass & Paper Framed Photo -
 Carlton Football Club
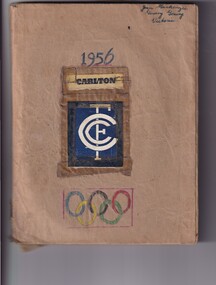
Brown Covered Excercise Scrap Book, 1956 Carlton, 1956
1956 Season depicted by a collection of newspaper articles and personal entriesA collection of newspaper articles depicting Carlton's 1956 season in an Olympic Year for Melbourne. 1956 Summary After losses in the first two rounds to Essendon and Melbourne (two of the 1955 finalists), Carlton managed to win 6 games in a row between rounds 3 and 8. The Blues would have won 8 in a row if not for a 1 point loss to Geelong in round 9. After round 10, the Blues sat fourth on the ladder, with a game in hand over fifth place. Our strong mid-season form deserted us, and the club could only manage a 3 win, 1 draw and 4 loss record in its last 8 games. Going into the last game of the season, the Blues still clung onto 4th place on the ladder, half a game in front of Footscray. With the last game of the season being the Dogs at Princes Park, the Blues had a strong chance of playing finals football. Unfortunately, Footscray narrowly outscored Carlton in every quarter, resulting in a 17 point win and leapfrogging the Blues for 4th spot. The season did point to the continued improvement in the club's playing fortunes, showing year-on-year improvement for the club since the low point of 1954. This improvement would continue in 1957, with the club making the finals for the first time since 1952. Brown Covered Exercise BookOlympic Symbol & Carlton Emblem both on front cover -
 Carlton Football Club
Letter from Victorian Football League 1981, VFL Registration Form 5A, 1981
A now defunct Form 5A registration of playerA now defunct Form 5A registration of player of four time premiership player David McKay Career : 1969 - 1981 Debut : Round 3, 1969 vs Footscray, aged 19 years, 165 days Carlton Player No. 809 Games : 263 Goals : 277 Last Game : Grand Final, 1981 vs Collingwood, aged 31 years, 325 days Guernsey No. 43 Height : 191 cm (6 ft. 3 in.) Weight : 92 kg (15 stone, 0 lbs.) DOB : November 5, 1949 Premiership Player 1970, 1972, 1979, 1981 Carlton Hall of Fame (1996) One of the most spectacular high marks of his era, David Robert James “Swan” McKay was a Carlton star for twelve seasons, and a key member of four Premiership teams. Recruited from Newlyn, near Ballarat in central Victoria, McKay arrived at Princes Park in 1968 as a raw-boned 19 year-old. Coach Ron Barassi liked what he saw, and quickly realised that the laconic, easy-going country kid had the makings of something special after only a handful of games in the Blues’ number 43 guernsey. At 191cm and 95 kg he was robust enough to play in the ruck, while his exceptional aerial skills allowed him to hold down a key position. The problem was that he had joined the reigning premiers, so he wasn’t able to claim a regular place in the side until after the Blues were beaten by Richmond in the ’69 Grand Final. Early in the following season, McKay was given a chance at centre half-back, and took to it “like a swan to water.” Quick for his size and blessed with wonderful judgement, “Swan” soon became a crowd favourite. From that season on and throughout his career, it was only on rare occasions when the weekly televised football highlights package did not include footage of him drifting across the front of the pack to pluck the ball from the hands of an opponent, or leaping high over three or four sets of shoulders to take another soaring high mark. By 1970, McKay was embedded in the Carlton defence and hadn’t missed a game all season. After the Blues wound up second on the ladder, David experienced the thrill of a VFL final for the first time in his 29th senior match, when almost 113,000 fans packed into the MCG to see Collingwood beat Carlton by 10 points in a high-scoring Semi Final. Swan took 10 marks amid his 16 possessions that afternoon, and although his side was beaten, he revelled in the occasion. A fortnight later, after destroying St Kilda in a one-sided Preliminary Final, Carlton met Collingwood again in the Grand Final in front of an even bigger crowd. McKay was in trouble early against his taller, equally athletic opponent Len Thompson, but rallied after half time to get right on top as the Blues came from 44 points down to shatter Collingwood in the greatest of all Grand Final comebacks. Swan took nine telling marks and collected 18 possessions to be hailed as Best on Ground, before collecting the first of his four Premiership medals. One of the hallmarks of the Carlton teams coached by Barassi was their versatility, so as his career progressed, McKay started spending time up forward or in the ruck. From then on, when a game was in the balance and a goal or two was sorely needed, he was the man the Blues often looked for. He worked hard on his shooting for goal and became a reliable forward option. The 1972 final series must rank as one of Carlton’s finest hours, as the Blues fought their way through three hard, cut-throat games to meet the raging favourites Richmond in the Grand Final. In that remarkable encounter on a fine, cool day at the MCG, Swan lined up in a back pocket to cover the Tigers’ resting ruckmen and for once, lowered his colours to Richmond’s Neil Balme, who kicked 5 goals – but the Blues still won by 27 points and McKay picked up his second medal. In August 1973, Swan brought up game number 100 against Footscray at the Western Oval. Carlton won by nine points – thanks to McKay’s 13 marks in great game at centre half-back. A month later, the Blues and the Tigers met again on Grand Final day, and – still smarting from their surprise defeat the previous year – Richmond went head-hunting in a spiteful match. Swan was shifted forward early and kicked two majors, but neither he nor his team could match Richmond’s ferocity and the Tigers won the flag by 30 points. Midway through the following season, in round 14, 1975 - McKay was embroiled in another infamous encounter at Essendon’s Windy Hill – a game that saw eight players (himself included) reported. On a wet and miserable day dominated by a howling wind, Swan’s 22 disposals, 14 marks and eight goals won the game for Carlton, and making that victory even sweeter, he later escaped suspension for striking. By the time Carlton was knocked out of the finals in 1976 by straight-sets defeats at the hands of Hawthorn and North Melbourne, McKay was 27 and had racked up 172 games. But he felt he needed relief from the pressure-cooker life of a VFL footballer, so he agreed in principle to join WAFL club Subiaco. When he requested a clearance from Carlton however, the Blues steadfastly refused. Both sides dug in their heels, and some unfortunate headlines resulted before Swan relented and resumed training some weeks into 1977. In round 13 of that season, on a freezing cold and wet Saturday afternoon at the Junction Oval, bottom side Fitzroy caused a huge upset by beating Carlton by 7 points. In his 181st game, McKay took 9 marks, and his second goal of the game was the 200th of his career. McKay’s fourth Grand Final came in 1979 against Collingwood. By then one of only five survivors from the ’73 team, Swan was approaching his 30th birthday. yet still playing valuable, consistent football. In a close, absorbing match on a wet and slippery MCG that day, Carlton again won a nail-biter by just 5 points, thanks to Wayne Harmes’ famous swipe at the ball from a forward pocket in the last minutes of the game. The ball ended at the feet of Ken Sheldon, whose goal clinched Carlton’s twelfth Premiership, and McKay’s third. Throughout the majority of his career, Swan was a durable type who rarely suffered serious injury. That all changed in 1980 however, when he rolled an ankle, played on, and compounded the injury which hampered him for the rest of his career. Carlton made the finals again, but dropped out after successive losses. That was a bitter blow for the Blues, who promptly sacked coach Peter Jones and reinstated David Parkin. Because of his ankle, Swan missed a number of games early in 1981, but was back to near his best for the finals. Carlton destroyed Geelong by 40 points in the second Semi Final and marched into the Grand Final as hot favourites against Collingwood. In a typically fierce and physical decider, Collingwood led by 21 points late in the third quarter, before the confident Blues overwhelmed them in the last term - winning Premiership number four for Swan McKay, and flag number thirteen for Carlton. One of the goals in that vital last quarter came from the big number 43. It was his second major of the game, and his last kick in league football. Amid the jubilation of victory in the rooms after the game, Swan announced his retirement after 263 games and 277 career goals. He was a few weeks short of his thirty-second birthday and it was an appropriate way to end the playing career of one of the club’s favourite sons. Following his retirement, McKay stayed involved at Princes Park in a number of off-field roles. He was inducted into the Carlton Hall of Fame in 1996, and later became a high-profile critic of Carlton’s President John Elliott. When Elliott was voted out of office in 2002, McKay was appointed a director of the club under new President Ian Collins. During 1999 and 2000, David's son James McKay played eight Reserves games and kicked two goals for Carlton. Milestones 100 Games : Round 21, 1973 vs Footscray 150 Games : Round 2, 1976 vs Essendon 200 Games : Round 10, 1978 vs Footscray 250 Games : Round 9, 1981 vs South Melbourne 100 Goals : Round 13, 1974 vs Geelong 200 Goals : Round 13, 1977 vs FitzroyLetters & copy of form from VFL -
 Melbourne Legacy
Photograph, Melbourne Legacy, Footscray Class 1953, 1953
... and outing to Luna Park etc. The Footscray Class was in the Drill... the Footscray boys receiving certificates and badges from the President ...A photo from a newsletter from September 1953. The photo shows the Footscray boys receiving certificates and badges from the President of Legacy, Legatee S Nevile. The article says the group offers boys the chance of forming lasting friendships with other Junior Legatees, and evening of healthful exercise, games, basketball, etc under the guidance of a fully qualified and capable physical education instructor. Gymnasium kit and free milk are provided for each boy and during the year other interests are available, such as picture nights, pie nights, Christmas parties and outing to Luna Park etc. The Footscray Class was in the Drill Hall, at the corner of Barkly and Gordon Streets Footscray at 7.30 on Friday nights. Individual photos being catalogued to record detail about each one.The newsletter outlining news of Junior Legatee activities with mentions of boys by name.Black and white photo of the Footscray boys with the president in a newsletter in September 1953.junior legatees, boys classes -
 Melbourne Tram Museum
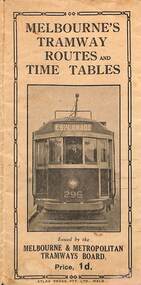
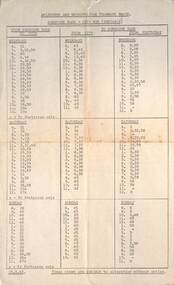
Map, Melbourne & Metropolitan Tramways Board (MMTB), Melbourne's tramway routes and timetables - MMTB, 1925
Map of the MMTB Tramway routes 1925 with a list of first and last cars, along with photographs of Wattle Park, Luna Park, and Studley Park. Provides information for the Prahran and Malvern lines, Hawthorn, Footscray, Essendon, Coburg, Kew, St Kilda, cable tram routes, and buses. Also provides information for passengers. The cover photo is of the front of W 296, with the destination of Esplanade. The map is dated by the opening of the line to West Brunswick as far as Albion St, the City Road to St Kilda line via Sturt St lines, and the electric line in Flemington Road which were all opened during mid to late 1925. See Reference. Shows a number of buildings and locations by a numbered reference list, including the Federal Parliament house. The map has advertisements around the outside of the map for Kiwi Shoe or boot polish.Yields information about the Melbourne tramway system in 1925 and demonstrates the methodology the MMTB used to provide information to travellers. Shows both cable and electric tram lines and the development of the Melbourne system.Map book - 15 fold paper titled "Melbourne's tramway routes and timetables"trams, tramways, mmtb, tramway maps, wattle park, studley park, timetables, cable trams, w class tram, tram 296, kiwi shoe polish -
 Melbourne Tram Museum
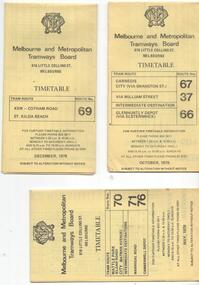
Document - Timetable - MMTB bus routes 1962 and 1963, Melbourne & Metropolitan Tramways Board (MMTB)
Produced by the MMTB to provide timetable information on Melbourne bus routes to passengers. Shows the extension of the Clifton Hill to Elsternwick route to Point Ormond after the closure of tram service to Point Ormond and for services that replaced the Footscray tram lines.Shows the method of production of timetables in the early 1960s.Set of 7 bus timetables, duplicated sheets as noted below - printed on foolscap sheets. .1 - Sunshine Park - City - 15/3/1963 - single sheet .2 - Sunshine (via South and Dynon Roads) - City Bus - 20/7/1962 - single sheet .3 -Garden City - City - undated - single sheet .4 - Queens Bridge - Fisherman's Bend, - via various routes - June 1963, four sheets stapled in top left hand corner. .5 - Deer Park - City - 14/11/1962 .6 - Clifton Hill - Point Ormond - Esternwick - undated .7 - Ballarat Road - Footscray Station - Williamstown Rd - Russell St - 15/6/1962 - three sheets stapled in top left hand corner.timetables, buses, mmtb, footscray, sunshine, fisherman's bend, clifton hill, point ormond, garden city, bus replacement -
 Melbourne Tram Museum
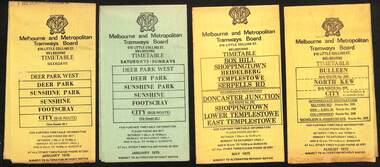
Ephemera - Timetables - MMTB Buses, Melbourne & Metropolitan Tramways Board (MMTB)
... - Deer Park West - Sunshine - Footscray - City - Jan 1975... allocated a route number at the time. 1 - Deer Park West - Sunshine ...Timetables - provide information on ticketing, fares, timing points, with a description of the route and a map. Not all services had been allocated a route number at the time. 1 - Deer Park West - Sunshine - Footscray - City - Jan 1975, including a separate weekend timetable' 2 - Box Hill - Shoppingtown - Templestowe - May 1975 3 - Bulleen - North Kew City - Routes 203, 204, 205, 206, 208 and 209 - August 1972 4 - North Altona - City - route 232 - June 1979 5 - Clifton Hill - Elsternwick route - route 246, Point Ormond - route 247 and 248 - June 1974 6 - La Trobe University - Northland - West Heidelberg - City - routes 256, 251, 253, 254, 252, 255 - August 1974 7 - Warrandyte - Park Orchards - Ringwood - routes 273, 274, 275 - Feb. 1974 8 - Warrandyte - Donvale - Templestowe - Shoppingtown - City - routes 276, 277, 278, 294, 278, 280, 299, 268 - April 1975 9 - East Kew, Box Hill Doncaster, Shoppingtown - routes 284, 285, 270 - May 1974 10 - Box Hill - Mitcham, East Doncaster, Ringwood - routes 287, 286, 288, 282, 283, 272 - March 1974' 11 - Box Hill - North Blackburn - route 290 - March 1974 12 - Fishermans Bend - City - routes 233, 235, 237 - Feb 1979.Yields information about MMTB Bus services during the 1970s.Set of twelve MMTB Bus timetables - multifolded printed on yellow paper, except for Deer Park timetables for Saturdays and Sundays printed on green paper.timetable, the met, buses, box hill, doncaster, templestowe, warrandyte, elsternwick, fishermans bend, deer park, altona, sunshine, footscray, shoppingtown -
 Melbourne Tram Museum
Album - Charles Craig - part 1 of 2, 1950s to 1970s
Photo - see pdf file for further information. Number Brief Description CC1 S178 at Elsternwick level crossing track works CC2 Building East Preston Depot 1955 CC3 Camberwell depot – post WW2 – lots of trams and a black cat CC4 W2 584 and SW6 958 northbound – Chapel St and Brighton Road CC5 W2 357 – southbound, Chapel St Brighton Road CC6 Pascoe Vale Road, Raceday working – note the signal CC7 The Preston Workshops - The Argus, post WW2, 223, 647 et al CC8 923 or is it 922 being built at Preston – The Argus photo - CC8A 832 being positioned onto trucks at Preston after an overhaul – Argus Photo – see also CC306 CC9 Footscray depot` CC10 W5 797 in St Kilda Road during track works – 1950s CC11 W2 457 at Kew Post Office CC12 Wellington Parade – W2 432, 492 and 337 – special event CC13 Swan St line up of trams – football? Or other special event – Sinclair’s bus on the right side. CC14 W2 630 being washed at a depot – The Argus photo CC15 Royal Park line at Flemington Road – W2 355 and W5 786 CC16 Nicholson St track construction from a tram cab CC17 T181 on tour at Gordon St CC18 T181 on Maribyrnong Bridge CC19 Ditto at River St just off bridge CC20 As for CC18 CC21 At Raleigh Rd CC22 T181 at Footscray depot CC23 Track construction, Nicholson, just north of Gertrude CC24 Commissioning overhead Bourke St tram 988 CC25 Queens Parade – 997 and 994 CC26 Swapping trolley wheel to skid – commissioning CC27 Track construction in Gertrude St CC28 985 in Queens Parade running special CC29 997 in Queens Parade CC30 1033 at North Fitzroy – AETA Special CC31 Bourke St at Elizabeth St – has passengers on board CC32 W6 985, 996 Queens Parade, Mk 3 bus 333 CC33 As above CC34 Showing construction at Nicholson & Gertrude – Bourke St CC35 W2 223 on Burnley temporary bridge – VR track expansion CC36 W5 823 – ditto CC37 Tram on old bridge prior to removal CC38 W2 433 on temporary bridge with new bridge beams and old track CC39 Looking down showing temporary single track – Swan St CC40 Tait train passing under tram bridge CC41 SW6 on single line – off loading CC42 W2 547 at City Road Junction CC43 City Road Jtn – 1969 – 596 and 771 CC44 City Road Jtn – 1969 – 596 and 771 (same as CC45 438 in Flinders St CC46 355 somewhere CC47 552 somewhere CC47A 364 at Preston Workshops? CC48 W2 334 on Traverser – Preston Workshops CC49 Wellington pade – large line up of trams, c1950 925, and 611 CC50 W2 493 Franklin st – advertising for Savings Certificates CC51 Possibly 551 with advertising for fund raising for Blind institute CC52 249 at Hawthorn – Riversdale Junction – with a Tally Ho and Village Fair Aux. board CC53 MMTB Postcard of 511 CC54 Wattle Park terminus with Single line warning sign CC55 Wattle Park Duplication CC56 36 at Domain Junction – 833 CC57 36 at Domain Junction CC58 36 at Domain Junction with 810 and 833 CC59 36 in Swanston by Flinders St Station CC60 36 in Spencer St at A’Beckett CC61 36 crossing Collins St CC62 36 crossing Collins St CC63 36 northbound in St Kilda Road with Shrine in background CC64 36 northbound in Swanston St at Flinders St CC65 Postcard – Ballarat 36 in Domain Road CC66 Postcard - Stampshow – Hawthorn Horse tram CC67 Postcard - Stampshow – Peace cable tram CC68 Postcard - 1041 and cable car set 1 at Preston CC69 Postcard - Colins & Elizabeth – greetings from old Melbourne CC70 Postcard - Cable car set at Preston CC71 Postcard - Twentyman’s cable cars CC72 Postcard - Nu-color-vue – horse tram 256 CC73 Cable car set – Market & Flinders CC74 Cable trams at Twentymans’ in their shed CC75 Cable tram track at Bourke & Spencer prior to removal CC76 Cable tram bogie at Preston Workshops – used as a dolly CC77 Cable trams at Twentymans’ CC78 Postcard - Valentines – Bourke looking west from Swanston CC79 Postcard - Rose 3938 – Bourke at Swanston – the Leviathan building CC80 Postcard - Valentines – Elizabeth St looking south from Collins – No. 19 CC81 Postcard - Rose P4765 – Bourke St Melbourne CC82 Postcard - Rose 4090 – cable tram passing Parliament house CC83 Postcard - Valentines – GPO Elizabeth St CC84 Interior of cable trailer with clothing on a set CC85 Elizabeth St looking north CC86 Cigarette card - Collins St No. 41- WD HO Wills CC87 Postcard - Rialto building with cable set CC88 Postcard - Valentines - Swanston at Flinders looking north CC89 CC90 Q 150 Hanna St – dated on rear CC91 176 turning – photo ex Alan Jungworth CC92 161 on Princes Bridge – minimum fare 4d sign and Inspector CC93 459 at Point Ormond CC94 158 at Gordon St – side on view CC95 X 217 in Swanston St CC96 X 217 in Swanston St with an East Brighton destination CC97 T177 CC98 T177 Peel St – no destination roll – being transferred? CC99 X1 462 in Glenhuntly Road to Point Ormond CC100 X1 462 in Glenhuntly Road to Elsternwick Rly Station CC101 X1 462 in Glenhuntly Road to Point Ormond CC102 Q 150 Hanna St CC103 190 at Camberwell Depot CC104 T182 at Footscray CC105 X1 466 and W2 at Footscray CC106 190 at Camberwell Depot CC107 X1 467 Barkly St Footscray CC108 X2 679 turning into William St from La Trobe St CC109 X2 677 Glenhuntly Road with Point Ormond Destination CC110 Postcard T180 CC111 Postcard format – X1 467 on a truck – see also CC178 CC112 Postcard format – X1 467 at Wantirna South CC113 Q200 and SW6 896 at Thornbury – has labels on rear CC114 T177, Ballarat Road – has labels on rear CC115 T178 at Point Ormond CC116 Postcard X1 465 and 466 CC117 Postcard – X2 676 CC118 Postcard – TMSV X2 217 CC119 810 on temporary bridging – 24-12-67 CC120 W2 575 – Queens Parade junction in, still temporary bridging, substation under construction CC121 Forming Queens Parade Junction base slab CC122 W2 596 prior to tramway works – all tracks still in position CC123 It’s a mass of reinforcing – bridging being formed CC124 Looking north with substation being built CC125 Looking east with some rather tight curves, Wellington St still in use CC126 SW6 958 ex Wellington St with all tracks and signal box and buildings. CC127 Victoria Pde at Gisborne looking east – at least 4 cars CC128 SW6 893? With dash canopy lights and SW6 862 and a man with a newspaper CC129 SW6 894 on the S curves, with tram in Wellington St CC130 Similar photo CC131 W2 564 turning into Wellington St – the concrete tracks are not that old CC132 W2 552 running out of Wellington St CC133 W5 732 from Fitzroy St into St Kilda Road with next iteration in position – very wonky CC134 W5 764 turning into Fitzroy St CC135 SW6 947 turning from Wellington St CC136 W2 586 running out of High St CC137 W2 500 turning into Wellington St CC138 W2 543 in Wellington St inbound CC139 L103 with St Kilda Junction destination, and a tower truck on right CC140 Workmen – new track in Queensway in use CC141 Ditto CC142 L103 in Queensway, and another car in bound CC143 Looking east along Wellington St which has been taken out of use. Also a MMTB Roller CC144 W5 824 and a W2 and all types of wobbly temporary track CC145 W2 354 to High St CC146 Sw6 947 on the S bends CC147 W2 500 looking north – tram on the S bends CC148 SW6 896 leaving the S bend CC149 W2 357 and a MMTB City bus with trees/gardens on the side CC150 W5 817 Elliot Ave – see also CC302 CC151 W2 552 – note the large trolley bridge CC152 W2 550 at depot or workshops CC153 1B truck CC154 SW2 432 CC155 W2 155 at Glenhuntly CC156 SW6 937 on AETA tour? CC157 X2 677 on Footscray service – Ballarat Rd? CC158 W2 641 – High St Kew? CC159 SW6 847 – Power St Hawthorn CC160 Simpson St – big line up CC161 W2 546 truck No. 1? CC162 W2s at Glenhuntly depot CC163 No. 15 truck under 899 CC164 206 and other junk at Preston Workshops CC165 W in Swanston St Melbourne – Rose series card CC166 Y1 613 Batman Ave?? or William St at Collins CC167 Tram plans CC168 X 217 Swanston St – see also 95 and 96 CC169 217 in Swanston St – same as 95 CC169A 192 in St Kilda Road at Princes bridge CC170 192 in St Kilda Road at Princes bridge CC171 Bendigo 3 arriving Malvern depot – being unloaded CC172 Ditto CC173 T180 at a depot CC174 X1 463 wheel set CC175 C30 – dog car side view – close up CC176 C30 dog car CC177 206 and 30 at Preston Workshops CC178 X1 467 on a truck – see CC111 also CC179 42 CC180 42 at a depot, no destination box CC181 W2 556 1A type truck CC182 Flinders St Station – Rose Series CC183 W7 1035 Spring – Nicholson St CC184 W7 1022 MMTB Post Card CC185 Adelaide 178 – has on rear – R. Lilburn 4/82 CC186 Adelaide 175 – has on rear – R. Lilburn 4/82 CC187 Y1 610 on AETA tour CC188 Y1 610 on AETA tour with large group – Point Ormond CC189 AETA display – has GH55-32 in pencil on rear CC190 AETA display – has GH55-29 in pencil on rear CC191 Y1 610 on AETA tour with large group – Point Ormond CC192 VR 53 at Footscray CC193 VR cars 40 and 34 at Elwood wash dock CC194 W7 1024 as the 1970 Christmas tram CC195 Geelong – loading a set of 22E trucks CC196 Geelong 10 and 23 running an AETA special CC197 Geelong – AETA special CC198 Geelong 7 at Junction CC199 Geelong 10, in the city CC200 Geelong 33 with Belmont destination CC201 Geelong 15 Eastern Park destination 29-3-1948 CC202 Geelong 23 at Railway Station – 29-3-1948 CC203 Geelong 23 at Railway Station – 29-3-1948 CC204 Geelong – loading a bogie tram CC205 Geelong – loading a bogie tram CC206 Geelong 40 – loaded on truck CC207 Geelong 40 – on jacks CC208 Geelong 40 on jacks – 19 behind CC209 Geelong 38 with two workers on either side CC210 – 214 Australian Historic Tramways stamp folder and set CC215 Bendigo 17 at depot – has dup JBS on rear CC216 Bendigo 20, 29 bogie and straight sill car at Charing Cross CC217 Bendigo one man bogie Pall Mall CC218 Bendigo – Bogie 23, other cars and welding truck at depot CC219 Bendigo 7 with Quarry Hill destination CC220 Bendigo 21 with Lake Weerona destination CC221 ESCo 18 Ballarat CC222 Ballarat bogie 22 on AETA special CC223 Ditto CC224 Ballarat 34 at Stones Corner – R Lilburn CC225 Ballarat 15 in Bridge St – R Lilburn CC226 Ballarat 40 at Gardens – R Lilburn CC227 Ballarat 37 running out of depot – R Lilburn CC228 Postcard – Valentines – Sturt St with loaded horse tram trailer CC229 AETA Geelong tram tour ticket – 29-3-1948 CC230 Postcard – Geelong – Valentine 2114 – T&G building CC231 Postcard – PMTT ! – High St Malvern CC232 Postcard – Empire – Glenferrie Road, Malvern at Wattletree Rd CC233 Postcard Y469, MMTB CC234 Postcard Z2 Spring St CC235 Postcard – Z1 MMTB CC236 Postcard – Stamp Show W1 431 CC237 Postcard – Stamp show B2005 CC238 Postcard – Stamp show W6 982 CC239 Postcard – Valentines 1264 – Johnstone Park with tram in distance CC240 Postcard – Rose 10711 – Swanston and Lonsdale – Hospital and W232 CC241 Postcard – Rose 4827 – Fitzroy St St Kilda W2 362 and 548 CC242 Postcard – Valentines – 939 – St Kilda War Memorial, W and a R? CC243 Postcard – Valentines – 572 – St Kilda War Memorial, W 413 and 140? CC244 Postcard – Valentines – 938 – Uper and Lower Esplanade – L 104 CC245 Postcard – St Kilda Rd at Princes Bridge Y1 and W CC246 Postcard – Biscay BG82 – W5 814 - CC247 Postcard – Biscay 796112 – Bourke St looking west CC248 Postcard – Biscay 796109 – Bourke St looking east CC249 Postcard – Biscay 2AUS58 – Z5 Bourke St CC250 Postcard – Biscay BG 249 – Swanston St CC251 Postcard – National View – St Kilda Rd – shrine and Prince Henrys W2 405 CC252 Postcard – Nu color vue – 11 ML 156 – St Kilda Rd CC253 Postcard – Nu color vue – 11 ML 153 – Swanston St CC254 Postcard – Nu Color vue – Collins St 442 CC255 Postcard – Pitt card – Adelaide – H 364 at Victoria St CC256 Postcard – SPER L/P 154 CC257 Postcard – BTMS – 550 CC258 Postcard – SPER – Brisbane 295 CC259 Adelaide 131 at Burnside – has R Lilburn on card, c1911 CC260 Adelaide 194 CC261 Adelaide 235, with two crew, The News photo CC262 Rockhampton, outside post office – has source of photo details CC263 Sydney – 2086 and 2062 arriving Circular Quay CC264 Sydney – P class – Pitt St? CC265 Sydney – 1610 at Circular Quay CC266 Brisbane 99 and 468 CC267 Sydney with bridge behind CC268 Steam tram Paramatta Park – 103 CC269 Sydney – Museum Station =- Elizabeth St CC270 Sydney – weed burner 137S at a loop Demonstrates the work of Charles Craig in photography and collection of prints.Assembled album in a black presentation folder of 270 photographs from the Charles Craig Collection - 86 sleeves - part 1 of 2. All photographs have been scanned and placed on the Museum's G drive. A list of all photographs with details where possible has been compiled. Victorian Provincial, Launceston, Hobart and Sydney tram photos have been transferred to other Museums, image files retained.melbourne, tramways, tramcars, trams, charles craig, st kilda junction, trackworks -
 Melbourne Tram Museum
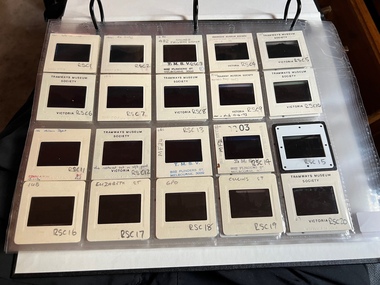
Album - Ron Scholten Slide Collection, Ron Scholten
Photo - see pdf file for further information. Number Brief Description RSC1 PCC 1041 at the gates of Preston Workshops on a test run without it’s trolley retriever RSC2 PCC 1041 in Glenhuntly Road on Route 67 en route to Carnegie crossing the Railway Gates at Glenhuntly Station RSC3 W2 482 stored at Malvern Depot with Olympic Park on the Destination RSC4 Cable Car Set 64 in Swanston St outside Princess Bridge Station in Bound with open top Double Deck Bus, Trak Motors ? Departing from Flinders St Station RSC5 W3 669 in St George Rd at Sumner St en route to Preston Workshops for scrapping RSC6 Cable Car in Lygon St en route to Carlton RSC7 PCC 1041 turning from St Georges Rd into Miller St to enter Preston Workshops RSC8 Flinders St Station with cable cars RSC9 PCC 1041 in strife on it’s maiden day in service. Trams on route 88 delayed in Queens Parade Clifton Hill RSC10 Flinders St at William St with Cable Cars RSC11 L 104 on the fan of the new shed at Malvern Depot on a TMSV tour RSC12 Cable Set 1 after it’s restoration at Preston Workshops on the fan near the front gate RSC13 X1 466 at a suburban terminus of the Footscray System RSC14 X2 680 at Point Ormond Terminus RSC15 An ex Launceston Tram at the outside terminus of the Penny Royal Complex Tramway in Launceston RSC16 Q 148 at Preston Workshops awaiting disposal RSC17 Elizabeth St with Cable Cars RSC18 Elizabeth and Bourke St corner outside the GPO with cable cars RSC19 Collins St with Cable Cars RSC20 A photo taken from the observation deck of the ICI building showing a view of Parliament house with a w class tram in Nicholson St RSC21 Auburn Horse car with a posed photo of all the tramwaymen employed RSC22 Cheltenham Double Deck Horsecar with a full load of passengers RSC23 City of Northcote cable trailer 3 at a terminus RSC24 City of Northcote Cable cars passing in High St Northcote RSC25 St Kilda Rd at Princes Bridge with Cable Cars RSC26 Flinders St with Cable Cars RSC27 Cable Cars RSC28 Bourke St looking towards Elizabeth St from Queen St RSC29 Cable cars in Bourke St at Elizabeth St looking East RSC30 Cable cars in Elizabeth St at the terminus at Flinders St RSC31 Cable cars in Bourke St at Swanston St looking west RSC32 Cable cars in Swanston St at Flinders St looking North RSC33 Cable cars in Collins St near Russell St RSC34 Cable cars in Elizabeth St at Bourke St RSC35 Cable cars in Collins St at Elizabeth St RSC36 Cable Cars in Swanston St at Flinders St RSC37 Cable cars in Collins St RSC38 Cable Cars RSC39 Cable cars in St Kilda Rd near Princes Bridge RSC40 Cable cars in Collins St East of Swanston St RSC41 Cable cars in Spring St outside Parliament house RSC42 K 92 in M&MTB Chocolate and cream livery but with a P&MTT Destination box on Route 14 RSC43 Thornbury depot viewed from Miller St and St Georges rd. Two W2 class cars are laying over between the peaks RSC44 Z3 201 in Met Livery passes D1 3510 in new M Tram livery. A Staff member in uniform stands in the doorway. Dandenong Rd RSC45 D1 3530 advertising Heinekin Super Golf on Route 55 in Royal Park RSC46 D1 3504 in M Tram livery on the reserved track in Matthews Ave near Essendon Airport showing Route 81 Travancore . I suspect it is a private enthusiasts charter due to the Malvern W class run number in the rear windscreen RSC47 D1 3504 on Route 64 in Dandenong Rd in M Tram Livery RSC48 D1 3504 in M Tram Livery at Airport West Terminus RSC49 D1 3504 in M Tram Livery in Union Rd outside the Showgrounds RSC50 D1 3504 at West Maribyrnong Terminus in M Tram Livery RSC51 D1 3503 in M Tram Livery in Malvern Depot RSC52 SW6 960 and VR 53 in Harbour Esplanade for the NMEL&T Co Centenary RSC53 Hawthorn Tramways Trust 32 in Harbour Esplanade for the NMEL&T Co Centenary RSC54 VR 53 & B 2042 in Harbour Esplanade for the NMEL&T Co Centenary RSC55 VR 53 & C 3016 in Harbour Esplanade for the NMEL&T Co Centenary RSC56 NMEL&T Co 13 usually V214 in Harbour Esplanade for the NMEL&T Co Centenary RSC57 NMEL&T Co 13 usually V214 at Preston Workshops for the NMEL&T Co Centenary RSC58 Hawthorn Tramways Trust Lettering on HTT 32 in Harbour Esplanade for the NMEL&T Co Centenary RSC59 Hawthorn Tramways Trust 32 in Harbour Esplanade for the NMEL&T Co Centenary RSC60 Hawthorn Tramways Trust 32in Harbour Esplanade for the NMEL&T Co Centenary RSC61 Hawthorn Tramways Trust 32 in Harbour Esplanade for the NMEL&T Co Centenary RSC62 NMEL&T Co 13 usually V214 at Preston Workshops for the NMEL&T Co Centenary RSC63 W2 516 and another on route 59 wait to shunt at Essendon Airdrome Terminus as W2 571 on route 49 departs. This was the last day of operation. RSC64 Australia’s First Electric Tram at Box Hill with Tramwaymen including H J Hilton who is in the centre RSC65 W2 484 en route to St Kilda Junction and another wait for passengers after a race meeting at Caulfield Racecourse RSC66 X1 463 on the Footscray system en route to Russell St RSC67 Geelong 35 on Chilwell Route, Formerly HTT 13, M&MTB 119, then Bendigo 1 and Ballarat 37 RSC68 P&MTT 4 on Opening Day of the system in Glenferrie Rd RSC69 Bendigo 6 in McCrae St near the Depot end route to North Bendigo RSC70 P&MTT 4 in Glenferrie on opening day of the System RSC71 Scrubber 3 stripped and awaiting scrapping at Preston Workshops RSC72 Scrubber 4 at South Melbourne Depot RSC73 Q 191 & 139 at Preston Workshops awaiting scrapping RSC74 Rail Grinder 3 at Preston Workshops as purchased from Sydney RSC75 Y 469 waits to shunt at Wattle Park Terminus as Y1 613 departs on driver training duties RSC76 VR 53 on the outside roads at Essendon Depot RSC77 W5 796 with three doors and square windows running out of Brunswick Depot in Cameron St, with a supplementary destination board showing “City via Swanston St” RSC78 W2 258 on the wheel grinder road at Brunswick depot RSC79 X2 676 on a TMSV tour, W5 817 & 836 & VR 53 on the open roads at Essendon Depot RSC80 PCC 1041 on test, passes W71035 in High St Preston RSC81 D1 class production number 7 as delivered on test in Matthews Ave RSC82 W2 383 on route 5 turning from the reserved track in Dandenong Rd into St Kilda Rd at St Kilda Junction RSC83 Z3 204 as advertising tram for Vodaphone Grand Prix running into Malvern Depot new shed RSC84 Z1 4 on test in St Georges Rd RSC85 PCC 1041 on Route 96 in Burke St near Exhibition St RSC86 Z1 3 without numbers on test turning from Miller St in St Georges Rd RSC87 Track components stored in Coldblo Rd at Malvern Depot with Z class cars adjacent RSC88 D1 3501 in M Tram Livery on Route 55 in Peel St at Franklin St RSC89 C 3001 in Yarra Trams Livery Porto 018 & D13502 in M Tram Livery on Display in Harbourside Esplanade RSC90 D1 class tram production number 7, in as delivered condition on test in Matthews Ave RSC91 D1 3503 inside Malvern Depot RSC92 SW6 955 and W6 974 in St Kilda at City Rd at Dusk RSC93 Freight Car 19 at Preston Workshops in green Livery RSC94 Rail Grinder 3 in green Livery at South Melb Per Way Yard RSC95 A SW6 class car on route 50 shunting at Elizabeth St Terminus at night, taken from Flinders St Station RSC96 W2 588 & 435 in St Kilda Rd at Batman Ave RSC97 Y1 613 in service at Wattle Park Terminus RSC98 W2 588 in Wellington Parade en-route to the City with a Grand Final Load of passengers followed closely by 384 RSC99 W2 558 on a MCG Footy Special entering the Simpson St sidings RSC100 W3 657 & an L Class in the new shed at Malvern Depot RSC101 Y1 613 in St Kilda Rd on an enthusiasts tour in St Kilda Rd south of St Kilda jun RSC102 Y1 613 on an enthusiasts tour in Clarendon St with the two extra tracks on the Viaduct under construction RSC103 W6 976 on the fan of the new shed at Malvern Depot RSC104 W7 1024 as an advertising car for Bank of NSW at the route 1 terminus at South Melb Beach RSC105 PCC 980 on route 96 in Nicholson St near North Fitzroy Depot RSC106 SW6 890 with dash canopy lighting in Market St on the opening day of William St Services RSC107 W2 444 with big numbers heads a line of footy specials in Simpson St Sidings RSC108 Cable Cars in Elizabeth St RSC109 NMEL&T co 2 with a trailer outside the power station in Mount Alexander Rd RSC110 Alf Twentyman’s cable car set in his Northcote backyard RSC111 Cable Cars in Queens Parade Clifton Hill RSC112 Cable cars in Collins St outside the Townhall RSC113 PCC 1041 at Carnegie terminus RSC114 Cable cars in Elizabeth St RSC115 Cable cars in Collins St near Swanston St RSC116 HTT 19 turns from Riversdale Rd into Camberwell Rd at Camberwell Junction RSC117 W1 419 official builders photo of first car of the class RSC118 Cable car with a full load of passengers RSC119 W1 422 illuminated for the visit of T.R.H. The Duke and Duchess of York RSC120 PCC 1041 in strife on it’s maiden day in service. Trams on route 88 delayed in Queens Parade Clifton Hill RSC121 Bendigo birney in Finn St near North Bendigo terminus RSC122 SW6 in St Kilda Rd at Domain Rd at night RSC123 All 3 of Alf Twentyman’s cable cars in his Northcote backyard RSC124 Cable trailer 256 being unloaded into the shed at Bylands RSC125 Cable grip car 1 being removed from the Melbourne Museum RSC126 Alf Twentyman's cable cars in his Northcote Backyard RSC127 Alf Twentyman's cable cars in his Northcote Backyard RSC128 Alf Twentyman's cable cars in his Northcote Backyard RSC129 Alf Twentyman's cable cars in his Northcote Backyard RSC130 W class car in Swanston St at Collins St RSC131 Y1 469, L & W3 on the run out of Glenhuntly Depot on a tour RSC132 W7 1024 as an advertising tram for Bank of NSW at Clifton Hill RSC133 W2 496 on a footy special in Simpson St Sidings RSC134 W2 as originally converted to a test car at Preston Workshops RSC135 W3 667 in Brunswick Depot with Ellen Butland at the controls RSC136 W3 669 on it’s final run at Victoria Prd & Brunswick St RSC137 W2 571 in Wellington Prd at Clarendon St with a Footy Final load of Passengers RSC138 Y1 613 shunts at Spencer St Terminus as X217 waits on Australia Day Pageant RSC139 PCC 1041 on Rt 96 in Burke St outside the Southern Cross Hotel RSC140 890 with accident damage on the outside roads at Preston Workshops c1978 RSC141 535 on Rt 4 at the old St Kilda Jun c1967 RSC142 1041 on Rt 88 turns from Bourke St into Spring St 1973 RSC143 102 on a tour at Albert Park Beach Terminus Feb 1972 RSC144 833, 835 & 834 in the shed at Malvern Depot c1976 RSC145 281 in Wellington Parade on a football very crowded special c1974 RSC146 464 Ballarat Rd 1960 RSC147 181 Explosives Fty - at Footscray Station - July 1960 RSC148 181 Williamstown Road 1960 RSC149 Cable car set at Alf Twentyman’s c1970 RSC150 X 217 at Malvern Depot c1970 RSC151 X1 465 and T181 Footscray Football ground in Barkly St. c1960 RSC152 Scrubber 5 at South Melbourne depot c1960 RSC153 X1 465 Footscray to Russell St, c1960 RSC154 X1 467 Leeds St Footscray 1960 RSC155 PMTT 4 Glenferrie Road, 1910 RSC156 S 164 at Malvern Depot c1970 RSC157 T178 Footscray c1960 RSC158 Cleaner No. 7 at South Melbourne depot c1960 RSC159 Two Y classes at Princes Bridge / Batman Ave mid 1950s RSC160 Swanston St – Nu color vue slide – M142 Demonstrates the work of Ron Scholten in photography, collection and/or production of duplicate slidesAssembled album in a black presentation folder of 160 colour slides, 8 slide sleeves, collected or produced by Ron Scholten. Many are TMSV or Windsor Publications slides. All photographs have been scanned and placed on the Museum's G drive. A list of all photographs with details has been compiled. melbourne, tramways, trams, cable trams -
 Melbourne Tram Museum
Ephemera - Timetable/s, Public Transport Victoria (PTV), Set of 25 digital timetables, 2018
Set of 25 digital timetables generally applicable from 20-05-2018 following the introduction of more frequent services on many routes. Image files are htd2860iRx - x being the route number. Route 1 - East Coburg - South Melbourne Beach Route 3 and 3A - Melbourne University - East Malvern - and via St Kilda Beach Route 5 - Melbourne University - Malvern Route 6 - Melbourne University - Glen Iris Route 8 - Moreland - Toorak Route 11 - West Preston - Victoria Harbour Docklands Route 12 - Victoria Gardens - St Kilda Route 16 - Melbourne University - Kew Via St Kilda Route 19 - North Coburg - Flinders St Route 30 - St Vincent's Plaza - Etihad Stadium Docklands Route 35 - City Circle Route 48 - North Balwyn - Victoria Harbour Docklands Route 55 - West Coburg - Domain Interchange Route 57 - West Maribyrnong - Flinders St Route 59 - Airport West - Flinders St Route 64 - East Brighton - Melbourne University Route 67 - Carnegie - Melbourne University Route 70 - Wattle Park - Waterfront City Docklands Route 72 - Camberwell - Melbourne University Route 75 - Vermont South - Etihad Stadium Docklands Route 78 - North Richmond - Balaclava via Prahran Route 82 - Footscray - Moonee Ponds Route 86 - Bundoora RMIT - Waterfront City Docklands Route 96 - East Brunswick - St Kilda Beach Route 109 - Box Hill - Port Melbournetrams, tramways, timetables, yarra trams, route 1, route 3, route 5, route 6, route 8, route 11, route 12, route 16, route 19, route 30, route 35, route 48, route 55, route 57, route 59, route 64, route 67, route 70, route 72, route 75, route 78, route 82, route 86, route 96, route 109 -
 Melbourne Tram Museum
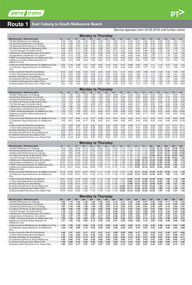
Ephemera - Timetable/s, Melbourne & Metropolitan Tramways Board (MMTB), "MMTB Tram Timetables", 1977 to 1978
Set of 6 MMTB Tram timetables, folded sheets, 8 sections, providing timetables for specific routes, day of week giving information on tram times at specific time points, route map, sections and fares and organisation address - 616 Little Collins St. Melbourne. All printed on yellow paper. 1. - Route 67, 37 and 66 - Carnegie - City via Swanston St (67), via William St (37) and Glenhuntly Depot (66) - dated Oct. 1978. .2 - Route 69 - Kew Cotham Road - St Kilda Beach dated Dec. 1978 .3 - Route 70, 71 and 76 - Wattle Park - Batman Ave, Arraign Road (Route 71) and Camberwell Depot (Route 76), dated May 1978 .4 - Route 72, 32 and 73 - Camberwell City via Swanston St (72), via William St (32) and Camberwell Junction (73) dated Sept, 1978. .5 - Route 82 - Moonee Ponds - Footscray - Highpoint West - dated Sept. 1977 .6 - Route 88, 14, 89 and 90, 96, 95 and 97 - East Preston via Bourke St (88), via Latrobe St (14), East Preston Bell St (89) and Northcote Dundas St (90) to the city and East Brunswick (96), Exhibition (95) and North Fitzroy (Park St), dated May 1978. .7 - Routes 48, 24, 40, 41, 29, 74, 76. 28 - July 1978 .8 - ditto - Weekends, July 1978, printed on green paper. .9 - Bus routes 284 (East Kew - Doncaster North) and 270 (East Kew - Shoppingtown) - dated August 1978trams, tramways, mmtb, timetables, melbourne, fares, route 14, route 32, route 37, route 66, route 67, route 69, route 70, route 71, route 72, route 73, route 76, route 82, route 88, route 89, route 90, route 95, route 96, route 97, route 48, route 24, route 40, route 41, route 29, route 74, route 76, route 28, route 284, route 270 -
 Melbourne Tram Museum
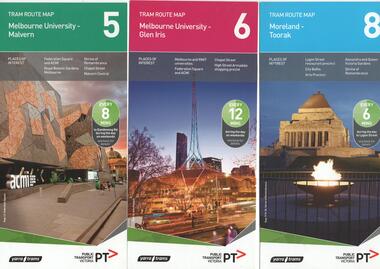
Ephemera - Tram Route Guides, Public Transport Victoria (PTV), "Tram Route Map", 1/2015 and 6/2015
Set of 7 Tram Route Maps, published during 2015. Each comprises a vertical DL folded sheet, full colour for the nominated routes, with Yarra Trams and PTV logos, listing the stops, interchanges with bus and other tram services, ticketing zones, estimated frequencies with adverts for Night tram services, TramTracker and Myki tickets. .1 - Route 5 - Melbourne University to Malvern .2 - Route 6 - Melbourne University to Glen Iris .3 - Route 8 - Moreland to Toorak .4 - Route 11 - West Preston - Victoria Harbour Docklands .5 - Route 19 - North Coburg - Flinders St Station .6 - Route 70 - Wattle Park to Waterfront City Docklands .7 - Route 72 - Melbourne University to Camberwell .8 - Route 1 - East Coburg - South Melbourne Beach .9 - Route 3 and 3A - Melbourne University to East Malvern .10 - Route 16 - Melbourne University to Kew .11 - Route 55 - West Coburg - Domain Interchange .12 - Route 57 - West Maribyrnong - Flinders St Station .13 - Route 59 - Airport West - Flinders St. Station .14 - Route 64 - Melbourne University - East Brighton .15 - Route 67 - Melbourne University - Carnegie .16 - Route 78 - North Richmond - Balaclava via Prahran .17 - Route 82 - Footscray - Moonee Ponds See Reg Item 2396 for 2012, 2278 for 2016 and 2940 for 2014 versionstrams, tramways, timetables, maps, route 1, route 3, route 5, route 6, route 8, route 11, route 16, route 19, route 55, route 57, route 59, route 64, route 67, route 70, route 72, route 78, route 82, east coburg, south melbourne, east malvern, kew, west coburg, west maribyrnong, airport west, east brighton, carnegie, north richmond, balaclava, footscray, moonee ponds, malvern, glen iris, moreland, west preston, north coburg, wattle park, camberwell -
 Melbourne Tram Museum
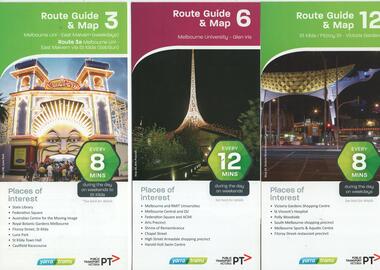
Ephemera - Tram Route Guides, Public Transport Victoria (PTV), "Tram Route Guide and Map", Oct. 13 to July 14
Set of 17 Tram Route Maps, published during 2013 and 2014. Each comprises a vertical DL folded sheet, full colour for the nominated routes, with Yarra Trams and PTV logos, listing the stops, interchanges with bus and other tram services, ticketing zones, estimated frequencies with adverts for Night tram services, TramTracker and Myki tickets. .1 - Route 3 - East Malvern - Melbourne Uni and 3A via St Kilda (Sat and Sun) .2 - Route 6 - Melbourne University to Glen Iris .3 - Route 12 - St Kilda - Victoria Gardens .4 - Route 16 - Kew via St Kilda .5 -Route 30 - St Vincent's Plaza - Etihad Stadium .6 - Route 55 - West Coburg - Domain Interchange .7 - Route 59 - Airport West - City (Elizabeth St) .8 - Route 64 - Melbourne University - East Brighton .9 - Route 70 - Wattle Park to Waterfront City Docklands .10 - Route 75 - Docklands - Vermont South .11 - Route 78 - North Richmond - Balaclava .12 - Route 82 - Moonee Ponds - Footscray .13 - Route 86 - Bundoora - Waterfront City .14 - Route 96 - East Brunswick - St Kilda Beach .15 - Route 109 - Box Hill - Port Melbourne .16 - Route 112 and 11 - West Preston - St Kilda and West Preston - Victoria Harbour Docklands .17 - Route 24 - North Balwyn to Etihad Stadium See Reg Item 2396 for 2012, 2278 for 2016 and 2939 for 2015 versionstrams, tramways, timetables, maps, route 3, route 6, route 11, route 12, route 16, route 24, route 30, route 55, route 59, route 64, route 70, route 75, route 78, route 82, route 86, route 96, route 109, route 112, east malvern, glen iris, victoria gardens, kew, st vincent's plaza, west coburg, airport west, east brighton, wattle park, vermont south, north richmond, moonee ponds, footscray, st kilda, docklands, west preston, victoria harbour, north balwyn, etihad stadium