Showing 42 items
matching long-service leave
-
 Federation University Historical Collection
Pamplet, The Richard W. Richards Medal, c1975
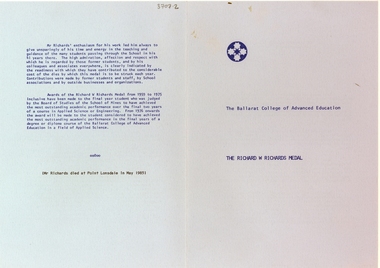
Dick Richards has been honoured through the naming of a Ballarat School of Mines prize - The R.W. Richards Medal. This medal later became a University of Ballarat prize. It has been awarded annually since 1959 to the Bachelor of Applied Science graduate considered to have achieved the most outstanding academic performance of their course. The award was was introduced to commemorate the long years of service to tertiary education in Ballarat by Mr Richards. Dick Richards joined the Ballarat School of Mines (SMB) in 1914, and soon afterwards was granted leave to join an expedition to Antarctica. In 1915 he sailed from Australia with the Antarctic Exploration Expedition, led by Sir Ernest Shackleton. White folded pamphlet outlining the Dick Richards medal. dick richards, r.w. richards, dick richards medal, richard w. richards medal, r.w. richards medal, awards, prize, antarctica, ballarat school of mines principal -
 Ballarat Tramway Museum
Slide - 35mm slide/s - set of 20, Noel Simons, 21/05/1971 12:00:00 AM
Set of 20 transparencies taken on 21/5/1971 on Kodak mounts. 1197.1 - Bendigo No. 5 en route to Eaglehawk at Creeth St Long Gully. Tram has a SEC roof ad and Cinzano roof ad. 1197.2 - No 5 approaching Needle Loop between Long Gully and California Gully. On left hand side is the City of Bendigo sign, indicating city boundary. 1197.3 - As for 1197.2 but actually entering loop. Photo taken after tram has passed photographer. 1197.4 - No. 26 bound for Eaglehawk descending the railway bridge near Eaglehawk, at Jobs Gully. 1197.5 - as for 1197.4, but after crossing bridge, now ascending a hill. Photo taken after tram has passed photographer. 1197.6 - No. 26 climbing High St. hill Eaglehawk, nearing end of Double track, bound for Quarry Hill. Shows centre of the road poles. 1197.7 - As for 1197.6, with tram entering single track section. Photo taken after tram has passed photographer. Has a BP service station in the background. 1197.8 - No. 26 (bound for Quarry Hill) crossing No. 17 (Eaglehawk) at Job's Gully Loop. 1197.9 - No. 17 climbing railway bridge at Job's Gully, en route to Eaglehawk. Photo taken after tram has passed photographer. 1197.10 - No.26 bound for Quarry Hill, leaving Long Gully Loop? Has the Creeth St. church in l197.l in the far background. Photo taken after tram has passed photographer. 1197.11 - Tramway Point work at the northern end of Long Gully Loop. 1197.12 - No. 17 en route for Quarry Hill turning into View St. from Bamard St. Tram has SEC roof ads "Everything fine in my all electric Kitchen' and 'Electric Cooking is Matchless'. 1197.13 - as for 1197.12, but tram has turned into View St and about to enter the double line track. Photo taken after tram has passed photographer. 1197.14 - No. 21 enters Nolan St after turning from MacRae St. en route to Bendigo. Note sign on its own post noting tram turns "Beware Tram Turns" and stop sign on adjacent pole "Trams stop on Request". No. 21 has two SEC roof ads. 1197.15 - No. 21 in Nolan St. after turning from Bridge St. (White Hills Road). Note signal light for Bridge St. loop on pole corner of street. Photo taken after tram has passed photographer. 1197.16 - No. 2 bound for Eaglehawk at unknown location. 1197.17 - Tram stop sign on a pole "CARS STOP BY REQUEST" 1197.18 - No. 5 in Carpenter St.? en route to Quarry Hill. 1197.19 - No. 28 has just arrive at Golden Square terminus, passengers are disembarking and the trolley pole is being turned. Golden Square Hotel in the background. 1197.20 - No. 28 at Golden Square terminus. Has a "Nothing beats Briquettes for hear roof ad. Information written on in black ink and date stamped on purple ink. 1197.1 - "No. 5 at Creeth St. Long Gully" 1197.2 - "No. 5 approaching Needle Loop between Long Gully and California Gully" 1197.3 - "No. 5 at Needle Loop between Long Gully and California Gully" 1197.4 - "No. 26 crossing railway bridge at Job's Gully near Eaglehawk" 1197.5 - "No. 26 just after crossing railway bridge at Job's Gully near Eaglehawk/ 1197.6 - "No. 26 in High St. Eaglehawk" 1197.7 - "No. 26 at end of double track in High St. Eaglehawk" 1197.8 - "Nos. 26 and 17 crossing at Job's Gully Loop" 1197.9 - "No. 17 crossing railway bridge at Job's Gully near Eaglehawk". 1197.10 - "No. 26 at Long Gully" 1197.11 - 'Northern end of points at Long Gully Loop". 1197.12 - "No. 17 turning into View St. from Bamard St. Bendigo". 1197.13 -'No. 17 at beginning of double track in View St. after leaving Bamard St. Bendigo. 1197.14 - "No. 21 enters Nolan St. from MacRae St. Bendigo." 1197.15 - "No. 21 in Nolan St. Bendigo just after leaving White Hills Road." 1197.16 - "No. 2" 1197.18 - "No. 5" 1197.19 - "Birney car No. 28 at Golden Square Terminus" 1197.20 "Birney car No. 28 at Golden Square Terminus" tramways, trams, bendigo, long gully, railway bridge, jobs gully, trackwork, nolan st, quarry hill, tram stops, golden square, tram 2, tram 5, tram 17, tram 21, tram 26, tram 28 -
 Ballarat Tramway Museum
Slide - 35mm slide/s - set of 13, Noel Simons, 24/05/1971 12:00:00 AM
Set of 13 transparencies taken on 24/5/1971 on Kodak mounts. 1200.1 - No. 7 en route to Golden Square turning from Bridge St. into Nolan St. Photo taken after tram has passed photographer. Tram has a briquettes roof ad. 1200.2 - No. 21 in McCrae St. just before Nolan St. Photo taken after tram has passed photographer. 1200.3 - No. 7 in Nolan St at corner with McCrae St. Passenger boarding tram at a tram stop. 1200.4 - No 7 turning from Nolan into McCrae St. with Golden Fleece service station in background. 1200.5 - No. 7 in Thunder St en route to North Bendigo. Photo taken after tram has passed photographer. 1200.6 - No. 5 en route to Eaglehawk just after leaving Needle Loop between Long Gully and California Gully. 1200.7 - No. 5 at the start of the double track in High St. Eaglehawk. 1200.8 - No. 5 at Eaglehawk terminus showing "Depot" with Leo A Hughes Photographer advertisement on building in background. 1200.9 - No. 5 at Eaglehawk terminus. Has two SEC roof ads 'Everything's fine in my all electric kitchen' and 'Electricity best for cooking'. 1200.10 - No. 5 at Eaglehawk terminus, with canon, war memorial outside Town Hall and Leo A Hughes Photographer advertisement on building in background. 1200.11 - No. 5 in McCrae St. about to enter Arnold St. and depot. Tram showing depot, has driver changing points. 1200.12 - No. 5 in Arnold St. Photo taken looking up the centre of the access track - shows the overhead at depot junction. 1200.13 - Depot entrance with signage at depot entrance and depot building in background.Information written on in black ink and date stamped on purple ink. 1200.1 - "No. 7 entering Nolan St. from Bridge St." 1200.2 -"No. 21 in McRae St. about to turn into Nolan St." 1200.3 - "No. 7 in Nolan St. at corner of McRae St." 1200.4 - "No. 7 turning from Nolan St. into McRae St." 1200.5 - "No. 7 in Thunder St. just after turning from Caledonia St." 1200.6 - "No. 5 just after leaving Needle Loop between Long Gully and California Gully. 1200.7 - "No. 5 in High St. Eaglehawk at start of double track." 1200.8 - "No. 5 at Eaglehawk terminus" 1200.9 - "No. 5 at Eaglehawk terminus" 1200.10 - "No. 5 at Eaglehawk terminus."\ 1200.11 - "No. 5 in McCrae St. about to enter Arnold St." 1200.12 - "No. 5 in Arnold St." 1200.13 - "Entrance to Bendigo Tram Depot, No. 5 running into shed."tramways, trams, bendigo, mccrae st, north bendigo, california gully, eaglehawk, depot, tram 5, tram 7, tram 21 -
 Ballarat Tramway Museum
Slide - 35mm slide/s - set of 32, Noel Simons, 25/02/1971 12:00:00 AM
Set of 31 transparencies taken on 25/2/1972 on Kodak mounts. 1201.1 - Bendigo No. 26 in Bond St. just after leaving Long Gully en route for Quarry Hill. Has Norris Supermarket in background. Has two SEC roof ads. 1201.2 - No. 26 climbing View St. from Charing Cross en route to Eaglehawk. Has ANZ bank and AMOCO service station in background. 1201.3 - as for 1201.3, but after tram has passed photographer. Has buildings west of Mackenzie St. in photograph. 1201.4 - Tram stop and centre of the road pole with two "CARS STOP BY REQUEST" signs mounted on pole at the corner of Mackenzie St. 1201.5 - same position as for 1201.3, but with No. 5 descending the street. 1201.6 - same position as for 1201.2, but with No. 5 descending the street. Photo taken after tram has passed photographer. 1201.7 - No. 7 in Nolan St. from across the park at Lake Weeroona. 1201.8 - No. 7 entering McCrae St from Nolan St. - distant view. Note "TRAM "sign on left hand side under tree and overhead in McCrae St. from former track that once was in this street. 1201.9 - No. 7 in High St. with Cathedral in background. Tram en route to North Bendigo. Note scaffolding around Cathedral main spire area. 1201.10 - No. 7 crossing Bendigo Creek bridge in High St. near Golden Square. Has a Caltex Service station in the background. 1201.11 - No. 7 at Golden Square terminus with Sunburst Fruit Juices and a Peters Ice cream delivery vans alongside. 1201.12 - as for 1201.11 but photo taken from behind tram, with the end of the rails in the photograph. 1201.13 - No. 7 and 21 in Pall Mall at Charing Cross with No. 5 in the background. Taken some distance away from the location. 1201.14 - No. 7 at Golden Square terminus, taken a short distance from the tram terminus. Shows Milk Bar on right hand side and the hotel on the left hand side. Taken from the south side of the roadway. 1201.15 - as from 1201.14 but taken from the north side of the roadway. 1201.16 - No 5 waiting at California Gully loop. Distant photo showing surrounds 1201.17 - No. 5 en route for Quarry Hill crossing No. 26 at California Gully. 1201.18 - No. 26 at Eaglehawk terminus with Eaglehawk Town Hall and Post Office in background. 1201.19 - No. 21 arriving at Charing Cross en route to North Bendigo. Has Alexandra Fountain in the background, ANZ bank RACV building, and other buildings on the north side of Pall Mall or Nolan St. 1201.20 - No. 26 en route for Quarry Hill at Charing Cross, with crew standing by front door. Has Colonial Mutual life building, Armstrong Tyre Service (Firestone) and a sign for Cohns Drinks in the background. 1201.21 - as for 1201.20 but with No. 5 en route to Eaglehawk now in photograph. 1201.22 - No. 26 at Quarry Hill terminus. 1201.23 - No. 26 at Quarry Hill terminus, view of front portion of tram only from a gate at the Bendigo cemetery. 1201.24 - Track at the end of the Quarry Hill line showing the point blades of the former "Y" terminus and the overhead for this. 1201.25 - No. 2 at the Quarry Hill terminus, looking along the former Trackwork. 1201.26 - as for 1201.25 1201.27 - number not used. 1201.28 - Golden Square terminus from some distance from the actual terminus, showing the Warning sign "TRAM" for motorists from the south. No. 7 at the terminus. 1201.29 - No. 7 passing through the Golden Square shopping centre. Numerous cars and pedestrians. Tram en route for North Bendigo. 1201.30 - No. 7 in High St. Golden Square, en route for North Bendigo. Photo taken after tram has passed photographer. 1201.31 - No. 7 in High St. just past Wattle St. with the Cathedral in the background. Tram has two SEC roof ads good side on photo, 'Everything's fine in my all electric kitchen' and 'Electrical cooking - clean, quick, economical'. 1201.32 - No. 7 in High St. nearing Wattle St. Has Cathedral in the background. Photo taken after tram has passed photographer.Information written on in black ink and date stamped on purple ink. 1201.1 - "No. 26 in Bond St just after leaving Long Gully" 1201.2 - "No. 26 climbing View St. from Charing Cross" 1201.3 - "No. 26 ascending View St. from Charing Cross (At Mackenzie St.)" 1201.4 - "View St. & Mackenzie St." 1201.5 - "No. 5 in View St. near Mackenzie St." 1201.6 - "No. 5 in View St. nearing Charing Cross." 1201.7 - "No. 7 in Nolan St. seen from Lake Weeroona Park." 1201.8 - "No. 7 entering McRae St. from Nolan St. Note "TRAM" warning sign on left. 1201.9 - "No. 7 in High St. passing Short St." 1201.10 - "No. 7 crossing Bendigo Creek bridge in High St. near Golden Square." 1201.11 - "No. 7 at Golden Square terminus" 1201.12 - "No. 7 at Golden Square terminus" 1201.13 - "No 7, 21 and 5 at Charing Cross" 1201.14 - "No. 7 at Golden Square terminus" 1201.15 - "No. 7 at Golden Square terminus" 1201.16 - "No 5 waiting at California Gully loop." 1201.17 - "Nos. 5 and 26 crossing at California Gully loop" 1201.18 - "No. 26 at Eaglehawk terminus" 1201.19 - "No. 21 arriving at Charing Cross from Golden Square" 1201.20 - "No. 26 at Charing Cross" 1201.21 - "Nos. 5 and 26 at Charing Cross." 1201.22 - "No. 26 at Quarry Hill terminus" 1201.23 - "No. 26 at Quarry Hill terminus seen through the gates of the Bendigo Cemetery." 1201.24 - "Quarry Hill terminus showing remains for former double track layout abandoned before 1964." 1201.25 - "No. 2 at Quarry Hill terminus" 1201.26 - "No. 2 at Quarry Hill terminus" 1201.28 - "The Southern approach to Golden Square with No. 7 standing at the terminus, "TRAM" warning sign on the left. 1201.29 - "No. 7 passing through Golden Square Shopping Centre" 1201.30 - "No. 7 in High St. Golden Square" 1201.31 - "No. 7 in High St. passing Wattle St." 1201.32 - "No. 7 in High St. nearing Wattle St."tramways, trams, bendigo, bond st., view st., nolan st., high st., eaglehawk, california gully, charing cross, quarry hill, trackwork, tram 2, tram 5, tram 7, tram 21, tram 26 -
 Ballarat Tramway Museum
Slide - 35mm slide/s - set of 25, Noel Simons, 26/02/1972 12:00:00 AM
Set of 25 transparencies taken on 26/2/1972 on Kodak mounts. 1204.1 - Bendigo No. 5 - just arrived at Manchester Loop near Havilah Road, Long Gully. Photo taken after tram has passed photographer. 1204.2 - No. 26 in Backhaus St. Long Gully passing William St, en route to Quarry Hill. Photo taken after tram has passed photographer. 1204.3 - No. 5 climbing the High St. Hill Eaglehawk, heading for Quarry Hill with the buildings on the West side of High St. in the background, including the Eaglehawk Town Hall. 1204.4 - as for 1204.3, but tram close up. 1204.5 - as for 1204.3, but after tram has passed photographer. 1204.6 - No. 5 at intersection of Mt Korong Road Ironbark and Calder Highway, with the AMPOL service 'station in the background. Photo taken after tram has passed photographer. 1204.7 - No. 26 en route to Quarry Hill shortly after leaving Needle Loop, passing William St., Long Gully. 1204.8 - No. 5 at California Gully Loop, picking up a passenger, with the shops at Long Gully in the background. Photo taken after tram has passed photographer. 1204.9 - No. 5 in Long Gully, en route to Quarry Hill. Photo taken after tram has passed photographer. 1204.10 - No. 2 at Eaglehawk terminus with the Eaglehawk Town Hall and Post Office in the background. Tram has two SEC roof ads. 1204.11 - No. 2 at Eaglehawk terminus, close up. 1204.12 - as for 1204.11, but through the park gates. 1204.13 - as for 1204.11, but with tram stop shelters in the foreground and buildings on the West side of High St in the background. 1204.14 - No. 2 in Mt. Korong Rd, midway between California Gully Loop and Needle Loop. Photo taken after tram has passed photographer. 1204.15 - No. 5 in Long Gully, en route to Quarry Hill. 1204.16 - as for 1204.15, but with trams departed loop. Has an ESSO service station in the background. 1204.17 - No. 26 leaves Charing Cross up View St.. Photo taken after tram has passed photographer. Has Armstrong Tyre Service, Cohns Drinks ad on a building and the T&G building in the background. Also Firestone ads on the tyre service building. 1204.18 - No. 5 waits at Charing Cross with the Alexandra Fountain in the background. Tram has two SEC roof ads, 'Everything s fine in my all electric kitchen' and 'Electricity Best for Cooking'. Has RACV, Colonial Mutual Life buildings in the background and the planting areas around Charing Cross gardens in the foreground. 1204.19 - No. 21 en route to North Bendigo arrives at Charing Cross, with passengers waiting to board. No. 5 in the background. In the background is the Fountain Gate Plaza building and the City Family Hotel. 1204.20 - as for 1204.19, but with No. 7 en route to Golden Square. 1204.21 - as for 1204.19, but closer up. 1204.22 - as for 1204.18 1204.23 - No. 25 in Nolan St. near the crossing of Bendigo Creek, running a special tram tour. 1204.24 - No. 25 on a special charter, in Weeroona Ave. at Cnr of Caledonia St. passing the Gas works. 1204.25 - Nos. 25 (showing Golden Square), 7 and 26 at Charing Cross. Has fountain in the background.Information written on in blue ink and date stamped on purple ink. 1204.1 - "No. 5 at Manchester Loop, near Havilah Rd. Long Gully." 1204.2 - "No. 26 in Backhaus St. Long Gully passing William St." 1204.3 - "No. 5 in High St. Eaglehawk." 1204.4 - "No. 5 in High St. Eaglehawk." 1204.5 - "No. 5 in High St. Eaglehawk." 1204.6 - "No. 5 in Mt. Korong Rd., Ironbark, passing Calder Highway Junctn." 1204.7 - "No. 26 shortly after leaving Needle Loop, passing William St., Long Gully. No. 5 cresting hill in distance." 1204.8 - "No. 5 at California Gully Loop." 1204.9 - "No. 5 in Long Gully" 1204.10 - "No. 2 at Eaglehawk terminus." 1204.11 - "No. 2 at Eaglehawk terminus." 1204.12 - "No. 2 at Eaglehawk terminus." 1204.13 - "No. 2 at Eaglehawk terminus." 1204.14 - "No. 2 in Mt. Korong Rd, midway between California Gully Loop and Needle Loop. 1204.15 - "Nos. 2 and 26 crossing at Long Gully." 1204.16 - "No. 26 leaves Long Gully loop for Eaglehawk as No. 2 pulls out of the far end towards Bendigo" 1204.17 - "No. 26 beginning the climb up View St. from Charing Cross." 1204.18 - "No. 5 at Charing Cross." 1204.19 - "No 21 arrives at Charing Cross from Golden Square while No. 5 awaits departure time for Eaglehawk." 1204.20 - "Nos. 7, 21, and 2 (behind which is No. 5) at Charing Cross." 1204.21 - "Nos. 7, 21, and 2 at Charing Cross." 1204.22 - "No. 5 at Charing Cross." 1204.23 - "No. 25 in Nolan St. near Bendigo creek crossing" 1204.24 - "No. 25 in Weeroona Ave. at cnr of Caledonia St." 1204.25 - "Nos. 25, 7, 26 and 2 (behind 26) at Charing Cross."tramways, trams, bendigo, eaglehawk, long gully, california gully, charing cross, north bendigo, tram 2, tram 5, tram 7, tram 21, tram 25, tram 26 -
 Ballarat Tramway Museum
Book, State Electricity Commission of Victoria (SECV), "Staff Regulations and Information", Dec. 1984
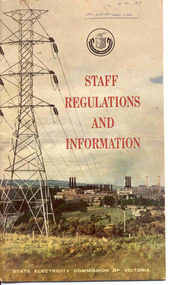
Demonstrates aspects of the SEC personnel practices in giving guidance to its employees about wages, and leave entitlements and processes within the SEC itself. Would have been given to new employees.Thirty two page book, with card cover, centre stapled, titled SEC "Staff Regulations and Information". Has colour cover of Yallourn power station with, SEC logo. Gives an introduction, advice on appointments and promotions, salary accelerations and increments, education and training, leave (Recreation, sick, special and long service), classification and appeals committee rules and information. Issued by the SEC 12/1964. Full scan of document added as a pdf file 5/6/2019.On front cover "W. Chandler" in ink. Marks on paragraphs regarding leave and termination.trams, tramways, sec, staff, personnel -
 Ballarat Tramway Museum
Ephemera - Timetable/s, State Electricity Commission of Victoria (SECV), "Official Time Table Bendigo June 1940", Jun. 1940
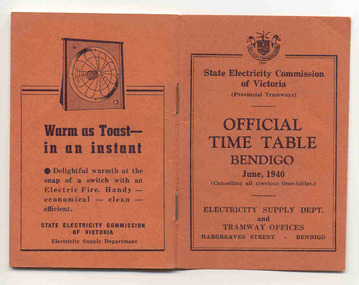
Centre pages show a map of the system and the sections. The extension to North Bendigo is yet to be constructed. Gives times for trams leaving the city or the terminals for the routes and for the Eaglehawk route, leaving Long Gully Bridge. Has four SECV Advertisements within the book for hot water, ovens - cookers, toasters and electric fan heaters. Three copies held. See item 5356 for a digital image of the same document with a photograph of Len Smith of Geelong loading a pram into a Birney tram.Provides details of 1940 tram services in Bendigo.Forty-page booklet, with orange lightweight covers, saddle-stapled, SECV Provincial Tramways with the title "Official Time Table Bendigo June 1940". Has address if Hargreaves St Bendigo on bottom of the cover. Two copies held.bendigo, timetables, secv -
 Warrnambool and District Historical Society Inc.
Document - Charles Geary Collection, 1915-1922
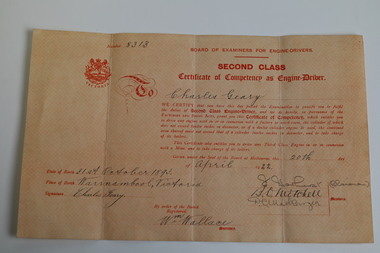
This collection of six documents (1915-1922) belonged to Charles Geary who was born in Warrnambool, the son of Thomas and Martha Ellen Geary in 1893. The collection documents his joining the Australian Imperial Expeditionary Force A.A.M.C. Dental Reserve, his subsequent discharge and post military employment in the Town of Warrnambool as a Hackney Carriage Driver and later as a second class engine driver.. This collection gives examples of references and certificates of leave required to join the A.I.F. in 1916. The discharge certificate is a good example of what was given to military personnel after their services were no longer required. The llicense and certificate of competency show some of Charles' post war endeavours. Charles is listed on the Warrnambool Fire Brigade World War 1 Honour Roll as an active member. (.1) Typewritten refence on Robinson's Motor Pty. Ltd. green and navy printed letterhead with a purple ink stamp and black written signature and embossed company seal. (.2) Reference, handwritten in black ink on blue 8mm lined white paper with a 38mm printed margin. (.3) Black print on a cream certificate completed in black ink. (.4) Cotton woven paper certificate completed in blue, black and red ink with black ink thumb prints. (.5) Black printed Certificate number 1069 on cream paper completed in black ink. (.6) Peach coloured certificate with red printing on heavy weight paper completed in black ink and numbered 8313charles geary, australian army medical corps dental reserve, a.a.m.c., robinson's motor proprietary limited, geo powell, country fire brigades board of victoria, hackney carriage driver's license, second class engine driver, dental mechanic -
 Mission to Seafarers Victoria
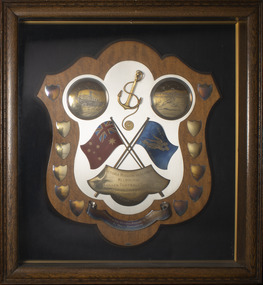
Award - Shield, Soccer Football Shield For Annual Competition by Crews of Merchant Ships, c. 1936
Football matches were a popular onshore activity and Annual reports note Reverend Weller in the 1920s managed to establish a temporary pitch and a change room facility near Port Melbourne. The donor, Wally Nancarrow, was a tailor in the Queen Victoria Building in Sydney (from Nov. 1927- Aug. 1935 on Trove) so the relation with the Melbourne Mission is unclear. The shield can be seen hanging above the canteen on item 1713 (dated c. 1950) and in the Celia Little Room. The Annual Report 1936 mentions a shield (p11) seen on page 15: "Football: The competition has been extended this year, and in the future is to include all matches played in Australian ports. The Victorian Missions to Seamen Shield is the present trophy, and the Assistant-Chaplain has been appointed Organiser and Honorary Secretary." The shield may have been done after the one mentioned in the annual report and we can only speculate nothing was ever engraved because of WW2.The collection holds many historic and later contemporary colour photos of crew football teams posed onshore and on decks. Sports and games were an essential part of the welfare services offered by the Mission when seamen had long shore leave.Wooden shield featuring two circular disk silver plaques one on each side at the top. One with the engraving of a ship and the other with the engraving of a footballer. At the top in the centre is an anchor in relief gilded with a rope attached, falling across the front of it and coiling at the bottom of the anchor. Two flags crossing over in the middle of the shield; one the Australian Navy flag and the other the Mission to Seamen flag. Laying over the top of the poles of the flags is a brass banner with the competition description engraved on it. At the bottom is a brass scroll with an inscription about who presented it and where. The shield has 12 smaller, blank silver shields along the sides. The shield is kept inside a wooden display cabinet with a glass front and navy material back ground.engraved on brass banner: For annual competition by crew of merchant ships presented by Wally Nancarrow, Sydneyshield, soccer, football, anchor, brass, silver, wally nancarrow, mission to seafarers victoria, walter james nancarrow (1885 - 1961) -
 Wangaratta RSL Sub Branch
Work on paper - Envelope Art
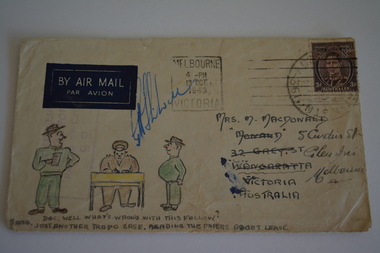
One of several illustrated envelopes, without letter, sketched by soldier/s during the second world war and sent to Mrs MacDonald of WangarattaVictoria's 2/24th Infantry Battalion was raised in Wangaratta in July 1940. They were welcomed with open arms by the local community as they rapidly built up their numbers. The people of Wangaratta adopted the Battalion and they became known as "Wangaratta's Own" because of the time the battalion spent in the town during its formative period prior to deployment overseas. Many of the soldiers maintained life long friendships with the people of Wangaratta. Even though the Battation was disbanded in 1946 members and their families return each year, in November, for a commemorative service at the 2/24th Battalion Memorial Wall at the Wangaratta Cemetery.Cream paper envelope with coloured sketch of officer at desk with a soldier either sideTop left - BY AIR MAIL Top right - postage stamp Left side - AIF Censor stamp Right side - Mrs M MacDonald "Monald" 32 Grey Street Wangaratta Victoria Australia crossed out - 5 ? Street Glen Iris Melbourne. Bottom - "Sarg, Doc Well what's wrong with this fellow?Just another tropo case, reading the papers about leave" ww2, envelope art -
 Wangaratta RSL Sub Branch
Mixed media - Framed photographs and boomerang, Acme Picture Framing
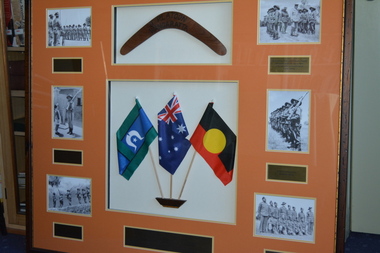
Dedication to the Aboriginal soldiers who formed a special all volunteer platoon at No 9 Camp Wangaratta in Victoria from late 1940 until February 1941. No 9 Camp was set up at the Wangaratta Showgrounds to allow the formation of the 2/24th Australian Infantry Battalion prior to leaving for Egypt. Major Joseph Albert Wright a WW1 Light Horse veteran was in charge of this platoon the only Aboriginal squad in the Australian Military Forces at that time. Aboriginals from Lake Tyers enlisted at Caulfield between June and July 1940. 7 of the 13 who enlisted in June 1940 were discharged as members of the 2/23rd Battalion. 10 were discharged on the 22/3/1941 as Services No Longer Required, 1 discharged in November 1940, 1 in January 1941 and another in April 1941. Dedication to Aboriginal soldiers who formed a special all volunteer platoon at No 9 Camp Wangaratta in Victoria from late 1940 until February 1941. No 9 Camp was set up at the Wangaratta Showgrounds to allow the formation of the 2/24th Australian Infantry Battalion prior to leaving for Egypt. Major Joseph Albert Wright a WW1 Light Horse veteran was in charge of this platoon the only Aboriginal squad in the Australian Military Forces at that time.Large timber frame with orange mount containing boomerang three flags six photographs and narrative plaques9 Platoon Wangarattaaboriginal, 9 platoon, wangaratta, no 9 camp -
 Narre Warren and District Family History Group
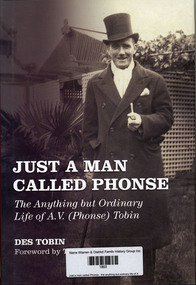
Book, Des Tobin, Just a man called Phonse : the anything but ordinary life of A. V. (Phonse) Tobin, 2018
The life of Phonse Tobin was anything but ordinary. Born in 1905, he followed on behind soldiers as they marched to the wharves to depart for WW1. He earned pocket money by trapping rats and collecting the South Melbourne Council's rat bounty, and almost 'haunted' the Collins Street movie and live theatres. After leaving school in 1919 he worked as a storeman, salesman, soldier and fireman. In 1934 Phonse and his brothers Leo, Tom and Kevin started what has become Australia's most successful family-owned funeral service company. A natural entertainer, Phonse possessed a fine singing voice and produced many amateur theatrical productions in the 1930s. He was a good all-round sportsman and a successful professional footrunner. He was a long-serving member of the North Melbourne Football Club committee and was the club's president from 1955 to 1957. He was a life member of both the NMFC and the VFL (now AFL). Phonse married Vera Crough in 1935. They had four children. Phonse was one of those rare characters who could meet, communicate and be at ease with people of all classes and walks of life - from prize fighters to prime ministers, from 'mug' punters to wealthy publicans or bookmakers, from Knights of the Southern Cross to knights of the realm, from everyday parish priests to 'princes' of the church, and from grave diggers to governors.non-fictionThe life of Phonse Tobin was anything but ordinary. Born in 1905, he followed on behind soldiers as they marched to the wharves to depart for WW1. He earned pocket money by trapping rats and collecting the South Melbourne Council's rat bounty, and almost 'haunted' the Collins Street movie and live theatres. After leaving school in 1919 he worked as a storeman, salesman, soldier and fireman. In 1934 Phonse and his brothers Leo, Tom and Kevin started what has become Australia's most successful family-owned funeral service company. A natural entertainer, Phonse possessed a fine singing voice and produced many amateur theatrical productions in the 1930s. He was a good all-round sportsman and a successful professional footrunner. He was a long-serving member of the North Melbourne Football Club committee and was the club's president from 1955 to 1957. He was a life member of both the NMFC and the VFL (now AFL). Phonse married Vera Crough in 1935. They had four children. Phonse was one of those rare characters who could meet, communicate and be at ease with people of all classes and walks of life - from prize fighters to prime ministers, from 'mug' punters to wealthy publicans or bookmakers, from Knights of the Southern Cross to knights of the realm, from everyday parish priests to 'princes' of the church, and from grave diggers to governors.phonse tobin, undertakers, biography, alphonsus vincent tobin