Showing 39 items matching "route 97"
-
 Wodonga & District Historical Society Inc
Booklet - Postcode Instruction Book, Australia Post, 1967
The use of postcodes was introduced in Australia on Saturday, 1 July 1967 by the Postmaster General's department. They are used to more efficiently sort and route mail within AUstralia. In July 1967, the first edition of the Postcode Booklet was distributed free by mail to every Australian household and business address. A total of 4.5 million booklets were distributed, as well as a postcard identifying the recipient’s own postcode. Originally the four digit postcodes were developed for electronic mail handling equipment at the former Redfern Mail Exchange in Sydney. This was extended to cover all locations in Australia and continues to grow as new residential areas are developed.A small booklet issued by the Australian Post Office to explain the use of post codes 1967. It outlines how to use a postcode, advice for businesses to ensure their correct use and a list of all the postcodes allocated throughout Australia at that time. Two other booklets are updated lists of postcodes.non-fictionThe use of postcodes was introduced in Australia on Saturday, 1 July 1967 by the Postmaster General's department. They are used to more efficiently sort and route mail within AUstralia. In July 1967, the first edition of the Postcode Booklet was distributed free by mail to every Australian household and business address. A total of 4.5 million booklets were distributed, as well as a postcard identifying the recipient’s own postcode. Originally the four digit postcodes were developed for electronic mail handling equipment at the former Redfern Mail Exchange in Sydney. This was extended to cover all locations in Australia and continues to grow as new residential areas are developed.australian mail services, australia post, postcodes -
 Wodonga & District Historical Society Inc
Book - Touring Murray River Country, Stone, Derrick I & Stone, Sascha C, 1996
A touring guide of the Murray RIver, Australia from its source in the mountains following its journey to the sea. The first sections cover information about the area of the Upper Murray, including Lake Hume and the Albury-Wodonga area.A publication of 128 pages includes 230 full colour photos, 42 illustrations and 19 colour route maps. A touring guide of the Murray RIver, Australia from its source in the mountains following its journey to the sea. The first sections cover information about the area of the Upper Murray, including Lake Hume and the Albury-Wodonga area.murray river, australia - tourism -
 Wodonga & District Historical Society Inc
Photograph - The River Port of Red Bank
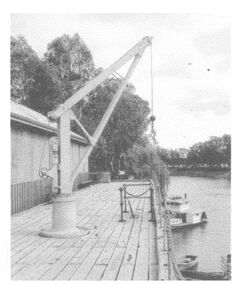
THE RIVER PORT OF REDBANK During the 1870s, Red Bank would have been one of the busiest ports on the Murray River. When the railway line was being built from Melbourne to Wodonga all the railway material was brought up river from Echuca by paddle steamer and barge and unloaded at Red Bank. The material was loaded onto horse teams or bullock wagons and taken along the route of the spur line. During the 187 MacCulloch & Co. handled 3000 tons of railway material here' The port was operational from approximately 1870 until 1874. THE FIG TREES The fig trees and a small bank of gravel are the only visible reminders of where the spur line from the wharf at Red Bank met the main line. It was at this point that all the material for the mainline was transferred from the small locomotives and wagons from Red Bank. It would have been carried by bullock wagons and horse teams and unloaded at different places as the line progressed. After the line was completed in 1873 the fettlers from Wodonga would patrol this length of the line.These images are significant because they document an important stage in the development of transportation in North East Victoria.Images of the River Port of Red bank near Wodonga on the Murray River. 1. The wharf 2. All that remainsred bank port, historic wharf wodonga, river transport -
 Melbourne Tram Museum
Book, Keith Kings, "Bendigo's Vintage Talking Trams", 1999
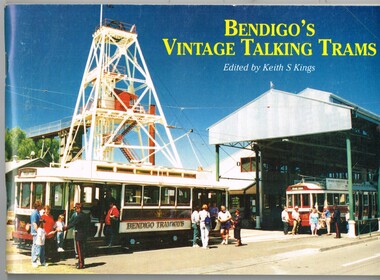
Book - 100 pages, plus printed colour covers on gloss paper, centre stapled, titled "Bendigo's Vintage Talking Trams", authored by Keith Kings1996, published by the Bendigo Trust December 1981. Has many historic photos of Bendigo, trams in the streets of Bendigo and its then fleet of trams. Gives a history of the trams in Bendigo, including battery tram, steam, ESCo, SEC, the Trust, Central Deborah Gold Mine and its trammies. Pages 49 to 52 - colour pages including a map of the route and staff and volunteers 30/10/1996.Page 1 note in ink "To Charles 20/2/97 Keith Kings"trams, tramways, bendigo, battery trams, bendigo trust -
 Melbourne Tram Museum
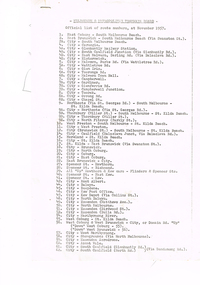
Document - List, Wal Jack, "Official list of route numbers, at November 1957", Nov. 1957
Two page photocopied printed list, foolscap sheets titled "Official list of route numbers, at November 1957", giving the list of route numbers for all numbers to 97 including A to E, showing where numbers and most letters not used at the time. Does not give bus route numbers. Shows the un-numbered routes. List prepared by Wal Jack.trams, tramways, mmtb, route numbers, routes -
 Melbourne Tram Museum
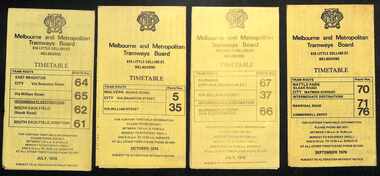
Ephemera - Timetables - MMTB trams - set of 8, Melbourne & Metropolitan Tramways Board (MMTB), 1976
Timetables - provide information on ticketing, fares, and timing points, with a description of the route and a map. Not all services had been allocated a route number at the time. 1 - East Brighton - City and via William St - routes 64, 65, 62 and 61 - July 1976 2 - Malvern (Burke Rd) to City and via Wiliam St - routes 5 and 35 - Oct. 1976 3 - Carnegie - City and via William St - routes 67, 37, and 66 - July 1976 4 - Wattle Parke - City and Camberwell depot - routes 70, 71 and 76 - Sept. 1976 5 - Kew - Cotham Road to St Kilda Beach - route 69 - August 1976 6 - East Preston - via Bourke or La Trobe, and East Brunswick - routes 88, 14, 89. 90, 96, 95, and 97 - Feb. 1976 7 - Toorak - City and via William St - routes 8 and 38 - August 1976 8 - St Kilda Beach and South Melbourne Beach and via William St - routes 15, 16, 53, 55, 1, 2 and 4 - Sept. 1976 Yields information about MMTB tram services during the 1970s. Set of 8 MMTB tram timetables - multifolded printed on yellow paper.timetable, mmtb, wattle park, east brighton, malvern, carnegie, kew, east brunswick, toorak, st kilda beach, south melbourne beach, route 64, route 65, route 62, route 61, roure 5, route 35, route 67, route 37, route 66, route 70, route 71, route 76, route 69, route 88, route 96, route 8, route 38, route 15, route 1, route 2, route 55, route 53 -
 Melbourne Tram Museum
Newspaper, Southern Cross, "Next stop change. But is it better?", "Tram users tipped as losers", "A rattlers' farewell", "Depot to lose route", 22/03/1995 12:00:00 AM
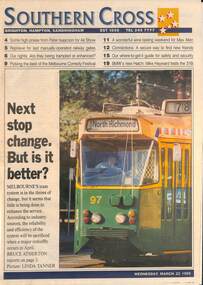
Newspaper clipping - set of four cuttings - from the Southern Cross or other papers as noted, 22/3/1995 titled "Next stop change. But is it better?" discussing proposed route changes to Melbourne trams 1 - Front cover with a photo of Z97, with a destination of North Richmond Route 78. 2 - Page 3 of above newspaper, titled "Tram users tipped as losers" outlining the proposed changes to routes 1, 8, 10, 15, 78, 79. 96, 109 - affecting the types of trams used and depots. Quotes Ray Wilson of the PTC, Lou Di Gregorio of the Union, and John Andrews of the of the Committee for the Retention and Extension of Kew Tramlines. Written by Linda Tanner with a photo of Z9 on route 78. 3 - Page 6 of The Melbourne Times, 22/3/1995. titled "A rattlers' farewell", about the removal of the W class tram from the Brunswick St route. Item includes a photo of SW5 800. Written by Jane Kenrick, photo Peter Weaving. Quotes Mr. Mees of the PTUA. .4 - page 3 of the "Emerald Hill Times", 22/3/1995, titled "Depot to lose route", written by Petrina Dakin and Bruce Atherton, about the proposed changes including the loss the Route 12, and other issues. Has a photo of a tram with Route 12 showing.trams, tramways, tram routes, w class, route 1, route 8, route 10, route 15, route 78, route 79, ptc, route 96, route 109, z class, tram 97, tram 9, tram 800 -
 Melbourne Tram Museum
Slide - Set of 3, Keith Caldwell, 1/11/1978 12:00:00 AM
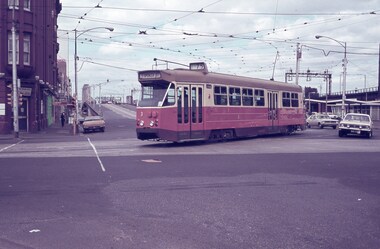
.1 - Agfa colour slide, blue and white plastic mount, photo by Keith Caldwell 1/11/1978 - of Z3 turning from Flinders St into Spencer St, route 75. Has the Flinders St over pass, over King St and the railway viaduct in the background. In the background is the Great Southern Hotel. .2 - Kodachrome cardboard mount, same date of Z12 southbound in Spencer St passing Bourke St with the Mail Exchange in the back and Z 97 standing in the Bourke St terminus with another Z arriving. Taken from the 2nd floor of Spencer St station building. .3 - as above with Z23 northbound in Spencer St. The cable tram track in Bourke St, can perhaps just been seen.In red ink "1-11.78" and in pencil "MLB 10/78 BX".trams, tramways, spencer st, flinders st, z class, bourke st, tram 3, tram 12, tram 97, tram 23 -
 Melbourne Tram Museum
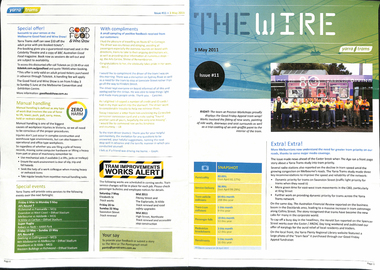
Magazine, Yarra Trams, "The Wire", 5/2011 to 1/2015
0 - No 9 - 1/4/2011 - Rhinos on skateboards, Did you know, Spencer St works, .1 - No. 11 of 3/5/2011 with the revised Yarra trams logo, traffic priority, work over Easter in Spencer St at Bourke and Collins St, Good Friday appeal, safety, passenger feedback and future works. .2 - No. 13 - 31/5/2011 - new uniform, cleaning, CEPR, trackwork - Fitzroy St, Northcote, Rhino, Carlton Control. .3 - No. 14 - 15/6/2011 - Haymarket Roundabout, accessibility, maintenance, CSE. 3a - No. 16 - 19/7/2011 - Managers on the move, Trevor Jones, Yarra's vision, Richard Ch'ng and Rhino update. .4 - No. 17 - 2/8/2011 - High St Westgarth trackwork, Swanston St, IMF CEO visit .5 - No. 18 - 16/8/2011 - Performance benchmarks met, Preston Workshops, repairs to 3018, tram signal priority. .6 - No . 19 - 30/8/2011 - New E class trams, routes "a" or "d", TramTracker in shelters, police, fare evasion .7 - No. 20 - 15/9/2011 - Football trams, Superstops, Bridge Road, Rhinos. .8 - No. 21 - 27/9/2011 - CEO's journey to work, accessibility, increased patronage, E class. .8a - No. 22 - 11/10/2011 - Minister Mulder visit, E class, Customer experience, Elizabeth Kerdelhue Corporate Affairs Director, flood indicator in Wellington Parade, Keolis - Orleans and PTV coming your way. .9 - No. 23 - 25/10/2011 - forthcoming royal visit, opening for Footscray Road extension, Rhinos, Stockholm .10 - No. 24 - 8/11/2011- Royal visit, photos, Z3 158, route 86 works in High St. (see htd5043i21 for a image from an unknown newspaper of the actual event - features Z3 158.) .11 - No. 25 - 22/11/2011 - new staff guide, Gold Coast tram line, Macarthur St, overhead, fund raising, route numbering update. .12 - No. 26 - 6/12/2011 - Swanston St Superstops, Newmarket bridge strikes, rhinos. .13 - No. 27 - 20/12/2011 - Christmas carnival, Lenny Bates, portable crossover, uniforms. .14 - No. 28 - 17/1/2012 - Passing of Len Bates, Myki, Gardiner railway station. 14a - No. 29 - 31/1/2012 - Southbank depot, patronage, myki, think like a passenger, fatigue management, .15 - No. 30 - 15/2/2012 - visit of Keolis, SNCF people, list of Executive leadership team with photos, Swanston St works, Myki introduction. .16 - No. 31 - 29/2/2012 - patronage up, tram postage stamps, Myki, rhinos. .17 - No. 32 - 14/3/2012 - St Kilda Rd trackwork, fund raising, Southbank Depot extensions, Myki, driving conditions, grand prix. .18 - No. 33 - 30/3/2012 - introduction of the PTV, end of MetLink and Transport Ticketing Authority, changes in management structure, trackwork, Gold Coast tramway and Keolis. .19 - No. 34 - Dr Jake - Royal children's Hospital super stop, route 96 - Premium line. .20 - No. 35, 2/5/2012 - Revision of Rules, trackwork in St Kilda Road and Elizabeth St, Myki, safety - Zero Harm. .21 - No. 69 - 25/9/2013 - Passengers paying their way, E class update, Mal Ashworth retires, progress report, feedback, new chime on trams. .22 - No. 70 - 9/10/2013 - Art comes alive, tram 925, driver simulator at Preston Workshops, E class project, 90th Glen Huntly. .23 - No. 83 - 23/4/2014 - Screen time for trams, new PIDs on B class, assistance animals, Operations Centre, Preston Workshops, Electrical log sheets to SLV. .24 - No. 89 - 23/7/2014 - punctuality, refresh of network map (fold-out map), women drivers. .25 - No. 97 - 19/11/2014 - Revitalising route 96, Keolis news, free tram zone, guide dogs. .26 - No. 99 - 17/12/2014 - Accessibility week, new uniform top for CSE's, free tram zone, world trade centre stop upgrade, heat stress, Art tram 158. .27 - No. 100 - 14/1/2015 - Route 96 complete, New Years eve free travel, fare compliance, patronage down, .28 - No. 12 - 16/5/2011 - Gold coast tramway, performance dashboard, tramworks and the rhino .29 - No. 16 - 19/7/2011 - Depot managers, tevor jones, record patronage, vision, rhino .30 - No. 17 - 2/8/2011 - High St Westgarth works, Duncan Smith, David Clarke Training, Swanston St works, and Preston Workshops . .32 - No. 39 - 28/6.2012 - maintenance, Emmanual Sorin, transformation, fare evasion, and Combino in Potsdam. .33 - No. 105 - 25/3/2015 - Grand Prix, Elgin and Lygon upgrade, Camberwell Junction, PTV hub, overhead.Demonstrates Yarra trams staff newsletters.Set of 33 Yarra Trams internal newsletter "The Wire", All A4, printed in full colour. All four pages unless noted otherwise, full colour, performance snapshot on front cover.trams, tramways, yarra trams, traffic control, trackwork, spencer st, fund raising, operations, rhinos, carlton control, high st, haymarket, preston workshops, e class, route numbers, bridge road, wellington parade, ptv, royal visit, footscray road, new tramway, gold coast, macarthur st, swanston st, superstops, newmarket, gardiner, burke road, level crossings, railway squares, myki, metlink, tickets, route 96, rules, st kilda road, elizabeth st, tram 158, tram 925, glen huntly depot, simulator, b class, opeations centre, art trams, patronage