Federation University Historical Collection
Document - Correspondence, Richard Squire Mining Correspondence
Seems that Tom pays Ned's wages. Numerous bores were sunk , some were opened out and driven in the direction of the reef. Numerous Cross cuts were also made from the main tunnel.Unless otherwise stated the letters are from Dad (Richard Squire) to Tom, Hazel & Kiddies all.
.1) Handwritten two page letter from Richard Squire to 'Tom & Hazel & little men' with information regarding the Leigh River Tunnel at Mount Mercer, dated 6/8/28.
.2) Handwritten three page letter with information regarding mining operations dated 27.6.29.
.3) Handwritten three page letter from Richard Squire to 'Tom & Hazel & Flock' with queries regarding the health of one of their children, other personal information and information regarding mining operations dated 18/7/29.
.4) Handwritten one page letter from Richard Squire to 'Tom' dated 20/7/29, regarding the enclosed handwritten receipt with stamp for Call of two shares costing 8 pounds 7 shillings and 2 pence in Leigh River Tunnel Syndicate from Richard Squire dated 13th July 1927.
.5) Handwritten two page letter from Richard Squire to 'Tom & Hazel & Pinchers' regarding his health, other personal information and information about the four page report of position of work at 'Leigh River Tunnel' enclosed. The letter is dated 29/11/29 and the report dated Nov 28th 29.
.6) Handwritten two page letter with personal information and a suggestion that Tom learn to swim dated 13th Jan 30.
.7) Handwritten two page report by Richard Squire regarding Leigh River Tunnel Syndicate plus a one page 'Rough Section' drawing of the tunnel dated 29th April 1930.
.8) Typed one page report by Richard Squire regarding Leigh River Tunnel Syndicate and the findings of a new shaft dated 9th December 30.
.9) Handwritten one page letter by Richard Squire to 'Tom' regarding mining operations and four handwritten receipts for payment of Calls from Richard Squire and Mr H McLeod and Mr E McLeod with stamps.
.10) Handwritten two page letter regarding a meeting he had with the Secretary for Mines, Mr Whitehead dated 22 Feb 1931.
.11) Handwritten two page letter regarding the difficulties in financing the mining operation occasioned by the interference of the government department dated 12th Mar 31.
.12) Handwritten one page letter regarding the delay in the submission of his letter to the Gold Committee and with details of plans he had sent to Tom separately, dated 1st April 31.
.13) Handwritten two page letter by Richard Squire to 'Tom' regarding personal matters including his health and also information regarding Tunnel work, dated May 11th 31.
.14) Handwritten two page letter regarding the mine work, how his new employee, Ned, was going and also his health, dated Thur 21st May 31.
.15) Handwritten two page letter regarding the Tunnel progress and financial matters dated Tue 26th May.
.16) Handwritten three page letter regarding the Tunnel progress dated Thur June 11th.
.17) Handwritten two page letter regarding the Tunnel progress, an issue relating to Ned's taxation assessment and his own health, dated 28th June 31.
.18) Handwritten three page letter with detailed information on the Tunnel progress and information regarding his health, dated Thur July 23rd.
.19) Handwritten two page letter regarding the Tunnel progress and some personal greetings, dated Thur July 30th 31.
.20) Handwritten two page letter regarding the Tunnel progress, an agreement with Messrs Read & Peers? and a renaming of a Prospect as Lawaluk instead of Mount Mercer, dated Sun 2nd Aug 31.
.21) Handwritten three page letter regarding the Tunnel progress, the lease agreement on Mr Read's property at Mount Mercer which he had been unable to pay and a parsley root remedy which a Ballarat Chinese herbalist had prescribed for his catarrh and had been effective, dated Thur 13th Aug 31.
.22) Handwritten two page letter regarding the efficacy of the parsley (root) water in healing his catarrh and detailed progress report on the Tunnel which showed a little gold in the uncovered 'wash', dated Mon 24th Aug.
.23) Handwritten three page letter regarding the progress of the Tunnel and one of the bores sunk also mentions his health, dated Mon Sept 7th.
.24) Handwritten three page letter regarding the Tunnel progress in detail and an account of his illness, dated Thur 24th Sept.
.25) Handwritten two page letter regarding the Tunnel progress in detail and his health which had been poor, dated Thur Oct 8th 31.
.26) Handwritten four page letter regarding the Tunnel progress in detail, dated Thur Oct 22.
.27) Handwritten four page letter regarding a detailed report of the Tunnel progress including the news of some show of gold and other personal matters including advising Tom not to drive there when he would have to drive home in the dark because of the accidents caused by 'Boosy Drivers', dated Thur Nov 19th 31.
.28) Handwritten two page letter regarding the continued promising Tunnel progress, dated Thur Nov 26th.
.29) Handwritten two page letter regarding Tunnel progress and personal matters relating to the coming Christmas visit, dated Thur Dec 3rd 1931.
.30) Handwritten two page letter regarding Tunnel progress and personal matters regarding the impending visit by the family, dated Sun Dec 6th 31.
.31) Handwritten two page letter regarding his health and the treatment proscribed by a Chinese herbalist and also some information about his expenses, dated Sunday 25/1/32.
.32) Handwritten four page letter regarding Tunnel progress including a small diagram and further information on his health, dated Thur 25th Feb 32.
.33) Handwritten three page letter regarding Tunnel progress and some personal and family information, dated Mon 21st 32.
.34) Handwritten one page letter regarding some personal matters and information about the Tunnel progress, dated Thus 31st Mar.
.35) Handwritten two page letter regarding detailed information about the Tunnel as well as a one page diagram of the Drives being excavated, dated Sun night 3rd April.
.36). Handwritten three page letter from his home in Prahran regarding a mixture of personal matters and matters relating to the Tunnel, dated 18/4/32.
.37) Handwritten one page letter regarding enclosed three shares which were to be placed as he was very short of funds, dated 19-4-32.
.38) Handwritten two page letter from his home in Prahran regarding work carried out by Ned at the Tunnel and family matters, dated 6/5/32.
.39) Handwritten one page letter from his home in Prahran regarding work carried out by Ned at the Tunnel, dated 10/5/32 plus an attached one page letter written by Ned (E. Woodlook) to 'Mr Squire' regarding regarding Tunnel progress, dated Saturday.
.40) Handwritten two page letter from his home in Prahran regarding Tunnel progress and some personal matters, dated 27/5/32 plus an attached one page letter written by Ned to 'Mr Squire' regarding Tunnel progress and with the information that the rats were bad in Richard's hut, dated Friday.
.41) Handwritten two page letter from his home in Prahran regarding Tunnel progress, dated 3/6/32 plus a two page letter written by E.Woodlock to 'Mr Squire' regarding Tunnel progress as well as person matters regarding his health, dated Friday (27th May 32 written in pencil by Richard).
.42) Handwritten three page letter from his home in Prahran regarding tunnel progress and financial matters, also detailed information about the Madison's Tunnel, dated 8/6/32, plus a one page letter from E. Woodlock (Ned) to 'Mr Squire' regarding Tunnel progress dated Saturday (4 June, 32).
.43) Handwritten three page letter from his home Prahran regarding a sketch he had made of Madison's Tunnel and the Mercer Shaft (not present) and the similarity of other mines with barely Payable gold, dated 13/6/32. plus a one page letter from E. Woodlock to 'Mr Squire' regarding Tunnel progress dated Saturday.
.44) Handwritten one page letter by Richard Squire to 'Tom' from his home in Prahran with some personal information as well as the hope to return to Mt Mercer as he felt he was now well, not dated, plus a two page letter from E. Woodlock to 'Mr Squire' regarding duty stamps sent and Tunnel progress dated Saturday.
.45) Handwritten two page letter from his home in Prahran regarding the progress of the Tunnel, dated 21/6/32, plus a one page letter from E. Woodlock regarding the progress of the Tunnel work, dated Monday (20/6/32).
.46) Handwritten three page letter from his home in Prahran regarding the price of gold and the effect that mining Payable gold in the Madison Tunnel could have, dated 27/6/32.
.47) Handwritten three page letter by Richard Squire to Tom, Hazel & Kiddies all' from his home in Prahran regarding his thoughts on the Madison Tunnel at Piggoreet, dated Mon 4th July 32, plus two one page letters by E Woodlock to 'Mr Squire' regarding the Tunnel work and more personal things, dated Wednesday (June 29th 32) and Saturday (July 2nd).
.48) Handwritten two page letter from his home in Prahran regarding his intention to return to the diggings in a small car procured for his use and his intention to re-peg the Leigh River Lease in another name, dated Sun 17/7/32, plus a two page and a one page letter by E Woodlock to 'Mr Squire' regarding progress at the Tunnel dated Thursday (7th July) and Tuesday (12th July 32).
.49) Handwritten one page letter by E Woodlock to Mr Squire detailing the tunnel work and other work related details dated Saturday (16th July 32), plus a one page letter by 'Dad' (Richard Squire) to 'Tom, Hazel & Kiddies all' regarding the letter sent by Ned (E Woodlock) and the ongoing work. He also talks about the health of Mam, his wife, dated 19th July 32.
.50) Handwritten one page letter regarding the work at the tunnel and with the information that he was to finally return to the mine, dated 22/7/32, plus a one page letter by E Woodlock to Mr Squire about the ongoing work, dated Wednesday (20th July).
.51) Handwritten two page letter written from Mt Mercer, regarding the works in the Mt Mercer Tunnel (mentioning South Cockloft). He also details that the drive from town (Melbourne) took 4 gallons of petrol, dated Thur 28th July 32.
.52) Handwritten 3 page letter detailing the work carried on at the tunnels and with the information that underground gas had halted work temporarily. He was keen that Tom should visit one weekend soon, dated Sat 6th Aug 1932.
.53) Handwritten four page letter detailing the work and new bore holes near Madisons Tunnel. The No 1 tunnel work had to be suspended due to continued gas filling the diggings every time the barometric pressure dropped. On the last page was a rough sketch of the area which was being worked, dated 19th Aug 32.
.54) Handwritten two page letter regarding Tom's proposed visit to the site and some plans that he should bring with him. He also spoke of a pup that he was housing till Tom came, dated 21/8/32.
.55) Handwritten one page letter encouraging Tom to bring skid chains for his vehicle as the road was muddy when he came on the weekend. He gave a brief account of the work and of the pup's progress, dated 25/8/32
.56) Handwritten three page letter regarding the weather and the relief he felt at knowing Tom and his companions had arrived safely home. He also thanked Tom for the cheques for Ned and detailed a little of the work at the tunnel and the need for more explosives as well as the fact that they had had to put a lock on the door of the hut to stop intruders, dated Sun Sept 4th 32.
.57) Handwritten one page letter regarding the ongoing work at the tunnel, dated Thur Sept 8/32.
.58) Handwritten two page letter written from Prahran, regarding his trip home, work at the tunnel and with information about the enclosed receipts, dated 16/9/32. Also included was a one page letter from E Woodlock to Mr Squire regarding the work at the tunnel, dated Wednesday.
.59) Handwritten one page letter from Dad (Richard Squire) to 'Tom, Hazel & Kiddies all' written from Mt Mercer, regarding the work at the tunnel and the effect that 2 inches of rain had on the work, dated Wed Sept 20th 32.
.60) Handwritten two page letter regarding the work at the tunnel and with the information that Mr Read who owned the property where the tunnel was located, had a serious accident in Melbourne, dated Thur 29th Sept 30 (this 1930 date is a mistake as the information contained in this letter follows on from his previous letter dated 20th Sept 32).
.61) Handwritten one page letter regarding the work at the tunnel with the encouraging information that flecks of gold were found in about half a dish (mining pan), dated Thur Sept 22nd.
.62) Handwritten two page letter regarding the progress at the tunnel and the difficulties of the work and thanks for Ned's cheque. Also mentioned was the information that Mr Read had a fractured pelvis and would be in hospital for two months, so Mrs Read with her father was looking after the shearing, dated Thur 6th Oct.
.63) Handwritten two page letter with a third page of a diagram of a cross section of the Leigh River Tunnel, including the new tunnel and Madisons tunnel, with detailed description of the work in the tunnel, dated Sat 8th Oct.
.64) Handwritten two page letter written from Prahran, giving detailed information of the tunnel and the expected outcome of the work. He also commented that he was to visit Mr Read in hospital, dated 14/10/32.
.65) Handwritten two page letter written from Mt Mercer, giving information about the work in the tunnel and his visit to Mr Read, dated Wed 19th Oct. Enclosed also was a one page letter from E Woodlock to Mr Squire giving an account of his work in the tunnel, dated Thursday.
.66) Handwritten one page letter regarding the work in the tunnel, dated Sun Oct 23/32.
.67) Handwritten two page letter from Dad & Jim (Richard Squire) to 'Tom, Hazel & Kiddies all' regarding the receipt of Ned's wages cheque and the insurance of Ned's person as well as a detailed description of the tunnel and its relationship to Madisons Tunnel. He also gives some indication of his health, dated Tue Nov 1st 32.
.68) Handwritten on page letter written from Prahran, giving a small amount of information about the tunnel work as well as his visit to see Mr Read and some personal information, undated. Enclosed also is a one page letter by E Woodlock to Mr Squire about the work in the tunnel, dated Thursday.
.69) Handwritten one page letter with little information, dated 11/11/32. Also enclosed is a one page letter from E Woodlock to Mr Squire about the work in the tunnel, dated Thursday.
.70) Handwritten three page letter with detailed information about the tunnel work and an aside about Jim's help and the he suffered from "Imaginitis imagines he sees a speck of gold in every bit of gravel met", dated 10/11/32.
.71) Handwritten two page letter with detailed information on the work as their tunnel crossed with the old Madison Tunnel, dated Thur 17th Nov.
.72) Handwritten three page letter detailing information on an application for a 500 acre lease which was posted at the Grenville Post Office and how it would impact on their lease. The upshot was that their leases would need to be re-pegged and the fee to publish a Notice of Application on their Leigh River claim was necessary to pay and he wondered if one of their investors would pay the 10 pounds necessary to secure the claim. He also spoke of perhaps forming a Company to put a plant on their Mt Mercer shaft as he felt that the gold would be of a payable quantity, dated Sunday 20th Nov, Also included was a note written by Ned (Edward Woodlock) who had copied the Notice of Application.
.73) Handwritten two page letter detailing information found in Madison's Tunnel as it related to their own tunnels, particularly No 2 tunnel and how far he felt he would need to tunnel to reach an improvement in the 'wash', dated Thur 24th Nov.
.74) Handwritten one page letter thanking him for the cheque the investor, Mr Wilkinson had provided for the Notice of Application for the Mt Mercer old Lease of 828 acres. He also gave some information about how it was originally farm labourers who only worked this lease and only when they had no other work. He also gave some personal information about Mam's birthday, dated Mon Nov 28th 32.
.75) Handwritten two page letter by Dad (Richard Squire) to 'Tom, Hazel & Kiddies 3' written from Prahran, telling them that they had received Ned Cheque and that that Jim and He had come home. He also detailed an incident that Jim had had with a tyre blowout whilst on his way to get explosives and post the Notice of Application in the Warden's Office in Ballarat. The stub axle had bent and Jim had to ride a bike to get a new one and after changing the inner tube of the tyre they were able to drive back to Melbourne and were in the process on having the tyre re-treaded, dated 6/12/32.
.76) Handwritten one page letter explaining how he and Mam had contracted colds and that his kidneys had some of their of trouble. He hoped to return to Mt Mercer on the weekend, dated 18th Jan 33. Also included was a handwritten two page letter by E Woodlock to Mr Squire giving information about the tunnel work, an injury to his hand and the fact that he had only 3 picks that were any good. He also asked for some vegetables, tomatoes and bacon when Richard returned, dated Saturday.
.77) Handwritten one page letter written from Mt Mercer, giving information about the tunnel work, now 97'6" in and how he had expected to have already come upon the Madison's gold bearing gravel wash, dated Wed 25th Jan 33.
.78) Handwritten two page letter with detailed information about how the tunnel had cut across a second Madison's tunnel and the prospects in this tunnel looked more promising. He also stated that he had not been well the last few days, dated Frid 27th 33
.79) Handwritten one page letter with information about the shotty gold found and the tunnel work and that he would test the value of the wash where the gold was found, dated Mon 30th Jan.
.80) Handwritten short note of one page giving sketchy information about the tunnel work, dated Tue 31st Jan 33.
.81) Handwritten two page letter giving information about his dealings with the Secretary for Mines relating to the fact that because the application for lease was identical to the old lease, they therefore should not need to pay for a full survey costing 7 pounds, just an inspection. He also detailed the workings and asks for more parsley roots to be sent to him, dated Thur Feb 9th 33.
.82) Handwritten one page letter stating that he had received Ned's cheque and information about the workings, the coarse gold found and the fact they were going home for fresh food, dated Tue 14th 33.
.83) Handwritten two page letter giving detailed information on the progress of the tunnelling as well as the information that Len and Max had come to visit the site and that Len had brought with him Keating, who he detested and pondered the reason for his bringing the man. As they were leaving Max "told Ned he thought they were going down to Ice Mam". Richard was worried about paying the 7 pounds ten shillings for the Department of Mines survey and was loath to put in another 20 pounds for another share of the mine to pay for it. He gave his thanks for a parcel of parsley he'd received , dated Tue 21st Feb 33.
.84) Handwritten two page letter written saying that he had received Ned's cheque (for wages) and giving detailed information on the progress and for the need to timber the drive and have the bottom stoped up. He had no timber or laths left and was concerned about the cost necessary to satisfy the Mines Department. He mentions the possibility of insolvency. Fine gold had been found but not like the Madison's tunnel, dated Tue 28th Feb 33.
.85) Handwritten two page letter written giving detailed information of the progress in the tunnel and with the expectation that they would soon meet the same wash which was in Madison's Tunnel. He also personal information about his health. the parsley roots received and the apples which Jim had "burgled", dated Sun 5th Mar 33.
.86) Handwritten four page letter by with a very detailed account of the progress of the tunnelling and the reason why the expected intersection with the Madison wash did not occur, but with the hope that this intersection would soon occur, then they would be able to meet expenses. He also talked about not being able to pay for the lease but had the hope they they would not be too rigid in their case. He added some personal information about Jim not having the makings of a miner, catching rabbits "for the pot" and the fact that Mr Read was so much better that he was able to ride his horse, dated Sat 11th Mar 33.
.87) Handwritten one page letter written from Prahran, acknowledging the receipt of Ned's cheque, a note about the work at the tunnel and some personal information, dated 21/3/33.
.88) Handwritten one page letter written from Mt Mercer, saying that there was little change in the tunnel but that he was would open a cross cut north, dated Thur 23 March 33.
.89) Handwritten note of a half page telling them that he had cross cut the tunnel, dated Sat 25th Mar.
.90) Handwritten one page letter with progress of the tunnelling and where it is in relation to Madison's Tunnel, dated Thur 30th Mar 33.
.91) Handwritten three page letter with the first part of the letter talking about the personal and financial worries he and his family had with travelling and mining expenses as well as Ned's wages which could not have been managed without Judy's little car, Jim's help and the payment of Ned's wages by Tom. He went on to give detailed information of the tunnelling and then talked about a letter received by the Department of Mines regarding the non payment of the lease and that a Notice of Abandonment would be published if not paid. Lastly he talked about the struggle he had had with this process and that it was only because of Tom's help that he had been able to continue this far, dated Sun 2/4/33.
.92) A one page letter with information about the progress as well as the information that he had not heard from the Mines Department regarding the lease, and the the 1000 sq ft Miners Right Claim was secure, dated Thur 6th April.
.93) A three page letter with detailed information about the work in the tunnel and also detailed explanation of the leases he has pegged and repegged. He also thanked Tom for paying the balance which was owed to the Department and informed Tom that he was going home, dated Tues 11th April 33.
.94) A four page letter written from Prahran, thanking Tom for Ned's cheque and with information about the work still being carried on by Ned. He also talked about the pegging of the Mt Mercer claim and the cost of the advertisement and application and survey fees to secure the site as well as his opinion of the probable value of the gold from this site. He also stated that he really needed more investment from those who had initially invested with him or from new investors, dated 17/4/33. Included was a one page letter from Edward Woodlock (Ned) to Mr Squire regarding the work he was carrying out at the tunnel, dated Saturday.
.95) A three page letterwritten from Mt Mercer, regarding the work in the tunnel and the quality of the gold found and the direction they will take. He also stated that he was posting letters to the original investors to see if they would contribute to the cost of the lease and also talked about another man who had a Notice of Application posted at Grenville for the water rights for a 25 miles long area and a dam. His Capital is 300 pounds and the supposition is that he wants to 'unwater' the leads, dated Frid 20th April.
.96) A one page letter regarding the continued work in the tunnel and how his suppositions seemed to be correct, dated Thur 27th April 33.
.97) A three page letter thanking Tom for Ned's cheque of 6 pounds 7 shillings and 6 pence. He also gave detailed information about the tunneling and the type of ground found and his next intentions. He also gave further information about the Notice of Application at Grenville which was posted by B Ryan, Agent for Western Deep Leads Coy Limited for 6000 acres, dated Sun 30th April 33. As well is a note detailing the information copied from the Notice.
.98) A two page handwritten letter detailing the work being carried out as well as a complaint that he had not heard from the men he had written to, dated Thur 4th May 33.
.99) A one page handwritten letter regarding the tunnel work and informing Tom that the gold found is shotty, dated Sat 6th May 33.
.100) A four page handwritten letter written from Prahran, detailing the tunnel work and informing that the gold prospects were better in no.1 cross cut south and there was also payable fair gold where they were currently working, if worked in bulk. He also talked about the possibility of new investors as the old ones had not responded to his letter and the necessity of securing the leases, dated 11th May 1933.
.101) A one page handwritten letter by E. Woodlock (Ned) to Mr Squire regarding the work going on, dated Thursday.
.102) A six page handwritten letter written from Prahran historically detailing the acquisition of the two leases at Mt Mercer, 35 years earlier, with M C Donnely/Donney and Jas Clements, including Madisons. He goes on to clarify Tom's suggestion regarding the Leases and the Companies to be floated, then details the the shafts, bores, tunnels and Deep Leads held in the leases and then goes on to say what his next steps would be, dated 13th May 33.
.103) A two page letter written from Mt Mercer detailing the continued work in the tunnel with the added information that because of the incline it was taking two men to push the truck up the tunnel. Richard also told of the need to take more parsley water for his condition, dated Thur 18th 33.
.104) A three page letter with a very detailed description of the work in the tunnel. Richard also told that he had run out of metal rails and was having to use timber as a substitute. He was also to re-peg the North and South Leases in the morning, dated Sun 21st May 33.
.105) A two page letter detailing the work in the tunnel and saying that there was a hundred feet of rail locked in by a fall in the No.2 Tunnel and he was hoping to get them out to replace the wooden rails as they made for heavy work on the inclines. He also said that he had a letter from the Department telling him to communicate with the Surveyor in Ballarat, dated Wed 24th May.
.106) A three page letter acknowledging Ned's cheque as well as information about the work in the tunnel, including that he had been able to retrieve 45 feet of rail and would get more when needed. He said he was pleased that Tom and Mr Wilkinson were making a trip on Saturday to see him. He talked of the weather and the fact that the bread was a week old, so to bring enough to last till the Monday. Among other things he also spoke of Tom revising the Plans and also having a Share book printed and the name was to be the Ballarat Deep Leads Extension for which there could possibly be 3 Companies, dated Sun 28th May.
.107) A one page letter with information about the work in the tunnel and also a weather update and the best way to come, dated Wed 31 May 33.
.108) A two page letter written from Prahran, explaining a visit to the Leigh River Shaft to get whim rope, whip wheels and sundry items. He shifted some equipment and built a new forge and was to fix and mount a windlass and rope to enable Ned to get the truck up the incline of the tunnel. He also spoke of the work being undertake by Ned then when on to more personal correspondence about a birthday present for one of Tom's boys, dated 9/6/33.
.109) A two page letter acknowledging receipt of the 'Prospectus of the Ballarat Deep Leads Extension Syndicate' and 'Share Certificate'. The No.1 Lease was in Ned's name and the No.2 Lease was in Jim's name to avoid inquisitive interest. Jim logged a Notice of Application and paid the fees. Richard acknowledged receipt of Ned's cheque and asked for 5 pounds as his finances were 'rather tight', dated 14/6/33. Included was a 1 page letter from Ned to Mr Squire regarding the work in the mine, dated Saturday.
.110) A one page letter written from Mt Mercer giving information about what was happening in the new x cut N near the mouth of the tunnel, dated Friday 16/6/33.
.111) A one page letter telling about the work and that he had fixed an old shed of Mr Reads for the forge. Mr Read and Mr Cameron visited and Richard was hopeful that Mr Cameron, the owner of the land in the North Lease would be easy as regards an agreement, dated June 22/33.
.112) A two page letter which talked about his health, the mine, the local J.P. who had lost his eye in a shearing accident and the surveyors visit, He also spoke about contacting the Gold Mines Ltd and the Berry Leads Company, dated Tue 27th 33. Also included was a letter to the Mines Department and a receipt from the Mines Department for the sum of 7 pounds 10 shillings as well as the Lease Applications from the newspaper dated June 13th 1933.
.113) A two page letter complaining of the charge made by the Mines Department for a Surveyors Inspection. He also wrote of trying to set up a float for the mine which he would do when he returned home.He also explained the current findings at the mine, dated Sun 2nd July 1933.
.114) A one page note written from Prahran informing Tom that he had not yet heard from Gold Mines Ltd and also that there was a hitch with the lease on the house, but this was to hopefully be fixed the following day. He also spoke of Tom's trip home (completed in tow), dated 18/7/33.
.115) A two page letter recounting some of the difficulties they were having with the new owners of the house they leased in Prahran. He also spoke of the fact that the Mines Department had requested another 10 pounds although they had not yet completed the survey on either mine, dated 21/7/1933. Also included was a one page letter from E. Woodlock (Ned) to Mr Squire about the workings, dated Tuesday and a letter from the Gold Mines of Australia Limited saying that the information he had supplied was now with their engineers, dated 20th July, 1933.
.116) A three page letter written from Armidale saying that Mam (his wife) was fretting with the move to this house. He also told of the rejection by the Gold Mines of Australia Limited of his proposal to invest in his Mt Merser Mine, stating that he believed that Jim Clements who had been the manager when the mine had previously been opened, had most likely "thrown all the cold water he could" on the proposal. He spoke at length about how this man had run the mine into the ground and his own involvement with the winding up of the company. He went on to say that he would approach Ryall to see if he was interested in investing, dated 28/7/33. Included was the letter from Gold Mines of Australia Limited, dated 26th July, 1933.
.117) A two page letter written from Prahran telling of the move to another house where Mam was quite settled. He also wrote of the work Ned was carrying out at the mine as well as personal and family news. He wrote that as he had not heard from Ryall, he would visit him the following day, dated 6/8/33. Also included was a two page letter from E Woodlock to Mr Squire giving detailed information of the progress at the tunnel, as well as asking for a new pair of boots as the ground was so wet his were letting in the water, dated Thursday.
.118) A two page letter explaining about a letter he received from Mr Cameron who believed he had found gold as well as some personal information and his health, dated 8/8/33. Also included was a one page letter from Neil W Cameron to R B Squire telling about some specks of gold he'd found in a post hole, dated July 31st 33. Thirdly was a one page letter from Ned to Mr Squire explaining the work he was doing in the tunnel, dated Saturday.
.119) A one page note saying that he did not like the enclosed 2 copies of the typed Agreement of the Leigh River Gold Mining Company with William Ryall, but asked Tom's advice. dated 9/8/33.
.120) A two page letter dealing mainly about the work going on at the new house and the settling in process. He also wrote about the proposed Agreement with Ryall, dated 11/8/33. Also included was a one page letter from Mr Ryall to R B Squire from which part of the left hand side had been severed, dated 10th August 1933.
.121) A one page note from R B Squire to W Ryall dated 14/8/33, with attached one page of information and figures. Also attached a one page letter from R B Squire to W Ryall asking if Ryall would be interested viewing the plans for an alluvial mining proposition, dated 27/7/33.
.122) A three page letter mainly about the visit to Ryall and a Mr Cundy about the proposed agreement with his concerns about the language and terms of the agreement, dated Sun 21st 33. Also included was a letter from Ned to Mr Squire about the continued work in the tunnel and the fact that two of the pick heads had cracked and would have to be fixed, dated Thursday.
.123) A two page letter dealing with a meeting had with Ryall and others in a private office regarding the interest in investing in the mining proposition, dated 23/8/33.
.124) A four page letter dealing mainly with the work at the tunnel and exploratory diggings at the spot Mr Cameron had written about as well as the damage done to the car on the way to the workings, dated 29/8/33.
.125) A one page letter telling of a proposed meeting with Mr Taylor and a Mr Bowler, who may turn out to be Alan Bowler who he knew, regarding the Mr Mercer Float scheduled for the following day, dated 30/8/33.
.126) A five page letter explaining the content of the meeting held with Mr Bowler, who represented an English consortium which was interested in the Mt Mercer site. He explained the terms that the consortium would offer if they went ahead, This included 25 % shares in the mine but no money, which he bemoaned because of the shortness of their cash reserves. He went on to detail the 4 distinct deposits of wash in this field, which he believed were unique in the Ballarat district. He also stated that he had not heard from Mr Ryall. He closed by talking about the water levels in the mine, dated 1/9/33.
.127) A two page letter saying that he had written an 11 page report on the Mt Mercer field for the English consortium as well as a private letter for the chairman.He also reported that he had been to see Ryall. Neither party knew that he was talking to the other. added was some personal information, dated 6/9/33.
.128) A one page letter telling of a meeting with Mr Bowler and Mr Tayler who carefully went through his report. It was then being typed. He believed he had two strong supporters, dated 7/9/33. Also included was a 2 page note from A Bowler to R B Squire asking him to bring the report into the office the following day to be perused and typed, dated Sept 6th 33.
.129) A two page letter with personal encouragement for one of the children. The letter then goes on with more information about the meeting with Mr Tayler and Bowler and his impressions of their interest. He also talked about the one of the experts who was to examine the site and also about the report which was now typed and a copy sent to Tom, dated 8/9/33.
.130) A one page letter keeping him informed of progress. The expert was away but would be briefed on his return. He also thanked Tom for a cheque, which was used to get the car 'Liz' back in order for the trip to be made with the experts at a later date. He informed Tom of his intention to return to Mt Mercer, dated 13/9/33.
.131) A one page letter written from Mt Mercer telling of the trip from Melbourne and the weather. He spoke of what was happening in the tunnel and that he had not yet heard from any of the interested parties, dated Tue 19th Sept.
.132) A five page letter written from Prahran with detailed information about the tunnels, the washes and the shows. He also detailed his meeting with Bryant 38 years ago at the No 1 at Carisbrook and how he had given him assistance at that time and subsequently as well as giving his version of a potted history of Bryant, dated 29/9/33.
.133) A two page letter with information about the arrival of the chairman of the English group and that Ned had shown Mr Kermode around the site, dated 6/10/33. Also included was a cutting from the Age about the arrival of Mr F W Baker, representing a large English financial group interested in Victorian deep lead propositions, dated Oct 6th. As well were two, one page letters from Ned (E Woodlock) to Tom, regarding the work in the tunnels, the bad air and the hopes of a successful float, dated Tuesday and Wednesday.
.134) A one page letter thanking them for the gift of eggs and parsley. He also talked about a letter from Bowler regarding the business of the experts and that their leases would be seen in due course, dated 10/10/33. Included was a one page letter from A Bowler to P B Squires saying that Mt Mercer site was receiving attention but that no decision had as yet been made, dated Oct 9th 1933.
.135) A three page letter written from Prahran giving information about Richards visit and conversation with Mr Ryall, who indicated that no decision had as yet been made regarding his proposal. He also included some personal information about members of the family, dated 18/10/33. Included was a one page letter from Ned (E Woodlock) to Tom with information about the tunnelling progress in no.2 tunnel and the bad air that drove them out for a time, dated Saturday.
.136) A one page letter containing a brief update on the state of affairs , dated 20/10/33. Included was a one page letter from Ned to Mr Squire with an information on the progress at the tunnel and with the information that his hands were cracked so badly that he was wearing two socks on each hand, dated Saturday.
.137) A one page letter which family news and a paragraph about the figures in his calculations, dated 21/10/33. On the back side was a letter from E Squire (his wife) to Tom, Hazel & boys again with family and personal information, dated 22nd 10/33.
.138) A three page letter with the disappointing news that the English consortium would not take up the option on the Mt Mercer lease and gave his opinion that it was self interest that stopped it going ahead. He then gave two options as to the way forward, dated 24/10/33. Also included was a typed one page letter from W C Tayler to R B Squire informing him of a letter stating that the proposal had been turned down, dated 23rd October 1933.
.139) A three page letter informing of further developments with Mr Tayler who asked for the plans to be left at the office till the following week as there was another company who may yet be interested to take up the option, dated 27/10/33.
.140) A one page letter asking for 9 copies of the old agreement to be typed for the 3 Syndicate members, Rice, Cameron and McNaughton, dated 5/11/33.
.141) A three page letter regarding the decision by the Syndicate to reopen the LRG shaft and the practical issues of timber acquisition and probable costs. He then went on to talk about Mam's indisposition and treatment by the herbalist, Goon, dated 8/11/33. Also included was a newspaper clipping from the Age entitled 'Inquiries for properties at Ballarat'.
.142) A three page letter giving all the news regarding the agreements, the costs and the way forward. He also spoke of his wife's improvement and other personal information, dated 11/11/33.
.143) A two page letter written from Mt Mercer regarding the difficulties in obtaining the timbers and tanks needed to reopen the shaft and the state of all the existing fittings and what would be needed to get the site operational again. His agreement with Mr Read had duly been signed, dated Thurs 16th 33.
.144) A two page letter with further information about the progress with acquiring and repairing the shaft site, dated Mon Nov 20th 33.
.145) A three page letter informing that the timber for the whim & shaft were being delivered and the area had been cleared out for the poppet heads. The top of the shaft had been cleared ready for re-framing and other work had been carried out. Liz, the car had broken down and Jim was in the process of fixing her. He concluded with information about his and his wife's health, dated Sun 26th Nov 33.
.146) A four page letter with news of Mam's health, the problems associated with fixing the car and the floods which stopped Jim from going to Ballarat and washed away the Gary Bridge which affected the mail and had halted work at the shaft, as well as delaying the second delivery of timber, dated Sun Dec 3rd.
.147)
richard squire, william ryall, jim clements, gold mines of australia limited, e woodlock, ned woodlock, neil w cameron, alan bowler, mr cundy, don mcnaughton, mr rice
 Glen Eira Historical Society
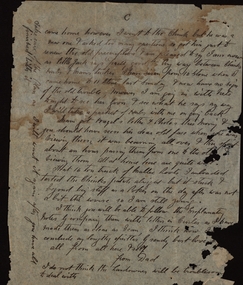 Federation University Historical Collection
 Royal Australian and New Zealand College of Obstetricians & Gynaecologists (RANZCOG)
 Sunshine and District Historical Society Incorporated
 Ballarat Tramway Museum
 Ballarat Tramway Museum
 Ballarat Tramway Museum
 Ballarat Tramway Museum
 Ballarat Tramway Museum
 Ballarat Tramway Museum
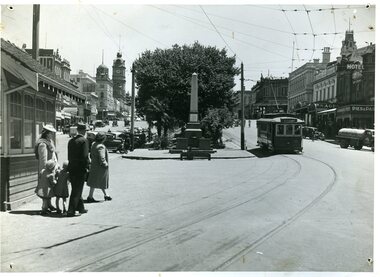 Ballarat Tramway Museum
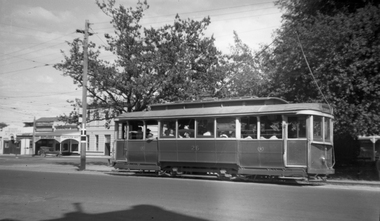 Ballarat Tramway Museum
 Ballarat Tramway Museum
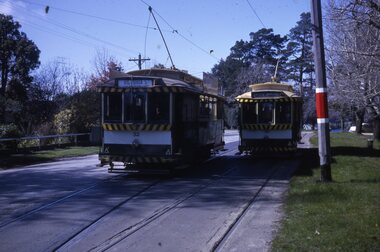 Ballarat Tramway Museum
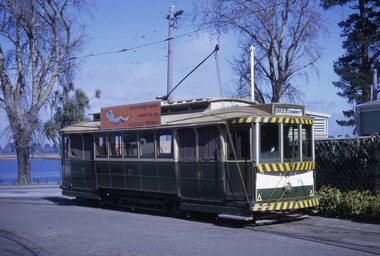 Ballarat Tramway Museum
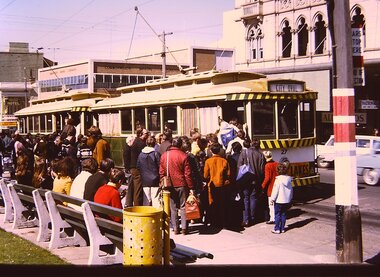 Ballarat Tramway Museum
 Ballarat Tramway Museum
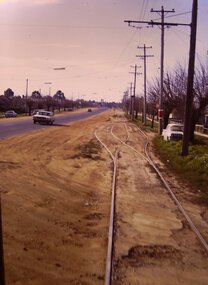 Ballarat Tramway Museum
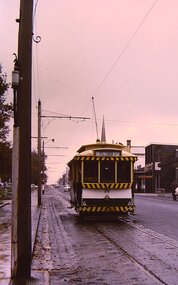 Ballarat Tramway Museum
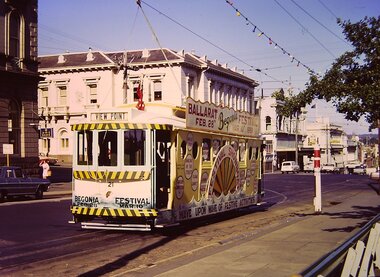 Ballarat Tramway Museum
 Ballarat Tramway Museum
 Ballarat Tramway Museum
 Ballarat Tramway Museum
 Ballarat Tramway Museum
 Ballarat Tramway Museum
 Ballarat Tramway Museum
 Ballarat Tramway Museum
 Ballarat Tramway Museum
 Ballarat Tramway Museum
 Ballarat Tramway Museum