Showing 458 items matching "options"
-
 Eltham District Historical Society Inc
Photograph - Black and White Print, Lewis Tulk, Stage IV Scout Leader Training course, Gillwell Park, Gembrook, Vic, c.1960
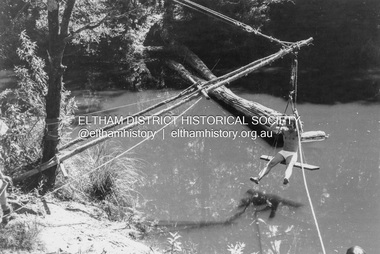
Water activies at dam on site Gilwell Park is a campsite and outdoor recreation area located in Gembrook, Victoria, Australia. It is primarily used by the scouting community as a training and camping facility. The site is owned and operated by Scouts Victoria, and is one of the largest and most popular campsites in the state. It covers over 95 hectares of natural bushland, and features a range of facilities including campsites, activity areas, a dining hall, and accommodation options. Gilwell Park has a long history within the scouting movement, and is named after the original Gilwell Park located in Epping Forest, England. The English site is considered the spiritual home of scouting, and was where the first Wood Badge training course was held in 1919. Today, Gilwell Park at Gembrook offers a range of training courses and programs for scouts, leaders, and other community groups. It is also a popular destination for school camps, corporate team-building events, and outdoor enthusiasts looking to explore the natural beauty of the region. [Source: ChatGPT Open AI - Gilwell Park in Australia.. (2023, March 23). Retrieved from https://chat.openai.com/chat] Donated by Lewis Tulk, former Scout Area Training Commisioner for Leaders. Lewis did his training at Gillwell Park in London.On reverse of print, stamped with film no. 6927scouts victoria, gillwell park, gembrook, scout leader training, lewis tulk collection -
 Eltham District Historical Society Inc
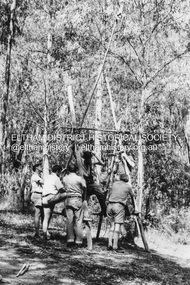
Photograph - Black and White Print, Lewis Tulk, Stage IV Scout Leader Training course, Gillwell Park, Gembrook, Vic, c.1960
Pioneering activity Gilwell Park is a campsite and outdoor recreation area located in Gembrook, Victoria, Australia. It is primarily used by the scouting community as a training and camping facility. The site is owned and operated by Scouts Victoria, and is one of the largest and most popular campsites in the state. It covers over 95 hectares of natural bushland, and features a range of facilities including campsites, activity areas, a dining hall, and accommodation options. Gilwell Park has a long history within the scouting movement, and is named after the original Gilwell Park located in Epping Forest, England. The English site is considered the spiritual home of scouting, and was where the first Wood Badge training course was held in 1919. Today, Gilwell Park at Gembrook offers a range of training courses and programs for scouts, leaders, and other community groups. It is also a popular destination for school camps, corporate team-building events, and outdoor enthusiasts looking to explore the natural beauty of the region. [Source: ChatGPT Open AI - Gilwell Park in Australia.. (2023, March 23). Retrieved from https://chat.openai.com/chat] Donated by Lewis Tulk, former Scout Area Training Commisioner for Leaders. Lewis did his training at Gillwell Park in London.On reverse of print, stamped with film no. 6927scouts victoria, gillwell park, gembrook, scout leader training, lewis tulk collection -
 Eltham District Historical Society Inc
Photograph - Negative, Lewis Tulk, Gillwell Park, Gembrook, Vic, c.May 1957
Gilwell Park is a campsite and outdoor recreation area located in Gembrook, Victoria, Australia. It is primarily used by the scouting community as a training and camping facility. The site is owned and operated by Scouts Victoria, and is one of the largest and most popular campsites in the state. It covers over 95 hectares of natural bushland, and features a range of facilities including campsites, activity areas, a dining hall, and accommodation options. Gilwell Park has a long history within the scouting movement, and is named after the original Gilwell Park located in Epping Forest, England. The English site is considered the spiritual home of scouting, and was where the first Wood Badge training course was held in 1919. Today, Gilwell Park at Gembrook offers a range of training courses and programs for scouts, leaders, and other community groups. It is also a popular destination for school camps, corporate team-building events, and outdoor enthusiasts looking to explore the natural beauty of the region. [Source: ChatGPT Open AI - Gilwell Park in Australia.. (2023, March 23). Retrieved from https://chat.openai.com/chat] Donated by Lewis Tulk, former Scout Area Training Commisioner for Leaders. Lewis did his training at Gillwell Park in London.Print copy stamped "17" on reverselewis tulk collection, scouts victoria, gillwell park, gembrook, scout leader training -
 Federation University Historical Collection
Document - Outreach Program, Federation University Australia, Regional Schools outreach Program (RSOP) Federation University, 2008 - 2017
Regional Schools Outreach Program is a Federation University Program in conjunction with the Australian Government.1 Student Action Plan A4 Sheet .2 Regional Schools Outreach Program informations sheet A4 .3 VTAC information sheet 2014 A4 .4 Special Entry Access Scheme (SEAS) information sheet A4 .5 Open Days 2014 A4 flyer .6 VCAL snapshot A4 flyer .7 4 page booklet titled University, put yourself in the picture. .8 From High School to University - Making the transistion A4 flyer .9 I don't know what I want to do! A4 Flyer .10 Bridging Courses and Pathway Programs A4 Flyer .11 FedUni Schools Outreach - Focus on your Future A4 Flyer .12 60 page A4 booklet Regional Schools outreach Program 2008 - 2013 Evaluation Report .13 9 Page A4 Booklet Excite explore Empower - Evaluation of Federation University Australia Regional Schools Outreach Program - Summary of 2008 - 2013 Evaluation Findings and Conclusions .14 Key Dates list 2016 - 2017 .15 Student Guide - Year 10 - Course and Career Options A4 Booklet - 13 Pages .16 Univeristy - Year 10 - Put yourself in the picture A4 Flyer .17 Year 9 Teacher's Guide - Focus on your future - A4 Booklet 13 page booklet .18a Focus on Your Future - Year 9 - Student Workbook 2015 - A4 Booklet 12 pages .18b Focus on your Future - Year 9 - Teacher's Guide 2015 - A4 Booklet 12 pages .19 Focus on their future - Parent's Guide 2015 - A4 Booklet 8 page booklet .20 Focus on your Future - A Parent's Guide 2013 - A4 Booklet 8 Pages .21 The Future is Now - Year 8 - Teacher's Guide 2014 - A4 Booklet 12 pages .22 a & b - The future is now - Year 8 - Student Workbook 2014 - A4 Booklets 12 pages .23 Dream Makers - Grade 5/6 a Parents guide - A5 8 page Booklet .24a & b Stepping Up reach for the stars - Grade 5/6 Parent's Guide - A5 8 page Booklet .25a & b Regional Schools Outreach Program Grade 5/6 Stepping up Workshop - Teacher's Resource - 3 page A4 document .26a & b Stepping up reach for th stars - Student Workbook - A4 12 page Booklet x 2 .27a & b Grade 5/6 Building your Future - A Parent's guide - 4 page A5 Booklet .28 Building your future - Grade 5/6 A Student's Guide - A4 8 page booklet .29 Joining the dots from secondary school to University - Course and career options - Beyond secondary school - a guide to future career options 2013 .30 Later years Students - University - How to Make it Happen 2014 - A4 Booklet 16 pages .31a & b Scholarships and SEAS Applications - Year 12 Guide - 4 page A4 document .32 Student Guide - Later Years - University how to make it happen - A4 Booklet 16 pages .33 Regional Schools Outreach Program - Putting Regional Students in the picture for University - A4 4 page pamphlet regional schools outreach program, federation university, student guide, later years, scholarships, seas, special entry access scheme, university how to make it happen, course and career options, building your future, grade 5/6, stepping up, parent's guide, reach for the stars, workshop, teachers resource, dream makers, the future is now, year 8, teacher's guide, focus on your future, focus on their future, year 9, student workbook, year 10, put yourself in the picture, what do you know about uni?, key dates, excite explore empower, evaluation findings and conclusions, evaluation report, fed uni schools outreach, bridging courses, pathway programs, i don't know what i want to do., support services, picture the possibilities, booklet, vcal, snapshot, vce, open days 2014, vtac, student action plan -
 Eltham District Historical Society Inc
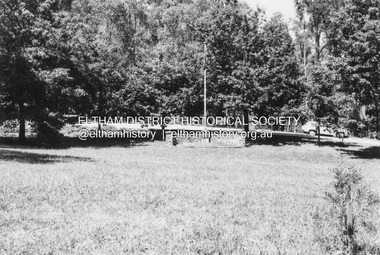
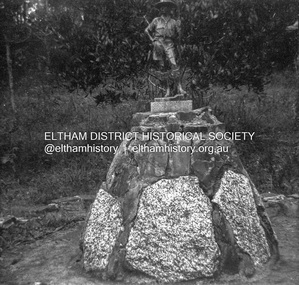
Photograph - Black and White Print, Lewis Tulk, Parade Ground, Gillwell Park, Gembrook, Vic, c.1960
The Parade Ground was where the annual presentations of awards were made. On the right is the little Chapel. Gilwell Park is a campsite and outdoor recreation area located in Gembrook, Victoria, Australia. It is primarily used by the scouting community as a training and camping facility. The site is owned and operated by Scouts Victoria, and is one of the largest and most popular campsites in the state. It covers over 95 hectares of natural bushland, and features a range of facilities including campsites, activity areas, a dining hall, and accommodation options. Gilwell Park has a long history within the scouting movement, and is named after the original Gilwell Park located in Epping Forest, England. The English site is considered the spiritual home of scouting, and was where the first Wood Badge training course was held in 1919. Today, Gilwell Park at Gembrook offers a range of training courses and programs for scouts, leaders, and other community groups. It is also a popular destination for school camps, corporate team-building events, and outdoor enthusiasts looking to explore the natural beauty of the region. [Source: ChatGPT Open AI - Gilwell Park in Australia.. (2023, March 23). Retrieved from https://chat.openai.com/chat] Donated by Lewis Tulk, former Scout Area Training Commisioner for Leaders. Lewis did his training at Gillwell Park in London.On reverse of print, stamped with film no. 6927scouts victoria, gillwell park, gembrook, scout leader training, lewis tulk collection -
 Eltham District Historical Society Inc
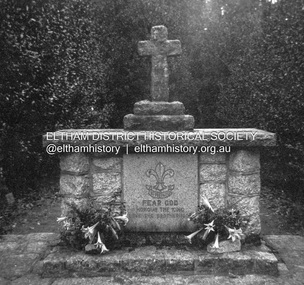
Photograph - Negative, Lewis Tulk, Outdoor Chapel, Gillwell Park, Gembrook, Vic, c.May 1957
Outdoor Chapel, Gilwell Park Scout Association State Training Centre - mainly for leaders Gilwell Park is a campsite and outdoor recreation area located in Gembrook, Victoria, Australia. It is primarily used by the scouting community as a training and camping facility. The site is owned and operated by Scouts Victoria, and is one of the largest and most popular campsites in the state. It covers over 95 hectares of natural bushland, and features a range of facilities including campsites, activity areas, a dining hall, and accommodation options. Gilwell Park has a long history within the scouting movement, and is named after the original Gilwell Park located in Epping Forest, England. The English site is considered the spiritual home of scouting, and was where the first Wood Badge training course was held in 1919. Today, Gilwell Park at Gembrook offers a range of training courses and programs for scouts, leaders, and other community groups. It is also a popular destination for school camps, corporate team-building events, and outdoor enthusiasts looking to explore the natural beauty of the region. [Source: ChatGPT Open AI - Gilwell Park in Australia.. (2023, March 23). Retrieved from https://chat.openai.com/chat] Donated by Lewis Tulk, former Scout Area Training Commisioner for Leaders. Lewis did his training at Gillwell Park in London.Print copy stamped "17" on reverselewis tulk collection, scouts victoria, gillwell park, gembrook, scout leader training -
 Eltham District Historical Society Inc
Photograph - Negative, Lewis Tulk, Outdoor Chapel, Gillwell Park, Gembrook, Vic, c.May 1957
At entrance to Chapel Outdoor Chapel, Gilwell Park Scout Association State Training Centre - mainly for leaders Gilwell Park is a campsite and outdoor recreation area located in Gembrook, Victoria, Australia. It is primarily used by the scouting community as a training and camping facility. The site is owned and operated by Scouts Victoria, and is one of the largest and most popular campsites in the state. It covers over 95 hectares of natural bushland, and features a range of facilities including campsites, activity areas, a dining hall, and accommodation options. Gilwell Park has a long history within the scouting movement, and is named after the original Gilwell Park located in Epping Forest, England. The English site is considered the spiritual home of scouting, and was where the first Wood Badge training course was held in 1919. Today, Gilwell Park at Gembrook offers a range of training courses and programs for scouts, leaders, and other community groups. It is also a popular destination for school camps, corporate team-building events, and outdoor enthusiasts looking to explore the natural beauty of the region. [Source: ChatGPT Open AI - Gilwell Park in Australia.. (2023, March 23). Retrieved from https://chat.openai.com/chat] Donated by Lewis Tulk, former Scout Area Training Commisioner for Leaders. Lewis did his training at Gillwell Park in London.Print copy stamped "17" on reverselewis tulk collection, scouts victoria, gillwell park, gembrook, scout leader training -
 Federation University Historical Collection
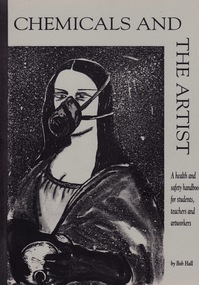
Book - Book - Handbook, VIOSH: Chemicals and the Artist; A health and safety handbook for students, teachers and artworkers by Bob Hall
Victorian Institute of Occupational Safety and Health (VIOSH) Australia is the Asia-Pacific centre for teaching and research in occupational health and safety (OHS) and is known as one of Australia's leaders on the field. VIOSH has a global reputation for its innovative approach within the field of OHS management. VIOSH had its first intake of students in 1979. At that time the Institution was known as the Ballarat College of Advanced Education. In 1990 it became known as Ballarat University College, then in 1994 as University of Ballarat. It was 2014 that it became Federation University. VIOSH Australia students are safety managers, senior advisors and experienced OHS professionals. They come from all over Australia and industry. Students are taught active research and enquiry; rather than textbook learning and a one-size fits all approach. VIOSH accepts people into the Graduate Diploma of Occupational Hazard Management who have no undergraduate degree - on the basis of extensive work experience and knowledge. Book outlines the requirements to be considered - chemicals, conditions re ventilation, protective clothing such as respiratory devices, gloves and eye and face protectors. An understanding of the effects of various chemical solutions. A detailed Glossary of health and safety terms is included. Alternative options for solvents etc is also given. The importance of a safety hazard audit register for hazardous substances is detailed. Glued and cloth bound book of 161 pages. Cover light fawn with black print and binding.viosh, safety and health, victorian institute of occupational safety and health, art facilities, chemicals, ventilation, safety audits, hazardous chemicals and substances, protective clothing, bob hall -
 Federation University Art Collection
Ceramic - Artwork - Ceramics, [Untitled]
Jan FEDER ( - 1981) Jan Feder is an alumna of Federation University having studied ceramics at the Gippsland Institute of Advanced Education (now Federation University Gippsland campus). Jan Feder was respected by all students for her diligence and technical ability. Her tragic death in 1981 evoked an immediate response from her peers for a memorial. Students discussed a number of memorial options, such as funds for equipment, scholarships and awards. The decision to commence a collection was made based on the idea that all future students could benefit from the availability of a collection, whereas only a very few individuals could benefit from a scholarship. Students immediately set about raising money by selling 'seconds' called 'Junque Sales'. a total of $760.00 was raised and the first two works purchased were by Victor Greenaway and Victoria Howlett. Ceramic works were purchased from visiting lecturers who became leading ceramic artists around the world, as well as from many of the staff who taught at the Gippsland Campus. The Artist in Residence Program assisted the collection, with many resident artists contributing to the Collection (ie Robin Welch, Anna Zamorska, Sandy Brown), as well as international guests. Ceramic events such as 'Strzelecki Spotkanie 1984' and 'Woodfire 86' also resulted on major contributions to the collection. Jan Feder Memorial Ceramics Collectionjan feder, jan feder memorial collection, ceramics, gippsland campus -
 Federation University Art Collection
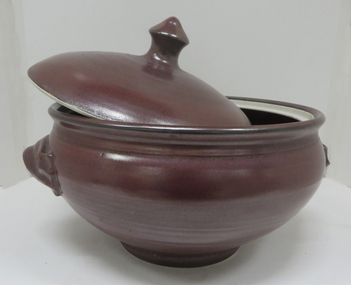
Ceramic - Artwork - Ceramics, Jan Feder, Lidded Stoneware Casseroles with iron glaze by Jan Feder, 1981
Jan FEDER ( - 1981) Jan Feder is an alumna of Federation University having studied ceramics at the Gippsland Institute of Advanced Education (now Federation Univesity Gippsland campus). Jan Feder was respected by all students for her diligence and technical ability. Her tragic death in 1981 evoked an immediate response from her peers for a memorial. Students discussed a number of memorial options, such as funds for equipment, scholarships and awards. The decision to commence a collection was made based on the idea that all future students culd benefit from the availability of a collection, whereas only a very few individuals could benefit from a scholarship. Students immediately set about raising money by selling 'seconds' called 'Junque Sales'. a total of $760.00 was raised and the first two works purchased were by Victor Greenaway and Victoria Howlett. Ceramic works were purchased from visiting lecturers who became leading ceramic artists around the world, as well as from many of the staff who taught at the Gippsland Campus. The Artist in Residendence Program assisted the collection, with many resident artists conrtibuting to the Collection (ie Robin Welch, Anna Zamorska, Sandy Brown), as well as international guests. Ceramic events such as 'Strzelecki Spotkanie 1984' and 'Woodfire 86' also resulted on major contributions to the collection. Three lidded pots by Jan Feder made in 1981.jan feder, jan feder memorial ceramics collection, ceramics, gippsland campus, alumni, casserole -
 Melbourne Legacy
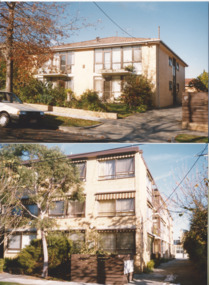
Photograph, Widows' Flats, c.1989
A photo of a block of flats in Sellwood St Hawthorn (top photo) and a block at 9 The Avenue, Windsor (bottom photo) that Legacy owned and leased at reasonable rates to widows in their care. It was with a group of photos from 1988 to 1990 in a folio with paper labels (see items 01042 to 01053). The September 1975 edition the widows newsletter mentions the 20 flats purchased by Legacy at 9 The Avenue and they are being renovated for widows to live in. Two options were presented, an 'ingoing' amount of $5,000 then a week maintenance charge of $7 a week; or on a rental basis of approximately $20 a week. A photo of the Windsor units in 1976 is at 01412. This photo of the Windsor flats was taken after 1981 when sun blinds were added to the building (from a Highlights of President report in 1981). The group of flats was known as 'Windsor Lodge' until 1987 when it was renamed 'The Miriam and Frederick James Ramsay Lodge'. From copies of the Title Deeds; 9 The Avenue Windsor was purchased on 7 February 1975, and 22 Selwood St Hawthorn was purchased on 28 June 1974. It was decided the Windsor units, and the ones in Hawthorn, would be sold in 2003 and announced by President Tony Parkes. The decision was published in Leader newspapers and Jellis Craig approached Legacy about the sale, see items at 01089.A record of Legacy supporting widows throughout their lives.Colour photo x 2 of widows' flats in Hawthorn and Windsor.Handwritten on back "Hawthorn Court / 22 Selwood St / Hawthorn East 3123". The other has 'Pic 4 / Miriam and Frederick Ramsey Lodge / 9 The Avenue Windsor 3181' in black pen. Yellow paper label was a note from Terry to Susie listing photos of widows flats in Hawthorn, Windsor and Clubrooms but only the Hawthorn and Windsor flat photos are attached.widows, properties -
NMIT (Northern Melbourne Institute of TAFE)
Video recordings: Promotional 1990-1994 NMCOT and NMIT, VHS video recordings: Promotional 1990-1994 NMCOT and NMIT
Promotional VHS Videos all produced during the 1990s. Listed alphabetically: An Introduction to NMIT 1996 Building & Construction Heidelberg 1992 Building & Construction Heidelberg 1992 1, 2, 3 (Umatic) Concrete pour - Heidelberg 1992 Foreign Fellowship Program 1996 Greensborough Music Promotional 1994 NMCOT College Promotion 1990 NMCOT College promotion 1992 NMCOT Corporate Video 1992 NMCOT Corporate video 1994 NMCOT Enrolment form 1991 (Umatic) NMCOT Enrolment Form 1992 NMCOT To Market to Market Promotional video 1993 NMCOT To Market to Market Promotional video 1994 NMIT Education TVCs To Market to Market 1997 NMIT To Market to Market Promotional video 1996 includes titles ‘General’, ‘Change’ and ‘Open Day’ Open Day (undated) Open Day 1992 Student Information Open day 1994, Commercial Course & College Information X 2 Open Day 1998 David Jones Promotional VHS Videos 1990s Recreation - Student Services 1994 X 2 TAFE College Group Marketing 1993 The TAFE Direction: smart options for young women (undated) northern metropolitan college of tafe, handbooks, nmit -
 Federation University Historical Collection
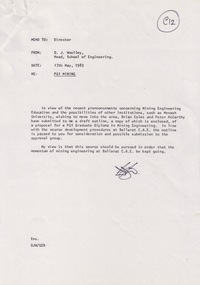
Document - Document - Proposal, VIOSH: Ballarat College of Advanced Education; Proposal for PGI Graduate Diploma in Mining Engineering, 1983
Victorian Institute of Occupational Safety and Health (VIOSH) Australia is the Asia-Pacific centre for teaching and research in occupational health and safety (OHS) and is known as one of Australia's leaders on the field. VIOSH has a global reputation for its innovative approach within the field of OHS management. VIOSH had its first intake of students in 1979. At that time the Institution was known as the Ballarat College of Advanced Education. In 1990 it became known as Ballarat University College, then in 1994 as University of Ballarat. It was 2014 that it became Federation University. VIOSH Australia students are safety managers, senior advisors and experienced OHS professionals. They come from all over Australia and industry. Students are taught active research and enquiry; rather than textbook learning and a one-size fits all approach. VIOSH accepts people into the Graduate Diploma of Occupational Hazard Management who have no undergraduate degree - on the basis of extensive work experience and knowledge. Due to recent pronouncements concerning Mining Engineering Education and the possibilities of other institutions wishing to introduce it, Brian Coles and Peter McCarthy submitted a draft outline of a proposal for a PGI Graduate Diploma in Mining Engineering to Derek Woolley.The outline of this was passed on to allow other to consider and comment on. It outlines the rationale, course structure, course content - core and options, student demand and resource implications. ".... view is that this course should be pursued in order that the momentum of mining engineering at Ballarat C.A.E be kept going". PGI - Post Graduate Institute.Four A4 pages - 3 typed, 1 with newspaper articleThe Weekend Australian May 7-8 1983 RMIT advertisementviosh, victorian institute of occupational safety and health, ballarat college of advanced education, derek woolley, director, brian coles, peter mccarthy, pgi, graduate diploma in mining engineering, post graduate institute, mining engineering education, proposal -
Bendigo Historical Society Inc.
Mixed media - Bendigo Tramways 100th Anniversary National Trust DVD, 1990
The Sandhurst and Electric Tramway Company was the first to blaze a trail when it introduced battery trams to Bendigo in June 1890. Unfortunately they had made a serious miscalculation, as the batteries quickly proved inadequate for the hilly terrain of Bendigo. After a couple of months battery trams ceased running and were later replaced by steam trams in February 1892. Steam trams were a reliable means of transport and successfully moved Bendigonians around for ten years, but the onset of the recession forced the Bendigo Tramways Company to sell up in 1899 to the Electric Supply Company of Victoria (ESCo) who continued to run steam trams until 1902. This turn-of-the-century sale led to the introduction of electric trams to Bendigo in April 1903. These were a success from the very beginning. During peak hour people would be standing in the aisles, in the doorways, even on the running boards on the outside of the tram. In addition, the trams were also the first option for deliveries. Parcels, newspapers, movie reels for the picture theatres and even mail bags found their way onto the trams; sent from outlying post offices to the GPO in the city centre. At the end of World War I the Victorian Government constituted the new semi-government instrumentality, the State Electricity Commission of Victoria (SEC). The SEC was to take over all privately owned power generating companies in Victoria and operate as a state owned monopoly ... Bendigo's tramway system was an integral part of the deal.Bendigo Tramways 100th Anniversary National Trust 31 minute DVD. Content includes brief history of the Bendigo trams from 1890 to 1990; driver's view movies of each of the four Bendigo Lines; and the set up of the tourist trams after the closure of the lines by the State Electricity Commission of Victoria.history, bendigo, bendigo trams -
![Ceramic - Artwork - Ceramics, Untitled [Pair Tea Cups], by Silvia Richardson, c1985, c1985](/media/collectors/530576742162ef0fa09a2288/items/56b7f64c2162f11c0c8c7590/item-media/59d0c82d21ea690cc8367f56/item-fit-380x285.jpg) Federation University Art Collection
Federation University Art CollectionCeramic - Artwork - Ceramics, Untitled [Pair Tea Cups], by Silvia Richardson, c1985, c1985
Silvia RICHARDSON A post graduate student at the Gippsland Centre for Art and Desish (GCAD) who presented this work to the Jan Feder Art Collection. Jan Feder was an alumna of Federation University having studied ceramics at the Gippsland Institute of Advanced Education (now Federation University Gippsland campus). Jan Feder was respected by all students for her diligence and technical ability. Her tragic death in 1981 evoked an immediate response from her peers for a memorial. Students discussed a number of memorial options, such as funds for equipment, scholarships and awards. The decision to commence a collection was made based on the idea that all future students could benefit from the availability of a collection, whereas only a very few individuals could benefit from a scholarship. Students immediately set about raising money by selling 'seconds' called 'Junque Sales'. a total of $760.00 was raised and the first two works purchased were by Victor Greenaway and Victoria Howlett. Ceramic works were purchased from visiting lecturers who became leading ceramic artists around the world, as well as from many of the staff who taught at the Gippsland Campus. The Artist in Residence Program assisted the collection, with many resident artists contributing to the Collection (ie Robin Welch, Anna Zamorska, Sandy Brown), as well as international guests. Ceramic events such as 'Strzelecki Spotkanie 1984' and 'Woodfire 86' also resulted on major contributions to the collection. Two low tempreture fused slipcase bone china with inlaid decoration. Jan Feder Memorial Collectionjan feder memorial collection, jan feder, sylvia richardson, ceramics, gippsland campus, artwork, artist -
 Federation University Art Collection
Ceramic - Artwork - Ceramics, Bruce Stewart, Set of Five Salt-glazed Pots, by Bruce Stewart, 1979
Bruce STEWART A Diploma Student in Ceramics at the Gippsland Institute of Advanced Education from 1977 to 1979. Jan Feder is an alumna of Federation University having studied ceramics at the Gippsland Institute of Advanced Education (now Federation University Gippsland campus). Jan Feder was respected by all students for her diligence and technical ability. Her tragic death in 1981 evoked an immediate response from her peers for a memorial. Students discussed a number of memorial options, such as funds for equipment, scholarships and awards. The decision to commence a collection was made based on the idea that all future students could benefit from the availability of a collection, whereas only a very few individuals could benefit from a scholarship. Students immediately set about raising money by selling 'seconds' called 'Junque Sales'. A total of $760.00 was raised and the first two works purchased were by Victor Greenaway and Victoria Howlett. Ceramic works were purchased from visiting lecturers who became leading ceramic artists around the world, as well as from many of the staff who taught at the Gippsland Campus. The Artist in Residence Program assisted the collection, with many resident artists contributing to the Collection (ie Robin Welch, Anna Zamorska, Sandy Brown), as well as international guests. Ceramic events such as 'Strzelecki Spotkanie 1984' and 'Woodfire 86' also resulted on major contributions to the collection. Salt-glazed pots. Presented to the Jan Feder Memorial Ceramic Collection by Bruce Stewart jan feder memorial collection, jan feder, ceramics, gippsland campus, artwork, artist, bruce stewart, alumni -
![[CeramicSculptural Form] by Larrel Kane](/media/collectors/530576742162ef0fa09a2288/items/5efef3e521ea6712bcaee859/item-media/5efef41a21ea6712bcaf1450/item-fit-380x285.jpg) Federation University Art Collection
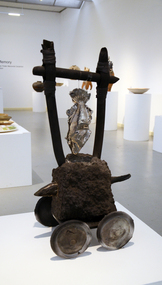
Federation University Art CollectionCeramic, [CeramicSculptural Form] by Larrel Kane, C1986
Larrel KANE A Diploma Student at the Gippsland Institute of Advanced Education. This item is a part of the Jan Feder Memorial Ceramics Collection. Jan Feder is an alumna of Federation University having studied ceramics at the Gippsland Institute of Advanced Education (now Federation University Gippsland campus). Jan Feder was respected by all students for her diligence and technical ability. Her tragic death in 1981 evoked an immediate response from her peers for a memorial. Students discussed a number of memorial options, such as funds for equipment, scholarships and awards. The decision to commence a collection was made based on the idea that all future students could benefit from the availability of a collection, whereas only a very few individuals could benefit from a scholarship. Students immediately set about raising money by selling 'seconds' called 'Junque Sales'. a total of $760.00 was raised and the first two works purchased were by Victor Greenaway and Victoria Howlett. Ceramic works were purchased from visiting lecturers who became leading ceramic artists around the world, as well as from many of the staff who taught at the Gippsland Campus. The Artist in Residence Program assisted the collection, with many resident artists contributing to the Collection (ie Robin Welch, Anna Zamorska, Sandy Brown), as well as international guests. Ceramic events such as 'Strzelecki Spotkanie 1984' and 'Woodfire 86' also resulted on major contributions to the collection. Earthernware Sculpure with hand thrown element. Gift of the Artist Jan Feder Memorial Ceramics Collectionjan feder memorial collection, ceramics, jan feder, woodfire, churchill, jan feder memorial ceramics collection, alumni -
Federation University Art Collection
Ceramic, [Decorated Bowl]
This work is part of the Jan Feder Memorial Ceramics Collection .Jan Feder is an alumna of Federation University having studied ceramics at the Gippsland Institute of Advanced Education (now Federation Univesity Gippsland campus). Jan Feder was respected by all students for her diligence and technical ability. Her tragic death in 1981 evoked an immediate response from her peers for a memorial. Students discussed a number of memorial options, such as funds for equipment, scholarships and awards. The decision to commence a collection was made based on the idea that all future students culd benefit from the availability of a collection, whereas only a very few individuals could benefit from a scholarship. Students immediately set about raising money by selling 'seconds' called 'Junque Sales'. a total of $760.00 was raised and the first two works purchased were by Victor Greenaway and Victoria Howlett. Ceramic works were purchased from visiting lecturers who became leading ceramic artists around the world, as well as from many of the staff who taught at the Gippsland Campus. The Artist in Residendence Program assisted the collection, with many resident artists conrtibuting to the Collection (ie Robin Welch, Anna Zamorska, Sandy Brown), as well as international guests. Ceramic events such as 'Strzelecki Spotkanie 1984' and 'Woodfire 86' also resulted on major contributions to the collection.A hand thrown stoneware bowl with with green, pink and black glaze decoration. If you can assist with information on this artist or artwork please use the email link below. jan feder memorial ceramics collection, alumni -
Federation University Art Collection
Ceramic, [Glazed Bowl]
This work is part of the Jan Feder Memorial Ceramics Collection .Jan Feder is an alumna of Federation University having studied ceramics at the Gippsland Institute of Advanced Education (now Federation Univesity Gippsland campus). Jan Feder was respected by all students for her diligence and technical ability. Her tragic death in 1981 evoked an immediate response from her peers for a memorial. Students discussed a number of memorial options, such as funds for equipment, scholarships and awards. The decision to commence a collection was made based on the idea that all future students culd benefit from the availability of a collection, whereas only a very few individuals could benefit from a scholarship. Students immediately set about raising money by selling 'seconds' called 'Junque Sales'. a total of $760.00 was raised and the first two works purchased were by Victor Greenaway and Victoria Howlett. Ceramic works were purchased from visiting lecturers who became leading ceramic artists around the world, as well as from many of the staff who taught at the Gippsland Campus. The Artist in Residendence Program assisted the collection, with many resident artists conrtibuting to the Collection (ie Robin Welch, Anna Zamorska, Sandy Brown), as well as international guests. Ceramic events such as 'Strzelecki Spotkanie 1984' and 'Woodfire 86' also resulted on major contributions to the collection.A hand thrown stoneware bowl with with a stunning gold and black glaze. If you can assist with information on this artist or artwork please use the email link below. jan feder memorial ceramics collection, alumni, japanese? -
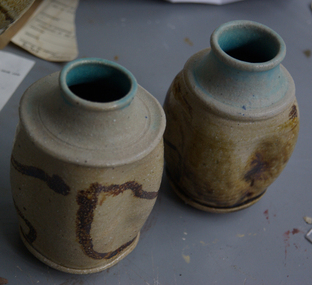
Federation University Art Collection
Ceramic
This work is part of the Jan Feder Memorial Ceramics Collection .Jan Feder is an alumna of Federation University having studied ceramics at the Gippsland Institute of Advanced Education (now Federation Univesity Gippsland campus). Jan Feder was respected by all students for her diligence and technical ability. Her tragic death in 1981 evoked an immediate response from her peers for a memorial. Students discussed a number of memorial options, such as funds for equipment, scholarships and awards. The decision to commence a collection was made based on the idea that all future students culd benefit from the availability of a collection, whereas only a very few individuals could benefit from a scholarship. Students immediately set about raising money by selling 'seconds' called 'Junque Sales'. a total of $760.00 was raised and the first two works purchased were by Victor Greenaway and Victoria Howlett. Ceramic works were purchased from visiting lecturers who became leading ceramic artists around the world, as well as from many of the staff who taught at the Gippsland Campus. The Artist in Residendence Program assisted the collection, with many resident artists conrtibuting to the Collection (ie Robin Welch, Anna Zamorska, Sandy Brown), as well as international guests. Ceramic events such as 'Strzelecki Spotkanie 1984' and 'Woodfire 86' also resulted on major contributions to the collection.Two small, hand thrown woodfired pots. If you can assist with information on this artist or artwork please use the email link below. jan feder memorial ceramics collection, alumni -
 Trafalgar Holden Museum
Vehicle - VY Acclaim sedan, 2002
The front and rear of the body had minor restyling, with new front grille, headlights and taillights. The interior has been significantly upgraded. Interior upgrade includes a new instrument panel, centre console and steering wheel and new design transmission lever and handbrake.[2] There is also a new mobile phone power outlet under the centre console. The new instrument cluster features a large multi-function digital display (single or triple-window, depending on model), which displays information such as radio station display, PRND321 gear selected indicator, trip computer with stopwatch function, service reminders and a help facility. Standard features (on some models) now include "twilight sentinel" - automatic headlamp control, programmable headlamps off time delay, high feature Blaupunkt audio systems, road-speed sensitive intermittent wipers and passenger airbags. The VY Series II update added cruise control, front power windows variable front seat lumbar support, and revised interior trims. A 245 kW (329 hp) V8 was introduced to sports variants and a sportier repositioning of the Calais model. This repositioning included a subtle body kit, the option of a 235 kW V8 in place of the previous 225 kW (302 hp) and a firmer suspension tune (known as FE 1.5) that was not as stiff as the FE2 suspension on sports variants. Released in September 2002 and produced until August 2004 (with a Series II released in August 2003), the VY series was the first major design departure (both inside and out) of the third generation Commodore range released in August 1997. It launched at the same time as the Ford Falcon (BA).VY Holden 4 door sedan white paint with grey fabric upholsteryLion and stone emblem grille centre, V6 badge on mudguards, Commodore badge on boot LHS, Lion and stone badge on boot centre, Acclaim badge RHS of boot lidvehicle, commodore, car -
 Bendigo Historical Society Inc.
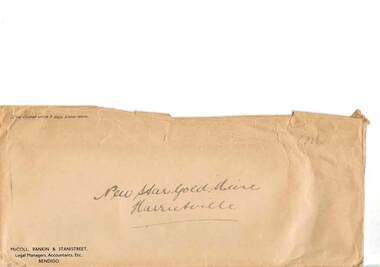
Document - MCCOLL, RANKIN AND STANISTREET COLLECTION: NEW STAR GOLD MINE HARRIETVILLE NL, c1934
McColl Rankin & Stanistreet, New Star Gold Mine Harrietville NL. a/ Department of Mines 20.2.1934 laboratory reports results, 3 receipts attached, list of general expenses, quarter ended 30.4.1934, heading Dargo ''Gold Butterfly'' Gold Butterfly crossed out hand inscription Gold Reefs Syndicate, Wanangatta, Dargo. b/ copy of Purchase agreement of leasehold land for the purpose of mining. Dated 28.6.1934. c/ Payments by R.A. Rankin - Office Account A/C Leases No's. 5187 and 5195 Dargo, Gippsland, prior to exercise of option. Inscription: Paid by New Star Company ?? On ?? 1934 ?? ?? ??. d/ Letter: purchase of Leases No's 5187 & 5195 Black Snake Black Snake Creek, Dargo. Dated: 22.8.1934. e/ letter acknowledging receipt of payment for application of Lease No. 5187, lease will be delayed until precise area is determined. Signed: ?? Rankin. 3 pence stamp for stamp duty attached. Dated: 23.8.1934. f/ Memo, Mr Grelis. Re Leases No's 5187 & 5195 Dated: 4.9.1935. Signed: ?? g/ McColl Rankin & Stanistreet business envelope. Envelope labelled New Star Gold Mine Harrietville. 46.organization, business, gold mine, mccoll rankin & stanistreet, new star gold mine harrietville nl. dargo ''gold butterfly'' gold reefs syndicate, wanangatta, dargo black snake black snake creek 1934 1935 -
 Melbourne Tram Museum
Pamphlet, Public Transport Victoria (PTV), "Route 96 Project", "Route 96 is being upgraded so everyone can catch the tram", 2013 and 2019
Set of 6 documents associated with the provision of low floor tram stop platforms along route 96, East Brunswick to St Kilda. .1 - Pamphlet - 20 pages centre stapled, titled "Route 96 Project - Have your say: Stop 133 Fitzroy St and Acland Street Early designs" Includes a feedback form. Dated 2013. .2 - Drop in DL card - for general update on Nicholson St between Kay Street and Fitzroy North and Brunswick Road. March 2019 .3 - 6 fold A3 to DL - "Route 96 is being upgraded so everyone can catch the tram" - shows the program and map for the provision of 9 stops and timeline. The later was not achieved. 2 copies held. .4 - 6 fold to DL, special size sheet - for the redevelopment of stop 125 Port Junction - shows the siding for the Tramcar Restaurant, and stop 124 at the world trade centre. Dated 2013 .5 - 8 fold to DL - special size paper (has been torn into two), for the Acland St options, and Fitzroy St at the junction with the Light Rail line. Again not all work undertaken. Dated 2013. Have logos of PTV, Yarra Trams and Department of Transport.trams, tramways, route 96, tram stops, fitzroy st, acland st, platform stops, nicholson st, brunswick rd, port junction, clarendon st, whiteman st -
 Melbourne Tram Museum
Document - Memorandum, Melbourne & Metropolitan Tramways Board (MMTB), "Notice to Employees Retiring and Death Gratuities", 31/03/1955 12:00:00 AM
Set of three documents concerning the MMTB Gratuity or Pension payout scheme. .1 Top half of an A4 photocopied sheet, with a tear off slip, titled "To all employees who elected in 1955 to remain under the provisions of the "old" gratuity scheme", giving employees the option to transfer to the new scheme (see item .3), asking to return the slip by 5/9/1981. .2 - Letter, stencil cut duplicated on quarto paper on MMTB letterhead, dated 9/5/1955, advising Ron Wearne of 31 Soudan Street Malvern that he has elected to remain in the present or "old" Retiring and Death Gratuity Scheme. Typed on Loadable Parchment watermarked paper. Signed in ink by H. A. Warner Secretary. .3 - Printed document on semi gloss paper titled "Notice to Employees Retiring and Death Gratuities" setting out the comparison in payments between the old and the new schemes that was to come into effect on 1/6/1955. Has a comparison of the scales on the rear of the Notice. Dated 31/3/1955 and printed Signed by H. A. Warner Secretary. Added to images 24-9-2016. 2nd copy of .3 added 8/2/2019.trams, tramways, gratuity scheme, mmtb, retirements, pension, notices to staff -
 Ruyton Girls' School
Newsletter, Ruyton Reports, 1987
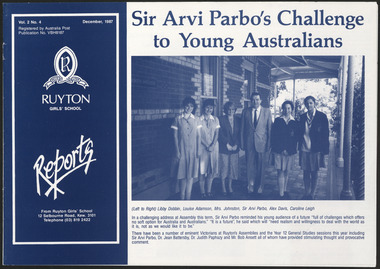
The Ruyton Reporter (formerly known as Ruyton Reports) captures the essential Ruyton Girls' School experience for the broader school community. It has been produced since 1986.The record has strong historic significance as it pertains to one of the oldest girls' school in Victoria, Australia. Ruyton was founded in 1878 in the Bulleen Road, Kew, home of newly widowed Mrs Charlotte Anderson (now High Street South). Thus, the record can be used as a reference example for research into Victorian school history. It also gives insight into the types of activities and events undertaken at Ruyton Girls' School during the period of its production. The record's significance is further enhanced by its exceptionally well-documented provenance, having remained the property of Ruyton Girls' School since its production.Black and white newsletter printed on paper with staple binding. 8 pages.Front Page: Vol. 2 No. 2 / Vol. 2 No. 4 December, 1987 / Registered by Australia Post / Publication No. VBH8187 / R / RECTE ET FIDE LITER / RUYTON / GIRLS' SCHOOL / Reports / From Ruyton Girls' School / 12 Selbourne Road, Kew. 3101 / Telephone (03) 819 2422 / Sir Arvi Parbo's Challenge / to Young Australians / (Left to Right) Libby Dobbin, Louise Adamson, Mrs. Johnston, Sir Arvi Parbo, Alex Davis, Caroline Leigh / In a challenging address at Assembly this term, Sir Arvi Parvo reminded his young audience of a future "full of challenges which offers / no soft option for Australia and Australians." "It is a future", he said which will "need realism and willingness to deal with the world as / it is, not as we would like it to be." / There have been a number of eminent Victorians at Ruyton's Assemblies and the Year 12 General Studies sessions this year including / Sir Arvi Parbo, Dr. Jean Battersby, Dr. Judith Paphazy and Mr. Bob Ansett all of whom have provided stimulating thought and provocative / comment. /ruyton girls' school, ruyton, school, students, newsletter, ruyton reports, ruyton news, kew, victoria, melbourne, girls school -
 Melbourne Tram Museum
Document - Report, Public transport Unions, "Metplan - Industry Unions - Briefing Paper No. 3 - Tram System Extensions", "Metplan Discussion Paper", 1987 to 1988
Set of four photocopied documents, A4 sheets, stapled in top left hand corner concerning the development and adoption of Metplan, a Metropolitan Public Transport Industry Plan - see Reg Item 1186 for a discussion paper. .1 - "Metplan - Industry Unions - Briefing Paper No. 3 - Tram System Extensions" - March 1988 - 16 sheets - one of series of four documents to give Public Transport Unions where the industry is heading over the 15 years project life period. document looks at the Docklands Light Rail in London and bus services through the Central district of Melbourne. .2 - "Metplan Draft Document - January 1988" - 5 pages - prepared by Martin Gray - December 1987 - looking at training, working conditions, employment security, station staff and service delivery and job opportunities. .3 - "Metplan Discussion Paper" - 3 sheets - gives an overview of the suburban system, union's role, what could be done, electrification, rail cars, station development, dual voltage systems. .4 - "Metplan Discussion Paper" - table looking at the various measures, percentage changes, Metplan issues, services, finance and extension options. See also Reg item 2809 for a August 1988 paper and 345 for a detailed report.trams, tramways, ptc, metplan, unions, buses, tramways, public transport, suburban and underground -
 Bendigo Military Museum
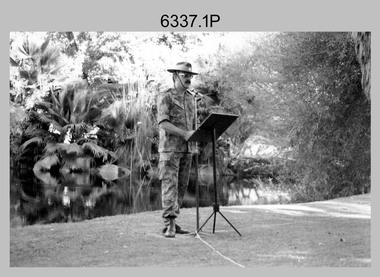
Photograph - CSP In-house Bid Announcement, Army Survey Regiment, Fortuna, Bendigo, 1994
This is a set of 14 photographs of an All-Staff meeting held by the lake at the Army Survey Regiment, Fortuna, Bendigo on the 24th of April 1994. At this meeting CO LTCOL Duncan Burns announced that under Defence’s Commercial Support Program (CSP), the In-House bid submitted in 1993 by a team led by then CO LTCOL Bob McHenry was successful. The In-House bid proposed the establishment of an organisation based at Fortuna to carry out non-core production with 150 of the 373 Survey Corps positions converted to Defence civilian positions. 110 of the Defence civilian positions would be filled voluntarily by military personnel under Section 81B of the Public Service Act 1992 with the remaining 40 positions filled by Public Service recruitment. Other options offered to Survey Corps personnel were postings to 1st Topographic Survey Squadron in Enoggera, QLD, transfer to another Corps in the Australian Army or discharge from the ADF. The In-House bid also proposed 143 Survey Corps military positions to remain at Fortuna to perform ‘core strategic non-sovereign tasks.’ However, Army subsequently decided to abolish the 143 positions, disband 4th Field Survey Squadron, Adelaide, SA and lastly, the demise of the Royal Australian Survey Corp in June 1996. This period of the Army Survey Regiment’s history is covered in more detail in pages 160 to 162 of Valerie Lovejoy’s book 'Mapmakers of Fortuna – A history of the Army Survey Regiment’ ISBN: 0-646-42120-4.This is a set of 14 photograph of an All-Staff Meeting held at the Army Survey Regiment, Fortuna, Bendigo on the 24th of April 1994, to announce the success of Army’s Defence’s Commercial Support Program (CSP) In-house Bid. The Black and white photos are on photographic paper and scanned at 300 dpi. They are part of the Army Survey Regiment’s Collection. .1) to .3) - Photo, black & white, 1994. CO LTCOL Duncan Burns briefing Army Survey Regiment personnel and civilians. .4) to .5P - Photo, black & white, 1994. D-SVY COL Simon Lemon briefing Army Survey Regiment personnel and civilians. .6) - Photo, black & white, 1994. L to R: D-SVY COL Simon Lemon, unidentified civilian. .7) - Photo, black & 1994. L to R: SCMA WO1 Alan Hancox, unidentified civilian. .8) - Photo, black & 1994. RSM WO1 Phil Meagher. .9) - Photo, black & 1994. WO2 Rob Bogumil. .10) - Photo, black & 1994. Left Row: all unidentified. Centre Row L to R: unidentified (x2), SGT Jim Ash, CPL Steve Linane, CPL Andrew Quin, SGT Craig Kellet, unidentified. Back row L to R: unidentified (x2), SGT Barry Miller, SSGT Steve Winner, SPR Shane Campbell, SPR Karen McQuaigue, CPL Geoff Webb. .11) - Photo, black & 1994. L to R: CPL Warren ‘Waldo’ Shirley, COL COMDT COL Don Swiney MBE. .12) - Photo, black & 1994. L to R: LT Scott Seefeld, CAPT Bin Fashar Sutiman (Indonesian Army), LT Darren Radford, CAPT Gary Warnest, unidentified US exchange officer. .13) - Photo, black & 1994. L to R: unidentified, SGT Mark Host, LT Anthony Chamberlayne, unidentified (x2), Mr Tony Spurling. .14) - Photo, black & 1994. L to R: unidentified US exchange officer, CAPT Bill Griggs, CAPT Matt Jackson CSM, LT Darren Radford, unidentified, LT Scott Seefeld, SGT Mark Host, LT Gordon Muir, CAPT Gary Warnest, LT Anthony Chamberlayne, unidentified (x2), LT Colin Davidson.No personnel are identified. Annotated with date on folder sleeve.royal australian survey corps, rasvy, army svy regt, army survey regiment, fortuna, asr -
 Glen Eira Historical Society
Document - Japanese School of Melbourne
Six documents about the Japanese School: 1/The Japanese School of Melbourne Planning Brief document draft February 1984 to the City of Caulfield. Brief includes background of school, current educational standards of school and structure, future plans, including forecast of future student numbers, request to use prefabricated rooms. Also plans for new building and room alterations. Includes appendice which has current and projection graph of students attending. Period covered: January 1968-February 1984 (17 pages). 2/Fourteen page school prospectus, which includes history and location, term dates, school hours, curriculum subjects, teachers qualifications, health department approval and enrolment list. Also includes Division of School Duties, school educational aims and guidance priorities. Period covered: 07/09/1968-13/05/1986. 3/An 11/11/1988 Melbourne Development and Prospectus for the Japanese School of Melbourne, includes purpose of school, development options, planning brief, construction time, and development program. Includes seven plans and maps of school location and bus routes (14 pages). Prepared for the City of Caulfield on its request. 4/List of representatives of the Japanese School of Melbourne that met with City of Caulfield councilors on 23/11/1988. 5/Black and white photo of 'Ian Rob with Japanese students September 1991', six students included. 6/Colour photograph of 'Mayor Ed Biggs with Japanese students February 1992', thirteen adults and young people included.japanese school of melbourne limited, japanese school, caulfield, holy cross catholic, holy cross school, ellington school, keeron street, mockridge stahle and mitchell architects, architects, secondary schools, primary schools, playgrounds, hawthorn road, caulfield south, yaji hidero, japanese community, yazaki yasuo, morita hiroshi, teachers, bloink des, stokes tony, building surveyors, japanese supplementary school of melbourne, school committees, libraries, school houses, brick, bloink clarke harding consulting architects group, anthony stokes and assoc. building surveyors and town planners, rob ian, biggs ed mayor -
 Eltham District Historical Society Inc
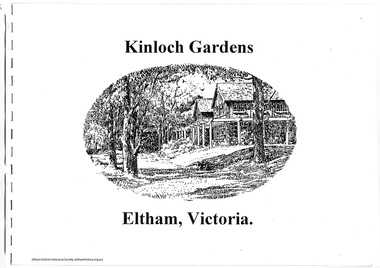
Document, Prospectus: Kinloch Gardens, Eltham Victoria, 1998c
“Kinloch Gardens at Eltham, Victoria is planned as a comprehensively designed and cohesive residential environment.” “Only twelve innovatively designed houses ,will be situated within the established gardens and grounds of this historic Eltham estate. Building design and development will be under the control of the Kinloch Gardens design and construction team.” “Kinloch Gardens is situated on one of the highest points in Eltham and enjoys panoramic views in all directions.” “Kinloch Gardens lies hidden from the outside world behind high stone retaining walls, terraced embankments and extensive landscaping. The existing buildings, amongst the most significant of the Eltham / Montsalvat domestic building tradition are set in park like surrounds and enjoy panoramic views of the ranges to the north east and the city sky line to the west. New houses combined with sensitive landscaping will blend immediately into the established garden environment and will share the amenity and ambience of a very private and unique estate. The central theme of the landscape master plan is a garden reserve and a planted avenue terminating in a -small square.” “Houses vary in size from 120m2 (12.9 squares) to 210m2 (22.6 squares) (or larger) and include an extensive range of planning options. House types include: The Studio House The Tower House The Pergola House The Gallery House 'The Barn' is one of the existing buildings of Kinloch Gardens and is situated on the premium Lot 11.” Developer: Kinloch Pty Ltd. Project Managers: Creative Block Design Pty Ltd. Architects: Graeme Gunn and Ian Jelbart. Landscape Architect: Suzy Boyd. Builder: Vizarje Homes Pty Ltd. Surveyors and Engineers: Miller Merrigan.Digital file only; created from scan undertaken by EDHSarthur street, creative block design pty ltd., eltham, graeme gunn, houses, ian jelbart, kinloch gardens, kinloch pty ltd, miller merrigan, real estate, suzy boyd, vizarje homes pty ltd. -
 Eltham District Historical Society Inc
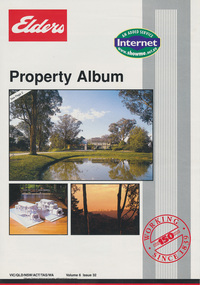
Document, Kinloch Gardens Property Album; Elders Real Estate sales material, 1998
“Kinloch Gardens at Eltham, Victoria is planned as a comprehensively designed and cohesive residential environment.” “Only twelve innovatively designed houses ,will be situated within the established gardens and grounds of this historic Eltham estate. Building design and development will be under the control of the Kinloch Gardens design and construction team.” “Kinloch Gardens is situated on one of the highest points in Eltham and enjoys panoramic views in all directions.” “Kinloch Gardens lies hidden from the outside world behind high stone retaining walls, terraced embankments and extensive landscaping. The existing buildings, amongst the most significant of the Eltham / Montsalvat domestic building tradition are set in park like surrounds and enjoy panoramic views of the ranges to the north east and the city sky line to the west. New houses combined with sensitive landscaping will blend immediately into the established garden environment and will share the amenity and ambience of a very private and unique estate. The central theme of the landscape master plan is a garden reserve and a planted avenue terminating in a -small square.” “Houses vary in size from 120m2 (12.9 squares) to 210m2 (22.6 squares) (or larger) and include an extensive range of planning options. House types include: The Studio House The Tower House The Pergola House The Gallery House 'The Barn' is one of the existing buildings of Kinloch Gardens and is situated on the premium Lot 11.” Developer: Kinloch Pty Ltd. Project Managers: Creative Block Design Pty Ltd. Architects: Graeme Gunn and Ian Jelbart. Landscape Architect: Suzy Boyd. Builder: Vizarje Homes Pty Ltd. Surveyors and Engineers: Miller Merrigan.Digital file only; created from scan undertaken by EDHSarthur street, elders real estate, eltham, kinloch gardens, real estate agent, the barn