Showing 5814 items matching "helper"
-
 Flagstaff Hill Maritime Museum and Village
Domestic object - Fork, c.1878
This fork is from the wreck of the Loch Ard, that sailed from Gravesend, London. The manifest listed an array of manufactured goods being exported to the Colony of Victoria. Included in the cargo manifest was a large number of hardware & cutlery items. This fork is representative of similar items of silver electro-plated cutlery salvaged from the Loch Ard wreck site, comprising nickel silver electroplated spoons and forks of various sizes but all sharing the same general shape and design. Some of the pieces display their makers’ mark of William Page & Co Birmingham UK. Within the Flagstaff Hills cutlery collection donated from the Loch Ard, maker’s marks are often obscured by sedimentary accretion or verdigris after a century of submersion in the ocean. However sufficient detail has survived to indicate that the collection of samples of electroplated cutlery probably originated from the same cargo consignment from the Loch Ard and were made by William Page & Co. William Page was born in 1811 and died in 1885. He was active as a manufacturer of cutlery from 1829 with premises at 74 Belmont Rd, Dales End as a "close plater" (someone who works sheet metal), and he began electroplating in 1855. William Page & Co was also active from 1880 at Cranemore St, Cattle’s Grove also 55 Albion St, Birmingham, in 1936 the firm became Ltd. The firm used the trademarks "Asrista, Bolivian Silver, Silverite, Roman Silver, Roumanian Silver and Trevor Plate. In 1938 William Page was a supplier to the British Government, marking it's products with the broad arrow symbol and was also present at Sheffield. History of the Loch Ard: The Loch Ard got its name from ”Loch Ard” a loch which lies to the west of Aberfoyle, and the east of Loch Lomond. It means "high lake" in Scottish Gaelic. The vessel belonged to the famous Loch Line which sailed many vessels from England to Australia. The Loch Ard was built in Glasgow by Barclay, Curdle and Co. in 1873, the vessel was a three-masted square-rigged iron sailing ship that measured 79.87 meters in length, 11.58 m in width, and 7 m in depth with a gross tonnage of 1693 tons with a mainmast that measured a massive 45.7 m in height. Loch Ard made three trips to Australia and one trip to Calcutta before its fateful voyage. Loch Ard left England on March 2, 1878, under the command of 29-year-old Captain Gibbs, who was newly married. The ship was bound for Melbourne with a crew of 37, plus 17 passengers. The general cargo reflected the affluence of Melbourne at the time. Onboard were straw hats, umbrella, perfumes, clay pipes, pianos, clocks, confectionery, linen and candles, as well as a heavier load of railway irons, cement, lead and copper. There were other items included that were intended for display in the Melbourne International Exhibition of 1880. The voyage to Port Phillip was long but uneventful. Then at 3 am on June 1, 1878, Captain Gibbs was expecting to see land. But the Loch Ard was running into a fog which greatly reduced visibility. Captain Gibbs was becoming anxious as there was no sign of land or the Cape Otway lighthouse. At 4 am the fog lifted and a lookout aloft announced that he could see breakers. The sheer cliffs of Victoria's west coast came into view, and Captain Gibbs realised that the ship was much closer to them than expected. He ordered as much sail to be set as time would permit and then attempted to steer the vessel out to sea. On coming head-on into the wind, the ship lost momentum, the sails fell limp and Loch Ard's bow swung back towards land. Gibbs then ordered the anchors to be released in an attempt to hold its position. The anchors sank some 50 fathoms - but did not hold. By this time the ship was among the breakers and the tall cliffs of Mutton Bird Island rose behind. Just half a mile from the coast, the ship's bow was suddenly pulled around by the anchor. The captain tried to tack out to sea, but the ship struck a reef at the base of Mutton Bird Island, near Port Campbell. Waves subsequently broke over the ship and the top deck became loosened from the hull. The masts and rigging came crashing down knocking passengers and crew overboard. When a lifeboat was finally launched, it crashed into the side of Loch Ard and capsized. Tom Pearce, who had launched the boat, managed to cling to its overturned hull and shelter beneath it. He drifted out to sea and then on the flood tide came into what is now known as Loch Ard Gorge. He swam to shore, bruised and dazed, and found a cave in which to shelter. Some of the crew stayed below deck to shelter from the falling rigging but drowned when the ship slipped off the reef into deeper water. Eva Carmichael a passenger had raced onto the deck to find out what was happening only to be confronted by towering cliffs looming above the stricken ship. In all the chaos, Captain Gibbs grabbed Eva and said, "If you are saved Eva, let my dear wife know that I died like a sailor". That was the last Eva Carmichael saw of the captain. She was swept off the ship by a huge wave. Eva saw Tom Pearce on a small rocky beach and yelled to attract his attention. He dived in and swam to the exhausted woman and dragged her to shore. He took her to the cave and broke the open case of brandy which had washed up on the beach. He opened a bottle to revive the unconscious woman. A few hours later Tom scaled a cliff in search of help. He followed hoof prints and came by chance upon two men from nearby Glenample Station three and a half miles away. In a complete state of exhaustion, he told the men of the tragedy. Tom then returned to the gorge while the two men rode back to the station to get help. By the time they reached Loch Ard Gorge, it was cold and dark. The two shipwreck survivors were taken to Glenample Station to recover. Eva stayed at the station for six weeks before returning to Ireland by steamship. In Melbourne, Tom Pearce received a hero's welcome. He was presented with the first gold medal of the Royal Humane Society of Victoria and a £1000 cheque from the Victorian Government. Concerts were performed to honour the young man's bravery and to raise money for those who lost family in the disaster. Of the 54 crew members and passengers on board, only two survived: the apprentice, Tom Pearce and the young woman passenger, Eva Carmichael, who lost her family in the tragedy. Ten days after the Loch Ard tragedy, salvage rights to the wreck were sold at auction for £2,120. Cargo valued at £3,000 was salvaged and placed on the beach, but most washed back into the sea when another storm developed. The wreck of Loch Ard still lies at the base of Mutton Bird Island. Much of the cargo has now been salvaged and some items were washed up into Loch Ard Gorge. Cargo and artefacts have also been illegally salvaged over many years before protective legislation was introduced in March 1982. The shipwreck of the Loch Ard is of significance for Victoria and is registered on the Victorian Heritage Register ( S 417). Flagstaff Hill has a varied collection of artefacts from Loch Ard and its collection is significant for being one of the largest accumulation of artefacts from this notable Victorian shipwreck. The collections object is to also give us a snapshot into history so we can interpret the story of this tragic event. The collection is also archaeologically significant as it represents aspects of Victoria's shipping history that allows us to interpret Victoria's social and historical themes of the time. The collections historically significance is that it is associated unfortunately with the worst and best-known shipwreck in Victoria's history. Silver plated copper alloy table fork from the wreck of the Loch Ard. William Pageflagstaff hill, warrnambool, shipwrecked coast, flagstaff hill maritime museum, maritime museum, shipwreck coast, flagstaff hill maritime village, great ocean road, loch line, loch ard, captain gibbs, eva carmichael, tom pearce, glenample station, mutton bird island, loch ard gorge, electroplated cutlery, fork -
Flagstaff Hill Maritime Museum and Village
Domestic object - Fork, c.1878
This fork is from the wreck of the Loch Ard that sailed from Gravesend London. The manifest listed an array of manufactured goods being exported to the Colony of Victoria. Included in the cargo manifest was a large number of hardware & cutlery items. This fork is representative of similar items of silver electro-plated cutlery salvaged from the Loch Ard wreck site, comprising nickel silver electroplated spoons and forks of various sizes but all sharing the same general shape and design. Some of the pieces display their makers’ mark of William Page & Co Birmingham UK. Within the Flagstaff Hills cutlery collection donated from the Loch Ard, maker’s marks are often obscured by sedimentary accretion or verdigris after a century of submersion in the ocean. However sufficient detail has survived to indicate that the collection of samples of electroplated cutlery probably originated from the same cargo consignment from the Loch Ard and were made by William Page & Co. William Page was born in 1811 and died in 1885. He was active as a manufacturer of cutlery from 1829 with premises at 74 Belmont Rd, Dales End as a "close plater" (someone who works sheet metal), and he began electroplating in 1855. William Page & Co was also active from 1880 at Cranemore St, Cattle’s Grove also 55 Albion St, Birmingham, in 1936 the firm became Ltd. The firm used the trademarks "Asrista, Bolivian Silver, Silverite, Roman Silver, Roumanian Silver and Trevor Plate. In 1938 William Page was a supplier to the British Government, marking it's products with the broad arrow symbol and was also present at Sheffield. History of the Loch Ard: The Loch Ard got its name from ”Loch Ard” a loch which lies to the west of Aberfoyle, and the east of Loch Lomond. It means "high lake" in Scottish Gaelic. The vessel belonged to the famous Loch Line which sailed many vessels from England to Australia. The Loch Ard was built in Glasgow by Barclay, Curdle and Co. in 1873, the vessel was a three-masted square-rigged iron sailing ship that measured 79.87 meters in length, 11.58 m in width, and 7 m in depth with a gross tonnage of 1693 tons with a mainmast that measured a massive 45.7 m in height. Loch Ard made three trips to Australia and one trip to Calcutta before its fateful voyage. Loch Ard left England on March 2, 1878, under the command of 29-year-old Captain Gibbs, who was newly married. The ship was bound for Melbourne with a crew of 37, plus 17 passengers. The general cargo reflected the affluence of Melbourne at the time. On board were straw hats, umbrella, perfumes, clay pipes, pianos, clocks, confectionery, linen and candles, as well as a heavier load of railway irons, cement, lead and copper. There were other items included that were intended for display in the Melbourne International Exhibition of 1880. The voyage to Port Phillip was long but uneventful. Then at 3 am on June 1, 1878, Captain Gibbs was expecting to see land. But the Loch Ard was running into a fog which greatly reduced visibility. Captain Gibbs was becoming anxious as there was no sign of land or the Cape Otway lighthouse. At 4 am the fog lifted and a lookout aloft announced that he could see breakers. The sheer cliffs of Victoria's west coast came into view, and Captain Gibbs realised that the ship was much closer to them than expected. He ordered as much sail to be set as time would permit and then attempted to steer the vessel out to sea. On coming head-on into the wind, the ship lost momentum, the sails fell limp and Loch Ard's bow swung back towards land. Gibbs then ordered the anchors to be released in an attempt to hold its position. The anchors sank some 50 fathoms - but did not hold. By this time the ship was among the breakers and the tall cliffs of Mutton Bird Island rose behind. Just half a mile from the coast, the ship's bow was suddenly pulled around by the anchor. The captain tried to tack out to sea, but the ship struck a reef at the base of Mutton Bird Island, near Port Campbell. Waves subsequently broke over the ship and the top deck became loosened from the hull. The masts and rigging came crashing down knocking passengers and crew overboard. When a lifeboat was finally launched, it crashed into the side of Loch Ard and capsized. Tom Pearce, who had launched the boat, managed to cling to its overturned hull and shelter beneath it. He drifted out to sea and then on the flood tide came into what is now known as Loch Ard Gorge. He swam to shore, bruised and dazed, and found a cave in which to shelter. Some of the crew stayed below deck to shelter from the falling rigging but drowned when the ship slipped off the reef into deeper water. Eva Carmichael a passenger had raced onto the deck to find out what was happening only to be confronted by towering cliffs looming above the stricken ship. In all the chaos, Captain Gibbs grabbed Eva and said, "If you are saved Eva, let my dear wife know that I died like a sailor". That was the last Eva Carmichael saw of the captain. She was swept off the ship by a huge wave. Eva saw Tom Pearce on a small rocky beach and yelled to attract his attention. He dived in and swam to the exhausted woman and dragged her to shore. He took her to the cave and broke the open case of brandy which had washed up on the beach. He opened a bottle to revive the unconscious woman. A few hours later Tom scaled a cliff in search of help. He followed hoof prints and came by chance upon two men from nearby Glenample Station three and a half miles away. In a complete state of exhaustion, he told the men of the tragedy. Tom then returned to the gorge while the two men rode back to the station to get help. By the time they reached Loch Ard Gorge, it was cold and dark. The two shipwreck survivors were taken to Glenample Station to recover. Eva stayed at the station for six weeks before returning to Ireland by steamship. In Melbourne, Tom Pearce received a hero's welcome. He was presented with the first gold medal of the Royal Humane Society of Victoria and a £1000 cheque from the Victorian Government. Concerts were performed to honour the young man's bravery and to raise money for those who lost family in the disaster. Of the 54 crew members and passengers on board, only two survived: the apprentice, Tom Pearce and the young woman passenger, Eva Carmichael, who lost her family in the tragedy. Ten days after the Loch Ard tragedy, salvage rights to the wreck were sold at auction for £2,120. Cargo valued at £3,000 was salvaged and placed on the beach, but most washed back into the sea when another storm developed. The wreck of Loch Ard still lies at the base of Mutton Bird Island. Much of the cargo has now been salvaged and some items were washed up into Loch Ard Gorge. Cargo and artefacts have also been illegally salvaged over many years before protective legislation was introduced in March 1982. The shipwreck of the Loch Ard is of significance for Victoria and is registered on the Victorian Heritage Register ( S 417). Flagstaff Hill has a varied collection of artefacts from Loch Ard and its collection is significant for being one of the largest accumulation of artefacts from this notable Victorian shipwreck. The collections object is to also give us a snapshot into history so we can interpret the story of this tragic event. The collection is also archaeologically significant as it represents aspects of Victoria's shipping history that allows us to interpret Victoria's social and historical themes of the time. The collections historically significance is that it is associated unfortunately with the worst and best-known shipwreck in Victoria's history. Silver plated copper alloy table fork from the wreck of the Loch Ard. Some verdigris.William Pageflagstaff hill, warrnambool, shipwrecked coast, flagstaff hill maritime museum, maritime museum, shipwreck coast, flagstaff hill maritime village, great ocean road, loch line, loch ard, captain gibbs, eva carmichael, tom pearce, glenample station, mutton bird island, loch ard gorge, electroplated cutlery, fork -
 Flagstaff Hill Maritime Museum and Village
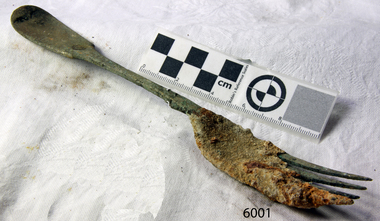
Domestic object - Fork, circa 1878
This fork is from the wreck of the Loch Ard, that sailed from Gravesend, London. The manifest listed an array of manufactured goods being exported to the Colony of Victoria. Included in the cargo manifest was a large number of hardware & cutlery items. This fork is representative of similar items of silver electro-plated cutlery salvaged from the Loch Ard wreck site, comprising nickel silver electroplated spoons and forks of various sizes but all sharing the same general shape and design. Some of the pieces display their makers’ mark of William Page & Co Birmingham UK. Within the Flagstaff Hills cutlery collection donated from the Loch Ard, maker’s marks are often obscured by sedimentary accretion or verdigris after a century of submersion in the ocean. However sufficient detail has survived to indicate that the collection of samples of electroplated cutlery probably originated from the same cargo consignment from the Loch Ard and were made by William Page & Co. William Page was born in 1811 and died in 1885. He was active as a manufacturer of cutlery from 1829 with premises at 74 Belmont Rd, Dales End as a "close plater" (someone who works sheet metal), and he began electroplating in 1855. William Page & Co was also active from 1880 at Cranemore St, Cattle’s Grove also 55 Albion St, Birmingham, in 1936 the firm became Ltd. The firm used the trademarks "Asrista, Bolivian Silver, Silverite, Roman Silver, Roumanian Silver and Trevor Plate. In 1938 William Page was a supplier to the British Government, marking it's products with the broad arrow symbol and was also present at Sheffield. History of the Loch Ard: The Loch Ard got its name from ”Loch Ard” a loch which lies to the west of Aberfoyle, and the east of Loch Lomond. It means "high lake" in Scottish Gaelic. The vessel belonged to the famous Loch Line which sailed many vessels from England to Australia. The Loch Ard was built in Glasgow by Barclay, Curdle and Co. in 1873, the vessel was a three-masted square-rigged iron sailing ship that measured 79.87 meters in length, 11.58 m in width, and 7 m in depth with a gross tonnage of 1693 tons with a mainmast that measured a massive 45.7 m in height. Loch Ard made three trips to Australia and one trip to Calcutta before its fateful voyage. Loch Ard left England on March 2, 1878, under the command of 29-year-old Captain Gibbs, who was newly married. The ship was bound for Melbourne with a crew of 37, plus 17 passengers. The general cargo reflected the affluence of Melbourne at the time. Onboard were straw hats, umbrella, perfumes, clay pipes, pianos, clocks, confectionery, linen and candles, as well as a heavier load of railway irons, cement, lead and copper. There were other items included that were intended for display in the Melbourne International Exhibition of 1880. The voyage to Port Phillip was long but uneventful. Then at 3 am on June 1, 1878, Captain Gibbs was expecting to see land. But the Loch Ard was running into a fog which greatly reduced visibility. Captain Gibbs was becoming anxious as there was no sign of land or the Cape Otway lighthouse. At 4 am the fog lifted and a lookout aloft announced that he could see breakers. The sheer cliffs of Victoria's west coast came into view, and Captain Gibbs realised that the ship was much closer to them than expected. He ordered as much sail to be set as time would permit and then attempted to steer the vessel out to sea. On coming head-on into the wind, the ship lost momentum, the sails fell limp and Loch Ard's bow swung back towards land. Gibbs then ordered the anchors to be released in an attempt to hold its position. The anchors sank some 50 fathoms - but did not hold. By this time the ship was among the breakers and the tall cliffs of Mutton Bird Island rose behind. Just half a mile from the coast, the ship's bow was suddenly pulled around by the anchor. The captain tried to tack out to sea, but the ship struck a reef at the base of Mutton Bird Island, near Port Campbell. Waves subsequently broke over the ship and the top deck became loosened from the hull. The masts and rigging came crashing down knocking passengers and crew overboard. When a lifeboat was finally launched, it crashed into the side of Loch Ard and capsized. Tom Pearce, who had launched the boat, managed to cling to its overturned hull and shelter beneath it. He drifted out to sea and then on the flood tide came into what is now known as Loch Ard Gorge. He swam to shore, bruised and dazed, and found a cave in which to shelter. Some of the crew stayed below deck to shelter from the falling rigging but drowned when the ship slipped off the reef into deeper water. Eva Carmichael a passenger had raced onto the deck to find out what was happening only to be confronted by towering cliffs looming above the stricken ship. In all the chaos, Captain Gibbs grabbed Eva and said, "If you are saved Eva, let my dear wife know that I died like a sailor". That was the last Eva Carmichael saw of the captain. She was swept off the ship by a huge wave. Eva saw Tom Pearce on a small rocky beach and yelled to attract his attention. He dived in and swam to the exhausted woman and dragged her to shore. He took her to the cave and broke the open case of brandy which had washed up on the beach. He opened a bottle to revive the unconscious woman. A few hours later Tom scaled a cliff in search of help. He followed hoof prints and came by chance upon two men from nearby Glenample Station three and a half miles away. In a complete state of exhaustion, he told the men of the tragedy. Tom then returned to the gorge while the two men rode back to the station to get help. By the time they reached Loch Ard Gorge, it was cold and dark. The two shipwreck survivors were taken to Glenample Station to recover. Eva stayed at the station for six weeks before returning to Ireland by steamship. In Melbourne, Tom Pearce received a hero's welcome. He was presented with the first gold medal of the Royal Humane Society of Victoria and a £1000 cheque from the Victorian Government. Concerts were performed to honour the young man's bravery and to raise money for those who lost family in the disaster. Of the 54 crew members and passengers on board, only two survived: the apprentice, Tom Pearce and the young woman passenger, Eva Carmichael, who lost her family in the tragedy. Ten days after the Loch Ard tragedy, salvage rights to the wreck were sold at auction for £2,120. Cargo valued at £3,000 was salvaged and placed on the beach, but most washed back into the sea when another storm developed. The wreck of Loch Ard still lies at the base of Mutton Bird Island. Much of the cargo has now been salvaged and some items were washed up into Loch Ard Gorge. Cargo and artefacts have also been illegally salvaged over many years before protective legislation was introduced in March 1982. The shipwreck of the Loch Ard is of significance for Victoria and is registered on the Victorian Heritage Register ( S 417). Flagstaff Hill has a varied collection of artefacts from Loch Ard and its collection is significant for being one of the largest accumulation of artefacts from this notable Victorian shipwreck. The collections object is to also give us a snapshot into history so we can interpret the story of this tragic event. The collection is also archaeologically significant as it represents aspects of Victoria's shipping history that allows us to interpret Victoria's social and historical themes of the time. The collections historically significance is that it is associated unfortunately with the worst and best-known shipwreck in Victoria's history. Large Nickel Silver plated dinner fork, fiddle-back design handle, narrow stem with flared collar and elongated forks.makers’ mark “W” & “P” placed within a raised diamond outline, which is in turn contained within a sunken crown shape identifying the manufacturer as William Page & Co of Birmingham.flagstaff hill, warrnambool, shipwrecked coast, flagstaff hill maritime museum, maritime museum, shipwreck coast, flagstaff hill maritime village, great ocean road, loch line, loch ard, captain gibbs, eva carmichael, tom pearce, glenample station, mutton bird island, loch ard gorge, electroplated cutlery, fork -
Flagstaff Hill Maritime Museum and Village
Domestic object - Fork, c.1878
This fork is from the wreck of the Loch Ard, that sailed from Gravesend, London. The manifest listed an array of manufactured goods being exported to the Colony of Victoria. Included in the cargo manifest was a large number of hardware & cutlery items. This fork is representative of similar items of silver electro-plated cutlery salvaged from the Loch Ard wreck site, comprising nickel silver electroplated spoons and forks of various sizes but all sharing the same general shape and design. Some of the pieces display their makers’ mark of William Page & Co Birmingham UK. Within the Flagstaff Hills cutlery collection donated from the Loch Ard, maker’s marks are often obscured by sedimentary accretion or verdigris after a century of submersion in the ocean. However sufficient detail has survived to indicate that the collection of samples of electroplated cutlery probably originated from the same cargo consignment from the Loch Ard and were made by William Page & Co. William Page was born in 1811 and died in 1885. He was active as a manufacturer of cutlery from 1829 with premises at 74 Belmont Rd, Dales End as a "close plater" (someone who works sheet metal), and he began electroplating in 1855. William Page & Co was also active from 1880 at Cranemore St, Cattle’s Grove also 55 Albion St, Birmingham, in 1936 the firm became Ltd. The firm used the trademarks "Asrista, Bolivian Silver, Silverite, Roman Silver, Roumanian Silver and Trevor Plate. In 1938 William Page was a supplier to the British Government, marking it's products with the broad arrow symbol and was also present at Sheffield. History of the Loch Ard: The Loch Ard got its name from ”Loch Ard” a loch which lies to the west of Aberfoyle, and the east of Loch Lomond. It means "high lake" in Scottish Gaelic. The vessel belonged to the famous Loch Line which sailed many vessels from England to Australia. The Loch Ard was built in Glasgow by Barclay, Curdle and Co. in 1873, the vessel was a three-masted square-rigged iron sailing ship that measured 79.87 meters in length, 11.58 m in width, and 7 m in depth with a gross tonnage of 1693 tons with a mainmast that measured a massive 45.7 m in height. Loch Ard made three trips to Australia and one trip to Calcutta before its fateful voyage. Loch Ard left England on March 2, 1878, under the command of 29-year-old Captain Gibbs, who was newly married. The ship was bound for Melbourne with a crew of 37, plus 17 passengers. The general cargo reflected the affluence of Melbourne at the time. Onboard were straw hats, umbrella, perfumes, clay pipes, pianos, clocks, confectionery, linen and candles, as well as a heavier load of railway irons, cement, lead and copper. There were other items included that were intended for display in the Melbourne International Exhibition of 1880. The voyage to Port Phillip was long but uneventful. Then at 3 am on June 1, 1878, Captain Gibbs was expecting to see land. But the Loch Ard was running into a fog which greatly reduced visibility. Captain Gibbs was becoming anxious as there was no sign of land or the Cape Otway lighthouse. At 4 am the fog lifted and a lookout aloft announced that he could see breakers. The sheer cliffs of Victoria's west coast came into view, and Captain Gibbs realised that the ship was much closer to them than expected. He ordered as much sail to be set as time would permit and then attempted to steer the vessel out to sea. On coming head-on into the wind, the ship lost momentum, the sails fell limp and Loch Ard's bow swung back towards land. Gibbs then ordered the anchors to be released in an attempt to hold its position. The anchors sank some 50 fathoms - but did not hold. By this time the ship was among the breakers and the tall cliffs of Mutton Bird Island rose behind. Just half a mile from the coast, the ship's bow was suddenly pulled around by the anchor. The captain tried to tack out to sea, but the ship struck a reef at the base of Mutton Bird Island, near Port Campbell. Waves subsequently broke over the ship and the top deck became loosened from the hull. The masts and rigging came crashing down knocking passengers and crew overboard. When a lifeboat was finally launched, it crashed into the side of Loch Ard and capsized. Tom Pearce, who had launched the boat, managed to cling to its overturned hull and shelter beneath it. He drifted out to sea and then on the flood tide came into what is now known as Loch Ard Gorge. He swam to shore, bruised and dazed, and found a cave in which to shelter. Some of the crew stayed below deck to shelter from the falling rigging but drowned when the ship slipped off the reef into deeper water. Eva Carmichael a passenger had raced onto the deck to find out what was happening only to be confronted by towering cliffs looming above the stricken ship. In all the chaos, Captain Gibbs grabbed Eva and said, "If you are saved Eva, let my dear wife know that I died like a sailor". That was the last Eva Carmichael saw of the captain. She was swept off the ship by a huge wave. Eva saw Tom Pearce on a small rocky beach and yelled to attract his attention. He dived in and swam to the exhausted woman and dragged her to shore. He took her to the cave and broke the open case of brandy which had washed up on the beach. He opened a bottle to revive the unconscious woman. A few hours later Tom scaled a cliff in search of help. He followed hoof prints and came by chance upon two men from nearby Glenample Station three and a half miles away. In a complete state of exhaustion, he told the men of the tragedy. Tom then returned to the gorge while the two men rode back to the station to get help. By the time they reached Loch Ard Gorge, it was cold and dark. The two shipwreck survivors were taken to Glenample Station to recover. Eva stayed at the station for six weeks before returning to Ireland by steamship. In Melbourne, Tom Pearce received a hero's welcome. He was presented with the first gold medal of the Royal Humane Society of Victoria and a £1000 cheque from the Victorian Government. Concerts were performed to honour the young man's bravery and to raise money for those who lost family in the disaster. Of the 54 crew members and passengers on board, only two survived: the apprentice, Tom Pearce and the young woman passenger, Eva Carmichael, who lost her family in the tragedy. Ten days after the Loch Ard tragedy, salvage rights to the wreck were sold at auction for £2,120. Cargo valued at £3,000 was salvaged and placed on the beach, but most washed back into the sea when another storm developed. The wreck of Loch Ard still lies at the base of Mutton Bird Island. Much of the cargo has now been salvaged and some items were washed up into Loch Ard Gorge. Cargo and artefacts have also been illegally salvaged over many years before protective legislation was introduced in March 1982. The shipwreck of the Loch Ard is of significance for Victoria and is registered on the Victorian Heritage Register ( S 417). Flagstaff Hill has a varied collection of artefacts from Loch Ard and its collection is significant for being one of the largest accumulation of artefacts from this notable Victorian shipwreck. The collections object is to also give us a snapshot into history so we can interpret the story of this tragic event. The collection is also archaeologically significant as it represents aspects of Victoria's shipping history that allows us to interpret Victoria's social and historical themes of the time. The collections historically significance is that it is associated unfortunately with the worst and best-known shipwreck in Victoria's history. Silver plated copper alloy table forks entree from the wreck of the Loch Ard. William Pageflagstaff hill, warrnambool, shipwrecked coast, flagstaff hill maritime museum, maritime museum, shipwreck coast, flagstaff hill maritime village, great ocean road, loch line, loch ard, captain gibbs, eva carmichael, tom pearce, glenample station, mutton bird island, loch ard gorge, electroplated cutlery, fork -
Flagstaff Hill Maritime Museum and Village
Domestic object - Forks, c.1878
This fork is from the wreck of the Loch Ard, that sailed from Gravesend, London. The manifest listed an array of manufactured goods being exported to the Colony of Victoria. Included in the cargo manifest was a large number of hardware & cutlery items. This fork is representative of similar items of silver electro-plated cutlery salvaged from the Loch Ard wreck site, comprising nickel silver electroplated spoons and forks of various sizes but all sharing the same general shape and design. Some of the pieces display their makers’ mark of William Page & Co Birmingham UK. Within the Flagstaff Hills cutlery collection donated from the Loch Ard, maker’s marks are often obscured by sedimentary accretion or verdigris after a century of submersion in the ocean. However sufficient detail has survived to indicate that the collection of samples of electroplated cutlery probably originated from the same cargo consignment from the Loch Ard and were made by William Page & Co. William Page was born in 1811 and died in 1885. He was active as a manufacturer of cutlery from 1829 with premises at 74 Belmont Rd, Dales End as a "close plater" (someone who works sheet metal), and he began electroplating in 1855. William Page & Co was also active from 1880 at Cranemore St, Cattle’s Grove also 55 Albion St, Birmingham, in 1936 the firm became Ltd. The firm used the trademarks "Asrista, Bolivian Silver, Silverite, Roman Silver, Roumanian Silver and Trevor Plate. In 1938 William Page was a supplier to the British Government, marking it's products with the broad arrow symbol and was also present at Sheffield. History of the Loch Ard: The Loch Ard got its name from ”Loch Ard” a loch which lies to the west of Aberfoyle, and the east of Loch Lomond. It means "high lake" in Scottish Gaelic. The vessel belonged to the famous Loch Line which sailed many vessels from England to Australia. The Loch Ard was built in Glasgow by Barclay, Curdle and Co. in 1873, the vessel was a three-masted square-rigged iron sailing ship that measured 79.87 meters in length, 11.58 m in width, and 7 m in depth with a gross tonnage of 1693 tons with a mainmast that measured a massive 45.7 m in height. Loch Ard made three trips to Australia and one trip to Calcutta before its fateful voyage. Loch Ard left England on March 2, 1878, under the command of 29-year-old Captain Gibbs, who was newly married. The ship was bound for Melbourne with a crew of 37, plus 17 passengers. The general cargo reflected the affluence of Melbourne at the time. Onboard were straw hats, umbrella, perfumes, clay pipes, pianos, clocks, confectionery, linen and candles, as well as a heavier load of railway irons, cement, lead and copper. There were other items included that were intended for display in the Melbourne International Exhibition of 1880. The voyage to Port Phillip was long but uneventful. Then at 3 am on June 1, 1878, Captain Gibbs was expecting to see land. But the Loch Ard was running into a fog which greatly reduced visibility. Captain Gibbs was becoming anxious as there was no sign of land or the Cape Otway lighthouse. At 4 am the fog lifted and a lookout aloft announced that he could see breakers. The sheer cliffs of Victoria's west coast came into view, and Captain Gibbs realised that the ship was much closer to them than expected. He ordered as much sail to be set as time would permit and then attempted to steer the vessel out to sea. On coming head-on into the wind, the ship lost momentum, the sails fell limp and Loch Ard's bow swung back towards land. Gibbs then ordered the anchors to be released in an attempt to hold its position. The anchors sank some 50 fathoms - but did not hold. By this time the ship was among the breakers and the tall cliffs of Mutton Bird Island rose behind. Just half a mile from the coast, the ship's bow was suddenly pulled around by the anchor. The captain tried to tack out to sea, but the ship struck a reef at the base of Mutton Bird Island, near Port Campbell. Waves subsequently broke over the ship and the top deck became loosened from the hull. The masts and rigging came crashing down knocking passengers and crew overboard. When a lifeboat was finally launched, it crashed into the side of Loch Ard and capsized. Tom Pearce, who had launched the boat, managed to cling to its overturned hull and shelter beneath it. He drifted out to sea and then on the flood tide came into what is now known as Loch Ard Gorge. He swam to shore, bruised and dazed, and found a cave in which to shelter. Some of the crew stayed below deck to shelter from the falling rigging but drowned when the ship slipped off the reef into deeper water. Eva Carmichael a passenger had raced onto the deck to find out what was happening only to be confronted by towering cliffs looming above the stricken ship. In all the chaos, Captain Gibbs grabbed Eva and said, "If you are saved Eva, let my dear wife know that I died like a sailor". That was the last Eva Carmichael saw of the captain. She was swept off the ship by a huge wave. Eva saw Tom Pearce on a small rocky beach and yelled to attract his attention. He dived in and swam to the exhausted woman and dragged her to shore. He took her to the cave and broke the open case of brandy which had washed up on the beach. He opened a bottle to revive the unconscious woman. A few hours later Tom scaled a cliff in search of help. He followed hoof prints and came by chance upon two men from nearby Glenample Station three and a half miles away. In a complete state of exhaustion, he told the men of the tragedy. Tom then returned to the gorge while the two men rode back to the station to get help. By the time they reached Loch Ard Gorge, it was cold and dark. The two shipwreck survivors were taken to Glenample Station to recover. Eva stayed at the station for six weeks before returning to Ireland by steamship. In Melbourne, Tom Pearce received a hero's welcome. He was presented with the first gold medal of the Royal Humane Society of Victoria and a £1000 cheque from the Victorian Government. Concerts were performed to honour the young man's bravery and to raise money for those who lost family in the disaster. Of the 54 crew members and passengers on board, only two survived: the apprentice, Tom Pearce and the young woman passenger, Eva Carmichael, who lost her family in the tragedy. Ten days after the Loch Ard tragedy, salvage rights to the wreck were sold at auction for £2,120. Cargo valued at £3,000 was salvaged and placed on the beach, but most washed back into the sea when another storm developed. The wreck of Loch Ard still lies at the base of Mutton Bird Island. Much of the cargo has now been salvaged and some items were washed up into Loch Ard Gorge. Cargo and artefacts have also been illegally salvaged over many years before protective legislation was introduced in March 1982. The shipwreck of the Loch Ard is of significance for Victoria and is registered on the Victorian Heritage Register ( S 417). Flagstaff Hill has a varied collection of artefacts from Loch Ard and its collection is significant for being one of the largest accumulation of artefacts from this notable Victorian shipwreck. The collections object is to also give us a snapshot into history so we can interpret the story of this tragic event. The collection is also archaeologically significant as it represents aspects of Victoria's shipping history that allows us to interpret Victoria's social and historical themes of the time. The collections historically significance is that it is associated unfortunately with the worst and best-known shipwreck in Victoria's history. Silver plated copper alloy table forks entree from the wreck of the Loch Ard. William Pageflagstaff hill, warrnambool, shipwrecked coast, flagstaff hill maritime museum, maritime museum, shipwreck coast, flagstaff hill maritime village, great ocean road, loch line, loch ard, captain gibbs, eva carmichael, tom pearce, glenample station, mutton bird island, loch ard gorge, electroplated cutlery, fork -
 Flagstaff Hill Maritime Museum and Village
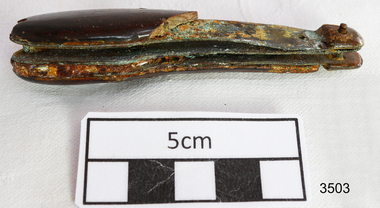
Pocket Knife, before 1878
Found on board the "Loch Ard" . 'Loch Ard" left Gravesend, England on 2nd March 1878, under the command of Captain Gibb, bound for Melbourne loaded with passengers and cargo. On June 1st 1878, almost at the end of her journey, she ran into a rocky reef at the base of Mutton Bird Island, near Port Campbell. Of the 54 crew members and passengers on board, only two survived: an apprentice, Tom Pearce and a young woman passenger, Eva Carmichael, who lost all of her family in the tragedy. The wreck of Loch Ard still lies at the base of Mutton Bird Island and much of the cargo has been salvaged. Some was washed up into what is now known as Loch Ard Gorge following the shipwreck. Amongst artefacts salvaged from the Loch Ard is the now famous Minton Peacock Statue which was destined for the Melbourne International Exhibition to be held in 1880 HISTORY OF THE LOCH ARD The LOCH ARD belonged to the famous Loch Line which sailed many ships from England to Australia. Built in Glasgow by Barclay, Curdle and Co. in 1873, the LOCH ARD was a three-masted square rigged iron sailing ship. The ship measured 262ft 7" (79.87m) in length, 38ft (11.58m) in width, 23ft (7m) in depth and had a gross tonnage of 1693 tons. The LOCH ARD's main mast measured a massive 150ft (45.7m) in height. LOCH ARD made three trips to Australia and one trip to Calcutta before its final voyage. LOCH ARD left England on March 2, 1878, under the command of Captain Gibbs, a newly married, 29 year old. She was bound for Melbourne with a crew of 37, plus 17 passengers and a load of cargo. The general cargo reflected the affluence of Melbourne at the time. On board were straw hats, umbrella, perfumes, clay pipes, pianos, clocks, confectionary, linen and candles, as well as a heavier load of railway irons, cement, lead and copper. There were items included that intended for display in the Melbourne International Exhibition in 1880. The voyage to Port Phillip was long but uneventful. At 3am on June 1, 1878, Captain Gibbs was expecting to see land and the passengers were becoming excited as they prepared to view their new homeland in the early morning. But LOCH ARD was running into a fog which greatly reduced visibility. Captain Gibbs was becoming anxious as there was no sign of land or the Cape Otway lighthouse. At 4am the fog lifted. A man aloft announced that he could see breakers. The sheer cliffs of Victoria's west coast came into view, and Captain Gibbs realised that the ship was much closer to them than expected. He ordered as much sail to be set as time would permit and then attempted to steer the vessel out to sea. On coming head on into the wind, the ship lost momentum, the sails fell limp and LOCH ARD's bow swung back. Gibbs then ordered the anchors to be released in an attempt to hold its position. The anchors sank some 50 fathoms - but did not hold. By this time LOCH ARD was among the breakers and the tall cliffs of Mutton Bird Island rose behind the ship. Just half a mile from the coast, the ship's bow was suddenly pulled around by the anchor. The captain tried to tack out to sea, but the ship struck a reef at the base of Mutton Bird Island, near Port Campbell. Waves broke over the ship and the top deck was loosened from the hull. The masts and rigging came crashing down knocking passengers and crew overboard. When a lifeboat was finally launched, it crashed into the side of LOCH ARD and capsized. Tom Pearce, who had launched the boat, managed to cling to its overturned hull and shelter beneath it. He drifted out to sea and then on the flood tide came into what is now known as LOCH ARD Gorge. He swam to shore, bruised and dazed, and found a cave in which to shelter. Some of the crew stayed below deck to shelter from the falling rigging but drowned when the ship slipped off the reef into deeper water. Eva Carmichael had raced onto deck to find out what was happening only to be confronted by towering cliffs looming above the stricken ship. In all the chaos, Captain Gibbs grabbed Eva and said, "If you are saved Eva, let my dear wife know that I died like a sailor". That was the last Eva Carmichael saw of the captain. She was swept off the ship by a huge wave. Eva saw Tom Pearce on a small rocky beach and yelled to attract his attention. He dived in and swam to the exhausted woman and dragged her to shore. He took her to the cave and broke open case of brandy which had washed up on the beach. He opened a bottle to revive the unconscious woman. A few hours later Tom scaled a cliff in search of help. He followed hoof prints and came by chance upon two men from nearby Glenample Station three and a half miles away. In a state of exhaustion, he told the men of the tragedy. Tom returned to the gorge while the two men rode back to the station to get help. By the time they reached LOCH ARD Gorge, it was cold and dark. The two shipwreck survivors were taken to Glenample Station to recover. Eva stayed at the station for six weeks before returning to Ireland, this time by steamship. In Melbourne, Tom Pearce received a hero's welcome. He was presented with the first gold medal of the Royal Humane Society of Victoria and a £1000 cheque from the Victorian Government. Concerts were performed to honour the young man's bravery and to raise money for those who lost family in the LOCH ARD disaster. Of the 54 crew members and passengers on board, only two survived: the apprentice, Tom Pearce and the young woman passenger, Eva Carmichael, who lost all of her family in the tragedy. Ten days after the LOCH ARD tragedy, salvage rights to the wreck were sold at auction for £2,120. Cargo valued at £3,000 was salvaged and placed on the beach, but most washed back into the sea when another storm developed. The wreck of LOCH ARD still lies at the base of Mutton Bird Island. Much of the cargo has now been salvaged and some was washed up into what is now known as LOCH ARD Gorge. Cargo and artefacts have also been illegally salvaged over many years before protective legislation was introduced. One of the most unlikely pieces of cargo to have survived the shipwreck was a Minton porcelain peacock - one of only nine in the world. The peacock was destined for the Melbourne International Exhibition in 1880. It had been well packed, which gave it adequate protection during the violent storm. Today, the Minton peacock can be seen at the Flagstaff Hill Maritime Museum in Warrnambool. From Australia's most dramatic shipwreck it has now become Australia's most valuable shipwreck artefact and is one of very few 'objects' on the Victorian State Heritage Register. The "Loch Ard" is registered on the National Shipwreck database and is protected as an Historic "Shipwreck. It is one of Australia's and Victoria's most tragic and most famous shipwrecks. The quantity of luxury and commercial items carried as cargo show the type and quality of goods passengers migrating to Australia at that time were bringing with them Flagstaff Hill’s collection of artefacts from LOCH ARD is significant for being one of the largest collections of artefacts from this shipwreck in Victoria. It is significant for its association with the shipwreck, which is on the Victorian Heritage Register (VHR S417). The collection is significant because of the relationship between the objects, as together they have a high potential to interpret the story of the LOCH ARD. The LOCH ARD collection is archaeologically significant as the remains of a large international passenger and cargo ship. The LOCH ARD collection is historically significant for representing aspects of Victoria’s shipping history and its potential to interpret sub-theme 1.5 of Victoria’s Framework of Historical Themes (living with natural processes). The collection is also historically significant for its association with the LOCH ARD, which was one of the worst and best known shipwrecks in Victoria’s history. Small pocket knife salvaged from the wreck of the Loch Ard. It has a dark brown cover on one side. Reverse side is only partly there. Both blades are missingflagstaff hill, warrnambool, shipwrecked coast, flagstaff hill maritime museum, maritime museum, shipwreck coast, flagstaff hill maritime village, great ocean road, loch line, loch ard, captain gibbs, eva carmichael, tom pearce, glenample station, mutton bird island, loch ard gorge, pocket knife, knife, tool -
 Flagstaff Hill Maritime Museum and Village
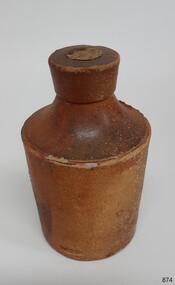
Container - Ink Bottle, Royal Doulton, 1853-1878
The ink bottle was made by the Royal Doulton company which began as a partnership between John Doulton, Martha Jones, and John Wattis an English ceramic and home accessories manufacturer founded in 1815. Operating initially in Vauxhall, London, it later moved to Lambeth, In1882 it opened a factory in Burslem, Stoke on Trent, in the centre of English pottery. The business specialised in making salt-glazed stoneware articles, including utilitarian or decorative bottles, jugs and jars, much of it intended for inns and pubs. The backbone of the business was a wide range of utilitarian wares, mostly stoneware's, including storage jars, tankards and the like, and later extending to pipes for drains, lavatories and other bathroom ceramics. From 1853 to 1902 its wares were marked Doulton & Co., then from 1902, when a royal warrant was given, wares were marked Royal Doulton. The company always made some more decorative items, initially still mostly stoneware, and from the 1860s the firm made considerable efforts to get a reputation for design, in which it was largely successful, as one of the first British makers of art pottery. Initially, this was done through artistic stoneware made in Lambeth, but in 1882 the firm bought a Burslem factory, which was mainly intended for making bone china table wares and decorative items. History of the Loch Ard: The Loch Ard got its name from ”Loch Ard” a loch that lies to the west of Aberfoyle, and the east of Loch Lomond. It means "high lake" in Scottish Gaelic. The vessel belonged to the famous Loch Line which sailed many vessels from England to Australia. The Loch Ard was built in Glasgow by Barclay, Curdle and Co. in 1873, the vessel was a three-masted square-rigged iron sailing ship that measured 79.87 meters in length, 11.58 m in width, and 7 m in depth with a gross tonnage of 1693 tons with a mainmast that measured a massive 45.7 m in height. Loch Ard made three trips to Australia and one trip to Calcutta before its fateful voyage. Loch Ard left England on March 2, 1878, under the command of 29-year-old Captain Gibbs, who was newly married. The ship was bound for Melbourne with a crew of 37, plus 17 passengers. The general cargo reflected the affluence of Melbourne at the time. Onboard were straw hats, umbrellas, perfumes, clay pipes, pianos, clocks, confectionery, linen and candles, as well as a heavier load of railway irons, cement, lead and copper. There were other items included that were intended for display in the Melbourne International Exhibition of 1880. The voyage to Port Phillip was long but uneventful. Then at 3 am on June 1, 1878, Captain Gibbs was expecting to see land. But the Loch Ard was running into a fog which greatly reduced visibility. Captain Gibbs was becoming anxious as there was no sign of land or the Cape Otway lighthouse. At 4 am the fog lifted and a lookout aloft announced that he could see breakers. The sheer cliffs of Victoria's west coast came into view, and Captain Gibbs realised that the ship was much closer to them than expected. He ordered as much sail to be set as time would permit and then attempted to steer the vessel out to sea. On coming head-on into the wind, the ship lost momentum, the sails fell limp and Loch Ard's bow swung back towards land. Gibbs then ordered the anchors to be released in an attempt to hold their position. The anchors sank some 50 fathoms - but did not hold. By this time the ship was among the breakers and the tall cliffs of Mutton Bird Island rose behind. Just half a mile from the coast, the ship's bow was suddenly pulled around by the anchor. The captain tried to tack out to sea, but the ship struck a reef at the base of Mutton Bird Island, near Port Campbell. Waves subsequently broke over the ship and the top deck became loosened from the hull. The masts and rigging came crashing down knocking passengers and crew overboard. When a lifeboat was finally launched, it crashed into the side of Loch Ard and capsized. Tom Pearce, who had launched the boat, managed to cling to its overturned hull and shelter beneath it. He drifted out to sea and then on the flood tide came into what is now known as Lochard Gorge. He swam to shore, bruised and dazed, and found a cave in which to shelter. Some of the crew stayed below deck to shelter from the falling rigging but drowned when the ship slipped off the reef into deeper water. Eva Carmichael a passenger had raced onto the deck to find out what was happening only to be confronted by towering cliffs looming above the stricken ship. In all the chaos, Captain Gibbs grabbed Eva and said, "If you are saved Eva, let my dear wife know that I died like a sailor". That was the last Eva Carmichael saw of the captain. She was swept off the ship by a huge wave. Eva saw Tom Pearce on a small rocky beach and yelled to attract his attention. He dived in and swam to the exhausted woman and dragged her to shore. He took her to the cave and broke the open case of brandy which had washed up on the beach. He opened a bottle to revive the unconscious woman. A few hours later Tom scaled a cliff in search of help. He followed hoof prints and came by chance upon two men from nearby Glenample Station three and a half miles away. In a complete state of exhaustion, he told the men of the tragedy. Tom then returned to the gorge while the two men rode back to the station to get help. By the time they reached Loch Ard Gorge, it was cold and dark. The two shipwreck survivors were taken to Glenample Station to recover. Eva stayed at the station for six weeks before returning to Ireland by steamship. In Melbourne, Tom Pearce received a hero's welcome. He was presented with the first gold medal of the Royal Humane Society of Victoria and a £1000 cheque from the Victorian Government. Concerts were performed to honour the young man's bravery and to raise money for those who lost family in the disaster. Of the 54 crew members and passengers on board, only two survived: the apprentice, Tom Pearce and the young woman passenger, Eva Carmichael, who lost her family in the tragedy. Ten days after the Lochard tragedy, salvage rights to the wreck were sold at auction for £2,120. Cargo valued at £3,000 was salvaged and placed on the beach, but most washed back into the sea when another storm developed. The wreck of Lochard still lies at the base of Mutton Bird Island. Much of the cargo has now been salvaged and some items were washed up into Lochard Gorge. Cargo and artefacts have also been illegally salvaged over many years before protective legislation was introduced in March 1982. One of the most unlikely pieces of cargo to have survived the shipwreck was a Minton majolica peacock- one of only nine in the world. The peacock was destined for the Melbourne 1880 International Exhibition. It had been well packed, which gave it adequate protection during the violent storm. Today the Minton peacock can be seen at the Flagstaff Hill Maritime Museum in Warrnambool. From Australia's most dramatic shipwreck, it has now become Australia's most valuable shipwreck artifact and is one of very few 'objects' on the Victorian State Heritage Register.An early utilitarian stoneware item made by a well-known company that specialised in making salt-glazed items that later earned a reputation for making stoneware art objects. Of additional significance is that it was recovered from the wreck of the Loch Ard. A shipwreck that is of additional significance as it is registered on the Victorian Heritage Register ( S 417). Flagstaff Hill has a varied collection of artefacts from Loch Ard and its collection is significant for being one of the largest accumulations of artefacts from this notable Victorian shipwreck of which the subject items are a small part. The collections objects give us a snapshot of how we can interpret the story of this tragic event. The collection is also archaeologically significant as it represents aspects of Victoria's shipping history that allows us to interpret Victoria's social and historical themes of the time. Through is associated with the worst and best-known shipwreck in Victoria's history. Salt glazed stoneware ink bottle, large capacity, tapered lip and body, two-tone brown with some encrustation on surface, still sealed with cork. Inscription in clay. Recovered from the wreck of the LOCH ARD.Stamped into clay "DOULTON LAMBETH"flagstaff hill, warrnambool, flagstaff hill maritime museum, shipwreck coast, flagstaff hill maritime village, great ocean road, loch line, loch ard, captain gibbs, eva carmichael, tom pearce, glenample station, mutton bird island, loch ard gorge, ink bottle, bulk ink bottle, writing accessory, stationery, stoneware, doulton lambeth, royal doulton, writing equipment -
 Flagstaff Hill Maritime Museum and Village
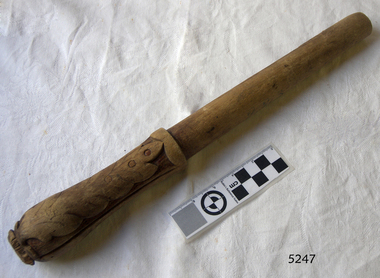
Functional object - Belaying Pin, Before 1878
Belaying Pin: A belaying pin is a solid metal or wooden object used on traditionally rigged sailing vessels to secure lines of running sale rigging. Largely replaced on most modern vessels by cleats, but are still used, particularly on square-rigged ships. A belaying pin is composed of a round handle and cylindrical shaft. The shaft is inserted into a hole in various strategically located wooden pin rails that line the extension of a ship's side above the level of the deck and the surrounding the base of masts, or free-standing, called (fife rails) up to the base of the pins handle. A line is then led under and behind the base of the pin then round the top in a figure-8 pattern for at least four turns. The excess line is coiled and stored neatly by taking a bight from the upper part of the final strand, looping it over and round beneath the coil, then twisting it once or more before slipping the twisted end over the top of the belaying pin to secure the coil in place. The subject item seems to have been hand made possibly by a crew member to while away his time at sea given the item is hand carved and rather personalised in appearance. History of the Loch Ard: The Loch Ard got its name from ”Loch Ard” a loch which lies to the west of Aberfoyle, and the east of Loch Lomond. It means "high lake" in Scottish Gaelic. The vessel belonged to the famous Loch Line which sailed many vessels from England to Australia. The Loch Ard was built in Glasgow by Barclay, Curdle and Co. in 1873, the vessel was a three-masted square-rigged iron sailing ship that measured 79.87 meters in length, 11.58 m in width, and 7 m in depth with a gross tonnage of 1693 tons with a mainmast that measured a massive 45.7 m in height. Loch Ard made three trips to Australia and one trip to Calcutta before its fateful voyage. Loch Ard left England on March 2, 1878, under the command of 29-year-old Captain Gibbs, who was newly married. The ship was bound for Melbourne with a crew of 37, plus 17 passengers. The general cargo reflected the affluence of Melbourne at the time. Onboard were straw hats, umbrella, perfumes, clay pipes, pianos, clocks, confectionery, linen and candles, as well as a heavier load of railway irons, cement, lead and copper. There were other items included that were intended for display in the Melbourne International Exhibition of 1880. The voyage to Port Phillip was long but uneventful. Then at 3 am on June 1, 1878, Captain Gibbs was expecting to see land. But the Loch Ard was running into a fog which greatly reduced visibility. Captain Gibbs was becoming anxious as there was no sign of land or the Cape Otway lighthouse. At 4 am the fog lifted and a lookout aloft announced that he could see breakers. The sheer cliffs of Victoria's west coast came into view, and Captain Gibbs realised that the ship was much closer to them than expected. He ordered as much sail to be set as time would permit and then attempted to steer the vessel out to sea. On coming head-on into the wind, the ship lost momentum, the sails fell limp and Loch Ard's bow swung back towards land. Gibbs then ordered the anchors to be released in an attempt to hold its position. The anchors sank some 50 fathoms - but did not hold. By this time the ship was among the breakers and the tall cliffs of Mutton Bird Island rose behind. Just half a mile from the coast, the ship's bow was suddenly pulled around by the anchor. The captain tried to tack out to sea, but the ship struck a reef at the base of Mutton Bird Island, near Port Campbell. Waves subsequently broke over the ship and the top deck became loosened from the hull. The masts and rigging came crashing down knocking passengers and crew overboard. When a lifeboat was finally launched, it crashed into the side of Loch Ard and capsized. Tom Pearce, who had launched the boat, managed to cling to its overturned hull and shelter beneath it. He drifted out to sea and then on the flood tide came into what is now known as Loch Ard Gorge. He swam to shore, bruised and dazed, and found a cave in which to shelter. Some of the crew stayed below deck to shelter from the falling rigging but drowned when the ship slipped off the reef into deeper water. Eva Carmichael a passenger had raced onto the deck to find out what was happening only to be confronted by towering cliffs looming above the stricken ship. In all the chaos, Captain Gibbs grabbed Eva and said, "If you are saved Eva, let my dear wife know that I died like a sailor". That was the last Eva Carmichael saw of the captain. She was swept off the ship by a huge wave. Eva saw Tom Pearce on a small rocky beach and yelled to attract his attention. He dived in and swam to the exhausted woman and dragged her to shore. He took her to the cave and broke the open case of brandy which had washed up on the beach. He opened a bottle to revive the unconscious woman. A few hours later Tom scaled a cliff in search of help. He followed hoof prints and came by chance upon two men from nearby Glenample Station three and a half miles away. In a complete state of exhaustion, he told the men of the tragedy. Tom then returned to the gorge while the two men rode back to the station to get help. By the time they reached Loch Ard Gorge, it was cold and dark. The two shipwreck survivors were taken to Glenample Station to recover. Eva stayed at the station for six weeks before returning to Ireland by steamship. In Melbourne, Tom Pearce received a hero's welcome. He was presented with the first gold medal of the Royal Humane Society of Victoria and a £1000 cheque from the Victorian Government. Concerts were performed to honour the young man's bravery and to raise money for those who lost family in the disaster. Of the 54 crew members and passengers on board, only two survived: the apprentice, Tom Pearce and the young woman passenger, Eva Carmichael, who lost her family in the tragedy. Ten days after the Loch Ard tragedy, salvage rights to the wreck were sold at auction for £2,120. Cargo valued at £3,000 was salvaged and placed on the beach, but most washed back into the sea when another storm developed. The wreck of Loch Ard still lies at the base of Mutton Bird Island. Much of the cargo has now been salvaged and some items were washed up into Loch Ard Gorge. Cargo and artefacts have also been illegally salvaged over many years before protective legislation was introduced in March 1982. One of the most unlikely pieces of cargo to have survived the shipwreck was a Minton majolica peacock- one of only nine in the world. The peacock was destined for the Melbourne 1880 International Exhibition in. It had been well packed, which gave it adequate protection during the violent storm. Today the Minton peacock can be seen at the Flagstaff Hill Maritime Museum in Warrnambool. From Australia's most dramatic shipwreck it has now become Australia's most valuable shipwreck artifact and is one of very few 'objects' on the Victorian State Heritage Register. The shipwreck of the Loch Ard is of significance for Victoria and is registered on the Victorian Heritage Register ( S 417). Flagstaff Hill has a varied collection of artefacts from Loch Ard and its collection is significant for being one of the largest accumulation of artefacts from this notable Victorian shipwreck. The collections object is to also give us a snapshot into history so we are able to interpret the story of this tragic event. The collection is also archaeologically significant as it represents aspects of Victoria's shipping history that allows us to interpret Victoria's social and historical themes of the time. The collections historically significance is that it is associated unfortunately with the worst and best-known shipwreck in Victoria's history. Wooden belaying pin with leaf design on the handle (hand made).Has the words Loch Ard faintly inscribed on handle (Artifact Rego No LA/32)flagstaff hill, warrnambool, shipwrecked coast, flagstaff hill maritime museum, maritime museum, shipwreck coast, flagstaff hill maritime village, great ocean road, loch line, loch ard, captain gibbs, eva carmichael, tom pearce, glenample station, mutton bird island, loch ard gorge, wooden belaying pin -
 Ringwood and District Historical Society
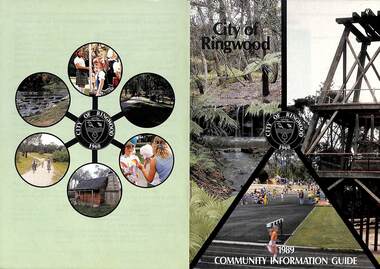
Booklet, City of Ringwood 1989 Community Information Guide, 1989
Community information booklet issued by City of Ringwood for 1989 - covering the facilities and activities of the Ringwood Council and other local organisations and associations. Cover photographs: Front - Fern Gully at Ringwood Lake, Poppett Head at rear of Lake, Athletics Track. Back - Highland Carnival, Wombalano Park, Miners Cottage at Ringwood Lake, Bike Path, Water Cascade at rear of Lake.CONTENTS: (page no.) 1. COUNCIL SERVICES After School Activities Programme 29 Aged Services 31, 32 & 33 Aquatic Centre 20 & 21 Budget 14 Building Information 16 By-Laws 26 Chief Executive's Message 9 Children's Services 29 Civic Centre 4 Committees of Council 5 Common Questions 36 Community Plan 10 & 11 Council Meeting Dates 4 Council Representatives 8 Councillors 6 & 7 Dogs 26 Dual Occupancy 12 Emergency Telephone Numbers 63 Family Day Care 29 Fire Hazards 27 Garbage 34 & 35 Golf Course 24 Home Handyman Services 31 Home Help 31 Incinerators 26 Knaith Road Child Care Centre 29 Library 23 Maternal and Child Health 28 Mayoral Message – Cr. R. Gardini 3 Meals on Wheels 31 Members of Parliament 62 Parks and Gardens 18 Rates 25 Residential Development Provisions 12 & 13 Ringwood Bypass Road 13 Ringwood Convention Centre & Performing Arts Centre 22 Ringwood District Centre 14 Staff 10 Town Planning 17 Works Depot 30 Youth Outreach Worker 33 2. LOCAL COMMUNITY SERVICES Accommodation 37 Alcoholism 37 Birthright 38 Blind 38 Care Force 39 Catholic Family Welfare Bureau 39 Central Ringwood Community Centre 39 Childbirth and Parenting Association 39 & 40 Churches 40 & 41 Community Services Victoria 42 Day Centres and Drop In Centres 43 Do Care 43 Drugs 43 Elderly Day Care 44 Emergency Housing 45 Family Planning Services 45 Financial Counselling 46 Hearing Aid Service 47 Hospitals 47 Housing 48 Information 48 Legal 49 Literacy 50 Lone Parents 50 Marriage Celebrants 50 Maroondah Social Health Centre 51 Neighbourhood Mediation Centre - Outer East 51 North Ringwood Community House 52 Nursing 52 Optometric Services 52 Playgroups 53 Podiatry 53 Pre-Schools 54 Red Cross 55 Retirement 55 Ringwood Croydon Advisory Service 55 Schools 56 & 57 Senior Citizens' Centres 58 Transport 59 Twins 59 Unemployment 60 Volunteering 60 Youth Accommodation Project (Maroondah). 60 Youth Emergency Accommodation Services... 60 rinx -
 Ringwood and District Historical Society
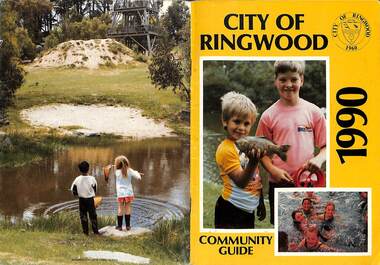
Booklet, City of Ringwood 1990 Community Guide, 1990
Community information booklet issued by City of Ringwood for 1990 - covering the facilities and activities of the Ringwood Council and other local organisations and associations.CONTENTS: (page no.) 1. COUNCIL SERVICES After School Programme 33 Aged Services 33, 34,35 Aquatic Centre 15,16,17 Aquatic Centre Bonus Vouchers 17 Biological Wasp Control 24 Budget 13,14 Building information 26 By-Laws 29 Chief Executive's Message 9 Children's Services 44 Citizenship 35 Civic Centre 4 Committees of Council 5 Common Questions 39 Council Meeting Dates 4 Council Representatives 8 Councillors 6,7 Dogs 29 Emergency Telephone Numbers 67 Family Day Care 32 Fire Hazards 29 Garbage 37 Golf Course 19 Health and Environmental Services 24 Home Handyman Services 54 Home Help 33 Immunisation 25 incinerators 29 Knaith Road Child Care Centre 32 Library 22 Library Service Senior Citizens 34 Maternal and Child Health 31 Mayoral Message - Cr. Lillian Rosewarne 3 Meals on Wheels 33 Members of Parliament 40 Parks and Gardens 22,23 Rates 28 Residential Development Provisions 12 Ringwood Bypass Road 11 Ringwood Convention Centre & Performing Arts Centre 20 Ringwood District Centre 13 Ringwood Festival 21 Shopping Bus 34 Staff 10 Town Planning 26 Works Depot 36 Youth Outreach Worker 36 2. LOCAL COMMUNITY SERVICES Accommodation 42 Aged Accommodation 42 Alcoholism 42 Arthritis Foundation 43 Arts and Crafts 43 Blind 43 Care Force 43 Catholic Family Welfare Bureau 43 Central Ringwood Community Centre 43 Childbirth and Parenting Association 44 Churches 45 Community Services Victoria 47 Day Centres and Drop-in Centres 48 Disabled Facilities 49 Do Care 50 Drugs 50 Elderly Day Care 50 Emergency Housing 51 Family Planning Services 51 Financial Counselling 52 Hearing Aid Service 53 Hospitals 54 Housing 54 Information 55 Legal 55 Literacy 55 Lone Parents 57 Marriage Celebrants 57 Maroondah Social Health Centre 57 Neighbourhood Mediation Centre - Outer East 57 North Ringwood Community House 53 Nursing 59 Optometric Services 59 Playgroups 60 Pre-Schools 60 Red Cross 61 Retirement 62 Ringwood Croydon Advisory Service 62 Schools 63 Senior Citizens' Centres 65 Transport 66 Twins 66 Unemployment 66 Volunteering 66 Youth Accommodation Project (Maroondah) 67 Youth Emergency Services 67 rinx -
 Flagstaff Hill Maritime Museum and Village
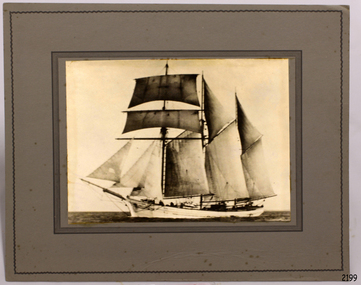
Photograph - Ship, Alma Doepel, 1931-1934
This photograph is of the square-rigged schooner "Alma Doepel". Details added to the back of the photograph incorrectly describe the vessel as "Amy Doepel / ketch / Amy Doepel". The rigging on the vessel dates the photograph to sometime between 1931-1933. The location is yet to be determined. Frederick Doepel was a shipping agent in Bellinger Valley, NSW. He employed an experienced shipwright to build Alma Doepel, which was made from local timber. He named the ship “Alma Doepel” after his baby daughter Alma. The ship was registered in Sydney and launched 19th October 1903, and her first sea voyage was in December. She traded in timber Port Macquarie/Bellinger River and New Zealand. “Alma Doepel” was purchased by Henry Jones & Co., Hobart jam makers, in partnership with Harry Heather, her new captain, in 1916. The ship was then registered in Hobart. She carried jam and timber to the mainland, particularly Melbourne, and brought back cargo for Tasmania. She even carried the piles for the building of Portland Harbour. When Harry Heather passed away in 1937 he was succeeded by Eric Droscoll. Before the square-rigged "Alma Doepel" left for Tasmania on March 8th 1937 she was fitted with a new set of sails, becoming a fore-and-aft rigged schooner. She had been the last 'top sail' schooner in Bass Strait trade! "Alma Doepel" continued her coastal trading until 1942, when she was requisitioned by the Army. In January 1943 she was left in Melbourne by her crew and the Army took her over, taking her to Sydney in February, 1943. She was relaunched by the Army in 1944 minus two of her masts and her small 1936 engine, and was fitted with three large bus engines. In March 1945 she headed for the war zone, delivering cargo up and down the coast of New Guinea, at one time carrying over 400 troops. In 1946 she returned to Hobart where the Army re-converted her back for Bass Strait trading and returned her. In January 1947 Eric Driscoll took “Alma Doepel” to the eastern Tasmanian coastal port of St. Helens, trading cargo of local mountain ash timber to Melbourne on the mainland until 1959. She was then stripped down to her hull with only a single mast and two engines, and fitted with wooden bins on rails in her hold. From 1961 to 1975 she carried limestone to a factory to make carbide. Michael Wood and David Boykett, two of the governors of "Sail and Adventure", then bought her for the price of her two Gardiner engines and in 1976 they brought her to Melbourne. An Alma Doepel Supporters Club was formed to support the ship’s major restoration to a topsail schooner. In 1987 she was overhauled in Adelaide, with the support of Elders IXL and she returned to Sydney to lead the Parade of Sail on Bicentenary Day, 25th January 1988. She returned to Melbourne in February and began sail training voyages in Port Phillip Bay, operating from an office on Station Pier. The Alma Doepel Voyagers Club was started. Trainees joined the crew in sailing the ship over nine or ten days of instruction in sailing and seamanship. These trips plus chartered trips and fund raisers continued until early 1999, when she was no longer in a condition to operate; she needed a lot of attention. She lay idle in Victoria Dock for quite some time. In April 2001 “Alma Doepel” was taken to Port Macquarie’s Lady Nelson Wharf where she became a museum ship maintained by volunteers. In 2008 she had time in dry-dock and after sea-trials headed off to Victoria Harbour, Docklands, in Melbourne, where she is currently being restored with the help of The Supporters.This phot graph is significant for its connection with the Bass Strait trade, being the last top-sail schooner to brade across the strait. The photograph is also significant in its representation of the the sailing ships that traded around Australia in the 1930s.Photograph of "Alma Doepel " a wooden, 3 masted, square rigged sailing schooner built in Sydney, launched in 10/10/1903. Photograph is sepia coloured, mounted on card, inscription on the back. Information also provided with photograph. Photograph (marked incorrectly on back) "Amy Doepel / ketch / Amy Doepel". Sticker with "91" in pencil. Information provided (dated incorrectly) "1943, Sydney, New South Wales"flagstaff hill, warrnambool, shipwreck coast, maritime museum, maritime village, photograph, alma doepel, frederick doepel, henry jones and co, harry heather, eric droscoll, alma doepel supporters club, elders ixl, parade of sail, bicentenary day, alma doepel voyagers club, last top sail schooner in bass strait trade, square-rigged, fore-and-aft rigged -
 Eltham District Historical Society Inc
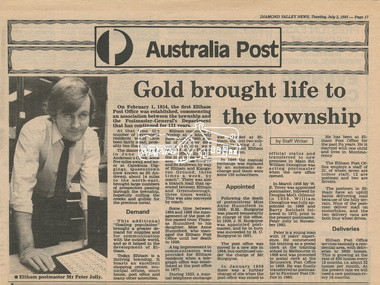
Newsclipping, Diamond Valley News, Gold brought life to the township, Diamond Valley News, 2 July 1985, p17, 2 Jul 1985
A history of Eltham Post Office. Australia Post: Gold brought life to the township - Diamond Valley News, Tuesday July 2, 1985, p17 On February 1, 1854, the first Eltham Post Office was established, commencing an association between the township and the Postmaster-General's Department that has continued for 131 years. At that time, the number of permanent residents would have been fairly small, probably less than 200. The discovery of gold in June 1851, at Anderson’s Creek, some five miles away, and later at Caledonia Diggings, Queenstown (now known as St Andrews), about 14 miles to the north-east, brought large numbers of prospectors passing through the township, hopefully culling the creeks and gullies for the precious metal. This additional "floating population" brought a greater demand for supplies and for communication with the outside world, and so it helped in the development of Eltham. Today, Eltham is a thriving township. It boasts an excellent shopping centre, municipal offices, court house. post office and many other amenities. Eltham continued to develop at a leisurely pace. During 1860, a total of just over 8000 postal articles were handled at the Eltham Post Office. By 1862, the mail route was "to and from Melbourne by way of Eltham and Kangaroo Ground, three times a week, by coach". There was also a branch mail that operated between Eltham and Greensborough, three times weekly. This was also conveyed by coach. Some time between 1864 and 1868 the management of the post office passed from Thomas Hunniford to his daughter, Miss Anne Hunniford, who managed the Eltham Post Office until her death in 1928. A big improvement in communication was provided for Eltham residents when a telegraph office was established at the post office in 1877. During 1923 a manual telephone exchange was provided at Eltham, the first two subscribers being J.J. O’Connor and Eltham Police Station. In 1949 the manual exchange was replaced by an automatic exchange and there were some 150 subscribers. Following the death of postmistress Miss Anne Hunniford in 1928, B.M. Burgoyne was placed temporarily in charge of the office. In 1929, J. N. Burgoyne was appointed postmaster, and he in turn was succeeded by H. C. Burgoyne in 1951. The post office was moved to a new site in 1954, but continued under the charge of Mr Burgoyne. In January 1958 there was a further change of site when the post office was raised to official status and transferred to new premises in Main Rd. William Donoghue was acting postmaster when the new office was opened. In March 1958 Mr W.E. Tovey was appointed postmaster, followed by Douglas McG. Gilmour in 1959. William Donoghue was fully appointed in 1966 and Barry Reichelt followed in 1973, prior to the present postmaster, Peter Jolly in November 1982. Peter is a young man with 18 years' experience. He commenced his training as a postal clerk at the training school in Melbourne in 1968 and was promoted to postal clerk at the Brunswick Post Office in 1969. He was finally transferred as postmaster to Fawkner Post Office in 1980. He has been at Eltham Post Office for the past 2½ years. He is married with one child and lives in Montmorency. The Eltham Post Office employs a staff of 21, of whom seven are indoor staff, 12 are postmen and two are drivers. The postmen in Eltham have an uphill battle delivering mail because of the hilly terrain. Nine of the postmen deliver mail on motorbikes, and the two delivery vans are both four wheel drives. Eltham Post Office services basically a residential area, with deliveries to 5600 homes. This is growing at the rate of 600 homes every 18 months, i.e. about 32 homes per month. At the present rate we will need a new postman every 18 months.Digital file only - Digitised by EDHS from a scrapbook on loan from Beryl Bradbury (nee Stokes), daughter of Frank Stokes.anderson's creek, anne hunniford, b.m. burgoyne, barry reichelt, beryl bradbury (nee stokes) collection, eltham police station, eltham post office, eltham post office history, gold, h.c. burgoyne, j.j. o'connor, j.n. burgoyne, peter jolly, postmaster, telephone exchange, thomas hunniford, w.e. tovey, william donoghue -
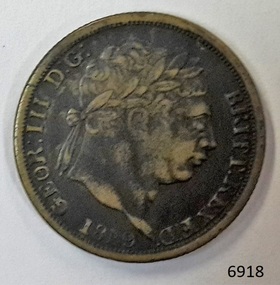 Flagstaff Hill Maritime Museum and Village
Currency - Coin, 1819
This Great Britain shilling is dated 1819, the year before King George III died. There were over 7 million of these coins minted. King George III succeeded his grandfather, King George II, on the throne in 1760. He reigned until his death on 29th January 1820. The shield in the centre of the reverse of the coin is the Hanoverian Shield, showing that the House of Hanover was elected to the crown rather than taking the crown as a victory. This coin’s denomination is not inscribed on the coin but it has been identified as a shilling from information about the King George III currency 1816-1820. - The 6 pence coin is 19mm - This Shilling is 24mm (the same size as this coin) - The Half Crown is 32mm British coins such as this one shilling were in circulation in the colony of Australia until 1910, when the Commonwealth of Australia began producing its own coinage. This coin was minted by the Royal Mint at Royal Mint Court, in Little Tower Hill, London, England. Coins for circulation in the Kingdom of England, Great Britain and most of the British Empire were produced here until the 1960’s when the Royal Mint shifted location to Wales. The obverse side of the coin’s inscription translation is “George III by the Grace of God, King of the British territories, Defender of the Faith”. The engraver of the obverse image was Benedetto Pistrucci. The reverse side’s inscription on the coin is translated "Evil to him who evil thinks” The engraver of the reverse image was Thomas Wyon. AUSTRALIAN CURRENCY The early settlers of Australia brought their own currency with them so a wide variety of coins, tokens and even ‘promissory’ notes (often called IOU’s) were used in the exchange of goods and services. In 1813 40,000 silver Spanish dollars, purchased by the English government, were delivered to Sydney to help resolve the currency problem reported by Governor Macquarie. The coins were converted for use by punching a hole in the centre of the coin. Both the outer ring, called the holey dollar, and the punched out ‘hole’, called the dump, were then used as the official currency. The holey dollars hold the place of being the first distinctively Australian coins. In 1825 the British Government passed the Sterling Silver Currency Act, making the British Pound the only legal form of currency in the Australian colonies. Not enough British currency was imported into the colony so other forms of currency were still used. In the mid 1800’s Australia entered the Gold Rush period when many made their fortunes. Gold was used for trading, often shaped into ingots, stamped with their weight and purity, and one pound tokens. In 1852 the Adelaide Assay Office, without British approval, made Australia’s first gold coin to meet the need for currency in South Australia after the Gold Rush began. In 1855 the official Australian Mint opened in Sydney, operating as a branch of the Royal Mint in London, and the gold was turned into coins called ‘sovereigns’. Other branches also opened in Melbourne and Perth. Up to the time Australia became a federation in 1901 its currency included British copper and silver coins, Australian gold sovereigns, locally minted copper trade tokens, private banknotes, New South Wales and Queensland government treasury notes and Queensland government banknotes. After Federation, the Australian government began to overwrite privately issued notes and prepared for the introduction of its own currency. In 1910 a National Australian Currency was formed, based on the British currency of ‘pounds, shillings and pence’ and the first Commonwealth coining was produced. In 1966, on February 14th, Australia changed over to the decimal currency system of dollars and cents. Australia did not have its own currency in the colonial times. Settlers brought money from other countries and they also traded goods such as grain when currency was scarce. For a long time there was no standardised value for the different currencies. In 1825 British currency became the only official currency in the colony of Australia and coins such as this silver shilling were imported into Australia to replace the mixture of foreign currency. Australia became a Federated nation on 1st January 1901. In 1910 National Australian Currency was formed and Australia produced its own currency, based on the British ‘pounds, shillings and pence’. The British currency was no longer valid. This silver shilling is of national significance as it represents the British currency used in Australia from 1825-1910. Coin, Great Britain shilling, 1819. Silver coin, round. Obverse; King George III head, looking right. Reverse; crown on top of quartered shield, 2 diagonally opposite quarters both show 3 lions, another quarter has a rampant lion, another quarter has a harp; in the centre of the shield is a small crowned shield with 3 symbols that appear to be lions. Inscriptions on both sides of coin (denomination not inscribed).Obverse “GEOR . III D . G . BRITT . REX F . D .” and “1819” Reverse “HONI . SOIT . Q [UI obscured] . MAL . Y . PENSE” flagstaff hill, warrnambool, shipwrecked coast, flagstaff hill maritime museum, maritime museum, shipwreck coast, flagstaff hill maritime village, great ocean road, coin, currency, money, legal tender, australian currency history, royal mint, great britain shilling 1819, king george iii currency, colonial australia currency, benedetto pistrucci, thomas wyon, numismatics -
 Flagstaff Hill Maritime Museum and Village
Currency - Coin, 1819
This Great Britain shilling is dated 1819, the year before King George III died. There were over 7 million of these coins minted. King George III succeeded his grandfather, King George II, on the throne in 1760. He reigned until his death on 29th January 1820. The shield in the centre of the reverse of the coin is the Hanoverian Shield, showing that the House of Hanover was elected to the crown rather than taking the crown as a victory. This coin’s denomination is not inscribed on the coin but it has been identified as a shilling from information about the King George III currency 1816-1820. - The 6 pence coin is 19mm - This Shilling is 24mm (the same size as this coin) - The Half Crown is 32mm British coins such as this one shilling were in circulation in the colony of Australia until 1910, when the Commonwealth of Australia began producing its own coinage. This coin was minted by the Royal Mint at Royal Mint Court, in Little Tower Hill, London, England. Coins for circulation in the Kingdom of England, Great Britain and most of the British Empire were produced here until the 1960’s when the Royal Mint shifted location to Wales. The obverse side of the coin’s inscription translation is “George III by the Grace of God, King of the British territories, Defender of the Faith”. The engraver of the obverse image was Benedetto Pistrucci. The reverse side’s inscription on the coin is translated "Evil to him who evil thinks” The engraver of the reverse image was Thomas Wyon. AUSTRALIAN CURRENCY The early settlers of Australia brought their own currency with them so a wide variety of coins, tokens and even ‘promissory’ notes (often called IOU’s) were used in the exchange of goods and services. In 1813 40,000 silver Spanish dollars, purchased by the English government, were delivered to Sydney to help resolve the currency problem reported by Governor Macquarie. The coins were converted for use by punching a hole in the centre of the coin. Both the outer ring, called the holey dollar, and the punched out ‘hole’, called the dump, were then used as the official currency. The holey dollars hold the place of being the first distinctively Australian coins. In 1825 the British Government passed the Sterling Silver Currency Act, making the British Pound the only legal form of currency in the Australian colonies. Not enough British currency was imported into the colony so other forms of currency were still used. In the mid 1800’s Australia entered the Gold Rush period when many made their fortunes. Gold was used for trading, often shaped into ingots, stamped with their weight and purity, and one pound tokens. In 1852 the Adelaide Assay Office, without British approval, made Australia’s first gold coin to meet the need for currency in South Australia after the Gold Rush began. In 1855 the official Australian Mint opened in Sydney, operating as a branch of the Royal Mint in London, and the gold was turned into coins called ‘sovereigns’. Other branches also opened in Melbourne and Perth. Up to the time of Australia becoming a federation in 1901 its currency included British copper and silver coins, Australian gold sovereigns, locally minted copper trade tokens, private banknotes, New South Wales and Queensland government treasury notes and Queensland government banknotes. After Federation the Australian government began to overwrite privately issued notes and prepared for the introduction of its own currency. In 1910 a National Australian Currency was formed, based on the British currency of ‘pounds, shillings and pence’ and the first Commonwealth coining was produced. In 1966, on February 14th, Australia changed over to the decimal currency system of dollars and cents. Australia did not have its own currency in the colonial times. Settlers brought money from other countries and they also traded goods such as grain when currency was scarce. For a long time there was no standardised value for the different currencies. In 1825 British currency became the only official currency in the colony of Australia and coins such as this silver shilling were imported into Australia to replace the mixture of foreign currency. Australia became a Federated nation on 1st January 1901. In 1910 National Australian Currency was formed and Australia produced its own currency, based on the British ‘pounds, shillings and pence’. The British currency was no longer valid. This silver shilling is of national significance as it represents the British currency used in Australia from 1825-1910. Coin, Great Britain shilling, 1819. Silver coin, round. Obverse; King George III head, looking right. Reverse; crown on top of quartered shield, 2 diagonally opposite quarters each show 3 lions, another quarter has a rampant lion, another quarter has a harp; in the centre of the shield is a small crowned shield with 3 symbols that appear to be lions. Inscriptions on both sides of coin (denomination not inscribed).Obverse “GEOR . III D . G . BRITT . REX F . D .” and “1819” Reverse “HONI . SOIT . Q [UI obscured] . MAL . Y . PENSE” flagstaff hill, warrnambool, shipwrecked coast, flagstaff hill maritime museum, maritime museum, shipwreck coast, flagstaff hill maritime village, great ocean road, coin, currency, money, legal tender, australian currency history, royal mint, great britain shilling 1819, king george iii currency, colonial australia currency, benedetto pistrucci, thomas wyon, numismatics -
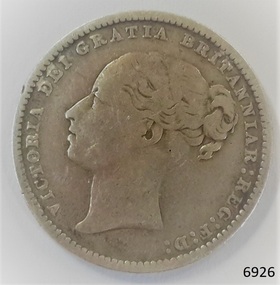 Flagstaff Hill Maritime Museum and Village
Currency - Coin, 1883
This Great Britain one shilling coin is dated 1883, which is during the reign of Queen Victoria. There were over 7 million of these coins minted. Queen Victoria succeeded King William IV to the British Throne in 1837 – she was only 18 years old at the time – and she ruled until 1901. British coins such as this one shilling were in circulation in the colony of Australia until 1910, when the Commonwealth of Australia began producing its own coinage. This one shilling coin was minted by the Royal Mint at Royal Mint Court, in Little Tower Hill, London, England. Coins for circulation in the Kingdom of England, Great Britain and most of the British Empire were produced here until the 1960’s when the Royal Mint shifted location to Wales. There are three main groups of shillings produced during Queen Victoria’s reign:- - The Young Head; 1837-1887, in 8 different versions, on the obverse showing the Queen’s maturing face over 50 years. - The Junior Head; 1887-1892, minted when Queen Victoria had been reigning for 50 years. Her head was smaller on the coins minted 1887-1889 than on those shillings minted 1889-1892. - The Old Head; 1893-1901, shows the veiled head of Queen Victoria. The obverse side of the coin’s inscription translation is “Victoria by the Grace of God, Queen of the British territories, Defender of the Faith”. The engraver of the obverse image was William Wyon. The reverse side of the coin is inscribed "ONE SHILLING. The engraver of the reverse image was Jean Baptiste Merlen. AUSTRALIAN CURRENCY The early settlers of Australia brought their own currency with them so a wide variety of coins, tokens and even ‘promissory’ notes (often called IOU’s) were used in the exchange of goods and services. In 1813 40,000 silver Spanish dollars, purchased by the English government, were delivered to Sydney to help resolve the currency problem reported by Governor Macquarie. The coins were converted for use by punching a hole in the centre of the coin. Both the outer ring, called the holey dollar, and the punched out ‘hole’, called the dump, were then used as the official currency. The holey dollars hold the place of being the first distinctively Australian coins. In 1825 the British Government passed the Sterling Silver Currency Act, making the British Pound the only legal form of currency in the Australian colonies. Not enough British currency was imported into the colony so other forms of currency were still used. In the mid 1800’s Australia entered the Gold Rush period when many made their fortunes. Gold was used for trading, often shaped into ingots, stamped with their weight and purity, and one pound tokens. In 1852 the Adelaide Assay Office, without British approval, made Australia’s first gold coin to meet the need for currency in South Australia after the Gold Rush began. In 1855 the official Australian Mint opened in Sydney, operating as a branch of the Royal Mint in London, and the gold was turned into coins called ‘sovereigns’. Other branches also opened in Melbourne and Perth. Up to the time of Australia becoming a federation in 1901 its currency included British copper and silver coins, Australian gold sovereigns, locally minted copper trade tokens, private banknotes, New South Wales and Queensland government treasury notes and Queensland government banknotes. After Federation the Australian government began to overwrite privately issued notes and prepared for the introduction of its own currency. In 1910 a National Australian Currency was formed, based on the British currency of ‘pounds, shillings and pence’ and the first Commonwealth coining was produced. In 1966, on February 14th, Australia changed over to the decimal currency system of dollars and cents. Australia did not have its own currency in the colonial times. Settlers brought money from other countries and they also traded goods such as grain when currency was scarce. For a long time there was no standardised value for the different currencies. In 1825 British currency became the only official currency in the colony of Australia and coins such as this silver shilling were imported into Australia to replace the mixture of foreign currency. Australia became a Federated nation on 1st January 1901. In 1910 National Australian Currency was formed and Australia produced its own currency, based on the British ‘pounds, shillings and pence’. The British currency was no longer valid. This silver shilling is of national significance as it represents the British currency used in Australia from 1825-1910. Coin, Great Britain Shilling, 1883. Silver coin, round. Obverse; Queen Victoria head, ‘Young Head’, looking left. Reverse; crown on top of wreath. Inscriptions on both sides of coin.Obverse “VICTORIA DEI GRATIA BRITANNIAR: REG: F: D :” Reverse “ONE SHILLING, 1883” flagstaff hill, warrnambool, shipwrecked coast, flagstaff hill maritime museum, maritime museum, shipwreck coast, flagstaff hill maritime village, great ocean road, coin, currency, money, legal tender, australian currency history, royal mint, great britain shilling 1883, queen victoria currency, colonial australia currency, wlliam wyon, jean baptiste merlen, numismatics -
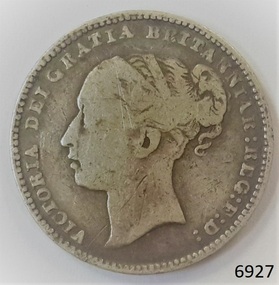 Flagstaff Hill Maritime Museum and Village
Currency - Coin, 1885
This Great Britain one shilling coin is dated 1885, which is during the reign of Queen Victoria. There were over 3 million of these coins minted. Queen Victoria succeeded King William IV to the British Throne in 1837 – she was only 18 years old at the time – and she ruled until 1901. British coins such as this one shilling were in circulation in the colony of Australia until 1910, when the Commonwealth of Australia began producing its own coinage. This one shilling coin was minted by the Royal Mint at Royal Mint Court, in Little Tower Hill, London, England. Coins for circulation in the Kingdom of England, Great Britain and most of the British Empire were produced here until the 1960’s when the Royal Mint shifted location to Wales. There are three main groups of shillings produced during Queen Victoria’s reign:- - The Young Head; 1837-1887, in 8 different versions, on the obverse showing the Queen’s maturing face over 50 years. - The Junior Head; 1887-1892, minted when Queen Victoria had been reigning for 50 years. Her head was smaller on the coins minted 1887-1889 than on those shillings minted 1889-1892. - The Old Head; 1893-1901, shows the veiled head of Queen Victoria. The obverse side of the coin’s inscription translation is “Victoria by the Grace of God, Queen of the British territories, Defender of the Faith”. The engraver of the obverse image was William Wyon. The reverse side of the coin is inscribed "ONE SHILLING. The engraver of the reverse image was Jean Baptiste Merlen. AUSTRALIAN CURRENCY The early settlers of Australia brought their own currency with them so a wide variety of coins, tokens and even ‘promissory’ notes (often called IOU’s) were used in the exchange of goods and services. In 1813 40,000 silver Spanish dollars, purchased by the English government, were delivered to Sydney to help resolve the currency problem reported by Governor Macquarie. The coins were converted for use by punching a hole in the centre of the coin. Both the outer ring, called the holey dollar, and the punched out ‘hole’, called the dump, were then used as the official currency. The holey dollars hold the place of being the first distinctively Australian coins. In 1825 the British Government passed the Sterling Silver Currency Act, making the British Pound the only legal form of currency in the Australian colonies. Not enough British currency was imported into the colony so other forms of currency were still used. In the mid 1800’s Australia entered the Gold Rush period when many made their fortunes. Gold was used for trading, often shaped into ingots, stamped with their weight and purity, and one pound tokens. In 1852 the Adelaide Assay Office, without British approval, made Australia’s first gold coin to meet the need for currency in South Australia after the Gold Rush began. In 1855 the official Australian Mint opened in Sydney, operating as a branch of the Royal Mint in London, and the gold was turned into coins called ‘sovereigns’. Other branches also opened in Melbourne and Perth. Up to the time of Australia becoming a federation in 1901 its currency included British copper and silver coins, Australian gold sovereigns, locally minted copper trade tokens, private banknotes, New South Wales and Queensland government treasury notes and Queensland government banknotes. After Federation the Australian government began to overwrite privately issued notes and prepared for the introduction of its own currency. In 1910 a National Australian Currency was formed, based on the British currency of ‘pounds, shillings and pence’ and the first Commonwealth coining was produced. In 1966, on February 14th, Australia changed over to the decimal currency system of dollars and cents. Australia did not have its own currency in the colonial times. Settlers brought money from other countries and they also traded goods such as grain when currency was scarce. For a long time there was no standardised value for the different currencies. In 1825 British currency became the only official currency in the colony of Australia and coins such as this silver shilling were imported into Australia to replace the mixture of foreign currency. Australia became a Federated nation on 1st January 1901. In 1910 National Australian Currency was formed and Australia produced its own currency, based on the British ‘pounds, shillings and pence’. The British currency was no longer valid. This silver shilling is of national significance as it represents the British currency used in Australia from 1825-1910. Coin, Great Britain Shilling, 1885. Silver coin, round. Obverse; Queen Victoria head, ‘Young Head’, looking left. Reverse; crown on top of wreath. Inscriptions on both sides of coin.Obverse “VICTORIA DEI GRATIA BRITANNIAR : REG : F : D :” Reverse “ONE SHILLING, 1885” flagstaff hill, warrnambool, shipwrecked coast, flagstaff hill maritime museum, maritime museum, shipwreck coast, flagstaff hill maritime village, great ocean road, coin, currency, money, legal tender, australian currency history, royal mint, great britain shilling 1885, queen victoria currency, colonial australia currency, wlliam wyon, jean baptiste merlen, numismatics -
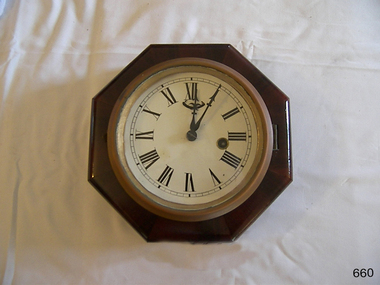 Flagstaff Hill Maritime Museum and Village
Clock, 1867-1870
Chauncey Jerome (1793–1868) was an American clock maker in the early to mid 19th century. He made a fortune selling his clocks, and his business grew quickly. Jerome was born in Canaan USA in 1793 son of a blacksmith and nail-maker. He began his career in Plymouth, making dials for long-case clocks where he learned all he could about clocks, particularly clock cases, and then went to New Jersey to make seven-foot cases for clocks mechanisms. In 1816 he went to work for Eli Terry making "Patent Shelf Clocks," learning how to make previously handmade cases using machinery. Deciding to go into business for himself, Jerome began to make cases, trading them to Terry for wooden movements. In 1822 Jerome moved his business to Bristol New Haven, opening a small shop with his brother Noble and began to produce a 30-hour and eight-day wooden clocks. By 1837 Jerome's company was selling more clocks than any of his competitors. A one-day wood-cased clock, which sold for six dollars had helped put the company on the map. A year later his company was selling that same clock for four dollars. The company also sold one line of clocks at a wholesale price of 75 cents and by 1841 the company was showing an annual profit of a whopping $35,000, primarily from the sale of its brass movements. In 1842 Jerome moved his clock-case manufacturing operation to St. John Street in New Haven. Three years later, following a fire that destroyed the Bristol plant, Jerome relocated the entire operation to Elm City factory. Enlarging the plant, the company soon became the largest industrial employer in the city, producing 150,000 clocks annually. In 1850 Jerome formed the Jerome Manufacturing Co. as a joint-stock company with Benedict & Burnham, brass manufacturers of Waterbury. In 1853 the company then became known as the New Haven Clock Co, producing 444,000 clocks and timepieces annually, then the largest clock maker in the world. Jerome's future should have been secure but in 1855 he bought out a failed Bridgeport clock company controlled by P.T. Barnum, which wiped him out financially, leaving the Jerome Manufacturing Co. bankrupt. Jerome never recovered from the loss. By his admission, he was a better inventor than a businessman. When Jerome went bankrupt in 1856 the New Haven Clock Company purchased the company. One of the primary benefits of Jerome purchasing New Haven in the first place was the good reputation of the Jerome brand and the network of companies that remained interested in selling its clocks. In England, Jerome & Co. Ltd. sold Jerome clocks for the New Haven company until 1904, when New Haven purchased the English firm outright. After his involvement with the New Haven Company in 1856, Jerome traveled from town to town, taking jobs where he could, often working for clock companies that had learned the business of clock making using Jerome's inventions. On returning to New Haven near the end of his life, he died, penniless, in 1868 at the age of 74. The company struggled on after Jerome's bankruptcy until after World War II, when the company endeavored to continue through disruptions caused by a takeover along with poor sales, finally having to fold its operations in 1960 a little more than 100 years after it had been founded. The item is significant as it is associated with Chauncey Jerome who had made a historic contribution to the clock making industry during the 19th century when he began to substitute brass mechanisms for wooden mechanisms in his clocks. This was said to be the greatest and most far-reaching contribution to the clock industry. Because of his discovery of stamping out clockwork gears rather than using castings, Jerome was producing the lowest-priced clocks in the world. That can only add to his significance as the major clock manufacture of the 19th century. Jerome may have made and lost, a fortune selling his clocks but was perhaps the most influential and creative person associated with the American clock business during the mid-19th century. Also, he had served his community as a legislator in 1834, a Presidential elector in 1852 and mayor of New Haven, Connecticut from 1854 to 1855.Eight day movement wall clock with Roman numerals, octagonal shaped rosewood veneered casing, hinged face with locking clip. Wound from front. Face has adjustment for Fast-to-Slow.Part paper label on back of case can just make out "Jerome" and "ight and One" probable meaning is "Eight and One Day" describing the movements operational time between winding the mechanism.flagstaff hill, warrnambool, shipwrecked-coast, flagstaff-hill, flagstaff-hill-maritime-museum, maritime-museum, shipwreck-coast, flagstaff-hill-maritime-village, clock maker, jerome & co, new haven, chauncey jerome, canaan -
 Federation University Historical Collection
Book, Gippsland Institute of Advanced Education Handbooks, 1970-1985
.1) 1977 Gippsland Institute of Advanced Education Handbook with white cover .2) 1978 Gippsland Institute of Advanced Education Handbook with blue/black cover .3) 1979 Gippsland Institute of Advanced Education Handbook with orange cover .4) 1980 Gippsland Institute of Advanced Education Handbook with yellow/brown cover .5) 1981 Gippsland Institute of Advanced Education Handbook with grey/black cover .6 1984 Gippsland Institute of Advanced Education Handbook with blue cover .7) 1985 Gippsland Institute of Advanced Education Handbook with purple cover .8) 1989 Gippsland Institute of Advanced Education Handbook with white/purple/grey/red/blue cover .7) 1985 Gippsland Institute of Advanced Education Handbook with pale green cover. .9) 1974 Gippsland Institute of Advanced Education Handbook with orangeand white cover .10) 1975 Gippsland Institute of Advanced Education Handbook with green and white cover .11) 1976 Gippsland Institute of Advanced Education Handbook with white cover .12) 1986 Gippsland Institute of Advanced Education Handbook with mid-blue cover .13) 1987 Gippsland Institute of Advanced Education Handbook with red cover .14) 1988 Gippsland Institute of Advanced Education Handbook with red cover .15) 1973 Gippsland Institute of Advanced Education Handbook with brown cover .16) 1972 Gippsland Institute of Advanced Education Handbook with pale green cover .17) 1971 Gippsland Institute of Advanced Education Handbook with mid-blue cover non-fictiongippsland institute of advanced education, giae, gippsland, churchill, morwell, electricty, handbook, gippsland campus -
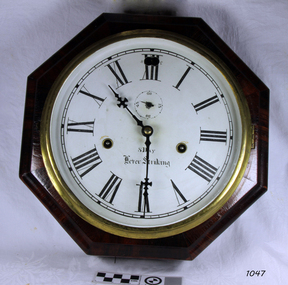 Flagstaff Hill Maritime Museum and Village
Clock, 1867-1870
Chauncey Jerome (1793–1868) was an American clock maker in the early to mid 19th century. He made a fortune selling his clocks, and his business grew quickly. Jerome was born in Canaan USA in 1793 son of a blacksmith and nail-maker. He began his career in Plymouth, making dials for long-case clocks where he learned all he could about clocks, particularly clock cases, and then went to New Jersey to make seven-foot cases for clocks mechanisms. In 1816 he went to work for Eli Terry making "Patent Shelf Clocks," learning how to make previously handmade cases using machinery. Deciding to go into business for himself, Jerome began to make cases, trading them to Terry for wooden movements. In 1822 Jerome moved his business to Bristol New Haven, opening a small shop with his brother Noble and began to produce a 30-hour and eight-day wooden clocks. By 1837 Jerome's company was selling more clocks than any of his competitors. A one-day wood-cased clock, which sold for six dollars had helped put the company on the map. A year later his company was selling that same clock for four dollars. The company also sold one line of clocks at a wholesale price of 75 cents and by 1841 the company was showing an annual profit of a whopping $35,000, primarily from the sale of its brass movements. In 1842 Jerome moved his clock-case manufacturing operation to St. John Street in New Haven. Three years later, following a fire that destroyed the Bristol plant, Jerome relocated the entire operation to Elm City factory. Enlarging the plant, the company soon became the largest industrial employer in the city, producing 150,000 clocks annually. In 1850 Jerome formed the Jerome Manufacturing Co. as a joint-stock company with Benedict & Burnham, brass manufacturers of Waterbury. In 1853 the company then became known as the New Haven Clock Co, producing 444,000 clocks and timepieces annually, then the largest clock maker in the world. Jerome's future should have been secure but in 1855 he bought out a failed Bridgeport clock company controlled by P.T. Barnum, which wiped him out financially, leaving the Jerome Manufacturing Co. bankrupt. Jerome never recovered from the loss. By his admission, he was a better inventor than a businessman. When Jerome went bankrupt in 1856 the New Haven Clock Company purchased the company. One of the primary benefits of Jerome purchasing New Haven in the first place was the good reputation of the Jerome brand and the network of companies that remained interested in selling its clocks. In England, Jerome & Co. Ltd. sold Jerome clocks for the New Haven company until 1904, when New Haven purchased the English firm outright. After his involvement with the New Haven Company in 1856, Jerome traveled from town to town, taking jobs where he could, often working for clock companies that had learned the business of clock making using Jerome's inventions. On returning to New Haven near the end of his life, he died, penniless, in 1868 at the age of 74. The company struggled on after Jerome's bankruptcy until after World War II, when the company endeavored to continue through disruptions caused by a takeover along with poor sales, finally having to fold its operations in 1960 a little more than 100 years after it had been founded. The item is significant as it is associated with Chauncey Jerome who had made a historic contribution to the clock making industry during the 19th century when he began to substitute brass mechanisms for wooden mechanisms in his clocks. This was said to be the greatest and most far-reaching contribution to the clock industry. Because of his discovery of stamping out clockwork gears rather than using castings, Jerome was producing the lowest-priced clocks in the world. That can only add to his significance as the major clock manufacture of the 19th century. Jerome may have made and lost, a fortune selling his clocks but was perhaps the most influential and creative person associated with the American clock business during the mid-19th century. Also, he had served his community as a legislator in 1834, a Presidential elector in 1852 and mayor of New Haven, Connecticut from 1854 to 1855.Clock, marine, in octagonal rosewood veneer case. Roman numerals to dial, has a seconds dial. 2 key-winding holes slow-to-Fast adjustment pin through dial. Small lever in lower edge of case activates a chime. "8 day, 8 inch, Lever Striking escarpment " Paper label on the back of the clock "Jerome & Co, New Haven, Conn" "Manufacturers of every variety of Office and Home Clocks and Time Pieces".flagstaff hill, warrnambool, shipwrecked-coast, flagstaff-hill, flagstaff-hill-maritime-museum, maritime-museum, shipwreck-coast, flagstaff-hill-maritime-village, clock, jerome & co, new haven, clock maker, chauncey jerome -
 Kew Historical Society Inc
Certificate - Certificate of Appreciation to Mr John Watson Esq, Kew Methodist Church, 1907
"METHODIST CHURCH. In 1881, during the ministry of Rev. W. H. Fitchett, B.A., at Hawthorn, a number of members of the denomination living at Kew considered that the time was opportune for founding a local Church. The Superintendent of the Circuit, the Rev. W. A. Quick of Richmond, met the members and formed them into a society class under the leadership of Mr. A. Brown and a Church was formally instituted at the house of Mr. T. J. Eaton, of Eglinton Street, in December, 1881. Services were regularly held for some time at the same place, and funds for purchasing a block of land were gradually collected, resulting in the present site in Highbury Grove being purchased for £350. Messrs. W. Cleverdon, A. Money, T. E. Serpell, and T. Vasey, of Hawthorn, and Messrs. A. Brown, R. Eyre, and T. J. Eaton of Kew, were appointed trustees. A public meeting was held a the Town Hall, when over £100 was raised. The Rev. John Harcourt, who had just been placed on the supernumerary list, was persuaded to undertake the charge, and commenced services in the Town Hall on 29th April, 1882, which were continued for eighteen months. A Sunday School was started, and altogether the effort progressed so satisfactorily that in October, 1882, the foundation and memorial stones of the present Church were laid by Mr James Huddart. At the tea meeting held in connection with this event nearly £200 was raised and a few months later £250 more was obtained by means of a bazaar. The contract for building Church was let for £1,200. The Sunday School celebrated its first anniversary in June, and the Church was opened on 7th October 1883, the preachers on the occasion being Revs. E. J. Watkin, S. Chapman, and John Harcourt, the collections amounting to £230. Towards raising these sums of money the ladies of the congregation helped very materially. In 1886 the foundation stone of a Sunday school, to cost about £900, was laid by Mrs. H Berry, the building being opened in April 1887. During the same year the Church was enlarged. In 1889 parsonage was erected, and again arrangements had to be made for a further enlargement of the Church, at a cost of nearly £2,000. The foundation stones of the tower were laid by Rev J. Harcourt, and of the transepts by Mrs. Job Smith and Mrs. John Watson. These additions were made during the ministry of Rev. P. R. C. Ussher, the first minister appointed to Kew by conference. He has been succeeded by Revs. Henry Howard, J. de Q. Robin, J. J. Brown, J. G. Wheen, A. E. Albiston, M.A., and F. J. Nance, M.A., who is at present ably filling the pulpit. For the musical portion of the services, the Church has been greatly indebted to the enthusiasm of Mr. C. Gardner, the leader of the choir, and Mr. C. E. Gardner, the organist. The Sunday School has had a number of excellent workers, among whom may be mentioned Messrs. Burchett, Allum, Hillard, Tonkin, Dent, Avery, McDonald, Green, and B. Hoadley, who have acted as Superintendents, and Messrs. Arnall and McCaghern as Secretaries. The present trustees are Messrs. H. Berry, Job Smith, A. Hoadley, F. Vial, C. Powers, H. L. Carnegie, C. H. Green, W. R. Rylah, E. M. Tonkin, S. Gaylard, J. Gregory, J. R. McDonald, T. J. Eaton, F. S. Fitchett, and S. Lamble; Society Stewards, T. J. Eaton and B. Hoadley; Poor Stewards, G. Hinchliffe and G. Fraser; Church Stewards, C. H. Green and G. Hinchliffe; Treasurer, F. S. Fitchett; Secretary, S. Lamble." Source: FGA Barnard, Jubilee History of Kew, Victoria, 1910Commemorative tributes were regularly produced in the 19th and early 20th Century to honour community service. Most were adapted from traditional lithographed models. This example, while created within a formal lithographed border has been transmuted into the equivalent of an illuminated document, hand-painted, and therefore rare. The use of flowers in the design emphasises the sentimental and spiritual aspects of the certificate. The document is a rare unique record of the Kew Methodist Church's history.A hand written testimonial for John Watson Esq from the Trustees of the Kew Methodist Church. The customised colour lithograph includes, at lower left, a turn of the century photograph of the Kew Methodist Church in Highbury Grove. The entire certificate is surrounded by floral art and scroll work. The central text uses neo-gothic lettering.‘Dear Sir … in view of your compulsory retirement on health grounds, from the position of Church Steward, [the Trustees] desire to express their great appreciation of your long service of over 22 years, in that and other offices in the Church. They trust that you will yet be spared many years in fellowship with our Church, and that God’s richest blessing be on you, and your family. We remain, Yours sincerely A. E. Albiston (Minister), S. Lamble (Secretary), F. S. Fitchett (Treasurer), T. J. Eaton (Trustee), C. H. Green and Hubert S. Howell (Church Stewards); March 28th 1907’. john watson esq, kew methodist church, highbury grove, certificates, tesimonials -
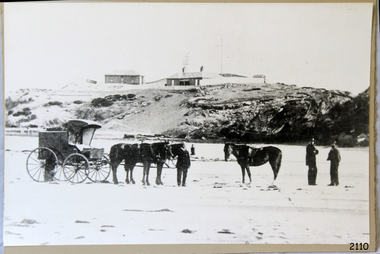 Flagstaff Hill Maritime Museum and Village
Photograph - Scene - Warrnambool, C. 1854-1871
This is an image of the Warrnambool Lighthouse Complex on Middle Island in 1854. The Store, Lighthouse Keeper's Quarters, Lighthouse and Flagstaff are in the background. The foreground shows a covered buggy drawn by two horses and a person in attendance, and another wheeled vehicle behind it with a figure nearby. There is a saddled horse to the right with two males in conversation nearby. The ground is soft, perhaps the riverbed or sandy shore. THE LIGHTHOUSE KEEPERS Lighthouse Keepers were responsible for keeping their Lighthouse’s lights shining at night. They kept a lookout for passing vessels and changes in weather. They were expected to clean, polish and maintain the equipment and buildings. They kept regular and detailed records of who was on watch, and the time the light was lit, trimmed and extinguished. They kept a journal about other events that occurred. They keep regular, accurate Meteorological Logs. It was expected that they were competent in Morse code signalling. They would be called to help in times of disasters and shipwrecks and to give official statements about these events. Many Lighthouse Keepers also volunteered as members of the lifeboat crew. The Lady Bay lighthouses were officially classified as small, so the Keepers had the official titles of Senior Assistant Lighthouse Keeper and Assistant Lighthouse Keeper. They were employed by the Public Service and paid rent to live in the Lighthouse Quarters. They were compulsorily retired at the age of 60, with most receiving a superannuation payment. Despite their time-consuming duties, there was time to follow hobbies and crafts such as growing vegetables, playing musical instruments, making models of buildings including lighthouses, and crafting furniture pieces. An example of a keeper’s skills is the carved fire screen made by /assistant Keeper Thomas Hope in the late 19th century and displayed in the Lighthouse Keeper’s cottage at Flagstaff Hill. Both Alexander and Farncombe had served under Senior Keeper Robert Deverell, who was the first and only Senior Lighthouse Keeper at the Middle Island Complex. John Alexander was the Assistant Keeper in the 1850s. Andrew Farncombe was the last Assistant Keeper at Middle Island, serving there with his family from 1864 to 1871. During 1871 and 1872 the Lighthouse Complex was moved to Flagstaff Hill on Merri Street. Farncombe and Deverell then became the first Keepers and occupants of the Lady Bay Lighthouse Complex at Flagstaff Hill. They continued their service together; overall, Deverell served from 1859 to 1885 and Farncombe from 1864 to 1974. WARRNAMBOOL'S LADY BAY LIGHTHOUSE COMPLEX - The original Lighthouse Complex was built on Middle Island in 1858-1859 then transferred stone-by-stone to Flagstaff Hill in 1871. The Complex comprised the Lighthouse, the Lighthouse Keepers’ Quarters and a Privy. The bluestone Keeper’s Quarters was a cottage divided into two compartments, one for the Senior Keeper and his family, the other for the Assistant Keeper and his family. The bluestone Store was divided into three; a store, a workshop, and an oil store (or office). The Privy comprised a small building also divided into two separate, back-to-back toilets, one for each Keeper and his family. In the 1970s the Flagstaff Hill Planning Board was set up under the chairmanship of John Lindsay. The Board was to make recommendations to the Warrnambool City Council regarding the use of the buildings and the rest of the Crown Land on the site. The Flagstaff Hill Maritime Village opened in 1975 and began renovating the Cottage in stages, during which time evidence of a 1920s fire was found in the eastern section of the cottage. Additions of a porch on the west and a washroom on the east were made in the 1980s. The western part of the building is now a Shipwreck Museum and the east has returned to a late 19th-century Lighthouse Keeper’s cottage and includes the screen made by Assistant Lighthouse Keeper Thomas Hope in the late 19th century. Hope served two periods of time at the Lighthouse. This photograph is significant as a visual record of the original Warrnambool Lighthouse Complex on Middle Island, the origin of what is now the Lady Bay Lighthouse Complex. The photograph is significant for its connection to the Complex, which is now listed on the Victorian Heritage Register, H1520, for being of historical, scientific (technological) and architectural significance to the State of Victoria. The Complex is significant as an example of early colonial development. The photograph is significant for its connection with the important navigational function of the Lighthouses, a function still being performed to this day. The photograph is also significant as it shows an example of buildings organised by the Public Works Department in Victoria in the mid-to-late 19th century. The structures tare still stand strong. Photograph of horses, a buggy and three gentlemen in the foreground and the background shows a lighthouse and accompanying buildings. Printed in black and white. (Another two horse-drawn vehicles are partially visible). The subject is the Lighthouse Complex on Middle Island, Warrnambool, dated between 1854 and 1871.An inscription is handwritten in black pen on the back of the mounting board."The lighthouse and accompanying buildings were / established on Middle Island in 1854, as this / picture shows. In 1871 they were moved to their / present site on Flagstaff Hill."flagstaff hill, flagstaff hill maritime museum, flagstaff hill maritime village, warrnambool, maritime museum, shipwreck coast, lighthouse keeper's cottage, lighthouse residence, lighthouse, chart room, quarters, privy, middle island, beach lighthouse, obelisk, lighthouse complex, lady bay complex, warrnambool port, warrnambool harbour, lady bay, keepers, lighthouse keeper, upper lighthouse, lower lighthouse, assistant keeper, ports and harbours, cottage, meteorological record, 1854, 1871 -
 Eltham District Historical Society Inc
Photograph - Digital Photograph, Alan King, Allwood House, Hurstbridge, 16 April 2008
Allwood - built in 1894 by Henry Hurst’s relatives, stands near the site of his house, which was demolisherd in the 1940s. Until 1924 Hurstbridge was known as Allwood. The building, one of the district's oldest is situated back from the corner of Arthurs Creek Road and Main Road. Covered under Heritage Overlay, Nillumbik Planning Scheme Published: Nillumbik Now and Then / Marguerite Marshall 2008; photographs Alan King with Marguerite Marshall.; p17 Hurst, who was a surveyor, came to Melbourne in 1852 by default, as on the way to Sydney he contracted typhoid and was off-loaded in Melbourne. Deciding to settle near Melbourne, he selected some land near the present Eltham railway station and was one of the first to grow crops there.2 But disaster struck again, when his shack was looted and burned, while he was carting goods for sale to nearby goldfields. It was then that Hurstbridge’s first settler, Cornelius Haley, asked Hurst to manage his 160 acres (65ha) grazing property and 9000 acres (3443ha) of leased land where the present Hurstbridge stands. Hurst proved equal to the tough conditions and he and his brother, Fred, cut a track with a bullock team from the property to Romsey, where Haley had selected some land. Hurst also put up a bridge across the creek near his house, after which Hurstbridge was named. He ran the property helped by two ticket-of-leave men and others, several of whom were sailors who had abandoned ship in search of gold, and were working there temporarily. In 1866, only 14 years after coming to Australia, Hurst met an early tragic death. One day a bushranger named Burke came to the house and demanded a horse. Hurst thought the bushranger might be an officer in search of runaway sailors3 and anyway, did not like the look of him, so he refused. A tussle followed and apparently Hurst shot first.4 He was shot and died five hours later from loss of blood. Later, troopers found Burke, who was subsequently hanged. The event is recorded in the Old Melbourne Gaol. The government offered the family £500 but the family refused it as ‘blood money’. Hurst’s father, Robert, even signed a petition against the bushranger’s death, claiming one life did not replace another. Hurst’s family continued to live in the district and saw a rise in their fortunes. They bought Haley’s cattle station and built the present Allwood House, using the original home as an orchard packing shed. The present Victorian style timber house had several outbuildings including a blacksmith’s shop. The property passed on to William Gray, an orchardist and nurseryman, who married Hurst’s grandniece, Frances. The business boomed from the early 1900s when it supplied most of the orchards in the area. Gray was Eltham Shire’s President for two terms and was asked to stand for parliament, but his wife’s illness and other family commitments prevented him from doing so. Then several calamities drove the family to bankruptcy. During World War One, Gray lost more than one million pounds on trees shipped overseas, which the Lloyd’s company had refused to insure. Other factors, including the Great Depression, ruined the family’s fortunes. The land was reduced from more than 640 acres (256ha) to 50 acres (20ha) and the older members married and left. After Mr Gray died, the house was leased, until his daughter Sheila Ferguson and her husband Gordon settled there in 1951, after buying it from other family members. However in 1975 the Shire designated the property as a passive recreation reserve. The Ferguson family sold most of the land, leaving the house on 0.6 hectares.This collection of almost 130 photos about places and people within the Shire of Nillumbik, an urban and rural municipality in Melbourne's north, contributes to an understanding of the history of the Shire. Published in 2008 immediately prior to the Black Saturday bushfires of February 7, 2009, it documents sites that were impacted, and in some cases destroyed by the fires. It includes photographs taken especially for the publication, creating a unique time capsule representing the Shire in the early 21st century. It remains the most recent comprehenesive publication devoted to the Shire's history connecting local residents to the past. nillumbik now and then (marshall-king) collection, hurstbridge, henry hurst, allwood house -
 Eltham District Historical Society Inc
Photograph - Digital Photograph, Alan King, Downing-Le Gallienne house, Yarra Braes Road, Eltham, 30 January 2008
The property is a classic example of what made Eltham famous from the late 1940s to the 1960s. Covered under Heritage Overlay, Nillumbik Planning Scheme. Published: Nillumbik Now and Then / Marguerite Marshall 2008; photographs Alan King with Marguerite Marshall.; p149 The first view of the large double-storey house at Yarra Braes Road, Eltham South, is of a jutting roofline over a balcony, reminiscent of a large sailing vessel or galleon – very appropriate, considering the name of one of the first owners, Le Gallienne. The Downing-Le Gallienne property is a classic example of what made Eltham famous from the late 1940s to the 1960s and attracted so many artists and intellectuals to the area. Set in a largely indigenous bush-style garden, the mud-brick and timber house was built by Alistair Knox. It was built for economist Richard Downing, to become a founder of the welfare state in Australia and Chairman of the Australian Broadcasting Commission, and musician and composer Dorian Le Gallienne. Le Gallienne was a pioneering composer of modern music in Victoria before 1945, whose works included the Symphony in E.1 He wrote several pieces of film music for Eltham Films, including The Prize, working with its writer and artistic director Tim Burstall. Le Gallienne was also a music critic for The Argus and later for The Age. In 1967 the music critic Roger Covell argued that Le Gallienne’s Symphony, was ‘still the most accomplished and purposive . . . written by an Australian’. According to Alan Marshall the main inspiration behind the building that evolved from 1948 to 1964 was Le Gallienne. ‘He was able to see value in the simplest things and many who worked there had their eyes opened for the first time to the Eltham environment, to the bush and the trees and the fauna which lived there.’ The garden included no formality, no lawns, nor exotic plants. ‘Natural informal growth came right up to their doors and so did the indigenous birdlife.’ This informal style – consisting of mass and void – was to be developed and popularised by landscaper Gordon Ford from the 1950s. The large mud-brick and timber house, which was built in four stages and has three separate but linked sections, began as a small weekend retreat for the couple. In 1948, Downing and Le Gallienne (Dick and Dor to their friends), asked Knox to build the 36 x18 foot (11mx5.4m) building with a pitched slate roof. It was built on a concrete slab and included a fireplace, which is still in use. The second wing was built in 1954 after Downing had returned from working at the International Labour Office and the couple decided to live there full-time. The third section was built after the death of Le Gallienne in 1963, aged 48. He is buried in the Eltham Cemetery. When Downing married widow, Jean Norman (nee McGregor) and had to accommodate a large family, including her six children and one of their own, the last stage was built by 1964. At that time the house was considered one of the largest mud-brick houses in Victoria. It consists of five living areas, including a small ballroom. Several artists helped Knox build the Downing-Le Gallienne house, which was one of his first of mud-brick. They included painter Clifton Pugh, artist John Howley and actor Wynn Roberts. Ellis Stones had landscaped the first wing and Gordon Ford set the boulder steps and made a pool as part of the landscaping he completed. Inside, the mud-bricks are largely whitewashed with pine-lined ceilings and Oregon beams. A winding timber staircase in the front extends behind a glass window from the ground floor to the top. The property, of a little more than 0.5 ha, is bordered by Parks Victoria land, which extends to the Yarra River.This collection of almost 130 photos about places and people within the Shire of Nillumbik, an urban and rural municipality in Melbourne's north, contributes to an understanding of the history of the Shire. Published in 2008 immediately prior to the Black Saturday bushfires of February 7, 2009, it documents sites that were impacted, and in some cases destroyed by the fires. It includes photographs taken especially for the publication, creating a unique time capsule representing the Shire in the early 21st century. It remains the most recent comprehenesive publication devoted to the Shire's history connecting local residents to the past. nillumbik now and then (marshall-king) collection, dorian le gallienne, downing-le gallienne house, eltham, mudbrick construction, mudbrick houses, richard downing, yarra braes road -
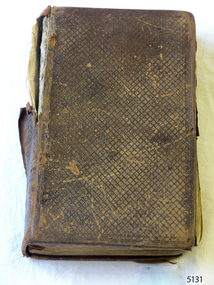 Flagstaff Hill Maritime Museum and Village
Book - Religious Book, The Holy Bible, 1836
This Holy Bible is entitled "The Holy Bible containing the Old and New Testaments, translated out of the original tongues: and with former translations diligently compared and revised by His Majesty's Spiritual Command." It was printed by Sir D. Hunter Blair and M.T. Bruce in Edinburgh, 1836, printers to the King's most Excellent Majesty, H.B.S." The Bible belonged to David and Alice Ellis, a young couple married in Dublin in 1855. It has been handed down in the Ellis family until it was donated, together with other personal effects, in 2004 by David and Alice’s granddaughter, daughter of David Ellis Junior. Alice treated the Bible as an important posession. On 6th October 1855 newlyweds David and Alice Ellis set sail for Australia in the brand new Schomberg, considered the most perfect clipper ship. She was built as an emigrant ship in Aberdeen and set sail from Liverpool on her maiden voyage, bound for Melbourne, Australia. She was loaded with 430 passengers plus cargo that included iron rails and equipment intended for building the Geelong Railway and a bridge over the Yarra from Melbourne to Hawthorn. On 27th December 1855, only one day from her Melbourne destination, the Schomberg was grounded on a sand-spit on the Victorian coast near Peterborough. The passengers and crew were all safely rescued by a passing small steamer, the SS Queen, which traded between Melbourne and Warrnambool, and taken to Melbourne. The passengers had been told, when leaving the sinking Schomberg, that all they could take with them was a small basket or handbag. A newspaper article later mentioned that one of the things Alice made space for in her basket was her Bible. (It is unclear whether Alice took any possessions with her onto the SS Queen, but a note accompanying the donation of the Bible and basket states that the items were “left on deck and salvaged as Schomberg went down”.) Another steamer was despatched from Melbourne to retrieve the passengers’ luggage from the Schomberg and Alice was reunited with all of her boxes of belongings. Other steamers helped unload the cargo until the change in weather made it too difficult. Although the Schomberg was wrecked there were no lives lost. At that time David was 23 years old (born in Wales, 1832) and his new bride Alice was 26 (born in Dublin, 1829). They had been given letters of introduction to people in Tasmania so they travelled there from Melbourne. However the couple only stayed on that island for about a year before they returned to the Western District of Victoria. David worked for Mr Neil Black as a gardener for a while then, when the land in the area was made available by the Victorian government, David and Alice claimed a selection of land on Noorat Road in the Terang district. They settled there for the remainder of their lives, expanding their property “Allambah” as opportunities arose. A document accompanying the donation lists the names of six children; William, Grace (c. 1859-1946), Thomas (c. 1866 – 1939), David (c. 1962 – 1953), James and Victor. David died on 13th April 1911, aged 79, at their property. Alice passed away the following year, November 1912, aged 83. Alice’s obituary described her as “a very homely, kindly-natured woman, who was highly esteemed by a large circle of friends; and she was also a firm adherent of the Presbyterian Church”. At the time of Alice’s death she left behind three sons and one daughter. Her daughter Grace Ellis was also a very active member of the Terang Presbyterian Church and a member of the PWMU (Presbyterian Women’s Missionary Union). She was also involved in the Red Cross and other charities. Grace passed away in 1946, aged 87. David and Alice Ellis were amongst the very earlies pioneers of the Terang district of Western Victoria. Their donated possessions are a sample of the personal effects of emigrants to Australia. The donated items are a sample of the personal goods carried aboard a significant migrant ship in 1855. They are also significant for their association with the Schomberg. The Schomberg, which is on the Victorian Heritage Register (VHR S612), has great historical significance as a rare example of a large, fast clipper ship on the England to Australia run, carrying emigrants at the time of the Victorian gold rush. She represents the technical advances made to break sailing records between Europe and Australia. Flagstaff Hill’s collection of artefacts from the Schomberg is significant for its association with the shipwreck, The collection is primarily significant because of the relationship between the objects, as together they have a high potential to interpret the story of the Schomberg. It is archaeologically significant as the remains of an international passenger Ship. It is historically significant for representing aspects of Victoria’s shipping history and for its association with the shipwreck and the ship, which was designed to be fastest and most luxurious of its day Bible, known as the Ellis - Schomberg Bible, with patterned brown leather cover. Printed by Sir D. Hunter Blair and M.T. Bruce, Edinburgh 1836. Bookmark of card placed within Bible’s pages is from Keswick Book Depot, Melbourne. Bible has hand written inscriptions inside front and back covers and has been well used. Bible was amongst the possessions of David and Alice Ellis, passengers on the Schomberg when wrecked in 1855.Scripture references and notes are hand written in pencil on front and back inner pages. Bookmark card has printed inscription; on front “BOOK MARK / KESWICK / BOOK / DEPOT / EVERYTHING / EVANGELISTIC / 315 COLLINS ST / MELBOURNE / CENT. 3013”, on back is line drawing of a stem of iris flowers above the verse “The entrance of Thy / words giveth light; it / giveth understanding / unto the Simple. Ps. 119-30” flagstaff hill, warrnambool, shipwrecked coast, flagstaff hill maritime museum, maritime museum, shipwreck coast, flagstaff hill maritime village, great ocean road, schomberg, holy bible, schomberg bible, d hunter blair and m t bruce, 1836 bible, 1855 shipwreck, peterborough shipwreck, ss queen, david ellis, alice ellis, allambah terang, dublin emigrants, terang presbyterian church, western district victoria -
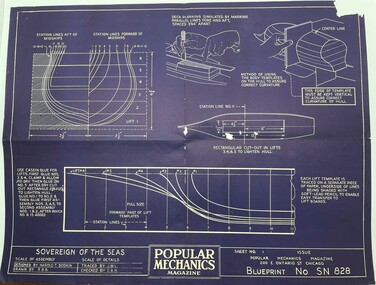 Flagstaff Hill Maritime Museum and Village
Work on paper - Sovereign of the Seas Model Blueprints, Popular Mechanics Press, "Sovereign of the Seas", 1933
A complete set of 8 blueprints from “Popular Mechanics Magazine”, Chicago. The blueprints are on a royal purple coloured paper with white print. Each print displays labelled diagrams to assist the hobbyist to assemble the ship model “Sovereign of the Seas”. The designer is Harold T. Bodkin. Distinct fold creases divide the documents into quarters. There is some silverfish damage leaving holes, however, all instructions are visible. flagstaff hill, warrnambool, maritime village, maritime museum, flagstaff hill maritime museum and village, shipwreck coast, great ocean road, model ship, vessel sovereign of the seas, jim williams, james bernard williams, the forth tasmania, freda williams, heather williams, phyllis bowditch, fletcher jones staff 1936, 17th century sailing ship, cramond and dickson, sovereign of the seas, royal sovereign, sovereign, charles 1, fletcher jones, warrnambool breakwater, popular mechanics magazine -
 Flagstaff Hill Maritime Museum and Village
Functional object - Padlock, c. 1855
This padlock has been salvaged from the wrecked sailing ship SCHOMBERG. It is not known whether the padlock was a part of the ship’s equipment or if it was among personal effects or cargo. At some point in time the padlock has been mounted and sealed in resin, perhaps for both display and preservation purposes. ABOUT THE SCHOMBERG When SCHOMBERG was launched in 1855, she was considered the “Noblest ship that ever floated on water.” SCHOMBERG’s owners, the Black Ball Line, commissioned the ship for their fleet of passenger liners. She was built by Alexander Hall of Aberdeen. Overall she had accommodation for 1000 passengers. SCHOMBERG’s 34 year old master, Captain ‘Bully’ Forbes, (James Nicol Forbes) was born in Aberdeen in 1821 and rose to fame with his record-breaking voyages on the famous Black Ball Line ships; MARCO POLO and LIGHTNING. On this, the SCHOMBERG’s maiden voyage, he was going to break records. SCHOMBERG departed Liverpool 6 October 1855 flying the sign “Sixty Days to Melbourne”. She carried 430 passengers and 3000 tons cargo including iron rails and equipment intended to build the Melbourne to Geelong Railway and a bridge over the Yarra from Melbourne to Hawthorn. She also carried a cow for fresh milk, pens for fowls and pigs, 90,000 gallons of water for washing and drinking, 17,000 letters and 31,800 newspapers. The ship and cargo was insured for $300,000, a fortune for the time. The winds were poor as she sailed across the equator, slowing SCHOMBERG’s journey considerably. Land was first sighted on Christmas Day, at Cape Bridgewater near Portland, and Captain Forbes followed the coastline towards Melbourne. Forbes was said to be playing cards when called by the Third Mate Henry Keen, who reported land about 3 miles off, Due in large part to the captain's regarding a card game as more important than his ship, it eventually ran aground on a sand spit near Curdie's Inlet (about 56 km west of Cape Otway) on 26 December 1855, 78 days after leaving Liverpool. The sand spit and the currents were not marked on Forbes’s map. The crew from the scouting party advised Forbes to wait until morning before trying to take the passengers to safety in the lifeboats because the rough seas could easily overturn the small vessels. The ship’s Chief Officer spotted SS QUEEN at dawn and signalled the steamer. The master of the SS QUEEN approached the stranded vessel and all of SCHOMBERG’s passengers and crew were able to disembark safely. The SCHOMBERG was lost and with her, Forbes’ reputation. The Black Ball Line’s Melbourne agent sent a steamer to retrieve the passengers’ baggage from the SCHOMBERG. Other steamers helped unload her cargo until the weather changed and prevented the salvage teams from accessing the ship. Later one plunderer found a case of Wellington boots, but alas, all were for the left foot! Local merchants Manifold & Bostock bought the wreck and cargo, but did not attempt to salvage the cargo that was still on board the ship. They eventually sold it on to a Melbourne businessman and two seafarers. In 1864, after two of the men drowned when they tried to reach SCHOMBERG, salvage efforts were abandoned. Parts of the SCHOMBERG were washed ashore on the south island of New Zealand in 1870, nearly 15 years after the wreck. The wreck now lies in almost 9 metres of water and the shape of the ship can still be seen due to the remaining railway irons, girders and the ship’s frame. A variety of goods and materials can be seen scattered about nearby. Flagstaff Hill holds many items salvaged from the SCHOMBERG including a ciborium (in which a diamond ring was concealed), communion set, ship fittings and equipment, personal effects, a lithograph, tickets, menu and photograph from the SCHOMBERG. This brass padlock is registered as an artefact in the SCHOMBERG collection. The SCHOMBERG collection as a whole is of historical and archaeological significance at a State level, listed on the Victorian Hertage Register VHR S612. Flagstaff Hill’s collection of artefacts from the SCHOMBERG is significant for its association with the Victorian Heritage Registered shipwreck. The collection is primarily significant because of the relationship between the objects, as together they have a high potential to interpret the story of the SCHOMBERG. The SCHOMBERG collection is archaeologically significant as the remains of an international passenger ship. The shipwreck collection is historically significant for representing aspects of Victoria’s shipping history and its potential to interpret sub-theme 1.5 of Victoria’s Framework of Historical Themes (living with natural processes). The collection is also historically significant for its association with the shipwreck and the ship, which was designed to be fastest and most luxurious of its day. The SCHOMBERG collection meets the following criteria for assessment: Criterion A: Importance to the course, or pattern, of Victoria’s cultural history. Criterion B: Possession of uncommon, rare or endangered aspects of Victoria’s cultural history. Criterion C: Potential to yield information that will contribute to an understanding of Victoria’s cultural Brass Padlock lying in a wooden block and encased in resin. The wood encasing the padlock has seven man-made holes in it, perhaps used to hand as a display. There was a paper label with an inscription on the top and bottom of the wood immediately surrounding the padlock. the brass has tarnished. Recovered from the wreck of the Schomberg in 1974.Marked on block - "Recovered 1974 'Schomberg'"flagstaff hill, warrnambool, shipwrecked-coast, flagstaff-hill, flagstaff-hill-maritime-museum, maritime-museum, shipwreck-coast, flagstaff-hill-maritime-village, padlock, schomberg shipwreck, brass padlock circa 1855, object salvaged from shipwreck, captain bully forbes, 19th century security hardware, sjouvenir, security, brass padlock -
Bendigo Historical Society Inc.
Document - BENDIGO OPERATIC SOCIETY'S 12TH PRODUCTION, CAPITAL THEATRE, 18 Oct. 1957
Bendigo Operatic Society's 12th Production, Capital Theatre. Fr., Sat., Mon., Tue., Wed. Oct. 18th, 19th, 21st, 22nd, 23rd 1957. Price, 1/- Bendigo Operatic Society President: Mr J Cannon, Vice-President: Mr C Bubb, Hon. Secretary: Mr B Thomas, Hon. Treasurer: Mr B Ralph Committee: Mesdames J Cannon, N McCarthy, C Blake, B McGregor, Miss M Welch, Messrs L Spencely, F Treawrne, J Smyth.. The Society acknowledges the help received from _ The Bendigo Advertiser, 3BO Bendigo, J L Howard (A Wearne, L Reed), Electrical Fittings Madge Welch, Studio and Properties, The Board of Management and Caretaker of the Capital Theatre, R Vincent Kelly- Photography, F Mamourney- Stage Furniture. Photo and brief write up on the following: Max O'Loghlen Musical Director, Norman Lee, Margaret Rule, Brian Thomas. Ballet: Kathleen Goss, Valerie Cartwright, Shirley Harding, Suzanne Tunzi, June Luke, Maureen Doyle, Marlene Holt, Ann Stone. Ladies of the ensemble: Marilyn Smith, Sandra Cannon, Lorraine Rigg, Dawn Beck with, Betty Cullen, Olive Hamilton, Ethel Harris, Dorothy Field, Joy Hartley, Margaret Manderson, Gwen Manderson, Nancy Walker, Joan Hokin, Aileen Simmonds, Anne Hassett, June Mason, Lorna Paynter, Patricia Lyon, Jess Millikins, Helen Jalland, Edna Tudball Smith, Ronda Miller. Gentlemen of the ensemble: Alan Ewart, Bob Nicholls, Fred Trewarne, Davis Elvery, Don Chisholm, Adrian Van Dyke, John McGregor, Bill Banks, Joseph Quigg, John Gowty, Ian Beckwith, Andrew Nelson, Fred Smith, Malcolm Cannon, Reg Boromeo. Members of the orchestra: Miss A McNair, Mrs S Grant, Mrs V Messer, Mr T Conolan. Mr E Jarrett, Mrs C Bubb, Mr C Bubb, Miss N Brache, Mr C Hargreaves, Mr R Holyoake, Mr G Mackay, Mr K Holland, Mr C Holmes, Mr J May, Mr B Armstrong, Mr N Pierce. Cast of Characters: Mervyn Penno, Alfred Annison, Max Beckwith, Greta Smyth, Alfred Austin, Brian Brewer, Rosalie Spencely, Harry Brewer, Alan Ewart, Adrian Van Dyke, Margaret Rule, Bert Donavan, Barbara McGregor, Coral Shiell, Charles Phillips, Ruth Ennor, Ian Beckwith, Malcom Cannon, Reg Boromeo. Bendigo Concert Orchestra, Ballets-Madge Welch, Musical Director-Max O'Loghlen, Society's Pianist-Phyllis House, Asst. Pianist-Fred Trewarne, Music by Sigmund Romberg, Book and Lyrics by Otto Harbach, Oscar Hammerstein 2nd., and Frank Mandel, Costumes-J C Williamson Theatres Lt., Ada Colten, Melb. Scenery-J C Howard, Stage Management-W Kelly & Staff, Wardrobe-Mrs N McCarthy, Mrs L Spencely. Advertisements: Farmers and Citizens Trustees Company Bendigo Limited acts as executor, trustee, administrator, agent attorney. J R Tredinnick, Manager, Charing Cross Bendigo. Phone: Bendigo 86. Suttons Pty. Ltd. 'The House of Music' Pall Mall 287. Bendigo Fashion House Phone 296, Brown Tyre Service 242 Hargreaves Street. Rockmans Ladies' Fashions 295 Williamson St., Bendigo Ph 1141. J L Howard Pty. Ltd., Electrical Contractors, 174-176 Mitchell Street, Bendigo, Phone- 1675, 1676, 1677. Bendigo Plastering and Sheeting Co., 125 & 148 White Hills Road, Phone 4279. Pam Crammond, Ladies' Hairdresser, Hammer Street, Flora Hill, Phone 3620. John R Crammond Cabinet Making-Joinery-Shopfitting, 5 Houston Street, Phone 3620. J M Leech, Jewelry, Gifts and engraving. 238 Hargreaves St., Bendigo, Ph., 1301. Leedall Knitwear. Allan's 'Home of music', Phone 244. Ashman's The Home of Better Suit', Cr. Williamson & Hargreaves Streets, Bendigo. John Brown, socks and knitwear, and Welmar shirts and pyjamas, produced in Bendigo by John Brown Industries Ltd. And Welmar Industries Pty. Ltd.Cambridge Press, Bendigoprogram, music, bendigo operatic society, bendigo operatic society's 12th production, capital theatre. oct. 1957. price, society president: mr j cannon, vice-president: mr c bubb, hon. secretary: mr b thomas, hon. treasurer: mr b ralph committee: mesdames j cannon, n mccarthy, c blake, b mcgregor, miss m welch, messrs l spencely, f treawrne, j smyth. society acknowledges the help received from: the bendigo advertiser, 3bo bendigo, j l howard (a wearne, l reed), electrical fittings madge welch, studio and properties, the board of management and caretaker of the capital theatre, r vincent kelly- photography, f mamourney- stage furniture. photo and brief write up on the following: max o'loghlen, norman lee, margaret rule, brian thomas. ballet: kathleen goss, valerie cartwright, shirley harding, suzanne tunzi, june luke, maureen doyle, marlene holt, ann stone. ladies of the ensemble: marilyn smith, sandra cannon, lorraine rigg, dawn beckwith, betty cullen, olive hamilton, ethel harris, dorothy field, joy hartley, margaret manderson, gwen manderson, nancy walker, joan hokin, aileen simmonds, anne hassett, june mason, lorna paynter, patricia lyon, jess millikins, helen jalland, edna tudball smith, ronda miller. gentlemen of the ensemble: alan ewart, bob nicholls, fred trewarne, davis elvery, don chisholm, adrian van dyke, john mcgregor, bill banks, joseph quigg, john gowty, ian beckwith, andrew nelson, fred smith, malcolm cannon, reg boromeo. members of the orchestra: miss a mcnair, mrs s grant, mrs v messer, mr t conolan. mr e jarrett, mrs c bubb, mr c bubb, miss n brache, mr c hargreaves, mr r holyoake, mr g mackay, mr k holland, mr c holmes, mr j may, mr b armstrong, mr n pierce. cast: mervyn penno, alfred annison, max beckwith, greta smyth, alfred austin, brian brewer, rosalie spencely, harry brewer, alan ewart, adrian van dyke, margaret rule, bert donavan, barbara mcgregor, coral shiell, charles phillips, ruth ennor, ian beckwith, malcom cannon, reg boromeo. bendigo concert orchestra, ballets-madge welch, musical director-max o'loghlen, society's pianist-phyllis house, asst. pianist-fred trewarne, music by sigmund romberg, book and lyrics by otto harbach, oscar hammerstein 2nd., and frank mandel, costumes-j c williamson theatres lt., ada colten, melb. scenery-j c howard, stage management-w kelly & staff, wardrobe-mrs n mccarthy, mrs l spencely. advertisements: farmers and citizens trustees company bendigo limited acts as executor, trustee, administrator, agent attorney. j r tredinnick, manager, charing cross bgo. ph: bgo 86. suttons pty. ltd. 'the house of music' pall mall 287. bendigo fashion house ph 296, brown tyre service 242 hargreaves st. rockmans ladies' fashions 295 williamson st., bgo ph 1141. j l howard pty. ltd., electrical contractors, 174-176 mitchell street, bendigo, ph- 1675, 1676, 1677. bendigo plastering and sheeting co., 125 & 148 white hills rd, ph 4279. pam crammond, ladies' hairdresser, hammer street, flora hill, ph 3620. john r crammond cabinet making-joinery-shopfitting, 5 houston street, phone 3620. j m leech, jewelry, gifts and engraving. 238 hargreaves st., . leedall knitwear. allan's. ashman's, cr. williamson & hargreaves streets. john brown, socks knitwear, welmar, produced in bendigo by john brown industries ltd. welmar industries pty. ltd. -
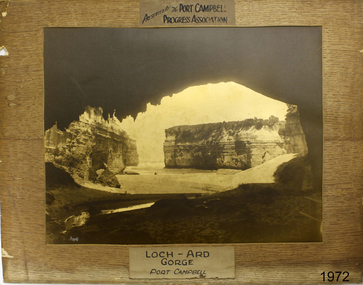 Flagstaff Hill Maritime Museum and Village
Photograph - Coastal Scene, Foyle Photographic Studio, Loch Ard Gorge Port Campbell, 1889-1919
The photograph shows the popular tourist attraction, Loch Ard Gorge, which is located along the Great Ocean Road in Victoria, near Port Campbell. The gorge is named after the famous sailing ship, the LOCH ARD, that was wrecked there in 1878. Only two of the 54 passengers and crew survived. FOYLE “Foyle” written on the photograph is the name of Foyle’s Photographic studio. At the time of the photograph, the studio was owned by both Charles and Lilian Foyle (sometimes known as Lillian or Lily), either of whom could have taken this photograph. They also worked together at a later date on the photographs, sketches and paintings of the famous and historical Pioneers’ Honour Board, which is currently on view in the Warrnambool Library. Foyles Photography was the studio of James Charles Foyle. He owned “Foyle’s Photo Card Studios” in Liebig St, Warrnambool, which operated between 1889 – 1919. A letter to the editor (by Mr Edward Vidler) in the Melbourne Argus, 3rd August 1907, mentions that in that year Warrnambool would celebrate the 60th anniversary of its proclamation as a town, and that talented local artist Miss Lily Foyle would paint 200 portraits in watercolour of the pioneers who settled in the district prior to 1860. The Pioneer Honour Board can still be seen on display in the Warrnambool Library. In the Warrnambool Standard, Dec. 1917, “Mr Foyle’s studio was awarded the contract to decorate rail cars on newly opened Trans-Continental railway, assisted by his sister, Miss Findlay.” HISTORY OF THE LOCH ARD The LOCH ARD belonged to the famous Loch Line which sailed many ships from England to Australia. Built-in Glasgow by Barclay, Curdle and Co. in 1873, the LOCH ARD was a three-masted square-rigged iron sailing ship. The ship measured 262ft 7" (79.87m) in length, 38ft (11.58m) in width, 23ft (7m) in depth and had a gross tonnage of 1693 tons. The LOCH ARD's main mast measured a massive 150ft (45.7m) in height. LOCH ARD made three trips to Australia and one trip to Calcutta before its final voyage. LOCH ARD left England on March 2, 1878, under the command of Captain Gibbs, a newly married, 29-year-old. She was bound for Melbourne with a crew of 37, plus 17 passengers and a load of cargo. The general cargo reflected the affluence of Melbourne at the time. Onboard were straw hats, umbrella, perfumes, clay pipes, pianos, clocks, confectionary, linen and candles, as well as a heavier load of railway irons, cement, lead and copper. There were items included that intended for display in the Melbourne International Exhibition in 1880. The voyage to Port Phillip was long but uneventful. At 3 am on June 1, 1878, Captain Gibbs was expecting to see land and the passengers were becoming excited as they prepared to view their new homeland in the early morning. But LOCH ARD was running into a fog which greatly reduced visibility. Captain Gibbs was becoming anxious as there was no sign of land or the Cape Otway lighthouse. At 4 am the fog lifted. A man aloft announced that he could see breakers. The sheer cliffs of Victoria's west coast came into view, and Captain Gibbs realised that the ship was much closer to them than expected. He ordered as much sail to be set as time would permit and then attempted to steer the vessel out to sea. On coming head-on into the wind, the ship lost momentum, the sails fell limp and LOCH ARD's bow swung back. Gibbs then ordered the anchors to be released in an attempt to hold its position. The anchors sank some 50 fathoms - but did not hold. By this time LOCH ARD was among the breakers and the tall cliffs of Mutton Bird Island rose behind the ship. Just half a mile from the coast, the ship's bow was suddenly pulled around by the anchor. The captain tried to tack out to sea, but the ship struck a reef at the base of Mutton Bird Island, near Port Campbell. Waves broke over the ship and the top deck was loosened from the hull. The masts and rigging came crashing down knocking passengers and crew overboard. When a lifeboat was finally launched, it crashed into the side of LOCH ARD and capsized. Tom Pearce, who had launched the boat, managed to cling to its overturned hull and shelter beneath it. He drifted out to sea and then on the flood tide came into what is now known as LOCH ARD Gorge. He swam to shore, bruised and dazed, and found a cave in which to shelter. Some of the crew stayed below deck to shelter from the falling rigging but drowned when the ship slipped off the reef into deeper water. Eva Carmichael had raced onto the deck to find out what was happening only to be confronted by towering cliffs looming above the stricken ship. In all the chaos, Captain Gibbs grabbed Eva and said, "If you are saved Eva, let my dear wife know that I died like a sailor". That was the last Eva Carmichael saw of the captain. She was swept off the ship by a huge wave. Eva saw Tom Pearce on a small rocky beach and yelled to attract his attention. He dived in and swam to the exhausted woman and dragged her to shore. He took her to the cave and broke and opened the case of brandy, which had washed up on the beach. He opened a bottle to revive the unconscious woman. A few hours later Tom scaled a cliff in search of help. He followed hoof prints and came by chance upon two men from nearby Glenample Station three and a half miles away. In a state of exhaustion, he told the men of the tragedy. Tom returned to the gorge while the two men rode back to the station to get help. By the time they reached LOCH ARD Gorge, it was cold and dark. The two shipwreck survivors were taken to Glenample Station to recover. Eva stayed at the station for six weeks before returning to Ireland, this time by steamship. In Melbourne, Tom Pearce received a hero's welcome. He was presented with the first gold medal of the Royal Humane Society of Victoria and a £1000 cheque from the Victorian Government. Concerts were performed to honour the young man's bravery and to raise money for those who lost family in the LOCH ARD disaster. Of the 54 crew members and passengers on board, only two survived: the apprentice, Tom Pearce and the young woman passenger, Eva Carmichael, who lost all of her family in the tragedy. Ten days after the LOCH ARD tragedy, salvage rights to the wreck were sold at auction for £2,120. Cargo valued at £3,000 was salvaged and placed on the beach, but most washed back into the sea when another storm developed. The wreck of LOCH ARD still lies at the base of Mutton Bird Island. Much of the cargo has now been salvaged, and some of it was washed up into what is now known as LOCH ARD Gorge. Cargo and artefacts have also been illegally salvaged over many years before protective legislation was introduced. One of the most unlikely pieces of cargo to have survived the shipwreck was a Minton porcelain peacock - one of only nine in the world. The peacock was destined for the Melbourne International Exhibition in 1880. It had been well packed, which gave it adequate protection during the violent storm. Today, the Minton peacock can be seen at the Flagstaff Hill Maritime Museum in Warrnambool. From Australia's most dramatic shipwreck it has now become Australia's most valuable shipwreck artefact and is one of very few 'objects' on the Victorian State Heritage Register.Flagstaff Hill’s collection of artefacts from LOCH ARD is significant for being one of the largest collections of artefacts from this shipwreck in Victoria. It is significant for its association with the shipwreck, which is on the Victorian Heritage Register (VHR S417). The collection is significant because of the relationship between the objects, as together they have a high potential to interpret the story of the LOCH ARD. The LOCH ARD collection is archaeologically significant as the remains of a large international passenger and cargo ship. The LOCH ARD collection is historically significant for representing aspects of Victoria’s shipping history and its potential to interpret sub-theme 1.5 of Victoria’s Framework of Historical Themes (living with natural processes). The collection is also historically significant for its association with the LOCH ARD, which was one of the worst and best-known shipwrecks in Victoria’s history. Foyle's photographs date from the late 19th century to the early 20th century, representing a time of growth in the Warrnambool district and a time when the still relatively new technology of photography was more available to the community.Photograph of Loch Ard Gorge. This sepia coloured rectangular photograph is mounted on a brown cardboard backing that has a wood grain pattern. The photograph has an inscription above it, below it, and in the bottom left corner. It was made for the purpose of a presentation by the Port Campbell Progress Association. Printed above the photograph "PRESENTED BY THE PORT CAMPBELL / PROGRESS ASSOCIATION". Printed below the photograph "LOCH ARD GORGE / PORT CAMPBELL". Hand written on bottom left corner "Foyle". flagstaff hill, warrnambool, shipwrecked coast, flagstaff hill maritime museum, maritime museum, shipwreck coast, flagstaff hill maritime village, great ocean road, loch line, loch ard, captain gibbs, eva carmichael, tom pearce, glenample station, mutton bird island, loch ard gorge, photograph, port campbell, port campbell progress association, foyle photograph, foyle photographic studio warrnambool, warrnambool photo studio -
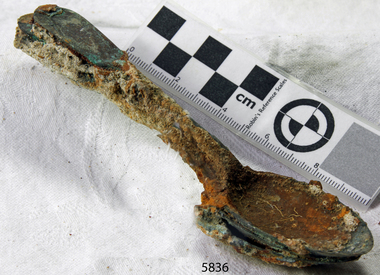 Flagstaff Hill Maritime Museum and Village
Domestic object - Teaspoons, c. 1878
Context: These teaspoons are from the wreck of the Loch Ard, that sailed from Gravesend, London. The manifest listed an array of manufactured goods being exported to the Colony of Victoria. Included in the cargo manifest was a large number of hardware & cutlery items. These spoons are representative of similar items of silver electro-plated cutlery salvaged from the Loch Ard wreck site, comprising nickel silver electroplated spoons and forks of various sizes but all sharing the same general shape and design. Some of the pieces display their makers’ mark of William Page & Co Birmingham UK. Within the Flagstaff Hills cutlery collection donated from the Loch Ard, maker’s marks are often obscured by sedimentary accretion or verdigris after a century of submersion in the ocean. However sufficient detail has survived to indicate that the collection of samples of electroplated cutlery probably originated from the same cargo consignment from the Loch Ard and were made by William Page & Co. William Page was born in 1811 and died in 1885. He was active as a manufacturer of cutlery from 1829 with premises at 74 Belmont Rd, Dales End as a "close plater" (someone who works sheet metal), and he began electroplating in 1855. William Page & Co was also active from 1880 at Cranemore St, Cattle’s Grove also 55 Albion St, Birmingham, in 1936 the firm became Ltd. The firm used the trademarks "Asrista, Bolivian Silver, Silverite, Roman Silver, Roumanian Silver and Trevor Plate. In 1938 William Page was a supplier to the British Government, marking it's products with the broad arrow symbol and was also present at Sheffield. History of the Loch Ard: The Loch Ard got its name from ”Loch Ard” a loch which lies to the west of Aberfoyle, and the east of Loch Lomond. It means "high lake" in Scottish Gaelic. The vessel belonged to the famous Loch Line which sailed many vessels from England to Australia. The Loch Ard was built in Glasgow by Barclay, Curdle and Co. in 1873, the vessel was a three-masted square-rigged iron sailing ship that measured 79.87 meters in length, 11.58 m in width, and 7 m in depth with a gross tonnage of 1693 tons with a mainmast that measured a massive 45.7 m in height. Loch Ard made three trips to Australia and one trip to Calcutta before its fateful voyage. Loch Ard left England on March 2, 1878, under the command of 29-year-old Captain Gibbs, who was newly married. The ship was bound for Melbourne with a crew of 37, plus 17 passengers. The general cargo reflected the affluence of Melbourne at the time. Onboard were straw hats, umbrella, perfumes, clay pipes, pianos, clocks, confectionery, linen and candles, as well as a heavier load of railway irons, cement, lead and copper. There were other items included that were intended for display in the Melbourne International Exhibition of 1880. The voyage to Port Phillip was long but uneventful. Then at 3 am on June 1, 1878, Captain Gibbs was expecting to see land. But the Loch Ard was running into a fog which greatly reduced visibility. Captain Gibbs was becoming anxious as there was no sign of land or the Cape Otway lighthouse. At 4 am the fog lifted and a lookout aloft announced that he could see breakers. The sheer cliffs of Victoria's west coast came into view, and Captain Gibbs realised that the ship was much closer to them than expected. He ordered as much sail to be set as time would permit and then attempted to steer the vessel out to sea. On coming head-on into the wind, the ship lost momentum, the sails fell limp and Loch Ard's bow swung back towards land. Gibbs then ordered the anchors to be released in an attempt to hold its position. The anchors sank some 50 fathoms - but did not hold. By this time the ship was among the breakers and the tall cliffs of Mutton Bird Island rose behind. Just half a mile from the coast, the ship's bow was suddenly pulled around by the anchor. The captain tried to tack out to sea, but the ship struck a reef at the base of Mutton Bird Island, near Port Campbell. Waves subsequently broke over the ship and the top deck became loosened from the hull. The masts and rigging came crashing down knocking passengers and crew overboard. When a lifeboat was finally launched, it crashed into the side of Loch Ard and capsized. Tom Pearce, who had launched the boat, managed to cling to its overturned hull and shelter beneath it. He drifted out to sea and then on the flood tide came into what is now known as Loch Ard Gorge. He swam to shore, bruised and dazed, and found a cave in which to shelter. Some of the crew stayed below deck to shelter from the falling rigging but drowned when the ship slipped off the reef into deeper water. Eva Carmichael a passenger had raced onto the deck to find out what was happening only to be confronted by towering cliffs looming above the stricken ship. In all the chaos, Captain Gibbs grabbed Eva and said, "If you are saved Eva, let my dear wife know that I died like a sailor". That was the last Eva Carmichael saw of the captain. She was swept off the ship by a huge wave. Eva saw Tom Pearce on a small rocky beach and yelled to attract his attention. He dived in and swam to the exhausted woman and dragged her to shore. He took her to the cave and broke the open case of brandy which had washed up on the beach. He opened a bottle to revive the unconscious woman. A few hours later Tom scaled a cliff in search of help. He followed hoof prints and came by chance upon two men from nearby Glenample Station three and a half miles away. In a complete state of exhaustion, he told the men of the tragedy. Tom then returned to the gorge while the two men rode back to the station to get help. By the time they reached Loch Ard Gorge, it was cold and dark. The two shipwreck survivors were taken to Glenample Station to recover. Eva stayed at the station for six weeks before returning to Ireland by steamship. In Melbourne, Tom Pearce received a hero's welcome. He was presented with the first gold medal of the Royal Humane Society of Victoria and a £1000 cheque from the Victorian Government. Concerts were performed to honour the young man's bravery and to raise money for those who lost family in the disaster. Of the 54 crew members and passengers on board, only two survived: the apprentice, Tom Pearce and the young woman passenger, Eva Carmichael, who lost her family in the tragedy. Ten days after the Loch Ard tragedy, salvage rights to the wreck were sold at auction for £2,120. Cargo valued at £3,000 was salvaged and placed on the beach, but most washed back into the sea when another storm developed. The wreck of Loch Ard still lies at the base of Mutton Bird Island. Much of the cargo has now been salvaged and some items were washed up into Loch Ard Gorge. Cargo and artefacts have also been illegally salvaged over many years before protective legislation was introduced in March 1982. One of the most unlikely pieces of cargo to have survived the shipwreck was a Minton majolica peacock- one of only nine in the world. The peacock was destined for the Melbourne 1880 International Exhibition in. It had been well packed, which gave it adequate protection during the violent storm. Today the Minton peacock can be seen at the Flagstaff Hill Maritime Museum in Warrnambool. From Australia's most dramatic shipwreck it has now become Australia's most valuable shipwreck artifact and is one of very few 'objects' on the Victorian State Heritage Register. The shipwreck of the Loch Ard is of significance for Victoria and is registered on the Victorian Heritage Register ( S 417). Flagstaff Hill has a varied collection of artefacts from Loch Ard and its collection is significant for being one of the largest accumulation of artefacts from this notable Victorian shipwreck. The collections object is to also give us a snapshot into history so we can interpret the story of this tragic event. The collection is also archaeologically significant as it represents aspects of Victoria's shipping history that allows us to interpret Victoria's social and historical themes of the time. The collections historically significance is that it is associated unfortunately with the worst and best-known shipwreck in Victoria's history. Nickel Silver plated teaspoons in a concreted group, fiddle-back design handle, narrow stem with flared collar and elongated bowl. There are 3 spoons in the group. makers’ mark “W” & “P” placed within a raised diamond outline, which is in turn contained within a sunken crown shape identifying the manufacturer as William Page & Co of Birmingham.flagstaff hill maritime museum, shipwreck coast, great ocean road, loch line, loch ard, mutton bird island, loch ard gorge, electroplated cutlery, nickel silver, william page & co, birmingham brass plating, makers marks, william page & co, teaspoons -
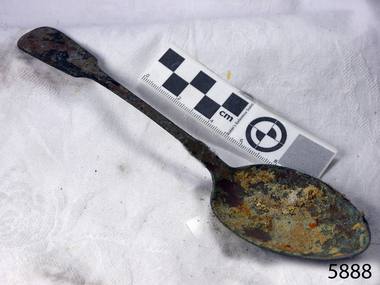 Flagstaff Hill Maritime Museum and Village
Domestic object - Desert Spoon, c.1878
Context: This dessert spoon is from the wreck of the Loch Ard, which sailed from Gravesend, London 1878. The manifest listed an array of manufactured goods being exported to the Colony of Victoria. Included in the cargo manifest was a large number of hardware & cutlery items. The spoon is representative of similar items of silver electro-plated cutlery salvaged from the Loch Ard wreck site, comprising nickel silver electroplated spoons and forks of various sizes but all sharing the same general shape and design. Some of the pieces display their makers’ mark of William Page & Co Birmingham UK. Within the Flagstaff Hills cutlery collection donated from the Loch Ard, maker’s marks are often obscured by sedimentary accretion or verdigris after a century of submersion in the ocean. However sufficient detail has survived to indicate that the collection of samples of electroplated cutlery probably originated from the same cargo consignment from the Loch Ard and were made by William Page & Co. Of Birmingham England. William Page was born in 1811 and died in 1885. He was active as a manufacturer of cutlery from 1829 with premises at 74 Belmont Rd, Dales End as a "close plater" (someone who works sheet metal), and he began electroplating in 1855. William Page & Co was also active from 1880 at Cranemore St, Cattle’s Grove also 55 Albion St, Birmingham, and in 1936 the firm became an Ltd company. The firm used the trademarks "Asrista, Bolivian Silver, Silverite, Roman Silver, Romanian Silver, and Trevor Plate. In 1938 William Page was a supplier to the British Government, marking its products with the broad arrow symbol and was also present at Sheffield. (See additional notes note section this document for more information on Electro Plating and its makers marks.) History of the Loch Ard: The Loch Ard got its name from "Loch Ard" a loch that lies to the west of Aberfoyle, and the east of Loch Lomond. It means "high lake" in Scottish Gaelic. The vessel belonged to the famous Loch Line which sailed many vessels from England to Australia. The Loch Ard was built in Glasgow by Barclay, Curdle, and Co. in 1873, the vessel was a three-masted square-rigged iron sailing ship that measured 79.87 meters in length, 11.58 m in width, and 7 m in depth with a gross tonnage of 1693 tons with a mainmast that measured a massive 45.7 m in height. Loch Ard made three trips to Australia and one trip to Calcutta before its fateful voyage. Loch Ard left England on March 2, 1878, under the command of 29-year-old Captain Gibbs, who was newly married. The ship was bound for Melbourne with a crew of 37, plus 17 passengers. The general cargo reflected the affluence of Melbourne at the time. Onboard were straw hats, umbrellas, perfumes, clay pipes, pianos, clocks, confectionery, linen, and candles, as well as a heavier load of railway irons, cement, lead, and copper. There were other items included that were intended for display in the Melbourne International Exhibition of 1880. The voyage to Port Phillip was long but uneventful. Then at 3 am on June 1, 1878, Captain Gibbs was expecting to see land. But the Loch Ard was running into a fog which greatly reduced visibility. Captain Gibbs was becoming anxious as there was no sign of land or the Cape Otway lighthouse. At 4 am the fog lifted and a lookout aloft announced that he could see breakers. The sheer cliffs of Victoria's west coast came into view, and Captain Gibbs realised that the ship was much closer to them than expected. He ordered as much sail to be set as time would permit and then attempted to steer the vessel out to sea. On coming head-on into the wind, the ship lost momentum, the sails fell limp and Loch Ard's bow swung back towards land. Gibbs then ordered the anchors to be released in an attempt to hold their position. The anchors sank some 50 fathoms - but did not hold. By this time the ship was among the breakers and the tall cliffs of Mutton Bird Island rose behind. Just half a mile from the coast, the ship's bow was suddenly pulled around by the anchor. The captain tried to tack out to sea, but the ship struck a reef at the base of Mutton Bird Island, near Port Campbell. Waves subsequently broke over the ship and the top deck became loosened from the hull. The masts and rigging came crashing down knocking passengers and crew overboard. When a lifeboat was finally launched, it crashed into the side of Loch Ard and capsized. Tom Pearce, who had launched the boat, managed to cling to its overturned hull and shelter beneath it. He drifted out to sea and then on the flood tide came into what is now known as Loch Ard Gorge. He swam to shore, bruised and dazed, and found a cave in which to shelter. Some of the crew stayed below deck to shelter from the falling rigging but drowned when the ship slipped off the reef into deeper water. Eva Carmichael a passenger had raced onto the deck to find out what was happening only to be confronted by towering cliffs looming above the stricken ship. In all the chaos, Captain Gibbs grabbed Eva and said, "If you are saved Eva, let my dear wife know that I died like a sailor". That was the last Eva Carmichael saw of the captain. She was swept off the ship by a huge wave. Eva saw Tom Pearce on a small rocky beach and yelled to attract his attention. He dived in and swam to the exhausted woman and dragged her to shore. He took her to the cave and broke the open case of brandy that had washed up on the beach. He opened a bottle to revive the unconscious woman. A few hours later Tom scaled a cliff in search of help. He followed hoof prints and came by chance upon two men from nearby Glenample Station three and a half miles away. In a complete state of exhaustion, he told the men of the tragedy. Tom then returned to the gorge while the two men rode back to the station to get help. By the time they reached Loch Ard Gorge, it was cold and dark. The two shipwreck survivors were taken to Glenample Station to recover. Eva stayed at the station for six weeks before returning to Ireland by steamship. In Melbourne, Tom Pearce received a hero's welcome. He was presented with the first gold medal of the Royal Humane Society of Victoria and a £1000 cheque from the Victorian Government. Concerts were performed to honour the young man's bravery and to raise money for those who lost family in the disaster. Of the 54 crew members and passengers on board, only two survived: the apprentice, Tom Pearce, and the young woman passenger, Eva Carmichael, who lost her family in the tragedy. Ten days after the Loch Ard tragedy, salvage rights to the wreck were sold at auction for £2,120. Cargo valued at £3,000 was salvaged and placed on the beach, but most washed back into the sea when another storm developed. The wreck of Loch Ard still lies at the base of Mutton Bird Island. Much of the cargo has now been salvaged and some items were washed up into Loch Ard Gorge. Cargo and artifacts have also been illegally salvaged over many years before protective legislation was introduced in March 1982. One of the most unlikely pieces of cargo to have survived the shipwreck was a Minton majolica peacock- one of only nine in the world. The peacock was destined for the Melbourne 1880 International Exhibition. It had been well packed, which gave it adequate protection during the violent storm. Today the Minton peacock can be seen at the Flagstaff Hill Maritime Museum in Warrnambool. From Australia's most dramatic shipwreck it has now become Australia's most valuable shipwreck artifact and is one of very few 'objects' on the Victorian State Heritage Register. The shipwreck of the Loch Ard is of significance for Victoria and is registered on the Victorian Heritage Register ( S 417). Flagstaff Hill has a varied collection of artifact s from Loch Ard and its collection is significant for being one of the largest accumulation of artifact s from this notable Victorian shipwreck. The collection's object is to also give us a snapshot into history so we can interpret the story of this tragic event. The collection is also archaeologically significant as it represents aspects of Victoria's shipping history that allows us to interpret Victoria's social and historical themes of the time. The collection's historical significance is that it is associated unfortunately with the worst and best-known shipwreck in Victoria's history.Large Nickel Silver copper plated teaspoon, fiddle-back design handle, narrow stem with flared collar and elongated bowl.Makers’ mark “W” & “P” placed within a raised diamond outline, which is in turn contained within a sunken crown shape identifying the manufacturer as William Page & Co of Birmingham just visable.flagstaff hill maritime museum, shipwreck coast, great ocean road, loch line, loch ard, mutton bird island, loch ard gorge, electroplated cutlery, loch ard shipwreck, william page and co, birmingham brass plating, table spoons