Showing 4314 items
matching ? waller
-
 Williamstown Botanic Gardens- Hobsons Bay City Council
Photographs - Williamstown Botanic Gardens, 1936
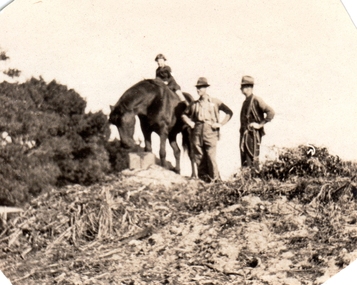
Ernest Anderson (head gardener) and Harry (gardener) worked at Williamstown Botanic Gardens. The Anderson family lived in the curators lodge on the grounds in the 1930s. Horses were used at the gardens until the 1960s when the council bought a truck. Mr Biggs drove as Mr Anderson did not have a licence. He rode his bike to the Town Hall every Friday to put in the time sheets. The collection is the only known photos of the Gardens working horses and demonstrates Edwardian Municipal gardening techniques that continued into the 1960s. They are photographic evidence of the planting styles, species choices and structures. Details inscribed on the reverse of some of the photos confirm names of staff at this time. Photo 13 (m) m: Only known photo of Ernest Anderson to be held by the Gardens2013.001.a-l is a collection of 12 small format photographs from the Anderson family album dated from 1917-1936 plus one large image of donor's wedding c1953. Ernest Anderson (head gardener) and Harry (gardener) worked at Williamstown Botanic Gardens. The Anderson family lived in the curators lodge on the grounds in the 1930s. Photo 1 (a) Sepia photo of young girl (Chic Anderson) on horse with no saddle. Two men, with hands on hips, standing alongside wearing hats. All are on a small hill (a compost heap) with a shrub on the left of the image. Photo 2 (b) Young girl and horse standing on the top of a small hill (compost heap). Girl has short hair and is wearing a jumper, skirt and long socks. Horse has no saddle and has its head down as if to eat. Photo 3 (c) Horse and foal standing in a fenced enclosure. Part of yard is paved. Horse has a white blaze and white feet. Foal has white blaze and white legs and is looking up at the horse. Photo 4 (d) Horse pulling a mower. Two men standing with mower. One is holding mower, the other the reins of the horse. Both men are wearing hats, with one wearing a vest. Horse has hessian wrapping on his hooves. Photo 5 (e) Horse and man. Horse has a rope bridle. Man holding bridle and is dressed in trousers, shirt, cardigan and hat. They are in front of a hedge and closed timber gate. Tall palm is in background. Horse is side on to the camera. Photo 6 (f) Man and horse standing in front of hedge and open timber gate. Palms in background. Man wearing trousers, shirt, vest, tie, hat. Trousers look to be tucked into boots. He is looking at the horse. The horse is facing the camera. Photo 7 (g) Three horses looking over a picket fence. All with a white blaze. There is a timber wall with a window to the right of the photograph. A man’s arm holding something is seen on the right of the photo. Photo 8 (h) Large palm tree, understorey of shrubs with two palms in the background. Photo 9 (i) Scene of the Gardens. Path dividing at a conifer tree. Woman in long skirt and hat looking up at the conifer. Different varieties of palm trees with understorey of shrubs. Photo 10 (j) Garden bed of Dahlias surrounded by a wire fence. Palms and other trees in background. Photo 11 (k) Avenue of tall palm trees with under storey of shrubs. Photo has angles cut at top corners and two large crease marks at the bottom right hand corner. Photo 12 (l) Set of cast iron gates – double carriage gates with single pedestrian gates on either side and supported by four cast iron posts with ornamental finials on top. Photo 13 (m) Ernest Anderson and daughter Chic prior to her wedding. Ernest is holding his gloves in his left hand and Chic’s hand with his right. Palms trees in the background. Photo 1 (a) 'Ern & Harry / May 8th 1936' Photo 2 (b) ‘Jack aged 36 / Chic 5 years / (unclear) 1936’ Photo 3 (c) ‘foal born in / back shed’ Photo 4 (d) ‘The Olde Firm / Jack Ernie Harry / 1917’ Photo 6 (f ) ‘Before the / council provided / a truck all / work was done / with the horses’ Photo 7 (g) ‘our work horses’ Photo 9 (i) ‘Panoramic view of Gardens / looking South from Lodge / Wms Town Botanical Gardens / 15-10-17’ Photo 12 (l) ‘Gates Public Gardens’hobsons-bay-city-council, curator, lodge, horse, transport, dahlia, compost, anderson, williamstown, botanic, gardens, williamstown-botanic-gardens, hobsons-bay, hobsons, edwardian, gardening, 1936, 1917, -
 Eltham District Historical Society Inc
Minute Book, Eltham War Memorial Trust Minutes, Book No. 2, 20 March 1951 to 4 June 1957
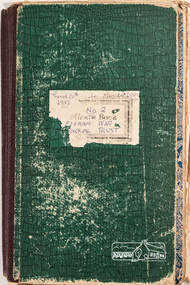
History of the War Memorial Following the end of the First World War, communities across Victoria and Australia typically erected memorials which were predominantly statues, cenotaphs, avenues of honour and plaques. The Shire of Eltham established the Avenue of Honour at the gateway to the shire as well as an obelisk at the corner of Main Road and Bridge street and the Shire of Eltham War Memorial Tower at Kangaroo Ground. After the Second World War communities once again desired to preserve the memories of those who served and paid the ultimate sacrifice. Resources were scarce so there was a transition away from the traditional style memorials that sprang up post 1918 to one of building facilities that would provide ongoing benefit to the community. Even before the end of the Second World War, the citizens of Eltham began to consider an appropriate form of memorial for those from the area who fought and died in the First and Second World Wars. In 1943 the Eltham Women’s Auxiliary raised funds for the construction of buildings to be established on land to be purchased for the proposed War Memorial. On March 27th, 1945, the Eltham District Progress Association called a meeting of local people who in turn set up and registered the Eltham War Memorial Trust Inc. As a focus for the purpose of the memorial, the newspaper notice read:- ‘Those who have had a member of their family in the fighting services will want to see that the form of a memorial we are concerned with is the one which will be a constant reminder to us of those who fought for us and the little ones for whom they fought and died.’ At that meeting it was decided the Memorial should take the form of a baby health centre along with a creche and children’s library. In late 1945, the newly formed Eltham War Memorial Trust purchased the land at 903-907 Main Road Eltham from Miss Shillinglaw, which once formed part of the Shillinglaw farm on Lot 90 of Holloway’s 1851 “Little Eltham” subdivision. The Governor of Victoria, General Sir Dallas Brooks, laid the foundation stone on November 24th, 1950, in memory of those who fell in the Second World War. The Eltham Infant Welfare Centre was opened November 15th, 1952, the Pre-school on December 1st, 1956, and the Children’s Library in 1961. In late 1966 the children’s library service was integrated into the Heideberg Regional Library Service and the building was officially renamed the Eltham War Memorial Hall. Following the opening of the Eltham Infant Welfare Centre, work began in 1953 planning for the entrance to the grounds, which is signaled by a wrought iron arch entitled “Eltham War Memorial” . In 1954 the Eltham War Memorial Trust decided that a legacy provided by the late Councillor Ernest James Andrew (d. 29 March 1950) in memory of his wife, Mrs. Ellen Andrew (d. 13 July 1946) and who are both buried at Eltham Cemetery, should be used to fund the construction of the entrance. A metal plate inscribed to this effect was attached to the gates. Work on the Memorial Gardens was undertaken throughout the following decade, with a Memorial Forecourt included in the final 1956 plans for the Pre-School Centre. A quote was accepted by the Trust in 1963 for the implementation of a memorial garden, which included grading of a sixty-five foot strip at the rear of the Trust buildings and construction of concrete paths. The stone retaining walls at the front of the site were installed in 1968 when Main Road was widened and it is believed that the Memorial Gates were relocated at that time also. Eltham Senior Citizens Centre In 1964, Eltham Shire Council purchased a section of land from the Trust at the northern end of the site, as a provision for Country Fire Authority buildings. At the same time the Elderly Citizens Club proposed a Senior Citizens Centre on the south western section of the Trust’s property. This was approved by the Trust with the provision that the building was constructed in ‘accord’ with those already existing. In 1965 Council took on board the plans for the Senior Citizens Centre and applied for a government grant. These could only be awarded if Council owned the site. In 1962 the Trust had resolved to hand over the assets to Council once the Memorial Gardens were completed. This was in line with Health Department requirements that grants for the ongoing operation and maintenance of the three facilities would only be made once the the facilities were completed and handed over to Council. In 1965 the Department of Health further demanded substantial alterations to the Pre-School playground as a result of the pending impact of the planned Senior Citizens Centre and Main Road duplication. As a consequence, handover of the Trust’s assets to Council was initiated with a formal ceremony held in the Children’s Library on August 28th, 1965. The Trust continued on as a committee of management for another twelve months. Plans and specifications for the Senior Citizens Centre were prepared by March 1966. Council obtained a grant from the Government which covered one third of the cost and the building was completed by April 1967. Whilst the Senior Citizens Centre is contained within the original Eltham War Memorial building precinct, it was not part of the original Memorial and was not funded by the Eltham War Memorial Trust.A Conquest Account Book manufactured by Norman Bros. (stationers) Pty Ltd, Melbourne. 33 x 20 x 4 cm, green covers; incorrectly noted to March 4th, 1958. Contains various minutes glued, stapled or pinned into minute book and some loose copies of duplicates or missing meeting minutes inserted at appropriate pages. 180 pages, last 26 blankeltham children's library, eltham infant welfare centre, eltham pre-school, eltham war memorial hall, eltham war memorial trust, meeting minutes, minute book, women's auxiliary -
 Eltham District Historical Society Inc
Minute Book, Eltham War Memorial Trust Minutes, 2 July 1957 to 12 November 1973
History of the War Memorial Following the end of the First World War, communities across Victoria and Australia typically erected memorials which were predominantly statues, cenotaphs, avenues of honour and plaques. The Shire of Eltham established the Avenue of Honour at the gateway to the shire as well as an obelisk at the corner of Main Road and Bridge street and the Shire of Eltham War Memorial Tower at Kangaroo Ground. After the Second World War communities once again desired to preserve the memories of those who served and paid the ultimate sacrifice. Resources were scarce so there was a transition away from the traditional style memorials that sprang up post 1918 to one of building facilities that would provide ongoing benefit to the community. Even before the end of the Second World War, the citizens of Eltham began to consider an appropriate form of memorial for those from the area who fought and died in the First and Second World Wars. In 1943 the Eltham Women’s Auxiliary raised funds for the construction of buildings to be established on land to be purchased for the proposed War Memorial. On March 27th, 1945, the Eltham District Progress Association called a meeting of local people who in turn set up and registered the Eltham War Memorial Trust Inc. As a focus for the purpose of the memorial, the newspaper notice read:- ‘Those who have had a member of their family in the fighting services will want to see that the form of a memorial we are concerned with is the one which will be a constant reminder to us of those who fought for us and the little ones for whom they fought and died.’ At that meeting it was decided the Memorial should take the form of a baby health centre along with a creche and children’s library. In late 1945, the newly formed Eltham War Memorial Trust purchased the land at 903-907 Main Road Eltham from Miss Shillinglaw, which once formed part of the Shillinglaw farm on Lot 90 of Holloway’s 1851 “Little Eltham” subdivision. The Governor of Victoria, General Sir Dallas Brooks, laid the foundation stone on November 24th, 1950, in memory of those who fell in the Second World War. The Eltham Infant Welfare Centre was opened November 15th, 1952, the Pre-school on December 1st, 1956, and the Children’s Library in 1961. In late 1966 the children’s library service was integrated into the Heideberg Regional Library Service and the building was officially renamed the Eltham War Memorial Hall. Following the opening of the Eltham Infant Welfare Centre, work began in 1953 planning for the entrance to the grounds, which is signaled by a wrought iron arch entitled “Eltham War Memorial” . In 1954 the Eltham War Memorial Trust decided that a legacy provided by the late Councillor Ernest James Andrew (d. 29 March 1950) in memory of his wife, Mrs. Ellen Andrew (d. 13 July 1946) and who are both buried at Eltham Cemetery, should be used to fund the construction of the entrance. A metal plate inscribed to this effect was attached to the gates. Work on the Memorial Gardens was undertaken throughout the following decade, with a Memorial Forecourt included in the final 1956 plans for the Pre-School Centre. A quote was accepted by the Trust in 1963 for the implementation of a memorial garden, which included grading of a sixty-five foot strip at the rear of the Trust buildings and construction of concrete paths. The stone retaining walls at the front of the site were installed in 1968 when Main Road was widened and it is believed that the Memorial Gates were relocated at that time also. Eltham Senior Citizens Centre In 1964, Eltham Shire Council purchased a section of land from the Trust at the northern end of the site, as a provision for Country Fire Authority buildings. At the same time the Elderly Citizens Club proposed a Senior Citizens Centre on the south western section of the Trust’s property. This was approved by the Trust with the provision that the building was constructed in ‘accord’ with those already existing. In 1965 Council took on board the plans for the Senior Citizens Centre and applied for a government grant. These could only be awarded if Council owned the site. In 1962 the Trust had resolved to hand over the assets to Council once the Memorial Gardens were completed. This was in line with Health Department requirements that grants for the ongoing operation and maintenance of the three facilities would only be made once the the facilities were completed and handed over to Council. In 1965 the Department of Health further demanded substantial alterations to the Pre-School playground as a result of the pending impact of the planned Senior Citizens Centre and Main Road duplication. As a consequence, handover of the Trust’s assets to Council was initiated with a formal ceremony held in the Children’s Library on August 28th, 1965. The Trust continued on as a committee of management for another twelve months. Plans and specifications for the Senior Citizens Centre were prepared by March 1966. Council obtained a grant from the Government which covered one third of the cost and the building was completed by April 1967. Whilst the Senior Citizens Centre is contained within the original Eltham War Memorial building precinct, it was not part of the original Memorial and was not funded by the Eltham War Memorial Trust.Minutes (unbound) of the Eltham War Memorial Trust until handover of the property to Eltham Shire Council in August 1965. Also includes notification to Council of disbanding of the Committee of Management of the Eltham War Memorial Hall and handing over responsibility of that to Council in November 1973 Various sizes up to foolscap size. Approx 54 documentseltham children's library, eltham infant welfare centre, eltham pre-school, eltham war memorial hall, eltham war memorial trust, meeting minutes, minute book, women's auxiliary -
 Eltham District Historical Society Inc
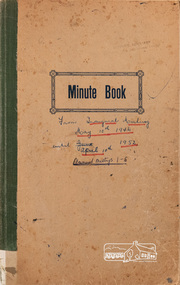
Minute Book, Minute Book No. 1, Women's Auxiliary, Eltham War Memorial Trust, 10 May 1946 to 10 April 1952
History of the War Memorial Following the end of the First World War, communities across Victoria and Australia typically erected memorials which were predominantly statues, cenotaphs, avenues of honour and plaques. The Shire of Eltham established the Avenue of Honour at the gateway to the shire as well as an obelisk at the corner of Main Road and Bridge street and the Shire of Eltham War Memorial Tower at Kangaroo Ground. After the Second World War communities once again desired to preserve the memories of those who served and paid the ultimate sacrifice. Resources were scarce so there was a transition away from the traditional style memorials that sprang up post 1918 to one of building facilities that would provide ongoing benefit to the community. Even before the end of the Second World War, the citizens of Eltham began to consider an appropriate form of memorial for those from the area who fought and died in the First and Second World Wars. In 1943 the Eltham Women’s Auxiliary raised funds for the construction of buildings to be established on land to be purchased for the proposed War Memorial. On March 27th, 1945, the Eltham District Progress Association called a meeting of local people who in turn set up and registered the Eltham War Memorial Trust Inc. As a focus for the purpose of the memorial, the newspaper notice read:- ‘Those who have had a member of their family in the fighting services will want to see that the form of a memorial we are concerned with is the one which will be a constant reminder to us of those who fought for us and the little ones for whom they fought and died.’ At that meeting it was decided the Memorial should take the form of a baby health centre along with a creche and children’s library. In late 1945, the newly formed Eltham War Memorial Trust purchased the land at 903-907 Main Road Eltham from Miss Shillinglaw, which once formed part of the Shillinglaw farm on Lot 90 of Holloway’s 1851 “Little Eltham” subdivision. The Governor of Victoria, General Sir Dallas Brooks, laid the foundation stone on November 24th, 1950, in memory of those who fell in the Second World War. The Eltham Infant Welfare Centre was opened November 15th, 1952, the Pre-school on December 1st, 1956, and the Children’s Library in 1961. In late 1966 the children’s library service was integrated into the Heideberg Regional Library Service and the building was officially renamed the Eltham War Memorial Hall. Following the opening of the Eltham Infant Welfare Centre, work began in 1953 planning for the entrance to the grounds, which is signaled by a wrought iron arch entitled “Eltham War Memorial” . In 1954 the Eltham War Memorial Trust decided that a legacy provided by the late Councillor Ernest James Andrew (d. 29 March 1950) in memory of his wife, Mrs. Ellen Andrew (d. 13 July 1946) and who are both buried at Eltham Cemetery, should be used to fund the construction of the entrance. A metal plate inscribed to this effect was attached to the gates. Work on the Memorial Gardens was undertaken throughout the following decade, with a Memorial Forecourt included in the final 1956 plans for the Pre-School Centre. A quote was accepted by the Trust in 1963 for the implementation of a memorial garden, which included grading of a sixty-five foot strip at the rear of the Trust buildings and construction of concrete paths. The stone retaining walls at the front of the site were installed in 1968 when Main Road was widened and it is believed that the Memorial Gates were relocated at that time also. Eltham Senior Citizens Centre In 1964, Eltham Shire Council purchased a section of land from the Trust at the northern end of the site, as a provision for Country Fire Authority buildings. At the same time the Elderly Citizens Club proposed a Senior Citizens Centre on the south western section of the Trust’s property. This was approved by the Trust with the provision that the building was constructed in ‘accord’ with those already existing. In 1965 Council took on board the plans for the Senior Citizens Centre and applied for a government grant. These could only be awarded if Council owned the site. In 1962 the Trust had resolved to hand over the assets to Council once the Memorial Gardens were completed. This was in line with Health Department requirements that grants for the ongoing operation and maintenance of the three facilities would only be made once the the facilities were completed and handed over to Council. In 1965 the Department of Health further demanded substantial alterations to the Pre-School playground as a result of the pending impact of the planned Senior Citizens Centre and Main Road duplication. As a consequence, handover of the Trust’s assets to Council was initiated with a formal ceremony held in the Children’s Library on August 28th, 1965. The Trust continued on as a committee of management for another twelve months. Plans and specifications for the Senior Citizens Centre were prepared by March 1966. Council obtained a grant from the Government which covered one third of the cost and the building was completed by April 1967. Whilst the Senior Citizens Centre is contained within the original Eltham War Memorial building precinct, it was not part of the original Memorial and was not funded by the Eltham War Memorial Trust.At rear of book are the minutes of the 1st to 5th Annual Meetings (1947-1951) and a list of financial members 33 x 21 x 1 cm; beige cardboard endcovers with green cloth spine binding; 132 pageseltham children's library, eltham infant welfare centre, eltham pre-school, eltham war memorial hall, eltham war memorial trust, meeting minutes, minute book, women's auxiliary -
 Eltham District Historical Society Inc
Minute Book, Minute Book No. 2, Women's Auxiliary, Eltham War Memorial Trust, 12 June 1952 to 14 June 1956
History of the War Memorial Following the end of the First World War, communities across Victoria and Australia typically erected memorials which were predominantly statues, cenotaphs, avenues of honour and plaques. The Shire of Eltham established the Avenue of Honour at the gateway to the shire as well as an obelisk at the corner of Main Road and Bridge street and the Shire of Eltham War Memorial Tower at Kangaroo Ground. After the Second World War communities once again desired to preserve the memories of those who served and paid the ultimate sacrifice. Resources were scarce so there was a transition away from the traditional style memorials that sprang up post 1918 to one of building facilities that would provide ongoing benefit to the community. Even before the end of the Second World War, the citizens of Eltham began to consider an appropriate form of memorial for those from the area who fought and died in the First and Second World Wars. In 1943 the Eltham Women’s Auxiliary raised funds for the construction of buildings to be established on land to be purchased for the proposed War Memorial. On March 27th, 1945, the Eltham District Progress Association called a meeting of local people who in turn set up and registered the Eltham War Memorial Trust Inc. As a focus for the purpose of the memorial, the newspaper notice read:- ‘Those who have had a member of their family in the fighting services will want to see that the form of a memorial we are concerned with is the one which will be a constant reminder to us of those who fought for us and the little ones for whom they fought and died.’ At that meeting it was decided the Memorial should take the form of a baby health centre along with a creche and children’s library. In late 1945, the newly formed Eltham War Memorial Trust purchased the land at 903-907 Main Road Eltham from Miss Shillinglaw, which once formed part of the Shillinglaw farm on Lot 90 of Holloway’s 1851 “Little Eltham” subdivision. The Governor of Victoria, General Sir Dallas Brooks, laid the foundation stone on November 24th, 1950, in memory of those who fell in the Second World War. The Eltham Infant Welfare Centre was opened November 15th, 1952, the Pre-school on December 1st, 1956, and the Children’s Library in 1961. In late 1966 the children’s library service was integrated into the Heideberg Regional Library Service and the building was officially renamed the Eltham War Memorial Hall. Following the opening of the Eltham Infant Welfare Centre, work began in 1953 planning for the entrance to the grounds, which is signaled by a wrought iron arch entitled “Eltham War Memorial” . In 1954 the Eltham War Memorial Trust decided that a legacy provided by the late Councillor Ernest James Andrew (d. 29 March 1950) in memory of his wife, Mrs. Ellen Andrew (d. 13 July 1946) and who are both buried at Eltham Cemetery, should be used to fund the construction of the entrance. A metal plate inscribed to this effect was attached to the gates. Work on the Memorial Gardens was undertaken throughout the following decade, with a Memorial Forecourt included in the final 1956 plans for the Pre-School Centre. A quote was accepted by the Trust in 1963 for the implementation of a memorial garden, which included grading of a sixty-five foot strip at the rear of the Trust buildings and construction of concrete paths. The stone retaining walls at the front of the site were installed in 1968 when Main Road was widened and it is believed that the Memorial Gates were relocated at that time also. Eltham Senior Citizens Centre In 1964, Eltham Shire Council purchased a section of land from the Trust at the northern end of the site, as a provision for Country Fire Authority buildings. At the same time the Elderly Citizens Club proposed a Senior Citizens Centre on the south western section of the Trust’s property. This was approved by the Trust with the provision that the building was constructed in ‘accord’ with those already existing. In 1965 Council took on board the plans for the Senior Citizens Centre and applied for a government grant. These could only be awarded if Council owned the site. In 1962 the Trust had resolved to hand over the assets to Council once the Memorial Gardens were completed. This was in line with Health Department requirements that grants for the ongoing operation and maintenance of the three facilities would only be made once the the facilities were completed and handed over to Council. In 1965 the Department of Health further demanded substantial alterations to the Pre-School playground as a result of the pending impact of the planned Senior Citizens Centre and Main Road duplication. As a consequence, handover of the Trust’s assets to Council was initiated with a formal ceremony held in the Children’s Library on August 28th, 1965. The Trust continued on as a committee of management for another twelve months. Plans and specifications for the Senior Citizens Centre were prepared by March 1966. Council obtained a grant from the Government which covered one third of the cost and the building was completed by April 1967. Whilst the Senior Citizens Centre is contained within the original Eltham War Memorial building precinct, it was not part of the original Memorial and was not funded by the Eltham War Memorial Trust.At centre of book are the minutes of the 6th, 7th, 8th and 9th Annual Meetings (1952-1955) 32.5 x 20.5 x 1 cm; burgundy hard endcovers with burgundy cloth spine binding; contents almost separated from spine and cover plates; 94 pageseltham children's library, eltham infant welfare centre, eltham pre-school, eltham war memorial hall, eltham war memorial trust, meeting minutes, minute book, women's auxiliary -
 Eltham District Historical Society Inc
Minute Book, Minute Book No. 3, Women's Auxiliary, Eltham War Memorial Trust, 12 July 1957 to 14 May 1959
History of the War Memorial Following the end of the First World War, communities across Victoria and Australia typically erected memorials which were predominantly statues, cenotaphs, avenues of honour and plaques. The Shire of Eltham established the Avenue of Honour at the gateway to the shire as well as an obelisk at the corner of Main Road and Bridge street and the Shire of Eltham War Memorial Tower at Kangaroo Ground. After the Second World War communities once again desired to preserve the memories of those who served and paid the ultimate sacrifice. Resources were scarce so there was a transition away from the traditional style memorials that sprang up post 1918 to one of building facilities that would provide ongoing benefit to the community. Even before the end of the Second World War, the citizens of Eltham began to consider an appropriate form of memorial for those from the area who fought and died in the First and Second World Wars. In 1943 the Eltham Women’s Auxiliary raised funds for the construction of buildings to be established on land to be purchased for the proposed War Memorial. On March 27th, 1945, the Eltham District Progress Association called a meeting of local people who in turn set up and registered the Eltham War Memorial Trust Inc. As a focus for the purpose of the memorial, the newspaper notice read:- ‘Those who have had a member of their family in the fighting services will want to see that the form of a memorial we are concerned with is the one which will be a constant reminder to us of those who fought for us and the little ones for whom they fought and died.’ At that meeting it was decided the Memorial should take the form of a baby health centre along with a creche and children’s library. In late 1945, the newly formed Eltham War Memorial Trust purchased the land at 903-907 Main Road Eltham from Miss Shillinglaw, which once formed part of the Shillinglaw farm on Lot 90 of Holloway’s 1851 “Little Eltham” subdivision. The Governor of Victoria, General Sir Dallas Brooks, laid the foundation stone on November 24th, 1950, in memory of those who fell in the Second World War. The Eltham Infant Welfare Centre was opened November 15th, 1952, the Pre-school on December 1st, 1956, and the Children’s Library in 1961. In late 1966 the children’s library service was integrated into the Heideberg Regional Library Service and the building was officially renamed the Eltham War Memorial Hall. Following the opening of the Eltham Infant Welfare Centre, work began in 1953 planning for the entrance to the grounds, which is signaled by a wrought iron arch entitled “Eltham War Memorial” . In 1954 the Eltham War Memorial Trust decided that a legacy provided by the late Councillor Ernest James Andrew (d. 29 March 1950) in memory of his wife, Mrs. Ellen Andrew (d. 13 July 1946) and who are both buried at Eltham Cemetery, should be used to fund the construction of the entrance. A metal plate inscribed to this effect was attached to the gates. Work on the Memorial Gardens was undertaken throughout the following decade, with a Memorial Forecourt included in the final 1956 plans for the Pre-School Centre. A quote was accepted by the Trust in 1963 for the implementation of a memorial garden, which included grading of a sixty-five foot strip at the rear of the Trust buildings and construction of concrete paths. The stone retaining walls at the front of the site were installed in 1968 when Main Road was widened and it is believed that the Memorial Gates were relocated at that time also. Eltham Senior Citizens Centre In 1964, Eltham Shire Council purchased a section of land from the Trust at the northern end of the site, as a provision for Country Fire Authority buildings. At the same time the Elderly Citizens Club proposed a Senior Citizens Centre on the south western section of the Trust’s property. This was approved by the Trust with the provision that the building was constructed in ‘accord’ with those already existing. In 1965 Council took on board the plans for the Senior Citizens Centre and applied for a government grant. These could only be awarded if Council owned the site. In 1962 the Trust had resolved to hand over the assets to Council once the Memorial Gardens were completed. This was in line with Health Department requirements that grants for the ongoing operation and maintenance of the three facilities would only be made once the the facilities were completed and handed over to Council. In 1965 the Department of Health further demanded substantial alterations to the Pre-School playground as a result of the pending impact of the planned Senior Citizens Centre and Main Road duplication. As a consequence, handover of the Trust’s assets to Council was initiated with a formal ceremony held in the Children’s Library on August 28th, 1965. The Trust continued on as a committee of management for another twelve months. Plans and specifications for the Senior Citizens Centre were prepared by March 1966. Council obtained a grant from the Government which covered one third of the cost and the building was completed by April 1967. Whilst the Senior Citizens Centre is contained within the original Eltham War Memorial building precinct, it was not part of the original Memorial and was not funded by the Eltham War Memorial Trust.At rear of book are the minutes of the 10th, 11th and 12th Annual Meetings (1956-1958) The Pencraft Faint Account Book 32.5 x 20.5 x 0.5 cm; beige cardboard endcovers with red cloth spine binding; 66 pageseltham children's library, eltham infant welfare centre, eltham pre-school, eltham war memorial hall, eltham war memorial trust, meeting minutes, minute book, women's auxiliary -
 Eltham District Historical Society Inc
Minute Book, Minute Book No. 4, Women's Auxiliary, Eltham War Memorial Trust, 14 May 1959 to 12 August 1965
History of the War Memorial Following the end of the First World War, communities across Victoria and Australia typically erected memorials which were predominantly statues, cenotaphs, avenues of honour and plaques. The Shire of Eltham established the Avenue of Honour at the gateway to the shire as well as an obelisk at the corner of Main Road and Bridge street and the Shire of Eltham War Memorial Tower at Kangaroo Ground. After the Second World War communities once again desired to preserve the memories of those who served and paid the ultimate sacrifice. Resources were scarce so there was a transition away from the traditional style memorials that sprang up post 1918 to one of building facilities that would provide ongoing benefit to the community. Even before the end of the Second World War, the citizens of Eltham began to consider an appropriate form of memorial for those from the area who fought and died in the First and Second World Wars. In 1943 the Eltham Women’s Auxiliary raised funds for the construction of buildings to be established on land to be purchased for the proposed War Memorial. On March 27th, 1945, the Eltham District Progress Association called a meeting of local people who in turn set up and registered the Eltham War Memorial Trust Inc. As a focus for the purpose of the memorial, the newspaper notice read:- ‘Those who have had a member of their family in the fighting services will want to see that the form of a memorial we are concerned with is the one which will be a constant reminder to us of those who fought for us and the little ones for whom they fought and died.’ At that meeting it was decided the Memorial should take the form of a baby health centre along with a creche and children’s library. In late 1945, the newly formed Eltham War Memorial Trust purchased the land at 903-907 Main Road Eltham from Miss Shillinglaw, which once formed part of the Shillinglaw farm on Lot 90 of Holloway’s 1851 “Little Eltham” subdivision. The Governor of Victoria, General Sir Dallas Brooks, laid the foundation stone on November 24th, 1950, in memory of those who fell in the Second World War. The Eltham Infant Welfare Centre was opened November 15th, 1952, the Pre-school on December 1st, 1956, and the Children’s Library in 1961. In late 1966 the children’s library service was integrated into the Heideberg Regional Library Service and the building was officially renamed the Eltham War Memorial Hall. Following the opening of the Eltham Infant Welfare Centre, work began in 1953 planning for the entrance to the grounds, which is signaled by a wrought iron arch entitled “Eltham War Memorial” . In 1954 the Eltham War Memorial Trust decided that a legacy provided by the late Councillor Ernest James Andrew (d. 29 March 1950) in memory of his wife, Mrs. Ellen Andrew (d. 13 July 1946) and who are both buried at Eltham Cemetery, should be used to fund the construction of the entrance. A metal plate inscribed to this effect was attached to the gates. Work on the Memorial Gardens was undertaken throughout the following decade, with a Memorial Forecourt included in the final 1956 plans for the Pre-School Centre. A quote was accepted by the Trust in 1963 for the implementation of a memorial garden, which included grading of a sixty-five foot strip at the rear of the Trust buildings and construction of concrete paths. The stone retaining walls at the front of the site were installed in 1968 when Main Road was widened and it is believed that the Memorial Gates were relocated at that time also. Eltham Senior Citizens Centre In 1964, Eltham Shire Council purchased a section of land from the Trust at the northern end of the site, as a provision for Country Fire Authority buildings. At the same time the Elderly Citizens Club proposed a Senior Citizens Centre on the south western section of the Trust’s property. This was approved by the Trust with the provision that the building was constructed in ‘accord’ with those already existing. In 1965 Council took on board the plans for the Senior Citizens Centre and applied for a government grant. These could only be awarded if Council owned the site. In 1962 the Trust had resolved to hand over the assets to Council once the Memorial Gardens were completed. This was in line with Health Department requirements that grants for the ongoing operation and maintenance of the three facilities would only be made once the the facilities were completed and handed over to Council. In 1965 the Department of Health further demanded substantial alterations to the Pre-School playground as a result of the pending impact of the planned Senior Citizens Centre and Main Road duplication. As a consequence, handover of the Trust’s assets to Council was initiated with a formal ceremony held in the Children’s Library on August 28th, 1965. The Trust continued on as a committee of management for another twelve months. Plans and specifications for the Senior Citizens Centre were prepared by March 1966. Council obtained a grant from the Government which covered one third of the cost and the building was completed by April 1967. Whilst the Senior Citizens Centre is contained within the original Eltham War Memorial building precinct, it was not part of the original Memorial and was not funded by the Eltham War Memorial Trust.At rear of book are the minutes of the 13th, 14th, 15th and 16th Annual Meetings (1959-1962). Also stuck on rear inside cover a list of financial members for 1960. Ritewell No. 246 Faint Only book 32.5 x 20.5 x 1 cm; beige cardboard endcovers with blue cloth spine binding; 128 pages (52 blank)eltham children's library, eltham infant welfare centre, eltham pre-school, eltham war memorial hall, eltham war memorial trust, meeting minutes, minute book, women's auxiliary -
 Eltham District Historical Society Inc
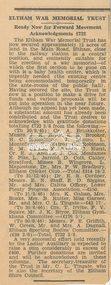
Newspaper clipping, Eltham War Memorial Trust: Ready Now for Forward Movement; Acknowledgements £722; publication unknown, c.1946, 1946c
Article about the purchase of land for the Eltham War Memorial and preparations to make a drive for funds History of the War Memorial Following the end of the First World War, communities across Victoria and Australia typically erected memorials which were predominantly statues, cenotaphs, avenues of honour and plaques. The Shire of Eltham established the Avenue of Honour at the gateway to the shire as well as an obelisk at the corner of Main Road and Bridge street and the Shire of Eltham War Memorial Tower at Kangaroo Ground. After the Second World War communities once again desired to preserve the memories of those who served and paid the ultimate sacrifice. Resources were scarce so there was a transition away from the traditional style memorials that sprang up post 1918 to one of building facilities that would provide ongoing benefit to the community. Even before the end of the Second World War, the citizens of Eltham began to consider an appropriate form of memorial for those from the area who fought and died in the First and Second World Wars. In 1943 the Eltham Women’s Auxiliary raised funds for the construction of buildings to be established on land to be purchased for the proposed War Memorial. On March 27th, 1945, the Eltham District Progress Association called a meeting of local people who in turn set up and registered the Eltham War Memorial Trust Inc. As a focus for the purpose of the memorial, the newspaper notice read:- ‘Those who have had a member of their family in the fighting services will want to see that the form of a memorial we are concerned with is the one which will be a constant reminder to us of those who fought for us and the little ones for whom they fought and died.’ At that meeting it was decided the Memorial should take the form of a baby health centre along with a creche and children’s library. In late 1945, the newly formed Eltham War Memorial Trust purchased the land at 903-907 Main Road Eltham from Miss Shillinglaw, which once formed part of the Shillinglaw farm on Lot 90 of Holloway’s 1851 “Little Eltham” subdivision. The Governor of Victoria, General Sir Dallas Brooks, laid the foundation stone on November 24th, 1950, in memory of those who fell in the Second World War. The Eltham Infant Welfare Centre was opened November 15th, 1952, the Pre-school on December 1st, 1956, and the Children’s Library in 1961. In late 1966 the children’s library service was integrated into the Heideberg Regional Library Service and the building was officially renamed the Eltham War Memorial Hall. Following the opening of the Eltham Infant Welfare Centre, work began in 1953 planning for the entrance to the grounds, which is signaled by a wrought iron arch entitled “Eltham War Memorial” . In 1954 the Eltham War Memorial Trust decided that a legacy provided by the late Councillor Ernest James Andrew (d. 29 March 1950) in memory of his wife, Mrs. Ellen Andrew (d. 13 July 1946) and who are both buried at Eltham Cemetery, should be used to fund the construction of the entrance. A metal plate inscribed to this effect was attached to the gates. Work on the Memorial Gardens was undertaken throughout the following decade, with a Memorial Forecourt included in the final 1956 plans for the Pre-School Centre. A quote was accepted by the Trust in 1963 for the implementation of a memorial garden, which included grading of a sixty-five foot strip at the rear of the Trust buildings and construction of concrete paths. The stone retaining walls at the front of the site were installed in 1968 when Main Road was widened and it is believed that the Memorial Gates were relocated at that time also. Eltham Senior Citizens Centre In 1964, Eltham Shire Council purchased a section of land from the Trust at the northern end of the site, as a provision for Country Fire Authority buildings. At the same time the Elderly Citizens Club proposed a Senior Citizens Centre on the south western section of the Trust’s property. This was approved by the Trust with the provision that the building was constructed in ‘accord’ with those already existing. In 1965 Council took on board the plans for the Senior Citizens Centre and applied for a government grant. These could only be awarded if Council owned the site. In 1962 the Trust had resolved to hand over the assets to Council once the Memorial Gardens were completed. This was in line with Health Department requirements that grants for the ongoing operation and maintenance of the three facilities would only be made once the the facilities were completed and handed over to Council. In 1965 the Department of Health further demanded substantial alterations to the Pre-School playground as a result of the pending impact of the planned Senior Citizens Centre and Main Road duplication. As a consequence, handover of the Trust’s assets to Council was initiated with a formal ceremony held in the Children’s Library on August 28th, 1965. The Trust continued on as a committee of management for another twelve months. Plans and specifications for the Senior Citizens Centre were prepared by March 1966. Council obtained a grant from the Government which covered one third of the cost and the building was completed by April 1967. Whilst the Senior Citizens Centre is contained within the original Eltham War Memorial building precinct, it was not part of the original Memorial and was not funded by the Eltham War Memorial Trust.Newsprint clippingeltham children's library, eltham infant welfare centre, eltham pre-school, eltham war memorial hall, eltham war memorial trust, women's auxiliary -
 Eltham District Historical Society Inc
Newspaper clipping, Eltham War Memorial Trust: "Garden of Remembrance"; Baby Health Centre First Building, The News: The Newspaper of the City of Heidelberg and of the Shire of Eltham, 11 April 1947, 1947
Report on the second annual meeting of the Eltham War Memorial Trust History of the War Memorial Following the end of the First World War, communities across Victoria and Australia typically erected memorials which were predominantly statues, cenotaphs, avenues of honour and plaques. The Shire of Eltham established the Avenue of Honour at the gateway to the shire as well as an obelisk at the corner of Main Road and Bridge street and the Shire of Eltham War Memorial Tower at Kangaroo Ground. After the Second World War communities once again desired to preserve the memories of those who served and paid the ultimate sacrifice. Resources were scarce so there was a transition away from the traditional style memorials that sprang up post 1918 to one of building facilities that would provide ongoing benefit to the community. Even before the end of the Second World War, the citizens of Eltham began to consider an appropriate form of memorial for those from the area who fought and died in the First and Second World Wars. In 1943 the Eltham Women’s Auxiliary raised funds for the construction of buildings to be established on land to be purchased for the proposed War Memorial. On March 27th, 1945, the Eltham District Progress Association called a meeting of local people who in turn set up and registered the Eltham War Memorial Trust Inc. As a focus for the purpose of the memorial, the newspaper notice read:- ‘Those who have had a member of their family in the fighting services will want to see that the form of a memorial we are concerned with is the one which will be a constant reminder to us of those who fought for us and the little ones for whom they fought and died.’ At that meeting it was decided the Memorial should take the form of a baby health centre along with a creche and children’s library. In late 1945, the newly formed Eltham War Memorial Trust purchased the land at 903-907 Main Road Eltham from Miss Shillinglaw, which once formed part of the Shillinglaw farm on Lot 90 of Holloway’s 1851 “Little Eltham” subdivision. The Governor of Victoria, General Sir Dallas Brooks, laid the foundation stone on November 24th, 1950, in memory of those who fell in the Second World War. The Eltham Infant Welfare Centre was opened November 15th, 1952, the Pre-school on December 1st, 1956, and the Children’s Library in 1961. In late 1966 the children’s library service was integrated into the Heideberg Regional Library Service and the building was officially renamed the Eltham War Memorial Hall. Following the opening of the Eltham Infant Welfare Centre, work began in 1953 planning for the entrance to the grounds, which is signaled by a wrought iron arch entitled “Eltham War Memorial” . In 1954 the Eltham War Memorial Trust decided that a legacy provided by the late Councillor Ernest James Andrew (d. 29 March 1950) in memory of his wife, Mrs. Ellen Andrew (d. 13 July 1946) and who are both buried at Eltham Cemetery, should be used to fund the construction of the entrance. A metal plate inscribed to this effect was attached to the gates. Work on the Memorial Gardens was undertaken throughout the following decade, with a Memorial Forecourt included in the final 1956 plans for the Pre-School Centre. A quote was accepted by the Trust in 1963 for the implementation of a memorial garden, which included grading of a sixty-five foot strip at the rear of the Trust buildings and construction of concrete paths. The stone retaining walls at the front of the site were installed in 1968 when Main Road was widened and it is believed that the Memorial Gates were relocated at that time also. Eltham Senior Citizens Centre In 1964, Eltham Shire Council purchased a section of land from the Trust at the northern end of the site, as a provision for Country Fire Authority buildings. At the same time the Elderly Citizens Club proposed a Senior Citizens Centre on the south western section of the Trust’s property. This was approved by the Trust with the provision that the building was constructed in ‘accord’ with those already existing. In 1965 Council took on board the plans for the Senior Citizens Centre and applied for a government grant. These could only be awarded if Council owned the site. In 1962 the Trust had resolved to hand over the assets to Council once the Memorial Gardens were completed. This was in line with Health Department requirements that grants for the ongoing operation and maintenance of the three facilities would only be made once the the facilities were completed and handed over to Council. In 1965 the Department of Health further demanded substantial alterations to the Pre-School playground as a result of the pending impact of the planned Senior Citizens Centre and Main Road duplication. As a consequence, handover of the Trust’s assets to Council was initiated with a formal ceremony held in the Children’s Library on August 28th, 1965. The Trust continued on as a committee of management for another twelve months. Plans and specifications for the Senior Citizens Centre were prepared by March 1966. Council obtained a grant from the Government which covered one third of the cost and the building was completed by April 1967. Whilst the Senior Citizens Centre is contained within the original Eltham War Memorial building precinct, it was not part of the original Memorial and was not funded by the Eltham War Memorial Trust.Newsprint clippingeltham children's library, eltham infant welfare centre, eltham pre-school, eltham war memorial hall, eltham war memorial trust, women's auxiliary -
 Eltham District Historical Society Inc
Newspaper, The News: The Newspaper of the City of Heidelberg and of the Shire of Eltham; Friday, December 1, 1950, 1950
Page 1 article about the laying of the foundation stone for the Baby Health Centre by the Governor of Victoria (Sir Dallas Brooks) on Friday, November 24, 1950 (including photograph of Sir Dallas Brooks laying the stone) History of the War Memorial Following the end of the First World War, communities across Victoria and Australia typically erected memorials which were predominantly statues, cenotaphs, avenues of honour and plaques. The Shire of Eltham established the Avenue of Honour at the gateway to the shire as well as an obelisk at the corner of Main Road and Bridge street and the Shire of Eltham War Memorial Tower at Kangaroo Ground. After the Second World War communities once again desired to preserve the memories of those who served and paid the ultimate sacrifice. Resources were scarce so there was a transition away from the traditional style memorials that sprang up post 1918 to one of building facilities that would provide ongoing benefit to the community. Even before the end of the Second World War, the citizens of Eltham began to consider an appropriate form of memorial for those from the area who fought and died in the First and Second World Wars. In 1943 the Eltham Women’s Auxiliary raised funds for the construction of buildings to be established on land to be purchased for the proposed War Memorial. On March 27th, 1945, the Eltham District Progress Association called a meeting of local people who in turn set up and registered the Eltham War Memorial Trust Inc. As a focus for the purpose of the memorial, the newspaper notice read:- ‘Those who have had a member of their family in the fighting services will want to see that the form of a memorial we are concerned with is the one which will be a constant reminder to us of those who fought for us and the little ones for whom they fought and died.’ At that meeting it was decided the Memorial should take the form of a baby health centre along with a creche and children’s library. In late 1945, the newly formed Eltham War Memorial Trust purchased the land at 903-907 Main Road Eltham from Miss Shillinglaw, which once formed part of the Shillinglaw farm on Lot 90 of Holloway’s 1851 “Little Eltham” subdivision. The Governor of Victoria, General Sir Dallas Brooks, laid the foundation stone on November 24th, 1950, in memory of those who fell in the Second World War. The Eltham Infant Welfare Centre was opened November 15th, 1952, the Pre-school on December 1st, 1956, and the Children’s Library in 1961. In late 1966 the children’s library service was integrated into the Heideberg Regional Library Service and the building was officially renamed the Eltham War Memorial Hall. Following the opening of the Eltham Infant Welfare Centre, work began in 1953 planning for the entrance to the grounds, which is signaled by a wrought iron arch entitled “Eltham War Memorial” . In 1954 the Eltham War Memorial Trust decided that a legacy provided by the late Councillor Ernest James Andrew (d. 29 March 1950) in memory of his wife, Mrs. Ellen Andrew (d. 13 July 1946) and who are both buried at Eltham Cemetery, should be used to fund the construction of the entrance. A metal plate inscribed to this effect was attached to the gates. Work on the Memorial Gardens was undertaken throughout the following decade, with a Memorial Forecourt included in the final 1956 plans for the Pre-School Centre. A quote was accepted by the Trust in 1963 for the implementation of a memorial garden, which included grading of a sixty-five foot strip at the rear of the Trust buildings and construction of concrete paths. The stone retaining walls at the front of the site were installed in 1968 when Main Road was widened and it is believed that the Memorial Gates were relocated at that time also. Eltham Senior Citizens Centre In 1964, Eltham Shire Council purchased a section of land from the Trust at the northern end of the site, as a provision for Country Fire Authority buildings. At the same time the Elderly Citizens Club proposed a Senior Citizens Centre on the south western section of the Trust’s property. This was approved by the Trust with the provision that the building was constructed in ‘accord’ with those already existing. In 1965 Council took on board the plans for the Senior Citizens Centre and applied for a government grant. These could only be awarded if Council owned the site. In 1962 the Trust had resolved to hand over the assets to Council once the Memorial Gardens were completed. This was in line with Health Department requirements that grants for the ongoing operation and maintenance of the three facilities would only be made once the the facilities were completed and handed over to Council. In 1965 the Department of Health further demanded substantial alterations to the Pre-School playground as a result of the pending impact of the planned Senior Citizens Centre and Main Road duplication. As a consequence, handover of the Trust’s assets to Council was initiated with a formal ceremony held in the Children’s Library on August 28th, 1965. The Trust continued on as a committee of management for another twelve months. Plans and specifications for the Senior Citizens Centre were prepared by March 1966. Council obtained a grant from the Government which covered one third of the cost and the building was completed by April 1967. Whilst the Senior Citizens Centre is contained within the original Eltham War Memorial building precinct, it was not part of the original Memorial and was not funded by the Eltham War Memorial Trust.Newspaper Broadsheet, 8 pageseltham children's library, eltham infant welfare centre, eltham pre-school, eltham war memorial hall, eltham war memorial trust, women's auxiliary -
 Eltham District Historical Society Inc
Souvenir Booklet, Eltham War Memorial Trust, 1954, 1954
History of the War Memorial Following the end of the First World War, communities across Victoria and Australia typically erected memorials which were predominantly statues, cenotaphs, avenues of honour and plaques. The Shire of Eltham established the Avenue of Honour at the gateway to the shire as well as an obelisk at the corner of Main Road and Bridge street and the Shire of Eltham War Memorial Tower at Kangaroo Ground. After the Second World War communities once again desired to preserve the memories of those who served and paid the ultimate sacrifice. Resources were scarce so there was a transition away from the traditional style memorials that sprang up post 1918 to one of building facilities that would provide ongoing benefit to the community. Even before the end of the Second World War, the citizens of Eltham began to consider an appropriate form of memorial for those from the area who fought and died in the First and Second World Wars. In 1943 the Eltham Women’s Auxiliary raised funds for the construction of buildings to be established on land to be purchased for the proposed War Memorial. On March 27th, 1945, the Eltham District Progress Association called a meeting of local people who in turn set up and registered the Eltham War Memorial Trust Inc. As a focus for the purpose of the memorial, the newspaper notice read:- ‘Those who have had a member of their family in the fighting services will want to see that the form of a memorial we are concerned with is the one which will be a constant reminder to us of those who fought for us and the little ones for whom they fought and died.’ At that meeting it was decided the Memorial should take the form of a baby health centre along with a creche and children’s library. In late 1945, the newly formed Eltham War Memorial Trust purchased the land at 903-907 Main Road Eltham from Miss Shillinglaw, which once formed part of the Shillinglaw farm on Lot 90 of Holloway’s 1851 “Little Eltham” subdivision. The Governor of Victoria, General Sir Dallas Brooks, laid the foundation stone on November 24th, 1950, in memory of those who fell in the Second World War. The Eltham Infant Welfare Centre was opened November 15th, 1952, the Pre-school on December 1st, 1956, and the Children’s Library in 1961. In late 1966 the children’s library service was integrated into the Heideberg Regional Library Service and the building was officially renamed the Eltham War Memorial Hall. Following the opening of the Eltham Infant Welfare Centre, work began in 1953 planning for the entrance to the grounds, which is signaled by a wrought iron arch entitled “Eltham War Memorial” . In 1954 the Eltham War Memorial Trust decided that a legacy provided by the late Councillor Ernest James Andrew (d. 29 March 1950) in memory of his wife, Mrs. Ellen Andrew (d. 13 July 1946) and who are both buried at Eltham Cemetery, should be used to fund the construction of the entrance. A metal plate inscribed to this effect was attached to the gates. Work on the Memorial Gardens was undertaken throughout the following decade, with a Memorial Forecourt included in the final 1956 plans for the Pre-School Centre. A quote was accepted by the Trust in 1963 for the implementation of a memorial garden, which included grading of a sixty-five foot strip at the rear of the Trust buildings and construction of concrete paths. The stone retaining walls at the front of the site were installed in 1968 when Main Road was widened and it is believed that the Memorial Gates were relocated at that time also. Eltham Senior Citizens Centre In 1964, Eltham Shire Council purchased a section of land from the Trust at the northern end of the site, as a provision for Country Fire Authority buildings. At the same time the Elderly Citizens Club proposed a Senior Citizens Centre on the south western section of the Trust’s property. This was approved by the Trust with the provision that the building was constructed in ‘accord’ with those already existing. In 1965 Council took on board the plans for the Senior Citizens Centre and applied for a government grant. These could only be awarded if Council owned the site. In 1962 the Trust had resolved to hand over the assets to Council once the Memorial Gardens were completed. This was in line with Health Department requirements that grants for the ongoing operation and maintenance of the three facilities would only be made once the the facilities were completed and handed over to Council. In 1965 the Department of Health further demanded substantial alterations to the Pre-School playground as a result of the pending impact of the planned Senior Citizens Centre and Main Road duplication. As a consequence, handover of the Trust’s assets to Council was initiated with a formal ceremony held in the Children’s Library on August 28th, 1965. The Trust continued on as a committee of management for another twelve months. Plans and specifications for the Senior Citizens Centre were prepared by March 1966. Council obtained a grant from the Government which covered one third of the cost and the building was completed by April 1967. Whilst the Senior Citizens Centre is contained within the original Eltham War Memorial building precinct, it was not part of the original Memorial and was not funded by the Eltham War Memorial Trust.16 pages 18.5 x 12.3 cm, double stapled; three copies. 1,000 copies distributed 1953-54 Copy marked '1954' in red pencil from personal papers of Stanley Simpson Addison M.B.E.Copy marked '1954' in red pencil from personal papers of Stanley Simpson Addison M.B.E.eltham children's library, eltham infant welfare centre, eltham pre-school, eltham war memorial hall, eltham war memorial trust, stanley s addison collection, women's auxiliary -
 Eltham District Historical Society Inc
Minute Book, Eltham War Memorial Trust; Easter Gymkhana Committee Minutes, 19 Nov 1954-6 Jun 1958
History of the War Memorial Following the end of the First World War, communities across Victoria and Australia typically erected memorials which were predominantly statues, cenotaphs, avenues of honour and plaques. The Shire of Eltham established the Avenue of Honour at the gateway to the shire as well as an obelisk at the corner of Main Road and Bridge street and the Shire of Eltham War Memorial Tower at Kangaroo Ground. After the Second World War communities once again desired to preserve the memories of those who served and paid the ultimate sacrifice. Resources were scarce so there was a transition away from the traditional style memorials that sprang up post 1918 to one of building facilities that would provide ongoing benefit to the community. Even before the end of the Second World War, the citizens of Eltham began to consider an appropriate form of memorial for those from the area who fought and died in the First and Second World Wars. In 1943 the Eltham Women’s Auxiliary raised funds for the construction of buildings to be established on land to be purchased for the proposed War Memorial. On March 27th, 1945, the Eltham District Progress Association called a meeting of local people who in turn set up and registered the Eltham War Memorial Trust Inc. As a focus for the purpose of the memorial, the newspaper notice read:- ‘Those who have had a member of their family in the fighting services will want to see that the form of a memorial we are concerned with is the one which will be a constant reminder to us of those who fought for us and the little ones for whom they fought and died.’ At that meeting it was decided the Memorial should take the form of a baby health centre along with a creche and children’s library. In late 1945, the newly formed Eltham War Memorial Trust purchased the land at 903-907 Main Road Eltham from Miss Shillinglaw, which once formed part of the Shillinglaw farm on Lot 90 of Holloway’s 1851 “Little Eltham” subdivision. The Governor of Victoria, General Sir Dallas Brooks, laid the foundation stone on November 24th, 1950, in memory of those who fell in the Second World War. The Eltham Infant Welfare Centre was opened November 15th, 1952, the Pre-school on December 1st, 1956, and the Children’s Library in 1961. In late 1966 the children’s library service was integrated into the Heideberg Regional Library Service and the building was officially renamed the Eltham War Memorial Hall. Following the opening of the Eltham Infant Welfare Centre, work began in 1953 planning for the entrance to the grounds, which is signaled by a wrought iron arch entitled “Eltham War Memorial” . In 1954 the Eltham War Memorial Trust decided that a legacy provided by the late Councillor Ernest James Andrew (d. 29 March 1950) in memory of his wife, Mrs. Ellen Andrew (d. 13 July 1946) and who are both buried at Eltham Cemetery, should be used to fund the construction of the entrance. A metal plate inscribed to this effect was attached to the gates. Work on the Memorial Gardens was undertaken throughout the following decade, with a Memorial Forecourt included in the final 1956 plans for the Pre-School Centre. A quote was accepted by the Trust in 1963 for the implementation of a memorial garden, which included grading of a sixty-five foot strip at the rear of the Trust buildings and construction of concrete paths. The stone retaining walls at the front of the site were installed in 1968 when Main Road was widened and it is believed that the Memorial Gates were relocated at that time also. Eltham Senior Citizens Centre In 1964, Eltham Shire Council purchased a section of land from the Trust at the northern end of the site, as a provision for Country Fire Authority buildings. At the same time the Elderly Citizens Club proposed a Senior Citizens Centre on the south western section of the Trust’s property. This was approved by the Trust with the provision that the building was constructed in ‘accord’ with those already existing. In 1965 Council took on board the plans for the Senior Citizens Centre and applied for a government grant. These could only be awarded if Council owned the site. In 1962 the Trust had resolved to hand over the assets to Council once the Memorial Gardens were completed. This was in line with Health Department requirements that grants for the ongoing operation and maintenance of the three facilities would only be made once the the facilities were completed and handed over to Council. In 1965 the Department of Health further demanded substantial alterations to the Pre-School playground as a result of the pending impact of the planned Senior Citizens Centre and Main Road duplication. As a consequence, handover of the Trust’s assets to Council was initiated with a formal ceremony held in the Children’s Library on August 28th, 1965. The Trust continued on as a committee of management for another twelve months. Plans and specifications for the Senior Citizens Centre were prepared by March 1966. Council obtained a grant from the Government which covered one third of the cost and the building was completed by April 1967. Whilst the Senior Citizens Centre is contained within the original Eltham War Memorial building precinct, it was not part of the original Memorial and was not funded by the Eltham War Memorial Trust.33 x 21 x 1 cm; green faux crocodile skin hard board end-covers with black spine binding; 82 pages (last 38 blank)easter gymkhana committee, eltham war memorial trust, minutes -
 Ballarat Clarendon College
Book, The watches of the trails
John Anning MacLeod John was born in Ballarat as the second generation of Ballarat MacLeod’s, with his grandfather arriving in Geelong on the Hornet in 1857 as an 11 year old child with his 60 year old father John and mother Mary aged 37 years and 5 brothers and one sister. He grew up on the corner of Drummond Street and Mair Streets, opposite what became St John of God hospital, at his parents house of Dunvegan. John entered Ballarat College as a junior student in 1923. He received 3rd in Form prizes in both 1924 and 1925. His sister Margaret, attended Clarendon Ladies College. The household employed a chauffeur, a cook, a gardener and a ladies maid to care for them. In the 1930’s his father lost his fortune in the collapse of the jute future’s market so the staff were dismissed and he left Ballarat to go to Geelong College as a boarder. He was an officer in the Geelong College cadet corps and joined the Army as a private and rose to the permanent rank of Major after meritorious performance in the intelligence area of operations. He served in North Africa, in Palestine, Egypt, Moratai, the Philippines, Java and New Guinea. He was awarded his Military MBE by King George VI for exceptional devotion to duty and for brilliant coordination work amongst the allied intelligence team. During the war he met Mary Monica Carrol Bateman, a lietenant in the 2/4th Army General Hospital at a dinner party in Brisbane. The couple had four children, Hamish John Torquil born in 1945, Rory Hugh Alexander born in 1947 and twins Ian Donald and Katriona Margaret born in 1948. After the Second World War he worked for Lumley’s Insurance Brokers in London for a couple of years to follow up his accountancy training and then returned to Ballarat due to his father’s failing health and took over the management of John MacLeod and Co, Wholesale grocers and Merchants in Lydiard Street, Ballarat. The business had been started by his great grandfather and they produced the famous Sirdar brand of products and a special tea blend called Afternoon Cup. There was a spice mill in nearby Market Street and there they roasted peanuts, coffee and ground spices for packaging and distribution to the small corner shops who were the mainstay of commercial grocery. In the 1950’s John MacLeod and Co merged with James McKay and Sons to form McKay MacLeod Pty Ltd., wholesale tobacco, wine and spirits and grocery merchants who also manufactured the Sunny South brand of sweet mustard pickles, brewed vinegar and tomato sauce. He introduced the semi-automated system for extensions and financial records on the Bradma plates that saved staff the problems of sorting out the calculations for sales tax, miscellaneous charges etc. that greatly sped up the transactions at the checkout points. A new warehouse and office complex was built in Mair Street east up near Humffray Street, with the manufacturing factory on the opposite side of the street. They had a shop in St Arnaud and one in Geelong which was the local wholesaler for supplying to the corner shops of the greater Geelong area. With the development of supermarkets the demise of the corner store began and so the sales profiles began to diminish. He unsuccessfully stood for Liberal Party pre-selection for the seat of Ballarat in 1948 and served on the Liberal state finance and executive team for many years before resigning over the issue of conscripts being sent to Vietnam. He was instrumental in leading a group of Ballarat academics in opposition to the Vietnam war and publicly resigned from the Liberal Party over their foreign policy. John MacLeod saw the writing on the wall of the business in the early 1970’s and suggested that the firm restructured with focusing on tobacco, wine and spirits. His partners did not agree and so he sold out and retired to Barwon Heads. After a few years of golfing and surfing he became frustrated and joined SCORE, the Service Corp of Retired Executives. In this role he worked for ten years in the Geelong area solving accounting problems for Geelong small businesses and so helped Beaumont’s bakery back onto its feet. He worked gentlemen’s hours of 10 am to 3 pm which allowed him to have time for a round of 9 holes on the golf course at the end of the day and to have a surf before breakfast. He fully retired at the age of 65 and had ten years of voluminous reading of local library books before dying of burns at the age of 75. His war record has been documented in other archives at the College. He was a member of the Naval and Military Club and of the Barwon Heads Golf Club. He had good crafting skills and built a series of steam driven boats for his four children that used to be sailed at home on Lake Wendouree, Lake Learmonth and on the sheltered waters of the Barwon River. The boats are now being restored to operational order to be sailed by his great grandson Grayson Girardi. Red cloth bound book with title printed in gold lettering on spine, embossed publisher's mark centre of front cover and school crest in gold relief on front cover; book plate inside front cover. Book plate inside front cover: School crest / Ballarat College / I form / 3rd in form Prize / Awarded to / J MacLeod / December 1924 A Richardson B A Principaljohn-macleod, ballarat-college, book-prize, 1924 -
 Ballarat Clarendon College
Book, The school across the road
John Anning MacLeod John was born in Ballarat as the second generation of Ballarat MacLeod’s, with his grandfather arriving in Geelong on the Hornet in 1857 as an 11 year old child with his 60 year old father John and mother Mary aged 37 years and 5 brothers and one sister. He grew up on the corner of Drummond Street and Mair Streets, opposite what became St John of God hospital, at his parents house of Dunvegan. John entered Ballarat College as a junior student in 1923. He received 3rd in Form prizes in both 1924 and 1925. His sister Margaret, attended Clarendon Ladies College. The household employed a chauffeur, a cook, a gardener and a ladies maid to care for them. In the 1930’s his father lost his fortune in the collapse of the jute future’s market so the staff were dismissed and he left Ballarat to go to Geelong College as a boarder. He was an officer in the Geelong College cadet corps and joined the Army as a private and rose to the permanent rank of Major after meritorious performance in the intelligence area of operations. He served in North Africa, in Palestine, Egypt, Moratai, the Philippines, Java and New Guinea. He was awarded his Military MBE by King George VI for exceptional devotion to duty and for brilliant coordination work amongst the allied intelligence team. During the war he met Mary Monica Carrol Bateman, a lietenant in the 2/4th Army General Hospital at a dinner party in Brisbane. The couple had four children, Hamish John Torquil born in 1945, Rory Hugh Alexander born in 1947 and twins Ian Donald and Katriona Margaret born in 1948. After the Second World War he worked for Lumley’s Insurance Brokers in London for a couple of years to follow up his accountancy training and then returned to Ballarat due to his father’s failing health and took over the management of John MacLeod and Co, Wholesale grocers and Merchants in Lydiard Street, Ballarat. The business had been started by his great grandfather and they produced the famous Sirdar brand of products and a special tea blend called Afternoon Cup. There was a spice mill in nearby Market Street and there they roasted peanuts, coffee and ground spices for packaging and distribution to the small corner shops who were the mainstay of commercial grocery. In the 1950’s John MacLeod and Co merged with James McKay and Sons to form McKay MacLeod Pty Ltd., wholesale tobacco, wine and spirits and grocery merchants who also manufactured the Sunny South brand of sweet mustard pickles, brewed vinegar and tomato sauce. He introduced the semi-automated system for extensions and financial records on the Bradma plates that saved staff the problems of sorting out the calculations for sales tax, miscellaneous charges etc. that greatly sped up the transactions at the checkout points. A new warehouse and office complex was built in Mair Street east up near Humffray Street, with the manufacturing factory on the opposite side of the street. They had a shop in St Arnaud and one in Geelong which was the local wholesaler for supplying to the corner shops of the greater Geelong area. With the development of supermarkets the demise of the corner store began and so the sales profiles began to diminish. He unsuccessfully stood for Liberal Party pre-selection for the seat of Ballarat in 1948 and served on the Liberal state finance and executive team for many years before resigning over the issue of conscripts being sent to Vietnam. He was instrumental in leading a group of Ballarat academics in opposition to the Vietnam war and publicly resigned from the Liberal Party over their foreign policy. John MacLeod saw the writing on the wall of the business in the early 1970’s and suggested that the firm restructured with focusing on tobacco, wine and spirits. His partners did not agree and so he sold out and retired to Barwon Heads. After a few years of golfing and surfing he became frustrated and joined SCORE, the Service Corp of Retired Executives. In this role he worked for ten years in the Geelong area solving accounting problems for Geelong small businesses and so helped Beaumont’s bakery back onto its feet. He worked gentlemen’s hours of 10 am to 3 pm which allowed him to have time for a round of 9 holes on the golf course at the end of the day and to have a surf before breakfast. He fully retired at the age of 65 and had ten years of voluminous reading of local library books before dying of burns at the age of 75. His war record has been documented in other archives at the College. He was a member of the Naval and Military Club and of the Barwon Heads Golf Club. He had good crafting skills and built a series of steam driven boats for his four children that used to be sailed at home on Lake Wendouree, Lake Learmonth and on the sheltered waters of the Barwon River. The boats are now being restored to operational order to be sailed by his great grandson Grayson Girardi. john-macleod, ballarat-college, 1925, book-prize -
 Ringwood and District Historical Society
Newspaper, The Mail, Obituary - Joseph Richard Sanders - Old and Respected Pioneer Ringwood 1959 from the Ringwood Mail, 1959
The article was contributed by J.K.McCaskill, JP. a mayor of Ringwood in the years between 1924-1951.The Sanders family came from England and are mentioned in the book "Ringwood a Place of Many Eagles" by Hugh AndersonObituary from The Ringwood Mail of Joseph Richard Sanders of 18, Wantirna Road, Ringwood, aged 87 years. He came from a family who were early pioneers of Ringwood. he was born in Collingwood but schooled in Ringwood, married and brought up his family in Ringwood. He lived at 18, Wantirna Road .The article was contributed by J.K.McCaskill, JP. a mayor of Ringwood in the years between 1924-1951.Transcript: "The death occurred of Joseph Richard Sanders, 18 Wantirna Rd, Ringwood, on Wednesday, 21st October 1959, in his 87th year, marks the passing of another of Ringwood’s early pioneers. He was born in Collingwood in August 1873 and came to Ringwood with his parents when 15 months old. They made their home on land on what is now known as Jubilee Park (Fuller particulars of this Park will appear in ‘The Mail’ at a later date, also reference will be made to Wantirna Rd, in the early days it was known as West Prussia Rd). Joe went to the school held in the old homestead and orchard of Mr. Mills, just through the Heatherdale Road railway gates. He remembered many of the scholars, some of the boys and girls had to walk three and four miles to school through rough scrub paddocks in all kinds of weather. During the lunch hour a few of the boys generally went to the creek to fish for eels and would be late in getting back to school, greatly to the annoyance of the teacher. One day the fishing was good, and the boys rather reluctantly returned to the school late as usual. The teacher was furious and made them stand in front of the class but before inflicting punishment she called out to one of the boys to throw out that dirty bag he was holding. The lad gave the bag a shake and out wriggled a snake. There was immediately a general stampede from the classroom, led by the teacher. The school was closed for the rest of the afternoon. Another incident related to a few tramps who after the scholars had all gone home, generally camped for the night in an old back room in the homestead. One of the boys put a little gunpowder in this old fireplace and when the tramps lit the fire to boil their billies the old chimney and part of the old wall just collapsed. Joe, after leaving school, worked around the district for some time and later left Ringwood to live in other suburbs. He at one time was employed at the Aust Glass Works, and later as a carpenter worked on building the dome of the Railway Station at Flinders St. He married a Miss E. M. Wood in 1901 at Richmond and a few years afterwards returned to Ringwood and resided at No. 18 Wantirna Rd., where he reared a family' of three girls (Alice, Ethel, Joyce) and two boys (Robert and Joe). Joe recalled many interesting events of earlier years, such as the duplication of the railway line, and the cutting back of the embankment at the Goods Shed, the earth being used to heighten up the railway bridge over Wantirna Rd. The brickworks at Ringwood East and reference to early land surveys, the using of the heavy chain links before the use of the theodolite became general, and the many neighbours and friends whom he knew. He was interested in local public affairs and was fond of fishing. He proved himself a good citizen and was highly respected and esteemed throughout the district, and so another old pioneer passes on." (Contributed by J. K. McCaskill, J.P.) RM 19 Nov 1959 -
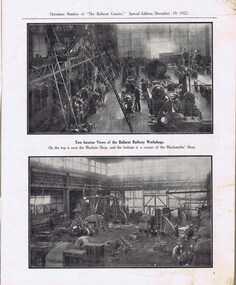 Ballarat Tramway Museum
Newspaper, The Courier Ballarat, The Courier, Christmas Number, 1922, Special Issue, Dec. 1922
Yields information about Ballarat, it businesses, identifies and its locations or environs through photos and advertisements and articles.The body of the "Christmas Number of the Ballarat Courier, Special Edition - December 1922" = coves missing. See attached listing with worksheet for summary of contents. Contains many advertisement for local business houses, photos and fiction and articles , pages 3 - 94 still existing, stapled. Notes on contents of Christmas Number of The Ballarat Courier Special edition, December 19, 1922. Photos Ballarat Association Cricket Team, winners Country championship - 1922 and photo of dinner at Sth Melb. Town Hall by VCA. - p83 Ballarat Golf club, Arch of Victoria and Club House - p63, 65 Ballarat Imperial Football club - league premier- 1922 - p19 Ballarat Miners Turf Club - showing stands and office bearers - p43 Ballarat North Golf Club - p67 Ballarat Town hall - p87 Ballarat Turf Club Office bearers and race finish - p45 Ballarat Yacht club - opening day and yacht race - p89 Black Hill Progress Association, - members and scenes - p33 Eureka Monument - p79 Finish of a race at Miners RC - p45 Head of the Lake and St. Patrick's the winning crew - p47 1.ake Wendouree - boating on (Gardens side - p] 1 Lake Wendouree, rowing and club houses - p28 Lal Lal waterfalls - p61 Lydiard St. View - Railway Station, Cemetery gates, Mining Exchange, Post Office and Banks - p71 National Federation Conference - 1922 - p39 South city Football club, Ballarat Assoc. Premiers 1922 - p25 Sturt and Lydiard St - top photo Town Hall and T&G building, with ESCo tram (pencil note "Tram No- 3 - Peckham Truck" written in - p75. Bottom photo, looking south from Town Hall. The Western Oval during a football match - p23 Victorian Farmers Union Conference, Ballarat 1922 - p37 Victorian Railway photos of various scenes around Victoria: Pages 3, 5, 7, 55, 59 Views of Victoria Park - p91 VR Ballarat Railway Workshops - p9 Advertisements on even numbered pages, featuring in particular: Ballarat Motor Garage - with photos - p88 C.A.V. Willard - storage battery service Stn - p76 with photo. CA Mitaxa - Builder - includes photos of new homes - p38 Coles & Pullham - stock sales - with photos - p86 ESCo - p70 Geo E. Dibble, machinery merchant - includes photos - p26 Geo. Waller - asphalt and carrier - photos of work and buildings Hanrahan's of Ballarat - Garage and stables - p30 J.L.Ridings - dentists, - photos of surgery p14 Longhurst's Bakeries - Mair and Yuille St. Includes Photos. - P84 Preston Motors, Melbourne - The Maxwell Sep Morse - Motor and Carriage builders - photo - p78 St. Patrick's College - photos of students and buildings - p46 State Savings Bank of Vic. - p20 T-J. Brown house remover and general carrier, photo of traction engines - p90 T.J.Haymes - Wallpaper etc. - p33 The Ballarat Co-Op Distribution Society - includes photos - p44 The Hupmobile - McLean Richards Motors - p22 Wallace Butter Factor - p82 Articles Black Hill Progress Association - p35 Damaged pages - cut outs clippings etc. Page 17/18 - top half bottom 1/3 of page 21/22 Pages: 9, 70, 71, 75, 87 and 90 imaged. Record reviewed and images of some of the pages added 10-9-2013p74. Note re tram 33.trams, tramways, ballarat, commerce, ballarat business, sports, science, esco -
 Flagstaff Hill Maritime Museum and Village
Domestic object - Bowl, Late 19th or early 20th Century
The Process of Making Pottery Decorating, Firing, Glazing, Making, Technical There is a rhythm and flow to clay. It can’t be done all at once! Even the making process! It can take weeks to get everything done, especially if you can only work on your pottery once a week! Even though we have three hour classes, it’s often just not enough time! Here is an overview of some of the processes so you have a bit more grasp on some of the technical stuff! Step One – Design There are SO many ideas out there for making stuff in clay! From delicate porcelain jewellery, through to heavy sculptural work and everything in between. Deciding your direction is sometimes not that easy – when you first start, try everything, you will naturally gravitate to the style that you enjoy! The options and variations are endless and can get a wee bit overwhelming too! Check in with me before you start to ensure your ideas will work, what order you might do things, how you could achieve the look you are seeking and any other technical data required! Step Two – Making Clay is thixotropic. This means that as you work with it, the clay first gets sloppier and wetter, before is begins to dry in the atmosphere. For most things, you simply can’t do all parts of the project at once. An example of work order might look like: Get last weeks work out from the shelves Prepare clay for today’s work – roll your clay, prepare balls for throwing, make the first stage of a pinch pot) Clean up last week’s work and put it on the shelf for bisque firing Check that you have any glazing to do – and do enough of it that you will have time to finish your main project Do the next step of your next project – there might be a further step that can’t be complete immediately, in that case, wrap your work well and put onto the shelves. Letting your work rest for a while can really help keep your work clean and professional looking. Many things require bagging under plastic to keep it ready for work the next week – put your name on the outside of the bag so you can find your work easily. We have stickers and markers. Consider how you want to decorate your work – coloured slip can be applied at a fairly wet stage (remembering that it will make your work even wetter!). Trying to apply slip to dry clay won’t work! If you want to do sgraffito – you will need to keep the work leather hard (a state of dryness where you can still work the clay with a little effort and a little water and care). Step Three – Drying Most of the time your work can go into the rack uncovered to let it dry out for the following week. If you want to continue forming or shaping you will need to double bag your work – put your work on a suitable sized bat and put the bat in a bag so the base of the bag is under the bat, then put another bag over the top of the work and tuck the top of the bag under the bat. If you want to trim (or turn) your thrown work the following week, it should also be double bagged. If your work is large, delicate, or of uneven thicknesses, you should lightly cover your work for drying. When considering the drying process, bare in mind the weather, humidity and wind! The hotter and dryer, the faster things dry and work can dry unevenly in the shelves – this can lead to cracking – another time to lightly cover your work for drying. Step Four – Trimming and Cleaning Up Your work is dry! It is called greenware now and it is at it’s most fragile! Handle everything with two hands. I often refer to soft hands – keep everything gentle and with your fingers spread as much as possible. Try to not pick up things like plates too much, and always with both hands! Before your work can be bisque fired it should be “cleaned up”. You work won’t go into the kiln if it has sharp edges – when glazed, sharp edges turn into razor blades! Use a piece of fly wire to rub the work all over – this will scratch a little so be light handed. Use a knife or metal kidney to scrape any areas that require a bit more dynamic treatment than the fly wire offers! Finally, a very light wipe over with a slightly damp sponge can help soften and soothe all of your edges and dags! Trimming thrown work: If you are planning to trim (or turn) your thrown work (and you should be), make sure you bag it well – your work should be leather hard to almost dry for easiest trimming. Use this step to finish the work completely – use a metal kidney to polish the surface, or a slightly damp sponge to give a freshly thrown look. Wipe the sponge around the rim after trimming, and check the inside of the pot for dags! Trimming slip cast work: Usually I will trim the rims of your work on the wheel the following day to make that stage easier, however you will still need to check your work for lumps and bumps. Last but not least – check that your name is still clearly on the bottom of your work. Step Five – Bisque Firing When the work is completely dry it can go into the bisque kiln. The bisque kiln is fired to 1000°C. This process burns off the water in the clay as well as some of the chemically bound water. The structure of the clay is not altered that much at this temperature. Inside the bisque kiln, the work is stacked a little, small bowl inside a larger bowl and onto a heavy plate. Smaller items like decorations or drink coasters might get stacked several high. Consideration is paid to the weight of the stack and shape of the work. A bisque kiln can fire about one and a half times the amount of work that the glaze kiln can fire. The firing takes about 10 hours to complete the cycle and about two days to cool down. Once it has been emptied the work is placed in the glaze room ready for you to decorate! Step Six – Glazing Decorating your work with colour can be a lot of fun – and time consuming! There are three main options for surface treatment at this stage: Oxide Washes Underglazes Glazes Washes and underglazes do not “glaze” the work – It will still need a layer of glaze to fully seal the clay (washes don’t need glaze on surfaces not designed for food or liquid as they can gloss up a little on their own). Underglazes are stable colourants that turn out pretty much how they look in the jar. They can be mixed with each other to form other colours and can be used like water colours to paint onto your work. Mostly they should have a clear glaze on top to seal them. Oxides are a different species – the pink oxide (cobalt) wash turns out bright blue for instance. They don’t always need a glaze on top, and some glazes can change the colour of the wash! The glazes need no other “glaze” on top! Be careful of unknown glaze interactions – you can put any combination of glaze in a bowl or on a plate, but only a single glaze on the outside of any vertical surface! Glazes are a chemical reaction under heat. We don’t know the exact chemicals in the Mayco glazes we use. I can guess by the way they interact with each other, however, on the whole, you need to test every idea you have, and not run the test on a vertical surface! Simply put, glaze is a layer of glass like substance that bonds with the clay underneath. Clay is made of silica, alumina and water. Glaze is made of mostly silica. Silica has a melting point of 1700°C and we fire to 1240°C. The silica requires a “flux” to help it melt at the lower temperature. Fluxes can be all sorts of chemicals – a common one is calcium – calcium has a melting point of 2500°C, however, together they both melt at a much lower temperature! Colourants are metal oxides like cobalt (blue), chrome (green through black), copper (green, blue, even red!), manganese (black, purple and pink) iron (red brown), etc. Different chemicals in the glaze can have dramatic effects. for example, barium carbonate (which we don’t use) turns manganese bright pink! Other elements can turn manganese dioxide brown, blue, purple and reddish brown. Manganese dioxide is a flux in and of itself as well. So, glazes that get their black and purple colours, often interact with other glazes and RUN! Our mirror black is a good example – it mixes really well with many glazes because it fluxes them – causes them to melt faster. It will also bring out many beautiful colours in the glazes because it’s black colouring most definitely comes from manganese dioxide! Glaze chemistry is a whole subject on it’s own! We use commercial Mayco glazes on purpose – for their huge range of colour possibilities, stability, cool interactions, artistic freedom with the ability to easily brush the glazes on and ease of use. We currently have almost 50 glazes on hand! A major project is to test the interactions of all glazes with each other. That is 2,500 test tiles!!!! I’m going to make the wall behind the wheels the feature wall of pretty colours! Step Seven – Glaze (Gloss or sometimes called “Glost”) Firing Most of the time this is the final stage of making your creation (but not always!) The glaze kiln goes to 1240°C. This is called cone 6, or midrange. It is the low end of stoneware temperatures. Stoneware clays and glazes are typically fired at cone 8 – 10, that is 1260 – 1290°C. The energy requirement to go from 1240°C to 1280°C is almost a 30% more! Our clay is formulated to vitrify (mature, turn “glass-like”) at 1240°, as are our glazes. A glaze kiln take around 12 hours to reach temperature and two to three days to cool down. Sometimes a third firing process is required – this is for decoration that is added to work after the glaze firing. For example – adding precious metals and lustres. this firing temperature is usually around 600 – 800°C depending upon the techniques being used. There are many students interested in gold and silver trims – we will be doing this third type of firing soon! After firing your work will be in the student finished work shelves. Remember to pay for it before you head out the door! There is a small extra charge for using porcelain clay (it’s more than twice the price of regular clay), and for any third firing process! Once your work has been fired it can not turn back into clay for millennia – so don’t fire it if you don’t like it! Put it in the bucket for recycling. https://firebirdstudios.com.au/the-process-of-making-pottery/ The bowl is an example of kitchenware used in the 19th century and still in use today.Bowl white ceramic. Crack on side. Badly stained.Backstamp very faint and unable to be read.flagstaff hill, warrnambool, shipwrecked-coast, flagstaff-hill, flagstaff-hill-maritime-museum, maritime-museum, shipwreck-coast, flagstaff-hill-maritime-village, mixing bowl, food preparation, kitchen equipment, ceramic -
 Flagstaff Hill Maritime Museum and Village
Domestic object - Bowl
The Process of Making Pottery Decorating, Firing, Glazing, Making, Technical There is a rhythm and flow to clay. It can’t be done all at once! Even the making process! It can take weeks to get everything done, especially if you can only work on your pottery once a week! Even though we have three hour classes, it’s often just not enough time! Here is an overview of some of the processes so you have a bit more grasp on some of the technical stuff! Step One – Design There are SO many ideas out there for making stuff in clay! From delicate porcelain jewellery, through to heavy sculptural work and everything in between. Deciding your direction is sometimes not that easy – when you first start, try everything, you will naturally gravitate to the style that you enjoy! The options and variations are endless and can get a wee bit overwhelming too! Check in with me before you start to ensure your ideas will work, what order you might do things, how you could achieve the look you are seeking and any other technical data required! Step Two – Making Clay is thixotropic. This means that as you work with it, the clay first gets sloppier and wetter, before is begins to dry in the atmosphere. For most things, you simply can’t do all parts of the project at once. An example of work order might look like: Get last weeks work out from the shelves Prepare clay for today’s work – roll your clay, prepare balls for throwing, make the first stage of a pinch pot) Clean up last week’s work and put it on the shelf for bisque firing Check that you have any glazing to do – and do enough of it that you will have time to finish your main project Do the next step of your next project – there might be a further step that can’t be complete immediately, in that case, wrap your work well and put onto the shelves. Letting your work rest for a while can really help keep your work clean and professional looking. Many things require bagging under plastic to keep it ready for work the next week – put your name on the outside of the bag so you can find your work easily. We have stickers and markers. Consider how you want to decorate your work – coloured slip can be applied at a fairly wet stage (remembering that it will make your work even wetter!). Trying to apply slip to dry clay won’t work! If you want to do sgraffito – you will need to keep the work leather hard (a state of dryness where you can still work the clay with a little effort and a little water and care). Step Three – Drying Most of the time your work can go into the rack uncovered to let it dry out for the following week. If you want to continue forming or shaping you will need to double bag your work – put your work on a suitable sized bat and put the bat in a bag so the base of the bag is under the bat, then put another bag over the top of the work and tuck the top of the bag under the bat. If you want to trim (or turn) your thrown work the following week, it should also be double bagged. If your work is large, delicate, or of uneven thicknesses, you should lightly cover your work for drying. When considering the drying process, bare in mind the weather, humidity and wind! The hotter and dryer, the faster things dry and work can dry unevenly in the shelves – this can lead to cracking – another time to lightly cover your work for drying. Step Four – Trimming and Cleaning Up Your work is dry! It is called greenware now and it is at it’s most fragile! Handle everything with two hands. I often refer to soft hands – keep everything gentle and with your fingers spread as much as possible. Try to not pick up things like plates too much, and always with both hands! Before your work can be bisque fired it should be “cleaned up”. You work won’t go into the kiln if it has sharp edges – when glazed, sharp edges turn into razor blades! Use a piece of fly wire to rub the work all over – this will scratch a little so be light handed. Use a knife or metal kidney to scrape any areas that require a bit more dynamic treatment than the fly wire offers! Finally, a very light wipe over with a slightly damp sponge can help soften and soothe all of your edges and dags! Trimming thrown work: If you are planning to trim (or turn) your thrown work (and you should be), make sure you bag it well – your work should be leather hard to almost dry for easiest trimming. Use this step to finish the work completely – use a metal kidney to polish the surface, or a slightly damp sponge to give a freshly thrown look. Wipe the sponge around the rim after trimming, and check the inside of the pot for dags! Trimming slip cast work: Usually I will trim the rims of your work on the wheel the following day to make that stage easier, however you will still need to check your work for lumps and bumps. Last but not least – check that your name is still clearly on the bottom of your work. Step Five – Bisque Firing When the work is completely dry it can go into the bisque kiln. The bisque kiln is fired to 1000°C. This process burns off the water in the clay as well as some of the chemically bound water. The structure of the clay is not altered that much at this temperature. Inside the bisque kiln, the work is stacked a little, small bowl inside a larger bowl and onto a heavy plate. Smaller items like decorations or drink coasters might get stacked several high. Consideration is paid to the weight of the stack and shape of the work. A bisque kiln can fire about one and a half times the amount of work that the glaze kiln can fire. The firing takes about 10 hours to complete the cycle and about two days to cool down. Once it has been emptied the work is placed in the glaze room ready for you to decorate! Step Six – Glazing Decorating your work with colour can be a lot of fun – and time consuming! There are three main options for surface treatment at this stage: Oxide Washes Underglazes Glazes Washes and underglazes do not “glaze” the work – It will still need a layer of glaze to fully seal the clay (washes don’t need glaze on surfaces not designed for food or liquid as they can gloss up a little on their own). Underglazes are stable colourants that turn out pretty much how they look in the jar. They can be mixed with each other to form other colours and can be used like water colours to paint onto your work. Mostly they should have a clear glaze on top to seal them. Oxides are a different species – the pink oxide (cobalt) wash turns out bright blue for instance. They don’t always need a glaze on top, and some glazes can change the colour of the wash! The glazes need no other “glaze” on top! Be careful of unknown glaze interactions – you can put any combination of glaze in a bowl or on a plate, but only a single glaze on the outside of any vertical surface! Glazes are a chemical reaction under heat. We don’t know the exact chemicals in the Mayco glazes we use. I can guess by the way they interact with each other, however, on the whole, you need to test every idea you have, and not run the test on a vertical surface! Simply put, glaze is a layer of glass like substance that bonds with the clay underneath. Clay is made of silica, alumina and water. Glaze is made of mostly silica. Silica has a melting point of 1700°C and we fire to 1240°C. The silica requires a “flux” to help it melt at the lower temperature. Fluxes can be all sorts of chemicals – a common one is calcium – calcium has a melting point of 2500°C, however, together they both melt at a much lower temperature! Colourants are metal oxides like cobalt (blue), chrome (green through black), copper (green, blue, even red!), manganese (black, purple and pink) iron (red brown), etc. Different chemicals in the glaze can have dramatic effects. for example, barium carbonate (which we don’t use) turns manganese bright pink! Other elements can turn manganese dioxide brown, blue, purple and reddish brown. Manganese dioxide is a flux in and of itself as well. So, glazes that get their black and purple colours, often interact with other glazes and RUN! Our mirror black is a good example – it mixes really well with many glazes because it fluxes them – causes them to melt faster. It will also bring out many beautiful colours in the glazes because it’s black colouring most definitely comes from manganese dioxide! Glaze chemistry is a whole subject on it’s own! We use commercial Mayco glazes on purpose – for their huge range of colour possibilities, stability, cool interactions, artistic freedom with the ability to easily brush the glazes on and ease of use. We currently have almost 50 glazes on hand! A major project is to test the interactions of all glazes with each other. That is 2,500 test tiles!!!! I’m going to make the wall behind the wheels the feature wall of pretty colours! Step Seven – Glaze (Gloss or sometimes called “Glost”) Firing Most of the time this is the final stage of making your creation (but not always!) The glaze kiln goes to 1240°C. This is called cone 6, or midrange. It is the low end of stoneware temperatures. Stoneware clays and glazes are typically fired at cone 8 – 10, that is 1260 – 1290°C. The energy requirement to go from 1240°C to 1280°C is almost a 30% more! Our clay is formulated to vitrify (mature, turn “glass-like”) at 1240°, as are our glazes. A glaze kiln take around 12 hours to reach temperature and two to three days to cool down. Sometimes a third firing process is required – this is for decoration that is added to work after the glaze firing. For example – adding precious metals and lustres. this firing temperature is usually around 600 – 800°C depending upon the techniques being used. There are many students interested in gold and silver trims – we will be doing this third type of firing soon! After firing your work will be in the student finished work shelves. Remember to pay for it before you head out the door! There is a small extra charge for using porcelain clay (it’s more than twice the price of regular clay), and for any third firing process! Once your work has been fired it can not turn back into clay for millennia – so don’t fire it if you don’t like it! Put it in the bucket for recycling. https://firebirdstudios.com.au/the-process-of-making-pottery/ This bowl is an example of kitchenware used in the 19th century and still in use today.Bowl white ceramic plain that has two sets of edging around lip. Inside bowl has plaster designed to look like cooking mixture.flagstaff hill, warrnambool, shipwrecked-coast, flagstaff-hill, flagstaff-hill-maritime-museum, maritime-museum, shipwreck-coast, flagstaff-hill-maritime-village, kitchen equipment, ceramic -
 Flagstaff Hill Maritime Museum and Village
Domestic object - Bowl, J & G Meakin, Late 19th or early 20th Century
The Process of Making Pottery Decorating, Firing, Glazing, Making, Technical There is a rhythm and flow to clay. It can’t be done all at once! Even the making process! It can take weeks to get everything done, especially if you can only work on your pottery once a week! Even though we have three hour classes, it’s often just not enough time! Here is an overview of some of the processes so you have a bit more grasp on some of the technical stuff! Step One – Design There are SO many ideas out there for making stuff in clay! From delicate porcelain jewellery, through to heavy sculptural work and everything in between. Deciding your direction is sometimes not that easy – when you first start, try everything, you will naturally gravitate to the style that you enjoy! The options and variations are endless and can get a wee bit overwhelming too! Check in with me before you start to ensure your ideas will work, what order you might do things, how you could achieve the look you are seeking and any other technical data required! Step Two – Making Clay is thixotropic. This means that as you work with it, the clay first gets sloppier and wetter, before is begins to dry in the atmosphere. For most things, you simply can’t do all parts of the project at once. An example of work order might look like: Get last weeks work out from the shelves Prepare clay for today’s work – roll your clay, prepare balls for throwing, make the first stage of a pinch pot) Clean up last week’s work and put it on the shelf for bisque firing Check that you have any glazing to do – and do enough of it that you will have time to finish your main project Do the next step of your next project – there might be a further step that can’t be complete immediately, in that case, wrap your work well and put onto the shelves. Letting your work rest for a while can really help keep your work clean and professional looking. Many things require bagging under plastic to keep it ready for work the next week – put your name on the outside of the bag so you can find your work easily. We have stickers and markers. Consider how you want to decorate your work – coloured slip can be applied at a fairly wet stage (remembering that it will make your work even wetter!). Trying to apply slip to dry clay won’t work! If you want to do sgraffito – you will need to keep the work leather hard (a state of dryness where you can still work the clay with a little effort and a little water and care). Step Three – Drying Most of the time your work can go into the rack uncovered to let it dry out for the following week. If you want to continue forming or shaping you will need to double bag your work – put your work on a suitable sized bat and put the bat in a bag so the base of the bag is under the bat, then put another bag over the top of the work and tuck the top of the bag under the bat. If you want to trim (or turn) your thrown work the following week, it should also be double bagged. If your work is large, delicate, or of uneven thicknesses, you should lightly cover your work for drying. When considering the drying process, bare in mind the weather, humidity and wind! The hotter and dryer, the faster things dry and work can dry unevenly in the shelves – this can lead to cracking – another time to lightly cover your work for drying. Step Four – Trimming and Cleaning Up Your work is dry! It is called greenware now and it is at it’s most fragile! Handle everything with two hands. I often refer to soft hands – keep everything gentle and with your fingers spread as much as possible. Try to not pick up things like plates too much, and always with both hands! Before your work can be bisque fired it should be “cleaned up”. You work won’t go into the kiln if it has sharp edges – when glazed, sharp edges turn into razor blades! Use a piece of fly wire to rub the work all over – this will scratch a little so be light handed. Use a knife or metal kidney to scrape any areas that require a bit more dynamic treatment than the fly wire offers! Finally, a very light wipe over with a slightly damp sponge can help soften and soothe all of your edges and dags! Trimming thrown work: If you are planning to trim (or turn) your thrown work (and you should be), make sure you bag it well – your work should be leather hard to almost dry for easiest trimming. Use this step to finish the work completely – use a metal kidney to polish the surface, or a slightly damp sponge to give a freshly thrown look. Wipe the sponge around the rim after trimming, and check the inside of the pot for dags! Trimming slip cast work: Usually I will trim the rims of your work on the wheel the following day to make that stage easier, however you will still need to check your work for lumps and bumps. Last but not least – check that your name is still clearly on the bottom of your work. Step Five – Bisque Firing When the work is completely dry it can go into the bisque kiln. The bisque kiln is fired to 1000°C. This process burns off the water in the clay as well as some of the chemically bound water. The structure of the clay is not altered that much at this temperature. Inside the bisque kiln, the work is stacked a little, small bowl inside a larger bowl and onto a heavy plate. Smaller items like decorations or drink coasters might get stacked several high. Consideration is paid to the weight of the stack and shape of the work. A bisque kiln can fire about one and a half times the amount of work that the glaze kiln can fire. The firing takes about 10 hours to complete the cycle and about two days to cool down. Once it has been emptied the work is placed in the glaze room ready for you to decorate! Step Six – Glazing Decorating your work with colour can be a lot of fun – and time consuming! There are three main options for surface treatment at this stage: Oxide Washes Underglazes Glazes Washes and underglazes do not “glaze” the work – It will still need a layer of glaze to fully seal the clay (washes don’t need glaze on surfaces not designed for food or liquid as they can gloss up a little on their own). Underglazes are stable colourants that turn out pretty much how they look in the jar. They can be mixed with each other to form other colours and can be used like water colours to paint onto your work. Mostly they should have a clear glaze on top to seal them. Oxides are a different species – the pink oxide (cobalt) wash turns out bright blue for instance. They don’t always need a glaze on top, and some glazes can change the colour of the wash! The glazes need no other “glaze” on top! Be careful of unknown glaze interactions – you can put any combination of glaze in a bowl or on a plate, but only a single glaze on the outside of any vertical surface! Glazes are a chemical reaction under heat. We don’t know the exact chemicals in the Mayco glazes we use. I can guess by the way they interact with each other, however, on the whole, you need to test every idea you have, and not run the test on a vertical surface! Simply put, glaze is a layer of glass like substance that bonds with the clay underneath. Clay is made of silica, alumina and water. Glaze is made of mostly silica. Silica has a melting point of 1700°C and we fire to 1240°C. The silica requires a “flux” to help it melt at the lower temperature. Fluxes can be all sorts of chemicals – a common one is calcium – calcium has a melting point of 2500°C, however, together they both melt at a much lower temperature! Colourants are metal oxides like cobalt (blue), chrome (green through black), copper (green, blue, even red!), manganese (black, purple and pink) iron (red brown), etc. Different chemicals in the glaze can have dramatic effects. for example, barium carbonate (which we don’t use) turns manganese bright pink! Other elements can turn manganese dioxide brown, blue, purple and reddish brown. Manganese dioxide is a flux in and of itself as well. So, glazes that get their black and purple colours, often interact with other glazes and RUN! Our mirror black is a good example – it mixes really well with many glazes because it fluxes them – causes them to melt faster. It will also bring out many beautiful colours in the glazes because it’s black colouring most definitely comes from manganese dioxide! Glaze chemistry is a whole subject on it’s own! We use commercial Mayco glazes on purpose – for their huge range of colour possibilities, stability, cool interactions, artistic freedom with the ability to easily brush the glazes on and ease of use. We currently have almost 50 glazes on hand! A major project is to test the interactions of all glazes with each other. That is 2,500 test tiles!!!! I’m going to make the wall behind the wheels the feature wall of pretty colours! Step Seven – Glaze (Gloss or sometimes called “Glost”) Firing Most of the time this is the final stage of making your creation (but not always!) The glaze kiln goes to 1240°C. This is called cone 6, or midrange. It is the low end of stoneware temperatures. Stoneware clays and glazes are typically fired at cone 8 – 10, that is 1260 – 1290°C. The energy requirement to go from 1240°C to 1280°C is almost a 30% more! Our clay is formulated to vitrify (mature, turn “glass-like”) at 1240°, as are our glazes. A glaze kiln take around 12 hours to reach temperature and two to three days to cool down. Sometimes a third firing process is required – this is for decoration that is added to work after the glaze firing. For example – adding precious metals and lustres. this firing temperature is usually around 600 – 800°C depending upon the techniques being used. There are many students interested in gold and silver trims – we will be doing this third type of firing soon! After firing your work will be in the student finished work shelves. Remember to pay for it before you head out the door! There is a small extra charge for using porcelain clay (it’s more than twice the price of regular clay), and for any third firing process! Once your work has been fired it can not turn back into clay for millennia – so don’t fire it if you don’t like it! Put it in the bucket for recycling. https://firebirdstudios.com.au/the-process-of-making-pottery/This bowl was made by renowned pottery company J & G Meakin of England. The firm was established in the mid-1800's. The bowl is an example of kitchenware used in the 19th century and still in use today.Bowl; white ceramic, round and tapering inwards towards base. Made by J and G Meakin England.On base, 'Ironstone China Reg SOL 391413' with symbolflagstaff hill, flagstaff hill maritime museum and village, warrnambool, maritime museum, maritime village, great ocean road, shipwreck coast, mixing bowl, food preparation, j & g meakin, pottery, stoke-on-trent, kitchen equipment, ceramic -
 Flagstaff Hill Maritime Museum and Village
Domestic object - Plate
The Process of Making Pottery Decorating, Firing, Glazing, Making, Technical There is a rhythm and flow to clay. It can’t be done all at once! Even the making process! It can take weeks to get everything done, especially if you can only work on your pottery once a week! Even though we have three hour classes, it’s often just not enough time! Here is an overview of some of the processes so you have a bit more grasp on some of the technical stuff! Step One – Design There are SO many ideas out there for making stuff in clay! From delicate porcelain jewellery, through to heavy sculptural work and everything in between. Deciding your direction is sometimes not that easy – when you first start, try everything, you will naturally gravitate to the style that you enjoy! The options and variations are endless and can get a wee bit overwhelming too! Check in with me before you start to ensure your ideas will work, what order you might do things, how you could achieve the look you are seeking and any other technical data required! Step Two – Making Clay is thixotropic. This means that as you work with it, the clay first gets sloppier and wetter, before is begins to dry in the atmosphere. For most things, you simply can’t do all parts of the project at once. An example of work order might look like: Get last weeks work out from the shelves Prepare clay for today’s work – roll your clay, prepare balls for throwing, make the first stage of a pinch pot) Clean up last week’s work and put it on the shelf for bisque firing Check that you have any glazing to do – and do enough of it that you will have time to finish your main project Do the next step of your next project – there might be a further step that can’t be complete immediately, in that case, wrap your work well and put onto the shelves. Letting your work rest for a while can really help keep your work clean and professional looking. Many things require bagging under plastic to keep it ready for work the next week – put your name on the outside of the bag so you can find your work easily. We have stickers and markers. Consider how you want to decorate your work – coloured slip can be applied at a fairly wet stage (remembering that it will make your work even wetter!). Trying to apply slip to dry clay won’t work! If you want to do sgraffito – you will need to keep the work leather hard (a state of dryness where you can still work the clay with a little effort and a little water and care). Step Three – Drying Most of the time your work can go into the rack uncovered to let it dry out for the following week. If you want to continue forming or shaping you will need to double bag your work – put your work on a suitable sized bat and put the bat in a bag so the base of the bag is under the bat, then put another bag over the top of the work and tuck the top of the bag under the bat. If you want to trim (or turn) your thrown work the following week, it should also be double bagged. If your work is large, delicate, or of uneven thicknesses, you should lightly cover your work for drying. When considering the drying process, bare in mind the weather, humidity and wind! The hotter and dryer, the faster things dry and work can dry unevenly in the shelves – this can lead to cracking – another time to lightly cover your work for drying. Step Four – Trimming and Cleaning Up Your work is dry! It is called greenware now and it is at it’s most fragile! Handle everything with two hands. I often refer to soft hands – keep everything gentle and with your fingers spread as much as possible. Try to not pick up things like plates too much, and always with both hands! Before your work can be bisque fired it should be “cleaned up”. You work won’t go into the kiln if it has sharp edges – when glazed, sharp edges turn into razor blades! Use a piece of fly wire to rub the work all over – this will scratch a little so be light handed. Use a knife or metal kidney to scrape any areas that require a bit more dynamic treatment than the fly wire offers! Finally, a very light wipe over with a slightly damp sponge can help soften and soothe all of your edges and dags! Trimming thrown work: If you are planning to trim (or turn) your thrown work (and you should be), make sure you bag it well – your work should be leather hard to almost dry for easiest trimming. Use this step to finish the work completely – use a metal kidney to polish the surface, or a slightly damp sponge to give a freshly thrown look. Wipe the sponge around the rim after trimming, and check the inside of the pot for dags! Trimming slip cast work: Usually I will trim the rims of your work on the wheel the following day to make that stage easier, however you will still need to check your work for lumps and bumps. Last but not least – check that your name is still clearly on the bottom of your work. Step Five – Bisque Firing When the work is completely dry it can go into the bisque kiln. The bisque kiln is fired to 1000°C. This process burns off the water in the clay as well as some of the chemically bound water. The structure of the clay is not altered that much at this temperature. Inside the bisque kiln, the work is stacked a little, small bowl inside a larger bowl and onto a heavy plate. Smaller items like decorations or drink coasters might get stacked several high. Consideration is paid to the weight of the stack and shape of the work. A bisque kiln can fire about one and a half times the amount of work that the glaze kiln can fire. The firing takes about 10 hours to complete the cycle and about two days to cool down. Once it has been emptied the work is placed in the glaze room ready for you to decorate! Step Six – Glazing Decorating your work with colour can be a lot of fun – and time consuming! There are three main options for surface treatment at this stage: Oxide Washes Underglazes Glazes Washes and underglazes do not “glaze” the work – It will still need a layer of glaze to fully seal the clay (washes don’t need glaze on surfaces not designed for food or liquid as they can gloss up a little on their own). Underglazes are stable colourants that turn out pretty much how they look in the jar. They can be mixed with each other to form other colours and can be used like water colours to paint onto your work. Mostly they should have a clear glaze on top to seal them. Oxides are a different species – the pink oxide (cobalt) wash turns out bright blue for instance. They don’t always need a glaze on top, and some glazes can change the colour of the wash! The glazes need no other “glaze” on top! Be careful of unknown glaze interactions – you can put any combination of glaze in a bowl or on a plate, but only a single glaze on the outside of any vertical surface! Glazes are a chemical reaction under heat. We don’t know the exact chemicals in the Mayco glazes we use. I can guess by the way they interact with each other, however, on the whole, you need to test every idea you have, and not run the test on a vertical surface! Simply put, glaze is a layer of glass like substance that bonds with the clay underneath. Clay is made of silica, alumina and water. Glaze is made of mostly silica. Silica has a melting point of 1700°C and we fire to 1240°C. The silica requires a “flux” to help it melt at the lower temperature. Fluxes can be all sorts of chemicals – a common one is calcium – calcium has a melting point of 2500°C, however, together they both melt at a much lower temperature! Colourants are metal oxides like cobalt (blue), chrome (green through black), copper (green, blue, even red!), manganese (black, purple and pink) iron (red brown), etc. Different chemicals in the glaze can have dramatic effects. for example, barium carbonate (which we don’t use) turns manganese bright pink! Other elements can turn manganese dioxide brown, blue, purple and reddish brown. Manganese dioxide is a flux in and of itself as well. So, glazes that get their black and purple colours, often interact with other glazes and RUN! Our mirror black is a good example – it mixes really well with many glazes because it fluxes them – causes them to melt faster. It will also bring out many beautiful colours in the glazes because it’s black colouring most definitely comes from manganese dioxide! Glaze chemistry is a whole subject on it’s own! We use commercial Mayco glazes on purpose – for their huge range of colour possibilities, stability, cool interactions, artistic freedom with the ability to easily brush the glazes on and ease of use. We currently have almost 50 glazes on hand! A major project is to test the interactions of all glazes with each other. That is 2,500 test tiles!!!! I’m going to make the wall behind the wheels the feature wall of pretty colours! Step Seven – Glaze (Gloss or sometimes called “Glost”) Firing Most of the time this is the final stage of making your creation (but not always!) The glaze kiln goes to 1240°C. This is called cone 6, or midrange. It is the low end of stoneware temperatures. Stoneware clays and glazes are typically fired at cone 8 – 10, that is 1260 – 1290°C. The energy requirement to go from 1240°C to 1280°C is almost a 30% more! Our clay is formulated to vitrify (mature, turn “glass-like”) at 1240°, as are our glazes. A glaze kiln take around 12 hours to reach temperature and two to three days to cool down. Sometimes a third firing process is required – this is for decoration that is added to work after the glaze firing. For example – adding precious metals and lustres. this firing temperature is usually around 600 – 800°C depending upon the techniques being used. There are many students interested in gold and silver trims – we will be doing this third type of firing soon! After firing your work will be in the student finished work shelves. Remember to pay for it before you head out the door! There is a small extra charge for using porcelain clay (it’s more than twice the price of regular clay), and for any third firing process! Once your work has been fired it can not turn back into clay for millennia – so don’t fire it if you don’t like it! Put it in the bucket for recycling. https://firebirdstudios.com.au/the-process-of-making-pottery/Ceramics have evolved over thousands of years.White earthenware dinner plate. Crazing evident all over.Backstamped ‘Made in England S LTD’flagstaff hill, warrnambool, shipwrecked-coast, flagstaff-hill, flagstaff-hill-maritime-museum, maritime-museum, shipwreck-coast, flagstaff-hill-maritime-village, ceramics, tableware -
 Flagstaff Hill Maritime Museum and Village
Domestic object - Plate, Johnson Bros
The Process of Making Pottery Decorating, Firing, Glazing, Making, Technical There is a rhythm and flow to clay. It can’t be done all at once! Even the making process! It can take weeks to get everything done, especially if you can only work on your pottery once a week! Even though we have three hour classes, it’s often just not enough time! Here is an overview of some of the processes so you have a bit more grasp on some of the technical stuff! Step One – Design There are SO many ideas out there for making stuff in clay! From delicate porcelain jewellery, through to heavy sculptural work and everything in between. Deciding your direction is sometimes not that easy – when you first start, try everything, you will naturally gravitate to the style that you enjoy! The options and variations are endless and can get a wee bit overwhelming too! Check in with me before you start to ensure your ideas will work, what order you might do things, how you could achieve the look you are seeking and any other technical data required! Step Two – Making Clay is thixotropic. This means that as you work with it, the clay first gets sloppier and wetter, before is begins to dry in the atmosphere. For most things, you simply can’t do all parts of the project at once. An example of work order might look like: Get last weeks work out from the shelves Prepare clay for today’s work – roll your clay, prepare balls for throwing, make the first stage of a pinch pot) Clean up last week’s work and put it on the shelf for bisque firing Check that you have any glazing to do – and do enough of it that you will have time to finish your main project Do the next step of your next project – there might be a further step that can’t be complete immediately, in that case, wrap your work well and put onto the shelves. Letting your work rest for a while can really help keep your work clean and professional looking. Many things require bagging under plastic to keep it ready for work the next week – put your name on the outside of the bag so you can find your work easily. We have stickers and markers. Consider how you want to decorate your work – coloured slip can be applied at a fairly wet stage (remembering that it will make your work even wetter!). Trying to apply slip to dry clay won’t work! If you want to do sgraffito – you will need to keep the work leather hard (a state of dryness where you can still work the clay with a little effort and a little water and care). Step Three – Drying Most of the time your work can go into the rack uncovered to let it dry out for the following week. If you want to continue forming or shaping you will need to double bag your work – put your work on a suitable sized bat and put the bat in a bag so the base of the bag is under the bat, then put another bag over the top of the work and tuck the top of the bag under the bat. If you want to trim (or turn) your thrown work the following week, it should also be double bagged. If your work is large, delicate, or of uneven thicknesses, you should lightly cover your work for drying. When considering the drying process, bare in mind the weather, humidity and wind! The hotter and dryer, the faster things dry and work can dry unevenly in the shelves – this can lead to cracking – another time to lightly cover your work for drying. Step Four – Trimming and Cleaning Up Your work is dry! It is called greenware now and it is at it’s most fragile! Handle everything with two hands. I often refer to soft hands – keep everything gentle and with your fingers spread as much as possible. Try to not pick up things like plates too much, and always with both hands! Before your work can be bisque fired it should be “cleaned up”. You work won’t go into the kiln if it has sharp edges – when glazed, sharp edges turn into razor blades! Use a piece of fly wire to rub the work all over – this will scratch a little so be light handed. Use a knife or metal kidney to scrape any areas that require a bit more dynamic treatment than the fly wire offers! Finally, a very light wipe over with a slightly damp sponge can help soften and soothe all of your edges and dags! Trimming thrown work: If you are planning to trim (or turn) your thrown work (and you should be), make sure you bag it well – your work should be leather hard to almost dry for easiest trimming. Use this step to finish the work completely – use a metal kidney to polish the surface, or a slightly damp sponge to give a freshly thrown look. Wipe the sponge around the rim after trimming, and check the inside of the pot for dags! Trimming slip cast work: Usually I will trim the rims of your work on the wheel the following day to make that stage easier, however you will still need to check your work for lumps and bumps. Last but not least – check that your name is still clearly on the bottom of your work. Step Five – Bisque Firing When the work is completely dry it can go into the bisque kiln. The bisque kiln is fired to 1000°C. This process burns off the water in the clay as well as some of the chemically bound water. The structure of the clay is not altered that much at this temperature. Inside the bisque kiln, the work is stacked a little, small bowl inside a larger bowl and onto a heavy plate. Smaller items like decorations or drink coasters might get stacked several high. Consideration is paid to the weight of the stack and shape of the work. A bisque kiln can fire about one and a half times the amount of work that the glaze kiln can fire. The firing takes about 10 hours to complete the cycle and about two days to cool down. Once it has been emptied the work is placed in the glaze room ready for you to decorate! Step Six – Glazing Decorating your work with colour can be a lot of fun – and time consuming! There are three main options for surface treatment at this stage: Oxide Washes Underglazes Glazes Washes and underglazes do not “glaze” the work – It will still need a layer of glaze to fully seal the clay (washes don’t need glaze on surfaces not designed for food or liquid as they can gloss up a little on their own). Underglazes are stable colourants that turn out pretty much how they look in the jar. They can be mixed with each other to form other colours and can be used like water colours to paint onto your work. Mostly they should have a clear glaze on top to seal them. Oxides are a different species – the pink oxide (cobalt) wash turns out bright blue for instance. They don’t always need a glaze on top, and some glazes can change the colour of the wash! The glazes need no other “glaze” on top! Be careful of unknown glaze interactions – you can put any combination of glaze in a bowl or on a plate, but only a single glaze on the outside of any vertical surface! Glazes are a chemical reaction under heat. We don’t know the exact chemicals in the Mayco glazes we use. I can guess by the way they interact with each other, however, on the whole, you need to test every idea you have, and not run the test on a vertical surface! Simply put, glaze is a layer of glass like substance that bonds with the clay underneath. Clay is made of silica, alumina and water. Glaze is made of mostly silica. Silica has a melting point of 1700°C and we fire to 1240°C. The silica requires a “flux” to help it melt at the lower temperature. Fluxes can be all sorts of chemicals – a common one is calcium – calcium has a melting point of 2500°C, however, together they both melt at a much lower temperature! Colourants are metal oxides like cobalt (blue), chrome (green through black), copper (green, blue, even red!), manganese (black, purple and pink) iron (red brown), etc. Different chemicals in the glaze can have dramatic effects. for example, barium carbonate (which we don’t use) turns manganese bright pink! Other elements can turn manganese dioxide brown, blue, purple and reddish brown. Manganese dioxide is a flux in and of itself as well. So, glazes that get their black and purple colours, often interact with other glazes and RUN! Our mirror black is a good example – it mixes really well with many glazes because it fluxes them – causes them to melt faster. It will also bring out many beautiful colours in the glazes because it’s black colouring most definitely comes from manganese dioxide! Glaze chemistry is a whole subject on it’s own! We use commercial Mayco glazes on purpose – for their huge range of colour possibilities, stability, cool interactions, artistic freedom with the ability to easily brush the glazes on and ease of use. We currently have almost 50 glazes on hand! A major project is to test the interactions of all glazes with each other. That is 2,500 test tiles!!!! I’m going to make the wall behind the wheels the feature wall of pretty colours! Step Seven – Glaze (Gloss or sometimes called “Glost”) Firing Most of the time this is the final stage of making your creation (but not always!) The glaze kiln goes to 1240°C. This is called cone 6, or midrange. It is the low end of stoneware temperatures. Stoneware clays and glazes are typically fired at cone 8 – 10, that is 1260 – 1290°C. The energy requirement to go from 1240°C to 1280°C is almost a 30% more! Our clay is formulated to vitrify (mature, turn “glass-like”) at 1240°, as are our glazes. A glaze kiln take around 12 hours to reach temperature and two to three days to cool down. Sometimes a third firing process is required – this is for decoration that is added to work after the glaze firing. For example – adding precious metals and lustres. this firing temperature is usually around 600 – 800°C depending upon the techniques being used. There are many students interested in gold and silver trims – we will be doing this third type of firing soon! After firing your work will be in the student finished work shelves. Remember to pay for it before you head out the door! There is a small extra charge for using porcelain clay (it’s more than twice the price of regular clay), and for any third firing process! Once your work has been fired it can not turn back into clay for millennia – so don’t fire it if you don’t like it! Put it in the bucket for recycling. https://firebirdstudios.com.au/the-process-of-making-pottery/Ceramics have evolved over thousands of years.A white earthenware side plate with a gadroon edge. Has water marks and chips on front.‘Johnson Bros England Reg No 15587’flagstaff hill, warrnambool, shipwrecked-coast, flagstaff-hill, flagstaff-hill-maritime-museum, maritime-museum, shipwreck-coast, flagstaff-hill-maritime-village, johnson bros, ceramics, tableware -
 Flagstaff Hill Maritime Museum and Village
Domestic object - Plate, Alfred Meakin
The Process of Making Pottery Decorating, Firing, Glazing, Making, Technical There is a rhythm and flow to clay. It can’t be done all at once! Even the making process! It can take weeks to get everything done, especially if you can only work on your pottery once a week! Even though we have three hour classes, it’s often just not enough time! Here is an overview of some of the processes so you have a bit more grasp on some of the technical stuff! Step One – Design There are SO many ideas out there for making stuff in clay! From delicate porcelain jewellery, through to heavy sculptural work and everything in between. Deciding your direction is sometimes not that easy – when you first start, try everything, you will naturally gravitate to the style that you enjoy! The options and variations are endless and can get a wee bit overwhelming too! Check in with me before you start to ensure your ideas will work, what order you might do things, how you could achieve the look you are seeking and any other technical data required! Step Two – Making Clay is thixotropic. This means that as you work with it, the clay first gets sloppier and wetter, before is begins to dry in the atmosphere. For most things, you simply can’t do all parts of the project at once. An example of work order might look like: Get last weeks work out from the shelves Prepare clay for today’s work – roll your clay, prepare balls for throwing, make the first stage of a pinch pot) Clean up last week’s work and put it on the shelf for bisque firing Check that you have any glazing to do – and do enough of it that you will have time to finish your main project Do the next step of your next project – there might be a further step that can’t be complete immediately, in that case, wrap your work well and put onto the shelves. Letting your work rest for a while can really help keep your work clean and professional looking. Many things require bagging under plastic to keep it ready for work the next week – put your name on the outside of the bag so you can find your work easily. We have stickers and markers. Consider how you want to decorate your work – coloured slip can be applied at a fairly wet stage (remembering that it will make your work even wetter!). Trying to apply slip to dry clay won’t work! If you want to do sgraffito – you will need to keep the work leather hard (a state of dryness where you can still work the clay with a little effort and a little water and care). Step Three – Drying Most of the time your work can go into the rack uncovered to let it dry out for the following week. If you want to continue forming or shaping you will need to double bag your work – put your work on a suitable sized bat and put the bat in a bag so the base of the bag is under the bat, then put another bag over the top of the work and tuck the top of the bag under the bat. If you want to trim (or turn) your thrown work the following week, it should also be double bagged. If your work is large, delicate, or of uneven thicknesses, you should lightly cover your work for drying. When considering the drying process, bare in mind the weather, humidity and wind! The hotter and dryer, the faster things dry and work can dry unevenly in the shelves – this can lead to cracking – another time to lightly cover your work for drying. Step Four – Trimming and Cleaning Up Your work is dry! It is called greenware now and it is at it’s most fragile! Handle everything with two hands. I often refer to soft hands – keep everything gentle and with your fingers spread as much as possible. Try to not pick up things like plates too much, and always with both hands! Before your work can be bisque fired it should be “cleaned up”. You work won’t go into the kiln if it has sharp edges – when glazed, sharp edges turn into razor blades! Use a piece of fly wire to rub the work all over – this will scratch a little so be light handed. Use a knife or metal kidney to scrape any areas that require a bit more dynamic treatment than the fly wire offers! Finally, a very light wipe over with a slightly damp sponge can help soften and soothe all of your edges and dags! Trimming thrown work: If you are planning to trim (or turn) your thrown work (and you should be), make sure you bag it well – your work should be leather hard to almost dry for easiest trimming. Use this step to finish the work completely – use a metal kidney to polish the surface, or a slightly damp sponge to give a freshly thrown look. Wipe the sponge around the rim after trimming, and check the inside of the pot for dags! Trimming slip cast work: Usually I will trim the rims of your work on the wheel the following day to make that stage easier, however you will still need to check your work for lumps and bumps. Last but not least – check that your name is still clearly on the bottom of your work. Step Five – Bisque Firing When the work is completely dry it can go into the bisque kiln. The bisque kiln is fired to 1000°C. This process burns off the water in the clay as well as some of the chemically bound water. The structure of the clay is not altered that much at this temperature. Inside the bisque kiln, the work is stacked a little, small bowl inside a larger bowl and onto a heavy plate. Smaller items like decorations or drink coasters might get stacked several high. Consideration is paid to the weight of the stack and shape of the work. A bisque kiln can fire about one and a half times the amount of work that the glaze kiln can fire. The firing takes about 10 hours to complete the cycle and about two days to cool down. Once it has been emptied the work is placed in the glaze room ready for you to decorate! Step Six – Glazing Decorating your work with colour can be a lot of fun – and time consuming! There are three main options for surface treatment at this stage: Oxide Washes Underglazes Glazes Washes and underglazes do not “glaze” the work – It will still need a layer of glaze to fully seal the clay (washes don’t need glaze on surfaces not designed for food or liquid as they can gloss up a little on their own). Underglazes are stable colourants that turn out pretty much how they look in the jar. They can be mixed with each other to form other colours and can be used like water colours to paint onto your work. Mostly they should have a clear glaze on top to seal them. Oxides are a different species – the pink oxide (cobalt) wash turns out bright blue for instance. They don’t always need a glaze on top, and some glazes can change the colour of the wash! The glazes need no other “glaze” on top! Be careful of unknown glaze interactions – you can put any combination of glaze in a bowl or on a plate, but only a single glaze on the outside of any vertical surface! Glazes are a chemical reaction under heat. We don’t know the exact chemicals in the Mayco glazes we use. I can guess by the way they interact with each other, however, on the whole, you need to test every idea you have, and not run the test on a vertical surface! Simply put, glaze is a layer of glass like substance that bonds with the clay underneath. Clay is made of silica, alumina and water. Glaze is made of mostly silica. Silica has a melting point of 1700°C and we fire to 1240°C. The silica requires a “flux” to help it melt at the lower temperature. Fluxes can be all sorts of chemicals – a common one is calcium – calcium has a melting point of 2500°C, however, together they both melt at a much lower temperature! Colourants are metal oxides like cobalt (blue), chrome (green through black), copper (green, blue, even red!), manganese (black, purple and pink) iron (red brown), etc. Different chemicals in the glaze can have dramatic effects. for example, barium carbonate (which we don’t use) turns manganese bright pink! Other elements can turn manganese dioxide brown, blue, purple and reddish brown. Manganese dioxide is a flux in and of itself as well. So, glazes that get their black and purple colours, often interact with other glazes and RUN! Our mirror black is a good example – it mixes really well with many glazes because it fluxes them – causes them to melt faster. It will also bring out many beautiful colours in the glazes because it’s black colouring most definitely comes from manganese dioxide! Glaze chemistry is a whole subject on it’s own! We use commercial Mayco glazes on purpose – for their huge range of colour possibilities, stability, cool interactions, artistic freedom with the ability to easily brush the glazes on and ease of use. We currently have almost 50 glazes on hand! A major project is to test the interactions of all glazes with each other. That is 2,500 test tiles!!!! I’m going to make the wall behind the wheels the feature wall of pretty colours! Step Seven – Glaze (Gloss or sometimes called “Glost”) Firing Most of the time this is the final stage of making your creation (but not always!) The glaze kiln goes to 1240°C. This is called cone 6, or midrange. It is the low end of stoneware temperatures. Stoneware clays and glazes are typically fired at cone 8 – 10, that is 1260 – 1290°C. The energy requirement to go from 1240°C to 1280°C is almost a 30% more! Our clay is formulated to vitrify (mature, turn “glass-like”) at 1240°, as are our glazes. A glaze kiln take around 12 hours to reach temperature and two to three days to cool down. Sometimes a third firing process is required – this is for decoration that is added to work after the glaze firing. For example – adding precious metals and lustres. this firing temperature is usually around 600 – 800°C depending upon the techniques being used. There are many students interested in gold and silver trims – we will be doing this third type of firing soon! After firing your work will be in the student finished work shelves. Remember to pay for it before you head out the door! There is a small extra charge for using porcelain clay (it’s more than twice the price of regular clay), and for any third firing process! Once your work has been fired it can not turn back into clay for millennia – so don’t fire it if you don’t like it! Put it in the bucket for recycling. https://firebirdstudios.com.au/the-process-of-making-pottery/Ceramics have evolved over thousands of years.Earthenware dessert plate, cream colour. Made by Alfred Meakin, England. Backstamped ‘Alfred Meakin England’. flagstaff hill, warrnambool, shipwrecked-coast, flagstaff-hill, flagstaff-hill-maritime-museum, maritime-museum, shipwreck-coast, flagstaff-hill-maritime-village, alfred meakin, ceramics, earthenware, kitchenware -
 Flagstaff Hill Maritime Museum and Village
Domestic object - Jug
The Process of Making Pottery Decorating, Firing, Glazing, Making, Technical There is a rhythm and flow to clay. It can’t be done all at once! Even the making process! It can take weeks to get everything done, especially if you can only work on your pottery once a week! Even though we have three hour classes, it’s often just not enough time! Here is an overview of some of the processes so you have a bit more grasp on some of the technical stuff! Step One – Design There are SO many ideas out there for making stuff in clay! From delicate porcelain jewellery, through to heavy sculptural work and everything in between. Deciding your direction is sometimes not that easy – when you first start, try everything, you will naturally gravitate to the style that you enjoy! The options and variations are endless and can get a wee bit overwhelming too! Check in with me before you start to ensure your ideas will work, what order you might do things, how you could achieve the look you are seeking and any other technical data required! Step Two – Making Clay is thixotropic. This means that as you work with it, the clay first gets sloppier and wetter, before is begins to dry in the atmosphere. For most things, you simply can’t do all parts of the project at once. An example of work order might look like: Get last weeks work out from the shelves Prepare clay for today’s work – roll your clay, prepare balls for throwing, make the first stage of a pinch pot) Clean up last week’s work and put it on the shelf for bisque firing Check that you have any glazing to do – and do enough of it that you will have time to finish your main project Do the next step of your next project – there might be a further step that can’t be complete immediately, in that case, wrap your work well and put onto the shelves. Letting your work rest for a while can really help keep your work clean and professional looking. Many things require bagging under plastic to keep it ready for work the next week – put your name on the outside of the bag so you can find your work easily. We have stickers and markers. Consider how you want to decorate your work – coloured slip can be applied at a fairly wet stage (remembering that it will make your work even wetter!). Trying to apply slip to dry clay won’t work! If you want to do sgraffito – you will need to keep the work leather hard (a state of dryness where you can still work the clay with a little effort and a little water and care). Step Three – Drying Most of the time your work can go into the rack uncovered to let it dry out for the following week. If you want to continue forming or shaping you will need to double bag your work – put your work on a suitable sized bat and put the bat in a bag so the base of the bag is under the bat, then put another bag over the top of the work and tuck the top of the bag under the bat. If you want to trim (or turn) your thrown work the following week, it should also be double bagged. If your work is large, delicate, or of uneven thicknesses, you should lightly cover your work for drying. When considering the drying process, bare in mind the weather, humidity and wind! The hotter and dryer, the faster things dry and work can dry unevenly in the shelves – this can lead to cracking – another time to lightly cover your work for drying. Step Four – Trimming and Cleaning Up Your work is dry! It is called greenware now and it is at it’s most fragile! Handle everything with two hands. I often refer to soft hands – keep everything gentle and with your fingers spread as much as possible. Try to not pick up things like plates too much, and always with both hands! Before your work can be bisque fired it should be “cleaned up”. You work won’t go into the kiln if it has sharp edges – when glazed, sharp edges turn into razor blades! Use a piece of fly wire to rub the work all over – this will scratch a little so be light handed. Use a knife or metal kidney to scrape any areas that require a bit more dynamic treatment than the fly wire offers! Finally, a very light wipe over with a slightly damp sponge can help soften and soothe all of your edges and dags! Trimming thrown work: If you are planning to trim (or turn) your thrown work (and you should be), make sure you bag it well – your work should be leather hard to almost dry for easiest trimming. Use this step to finish the work completely – use a metal kidney to polish the surface, or a slightly damp sponge to give a freshly thrown look. Wipe the sponge around the rim after trimming, and check the inside of the pot for dags! Trimming slip cast work: Usually I will trim the rims of your work on the wheel the following day to make that stage easier, however you will still need to check your work for lumps and bumps. Last but not least – check that your name is still clearly on the bottom of your work. Step Five – Bisque Firing When the work is completely dry it can go into the bisque kiln. The bisque kiln is fired to 1000°C. This process burns off the water in the clay as well as some of the chemically bound water. The structure of the clay is not altered that much at this temperature. Inside the bisque kiln, the work is stacked a little, small bowl inside a larger bowl and onto a heavy plate. Smaller items like decorations or drink coasters might get stacked several high. Consideration is paid to the weight of the stack and shape of the work. A bisque kiln can fire about one and a half times the amount of work that the glaze kiln can fire. The firing takes about 10 hours to complete the cycle and about two days to cool down. Once it has been emptied the work is placed in the glaze room ready for you to decorate! Step Six – Glazing Decorating your work with colour can be a lot of fun – and time consuming! There are three main options for surface treatment at this stage: Oxide Washes Underglazes Glazes Washes and underglazes do not “glaze” the work – It will still need a layer of glaze to fully seal the clay (washes don’t need glaze on surfaces not designed for food or liquid as they can gloss up a little on their own). Underglazes are stable colourants that turn out pretty much how they look in the jar. They can be mixed with each other to form other colours and can be used like water colours to paint onto your work. Mostly they should have a clear glaze on top to seal them. Oxides are a different species – the pink oxide (cobalt) wash turns out bright blue for instance. They don’t always need a glaze on top, and some glazes can change the colour of the wash! The glazes need no other “glaze” on top! Be careful of unknown glaze interactions – you can put any combination of glaze in a bowl or on a plate, but only a single glaze on the outside of any vertical surface! Glazes are a chemical reaction under heat. We don’t know the exact chemicals in the Mayco glazes we use. I can guess by the way they interact with each other, however, on the whole, you need to test every idea you have, and not run the test on a vertical surface! Simply put, glaze is a layer of glass like substance that bonds with the clay underneath. Clay is made of silica, alumina and water. Glaze is made of mostly silica. Silica has a melting point of 1700°C and we fire to 1240°C. The silica requires a “flux” to help it melt at the lower temperature. Fluxes can be all sorts of chemicals – a common one is calcium – calcium has a melting point of 2500°C, however, together they both melt at a much lower temperature! Colourants are metal oxides like cobalt (blue), chrome (green through black), copper (green, blue, even red!), manganese (black, purple and pink) iron (red brown), etc. Different chemicals in the glaze can have dramatic effects. for example, barium carbonate (which we don’t use) turns manganese bright pink! Other elements can turn manganese dioxide brown, blue, purple and reddish brown. Manganese dioxide is a flux in and of itself as well. So, glazes that get their black and purple colours, often interact with other glazes and RUN! Our mirror black is a good example – it mixes really well with many glazes because it fluxes them – causes them to melt faster. It will also bring out many beautiful colours in the glazes because it’s black colouring most definitely comes from manganese dioxide! Glaze chemistry is a whole subject on it’s own! We use commercial Mayco glazes on purpose – for their huge range of colour possibilities, stability, cool interactions, artistic freedom with the ability to easily brush the glazes on and ease of use. We currently have almost 50 glazes on hand! A major project is to test the interactions of all glazes with each other. That is 2,500 test tiles!!!! I’m going to make the wall behind the wheels the feature wall of pretty colours! Step Seven – Glaze (Gloss or sometimes called “Glost”) Firing Most of the time this is the final stage of making your creation (but not always!) The glaze kiln goes to 1240°C. This is called cone 6, or midrange. It is the low end of stoneware temperatures. Stoneware clays and glazes are typically fired at cone 8 – 10, that is 1260 – 1290°C. The energy requirement to go from 1240°C to 1280°C is almost a 30% more! Our clay is formulated to vitrify (mature, turn “glass-like”) at 1240°, as are our glazes. A glaze kiln take around 12 hours to reach temperature and two to three days to cool down. Sometimes a third firing process is required – this is for decoration that is added to work after the glaze firing. For example – adding precious metals and lustres. this firing temperature is usually around 600 – 800°C depending upon the techniques being used. There are many students interested in gold and silver trims – we will be doing this third type of firing soon! After firing your work will be in the student finished work shelves. Remember to pay for it before you head out the door! There is a small extra charge for using porcelain clay (it’s more than twice the price of regular clay), and for any third firing process! Once your work has been fired it can not turn back into clay for millennia – so don’t fire it if you don’t like it! Put it in the bucket for recycling. https://firebirdstudios.com.au/the-process-of-making-pottery/The form of the jug has been in use for many centuries.Stoneware jug. Two tone brown glaze with pierced lip behind spout. Spout chipped.None.flagstaff hill, warrnambool, shipwrecked-coast, flagstaff-hill, flagstaff-hill-maritime-museum, maritime-museum, shipwreck-coast, flagstaff-hill-maritime-village, jug, ceramic jug -
 Flagstaff Hill Maritime Museum and Village
Book - Record Book, before 1918
In UK in early 1800's the word 'mechanic' was applied to a broader range of skills such as working man, tradesman or artisan. Mechanics' Institutes were formed originally for voluntary, self-funded organisations, to improve the education of working men and to instruct them on their various trades. The germ of the idea came from a class formed in 1799 by Professor George Birbeck in Glasgow, Scotland, for journeymen mechanics (apprentice trade workers), with the first Institutes being organised in London and Manchester in the 1820's. By then the original aim had broadened and the Mechanics' Institutes were established as popular agencies of adult education. The Mechanics' Institutes were run by committees that provided facilities for a meeting room, hall suitable for lectures, and a library. Funding was raised locally and often supplemented by grants from government agencies for the purchase of books and other resources. Activities were community based. In Australia, Mechanics' Institutes were set up in New South Wales and in Tasmania in the late 1820's. Mechanics' Institutes began in Victoria, with the first one in Melbourne dating from 1839, providing similar services but in time offered services tailored to their specific area. Warrnambool's Mechanics' Institute (or Institution as it was sometimes called) was one of the earliest in Victoria. On 17th October 1853 a meeting was held where it was resolved to request the Lieutenant Governor of the Colony to grant land for the erection of a Mechanics' Institutes building. A committee was formed at the meeting and Richard Osburne chaired the first meeting of this committee. The land on the North West corner of Banyan and Merri Streets was granted but there were no funds to erect the building. The Formal Rights of the Warrnambool Mechanics' Institute's encompassed its aims and these were officially adopted in1859; "This Institution has for its object the diffusion of literary, scientific, and other useful knowledge amongst its members, excluding all controversial subjects, religious or political. "These objects are sought to be obtained by means of a circulating library, a reading room, the establishment of classes, debates, and the occasional delivery of lectures on natural and experimental philosophy, mechanics, astronomy, chemistry, natural history, literature, and the useful and ornamental arts, particularly those which have a more immediate reference to the colony." The Warrnambool Mechanics' Institute opened its first reading room in November1884 in the National School building at the corner of Banyan and Timor Streets. The Institute was funded by member subscription, payable on a quarterly, half yearly or yearly basis. Samuel Hannaford, the Manager of the Warrnambool Bank of Australasia, was the first Honorary Secretary of the Mechanics' Institutes, and an early President and Vice-President. He also gave several of the early lectures in the Reading Room. Another early Secretary, Librarian and lecturer was Marmaduke Fisher, the teacher at the National School. Lecture topics included The Poets and Poetry of Ireland', 'The Birth and Development of the Earth', 'The Vertebrae - with Remarks on the pleasures resulting from the study of Natural History' and 'Architecture'. In q856 the Reading Room was moved to James Hider's shop in Timor Street, and by 1864 it was located in the bookshop of Davies and Read. In the 1860's the Mechanics' Institute struggled as membership waned but in 1866, after a series of fund raising efforts, the committee was able to purchase land in Liebig Street, on a site then called Market Square, between the weighbridge and the fire station. A Mechanics' Institute building was opened at this site in August 1871. The following year four more rooms were added to the main Reading Room and in 1873 the Artisan School of Design was incorporated into the Institute. The same year Joseph Archibald established a Museum; however it deteriorated when he was transferred to Bendigo in 1877. In 1880, with Archibald's return to Warrnambool, the Museum was re-established, and in 1885 a new building was built at the back of the Institute to accommodate the re-created School of Design, the Art Gallery and the Museum. In 1887 the Museum section was moved to the former court house in Timor Street (for some time the walls of the building formed part of the TAFE cafeteria but all is now demolished)). In 1911 the Museum was transferred back to the original building and the management of the Mechanics' Institute was handed over to the Warrnambool City Council. The Museum and Art Gallery became one and housed many fine works of art., and the Library continued to grow. The building was well patronised, with records showing that at the beginning of the 20th century there were between 500 and 800 visitors. During World War One the monthly figures were in the thousands, with 3,400 people visiting in January 1915. The Museum was a much loved Institution in Warrnambool until the contents of the Museum and Art Gallery were removed to make room for the Warrnambool City Council Engineers' Department. The contents were stored but many of the items were scattered or lost. In 1975 the original building was demolished and the site became occupied by the Civic Centre, which included the new City Library. (The library was temporarily located in the old Palais building in Koroit Street.) In the process of reorganisation the Collection was distributed amongst the community groups: - The new City Library took some of the historic books and some important documents, historic photographs and newspapers. - The Art Gallery kept the 19th Century art collection and some of the artefacts from the museum. - The Historic Society has some items - The State Museum has some items - Some items were destroyed - Flagstaff Hill Maritime Village has old newspapers, Government Gazettes, most of the Mechanics' Institute Library, ledgers and documents connected to the Mechanics' Institute Library, some framed and unframed art works and some photographs. The Warrnambool Mechanics' Institute Library book collection is deemed to be of great importance because it is one of the few collections in an almost intact state, and many of the books are now very rare and of great value. NOTE: Pages of this book have been digitally recorded and archived. The Warrnambool Mechanics Institute book collection has historical and social significance for its strong association with the Mechanics Institute movement and the important role it played in the intellectual, cultural and social development of people throughout the latter part of the nineteenth century and the early twentieth century. The collection of books is a rare example of an early lending library and its significance is enhanced by the survival of an original collection of many volumes. The Warrnambool Mechanics Institute Accessions Book, 1913-1922. Hard cover, olive green cover with brown protective cloth on corners. Page edges have coloured marble pattern. Hand written inside cover "RA 02749457 MEC,000451"flagstaff hill, warrnambool, shipwrecked coast, flagstaff hill maritime museum, maritime museum, shipwreck coast, flagstaff hill maritime village, great ocean road, warrnambool mechanics' institute, mechanics' institute records warrnambool, record book c1918 -
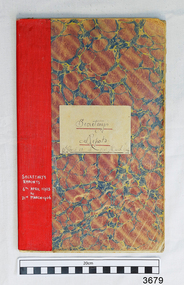 Flagstaff Hill Maritime Museum and Village
Record Book, before 5th April 1903
In UK in early 1800's the word 'mechanic' was applied to a broader range of skills such as working man, tradesman or artisan. Mechanics' Institutes were formed originally for voluntary, self-funded organisations, to improve the education of working men and to instruct them on their various trades. The germ of the idea came from a class formed in 1799 by Professor George Birbeck in Glasgow, Scotland, for journeymen mechanics (apprentice trade workers), with the first Institutes being organised in London and Manchester in the 1820's. By then the original aim had broadened and the Mechanics' Institutes were established as popular agencies of adult education. The Mechanics' Institutes were run by committees that provided facilities for a meeting room, hall suitable for lectures, and a library. Funding was raised locally and often supplemented by grants from government agencies for the purchase of books and other resources. Activities were community based. In Australia, Mechanics' Institutes were set up in New South Wales and in Tasmania in the late 1820's. Mechanics' Institutes began in Victoria, with the first one in Melbourne dating from 1839, providing similar services but in time offered services tailored to their specific area. Warrnambool's Mechanics' Institute (or Institution as it was sometimes called) was one of the earliest in Victoria. On 17th October 1853 a meeting was held where it was resolved to request the Lieutenant Governor of the Colony to grant land for the erection of a Mechanics' Institutes building. A committee was formed at the meeting and Richard Osburne chaired the first meeting of this committee. The land on the North West corner of Banyan and Merri Streets was granted but there were no funds to erect the building. The Formal Rights of the Warrnambool Mechanics' Institute's encompassed its aims and these were officially adopted in1859; "This Institution has for its object the diffusion of literary, scientific, and other useful knowledge amongst its members, excluding all controversial subjects, religious or political. "These objects are sought to be obtained by means of a circulating library, a reading room, the establishment of classes, debates, and the occasional delivery of lectures on natural and experimental philosophy, mechanics, astronomy, chemistry, natural history, literature, and the useful and ornamental arts, particularly those which have a more immediate reference to the colony." The Warrnambool Mechanics' Institute opened its first reading room in November1884 in the National School building at the corner of Banyan and Timor Streets. The Institute was funded by member subscription, payable on a quarterly, half yearly or yearly basis. Samuel Hannaford, the Manager of the Warrnambool Bank of Australasia, was the first Honorary Secretary of the Mechanics' Institutes, and an early President and Vice-President. He also gave several of the early lectures in the Reading Room. Another early Secretary, Librarian and lecturer was Marmaduke Fisher, the teacher at the National School. Lecture topics included The Poets and Poetry of Ireland', 'The Birth and Development of the Earth', 'The Vertebrae - with Remarks on the pleasures resulting from the study of Natural History' and 'Architecture'. In q856 the Reading Room was moved to James Hider's shop in Timor Street, and by 1864 it was located in the bookshop of Davies and Read. In the 1860's the Mechanics' Institute struggled as membership waned but in 1866, after a series of fund raising efforts, the committee was able to purchase land in Liebig Street, on a site then called Market Square, between the weighbridge and the fire station. A Mechanics' Institute building was opened at this site in August 1871. The following year four more rooms were added to the main Reading Room and in 1873 the Artisan School of Design was incorporated into the Institute. The same year Joseph Archibald established a Museum; however it deteriorated when he was transferred to Bendigo in 1877. In 1880, with Archibald's return to Warrnambool, the Museum was re-established, and in 1885 a new building was built at the back of the Institute to accommodate the re-created School of Design, the Art Gallery and the Museum. In 1887 the Museum section was moved to the former court house in Timor Street (for some time the walls of the building formed part of the TAFE cafeteria but all is now demolished)). In 1911 the Museum was transferred back to the original building and the management of the Mechanics' Institute was handed over to the Warrnambool City Council. The Museum and Art Gallery became one and housed many fine works of art., and the Library continued to grow. The building was well patronised, with records showing that at the beginning of the 20th century there were between 500 and 800 visitors. During World War One the monthly figures were in the thousands, with 3,400 people visiting in January 1915. The Museum was a much loved Institution in Warrnambool until the contents of the Museum and Art Gallery were removed to make room for the Warrnambool City Council Engineers' Department. The contents were stored but many of the items were scattered or lost. In 1975 the original building was demolished and the site became occupied by the Civic Centre, which included the new City Library. (The library was temporarily located in the old Palais building in Koroit Street.) In the process of reorganisation the Collection was distributed amongst the community groups: - The new City Library took some of the historic books and some important documents, historic photographs and newspapers. - The Art Gallery kept the 19th Century art collection and some of the artefacts from the museum. - The Historic Society has some items - The State Museum has some items - Some items were destroyed - Flagstaff Hill Maritime Village has old newspapers, Government Gazettes, most of the Mechanics' Institute Library, ledgers and documents connected to the Mechanics' Institute Library, some framed and unframed art works and some photographs. The Warrnambool Mechanics' Institute Library book collection is deemed to be of great importance because it is one of the few collections in an almost intact state, and many of the books are now very rare and of great value. NOTE: Pages of this book have been digitally recorded and archived.The Warrnambool Mechanics Institute book collection has historical and social significance for its strong association with the Mechanics Institute movement and the important role it played in the intellectual, cultural and social development of people throughout the latter part of the nineteenth century and the early twentieth century. The collection of books is a rare example of an early lending library and its significance is enhanced by the survival of an original collection of many volumes. Record book, Warrnambool Mechanics Institute Committee, Secretaries reports, 5th April 1903 - 31st March, 1906. Soft card with red/blue/white marble pattern and red binding. Ruled lines with red left margins. flagstaff hill, warrnambool, shipwrecked coast, flagstaff hill maritime museum, maritime museum, shipwreck coast, flagstaff hill maritime village, great ocean road, warrnambool mechanics' institute, mechanics' institute records warrnambool, record book c1903 -
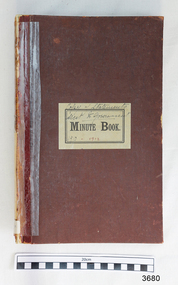 Flagstaff Hill Maritime Museum and Village
Record Book, c. 1910
In UK in early 1800's the word 'mechanic' was applied to a broader range of skills such as working man, tradesman or artisan. Mechanics' Institutes were formed originally for voluntary, self-funded organisations, to improve the education of working men and to instruct them on their various trades. The germ of the idea came from a class formed in 1799 by Professor George Birbeck in Glasgow, Scotland, for journeymen mechanics (apprentice trade workers), with the first Institutes being organised in London and Manchester in the 1820's. By then the original aim had broadened and the Mechanics' Institutes were established as popular agencies of adult education. The Mechanics' Institutes were run by committees that provided facilities for a meeting room, hall suitable for lectures, and a library. Funding was raised locally and often supplemented by grants from government agencies for the purchase of books and other resources. Activities were community based. In Australia, Mechanics' Institutes were set up in New South Wales and in Tasmania in the late 1820's. Mechanics' Institutes began in Victoria, with the first one in Melbourne dating from 1839, providing similar services but in time offered services tailored to their specific area. Warrnambool's Mechanics' Institute (or Institution as it was sometimes called) was one of the earliest in Victoria. On 17th October 1853 a meeting was held where it was resolved to request the Lieutenant Governor of the Colony to grant land for the erection of a Mechanics' Institutes building. A committee was formed at the meeting and Richard Osburne chaired the first meeting of this committee. The land on the North West corner of Banyan and Merri Streets was granted but there were no funds to erect the building. The Formal Rights of the Warrnambool Mechanics' Institute's encompassed its aims and these were officially adopted in1859; "This Institution has for its object the diffusion of literary, scientific, and other useful knowledge amongst its members, excluding all controversial subjects, religious or political. "These objects are sought to be obtained by means of a circulating library, a reading room, the establishment of classes, debates, and the occasional delivery of lectures on natural and experimental philosophy, mechanics, astronomy, chemistry, natural history, literature, and the useful and ornamental arts, particularly those which have a more immediate reference to the colony." The Warrnambool Mechanics' Institute opened its first reading room in November1884 in the National School building at the corner of Banyan and Timor Streets. The Institute was funded by member subscription, payable on a quarterly, half yearly or yearly basis. Samuel Hannaford, the Manager of the Warrnambool Bank of Australasia, was the first Honorary Secretary of the Mechanics' Institutes, and an early President and Vice-President. He also gave several of the early lectures in the Reading Room. Another early Secretary, Librarian and lecturer was Marmaduke Fisher, the teacher at the National School. Lecture topics included The Poets and Poetry of Ireland', 'The Birth and Development of the Earth', 'The Vertebrae - with Remarks on the pleasures resulting from the study of Natural History' and 'Architecture'. In q856 the Reading Room was moved to James Hider's shop in Timor Street, and by 1864 it was located in the bookshop of Davies and Read. In the 1860's the Mechanics' Institute struggled as membership waned but in 1866, after a series of fund raising efforts, the committee was able to purchase land in Liebig Street, on a site then called Market Square, between the weighbridge and the fire station. A Mechanics' Institute building was opened at this site in August 1871. The following year four more rooms were added to the main Reading Room and in 1873 the Artisan School of Design was incorporated into the Institute. The same year Joseph Archibald established a Museum; however it deteriorated when he was transferred to Bendigo in 1877. In 1880, with Archibald's return to Warrnambool, the Museum was re-established, and in 1885 a new building was built at the back of the Institute to accommodate the re-created School of Design, the Art Gallery and the Museum. In 1887 the Museum section was moved to the former court house in Timor Street (for some time the walls of the building formed part of the TAFE cafeteria but all is now demolished)). In 1911 the Museum was transferred back to the original building and the management of the Mechanics' Institute was handed over to the Warrnambool City Council. The Museum and Art Gallery became one and housed many fine works of art., and the Library continued to grow. The building was well patronised, with records showing that at the beginning of the 20th century there were between 500 and 800 visitors. During World War One the monthly figures were in the thousands, with 3,400 people visiting in January 1915. The Museum was a much loved Institution in Warrnambool until the contents of the Museum and Art Gallery were removed to make room for the Warrnambool City Council Engineers' Department. The contents were stored but many of the items were scattered or lost. In 1975 the original building was demolished and the site became occupied by the Civic Centre, which included the new City Library. (The library was temporarily located in the old Palais building in Koroit Street.) In the process of reorganisation the Collection was distributed amongst the community groups: - The new City Library took some of the historic books and some important documents, historic photographs and newspapers. - The Art Gallery kept the 19th Century art collection and some of the artefacts from the museum. - The Historic Society has some items - The State Museum has some items - Some items were destroyed - Flagstaff Hill Maritime Village has old newspapers, Government Gazettes, most of the Mechanics' Institute Library, ledgers and documents connected to the Mechanics' Institute Library, some framed and unframed art works and some photographs. The Warrnambool Mechanics' Institute Library book collection is deemed to be of great importance because it is one of the few collections in an almost intact state, and many of the books are now very rare and of great value. NOTE: Pages of this book have been digitally recorded and archived.The Warrnambool Mechanics Institute book collection has historical and social significance for its strong association with the Mechanics Institute movement and the important role it played in the intellectual, cultural and social development of people throughout the latter part of the nineteenth century and the early twentieth century. The collection of books is a rare example of an early lending library and its significance is enhanced by the survival of an original collection of many volumes. Record Book, Warrnambool Mechanics Institute, Copy of Statements sent to Government, 1910-1912. Hard cover, brown, pages have blue lines with red left margins, edges of pages have marbled pattern.flagstaff hill, warrnambool, shipwrecked coast, flagstaff hill maritime museum, maritime museum, shipwreck coast, flagstaff hill maritime village, great ocean road, warrnambool mechanics' institute, mechanics' institute records warrnambool, record book 1910 -
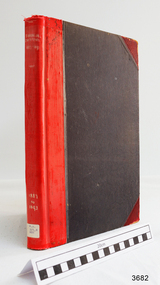 Flagstaff Hill Maritime Museum and Village
Record Book, c. 1887
In UK in early 1800's the word 'mechanic' was applied to a broader range of skills such as working man, tradesman or artisan. Mechanics' Institutes were formed originally for voluntary, self-funded organisations, to improve the education of working men and to instruct them on their various trades. The germ of the idea came from a class formed in 1799 by Professor George Birbeck in Glasgow, Scotland, for journeymen mechanics (apprentice trade workers), with the first Institutes being organised in London and Manchester in the 1820's. By then the original aim had broadened and the Mechanics' Institutes were established as popular agencies of adult education. The Mechanics' Institutes were run by committees that provided facilities for a meeting room, hall suitable for lectures, and a library. Funding was raised locally and often supplemented by grants from government agencies for the purchase of books and other resources. Activities were community based. In Australia, Mechanics' Institutes were set up in New South Wales and in Tasmania in the late 1820's. Mechanics' Institutes began in Victoria, with the first one in Melbourne dating from 1839, providing similar services but in time offered services tailored to their specific area. Warrnambool's Mechanics' Institute (or Institution as it was sometimes called) was one of the earliest in Victoria. On 17th October 1853 a meeting was held where it was resolved to request the Lieutenant Governor of the Colony to grant land for the erection of a Mechanics' Institutes building. A committee was formed at the meeting and Richard Osburne chaired the first meeting of this committee. The land on the North West corner of Banyan and Merri Streets was granted but there were no funds to erect the building. The Formal Rights of the Warrnambool Mechanics' Institute's encompassed its aims and these were officially adopted in1859; "This Institution has for its object the diffusion of literary, scientific, and other useful knowledge amongst its members, excluding all controversial subjects, religious or political. "These objects are sought to be obtained by means of a circulating library, a reading room, the establishment of classes, debates, and the occasional delivery of lectures on natural and experimental philosophy, mechanics, astronomy, chemistry, natural history, literature, and the useful and ornamental arts, particularly those which have a more immediate reference to the colony." The Warrnambool Mechanics' Institute opened its first reading room in November1884 in the National School building at the corner of Banyan and Timor Streets. The Institute was funded by member subscription, payable on a quarterly, half yearly or yearly basis. Samuel Hannaford, the Manager of the Warrnambool Bank of Australasia, was the first Honorary Secretary of the Mechanics' Institutes, and an early President and Vice-President. He also gave several of the early lectures in the Reading Room. Another early Secretary, Librarian and lecturer was Marmaduke Fisher, the teacher at the National School. Lecture topics included The Poets and Poetry of Ireland', 'The Birth and Development of the Earth', 'The Vertebrae - with Remarks on the pleasures resulting from the study of Natural History' and 'Architecture'. In q856 the Reading Room was moved to James Hider's shop in Timor Street, and by 1864 it was located in the bookshop of Davies and Read. In the 1860's the Mechanics' Institute struggled as membership waned but in 1866, after a series of fund raising efforts, the committee was able to purchase land in Liebig Street, on a site then called Market Square, between the weighbridge and the fire station. A Mechanics' Institute building was opened at this site in August 1871. The following year four more rooms were added to the main Reading Room and in 1873 the Artisan School of Design was incorporated into the Institute. The same year Joseph Archibald established a Museum; however it deteriorated when he was transferred to Bendigo in 1877. In 1880, with Archibald's return to Warrnambool, the Museum was re-established, and in 1885 a new building was built at the back of the Institute to accommodate the re-created School of Design, the Art Gallery and the Museum. In 1887 the Museum section was moved to the former court house in Timor Street (for some time the walls of the building formed part of the TAFE cafeteria but all is now demolished)). In 1911 the Museum was transferred back to the original building and the management of the Mechanics' Institute was handed over to the Warrnambool City Council. The Museum and Art Gallery became one and housed many fine works of art., and the Library continued to grow. The building was well patronised, with records showing that at the beginning of the 20th century there were between 500 and 800 visitors. During World War One the monthly figures were in the thousands, with 3,400 people visiting in January 1915. The Museum was a much loved Institution in Warrnambool until the contents of the Museum and Art Gallery were removed to make room for the Warrnambool City Council Engineers' Department. The contents were stored but many of the items were scattered or lost. In 1975 the original building was demolished and the site became occupied by the Civic Centre, which included the new City Library. (The library was temporarily located in the old Palais building in Koroit Street.) In the process of reorganisation the Collection was distributed amongst the community groups: - The new City Library took some of the historic books and some important documents, historic photographs and newspapers. - The Art Gallery kept the 19th Century art collection and some of the artefacts from the museum. - The Historic Society has some items - The State Museum has some items - Some items were destroyed - Flagstaff Hill Maritime Village has old newspapers, Government Gazettes, most of the Mechanics' Institute Library, ledgers and documents connected to the Mechanics' Institute Library, some framed and unframed art works and some photographs. The Warrnambool Mechanics' Institute Library book collection is deemed to be of great importance because it is one of the few collections in an almost intact state, and many of the books are now very rare and of great value. NOTE: Pages of this book have been digitally recorded and archived.The Warrnambool Mechanics Institute book collection has historical and social significance for its strong association with the Mechanics Institute movement and the important role it played in the intellectual, cultural and social development of people throughout the latter part of the nineteenth century and the early twentieth century. The collection of books is a rare example of an early lending library and its significance is enhanced by the survival of an original collection of many volumes. Record book, Warrnambool Mechanics Institute Financial Statements 1887-1893, Hard cover, black with red spine and red corner protection. Page edges have marbled pattern, pages have accounting columns.flagstaff hill, warrnambool, shipwrecked coast, flagstaff hill maritime museum, maritime museum, shipwreck coast, flagstaff hill maritime village, great ocean road, warrnambool mechanics' institute, mechanics' institute records warrnambool, record book c. 1887 -
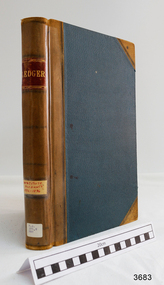 Flagstaff Hill Maritime Museum and Village
Record Book, c. 1892
In UK in early 1800's the word 'mechanic' was applied to a broader range of skills such as working man, tradesman or artisan. Mechanics' Institutes were formed originally for voluntary, self-funded organisations, to improve the education of working men and to instruct them on their various trades. The germ of the idea came from a class formed in 1799 by Professor George Birbeck in Glasgow, Scotland, for journeymen mechanics (apprentice trade workers), with the first Institutes being organised in London and Manchester in the 1820's. By then the original aim had broadened and the Mechanics' Institutes were established as popular agencies of adult education. The Mechanics' Institutes were run by committees that provided facilities for a meeting room, hall suitable for lectures, and a library. Funding was raised locally and often supplemented by grants from government agencies for the purchase of books and other resources. Activities were community based. In Australia, Mechanics' Institutes were set up in New South Wales and in Tasmania in the late 1820's. Mechanics' Institutes began in Victoria, with the first one in Melbourne dating from 1839, providing similar services but in time offered services tailored to their specific area. Warrnambool's Mechanics' Institute (or Institution as it was sometimes called) was one of the earliest in Victoria. On 17th October 1853 a meeting was held where it was resolved to request the Lieutenant Governor of the Colony to grant land for the erection of a Mechanics' Institutes building. A committee was formed at the meeting and Richard Osburne chaired the first meeting of this committee. The land on the North West corner of Banyan and Merri Streets was granted but there were no funds to erect the building. The Formal Rights of the Warrnambool Mechanics' Institute's encompassed its aims and these were officially adopted in1859; "This Institution has for its object the diffusion of literary, scientific, and other useful knowledge amongst its members, excluding all controversial subjects, religious or political. "These objects are sought to be obtained by means of a circulating library, a reading room, the establishment of classes, debates, and the occasional delivery of lectures on natural and experimental philosophy, mechanics, astronomy, chemistry, natural history, literature, and the useful and ornamental arts, particularly those which have a more immediate reference to the colony." The Warrnambool Mechanics' Institute opened its first reading room in November1884 in the National School building at the corner of Banyan and Timor Streets. The Institute was funded by member subscription, payable on a quarterly, half yearly or yearly basis. Samuel Hannaford, the Manager of the Warrnambool Bank of Australasia, was the first Honorary Secretary of the Mechanics' Institutes, and an early President and Vice-President. He also gave several of the early lectures in the Reading Room. Another early Secretary, Librarian and lecturer was Marmaduke Fisher, the teacher at the National School. Lecture topics included The Poets and Poetry of Ireland', 'The Birth and Development of the Earth', 'The Vertebrae - with Remarks on the pleasures resulting from the study of Natural History' and 'Architecture'. In q856 the Reading Room was moved to James Hider's shop in Timor Street, and by 1864 it was located in the bookshop of Davies and Read. In the 1860's the Mechanics' Institute struggled as membership waned but in 1866, after a series of fund raising efforts, the committee was able to purchase land in Liebig Street, on a site then called Market Square, between the weighbridge and the fire station. A Mechanics' Institute building was opened at this site in August 1871. The following year four more rooms were added to the main Reading Room and in 1873 the Artisan School of Design was incorporated into the Institute. The same year Joseph Archibald established a Museum; however it deteriorated when he was transferred to Bendigo in 1877. In 1880, with Archibald's return to Warrnambool, the Museum was re-established, and in 1885 a new building was built at the back of the Institute to accommodate the re-created School of Design, the Art Gallery and the Museum. In 1887 the Museum section was moved to the former court house in Timor Street (for some time the walls of the building formed part of the TAFE cafeteria but all is now demolished)). In 1911 the Museum was transferred back to the original building and the management of the Mechanics' Institute was handed over to the Warrnambool City Council. The Museum and Art Gallery became one and housed many fine works of art., and the Library continued to grow. The building was well patronised, with records showing that at the beginning of the 20th century there were between 500 and 800 visitors. During World War One the monthly figures were in the thousands, with 3,400 people visiting in January 1915. The Museum was a much loved Institution in Warrnambool until the contents of the Museum and Art Gallery were removed to make room for the Warrnambool City Council Engineers' Department. The contents were stored but many of the items were scattered or lost. In 1975 the original building was demolished and the site became occupied by the Civic Centre, which included the new City Library. (The library was temporarily located in the old Palais building in Koroit Street.) In the process of reorganisation the Collection was distributed amongst the community groups: - The new City Library took some of the historic books and some important documents, historic photographs and newspapers. - The Art Gallery kept the 19th Century art collection and some of the artefacts from the museum. - The Historic Society has some items - The State Museum has some items - Some items were destroyed - Flagstaff Hill Maritime Village has old newspapers, Government Gazettes, most of the Mechanics' Institute Library, ledgers and documents connected to the Mechanics' Institute Library, some framed and unframed art works and some photographs. The Warrnambool Mechanics' Institute Library book collection is deemed to be of great importance because it is one of the few collections in an almost intact state, and many of the books are now very rare and of great value. NOTE: Pages of this book have been digitally recorded and archived.The Warrnambool Mechanics Institute book collection has historical and social significance for its strong association with the Mechanics Institute movement and the important role it played in the intellectual, cultural and social development of people throughout the latter part of the nineteenth century and the early twentieth century. The collection of books is a rare example of an early lending library and its significance is enhanced by the survival of an original collection of many volumes. Record book, Warrnambool Mechanics Institute Accounts Ledger, 1892-1896. Hard ccover, green with brown fabric protecting corners, Front of book has alphabetical index tabs, remainder of book has numbered pages with accounting columns.flagstaff hill, warrnambool, shipwrecked coast, flagstaff hill maritime museum, maritime museum, shipwreck coast, flagstaff hill maritime village, great ocean road, warrnambool mechanics' institute, mechanics' institute records warrnambool, record book 1892 -
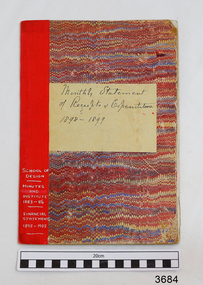 Flagstaff Hill Maritime Museum and Village
Record Book, c. 1883
In UK in early 1800's the word 'mechanic' was applied to a broader range of skills such as working man, tradesman or artisan. Mechanics' Institutes were formed originally for voluntary, self-funded organisations, to improve the education of working men and to instruct them on their various trades. The germ of the idea came from a class formed in 1799 by Professor George Birbeck in Glasgow, Scotland, for journeymen mechanics (apprentice trade workers), with the first Institutes being organised in London and Manchester in the 1820's. By then the original aim had broadened and the Mechanics' Institutes were established as popular agencies of adult education. The Mechanics' Institutes were run by committees that provided facilities for a meeting room, hall suitable for lectures, and a library. Funding was raised locally and often supplemented by grants from government agencies for the purchase of books and other resources. Activities were community based. In Australia, Mechanics' Institutes were set up in New South Wales and in Tasmania in the late 1820's. Mechanics' Institutes began in Victoria, with the first one in Melbourne dating from 1839, providing similar services but in time offered services tailored to their specific area. Warrnambool's Mechanics' Institute (or Institution as it was sometimes called) was one of the earliest in Victoria. On 17th October 1853 a meeting was held where it was resolved to request the Lieutenant Governor of the Colony to grant land for the erection of a Mechanics' Institutes building. A committee was formed at the meeting and Richard Osburne chaired the first meeting of this committee. The land on the North West corner of Banyan and Merri Streets was granted but there were no funds to erect the building. The Formal Rights of the Warrnambool Mechanics' Institute's encompassed its aims and these were officially adopted in1859; "This Institution has for its object the diffusion of literary, scientific, and other useful knowledge amongst its members, excluding all controversial subjects, religious or political. "These objects are sought to be obtained by means of a circulating library, a reading room, the establishment of classes, debates, and the occasional delivery of lectures on natural and experimental philosophy, mechanics, astronomy, chemistry, natural history, literature, and the useful and ornamental arts, particularly those which have a more immediate reference to the colony." The Warrnambool Mechanics' Institute opened its first reading room in November1884 in the National School building at the corner of Banyan and Timor Streets. The Institute was funded by member subscription, payable on a quarterly, half yearly or yearly basis. Samuel Hannaford, the Manager of the Warrnambool Bank of Australasia, was the first Honorary Secretary of the Mechanics' Institutes, and an early President and Vice-President. He also gave several of the early lectures in the Reading Room. Another early Secretary, Librarian and lecturer was Marmaduke Fisher, the teacher at the National School. Lecture topics included The Poets and Poetry of Ireland', 'The Birth and Development of the Earth', 'The Vertebrae - with Remarks on the pleasures resulting from the study of Natural History' and 'Architecture'. In q856 the Reading Room was moved to James Hider's shop in Timor Street, and by 1864 it was located in the bookshop of Davies and Read. In the 1860's the Mechanics' Institute struggled as membership waned but in 1866, after a series of fund raising efforts, the committee was able to purchase land in Liebig Street, on a site then called Market Square, between the weighbridge and the fire station. A Mechanics' Institute building was opened at this site in August 1871. The following year four more rooms were added to the main Reading Room and in 1873 the Artisan School of Design was incorporated into the Institute. The same year Joseph Archibald established a Museum; however it deteriorated when he was transferred to Bendigo in 1877. In 1880, with Archibald's return to Warrnambool, the Museum was re-established, and in 1885 a new building was built at the back of the Institute to accommodate the re-created School of Design, the Art Gallery and the Museum. In 1887 the Museum section was moved to the former court house in Timor Street (for some time the walls of the building formed part of the TAFE cafeteria but all is now demolished)). In 1911 the Museum was transferred back to the original building and the management of the Mechanics' Institute was handed over to the Warrnambool City Council. The Museum and Art Gallery became one and housed many fine works of art., and the Library continued to grow. The building was well patronised, with records showing that at the beginning of the 20th century there were between 500 and 800 visitors. During World War One the monthly figures were in the thousands, with 3,400 people visiting in January 1915. The Museum was a much loved Institution in Warrnambool until the contents of the Museum and Art Gallery were removed to make room for the Warrnambool City Council Engineers' Department. The contents were stored but many of the items were scattered or lost. In 1975 the original building was demolished and the site became occupied by the Civic Centre, which included the new City Library. (The library was temporarily located in the old Palais building in Koroit Street.) In the process of reorganisation the Collection was distributed amongst the community groups: - The new City Library took some of the historic books and some important documents, historic photographs and newspapers. - The Art Gallery kept the 19th Century art collection and some of the artefacts from the museum. - The Historic Society has some items - The State Museum has some items - Some items were destroyed - Flagstaff Hill Maritime Village has old newspapers, Government Gazettes, most of the Mechanics' Institute Library, ledgers and documents connected to the Mechanics' Institute Library, some framed and unframed art works and some photographs. The Warrnambool Mechanics' Institute Library book collection is deemed to be of great importance because it is one of the few collections in an almost intact state, and many of the books are now very rare and of great value. NOTE: Pages of this book have been digitally recorded and archived.The Warrnambool Mechanics Institute book collection has historical and social significance for its strong association with the Mechanics Institute movement and the important role it played in the intellectual, cultural and social development of people throughout the latter part of the nineteenth century and the early twentieth century. The collection of books is a rare example of an early lending library and its significance is enhanced by the survival of an original collection of many volumes. Record book; School of Design Minutes and Institute 1883-1886 / Monthly Statement of Receipts & Expenditure 1898-1905 (Double purpose book). Card cover, red/blue/white pattern, red cloth binding, pages have ruled lines. Label on one cover reads "Monthly Statement of Receipts and Expenditure 1898-1899", label on other cover reads "Comparative Statement"flagstaff hill, warrnambool, shipwrecked coast, flagstaff hill maritime museum, maritime museum, shipwreck coast, flagstaff hill maritime village, great ocean road, warrnambool mechanics' institute, mechanics' institute records warrnambool, record book 1883 -
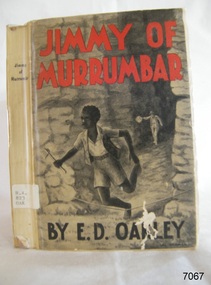 Flagstaff Hill Maritime Museum and Village
Book, Jimmy of Murrumbar, circa 1938
This novel, Jimmy of 'Murrumbar' by E.D. Oakley (Edward Daniel Oakley 1877-1962), is a children’s adventure story about an Australian indigenous boy who was educated in a mission and worked as a 'black tracker’ for the police to hunt down criminals in the bush and mountain region of the Grampian Ranges of Victoria. Oakely's parents, Thomas and Eliza, had a farm in Warrnambool called 'Oakbank'. Oakley worked at various jobs in the local district and later had his own wheat farms. When he returned to Warrnambool to build commercial premises and work in the retail industry. His influence encouraged Fletcher Jones to open a shop in Warrnambool. His novel - Jimmy of 'Murrumbar' - was written after he retired. The copy of the book in our collection does not have a publication date. The National Library of Australia lists two editions of this book, one dated 1938, the other is undetermined. It was published as part of a series called the Marcie Muir Collection of Australian children's books. No reference has been found to the author or any further works by him/her. The novel was reprinted as a reproduction in 2017 as a paperback and a leather bound edition 'Classic Reprint' by Forgotten Books. WARRNAMBOOL MECHANICS’ INSTITUTE Warrnambool's Mechanics' Institute (or Institution as it was sometimes called) was one of the earliest in Victoria. On 17th October 1853, a meeting was held where it was resolved to request the Lieutenant Governor of the Colony to grant land for the erection of a Mechanics' Institutes building. A committee was formed at the meeting and Richard Osburne chaired the first meeting of this committee. The land on the North West corner of Banyan and Merri Streets was granted but there were no funds to erect the building. The Formal Rights of the Warrnambool Mechanics' Institute's encompassed its aims and these were officially adopted in1859; "This Institution has for its object the diffusion of literary, scientific, and other useful knowledge amongst its members, excluding all controversial subjects, religious or political. These objects are sought to be obtained by means of a circulating library, a reading room, the establishment of classes, debates, and the occasional delivery of lectures on natural and experimental philosophy, mechanics, astronomy, chemistry, natural history, literature, and the useful and ornamental arts, particularly those which have a more immediate reference to the colony." The Warrnambool Mechanics' Institute opened its first reading room in November 1884 in the National School building at the corner of Banyan and Timor Streets. The Institute was funded by member subscription, payable on a quarterly, half-yearly or yearly basis. Samuel Hannaford, the Manager of the Warrnambool Bank of Australasia, was the first Honorary Secretary of the Mechanics' Institutes, and an early President and Vice-President. He also gave several of the early lectures in the Reading Room. Another early Secretary, Librarian and lecturer was Marmaduke Fisher, the teacher at the National School. Lecture topics included The Poets and Poetry of Ireland', 'The Birth and Development of the Earth', 'The Vertebrae - with Remarks on the pleasures resulting from the study of Natural History' and 'Architecture'. In 1856 the Reading Room was moved to James Hider's shop in Timor Street, and by 1864 it was located in the bookshop of Davies and Read. In the 1860's the Mechanics' Institute struggled as membership waned but in 1866, after a series of fundraising efforts, the committee was able to purchase land in Liebig Street, on a site then called Market Square, between the weighbridge and the fire station. A Mechanics' Institute building was opened at this site in August 1871. The following year four more rooms were added to the main Reading Room and in 1873 the Artisan School of Design was incorporated into the Institute. The same year Joseph Archibald established a Museum; however, it deteriorated when he was transferred to Bendigo in 1877. In 1880, with Archibald's return to Warrnambool, the Museum was re-established, and in 1885 a new building was built at the back of the Institute to accommodate the re-created School of Design, the Art Gallery and the Museum. In 1887 the Museum section was moved to the former courthouse in Timor Street (for some time the walls of the building formed part of the TAFE cafeteria but all is now demolished)). In 1911 the Museum was transferred back to the original building and the management of the Mechanics' Institute was handed over to the Warrnambool City Council. The Museum and Art Gallery became one and housed many fine works of art, and the Library continued to grow. The building was well patronised, with records showing that at the beginning of the 20th century there were between 500 and 800 visitors. During World War One the monthly figures were in the thousands, with 3,400 people visiting in January 1915. The Museum was a much loved Institution in Warrnambool until the contents of the Museum and Art Gallery were removed to make room for the Warrnambool City Council Engineers' Department. The contents were stored but many of the items were scattered or lost. When the original building was demolished the site became occupied by the Civic Centre, which included the new City Library. (The library was temporarily located in the old Palais building in Koroit Street.) In the process of reorganisation the Collection was distributed amongst the community groups: -The new City Library took some of the historical books and some important documents, historic photographs and newspapers. -The Art Gallery kept the 19th Century art collection and some of the artefacts from the museum. -The Historical Society has some items -The State Museum has some items -Some items were destroyed -Flagstaff Hill Maritime Village has old newspapers, Government Gazettes, most of the Mechanics' Institute Library, ledgers and documents connected to the Mechanics' Institute Library, some framed and unframed artworks and some photographs. The Warrnambool Mechanics' Institute Library book collection is deemed to be of great importance because it is one of the few collections in an almost intact state, and many of the books are now very rare and of great value. This novel is historically significant for its story, representing the changes to Australian Indigenous culture and life after colonisation. The book appears to be that this is the only work written by E.D. Oakley. It is locally significant for being written by an early prominent Warrnambool family member. Jimmy of Murrumbar : A Story of the Amazing Ability and Fidelity of an Australian Black Tracker Author: E D Oakley (Edward Daniel Oakley) Publisher: Osboldstone & Co, Pty Ltd, Melbourne, Australia The label on the spine with typed text R.A. 823 OAK The front loose endpaper has a sticker from Warrnambool Children’s Library shipwrecked-coast, flagstaff-hill, flagstaff-hill-maritime-museum, warrnambool, maritime-museum, shipwreck-coast, flagstaff-hill-maritime-village, shipwrecked-artefact, book, pattison collection, warrnambool library, warrnambool mechanics’ institute, ralph eric pattison, corangamite regional library service, warrnambool city librarian, mechanics’ institute library, victorian library board, warrnambool books and records, warrnambool children’s library, jimmy of murrumbar, e d oakley, edward daniel oakley, novel, young adult novel, juvenile fiction, australian black tracker, law enforcement - police trackers, tracking and trailing in australia, australian bush, grampian ranges in victoria, warrnambool history, fletcher jones, oakbank, thomas and eliza oakley, indigenous literature, indigenous australians