Showing 7307 items
matching cross-fertilisation
-
 Melbourne Tram Museum
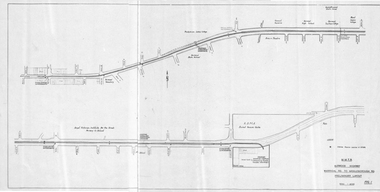
Drawing, Melbourne & Metropolitan Tramways Board (MMTB), "Burwood Highway Warragul Rd to Middleborough Rd - Preliminary Layout", c1975
Drawing, folded sheet to A4, titled "Burwood Highway Warragul Rd to Middleborough Rd - Preliminary Layout" showing the proposed layout of the tramway that was later built by the MMTB. Shows track alignment, cross streets, schools, the RSPCA, and a track into a proposed shopping centre complex where a bus interchange was noted. Part of a larger report.trams, tramways, burwood, burwood highway, new tramway, middleborough rd, buses -
 Melbourne Tram Museum
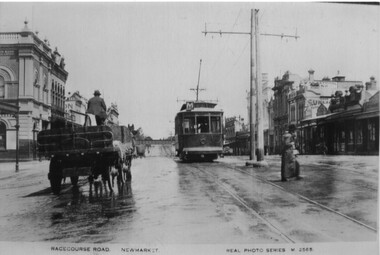
Photograph - Black and White photograph, 1920s
.1 - Black and White photo of NMETL No. 1 (U class, letter M, Maribyrnong River) westbound in Racecourse Road Flemington, at the intersection with Wellington and Pridham St. Note the centre poles. The Railway over bridge is in the distance. c1920. A horse drawn cart with hay or straw is alongside while two ladies cross the road.On rear in ink "Photo David Bowman Coll."trams, tramways, newmarket, racecourse road, flemington, u class, tram 1, nmeltl -
 Melbourne Tram Museum
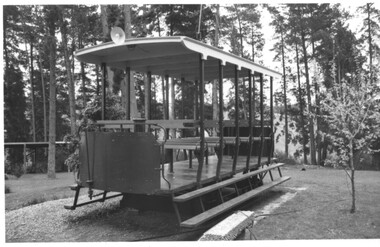
Photograph - Black and White photograph, Keith Kings, 11/10/1979 12:00:00 AM
Black and White photographs the replica open cross bench car of the Box Hill Doncaster - Doncaster tram. Made by the Doncaster-Templestowe City Council Workshops in 1979. Photographer notes that the rear that it was on display at the Doncaster Historical Society's restored Schramm's Cottage, Doncaster Dated 11/10/1979. Photo Number 179-34Has the Keith Kings photo stamp on the rear, with extensive details of the photograph.trams, tramways, box hill, doncaster, replica, cross bench tram -
 Melbourne Tram Museum
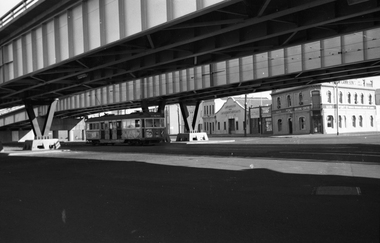
Negative, Wal Jack, 11/03/1962 12:00:00 AM
Black and white negative, by Wal Jack, of W5 684, West Coburg Route 55 inbound passing under the Kingsway over bridge and about to cross City Road. The bridge was opened to traffic during 1961. In the background is the Main Point Building Centre, a shop advertising Turf Cigarettes, J McCann Lime and Cement.trams, tramways, kingsway, city road, west coburg, route 55, w5 class, tram 684 -
 Melbourne Tram Museum
Drawing, Melbourne & Metropolitan Tramways Board (MMTB), "Melbourne & Metropolitan Tramways Board Electric Tramway System 1979", 1979
Photocopy of the track plan for the Melbourne Tramway System in 1979 over two separate sheets - titled "Melbourne & Metropolitan Tramways Board Electric Tramway System 1979". Shows the route numbers and terminus names, depot locations, rail lines, cross overs and junctions. Has the name J.Chau in bottom left hand corner.trams, tramways, melbourne, map, trackwork, depots, route numbers, railways, junction -
 Mission to Seafarers Victoria
Book (Item) - Scrapbook, Edith E Hitchcock, Victoria Missions to Seamen, Spencer Street Railway Station, 1931-1943
The scrapbook, compiled by Edith E Hitchcock, displays a variety of newspaper clippings with photographs relating to ships, sailors, their hobbies, Padre Oliver. Page 1 - Map of the British Empire Page 3 - Newspaper clipping with photographs: "Happy Sailors Lads" onboard the CB Pedersen C.1935 Page 5 - Photograph depicting three children watching of a ship at sea Page 7 - 1937: article: with photograph"Sea Captain and Artist": Captain A.C.G. Dreillek, Swedish ship Yngaren (similar photo published in 1937 in the Courier Mail Brisbane) Page 9 - 1935: "Reunited": Dog Patsy with ship Pegasus crew members / "Sydney Harbour Bridge": Phillip Vanderhill, Cook of the Kota Inter and its sitar creation Page 11: Mr G. Gatty and Tim, the cat from the Esperance Bay / Herbert the hen, pet on the ship King Arthur / Frank Simpson, quartermaster and painter from the ship City of Dieppe. Page 13: Conway Seymour and shipmate aboard the Orford. Page 15: 3 photographs of French sailors from the cruiser Rigault de Grenouilly in 1936. Page 16: Photograph of A.J. Kramer working on a ship model aboard the Dutch ship, Kota Inten. Page 17: 1936: Photographs of sailors from the French ship Rigault de Grenouilly and the American ship: California State berthed in Prince's Pier. (plus two large loose clippings with portraits of same sailors). Page 18: 1934: Ball on the Manunda to raise funds for the Mission: photograph of Captain Robert Sunter, Padre Oliver, Moira Oliver, Mrs Harold Clapp. Page 19: Photograph of French sailors from the Rigault de Grenouilly in a bus en route to the Dandenong Ranges. Page 21: Photographs of a shipwreck (probably Kakariki in 1938, see next page). Page 23: Aerial photograph of the shipwreck Kakariki in Hobson's Bay in 1937 Page 25: Photograph of the shipwreck Kakariki in Hobson's Bay in 1937. Page 26: Photograph of the shipwreck Kakariki in Hobson's Bay in 1937. Page 27: Photograph of the survivors from the shipwreck Kakariki in the Mission in 1937: A. Bunyard, W. Fisk, J. Greene, L. Tarlington, J. McInnes, G. Coote, G. Sugar. Page 28: Photograph of the survivors from the shipwreck Kakariki in the Caradale in 1937: W. Fisk, T.W. White. Page 29: Missioneers talk to Firemen: Padre Oliver and his assistant, L.V. Owen talking to ship's firemen.(the Argus, 24 July 1931) Page 31: 3 articles with photographs: American cadets from the California State / Governor's Surprise Visit: Lord Huntingfield visiting Padre Oliver in the Mission (the Argus, 19 May 1936) / Sea Scouts on Liner: Padre Oliver on the P&O Cathay (the Argus, 16 June 1936) Page 33: Harbour Lights: padre Oliver, Lord Somers and Rev. R. Kerdell / Visit of the Duchess to the Mission (the Argus, 26 february 1945). Page 34: Photograph titled "An old salt still yearns for the sea- 369 miles away". Page 35: two clippings : Presentation of cheques for Merchant Navy: Betty Raymond giving a cheque to Padre L.L. Elliott / A cheque for the Seamen's Mission: Photograph of Padre Oliver with a cheque. Page 37: 4 clippings with photographs: Padre Oliver playing the piano for the cadets of the C.B. Pedersen / Miss Gladys Grant with parcels (from the Age 10 November 1943) / All Nations' Dance / Christmas at the Flinders Street mission, Padre Oliver cutting the cake (The Age, 15 December 1942) Page 39: Unveiling of the Memorial window to Captain Robert Sunter in 1936. Page 41: 2 clippings: At the Seamen's Mission: photographs of J. W. Neill and Padre Oliver / Married: Albert Robertson and Beryl Landrigan / Postcard of the St Peter Chapel. Page 43: 2 postcards: The Cloisters / The Mission view from Flinders Street. Page 45: Postcard of the windvane. / clipping of Sailors from the Zealandic. Page 46: 2 clippings: Virtually a Man without a country: Frans Nobel on the ship Milleeta / Seaman, Soldier, Waiter, Singer, Cook Finds Peace (Frans Nobel).(1939) Page 47: That Land Looks Good: two seamen from the tanker British Fame Page 48: large clipping of the C.B. Pedersen "Like a page from the past".(april-May 1935) Page 49: Photograph of Padre Oliver in his army uniform.This scrapbook is significant because it makes reference to contemporaneous events related to the Mission to Seafarers. On the inside cover is the name Edith E. Hitchcock.edith e. hitchcock, scrapbooks, c.b. pedersen, hobbies, ship models, painting, frank leslie oliver, mv manunda, captain robert sunter, windvane, rigault de genouilly, french, german, california, kakariki, ship pegasus, sydney harbour bridge, sugar, kota inten, philip vanderhill, lord somers, reverend r. kerdell, r.m.s. moldavia, victoria dock, ww2, pets, bird, dog, cat, gladys grant, alphonse polo, eugene emonin, raoul gannson, esperance bay, g. gatty, captain a. macwhirter, frank simpson, city of dieppe, conway seymour, orford, a.j. kramer, dutch, moira bird oliver (nee good), mrs harold clapp, caradale, 3uz radio, betty raymond, l.l. elliott, j.h. bustard, merchant navy patriotic fund, g.h. martin, j.w. neill, albert robertson, beryl landrigan, zealandic, frans nobel, milleeta, british fame -
 Flagstaff Hill Maritime Museum and Village
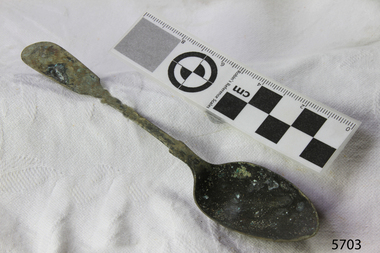
Spoon, circa 1878
This tea spoon is from the wreck of the LOCH ARD, a Loch Line ship of 1,693 tons which sailed from Gravesend, London, on 2 March 1878 with 17 passengers and a crew of 36 under Captain George Gibbs. “The intention was to discharge cargo in Melbourne, before returning to London via the Horn with wool and wheat”. Instead, on 1 June 1878, after 90 days at sea, she struck the sandstone cliffs of Mutton Bird Island on the south west coast of Victoria, and sank with the loss of 52 lives and all her cargo. The manifest of the LOCH ARD listed an array of manufactured goods and bulk metals being exported to the Colony of Victoria, with a declared value of £53,700. (202 bills of lading show an actual invoice value of £68, 456, with insurance underwriting to £30,000 of all cargo). Included in the manifest is the item of “Tin hardware & cutlery £7,530”. This teaspoon is one of 482 similar items of electro-plated cutlery from the LOCH ARD site, comprising spoons and forks of various sizes but all sharing the same general shape or design and metallic composition. 49 of these pieces display a legible makers’ mark — the initials “W” and “P” placed within a raised diamond outline, which is in turn contained within a sunken crown shape — identifying the manufacturer as William Page & Co of Birmingham. An electroplater’s makers’ marks, unlike sterling silver hallmarks, are not consistent identifiers of quality or date and place of manufacture. A similar line of five impressions was usually made to impress the consumer with an implication of industry standards, but what each one actually signified was not regulated and so they varied according to the whim of the individual foundry. In this case, the maker’s marks are often obscured by sedimentary accretion or removed by corrosion after a century of submersion in the ocean. However sufficient detail has survived to indicate that these samples of electro-plated cutlery probably originated from the same consignment in the LOCH ARD’s cargo. The following descriptions of maker’s marks are drawn from 255 tea spoons, 125 dessert spoons, and 99 table forks. These marks are clearly visible in 66 instances, while the same sequence of general outlines, or depression shapes, is discernible in another 166 examples. 1. A recessed Crown containing a raised Diamond outline and the initials “W” and “P” (the recognised trademark of William Page & Co) 2. An impressed Ellipse containing a raised, pivoted, Triangle in its lower part and bearing a Resurrection Cross on its upper section (a possible dissenting church symbol reflecting religious affiliation); OR a rounded Square impression containing a raised, ‘lazy’, letter “B” (possibly mimicking sterling silver hallmark signifying city of manufacture i.e. Birmingham) 3. An impressed rounded Square filled with a raised Maltese Cross (the base metal composite of nickel silver was also known as ‘German silver’ after its Berlin inventors in 1823) 4. A recessed Circle containing a Crab or Scarab Beetle image; OR a recessed Circle containing a rotated ‘fleur de lys’ or ‘fasces’ design 5. A depressed Diamond shape enclosing a large raised letter “R” and a small raised letter “D” (mimicking the U.K. Patent Office stamp which abbreviated the term ‘registered’ to “RD”, but also included date and class of patent) Suggested trade names for William Page & Co’s particular blend of brass plating are ‘roman silver’ or ‘silverite’. This copper alloy polishes to a lustrous gold when new, discolouring to a murky grey with greenish hue when neglected. HISTORY OF THE LOCH ARD The LOCH ARD belonged to the famous Loch Line which sailed many ships from England to Australia. Built in Glasgow by Barclay, Curdle and Co. in 1873, the LOCH ARD was a three-masted square rigged iron sailing ship. The ship measured 262ft 7" (79.87m) in length, 38ft (11.58m) in width, 23ft (7m) in depth and had a gross tonnage of 1693 tons. The LOCH ARD's main mast measured a massive 150ft (45.7m) in height. LOCH ARD made three trips to Australia and one trip to Calcutta before its final voyage. LOCH ARD left England on March 2, 1878, under the command of Captain Gibbs, a newly married, 29 year old. She was bound for Melbourne with a crew of 37, plus 17 passengers and a load of cargo. The general cargo reflected the affluence of Melbourne at the time. On board were straw hats, umbrella, perfumes, clay pipes, pianos, clocks, confectionary, linen and candles, as well as a heavier load of railway irons, cement, lead and copper. There were items included that intended for display in the Melbourne International Exhibition in 1880. The voyage to Port Phillip was long but uneventful. At 3am on June 1, 1878, Captain Gibbs was expecting to see land and the passengers were becoming excited as they prepared to view their new homeland in the early morning. But LOCH ARD was running into a fog which greatly reduced visibility. Captain Gibbs was becoming anxious as there was no sign of land or the Cape Otway lighthouse. At 4am the fog lifted. A man aloft announced that he could see breakers. The sheer cliffs of Victoria's west coast came into view, and Captain Gibbs realised that the ship was much closer to them than expected. He ordered as much sail to be set as time would permit and then attempted to steer the vessel out to sea. On coming head on into the wind, the ship lost momentum, the sails fell limp and LOCH ARD's bow swung back. Gibbs then ordered the anchors to be released in an attempt to hold its position. The anchors sank some 50 fathoms - but did not hold. By this time LOCH ARD was among the breakers and the tall cliffs of Mutton Bird Island rose behind the ship. Just half a mile from the coast, the ship's bow was suddenly pulled around by the anchor. The captain tried to tack out to sea, but the ship struck a reef at the base of Mutton Bird Island, near Port Campbell. Waves broke over the ship and the top deck was loosened from the hull. The masts and rigging came crashing down knocking passengers and crew overboard. When a lifeboat was finally launched, it crashed into the side of LOCH ARD and capsized. Tom Pearce, who had launched the boat, managed to cling to its overturned hull and shelter beneath it. He drifted out to sea and then on the flood tide came into what is now known as LOCH ARD Gorge. He swam to shore, bruised and dazed, and found a cave in which to shelter. Some of the crew stayed below deck to shelter from the falling rigging but drowned when the ship slipped off the reef into deeper water. Eva Carmichael had raced onto deck to find out what was happening only to be confronted by towering cliffs looming above the stricken ship. In all the chaos, Captain Gibbs grabbed Eva and said, "If you are saved Eva, let my dear wife know that I died like a sailor". That was the last Eva Carmichael saw of the captain. She was swept off the ship by a huge wave. Eva saw Tom Pearce on a small rocky beach and yelled to attract his attention. He dived in and swam to the exhausted woman and dragged her to shore. He took her to the cave and broke open case of brandy which had washed up on the beach. He opened a bottle to revive the unconscious woman. A few hours later Tom scaled a cliff in search of help. He followed hoof prints and came by chance upon two men from nearby Glenample Station three and a half miles away. In a state of exhaustion, he told the men of the tragedy. Tom returned to the gorge while the two men rode back to the station to get help. By the time they reached LOCH ARD Gorge, it was cold and dark. The two shipwreck survivors were taken to Glenample Station to recover. Eva stayed at the station for six weeks before returning to Ireland, this time by steamship. In Melbourne, Tom Pearce received a hero's welcome. He was presented with the first gold medal of the Royal Humane Society of Victoria and a £1000 cheque from the Victorian Government. Concerts were performed to honour the young man's bravery and to raise money for those who lost family in the LOCH ARD disaster. Of the 54 crew members and passengers on board, only two survived: the apprentice, Tom Pearce and the young woman passenger, Eva Carmichael, who lost all of her family in the tragedy. Ten days after the LOCH ARD tragedy, salvage rights to the wreck were sold at auction for £2,120. Cargo valued at £3,000 was salvaged and placed on the beach, but most washed back into the sea when another storm developed. The wreck of LOCH ARD still lies at the base of Mutton Bird Island. Much of the cargo has now been salvaged and some was washed up into what is now known as LOCH ARD Gorge. Cargo and artefacts have also been illegally salvaged over many years before protective legislation was introduced. One of the most unlikely pieces of cargo to have survived the shipwreck was a Minton porcelain peacock - one of only seven in the world. The peacock was destined for the Melbourne International Exhibition in 1880. It had been well packed, which gave it adequate protection during the violent storm. Today, the Minton peacock can be seen at the Flagstaff Hill Maritime Museum in Warrnambool. From Australia's most dramatic shipwreck it has now become Australia's most valuable shipwreck artefact and is one of very few 'objects' on the Victorian State Heritage Register The LOCH ARD shipwreck is of State significance – Victorian Heritage Register S 417. Flagstaff Hill’s collection of artefacts from LOCH ARD is significant for being one of the largest collections of artefacts from this shipwreck in Victoria. It is significant for its association with the shipwreck, which is on the Victorian Heritage Register (VHR S417). The collection is significant because of the relationship between the objects, as together they have a high potential to interpret the story of the LOCH ARD. The LOCH ARD collection is archaeologically significant as the remains of a large international passenger and cargo ship. The LOCH ARD collection is historically significant for representing aspects of Victoria’s shipping history and its potential to interpret sub-theme 1.5 of Victoria’s Framework of Historical Themes (living with natural processes). The collection is also historically significant for its association with the LOCH ARD, which was one of the worst and best known shipwrecks in Victoria’s history. Unrestored tea spoon from the wreck of the LOCH ARD. The spoon design has a flattened fiddle-back handle, with a thin stem or shank, flared collar, and elongated bowl. The spoons metallic composition is a thin layer of brass alloy which has partially corroded back to a nickel-silver base metal. Approximately 15% of original electroplating remains with some verdigris. Two of five makers marks are visible: (3) Maltese Cross (4) Crab Designflagstaff hill, warrnambool, shipwrecked coast, flagstaff hill maritime museum, maritime museum, shipwreck coast, flagstaff hill maritime village, great ocean road, loch line, loch ard, captain gibbs, eva carmichael, tom pearce, glenample station, mutton bird island, loch ard gorge, electroplated cutlery, loch ard shipwreck, nickel silver, william page & co, birmingham, brass plating, makers marks -
 Flagstaff Hill Maritime Museum and Village
Spoon, circa 1878
This tea spoon is from the wreck of the LOCH ARD, a Loch Line ship of 1,693 tons which sailed from Gravesend, London, on 2 March 1878 with 17 passengers and a crew of 36 under Captain George Gibbs. “The intention was to discharge cargo in Melbourne, before returning to London via the Horn with wool and wheat”. Instead, on 1 June 1878, after 90 days at sea, she struck the sandstone cliffs of Mutton Bird Island on the south west coast of Victoria, and sank with the loss of 52 lives and all her cargo. The manifest of the LOCH ARD listed an array of manufactured goods and bulk metals being exported to the Colony of Victoria, with a declared value of £53,700. (202 bills of lading show an actual invoice value of £68, 456, with insurance underwriting to £30,000 of all cargo). Included in the manifest is the item of “Tin hardware & cutlery £7,530”. This teaspoon is one of 482 similar items of electro-plated cutlery from the LOCH ARD site, comprising spoons and forks of various sizes but all sharing the same general shape or design and metallic composition. 49 of these pieces display a legible makers’ mark — the initials “W” and “P” placed within a raised diamond outline, which is in turn contained within a sunken crown shape — identifying the manufacturer as William Page & Co of Birmingham. An electroplater’s makers’ marks, unlike sterling silver hallmarks, are not consistent identifiers of quality or date and place of manufacture. A similar line of five impressions was usually made to impress the consumer with an implication of industry standards, but what each one actually signified was not regulated and so they varied according to the whim of the individual foundry. In this case, the maker’s marks are often obscured by sedimentary accretion or removed by corrosion after a century of submersion in the ocean. However sufficient detail has survived to indicate that these samples of electro-plated cutlery probably originated from the same consignment in the LOCH ARD’s cargo. The following descriptions of maker’s marks are drawn from 255 tea spoons, 125 dessert spoons, and 99 table forks. These marks are clearly visible in 66 instances, while the same sequence of general outlines, or depression shapes, is discernible in another 166 examples. 1. A recessed Crown containing a raised Diamond outline and the initials “W” and “P” (the recognised trademark of William Page & Co) 2. An impressed Ellipse containing a raised, pivoted, Triangle in its lower part and bearing a Resurrection Cross on its upper section (a possible dissenting church symbol reflecting religious affiliation); OR a rounded Square impression containing a raised, ‘lazy’, letter “B” (possibly mimicking sterling silver hallmark signifying city of manufacture i.e. Birmingham) 3. An impressed rounded Square filled with a raised Maltese Cross (the base metal composite of nickel silver was also known as ‘German silver’ after its Berlin inventors in 1823) 4. A recessed Circle containing a Crab or Scarab Beetle image; OR a recessed Circle containing a rotated ‘fleur de lys’ or ‘fasces’ design 5. A depressed Diamond shape enclosing a large raised letter “R” and a small raised letter “D” (mimicking the U.K. Patent Office stamp which abbreviated the term ‘registered’ to “RD”, but also included date and class of patent) Suggested trade names for William Page & Co’s particular blend of brass plating are ‘roman silver’ or ‘silverite’. This copper alloy polishes to a lustrous gold when new, discolouring to a murky grey with greenish hue when neglected. HISTORY OF THE LOCH ARD The LOCH ARD belonged to the famous Loch Line which sailed many ships from England to Australia. Built in Glasgow by Barclay, Curdle and Co. in 1873, the LOCH ARD was a three-masted square rigged iron sailing ship. The ship measured 262ft 7" (79.87m) in length, 38ft (11.58m) in width, 23ft (7m) in depth and had a gross tonnage of 1693 tons. The LOCH ARD's main mast measured a massive 150ft (45.7m) in height. LOCH ARD made three trips to Australia and one trip to Calcutta before its final voyage. LOCH ARD left England on March 2, 1878, under the command of Captain Gibbs, a newly married, 29 year old. She was bound for Melbourne with a crew of 37, plus 17 passengers and a load of cargo. The general cargo reflected the affluence of Melbourne at the time. On board were straw hats, umbrella, perfumes, clay pipes, pianos, clocks, confectionary, linen and candles, as well as a heavier load of railway irons, cement, lead and copper. There were items included that intended for display in the Melbourne International Exhibition in 1880. The voyage to Port Phillip was long but uneventful. At 3am on June 1, 1878, Captain Gibbs was expecting to see land and the passengers were becoming excited as they prepared to view their new homeland in the early morning. But LOCH ARD was running into a fog which greatly reduced visibility. Captain Gibbs was becoming anxious as there was no sign of land or the Cape Otway lighthouse. At 4am the fog lifted. A man aloft announced that he could see breakers. The sheer cliffs of Victoria's west coast came into view, and Captain Gibbs realised that the ship was much closer to them than expected. He ordered as much sail to be set as time would permit and then attempted to steer the vessel out to sea. On coming head on into the wind, the ship lost momentum, the sails fell limp and LOCH ARD's bow swung back. Gibbs then ordered the anchors to be released in an attempt to hold its position. The anchors sank some 50 fathoms - but did not hold. By this time LOCH ARD was among the breakers and the tall cliffs of Mutton Bird Island rose behind the ship. Just half a mile from the coast, the ship's bow was suddenly pulled around by the anchor. The captain tried to tack out to sea, but the ship struck a reef at the base of Mutton Bird Island, near Port Campbell. Waves broke over the ship and the top deck was loosened from the hull. The masts and rigging came crashing down knocking passengers and crew overboard. When a lifeboat was finally launched, it crashed into the side of LOCH ARD and capsized. Tom Pearce, who had launched the boat, managed to cling to its overturned hull and shelter beneath it. He drifted out to sea and then on the flood tide came into what is now known as LOCH ARD Gorge. He swam to shore, bruised and dazed, and found a cave in which to shelter. Some of the crew stayed below deck to shelter from the falling rigging but drowned when the ship slipped off the reef into deeper water. Eva Carmichael had raced onto deck to find out what was happening only to be confronted by towering cliffs looming above the stricken ship. In all the chaos, Captain Gibbs grabbed Eva and said, "If you are saved Eva, let my dear wife know that I died like a sailor". That was the last Eva Carmichael saw of the captain. She was swept off the ship by a huge wave. Eva saw Tom Pearce on a small rocky beach and yelled to attract his attention. He dived in and swam to the exhausted woman and dragged her to shore. He took her to the cave and broke open case of brandy which had washed up on the beach. He opened a bottle to revive the unconscious woman. A few hours later Tom scaled a cliff in search of help. He followed hoof prints and came by chance upon two men from nearby Glenample Station three and a half miles away. In a state of exhaustion, he told the men of the tragedy. Tom returned to the gorge while the two men rode back to the station to get help. By the time they reached LOCH ARD Gorge, it was cold and dark. The two shipwreck survivors were taken to Glenample Station to recover. Eva stayed at the station for six weeks before returning to Ireland, this time by steamship. In Melbourne, Tom Pearce received a hero's welcome. He was presented with the first gold medal of the Royal Humane Society of Victoria and a £1000 cheque from the Victorian Government. Concerts were performed to honour the young man's bravery and to raise money for those who lost family in the LOCH ARD disaster. Of the 54 crew members and passengers on board, only two survived: the apprentice, Tom Pearce and the young woman passenger, Eva Carmichael, who lost all of her family in the tragedy. Ten days after the LOCH ARD tragedy, salvage rights to the wreck were sold at auction for £2,120. Cargo valued at £3,000 was salvaged and placed on the beach, but most washed back into the sea when another storm developed. The wreck of LOCH ARD still lies at the base of Mutton Bird Island. Much of the cargo has now been salvaged and some was washed up into what is now known as LOCH ARD Gorge. Cargo and artefacts have also been illegally salvaged over many years before protective legislation was introduced. One of the most unlikely pieces of cargo to have survived the shipwreck was a Minton porcelain peacock - one of only seven in the world. The peacock was destined for the Melbourne International Exhibition in 1880. It had been well packed, which gave it adequate protection during the violent storm. Today, the Minton peacock can be seen at the Flagstaff Hill Maritime Museum in Warrnambool. From Australia's most dramatic shipwreck it has now become Australia's most valuable shipwreck artefact and is one of very few 'objects' on the Victorian State Heritage Register. The LOCH ARD shipwreck is of State significance – Victorian Heritage Register S 417. Flagstaff Hill’s collection of artefacts from LOCH ARD is significant for being one of the largest collections of artefacts from this shipwreck in Victoria. It is significant for its association with the shipwreck, which is on the Victorian Heritage Register (VHR S417). The collection is significant because of the relationship between the objects, as together they have a high potential to interpret the story of the LOCH ARD. The LOCH ARD collection is archaeologically significant as the remains of a large international passenger and cargo ship. The LOCH ARD collection is historically significant for representing aspects of Victoria’s shipping history and its potential to interpret sub-theme 1.5 of Victoria’s Framework of Historical Themes (living with natural processes). The collection is also historically significant for its association with the LOCH ARD, which was one of the worst and best known shipwrecks in Victoria’s history. Unrestored tea spoon from the wreck of the LOCH ARD. The spoon design has a flattened fiddle-back handle, with a thin stem or shank, flared collar, and elongated bowl. The spoons metallic composition is a thin layer of brass alloy which has partially corroded back to a nickel-silver base metal. Approximately 15% of original electroplating survives with traces of verdigris. Outlines of five makers marks are visible and the details of one of these are legible: (3) Maltese Cross.flagstaff hill, warrnambool, shipwrecked coast, flagstaff hill maritime museum, maritime museum, shipwreck coast, flagstaff hill maritime village, great ocean road, loch line, loch ard, captain gibbs, eva carmichael, tom pearce, glenample station, mutton bird island, loch ard gorge, electroplated cutlery, loch ard shipwreck, nickel silver, william page & co, birmingham, brass plating, makers marks -
 Flagstaff Hill Maritime Museum and Village
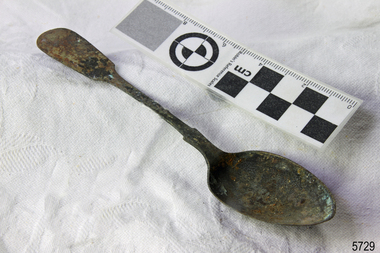
Domestic object - Spoon, c.1878
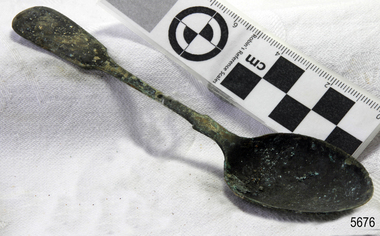
This tea spoon is from the wreck of the LOCH ARD, a Loch Line ship of 1,693 tons which sailed from Gravesend, London, on 2 March 1878 with 17 passengers and a crew of 36 under Captain George Gibbs. “The intention was to discharge cargo in Melbourne, before returning to London via the Horn with wool and wheat”. Instead, on 1 June 1878, after 90 days at sea, she struck the sandstone cliffs of Mutton Bird Island on the south west coast of Victoria, and sank with the loss of 52 lives and all her cargo. The manifest of the LOCH ARD listed an array of manufactured goods and bulk metals being exported to the Colony of Victoria, with a declared value of £53,700. (202 bills of lading show an actual invoice value of £68, 456, with insurance underwriting to £30,000 of all cargo). Included in the manifest is the item of “Tin hardware & cutlery £7,530”. This teaspoon is one of 482 similar items of electro-plated cutlery from the LOCH ARD site, comprising spoons and forks of various sizes but all sharing the same general shape or design and metallic composition. 49 of these pieces display a legible makers’ mark — the initials “W” and “P” placed within a raised diamond outline, which is in turn contained within a sunken crown shape — identifying the manufacturer as William Page & Co of Birmingham. An electroplater’s makers’ marks, unlike sterling silver hallmarks, are not consistent identifiers of quality or date and place of manufacture. A similar line of five impressions was usually made to impress the consumer with an implication of industry standards, but what each one actually signified was not regulated and so they varied according to the whim of the individual foundry. In this case, the maker’s marks are often obscured by sedimentary accretion or removed by corrosion after a century of submersion in the ocean. However sufficient detail has survived to indicate that these samples of electro-plated cutlery probably originated from the same consignment in the LOCH ARD’s cargo. The following descriptions of maker’s marks are drawn from 255 tea spoons, 125 dessert spoons, and 99 table forks. These marks are clearly visible in 66 instances, while the same sequence of general outlines, or depression shapes, is discernible in another 166 examples. 1. A recessed Crown containing a raised Diamond outline and the initials “W” and “P” (the recognised trademark of William Page & Co) 2. An impressed Ellipse containing a raised, pivoted, Triangle in its lower part and bearing a Resurrection Cross on its upper section (a possible dissenting church symbol reflecting religious affiliation); OR a rounded Square impression containing a raised, ‘lazy’, letter “B” (possibly mimicking sterling silver hallmark signifying city of manufacture i.e. Birmingham) 3. An impressed rounded Square filled with a raised Maltese Cross (the base metal composite of nickel silver was also known as ‘German silver’ after its Berlin inventors in 1823) 4. A recessed Circle containing a Crab or Scarab Beetle image; OR a recessed Circle containing a rotated ‘fleur de lys’ or ‘fasces’ design 5. A depressed Diamond shape enclosing a large raised letter “R” and a small raised letter “D” (mimicking the U.K. Patent Office stamp which abbreviated the term ‘registered’ to “RD”, but also included date and class of patent) Suggested trade names for William Page & Co’s particular blend of brass plating are ‘roman silver’ or ‘silverite’. This copper alloy polishes to a lustrous gold when new, discolouring to a murky grey with greenish hue when neglected. HISTORY OF THE LOCH ARD The LOCH ARD belonged to the famous Loch Line which sailed many ships from England to Australia. Built in Glasgow by Barclay, Curdle and Co. in 1873, the LOCH ARD was a three-masted square rigged iron sailing ship. The ship measured 262ft 7" (79.87m) in length, 38ft (11.58m) in width, 23ft (7m) in depth and had a gross tonnage of 1693 tons. The LOCH ARD's main mast measured a massive 150ft (45.7m) in height. LOCH ARD made three trips to Australia and one trip to Calcutta before its final voyage. LOCH ARD left England on March 2, 1878, under the command of Captain Gibbs, a newly married, 29 year old. She was bound for Melbourne with a crew of 37, plus 17 passengers and a load of cargo. The general cargo reflected the affluence of Melbourne at the time. On board were straw hats, umbrella, perfumes, clay pipes, pianos, clocks, confectionary, linen and candles, as well as a heavier load of railway irons, cement, lead and copper. There were items included that intended for display in the Melbourne International Exhibition in 1880. The voyage to Port Phillip was long but uneventful. At 3am on June 1, 1878, Captain Gibbs was expecting to see land and the passengers were becoming excited as they prepared to view their new homeland in the early morning. But LOCH ARD was running into a fog which greatly reduced visibility. Captain Gibbs was becoming anxious as there was no sign of land or the Cape Otway lighthouse. At 4am the fog lifted. A man aloft announced that he could see breakers. The sheer cliffs of Victoria's west coast came into view, and Captain Gibbs realised that the ship was much closer to them than expected. He ordered as much sail to be set as time would permit and then attempted to steer the vessel out to sea. On coming head on into the wind, the ship lost momentum, the sails fell limp and LOCH ARD's bow swung back. Gibbs then ordered the anchors to be released in an attempt to hold its position. The anchors sank some 50 fathoms - but did not hold. By this time LOCH ARD was among the breakers and the tall cliffs of Mutton Bird Island rose behind the ship. Just half a mile from the coast, the ship's bow was suddenly pulled around by the anchor. The captain tried to tack out to sea, but the ship struck a reef at the base of Mutton Bird Island, near Port Campbell. Waves broke over the ship and the top deck was loosened from the hull. The masts and rigging came crashing down knocking passengers and crew overboard. When a lifeboat was finally launched, it crashed into the side of LOCH ARD and capsized. Tom Pearce, who had launched the boat, managed to cling to its overturned hull and shelter beneath it. He drifted out to sea and then on the flood tide came into what is now known as LOCH ARD Gorge. He swam to shore, bruised and dazed, and found a cave in which to shelter. Some of the crew stayed below deck to shelter from the falling rigging but drowned when the ship slipped off the reef into deeper water. Eva Carmichael had raced onto deck to find out what was happening only to be confronted by towering cliffs looming above the stricken ship. In all the chaos, Captain Gibbs grabbed Eva and said, "If you are saved Eva, let my dear wife know that I died like a sailor". That was the last Eva Carmichael saw of the captain. She was swept off the ship by a huge wave. Eva saw Tom Pearce on a small rocky beach and yelled to attract his attention. He dived in and swam to the exhausted woman and dragged her to shore. He took her to the cave and broke open case of brandy which had washed up on the beach. He opened a bottle to revive the unconscious woman. A few hours later Tom scaled a cliff in search of help. He followed hoof prints and came by chance upon two men from nearby Glenample Station three and a half miles away. In a state of exhaustion, he told the men of the tragedy. Tom returned to the gorge while the two men rode back to the station to get help. By the time they reached LOCH ARD Gorge, it was cold and dark. The two shipwreck survivors were taken to Glenample Station to recover. Eva stayed at the station for six weeks before returning to Ireland, this time by steamship. In Melbourne, Tom Pearce received a hero's welcome. He was presented with the first gold medal of the Royal Humane Society of Victoria and a £1000 cheque from the Victorian Government. Concerts were performed to honour the young man's bravery and to raise money for those who lost family in the LOCH ARD disaster. Of the 54 crew members and passengers on board, only two survived: the apprentice, Tom Pearce and the young woman passenger, Eva Carmichael, who lost all of her family in the tragedy. Ten days after the LOCH ARD tragedy, salvage rights to the wreck were sold at auction for £2,120. Cargo valued at £3,000 was salvaged and placed on the beach, but most washed back into the sea when another storm developed. The wreck of LOCH ARD still lies at the base of Mutton Bird Island. Much of the cargo has now been salvaged and some was washed up into what is now known as LOCH ARD Gorge. Cargo and artefacts have also been illegally salvaged over many years before protective legislation was introduced. One of the most unlikely pieces of cargo to have survived the shipwreck was a Minton porcelain peacock - one of only seven in the world. The peacock was destined for the Melbourne International Exhibition in 1880. It had been well packed, which gave it adequate protection during the violent storm. Today, the Minton peacock can be seen at the Flagstaff Hill Maritime Museum in Warrnambool. From Australia's most dramatic shipwreck it has now become Australia's most valuable shipwreck artefact and is one of very few 'objects' on the Victorian State Heritage Register. The LOCH ARD shipwreck is of State significance – Victorian Heritage Register S 417. Flagstaff Hill’s collection of artefacts from LOCH ARD is significant for being one of the largest collections of artefacts from this shipwreck in Victoria. It is significant for its association with the shipwreck, which is on the Victorian Heritage Register (VHR S417). The collection is significant because of the relationship between the objects, as together they have a high potential to interpret the story of the LOCH ARD. The LOCH ARD collection is archaeologically significant as the remains of a large international passenger and cargo ship. The LOCH ARD collection is historically significant for representing aspects of Victoria’s shipping history and its potential to interpret sub-theme 1.5 of Victoria’s Framework of Historical Themes (living with natural processes). The collection is also historically significant for its association with the LOCH ARD, which was one of the worst and best known shipwrecks in Victoria’s history. Unrestored tea spoon from the wreck of the LOCH ARD. The spoon design has a flattened fiddle-back handle, with a thin stem or shank, flared collar, and elongated bowl. The spoons metallic composition is a thin layer of brass alloy which has partially corroded back to a nickel-silver base metal. Four of five makers marks are legible: (1) Trade Mark (2) Lazy "B" (3) Maltese Cross (5) Register Stamp.flagstaff hill maritime museum, shipwreck coast, great ocean road, loch line, loch ard, electroplated cutlery, loch ard, william page and company, birmingham brass plating, makers marks, nickel silver -
 Flagstaff Hill Maritime Museum and Village
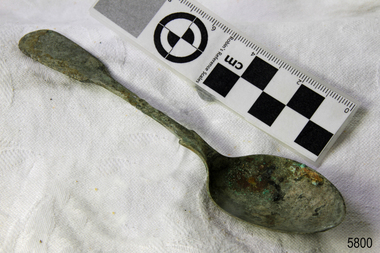
Spoon, circa 1878
This tea spoon is from the wreck of the LOCH ARD, a Loch Line ship of 1,693 tons which sailed from Gravesend, London, on 2 March 1878 with 17 passengers and a crew of 36 under Captain George Gibbs. “The intention was to discharge cargo in Melbourne, before returning to London via the Horn with wool and wheat”. Instead, on 1 June 1878, after 90 days at sea, she struck the sandstone cliffs of Mutton Bird Island on the south west coast of Victoria, and sank with the loss of 52 lives and all her cargo. The manifest of the LOCH ARD listed an array of manufactured goods and bulk metals being exported to the Colony of Victoria, with a declared value of £53,700. (202 bills of lading show an actual invoice value of £68, 456, with insurance underwriting to £30,000 of all cargo). Included in the manifest is the item of “Tin hardware & cutlery £7,530”. This teaspoon is one of 482 similar items of electro-plated cutlery from the LOCH ARD site, comprising spoons and forks of various sizes but all sharing the same general shape or design and metallic composition. 49 of these pieces display a legible makers’ mark — the initials “W” and “P” placed within a raised diamond outline, which is in turn contained within a sunken crown shape — identifying the manufacturer as William Page & Co of Birmingham. An electroplater’s makers’ marks, unlike sterling silver hallmarks, are not consistent identifiers of quality or date and place of manufacture. A similar line of five impressions was usually made to impress the consumer with an implication of industry standards, but what each one actually signified was not regulated and so they varied according to the whim of the individual foundry. In this case, the maker’s marks are often obscured by sedimentary accretion or removed by corrosion after a century of submersion in the ocean. However sufficient detail has survived to indicate that these samples of electro-plated cutlery probably originated from the same consignment in the LOCH ARD’s cargo. The following descriptions of maker’s marks are drawn from 255 tea spoons, 125 dessert spoons, and 99 table forks. These marks are clearly visible in 66 instances, while the same sequence of general outlines, or depression shapes, is discernible in another 166 examples. 1. A recessed Crown containing a raised Diamond outline and the initials “W” and “P” (the recognised trademark of William Page & Co) 2. An impressed Ellipse containing a raised, pivoted, Triangle in its lower part and bearing a Resurrection Cross on its upper section (a possible dissenting church symbol reflecting religious affiliation); OR a rounded Square impression containing a raised, ‘lazy’, letter “B” (possibly mimicking sterling silver hallmark signifying city of manufacture i.e. Birmingham) 3. An impressed rounded Square filled with a raised Maltese Cross (the base metal composite of nickel silver was also known as ‘German silver’ after its Berlin inventors in 1823) 4. A recessed Circle containing a Crab or Scarab Beetle image; OR a recessed Circle containing a rotated ‘fleur de lys’ or ‘fasces’ design 5. A depressed Diamond shape enclosing a large raised letter “R” and a small raised letter “D” (mimicking the U.K. Patent Office stamp which abbreviated the term ‘registered’ to “RD”, but also included date and class of patent) Suggested trade names for William Page & Co’s particular blend of brass plating are ‘roman silver’ or ‘silverite’. This copper alloy polishes to a lustrous gold when new, discolouring to a murky grey with greenish hue when neglected. HISTORY OF THE LOCH ARD The LOCH ARD belonged to the famous Loch Line which sailed many ships from England to Australia. Built in Glasgow by Barclay, Curdle and Co. in 1873, the LOCH ARD was a three-masted square rigged iron sailing ship. The ship measured 262ft 7" (79.87m) in length, 38ft (11.58m) in width, 23ft (7m) in depth and had a gross tonnage of 1693 tons. The LOCH ARD's main mast measured a massive 150ft (45.7m) in height. LOCH ARD made three trips to Australia and one trip to Calcutta before its final voyage. LOCH ARD left England on March 2, 1878, under the command of Captain Gibbs, a newly married, 29 year old. She was bound for Melbourne with a crew of 37, plus 17 passengers and a load of cargo. The general cargo reflected the affluence of Melbourne at the time. On board were straw hats, umbrella, perfumes, clay pipes, pianos, clocks, confectionary, linen and candles, as well as a heavier load of railway irons, cement, lead and copper. There were items included that intended for display in the Melbourne International Exhibition in 1880. The voyage to Port Phillip was long but uneventful. At 3am on June 1, 1878, Captain Gibbs was expecting to see land and the passengers were becoming excited as they prepared to view their new homeland in the early morning. But LOCH ARD was running into a fog which greatly reduced visibility. Captain Gibbs was becoming anxious as there was no sign of land or the Cape Otway lighthouse. At 4am the fog lifted. A man aloft announced that he could see breakers. The sheer cliffs of Victoria's west coast came into view, and Captain Gibbs realised that the ship was much closer to them than expected. He ordered as much sail to be set as time would permit and then attempted to steer the vessel out to sea. On coming head on into the wind, the ship lost momentum, the sails fell limp and LOCH ARD's bow swung back. Gibbs then ordered the anchors to be released in an attempt to hold its position. The anchors sank some 50 fathoms - but did not hold. By this time LOCH ARD was among the breakers and the tall cliffs of Mutton Bird Island rose behind the ship. Just half a mile from the coast, the ship's bow was suddenly pulled around by the anchor. The captain tried to tack out to sea, but the ship struck a reef at the base of Mutton Bird Island, near Port Campbell. Waves broke over the ship and the top deck was loosened from the hull. The masts and rigging came crashing down knocking passengers and crew overboard. When a lifeboat was finally launched, it crashed into the side of LOCH ARD and capsized. Tom Pearce, who had launched the boat, managed to cling to its overturned hull and shelter beneath it. He drifted out to sea and then on the flood tide came into what is now known as LOCH ARD Gorge. He swam to shore, bruised and dazed, and found a cave in which to shelter. Some of the crew stayed below deck to shelter from the falling rigging but drowned when the ship slipped off the reef into deeper water. Eva Carmichael had raced onto deck to find out what was happening only to be confronted by towering cliffs looming above the stricken ship. In all the chaos, Captain Gibbs grabbed Eva and said, "If you are saved Eva, let my dear wife know that I died like a sailor". That was the last Eva Carmichael saw of the captain. She was swept off the ship by a huge wave. Eva saw Tom Pearce on a small rocky beach and yelled to attract his attention. He dived in and swam to the exhausted woman and dragged her to shore. He took her to the cave and broke open case of brandy which had washed up on the beach. He opened a bottle to revive the unconscious woman. A few hours later Tom scaled a cliff in search of help. He followed hoof prints and came by chance upon two men from nearby Glenample Station three and a half miles away. In a state of exhaustion, he told the men of the tragedy. Tom returned to the gorge while the two men rode back to the station to get help. By the time they reached LOCH ARD Gorge, it was cold and dark. The two shipwreck survivors were taken to Glenample Station to recover. Eva stayed at the station for six weeks before returning to Ireland, this time by steamship. In Melbourne, Tom Pearce received a hero's welcome. He was presented with the first gold medal of the Royal Humane Society of Victoria and a £1000 cheque from the Victorian Government. Concerts were performed to honour the young man's bravery and to raise money for those who lost family in the LOCH ARD disaster. Of the 54 crew members and passengers on board, only two survived: the apprentice, Tom Pearce and the young woman passenger, Eva Carmichael, who lost all of her family in the tragedy. Ten days after the LOCH ARD tragedy, salvage rights to the wreck were sold at auction for £2,120. Cargo valued at £3,000 was salvaged and placed on the beach, but most washed back into the sea when another storm developed. The wreck of LOCH ARD still lies at the base of Mutton Bird Island. Much of the cargo has now been salvaged and some was washed up into what is now known as LOCH ARD Gorge. Cargo and artefacts have also been illegally salvaged over many years before protective legislation was introduced. One of the most unlikely pieces of cargo to have survived the shipwreck was a Minton porcelain peacock - one of only seven in the world. The peacock was destined for the Melbourne International Exhibition in 1880. It had been well packed, which gave it adequate protection during the violent storm. Today, the Minton peacock can be seen at the Flagstaff Hill Maritime Museum in Warrnambool. From Australia's most dramatic shipwreck it has now become Australia's most valuable shipwreck artefact and is one of very few 'objects' on the Victorian State Heritage Register. The LOCH ARD shipwreck is of State significance – Victorian Heritage Register S 417. Flagstaff Hill’s collection of artefacts from LOCH ARD is significant for being one of the largest collections of artefacts from this shipwreck in Victoria. It is significant for its association with the shipwreck, which is on the Victorian Heritage Register (VHR S417). The collection is significant because of the relationship between the objects, as together they have a high potential to interpret the story of the LOCH ARD. The LOCH ARD collection is archaeologically significant as the remains of a large international passenger and cargo ship. The LOCH ARD collection is historically significant for representing aspects of Victoria’s shipping history and its potential to interpret sub-theme 1.5 of Victoria’s Framework of Historical Themes (living with natural processes). The collection is also historically significant for its association with the LOCH ARD, which was one of the worst and best known shipwrecks in Victoria’s history. Unrestored tea spoon from the wreck of the LOCH ARD. The spoon design has a flattened fiddle-back handle, with a thin stem or shank, flared collar, and elongated bowl. The spoons metallic composition is a thin layer of brass alloy which has partially corroded back to a nickel-silver base metal. Bowl has thin perforated edges and some concretion. Two of five makers marks are distinguishable: (3) Maltese Cross (4) Crab Design.flagstaff hill, warrnambool, shipwrecked coast, flagstaff hill maritime museum, maritime museum, shipwreck coast, flagstaff hill maritime village, great ocean road, loch line, loch ard, captain gibbs, eva carmichael, tom pearce, glenample station, mutton bird island, loch ard gorge, electroplated cutlery, loch ard shipwreck, nickel silver, william page & co, birmingham, brass plating, makers marks -
 Orbost & District Historical Society
Council Seal
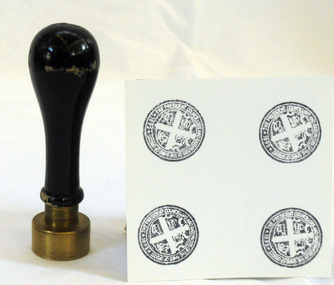
This item was used as a seal (stamp) on official Shire Council documents. The coat of arms of the Shire of Orbost was designed in the form of a cross in which five stars are depicted on a shield. A small crown above the cross indicates the loyalty of the president,councillors and ratepayers to the reigning monarch. The inner section of the shield contains 4 figures, a sheaf of wheat, a factory, a co and a ship - all representing the activities of agriculture, fishing,industry and dairying undertaken in the shire. Originally part of the Bairnsdale district, Orbost split away as part of the Tambo Shire in 1882, and became a shire in its own right as the Shire of Croajingolong on 30th May,1892. The name was changed to the Shire of Orbost on 17th February, 1893. The Orbost Shire Council was abolished on 2nd December, 1994 as part of a state-wide program of local government reform to become part of the newly constituted East Gippsland Shire council.Local governments play an important role in the lives of citizens in Australia. Local government authorities exist to provide services and amenities to local communities, and are also responsible for regulating and providing services for land and property in their district. This item is representative of a time when Orbost had its own Shire Council.The former Orbost Shire Council Seal (stamp) depicting the coat of arms. The circular seal is brass and has a wooden handle with a bulb shaped top.President, Councillors and Ratepayers of the Shire of Orbost-1892orbost orbost-shire-council government history seal -
 Federation University Historical Collection
Photograph (black & White), Major-General John Denton Pinkstone French, 1st Earl of Ypres - South Africa
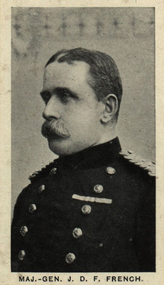
French was born in Kent in 1852. He had a brief service in the Royal Navy before becoming a cavalry officer. He distinguished himself on the Gordon Relief Expedition and was rapidly promoted. French became a national hero during the Second Boer War. He won the Battle of Elandslaagte near Ladysmith, escaping on the last train as the siege began. He commanded the Cavalry Division, winning the Battle of Klip Drift during the march to relieve Kimberley. In Cape Colony he conducted Counter-insurgency operations. Attained the rank of Field Marshall. Awards he received: Knight of the Order of St Patrick, Knight Grand Cross of the Order of the Bath, Member of the Order of Merit, Knight Grand Cross of the Royal Victorian Order, Knight Commander of the Order of St Michael and St George. French died in Kent in !925, aged 72. Individual image from photographed poster of tobacco and cigarette cards.1st earl of ypres, john french, second boer war, gordon relief expedition, cavalry, battle of klip drift, battle of elandslaagte, cape colony, counter insurgency operations, field marshall, knight of the order of st patrick, knight grand cross of the order of the bath, order of merit, knight grand cross of the royal victorian order, knight commander of the order of st michael and st george -
 Federation University Historical Collection
Photograph (black & White), Major-General Sir Archibald Hunter - South Africa
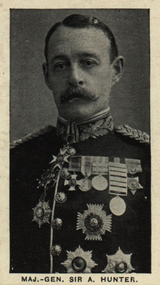
At the outbreak of the Second Boer War, Major General Hunter was on the staff of Sir George White's Natal Field Force during the Battle of Ladysmith in Natal. He led a small raid against some of the Boers' guns, disabled them and relieved the town. Promotion followed and he became General Officer Commanding 10th Division. The Division was sent to join Lord Roberts' army camped at the captured Orange Free State capital. Hunter led them in the march on Pretoria. Once Pretoria was captured they still had to deal with Guerrilla Warfare and Hunter was sent south as overall commander of five columns that converged on the Free State army camped at Brandwater Basin, forcing the surrender of 4,314 Boers led by Marthinus Prinsloo. He was awarded Knight Grand Cross of the Order of the Bath, Knight Grand Cross of the Royal Victorian Order, Territorial Decoration Legion of Honour (France)Individual image taken from photographed poster of tobacco and cigarette cardssecond boer war, major generl, archibald hunter, natal field force, battle of ladysmith, general officer commanding, sir george white, guerrilla warfare, orange free state, brandwater basin, marthinus prinsloo, knight grand cross of the order of the bath, knight grand crossof the royal victorian order, legion of honour (france) -
 Bendigo Historical Society Inc.
Memorabilia - Alexandra Fountain Souvenir Plate
Alexandra Fountain is a fountain in the Australian city of Bendigo, Victoria. It is regarded as one of the city's most prominent landmarks and monuments The fountain is located in Bendigo's Charing Cross area at the intersection of View Street and Pall Mall. Charing Cross effectively stands at the centre of the city and is one of Bendigo's busiest and most prominent intersections. The fountain stands opposite the main entrance of Rosalind Park. Alexandra Fountain was funded from the proceeds of the Bendigo Juvenile Industrial Exhibition (1879), a £500 gift from George Lansell and a further £700 from the Sandhurst City Council (now the City of Greater Bendigo). The fountain was designed by William Vahland (1828–1915), a local architect responsible for some of the city's most prominent buildings. The fountain was named in honour of Alexandra, Princess of Wales. Its grand opening on 5 July 1881 was attended by her sons Prince Albert and Prince George.White shallow bowl with transfer of Alexandra Fountain in centreMade in Japanalexandra fountain, bendigo landmarks -
 Melbourne Legacy
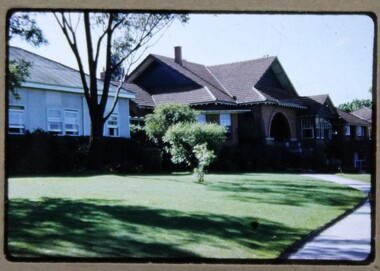
Slide, Stanhope, 1950s
Slide photograph of the exterior of Stanhope on a cloudy day. Believed to be from from the 1950s, very similar to 02511 and could be from the same film. Stanhope was a residence run by Melbourne Legacy to take care of children whose fathers were deceased servicemen, and who may have been left orphans, or whose mother may have been unable to care for them herself, or they needed to stay in Melbourne for further education. It was at 1245 Burke Road Kew (corner of Cotham Rd). It was purchased by Red Cross in 1945 who refurbished it and leased it back to Legacy for as long as it was required as a residence for junior legatees. It was handed back to Red Cross in 1981. The slides have been photographed to make digital images and moved to archive quality sleeves. In many cases the original images were not well focussed and the digital image is the best available.A record of the outside of Stanhope.Colour slide of the exterior of Stanhope sitting on the lawn, in a cardboard mount.Imprinted with slide number 12. Handwritten on front 'Stanhope' in black pen.stanhope, residences -
 Bendigo Military Museum
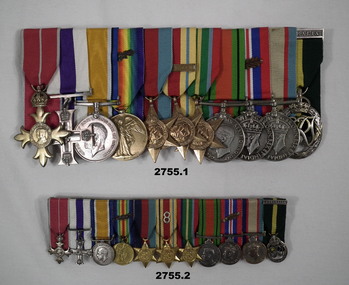
Award - MEDAL SETS, MOUNTED, Post WWI & Post WWII
HERBERT TRANGMAR ALLAN OBE, MC, ED. Herbert Allan served pre WW1 with Sydney University Scouts with the rank of 2nd Lieut. Joined the AIF 6.9.1915 in the 14th Reinforcements 17th Batt aged 21 years 6 months, embarked for England 22.8.1916, promoted to Lieut, embarked for France 22.1.1917, awarded the Military Cross 9.10.1917 at Passchendaele Ridge, WIA slight 3.11.1917. Awarded a Mention in Despatches, promoted to Captain 24.11.1917, WIA 3.10.1918, Gassed, appointment terminated in the AIF 26.5.1919. He remains active in several postings in the CMF as a Captain. He goes on full time duty 9.10.1939 with 2nd Garrison Batt No N60005, transfers to the 2nd AIF No NX12229 1.5.1940, posted Captain in 2nd 17th Batt. Embarks for the Middle East 10.10.1940, serves in Tobruk, promoted to Major 7.1.1941, promoted to Brigade Major 20th Inf Brigade 12.6.1941, appointed Claims Officer 9th Division 13.2 1942, awarded the “OBE” 14.4.1942, embark for Australia 27.1.1943, promoted Lt Col 8.6.1943, emplaned for New Guinea 16.6.1943, one of 5 to New Guinea and New Britain, promoted T/Colonel 1.4.1945, final disembark in Australia 28.8.1945, appointed to Command the Pacific Islands Regt 10.10.1945, appointed Hon Colonel in the Reserve of Officers 1.5.1946. During WW11 he was awarded a Mention in Despatches 4 times, once in the Middle East and 3 in the Pacific. He spent 1773 days outside Australia and 253 in Australia during WW11. Awarded Efficiency Decoration (ED) in 1946. Refer 2756.The group of medals were awarded to Herbert Trangmar Allan OBE, MC, ED plus mentioned in Dispatches 5 times. With the medals to add to their significance is a large collection of documentation covering his career with some 136 items plus photographs. As Commander of the Pacific Islands Regiment after WW2 he was presented with a pair of Japanese Artillery Binoculars to bring home as a War Trophy. This is in the collection also. This group of eleven (11) Decoration, Campaign and Service Medals has a very high significance as they relate to both World Wars and service recognition from 1915 through to 1946, 31 years. There is also a full set of miniatures to compliment the main medal set. The “Order of the British Empire”, “Military Cross”, Efficiency Decoration” gained over both Wars and Service are among the highest in the British Empire Awards system and therefore quite rare. The addition of 5 Mention in Dispatches adds to that rarity. The medals are in very good condition with only a small amount of tarnishing. The ribbons are new and Court mounting for display purposes, the originals have been kept for historical purposes.WWI & WWII Medals: .1) Medal set, brass plate mounted, set of 11 re H T ALLAN OBE, MC, ED. 1. Order of the British Empire - OBE. 2. Military Cross - MC. 3. War Medal 1914 - 1919. 4. Victory Medal with clasp - Mention in Despatches. 5. 1939 - 45 Star. 6. African Star with clasp - 8th Army. 7. Pacific Star. 8. Defence Medal. 9. War Medal with clasp - Mention in Despatches. 10. Australian Service Medal. 11. Efficiency Decoration - ED. WWI & WWII Medals: .2) Medal set, minatures, brass plate mounted, set of 11 re H T ALLAN OBE, MC, ED. Same as in .1) .3) Original ribbons as per .1). .4) Original ribbons as per .2)..1) CAPTAIN H T ALLAN AIF NX12229 H J ALLEN NX12229 COL ALLEN H T Note: Correct spelling is H T ALLANmedals, military, bravery -
 Orbost & District Historical Society
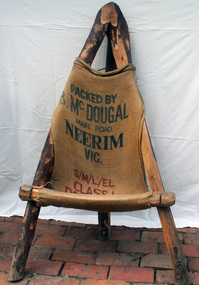
chair, 1988-1989
This pole chair was probably made as a display item for the Slab Hut (Orbost Visitor Information Centre).A triangular shaped three-legged pole chair. The chair seat is made from a hessian potato sack - Packed by McDougals of Neerim Vic. The sack is attached by wire. The frame of the chair appears to be made from one solid piece of wood. It is dark brown in colour and has a cross piece at the front and a small strengthening piece on the backm leg.furniture chair -
 Bendigo Military Museum
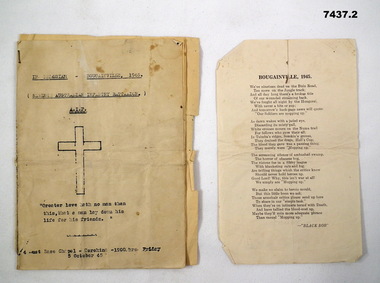
Programme - PROGRAMME, MEMORIAL SERVICE, IN MEMORIAM - BOUGAINVILLE 1945, c1945
Programme for service held at 4th Aust. Base Chapel TOROKINA - 1900hrs FRIDAY 5th OCT 45 to COMMEMORATE THE FALLEN DURING WW2 Poem was description of last battles of war with a sentiment that critics at home called mopping up but people were still dying.1. Programme for Memorial Service in Bougainville Oct 45. 10 pages stapled together on cream white paper. Contents description of the Service. On front is a cross and a small poem. 2. Poem written in black on white paper heading Bougainville 1945. Poem was talking about the experience of the mopping up battles towards the end of the war.Headed- " IN MEMORIAM - BOUGAINVILLE 1945" "SEVENTH AUSTRALIAN INFANTRY REGIMENT" "A.I.F." 7th australian infantry battalion, bougainville, torokina -
 Warrnambool and District Historical Society Inc.
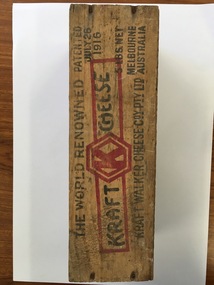
Container - Kraft cheese box used for storing bulbs, Mid 20th century
This is a box for packaging Kraft Cheese in Victoria. A Melbourne man, Fred Walker, negotiated with the American company the Kraft processing of cheese and established the Kraft Walker Cheese Company in 1934 and leased the Warrnambool Cheese and Butter Factory premises in Allansford in 1935. Until 1993 this factory produced Cheddar Cheese, Swiss Cheese, Cracker Barrel and Tasty Cheddar Cheese and other varieties and won many Australian awards. A microbiological laboratory was established and from 1939 Ls O’Callaghan, a noted Warrnambool historian, worked in this laboratory, establishing the basis of the dairy industry guidelines for effective and scientific processing of milk. He worked there for 45 years. The Warrnambool Cheese and Butter Factory is still today a major industry in the Warrnambool area. This box is of key importance as an item that held Kraft Walker Cheese Company cheese. This company and its factory in Allansford was a key business in the dairying industry in the Warrnambool area for nearly 60 years. The box may have been used locally in the Allansford factory. This is a wooden oblong box with no lid. It has been nailed together with 12 nail heads visible and three nails protruding from the top edges. It has been used to package five pounds of Kraft Cheese. There is handwritten material in pencil on three sides (some crossed out) and the Kraft Cheese information with the ‘K’ logo is stamped on the bottom. ‘The World Renowned Kraft Cheese (K), Patented July 26 1916, 5 lbs net, Kraft Walker Cheese Co. Pty. Ltd., Melbourne, Australia’kraft walker cheese company (allansford), fred walker, warrnambool cheese and butter factory, warrnambool, history -
 Bendigo Military Museum
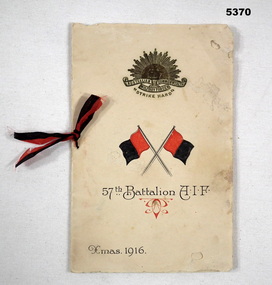
Card - XMAS CARD, 57TH BN, C.1916
The sender is unknown at this point.Xmas card four pages light cream colour, front has embossed Rising Sun with the words “Strike Hard” under, two crossed flags under representing the 57th BN colour patch Red/Black followed by 57th Battalion AIF, at the bottom “Xmas 1916”, a ribbon Red/Black holds the pages together.On first page in pencil, “Letter following”, In centre printed, “With best wishes from your Boys in France”, in pencil , “ To Fred from Ted” cards, xmas, 57th bn -
 Bendigo Military Museum
Flag - FLAG, WHITE ENSIGN HMAS BENDIGO, C. 1939 - 45
The HMAS BENDIGO (1) was a Bathurst type Minelayer/Corvette. It was made in Australia. Launched 1 MAR 1941 and paid off 27 SEP 1946. The ship had a normal complement of 85 hands. The ENSIGN is the standard pattern Royal Navy ensign in use at the time by The Royal Australian Navy. The Ensign has five written names including the Captain and has 85 autographs. All but two have been identified. Referring to the sailor's service cards, the signing probably occurred between OCT 1945 to FEB 1946. Post WW2, the Ensign was presented in gratitude to the City of Bendigo where it was on display in the Old Town Hall for decades. The City then gifted the Ensign to the Bendigo and District R.S.L. After some time the RSL lodged the Ensign with the Soldier's Memorial Institute Military museum for safe keeping.The main part is of a strong open weave white cotton. The flag is divided by a bright red cross vertically and horizontally. In the top left quadrant is the Union flag of the U.K. The left side has a strong canvas spine in which is mounted the sisal rope. The rope has a small length with loop at the top and a longer length with loop at the bottomThe bottom right quadrant, has these words stencilled on it..."In Appreciation from HMAS BENDIGO". The other two quadrants have a large quantity of signatures.corvettes ww2, hmas bendigo -
 Bendigo Military Museum
Certificate - CERTIFICATES WW2, 1945
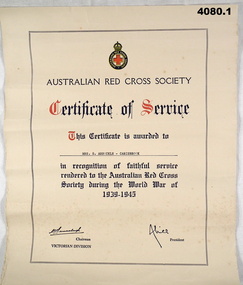
Both certificates awarded to Mrs ARBUCKLE were for her work during the World War of 1939-45..1) Certificate of Service, Australian Red Cross, parchment paper, off white, details in red & blue, persons name centre typed in black. .2) Certificate, Australian Comforts Fund Victoria Division, parchment paper off white, details in red & black, persons name hand written near top, signed by executive at bottom..1) "Mrs S Arbuckle - Carisbrook" .2) "Mrs S R Arbuckle"certificates, red cross, comforts fund -
 Bendigo Military Museum
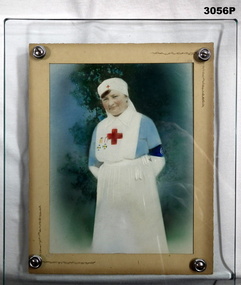
Photograph - PHOTOGRAPH, FRAMED
Photo relates to Beryl Grimshaw (Morrel) Ron Morrell, Cat No,s 306, 315, 316, 304P, 305P, 312.Heavy glass frame with thick timber backboard (smaller than glass) joined together with 4 metal screws. Beige mount. Hand tinted photo, 3/4 length portrait of female in a nurse's uniform, blue dress, white apron, sleeves, collar & veil. Red cross on apron bib & veil. Blue armband.photography - photographs, frame accessories, trades - carpentery -
 Bendigo Military Museum
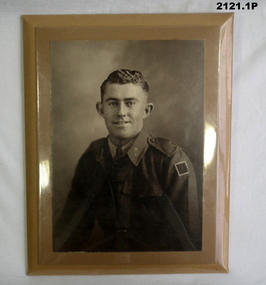
Memorabilia - PHOTOGRAPHS, FRAMED, Est post 1941
Kingsley William Allen VX109839 2nd AIF. Refer 2192.4, 2195 for service history also 2193, 2196P.1) Photo, sepia tone, on metal frame, brown colour, plastic coated. Soldier in uniform, no hat. .2) Photo, sepia tone, on metal frame, brown colour, plastic coated. Soldier in uniform with peak hat showing 2x Chevrons and crossed tongs and hammer on sleeves. Same person in both photos being K.W Allen. photography, military, frameing -
 Flagstaff Hill Maritime Museum and Village
Furniture - Set of Chairs, 1880s
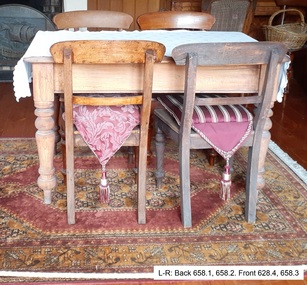
This set of four dining chairs was part of the original furnishings of the St Nicholas' Mission to Seamen's Church at 139 Nelson Place, Williamstown, Victoria. The Australian colonial wooden chairs date to the late 1880s and are most like to have been purchased for use in the Sailors’ Rest when it moved into Ann Street, Williamstown, around the 1880s. THE MISSIONS TO SEAMEN (Brief History: for more, see our Reg. No. 611, Set of Pews) The Missions to Seamen, an Anglican charity, has served seafarers of the world since 1856 in Great Britain. It symbol is a Flying Angel, inspired by a Bible verse. Today there are centr4es in over 200 ports world-wide where seamen of all backgrounds are offered a warm welcome and provided with a wide range of facilities. In Victoria the orgainsation began in Williamstown in 1857. It was as a Sailors’ Church, also known as ‘Bethel’ or the ‘Floating Church’. Its location was an old hulk floating in Hobson’s Bay, Port of Melbourne. It soon became part of the Missions to Seamen, Victoria. In the year 2000 the organisation, now named Mission to Seafarers, still operated locally in Melbourne, Portland, Geelong and Hastings. The Ladies’ Harbour Lights Guild was formed in 1906 to support the Missions to Seamen in Melbourne and other centres such as Williamstown. Two of the most significant ladies of the Guild were founder Ethel Augusta Godfrey and foundation member Alice Sibthorpe Tracy (who established a branch of the Guild in Warrnambool in 1920). The Guild continued its work until the 1960s. In 1943 a former Williamstown bank was purchased for the Missions to Seaman Club. The chapel was named St Nicholas’ Seamen’s Church and was supported by the Ladies’ Harbour Lights Guild, the Williamstown Lightkeepers’ Auxiliary and the League of Soldiers’ and Sailors’ Friends. It ceased operation in 1966. A Missions to Seamen Chapel and Recreation Room was a significant feature of ports during the late 1800s and into the 1900s. It seemed appropriate for Flagstaff Hill to include such a representation within the new Maritime Village, so the Melbourne Board of Management of Missions to Seamen Victoria gave its permission on 21st May 1979 for the entire furnishings of the Williamstown chapel to be transferred to Flagstaff Hill. The St Nicholas Seamen’s Church was officially opened on October 11, 1981 and closely resembles the Williamstown chapel. This set of chairs is significant historically for its origin in the St Nicholas Mission to Seamen's Church in Williamstown, established in 1857 to cater for the physical, social, and spiritual needs of seafarers. It originated in Bristol, England when a Seamen's Mission was formed in 1837. The set of chairs is historically significant for its connection to the Ladies Lightkeepers’ Auxiliary, an organisation of women, formed to support seafarers. The connection of this set of chairs to the Mission to Seamen and to the Ladies Lightkeepers’ Auxiliary highlights the strong community awareness of the life of people at sea, their dangers and hardships, and their need for physical, financial, spiritual and moral support. Chairs: set of four (4) cedar wood dining chairs. Each chair has a rounded rail back, flat cross rail, flat wooden seat, curved back legs and colonial turned front legs. Mid-brown colour, veneered finish. The set of chairs is part of the St Nicholas Seamen's Church Williamstown Collection. flagstaff hill, warrnambool, shipwrecked coast, flagstaff hill maritime museum, maritime museum, shipwreck coast, flagstaff hill maritime village, great ocean road, religion, religious service, sailors rest, bethel sailors’ church, bethel floating church, ladies harbour light guild, lightkeepers’ auxiliary, missions to seamen victoria, mission to seafarers, flying angel’s club, st nicholas mission to seamen church williamstown, mission to seamen williamstown, st nicholas seamen’s church flagstaff hill, 139 nelson place williamstown, church furniture, religious furniture, religious worship, anglican church, chair, dining chair, kitchen chair, domestic furniture, colonial chair, australian colonial period, set of chairs, squab chairs, sailors' church, ann street williamstown -
 Montmorency/Eltham RSL Sub Branch
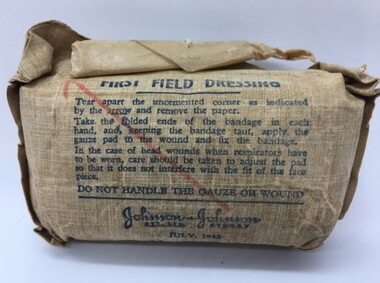
Dressing, First Field, WW2, July 1942
Issued to Service Personal whilst on active service to render first aid if required.Unopened rectangle packet covered in off-white cotton (or similar) containing a bandage and gauze pad. The front of the package is printed with an inscription identifying it as a 'First Field Dressing' along with a list of contents and instructions for use in blue writing. Text crossed with diagonal red arrow from bottom right hand side pointing to top left corner. FIRST FIELD DRESSING Tear apart the uncemented corner as indicated by the arrow and remove the paper. Take the folded ends of the bandage in each hand, and, keeping the bandage taut, apply the gauze pad to the wound and fix the bandage. In case of head wounds when respirators have to be worn, care should be taken to adjust the pad so that it does not interfere with the fit of the face piece. DO NOT HANDLE THE GAUZE OR WOUND Johnson & Johnson Pty. Ltd. Sydney July, 1942 ww11, bandage, gauze, dressing, wound -
 Glenelg Shire Council Cultural Collection
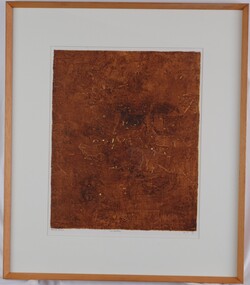
Print, Robert Grieve, Composition, 1973
UnknownAbstract print. Yellow underlayer with brown layer of ink on top. Darker pigmentation towards the centre of the print. At the top right and bottom centre there are two thin crosses. The entire surface is thickly built up, creating an undulating surface to the image with variation in pigmentation. Mounted in cream matt. Framed in natural wood frame with perspex glazing.Front: Robert Grieve (lower left) Composition (centre) 4-10 73 (lower right) (pencil) -
 Orbost & District Historical Society
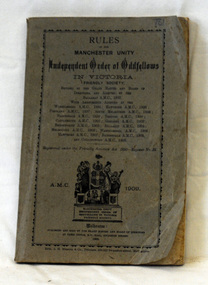
book, Rules of the Manchester Unity, 1909
This item probably belonged to Albert Coulson a farmer of Brodribb. Friendly Societies were founded in the Australian Colonies in the mid-19th Century by immigrants from England who had been members in Societies which dated back to the 18th Century. Like all working people these immigrants experienced sickness, accidents, unemployment, death and burial. They needed help of like fellows to tide their families over these times. So they formed a branch of one of the Friendly Societies back in the mother country. The idea was to make fixed contributions to a fund and when they were off work they would receive a payment. When they died funeral benefits would be paid and the widow and children would be cared for. It was a form of local insurance for hard times. This book was used in a time of 'look after yourself' as the Colonial Governments did not provide pensions or benefits. This item reflects those times.A small grey book with the Manchester Unity Independent Order of Oddfellows. At the bottom of the cover in black print is the society's Coat of Arms showing a woman holding a child with two children beside her. On the right is a woman holding an anchor with her arm around a woman holding a cross. There is an images of a group of people holding a scroll beside a reclining lion."Brother A.H.J. Coulto was initiated a member of the Loyal Orbost Lodge 8 Sept 1909" -
 Orbost & District Historical Society
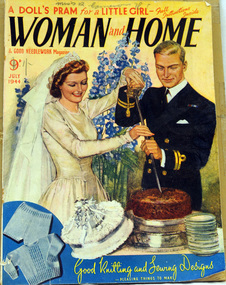
magazine, Woman and Home July 1944, July 1944
This magazine belonged to Roma Cameron, who was the daughter of Harry Purchase Cameron and Lilian Gladys (nee Harding). Roma married Ronald Richard Smith in 1944 and is the mother of Lorraine (Mrs Peter Coulton) and Margaret Smith. Harry's father, James Cameron, came to Bellagoogan on Majors Creek in 1882. Bellagoogan was on Majors Creek near Orbost and was the site of the first race course. Like many others at the time, the Camerons bred race horses.Harry died in 1964 aged 75. Roma was the youngest of three siblings: Jean (Mrs John Gavin (Jack) Ralston) and James (Jim) (m. Joan Hossack). Women’s magazines during WWII played a “reflecting role,” meaning they cooperated with government agendas while still including topics of readers’ interests Women’s employment rate had skyrocketed during WWII. However, even though the number of women working outside the home grew rapidly most of them were still engaged entirely in homemaking. Therefore women’s magazines centered mostly on the stresses and shortages of wartime. Articles as well as advertisements presented information on “product rationing, tips on keeping the family healthy, guidelines for thrifty shopping and advice on how to look good through it all. This is an example of an English women's magazine published during WW11.It gives practical advice on needlework / knitting and evidences the widespread interest in contemporary fashion. In doing so it shows what were the fashionable, but broadly affordable, women's and children's clothing styles of their day. These magazines also reflect women's interests An English magazine published monthly. It is titled Woman and Home & Good Needlework Magazine, July 1944. On the front cover is a picture of a bride and groom cutting a wedding cake. The groom is dressed in military uniform. the price 9D has been crossed out and 1/- is below it. The magazine contains advertisements, stories, needlework patters and news articles.On front cover handwritten in pen : Miss R. Cameronmagazine-woman-and-home magazines-women's cameron -
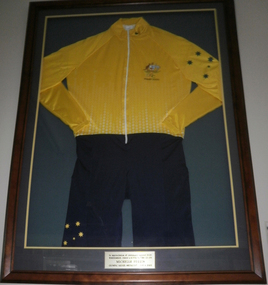 Cheese World Museum
Sports Uniform, Sydney 2000 Olympic Games Cycling Uniform, 2000 (estimated)
Uniform worn by Michelle Ferris, a Warrnambool athlete, who was sponsored by Warrnambool Cheese and Butter Factory. Long sleeved yellow lycra top joined to navy shorts, with a zippered front opening. Australian emblem and Sydney Olympics logo. the left sleeve and right leg have stars of the Southern Cross. The uniform is displayed in a wooden frame.On the frame- in appreciation of continued support of the Warrnambool Cheese and Butter Factory Co Ltd. Michelle Ferris Olympic Silver Medalist 1996 & 2000cycling, warrnambool cheese butter factory, ferris michelle, sydney, olympic games, uniforms