Showing 1091 items
matching north blue
-
 Bendigo Historical Society Inc.
Document - LISTS OF ITEMS AUCTIONED AT BENDIGO MINES
Typed copies of catalogues of items to be auctioned at the following mines: South Red, White and Blue 12th April 1938 Central Blue 28th October, 1941 at 11 a.m South Virginia Extended (found inside Central Blue catalogue) Big Blue 21st November, 1939 at 10.30 a.m Golden Transverse Bendigo 3rd September 1941Yandoit Co 19th April 1939 Chapman's Gold Mine Chewton 8th February 1939 Ross Creek Extended G.M. Coy 18th August 1938 Ross Creek Extended G.M.Coy Ross Creek Mines Account Mines Dept Pitfield Plains, Glenfine South Shaft Adelong Dredge and leases 10th February 1943 Bright Valley Dredge 9,10th February 1943 Exchequer Extended North Chewton 18th October, 1939 Talbot Alluvials Norbury's No. 2 shaft 5th May 1941 Gordon Gold Mine Inglewood 30th April 1940 Postg Office Hill Mine Chewton 7th February 1940 Carlisle & Whittaker Plant Buninyong Rand Yandoit Mine North Chewton 19th October 1939 Spring Gully Mine Chewton 14th Decembert 1938 Eureka Central Chewton 26th February 1941The Golod Mine Clunes 15th March 1941 Guildford Plateau 20th Novemer 1940 New Long Tunnel Walhalla 12th February 1941 Napoleon BML 28th October 1941 Alfords Battery Hercules No. 1 Mine 12th February 1942 Ramrod Gold Mine Bendigo 19th March 1942 Bendigo Amalgamated Goldfields Limited 10th and 11th August 1938 Virginia South Extended 1st June 1938 -
 Bendigo Historical Society Inc.
Book - MCCOLL, RANKIN AND STANISTREET COLLECTION: SHARE REGISTER - VARIOUS MINES LISTED BELOW, 1952
Book; Hard cover with paper pages listing shares held by shareholders and funds distributed. 1. South Deborah G.M. N.L. - 1st & final distribution. 2. Monument Hill Cons. N.L. 1st & final distribution. 3. Napoleon Reef G.M. N.L. 1st & final distribution. 4. South Wattle Gully Co. N.L. 1st 7 final distribution. 5. East Clarence G.M. Co. N.L. 1st 7 final distribution. 6. Golden Carshalton G.M. N.L. 1st 7 final distribution. 7. South Nell Gwynne G. M. N.L. 1st 7 final distribution. 8. North Virginia G.M. N.L. 1st 7 final distribution. 9. Central Napoleon G.M. N.L. 1st & final distribution. 10. Red White & Blue Extended G.M. N.L. 1st & final distribution. 11. South Costerfield Antimony G.M. Co. N.L. 1st & final distribution. Graphic Analysis Book 13 Sets on front cover.MCCOLL RANKIN & STANISTREETorganisation, industry, shares, mccoll rankin & stanistreet -
 Bendigo Historical Society Inc.
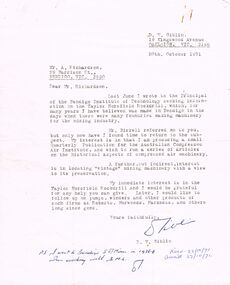
Document - CORRESPONDENCE: TAYLOR HORSFIELD, 20/10/1971
... Blue Mine North Deborah South Deborah D.V.Giblin Mr ...Correspondence re Taylor Horsfield between A Richardson and D (Desmond) Giblin dated 1971. Correspondence re the Taylor Horsfield Rock Drill ( mention of Taylor Horsfield Air Compressor), Mention of other firms - Roberts, Horwoods, Harkness.D. V. Giblinperson, individual, taylor horsfield, taylor horsfield rockdrill, roberts horwoods, harkness. taylor horsfield, central deborah, big blue mine, north deborah, south deborah, d.v.giblin, mr a. richardson. -
Bendigo Historical Society Inc.
Document - HERCULES AND ENERGETIC MINES - NOTES ON THE HERCULES AND ENERGETIC MINES
Four typed copies of notes on the Hercules and Energetic Mines. Notes include Location, depth of shafts, plant and machinery, Early History and Prominence. Reference: Mines Dept Special Edition Australian Mining Standard 1.6.1899, Mines Dept Booklet Bendigo Goldfield 1936, Mines Dept Annual and Quarterly Reports, Annals of Bendigo Mining Sections 1876 - 1921, A Richardson, The Bendigo Goldfield Registry J N Macartney 1.3.1871, Mines Dept Bulletin No 30 h Herman 1914, Bendigo Amalgamated Goldfields Coy Financial Reports 1920.mine, gold, hercules and energetic mines, hercules and energetic mines, notes on the hercules and energetic mines, the hercules, the energetic, the north energetic, the victoria pilot, plan of leases of 1870, bendigo amalgamated goldfields company, sheepshead line, wheat owl, central blue, big blue, mines dept special edition australian mining standard 1.6.1899, mines dept booklet bendigo goldfield 1936, mines dept annual and quarterly reports, annals of bendigo mining sections 1876 - 1921, a richardson, the bendigo goldfield registry j n macartney 1.3.1871, mines dept bulletin no 30 h herman 1914, bendigo amalgamated goldfields coy financial reports 1920 -
 Bendigo Historical Society Inc.
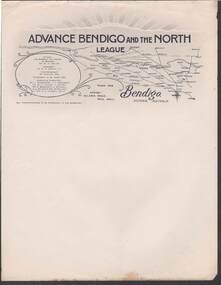
Document - CAMBRIDGE PRESS COLLECTION: LETTERHEAD - ADVANCE BENDIGO AND THE NORTH LEAGUE
Advance Bendigo and the North League, Allan's Walk, Pall Mall, Bendigo. Letterhead printed in dark blue and grey. At the top are sun rays above a cloud? On the right it has a map showing Bendigo and a large area to the North, North East and North West. On the left is an oval shape with the names of the Patron, His Worship the Mayor of Bendigo Cr. W. H. Taylor, President: Cr. G. D. Garvin, J.P., Vice-President W. Cowling, Esq, Executive Committee, Cr. J. Michelsen, J. L. Shoosmith, Cr. W. H. Taylor, J. Jeffrey, Dr. A. Beischer, C. L. Stilwell,A. L. Bolton O.B.E., W. Wallace, Lt. Col. G. V. Lansell, M.L.C.business, printers, cambridge press, cambridge press collection, advance bendigo and the north league, cr w h taylor, cr g d garvin j.p., w cowling, c m dawe, cr j michelsen, j l shoosmith, cr w h taylor, j jeffrey, dr a beischer, c l stillwell, a l bolton o.b.e., w wallace, lt col g v lansell m.l.c. -
 Bendigo Historical Society Inc.
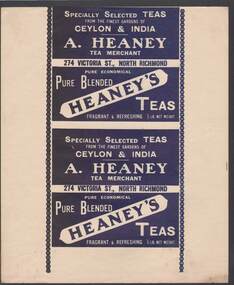
Document - CAMBRIDGE PRESS COLLECTION: LABEL - HEANEY'S TEAS
Sheet with the four sides of a tea packet printed in dark blue and white. Two sides have Specially Selected Teas from the finest gardens of Ceylon & India. A. Heaney, tea Merchant, 274 Victoria St., North Richmond. The other two sides have Pure Economical Pure Blended Heaney's Teas Fragrant & Refreshing. 1/2 lb. Net Weight printed on them.business, printers, cambridge press, cambridge press collection, a heaney, heaney's teas -
 Coal Creek Community Park & Museum
Box. Chemist, 1902-1944
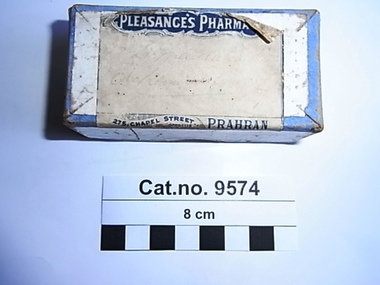
Victoria Government Gazette, January 12, 1917, Medical Act 1915, Part III. – Poisons Act 1915, THE PHARMACEUTICAL REGISTER OF VICTORIA and List of Licensed Dealers in Poisons for 1917.page 130. No. of Certificate : 1704, Date of Registration :10 Feb 1915, Name : Pleasance, Charles Maxwell, Address : 275 Chapel Street, Prahran, Qualifications : Final Exam., Vict., 14 Dec., 1914. No. of Certificate : 600, Date of Registration : 14 May 1879, Name : Pleasance, George, Address : 275 Chapel Street, Prahran, Qualifications : Mod. Exam., Vict., 7 Sept., 1877. No. of Certificate : 1739, Date of Registration : 12 Jan., 1916, Name : Pleasance, George Hayward, Address : 275 Chapel Street, Prahran, Qualifications : Final Exam., Vict., 8 Dec., 1915. George Pleasance was in business alone at 84 Chapel Street Prahran from 1898 to 1906 and at 275 Chapel Street from 1902 – 1915. Charles Maxwell Pleasance joined George in the business from 1916 until George died in December 1929 after which Charles Maxwell Pleasance continued the business alone at that address until 1944. George Hayward Pleasance also joined George & Charles Maxwell Pleasance in the business from 1917 until his death in 1925. The register was not Gazetted between 1945-47 but Charles Maxwell Pleasance next appeared on the register at 17 Khartoum Street, North Caulfield, 1948-1968 and at 2 Shrimpton Court, Box Hill 1969 -1973. Pleasances were a family of homeopaths, Pharmacists and Pharmacy owners in Victoria from the 1870's to at least the 1970's.Small cardboard box with cardboard lid, white paper label with dark blue print, and faded hand written text.On label 'Pleasance's Pharmacy 275 Chapel Street, Prahran (opposite the Arcade)' with faded hand written illegible text. pharmacist, pharmacy, pleasance -
 Coal Creek Community Park & Museum
Bottle, glass, Between 1889-1957
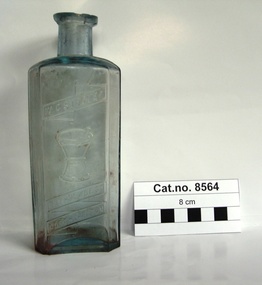
... & pestle. 'RATHDOWNE ST. NORTH CARLTON'. Rectangular clear blue ...Rectangular clear blue tinted glass bottle with text and illustration of a mortar & pestle embossed on side.'W. G. STROVER' . Illustration of mortar & pestle. 'RATHDOWNE ST. NORTH CARLTON'. -
 Port Melbourne Historical & Preservation Society
Card - North Port Electrical Services Business Card, c.2015
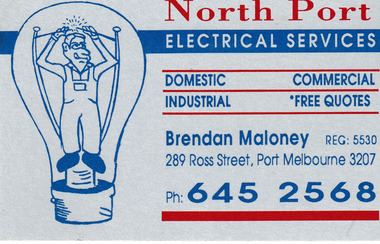
Brendan MALONEY'S business card for North Port Electrical Services located at 289 Ross Street, Port Melbourne.Grey business card with red & blue lettering and a drawing of a man inside a light bulb on the left hand side.business and traders, north port electrical services, brendan maloney, ross street -
 Essendon Football Club
AFL scorecard, 22/07/2001
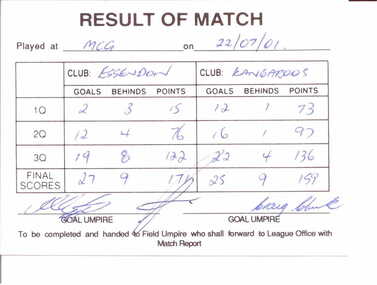
This is the scorecard for the home-and-away game between Essendon and North Melbourne Kangaroos at the MCG which Essendon won 27.9.171 to Kangaroos 25.9.159This item is of great significance for it is the official record of the greatest comeback in VFL/AFL history. Essendon came from 69 points down in the second quarter to defeat the Kangaroos by 12 points. It has been hailed as one of the greatest games ever.White cardboard card ruled into sectionsScores for each team for each quarter have been entered in blue ink and card has been signed by three umpiresessendon football club, north melbourne kangaroos, comebacks, significant events -
 Essendon Football Club
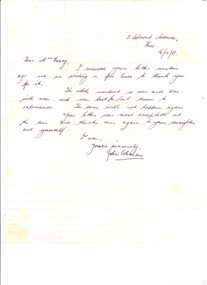
Letter, 16/10/1951
Essendon champion, John Coleman, was sensationally suspended before the 1951 VFL Grand Final. Many believe this cost Essendon the premiership.The letter is significant because it is one of the few hand-written letters by John Coleman held by the Hall of FameSheet of cream writing paper with pale blue lines and buff envelope; handwritten letter (VEF 2230.2.1) in dark blue ink from John Coleman to Mrs Geary thanking her for her kind words over his suspension against Carlton and subsequent missing of the Grand Final. Letter is dated 16/10/51 and address in top right corner is 13 Belmont Avenue, Kew. Envelope (VEF 2230.2.2) is addressed to Mrs D. Geary / 463 Dryburgh Street / North Melbourne and has a blue Australian 3 ╜ pence stamp in top right corner. essendon football club; john coleman; victorian football league; grand finals -
 Bendigo Historical Society Inc.
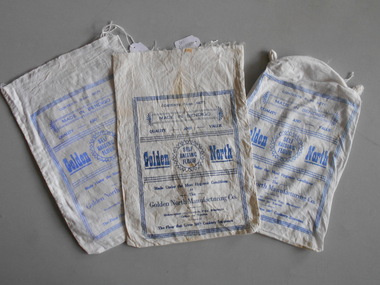
Textile - FLOUR BAG COLLECTION: UTILITY BAG, 1900 -1950
Textiles. Calico flour bag. Blue printed frame with following wording. "Contents 5lbs nett. Made in Bendigo. Quality and Value "Golden North Self Raising Flour. Made under the most Hygienic Conditions by the Golden North Manufacturing Co. Guaranteed to contain full strength Cream of Tartar The Flour that gives 100% Cookery Success" Boltons Print Bendigo. Three bags a. Good condition.Several small stains b. Faded with knots inneach corner c. Faded. Several small stainstextiles, domestic, utility bag -
 Bendigo Historical Society Inc.
Legal record - Solicitor's Records
McColl Rankin & Stanistreet solicitors electronic ledger entries for various Bendigo Gold Mining Companies 6994.1 Wages sheet - Nell Gwynne Reef Mine; manila folder containing one sheet of paper with wages entry for week ending 9th December 1979 6994.2 Ledger of names in alphabetical order, undated !!! 6994.3 Bound ledger, noted as Central Comet G. M. Co (Gold Mining Company), No Liability. handwritten entries by many hands. dated 11 March 1898 to 4 December 1899. reporting on payments not authorised by the Directors. Entries over five double pages majority of the ledger is unused. 6994.4 Deborah Gold Mines, No Liability, electronic ledger sheets dated from 1945 to 1950, for supplies, etc. 6994.5 Forfeited Share Sales. Exercise book with unreadable cover notation, listing sales of forfeited shares in various companies managed by McM R & S. 6994.6 South Deborah Gold Mines, No Liability. Paper pages containing ledger entries. Dated 1940s. 6994.7 East Clarence Gold Mining Company, No Liability. Paper pages of electronic ledger cards. Dated 1940s for wide range of company expenditures. 6994.8 Forbes Carshalton G. M. Co. No Liability paper pages with ledger entries. Dated 1940s. 6994.9 South Nell Gwynne G. M. Co. No Liability paper pages with ledger entries. Dated 1940s. 6994.10 Napoleon Reef G. M. Co. No Liability paper pages with ledger entries. Dated 1940s. 6994.11 Deborah United G. M. Co. No Liability paper pages with ledger entries. Dated 1940s. 6994.12 Central Napoleon G. M. Co. No Liability; paper pages with ledger entries. Dated 1940s. 6994.13 Golden Carshalton G. M. Co. No Liability; paper pages with ledger entries. Dated 1940s. 6994.14 North Virginia G. M. Co. No Liability; paper pages with ledger entries. Dated 1940s. 6994.15 New Monument G. M. Co. No Liability; paper pages with ledger entries. Dated 1940s. 6994.16 South Nell Gwynne G. M. Co. No Liability; paper pages with ledger entries. Dated 1940s. 6994.17 New Don G. M. Co. No Liability; paper pages with ledger entries. Dated 1940s. 6994.18 Red White & Blue Extended G. M. Co. No Liability paper pages with ledger entries. Dated 1940s. Company stamp at the top of the electronic ledger pagessocial history, mining company records, mining companies -
 Bendigo Historical Society Inc.
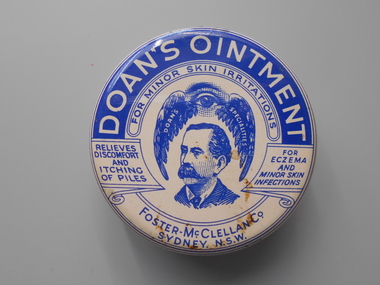
Container - PHARMACY COLLECTION: DOAN'S OINTMENT TIN, 1920's
Object. Small round Blue & white tin of Doan's Ointment for minor skin irritations. Illustration on lid of man with moustache under an eye with wings. Directions for use on bottom of tin.Foster - McClellan Co. 40 Miller St., North Sydney.medicine, pharmacy, tin -
 Bendigo Historical Society Inc.
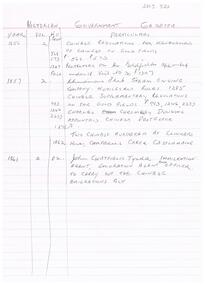
Document - MCCOLL, RANKIN AND STANISTREET COLLECTION: NOTES RE GOVERNMENT GAZETTES AND LIST OF PLANT
Two page, handwritten document on lined paper - front page reference to Victorian Government Gazettes and Chinese regulations, where listed in the gazettes and dates. Includes Chinese regulations for management of Chinese on Gold fields (1856) , Chinamans Flat Steam Engine company (1857), two Chinese murdered at Clinkers Hill, Castlemaine (1862) Charles Chromley Dowling appointed Chinese Protector (1857), John Chatfield Tyler Immigration agent, to carry out the Chinese Emigrations Act (1861) Back page dated 1947 lists "stocktake list of plant" On list - Deborah United 1946; North Hustlers; New Monument GMC, North Virginia, South Wattle Gully, Central Napoleon, Red, White and Blue Extended, Deborah Extended, New Don, East Clarence, Napoleon Reef, New Monument Battery, Deborah Extended. Possibly written by Albert Richardson.bendigo, mining, mccoll rankin & stanistreet -
 Bendigo Historical Society Inc.
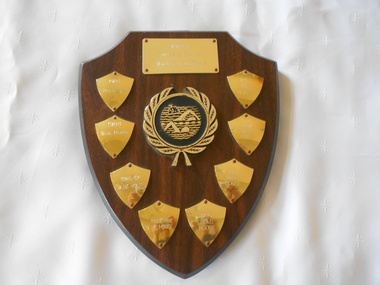
Award - BENDIGO NORTH PRIMARY SCHOOL COLLECTION: B.N.P.S SWIMMING SPORTS MOTHER’S CLUB SHIELD
Wooden shield, gold plaque on top of shield reads ‘B.N.P.S. Swimming sports, Mother’s Club Shield’ Eight smaller gold shields affixed around side of shield name the houses that won the sports in the years from 1983 to 1994. Red House 1983 and 1994. Blue House 1984, 1985, 1986, 1988, 1989 and 1992. Gold House 1990, Green House 1991.bendigo, education, bendigo north primary school -
 Bendigo Historical Society Inc.
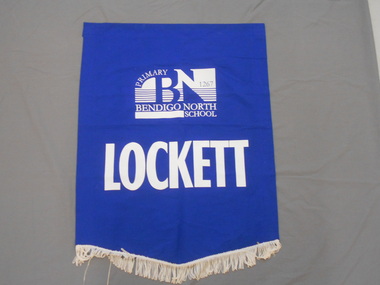
Ephemera - BENDIGO NORTH PRIMARY SCHOOL COLLECTION: BANNER
... BENDIGO Education Bendigo North Primary School Royal blue fabric ...Royal blue fabric banner, white writing, white fringing on bottom. Written on banner ' Primary 1267 Bendigo North School.bendigo, education, bendigo north primary school -
 Bendigo Historical Society Inc.
Medal - BENDIGO NORTH PRIMARY SCHOOL COLLECTION: MEDAL
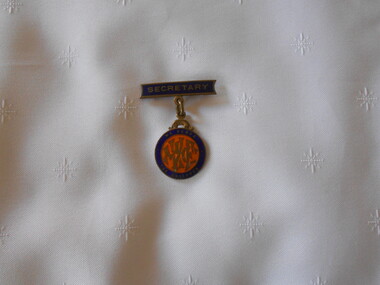
Medal, round blue and gold, suspended from bar on which is inscribed 'Secretary'. Inscribed around outside of medal 'We Serve The Children' in centre of medal initials VFMC - Victorian Federation of Mothers' Clubs.bendigo, education, bendigo north primary school -
 Bendigo Historical Society Inc.
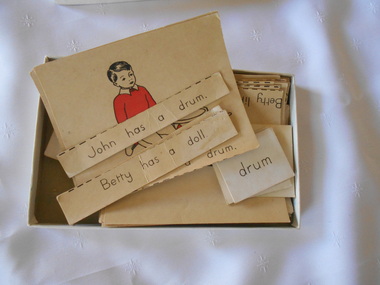
Document - BENDIGO NORTH PRIMARY SCHOOL COLLECTION: JOHN AND BETTY SENTENCE MATCHING CARDS
White box, yellow top. Written on top in blue texta ' John and Betty Sentence Matching Box 3' Box contains illustrated text matching cards and sentences.bendigo, education, bendigo north primary school -
Bendigo Historical Society Inc.
Document - VICTORIA HILL - VICTORIA HILL AND NEW CHUM HILL
Typed notes on Victoria Hill and New Chum Hill. Notes give location, value of gold and plans for a mining museum.document, gold, victoria hill, victoria hill, victoria hill and new chum hill, john neil macartney, the age, the australasian, bendigo goldfields registry 1871, victoria reef quartz mine, north old chum, victoria consols, new chum and victoria, pioneer, lansell 222 mine, lazarus, barnet lazarus, mt. alvernia hospital, fortuna villa, george lansell, a. h. q. survey regiment, central red white and blue, hudsons, burrowes & sterry, b c v channel 8, bendigo and district tourist association, section 14 of the lands act 1958, mr a r richardson, cr t r flood, tourist association -
Bendigo Historical Society Inc.
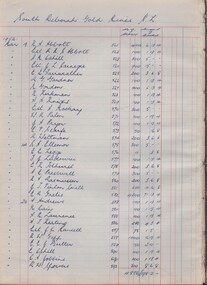
Document - NEW CHUM & VICTORIA LINES OF REEF - BENDIGO GOLDFIELD
Handwritten notes listing Bendigo Mines, their years of operation, ounces of gold taken out, Dividends, Calls, and depth of shaft. Some of the mines oly have the year they ceased operations mentioned. Dated 1/3/67.document, gold, new chum & victoria lines of reef, new chum & victoria lines of reef, bendigo goldfield, mines dept, new chum cons, new chum united, eureka extd, south belle vue, old chum, new chum & victoria, lansell big 180, ellenborough, st mungo, sth st mungo, little 180, mining register 1893 - 1902 m d annual reports 1902 on, mines dept quarterly to 1892, south new moon, hercules, ironbark, ironbark south, central r w & blue, stanfield, hercules no 1, north nell gwynne, new chum syncline, central nell gwynne, carshalton b m l, napoleon bml, nell gwynne bml, nell gwynne reefs, monument hill, central deborah, north deborah, deborah, south deborah, neangar, lightning hill, alliance, shellbach, south virginia, catherine reef united, belmont & saxby, lady barkly, unity, vict quartz, new argus, new chum railway, garden gully united -
Bendigo Historical Society Inc.
Book - AUCTION SALES: MINING CATALOGUE AUCTION SALES
Blue, black & white Woolstar exercise book with black & white check pattern to the left and a world globe over the top. Name on the front: A Richardson. Written on the front: Mining Catalogue Auction Sales. Book contains Lot numbers and description for auction sales at various mines. Mines mentioned are: Central Blue Gold Mine 19/2/42, Big Blue 23/11/1938, South Blue, Hercules Consols 19/2/1942, South Virginia 19/2/42, New Prince of Wales 5/2/48, Golden Carshalton G M 19/12/1957, North Virginia 3/5/57, North Nell Gwynne 25/2/53, South Shaft Diamond Hill, New Don 21/10/48, Sheepshead Battery Site 21/10/48, Forbes Carshalton 9/7/47, South Virginia 9/7/47, East Clarence 31/8/49?, Deborah Surplus Equipment 31/8/49, Deborah No 2 Shaft, North Deborah 31/8/49, Hercules Main Shaft 19/6/1950, Stanfield Shaft 20/6/1950, United Crushing Coy Battery (Unity Carlisle) 20/6/1950, Toolleen Gold Mine 23/2/1950, Ironbark Gold Mine 6/10/49, Ironbark South 1/12/49, Hercules New Chum 1/12/49, Great Southern Gold Mine 10/4/47, New Chum Syncline 2/3/1950, Deborah Associated 19/4/195? And the Deborah Consolidated 19/4/1950. Further information of Bendigo Mines from The Gold Mining Registry Guide to Bendigo Mines by H Kirkwood, Eaglehawk. Published by W. Welch. Mines include Lazarus New Chum Reg'd & Lazarus New Chum No 1, Princess Alexandra, Ellenborough, Trio-Hauling Coy, South Catherine Reef G. M. C., Princess Alice, Central Catherine Co,Cravens New Chum Co N. L., Garibaldi Mining and Crushing Co, Williams United, Catherine Reef Claimholders G. M. N. L., New Chum & Victoria Reef, Johnsons (Garden Gully) Line, United Ulster, Garden Gully Rly Reserve, South Ulster, Ulster and Cosmopolitan Coys, Golden Gate and Lansell'sBig 180. Some information on the Moon Mines 24/6/67 South New Moon, New Moon, Nth New Moon and New Moon Consolidated.In the reverseof the book is some information on the Lazarus New Chum Mine, Lazarus No 1 and Lazarus Mines. Also mentioned are New Chum Rly and Victoria Quartz. In 1895 a large gold bearing reef in Lazarus at 3000 feet. Also Some extracts from E. C. Dunn's Report 13/8/92 on the Lazarus Mine Old Shaft and Lazarus Main Shaft at various depths.book, bendigo, mining auction sales, auction sales, mining catalogue auction sales, a richardson, central blue g m, big blue, south blue, hercules consols, south virginia, new prince of wales, golden carshalton g m, north virginia, north nell gwynne, south shaft diamond hill, new don, sheepshead battery site, forbes carshalton, south virginia, east clarence, deborah, deborah no 2 shaft, north deborah, hercules main shaft, stanfield shaft, united crushing coy battery (unity carlisle), toolleen gold mine - toolleen, ironbark gold mine, ironbark south, hercules new chum, great southern gold mine, new chum syncline, deborah associated, deborah consolidated, j h curnow, miss kirkwood, the gold mining registry guide to bendigo mines, h kirkwood, w welch, lazarus new chum no 1, mr g armstrong, princess alexandra, h hectmann, ellenborough, amos arblaster, trio hauling coy, catherine reef g m c, w burnside, st mungo reef, princess alice, central catherine co, big catherine, belmont, cravens new chum co n l, wm w barker, c edwards, ellesmere, garibaldi mining and crushing co, henry von der heyde, w martin, williams united, wm cook, john chynowth, catherine reef claimholders g m n l, churchill davidson, edgar l rosman, new chum and victoria reef, johnsons (garden gully) line, united ulster, james mccoll, james quick, garden gully reserve, south ulster, ulster and cosmopolitan coys, golden gate, geo lansell's big 180, signal of a mine, mr langridge, e clarke, j hattam, a llewelly, n murray, a richardson, new moon, nth new moon, new moon consolidated, lazarus new chum, lazarus no 1, new chum rly, victoria quartz, lazarus, e c dunn -
 Bendigo Historical Society Inc.
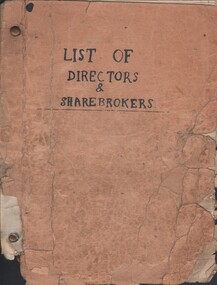
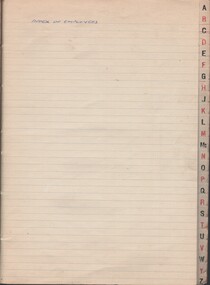
Document - MCCOLL, RANKIN AND STANISTREET COLLECTION: LIST OF DIRECTORS AND SHAREHOLDERS, 1950/61
Documents: paper bag contains - well-worn booklet 21x16cm 'List of Directors & sharebrokers' for goldmines, meeting times, reports to press, company report recipients for Monument Hill Consolidated, Central Nell Gwynne, East Clarence, New Don, South Nell Gwynne, Deborah Gold Mine, South Deborah, North Virginia, Central Deborah, North Deborah Mining, Nell Gwynne Reef, Central Napoleon, New Monument, North Hustlers, Napoleon Reef, Deborah Extended, Deborah United, South Wattle Gully Company, Red, White & Blue Extended, Golden Carshalton, poor condition, also several company change of address notices.MCCOLL RANKIN AND STANSISTREETorganization, business, gold mining - legal, mccoll rankin and stansistreet -
 Bendigo Historical Society Inc.
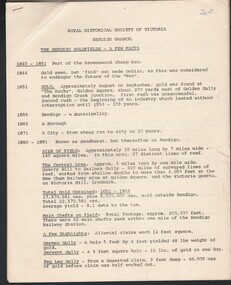
Document - THE BENDIGO GOLDFIELDS - A FEW FACTS, c1970
Document. A Few Facts (7 copies). Two page typed, timelined document on the Goldfield area of Bendigo 1851 1954 by the Bendigo Branch of the Royal Historical Society of Victoria. Mentions Ravenswood sheep run, German Gully, Derwent Gully, Peg Leg Gully, 'The Dascombe' & 'The Victoria' gold nuggets. Watson's Kentish mine in Long Gully, Garden Gully United in Ironbark, The Great Extended Hustlers Tribute on Hustlers Hill, The New Chum United in Golden Square, The Victoria Quartz in Victoria Hill Ironbark, The United Devonshire Mine in Eaglehawk, The Famous Devonshire Valley, Portion of the New Chum Group in Golden Square, The New Moon, The South New Moon, The 'Flying Fox' which conveyed the quartz from the Central Red, White and Blue mine to New Chum Hill, Lansell's'222' Mine, The Mine in the Heart of the City, The Fortuna Hustlers Mine; Snob's Hill, Sailors Gully & Devonshire Gully at Eaglehawk, California Gully, Long Gully, Victoria Hill at Ironbark, New Chum Hill & New Chum Valley at Golden Square, Hustlers Hill & Comet & Redan Hills at North Bendigo.cottage, miners, the bendigo goldfields, a few facts -
 Bendigo Historical Society Inc.
Document - PREMIER COMPANIES (GOLD MINING)
Document. 2 page typed document titled 'Premier Companies'. Lists various mining companies from 1870 to 1920 and the amount in pounds that each mine yielded. Mentions mines - Great Extended Hustlers, Great Extended Hustlers Tribute, Garden Gully United, Victory, Pandora, United Hustlers, Redan Garden Gully, United Devonshire, Old Chum, Victoria Quartz, North Johnson's, Johnson's Reef, New Red White and Blue, New Chum United, Lady Barkly, New Chum Railway, Great Southern, South New Moon, New Argus, Virginia, Central Red White and Blue, New Chum Goldfields, Victoria Consols, Carlisle, Hercules and Energetic, New Golden Fleece, Bendigo Amalgamated Goldfields.cottage, miners, premier companies (mining), bendigo mines -
Bendigo Historical Society Inc.
Archive - MCCOLL, RANKIN AND STANISTREET COLLECTION: NORTH DEBORAH GMC N L - MINE BOX, 1940's
Mining box. Metal box, painted dark blue, formerly box number 474 - Now North Deborah Mining Box 19. Tag affixed to front 'box 474'. North Deborah written on brown paper label on the front of the box. Box contains various documents relating to the North Deborah Mine. Documents are individually catalogued within box.North Deborah on labelmining, business, north deborah mining box 19, mccoll, rankin & stanistreet, north deborah gmc n l, gold mining, mining box -
 Bendigo Historical Society Inc.
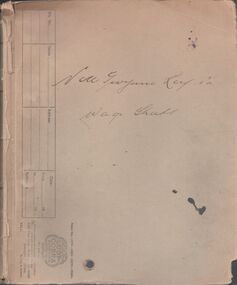
Document - MCCOLL, RANKIN AND STANISTREET COLLECTION: NORTH VIRGINIA GMC N L - INDEX OF EMPLOYEES
Document. Large blue marble coloured, string bound book. No front title. Letter indexed tabs.McColl, Rankin & Stanistreetorganization, business, north virginia gmc n l, mccoll, rankin & stanistreet, north virginia gmc n l, gold mining, index of employees -
 Bendigo Historical Society Inc.
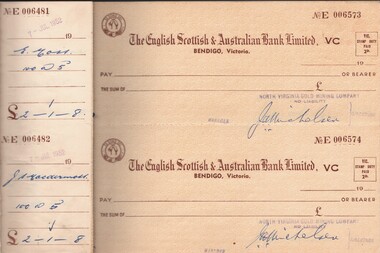
Document - MCCOLL, RANKIN AND STANISTREET COLLECTION: NORTH VIRGINIA GMC N L - CHEQUE BOOK, 7/6/1952 - 15/6/1956
Document. Blue/grey book with red binding. The English Scottish & Australian Bank Limited. North Virginia Gold Mining Co. Also 'Central Napoleon' written on the front cover.McColl, Rankin & Stanistreetorganization, business, north virginia gmc n l, mccoll, rankin & stanistreet, north virginia gmc n l, the english scottish & australian bank limited, gold mining, cheque book -
 Bendigo Historical Society Inc.
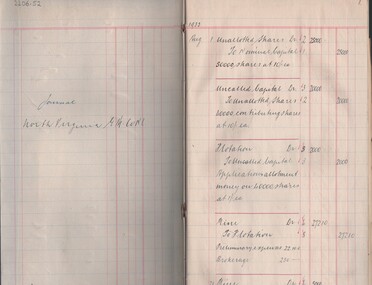
Document - MCCOLL, RANKIN AND STANISTREET COLLECTION: NORTH VIRGINIA GMC N L - JOURNAL, 1/8/1933 - 31/7/1952
... Document. Blue slim book. Ruled. North Virginia Gold... & Stanistreet Document. Blue slim book. Ruled. North Virginia Gold ...Document. Blue slim book. Ruled. North Virginia Gold Mining Co. 14 pages used, the rest blank. Stickered from Frank Every's Book & Stationary Centre Bendigo.McColl, Rankin & Stanistreetorganization, business, north virginia gmc n l, mccoll, rankin & stanistreet, north virginia gmc n l, gold mining, journal -
NMIT (Northern Melbourne Institute of TAFE)
Brochure: Diversity at work, Northern Melbourne Institute of TAFE. Language Studies Department, Diversity at work. 1997, 1997
Edition 1 of "Diversity at Work: a publication of the Language Studies Department of Norther Melbourne Institute of TAFE". The publication is a means of providing information and ideas about the skills of language students. The publication is aimed at employers, community organisations and service providers.First edition of this publication, dated August 1997.4 page brochure. Printed with blue text and photographs and green sub heading. diversity at work, language studies, newsletters, nmit