Showing 456 items matching "w. bridges"
-
 Melbourne Tram Museum
Magazine, National Trust, "Trust News - Vol 18 No 8", March 1990
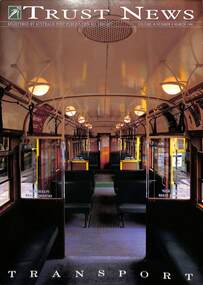
Published by the National Trust Victoria features a front cover photo of the interior of an SW5 class car by Brian Gilkes. Has an article by Frank Strahan on Melbourne W class trams and puts a case for their classification. Includes a photo of the Great Strike lineup of trams in Bourke St, An article by Celestina Sagazio on Melbourne's cable tram system looks at its history, remaining buildings, and Alf Twentyman's cable cars. Concludes with a note on the impending demolition of the Richmond Power or Engine house on the corner of Bridge Road and Hoddle St. Notes the moves to retain it and includes a photo of the building by Brian Gilkes. There is also an article on the Port Melbourne railway line, its heritage, and demolition.Yields information about the National Trust's proposals for the W class trams, cable trams and the Port Melbourne rail line.Magazine - 32 pages - part colour centre stapled.national trust, cable trams, w class trams, tramways, richmond, engine houses, port melbourne railway -
 Melbourne Tram Museum
Photograph - Collins St east of Swanston St, c1920
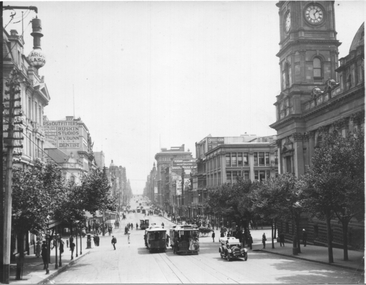
The photograph shows Collins Street just to the east of Swanston St. Some 10 cable trams can be seen in the view, along with some horse-drawn vehicles and one open-top motor car. It would appear that a person is boarding the nearest cable tram (Victoria Bridge) from the centre of the road. Trees have been planted between Swanston and Spring St. In the background are signs for Ruskins Studios, W V Dunn Dentist, Kodak Limited incorporating Baker House, Coles Arcade, and Broothorn studios - see reference. The Town Hall is on the right.Yields information about Collins St c1920.Black and White photograph - printed on plain paper.On the rear has pencil number "KM-M-058".cable trams, tramways, collins st -
 Port Melbourne Historical & Preservation Society
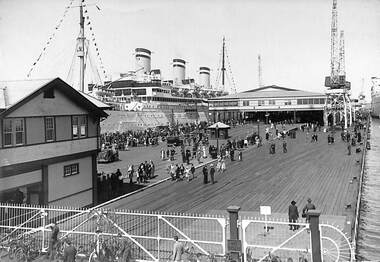
Photograph - Station Pier from Centenary Bridge, c1946 - 47
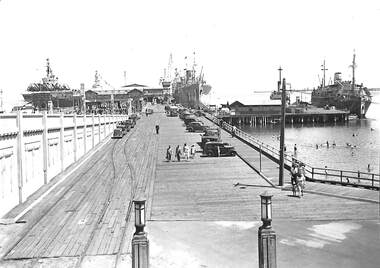
... War II Centenary Bridge HMS Glory C W Ward photo, 355 High St ...(From Glen Stuart). Photos taken from Centenary Bridge c1947. HMS Glory (inner East). HMS Implacable (outer East). HMS Indefatigable (outer West). Unknown freighter at Inner West. Ships still in wartime grey and used to transport personnel and equipment back to Australia after the war, before returning to England. PMHPS assume that these five photos (3354.01 - .05) were taken on the same day. See Glen Stuart's comment above. HMS Glory, Implacable and Indefatigable with attendant destroyers Tuscan and Armada arrived in Port Melbourne on 23 January 1946 and returned to England in 1947. [This series of photos 3354.01 - .05 as well as 3361 and 3362 came to PMHPS from the Moe Historical Society via the St Kilda Historical Society. Notations in pencil on the back along the left had edge indicate they came from "C W Ward photo, 355 High St, Prahran, Melbourne". Each photo bears the date 9-12-1947 in the top left corner. It is not known what this date refers to. Possibly it is when the photo was printed. Another notation on each photo says "Port Melbourne, taken in 1920". This is definitely incorrect and "NOT" has been written underneath this comment.]British aircraft carrier, HMS Glory (inner east) and unknown freighter (inner west) at Station Pier. Military personnel and civilians on Centenary Bridge ramp with Gatehouse in centre view. c 1946-47 C W Ward photo, 355 High St, Prahran, Melbournetransport - shipping, piers and wharves - station pier, war - world war ii, centenary bridge, hms glory -
 Port Melbourne Historical & Preservation Society
Photograph - Station Pier from Centenary Bridge c1946-47, c1946-47
(From Glen Stuart). Photos taken from Centenary Bridge c1947. HMS Glory (inner East). HMS Implacable (outer East). HMS Indefatigable (outer West). Unknown freighter at Inner West. Ships still in wartime grey and used to transport personnel and equipment back to Australia after the war, before returning to England. PMHPS assume that these five photos (3354.01 - .05) were taken on the same day. See Glen Stuart's comment above. HMS Glory, Implacable and Indefatigable with attendant destroyers Tuscan and Armada arrived in Port Melbourne on 23 January 1946 and returned to England in 1947. [This series of photos 3354.01 - .05 as well as 3361 and 3362 came to PMHPS from the Moe Historical Society via the St Kilda Historical Society. Notations in pencil on the back along the left had edge indicate they came from "C W Ward photo, 355 High St, Prahran, Melbourne". Each photo bears the date 9-12-1947 in the top left corner. It is not known what this date refers to. Possibly it is when the photo was printed. Another notation on each photo says "Port Melbourne, taken in 1920". This is definitely incorrect and "NOT" has been written underneath this comment.]Image taken from Centenary Bridge showing HMS Glory at Station Pier (inner east), an unidentified freighter at (inner west) and another unidentified ship berthed at the west finger pier. C W Ward photo, 355 High St, Prahran, Melbournetransport - shipping, piers and wharves - station pier, war - world war ii, centenary bridge, hms glory, hms implacable, hms indefaticable -
 Port Melbourne Historical & Preservation Society
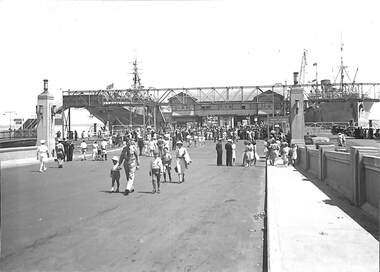
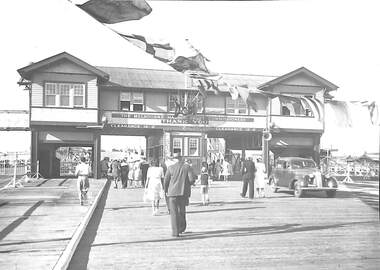
Photograph - Station Pier Gatehouse, c1946 - 47
... War - World War II Centenary Bridge C W Ward photo, 355 High ...(From Glen Stuart). Photos taken from Centenary Bridge c1947. HMS Glory (inner East). HMS Implacable (outer East). HMS Indefatigable (outer West). Unknown freighter at Inner West. Ships still in wartime grey and used to transport personnel and equipment back to Australia after the war, before returning to England. PMHPS assume that these five photos (3354.01 - .05) were taken on the same day. See Glen Stuart's comment above although this photo has been taken on the pier looking back through the gatehouse towards Centenary Bridge. HMS Glory, Implacable and Indefatigable with attendant destroyers Tuscan and Armada arrived in Port Melbourne on 23 January 1946 and returned to England in 1947. [This series of photos 3354.01 - .05 as well as 3361 and 3362 came to PMHPS from the Moe Historical Society via the St Kilda Historical Society. Notations in pencil on the back along the left had edge indicate they came from "C W Ward photo, 355 High St, Prahran, Melbourne". Each photo bears the date 9-12-1947 in the top left corner. It is not known what this date refers to. Possibly it is when the photo was printed. Another notation on each photo says "Port Melbourne, taken in 1920". This is definitely incorrect and "NOT" has been written underneath this comment.]Station Pier Gatehouse from waterside with bunting and a "Thank You" sign attached. Pedestrians walking towards Centenary Bridge. c1946 - 47C W Ward photo, 355 High St, Prahran, Melbournepiers and wharves - station pier, war - world war ii, centenary bridge -
 Port Melbourne Historical & Preservation Society
Photograph - Crowds on Station Pier, Port Melbourne, 6 Apr 1938
This photograph was taken on 6 April 1938 when the "Empress of Britain" and the German ocean liner Reliance visited Station Pier. (From Glen Stuart) Three funnel ship Reliance, 19980 gross tons, Hamburg America Line (ona cruise) at inner East Station Pier. Ship seen on right at outer West Station Pier, Empress of Britain, 42,348 gross tons. [This photo as well as 3354.01 - .05 and 3362 came to PMHPS from the Moe Historical Society via the St Kilda Historical Society. Notations in pencil on the back along the left had edge indicate they came from "C W Ward photo, 355 High St, Prahran, Melbourne". Each photo bears the date 9-12-1947 in the top left corner. It is not known what this date refers to. Possibly it is when the photo was printed. Another notation on each photo says "Port Melbourne, taken in 1920". This is definitely incorrect and "NOT" has been written underneath this comment.]Black and white photograph of German passenger liner "Reliance" and crowds at Station Pier from Centenary Bridge.C.W.Ward photo 335 High Street, Prahran, Melbournehamburg america line, reliance, transport - shipping, piers and wharves - station pier, empress of britain -
 Linton and District Historical Society Inc
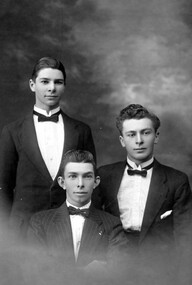
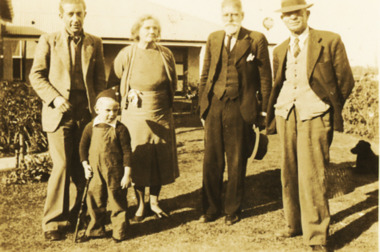
Photograph, W Mason and Co 144 Bridge Rd, Richmond Melbourne, Gordon, Harold and Stan Bennett
Gordon, Harold and Stan Bennett were the sons of George Garnsworthy (G G) Bennett and his wife Ada (née Bersey).Sepia photograph of three young men wearing formal attire two seated, one standing behind."The three Bennett Brothers".bennett family, gordon bennett, harold bennett, stanley bennett -
 Melbourne Tram Museum
Slide - set of 3, Chris Jacobson, Z class tram No 1, May 1975
Set of three Colour slides of a new Z class, No. 1 tram dated May 1975. The tram entered service on 5/5/1975 - see reference. 1 - Leaving Batman Ave terminus, route 70 for Wattle Park Elgar Road. 2 - In Wallen Road, just over the Yarra River Bridge at Hawthorn 3 - Swan St - Batman Ave intersection with the Olympic Swimming pool in the background along with a W class running a route 77.Yields information about Z class 1 and Batman Ave terminus.Set of 3 Kodachrome colour slides, cardboard mount.All have "Chris" in ink on the rear.tramways, z class, new tram, tram 1, batman ave, route 70, wallen road -
 Melbourne Tram Museum
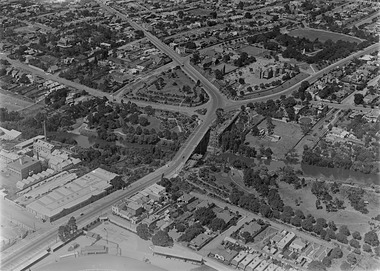
Photograph - Digital Image, Kevin O'Reilly, Kew Barkers Rd, c1930
Image from CD (Compact Diskette for use in computers) - see Reg Item 135. Image titled "Kew Barkers Rd" on CD, looking west from over Kew Junction towards Victoria Bridge over the Yarra River. Has a W class tram, eastbound in Victoria St, about to cross the bridge. c1930 (Cable conversion late 1929)trams, tramways, kew, barkers rd, victoria st -
 Melbourne Tram Museum
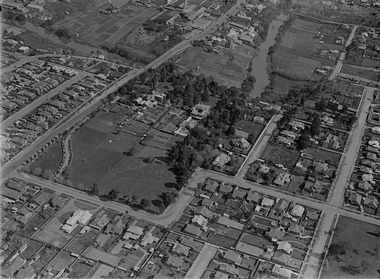
Photograph - Digital Image, Kevin O'Reilly, series of three images of the Hawthorn Bridge over the Yarra, c1930, c1930's
Image from CD (Compact Diskette for use in computers) - see Reg Item 135. A series of three images of the Hawthorn Bridge over the Yarra, c1930, during the era with problems with the bridge. See separate article for more details. Richmond 6, Richmond, Richmond 3 on the CD as original files. .1 - Looking from the south west, at the Hawthorn bridge with the temporary wooden bridge being constructed on the south side. Has the cable tram depot in the photo and part of the Burnley racing course. Temporary track on the north side of the steel bridge and crossings can be seen. .2 - Looking along Bridge Road to the east with Hawthorn Bridge in the middle of the photograph. Shows the industrial and residential areas, Hawthorn Railway Station and part of the Burnley Race course, the cable tram depot building. W class tram in Church St Hawthorn and W class tram crossing the bridge on the north side temporary track. Note the cable tram used as a shelter on the north east corner of the bridge. .3 - Looking south along River St towards Bridge Road, with the Yarra River and Hawthorn Bridge on the left side of the photograph. Shows the industry in the area at the time, wool and skin Merchants, north side of the cable depot, housing and the outlook to the river!trams, tramways, hawthorn, yarra river, burnley, richmond, hawthorn bridge -
 Melbourne Tram Museum
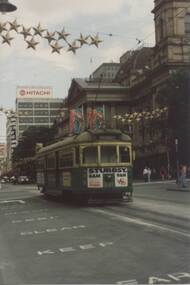
Photograph - Set of 7 Colour Print/s, Bill Davis, mid 1980's to 1990
Set of 7 colour prints of Melbourne trams and locations during the mid 1980's to 1990, Photos not well focused. .1 - 981 inbound, Swanston St with Town Hall in background. .2 - Two W's in Swanston St .3 - 918 outbound, Princes Bridge with the Gas and Fuel towers in the background. .4 - 947 and 425? Swanston St - with cars in Swanston St. .5 - large line up of trams in the north bound side of Swanston St. Note people at the tram safety zone. Last tram is 836. Has Billy Guyatts store in the background. .6 - 763 outbound, Swanston and Flinders St. Bourke St has been closed to motor traffic. .7 - Z3 172, Swanston St on a wet day, does not have a destination showing - could be a transfer tram. Features advertisements on trams for: Triple FM Radio, Bank of Melbourne Printed on Kodak or Konica paper.trams, tramways, ptc, swanston st, tram 981, tram 918, tram 947, tram 425, tram 836, tram 763, tram 172 -
 Melbourne Tram Museum
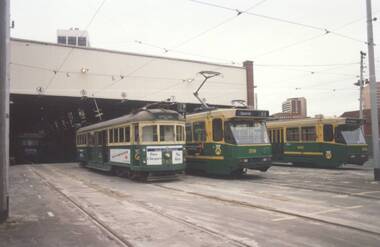
Photograph - Set of 11 Colour Print/s, Bill Davis, mid 1980's to 1990
Set of 11 colour prints of Melbourne trams and locations during the mid 1980's to 1990, Photos not well focused. .1 - trams 782, 259 and 2002 out the front of South Melbourne Depot .2 - 979 and 888 at ditto .3 - 888 .4 - 975 and two other W's at Preston Depot .5 - 2001 - Burwood Road on a Special, near Hawthorn Bridge. .6 - ditto .7 - 968, Kingsway, South Melbourne near Sturt St .8 - 861 ditto .9 - 881 outbound St Kilda Road .10 - 900 and W2 442 (Restaurant tram 1) at Acland St terminus. .11 - 913, inbound Glenhuntly Road, on the east side of Glenhuntly Station. Features advertisements on trams for: Triple FM Radio, Bank of Melbourne, Space Deamons Printed on Kodak, Fujichrome or Konica paper.trams, tramways, ptc, south melbourne depot, preston depot, burwood rd, kingsway, st kilda rd, acland st, glenhuntly rd, tram 782, tram 259, tram 2002, tram 2001, tram 979, tram 888, tram 975, tram 968, tram 861, tram 881, tram 900, tram 442, tram 913 -
 Bendigo Military Museum
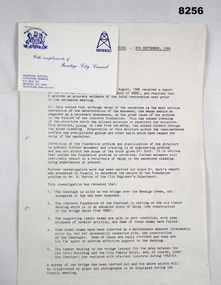
Document - SURVEYORS RESTORATION REPORT BENDIGO, Bendigo City Council, c.1986
Surveyors report 1986 regarding the restoration of the Bendigo Cenotaph continued on from Cat No 8255. The document starts with a report to a Council meeting held on August 18th 1986. This is a more detailed report of the first by Dr. A.H. Spry (AMDEL) followed by Mr W. Barton City Engineers Department. The state of the Cenotaph was also compounded by it's situation re the Bendigo Creek. Main points where. The Cenotaph is sited on the Bridge over the Creek not alongside it as was supposed. The Cenotaph concrete foundation was resting on the old timber decking which is in an advanced state of decay among 5 main points. Report goes on with points. Conclusion; "It would of course be necessary to demolish the Cenotaph to carry out this work". Estimate of costs in brief. 1. Bridge repairs $72,000.00. 2. Cenotaph repairs. - Demolish & rebuild $110,000.00. Options - There are only two options (as per estimate) or demolish and relocate to another location under 3 sections (a) (b) (c). Recommendations; Motions referred to Estimates 1986/87 and RSL for comments - 1 carried, 1 lost.Document, paper 3 pages foolscap size, all print in black, copy of original, stapled with the pages is a Bendigo City Compliments Card in blue text.Main points, "Building Surveyors report - 8th September 1986 - B.18/86 - restoration of Cenotaph (32.7.1)"document, surveyor, cenotaph, brsl, smirsl -
 Charlton Golden Grains Museum Inc
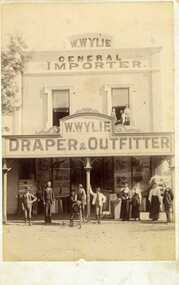
Photograph, Clarke Bros Photographers, W. Wylie shop, c.1890
W. Wylie's store, west end of High St, Charlton. built by Peter Johnson c. 1872, managed by Mr. Gatwood c.1880s, then bought by William Wylie. Group of people standing outside on footpath, young man on a bicycle, 2 children and a man in upstairs windowMounted unframed photograph. W. Wylie's store, west end of High St, Charlton. Group of nine people standing outside on footpath, includes three women, a young man on a bicycle being held by another young man, 2 children and a man in upstairs windowClarke Bros Photographers Windsorw. wylie, general importer, draper & outfitter, johnson's bridge store, high street, charlton -
 Port Melbourne Historical & Preservation Society
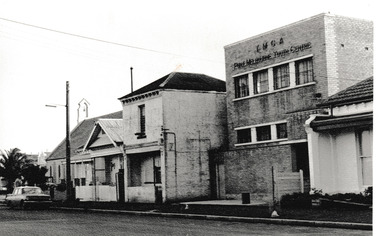
Photograph - YMCA Nott Street 1973, Reverend Donald LANGFORD, June 1973
The Bridge Street Presbyterian Church is on the left of the photograph with numbers to the right - 305, 397 & the YMCA Port Melbourne Youth Centre at 311 - 313.B & W photograph of YMCA Nott Street between Bridge & Spring Streets 1973.June 1973built environment - demolition, built environment - domestic, ymca, religion - presbyterian church, port melbourne youth centre -
 Bendigo Military Museum
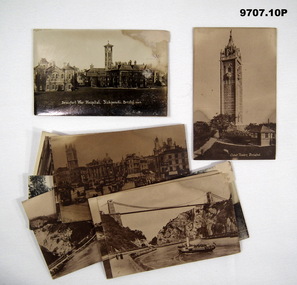
Postcard - PHOTOGRAPHIC POSTCARDS WW1, C.1918
Items in the collection relating to C.J.C. McQuie MM, refer Cat No 9680P for his service details. .1) Postcard dated 13.9.18, to McQuie's Mother, talks about his eyes getting better and that there are 2,000 lads in the Hospital. .2).3).4) Postcards dated 15.9.18. McQuie relates how he has just been appointed 2nd Lieutenant and maybe moved to an Officers Hospital. .5).6).7) Postcards dated 18.9.18, to McQuie's Mother, relates how he is now out of bed, slowly getting better. .8) Postcard dated 22.9.18, McQuie talks about the Postcard picture and his collection of Postcards on bridges. .9) Postcard dated 19.10.18. The sender appears to be Ronald Ernest McQuie No 1977 3rd Reinforcements 21st BN. .10) Postcard dated 11.11.18, "Armistice signed, I have just been before a Board. Fortnight home service then G.S."Ten Postcards. .1) B&W view of Beaufort War Hospital, text on rear in purple. .2) .3).4) Sepia tone with views around Bristol, text on rear in purple, cards are numbered 1,2 & 3. .5).6).7) Sepia tone with views around Bristol, text on rear in purple, cards are numbered 1,2 & 3. .8) Sepia tone with view of Bristol area, text on rear in purple. .9) B&W with view of Castle Walls, text on rear in black, Piece of LH corner missing. .10) Sepia tone with view in a Church Salisbury, text in black.1) to .7) All have, "Ward 20 Beaufort War Hospital". four have "Bristol" on as well. .8) "Bristol" .9) "France, Best wishes for a happy Xmas and a peaceful new year". .10) "11.11.18 Salisbury"postcards, photos, mcquie -
 Melbourne Tram Museum
Negative, Wal Larsen, 6/05/1940 12:00:00 AM
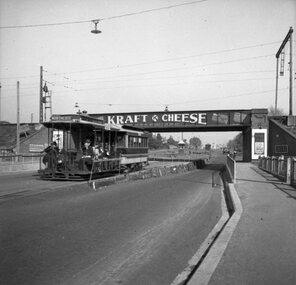
Photograph of a cable tram set in Queens Parade Clifton Hill, passing under the railway bridge at Clifton Hill 6-5-1940. The tram has the destination of Northcote. The bridge has an advert for Kraft Cheese. Road lowered in preparation of closure. Photo Wal Larsen. Trailer No. 506. In the background is the cabin for turning trams at the Clifton Hill depot or car sheds.Negative of a photograph black and white.on rear of negative in album "Getting ready for the double-decker buses at Clifton Hill. Road has been lowered on either side when cable goes rest of road will be lowered. Trailer 506 is shown. 1145am 6th May 1940 and camera settings. Photo by W. H. Larsen."trams, tramways, cable trams, queens parade, closure, clifton hill, bridges, railways, tram 506 -
 Ballarat Tramway Museum
Photograph - Black and White photograph/s - mounted, John Phillips, late 1960's or early 1970's
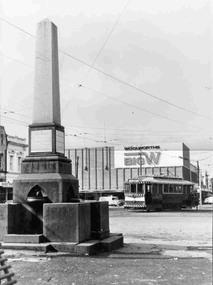
Black and white photograph mounted on heavy cardboard backing. Photo of Ballarat 26 outward bound to Victoria St., loading passengers just prior to crossing Grenville St. Tram has destination of "Victoria St". Has Big W (Woolworths) building in the background, along with the Ballarat Working Men or Labor (labour) monument (8 hour day) in the photograph. Taken by John Phillips late 1960's or early 1970's. Note: Image scanned in two runs through a scanned, resulting in the shading in the image file. .1 - ditto, mounted with four white Velcro dots on rear.trams, tramways, bridge st, grenville st, sturt st, monuments, tram 26 -
 Ballarat Heritage Services
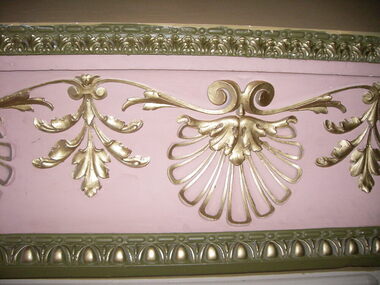
Photograph - Photograph - Colour, Interior, Her Majesty's Theatre, Lydiard Street South, Ballarat, c2015
Her Majesty’s has been a central part of the cultural life of Ballarat since it first opened its doors in 1875. Australia’s best preserved theatre building, it has been continuously used as Ballarat’s home of live performance ever since. It has been owned and operated by the City of Ballarat since 1987 and functions as Ballarat’s premier performing arts centre. The Theatre was first known as the Academy of Music, a name calculated to overcome religious and temperance scruples against patronising a “theatre.” The Academy had a flat floored auditorium suitable for dances and dinners, and a fully equipped stage. It was built to supersede Ballarat’s Theatre Royal (1858), which stood around the corner in Sturt Street, near where the Myer Department store sits today. While very grand, the Royal had become outdated and no longer met the technical requirements of the touring companies. The Academy was built by the wealthy Clarke family at the initiative of a group of local people who felt that Ballarat, as the premier city of the Victorian goldfields, should have a theatre worthy of its status. They guaranteed to rent it from the Clarkes at 10% of the construction cost, which was £13,000. The building of Ballarat’s handsome new theatre was supervised by Clarke’s architect, George “Diamond” Browne. It was ready ahead of schedule, and opened on 7th June 1875. The first production was a comic opera by the French composer Lecocq, “La Fille de Madame Angot,” presented by the Royal Opera Bouffe Company run by W. S. Lyster, Australia’s first opera impresario. Soon after the Academy opened, the large Supper Room above Lydiard Street was leased to William Bridges, a former miner, who ran it as an art gallery, displaying an excellent collection of European and Australian artworks, including his own tapestries. After Bridges moved his operations to Melbourne in 1883, the Ballarat Fine Art Gallery was formed. The Gallery Society ran the Gallery from the Academy from 1884 until 1890, when the present Art Gallery in Lydiard Street North was opened.Colour photograph of interior detail at Her Majesty's Theatre, Ballarat.her majesty's ballarat, theatre, performing arts, her majesty's theatre, academy of music, george browne -
 Melbourne Tram Museum
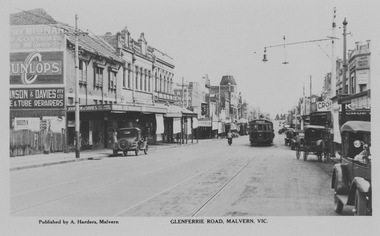
Photograph - M&MTB W class 255 in Glenferrie Rd, Malvern, Rose Stereograph Co, 1920s
The photograph shows Melbourne and Metropolitan Tramways Board W class tram 255 in Glenferrie Rd showing destination Victoria Bridge. The tramcar is in the mid ground and Glenferrie Rd is lined with retail shop verandahs on the ground floor and ornate second floor residences or workshops. Span poles hold the tramway overhead and several early motor cars are seen along the roadway.Yields information about Glenferries Rd and M&MTBBlack and white photograph with writing on the rear.Printed Post Card by Rose Stereograph, Armadale with ink stamp reading "K J Magor No." glenferrie rd, melbourne and metropolitan tramways board, w class, tram 255, victoria bridge, span poles, retail shop verandahs -
 Lakes Entrance Historical Society
Photograph - Mrs Alice Roadknight Opening Footbridge, 1937 and 1940
On back of photograph: W T Roadknight and Coates family. W T Roadknight Malcolm and Mum and DadBlack and white photograph of William Tasman Roadknight with Coates family 1940 c Second black and white photograph is of oldest resident Mrs Alice Roadknight after cutting the ribbon to open the Cunninghame Arm pedestrian bridge Lakes Entrance Victoria 1937genealogy, celebration, bridges, correspondence -
 Lakes Entrance Historical Society
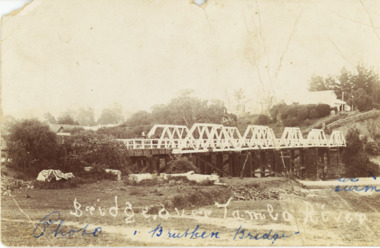
Postcard - Bridge over Tambo, 1906 c
Letter dated 20 February 1907 written on back to Miss Clark Turnbull Bairnsdale from E W B Batton Bruthen 2 penny stamp Queen VictoriaBlack and white postcard of the bridge over the Tambo River with Star Hotel visible on the hill, logs on ground below bridge Bruthen Victoriabridges, ships and shipping, waterways, hotels -
 Stawell Historical Society Inc
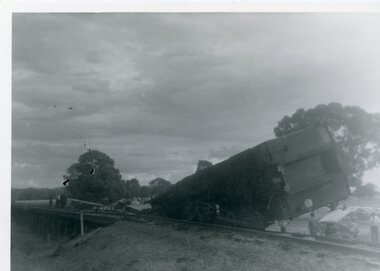
Photograph, Train Derailment near Glenorchy February 1971-- 6 Photos, 1971
Series of six photographs of Train derailment near Glenorchy February 1971. These Photographs are copies o=from negatives held by the society - Made possible by grant 1991. These photographs taken of a train accident. The Afternoon Passenger Train - at the level crossing on the Warracknabeal - Stawell Road. There are 2 crossings on the road - This crossing is near the Wimmera River Rail Bridge. The cause of the accident - was a collision between a loaded Gravel truck and the passenger train. The Driver of the Truck was killed. 1231-2 B/w Photo of Train Smash near Glenorchy. This photo was donated from the estate of Mr Boothey in 2010, and is almost identical to one in 1231. This Photo is in album 4. B/W Photos of a Train Smash - 1231 The deisel Engine completely derailed off the rail line. 1231-1 showing the derailed rolling stock from another angle. Many onlookers. 1231-2 The Boogie is completely off the carriage 3 Photogrpahsstawell railways transport, glenochy -
 Whitehorse Historical Society Inc.
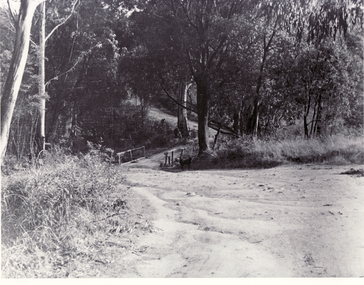
Photograph - B/W Photograph, Bridge at Deep Creek Road Mitcham. Circa 1940
Black and white photo of bridge at Deep Creek Road, Mitcham which leads to Loughnan's Hill.deep creek road, mitcham, bridge -
 Whitehorse Historical Society Inc.
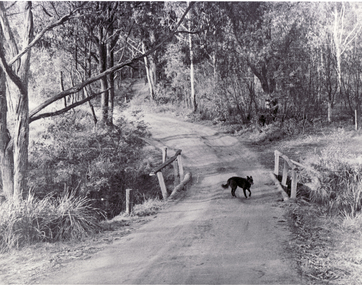
Photograph - B/W Photograph, Bridge at Deep Creek Road 1940
Black and white photo of bridge over Deep Creek Road, Mitcham with a dog crossing.deep creek road bridge, mitcham -
 Lakes Entrance Historical Society
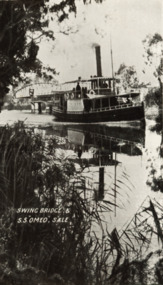
Postcard - S.S. Omeo, prior to 1915
Letter on back to Henry McMeeken from his sister Violet who was at Sale High School 8 November 1915Black and white postcard showing SS Omeo passing the swing bridge at Sale VictoriaN W Morrwey Stationer Saleships and shipping, correspondence -
 Buninyong & District Historical Society
Photograph - Copy of original photograph, Corduroy Bridge Hotel, Clarendon around 1914, Corduroy Bridge Hotel, Clarendon around 1914
BuildingsB&W copy of original photograph, Corduroy Bridge Hotel, Clarendon around 1914. Burnt down in 1916. -
 Emerald Museum & Nobelius Heritage Park
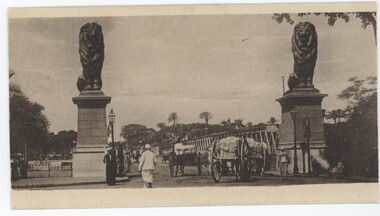
Postcard - Qasr El Nil Bridge Postcard, c. 1900s
This postcard is part of an album of postcards which date from late 19th century to mid 20th century.This postcard is in an album of postcards dating from the late 19th century to mid 20th century and, as such, indicate the popularity of postcards during that time.A postcard depicting the Qasr El Nil Bridge in Cairo.Back, very top, handwritten: 'On Active Service.' Back, top, printed: 'MARY POST CARD / CAIRO' Back, left, vertical: 'Cairo Brothers Editors - C[missing text]' Back, left, handwritten: '[missing text] I was / [missing text] at not getting / [missing text]ow you along / with the others, yesterday. / However, it is a pleasure / in store & up to the present / I h[missing text] been very fortunate / w[missing text]. Here were the / fi[missing text] is the / [missing text] Heaps of / lov[missing text]ec. son / Jack' Back, bottom left. printed: '[missing text] il Bridge' Back, right: 'Miss J.A. Crai[missing text] / Wedd[missing text]' Back, bottom right: '[missing text] / [missing text]stralia'postcard, 1900s, "green postcard album" -
 Emerald Museum & Nobelius Heritage Park
Postcard - Princes Bridge Postcard, c. 1900s
This postcard is part of an album of postcards which date from late 19th century to mid 20th century.This postcard is in an album of postcards dating from the late 19th century to mid 20th century and, as such, indicate the popularity of postcards during that time.Print postcard depicting Princes Bridge. Red one penny post stamp on back depicting Queen Victoria. On front: Under image: 'Princes Bridge.' On back: Left: '"Ailsa" / 10.7.05 / With best wishes / for present & / future. / Yours ever, / H. M. Craig' Right: 'Mr W. j Stuart / "Carlowrie" / Richmond Plains'postcard, 1900s, "green postcard album" -
 Lakes Entrance Historical Society
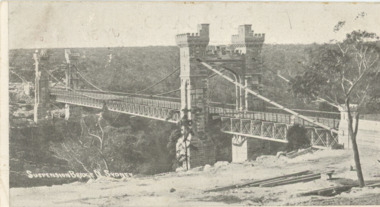
Postcard - Mary Lydia Laughton/Correspondence, 1905
Posted 31.7.1905 from N. S. W. to Miss Laughton Kalimna Lakes Entrance Victoria Message says Please keep this card for my collection am getting a few more Yours GBlack and white postcard of suspension bridge North Sydney showing bushland in distance Sydney Australia.Plus second photo showing details of message on rear side.city, correspondence, hobbies, hotels