Showing 613 items
matching bits
-
 Flagstaff Hill Maritime Museum and Village
Equipment - Block, Alexander Stephen and Sons, 1869
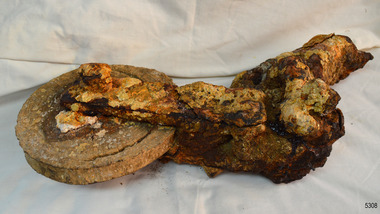
These remains of a block, shackle and wire are from the sailing ship Newfield. This would have been one of the hundreds of blocks and shackles used in the rigging of the vessel. The Newfield was a three-masted iron and steel barque, built in Dundee, Scotland, in 1869 by Alexander Stephen and Sons. It was owned by the Newfield Ship Company in 1890 and later that year It was registered in Liverpool to owners Brownells and Co. The Newfield left Sharpness, Scotland, on 28th May 1892 with a crew of 25 under the command of Captain George Scott and on 1st June left Liverpool. She was bound for Brisbane, Australia, with a cargo of 1850 tons of fine rock salt. On the night of 28 August 1892, the Captain mistook the Cape Otway light for that of Cape Wickham (King Island) and altered tack to the north and east putting the vessel on a collision course with the Victorian coast. At around 3:40 am the Newfield struck rocks about 100 yards from shore, and 5 feet of water filled the holds immediately. The captain gave orders to lower the boats which caused a disorganised scramble for safety among the crew. The starboard lifeboat was cleared for lowering with two seamen and two apprentices in her, but almost as soon as she touched the water she was smashed to bits against the side of the vessel, and only one of the four reached safety ashore, able seaman McLeod. The rough sea made the job of launching lifeboats very difficult. The first two lifeboats launched by the crew were smashed against the side of the ship and some men were crushed or swept away. The third lifeboat brought eight men to shore. It capsized when the crew tried to return it to the ship for further rescue The rescue was a difficult operation. The Port Campbell Rocket Crew arrived and fired four rocket lines, none of which connected with the ship. Peter Carmody, a local man, volunteered to swim about one mile offshore to the ship with a line to guide the fourth and final lifeboat safely to shore. He was assisted by James McKenzie and Gerard Irvine. Seventeen men survived the shipwreck but the captain and eight of his crew perished. The Newfield remained upright on the reef with sails set for a considerable time as the wind slowly ripped the canvas to shreds and the sea battered the hull to pieces. The Marine Board inquiry found the wreck was caused by a "one-man style of navigation" and that the Captain had not heeded the advice of his crew. For his heroic efforts, Peter Carmody was awarded the Bramley-Moore medal by the Liverpool Shipwreck and Humane Society for Saving Life at sea on January 21st 1893. The medal and a letter of congratulations were donated to Flagstaff Hill Maritime Museum by Peter Carmody's granddaughter Norma Bracken and her son Stuart Bracken on 25th May 2006. Flagstaff Hill’s collection of artefacts from the Newfield is significant for its association with the shipwreck Newfield, which is listed on the Victorian Heritage Registry. The collection is additionally significant because of the medal awarded to a local man Peter Carmody. The Newfield collection historically also represents aspects of Victoria's shipping history and its association with the shipwreck.This is what remains of a block, shackle and wire from the wreck of the sailing ship “Newfield”. The object is heavily encrusted. The exterior (cheeks) of the block is missing. The disc of the block has a channel part way around its face, about 2 cm from the edge. Two long, narrow plates are joined onto the centre of the disc’s face with a bolt through the centre. The other ends of the two plates join onto the elbow of the shackle. The elbow of the shackle is also joined onto a rod. At the other end of the rod can be seen the ends of thick wire strands.block, 1893, flagstaff hill, flagstaff hill maritime museum, peter carmody, newfield, 1892, port campbell, shipwreck, ship, victorian shipwrecks, barque, ship wreck, peterborough, sailing ship, 29 august 1892, block and shackle, curdies river, bramley-moore medal -
 Flagstaff Hill Maritime Museum and Village
Functional object - Porthole, Alexander Stephen and Sons, 1869
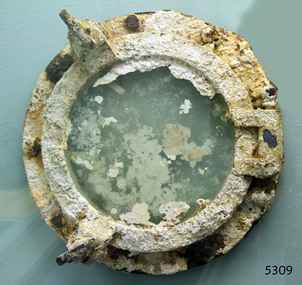
This large brass porthole is from the sailing ship Newfield this would have been one of the many port holes in the vessel used for light and ventilation. The Newfield was a three-masted iron and steel barque, built in Dundee, Scotland, in 1869 by Alexander Stephen and Sons. It was owned by the Newfield Ship Company in 1890 and later that year It was registered in Liverpool to owners Brownells and Co. The Newfield left Sharpness, Scotland, on 28th May 1892 with a crew of 25 under the command of Captain George Scott and on 1st June left Liverpool. She was bound for Brisbane, Australia, with a cargo of 1850 tons of fine rock salt. On the night of 28 August 1892, the Captain mistook the Cape Otway light for that of Cape Wickham (King Island) and altered tack to the north and east putting the vessel on a collision course with the Victorian coast. At around 3:40 am the Newfield struck rocks about 100 yards from shore, and 5 feet of water filled the holds immediately. The captain gave orders to lower the boats which caused a disorganised scramble for safety among the crew. The starboard lifeboat was cleared for lowering with two seamen and two apprentices in her, but almost as soon as she touched the water she was smashed to bits against the side of the vessel, and only one of the four reached safety ashore, able seaman McLeod. The rough sea made the job of launching lifeboats very difficult. The first two lifeboats launched by the crew were smashed against the side of the ship and some men were crushed or swept away. The third lifeboat brought eight men to shore. It capsized when the crew tried to return it to the ship for further rescue The rescue was a difficult operation. The Port Campbell Rocket Crew arrived and fired four rocket lines, none of which connected with the ship. Peter Carmody, a local man, volunteered to swim about one mile offshore to the ship with a line to guide the fourth and final lifeboat safely to shore. He was assisted by James McKenzie and Gerard Irvine. Seventeen men survived the shipwreck but the captain and eight of his crew perished. The Newfield remained upright on the reef with sails set for a considerable time as the wind slowly ripped the canvas to shreds and the sea battered the hull to pieces. The Marine Board inquiry found the wreck was caused by a "one-man style of navigation" and that the Captain had not heeded the advice of his crew. For his heroic efforts, Peter Carmody was awarded the Bramley-Moore medal by the Liverpool Shipwreck and Humane Society for Saving Life at sea on January 21st 1893. The medal and a letter of congratulations were donated to Flagstaff Hill Maritime Museum by Peter Carmody's granddaughter Norma Bracken and her son Stuart Bracken on 25th May 2006. Flagstaff Hill’s collection of artefacts from the Newfield is significant for its association with the shipwreck Newfield, which is listed on the Victorian Heritage Registry. The collection is additionally significant because of the medal awarded to a local man Peter Carmody. The Newfield collection historically also represents aspects of Victoria's shipping history and its association with the shipwreck.Heavily encrusted large brass porthole, complete with glass intact object is a circular, thick glass window surrounded by a round brass frame and attached to a round brass porthole frame with 9 bolt holes. This porthole was recovered from the wreck of the NEWFIELD.Nonewarrnambool, peter carmody, newfield, port campbell, shipwreck, nineteenth century, ship, victorian shipwrecks, peterborough, peter ronald, dog screw, newfield porthole, bramley-moore medal, flagstaff hill maritime museum, shipwreck artefact, ship fitting, ship window -
 Flagstaff Hill Maritime Museum and Village
Functional object - Skylight frame, Alexander Stephen and Sons, 1869
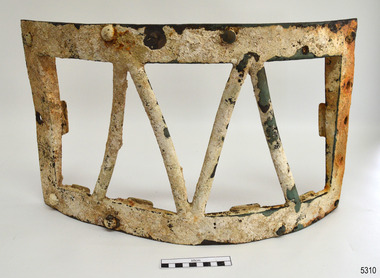
This skylight frame would have been fitted on the Newfield’s poop deck (or raised deck that forms the roof of a cabin at the aft or rear of the ship). It would have covered and protected a glass pane that allowed light to enter the area below desk. The glass pane from the skylight is missing. The Newfield was a three-masted iron and steel barque, built in Dundee, Scotland, in 1869 by Alexander Stephen and Sons. It was owned by the Newfield Ship Company in 1890 and later that year It was registered in Liverpool to owners Brownells and Co. The Newfield left Sharpness, Scotland, on 28th May 1892 with a crew of 25 under the command of Captain George Scott and on 1st June left Liverpool. She was bound for Brisbane, Australia, with a cargo of 1850 tons of fine rock salt. On the night of 28 August 1892, the Captain mistook the Cape Otway light for that of Cape Wickham (King Island) and altered tack to the north and east putting the vessel on a collision course with the Victorian coast. At around 3:40 am the Newfield struck rocks about 100 yards from shore, and 5 feet of water filled the holds immediately. The captain gave orders to lower the boats which caused a disorganised scramble for safety among the crew. The starboard lifeboat was cleared for lowering with two seamen and two apprentices in her, but almost as soon as she touched the water she was smashed to bits against the side of the vessel, and only one of the four reached safety ashore, able seaman McLeod. The rough sea made the job of launching lifeboats very difficult. The first two lifeboats launched by the crew were smashed against the side of the ship and some men were crushed or swept away. The third lifeboat brought eight men to shore. It capsized when the crew tried to return it to the ship for further rescue The rescue was a difficult operation. The Port Campbell Rocket Crew arrived and fired four rocket lines, none of which connected with the ship. Peter Carmody, a local man, volunteered to swim about one mile offshore to the ship with a line to guide the fourth and final lifeboat safely to shore. He was assisted by James McKenzie and Gerard Irvine. Seventeen men survived the shipwreck but the captain and eight of his crew perished. The Newfield remained upright on the reef with sails set for a considerable time as the wind slowly ripped the canvas to shreds and the sea battered the hull to pieces. The Marine Board inquiry found the wreck was caused by a "one-man style of navigation" and that the Captain had not heeded the advice of his crew. For his heroic efforts, Peter Carmody was awarded the Bramley-Moore medal by the Liverpool Shipwreck and Humane Society for Saving Life at sea on January 21st 1893. The medal and a letter of congratulations were donated to Flagstaff Hill Maritime Museum by Peter Carmody's granddaughter Norma Bracken and her son Stuart Bracken on 25th May 2006. Flagstaff Hill’s collection of artefacts from the Newfield is significant for its association with the shipwreck Newfield, which is listed on the Victorian Heritage Registry. The collection is additionally significant because of the medal awarded to a local man Peter Carmody. The Newfield collection historically also represents aspects of Victoria's shipping history and its association with the shipwreck.Skylight, frame only. The heavily encrusted brass framework has eight bolts around the long side, and four metal bars forming two ‘v’ shapes across the centre. The frame is, slightly concave towards the inner side. The shorter ends of the frame each have a ‘U’ shaped bracket attached in the centre. The shorter ends are wider on one end and taper towards the other end to about a quarter of the thickness. The frame was recovered from the wreck of the NEWFIELD.Noneflagstaff hill maritime museum, newfield ship wreck, alexander stephen & sons, brownells & co, captain george scott, great ocean road ship wreck, peter carmody, bramley-moore medal, liverpool shipwreck and humane society, skylight cover, skylight frame, ship fitting, light cover, newfield -
 Melton City Libraries
Letter, Letters from Fred to Mattie, 1910-11, 1913-14, 1916, 1920
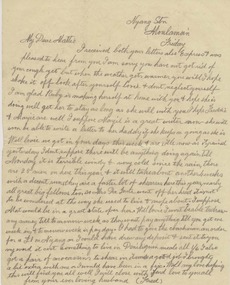
Letters sent to Martha (Mattie) dated from 1907 to 1920. Each letter is an edited version of the original pertaining to aspects of Fred Myers life as a shearer. Cobran Stn via Deniliquin Thursday Sept 1st 1910 …I got a reply from Eynesbury and a favourable reply, it starts on the 13th Oct so I will have plenty of time to get there, in fact far to much as we will finish here in a month full time so that will leave a fortnight to spare. We got rain here at last and it has put us back considerably as we only worked Monday. I have been idle ever since. We will probably start again Saturday. The weather has taken up nice and fine again…. I hope it will keep up to the cut out now I have 800 sheep shorn up to date and am fifth among thirty men so I’m doing well I think. Did you get the pound I sent? I’m sending two more this time, which I drew on Saturday. I don’t like sending too much as there is a chance of it going astray. Postcard Cobran Sept 18 1910 Just a note to let you know I am all right. I was disappointed not getting a letter yesterday, Saturday…I won’t get it now till next Saturday. We have three weeks here yet. I am sending 2 and tell me if you got the other 1. Cobran Stn via Deniliquin NSW Sunday 21st August (1911) ..I’m having a good time here, a good cook and the best of everything, no fires to lights or kettles to boil just get up and wire in but plenty of hard work. The sheep here a pretty rough but much better than Wandook. I am well among them here we had a little rain on Friday but not enough to stop us so we have got one full week in and the weather is now lovely I have been basking in the sunshine all morning and feel strong and fit as a fiddle. They are all a grand lot of men here I only knew one out of the lot but now them all pretty well now. We have a bit of a concert here every night almost. There are a few good singers here and we also had a phonograph up from the station with all the latest records. We have has two dances amongst ourselves, very boisterous affairs indeed they do make the dust fly. I have not ventured to take part in them yet and don’ think I will either. I get enough dancing all day long and besides I have to furnish the music. You ought to see them going when I rattle up the concertina they do make the dust fly. Sample of letters written by Fred Myers to his wife Mattie Myerslocal identities -
 Melbourne Tram Museum
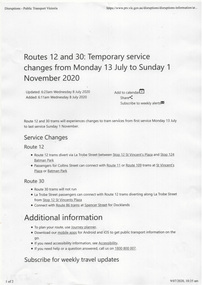
Ephemera - Timetable/s, Public Transport Victoria (PTV), Timetable Notice giving details of temporary changes to service as part of the COVID 19, 2020
Timetable Notice giving details of temporary changes to service as part of the COVID 19 response where route 12 diverted by La Trobe St, and thus provided a service along Spencer St. Route 30 was suspended. Route 11A was introduced between Docklands and St Vincent's Plaza. htd4777i1.pdf shows a timetable alteration, reduction of services after 8pm, introduction of the 8pm to 5am curfew and stage four restrictions that were to apply (hopefully) for a six week period. Set of 23 digital timetables generally applicable from 10-11-2019 and two timetables for route 11 and12 applicable from 13 July. This change was a bit confusing at the time. Image files are htd4777iRx - x being the route number. Route 1 - East Coburg - South Melbourne Beach Route 3 and 3A - Melbourne University - East Malvern - and via St Kilda Beach - two timetables for each Route 5 - Melbourne University - Malvern Route 6 - Melbourne University - Glen Iris Route 11 - West Preston - Victoria Harbour Docklands Route 12 - Victoria Gardens - St Kilda Route 16 - Melbourne University - Kew Via St Kilda Route 19 - North Coburg - Flinders St Route 30 - St Vincent's Plaza - Etihad Stadium Docklands - though the stadium was renamed Marvel after Marvel comics by Disney during May 2018. Route 35 - City Circle - NOT Published. Route 48 - North Balwyn - Victoria Harbour Docklands Route 55 - West Coburg - Domain Interchange Route 57 - West Maribyrnong - Flinders St Route 58 - Toorak to Route 59 - Airport West - Flinders St Route 64 - East Brighton - Melbourne University Route 67 - Carnegie - Melbourne University Route 70 - Wattle Park - Waterfront City Docklands Route 72 - Camberwell - Melbourne University Route 75 - Vermont South - Etihad Stadium Docklands Route 78 - North Richmond - Balaclava via Prahran Route 82 - Footscray - Moonee Ponds Route 86 - Bundoora RMIT - Waterfront City Docklands Route 96 - East Brunswick - St Kilda Beach Route 109 - Box Hill - Port Melbournetrams, tramways, timetables, yarra trams, route 1, route 3, route 5, route 6, route 8, route 11, route 11a, route 12, route 16, route 19, route 30, route 48, route 55, route 57, route 58, route 59, route 64, route 67, route 70, route 72, route 75, route 78, route 82, route 86, route 96, route 109, covid-19, st vincent's plaza, spencer st -
 Halls Gap & Grampians Historical Society
Newspaper - B/W
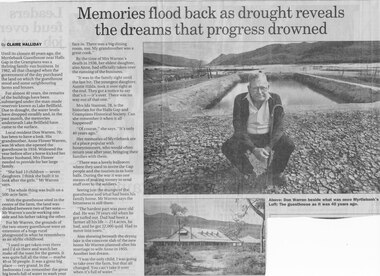
Until the closure 40 years ago, the Myrtlebank Guesthouse near Halls Gap in the Grampians was a thriving family - run business. In 1962, all that changed when the government of the day purchased the land on which the guesthouse stood and some neighbouring farms and houses. For almost 40 Years, the remains of the buildings have been submered under the man made reservoir known as Lake Bellfield. Due to drought, the eater levels have dropped steadily and, in the past month, the memories underneath Lake Bellfield have come to the surface. Local resident Don warren 70, has been to have a look. His grandmother Anne Flower Warren, was 56 when she opened the guesthouse in 1916. Widowed, the year before after a horse kicked her farmer husband, Mrs Flower needed to provide for their large family. "She had 13 children - seven daughters. I think she built it to look after the girls," Mr Warren says, "The whole think was built on a 500 acre farm." With the guesthouse sited in the centre of the farm, the land was divided between two of her sons- Mr Warren's uncle working one side and his father taking the other. For Mr Warren, the grounds of the two-storey guesthouse were an extension of a huge rural playground in what he remembers as an idyllic childhood. "I used to get taken over there and I'd sit there and watch her make all the toast for the guests. It was quite full all the time - maybe 40 or 50 people. It was a great big place - very grand. In the bedrooms I can remember the great big bowls full of water to wash your face in. There was a big dining room, too. My grandmother was a great cook." By the time of Mrs Warren's death in 1936, her eldest daughter also Anne, had officially taken over the running of the business. "It was in the family right until the last bit. The youngest daughter, Auntie Hilda, took it over right at the end. they got a notice to say that's it - it's over There was no way out of that one." Mrs Ida Stanton, 78, is the historian for the Halls Gap and Grampians Historical Society. Can she remember it when it all happened? "Of course" she says "It's only 40 years ago" Her memories of Myrtlebank are of a place popular with honeymooners, who would often return year after year, bringing their families with them. "There was a lovely ballroom where they used to invite the Gap people and the tourists in to have balls. During the war it was one means of making money to send stuff over to the soldiers." Seeing just the stumps of the guesthouse and what had been his family home, Mr Warren says the bitterness is still there. "The hardest part was poor old dad. He was 70 years old when he got turfed out. Dad had been a farmer all his life - 214 acres, he had, and he got 22,000 quid. Had to move into town" Also showing beneath the drying lake is the concrete slab of the new home Mr Warren planned after his marriage to wife Anne in 1955. Another lost dream. " I was the only child, I was going to take over the farm, but that all changed. You can't take it over when it's full of water.Newspaper clipping of history of Myrtlebank by Don Warren and photo of Don at old site of pooland guest House photo Article by Claire Halliday from newspaper 2002accommodation, guesthouses, myrtlebank -
 Flagstaff Hill Maritime Museum and Village
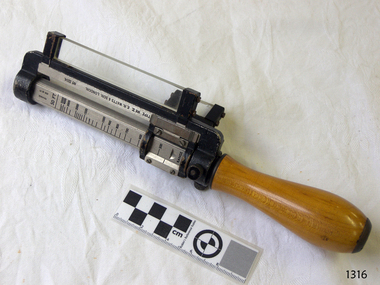
Rangefinder, E R Watts & Sons, 1930-1945
E. R. Watts and Son, makers of theodolites and other surveying instruments, of 123 Camberwell Road, London. The company was established in 1856 by Edwin Watts at twenty-three he had saved £100 from his earnings to start the business with his staff consisting of one boy and later Alexander Clarkson as an apprentice with the workshop a small room over a Bemondsey stable. Watts' first order was from Negretti and Zambra for a mining dial Alexander Clarkson In the early days the firm worked mainly on marine compasses. Edwin Watts would go down to the Docks to adjust the compasses once they had been installed on the ships. In May 1873 the business moved to larger premises a house with a garden. The workshop was also the home of Mr and Mrs Watts and their five sons and three daughters. By now there were fifteen to twenty men employed by the firm. The company were commissioned to supply the Theodolites and Levels for the construction to the Canadian Pacific Railway in 1881. Towards the end of the century, the firm began to make heliographs continuing to produce them for the government until just before the Second World War when by agreement assigned their manufacture to another firm. 1904 The first dividing engine was completed by George William Watts. It was so remarkable an instrument at the time and for years afterwards, In 1907 Arthur Ames went to Canada and started an organisation in Winnipeg in 1909 this became a separate company called E. R. Watts and Son Ltd. of Ottawa. This firm developed considerably and was eventually with the co-operation of three other instrument companies (Cambridge Instrument Co, Ross, and Negretti and Zambra), were reconstituted as ”Instruments Ltd” of Ottawa and Toronto. During the next ten years, the firm expanded greatly to include glass grinding, leather work, dividing and engraving, testing, adjusting and packing. This expansion was continued during the First World War when workshops were completed and the machinery installed and running within eleven weeks from the start of construction. During the war, a Sergeant Coles, among the rats, lice and mud of the trenches, fitted various bits of scrap into his cocoa tin and made the first Flash Spotter for plotting the positions of enemy guns. Coles was rushed home to the firm's factory where he and George William Watts designed a spotter not made out of a cocoa tin and as a result, the Watts Vertical Force Variometer was developed during WWI. Other Watts instruments made in the First World War included the Light Mountain Theodolites which were taken on Mt Everest expeditions. In 1919 ER Watts and Sons was incorporated as a limited company and in 1939 G. A. Whipple joined the Board of Directors. Shortly afterwards, Frank Charles Watts died having been Chairman of the firm for over 37 years and seen it through the First World War with all its expansions and difficulties. He was succeeded by his brother George William Watts with the vacant post of Managing Director being filled by G. A. Whipple. During the Second World War, the company expanded further and the number of employees rose to well over 1,300. In 1946 Watts acquired 78% of Adam Hilger and the microscope maker James Swift and Son Who were Manufacturers of Theodolites, Levels, Alidades, Meteorological Instruments, Variometers, and many other types of scientific instruments Then in 1948 the company amalgamated with Adam Hilger as Hilger and Watts which was then incorporated as a public company.Naval Rangefinder with a vertical wooden handle, and an arrangement of optical lenses. Three reversible brass inserts calibrated on both sides in yards, correspond to various base heights, (20 and 25 feet, 30 and 35 feet and 40 and 50 feet). They are fitted along the axis of the instrument. When the scale for the appropriate base height is selected and inserted, the carriage can be slid for coincidence and the distance read at the index mark on the sliding carriage.inscribed "Rangefinder Cotton Type Mk II" Calibrated scale up to 5000 yds (50 ft), 5000 yds (35 ft), 4000 yds (25 ft) made by E. R. Watts & Son.flagstaff hill, warrnambool, shipwrecked coast, flagstaff hill maritime museum, maritime museum, shipwreck coast, flagstaff hill maritime village, great ocean road, rangefinder, cotton type, e r watts & sons, naval range finder, marine equipment -
 Eltham District Historical Society Inc
Photograph, Eltham Hardware and Timber Co, Main Road, Eltham, opposite Railway Station. c.1952, 1952c
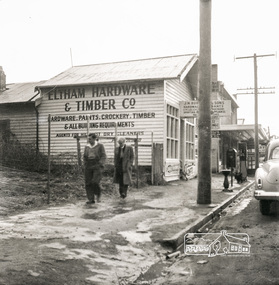
The Eltham Hardware and Timber Company first opened on Main Road opposite the Railway Station around late 1922. An advertisement placed in the Hurstbridge Advertiser advised that the Hardware Store had just opened with a varied stock of Saws, Hammers, Nails, Shovels, Screw Drivers, and every article required in a house or on a farm. People were also encouraged to try their Jams, Pickles, Sauces, Cups and Saucers, etc. A few months later in May 1923, William Walker, a plumber, placed an advertisement wishing to to announce that he had taken over the ELTHAM HARDWARE STORE, and asked for the continued support of the district. He also noted that all kinds of Plumbing work was done. Walker remained the proprietor of the Hardware Store for many years regularly advertising its services and wares up until at least 1941. The trail goes a bit quiet then but he does appear in the 1944 Electoral Roll listed as a Plumber, of Main Street, Eltham. However he is not listed in the 1949 Electoral Roll but his son, Thomas Roy Walker, also a plumber of Main Road is listed. Thomas had been on active duty overseas during the Second World War and returned at the end of 1945. It is assumed that William died sometime between 1945 and 1949. On November 18th, 1950 the Hardware Store and residence was auctioned on site by Scarff Bros. Pty Ltd. It is presumed that this is when J.N. Burgoyne and Sons took over the business. It would have been around this time the picture of the store was taken for only three years later, in October 1953, the business and dwelling was again put up for sale, this time by Trebilcock Bros, in two separate lots. LOT 1. — ELTHAM HARDWARE AND TIMBER CO. Freehold and Property, Plant, Fittings and Business; Plus Stock at Valuation. To be Sold as a Going Concern. THE FREEHOLD PROPERTY Comprises Large Brick and Timber Shop. Well Fitted. Has Good Light. Comfortable 3-Room Dwelling and Detached Bungalow, H.W.S., Phone, Garage and Outbuildings. Situate on Large Allotment, 50 Ft. x 150 Ft. Aprox. THE BUSINESS: Flourishing Hardware and Builders’ Supplies, Crockery, Glassware and Gifts, Dry Cleaning Agency and Petrol Reseller Licence (1 Bowser Installed), Oil Storage. Annual Turnover Aprox. £12,000. Audited Figures Available, Old-established Business Comprehensive Stock is Good, Clean and Saleable (Value Approx. £4000). TERMS: £1000 Deposit, Balance 30 Days. VACANT POSSESSION. LOT 2. — Superb Shop Sites. Adjoining the Above Property. Land 58 Ft. x 150 Ft. (Approx.). Erected on Land Is Old Style 4-r Timber Dwelling, Set Well Back from Footpath. Leaving Ample Apace to erect Shops. Also Small Shop Let as Agent’s Office. To Be Sold Subject to Existing Tenancies, Gross Rentals £106 12/ Per Annum. Terms: £1000 Deposit, Balance 30 days. GENERAL: Eltham Is a Rapidly Developing Area only 12 Miles from G.P.O. Street Frontage of these Two Adjoining Properties Is 108 Feet By Depth of 150 Feet in the Heart of Expanding Shopping Centre, directly Opposite Station Entrance. Full Details and Inspection Available on Application from the Auctioneers: TREBILCOCK BROS. AUCTIONEERS and ESTATE AGENTS, Coincidentally, the Hardware Store was taken over by Richard Phillip Trebilcock, an electrical engineer from Mayona Road, MontmorencyNegative black and white film 120 6x6 formatSingle frameeltham, main road, 1951 chevrolet deluxe, ampol, eltham hardware and timber, j.n. burgoyne and sons, petrol bowser, william walker, richard phillip trebilcock -
 Puffing Billy Railway
Equipment - Victorian Railways Carriage Foot Warmer
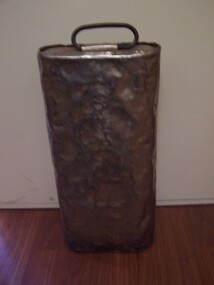
During prestige, long distance train journeys some carriages had air-conditioning, and the majority of passengers had to brave unheated carriages. To offer some comfort during the winter months, the non-air-conditioned carriages were provided with footwarmers. These were metal containers roughly 100 mm thick and 300 mm wide, and about 750 mm long, which were filled with salt crystals (concentrated crystalline hydrated sodium acetate). The footwarmers were covered by sleeves of thick canvas, and two footwarmers were usually placed in each compartment of non-air-conditioned carriages. To activate the chemicals, the footwarmers were heated almost to boiling point. This was done by removing the canvas sleeves and placing the footwarmers in a large bath of very hot water. After they had been heated, they were removed from the bath and the sleeves refitted. They were then ready to be placed in the carriages. The McLaren patent foot warmer was used on railways in New South Wales, Queensland, Victoria and South Australia as well as South Africa and New Zealand. It was during the 1901 royal visit by the Duke and Duchess of Cornwall that these foot warmers were first used in New Zealand in the royal carriage. Before railway carriage heating was introduced, McLaren patent foot warmers were placed on the floor of New South Wales government railway carriages from 1891 to provide a little passenger comfort. The rectangular steel container worked a bit like a hot water bottle but instead of water contained six and a half kilograms of loosely-packed salt crystals, (concentrated crystalline hydrated sodium acetate). This was permanently sealed inside the container with a soldered cap. After the foot warmer was heated in vat of boiling water for about one and a quarter hours the crystals became a hot liquid. (The melting point for sodium acetate is 58 degrees). There was a whole infrastructure of special furnaces set up at stations for the daily heating of foot warmers. By 1914 the Victorian railways had 4,000 foot warmers in service and by 1935 there were 33 furnaces at principal stations to heat them. After about 10 hours the container was picked up by the handle and given a good vertical shake which helped the cooled liquid reform into a solid mass of hot crystals. Staff or sometimes passengers shook them en route when the foot warmers began to get cold. However, as they were heavy this was only possible by fit and agile passengers. At the end of the journey the containers were boiled again for reuse on the next trip. Sodium acetate railway foot warmers were introduced in Victoria in 1889, Adelaide to Melbourne express in 1899. "Shaking up" on this service took place at Murray Bridge and Stawell on the tip to Melbourne and at Ballarat and Serviceton on the trip to Adelaide. The use of foot warmers began to decline in New South Wales from the 1930s with the first trial of carriage air-conditioning in 1936, steam heating from 1948 ad LP gas heating from 1961. By the early 1960s the main services using foot warmers were the overnight mail trains. info from : http://www.powerhousemuseum.com/collection/database/?irn=67564#ixzz4UBNzVf6t Under Creative Commons License: Attribution Non-Commercial There was a whole infrastructure set up at stations for the daily heating of foot warmers in special furnaces. In Victoria alone in 1935 there were 33 heating works.Historic - Victorian Railways - Carriage Heater - Foot warmerA rectangular-shaped stainless steel casing with a welded seam down the back and welded ends. There is a handle at one end for carrying and shaking. Inside the foot warmer are two baffle plates and three trays to contain the sodium acetate. There was a cast-iron ball in each internal compartment. puffing billy, victorian railways, carriage haeter, foot warmer, passenger comfort, station furnace, railway ephemera, early heating methods -
 Bendigo Historical Society Inc.
Document - NEW CHUM LINE OF REEF - NOTES ON SHAFT DETAILS ON THE NEW CHUM LINE OF REEF
Ten pages and one smaller page of notes showing depth of shaft, sill, size of shaft, relation to line of reef, depth bottom plat, depth to bottom of well, number of compartments, reference and remarks. Mines mentioned are: Young Chum, Old Chum (Old South), Shamrock, Shenandoah, New Chum Railway, Eureka Ext'd, South Belle Vue United, Lansell's 222, Denis Shaft, New Chum United, Ellesmere (North Shaft), New Chum Consolidated, Ellesmere No 1 or (South Shaft) also known as New Chum Coy, Garibaldi, Craven's, Lansell's Bit 180, North Old Chum, New Chum & Victoria, Old Chum, Lazarus New Chum Main, Lazarus New Chum (Old), Victoria Reef Gold (Ironbark), Victoria Consols, Adventure & Advance, Gt Central Victoria, Ballerstedt, Humbold, Victoria (Reef) Quartz, Pearl (later Hercules New Chum), Hercules Extended (Pearl (South) later, North Hercules, Hercules and Energetic, Hercules (Old),South Devonshire, Duchess Tribute, New St Mungo, Duke of Edinburgh, New Victoria Catherine (later Hercules Consols), Dixon's Tribute, Great Victoria Extended, Hopewell, Saxon & Celt Extended, St Mungo, Princess Alexander,West United Devonshire, United Devonshire, Duchess of Edinburgh, Sadowa, (Old) St Mungo, Lady Barkly, Princess Alice (South St Mungo) previously Gov. Barkly, Unicorn (Trib), Phoenix, Williams (New), Acadia Catherine, William United (Old Shaft), Snob's Hill Shaft, York & Durham, Belmont & Saxby, Ellenborough, Catherine Reef Extended, New Franklin, Murchison, Catherine Reef United Main Shaft, Catherine Reef United South Shaft. Small page has notes on the York and Durham: Reference - Matthew Mann - Mine Manager's Report 3/7/1893. This paragraph: Quote - 'Also measured main shaft from surface 1,430 and found it to be 1,416 feet and from Brace - 1,428 feet. Poppet legs 12 feet. Reference - Matthew Mann - Mine Manager's Report 15/7/1893 'Received cheque from La Belle Co. for 2 pound 13 shillings - which I payed into credit of Company'. Note: Report shows this to happen on several occasions. Note initialled AR.document, gold, new chum line of reef, new chum line of reef, notes on shaft details on the new chum line of reef, young chum, old chum (old south), shamrock, shenandoah, new chum railway, eureka ext'd, south belle vue united, lansell's 222, denis shaft, new chum united, ellesmere (north shaft), new chum consolidated, ellesmere no 1 or (south shaft) also known as new chum coy, garibaldi, craven's, lansell's bit 180, north old chum, new chum & victoria, old chum, lazarus new chum main, lazarus new chum (old), victoria reef gold (ironbark), victoria consols, adventure & advance, gt central victoria, ballerstedt, humbold, victoria (reef) quartz, pearl (later hercules new chum), hercules extended (pearl (south) later, north hercules, hercules and energetic, hercules (old), south devonshire, duchess tribute, new st mungo, duke of edinburgh, new victoria catherine (later hercules consols), dixon's tribute, great victoria extended, hopewell, saxon & celt extended, st mungo, princess alexander, west united devonshire, united devonshire, duchess of edinburgh, sadowa, (old) st mungo, lady barkly, princess alice (south st mungo) previously gov. barkly, unicorn (trib), phoenix, williams (new), acadia catherine, william united (old shaft), snob's hill shaft, york & durham, belmont & saxby, ellenborough, catherine reef extended, new franklin, murchison, catherine reef united main shaft, catherine reef united south shaft -
 Ballarat Tramway Museum
Ephemera - Ticket/s, State Electricity Commission of Victoria (SECV), Set of SEC predecimal tickets - Wal Jack Collection, 1960's
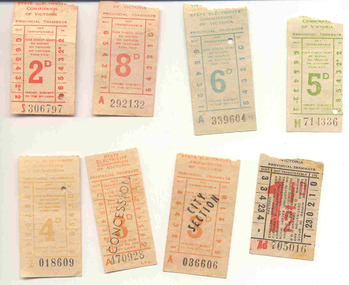
Yields information about the style and printing of tickets used in Ballarat tramways and how they were presented at the commencement of the SEC fare system. Generally issued c1963, some have dates on rear.Group of eight different pre-decimal values of used SEC Ballarat Tickets, ex the Wal Jack Collection. Tickets already held on the BTM system in blocks. All except .7, have a tartan or criss cross back. 1. - 5d Green (5 No. - B400836, B265927, W808385, B400835, Z742326) - note the same as Reg Items 3991 and 3994, though the printing of the section marks do vary a bit. These were not imaged. 2. - 5d Green (M714336) - imaged - has different section system on the side to the above - used 1/3/1963. 3. - 6d Teal - (34 No.) - some sequential - All A series. Note the same as Reg Item 3993. 4. - 6d Teal (L918047) - imaged 4009i4 - has different section system on the side to the above. 5. - 8d Red - (5 No. all A series, 292132 & 3, 206314, 315138 & 362937) - note the same as Reg Item 3984. 6. - 2d Red (S306797) - different section layout to Reg item 3986. 7. - 1 1/2d - (Ad705016) - black ticket, with red overprint of 1 1/2d fare and ticket prefix number - similar to Reg Item 2115, but different sectional layout. The section layout is the same as Reg Item 2116. Has Bushells Pty Ltd Tea advertisement on the rear. 8. - 3d City Section, Orange - (3No. A032622, 036606, 047637) - note the same as Reg Item 3982. All have dates on the rear - August 1963. 9. - 3d Concession - Orange, (A447731, 470928) - note the same as Reg Item 3989 and 4001. One has date of 1/3/63 on rear. 10 - 4d Brown (7 No. Y997727, 998446, Z004193, 005655, 012671, 018609 & 024899) - Some have dates of 1963 in pencil on the rear. Note the same as Reg Item 3995, though different series letter. All tickets and Reg Item 4006, 4007, 4010 to 4018 were received originally in a folded cloth wrapper - wax canvas? - with "All Since 1/3/1963 /3d Concession since 1/8/63" written in pencil on it. Stored with this item. See image btm4009i3. Tickets have not been formally numbered on the rear for this item No. All numbers recorded except for the 6d Teals. trams, tramways, secv, ticket -
 Flagstaff Hill Maritime Museum and Village
Domestic object - Bowl, Late 19th or early 20th Century
The Process of Making Pottery Decorating, Firing, Glazing, Making, Technical There is a rhythm and flow to clay. It can’t be done all at once! Even the making process! It can take weeks to get everything done, especially if you can only work on your pottery once a week! Even though we have three hour classes, it’s often just not enough time! Here is an overview of some of the processes so you have a bit more grasp on some of the technical stuff! Step One – Design There are SO many ideas out there for making stuff in clay! From delicate porcelain jewellery, through to heavy sculptural work and everything in between. Deciding your direction is sometimes not that easy – when you first start, try everything, you will naturally gravitate to the style that you enjoy! The options and variations are endless and can get a wee bit overwhelming too! Check in with me before you start to ensure your ideas will work, what order you might do things, how you could achieve the look you are seeking and any other technical data required! Step Two – Making Clay is thixotropic. This means that as you work with it, the clay first gets sloppier and wetter, before is begins to dry in the atmosphere. For most things, you simply can’t do all parts of the project at once. An example of work order might look like: Get last weeks work out from the shelves Prepare clay for today’s work – roll your clay, prepare balls for throwing, make the first stage of a pinch pot) Clean up last week’s work and put it on the shelf for bisque firing Check that you have any glazing to do – and do enough of it that you will have time to finish your main project Do the next step of your next project – there might be a further step that can’t be complete immediately, in that case, wrap your work well and put onto the shelves. Letting your work rest for a while can really help keep your work clean and professional looking. Many things require bagging under plastic to keep it ready for work the next week – put your name on the outside of the bag so you can find your work easily. We have stickers and markers. Consider how you want to decorate your work – coloured slip can be applied at a fairly wet stage (remembering that it will make your work even wetter!). Trying to apply slip to dry clay won’t work! If you want to do sgraffito – you will need to keep the work leather hard (a state of dryness where you can still work the clay with a little effort and a little water and care). Step Three – Drying Most of the time your work can go into the rack uncovered to let it dry out for the following week. If you want to continue forming or shaping you will need to double bag your work – put your work on a suitable sized bat and put the bat in a bag so the base of the bag is under the bat, then put another bag over the top of the work and tuck the top of the bag under the bat. If you want to trim (or turn) your thrown work the following week, it should also be double bagged. If your work is large, delicate, or of uneven thicknesses, you should lightly cover your work for drying. When considering the drying process, bare in mind the weather, humidity and wind! The hotter and dryer, the faster things dry and work can dry unevenly in the shelves – this can lead to cracking – another time to lightly cover your work for drying. Step Four – Trimming and Cleaning Up Your work is dry! It is called greenware now and it is at it’s most fragile! Handle everything with two hands. I often refer to soft hands – keep everything gentle and with your fingers spread as much as possible. Try to not pick up things like plates too much, and always with both hands! Before your work can be bisque fired it should be “cleaned up”. You work won’t go into the kiln if it has sharp edges – when glazed, sharp edges turn into razor blades! Use a piece of fly wire to rub the work all over – this will scratch a little so be light handed. Use a knife or metal kidney to scrape any areas that require a bit more dynamic treatment than the fly wire offers! Finally, a very light wipe over with a slightly damp sponge can help soften and soothe all of your edges and dags! Trimming thrown work: If you are planning to trim (or turn) your thrown work (and you should be), make sure you bag it well – your work should be leather hard to almost dry for easiest trimming. Use this step to finish the work completely – use a metal kidney to polish the surface, or a slightly damp sponge to give a freshly thrown look. Wipe the sponge around the rim after trimming, and check the inside of the pot for dags! Trimming slip cast work: Usually I will trim the rims of your work on the wheel the following day to make that stage easier, however you will still need to check your work for lumps and bumps. Last but not least – check that your name is still clearly on the bottom of your work. Step Five – Bisque Firing When the work is completely dry it can go into the bisque kiln. The bisque kiln is fired to 1000°C. This process burns off the water in the clay as well as some of the chemically bound water. The structure of the clay is not altered that much at this temperature. Inside the bisque kiln, the work is stacked a little, small bowl inside a larger bowl and onto a heavy plate. Smaller items like decorations or drink coasters might get stacked several high. Consideration is paid to the weight of the stack and shape of the work. A bisque kiln can fire about one and a half times the amount of work that the glaze kiln can fire. The firing takes about 10 hours to complete the cycle and about two days to cool down. Once it has been emptied the work is placed in the glaze room ready for you to decorate! Step Six – Glazing Decorating your work with colour can be a lot of fun – and time consuming! There are three main options for surface treatment at this stage: Oxide Washes Underglazes Glazes Washes and underglazes do not “glaze” the work – It will still need a layer of glaze to fully seal the clay (washes don’t need glaze on surfaces not designed for food or liquid as they can gloss up a little on their own). Underglazes are stable colourants that turn out pretty much how they look in the jar. They can be mixed with each other to form other colours and can be used like water colours to paint onto your work. Mostly they should have a clear glaze on top to seal them. Oxides are a different species – the pink oxide (cobalt) wash turns out bright blue for instance. They don’t always need a glaze on top, and some glazes can change the colour of the wash! The glazes need no other “glaze” on top! Be careful of unknown glaze interactions – you can put any combination of glaze in a bowl or on a plate, but only a single glaze on the outside of any vertical surface! Glazes are a chemical reaction under heat. We don’t know the exact chemicals in the Mayco glazes we use. I can guess by the way they interact with each other, however, on the whole, you need to test every idea you have, and not run the test on a vertical surface! Simply put, glaze is a layer of glass like substance that bonds with the clay underneath. Clay is made of silica, alumina and water. Glaze is made of mostly silica. Silica has a melting point of 1700°C and we fire to 1240°C. The silica requires a “flux” to help it melt at the lower temperature. Fluxes can be all sorts of chemicals – a common one is calcium – calcium has a melting point of 2500°C, however, together they both melt at a much lower temperature! Colourants are metal oxides like cobalt (blue), chrome (green through black), copper (green, blue, even red!), manganese (black, purple and pink) iron (red brown), etc. Different chemicals in the glaze can have dramatic effects. for example, barium carbonate (which we don’t use) turns manganese bright pink! Other elements can turn manganese dioxide brown, blue, purple and reddish brown. Manganese dioxide is a flux in and of itself as well. So, glazes that get their black and purple colours, often interact with other glazes and RUN! Our mirror black is a good example – it mixes really well with many glazes because it fluxes them – causes them to melt faster. It will also bring out many beautiful colours in the glazes because it’s black colouring most definitely comes from manganese dioxide! Glaze chemistry is a whole subject on it’s own! We use commercial Mayco glazes on purpose – for their huge range of colour possibilities, stability, cool interactions, artistic freedom with the ability to easily brush the glazes on and ease of use. We currently have almost 50 glazes on hand! A major project is to test the interactions of all glazes with each other. That is 2,500 test tiles!!!! I’m going to make the wall behind the wheels the feature wall of pretty colours! Step Seven – Glaze (Gloss or sometimes called “Glost”) Firing Most of the time this is the final stage of making your creation (but not always!) The glaze kiln goes to 1240°C. This is called cone 6, or midrange. It is the low end of stoneware temperatures. Stoneware clays and glazes are typically fired at cone 8 – 10, that is 1260 – 1290°C. The energy requirement to go from 1240°C to 1280°C is almost a 30% more! Our clay is formulated to vitrify (mature, turn “glass-like”) at 1240°, as are our glazes. A glaze kiln take around 12 hours to reach temperature and two to three days to cool down. Sometimes a third firing process is required – this is for decoration that is added to work after the glaze firing. For example – adding precious metals and lustres. this firing temperature is usually around 600 – 800°C depending upon the techniques being used. There are many students interested in gold and silver trims – we will be doing this third type of firing soon! After firing your work will be in the student finished work shelves. Remember to pay for it before you head out the door! There is a small extra charge for using porcelain clay (it’s more than twice the price of regular clay), and for any third firing process! Once your work has been fired it can not turn back into clay for millennia – so don’t fire it if you don’t like it! Put it in the bucket for recycling. https://firebirdstudios.com.au/the-process-of-making-pottery/ The bowl is an example of kitchenware used in the 19th century and still in use today.Bowl white ceramic. Crack on side. Badly stained.Backstamp very faint and unable to be read.flagstaff hill, warrnambool, shipwrecked-coast, flagstaff-hill, flagstaff-hill-maritime-museum, maritime-museum, shipwreck-coast, flagstaff-hill-maritime-village, mixing bowl, food preparation, kitchen equipment, ceramic -
 Flagstaff Hill Maritime Museum and Village
Domestic object - Bowl
The Process of Making Pottery Decorating, Firing, Glazing, Making, Technical There is a rhythm and flow to clay. It can’t be done all at once! Even the making process! It can take weeks to get everything done, especially if you can only work on your pottery once a week! Even though we have three hour classes, it’s often just not enough time! Here is an overview of some of the processes so you have a bit more grasp on some of the technical stuff! Step One – Design There are SO many ideas out there for making stuff in clay! From delicate porcelain jewellery, through to heavy sculptural work and everything in between. Deciding your direction is sometimes not that easy – when you first start, try everything, you will naturally gravitate to the style that you enjoy! The options and variations are endless and can get a wee bit overwhelming too! Check in with me before you start to ensure your ideas will work, what order you might do things, how you could achieve the look you are seeking and any other technical data required! Step Two – Making Clay is thixotropic. This means that as you work with it, the clay first gets sloppier and wetter, before is begins to dry in the atmosphere. For most things, you simply can’t do all parts of the project at once. An example of work order might look like: Get last weeks work out from the shelves Prepare clay for today’s work – roll your clay, prepare balls for throwing, make the first stage of a pinch pot) Clean up last week’s work and put it on the shelf for bisque firing Check that you have any glazing to do – and do enough of it that you will have time to finish your main project Do the next step of your next project – there might be a further step that can’t be complete immediately, in that case, wrap your work well and put onto the shelves. Letting your work rest for a while can really help keep your work clean and professional looking. Many things require bagging under plastic to keep it ready for work the next week – put your name on the outside of the bag so you can find your work easily. We have stickers and markers. Consider how you want to decorate your work – coloured slip can be applied at a fairly wet stage (remembering that it will make your work even wetter!). Trying to apply slip to dry clay won’t work! If you want to do sgraffito – you will need to keep the work leather hard (a state of dryness where you can still work the clay with a little effort and a little water and care). Step Three – Drying Most of the time your work can go into the rack uncovered to let it dry out for the following week. If you want to continue forming or shaping you will need to double bag your work – put your work on a suitable sized bat and put the bat in a bag so the base of the bag is under the bat, then put another bag over the top of the work and tuck the top of the bag under the bat. If you want to trim (or turn) your thrown work the following week, it should also be double bagged. If your work is large, delicate, or of uneven thicknesses, you should lightly cover your work for drying. When considering the drying process, bare in mind the weather, humidity and wind! The hotter and dryer, the faster things dry and work can dry unevenly in the shelves – this can lead to cracking – another time to lightly cover your work for drying. Step Four – Trimming and Cleaning Up Your work is dry! It is called greenware now and it is at it’s most fragile! Handle everything with two hands. I often refer to soft hands – keep everything gentle and with your fingers spread as much as possible. Try to not pick up things like plates too much, and always with both hands! Before your work can be bisque fired it should be “cleaned up”. You work won’t go into the kiln if it has sharp edges – when glazed, sharp edges turn into razor blades! Use a piece of fly wire to rub the work all over – this will scratch a little so be light handed. Use a knife or metal kidney to scrape any areas that require a bit more dynamic treatment than the fly wire offers! Finally, a very light wipe over with a slightly damp sponge can help soften and soothe all of your edges and dags! Trimming thrown work: If you are planning to trim (or turn) your thrown work (and you should be), make sure you bag it well – your work should be leather hard to almost dry for easiest trimming. Use this step to finish the work completely – use a metal kidney to polish the surface, or a slightly damp sponge to give a freshly thrown look. Wipe the sponge around the rim after trimming, and check the inside of the pot for dags! Trimming slip cast work: Usually I will trim the rims of your work on the wheel the following day to make that stage easier, however you will still need to check your work for lumps and bumps. Last but not least – check that your name is still clearly on the bottom of your work. Step Five – Bisque Firing When the work is completely dry it can go into the bisque kiln. The bisque kiln is fired to 1000°C. This process burns off the water in the clay as well as some of the chemically bound water. The structure of the clay is not altered that much at this temperature. Inside the bisque kiln, the work is stacked a little, small bowl inside a larger bowl and onto a heavy plate. Smaller items like decorations or drink coasters might get stacked several high. Consideration is paid to the weight of the stack and shape of the work. A bisque kiln can fire about one and a half times the amount of work that the glaze kiln can fire. The firing takes about 10 hours to complete the cycle and about two days to cool down. Once it has been emptied the work is placed in the glaze room ready for you to decorate! Step Six – Glazing Decorating your work with colour can be a lot of fun – and time consuming! There are three main options for surface treatment at this stage: Oxide Washes Underglazes Glazes Washes and underglazes do not “glaze” the work – It will still need a layer of glaze to fully seal the clay (washes don’t need glaze on surfaces not designed for food or liquid as they can gloss up a little on their own). Underglazes are stable colourants that turn out pretty much how they look in the jar. They can be mixed with each other to form other colours and can be used like water colours to paint onto your work. Mostly they should have a clear glaze on top to seal them. Oxides are a different species – the pink oxide (cobalt) wash turns out bright blue for instance. They don’t always need a glaze on top, and some glazes can change the colour of the wash! The glazes need no other “glaze” on top! Be careful of unknown glaze interactions – you can put any combination of glaze in a bowl or on a plate, but only a single glaze on the outside of any vertical surface! Glazes are a chemical reaction under heat. We don’t know the exact chemicals in the Mayco glazes we use. I can guess by the way they interact with each other, however, on the whole, you need to test every idea you have, and not run the test on a vertical surface! Simply put, glaze is a layer of glass like substance that bonds with the clay underneath. Clay is made of silica, alumina and water. Glaze is made of mostly silica. Silica has a melting point of 1700°C and we fire to 1240°C. The silica requires a “flux” to help it melt at the lower temperature. Fluxes can be all sorts of chemicals – a common one is calcium – calcium has a melting point of 2500°C, however, together they both melt at a much lower temperature! Colourants are metal oxides like cobalt (blue), chrome (green through black), copper (green, blue, even red!), manganese (black, purple and pink) iron (red brown), etc. Different chemicals in the glaze can have dramatic effects. for example, barium carbonate (which we don’t use) turns manganese bright pink! Other elements can turn manganese dioxide brown, blue, purple and reddish brown. Manganese dioxide is a flux in and of itself as well. So, glazes that get their black and purple colours, often interact with other glazes and RUN! Our mirror black is a good example – it mixes really well with many glazes because it fluxes them – causes them to melt faster. It will also bring out many beautiful colours in the glazes because it’s black colouring most definitely comes from manganese dioxide! Glaze chemistry is a whole subject on it’s own! We use commercial Mayco glazes on purpose – for their huge range of colour possibilities, stability, cool interactions, artistic freedom with the ability to easily brush the glazes on and ease of use. We currently have almost 50 glazes on hand! A major project is to test the interactions of all glazes with each other. That is 2,500 test tiles!!!! I’m going to make the wall behind the wheels the feature wall of pretty colours! Step Seven – Glaze (Gloss or sometimes called “Glost”) Firing Most of the time this is the final stage of making your creation (but not always!) The glaze kiln goes to 1240°C. This is called cone 6, or midrange. It is the low end of stoneware temperatures. Stoneware clays and glazes are typically fired at cone 8 – 10, that is 1260 – 1290°C. The energy requirement to go from 1240°C to 1280°C is almost a 30% more! Our clay is formulated to vitrify (mature, turn “glass-like”) at 1240°, as are our glazes. A glaze kiln take around 12 hours to reach temperature and two to three days to cool down. Sometimes a third firing process is required – this is for decoration that is added to work after the glaze firing. For example – adding precious metals and lustres. this firing temperature is usually around 600 – 800°C depending upon the techniques being used. There are many students interested in gold and silver trims – we will be doing this third type of firing soon! After firing your work will be in the student finished work shelves. Remember to pay for it before you head out the door! There is a small extra charge for using porcelain clay (it’s more than twice the price of regular clay), and for any third firing process! Once your work has been fired it can not turn back into clay for millennia – so don’t fire it if you don’t like it! Put it in the bucket for recycling. https://firebirdstudios.com.au/the-process-of-making-pottery/ This bowl is an example of kitchenware used in the 19th century and still in use today.Bowl white ceramic plain that has two sets of edging around lip. Inside bowl has plaster designed to look like cooking mixture.flagstaff hill, warrnambool, shipwrecked-coast, flagstaff-hill, flagstaff-hill-maritime-museum, maritime-museum, shipwreck-coast, flagstaff-hill-maritime-village, kitchen equipment, ceramic -
 Flagstaff Hill Maritime Museum and Village
Domestic object - Bowl, J & G Meakin, Late 19th or early 20th Century
The Process of Making Pottery Decorating, Firing, Glazing, Making, Technical There is a rhythm and flow to clay. It can’t be done all at once! Even the making process! It can take weeks to get everything done, especially if you can only work on your pottery once a week! Even though we have three hour classes, it’s often just not enough time! Here is an overview of some of the processes so you have a bit more grasp on some of the technical stuff! Step One – Design There are SO many ideas out there for making stuff in clay! From delicate porcelain jewellery, through to heavy sculptural work and everything in between. Deciding your direction is sometimes not that easy – when you first start, try everything, you will naturally gravitate to the style that you enjoy! The options and variations are endless and can get a wee bit overwhelming too! Check in with me before you start to ensure your ideas will work, what order you might do things, how you could achieve the look you are seeking and any other technical data required! Step Two – Making Clay is thixotropic. This means that as you work with it, the clay first gets sloppier and wetter, before is begins to dry in the atmosphere. For most things, you simply can’t do all parts of the project at once. An example of work order might look like: Get last weeks work out from the shelves Prepare clay for today’s work – roll your clay, prepare balls for throwing, make the first stage of a pinch pot) Clean up last week’s work and put it on the shelf for bisque firing Check that you have any glazing to do – and do enough of it that you will have time to finish your main project Do the next step of your next project – there might be a further step that can’t be complete immediately, in that case, wrap your work well and put onto the shelves. Letting your work rest for a while can really help keep your work clean and professional looking. Many things require bagging under plastic to keep it ready for work the next week – put your name on the outside of the bag so you can find your work easily. We have stickers and markers. Consider how you want to decorate your work – coloured slip can be applied at a fairly wet stage (remembering that it will make your work even wetter!). Trying to apply slip to dry clay won’t work! If you want to do sgraffito – you will need to keep the work leather hard (a state of dryness where you can still work the clay with a little effort and a little water and care). Step Three – Drying Most of the time your work can go into the rack uncovered to let it dry out for the following week. If you want to continue forming or shaping you will need to double bag your work – put your work on a suitable sized bat and put the bat in a bag so the base of the bag is under the bat, then put another bag over the top of the work and tuck the top of the bag under the bat. If you want to trim (or turn) your thrown work the following week, it should also be double bagged. If your work is large, delicate, or of uneven thicknesses, you should lightly cover your work for drying. When considering the drying process, bare in mind the weather, humidity and wind! The hotter and dryer, the faster things dry and work can dry unevenly in the shelves – this can lead to cracking – another time to lightly cover your work for drying. Step Four – Trimming and Cleaning Up Your work is dry! It is called greenware now and it is at it’s most fragile! Handle everything with two hands. I often refer to soft hands – keep everything gentle and with your fingers spread as much as possible. Try to not pick up things like plates too much, and always with both hands! Before your work can be bisque fired it should be “cleaned up”. You work won’t go into the kiln if it has sharp edges – when glazed, sharp edges turn into razor blades! Use a piece of fly wire to rub the work all over – this will scratch a little so be light handed. Use a knife or metal kidney to scrape any areas that require a bit more dynamic treatment than the fly wire offers! Finally, a very light wipe over with a slightly damp sponge can help soften and soothe all of your edges and dags! Trimming thrown work: If you are planning to trim (or turn) your thrown work (and you should be), make sure you bag it well – your work should be leather hard to almost dry for easiest trimming. Use this step to finish the work completely – use a metal kidney to polish the surface, or a slightly damp sponge to give a freshly thrown look. Wipe the sponge around the rim after trimming, and check the inside of the pot for dags! Trimming slip cast work: Usually I will trim the rims of your work on the wheel the following day to make that stage easier, however you will still need to check your work for lumps and bumps. Last but not least – check that your name is still clearly on the bottom of your work. Step Five – Bisque Firing When the work is completely dry it can go into the bisque kiln. The bisque kiln is fired to 1000°C. This process burns off the water in the clay as well as some of the chemically bound water. The structure of the clay is not altered that much at this temperature. Inside the bisque kiln, the work is stacked a little, small bowl inside a larger bowl and onto a heavy plate. Smaller items like decorations or drink coasters might get stacked several high. Consideration is paid to the weight of the stack and shape of the work. A bisque kiln can fire about one and a half times the amount of work that the glaze kiln can fire. The firing takes about 10 hours to complete the cycle and about two days to cool down. Once it has been emptied the work is placed in the glaze room ready for you to decorate! Step Six – Glazing Decorating your work with colour can be a lot of fun – and time consuming! There are three main options for surface treatment at this stage: Oxide Washes Underglazes Glazes Washes and underglazes do not “glaze” the work – It will still need a layer of glaze to fully seal the clay (washes don’t need glaze on surfaces not designed for food or liquid as they can gloss up a little on their own). Underglazes are stable colourants that turn out pretty much how they look in the jar. They can be mixed with each other to form other colours and can be used like water colours to paint onto your work. Mostly they should have a clear glaze on top to seal them. Oxides are a different species – the pink oxide (cobalt) wash turns out bright blue for instance. They don’t always need a glaze on top, and some glazes can change the colour of the wash! The glazes need no other “glaze” on top! Be careful of unknown glaze interactions – you can put any combination of glaze in a bowl or on a plate, but only a single glaze on the outside of any vertical surface! Glazes are a chemical reaction under heat. We don’t know the exact chemicals in the Mayco glazes we use. I can guess by the way they interact with each other, however, on the whole, you need to test every idea you have, and not run the test on a vertical surface! Simply put, glaze is a layer of glass like substance that bonds with the clay underneath. Clay is made of silica, alumina and water. Glaze is made of mostly silica. Silica has a melting point of 1700°C and we fire to 1240°C. The silica requires a “flux” to help it melt at the lower temperature. Fluxes can be all sorts of chemicals – a common one is calcium – calcium has a melting point of 2500°C, however, together they both melt at a much lower temperature! Colourants are metal oxides like cobalt (blue), chrome (green through black), copper (green, blue, even red!), manganese (black, purple and pink) iron (red brown), etc. Different chemicals in the glaze can have dramatic effects. for example, barium carbonate (which we don’t use) turns manganese bright pink! Other elements can turn manganese dioxide brown, blue, purple and reddish brown. Manganese dioxide is a flux in and of itself as well. So, glazes that get their black and purple colours, often interact with other glazes and RUN! Our mirror black is a good example – it mixes really well with many glazes because it fluxes them – causes them to melt faster. It will also bring out many beautiful colours in the glazes because it’s black colouring most definitely comes from manganese dioxide! Glaze chemistry is a whole subject on it’s own! We use commercial Mayco glazes on purpose – for their huge range of colour possibilities, stability, cool interactions, artistic freedom with the ability to easily brush the glazes on and ease of use. We currently have almost 50 glazes on hand! A major project is to test the interactions of all glazes with each other. That is 2,500 test tiles!!!! I’m going to make the wall behind the wheels the feature wall of pretty colours! Step Seven – Glaze (Gloss or sometimes called “Glost”) Firing Most of the time this is the final stage of making your creation (but not always!) The glaze kiln goes to 1240°C. This is called cone 6, or midrange. It is the low end of stoneware temperatures. Stoneware clays and glazes are typically fired at cone 8 – 10, that is 1260 – 1290°C. The energy requirement to go from 1240°C to 1280°C is almost a 30% more! Our clay is formulated to vitrify (mature, turn “glass-like”) at 1240°, as are our glazes. A glaze kiln take around 12 hours to reach temperature and two to three days to cool down. Sometimes a third firing process is required – this is for decoration that is added to work after the glaze firing. For example – adding precious metals and lustres. this firing temperature is usually around 600 – 800°C depending upon the techniques being used. There are many students interested in gold and silver trims – we will be doing this third type of firing soon! After firing your work will be in the student finished work shelves. Remember to pay for it before you head out the door! There is a small extra charge for using porcelain clay (it’s more than twice the price of regular clay), and for any third firing process! Once your work has been fired it can not turn back into clay for millennia – so don’t fire it if you don’t like it! Put it in the bucket for recycling. https://firebirdstudios.com.au/the-process-of-making-pottery/This bowl was made by renowned pottery company J & G Meakin of England. The firm was established in the mid-1800's. The bowl is an example of kitchenware used in the 19th century and still in use today.Bowl; white ceramic, round and tapering inwards towards base. Made by J and G Meakin England.On base, 'Ironstone China Reg SOL 391413' with symbolflagstaff hill, flagstaff hill maritime museum and village, warrnambool, maritime museum, maritime village, great ocean road, shipwreck coast, mixing bowl, food preparation, j & g meakin, pottery, stoke-on-trent, kitchen equipment, ceramic -
 Flagstaff Hill Maritime Museum and Village
Domestic object - Plate
The Process of Making Pottery Decorating, Firing, Glazing, Making, Technical There is a rhythm and flow to clay. It can’t be done all at once! Even the making process! It can take weeks to get everything done, especially if you can only work on your pottery once a week! Even though we have three hour classes, it’s often just not enough time! Here is an overview of some of the processes so you have a bit more grasp on some of the technical stuff! Step One – Design There are SO many ideas out there for making stuff in clay! From delicate porcelain jewellery, through to heavy sculptural work and everything in between. Deciding your direction is sometimes not that easy – when you first start, try everything, you will naturally gravitate to the style that you enjoy! The options and variations are endless and can get a wee bit overwhelming too! Check in with me before you start to ensure your ideas will work, what order you might do things, how you could achieve the look you are seeking and any other technical data required! Step Two – Making Clay is thixotropic. This means that as you work with it, the clay first gets sloppier and wetter, before is begins to dry in the atmosphere. For most things, you simply can’t do all parts of the project at once. An example of work order might look like: Get last weeks work out from the shelves Prepare clay for today’s work – roll your clay, prepare balls for throwing, make the first stage of a pinch pot) Clean up last week’s work and put it on the shelf for bisque firing Check that you have any glazing to do – and do enough of it that you will have time to finish your main project Do the next step of your next project – there might be a further step that can’t be complete immediately, in that case, wrap your work well and put onto the shelves. Letting your work rest for a while can really help keep your work clean and professional looking. Many things require bagging under plastic to keep it ready for work the next week – put your name on the outside of the bag so you can find your work easily. We have stickers and markers. Consider how you want to decorate your work – coloured slip can be applied at a fairly wet stage (remembering that it will make your work even wetter!). Trying to apply slip to dry clay won’t work! If you want to do sgraffito – you will need to keep the work leather hard (a state of dryness where you can still work the clay with a little effort and a little water and care). Step Three – Drying Most of the time your work can go into the rack uncovered to let it dry out for the following week. If you want to continue forming or shaping you will need to double bag your work – put your work on a suitable sized bat and put the bat in a bag so the base of the bag is under the bat, then put another bag over the top of the work and tuck the top of the bag under the bat. If you want to trim (or turn) your thrown work the following week, it should also be double bagged. If your work is large, delicate, or of uneven thicknesses, you should lightly cover your work for drying. When considering the drying process, bare in mind the weather, humidity and wind! The hotter and dryer, the faster things dry and work can dry unevenly in the shelves – this can lead to cracking – another time to lightly cover your work for drying. Step Four – Trimming and Cleaning Up Your work is dry! It is called greenware now and it is at it’s most fragile! Handle everything with two hands. I often refer to soft hands – keep everything gentle and with your fingers spread as much as possible. Try to not pick up things like plates too much, and always with both hands! Before your work can be bisque fired it should be “cleaned up”. You work won’t go into the kiln if it has sharp edges – when glazed, sharp edges turn into razor blades! Use a piece of fly wire to rub the work all over – this will scratch a little so be light handed. Use a knife or metal kidney to scrape any areas that require a bit more dynamic treatment than the fly wire offers! Finally, a very light wipe over with a slightly damp sponge can help soften and soothe all of your edges and dags! Trimming thrown work: If you are planning to trim (or turn) your thrown work (and you should be), make sure you bag it well – your work should be leather hard to almost dry for easiest trimming. Use this step to finish the work completely – use a metal kidney to polish the surface, or a slightly damp sponge to give a freshly thrown look. Wipe the sponge around the rim after trimming, and check the inside of the pot for dags! Trimming slip cast work: Usually I will trim the rims of your work on the wheel the following day to make that stage easier, however you will still need to check your work for lumps and bumps. Last but not least – check that your name is still clearly on the bottom of your work. Step Five – Bisque Firing When the work is completely dry it can go into the bisque kiln. The bisque kiln is fired to 1000°C. This process burns off the water in the clay as well as some of the chemically bound water. The structure of the clay is not altered that much at this temperature. Inside the bisque kiln, the work is stacked a little, small bowl inside a larger bowl and onto a heavy plate. Smaller items like decorations or drink coasters might get stacked several high. Consideration is paid to the weight of the stack and shape of the work. A bisque kiln can fire about one and a half times the amount of work that the glaze kiln can fire. The firing takes about 10 hours to complete the cycle and about two days to cool down. Once it has been emptied the work is placed in the glaze room ready for you to decorate! Step Six – Glazing Decorating your work with colour can be a lot of fun – and time consuming! There are three main options for surface treatment at this stage: Oxide Washes Underglazes Glazes Washes and underglazes do not “glaze” the work – It will still need a layer of glaze to fully seal the clay (washes don’t need glaze on surfaces not designed for food or liquid as they can gloss up a little on their own). Underglazes are stable colourants that turn out pretty much how they look in the jar. They can be mixed with each other to form other colours and can be used like water colours to paint onto your work. Mostly they should have a clear glaze on top to seal them. Oxides are a different species – the pink oxide (cobalt) wash turns out bright blue for instance. They don’t always need a glaze on top, and some glazes can change the colour of the wash! The glazes need no other “glaze” on top! Be careful of unknown glaze interactions – you can put any combination of glaze in a bowl or on a plate, but only a single glaze on the outside of any vertical surface! Glazes are a chemical reaction under heat. We don’t know the exact chemicals in the Mayco glazes we use. I can guess by the way they interact with each other, however, on the whole, you need to test every idea you have, and not run the test on a vertical surface! Simply put, glaze is a layer of glass like substance that bonds with the clay underneath. Clay is made of silica, alumina and water. Glaze is made of mostly silica. Silica has a melting point of 1700°C and we fire to 1240°C. The silica requires a “flux” to help it melt at the lower temperature. Fluxes can be all sorts of chemicals – a common one is calcium – calcium has a melting point of 2500°C, however, together they both melt at a much lower temperature! Colourants are metal oxides like cobalt (blue), chrome (green through black), copper (green, blue, even red!), manganese (black, purple and pink) iron (red brown), etc. Different chemicals in the glaze can have dramatic effects. for example, barium carbonate (which we don’t use) turns manganese bright pink! Other elements can turn manganese dioxide brown, blue, purple and reddish brown. Manganese dioxide is a flux in and of itself as well. So, glazes that get their black and purple colours, often interact with other glazes and RUN! Our mirror black is a good example – it mixes really well with many glazes because it fluxes them – causes them to melt faster. It will also bring out many beautiful colours in the glazes because it’s black colouring most definitely comes from manganese dioxide! Glaze chemistry is a whole subject on it’s own! We use commercial Mayco glazes on purpose – for their huge range of colour possibilities, stability, cool interactions, artistic freedom with the ability to easily brush the glazes on and ease of use. We currently have almost 50 glazes on hand! A major project is to test the interactions of all glazes with each other. That is 2,500 test tiles!!!! I’m going to make the wall behind the wheels the feature wall of pretty colours! Step Seven – Glaze (Gloss or sometimes called “Glost”) Firing Most of the time this is the final stage of making your creation (but not always!) The glaze kiln goes to 1240°C. This is called cone 6, or midrange. It is the low end of stoneware temperatures. Stoneware clays and glazes are typically fired at cone 8 – 10, that is 1260 – 1290°C. The energy requirement to go from 1240°C to 1280°C is almost a 30% more! Our clay is formulated to vitrify (mature, turn “glass-like”) at 1240°, as are our glazes. A glaze kiln take around 12 hours to reach temperature and two to three days to cool down. Sometimes a third firing process is required – this is for decoration that is added to work after the glaze firing. For example – adding precious metals and lustres. this firing temperature is usually around 600 – 800°C depending upon the techniques being used. There are many students interested in gold and silver trims – we will be doing this third type of firing soon! After firing your work will be in the student finished work shelves. Remember to pay for it before you head out the door! There is a small extra charge for using porcelain clay (it’s more than twice the price of regular clay), and for any third firing process! Once your work has been fired it can not turn back into clay for millennia – so don’t fire it if you don’t like it! Put it in the bucket for recycling. https://firebirdstudios.com.au/the-process-of-making-pottery/Ceramics have evolved over thousands of years.White earthenware dinner plate. Crazing evident all over.Backstamped ‘Made in England S LTD’flagstaff hill, warrnambool, shipwrecked-coast, flagstaff-hill, flagstaff-hill-maritime-museum, maritime-museum, shipwreck-coast, flagstaff-hill-maritime-village, ceramics, tableware -
 Flagstaff Hill Maritime Museum and Village
Domestic object - Plate, Johnson Bros
The Process of Making Pottery Decorating, Firing, Glazing, Making, Technical There is a rhythm and flow to clay. It can’t be done all at once! Even the making process! It can take weeks to get everything done, especially if you can only work on your pottery once a week! Even though we have three hour classes, it’s often just not enough time! Here is an overview of some of the processes so you have a bit more grasp on some of the technical stuff! Step One – Design There are SO many ideas out there for making stuff in clay! From delicate porcelain jewellery, through to heavy sculptural work and everything in between. Deciding your direction is sometimes not that easy – when you first start, try everything, you will naturally gravitate to the style that you enjoy! The options and variations are endless and can get a wee bit overwhelming too! Check in with me before you start to ensure your ideas will work, what order you might do things, how you could achieve the look you are seeking and any other technical data required! Step Two – Making Clay is thixotropic. This means that as you work with it, the clay first gets sloppier and wetter, before is begins to dry in the atmosphere. For most things, you simply can’t do all parts of the project at once. An example of work order might look like: Get last weeks work out from the shelves Prepare clay for today’s work – roll your clay, prepare balls for throwing, make the first stage of a pinch pot) Clean up last week’s work and put it on the shelf for bisque firing Check that you have any glazing to do – and do enough of it that you will have time to finish your main project Do the next step of your next project – there might be a further step that can’t be complete immediately, in that case, wrap your work well and put onto the shelves. Letting your work rest for a while can really help keep your work clean and professional looking. Many things require bagging under plastic to keep it ready for work the next week – put your name on the outside of the bag so you can find your work easily. We have stickers and markers. Consider how you want to decorate your work – coloured slip can be applied at a fairly wet stage (remembering that it will make your work even wetter!). Trying to apply slip to dry clay won’t work! If you want to do sgraffito – you will need to keep the work leather hard (a state of dryness where you can still work the clay with a little effort and a little water and care). Step Three – Drying Most of the time your work can go into the rack uncovered to let it dry out for the following week. If you want to continue forming or shaping you will need to double bag your work – put your work on a suitable sized bat and put the bat in a bag so the base of the bag is under the bat, then put another bag over the top of the work and tuck the top of the bag under the bat. If you want to trim (or turn) your thrown work the following week, it should also be double bagged. If your work is large, delicate, or of uneven thicknesses, you should lightly cover your work for drying. When considering the drying process, bare in mind the weather, humidity and wind! The hotter and dryer, the faster things dry and work can dry unevenly in the shelves – this can lead to cracking – another time to lightly cover your work for drying. Step Four – Trimming and Cleaning Up Your work is dry! It is called greenware now and it is at it’s most fragile! Handle everything with two hands. I often refer to soft hands – keep everything gentle and with your fingers spread as much as possible. Try to not pick up things like plates too much, and always with both hands! Before your work can be bisque fired it should be “cleaned up”. You work won’t go into the kiln if it has sharp edges – when glazed, sharp edges turn into razor blades! Use a piece of fly wire to rub the work all over – this will scratch a little so be light handed. Use a knife or metal kidney to scrape any areas that require a bit more dynamic treatment than the fly wire offers! Finally, a very light wipe over with a slightly damp sponge can help soften and soothe all of your edges and dags! Trimming thrown work: If you are planning to trim (or turn) your thrown work (and you should be), make sure you bag it well – your work should be leather hard to almost dry for easiest trimming. Use this step to finish the work completely – use a metal kidney to polish the surface, or a slightly damp sponge to give a freshly thrown look. Wipe the sponge around the rim after trimming, and check the inside of the pot for dags! Trimming slip cast work: Usually I will trim the rims of your work on the wheel the following day to make that stage easier, however you will still need to check your work for lumps and bumps. Last but not least – check that your name is still clearly on the bottom of your work. Step Five – Bisque Firing When the work is completely dry it can go into the bisque kiln. The bisque kiln is fired to 1000°C. This process burns off the water in the clay as well as some of the chemically bound water. The structure of the clay is not altered that much at this temperature. Inside the bisque kiln, the work is stacked a little, small bowl inside a larger bowl and onto a heavy plate. Smaller items like decorations or drink coasters might get stacked several high. Consideration is paid to the weight of the stack and shape of the work. A bisque kiln can fire about one and a half times the amount of work that the glaze kiln can fire. The firing takes about 10 hours to complete the cycle and about two days to cool down. Once it has been emptied the work is placed in the glaze room ready for you to decorate! Step Six – Glazing Decorating your work with colour can be a lot of fun – and time consuming! There are three main options for surface treatment at this stage: Oxide Washes Underglazes Glazes Washes and underglazes do not “glaze” the work – It will still need a layer of glaze to fully seal the clay (washes don’t need glaze on surfaces not designed for food or liquid as they can gloss up a little on their own). Underglazes are stable colourants that turn out pretty much how they look in the jar. They can be mixed with each other to form other colours and can be used like water colours to paint onto your work. Mostly they should have a clear glaze on top to seal them. Oxides are a different species – the pink oxide (cobalt) wash turns out bright blue for instance. They don’t always need a glaze on top, and some glazes can change the colour of the wash! The glazes need no other “glaze” on top! Be careful of unknown glaze interactions – you can put any combination of glaze in a bowl or on a plate, but only a single glaze on the outside of any vertical surface! Glazes are a chemical reaction under heat. We don’t know the exact chemicals in the Mayco glazes we use. I can guess by the way they interact with each other, however, on the whole, you need to test every idea you have, and not run the test on a vertical surface! Simply put, glaze is a layer of glass like substance that bonds with the clay underneath. Clay is made of silica, alumina and water. Glaze is made of mostly silica. Silica has a melting point of 1700°C and we fire to 1240°C. The silica requires a “flux” to help it melt at the lower temperature. Fluxes can be all sorts of chemicals – a common one is calcium – calcium has a melting point of 2500°C, however, together they both melt at a much lower temperature! Colourants are metal oxides like cobalt (blue), chrome (green through black), copper (green, blue, even red!), manganese (black, purple and pink) iron (red brown), etc. Different chemicals in the glaze can have dramatic effects. for example, barium carbonate (which we don’t use) turns manganese bright pink! Other elements can turn manganese dioxide brown, blue, purple and reddish brown. Manganese dioxide is a flux in and of itself as well. So, glazes that get their black and purple colours, often interact with other glazes and RUN! Our mirror black is a good example – it mixes really well with many glazes because it fluxes them – causes them to melt faster. It will also bring out many beautiful colours in the glazes because it’s black colouring most definitely comes from manganese dioxide! Glaze chemistry is a whole subject on it’s own! We use commercial Mayco glazes on purpose – for their huge range of colour possibilities, stability, cool interactions, artistic freedom with the ability to easily brush the glazes on and ease of use. We currently have almost 50 glazes on hand! A major project is to test the interactions of all glazes with each other. That is 2,500 test tiles!!!! I’m going to make the wall behind the wheels the feature wall of pretty colours! Step Seven – Glaze (Gloss or sometimes called “Glost”) Firing Most of the time this is the final stage of making your creation (but not always!) The glaze kiln goes to 1240°C. This is called cone 6, or midrange. It is the low end of stoneware temperatures. Stoneware clays and glazes are typically fired at cone 8 – 10, that is 1260 – 1290°C. The energy requirement to go from 1240°C to 1280°C is almost a 30% more! Our clay is formulated to vitrify (mature, turn “glass-like”) at 1240°, as are our glazes. A glaze kiln take around 12 hours to reach temperature and two to three days to cool down. Sometimes a third firing process is required – this is for decoration that is added to work after the glaze firing. For example – adding precious metals and lustres. this firing temperature is usually around 600 – 800°C depending upon the techniques being used. There are many students interested in gold and silver trims – we will be doing this third type of firing soon! After firing your work will be in the student finished work shelves. Remember to pay for it before you head out the door! There is a small extra charge for using porcelain clay (it’s more than twice the price of regular clay), and for any third firing process! Once your work has been fired it can not turn back into clay for millennia – so don’t fire it if you don’t like it! Put it in the bucket for recycling. https://firebirdstudios.com.au/the-process-of-making-pottery/Ceramics have evolved over thousands of years.A white earthenware side plate with a gadroon edge. Has water marks and chips on front.‘Johnson Bros England Reg No 15587’flagstaff hill, warrnambool, shipwrecked-coast, flagstaff-hill, flagstaff-hill-maritime-museum, maritime-museum, shipwreck-coast, flagstaff-hill-maritime-village, johnson bros, ceramics, tableware -
 Flagstaff Hill Maritime Museum and Village
Domestic object - Plate, Alfred Meakin
The Process of Making Pottery Decorating, Firing, Glazing, Making, Technical There is a rhythm and flow to clay. It can’t be done all at once! Even the making process! It can take weeks to get everything done, especially if you can only work on your pottery once a week! Even though we have three hour classes, it’s often just not enough time! Here is an overview of some of the processes so you have a bit more grasp on some of the technical stuff! Step One – Design There are SO many ideas out there for making stuff in clay! From delicate porcelain jewellery, through to heavy sculptural work and everything in between. Deciding your direction is sometimes not that easy – when you first start, try everything, you will naturally gravitate to the style that you enjoy! The options and variations are endless and can get a wee bit overwhelming too! Check in with me before you start to ensure your ideas will work, what order you might do things, how you could achieve the look you are seeking and any other technical data required! Step Two – Making Clay is thixotropic. This means that as you work with it, the clay first gets sloppier and wetter, before is begins to dry in the atmosphere. For most things, you simply can’t do all parts of the project at once. An example of work order might look like: Get last weeks work out from the shelves Prepare clay for today’s work – roll your clay, prepare balls for throwing, make the first stage of a pinch pot) Clean up last week’s work and put it on the shelf for bisque firing Check that you have any glazing to do – and do enough of it that you will have time to finish your main project Do the next step of your next project – there might be a further step that can’t be complete immediately, in that case, wrap your work well and put onto the shelves. Letting your work rest for a while can really help keep your work clean and professional looking. Many things require bagging under plastic to keep it ready for work the next week – put your name on the outside of the bag so you can find your work easily. We have stickers and markers. Consider how you want to decorate your work – coloured slip can be applied at a fairly wet stage (remembering that it will make your work even wetter!). Trying to apply slip to dry clay won’t work! If you want to do sgraffito – you will need to keep the work leather hard (a state of dryness where you can still work the clay with a little effort and a little water and care). Step Three – Drying Most of the time your work can go into the rack uncovered to let it dry out for the following week. If you want to continue forming or shaping you will need to double bag your work – put your work on a suitable sized bat and put the bat in a bag so the base of the bag is under the bat, then put another bag over the top of the work and tuck the top of the bag under the bat. If you want to trim (or turn) your thrown work the following week, it should also be double bagged. If your work is large, delicate, or of uneven thicknesses, you should lightly cover your work for drying. When considering the drying process, bare in mind the weather, humidity and wind! The hotter and dryer, the faster things dry and work can dry unevenly in the shelves – this can lead to cracking – another time to lightly cover your work for drying. Step Four – Trimming and Cleaning Up Your work is dry! It is called greenware now and it is at it’s most fragile! Handle everything with two hands. I often refer to soft hands – keep everything gentle and with your fingers spread as much as possible. Try to not pick up things like plates too much, and always with both hands! Before your work can be bisque fired it should be “cleaned up”. You work won’t go into the kiln if it has sharp edges – when glazed, sharp edges turn into razor blades! Use a piece of fly wire to rub the work all over – this will scratch a little so be light handed. Use a knife or metal kidney to scrape any areas that require a bit more dynamic treatment than the fly wire offers! Finally, a very light wipe over with a slightly damp sponge can help soften and soothe all of your edges and dags! Trimming thrown work: If you are planning to trim (or turn) your thrown work (and you should be), make sure you bag it well – your work should be leather hard to almost dry for easiest trimming. Use this step to finish the work completely – use a metal kidney to polish the surface, or a slightly damp sponge to give a freshly thrown look. Wipe the sponge around the rim after trimming, and check the inside of the pot for dags! Trimming slip cast work: Usually I will trim the rims of your work on the wheel the following day to make that stage easier, however you will still need to check your work for lumps and bumps. Last but not least – check that your name is still clearly on the bottom of your work. Step Five – Bisque Firing When the work is completely dry it can go into the bisque kiln. The bisque kiln is fired to 1000°C. This process burns off the water in the clay as well as some of the chemically bound water. The structure of the clay is not altered that much at this temperature. Inside the bisque kiln, the work is stacked a little, small bowl inside a larger bowl and onto a heavy plate. Smaller items like decorations or drink coasters might get stacked several high. Consideration is paid to the weight of the stack and shape of the work. A bisque kiln can fire about one and a half times the amount of work that the glaze kiln can fire. The firing takes about 10 hours to complete the cycle and about two days to cool down. Once it has been emptied the work is placed in the glaze room ready for you to decorate! Step Six – Glazing Decorating your work with colour can be a lot of fun – and time consuming! There are three main options for surface treatment at this stage: Oxide Washes Underglazes Glazes Washes and underglazes do not “glaze” the work – It will still need a layer of glaze to fully seal the clay (washes don’t need glaze on surfaces not designed for food or liquid as they can gloss up a little on their own). Underglazes are stable colourants that turn out pretty much how they look in the jar. They can be mixed with each other to form other colours and can be used like water colours to paint onto your work. Mostly they should have a clear glaze on top to seal them. Oxides are a different species – the pink oxide (cobalt) wash turns out bright blue for instance. They don’t always need a glaze on top, and some glazes can change the colour of the wash! The glazes need no other “glaze” on top! Be careful of unknown glaze interactions – you can put any combination of glaze in a bowl or on a plate, but only a single glaze on the outside of any vertical surface! Glazes are a chemical reaction under heat. We don’t know the exact chemicals in the Mayco glazes we use. I can guess by the way they interact with each other, however, on the whole, you need to test every idea you have, and not run the test on a vertical surface! Simply put, glaze is a layer of glass like substance that bonds with the clay underneath. Clay is made of silica, alumina and water. Glaze is made of mostly silica. Silica has a melting point of 1700°C and we fire to 1240°C. The silica requires a “flux” to help it melt at the lower temperature. Fluxes can be all sorts of chemicals – a common one is calcium – calcium has a melting point of 2500°C, however, together they both melt at a much lower temperature! Colourants are metal oxides like cobalt (blue), chrome (green through black), copper (green, blue, even red!), manganese (black, purple and pink) iron (red brown), etc. Different chemicals in the glaze can have dramatic effects. for example, barium carbonate (which we don’t use) turns manganese bright pink! Other elements can turn manganese dioxide brown, blue, purple and reddish brown. Manganese dioxide is a flux in and of itself as well. So, glazes that get their black and purple colours, often interact with other glazes and RUN! Our mirror black is a good example – it mixes really well with many glazes because it fluxes them – causes them to melt faster. It will also bring out many beautiful colours in the glazes because it’s black colouring most definitely comes from manganese dioxide! Glaze chemistry is a whole subject on it’s own! We use commercial Mayco glazes on purpose – for their huge range of colour possibilities, stability, cool interactions, artistic freedom with the ability to easily brush the glazes on and ease of use. We currently have almost 50 glazes on hand! A major project is to test the interactions of all glazes with each other. That is 2,500 test tiles!!!! I’m going to make the wall behind the wheels the feature wall of pretty colours! Step Seven – Glaze (Gloss or sometimes called “Glost”) Firing Most of the time this is the final stage of making your creation (but not always!) The glaze kiln goes to 1240°C. This is called cone 6, or midrange. It is the low end of stoneware temperatures. Stoneware clays and glazes are typically fired at cone 8 – 10, that is 1260 – 1290°C. The energy requirement to go from 1240°C to 1280°C is almost a 30% more! Our clay is formulated to vitrify (mature, turn “glass-like”) at 1240°, as are our glazes. A glaze kiln take around 12 hours to reach temperature and two to three days to cool down. Sometimes a third firing process is required – this is for decoration that is added to work after the glaze firing. For example – adding precious metals and lustres. this firing temperature is usually around 600 – 800°C depending upon the techniques being used. There are many students interested in gold and silver trims – we will be doing this third type of firing soon! After firing your work will be in the student finished work shelves. Remember to pay for it before you head out the door! There is a small extra charge for using porcelain clay (it’s more than twice the price of regular clay), and for any third firing process! Once your work has been fired it can not turn back into clay for millennia – so don’t fire it if you don’t like it! Put it in the bucket for recycling. https://firebirdstudios.com.au/the-process-of-making-pottery/Ceramics have evolved over thousands of years.Earthenware dessert plate, cream colour. Made by Alfred Meakin, England. Backstamped ‘Alfred Meakin England’. flagstaff hill, warrnambool, shipwrecked-coast, flagstaff-hill, flagstaff-hill-maritime-museum, maritime-museum, shipwreck-coast, flagstaff-hill-maritime-village, alfred meakin, ceramics, earthenware, kitchenware -
 Flagstaff Hill Maritime Museum and Village
Domestic object - Jug
The Process of Making Pottery Decorating, Firing, Glazing, Making, Technical There is a rhythm and flow to clay. It can’t be done all at once! Even the making process! It can take weeks to get everything done, especially if you can only work on your pottery once a week! Even though we have three hour classes, it’s often just not enough time! Here is an overview of some of the processes so you have a bit more grasp on some of the technical stuff! Step One – Design There are SO many ideas out there for making stuff in clay! From delicate porcelain jewellery, through to heavy sculptural work and everything in between. Deciding your direction is sometimes not that easy – when you first start, try everything, you will naturally gravitate to the style that you enjoy! The options and variations are endless and can get a wee bit overwhelming too! Check in with me before you start to ensure your ideas will work, what order you might do things, how you could achieve the look you are seeking and any other technical data required! Step Two – Making Clay is thixotropic. This means that as you work with it, the clay first gets sloppier and wetter, before is begins to dry in the atmosphere. For most things, you simply can’t do all parts of the project at once. An example of work order might look like: Get last weeks work out from the shelves Prepare clay for today’s work – roll your clay, prepare balls for throwing, make the first stage of a pinch pot) Clean up last week’s work and put it on the shelf for bisque firing Check that you have any glazing to do – and do enough of it that you will have time to finish your main project Do the next step of your next project – there might be a further step that can’t be complete immediately, in that case, wrap your work well and put onto the shelves. Letting your work rest for a while can really help keep your work clean and professional looking. Many things require bagging under plastic to keep it ready for work the next week – put your name on the outside of the bag so you can find your work easily. We have stickers and markers. Consider how you want to decorate your work – coloured slip can be applied at a fairly wet stage (remembering that it will make your work even wetter!). Trying to apply slip to dry clay won’t work! If you want to do sgraffito – you will need to keep the work leather hard (a state of dryness where you can still work the clay with a little effort and a little water and care). Step Three – Drying Most of the time your work can go into the rack uncovered to let it dry out for the following week. If you want to continue forming or shaping you will need to double bag your work – put your work on a suitable sized bat and put the bat in a bag so the base of the bag is under the bat, then put another bag over the top of the work and tuck the top of the bag under the bat. If you want to trim (or turn) your thrown work the following week, it should also be double bagged. If your work is large, delicate, or of uneven thicknesses, you should lightly cover your work for drying. When considering the drying process, bare in mind the weather, humidity and wind! The hotter and dryer, the faster things dry and work can dry unevenly in the shelves – this can lead to cracking – another time to lightly cover your work for drying. Step Four – Trimming and Cleaning Up Your work is dry! It is called greenware now and it is at it’s most fragile! Handle everything with two hands. I often refer to soft hands – keep everything gentle and with your fingers spread as much as possible. Try to not pick up things like plates too much, and always with both hands! Before your work can be bisque fired it should be “cleaned up”. You work won’t go into the kiln if it has sharp edges – when glazed, sharp edges turn into razor blades! Use a piece of fly wire to rub the work all over – this will scratch a little so be light handed. Use a knife or metal kidney to scrape any areas that require a bit more dynamic treatment than the fly wire offers! Finally, a very light wipe over with a slightly damp sponge can help soften and soothe all of your edges and dags! Trimming thrown work: If you are planning to trim (or turn) your thrown work (and you should be), make sure you bag it well – your work should be leather hard to almost dry for easiest trimming. Use this step to finish the work completely – use a metal kidney to polish the surface, or a slightly damp sponge to give a freshly thrown look. Wipe the sponge around the rim after trimming, and check the inside of the pot for dags! Trimming slip cast work: Usually I will trim the rims of your work on the wheel the following day to make that stage easier, however you will still need to check your work for lumps and bumps. Last but not least – check that your name is still clearly on the bottom of your work. Step Five – Bisque Firing When the work is completely dry it can go into the bisque kiln. The bisque kiln is fired to 1000°C. This process burns off the water in the clay as well as some of the chemically bound water. The structure of the clay is not altered that much at this temperature. Inside the bisque kiln, the work is stacked a little, small bowl inside a larger bowl and onto a heavy plate. Smaller items like decorations or drink coasters might get stacked several high. Consideration is paid to the weight of the stack and shape of the work. A bisque kiln can fire about one and a half times the amount of work that the glaze kiln can fire. The firing takes about 10 hours to complete the cycle and about two days to cool down. Once it has been emptied the work is placed in the glaze room ready for you to decorate! Step Six – Glazing Decorating your work with colour can be a lot of fun – and time consuming! There are three main options for surface treatment at this stage: Oxide Washes Underglazes Glazes Washes and underglazes do not “glaze” the work – It will still need a layer of glaze to fully seal the clay (washes don’t need glaze on surfaces not designed for food or liquid as they can gloss up a little on their own). Underglazes are stable colourants that turn out pretty much how they look in the jar. They can be mixed with each other to form other colours and can be used like water colours to paint onto your work. Mostly they should have a clear glaze on top to seal them. Oxides are a different species – the pink oxide (cobalt) wash turns out bright blue for instance. They don’t always need a glaze on top, and some glazes can change the colour of the wash! The glazes need no other “glaze” on top! Be careful of unknown glaze interactions – you can put any combination of glaze in a bowl or on a plate, but only a single glaze on the outside of any vertical surface! Glazes are a chemical reaction under heat. We don’t know the exact chemicals in the Mayco glazes we use. I can guess by the way they interact with each other, however, on the whole, you need to test every idea you have, and not run the test on a vertical surface! Simply put, glaze is a layer of glass like substance that bonds with the clay underneath. Clay is made of silica, alumina and water. Glaze is made of mostly silica. Silica has a melting point of 1700°C and we fire to 1240°C. The silica requires a “flux” to help it melt at the lower temperature. Fluxes can be all sorts of chemicals – a common one is calcium – calcium has a melting point of 2500°C, however, together they both melt at a much lower temperature! Colourants are metal oxides like cobalt (blue), chrome (green through black), copper (green, blue, even red!), manganese (black, purple and pink) iron (red brown), etc. Different chemicals in the glaze can have dramatic effects. for example, barium carbonate (which we don’t use) turns manganese bright pink! Other elements can turn manganese dioxide brown, blue, purple and reddish brown. Manganese dioxide is a flux in and of itself as well. So, glazes that get their black and purple colours, often interact with other glazes and RUN! Our mirror black is a good example – it mixes really well with many glazes because it fluxes them – causes them to melt faster. It will also bring out many beautiful colours in the glazes because it’s black colouring most definitely comes from manganese dioxide! Glaze chemistry is a whole subject on it’s own! We use commercial Mayco glazes on purpose – for their huge range of colour possibilities, stability, cool interactions, artistic freedom with the ability to easily brush the glazes on and ease of use. We currently have almost 50 glazes on hand! A major project is to test the interactions of all glazes with each other. That is 2,500 test tiles!!!! I’m going to make the wall behind the wheels the feature wall of pretty colours! Step Seven – Glaze (Gloss or sometimes called “Glost”) Firing Most of the time this is the final stage of making your creation (but not always!) The glaze kiln goes to 1240°C. This is called cone 6, or midrange. It is the low end of stoneware temperatures. Stoneware clays and glazes are typically fired at cone 8 – 10, that is 1260 – 1290°C. The energy requirement to go from 1240°C to 1280°C is almost a 30% more! Our clay is formulated to vitrify (mature, turn “glass-like”) at 1240°, as are our glazes. A glaze kiln take around 12 hours to reach temperature and two to three days to cool down. Sometimes a third firing process is required – this is for decoration that is added to work after the glaze firing. For example – adding precious metals and lustres. this firing temperature is usually around 600 – 800°C depending upon the techniques being used. There are many students interested in gold and silver trims – we will be doing this third type of firing soon! After firing your work will be in the student finished work shelves. Remember to pay for it before you head out the door! There is a small extra charge for using porcelain clay (it’s more than twice the price of regular clay), and for any third firing process! Once your work has been fired it can not turn back into clay for millennia – so don’t fire it if you don’t like it! Put it in the bucket for recycling. https://firebirdstudios.com.au/the-process-of-making-pottery/The form of the jug has been in use for many centuries.Stoneware jug. Two tone brown glaze with pierced lip behind spout. Spout chipped.None.flagstaff hill, warrnambool, shipwrecked-coast, flagstaff-hill, flagstaff-hill-maritime-museum, maritime-museum, shipwreck-coast, flagstaff-hill-maritime-village, jug, ceramic jug -
 National Wool Museum
Program, Dennys Lascelles Limited: Staff Reunion at the National Wool Centre 1988
A copy of both the ‘Dennys Lascelles Limited 1857-1957: Annual Wool Report & Centenary Review’ & ‘Staff Reunion Souvenir Programme, 1988’ was donated to the museum in 2021. These were duplicate items so only their story was retained in addition to the image of Rita located in Multimedia. “Enclose two items which may be of interest to add to your collection. They belonged to my mother, Rita Sedgwick (nee Glenn), who died earlier this year in April. She worked for Dennys Lascelles in two separate periods. First as a young girl, who had finished her schooling, at Morongo Presbyterian ladies College, having been sent as boarder there by her parents from their farm at Mathoura (just north of Echuca). This period was from 1942 — 1947. It was her second job out of school having worked first at the then Geelong Telephone Exchange. She would commute daily to work on a bicycle from where she was then living in Drumcondra. She had the front office role of receptionist and telephonist driving an old manual switchboard. The old front desk was her domain. She departed in 1947, shortly after she was married in late 1946. She spoke fondly of her times at the company as a young girl in her late teens and early twenties. Her second stint was much later, but again as the front-desk telephonist and receptionist commencing in 1972, ending 11 years later in 1983. This was a period when Sir Henry Bolte was on the Board, Don Urqhuart was MD, Ray Hobson was General Manger, Cliff Bone the company Secretary, Peter Keys the CFO and Jim Hay was also on the Executive team. While there were some 25 years between her periods of service, she welcomed the chance to re-join the company. Again, it was a time of hard work, and good friends. The busy times were the wool auctions, when the Firm would be visited by representatives of the big Japanese trading houses such as Mitsui, and Kanematsu. The Chief Auctioneer, Mr. Reeves (I can't recall his first name), would hold court at the now demolished Geelong Wool Exchange — I saw him in action once — what a sight. The huge show floors in the Denny's building would be full of open bales and samples for the buyers to inspect, and for mum days would start at 0800, and finish at 1800 or later. In quieter times over summer, it was reported that the empty show floor would provide an excellent arena for the more enthusiastic cricketers to get in a bit of practise with a tennis ball at lunch and after closing time! Dennys was a full-service firm for wool growers, with branches all over the Western Districts as far afield as Mt Gambier, but through Timboon, Warrnambool, and the like, as I am sure you are aware. She also saw the merger of Dennys and Strachan to create DSM, and later the amalgamation with AML&F to create Dennys AML (I think). She saw the change from the old manual switch board to the then latest of PABX technologies and was part of the team the relocated from the original offices to the new address on the south side of Brougham Street. Along with the shift from the large show floor-based sales of the past. She retired from fulltime work in mid-1983, again with fond memories and friendships that lasted a lifetime. I found these two items among her things recently, and felt that given her connection to the industry, and the place in which the Museum now resides you may like to add them to the collection. I hope you can find a home for them, and that they might add a little to the story that the wool museum now houses and curates.” Program 12pp: soft pale grey cover, contians brief history of the company , the buildings and at the last page is a list of acceptances for the reunion, 2nd October, 1988Judith Lagingdennys, lascelles limited -
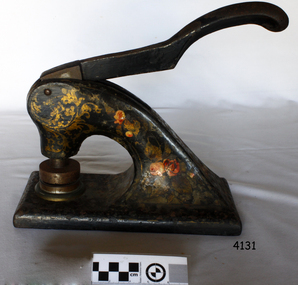 Flagstaff Hill Maritime Museum and Village
Functional object - Hand operated embossing document press, 1910
The woollen mill was a vital part of Warrnambool for all but 22 years of the town’s history since it's the establishment in 1847 when the first land sales were held and white settlement began. In 1869 the Warrnambool Meat Preserving Company began operations on the mill site, in 1875, shareholders of the then defunct Warrnambool Meat Preserving Company happily sold the land and buildings on the Merri river to Warrnambool Woollen Mill Company Ltd for £5,000. The site was sold again in 1876 to grazer Robert Hood of Sherwood, who was chairman of directors of the failed company, which couldn’t raise sufficient capital to keep the works operating. The entrepreneurial Hood then used the existing plant to turn his own wool into tweed cloth. But just as the mill was starting to show a profit, a fire destroyed the building and plant on the night of 25 March 1882. So again, the mill was operational for six short years. Insurers only paid a fraction over 10% of the damage, Hood couldn't raise sufficient capital to rebuild on his own, and so the site lay unused until 1910. In 1908 Marcus Saltau and Peter John McGennan convinced the Warrnambool Chamber of Commerce to invest in a secondary industry with local capital. A public meeting in September 1908 agreed to raise £40,000, electing Saltau chairman of directors, a post he held for 34 years. A year later, using mostly local money, the Warrnambool Woollen Mill Company dispatched its first manager, John E. Bennett, to buy a plant and recruit 20 experienced staff from the Yorkshire woollen industry in December 1909. Another year more, the new mill was officially opened on 14 November 1910 by Marcus Saltau as company chairman and town mayor. Eighteen months on, in May 1912, the mill paid its first half-yearly dividend of 2 ½%. It was now working two shifts, with a year's orders to fill. In 1914 the mill ordered its own generator, providing the town with electricity and effectively doubling its plant size by October 1915, six months after Gallipoli. Thereafter, government orders for cloth and military supplies assured the mill’s success right through the First World War and on until 1923. A plant upgrade in 1922 for machinery to make worsted fabric drained profits, which, with a fall in demand, led to a loss in 1925. Profits were restored by the 1930s, despite the Depression, mostly due to tight management and robust marketing. Production boomed again during the Second World War, but soon foreign competition bit into profits, forcing the company to consolidate operations. The ‘50s and ‘60s were golden years for the mill. Security and growth gave the company confidence to trial Australia’s first electric blanket in 1958 and to install Swiss Sulzer looms in 1965. Over time, the building facades took on the modern look that the mill presented until it closed. The Dunlop company bought the mill in 1968, fending off a challenge from Onkaparinga in South Australia, and continued to expand by adding Wendouree Woollen Mill in the same year and Dream-spun Textiles a decade later, in 1979. Soon after that purchase, however, the mill began its slippery slide into decline. Dunlop sold to its former rival bidder Onkaparinga Woollen Co. Ltd in 1982, which in turn was taken over by Macquarie Worsted's only a year later, in 1983. Operations remained stable for a decade until 1994 when the Macquarie Group signaled that its newly rationalised operations left no room for the Warrnambool investment. The final operator of the mill was The Smith Family charity group, which ran the site by agreement with the Warrnambool City Council and a state government grant in that same year, 1994. The mill became more of a fabric recycler than a manufacturer. The site was sold to private operators in February 2003 and rezoned four months later to allow for the mixed housing development. The embossing press is significant for its association with the Warrnambool Woollen Mills 1910-1968, a major employer in the Warrnambool district. The press is also significant as an example of commercial office equipment used in the 19th and 20th century.Press, metal, for Company seal of Warrnambool Woollen Mill, stamping their brand as Western District Worsted Mills Pty Ltd. Metal is black with red and gold floral markings. Inscription of stamp reads "WESTERN DISTRICT WORSTED MILLS PROPRIETRY LIMITED" flagstaff hill, warrnambool, shipwrecked-coast, flagstaff-hill, flagstaff-hill-maritime-museum, maritime-museum, warrnambool woollen mills, western district worsted mills proprietry limited, worsted fabric, printing press, logo printing press, stamp printing press, shipwreck-coast, flagstaff-hill-maritime-village -
 National Wool Museum
Journal, Dennys, Lascelles Limited 1857-1957 Annual Wool Report and Centenary Review, 1957
"Dennys, Lascelles Limited 1857-1957 Annual Wool Report and Centenary Review". Apart from the annual report, this booklet also contains a brief history of Dennys, Lascelles Limited from its founding in 1857 up to 1957. A copy of both the ‘Dennys Lascelles Limited 1857-1957: Annual Wool Report & Centenary Review’ & ‘Staff Reunion Souvenir Programme, 1988’ was donated to the museum in 2021. These were duplicate items so only their story was retained in addition to the image of Rita located in Multimedia. “Enclose two items which may be of interest to add to your collection. They belonged to my mother, Rita Sedgwick (nee Glenn), who died earlier this year in April. She worked for Dennys Lascelles in two separate periods. First as a young girl, who had finished her schooling, at Morongo Presbyterian ladies College, having been sent as boarder there by her parents from their farm at Mathoura (just north of Echuca). This period was from 1942 — 1947. It was her second job out of school having worked first at the then Geelong Telephone Exchange. She would commute daily to work on a bicycle from where she was then living in Drumcondra. She had the front office role of receptionist and telephonist driving an old manual switchboard. The old front desk was her domain. She departed in 1947, shortly after she was married in late 1946. She spoke fondly of her times at the company as a young girl in her late teens and early twenties. Her second stint was much later, but again as the front-desk telephonist and receptionist commencing in 1972, ending 11 years later in 1983. This was a period when Sir Henry Bolte was on the Board, Don Urqhuart was MD, Ray Hobson was General Manger, Cliff Bone the company Secretary, Peter Keys the CFO and Jim Hay was also on the Executive team. While there were some 25 years between her periods of service, she welcomed the chance to re-join the company. Again, it was a time of hard work, and good friends. The busy times were the wool auctions, when the Firm would be visited by representatives of the big Japanese trading houses such as Mitsui, and Kanematsu. The Chief Auctioneer, Mr. Reeves (I can't recall his first name), would hold court at the now demolished Geelong Wool Exchange — I saw him in action once — what a sight. The huge show floors in the Denny's building would be full of open bales and samples for the buyers to inspect, and for mum days would start at 0800, and finish at 1800 or later. In quieter times over summer, it was reported that the empty show floor would provide an excellent arena for the more enthusiastic cricketers to get in a bit of practise with a tennis ball at lunch and after closing time! Dennys was a full-service firm for wool growers, with branches all over the Western Districts as far afield as Mt Gambier, but through Timboon, Warrnambool, and the like, as I am sure you are aware. She also saw the merger of Dennys and Strachan to create DSM, and later the amalgamation with AML&F to create Dennys AML (I think). She saw the change from the old manual switch board to the then latest of PABX technologies and was part of the team the relocated from the original offices to the new address on the south side of Brougham Street. Along with the shift from the large show floor-based sales of the past. She retired from fulltime work in mid-1983, again with fond memories and friendships that lasted a lifetime. I found these two items among her things recently, and felt that given her connection to the industry, and the place in which the Museum now resides you may like to add them to the collection. I hope you can find a home for them, and that they might add a little to the story that the wool museum now houses and curates.” "Dennys, Lascelles Limited Annual Wool Report and Centenary Review, August 1957". Apart from the annual report, this booklet also contains a brief history of Dennys, Lascelles Limited from its founding in 1857 up to 1957.Dennys, Lascelles Limited Annual Wool Report and Centenary Review, August 1957wool brokering, wool growing, dennys, lascelles limited -
 Melton City Libraries
Newspaper, Bill was a pioneer, 1989
Bill Cahill in conversation at Victoria Hall Melton South July 1974 Chaff Mills Melton’s hey day, as I call it in the days when more hay was grown in Melton and Rockbank than, I’d say in any where in Victoria. We had two chaff mills. If I can remember rightly I’m sure of this, that in one month the amount of hay and chaff that went from Melton to Melbourne was about 1800 tons, that’s hay and chaff. There was a lot of hay went from the Melton Railway Station. I have often seen whole train load going down the Schutt and Barrie, that’s Bonnie’s father’s mill at West Footscray. The mills in those days employed up to from 18- 20 men in each, that was before electricity when the mills were run on steam then, there was no power. At times those chaff mills they got a lot of shipping orders, to the Philipines and other Asian countries. They’d work shifts at night on the second shift at night time they would have an old hurricane lamp hanging above from the ceiling just over the chaff cutter, you could hardly see yourself, or see the anything. Well they worked through the whole night they might have an order come in for perhaps 100tons up 500 tons of chaff to go a boat would be in and be waiting to be loaded in Melbourne and they’d have to go and work two shifts. Then they brought in casual labour to help them through and get the order cut and get it down by rail to ship board to send it away. Talking about the hay I’ve seen wagons of hay in the farmers carting to both mills and also hay going down to West Footscray. There would be a quarter of a mile without exaggeration wagons and teams would be waiting to get into the mill, they would come down at the weighbridge at about 3-4- o’clock, 2 o’clock waiting for the bridge to open to weigh their loads, the ones that would be running late would be there at the weighbridge about half past 7 - 8 o’clock. They would be lucky to get away by night before getting their load off. A funny episode I remember well was a farmer from up, Alan Hurley you would remember him, Sam McCorkell he would put on his load in the afternoon or evening leave it up the yard, and would leave Toolern Vale about 12 or 1 o’clock in the morning and he would get down to the weighbridge and when it was breaking day he would bring half of his fowl yard down with him. The fowls would hop up on top of the load and have a ride down and when it came daylight they’d hop off and away they’d go, and I suppose everybody had some of McCorkells poultry. [laughter from the audience] That always tickled my fancy and everybody would be laughing about the fowls getting off his load of hay. I reckon that was about one of the funniest things I’ve ever heard of. The Victoria Hall, where we are tonight was originally known as the Exford Hall. I believe Bonnie’s father was the original builder and owner of the chaff mills here round the corner which is known as Wards today. Later on I understand that his father had a chaff mill here were this hall is, then Dixon Bros were just a bit on the other side. I believe Bonnie’s father sold it to Dixon Bros, and they shifted this part of the mill here and took it over and joined it up. That’s the history of the early chaff mills. Is that right Bonnie? You might like to correct, I’m about right am I? Bonnie answers yes. The original audio tape was recorded on the reel to reel tape recorder by Bon Barrie using his own tape recorder. Transferred to CD by Tom Wood using computer technology capable of adjusting the recording to a legible speed for reproduction to compact disk. Bill Cahill article featured in the The Mail Expresslocal identities -
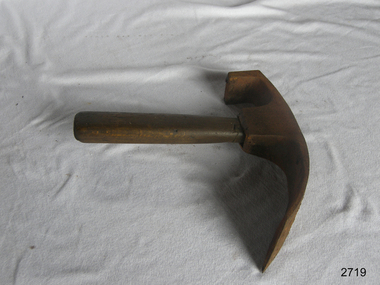 Flagstaff Hill Maritime Museum and Village
Tool - Hand Adze, A Mathieson and Son, First quarter of the 20th Century
An adze is an ancient and versatile cutting tool similar to an axe but with the cutting edge perpendicular to the handle rather than parallel. Adzes are used for smoothing or carving wood in hand woodworking, and as a hoe for agriculture and horticulture. Two basic forms of an adze are the hand adze (short hoe) a short handled tool swung with one hand and the foot adze (hoe) a long handled tool capable of powerful swings using both hands, the cutting edge usually striking at foot or shin level. Mathieson & Sons Maker: In 1792 John Manners had set up a workshop making woodworking planes at 14 Saracens Lane Glasgow. He also had employed an apprentice Alexander Mathieson (1773-1851). But in the following year at Saracen's Lane, the 1841 census describes Alexander Mathieson as a master plane-maker now at 38 Saracen Lane with his son Thomas Adam working with him as a journeyman plane-maker. Presumably, Alexander must have taken over the premises and business of John Manners. Now that the business had Thomas Adam Mathieson working with his father it gradually grew and became more diversified, and it is recorded at the time by the Post-Office Glasgow Annual Directory that by 1847-1848 Alexander Mathieson was a “plane, brace, bit, auger & edge tool maker” In 1849 the firm of James & William Stewart at 65 Nicolson Street, Edinburgh was taken over and Thomas was put in charge of the business, trading under the name Thomas A. Mathieson & Co. as plane and edge-tool makers. Thomas's company went on to acquire the Edinburgh edge-tool makers “Charles & Hugh McPherson” and took over their premises in Gilmore Street. In the Edinburgh directory of 1856/7, the business is recorded as being Alexander Mathieson & Son, plane and edge-tool makers at 48 Nicolson Street and Paul's Work, Gilmore Street Edinburgh. The 1851 census Alexander is recorded as working as a tool and plane-maker employing eight men. Later that year Alexander died and his son Thomas took over the business. Under the heading of an edge-tool maker in the 1852/3 Post-Office Glasgow Annual Directory the firm is now listed as Alexander Mathieson & Son, with further entries as "turning-lathe and vice manufacturers". By the early 1850s, the business had moved to 24 Saracen Lane. The directory for 1857/8 records that the firm had moved again only a few years later to East Campbell Street, off the Gallowgate area, and that through further diversification was also manufacturing coopers' and tinmen's tools. The ten-yearly censuses report the firm's growth in 1861 stating that Thomas was a tool manufacturer employing 95 men and 30 boys; in 1871 he had 200 men working for him and in 1881 300 men. By 1899 the firm had been incorporated as Alexander Mathieson & Sons Ltd, even though only Alexander's son Thomas appears ever to have joined the firm so the company was still in his fathers' name. In September 1868 Thomas Mathieson put a notice in the newspapers of the Sheffield & Rotherham Independent and the Sheffield Daily Telegraph stating that his firm had used the trade-mark of a crescent and star "for some time" and that "using or imitating the Mark would be proceeded against for infringement". The firm had acquired its interest in the crescent-and-star mark from the heirs of Charles Pickslay, the Sheffield cutler who had registered it with the Cutlers' Company in 1833 and had died in 1852. The year 1868 seems also to be the one in which the name Saracen Tool Works was first adopted; not only does it figure at the foot of the notice in the Sheffield press, it also makes its first appearance in the firm's entry in the Post-Office Glasgow Annual Directory in the 1868/9 edition. As Thomas Mathieson's business grew, so too did his involvement in local public life and philanthropy. One of the representatives of the third ward on the town council of Glasgow, he became a river bailie in 1868, a magistrate in 1870 and a preceptor of Hutcheson's Hospital in 1878. He had a passion for books and was an "ardent Ruskinian". He served on the committee handling the bequest for the setting up of the Mitchell Library in Glasgow. When he died at Coulter Maynes near Biggar in 1899, he left an estate worth £142,764. The firm of Alexander Mathieson & Sons was one of the leading makers of hand tools in Scotland. Its success went hand in hand with the growth of the shipbuilding industries on the Firth of Clyde in the nineteenth century and the emergence of Glasgow as the "second city of the Empire". It also reflected the firm's skill in responding to an unprecedented demand for quality tools by shipyards, cooperages and other industries, both locally and far and wide.Hand Adze or Cooper's adze No 4 A Mathieson & Sons Glasgowflagstaff hill, warrnambool, flagstaff-hill-maritime-museum, maritime-museum, shipwreck-coast, flagstaff-hill-maritime-village, adze mathieson & sons, cooperage tools, woodworking, barrel making, working timber, joiners tools, carpenters tools -
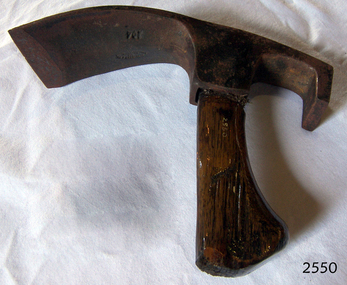 Flagstaff Hill Maritime Museum and Village
Tool - Coopers Adze, Mathieson and Son, First quarter of the 20th Century
An adze is an ancient and versatile cutting tool similar to an axe but with the cutting edge perpendicular to the handle rather than parallel. Adzes are used for smoothing or carving wood in hand woodworking, and as a hoe for agriculture and horticulture. Two basic forms of an adze are the hand adze (short hoe) a short handled tool swung with one hand and the foot adze (hoe) a long handled tool capable of powerful swings using both hands, the cutting edge usually striking at foot or shin level. Mathieson & Sons Maker: In 1792 John Manners had set up a workshop making woodworking planes at 14 Saracens Lane Glasgow. He also had employed an apprentice Alexander Mathieson (1773-1851). But in the following year at Saracen's Lane, the 1841 census describes Alexander Mathieson as a master plane-maker now at 38 Saracen Lane with his son Thomas Adam working with him as a journeyman plane-maker. Presumably, Alexander must have taken over the premises and business of John Manners. Now that the business had Thomas Adam Mathieson working with his father it gradually grew and became more diversified, and it is recorded at the time by the Post-Office Glasgow Annual Directory that by 1847-1848 Alexander Mathieson was a “plane, brace, bit, auger & edge tool maker” In 1849 the firm of James & William Stewart at 65 Nicholson Street, Edinburgh was taken over and Thomas was put in charge of the business, trading under the name Thomas A. Mathieson & Co. as plane and edge-tool makers. Thomas company went on to acquire the Edinburgh edge-tool makers “Charles & Hugh McPherson” and took over their premises in Gilmore Street. In the Edinburgh directory of 1856/7, the business is recorded as being Alexander Mathieson & Son, plane and edge-tool makers at 48 Nicholson Street and Paul's Work, Gilmore Street Edinburgh. The 1851 census Alexander is recorded as working as a tool and plane-maker employing eight men. Later that year Alexander died and his son Thomas took over the business. Under the heading of an edge-tool maker in the 1852/3 Post-Office Glasgow Annual Directory the firm is now listed as Alexander Mathieson & Son, with further entries as "turning-lathe and vice manufacturers". By the early 1850s, the business had moved to 24 Saracen Lane. The directory for 1857/8 records that the firm had moved again only a few years later to East Campbell Street, off the Gallowgate area, and that through further diversification was also manufacturing coopers' and tin men's tools. The ten-yearly censuses report the firm's growth in 1861 stating that Thomas was a tool manufacturer employing 95 men and 30 boys; in 1871 he had 200 men working for him and in 1881 300 men. By 1899 the firm had been incorporated as Alexander Mathieson & Sons Ltd, even though only Alexander's son Thomas appears ever to have joined the firm so the company was still in his fathers' name. In September 1868 Thomas Mathieson put a notice in the newspapers of the Sheffield & Rotherham Independent and the Sheffield Daily Telegraph stating that his firm had used the trade-mark of a crescent and star "for some time" and that "using or imitating the Mark would be proceeded against for infringement". The firm had acquired its interest in the crescent-and-star mark from the heirs of Charles Pickslay, the Sheffield cutler who had registered it with the Cutlers' Company in 1833 and had died in 1852. The year 1868 seems also to be the one in which the name Saracen Tool Works was first adopted; not only does it figure at the foot of the notice in the Sheffield press, it also makes its first appearance in the firm's entry in the Post-Office Glasgow Annual Directory in the 1868/9 edition. As Thomas Mathieson's business grew, so too did his involvement in local public life and philanthropy. One of the representatives of the third ward on the town council of Glasgow, he became a river Bailie in 1868, a magistrate in 1870 and a preceptor of Hutcheson's Hospital in 1878. He had a passion for books and was an "ardent Ruskinian". He served on the committee handling the bequest for the setting up of the Mitchell Library in Glasgow. When he died at Coulter Maynes near Biggar in 1899, he left an estate worth £142,764. The firm of Alexander Mathieson & Sons was one of the leading makers of hand tools in Scotland. Its success went hand in hand with the growth of the shipbuilding industries on the Firth of Clyde in the nineteenth century and the emergence of Glasgow as the "second city of the Empire". It also reflected the firm's skill in responding to an unprecedented demand for quality tools by shipyards, cooperages and other industries, both locally and far and wide.Coopers Adze steel with wooden handle No 194 A Mathieson & Sons Glasgowflagstaff hill, warrnambool, shipwrecked coast, flagstaff hill maritime museum, maritime museum, shipwreck coast, flagstaff hill maritime village, great ocean road, flagstaff hill, warrnambool, shipwrecked coast, flagstaff hill maritime museum, maritime museum, shipwreck coast, flagstaff hill maritime village, great ocean road -
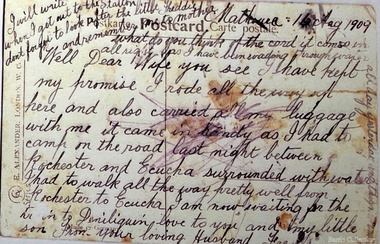 Melton City Libraries
Postcard, Postcards from Fred and Mattie Myers, 1909-1914
Post Card: Melton Railway Station 1909 Mattie to Fred My Dear Fred I received your letter and the L2 10/- I was very pleased to hear that I could write again. You say you will come home after the last shead. I should think so. I had a letter from E Jenkins so I am going down to see her next week we call the baby Fernie now I hope you will agree. Dear Fern has got the whooping cough. Written on the side: I suppose you will be away four weeks yet. Love from Mattie will write on Sunday. This letter appears to be connected with the post card Barwonleigh Saturday October 1908 handwriting My Dear Mattie I received your letter and was sorry to hear of our dear little babys misfortune how did it happen do you know what was the cause of it Mrs Watts must be a blind old fool not to have known what it was when you took him to her the first time poor dear you must be worried to death with all this trouble tell me what the doctor thinks of the rupture. I do hope dear he will get over this all right you must be nearly dead going without sleep for so long I had a bit of misfortune myself on Thursday the machine locked and jumped out of my hand and stuck in my bone I kept on working but it was very painful as all the holding is done with the..next page ..knee the boss also has been chipping a good deal this week he says the next time he has occasion to speak to me I will have to go he is very particular. I would like to go through if possible even if I do a lot less. I have about sixteen hundred done up to now and would get another nine hundred if I was let alone but I suppose we will live lovie even if I go do you know if they are full handed at Eynesbury if I thought I could get a week there I would cut myself out here quick. Well dear lovie I am sending you a couple of pounds as I suppose you will want it to get a truss. I don’t think they are very expensive and hope things will find this better with you. Well my dear love I must close with fond love for you and baby from your loving Husband Fred Post Card: 16 Aug 1909 - Mathoura The card depicts a small sailing boat laden with blue flowers. Well Dear Wife you see I have kept my promise. I rode all the way up here and also carried all my luggage with me it came in handy as I had to camp on the road last night between Rochester and Echuca surrounded by water. I had to walk all the way pretty well from Rochester to Echuca. I am now waiting for the train to Deniliquin. Love to you and my little son Fred. From you loving Husband Fred Written along the top and side of the card. what do you think if the card comes in all right as I have been wading through water all day yesterday and this might be …? will write when I get to the Station, don’t forget to look after the little Freddie and remember me to mother. Post Card: 1909 - view across the Flat from the Creek looking to the Presbyterian Church in the distance with some small dwellings in the foreground. To Mr Fred Myers Wandook Stn Denniliquin NSW Dear Fred, received your letter I am sorry to hear you are having such wet weather I will write a letter tomorrow baby is better With Love from M Post Card: 1910 Postmark Stamp 1d Aug 12 1910 Moama NSW Melton postmark stamped Aug 25? Hare Street, looking south Echuca Mrs F Myers, Melton P O Vic Dear Mattie, Just a line to let you know I got here all right I go to Pericotta tonight and to Cobran to morrow best love to all from yours Fred Letter Cobran Stn Via Deniliquin N.S.W. Sunday 21st Aug extract I am having a good time here, a good cook and the best of everything no fires to light or kettles to boil just get up and wire in… plenty hard work the sheep are pretty tough but much better than Wandook. I am well among them here we had a little rain on Friday but not enough to stop us so we have got one full week in .. the weather is lovely. I have been basking in the sunshine mainly in the morning and feel strong and fit a as fiddle, they are a grand lot of men here I only knew one out of the lots but know them all pretty well now, we have a bit of a concert here every nights almost there are a few good singers here and we also had a phonograph up from the station with all the latest records we have two dancers among ourselves very boisterous affairs indeed thy do make the dust fly. I have not ventured to take part in it and don’t think I will either. I get enough dancing all day long and besides I have to furnish the music you ought to see them going when I rattle up the concertina. Letter Cobran Stn via Deniliquin Thursday Sept 1st 1910 [abbreviated] My Dear Mattie, I received your welcome letter today. I though I was never going to get one as it was Sunday fortnight when I wrote to you but we only the mail here twice a week so it takes a long time to write and get an answer. I also got a reply from Eynesbury and a favourable reply it starts on the 13th Oct. …. I have 800 sheep shorn up to date and am fifth among about 30 men. I am sending two more [Ls] this time which I drew on Saturday. I don’t like sending too much more this time as there is a chance of it going astray and it is not very easily earned…. Things must be humming in Melton with all them babies coming and people getting married… I suppose we will be having new neighbours soon. If Mr Watts is selling out he was getting more property then he could keep. I hope you will soon have rain…. you will have to watch our little boy the dear little rascal he must be getting very cute opening the gates he will be tumbling into the tank …. I love to think of the happy times we have had together and hope that we will love one another to the end .. the mail will not leave here until Monday Love to you dear wife and baby Fred Post Card: – I Cling to you like Ivy Cobran September 18th 1910 Fred awaits a letter from Mattie I still have three weeks here yet.. I am sending L2 tell if you got the other 1L 1911 Letters Fred to Mattie October Spring Plains Oct 1911 Mia Mia Post Office I had a great job to catch the train at Diggers Rest as after I turned off the Keilor Rd it was very way and muddy and I had to walk a lot of the way and got there just in time. I came right into Redesdale by the train and stopped there last night… they had heavy rain on thursday up here and a tremendous fall of hail which covered the ground over a foot deep. There are only 4 shearers here yet.. I saw some of the sheep they look very rough and big so there will be no big tallies done, the men are saying he is giving 2s per hundred extra, so that will help a little. We are going to start Cobran via Deniliquin. Post Card: three scenes of Mathoura 10/9/1914 EB on a photo copy 10/9/12 ? Mathoura Thursday Dear Mattie, Just a line to let you know I got up here all right. I rode the seat out of my trousers. I have done 100 miles on the bike. I met none of the old hands this time so will go out on my own… Your loving husband Fred, did Marjie miss me at all. Post Card: Cobran 15th Sept 1912 Hearts and intertwined flowers and little envelope he has written Marjorie …just a line to let you know I will cut out here Friday next in find, we have had two falls of rain since I wrote and it has bean blowing a hurricane for couple of days and may blow up again however if we are delayed I will send you a card Wednesday I am longing to see you and the two little kiddies again…. Fred Copy only Golf Hill Sep 26th Cut out 31 Oct Total 2332 1913 Post Card: Scene View Street, Bendigo August 1913 Mathoura Tuesday My Dear Mattie Just a line to let you know I got up here all right. Teddy Ginger and another couple of chaps on the way ……. Letter Cobran Sunday Aug 7th 1913 My Dear Mattie Just a line to let you know that weather permitting we will cut out here about Thursday morning….I have not got any more shearing here. I have not heard from the other place…. Expect me about Friday …. I suppose Freddie and Marjie will be glad to see me, Marjie will climb all over me. I will be glad to se you all again you will have a fortnight before Golf Hill starts. I see in the Express you sent that Annie McPherson of (Dunvegan) is engaged to Len Farrell, she appears to be going to take no risks with him she wont let him slip through her hands like the banker did…… Fred Post Card: 1914 Garland of roses Warrambeen Stn Shelford PO October 14th 1914 Birthday wishes. Post Card: Love’s Golden Chain Golf Hill Tuesday Oct 17 1914 Birthday wishes [ this one might be a different year] Letter Cobran Wed 2nd Sept 1914 My Dear Mattie, I received your welcome letter today and also the papers which were very acceptable as we don’t get many papers here we only get see one at odd times as we get none for the hut this year.. I have not seen a bit of butter since I left home as it is too dear for us for sinners here. Poor Marjie had a cold.. so the little kid wants to go to the war, she must think it is good like a picnic. We had light rain on Monday as usual only half a day’s shearing in the shed so that is all we done this week, we took a vote 9 to 6 no shearing so nothing till to morrow morning Thursday so there is still a good fortnights shearing to do, will do nothing Saturday polling day as we have to go 13 miles is near Services where I was last year so we will want the full day 50 men to vote and some will probably have to walk to get there, all solid for Labour. I have just had an interval for lunch, pudding, yeast buns and rock cakes… We are doing nothing but eating and sleeping this week. Fred I am sending L1 in this which will do you till I come back if I keep drawing up I will have none when I finish so make the most of it. Post Card: Two doves with violets 1915 Cobran Wed 18th Sept [could be 1912] Sorry to tell you we are delayed with rain so will not be home till next week… only 3 days of shearing to do…. expect me about the middle of next week….I wish I was with you now and the dear little ones Fred Post Card: Iris Flowers Barwonleigh Stn Tuesday Oct 14th 1918 Happy birthday greetings from Fred Post Card: Irrigation channel Swan Hill 5 Year not shown Swan Hill Tuesday night Just a few lines to let you know I got this far all right. I had to walk nearly all the way to Gisborne and got there last night and took the train here today. It has been raining all the way between Gisborne and here. Moulamein tomorrow. I think it will be another case of walking as it is wet here no metal roads all mud. best love to yourself and the little ones and also mother. will write Sunday Post Card: The White Man’s Burden.The writing on the back rubbed out Mattie has written, I was weighed and I am 8 stone 10 pounds. 14 Post Cards, some have the original dates, others have the date added later by Martha. Two envelopes, one with addressed to Melton postmark Moule, stamp torn off, the other Cards from my dear Fred. The letters and the notebooks can be cross checked according the their contents. Italics show the dates added by Mattie local identities -
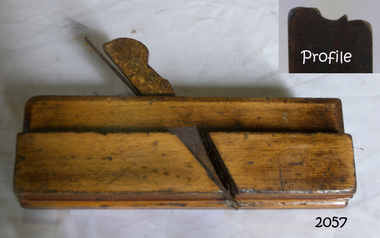 Flagstaff Hill Maritime Museum and Village
Tool - Moulding Plane, Mathieson and Son, 1900-1920
In 1792 John Manners had set up a workshop making woodworking planes at 14 Saracens Lane Glasgow. He also had employed an apprentice Alexander Mathieson (1773-1851). But in the following year at Saracen's Lane, the 1841 census describes Alexander Mathieson as a master plane-maker now at 38 Saracen Lane with his son Thomas Adam working with him as a journeyman plane-maker. Presumably, Alexander must have taken over the premises and business of John Manners. Now that the business had Thomas Adam Mathieson working with his father it gradually grew and became more diversified, and it is recorded at the time by the Post-Office Glasgow Annual Directory that by 1847-1848 Alexander Mathieson was a “plane, brace, bit, auger & edge tool maker” In 1849 the firm of James & William Stewart at 65 Nicolson Street, Edinburgh was taken over and Thomas was put in charge of the business, trading under the name Thomas A. Mathieson & Co. as plane and edge-tool makers. Thomas's company went on to acquire the Edinburgh edge-tool makers “Charles & Hugh McPherson” and took over their premises in Gilmore Street. In the Edinburgh directory of 1856/7, the business is recorded as being Alexander Mathieson & Son, plane and edge-tool makers at 48 Nicolson Street and Paul's Work, Gilmore Street Edinburgh. The 1851 census Alexander is recorded as working as a tool and plane-maker employing eight men. Later that year Alexander died and his son Thomas took over the business. Under the heading of an edge-tool maker in the 1852/3 Post-Office Glasgow Annual Directory the firm is now listed as Alexander Mathieson & Son, with further entries as "turning-lathe and vice manufacturers". By the early 1850s, the business had moved to 24 Saracen Lane. The directory for 1857/8 records that the firm had moved again only a few years later to East Campbell Street, off the Gallowgate area, and that through further diversification was also manufacturing coopers' and tinmen's tools. The ten-yearly censuses report the firm's growth in 1861 stating that Thomas was a tool manufacturer employing 95 men and 30 boys; in 1871 he had 200 men working for him and in 1881 300 men. By 1899 the firm had been incorporated as Alexander Mathieson & Sons Ltd, even though only Alexander's son Thomas appears ever to have joined the firm so the company was still in his fathers' name. In September 1868 Thomas Mathieson put a notice in the newspapers of the Sheffield & Rotherham Independent and the Sheffield Daily Telegraph stating that his firm had used the trade-mark of a crescent and star "for some time" and that "using or imitating the Mark would be proceeded against for infringement". The firm had acquired its interest in the crescent-and-star mark from the heirs of Charles Pickslay, the Sheffield cutler who had registered it with the Cutlers' Company in 1833 and had died in 1852. The year 1868 seems also to be the one in which the name Saracen Tool Works was first adopted; not only does it figure at the foot of the notice in the Sheffield press, it also makes its first appearance in the firm's entry in the Post-Office Glasgow Annual Directory in the 1868/9 edition. As Thomas Mathieson's business grew, so too did his involvement in local public life and philanthropy. One of the representatives of the third ward on the town council of Glasgow, he became a river bailie in 1868, a magistrate in 1870 and a preceptor of Hutcheson's Hospital in 1878. He had a passion for books and was an "ardent Ruskinian". He served on the committee handling the bequest for the setting up of the Mitchell Library in Glasgow. When he died at Coulter Maynes near Biggar in 1899, he left an estate worth £142,764. Company's later years: Both Thomas's sons, James Harper and Thomas Ogilvie were involved in the continuing life of the firm. James followed in his father's footsteps in becoming a local public figure. He was appointed Deputy Lieutenant of the County of the City of Glasgow and was made a deacon of the Incorporation of the Hammermen of Glasgow in 1919. His brother Thomas Ogilvie was recorded as tool manufacturer and employer in the 1911 census. Thomas Ogilvie's son Thomas Alastair Sutherland Ogilvie Mathieson was born in 1908 took a rather different approach to engineering, however, by becoming a racing driver. In 1947 he wed the French film actress Mila Parély. The firm had won many awards at world fairs for their goods. At the Great Exhibition, London, 1851. Prize medal for joiners' tools in the class of Cutlery & Edge Tools, Great London Exposition, 1862. Prize medal honoris causa. International Exhibition, Melbourne, 1880. Gold medal International Exhibition of Industry, Science and Art, Edinburgh, 1886. Prize medalThe firm of Alexander Mathieson & Sons was one of the leading makers of hand tools in Scotland. Its success went hand in hand with the growth of the shipbuilding industries on the Firth of Clyde in the nineteenth century and the emergence of Glasgow as the "second city of the Empire". It also reflected the firm's skill in responding to an unprecedented demand for quality tools by shipyards, cooperages and other industries, both locally and far and wide.Plane, Moulding, Side Bead - Single Box type Stamped maker Mathieson & Sons also JW (Owner)flagstaff hill, warrnambool, shipwrecked-coast, flagstaff-hill, flagstaff-hill-maritime-museum, maritime-museum, shipwreck-coast, flagstaff-hill-maritime-village -
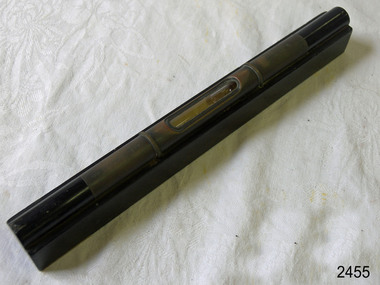 Flagstaff Hill Maritime Museum and Village
Spirit Level, circa 1880
In 1792 John Manners had set up a workshop making woodworking planes at 14 Saracens Lane Glasgow. He also had employed an apprentice Alexander Mathieson (1773-1851). But in the following year at Saracen's Lane, the 1841 census describes Alexander Mathieson as a master plane-maker now at 38 Saracen Lane with his son Thomas Adam working with him as a journeyman plane-maker. Presumably, Alexander must have taken over the premises and business of John Manners. Now that the business had Thomas Adam Mathieson working with his father it gradually grew and became more diversified, and it is recorded at the time by the Post-Office Glasgow Annual Directory that by 1847/8 Alexander Mathieson was a "plane, brace, bit, auger & edge-tool maker". In 1849 the firm of James & William Stewart at 65 Nicolson Street, Edinburgh was taken over and Thomas was put in charge of the business, trading under the name Thomas A. Mathieson & Co. as plane and edge-tool makers. Thomas's company went on to acquire the Edinburgh edge-tool makers “Charles & Hugh McPherson” and took over their premises in Gilmore Street. In the Edinburgh directory of 1856/7, the business is recorded as being Alexander Mathieson & Son, plane and edge-tool makers at 48 Nicolson Street and Paul's Work, Gilmore Street Edinburgh. The 1851 census Alexander is recorded as working as a tool and plane-maker employing eight men. Later that year Alexander died and his son Thomas took over the business. Under the heading of an edge-tool maker in the 1852/3 Post-Office Glasgow Annual Directory the firm is now listed as Alexander Mathieson & Son, with further entries as "turning-lathe and vice manufacturers". By the early 1850s, the business had moved to 24 Saracen Lane. The directory for 1857/8 records that the firm had moved again only a few years later to East Campbell Street, off the Gallowgate area, and that through further diversification was also manufacturing coopers' and tinmen's tools. The ten-yearly censuses report the firm's growth in 1861 stating that Thomas was a tool manufacturer employing 95 men and 30 boys; in 1871 he had 200 men working for him and in 1881 300 men. By 1899 the firm had been incorporated as Alexander Mathieson & Sons Ltd, even though only Alexander's son Thomas appears ever to have joined the firm so the company was still in his fathers' name. In September 1868 Thomas Mathieson put a notice in the newspapers of the Sheffield & Rotherham Independent and the Sheffield Daily Telegraph stating that his firm had used the trade-mark of a crescent and star "for some time" and that "using or imitating the Mark would be proceeded against for infringement". The firm had acquired its interest in the crescent-and-star mark from the heirs of Charles Pickslay, the Sheffield cutler who had registered it with the Cutlers' Company in 1833 and had died in 1852. The year 1868 seems also to be the one in which the name Saracen Tool Works was first adopted; not only does it figure at the foot of the notice in the Sheffield press, it also makes its first appearance in the firm's entry in the Post-Office Glasgow Annual Directory in the 1868/9 edition. As Thomas Mathieson's business grew, so too did his involvement in local public life and philanthropy. One of the representatives of the third ward on the town council of Glasgow, he became a river bailie in 1868, a magistrate in 1870 and a preceptor of Hutcheson's Hospital in 1878. He had a passion for books and was an "ardent Ruskinian". He served on the committee handling the bequest for the setting up of the Mitchell Library in Glasgow. When he died at Coulter Maynes near Biggar in 1899, he left an estate worth £142,764. Company's later years: Both Thomas's sons, James Harper and Thomas Ogilvie were involved in the continuing life of the firm. James followed in his father's footsteps in becoming a local public figure. He was appointed Deputy Lieutenant of the County of the City of Glasgow and was made a deacon of the Incorporation of the Hammermen of Glasgow in 1919. His brother Thomas Ogilvie was recorded as tool manufacturer and employer in the 1911 census. Thomas Ogilvie's son Thomas Alastair Sutherland Ogilvie Mathieson was born in 1908 took a rather different approach to engineering, however, by becoming a racing driver. In 1947 he wed the French film actress Mila Parély. The firm had won many awards at world fairs for their goods. At the Great Exhibition, London, 1851. Prize medal for joiners' tools in the class of Cutlery & Edge Tools, Great London Exposition, 1862. Prize medal honoris causa. International Exhibition, Melbourne, 1880. Gold medal International Exhibition of Industry, Science and Art, Edinburgh, 1886. Prize medalThe firm of Alexander Mathieson & Sons was one of the leading makers of hand tools in Scotland. Its success went hand in hand with the growth of the shipbuilding industries on the Firth of Clyde in the nineteenth century and the emergence of Glasgow as the "second city of the Empire". It also reflected the firm's skill in responding to an unprecedented demand for quality tools by shipyards, cooperage's and other industries, both locally and far and wide.Spirit level, brass in ebony wooden casing.Has "18C Warranted" stamped on barrel.flagstaff hill, warrnambool, shipwrecked-coast, flagstaff-hill, flagstaff-hill-maritime-museum, maritime-museum, shipwreck-coast, flagstaff-hill-maritime-village, spirit level, level, mathieson of glasgow, builders level, spirit level, alexander mathieson & sons, tool maker, wood working plane, john manners, thomas adam mathieson, james & william stewart, james harper, thomas ogilvie, machine manufacturer -
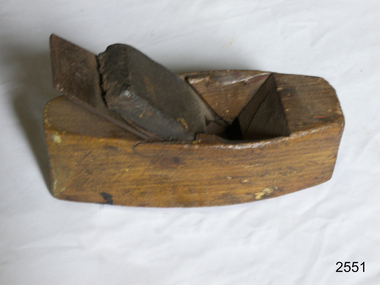 Flagstaff Hill Maritime Museum and Village
Tool - Plane, Mathieson and Son, 1841-1868
In 1792 John Manners had set up a workshop making woodworking planes at 14 Saracens Lane Glasgow. He also had employed an apprentice Alexander Mathieson (1773-1851). But in the following year at Saracen's Lane, the 1841 census describes Alexander Mathieson as a master plane-maker now at 38 Saracen Lane with his son Thomas Adam working with him as a journeyman plane-maker. Presumably, Alexander must have taken over the premises and business of John Manners. Now that the business had Thomas Adam Mathieson working with his father it gradually grew and became more diversified, and it is recorded at the time by the Post-Office Glasgow Annual Directory that by 1847-1848 Alexander Mathieson was a “plane, brace, bit, auger & edge tool maker.” In 1849 the firm of James & William Stewart at 65 Nicolson Street, Edinburgh was taken over and Thomas was put in charge of the business, trading under the name Thomas A. Mathieson & Co. as plane and edge-tool makers. Thomas's company went on to acquire the Edinburgh edge-tool makers “Charles & Hugh McPherson” and took over their premises in Gilmore Street. In the Edinburgh directory of 1856/7, the business is recorded as being Alexander Mathieson & Son, plane and edge-tool makers at 48 Nicolson Street and Paul's Work, Gilmore Street Edinburgh. The 1851 census Alexander is recorded as working as a tool and plane-maker employing eight men. Later that year Alexander died and his son Thomas took over the business. Under the heading of an edge-tool maker in the 1852/3 Post-Office Glasgow Annual Directory the firm is now listed as Alexander Mathieson & Son, with further entries as "turning-lathe and vice manufacturers". By the early 1850s, the business had moved to 24 Saracen Lane. The directory for 1857/8 records that the firm had moved again only a few years later to East Campbell Street, off the Gallowgate area, and that through further diversification was also manufacturing coopers' and tinmen's tools. The ten-yearly censuses report the firm's growth in 1861 stating that Thomas was a tool manufacturer employing 95 men and 30 boys; in 1871 he had 200 men working for him and in 1881 300 men. By 1899 the firm had been incorporated as Alexander Mathieson & Sons Ltd, even though only Alexander's son Thomas appears ever to have joined the firm so the company was still in his fathers' name. In September 1868 Thomas Mathieson put a notice in the newspapers of the Sheffield & Rotherham Independent and the Sheffield Daily Telegraph stating that his firm had used the trade-mark of a crescent and star "for some time" and that "using or imitating the Mark would be proceeded against for infringement". The firm had acquired its interest in the crescent-and-star mark from the heirs of Charles Pickslay, the Sheffield cutler who had registered it with the Cutlers' Company in 1833 and had died in 1852. The year 1868 seems also to be the one in which the name Saracen Tool Works was first adopted; not only does it figure at the foot of the notice in the Sheffield press, it also makes its first appearance in the firm's entry in the Post-Office Glasgow Annual Directory in the 1868/9 edition. As Thomas Mathieson's business grew, so too did his involvement in local public life and philanthropy. One of the representatives of the third ward on the town council of Glasgow, he became a river bailie in 1868, a magistrate in 1870 and a preceptor of Hutcheson's Hospital in 1878. He had a passion for books and was an "ardent Ruskinian". He served on the committee handling the bequest for the setting up of the Mitchell Library in Glasgow. When he died at Coulter Maynes near Biggar in 1899, he left an estate worth £142,764. Company's later years: Both Thomas's sons, James Harper and Thomas Ogilvie were involved in the continuing life of the firm. James followed in his father's footsteps in becoming a local public figure. He was appointed Deputy Lieutenant of the County of the City of Glasgow and was made a deacon of the Incorporation of the Hammermen of Glasgow in 1919. His brother Thomas Ogilvie was recorded as tool manufacturer and employer in the 1911 census. Thomas Ogilvie's son Thomas Alastair Sutherland Ogilvie Mathieson was born in 1908 took a rather different approach to engineering, however, by becoming a racing driver. In 1947 he wed the French film actress Mila Parély. The firm had won many awards at world fairs for their goods. At the Great Exhibition, London, 1851. Prize medal for joiners' tools in the class of Cutlery & Edge Tools, Great London Exposition, 1862. Prize medal honoris causa. International Exhibition, Melbourne, 1880. Gold medal International Exhibition of Industry, Science and Art, Edinburgh, 1886. Prize medalThe firm of Alexander Mathieson & Sons was one of the leading makers of hand tools in Scotland. Its success went hand in hand with the growth of the shipbuilding industries on the Firth of Clyde in the nineteenth century and the emergence of Glasgow as the "second city of the Empire". It also reflected the firm's skill in responding to an unprecedented demand for quality tools by shipyards, cooperages and other industries, both locally and far and wide.Plane Smoothing Coffin A Mathieson & Son makerflagstaff hill, warrnambool, shipwrecked-coast, flagstaff-hill, flagstaff-hill-maritime-museum, maritime-museum, shipwreck-coast, flagstaff-hill-maritime-village -
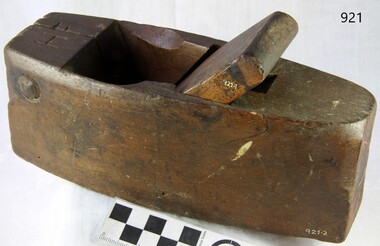 Flagstaff Hill Maritime Museum and Village
Tool - Wood smoothing plane coffin pattern, Mathieson and Son, Late 19th to early 20th Century
In 1792 John Manners had set up a workshop making woodworking planes at 14 Saracens Lane Glasgow. He also had employed an apprentice Alexander Mathieson (1773-1851). But in the following year at Saracen's Lane, the 1841 census describes Alexander Mathieson as a master plane-maker now at 38 Saracen Lane with his son Thomas Adam working with him as a journeyman plane-maker. Presumably, Alexander must have taken over the premises and business of John Manners. Now that the business had Thomas Adam Mathieson working with his father it gradually grew and became more diversified, and it is recorded at the time by the Post-Office Glasgow Annual Directory that by 1847-1848 Alexander Mathieson was a “plane, brace, bit, auger & edge tool maker” In 1849 the firm of James & William Stewart at 65 Nicolson Street, Edinburgh was taken over and Thomas was put in charge of the business, trading under the name Thomas A. Mathieson & Co. as plane and edge-tool makers. Thomas's company went on to acquire the Edinburgh edge-tool makers “Charles & Hugh McPherson” and took over their premises in Gilmore Street. In the Edinburgh directory of 1856/7, the business is recorded as being Alexander Mathieson & Son, plane and edge-tool makers at 48 Nicolson Street and Paul's Work, Gilmore Street Edinburgh. The 1851 census Alexander is recorded as working as a tool and plane-maker employing eight men. Later that year Alexander died and his son Thomas took over the business. Under the heading of an edge-tool maker in the 1852/3 Post-Office Glasgow Annual Directory the firm is now listed as Alexander Mathieson & Son, with further entries as "turning-lathe and vice manufacturers". By the early 1850s, the business had moved to 24 Saracen Lane. The directory for 1857/8 records that the firm had moved again only a few years later to East Campbell Street, off the Gallowgate area, and that through further diversification was also manufacturing coopers' and tinmen's tools. The ten-yearly censuses report the firm's growth in 1861 stating that Thomas was a tool manufacturer employing 95 men and 30 boys; in 1871 he had 200 men working for him and in 1881 300 men. By 1899 the firm had been incorporated as Alexander Mathieson & Sons Ltd, even though only Alexander's son Thomas appears ever to have joined the firm so the company was still in his fathers' name. In September 1868 Thomas Mathieson put a notice in the newspapers of the Sheffield & Rotherham Independent and the Sheffield Daily Telegraph stating that his firm had used the trade-mark of a crescent and star "for some time" and that "using or imitating the Mark would be proceeded against for infringement". The firm had acquired its interest in the crescent-and-star mark from the heirs of Charles Pickslay, the Sheffield cutler who had registered it with the Cutlers' Company in 1833 and had died in 1852. The year 1868 seems also to be the one in which the name Saracen Tool Works was first adopted; not only does it figure at the foot of the notice in the Sheffield press, it also makes its first appearance in the firm's entry in the Post-Office Glasgow Annual Directory in the 1868/9 edition. As Thomas Mathieson's business grew, so too did his involvement in local public life and philanthropy. One of the representatives of the third ward on the town council of Glasgow, he became a river bailie in 1868, a magistrate in 1870 and a preceptor of Hutcheson's Hospital in 1878. He had a passion for books and was an "ardent Ruskinian". He served on the committee handling the bequest for the setting up of the Mitchell Library in Glasgow. When he died at Coulter Maynes near Biggar in 1899, he left an estate worth £142,764. Company's later years: Both Thomas's sons, James Harper and Thomas Ogilvie were involved in the continuing life of the firm. James followed in his father's footsteps in becoming a local public figure. He was appointed Deputy Lieutenant of the County of the City of Glasgow and was made a deacon of the Incorporation of the Hammermen of Glasgow in 1919. His brother Thomas Ogilvie was recorded as tool manufacturer and employer in the 1911 census. Thomas Ogilvie's son Thomas Alastair Sutherland Ogilvie Mathieson was born in 1908 took a rather different approach to engineering, however, by becoming a racing driver. In 1947 he wed the French film actress Mila Parély. The firm had won many awards at world fairs for their goods. At the Great Exhibition, London, 1851. Prize medal for joiners' tools in the class of Cutlery & Edge Tools, Great London Exposition, 1862. Prize medal honoris causa. International Exhibition, Melbourne, 1880. Gold medal International Exhibition of Industry, Science and Art, Edinburgh, 1886. Prize medalThe firm of Alexander Mathieson & Son was one of the leading makers of hand tools in Scotland. Its success went hand in hand with the growth of the shipbuilding industries on the Firth of Clyde in the nineteenth century and the emergence of Glasgow as the "second city of the Empire". It also reflected the firm's skill in responding to an unprecedented demand for quality tools by shipyards, cooperages and other industries, both locally and far and wide.Smoothing, coffin type. Wedge but no blade, cracked section held together by bolt and nut. Imprinted "A Mathieson & Son, Glasgow Best Warranted" and "2in" on other end. "H F" carved on top face.flagstaff hill, warrnambool, shipwrecked-coast, flagstaff-hill, flagstaff-hill-maritime-museum, maritime-museum, shipwreck-coast, flagstaff-hill-maritime-village -
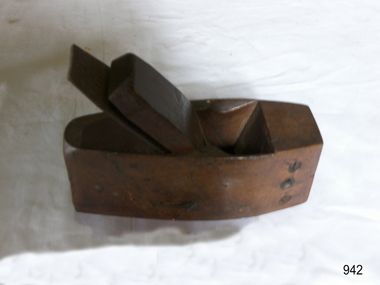 Flagstaff Hill Maritime Museum and Village
Tool - Wood smoothing plane coffin pattern, Mathieson and Son, Late 19th to early 20th Century
In 1792 John Manners had set up a workshop making woodworking planes at 14 Saracens Lane Glasgow. He also had employed an apprentice Alexander Mathieson (1773-1851). But in the following year at Saracen's Lane, the 1841 census describes Alexander Mathieson as a master plane-maker now at 38 Saracen Lane with his son Thomas Adam working with him as a journeyman plane-maker. Presumably, Alexander must have taken over the premises and business of John Manners. Now that the business had Thomas Adam Mathieson working with his father it gradually grew and became more diversified, and it is recorded at the time by the Post-Office Glasgow Annual Directory that by 1847-1848 Alexander Mathieson was a “plane, brace, bit, auger & edge tool maker” In 1849 the firm of James & William Stewart at 65 Nicolson Street, Edinburgh was taken over and Thomas was put in charge of the business, trading under the name Thomas A. Mathieson & Co. as plane and edge-tool makers. Thomas's company went on to acquire the Edinburgh edge-tool makers “Charles & Hugh McPherson” and took over their premises in Gilmore Street. In the Edinburgh directory of 1856/7, the business is recorded as being Alexander Mathieson & Son, plane and edge-tool makers at 48 Nicolson Street and Paul's Work, Gilmore Street Edinburgh. The 1851 census Alexander is recorded as working as a tool and plane-maker employing eight men. Later that year Alexander died and his son Thomas took over the business. Under the heading of an edge-tool maker in the 1852/3 Post-Office Glasgow Annual Directory the firm is now listed as Alexander Mathieson & Son, with further entries as "turning-lathe and vice manufacturers". By the early 1850s, the business had moved to 24 Saracen Lane. The directory for 1857/8 records that the firm had moved again only a few years later to East Campbell Street, off the Gallowgate area, and that through further diversification was also manufacturing coopers' and tinmen's tools. The ten-yearly censuses report the firm's growth in 1861 stating that Thomas was a tool manufacturer employing 95 men and 30 boys; in 1871 he had 200 men working for him and in 1881 300 men. By 1899 the firm had been incorporated as Alexander Mathieson & Sons Ltd, even though only Alexander's son Thomas appears ever to have joined the firm so the company was still in his fathers' name. In September 1868 Thomas Mathieson put a notice in the newspapers of the Sheffield & Rotherham Independent and the Sheffield Daily Telegraph stating that his firm had used the trade-mark of a crescent and star "for some time" and that "using or imitating the Mark would be proceeded against for infringement". The firm had acquired its interest in the crescent-and-star mark from the heirs of Charles Pickslay, the Sheffield cutler who had registered it with the Cutlers' Company in 1833 and had died in 1852. The year 1868 seems also to be the one in which the name Saracen Tool Works was first adopted; not only does it figure at the foot of the notice in the Sheffield press, it also makes its first appearance in the firm's entry in the Post-Office Glasgow Annual Directory in the 1868/9 edition. As Thomas Mathieson's business grew, so too did his involvement in local public life and philanthropy. One of the representatives of the third ward on the town council of Glasgow, he became a river bailie in 1868, a magistrate in 1870 and a preceptor of Hutcheson's Hospital in 1878. He had a passion for books and was an "ardent Ruskinian". He served on the committee handling the bequest for the setting up of the Mitchell Library in Glasgow. When he died at Coulter Maynes near Biggar in 1899, he left an estate worth £142,764. Company's later years: Both Thomas's sons, James Harper and Thomas Ogilvie were involved in the continuing life of the firm. James followed in his father's footsteps in becoming a local public figure. He was appointed Deputy Lieutenant of the County of the City of Glasgow and was made a deacon of the Incorporation of the Hammermen of Glasgow in 1919. His brother Thomas Ogilvie was recorded as tool manufacturer and employer in the 1911 census. Thomas Ogilvie's son Thomas Alastair Sutherland Ogilvie Mathieson was born in 1908 took a rather different approach to engineering, however, by becoming a racing driver. In 1947 he wed the French film actress Mila Parély. The firm had won many awards at world fairs for their goods. At the Great Exhibition, London, 1851. Prize medal for joiners' tools in the class of Cutlery & Edge Tools, Great London Exposition, 1862. Prize medal honoris causa. International Exhibition, Melbourne, 1880. Gold medal International Exhibition of Industry, Science and Art, Edinburgh, 1886. Prize medalThe firm of Alexander Mathieson & Son was one of the leading makers of hand tools in Scotland. Its success went hand in hand with the growth of the shipbuilding industries on the Firth of Clyde in the nineteenth century and the emergence of Glasgow as the "second city of the Empire". It also reflected the firm's skill in responding to an unprecedented demand for quality tools by shipyards, cooperages and other industries, both locally and far and wide.Smoothing Plane coffin type reinforcing screws in body complete with iron and wedge Maker Alex Mathieson and Son flagstaff hill, warrnambool, shipwrecked-coast, flagstaff-hill, flagstaff-hill-maritime-museum, maritime-museum, shipwreck-coast, flagstaff-hill-maritime-village