Showing 1039 items
matching general view
-
 Flagstaff Hill Maritime Museum and Village
Spoon, circa 1878
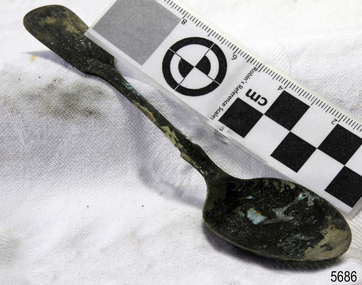
This tea spoon is from the wreck of the LOCH ARD, a Loch Line ship of 1,693 tons which sailed from Gravesend, London, on 2 March 1878 with 17 passengers and a crew of 36 under Captain George Gibbs. “The intention was to discharge cargo in Melbourne, before returning to London via the Horn with wool and wheat”. Instead, on 1 June 1878, after 90 days at sea, she struck the sandstone cliffs of Mutton Bird Island on the south west coast of Victoria, and sank with the loss of 52 lives and all her cargo. The manifest of the LOCH ARD listed an array of manufactured goods and bulk metals being exported to the Colony of Victoria, with a declared value of £53,700. (202 bills of lading show an actual invoice value of £68, 456, with insurance underwriting to £30,000 of all cargo). Included in the manifest is the item of “Tin hardware & cutlery £7,530”. This teaspoon is one of 482 similar items of electro-plated cutlery from the LOCH ARD site, comprising spoons and forks of various sizes but all sharing the same general shape or design and metallic composition. 49 of these pieces display a legible makers’ mark — the initials “W” and “P” placed within a raised diamond outline, which is in turn contained within a sunken crown shape — identifying the manufacturer as William Page & Co of Birmingham. An electroplater’s makers’ marks, unlike sterling silver hallmarks, are not consistent identifiers of quality or date and place of manufacture. A similar line of five impressions was usually made to impress the consumer with an implication of industry standards, but what each one actually signified was not regulated and so they varied according to the whim of the individual foundry. In this case, the maker’s marks are often obscured by sedimentary accretion or removed by corrosion after a century of submersion in the ocean. However sufficient detail has survived to indicate that these samples of electro-plated cutlery probably originated from the same consignment in the LOCH ARD’s cargo. The following descriptions of maker’s marks are drawn from 255 tea spoons, 125 dessert spoons, and 99 table forks. These marks are clearly visible in 66 instances, while the same sequence of general outlines, or depression shapes, is discernible in another 166 examples. 1. A recessed Crown containing a raised Diamond outline and the initials “W” and “P” (the recognised trademark of William Page & Co) 2. An impressed Ellipse containing a raised, pivoted, Triangle in its lower part and bearing a Resurrection Cross on its upper section (a possible dissenting church symbol reflecting religious affiliation); OR a rounded Square impression containing a raised, ‘lazy’, letter “B” (possibly mimicking sterling silver hallmark signifying city of manufacture i.e. Birmingham) 3. An impressed rounded Square filled with a raised Maltese Cross (the base metal composite of nickel silver was also known as ‘German silver’ after its Berlin inventors in 1823) 4. A recessed Circle containing a Crab or Scarab Beetle image; OR a recessed Circle containing a rotated ‘fleur de lys’ or ‘fasces’ design 5. A depressed Diamond shape enclosing a large raised letter “R” and a small raised letter “D” (mimicking the U.K. Patent Office stamp which abbreviated the term ‘registered’ to “RD”, but also included date and class of patent) Suggested trade names for William Page & Co’s particular blend of brass plating are ‘roman silver’ or ‘silverite’. This copper alloy polishes to a lustrous gold when new, discolouring to a murky grey with greenish hue when neglected. HISTORY OF THE LOCH ARD The LOCH ARD belonged to the famous Loch Line which sailed many ships from England to Australia. Built in Glasgow by Barclay, Curdle and Co. in 1873, the LOCH ARD was a three-masted square rigged iron sailing ship. The ship measured 262ft 7" (79.87m) in length, 38ft (11.58m) in width, 23ft (7m) in depth and had a gross tonnage of 1693 tons. The LOCH ARD's main mast measured a massive 150ft (45.7m) in height. LOCH ARD made three trips to Australia and one trip to Calcutta before its final voyage. LOCH ARD left England on March 2, 1878, under the command of Captain Gibbs, a newly married, 29 year old. She was bound for Melbourne with a crew of 37, plus 17 passengers and a load of cargo. The general cargo reflected the affluence of Melbourne at the time. On board were straw hats, umbrella, perfumes, clay pipes, pianos, clocks, confectionary, linen and candles, as well as a heavier load of railway irons, cement, lead and copper. There were items included that intended for display in the Melbourne International Exhibition in 1880. The voyage to Port Phillip was long but uneventful. At 3am on June 1, 1878, Captain Gibbs was expecting to see land and the passengers were becoming excited as they prepared to view their new homeland in the early morning. But LOCH ARD was running into a fog which greatly reduced visibility. Captain Gibbs was becoming anxious as there was no sign of land or the Cape Otway lighthouse. At 4am the fog lifted. A man aloft announced that he could see breakers. The sheer cliffs of Victoria's west coast came into view, and Captain Gibbs realised that the ship was much closer to them than expected. He ordered as much sail to be set as time would permit and then attempted to steer the vessel out to sea. On coming head on into the wind, the ship lost momentum, the sails fell limp and LOCH ARD's bow swung back. Gibbs then ordered the anchors to be released in an attempt to hold its position. The anchors sank some 50 fathoms - but did not hold. By this time LOCH ARD was among the breakers and the tall cliffs of Mutton Bird Island rose behind the ship. Just half a mile from the coast, the ship's bow was suddenly pulled around by the anchor. The captain tried to tack out to sea, but the ship struck a reef at the base of Mutton Bird Island, near Port Campbell. Waves broke over the ship and the top deck was loosened from the hull. The masts and rigging came crashing down knocking passengers and crew overboard. When a lifeboat was finally launched, it crashed into the side of LOCH ARD and capsized. Tom Pearce, who had launched the boat, managed to cling to its overturned hull and shelter beneath it. He drifted out to sea and then on the flood tide came into what is now known as LOCH ARD Gorge. He swam to shore, bruised and dazed, and found a cave in which to shelter. Some of the crew stayed below deck to shelter from the falling rigging but drowned when the ship slipped off the reef into deeper water. Eva Carmichael had raced onto deck to find out what was happening only to be confronted by towering cliffs looming above the stricken ship. In all the chaos, Captain Gibbs grabbed Eva and said, "If you are saved Eva, let my dear wife know that I died like a sailor". That was the last Eva Carmichael saw of the captain. She was swept off the ship by a huge wave. Eva saw Tom Pearce on a small rocky beach and yelled to attract his attention. He dived in and swam to the exhausted woman and dragged her to shore. He took her to the cave and broke open case of brandy which had washed up on the beach. He opened a bottle to revive the unconscious woman. A few hours later Tom scaled a cliff in search of help. He followed hoof prints and came by chance upon two men from nearby Glenample Station three and a half miles away. In a state of exhaustion, he told the men of the tragedy. Tom returned to the gorge while the two men rode back to the station to get help. By the time they reached LOCH ARD Gorge, it was cold and dark. The two shipwreck survivors were taken to Glenample Station to recover. Eva stayed at the station for six weeks before returning to Ireland, this time by steamship. In Melbourne, Tom Pearce received a hero's welcome. He was presented with the first gold medal of the Royal Humane Society of Victoria and a £1000 cheque from the Victorian Government. Concerts were performed to honour the young man's bravery and to raise money for those who lost family in the LOCH ARD disaster. Of the 54 crew members and passengers on board, only two survived: the apprentice, Tom Pearce and the young woman passenger, Eva Carmichael, who lost all of her family in the tragedy. Ten days after the LOCH ARD tragedy, salvage rights to the wreck were sold at auction for £2,120. Cargo valued at £3,000 was salvaged and placed on the beach, but most washed back into the sea when another storm developed. The wreck of LOCH ARD still lies at the base of Mutton Bird Island. Much of the cargo has now been salvaged and some was washed up into what is now known as LOCH ARD Gorge. Cargo and artefacts have also been illegally salvaged over many years before protective legislation was introduced. One of the most unlikely pieces of cargo to have survived the shipwreck was a Minton porcelain peacock - one of only seven in the world. The peacock was destined for the Melbourne International Exhibition in 1880. It had been well packed, which gave it adequate protection during the violent storm. Today, the Minton peacock can be seen at the Flagstaff Hill Maritime Museum in Warrnambool. From Australia's most dramatic shipwreck it has now become Australia's most valuable shipwreck artefact and is one of very few 'objects' on the Victorian State Heritage Register. The LOCH ARD shipwreck is of State significance – Victorian Heritage Register S 417. Flagstaff Hill’s collection of artefacts from LOCH ARD is significant for being one of the largest collections of artefacts from this shipwreck in Victoria. It is significant for its association with the shipwreck, which is on the Victorian Heritage Register (VHR S417). The collection is significant because of the relationship between the objects, as together they have a high potential to interpret the story of the LOCH ARD. The LOCH ARD collection is archaeologically significant as the remains of a large international passenger and cargo ship. The LOCH ARD collection is historically significant for representing aspects of Victoria’s shipping history and its potential to interpret sub-theme 1.5 of Victoria’s Framework of Historical Themes (living with natural processes). The collection is also historically significant for its association with the LOCH ARD, which was one of the worst and best known shipwrecks in Victoria’s history. Unrestored tea spoon from the wreck of the LOCH ARD. The spoon design has a flattened fiddle-back handle, with a thin stem or shank, flared collar, and elongated bowl. The spoons metallic composition is a thin layer of brass alloy which has partially corroded back to a nickel-silver base metal. Only 15% of original electroplating remains with bright vertigris on 5% of spoon surface.flagstaff hill, warrnambool, shipwrecked coast, flagstaff hill maritime museum, maritime museum, shipwreck coast, flagstaff hill maritime village, great ocean road, loch line, loch ard, captain gibbs, eva carmichael, tom pearce, glenample station, mutton bird island, loch ard gorge, electroplated cutlery, loch ard shipwreck, nickel silver, william page & co, birmingham, brass plating, makers marks -
 Flagstaff Hill Maritime Museum and Village
Domestic object - Spoon, circa 1878
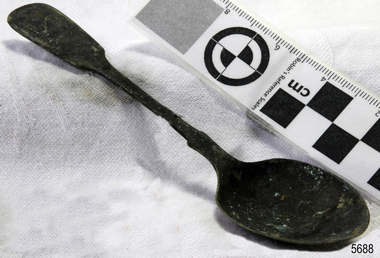
This tea spoon is from the wreck of the LOCH ARD, a Loch Line ship of 1,693 tons which sailed from Gravesend, London, on 2 March 1878 with 17 passengers and a crew of 36 under Captain George Gibbs. “The intention was to discharge cargo in Melbourne, before returning to London via the Horn with wool and wheat”. Instead, on 1 June 1878, after 90 days at sea, she struck the sandstone cliffs of Mutton Bird Island on the south west coast of Victoria, and sank with the loss of 52 lives and all her cargo. The manifest of the LOCH ARD listed an array of manufactured goods and bulk metals being exported to the Colony of Victoria, with a declared value of £53,700. (202 bills of lading show an actual invoice value of £68, 456, with insurance underwriting to £30,000 of all cargo). Included in the manifest is the item of “Tin hardware & cutlery £7,530”. This teaspoon is one of 482 similar items of electro-plated cutlery from the LOCH ARD site, comprising spoons and forks of various sizes but all sharing the same general shape or design and metallic composition. 49 of these pieces display a legible makers’ mark — the initials “W” and “P” placed within a raised diamond outline, which is in turn contained within a sunken crown shape — identifying the manufacturer as William Page & Co of Birmingham. An electroplater’s makers’ marks, unlike sterling silver hallmarks, are not consistent identifiers of quality or date and place of manufacture. A similar line of five impressions was usually made to impress the consumer with an implication of industry standards, but what each one actually signified was not regulated and so they varied according to the whim of the individual foundry. In this case, the maker’s marks are often obscured by sedimentary accretion or removed by corrosion after a century of submersion in the ocean. However sufficient detail has survived to indicate that these samples of electro-plated cutlery probably originated from the same consignment in the LOCH ARD’s cargo. The following descriptions of maker’s marks are drawn from 255 tea spoons, 125 dessert spoons, and 99 table forks. These marks are clearly visible in 66 instances, while the same sequence of general outlines, or depression shapes, is discernible in another 166 examples. 1. A recessed Crown containing a raised Diamond outline and the initials “W” and “P” (the recognised trademark of William Page & Co) 2. An impressed Ellipse containing a raised, pivoted, Triangle in its lower part and bearing a Resurrection Cross on its upper section (a possible dissenting church symbol reflecting religious affiliation); OR a rounded Square impression containing a raised, ‘lazy’, letter “B” (possibly mimicking sterling silver hallmark signifying city of manufacture i.e. Birmingham) 3. An impressed rounded Square filled with a raised Maltese Cross (the base metal composite of nickel silver was also known as ‘German silver’ after its Berlin inventors in 1823) 4. A recessed Circle containing a Crab or Scarab Beetle image; OR a recessed Circle containing a rotated ‘fleur de lys’ or ‘fasces’ design 5. A depressed Diamond shape enclosing a large raised letter “R” and a small raised letter “D” (mimicking the U.K. Patent Office stamp which abbreviated the term ‘registered’ to “RD”, but also included date and class of patent) Suggested trade names for William Page & Co’s particular blend of brass plating are ‘roman silver’ or ‘silverite’. This copper alloy polishes to a lustrous gold when new, discolouring to a murky grey with greenish hue when neglected. HISTORY OF THE LOCH ARD The LOCH ARD belonged to the famous Loch Line which sailed many ships from England to Australia. Built in Glasgow by Barclay, Curdle and Co. in 1873, the LOCH ARD was a three-masted square rigged iron sailing ship. The ship measured 262ft 7" (79.87m) in length, 38ft (11.58m) in width, 23ft (7m) in depth and had a gross tonnage of 1693 tons. The LOCH ARD's main mast measured a massive 150ft (45.7m) in height. LOCH ARD made three trips to Australia and one trip to Calcutta before its final voyage. LOCH ARD left England on March 2, 1878, under the command of Captain Gibbs, a newly married, 29 year old. She was bound for Melbourne with a crew of 37, plus 17 passengers and a load of cargo. The general cargo reflected the affluence of Melbourne at the time. On board were straw hats, umbrella, perfumes, clay pipes, pianos, clocks, confectionary, linen and candles, as well as a heavier load of railway irons, cement, lead and copper. There were items included that intended for display in the Melbourne International Exhibition in 1880. The voyage to Port Phillip was long but uneventful. At 3am on June 1, 1878, Captain Gibbs was expecting to see land and the passengers were becoming excited as they prepared to view their new homeland in the early morning. But LOCH ARD was running into a fog which greatly reduced visibility. Captain Gibbs was becoming anxious as there was no sign of land or the Cape Otway lighthouse. At 4am the fog lifted. A man aloft announced that he could see breakers. The sheer cliffs of Victoria's west coast came into view, and Captain Gibbs realised that the ship was much closer to them than expected. He ordered as much sail to be set as time would permit and then attempted to steer the vessel out to sea. On coming head on into the wind, the ship lost momentum, the sails fell limp and LOCH ARD's bow swung back. Gibbs then ordered the anchors to be released in an attempt to hold its position. The anchors sank some 50 fathoms - but did not hold. By this time LOCH ARD was among the breakers and the tall cliffs of Mutton Bird Island rose behind the ship. Just half a mile from the coast, the ship's bow was suddenly pulled around by the anchor. The captain tried to tack out to sea, but the ship struck a reef at the base of Mutton Bird Island, near Port Campbell. Waves broke over the ship and the top deck was loosened from the hull. The masts and rigging came crashing down knocking passengers and crew overboard. When a lifeboat was finally launched, it crashed into the side of LOCH ARD and capsized. Tom Pearce, who had launched the boat, managed to cling to its overturned hull and shelter beneath it. He drifted out to sea and then on the flood tide came into what is now known as LOCH ARD Gorge. He swam to shore, bruised and dazed, and found a cave in which to shelter. Some of the crew stayed below deck to shelter from the falling rigging but drowned when the ship slipped off the reef into deeper water. Eva Carmichael had raced onto deck to find out what was happening only to be confronted by towering cliffs looming above the stricken ship. In all the chaos, Captain Gibbs grabbed Eva and said, "If you are saved Eva, let my dear wife know that I died like a sailor". That was the last Eva Carmichael saw of the captain. She was swept off the ship by a huge wave. Eva saw Tom Pearce on a small rocky beach and yelled to attract his attention. He dived in and swam to the exhausted woman and dragged her to shore. He took her to the cave and broke open case of brandy which had washed up on the beach. He opened a bottle to revive the unconscious woman. A few hours later Tom scaled a cliff in search of help. He followed hoof prints and came by chance upon two men from nearby Glenample Station three and a half miles away. In a state of exhaustion, he told the men of the tragedy. Tom returned to the gorge while the two men rode back to the station to get help. By the time they reached LOCH ARD Gorge, it was cold and dark. The two shipwreck survivors were taken to Glenample Station to recover. Eva stayed at the station for six weeks before returning to Ireland, this time by steamship. In Melbourne, Tom Pearce received a hero's welcome. He was presented with the first gold medal of the Royal Humane Society of Victoria and a £1000 cheque from the Victorian Government. Concerts were performed to honour the young man's bravery and to raise money for those who lost family in the LOCH ARD disaster. Of the 54 crew members and passengers on board, only two survived: the apprentice, Tom Pearce and the young woman passenger, Eva Carmichael, who lost all of her family in the tragedy. Ten days after the LOCH ARD tragedy, salvage rights to the wreck were sold at auction for £2,120. Cargo valued at £3,000 was salvaged and placed on the beach, but most washed back into the sea when another storm developed. The wreck of LOCH ARD still lies at the base of Mutton Bird Island. Much of the cargo has now been salvaged and some was washed up into what is now known as LOCH ARD Gorge. Cargo and artefacts have also been illegally salvaged over many years before protective legislation was introduced. One of the most unlikely pieces of cargo to have survived the shipwreck was a Minton porcelain peacock - one of only seven in the world. The peacock was destined for the Melbourne International Exhibition in 1880. It had been well packed, which gave it adequate protection during the violent storm. Today, the Minton peacock can be seen at the Flagstaff Hill Maritime Museum in Warrnambool. From Australia's most dramatic shipwreck it has now become Australia's most valuable shipwreck artefact and is one of very few 'objects' on the Victorian State Heritage Register. The LOCH ARD shipwreck is of State significance – Victorian Heritage Register S 417. Flagstaff Hill’s collection of artefacts from LOCH ARD is significant for being one of the largest collections of artefacts from this shipwreck in Victoria. It is significant for its association with the shipwreck, which is on the Victorian Heritage Register (VHR S417). The collection is significant because of the relationship between the objects, as together they have a high potential to interpret the story of the LOCH ARD. The LOCH ARD collection is archaeologically significant as the remains of a large international passenger and cargo ship. The LOCH ARD collection is historically significant for representing aspects of Victoria’s shipping history and its potential to interpret sub-theme 1.5 of Victoria’s Framework of Historical Themes (living with natural processes). The collection is also historically significant for its association with the LOCH ARD, which was one of the worst and best known shipwrecks in Victoria’s history. Unrestored tea spoon from the wreck of the LOCH ARD. The spoon design has a flattened fiddle-back handle, with a thin stem or shank, flared collar, and elongated bowl. The spoons metallic composition is a thin layer of brass alloy which has partially corroded back to a nickel-silver base metal. Only 15% of original electroplating remains with verdigris on 5% of spoon surface. Outlines of five makers marks are visible but details are obscured.flagstaff hill maritime museum, shipwreck coast, great ocean road, loch line, loch ard, mutton bird island, loch ard gorge, electroplated cutlery, loch ard shipwreck, nickel silver, william page & co, birmingham, brass plating, makers marks -
 Flagstaff Hill Maritime Museum and Village
Spoon, circa 1878
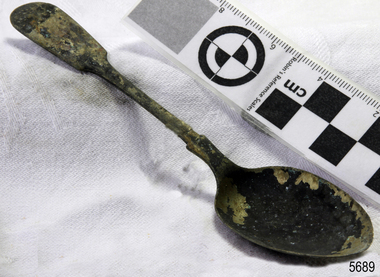
This tea spoon is from the wreck of the LOCH ARD, a Loch Line ship of 1,693 tons which sailed from Gravesend, London, on 2 March 1878 with 17 passengers and a crew of 36 under Captain George Gibbs. “The intention was to discharge cargo in Melbourne, before returning to London via the Horn with wool and wheat”. Instead, on 1 June 1878, after 90 days at sea, she struck the sandstone cliffs of Mutton Bird Island on the south west coast of Victoria, and sank with the loss of 52 lives and all her cargo. The manifest of the LOCH ARD listed an array of manufactured goods and bulk metals being exported to the Colony of Victoria, with a declared value of £53,700. (202 bills of lading show an actual invoice value of £68, 456, with insurance underwriting to £30,000 of all cargo). Included in the manifest is the item of “Tin hardware & cutlery £7,530”. This teaspoon is one of 482 similar items of electro-plated cutlery from the LOCH ARD site, comprising spoons and forks of various sizes but all sharing the same general shape or design and metallic composition. 49 of these pieces display a legible makers’ mark — the initials “W” and “P” placed within a raised diamond outline, which is in turn contained within a sunken crown shape — identifying the manufacturer as William Page & Co of Birmingham. An electroplater’s makers’ marks, unlike sterling silver hallmarks, are not consistent identifiers of quality or date and place of manufacture. A similar line of five impressions was usually made to impress the consumer with an implication of industry standards, but what each one actually signified was not regulated and so they varied according to the whim of the individual foundry. In this case, the maker’s marks are often obscured by sedimentary accretion or removed by corrosion after a century of submersion in the ocean. However sufficient detail has survived to indicate that these samples of electro-plated cutlery probably originated from the same consignment in the LOCH ARD’s cargo. The following descriptions of maker’s marks are drawn from 255 tea spoons, 125 dessert spoons, and 99 table forks. These marks are clearly visible in 66 instances, while the same sequence of general outlines, or depression shapes, is discernible in another 166 examples. 1. A recessed Crown containing a raised Diamond outline and the initials “W” and “P” (the recognised trademark of William Page & Co) 2. An impressed Ellipse containing a raised, pivoted, Triangle in its lower part and bearing a Resurrection Cross on its upper section (a possible dissenting church symbol reflecting religious affiliation); OR a rounded Square impression containing a raised, ‘lazy’, letter “B” (possibly mimicking sterling silver hallmark signifying city of manufacture i.e. Birmingham) 3. An impressed rounded Square filled with a raised Maltese Cross (the base metal composite of nickel silver was also known as ‘German silver’ after its Berlin inventors in 1823) 4. A recessed Circle containing a Crab or Scarab Beetle image; OR a recessed Circle containing a rotated ‘fleur de lys’ or ‘fasces’ design 5. A depressed Diamond shape enclosing a large raised letter “R” and a small raised letter “D” (mimicking the U.K. Patent Office stamp which abbreviated the term ‘registered’ to “RD”, but also included date and class of patent) Suggested trade names for William Page & Co’s particular blend of brass plating are ‘roman silver’ or ‘silverite’. This copper alloy polishes to a lustrous gold when new, discolouring to a murky grey with greenish hue when neglected. HISTORY OF THE LOCH ARD The LOCH ARD belonged to the famous Loch Line which sailed many ships from England to Australia. Built in Glasgow by Barclay, Curdle and Co. in 1873, the LOCH ARD was a three-masted square rigged iron sailing ship. The ship measured 262ft 7" (79.87m) in length, 38ft (11.58m) in width, 23ft (7m) in depth and had a gross tonnage of 1693 tons. The LOCH ARD's main mast measured a massive 150ft (45.7m) in height. LOCH ARD made three trips to Australia and one trip to Calcutta before its final voyage. LOCH ARD left England on March 2, 1878, under the command of Captain Gibbs, a newly married, 29 year old. She was bound for Melbourne with a crew of 37, plus 17 passengers and a load of cargo. The general cargo reflected the affluence of Melbourne at the time. On board were straw hats, umbrella, perfumes, clay pipes, pianos, clocks, confectionary, linen and candles, as well as a heavier load of railway irons, cement, lead and copper. There were items included that intended for display in the Melbourne International Exhibition in 1880. The voyage to Port Phillip was long but uneventful. At 3am on June 1, 1878, Captain Gibbs was expecting to see land and the passengers were becoming excited as they prepared to view their new homeland in the early morning. But LOCH ARD was running into a fog which greatly reduced visibility. Captain Gibbs was becoming anxious as there was no sign of land or the Cape Otway lighthouse. At 4am the fog lifted. A man aloft announced that he could see breakers. The sheer cliffs of Victoria's west coast came into view, and Captain Gibbs realised that the ship was much closer to them than expected. He ordered as much sail to be set as time would permit and then attempted to steer the vessel out to sea. On coming head on into the wind, the ship lost momentum, the sails fell limp and LOCH ARD's bow swung back. Gibbs then ordered the anchors to be released in an attempt to hold its position. The anchors sank some 50 fathoms - but did not hold. By this time LOCH ARD was among the breakers and the tall cliffs of Mutton Bird Island rose behind the ship. Just half a mile from the coast, the ship's bow was suddenly pulled around by the anchor. The captain tried to tack out to sea, but the ship struck a reef at the base of Mutton Bird Island, near Port Campbell. Waves broke over the ship and the top deck was loosened from the hull. The masts and rigging came crashing down knocking passengers and crew overboard. When a lifeboat was finally launched, it crashed into the side of LOCH ARD and capsized. Tom Pearce, who had launched the boat, managed to cling to its overturned hull and shelter beneath it. He drifted out to sea and then on the flood tide came into what is now known as LOCH ARD Gorge. He swam to shore, bruised and dazed, and found a cave in which to shelter. Some of the crew stayed below deck to shelter from the falling rigging but drowned when the ship slipped off the reef into deeper water. Eva Carmichael had raced onto deck to find out what was happening only to be confronted by towering cliffs looming above the stricken ship. In all the chaos, Captain Gibbs grabbed Eva and said, "If you are saved Eva, let my dear wife know that I died like a sailor". That was the last Eva Carmichael saw of the captain. She was swept off the ship by a huge wave. Eva saw Tom Pearce on a small rocky beach and yelled to attract his attention. He dived in and swam to the exhausted woman and dragged her to shore. He took her to the cave and broke open case of brandy which had washed up on the beach. He opened a bottle to revive the unconscious woman. A few hours later Tom scaled a cliff in search of help. He followed hoof prints and came by chance upon two men from nearby Glenample Station three and a half miles away. In a state of exhaustion, he told the men of the tragedy. Tom returned to the gorge while the two men rode back to the station to get help. By the time they reached LOCH ARD Gorge, it was cold and dark. The two shipwreck survivors were taken to Glenample Station to recover. Eva stayed at the station for six weeks before returning to Ireland, this time by steamship. In Melbourne, Tom Pearce received a hero's welcome. He was presented with the first gold medal of the Royal Humane Society of Victoria and a £1000 cheque from the Victorian Government. Concerts were performed to honour the young man's bravery and to raise money for those who lost family in the LOCH ARD disaster. Of the 54 crew members and passengers on board, only two survived: the apprentice, Tom Pearce and the young woman passenger, Eva Carmichael, who lost all of her family in the tragedy. Ten days after the LOCH ARD tragedy, salvage rights to the wreck were sold at auction for £2,120. Cargo valued at £3,000 was salvaged and placed on the beach, but most washed back into the sea when another storm developed. The wreck of LOCH ARD still lies at the base of Mutton Bird Island. Much of the cargo has now been salvaged and some was washed up into what is now known as LOCH ARD Gorge. Cargo and artefacts have also been illegally salvaged over many years before protective legislation was introduced. One of the most unlikely pieces of cargo to have survived the shipwreck was a Minton porcelain peacock - one of only seven in the world. The peacock was destined for the Melbourne International Exhibition in 1880. It had been well packed, which gave it adequate protection during the violent storm. Today, the Minton peacock can be seen at the Flagstaff Hill Maritime Museum in Warrnambool. From Australia's most dramatic shipwreck it has now become Australia's most valuable shipwreck artefact and is one of very few 'objects' on the Victorian State Heritage Register. The LOCH ARD shipwreck is of State significance – Victorian Heritage Register S 417. Flagstaff Hill’s collection of artefacts from LOCH ARD is significant for being one of the largest collections of artefacts from this shipwreck in Victoria. It is significant for its association with the shipwreck, which is on the Victorian Heritage Register (VHR S417). The collection is significant because of the relationship between the objects, as together they have a high potential to interpret the story of the LOCH ARD. The LOCH ARD collection is archaeologically significant as the remains of a large international passenger and cargo ship. The LOCH ARD collection is historically significant for representing aspects of Victoria’s shipping history and its potential to interpret sub-theme 1.5 of Victoria’s Framework of Historical Themes (living with natural processes). The collection is also historically significant for its association with the LOCH ARD, which was one of the worst and best known shipwrecks in Victoria’s history. Unrestored tea spoon from the wreck of the LOCH ARD. The spoon design has a flattened fiddle-back handle, with a thin stem or shank, flared collar, and elongated bowl. The spoons metallic composition is a thin layer of brass alloy which has partially corroded back to a nickel-silver base metal. Only 10% of original electroplating remains as a dull bronze colour. Outlines of five makers marks are visible.flagstaff hill, warrnambool, shipwrecked coast, flagstaff hill maritime museum, maritime museum, shipwreck coast, flagstaff hill maritime village, great ocean road, loch line, loch ard, captain gibbs, eva carmichael, tom pearce, glenample station, mutton bird island, electroplated cutlery, loch ard shipwreck, nickel silver, william page & co, birmingham, brass plating, makers marks -
 Flagstaff Hill Maritime Museum and Village
Spoon, circa 1878
This tea spoon is from the wreck of the LOCH ARD, a Loch Line ship of 1,693 tons which sailed from Gravesend, London, on 2 March 1878 with 17 passengers and a crew of 36 under Captain George Gibbs. “The intention was to discharge cargo in Melbourne, before returning to London via the Horn with wool and wheat”. Instead, on 1 June 1878, after 90 days at sea, she struck the sandstone cliffs of Mutton Bird Island on the south west coast of Victoria, and sank with the loss of 52 lives and all her cargo. The manifest of the LOCH ARD listed an array of manufactured goods and bulk metals being exported to the Colony of Victoria, with a declared value of £53,700. (202 bills of lading show an actual invoice value of £68, 456, with insurance underwriting to £30,000 of all cargo). Included in the manifest is the item of “Tin hardware & cutlery £7,530”. This teaspoon is one of 482 similar items of electro-plated cutlery from the LOCH ARD site, comprising spoons and forks of various sizes but all sharing the same general shape or design and metallic composition. 49 of these pieces display a legible makers’ mark — the initials “W” and “P” placed within a raised diamond outline, which is in turn contained within a sunken crown shape — identifying the manufacturer as William Page & Co of Birmingham. An electroplater’s makers’ marks, unlike sterling silver hallmarks, are not consistent identifiers of quality or date and place of manufacture. A similar line of five impressions was usually made to impress the consumer with an implication of industry standards, but what each one actually signified was not regulated and so they varied according to the whim of the individual foundry. In this case, the maker’s marks are often obscured by sedimentary accretion or removed by corrosion after a century of submersion in the ocean. However sufficient detail has survived to indicate that these samples of electro-plated cutlery probably originated from the same consignment in the LOCH ARD’s cargo. The following descriptions of maker’s marks are drawn from 255 tea spoons, 125 dessert spoons, and 99 table forks. These marks are clearly visible in 66 instances, while the same sequence of general outlines, or depression shapes, is discernible in another 166 examples. 1. A recessed Crown containing a raised Diamond outline and the initials “W” and “P” (the recognised trademark of William Page & Co) 2. An impressed Ellipse containing a raised, pivoted, Triangle in its lower part and bearing a Resurrection Cross on its upper section (a possible dissenting church symbol reflecting religious affiliation); OR a rounded Square impression containing a raised, ‘lazy’, letter “B” (possibly mimicking sterling silver hallmark signifying city of manufacture i.e. Birmingham) 3. An impressed rounded Square filled with a raised Maltese Cross (the base metal composite of nickel silver was also known as ‘German silver’ after its Berlin inventors in 1823) 4. A recessed Circle containing a Crab or Scarab Beetle image; OR a recessed Circle containing a rotated ‘fleur de lys’ or ‘fasces’ design 5. A depressed Diamond shape enclosing a large raised letter “R” and a small raised letter “D” (mimicking the U.K. Patent Office stamp which abbreviated the term ‘registered’ to “RD”, but also included date and class of patent) Suggested trade names for William Page & Co’s particular blend of brass plating are ‘roman silver’ or ‘silverite’. This copper alloy polishes to a lustrous gold when new, discolouring to a murky grey with greenish hue when neglected. HISTORY OF THE LOCH ARD The LOCH ARD belonged to the famous Loch Line which sailed many ships from England to Australia. Built in Glasgow by Barclay, Curdle and Co. in 1873, the LOCH ARD was a three-masted square rigged iron sailing ship. The ship measured 262ft 7" (79.87m) in length, 38ft (11.58m) in width, 23ft (7m) in depth and had a gross tonnage of 1693 tons. The LOCH ARD's main mast measured a massive 150ft (45.7m) in height. LOCH ARD made three trips to Australia and one trip to Calcutta before its final voyage. LOCH ARD left England on March 2, 1878, under the command of Captain Gibbs, a newly married, 29 year old. She was bound for Melbourne with a crew of 37, plus 17 passengers and a load of cargo. The general cargo reflected the affluence of Melbourne at the time. On board were straw hats, umbrella, perfumes, clay pipes, pianos, clocks, confectionary, linen and candles, as well as a heavier load of railway irons, cement, lead and copper. There were items included that intended for display in the Melbourne International Exhibition in 1880. The voyage to Port Phillip was long but uneventful. At 3am on June 1, 1878, Captain Gibbs was expecting to see land and the passengers were becoming excited as they prepared to view their new homeland in the early morning. But LOCH ARD was running into a fog which greatly reduced visibility. Captain Gibbs was becoming anxious as there was no sign of land or the Cape Otway lighthouse. At 4am the fog lifted. A man aloft announced that he could see breakers. The sheer cliffs of Victoria's west coast came into view, and Captain Gibbs realised that the ship was much closer to them than expected. He ordered as much sail to be set as time would permit and then attempted to steer the vessel out to sea. On coming head on into the wind, the ship lost momentum, the sails fell limp and LOCH ARD's bow swung back. Gibbs then ordered the anchors to be released in an attempt to hold its position. The anchors sank some 50 fathoms - but did not hold. By this time LOCH ARD was among the breakers and the tall cliffs of Mutton Bird Island rose behind the ship. Just half a mile from the coast, the ship's bow was suddenly pulled around by the anchor. The captain tried to tack out to sea, but the ship struck a reef at the base of Mutton Bird Island, near Port Campbell. Waves broke over the ship and the top deck was loosened from the hull. The masts and rigging came crashing down knocking passengers and crew overboard. When a lifeboat was finally launched, it crashed into the side of LOCH ARD and capsized. Tom Pearce, who had launched the boat, managed to cling to its overturned hull and shelter beneath it. He drifted out to sea and then on the flood tide came into what is now known as LOCH ARD Gorge. He swam to shore, bruised and dazed, and found a cave in which to shelter. Some of the crew stayed below deck to shelter from the falling rigging but drowned when the ship slipped off the reef into deeper water. Eva Carmichael had raced onto deck to find out what was happening only to be confronted by towering cliffs looming above the stricken ship. In all the chaos, Captain Gibbs grabbed Eva and said, "If you are saved Eva, let my dear wife know that I died like a sailor". That was the last Eva Carmichael saw of the captain. She was swept off the ship by a huge wave. Eva saw Tom Pearce on a small rocky beach and yelled to attract his attention. He dived in and swam to the exhausted woman and dragged her to shore. He took her to the cave and broke open case of brandy which had washed up on the beach. He opened a bottle to revive the unconscious woman. A few hours later Tom scaled a cliff in search of help. He followed hoof prints and came by chance upon two men from nearby Glenample Station three and a half miles away. In a state of exhaustion, he told the men of the tragedy. Tom returned to the gorge while the two men rode back to the station to get help. By the time they reached LOCH ARD Gorge, it was cold and dark. The two shipwreck survivors were taken to Glenample Station to recover. Eva stayed at the station for six weeks before returning to Ireland, this time by steamship. In Melbourne, Tom Pearce received a hero's welcome. He was presented with the first gold medal of the Royal Humane Society of Victoria and a £1000 cheque from the Victorian Government. Concerts were performed to honour the young man's bravery and to raise money for those who lost family in the LOCH ARD disaster. Of the 54 crew members and passengers on board, only two survived: the apprentice, Tom Pearce and the young woman passenger, Eva Carmichael, who lost all of her family in the tragedy. Ten days after the LOCH ARD tragedy, salvage rights to the wreck were sold at auction for £2,120. Cargo valued at £3,000 was salvaged and placed on the beach, but most washed back into the sea when another storm developed. The wreck of LOCH ARD still lies at the base of Mutton Bird Island. Much of the cargo has now been salvaged and some was washed up into what is now known as LOCH ARD Gorge. Cargo and artefacts have also been illegally salvaged over many years before protective legislation was introduced. One of the most unlikely pieces of cargo to have survived the shipwreck was a Minton porcelain peacock - one of only seven in the world. The peacock was destined for the Melbourne International Exhibition in 1880. It had been well packed, which gave it adequate protection during the violent storm. Today, the Minton peacock can be seen at the Flagstaff Hill Maritime Museum in Warrnambool. From Australia's most dramatic shipwreck it has now become Australia's most valuable shipwreck artefact and is one of very few 'objects' on the Victorian State Heritage Register. The LOCH ARD shipwreck is of State significance – Victorian Heritage Register S 417. Flagstaff Hill’s collection of artefacts from LOCH ARD is significant for being one of the largest collections of artefacts from this shipwreck in Victoria. It is significant for its association with the shipwreck, which is on the Victorian Heritage Register (VHR S417). The collection is significant because of the relationship between the objects, as together they have a high potential to interpret the story of the LOCH ARD. The LOCH ARD collection is archaeologically significant as the remains of a large international passenger and cargo ship. The LOCH ARD collection is historically significant for representing aspects of Victoria’s shipping history and its potential to interpret sub-theme 1.5 of Victoria’s Framework of Historical Themes (living with natural processes). The collection is also historically significant for its association with the LOCH ARD, which was one of the worst and best known shipwrecks in Victoria’s history. Unrestored tea spoon from the wreck of the LOCH ARD. The spoon design has a flattened fiddle-back handle, with a thin stem or shank, flared collar, and elongated bowl. The spoons metallic composition is a thin layer of brass alloy which has partially corroded back to a nickel-silver base metal. 50% of original electroplating remains. Two of five makers marks are legible: (1) Trade Mark (4) Crab Designflagstaff hill, warrnambool, shipwrecked coast, flagstaff hill maritime museum, maritime museum, shipwreck coast, flagstaff hill maritime village, great ocean road, loch line, loch ard, captain gibbs, eva carmichael, tom pearce, glenample station, mutton bird island, loch ard gorge, electroplated cutlery, loch ard shipwreck, nickel silver, william page & co, birmingham, brass plating, makers marks -
 Bendigo Military Museum
Newspaper, MacKay & Co, Bendigonian, 1914
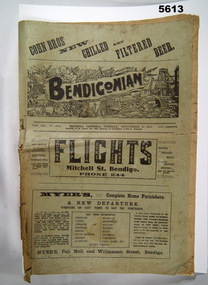
Newspaper produced weekly in Bendigo during 1914 - 1918. General articles, local and world wide, obituaries, photographs of local identities and group of military men. Views of Castlemaine photographs.Newspaper - PAPER, faded blue cover with fawn coloured pages. 28 pages, black print, photographs black and white.'BENDIGONIAN' Bendigo, Victoria, Tuesday September 15, 1914.newspaper, general articles, photos, ww1 -
 Bendigo Military Museum
Administrative record - Advisory Committee on Commonwealth Mapping Meeting Notes - (National Mapping Council Meetings), Circa 1972
Advisory Committee on Commonwealth Mapping (ACOCM) Meeting Notes. 15 Items of typed pages and diagrams. .1 Letter to the Hon WS Kent Hughes MVO, OBE, Mc, ED, MP, Minister for the Interior, ACT Signed Jos Francis. Cabinet Decision taken on 22 July 1954, effects on current military mapping agreements between AUS, UK and USA. Australian responsibility "Noted was the fact that RASvy was in preparation for War." .2 Letter by H Wells Lieutenant General, Chief of the General Staff, 17 Feb 1955. Refers to the invitation of Major General RL Brown UK Defence to visit Australia to help align the mapping programme. .3 Draft Cabinet Submission on National Mapping Survey and Mapping Co-ordination of the 22 July 1955. Attachment 1 Cabinet Minute, Vice-President's letter Canberra22 July 1954. Decision No2 (VP). Submission 8 National Mapping Survey and Mapping Co-ordination. .4 Air photography and Mapping Programme 1956/57. Signed by LF Fitzgerald OBE Director of Military Survey 26 Jan 56. .5 Letter Hon WS Kent Hughes MVO, OBE, MC, ED, MP. Minister for the Interior ACT. Confirming the Cabinet Decision No2 (VP) Signed by Joe Francis .6 National Mapping Programme 1956/57. States a view to Army's contribution to this programme .7 Clarifies Army participation in Cabinet Decision No2 (VP) .8 History of National Mapping Asst Secretary (General) 24 Apr 1958 .9 Report on Army Committee on National Mapping. 2 July 1958 .10 RASvy Brief Review of Activities Jan - Dec 1964 .11 Advisory Committee on Commonwealth Mapping Meeting Notes 12 Feb 1965 - Agenda item 8. This endorsed the principle of grouping Commonwealth Mapping Agencies in a Survey Mapping Group in Canberra which included AHQ Survey Regiment. This did not come to fruition. .12 Advisory Committee on Commonwealth Mapping Meeting Notes 12 Feb 1965 - Agenda item 8 para 5.1.3 - 11.2 .13 ACOCM Meeting Agenda 1968 .14 ACOCM Meeting Minutes 1970 .15 Letter to Mr B White CBE Secretary from LF BottAdvisory Committee on Commonwealth Mapping (ACOCM) Meeting Notes. 15 Items of typed pages and diagrams. .1 Letter 22 July 1954 .2 Letter 17 Feb 1955 .3 Letter 22 July 1955 .4 letter 26 Jan 1956 .5 Letter Hon WS Kent Hughes Minister for the Interior ACT .6 National Mapping Programme 1956/57 .7 Clarifies Army participation in Cabinet Decision No2 (VP) .8 History of National Mapping 24 Apr 1958 .9 Report on Army Committee on National Mapping 2 July 1958 .10 RASvy Brief Review of Activities Jan - Dec 1964 .11 Advisory Committee Meeting Notes 12 Feb 1965 - Agenda item 8 .12 Advisory Committee Meeting Notes 12 Feb 1965 - Agenda item 8 para 5.1.3 - 11.2 .13 ACOCM Meeting Agenda 1968 .14 ACOCM Meeting Minutes 1970 .15 Letter to Mr B White CBE Secretary from LF Bottroyal australian survey corps, rasvy, fortuna, army survey regiment, army svy regt, asr, national mapping -
 Bendigo Military Museum
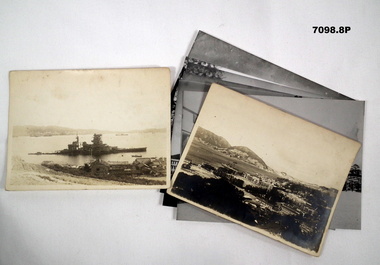
Photograph - PHOTOGRAPHS, BCOF, 1946 - 47
Items in the collection re Clarence Shearing, refer Cat No 7089.16P for his service details.Photographs B & W some are copies. Two are of the 130th Australian General Hospital, BCOF HQ. One of a torpedoed ship. Aerial view of the Japanese Naval Academy. Four showing different views of the Naval Academy."A torpedoed Ship at Kojo Ferry Eta Jima" "An aerial view of the former Naval Academy - now HQ BCOF area - The building with the X is where I work"photographs, bcof, 130th, naval -
 Kiewa Valley Historical Society
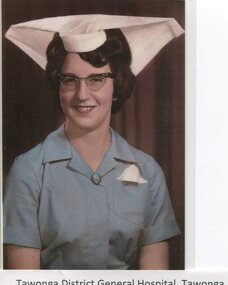
Photographs - Tawonga District General Hospital - Set of 21
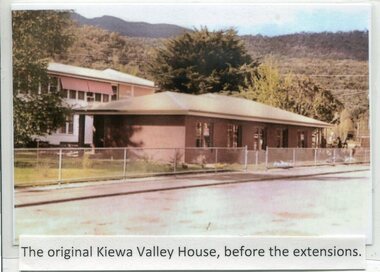
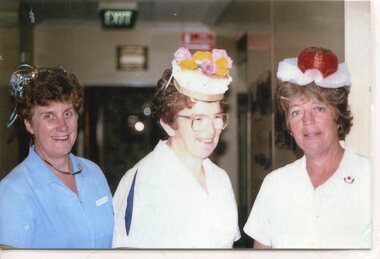
... of the Tawonga District General Hospital, with a view to providing ...In the early stages of the Kiewa Hydro-Electric Scheme the State Electricity Commission took over the financial and construction responsibility of the Tawonga District General Hospital building at a cost of 27,000 pounds. This included the removal and re-erection of the ex-military Bonegilla ward from Wodonga while in addition they carried out all the necessary building works that allowed the hospital to operate as a functional unit. The work was completed and handed over to the Hospital Committee of Management on September 1, 1949. Local residents raised 3,400 pounds through fund raising. The balance was met by the SEC and the Hospital and Charities Commission. The initial project was to provide for a basic temporary hospital which was later to include an Operating Theatre, Offices, Store, Mortuary and a Nurse’s Home, until the establishment of a permanent medical premises. Following the opening, 455 patients were admitted to the Tawonga District General Hospital and 254 operations were performed in the first year. The hospital relocated to Mount Beauty in the former SEC administration offices located in the town centre. Official opening of the 18 bed Tawonga District General Hospital on April 29 in 1961. Alpine Health CEO Mr Lyndon Seys oversaw the opening of the new Mount Beauty Hospital in November 2001 alongside Board of Management President Mr Andrew Randell, other board members and politicians. The Kiewa Hydro-Electric Scheme the State Electricity Commission played a pivotal part in the planning and initial funding of the Tawonga District General Hospital, with a view to providing medical support for its many workers on the Hydro scheme. Later, spouse and family members of workers were also able to access medical assistance The hospital was originally located in Tawonga away from the majority of the patients as the Hospital and Charities Board was not prepared to have it within the SEC controlled area. It was not until the gate at Tawonga South was taken down that the hospital was moved to the main centre of population at Mount Beauty. 1. Early nurses uniform; 2. Hospital Opening Ceremony; 3-7. Nursing Staff; 8. Delivery Room; 9. Mens Ward; 10.Enclosed Veranda; 11. Main Ward; 12-13. Kitchen; 14. Opening Ceremony 1949; 15.Original Hospital at Tawonga; 16-18. Relocated Hospital at Mt Beauty; 19. Rear of hospital and Matron’s quarters; 20. Hospital and Kiewa Valley House; 21. Renovated Hospital in 20001.Tawonga District General Hospital Tawonga; 2. Kiewa construction engineer Mr HHC Williams speaking at the opening of the hospital. Health Minister the Hon CP Gartside performed the official opening. L to R: TH Mitchell MLA; Manager of the hospital Mr RH Kronberg (obscured) Hon CP Gartside; CL McVilley; LT Knevitt; Matron AI Tarnish & W Sealey: 4. Dedicated Nursing Staff; 5. Nurse Campbell (nee Reid); 6. Sister Seager 1955 (nee Janice Burnett. First District Nurse; 7. L to R: Sister F Rosengrove; Sister J Griffiths; Matron AI Tarnish; Nurse D Satori; Nurse D Tregonning; Sister E Hill & Sister S O’Shannessy; 8. In the early years Tawonga District General Hospital had the second highest birth rate in Australia; 9. The men’s ward catered for men only in the early years of the hospitals operation; 10. The enclosed verandah at the original Tawonga District General Hospital allowed for an additional 10 beds; 11. Tawonga District General Hospital, Tawonga Main Ward. Ward ready and waiting for patients at Tawonga Hospital. Complete with lovely vases of flowers for every bed. Nice touch by the nurses; 12. Kitchen of Tawonga District General Hospital, Mt Beauty. The hospital kitchen provided meals for patients and a 3 course dinner for Meals on Wheels. In 1977, 11,795 meals were produced at an average cost of $2.60 per meal; 13. Tawonga District General Hospital, Tawonga. Kitchen. Kitchen staff employed in the old Tawonga District General Hospital 1949-1961; 14. The official opening ceremony of the Tawonga District General Hospital, 1949. The official ceremony was attended by a large number of residents and Tawonga District General Hospital was open for public inspection; 15. Original Tawonga District General Hospital transported form Bonegilla began operations in 1949; 16. In 1961, the Tawonga District General Hospital relocated to take a central position in the town of Mt Beauty in the former SEC Administration building; 19. The rear of the Tawonga District General Hospital and Matron’s house seen from Holland St, Mt Beauty during a snow storm in the mid 1960’s; 21. Tawonga District General Hospital & Kiewa Valley House, 2000. tawonga district hospital, mt beauty hospital, medical, health care, s.e.c. -
 Kiewa Valley Historical Society
Photographs - Demolition of the old Tawonga District General Hospital. Set of 8 colour photographs
... 1. No inscriptions 2. Side view of Tawonga District General... of the Tawonga District General Hospital, with a view to providing ...In the early stages of the Kiewa Hydro-Electric Scheme the State Electricity Commission took over the financial and construction responsibility of the Tawonga District General Hospital building at a cost of 27,000 pounds. This included the removal and re-erection of the ex-military Bonegilla ward from Wodonga while in addition they carried out all the necessary building works that allowed the hospital to operate as a functional unit. The work was completed and handed over to the Hospital Committee of Management on September 1, 1949. Local residents raised 3,400 pounds through fund raising. The balance was met by the SEC and the Hospital and Charities Commission. The initial project was to provide for a basic temporary hospital which was later to include an Operating Theatre, Offices, Store, Mortuary and a Nurse’s Home, until the establishment of a permanent medical premises. Following the opening, 455 patients were admitted to the Tawonga District General Hospital and 254 operations were performed in the first year. The hospital relocated to Mount Beauty in the former SEC administration offices located in the town centre. Official opening of the 18 bed Tawonga District General Hospital on April 29 in 1961. The old weatherboard building was demolished around the late 1900’s to early 2000’s and replaced with a new modern brick building. Alpine Health CEO Mr Lyndon Seys oversaw the opening of the new Mount Beauty Hospital in November 2001 alongside Board of Management President Mr Andrew Randell, other board members and politicians. The Kiewa Hydro-Electric Scheme the State Electricity Commission played a pivotal part in the planning and initial funding of the Tawonga District General Hospital, with a view to providing medical support for its many workers on the Hydro scheme. Later, spouse and family members of workers were also able to access medical assistance The hospital was originally located in Tawonga away from the majority of the patients as the Hospital and Charities Board was not prepared to have it within the SEC controlled area and it was not until the gate at Tawonga South was taken down that the hospital was moved to the main centre of population at Mount Beauty.8 Colour photographs of the demolition of the original Tawonga and District Hospital situated in Mt Beauty circa 20001. No inscriptions 2. Side view of Tawonga District General Hospital, 1990’s 3. Demolition of the weatherboard hospital: Nurses station, ward and corridor 4. Demolition of the weatherboard hospital: kitchen & utility rooms 5. Demolition of the weatherboard hospital” front entrance & gardens 7. Demolition of the weatherboard hospital: Matrons House 8. No inscriptions tawonga & district general hospital; kiewa hydro electric scheme; mt beauty; -
 Kiewa Valley Historical Society
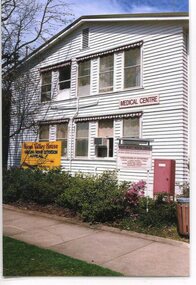
Photographs – Old Tawonga District General Hospital Mt Beauty. Set of 19 colour photographs
... of the Tawonga District General Hospital, with a view to providing ...In the early stages of the Kiewa Hydro-Electric Scheme the State Electricity Commission took over the financial and construction responsibility of the Tawonga District General Hospital building at a cost of 27,000 pounds. This included the removal and re-erection of the ex-military Bonegilla ward from Wodonga while in addition they carried out all the necessary building works that allowed the hospital to operate as a functional unit. The work was completed and handed over to the Hospital Committee of Management on September 1, 1949. Local residents raised 3,400 pounds through fund raising. The balance was met by the SEC and the Hospital and Charities Commission. The initial project was to provide for a basic temporary hospital which was later to include an Operating Theatre, Offices, Store, Mortuary and a Nurse’s Home, until the establishment of a permanent medical premises. Following the opening, 455 patients were admitted to the Tawonga District General Hospital and 254 operations were performed in the first year. The hospital relocated to Mount Beauty in the former SEC administration offices located in the town centre. Official opening of the 18 bed Tawonga District General Hospital was on April 29 in 1961. The old weatherboard building was demolished around the late 1900’s to early 2000’s and replaced with a new modern brick building. Alpine Health CEO Mr Lyndon Seys oversaw the opening of the new Mount Beauty Hospital in November 2001 alongside Board of Management President Mr Andrew Randell, other board members and politicians. The Kiewa Hydro-Electric Scheme the State Electricity Commission played a pivotal part in the planning and initial funding of the Tawonga District General Hospital, with a view to providing medical support for its many workers on the Hydro scheme. Later, spouse and family members of workers were also able to access medical assistance The hospital was originally located in Tawonga away from the majority of the patients as the Hospital and Charities. Many SEC workers and their families have received medical care at Tawonga District General Hospital and Alpine Health over the years. A number of family members of SECV workers as well as other dedicated staff have provided high quality medical attention and support in all the facilities as nursing staff, support staff and volunteers. Many past staff members and their families still remain living in the Kiewa Valley area 19 Colour photographs of the Tawonga and District Hospital situated in Mt Beauty circa 2000. Including photographs of interior and of some staff members1. No markings 2. G Ryder at front entrance 3. Sister G Ryder in the Resuscitation Room 4. Nurse D Hateley in the Kitchen 5. Nurse D Hateley in the Casualty Room 6. Sister W McClelland in new nurse’s station 7. R Forrest, G Ryder, ?, M Ranton 8. Nurse D Hateley in the Pan Room 9. Tawonga District General Hospital: Resuscitation Room 10. Hospital Hallway 11. Empty Nurses Station 12. Tawonga District General Hospital: Nursery 13. Patient Tea Room 14, 15, 16, 17, & 18. No marking mt beauty district hospital, tawonga district hospital, bonegilla ward, ryder family -
 Kiewa Valley Historical Society
Photographs- Kiewa Valley House (before and after extensions) & Tawonga District General Hospital- Set of 6 colour photographs
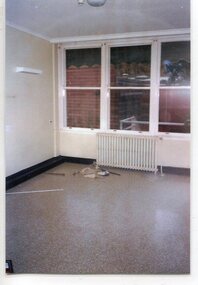
The establishment of Kiewa Valley House, was a significant victory for residents and senior citizens in the Kiewa Valley district. Plans were laid in the mid 1970’s and a proposal was formulated for a 12 bed unit nursing home to be attached to the Tawonga District General Hospital. The need for an aged care facility in Mount Beauty was prompted by recognition of the high ratio of senior citizens residing in the area. At the time residents had to travel to Beechworth, Wangaratta or Wodonga for care. On June 6th, 1980, an appeal to finance a 12 bed nursing wing was launched at a public meeting in Mount Beauty The Hospital and Charities Commission’s development board finally approved the application for government funds to build the 12 bed nursing home in early 1981. The official opening of the nursing home was on March 6th, 1985. Opening of the lounge extensions occurred in May, 1993 Many local residents have taken advantage of facilities at Kiewa Valley House when they became unable to manage independently in their own homes. This has meant they did not have to face the stress of leaving the area and being separated from their local family and friends. Many SEC workers and their families have been residents of Kiewa Valley House over the years.Set of 6 colour photographs of Kiewa Valley House and original Tawonga District General Hospital in Mt Beauty 1 Kiewa Valley House, before extensions, with old weatherboard hospital in background 2 & 3 Official opening of Kiewa Valley House. 4 & 5 Gardens between Kiewa Valley House and Hospital 5. Kiewa Valley lounge extension 1. The original Kiewa Valley House, before extensions 2. No markings 3. No markings 4. View of the gardens between the weatherboard hospital and Kiewa Valley House 5. Walkway between Hospital & Kiewa Valley House 6. Kiewa Valley House Lounge Room extension tawonga district hospital, kiewa valley house, mt beauty district hospital -
 Kiewa Valley Historical Society
Photographs – Photographs of staff from Tawonga District General Hospital & Alpine Health – Set of 13 colour photographs
... in the planning and initial funding of the Tawonga District General ...In the early stages of the Kiewa Hydro-Electric Scheme the State Electricity Commission took over the financial and construction responsibility of the Tawonga District General Hospital building at a cost of 27,000 pounds. This included the removal and re-erection of the ex-military Bonegilla ward from Wodonga while in addition they carried out all the necessary building works that allowed the hospital to operate as a functional unit. The work was completed and handed over to the Hospital Committee of Management on September 1, 1949. Local residents raised 3,400 pounds through fund raising. The balance was met by the SEC and the Hospital and Charities Commission. The initial project was to provide for a basic temporary hospital which was later to include an Operating Theatre, Offices, Store, Mortuary and a Nurse’s Home, until the establishment of a permanent medical premises. Following the opening, 455 patients were admitted to the Tawonga District General Hospital and 254 operations were performed in the first year. The hospital relocated to Mount Beauty in the former SEC administration offices located in the town centre. Official opening of the 18 bed Tawonga District General Hospital on April 29 in 1961. Kiewa Valley House nursing home was officially opened on March 6th, 1985, with a new lounge extension opening in May, 1993. Prior to this, residents had to travel to Beechworth, Wangaratta or Wodonga for care. The old weatherboard building was demolished around the late 1900’s to early 2000’s and replaced with a new modern brick building. Alpine Health CEO Mr Lyndon Seys oversaw the opening of the new Mount Beauty Hospital in November 2001 alongside Board of Management President Mr Andrew Randell, other board members and politicians.The Kiewa Hydro-Electric Scheme the State Electricity Commission played a pivotal part in the planning and initial funding of the Tawonga District General Hospital, with a view to providing medical support for its many workers on the Hydro scheme. Later, spouse and family members of workers were also able to access medical assistance. Many SEC workers and their families have received high medical care at Tawonga District General Hospital and Alpine Health and/or as residents of Kiewa Valley House over the years. A number of family members of SECV workers as well as other dedicated staff have provided high quality medical attention and support in all three facilities as nursing staff, support staff and volunteers. Many past staff members and their families still remain living in the Kiewa Valley area Set of 13 colour photographs of past nursing staff and support staff from Tawonga District General Hospital, Kiewa Valley House & Alpine Health 1. Marg Hickey, Barbara Clark & Margaret Ranton 2. Cheryl Clutterbuck & Rosemary Forrest 3. Margaret Ranton 4. Margaret Ranton holding unknown infant 5. Gwen Goss 6. Barbara Clark & Margaret Ranton 7. Margaret Ranton, Sue Zeinert & Jenny Piera 8. Margaret Ranton, Gloria Ryder & Jenny Piera 9. Sue Wesley, Ruth Barton, Margaret Ranton, Rosemary Forrest & Nola Henry 10. F Bogaski & H Sigmund 11. Maintenance Supervisor H Sigmund 12. Gardener Fred Keat & Handyman Joe Trezise (1977) 13. Nursing staff in new hospital 1-9 No markings 10 F Bogaski & H Sigmund 11. Maintenance Supervisor H Sigmund 12. Gardener Fred Keat & Handyman Joe Trezise (1977) 13. Nursing staff in new hospital tawonga district general hospital, kiewa valley house, alpine health -
 Warrnambool and District Historical Society Inc.
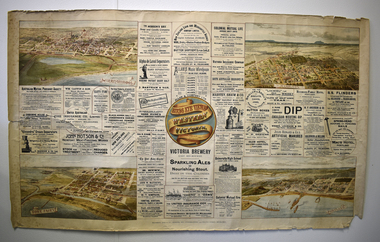
Poster - Print and Lithograph of Western Victorian towns and businesses, McCarron Bird & Co, Birds Eye Views in Western Victoria, c. 1900
This poster has been produced as a saleable item by the firm of McCarron Bird & Co of Melbourne about 1900. This firm was founded in 1872 and is best known for its publication of the two-volume work, 'Victoria and its Metropolis' (1888). The poster was intended to be hung on a wall for decorative and advertising purposes. It contains four attractive lithographs of the towns, Warrnambool, Port Fairy, Portland and Hamilton and a great number of advertisements and illustrations, some from Melbourne and the rest from the Westen District towns mentioned above. One Warrnambool advertisement is for the general merchant business of William Caffin in Kepler Street and two others are advertisements for the coastal ships, Flinders, Dawn and Casino which came into the port of Warrnambool. This poster has local historical significance as it has a descriptive drawing of the town of Warrnambool about 1900 and shows the buildings that were existing at that time.This is a cream-coloured sheet of paper with a coloured centre piece showing the title of the poster, four coloured lithographs of Western Victorian towns and advertisements printed and illustrated in black and white. The edges of the poster are frayed and the paper is torn at the centre left edge.warrnambool 1900, western victorian towns 1900, william caffin general merchant warrnambool -
 Eltham District Historical Society Inc
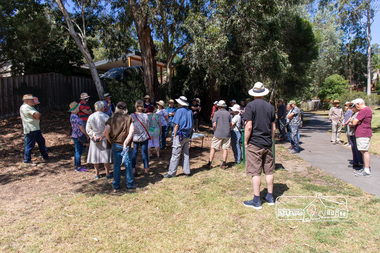
Photograph, Peter Pidgeon, Heritage Excursion: Woodridge Wander, 6 March 2021
The Woodridge Estate was a major residential subdivision that was developed in many stages in the 1970s and 80s. It extended easterly from the older residential area of Eltham into what had previously been largely privately owned bushland. The subdivision design took into account the steep topography and resulted in large blocks that enabled preservation of much of the tree cover. It included a number of small parks and walkways and the one kilometre long Woodridge Linear Park. A bushland area left as a proposed school site later became the Pauline Toner Butterfly Reserve for preservation of the rare Eltham Copper Butterfly. This walk explores some Woodridge streets as well as the linear park and butterfly reserve, a hilly walk of about 3 km and includes some moderately rough tracks. Permission to visit the external grounds of two private properties to view heritage listed houses not visible from the street was granted. The walk commenced at 2pm at the access to Woodridge Linear Park in Grove Street just east of the Eltham East Primary School (Melway ref 22 B4). This free walk was open to the general public as well as Society members. Whilst COVID restrictions did not require the wearing of masks in the open, masks had to be carried and all attendees registered with name and contct number.Born Digital (41 images)covid-19, eltham, eltham district historical society, heritage excursion, woodridge estate -
 Eltham District Historical Society Inc
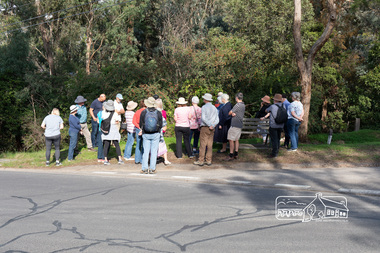
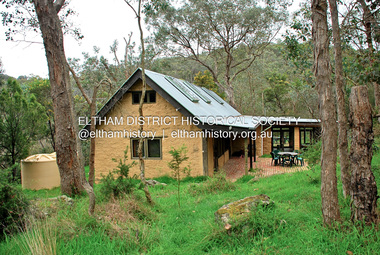
Photograph, Peter Pidgeon, Heritage Excursion: Mud Brick Meander, 6 March 2021
Corner of Diamond Street and Peter Street, Eltham. Walkers gather for the beginning of the walk led by local historian Russell Yeoman. The tree-covered hill that forms the western backdrop to the Eltham town centre exhibits many characteristics that are considered to contribute to the special character of Eltham. They include unmade streets, steeply sloping land, extensive tree cover and a large number of mud brick and pise (rammed earth) houses. A number of these were constructed in the 1940s and 50s by well-known builders John Harcourt and Alistair Knox. A significant proportion from this period were constructed by owner-builders. We walked around the upper part of the hill in the area of Kerrie Crescent and Peter Street. We visited several interesting houses (for external viewing only). The walk commenced at 2pm at the corner of Diamond Street and Peter Street (Melway ref 21H4) and was about 2 km. This free walk was open to the general public as well as Society members. Whilst COVID restrictions did not require the wearing of masks in the open, masks had to be carried and all attendees registered with name and contact number or via QR registration.Born Digital (8 images)covid-19, eltham, eltham district historical society, heritage excursion, mudbrick, peter street, diamond street, russell yeoman -
 Eltham District Historical Society Inc
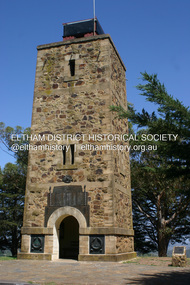
Photograph - Digital Photograph, Alan King, Shire of Eltham War Memorial, Kangaroo Ground, 28 January 2008
The Eltham Shire War Memorial, a tower of remembrance, was built with public donations to commemorate the memory of the fallen soldiers from the shire who enlisted in the 1914-1918 war. The tower is reminiscent of the peel-towers or watchtowers that lined the English-Scottish border from the mid 14th century to around 1600 and is constructed from locally quarried stone. This uncommon and picturesque war memorial, which affords an excellent view of the surrounding district was unveiled by His Excellency the Governor-General (Lord Stonehaven) on November 11, 1926. In July 1922 a deputation of returned soldiers from Panton Hill, presumably the Panton Hill branch of the Returned Sailors and Soldiers Imperial League of Australia (RSSILA), proposed to Eltham Shire Council that the monument should be a cairn of local stone “sufficiently high to form a prominent and conspicuous landmark, and crowned with some suitable device”. Eltham Shire Councillor and President of the Panton Hill branch of the RSSILA, Basil Hall, was credited with being the first to suggest a tower, and with organising a Memorial Park committee to raise funds for the monument in the Memorial Park. A meeting for those interested in the establishing a War Memorial monument in the park was held in January 1924 and the Eltham Shire War Memorial League was formed for this purpose. It appears that the broad and rounded cairn that had been recently built was considered by the League a temporary affair, and not the substantial cairn-as-monument, sufficiently high to form the conspicuous landmark, which had been envisaged by the Panton Hill RSSILA. A design competition was held for the monument. The chairman of the League, Councillor Basil Hall, suggested that the site of the memorial in Kangaroo Ground would lend itself to something rugged, instead of polished stone. By April 1924 thirty designs for a memorial had been received from which three designs were selected and of those, the design by the shire engineer Mr McCormack, for a 70ft tower suitable for construction in rough stone, was chosen. Artist Harold Herbert suggested that a peel tower-like design reminiscent of those along the English-Scottish border would be fitting for the site. Herbert drew up a rough sketch that was approved of, and later, Melbourne architect Percy Meldrum volunteered to draw up the design from sketch to architectural drawings. By January 1925 the Soldiers’ Memorial League had adopted Meldrum’s design for a 50ft high tower. Meldrum had also offered his design and supervision of construction free of charge. The Shire provided the stone to the builders, which was a gift quarried from land owned at Kangaroo Ground by Dr Ethel and Professor William Osborne The Shire of Eltham War Memorial, a tower of remembrance, and honour board were unveiled on November 11, 1926, by the Governor General Lord Stonehaven. At this stage a temporary honour roll was painted on the panels on either side of the tower entrance. In September 1930 bronze plates were added above the portal with the names of men who fell in the 1914-18 war. On November 16, 1951, the Governor of Victoria, Sir Dallas Brooks re-dedicated the war memorial tower and unveiled the names of men who gave their lives in the 1939-45 war. Two additional bronze plaques which recognise service in the armed conflicts of Korea, Borneo, Malaya, and Vietnam were unveiled November 11, 2001, by the Governor of Victoria, John Landy, A.C., M.B.E. The tower was first used for fire spotting activities following the Black Friday bushfire in January 1939 in response to a request from Mr R.D. Ness, secretary of the Kangaroo Ground bush fire brigade, who asked Council that the tower be used as an observation tower for detecting bush fires, and asked Council to arrange a telephone to be installed. It was suggested that if the Shire were to appoint a caretaker for the Memorial Park, his duties could also include raising the alarm in the event of a fire. Later in 1939 Council applied for a radio transmitter, which the Forestry Commission planned to install at vantage places throughout the state. The first dedicated fire spotter appointed from December1948, was Mr Smith of Warrandyte. A prefabricated glazed cabin was installed in 1974, which involved the removal of the original stone structure around the rooftop exit door. A new fire spotting cabin, which included the latest technology, was installed soon after the 2009 Black Saturday fires and is manned by CFA personnel on high fire danger days. Covered under Heritage Overlay, Nillumbik Planning Scheme. Published: Nillumbik Now and Then / Marguerite Marshall 2008; photographs Alan King with Marguerite Marshall.; p123This collection of almost 130 photos about places and people within the Shire of Nillumbik, an urban and rural municipality in Melbourne's north, contributes to an understanding of the history of the Shire. Published in 2008 immediately prior to the Black Saturday bushfires of February 7, 2009, it documents sites that were impacted, and in some cases destroyed by the fires. It includes photographs taken especially for the publication, creating a unique time capsule representing the Shire in the early 21st century. It remains the most recent comprehenesive publication devoted to the Shire's history connecting local residents to the past. While published in the book in black and white, this collection features the original colour digital photographs. nillumbik now and then (marshall-king) collection, garden hill, kangaroo ground, memorial park, shire of eltham war memorial -
 Eltham District Historical Society Inc
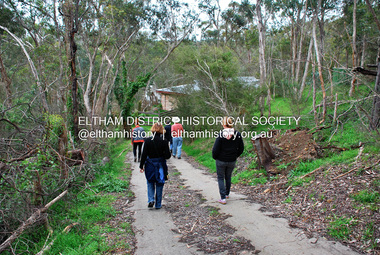
Photograph - Digital Photograph, Jim Connor, River Bend House, 130 Laughing Waters Road, Eltham, 7 September 2013
Laughing Waters Walk, 7 Sep 2013 This Society excursion was a follow up to the Laughing Waters Story told to us by Jane Woollard at our Annual General Meeting in March 2013. It involved a walk commencing from the corner of Laughing Waters and Overbank Roads along Laughing Waters Road to its eastern end and returning partly over the same route - a total distance of about 2.5km. On the way we visited the two artist in residence properties, River Bend and Birrarung, to view the houses on them that are associated with Alistair Knox, Gordon Ford and others in the local mud brick and artistic community. We also able to walk around the derelict ruin which was once home to Gordon and Sue Ford, Boomerang House. An unexpected afternoon tea was offered to us by the artists in residence at Birrarung House and we had a brief opportunity to view inside the house. River Bend was designed and built by Alistair Knox for Rosemary and Bill Cuming in 1968. It sits in a deep cutting on a steep slope above the Yarra River and features floor to ceiling windows and glass doors set into mission brown timber frames and walls of reclaimed bricks in pinkish hue. Rosemary laid the brick paving around the house, a copy of the shell paving found in the ancient French town of Colmar, where the family had lived for a period. The kitchen was equipped with a 1960s stove as well as a cast iron wood stove reclaimed from Rosemary's sister's home in Armadale. Max and Tini Huygens, migrants from Holland, purchased the property in 1975 and named it Tilwinda from an Aboriginal word meaning 'hole in a rock'. In late 1981 Tini died after a short illness, but Max continued to live at Tilwinda until he moved to a retirement village in 2000 and the property was sold to Parks Victoria. Renamed River Bend, the property became part of the Laughing Waters Artist in Residency Program in 2008. Nillumbik Shire Council upgraded the property in 2012 with solar panels, a heat pump for hot water and double glazing to improve the comfort of the artists in residence and make the house more energy efficient. For a more in-depth description of the property and biographies of the various artists in residence commencing from 2008 to 2015, see Jane Woollard's book, "Laughing Waters Road; Art, Landscape & Memory in Eltham" published 2016.2013-09-07, activities, artists in residence, eltham district historical society, heritage excursion, jim connor collection, laughing waters road, river bend house -
 Eltham District Historical Society Inc
Photograph - Digital Photograph, Jim Connor, Birrarung House, 195 Laughing Waters Road, Eltham, 7 September 2013
Laughing Waters Walk, 7 Sep 2013 This Society excursion was a follow up to the Laughing Waters Story told to us by Jane Woollard at our Annual General Meeting in March 2013. It involved a walk commencing from the corner of Laughing Waters and Overbank Roads along Laughing Waters Road to its eastern end and returning partly over the same route - a total distance of about 2.5km. On the way we visited the two artist in residence properties, River Bend and Birrarung, to view the houses on them that are associated with Alistair Knox, Gordon Ford and others in the local mud brick and artistic community. We also able to walk around the derelict ruin which was once home to Gordon and Sue Ford, Boomerang House. An unexpected afternoon tea was offered to us by the artists in residence at Birrarung House and we had a brief opportunity to view inside the house. Birrarung is situated near the end of Laughing Waters Road. It was built in 1974 by Graeme Rose for Gordon Ford who he had asked to build him a small ‘bach’. Builder Peter Jarvis who did his apprenticeship with Alistair Knox for a couple of years recalled there were no drawings. It evolved as more funds became available. Graeme would source second-hand building materials around which he would shape the house. The fireplace was built with chicken wire over which it was rendered with faro cement. A brick floored glass studio, added later, faces a wall of boulders pressed into a manmade cliff, a large pond the link between the rock wall and glass studio. A waterfall, fed by river water, no longer functions. The property became part of the Laughing Waters Artist in Residency Program with the first artist taking up residency in 2001. For a more in-depth description of the property and biographies of the various artists in residence commencing from 2001 through to 2015, see Jane Woollard's book, "Laughing Waters Road; Art, Landscape & Memory in Eltham" published 2016.2013-09-07, activities, artists in residence, eltham district historical society, heritage excursion, jim connor collection, laughing waters road, birrarung house -
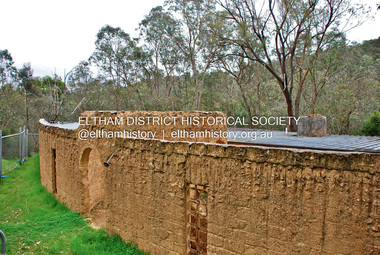 Eltham District Historical Society Inc
Photograph - Digital Photograph, Jim Connor, Boomerang House, 195 Laughing Waters Road, Eltham, 7 September 2013
Laughing Waters Walk, 7 Sep 2013 This Society excursion was a follow up to the Laughing Waters Story told to us by Jane Woollard at our Annual General Meeting in March 2013. It involved a walk commencing from the corner of Laughing Waters and Overbank Roads along Laughing Waters Road to its eastern end and returning partly over the same route - a total distance of about 2.5km. On the way we visited the two artist in residence properties, River Bend and Birrarung, to view the houses on them that are associated with Alistair Knox, Gordon Ford and others in the local mud brick and artistic community. We also able to walk around the derelict ruin which was once home to Gordon and Sue Ford, Boomerang House. An unexpected afternoon tea was offered to us by the artists in residence at Birrarung House and we had a brief opportunity to view inside the house. Gordon Ford and photographer Sue Winslow were married in 1965. They set up home in an old log cabin on the property Gordon had purchased in 1954 on Laughing Waters Road. Situated between the Yarra River and Overbank Road, Gordon had built a small mud-brick shack on the river and a pontoon. Over the decades the shack has been locally referred to as “the love shack”, the “rooting shack” or simply “Gordon’s shack”. Gordon and Sue commissioned local builder Graeme Rose to do a wattle and daub renovation and extension to the old log cabin on the north side of Laughing Waters Road. The work had only just been completed in 1965 when a bushfire swept through the area and destroyed the cabin. Gordon and Sue relocated to his property, Fulling, in Pitt Street, Eltham. In 1970 work started on a new house at the Laughing Waters property. Originally known as the Banana House, it is now known as Boomerang. Designed by Alistair Knox, the mud-brick house includes iron window grilles made by Matcham Skipper that puncture the curved mud walls. The grilles were made from ‘off-pressings’ from the Sidchrome tool works in Heidelberg. Gordon, Sue and family moved into the house in 1972. Their marriage fell apart and Sue moved to Sydney with the children around the same time Gordon commenced building Birrarung just below Boomerang on the Laughing Waters Road block. After the Fords moved out, Boomerang it was rented out to various share households of students, musicians, artists and environmentalists for twenty-four years. Gordon Ford sold Birrarung and Boomerang to Melbourne Water in 1999. The Laughing Waters Artist in Residence Program was developed as a partnership between Parks Victoria and Nillumbik Shire Council. Boomerang was deemed unfit for habitation so was used as a day studio only. By 2001 Boomerang was in a poor state of repair and by 2002 the last artist in residence was to use the house as a studio. Nillumbik Shire Council had been granted funds from the Melbourne Community Fund to restore both Boomerang and Birrarung but it was apparent in early 2003 that the funds would be insufficient to restore both houses. Boomerang was infested with termites which presented a risk to any occupants and so the decision was made to close Boomerang and concentrate funding on Birrarung. Boomerang was fenced off for safety and to prevent intrusion and remains ‘caged’ today (2023). However, it is readily apparent the property has been occupied by squatters over the years. By 2023 it was clear that the squatters had abandoned the property and sections of the roof structure have given away in some areas and collapsed internally. For a more in-depth description and history of the property and that of Gordon and Sue Ford, see Jane Woollard's book, "Laughing Waters Road; Art, Landscape & Memory in Eltham" published 2016.2013-09-07, activities, eltham district historical society, heritage excursion, jim connor collection, laughing waters road, boomerang house, gordon ford -
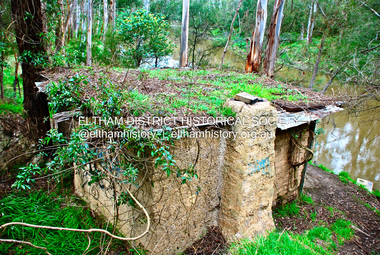 Eltham District Historical Society Inc
Photograph - Digital Photograph, Jim Connor, The Love Shack, 195 Laughing Waters Road, Eltham, 7 September 2013
Laughing Waters Walk, 7 Sep 2013 This Society excursion was a follow up to the Laughing Waters Story told to us by Jane Woollard at our Annual General Meeting in March 2013. It involved a walk commencing from the corner of Laughing Waters and Overbank Roads along Laughing Waters Road to its eastern end and returning partly over the same route - a total distance of about 2.5km. On the way we visited the two artist in residence properties, River Bend and Birrarung, to view the houses on them that are associated with Alistair Knox, Gordon Ford and others in the local mud brick and artistic community. We also able to walk around the derelict ruin which was once home to Gordon and Sue Ford, Boomerang House. An unexpected afternoon tea was offered to us by the artists in residence at Birrarung House and we had a brief opportunity to view inside the house. Gordon Ford and photographer Sue Winslow were married in 1965. They set up home in an old log cabin on the property Gordon had purchased in 1954 on Laughing Waters Road. Situated between the Yarra River and Overbank Road, Gordon had built a small mud-brick shack on the river and a pontoon. Over the decades the shack has been locally referred to as “the love shack”, the “rooting shack” or simply “Gordon’s shack”. Gordon and Sue commissioned local builder Graeme Rose to do a wattle and daub renovation and extension to the old log cabin on the north side of Laughing Waters Road. The work had only just been completed in 1965 when a bushfire swept through the area and destroyed the cabin. Gordon and Sue relocated to his property, Fulling, in Pitt Street, Eltham. In 1970 work started on a new house at the Laughing Waters property. Originally known as the Banana House, it is now known as Boomerang. Designed by Alistair Knox, the mud-brick house includes iron window grilles made by Matcham Skipper that puncture the curved mud walls. The grilles were made from ‘off-pressings’ from the Sidchrome tool works in Heidelberg. Gordon, Sue and family moved into the house in 1972. Their marriage fell apart and Sue moved to Sydney with the children around the same time Gordon commenced building Birrarung just below Boomerang on the Laughing Waters Road block. After the Fords moved out, Boomerang it was rented out to various share households of students, musicians, artists and environmentalists for twenty-four years. Gordon Ford sold Birrarung and Boomerang to Melbourne Water in 1999. The Laughing Waters Artist in Residence Program was developed as a partnership between Parks Victoria and Nillumbik Shire Council. Boomerang was deemed unfit for habitation so was used as a day studio only. By 2001 Boomerang was in a poor state of repair and by 2002 the last artist in residence was to use the house as a studio. Nillumbik Shire Council had been granted funds from the Melbourne Community Fund to restore both Boomerang and Birrarung but it was apparent in early 2003 that the funds would be insufficient to restore both houses. Boomerang was infested with termites which presented a risk to any occupants and so the decision was made to close Boomerang and concentrate funding on Birrarung. Boomerang was fenced off for safety and to prevent intrusion and remains ‘caged’ today (2023). However, it is readily apparent the property has been occupied by squatters over the years. By 2023 it was clear that the squatters had abandoned the property and sections of the roof structure have given away in some areas and collapsed internally. For a more in-depth description and history of the property and that of Gordon and Sue Ford, see Jane Woollard's book, "Laughing Waters Road; Art, Landscape & Memory in Eltham" published 2016.2013-09-07, activities, eltham district historical society, heritage excursion, jim connor collection, laughing waters road, boomerang house, gordon ford, gordon's shack, love shack -
 Eltham District Historical Society Inc
Photograph, Fay Bridge, Birrarung House, 195 Laughing Waters Road, Eltham, 7 September 2013
Laughing Waters Walk, 7 Sep 2013 This Society excursion was a follow up to the Laughing Waters Story told to us by Jane Woollard at our Annual General Meeting in March 2013. It involved a walk commencing from the corner of Laughing Waters and Overbank Roads along Laughing Waters Road to its eastern end and returning partly over the same route - a total distance of about 2.5km. On the way we visited the two artist in residence properties, River Bend and Birrarung, to view the houses on them that are associated with Alistair Knox, Gordon Ford and others in the local mud brick and artistic community. We also able to walk around the derelict ruin which was once home to Gordon and Sue Ford, Boomerang House. An unexpected afternoon tea was offered to us by the artists in residence at Birrarung House and we had a brief opportunity to view inside the house. Birrarung is situated near the end of Laughing Waters Road. It was built in 1974 by Graeme Rose for Gordon Ford who he had asked to build him a small ‘bach’. Builder Peter Jarvis who did his apprenticeship with Alistair Knox for a couple of years recalled there were no drawings. It evolved as more funds became available. Graeme would source second-hand building materials around which he would shape the house. The fireplace was built with chicken wire over which it was rendered with faro cement. A brick floored glass studio, added later, faces a wall of boulders pressed into a manmade cliff, a large pond the link between the rock wall and glass studio. A waterfall, fed by river water, no longer functions. The property became part of the Laughing Waters Artist in Residency Program with the first artist taking up residency in 2001. For a more in-depth description of the property and biographies of the various artists in residence commencing from 2001 through to 2015, see Jane Woollard's book, "Laughing Waters Road; Art, Landscape & Memory in Eltham" published 2016.2013-09-07, activities, artists in residence, eltham district historical society, heritage excursion, laughing waters road, birrarung house, fay bridge collection -
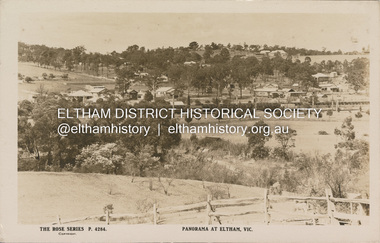 Eltham District Historical Society Inc
Postcard - Photograph postcard, Panorama at Eltham, Vic, c.1923
The Rose Series P. 4284 post card Taken from near what would be present day CLC car park looking southwest across Diamond Street, present-day Andrew Park to the railway station and developing Eltham shopping precinct. Arthur Street visible, Pryor and Luck Street not evident. Sunnybrook, the Taylor home is visible at the top of the hill in Bible Street. Only three residences visible in Arthur Street on the southern side, two of these are the David Harbison Rest Home at 10 and 12 Arthur Street (built and opened in November 1919), present day site of Eltham Mall. There are none on the north side of the street. Based on 1945 aerial view there are 8 buildings on the northern side between Main Road and Bible Street which and given the extent of commercial development on Main Road, it is estimated this image is circa 1925. Luther Haley was the first to build an open a baker and General Store in this location next to the railway station in 1902. However, it took nearly twenty years until the early to mid-1920s when a period of significant growth in the Eltham shopping centre happened with many businesses relocating their operations from the original town centre of Maria Street in Little Eltham as well as new businesses opening. Other stores/buildings noted (L-R) are: Stationmaster's House built circa 1910 Eltham Hardware Store opposite the railway station first opened on Main Road opposite the Railway Station around late 1922. An advertisement placed in the Hurstbridge Advertiser advised that the Hardware Store had just opened with a varied stock of Saws, Hammers, Nails, Shovels, Screw Drivers, and every article required in a house or on a farm. People were also encouraged to try their Jams, Pickles, Sauces, Cups and Saucers, etc. Newsagency with 'Leader' advertising on awning - E. J. Andrew opened his newsagency shop opposite the station in March 1923, advertising for sale stationery, school requisites and periodicals. Bird Brothers Cash Grocer & Fruiterer opposite the railway station offering summer drinks and confectionery a specialty with a full Stock of groceries of the best quality always on hand at city prices opened December 1921 William Capewell's Butcher shop at the corner of Dudley Street. Capewell previously had a small shop in front of the station opposite Luck Street. He enlisted in the AIF during WW1 and returned home in 1919. He re-applied for a slaughtering license in February 1920 and was advertising by October 1922 supplying all districts. Not visible (or not yet identified) but in business by October 1922 were: J.H. Fraser, Carpenter and Builder at Luck Street opposite the station George A. Danslow, Hairdresser and Tobacconist opposite the railway station Miss Barber's 'Blue Gum' Soda Fountain opened October 1922 opposite the railway station (hidden behind Stationmaster's House). It was so named due to its proximity to a tall Blue Gum tree G.H. McDonald Boot Repairer opposite the railway station In December 1923 the first portion of the main street to be formed from Dudley to Arthur streets was almost completed. This is the section in front of Capewell's Butcher shop though it is difficult to fully make out from the photoDigital file only Postcards scanned from the collection of Michael Aitken on loan to EDHS, 2 Sep. 2022michael aitken collection, eltham, postcards, arthur street, david harbison rest home, electrine candles, eltham railway station, eltham shopping centre, lloyd's general store, red rattler, rose series postcard, rose stereograph company, tait train, velvet soap, andrew park, bible street, bird brothers cash grocer & fruiterer, bird brothers cash grocer and fruiterer, butcher, diamond street, dudley street, eltham hardware and timber, eltham hardware store, eltham mall, main road, station masters house, stationmaster's house, sunnybrook, w.j. capewell, w.j. capewell butcher shop -
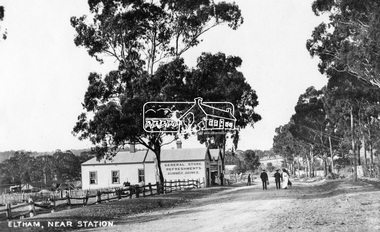 Eltham District Historical Society Inc
Photograph, Eltham, Main Road near station, c.1910
View looking north along Main Road, Eltham from near present day Dudley Street. On the immediate left is the railway station. The large weatherboard building on the bend (opposite present-day Arthur Street) with signs for General Store, Refreshments and Summer Drinks painted on the side is Luther and Ada Haley’s General Store and Bakery, built 1902. This was the first building in what is now Eltham’s present shopping town centre. Haley previously ran the General Store and Bakery on the corner of Main Road and York Street until his lease expired and the premises were bought by Mrs Sarah Burgoyne in 1902. The store later was known as Staff's Store. Followed by the saleyards, entrance to station, slaughter yard and William J Capewell’s butcher shop. Contained within the saleyards facing the street, a small shelter with the name H.H. Clark upon it. Horace Harold Clark was the son of Eltham State School’s first Head Teacher, David George Clark. As well as being a farmer, he was an Estate Agent and conducted auction sales, presumably from this shelter. On the eastern (right) side of Main Street is Haley’s Paddock, which was used on occasions for community picnics. Capable of holding 10,000 people, with ample shade and hilly surroundings it was an ideal place for any community gathering such as the State Schools’ Picnic in 1904. A worker from the bakery store is standing in the gateway at the rear of the store observing the photographer. People in the ‘Sunday Best’ are milling in front of the bakery or strolling down the centre of Main Road. The picture was most likely taken on a Sunday. With the opening of the railway to Eltham in 1902, Melbourne residents would regularly enjoy a Sunday excursion journey on the train to Eltham for a day’s outing to the countryside or beyond to Hurstbridge from 1912 when the railway was extended. Picture dated as c.1910 based on similar picture published in the Weekly Times, Feb. 1912. Cross Ref: 609 (looking south), 612, 611 (later stage), 613.This photo forms part of a collection of photographs gathered by the Shire of Eltham for their centenary project book,"Pioneers and Painters: 100 years of the Shire of Eltham" by Alan Marshall (1971). The collection of over 500 images is held in partnership between Eltham District Historical Society and Yarra Plenty Regional Library (Eltham Library) and is now formally known as the 'The Shire of Eltham Pioneers Photograph Collection.' It is significant in being the first community sourced collection representing the places and people of the Shire's first one hundred years.Digital image (4 x 5 inch negative missing - scanned from print) Printbaker, eltham, eltham railway station, general store, haley's paddock, luther haley, luther haley general store, main road, shire of eltham pioneers photograph collection, sign, summer drinks, butcher, railway station, w.j. capewell, eltham town centre, hot water, m.m. clark, eltham sale yards, eltham slaughter yard, staffs general store -
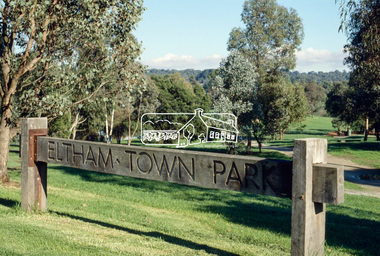 Eltham District Historical Society Inc
Slide - Photograph, Eltham Town Park, c.May 1988
In 1981 the Shire of Eltham Historical Society was asked by the Victorian Place Names Committee to comment on a proposal by the Shire of Eltham to assign names to parklands in Eltham as follows:- "Eltham Common" - the area between the municipal offices, Main Road, the Eltham railway -line, and Panther Place and containing Shillinglaw Cottage. The Shire has advised that this name has been used locally for the site since about 1975. "Alistair Knox Park" - the area bounded by the Eltham railway -line, Panther Place, Main Road, Bridge Street, and Susan Street, and through which flows the Diamond Creek. The area has been known locally as "Eltham Town Park" The proposed name "Alistair Knox Park" had created some local controversy with a number of reversals of the Council's decision and letters to the local paper both for and against the proposal. The society was reluctant to be drawn into this controversy particularly as there were known to be members with strong views both for and against the proposed name. The society appreciated the work done by Alistair Knox both in the formulation of the park concept and in its development but because of the controversy generated by the proposed naming and also because of the wide general use of the park by the public·, the name Eltham Town Park was felt more appropriate. The society noted that there was no outstanding historical associations with the land comprising the park which would warrant naming the park after any particular person, place or event. No objection was raised to the Eltham Common proposal as set-out above. The decision was made in the knowledge that Alistair Knox had been associated with the society over many years and was a prominent figure in the recent history of Eltham. He was regarded as a key figure in the environmental building movement and in particular was renowned for his use of mud bricks as a building material. He served as a councillor of the Shire of Eltham from 1971-1975, his final year as Shire President. It was during these years that the proposals to create the park in its present form were shaped and Alistair played a leading part in the decision to make it a landscaped passive recreational park rather than a sporting area. The parklands comprise a section of the Diamond Creek valley. The creek itself flows through the centre of the area which is overlooked by steep hills on each side. The parks form part of the land purchased from the Crown in 1851 by J.M. Holloway and then subdivided into allotments and called "Little Eltham". While most of the area was subdivided into residential lots the creek valley was subdivided into lots suitable for small farms. Some further subdivision took place over the years and the whole of the parks now comprises eight separate titles. A list of some of the former owners has been compiled but exhaustive research on all owners has not been carried out. The ownership of one parcel has been traced back to when it was purchased from Holloway by John Hicks Petty in 1874, long after it was subdivided. Other families owning land within the area over the years included Lyon, Rees, Clark, Waterfall, Carrucan, Graham, Hill and Morant. The character of the valley area has remained rural while development occurred on each side. Early photos show the area as orchard and grazing land. In 1901 the railway was constructed through the area resulting in the timber trestle bridge across the Diamond Creek. which is an important feature of the park landscape. A memorial obelisk to the Eltham servicemen killed in World War 1 was erected at the south eastern corner of the park. The site is now within the intersection of Main Road and Bridge Street and the memorial was shifted in the 1950s to the Eltham R.S.L. clubrooms. Following the financial failure of the local sub-branch, the memorial obelisk was again relocated to the Eltham War Memorial building precinct in 2011. During the early 1960's the Council started purchasing the land which now comprises the parks. In the late 1960's the area to the east of the Diamond Creek was used as a garbage tip and filled above the flood plain of the creek. When this area was filled the tip was transferred to the west side of the creek. From the early 1970's the area has been progressively developed as a park for passive recreation with ornamental lakes, extensive tree planting and landscaping. The character of the valley before the days of the tip has been recreated and this has earned a Landscape classification from the National Trust, an unusual honour for a man-made landscape. The parks are not only attractive in appearance. The large number of people using them, particularly at weekends and holidays is evidence of their popularity and the foresight and careful planning of local residents, Councillors and Council Staff. 35mm colour positive transparency (1 of 23) Mount - Kodak EktachromeProcess Date MAY 88Meltham, main road, alistair knox park, eltham town park -
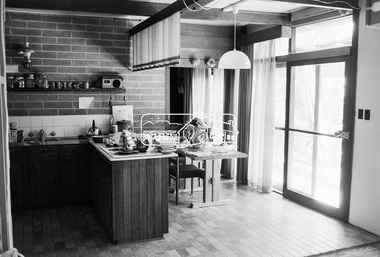 Eltham District Historical Society Inc
Photograph, 68 Mount Pleasant Road, Eltham, c.1983, 1983
An early Alistair Knox design and build, this home was purchased by George Coop in 1968. Eltham builder, Graham Rose, extended the original Alistair Knox structure over the foundation excavation dug by George. Graham organised the brick walls where required, raised all frame work and laid the steel tray roof. George did all external/internal wall cladding, made all opening windows, sliding and swinging doors, stairs and general interior timber cabinet work. Bedroom wardrobe doors came from scrapped Victorian Railways country coaches. This particular view shows the original Alistair Knox design and materials. The photo was taken where the original external wall was located and knocked down to add the extension.Digital TIFF file Scan of 35mm Ilford XP1 black and white transparencyalistair knox design, eltham, graham rose, houses, mount pleasant road -
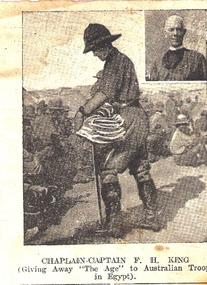 Waverley RSL Sub Branch
News paper Cutting Chaplain-Captain F. H. King, ? 1917
Captain Frank Herbert King was born in the Parish of St. Saviors in the borough of Brougham London March 5th 1875. He was educated in theology at St. Augustine's College Durban University. He went on to serve for 2 1/2 years in South Africa during the Boer Wars and then re-enlisted in the A.I.F.16th November 1916 when he listed his address as "The Vicarage Sunshine Victoria" and listed his wife as "Kathleen King" “Revd McCoy announced his intention of moving to the parish of Deniliquin in October 1915. He was replaced by F.H. King. Though the parish could not house him, he came in November. King was a typical “new broom”. In January 1916, at his instigation, the parish agreed to change its hymn book to Ancient and Modern. This decision could be viewed as a “churchmanship” matter, one of many that happened in these years. He pushed through the building of the vicarage, from tender in January to blessed and occupied by June. At the Annual General Meeting, King described 1915 as a trying time in the church and looked forward to a happier and more prosperous time during 1916. At a special vestry meeting, 3 November 1916, King announced that he had accepted an appointment by the Archbishop for service at the front, and that he had been instructed to prepare to go abroad. It was decided in his absence the parish use lay-readers, with periodic visits by clergy for Holy Communion. On 12 November, King thanked the parish for their loyalty and their devotion to him and the church. In return the parish presented him with a wrist watch. The parish was not formally vacant; just without a vicar. In September 1917, the Archbishop wrote advising that King had resigned. He appointed the Rev. W. Green to the parish, but Green declined.”(1) He was sent to Egypt where he administered to the Australian Stationary Hospital Australian 3rd and 5th light horse brigades. His Army record states he was Invalided and Completion of Duty 12 July 1918. He was later awarded th Order of the British Empire (OBE) 1 “The Junction” a history of St Mark’s Sunshine The picture of Chaplain-Captain F.H. King was carried in the Bible of Sig. H. C. Roussac ( a Gallipoli veteran) during his service with the A.I.F. in France. It can only be assumed that F.H.King had a profound effect on Sig. Roussac.Cutting of a lithographic picture showing Chaplain-Captain F. H. King giving away "The Age" (News paper) to Australian troops in Egypt 1917 Chaplain-Captain F. H. King giving away "The Age" to Australian troops in Egypta.i.f. egypt, chaplain, f.h.king, light horse egypt, roussac, o.b.e., boer war -
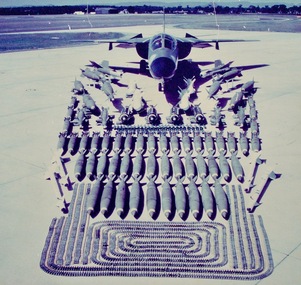 Lara RSL Sub Branch
Picture F-111 A8-146 with a selection of the ordinance it can deliver, Picture Australian Aircraft Aardvark--the General Dynamics F-111 and array of weapons available to be used in association with F-111 Aircraft
Picture shows the wide variety of the ordinance that can be used by the Aardvark--the General Dynamics F-111Great view of the aircraft and its ordinance - Australian Aardvark--the General Dynamics F-111Picture of Australian Aardvark--the General Dynamics F-111 and ammunition available to be fitted to the aircraft. Bombs , cannon shells, rockets etc. mounted on a MDF backboard.F-111 Australian Aircraft on the ground with a large variety of weapons that can be fitted too the aircarft.f-111 and ordinance, aardvark--the general dynamics f-111 -
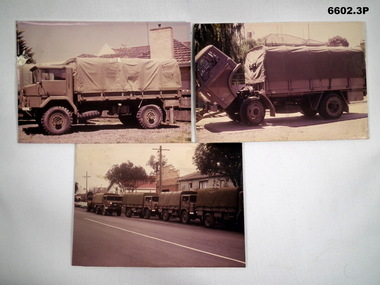 Bendigo Military Museum
Photograph - PHOTOGRAPHS, TRUCKS FROM 1970's, RACT, 1970's
3. 2 trucks have the 3rd MD TAC Sign, 1 truck has the TAC sign with 7 on it. Passchendaele Barracks was the name of the Army Drill Hall, Mollison Street, Bendigo. The drill hall was in use 1916 - abt 2004.1. Side view of international MK3 Army Truck 4 x 4 set up for troop or general service work. Canvas cover is on. Coloured photo taken in the Mollison Street Depot yard. Photo is mounted on stiff cardboard. 2. Side View of Army Commercial Ford Truck. Cabin tilted forward to enable access to engine (Ford CL 400). 3. Group photo in colour, of 5 MN3 trucks lined up on the road beside the Mollison Street Drill Hall,. 1. On the rear is a 'stuck on' label "International 2 1/2 tons GS MN3 Bendigo Deport Yard". 3. On the rear is written "Convoy Inter MK3's in Mollison Street Bendigo. trucks, cmf, passchendaele barracks trust -
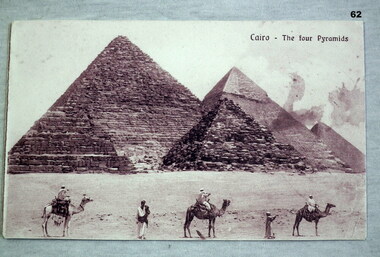 Bendigo Military Museum
Postcard - PICTURE POSTCARD, 20.2.1916
On rear; Sinai desert Asia Minor Feb 20th 1916. Dear Mother, your ever welcome letter to hand. Sorry to hear Dad is not well also yourself. Hope you are better err this. Things much the same as usual here. We are both well. I had a letter from Tom last week. We were inspected by the General after Church Parade this morning. Glad uncles crop turned out so well. I suppose Lot has gone to town by this. I wrote to her and sent her some things. You ought to have them by now. Roy has has had no letters from home for a long time. Don’t address them to Hospital. Use same address as myself. Too dusty here to write. Goodbye and love to all, from Bill. Collection re Mrs May Burns.Postcard photo, B & W with four pyramids at Cairo - camels and men in foreground. The rear has a black pencil written letter. On the front “Cairo - The four Pyramids” On rear above pencil letter is written in blue ink, “This boy lost his life in Service”.documents, postcards, views, pyramids, cairo, souvenirs -
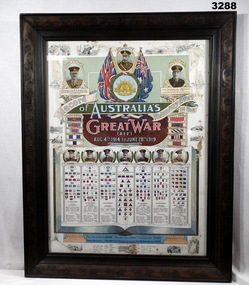 Bendigo Military Museum
Memorabilia - POSTER, FRAMED WW1, Post 1919
King George V portrait at top between Union Jack & Australian flags. LHS: General Sir W R Birdwood. RHS: Lt General Sir J Monash. LHS: List of Honours awarded. RHS: Honours Awarded. Portraits of Officers commanding with a list of their division's units, engagements & casualties. Ornate brown frame, glass front, cardboard backing.Printed in colour top centre: "Record of Australia's Voluntary Effort in the Great War (AIF) August 4 1914 - June 28 1919"documents-posters, military history, ww1 record