Showing 617 items
matching elements
-
 Moorabbin Air Museum
Document (item) - Roland Jahne Collection - See Description for details
-
 Victorian Aboriginal Corporation for Languages
Periodical, Australian Institute of Aboriginal and Torres Strait Islander Studies, Australian Aboriginal studies : journal of the Australian Institute of Aboriginal and Torres Strait Islander Studies, 2007
1. The moral lexicon of the Warlpiri people of central Australia LR Hiatt This paper discusses words that match ?Good? and ?Bad?; examples of ?Good? and ?Bad? behaviour; morality and law; and egalitarianism and dominance. It also presents a comparison with Gidjingarli (Burarra). 2. Mobs and bosses: Structures of Aboriginal sociality Patrick Mullins (Mount Druitt, NSW) A commonality of Aboriginal social organisation exists across the continent in communities as different as those from the Western Desert across to Cape York, from the towns of New South Wales and Western Australia to cities like Adelaide. This is found in the colloquial expressions ?mob? and ?boss?, which are used in widely differing contexts. Mobbing is the activity where relatedness, in the sense of social alliances, is established and affirmed by virtue of a common affiliation with place, common experience and common descent, as well as by the exchange of cash and commodities. Bossing is the activity of commanding respect by virtue of one?s capacity to bestow items of value such as ritual knowledge, nurturance, care, cash and commodities. Mobbing and bossing are best understood as structures in Giddens? sense of sets of rules and resources involved in the production of social systems, in this case social alliances. Mobbing and bossing imply a concept of a person as a being in a relationship. Attention needs to be given to the way these structures interact with institutions in the wider Australian society. 3. Recognising victims without blaming them: A moral contest? About Peter Sutton?s ?The Politics of Suffering: Indigenous Policy in Australia since the 1970s? and Gillian Cowlishaw?s replies Ma�a Ponsonnet (Universit� Paris- 8-Saint-Denis) Peter Sutton?s texts on Aboriginal violence, health and their politicisation are replied to using his methodology, and acknowledging his convincing points. Sutton rightly denounces a lack of lucidity and scientific objectivity in anthropological debates. These inadequacies impede identification of what Aboriginal groups can do to improve their situations for fear that this identification would lead to blame the victims. At the other end of the ethical spectrum, those who advocate a broader use of what I will call a ?resistance interpretation? of violence fail to recognise victims as such, on the implicit grounds that seeing victims as victims would deprive them of any agency, on the one hand, and entail blame, on the other hand. I aim to define a middle road between those views: the idea that victims should be acknowledged as such without being denied their agency and without being blamed for their own condition. This middle road allows identification of the colonisers? responsibilities in the contemporary situation of Indigenous communities in Australia, and to determine who can do what. Secondly, I show that Sutton?s texts convey, through subtle but recurrent remarks, an ideology of blame rather than a mere will to identify practical solutions. As a consequence, some of his proposals do not stand on a solid and objective causal analysis. 4. 'You would have loved her for her lore?: The letters of Daisy Bates Bob Reece (Murdoch University) Daisy Bates was once an iconic figure in Australia but her popular and academic reputation became tarnished by her retrograde views. Her credibility was also put in doubt through the exposure of her fictionalised Irish background. In more recent times, however, her ethnographic data on the Aborigines of Western Australia has been an invaluable source for Native Title claims, while her views on Aboriginal extinction, cannibalism and ?castes? are being seen as typical of her time. This article briefly reviews what has been the orthodox academic opinion of her scientific achievement before summarising what is reliably known of her early history and indicating what kind of person is revealed in the 3000 or more letters that she left behind. 5. What potential might Narrative Therapy have to assist Indigenous Australians reduce substance misuse? Violet Bacon (Curtin University of Technology) Substance misuse is associated with adverse consequences for many Australians including Aboriginal and Torres Strait Islander peoples. Extensive research has been conducted into various intervention, treatment and prevention programs to ascertain their potential in reducing substance misuse within Aboriginal and non-Aboriginal communities. I explore the potential of Narrative Therapy as a counselling intervention for assisting Indigenous Australians reduce the harm associated with substance misuse. 6. Bone points from the Adelaide River, Northern Territory Sally Brockwell (University of Canberra) and Kim Akerman (Moonah) Large earth mounds located next to the vast floodplains of the lower Adelaide River, one of the major tropical rivers draining the flat coastal plains of northern Australia, contain cultural material, including bone points. The floodplains of the north underwent dynamic environmental change from extensive mangrove swamps in the mid-Holocene, through a transition phase of variable estuarine and freshwater mosaic environments, to the freshwater environment that exists today. This geomorphological framework provides a background for the interpretation of the archaeology, which spans some 4000 years. 7. A different look: Comparative rock-art recording from the Torres Strait using computer enhancement techniques Liam M Brady (Monash University) In 1888 and 1898, Cambridge University?s Alfred C Haddon made the first recording of rock-art from the Torres Strait islands using photography and sketches. Systematic recording of these same paintings and sites was carried out from 2000 to 2004 by archaeologists and Indigenous Torres Strait Islander and Aboriginal communities as part of community-based rock-art recording projects. Computer enhancement techniques were used to identify differences between both sets of recordings, to reveal design elements that Haddon missed in his recordings, and to recover images recorded by Haddon that are today no longer visible to the naked eye. Using this data, preliminary observations into the antiquity of Torres Strait rock-art are noted along with recommendations for future Torres Strait region rock-art research and baseline monitoring projects. 8. Sources of bias in the Murray Black Collection: Implications for palaeopathological analysis Sarah Robertson (National Museum of Australia) The Murray Black collection of Aboriginal skeletal remains has been a mainstay of bio-anthropological research in Australia, but relatively little thought has been given to how and why this collection may differ from archaeologically obtained collections. The context in which remains were located and recovered has created bias within the sample, which was further skewed within the component of the collection sent to the Australian Institute of Anatomy, resulting in limitations for the research potential of the collection. This does not render all research on the collection unviable, but it demonstrates the importance of understanding the context of a skeletal collection when assessing its suitability for addressing specific research questions.maps, b&w photographs, colour photographs, illustrations, graphs, chartswarlpiri, sociology, daisy bates, substance abuse, narrative therapy, rock art, technology and art, murray black collection, pleistocene sites, watarrka plateau -
 Flagstaff Hill Maritime Museum and Village
Domestic object - Bowl, Late 19th or early 20th Century
The Process of Making Pottery Decorating, Firing, Glazing, Making, Technical There is a rhythm and flow to clay. It can’t be done all at once! Even the making process! It can take weeks to get everything done, especially if you can only work on your pottery once a week! Even though we have three hour classes, it’s often just not enough time! Here is an overview of some of the processes so you have a bit more grasp on some of the technical stuff! Step One – Design There are SO many ideas out there for making stuff in clay! From delicate porcelain jewellery, through to heavy sculptural work and everything in between. Deciding your direction is sometimes not that easy – when you first start, try everything, you will naturally gravitate to the style that you enjoy! The options and variations are endless and can get a wee bit overwhelming too! Check in with me before you start to ensure your ideas will work, what order you might do things, how you could achieve the look you are seeking and any other technical data required! Step Two – Making Clay is thixotropic. This means that as you work with it, the clay first gets sloppier and wetter, before is begins to dry in the atmosphere. For most things, you simply can’t do all parts of the project at once. An example of work order might look like: Get last weeks work out from the shelves Prepare clay for today’s work – roll your clay, prepare balls for throwing, make the first stage of a pinch pot) Clean up last week’s work and put it on the shelf for bisque firing Check that you have any glazing to do – and do enough of it that you will have time to finish your main project Do the next step of your next project – there might be a further step that can’t be complete immediately, in that case, wrap your work well and put onto the shelves. Letting your work rest for a while can really help keep your work clean and professional looking. Many things require bagging under plastic to keep it ready for work the next week – put your name on the outside of the bag so you can find your work easily. We have stickers and markers. Consider how you want to decorate your work – coloured slip can be applied at a fairly wet stage (remembering that it will make your work even wetter!). Trying to apply slip to dry clay won’t work! If you want to do sgraffito – you will need to keep the work leather hard (a state of dryness where you can still work the clay with a little effort and a little water and care). Step Three – Drying Most of the time your work can go into the rack uncovered to let it dry out for the following week. If you want to continue forming or shaping you will need to double bag your work – put your work on a suitable sized bat and put the bat in a bag so the base of the bag is under the bat, then put another bag over the top of the work and tuck the top of the bag under the bat. If you want to trim (or turn) your thrown work the following week, it should also be double bagged. If your work is large, delicate, or of uneven thicknesses, you should lightly cover your work for drying. When considering the drying process, bare in mind the weather, humidity and wind! The hotter and dryer, the faster things dry and work can dry unevenly in the shelves – this can lead to cracking – another time to lightly cover your work for drying. Step Four – Trimming and Cleaning Up Your work is dry! It is called greenware now and it is at it’s most fragile! Handle everything with two hands. I often refer to soft hands – keep everything gentle and with your fingers spread as much as possible. Try to not pick up things like plates too much, and always with both hands! Before your work can be bisque fired it should be “cleaned up”. You work won’t go into the kiln if it has sharp edges – when glazed, sharp edges turn into razor blades! Use a piece of fly wire to rub the work all over – this will scratch a little so be light handed. Use a knife or metal kidney to scrape any areas that require a bit more dynamic treatment than the fly wire offers! Finally, a very light wipe over with a slightly damp sponge can help soften and soothe all of your edges and dags! Trimming thrown work: If you are planning to trim (or turn) your thrown work (and you should be), make sure you bag it well – your work should be leather hard to almost dry for easiest trimming. Use this step to finish the work completely – use a metal kidney to polish the surface, or a slightly damp sponge to give a freshly thrown look. Wipe the sponge around the rim after trimming, and check the inside of the pot for dags! Trimming slip cast work: Usually I will trim the rims of your work on the wheel the following day to make that stage easier, however you will still need to check your work for lumps and bumps. Last but not least – check that your name is still clearly on the bottom of your work. Step Five – Bisque Firing When the work is completely dry it can go into the bisque kiln. The bisque kiln is fired to 1000°C. This process burns off the water in the clay as well as some of the chemically bound water. The structure of the clay is not altered that much at this temperature. Inside the bisque kiln, the work is stacked a little, small bowl inside a larger bowl and onto a heavy plate. Smaller items like decorations or drink coasters might get stacked several high. Consideration is paid to the weight of the stack and shape of the work. A bisque kiln can fire about one and a half times the amount of work that the glaze kiln can fire. The firing takes about 10 hours to complete the cycle and about two days to cool down. Once it has been emptied the work is placed in the glaze room ready for you to decorate! Step Six – Glazing Decorating your work with colour can be a lot of fun – and time consuming! There are three main options for surface treatment at this stage: Oxide Washes Underglazes Glazes Washes and underglazes do not “glaze” the work – It will still need a layer of glaze to fully seal the clay (washes don’t need glaze on surfaces not designed for food or liquid as they can gloss up a little on their own). Underglazes are stable colourants that turn out pretty much how they look in the jar. They can be mixed with each other to form other colours and can be used like water colours to paint onto your work. Mostly they should have a clear glaze on top to seal them. Oxides are a different species – the pink oxide (cobalt) wash turns out bright blue for instance. They don’t always need a glaze on top, and some glazes can change the colour of the wash! The glazes need no other “glaze” on top! Be careful of unknown glaze interactions – you can put any combination of glaze in a bowl or on a plate, but only a single glaze on the outside of any vertical surface! Glazes are a chemical reaction under heat. We don’t know the exact chemicals in the Mayco glazes we use. I can guess by the way they interact with each other, however, on the whole, you need to test every idea you have, and not run the test on a vertical surface! Simply put, glaze is a layer of glass like substance that bonds with the clay underneath. Clay is made of silica, alumina and water. Glaze is made of mostly silica. Silica has a melting point of 1700°C and we fire to 1240°C. The silica requires a “flux” to help it melt at the lower temperature. Fluxes can be all sorts of chemicals – a common one is calcium – calcium has a melting point of 2500°C, however, together they both melt at a much lower temperature! Colourants are metal oxides like cobalt (blue), chrome (green through black), copper (green, blue, even red!), manganese (black, purple and pink) iron (red brown), etc. Different chemicals in the glaze can have dramatic effects. for example, barium carbonate (which we don’t use) turns manganese bright pink! Other elements can turn manganese dioxide brown, blue, purple and reddish brown. Manganese dioxide is a flux in and of itself as well. So, glazes that get their black and purple colours, often interact with other glazes and RUN! Our mirror black is a good example – it mixes really well with many glazes because it fluxes them – causes them to melt faster. It will also bring out many beautiful colours in the glazes because it’s black colouring most definitely comes from manganese dioxide! Glaze chemistry is a whole subject on it’s own! We use commercial Mayco glazes on purpose – for their huge range of colour possibilities, stability, cool interactions, artistic freedom with the ability to easily brush the glazes on and ease of use. We currently have almost 50 glazes on hand! A major project is to test the interactions of all glazes with each other. That is 2,500 test tiles!!!! I’m going to make the wall behind the wheels the feature wall of pretty colours! Step Seven – Glaze (Gloss or sometimes called “Glost”) Firing Most of the time this is the final stage of making your creation (but not always!) The glaze kiln goes to 1240°C. This is called cone 6, or midrange. It is the low end of stoneware temperatures. Stoneware clays and glazes are typically fired at cone 8 – 10, that is 1260 – 1290°C. The energy requirement to go from 1240°C to 1280°C is almost a 30% more! Our clay is formulated to vitrify (mature, turn “glass-like”) at 1240°, as are our glazes. A glaze kiln take around 12 hours to reach temperature and two to three days to cool down. Sometimes a third firing process is required – this is for decoration that is added to work after the glaze firing. For example – adding precious metals and lustres. this firing temperature is usually around 600 – 800°C depending upon the techniques being used. There are many students interested in gold and silver trims – we will be doing this third type of firing soon! After firing your work will be in the student finished work shelves. Remember to pay for it before you head out the door! There is a small extra charge for using porcelain clay (it’s more than twice the price of regular clay), and for any third firing process! Once your work has been fired it can not turn back into clay for millennia – so don’t fire it if you don’t like it! Put it in the bucket for recycling. https://firebirdstudios.com.au/the-process-of-making-pottery/ The bowl is an example of kitchenware used in the 19th century and still in use today.Bowl white ceramic. Crack on side. Badly stained.Backstamp very faint and unable to be read.flagstaff hill, warrnambool, shipwrecked-coast, flagstaff-hill, flagstaff-hill-maritime-museum, maritime-museum, shipwreck-coast, flagstaff-hill-maritime-village, mixing bowl, food preparation, kitchen equipment, ceramic -
 Flagstaff Hill Maritime Museum and Village
Domestic object - Bowl
The Process of Making Pottery Decorating, Firing, Glazing, Making, Technical There is a rhythm and flow to clay. It can’t be done all at once! Even the making process! It can take weeks to get everything done, especially if you can only work on your pottery once a week! Even though we have three hour classes, it’s often just not enough time! Here is an overview of some of the processes so you have a bit more grasp on some of the technical stuff! Step One – Design There are SO many ideas out there for making stuff in clay! From delicate porcelain jewellery, through to heavy sculptural work and everything in between. Deciding your direction is sometimes not that easy – when you first start, try everything, you will naturally gravitate to the style that you enjoy! The options and variations are endless and can get a wee bit overwhelming too! Check in with me before you start to ensure your ideas will work, what order you might do things, how you could achieve the look you are seeking and any other technical data required! Step Two – Making Clay is thixotropic. This means that as you work with it, the clay first gets sloppier and wetter, before is begins to dry in the atmosphere. For most things, you simply can’t do all parts of the project at once. An example of work order might look like: Get last weeks work out from the shelves Prepare clay for today’s work – roll your clay, prepare balls for throwing, make the first stage of a pinch pot) Clean up last week’s work and put it on the shelf for bisque firing Check that you have any glazing to do – and do enough of it that you will have time to finish your main project Do the next step of your next project – there might be a further step that can’t be complete immediately, in that case, wrap your work well and put onto the shelves. Letting your work rest for a while can really help keep your work clean and professional looking. Many things require bagging under plastic to keep it ready for work the next week – put your name on the outside of the bag so you can find your work easily. We have stickers and markers. Consider how you want to decorate your work – coloured slip can be applied at a fairly wet stage (remembering that it will make your work even wetter!). Trying to apply slip to dry clay won’t work! If you want to do sgraffito – you will need to keep the work leather hard (a state of dryness where you can still work the clay with a little effort and a little water and care). Step Three – Drying Most of the time your work can go into the rack uncovered to let it dry out for the following week. If you want to continue forming or shaping you will need to double bag your work – put your work on a suitable sized bat and put the bat in a bag so the base of the bag is under the bat, then put another bag over the top of the work and tuck the top of the bag under the bat. If you want to trim (or turn) your thrown work the following week, it should also be double bagged. If your work is large, delicate, or of uneven thicknesses, you should lightly cover your work for drying. When considering the drying process, bare in mind the weather, humidity and wind! The hotter and dryer, the faster things dry and work can dry unevenly in the shelves – this can lead to cracking – another time to lightly cover your work for drying. Step Four – Trimming and Cleaning Up Your work is dry! It is called greenware now and it is at it’s most fragile! Handle everything with two hands. I often refer to soft hands – keep everything gentle and with your fingers spread as much as possible. Try to not pick up things like plates too much, and always with both hands! Before your work can be bisque fired it should be “cleaned up”. You work won’t go into the kiln if it has sharp edges – when glazed, sharp edges turn into razor blades! Use a piece of fly wire to rub the work all over – this will scratch a little so be light handed. Use a knife or metal kidney to scrape any areas that require a bit more dynamic treatment than the fly wire offers! Finally, a very light wipe over with a slightly damp sponge can help soften and soothe all of your edges and dags! Trimming thrown work: If you are planning to trim (or turn) your thrown work (and you should be), make sure you bag it well – your work should be leather hard to almost dry for easiest trimming. Use this step to finish the work completely – use a metal kidney to polish the surface, or a slightly damp sponge to give a freshly thrown look. Wipe the sponge around the rim after trimming, and check the inside of the pot for dags! Trimming slip cast work: Usually I will trim the rims of your work on the wheel the following day to make that stage easier, however you will still need to check your work for lumps and bumps. Last but not least – check that your name is still clearly on the bottom of your work. Step Five – Bisque Firing When the work is completely dry it can go into the bisque kiln. The bisque kiln is fired to 1000°C. This process burns off the water in the clay as well as some of the chemically bound water. The structure of the clay is not altered that much at this temperature. Inside the bisque kiln, the work is stacked a little, small bowl inside a larger bowl and onto a heavy plate. Smaller items like decorations or drink coasters might get stacked several high. Consideration is paid to the weight of the stack and shape of the work. A bisque kiln can fire about one and a half times the amount of work that the glaze kiln can fire. The firing takes about 10 hours to complete the cycle and about two days to cool down. Once it has been emptied the work is placed in the glaze room ready for you to decorate! Step Six – Glazing Decorating your work with colour can be a lot of fun – and time consuming! There are three main options for surface treatment at this stage: Oxide Washes Underglazes Glazes Washes and underglazes do not “glaze” the work – It will still need a layer of glaze to fully seal the clay (washes don’t need glaze on surfaces not designed for food or liquid as they can gloss up a little on their own). Underglazes are stable colourants that turn out pretty much how they look in the jar. They can be mixed with each other to form other colours and can be used like water colours to paint onto your work. Mostly they should have a clear glaze on top to seal them. Oxides are a different species – the pink oxide (cobalt) wash turns out bright blue for instance. They don’t always need a glaze on top, and some glazes can change the colour of the wash! The glazes need no other “glaze” on top! Be careful of unknown glaze interactions – you can put any combination of glaze in a bowl or on a plate, but only a single glaze on the outside of any vertical surface! Glazes are a chemical reaction under heat. We don’t know the exact chemicals in the Mayco glazes we use. I can guess by the way they interact with each other, however, on the whole, you need to test every idea you have, and not run the test on a vertical surface! Simply put, glaze is a layer of glass like substance that bonds with the clay underneath. Clay is made of silica, alumina and water. Glaze is made of mostly silica. Silica has a melting point of 1700°C and we fire to 1240°C. The silica requires a “flux” to help it melt at the lower temperature. Fluxes can be all sorts of chemicals – a common one is calcium – calcium has a melting point of 2500°C, however, together they both melt at a much lower temperature! Colourants are metal oxides like cobalt (blue), chrome (green through black), copper (green, blue, even red!), manganese (black, purple and pink) iron (red brown), etc. Different chemicals in the glaze can have dramatic effects. for example, barium carbonate (which we don’t use) turns manganese bright pink! Other elements can turn manganese dioxide brown, blue, purple and reddish brown. Manganese dioxide is a flux in and of itself as well. So, glazes that get their black and purple colours, often interact with other glazes and RUN! Our mirror black is a good example – it mixes really well with many glazes because it fluxes them – causes them to melt faster. It will also bring out many beautiful colours in the glazes because it’s black colouring most definitely comes from manganese dioxide! Glaze chemistry is a whole subject on it’s own! We use commercial Mayco glazes on purpose – for their huge range of colour possibilities, stability, cool interactions, artistic freedom with the ability to easily brush the glazes on and ease of use. We currently have almost 50 glazes on hand! A major project is to test the interactions of all glazes with each other. That is 2,500 test tiles!!!! I’m going to make the wall behind the wheels the feature wall of pretty colours! Step Seven – Glaze (Gloss or sometimes called “Glost”) Firing Most of the time this is the final stage of making your creation (but not always!) The glaze kiln goes to 1240°C. This is called cone 6, or midrange. It is the low end of stoneware temperatures. Stoneware clays and glazes are typically fired at cone 8 – 10, that is 1260 – 1290°C. The energy requirement to go from 1240°C to 1280°C is almost a 30% more! Our clay is formulated to vitrify (mature, turn “glass-like”) at 1240°, as are our glazes. A glaze kiln take around 12 hours to reach temperature and two to three days to cool down. Sometimes a third firing process is required – this is for decoration that is added to work after the glaze firing. For example – adding precious metals and lustres. this firing temperature is usually around 600 – 800°C depending upon the techniques being used. There are many students interested in gold and silver trims – we will be doing this third type of firing soon! After firing your work will be in the student finished work shelves. Remember to pay for it before you head out the door! There is a small extra charge for using porcelain clay (it’s more than twice the price of regular clay), and for any third firing process! Once your work has been fired it can not turn back into clay for millennia – so don’t fire it if you don’t like it! Put it in the bucket for recycling. https://firebirdstudios.com.au/the-process-of-making-pottery/ This bowl is an example of kitchenware used in the 19th century and still in use today.Bowl white ceramic plain that has two sets of edging around lip. Inside bowl has plaster designed to look like cooking mixture.flagstaff hill, warrnambool, shipwrecked-coast, flagstaff-hill, flagstaff-hill-maritime-museum, maritime-museum, shipwreck-coast, flagstaff-hill-maritime-village, kitchen equipment, ceramic -
 Flagstaff Hill Maritime Museum and Village
Domestic object - Bowl, J & G Meakin, Late 19th or early 20th Century
The Process of Making Pottery Decorating, Firing, Glazing, Making, Technical There is a rhythm and flow to clay. It can’t be done all at once! Even the making process! It can take weeks to get everything done, especially if you can only work on your pottery once a week! Even though we have three hour classes, it’s often just not enough time! Here is an overview of some of the processes so you have a bit more grasp on some of the technical stuff! Step One – Design There are SO many ideas out there for making stuff in clay! From delicate porcelain jewellery, through to heavy sculptural work and everything in between. Deciding your direction is sometimes not that easy – when you first start, try everything, you will naturally gravitate to the style that you enjoy! The options and variations are endless and can get a wee bit overwhelming too! Check in with me before you start to ensure your ideas will work, what order you might do things, how you could achieve the look you are seeking and any other technical data required! Step Two – Making Clay is thixotropic. This means that as you work with it, the clay first gets sloppier and wetter, before is begins to dry in the atmosphere. For most things, you simply can’t do all parts of the project at once. An example of work order might look like: Get last weeks work out from the shelves Prepare clay for today’s work – roll your clay, prepare balls for throwing, make the first stage of a pinch pot) Clean up last week’s work and put it on the shelf for bisque firing Check that you have any glazing to do – and do enough of it that you will have time to finish your main project Do the next step of your next project – there might be a further step that can’t be complete immediately, in that case, wrap your work well and put onto the shelves. Letting your work rest for a while can really help keep your work clean and professional looking. Many things require bagging under plastic to keep it ready for work the next week – put your name on the outside of the bag so you can find your work easily. We have stickers and markers. Consider how you want to decorate your work – coloured slip can be applied at a fairly wet stage (remembering that it will make your work even wetter!). Trying to apply slip to dry clay won’t work! If you want to do sgraffito – you will need to keep the work leather hard (a state of dryness where you can still work the clay with a little effort and a little water and care). Step Three – Drying Most of the time your work can go into the rack uncovered to let it dry out for the following week. If you want to continue forming or shaping you will need to double bag your work – put your work on a suitable sized bat and put the bat in a bag so the base of the bag is under the bat, then put another bag over the top of the work and tuck the top of the bag under the bat. If you want to trim (or turn) your thrown work the following week, it should also be double bagged. If your work is large, delicate, or of uneven thicknesses, you should lightly cover your work for drying. When considering the drying process, bare in mind the weather, humidity and wind! The hotter and dryer, the faster things dry and work can dry unevenly in the shelves – this can lead to cracking – another time to lightly cover your work for drying. Step Four – Trimming and Cleaning Up Your work is dry! It is called greenware now and it is at it’s most fragile! Handle everything with two hands. I often refer to soft hands – keep everything gentle and with your fingers spread as much as possible. Try to not pick up things like plates too much, and always with both hands! Before your work can be bisque fired it should be “cleaned up”. You work won’t go into the kiln if it has sharp edges – when glazed, sharp edges turn into razor blades! Use a piece of fly wire to rub the work all over – this will scratch a little so be light handed. Use a knife or metal kidney to scrape any areas that require a bit more dynamic treatment than the fly wire offers! Finally, a very light wipe over with a slightly damp sponge can help soften and soothe all of your edges and dags! Trimming thrown work: If you are planning to trim (or turn) your thrown work (and you should be), make sure you bag it well – your work should be leather hard to almost dry for easiest trimming. Use this step to finish the work completely – use a metal kidney to polish the surface, or a slightly damp sponge to give a freshly thrown look. Wipe the sponge around the rim after trimming, and check the inside of the pot for dags! Trimming slip cast work: Usually I will trim the rims of your work on the wheel the following day to make that stage easier, however you will still need to check your work for lumps and bumps. Last but not least – check that your name is still clearly on the bottom of your work. Step Five – Bisque Firing When the work is completely dry it can go into the bisque kiln. The bisque kiln is fired to 1000°C. This process burns off the water in the clay as well as some of the chemically bound water. The structure of the clay is not altered that much at this temperature. Inside the bisque kiln, the work is stacked a little, small bowl inside a larger bowl and onto a heavy plate. Smaller items like decorations or drink coasters might get stacked several high. Consideration is paid to the weight of the stack and shape of the work. A bisque kiln can fire about one and a half times the amount of work that the glaze kiln can fire. The firing takes about 10 hours to complete the cycle and about two days to cool down. Once it has been emptied the work is placed in the glaze room ready for you to decorate! Step Six – Glazing Decorating your work with colour can be a lot of fun – and time consuming! There are three main options for surface treatment at this stage: Oxide Washes Underglazes Glazes Washes and underglazes do not “glaze” the work – It will still need a layer of glaze to fully seal the clay (washes don’t need glaze on surfaces not designed for food or liquid as they can gloss up a little on their own). Underglazes are stable colourants that turn out pretty much how they look in the jar. They can be mixed with each other to form other colours and can be used like water colours to paint onto your work. Mostly they should have a clear glaze on top to seal them. Oxides are a different species – the pink oxide (cobalt) wash turns out bright blue for instance. They don’t always need a glaze on top, and some glazes can change the colour of the wash! The glazes need no other “glaze” on top! Be careful of unknown glaze interactions – you can put any combination of glaze in a bowl or on a plate, but only a single glaze on the outside of any vertical surface! Glazes are a chemical reaction under heat. We don’t know the exact chemicals in the Mayco glazes we use. I can guess by the way they interact with each other, however, on the whole, you need to test every idea you have, and not run the test on a vertical surface! Simply put, glaze is a layer of glass like substance that bonds with the clay underneath. Clay is made of silica, alumina and water. Glaze is made of mostly silica. Silica has a melting point of 1700°C and we fire to 1240°C. The silica requires a “flux” to help it melt at the lower temperature. Fluxes can be all sorts of chemicals – a common one is calcium – calcium has a melting point of 2500°C, however, together they both melt at a much lower temperature! Colourants are metal oxides like cobalt (blue), chrome (green through black), copper (green, blue, even red!), manganese (black, purple and pink) iron (red brown), etc. Different chemicals in the glaze can have dramatic effects. for example, barium carbonate (which we don’t use) turns manganese bright pink! Other elements can turn manganese dioxide brown, blue, purple and reddish brown. Manganese dioxide is a flux in and of itself as well. So, glazes that get their black and purple colours, often interact with other glazes and RUN! Our mirror black is a good example – it mixes really well with many glazes because it fluxes them – causes them to melt faster. It will also bring out many beautiful colours in the glazes because it’s black colouring most definitely comes from manganese dioxide! Glaze chemistry is a whole subject on it’s own! We use commercial Mayco glazes on purpose – for their huge range of colour possibilities, stability, cool interactions, artistic freedom with the ability to easily brush the glazes on and ease of use. We currently have almost 50 glazes on hand! A major project is to test the interactions of all glazes with each other. That is 2,500 test tiles!!!! I’m going to make the wall behind the wheels the feature wall of pretty colours! Step Seven – Glaze (Gloss or sometimes called “Glost”) Firing Most of the time this is the final stage of making your creation (but not always!) The glaze kiln goes to 1240°C. This is called cone 6, or midrange. It is the low end of stoneware temperatures. Stoneware clays and glazes are typically fired at cone 8 – 10, that is 1260 – 1290°C. The energy requirement to go from 1240°C to 1280°C is almost a 30% more! Our clay is formulated to vitrify (mature, turn “glass-like”) at 1240°, as are our glazes. A glaze kiln take around 12 hours to reach temperature and two to three days to cool down. Sometimes a third firing process is required – this is for decoration that is added to work after the glaze firing. For example – adding precious metals and lustres. this firing temperature is usually around 600 – 800°C depending upon the techniques being used. There are many students interested in gold and silver trims – we will be doing this third type of firing soon! After firing your work will be in the student finished work shelves. Remember to pay for it before you head out the door! There is a small extra charge for using porcelain clay (it’s more than twice the price of regular clay), and for any third firing process! Once your work has been fired it can not turn back into clay for millennia – so don’t fire it if you don’t like it! Put it in the bucket for recycling. https://firebirdstudios.com.au/the-process-of-making-pottery/This bowl was made by renowned pottery company J & G Meakin of England. The firm was established in the mid-1800's. The bowl is an example of kitchenware used in the 19th century and still in use today.Bowl; white ceramic, round and tapering inwards towards base. Made by J and G Meakin England.On base, 'Ironstone China Reg SOL 391413' with symbolflagstaff hill, flagstaff hill maritime museum and village, warrnambool, maritime museum, maritime village, great ocean road, shipwreck coast, mixing bowl, food preparation, j & g meakin, pottery, stoke-on-trent, kitchen equipment, ceramic -
 Flagstaff Hill Maritime Museum and Village
Domestic object - Plate
The Process of Making Pottery Decorating, Firing, Glazing, Making, Technical There is a rhythm and flow to clay. It can’t be done all at once! Even the making process! It can take weeks to get everything done, especially if you can only work on your pottery once a week! Even though we have three hour classes, it’s often just not enough time! Here is an overview of some of the processes so you have a bit more grasp on some of the technical stuff! Step One – Design There are SO many ideas out there for making stuff in clay! From delicate porcelain jewellery, through to heavy sculptural work and everything in between. Deciding your direction is sometimes not that easy – when you first start, try everything, you will naturally gravitate to the style that you enjoy! The options and variations are endless and can get a wee bit overwhelming too! Check in with me before you start to ensure your ideas will work, what order you might do things, how you could achieve the look you are seeking and any other technical data required! Step Two – Making Clay is thixotropic. This means that as you work with it, the clay first gets sloppier and wetter, before is begins to dry in the atmosphere. For most things, you simply can’t do all parts of the project at once. An example of work order might look like: Get last weeks work out from the shelves Prepare clay for today’s work – roll your clay, prepare balls for throwing, make the first stage of a pinch pot) Clean up last week’s work and put it on the shelf for bisque firing Check that you have any glazing to do – and do enough of it that you will have time to finish your main project Do the next step of your next project – there might be a further step that can’t be complete immediately, in that case, wrap your work well and put onto the shelves. Letting your work rest for a while can really help keep your work clean and professional looking. Many things require bagging under plastic to keep it ready for work the next week – put your name on the outside of the bag so you can find your work easily. We have stickers and markers. Consider how you want to decorate your work – coloured slip can be applied at a fairly wet stage (remembering that it will make your work even wetter!). Trying to apply slip to dry clay won’t work! If you want to do sgraffito – you will need to keep the work leather hard (a state of dryness where you can still work the clay with a little effort and a little water and care). Step Three – Drying Most of the time your work can go into the rack uncovered to let it dry out for the following week. If you want to continue forming or shaping you will need to double bag your work – put your work on a suitable sized bat and put the bat in a bag so the base of the bag is under the bat, then put another bag over the top of the work and tuck the top of the bag under the bat. If you want to trim (or turn) your thrown work the following week, it should also be double bagged. If your work is large, delicate, or of uneven thicknesses, you should lightly cover your work for drying. When considering the drying process, bare in mind the weather, humidity and wind! The hotter and dryer, the faster things dry and work can dry unevenly in the shelves – this can lead to cracking – another time to lightly cover your work for drying. Step Four – Trimming and Cleaning Up Your work is dry! It is called greenware now and it is at it’s most fragile! Handle everything with two hands. I often refer to soft hands – keep everything gentle and with your fingers spread as much as possible. Try to not pick up things like plates too much, and always with both hands! Before your work can be bisque fired it should be “cleaned up”. You work won’t go into the kiln if it has sharp edges – when glazed, sharp edges turn into razor blades! Use a piece of fly wire to rub the work all over – this will scratch a little so be light handed. Use a knife or metal kidney to scrape any areas that require a bit more dynamic treatment than the fly wire offers! Finally, a very light wipe over with a slightly damp sponge can help soften and soothe all of your edges and dags! Trimming thrown work: If you are planning to trim (or turn) your thrown work (and you should be), make sure you bag it well – your work should be leather hard to almost dry for easiest trimming. Use this step to finish the work completely – use a metal kidney to polish the surface, or a slightly damp sponge to give a freshly thrown look. Wipe the sponge around the rim after trimming, and check the inside of the pot for dags! Trimming slip cast work: Usually I will trim the rims of your work on the wheel the following day to make that stage easier, however you will still need to check your work for lumps and bumps. Last but not least – check that your name is still clearly on the bottom of your work. Step Five – Bisque Firing When the work is completely dry it can go into the bisque kiln. The bisque kiln is fired to 1000°C. This process burns off the water in the clay as well as some of the chemically bound water. The structure of the clay is not altered that much at this temperature. Inside the bisque kiln, the work is stacked a little, small bowl inside a larger bowl and onto a heavy plate. Smaller items like decorations or drink coasters might get stacked several high. Consideration is paid to the weight of the stack and shape of the work. A bisque kiln can fire about one and a half times the amount of work that the glaze kiln can fire. The firing takes about 10 hours to complete the cycle and about two days to cool down. Once it has been emptied the work is placed in the glaze room ready for you to decorate! Step Six – Glazing Decorating your work with colour can be a lot of fun – and time consuming! There are three main options for surface treatment at this stage: Oxide Washes Underglazes Glazes Washes and underglazes do not “glaze” the work – It will still need a layer of glaze to fully seal the clay (washes don’t need glaze on surfaces not designed for food or liquid as they can gloss up a little on their own). Underglazes are stable colourants that turn out pretty much how they look in the jar. They can be mixed with each other to form other colours and can be used like water colours to paint onto your work. Mostly they should have a clear glaze on top to seal them. Oxides are a different species – the pink oxide (cobalt) wash turns out bright blue for instance. They don’t always need a glaze on top, and some glazes can change the colour of the wash! The glazes need no other “glaze” on top! Be careful of unknown glaze interactions – you can put any combination of glaze in a bowl or on a plate, but only a single glaze on the outside of any vertical surface! Glazes are a chemical reaction under heat. We don’t know the exact chemicals in the Mayco glazes we use. I can guess by the way they interact with each other, however, on the whole, you need to test every idea you have, and not run the test on a vertical surface! Simply put, glaze is a layer of glass like substance that bonds with the clay underneath. Clay is made of silica, alumina and water. Glaze is made of mostly silica. Silica has a melting point of 1700°C and we fire to 1240°C. The silica requires a “flux” to help it melt at the lower temperature. Fluxes can be all sorts of chemicals – a common one is calcium – calcium has a melting point of 2500°C, however, together they both melt at a much lower temperature! Colourants are metal oxides like cobalt (blue), chrome (green through black), copper (green, blue, even red!), manganese (black, purple and pink) iron (red brown), etc. Different chemicals in the glaze can have dramatic effects. for example, barium carbonate (which we don’t use) turns manganese bright pink! Other elements can turn manganese dioxide brown, blue, purple and reddish brown. Manganese dioxide is a flux in and of itself as well. So, glazes that get their black and purple colours, often interact with other glazes and RUN! Our mirror black is a good example – it mixes really well with many glazes because it fluxes them – causes them to melt faster. It will also bring out many beautiful colours in the glazes because it’s black colouring most definitely comes from manganese dioxide! Glaze chemistry is a whole subject on it’s own! We use commercial Mayco glazes on purpose – for their huge range of colour possibilities, stability, cool interactions, artistic freedom with the ability to easily brush the glazes on and ease of use. We currently have almost 50 glazes on hand! A major project is to test the interactions of all glazes with each other. That is 2,500 test tiles!!!! I’m going to make the wall behind the wheels the feature wall of pretty colours! Step Seven – Glaze (Gloss or sometimes called “Glost”) Firing Most of the time this is the final stage of making your creation (but not always!) The glaze kiln goes to 1240°C. This is called cone 6, or midrange. It is the low end of stoneware temperatures. Stoneware clays and glazes are typically fired at cone 8 – 10, that is 1260 – 1290°C. The energy requirement to go from 1240°C to 1280°C is almost a 30% more! Our clay is formulated to vitrify (mature, turn “glass-like”) at 1240°, as are our glazes. A glaze kiln take around 12 hours to reach temperature and two to three days to cool down. Sometimes a third firing process is required – this is for decoration that is added to work after the glaze firing. For example – adding precious metals and lustres. this firing temperature is usually around 600 – 800°C depending upon the techniques being used. There are many students interested in gold and silver trims – we will be doing this third type of firing soon! After firing your work will be in the student finished work shelves. Remember to pay for it before you head out the door! There is a small extra charge for using porcelain clay (it’s more than twice the price of regular clay), and for any third firing process! Once your work has been fired it can not turn back into clay for millennia – so don’t fire it if you don’t like it! Put it in the bucket for recycling. https://firebirdstudios.com.au/the-process-of-making-pottery/Ceramics have evolved over thousands of years.White earthenware dinner plate. Crazing evident all over.Backstamped ‘Made in England S LTD’flagstaff hill, warrnambool, shipwrecked-coast, flagstaff-hill, flagstaff-hill-maritime-museum, maritime-museum, shipwreck-coast, flagstaff-hill-maritime-village, ceramics, tableware -
 Flagstaff Hill Maritime Museum and Village
Domestic object - Plate, Johnson Bros
The Process of Making Pottery Decorating, Firing, Glazing, Making, Technical There is a rhythm and flow to clay. It can’t be done all at once! Even the making process! It can take weeks to get everything done, especially if you can only work on your pottery once a week! Even though we have three hour classes, it’s often just not enough time! Here is an overview of some of the processes so you have a bit more grasp on some of the technical stuff! Step One – Design There are SO many ideas out there for making stuff in clay! From delicate porcelain jewellery, through to heavy sculptural work and everything in between. Deciding your direction is sometimes not that easy – when you first start, try everything, you will naturally gravitate to the style that you enjoy! The options and variations are endless and can get a wee bit overwhelming too! Check in with me before you start to ensure your ideas will work, what order you might do things, how you could achieve the look you are seeking and any other technical data required! Step Two – Making Clay is thixotropic. This means that as you work with it, the clay first gets sloppier and wetter, before is begins to dry in the atmosphere. For most things, you simply can’t do all parts of the project at once. An example of work order might look like: Get last weeks work out from the shelves Prepare clay for today’s work – roll your clay, prepare balls for throwing, make the first stage of a pinch pot) Clean up last week’s work and put it on the shelf for bisque firing Check that you have any glazing to do – and do enough of it that you will have time to finish your main project Do the next step of your next project – there might be a further step that can’t be complete immediately, in that case, wrap your work well and put onto the shelves. Letting your work rest for a while can really help keep your work clean and professional looking. Many things require bagging under plastic to keep it ready for work the next week – put your name on the outside of the bag so you can find your work easily. We have stickers and markers. Consider how you want to decorate your work – coloured slip can be applied at a fairly wet stage (remembering that it will make your work even wetter!). Trying to apply slip to dry clay won’t work! If you want to do sgraffito – you will need to keep the work leather hard (a state of dryness where you can still work the clay with a little effort and a little water and care). Step Three – Drying Most of the time your work can go into the rack uncovered to let it dry out for the following week. If you want to continue forming or shaping you will need to double bag your work – put your work on a suitable sized bat and put the bat in a bag so the base of the bag is under the bat, then put another bag over the top of the work and tuck the top of the bag under the bat. If you want to trim (or turn) your thrown work the following week, it should also be double bagged. If your work is large, delicate, or of uneven thicknesses, you should lightly cover your work for drying. When considering the drying process, bare in mind the weather, humidity and wind! The hotter and dryer, the faster things dry and work can dry unevenly in the shelves – this can lead to cracking – another time to lightly cover your work for drying. Step Four – Trimming and Cleaning Up Your work is dry! It is called greenware now and it is at it’s most fragile! Handle everything with two hands. I often refer to soft hands – keep everything gentle and with your fingers spread as much as possible. Try to not pick up things like plates too much, and always with both hands! Before your work can be bisque fired it should be “cleaned up”. You work won’t go into the kiln if it has sharp edges – when glazed, sharp edges turn into razor blades! Use a piece of fly wire to rub the work all over – this will scratch a little so be light handed. Use a knife or metal kidney to scrape any areas that require a bit more dynamic treatment than the fly wire offers! Finally, a very light wipe over with a slightly damp sponge can help soften and soothe all of your edges and dags! Trimming thrown work: If you are planning to trim (or turn) your thrown work (and you should be), make sure you bag it well – your work should be leather hard to almost dry for easiest trimming. Use this step to finish the work completely – use a metal kidney to polish the surface, or a slightly damp sponge to give a freshly thrown look. Wipe the sponge around the rim after trimming, and check the inside of the pot for dags! Trimming slip cast work: Usually I will trim the rims of your work on the wheel the following day to make that stage easier, however you will still need to check your work for lumps and bumps. Last but not least – check that your name is still clearly on the bottom of your work. Step Five – Bisque Firing When the work is completely dry it can go into the bisque kiln. The bisque kiln is fired to 1000°C. This process burns off the water in the clay as well as some of the chemically bound water. The structure of the clay is not altered that much at this temperature. Inside the bisque kiln, the work is stacked a little, small bowl inside a larger bowl and onto a heavy plate. Smaller items like decorations or drink coasters might get stacked several high. Consideration is paid to the weight of the stack and shape of the work. A bisque kiln can fire about one and a half times the amount of work that the glaze kiln can fire. The firing takes about 10 hours to complete the cycle and about two days to cool down. Once it has been emptied the work is placed in the glaze room ready for you to decorate! Step Six – Glazing Decorating your work with colour can be a lot of fun – and time consuming! There are three main options for surface treatment at this stage: Oxide Washes Underglazes Glazes Washes and underglazes do not “glaze” the work – It will still need a layer of glaze to fully seal the clay (washes don’t need glaze on surfaces not designed for food or liquid as they can gloss up a little on their own). Underglazes are stable colourants that turn out pretty much how they look in the jar. They can be mixed with each other to form other colours and can be used like water colours to paint onto your work. Mostly they should have a clear glaze on top to seal them. Oxides are a different species – the pink oxide (cobalt) wash turns out bright blue for instance. They don’t always need a glaze on top, and some glazes can change the colour of the wash! The glazes need no other “glaze” on top! Be careful of unknown glaze interactions – you can put any combination of glaze in a bowl or on a plate, but only a single glaze on the outside of any vertical surface! Glazes are a chemical reaction under heat. We don’t know the exact chemicals in the Mayco glazes we use. I can guess by the way they interact with each other, however, on the whole, you need to test every idea you have, and not run the test on a vertical surface! Simply put, glaze is a layer of glass like substance that bonds with the clay underneath. Clay is made of silica, alumina and water. Glaze is made of mostly silica. Silica has a melting point of 1700°C and we fire to 1240°C. The silica requires a “flux” to help it melt at the lower temperature. Fluxes can be all sorts of chemicals – a common one is calcium – calcium has a melting point of 2500°C, however, together they both melt at a much lower temperature! Colourants are metal oxides like cobalt (blue), chrome (green through black), copper (green, blue, even red!), manganese (black, purple and pink) iron (red brown), etc. Different chemicals in the glaze can have dramatic effects. for example, barium carbonate (which we don’t use) turns manganese bright pink! Other elements can turn manganese dioxide brown, blue, purple and reddish brown. Manganese dioxide is a flux in and of itself as well. So, glazes that get their black and purple colours, often interact with other glazes and RUN! Our mirror black is a good example – it mixes really well with many glazes because it fluxes them – causes them to melt faster. It will also bring out many beautiful colours in the glazes because it’s black colouring most definitely comes from manganese dioxide! Glaze chemistry is a whole subject on it’s own! We use commercial Mayco glazes on purpose – for their huge range of colour possibilities, stability, cool interactions, artistic freedom with the ability to easily brush the glazes on and ease of use. We currently have almost 50 glazes on hand! A major project is to test the interactions of all glazes with each other. That is 2,500 test tiles!!!! I’m going to make the wall behind the wheels the feature wall of pretty colours! Step Seven – Glaze (Gloss or sometimes called “Glost”) Firing Most of the time this is the final stage of making your creation (but not always!) The glaze kiln goes to 1240°C. This is called cone 6, or midrange. It is the low end of stoneware temperatures. Stoneware clays and glazes are typically fired at cone 8 – 10, that is 1260 – 1290°C. The energy requirement to go from 1240°C to 1280°C is almost a 30% more! Our clay is formulated to vitrify (mature, turn “glass-like”) at 1240°, as are our glazes. A glaze kiln take around 12 hours to reach temperature and two to three days to cool down. Sometimes a third firing process is required – this is for decoration that is added to work after the glaze firing. For example – adding precious metals and lustres. this firing temperature is usually around 600 – 800°C depending upon the techniques being used. There are many students interested in gold and silver trims – we will be doing this third type of firing soon! After firing your work will be in the student finished work shelves. Remember to pay for it before you head out the door! There is a small extra charge for using porcelain clay (it’s more than twice the price of regular clay), and for any third firing process! Once your work has been fired it can not turn back into clay for millennia – so don’t fire it if you don’t like it! Put it in the bucket for recycling. https://firebirdstudios.com.au/the-process-of-making-pottery/Ceramics have evolved over thousands of years.A white earthenware side plate with a gadroon edge. Has water marks and chips on front.‘Johnson Bros England Reg No 15587’flagstaff hill, warrnambool, shipwrecked-coast, flagstaff-hill, flagstaff-hill-maritime-museum, maritime-museum, shipwreck-coast, flagstaff-hill-maritime-village, johnson bros, ceramics, tableware -
 Flagstaff Hill Maritime Museum and Village
Domestic object - Plate, Alfred Meakin
The Process of Making Pottery Decorating, Firing, Glazing, Making, Technical There is a rhythm and flow to clay. It can’t be done all at once! Even the making process! It can take weeks to get everything done, especially if you can only work on your pottery once a week! Even though we have three hour classes, it’s often just not enough time! Here is an overview of some of the processes so you have a bit more grasp on some of the technical stuff! Step One – Design There are SO many ideas out there for making stuff in clay! From delicate porcelain jewellery, through to heavy sculptural work and everything in between. Deciding your direction is sometimes not that easy – when you first start, try everything, you will naturally gravitate to the style that you enjoy! The options and variations are endless and can get a wee bit overwhelming too! Check in with me before you start to ensure your ideas will work, what order you might do things, how you could achieve the look you are seeking and any other technical data required! Step Two – Making Clay is thixotropic. This means that as you work with it, the clay first gets sloppier and wetter, before is begins to dry in the atmosphere. For most things, you simply can’t do all parts of the project at once. An example of work order might look like: Get last weeks work out from the shelves Prepare clay for today’s work – roll your clay, prepare balls for throwing, make the first stage of a pinch pot) Clean up last week’s work and put it on the shelf for bisque firing Check that you have any glazing to do – and do enough of it that you will have time to finish your main project Do the next step of your next project – there might be a further step that can’t be complete immediately, in that case, wrap your work well and put onto the shelves. Letting your work rest for a while can really help keep your work clean and professional looking. Many things require bagging under plastic to keep it ready for work the next week – put your name on the outside of the bag so you can find your work easily. We have stickers and markers. Consider how you want to decorate your work – coloured slip can be applied at a fairly wet stage (remembering that it will make your work even wetter!). Trying to apply slip to dry clay won’t work! If you want to do sgraffito – you will need to keep the work leather hard (a state of dryness where you can still work the clay with a little effort and a little water and care). Step Three – Drying Most of the time your work can go into the rack uncovered to let it dry out for the following week. If you want to continue forming or shaping you will need to double bag your work – put your work on a suitable sized bat and put the bat in a bag so the base of the bag is under the bat, then put another bag over the top of the work and tuck the top of the bag under the bat. If you want to trim (or turn) your thrown work the following week, it should also be double bagged. If your work is large, delicate, or of uneven thicknesses, you should lightly cover your work for drying. When considering the drying process, bare in mind the weather, humidity and wind! The hotter and dryer, the faster things dry and work can dry unevenly in the shelves – this can lead to cracking – another time to lightly cover your work for drying. Step Four – Trimming and Cleaning Up Your work is dry! It is called greenware now and it is at it’s most fragile! Handle everything with two hands. I often refer to soft hands – keep everything gentle and with your fingers spread as much as possible. Try to not pick up things like plates too much, and always with both hands! Before your work can be bisque fired it should be “cleaned up”. You work won’t go into the kiln if it has sharp edges – when glazed, sharp edges turn into razor blades! Use a piece of fly wire to rub the work all over – this will scratch a little so be light handed. Use a knife or metal kidney to scrape any areas that require a bit more dynamic treatment than the fly wire offers! Finally, a very light wipe over with a slightly damp sponge can help soften and soothe all of your edges and dags! Trimming thrown work: If you are planning to trim (or turn) your thrown work (and you should be), make sure you bag it well – your work should be leather hard to almost dry for easiest trimming. Use this step to finish the work completely – use a metal kidney to polish the surface, or a slightly damp sponge to give a freshly thrown look. Wipe the sponge around the rim after trimming, and check the inside of the pot for dags! Trimming slip cast work: Usually I will trim the rims of your work on the wheel the following day to make that stage easier, however you will still need to check your work for lumps and bumps. Last but not least – check that your name is still clearly on the bottom of your work. Step Five – Bisque Firing When the work is completely dry it can go into the bisque kiln. The bisque kiln is fired to 1000°C. This process burns off the water in the clay as well as some of the chemically bound water. The structure of the clay is not altered that much at this temperature. Inside the bisque kiln, the work is stacked a little, small bowl inside a larger bowl and onto a heavy plate. Smaller items like decorations or drink coasters might get stacked several high. Consideration is paid to the weight of the stack and shape of the work. A bisque kiln can fire about one and a half times the amount of work that the glaze kiln can fire. The firing takes about 10 hours to complete the cycle and about two days to cool down. Once it has been emptied the work is placed in the glaze room ready for you to decorate! Step Six – Glazing Decorating your work with colour can be a lot of fun – and time consuming! There are three main options for surface treatment at this stage: Oxide Washes Underglazes Glazes Washes and underglazes do not “glaze” the work – It will still need a layer of glaze to fully seal the clay (washes don’t need glaze on surfaces not designed for food or liquid as they can gloss up a little on their own). Underglazes are stable colourants that turn out pretty much how they look in the jar. They can be mixed with each other to form other colours and can be used like water colours to paint onto your work. Mostly they should have a clear glaze on top to seal them. Oxides are a different species – the pink oxide (cobalt) wash turns out bright blue for instance. They don’t always need a glaze on top, and some glazes can change the colour of the wash! The glazes need no other “glaze” on top! Be careful of unknown glaze interactions – you can put any combination of glaze in a bowl or on a plate, but only a single glaze on the outside of any vertical surface! Glazes are a chemical reaction under heat. We don’t know the exact chemicals in the Mayco glazes we use. I can guess by the way they interact with each other, however, on the whole, you need to test every idea you have, and not run the test on a vertical surface! Simply put, glaze is a layer of glass like substance that bonds with the clay underneath. Clay is made of silica, alumina and water. Glaze is made of mostly silica. Silica has a melting point of 1700°C and we fire to 1240°C. The silica requires a “flux” to help it melt at the lower temperature. Fluxes can be all sorts of chemicals – a common one is calcium – calcium has a melting point of 2500°C, however, together they both melt at a much lower temperature! Colourants are metal oxides like cobalt (blue), chrome (green through black), copper (green, blue, even red!), manganese (black, purple and pink) iron (red brown), etc. Different chemicals in the glaze can have dramatic effects. for example, barium carbonate (which we don’t use) turns manganese bright pink! Other elements can turn manganese dioxide brown, blue, purple and reddish brown. Manganese dioxide is a flux in and of itself as well. So, glazes that get their black and purple colours, often interact with other glazes and RUN! Our mirror black is a good example – it mixes really well with many glazes because it fluxes them – causes them to melt faster. It will also bring out many beautiful colours in the glazes because it’s black colouring most definitely comes from manganese dioxide! Glaze chemistry is a whole subject on it’s own! We use commercial Mayco glazes on purpose – for their huge range of colour possibilities, stability, cool interactions, artistic freedom with the ability to easily brush the glazes on and ease of use. We currently have almost 50 glazes on hand! A major project is to test the interactions of all glazes with each other. That is 2,500 test tiles!!!! I’m going to make the wall behind the wheels the feature wall of pretty colours! Step Seven – Glaze (Gloss or sometimes called “Glost”) Firing Most of the time this is the final stage of making your creation (but not always!) The glaze kiln goes to 1240°C. This is called cone 6, or midrange. It is the low end of stoneware temperatures. Stoneware clays and glazes are typically fired at cone 8 – 10, that is 1260 – 1290°C. The energy requirement to go from 1240°C to 1280°C is almost a 30% more! Our clay is formulated to vitrify (mature, turn “glass-like”) at 1240°, as are our glazes. A glaze kiln take around 12 hours to reach temperature and two to three days to cool down. Sometimes a third firing process is required – this is for decoration that is added to work after the glaze firing. For example – adding precious metals and lustres. this firing temperature is usually around 600 – 800°C depending upon the techniques being used. There are many students interested in gold and silver trims – we will be doing this third type of firing soon! After firing your work will be in the student finished work shelves. Remember to pay for it before you head out the door! There is a small extra charge for using porcelain clay (it’s more than twice the price of regular clay), and for any third firing process! Once your work has been fired it can not turn back into clay for millennia – so don’t fire it if you don’t like it! Put it in the bucket for recycling. https://firebirdstudios.com.au/the-process-of-making-pottery/Ceramics have evolved over thousands of years.Earthenware dessert plate, cream colour. Made by Alfred Meakin, England. Backstamped ‘Alfred Meakin England’. flagstaff hill, warrnambool, shipwrecked-coast, flagstaff-hill, flagstaff-hill-maritime-museum, maritime-museum, shipwreck-coast, flagstaff-hill-maritime-village, alfred meakin, ceramics, earthenware, kitchenware -
 Flagstaff Hill Maritime Museum and Village
Domestic object - Jug
The Process of Making Pottery Decorating, Firing, Glazing, Making, Technical There is a rhythm and flow to clay. It can’t be done all at once! Even the making process! It can take weeks to get everything done, especially if you can only work on your pottery once a week! Even though we have three hour classes, it’s often just not enough time! Here is an overview of some of the processes so you have a bit more grasp on some of the technical stuff! Step One – Design There are SO many ideas out there for making stuff in clay! From delicate porcelain jewellery, through to heavy sculptural work and everything in between. Deciding your direction is sometimes not that easy – when you first start, try everything, you will naturally gravitate to the style that you enjoy! The options and variations are endless and can get a wee bit overwhelming too! Check in with me before you start to ensure your ideas will work, what order you might do things, how you could achieve the look you are seeking and any other technical data required! Step Two – Making Clay is thixotropic. This means that as you work with it, the clay first gets sloppier and wetter, before is begins to dry in the atmosphere. For most things, you simply can’t do all parts of the project at once. An example of work order might look like: Get last weeks work out from the shelves Prepare clay for today’s work – roll your clay, prepare balls for throwing, make the first stage of a pinch pot) Clean up last week’s work and put it on the shelf for bisque firing Check that you have any glazing to do – and do enough of it that you will have time to finish your main project Do the next step of your next project – there might be a further step that can’t be complete immediately, in that case, wrap your work well and put onto the shelves. Letting your work rest for a while can really help keep your work clean and professional looking. Many things require bagging under plastic to keep it ready for work the next week – put your name on the outside of the bag so you can find your work easily. We have stickers and markers. Consider how you want to decorate your work – coloured slip can be applied at a fairly wet stage (remembering that it will make your work even wetter!). Trying to apply slip to dry clay won’t work! If you want to do sgraffito – you will need to keep the work leather hard (a state of dryness where you can still work the clay with a little effort and a little water and care). Step Three – Drying Most of the time your work can go into the rack uncovered to let it dry out for the following week. If you want to continue forming or shaping you will need to double bag your work – put your work on a suitable sized bat and put the bat in a bag so the base of the bag is under the bat, then put another bag over the top of the work and tuck the top of the bag under the bat. If you want to trim (or turn) your thrown work the following week, it should also be double bagged. If your work is large, delicate, or of uneven thicknesses, you should lightly cover your work for drying. When considering the drying process, bare in mind the weather, humidity and wind! The hotter and dryer, the faster things dry and work can dry unevenly in the shelves – this can lead to cracking – another time to lightly cover your work for drying. Step Four – Trimming and Cleaning Up Your work is dry! It is called greenware now and it is at it’s most fragile! Handle everything with two hands. I often refer to soft hands – keep everything gentle and with your fingers spread as much as possible. Try to not pick up things like plates too much, and always with both hands! Before your work can be bisque fired it should be “cleaned up”. You work won’t go into the kiln if it has sharp edges – when glazed, sharp edges turn into razor blades! Use a piece of fly wire to rub the work all over – this will scratch a little so be light handed. Use a knife or metal kidney to scrape any areas that require a bit more dynamic treatment than the fly wire offers! Finally, a very light wipe over with a slightly damp sponge can help soften and soothe all of your edges and dags! Trimming thrown work: If you are planning to trim (or turn) your thrown work (and you should be), make sure you bag it well – your work should be leather hard to almost dry for easiest trimming. Use this step to finish the work completely – use a metal kidney to polish the surface, or a slightly damp sponge to give a freshly thrown look. Wipe the sponge around the rim after trimming, and check the inside of the pot for dags! Trimming slip cast work: Usually I will trim the rims of your work on the wheel the following day to make that stage easier, however you will still need to check your work for lumps and bumps. Last but not least – check that your name is still clearly on the bottom of your work. Step Five – Bisque Firing When the work is completely dry it can go into the bisque kiln. The bisque kiln is fired to 1000°C. This process burns off the water in the clay as well as some of the chemically bound water. The structure of the clay is not altered that much at this temperature. Inside the bisque kiln, the work is stacked a little, small bowl inside a larger bowl and onto a heavy plate. Smaller items like decorations or drink coasters might get stacked several high. Consideration is paid to the weight of the stack and shape of the work. A bisque kiln can fire about one and a half times the amount of work that the glaze kiln can fire. The firing takes about 10 hours to complete the cycle and about two days to cool down. Once it has been emptied the work is placed in the glaze room ready for you to decorate! Step Six – Glazing Decorating your work with colour can be a lot of fun – and time consuming! There are three main options for surface treatment at this stage: Oxide Washes Underglazes Glazes Washes and underglazes do not “glaze” the work – It will still need a layer of glaze to fully seal the clay (washes don’t need glaze on surfaces not designed for food or liquid as they can gloss up a little on their own). Underglazes are stable colourants that turn out pretty much how they look in the jar. They can be mixed with each other to form other colours and can be used like water colours to paint onto your work. Mostly they should have a clear glaze on top to seal them. Oxides are a different species – the pink oxide (cobalt) wash turns out bright blue for instance. They don’t always need a glaze on top, and some glazes can change the colour of the wash! The glazes need no other “glaze” on top! Be careful of unknown glaze interactions – you can put any combination of glaze in a bowl or on a plate, but only a single glaze on the outside of any vertical surface! Glazes are a chemical reaction under heat. We don’t know the exact chemicals in the Mayco glazes we use. I can guess by the way they interact with each other, however, on the whole, you need to test every idea you have, and not run the test on a vertical surface! Simply put, glaze is a layer of glass like substance that bonds with the clay underneath. Clay is made of silica, alumina and water. Glaze is made of mostly silica. Silica has a melting point of 1700°C and we fire to 1240°C. The silica requires a “flux” to help it melt at the lower temperature. Fluxes can be all sorts of chemicals – a common one is calcium – calcium has a melting point of 2500°C, however, together they both melt at a much lower temperature! Colourants are metal oxides like cobalt (blue), chrome (green through black), copper (green, blue, even red!), manganese (black, purple and pink) iron (red brown), etc. Different chemicals in the glaze can have dramatic effects. for example, barium carbonate (which we don’t use) turns manganese bright pink! Other elements can turn manganese dioxide brown, blue, purple and reddish brown. Manganese dioxide is a flux in and of itself as well. So, glazes that get their black and purple colours, often interact with other glazes and RUN! Our mirror black is a good example – it mixes really well with many glazes because it fluxes them – causes them to melt faster. It will also bring out many beautiful colours in the glazes because it’s black colouring most definitely comes from manganese dioxide! Glaze chemistry is a whole subject on it’s own! We use commercial Mayco glazes on purpose – for their huge range of colour possibilities, stability, cool interactions, artistic freedom with the ability to easily brush the glazes on and ease of use. We currently have almost 50 glazes on hand! A major project is to test the interactions of all glazes with each other. That is 2,500 test tiles!!!! I’m going to make the wall behind the wheels the feature wall of pretty colours! Step Seven – Glaze (Gloss or sometimes called “Glost”) Firing Most of the time this is the final stage of making your creation (but not always!) The glaze kiln goes to 1240°C. This is called cone 6, or midrange. It is the low end of stoneware temperatures. Stoneware clays and glazes are typically fired at cone 8 – 10, that is 1260 – 1290°C. The energy requirement to go from 1240°C to 1280°C is almost a 30% more! Our clay is formulated to vitrify (mature, turn “glass-like”) at 1240°, as are our glazes. A glaze kiln take around 12 hours to reach temperature and two to three days to cool down. Sometimes a third firing process is required – this is for decoration that is added to work after the glaze firing. For example – adding precious metals and lustres. this firing temperature is usually around 600 – 800°C depending upon the techniques being used. There are many students interested in gold and silver trims – we will be doing this third type of firing soon! After firing your work will be in the student finished work shelves. Remember to pay for it before you head out the door! There is a small extra charge for using porcelain clay (it’s more than twice the price of regular clay), and for any third firing process! Once your work has been fired it can not turn back into clay for millennia – so don’t fire it if you don’t like it! Put it in the bucket for recycling. https://firebirdstudios.com.au/the-process-of-making-pottery/The form of the jug has been in use for many centuries.Stoneware jug. Two tone brown glaze with pierced lip behind spout. Spout chipped.None.flagstaff hill, warrnambool, shipwrecked-coast, flagstaff-hill, flagstaff-hill-maritime-museum, maritime-museum, shipwreck-coast, flagstaff-hill-maritime-village, jug, ceramic jug -
 Victorian Aboriginal Corporation for Languages
Periodical, Australian Institute of Aboriginal and Torres Strait Islander Studies, Australian Aboriginal studies : journal of the Australian Institute of Aboriginal and Torres Strait Islander Studies, 2010
'Whose Ethics?':Codifying and enacting ethics in research settings Bringing ethics up to date? A review of the AIATSIS ethical guidelines Michael Davis (Independent Academic) A revision of the AIATSIS Guidelines for Ethical Research in Indigenous Studies was carried out during 2009-10. The purpose of the revision was to bring the Guidelines up to date in light of a range of critical developments that have occurred in Indigenous rights, research and knowledge management since the previous version of the Guidelines was released in 2000. In this paper I present an outline of these developments, and briefly discuss the review process. I argue that the review, and the developments that it responded to, have highlighted that ethical research needs to be thought about more as a type of behaviour and practice between engaged participants, and less as an institutionalised, document-focused and prescriptive approach. The arrogance of ethnography: Managing anthropological research knowledge Sarah Holcombe (ANU) The ethnographic method is a core feature of anthropological practice. This locally intensive research enables insight into local praxis and culturally relative practices that would otherwise not be possible. Indeed, empathetic engagement is only possible in this close and intimate encounter. However, this paper argues that this method can also provide the practitioner with a false sense of his or her own knowing and expertise and, indeed, with arrogance. And the boundaries between the anthropologist as knowledge sink - cultural translator and interpreter - and the knowledge of the local knowledge owners can become opaque. Globalisation and the knowledge ?commons?, exemplified by Google, also highlight the increasing complexities in this area of the governance and ownership of knowledge. Our stronghold of working in remote areas and/or with marginalised groups places us at the forefront of negotiating the multiple new technological knowledge spaces that are opening up in the form of Indigenous websites and knowledge centres in these areas. Anthropology is not immune from the increasing awareness of the limitations and risks of the intellectual property regime for protecting or managing Indigenous knowledge. The relevance of the Declaration on the Rights of Indigenous Peoples in opening up a ?rights-based? discourse, especially in the area of knowledge ownership, brings these issues to the fore. For anthropology to remain relevant, we have to engage locally with these global discourses. This paper begins to traverse some of this ground. Protocols: Devices for translating moralities, controlling knowledge and defining actors in Indigenous research, and critical ethical reflection Margaret Raven (Institute for Sustainability and Technology Policy (ISTP), Murdoch University) Protocols are devices that act to assist with ethical research behaviour in Indigenous research contexts. Protocols also attempt to play a mediating role in the power and control inherent in research. While the development of bureaucratically derived protocols is on the increase, critiques and review of protocols have been undertaken in an ad hoc manner and in the absence of an overarching ethical framework or standard. Additionally, actors implicated in research networks are seldom theorised. This paper sketches out a typology of research characters and the different moral positioning that each of them plays in the research game. It argues that by understanding the ways actors enact research protocols we are better able to understand what protocols are, and how they seek to build ethical research practices. Ethics and research: Dilemmas raised in managing research collections of Aboriginal and Torres Strait Islander materials Grace Koch (AIATSIS) This paper examines some of the ethical dilemmas for the proper management of research collections of Indigenous cultural materials, concentrating upon the use of such material for Native Title purposes. It refers directly to a number of points in the draft of the revised AIATSIS Guidelines for Ethical Research in Indigenous Studies and draws upon both actual and hypothetical examples of issues that may arise when requests are made for Indigenous material. Specific concerns about ethical practices in collecting data and the subsequent control of access to both the data itself and to published works based upon it are raised within the context of several types of collections, including those held by AIATSIS and by Native Title Representative Bodies. Ethics or social justice? Heritage and the politics of recognition Laurajane Smith (ANU) Nancy Fraser?s model of the politics of recognition is used to examine how ethical practices are interconnected with wider struggles for recognition and social justice. This paper focuses on the concept of 'heritage' and the way it is often uncritically linked to 'identity' to illustrate how expert knowledge can become implicated in struggles for recognition. The consequences of this for ethical practice and for rethinking the role of expertise, professional discourses and disciplinary identity are discussed. The ethics of teaching from country Michael Christie (CDU), with the assistance of Yi?iya Guyula, Kathy Gotha and Dh�?gal Gurruwiwi The 'Teaching from Country' program provided the opportunity and the funding for Yol?u (north-east Arnhem Land Aboriginal) knowledge authorities to participate actively in the academic teaching of their languages and cultures from their remote homeland centres using new digital technologies. As two knowledge systems and their practices came to work together, so too did two divergent epistemologies and metaphysics, and challenges to our understandings of our ethical behaviour. This paper uses an examination of the philosophical and pedagogical work of the Yol?u Elders and their students to reflect upon ethical teaching and research in postcolonial knowledge practices. Closing the gaps in and through Indigenous health research: Guidelines, processes and practices Pat Dudgeon (UWA), Kerrie Kelly (Australian Indigenous Psychologists Association) and Roz Walker (UWA) Research in Aboriginal contexts remains a vexed issue given the ongoing inequities and injustices in Indigenous health. It is widely accepted that good research providing a sound evidence base is critical to closing the gap in Aboriginal health and wellbeing outcomes. However, key contemporary research issues still remain regarding how that research is prioritised, carried out, disseminated and translated so that Aboriginal people are the main beneficiaries of the research in every sense. It is widely acknowledged that, historically, research on Indigenous groups by non-Indigenous researchers has benefited the careers and reputations of researchers, often with little benefit and considerably more harm for Indigenous peoples in Australia and internationally. This paper argues that genuine collaborative and equal partnerships in Indigenous health research are critical to enable Aboriginal and Torres Islander people to determine the solutions to close the gap on many contemporary health issues. It suggests that greater recognition of research methodologies, such as community participatory action research, is necessary to ensure that Aboriginal people have control of, or significant input into, determining the Indigenous health research agenda at all levels. This can occur at a national level, such as through the National Health and Medical Research Council (NHMRC) Road Map on Indigenous research priorities (RAWG 2002), and at a local level through the development of structural mechanisms and processes, including research ethics committees? research protocols to hold researchers accountable to the NHMRC ethical guidelines and values which recognise Indigenous culture in all aspects of research. Researching on Ngarrindjeri Ruwe/Ruwar: Methodologies for positive transformation Steve Hemming (Flinders University) , Daryle Rigney (Flinders University) and Shaun Berg (Berg Lawyers) Ngarrindjeri engagement with cultural and natural resource management over the past decade provides a useful case study for examining the relationship between research, colonialism and improved Indigenous wellbeing. The Ngarrindjeri nation is located in south-eastern Australia, a ?white? space framed by Aboriginalist myths of cultural extinction recycled through burgeoning heritage, Native Title, natural resource management ?industries?. Research is a central element of this network of intrusive interests and colonising practices. Government management regimes such as natural resource management draw upon the research and business sectors to form complex alliances to access funds to support their research, monitoring, policy development, management and on-ground works programs. We argue that understanding the political and ethical location of research in this contemporary management landscape is crucial to any assessment of the potential positive contribution of research to 'Bridging the Gap' or improving Indigenous wellbeing. Recognition that research conducted on Ngarrindjeri Ruwe/Ruwar (country/body/spirit) has impacts on Ngarrindjeri and that Ngarrindjeri have a right and responsibility to care for their lands and waters are important platforms for any just or ethical research. Ngarrindjeri have linked these rights and responsibilities to long-term community development focused on Ngarrindjeri capacity building and shifts in Ngarrindjeri power in programs designed to research and manage Ngarrindjeri Ruwe/Ruwar. Research agreements that protect Ngarrindjeri interests, including cultural knowledge and intellectual property, are crucial elements in these shifts in power. A preliminary review of ethics resources, with particular focus on those available online from Indigenous organisations in WA, NT and Qld Sarah Holcombe (ANU) and Natalia Gould (La Trobe University) In light of a growing interest in Indigenous knowledge, this preliminary review maps the forms and contents of some existing resources and processes currently available and under development in the Northern Territory, Queensland and Western Australia, along with those enacted through several cross-jurisdictional initiatives. A significant majority of ethics resources have been developed in response to a growing interest in the application of Indigenous knowledge in land and natural resource management. The aim of these resources is to ?manage? (i.e. protect and maintain) Indigenous knowledge by ensuring ethical engagement with the knowledge holders. Case studies are drawn on from each jurisdiction to illustrate both the diversity and commonality in the approach to managing this intercultural engagement. Such resources include protocols, guidelines, memorandums of understanding, research agreements and strategic plans. In conducting this review we encourage greater awareness of the range of approaches in practice and under development today, while emphasising that systematic, localised processes for establishing these mechanisms is of fundamental importance to ensuring equitable collaboration. Likewise, making available a range of ethics tools and resources also enables the sharing of the local and regional initiatives in this very dynamic area of Indigenous knowledge rights.b&w photographs, colour photographsngarrindjeri, ethics, ethnography, indigenous research, social justice, indigenous health -
 The Beechworth Burke Museum
Geological specimen - Greenstone / Gabbro, Unknown
This specimen was recovered from Ceres West of Geelong, Victoria. Greenstone is the name for any metamorphosed basic igneous rock (in the case of this specimen, Gabbro) that gains its greenish colour to the presence of the minerals chlorite, actinolite, or epidote, hence the term 'green' and 'stone'. Greenstone is often formed through metamorphsis along a convergent plate boundary. In the rock cycle (the series of processes that creates the various types of rocks) there are identified three different types of rocks, which are the sedimentary, the igneous and the metamorphic. Metamorphic rocks started out as sedimentary, igneous or earlier metamorphic rocks but changed from their original condition under the effect of high heat, high pressure or hot, mineral-rich fluid. However, if pressure or heat is too high, then the rock will melt, resulting in the formation of an igneous rock. The name used to describe these types of rocks reflects this specific inherent trait of change, since the word “metamorphic” derives from the Greek word “metamorphosis”, meaning “change of form or structure”. Metamorphic rocks form in the Earth`s crust but can be also found on the surface, due to elevation of the Earth`s surface. They are divided into two categories: the foliated metamorphic and the non-foliated metamorphic rocks. Gabbro is a highly useful mineral that is often polished to create cemetery markers and kitchen benches. It is notable for its qualities of durability, being able to withstand extreme elements and wear. Whilst not rare, Gabbro is of great utility and has been highly desirable for its qualities. This specimen is part of a larger collection of geological and mineral specimens collected from around Australia (and some parts of the world) and donated to the Burke Museum between 1868-1880. A large percentage of these specimens were collected in Victoria as part of the Geological Survey of Victoria that begun in 1852 (in response to the Gold Rush) to study and map the geology of Victoria. Collecting geological specimens was an important part of mapping and understanding the scientific makeup of the earth. Many of these specimens were sent to research and collecting organisations across Australia, including the Burke Museum, to educate and encourage further study.Greenstone is a solid hand-sized metamorphic mineral of a green colour. Greenstone is the name for any metamorphosed basic igneous rock (in the case of this specimen, Gabbro) that gains its greenish colour to the presence of the minerals chlorite, actinolite, or epidote, hence the term 'green' and 'stone'. Gabbro is a medium to coarse grained rocks that consist primarily of plagioclase feldspar and pyroxene. Greenstone is often formed through metamorphsis along a convergent plate boundary. Gabbro forms due to cooling and crystallization of magma underneath Earth's surface. Greenstone/Gabbro/from Ceres west/of Geelong. Has old Geological Survey label/and probably collected by/Richard Daintree in 1861/C.Willam 15/4/21/ Other label: 62 /greenstone, metamorphosed, igneous rock, gabbro, chlorite, actinolite, epidote, metamorphsis, rock cycle, various types of rocks, sedimentary, high heat, high pressure, mineral-rich fluid, metamorphosis, foliated metamorphic, non-foliated metamorphic, convergent plate boundary, greenish colour, minerals -
 Warrnambool and District Historical Society Inc.
Map, Warrnambool Harbour 1879, 1879
This map shows the plans by eminent harbour engineer, Sir John Coode in 1879. Construction of the breakwater commenced in 1884 and was completed in 1890. Coode first visited Australia in 1872 when he commenced work with the Melbourne Harbour Trust to report on ways to improve Melbourne Port. He is considered one of the most eminent harbour engineers of the 19th century. His original plans for Warrnambool were revised because of cost but then subsequently found to be inadequate and later extended. This was not successful either and the harbour continues to have silting problems to this day. The Warrnambool Breakwater is of historical importance to Victoria and as this map depicts the original plans, it too has great historical significance. It is also significant with its association with Sir John Coode, who was one of the most important port engineers of the 19th century. He worked to improve ports along the Victorian coast including Portland, Geelong, Port Fairy and Lakes Entrance. While this map demonstrates the engineering skills of the era, it also reflects the limitations when natural elements are involved. Its Historical importance also lies in the depiction of items on the map which relate to Warrnambool’s early history. Paper on linen map coloured, and depicting the harbour area of Warrnambool with the proposed breakwater plan in red. It has Victorian Harbours information in oval at top of map. It shows depths of some areas.In oval at top, “Victorian Harbours Warrnambool plan to accompany Sir John Coode report dated 28th Feb 1879. Drawing No 2. Scale 500 feet to 1 inch at bottom centre. Sir John Coode signature in bottom left corner. A 33 A on bottom left reversesir john goode, warrnambool harbour map, warrnambool harbour map 1879, port of warrnambool map 1879 -
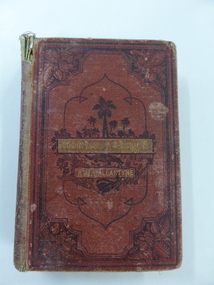 Warrnambool and District Historical Society Inc.
Book, Martin Tattler, 1876
This book, by the well-known author R.M.Ballantyne, was awarded to Edith Newton in 1877 when she was a pupil at the Warrnambool State School. This school was opened on August 1st 1876 when the National School in Warrnambool closed and most of the pupils of other denominational schools in Warrnambool at the time moved to the new State School. The Head Teacher, William Bryant was at the school until 1894. (Blanch) Edith Newton was born in 1868, the eighth child of Robert and Mary Newton. Robert Newton was a Rate Collector, Borough Inspector and Manager of the Town Common in Warrnambool. It is noted that the prize received by Edith Newton was an adventure book mostly appealing to male readers. This book is significant because it is connected with important elements in Warrnambool in 1877 – the school, Warrnambool State School, the pupil, Edith Newton and the Head Teacher, William Bryant,This is a hard cover book of 330 pages. It has a dark red cover with etched ornamental borders and patterns and an image of a jungle scene on the front cover and on the spine. The title and author’s name are in gold lettering. At the heading of each chapter there is an ornamental scroll and there are several black and white sketches throughout the pages. There are blue stamps of the Warrnambool & District Historical Society at the front and back of the book and a school plate label attached to the inside front cover. The spine is partly detached and torn and the cover is very worn and water or mould damaged. A letter from the donor accompanies the book. ‘Warrnambool State School, No. 1743, Prize Awarded to Edith Newton, 4th Class, Divn. 111, for Home Exercises, 19th December 1877, W.Bryant, Head Teacher.’ warrnambool state school, history of warrnambool, william bryant, edith newton -
Federation University Historical Collection
Book, The MIneral Industry its Statistics, Technology and Trade in the United States and Other Countries 1901
This volume includes Australasia, and lists each state seperately , as well as New Zealand, It also lists Bismoth, Chome iron ore, coal, copper, gold, lead, mineral industry growth, alumite, antinomy, cobalt, coke, copper ore, gold, iron, lead, limestone flux, managanese, shale, silver, silver-lead, tin and zinc. Australasian co.Red hard cloth covered book of 986 pages. Includes contents and index.non-fictionThis volume includes Australasia, and lists each state seperately , as well as New Zealand, It also lists Bismoth, Chome iron ore, coal, copper, gold, lead, mineral industry growth, alumite, antinomy, cobalt, coke, copper ore, gold, iron, lead, limestone flux, managanese, shale, silver, silver-lead, tin and zinc. Australasian co. mining, statistics, technology, trades, metal industry, minerals, united states, canada, china, france, germany, italy, japan, russia, south america, spain, sweden, united kingdom, ireland, coins, cuba, blast furnaces, gold, lead production, manganese, opals, silver, +, alumite, antinomy, cobalt, coke, copper ore, iron, lead, limestone flux, managanese, shale, silver-lead, tin, zinc, abrasives, chemical industry, gems, precious stones, quicksilver, rare elements, silica, slate\ -
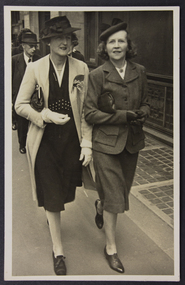 Mission to Seafarers Victoria
Photograph - Photograph, Sepia, 1940-1950
This photograph of Lillie and Olive Duncan is one of a number featuring the sisters. They were active members of the Ladies' Harbour Lights Guild during the 1920s and 1930s and the objects we have relating to the women highlight the relationships forged between seafarers and those who offered their time and energy to the Mission.The Ladies' Harbour Lights Guild was instrumental in raising the necessary funds for the construction of the current Mission to Seafarers building. They also worked to provide the tangible elements of seafarers' welfare, such as procuring donations of goods and money. However, their most important work, in many ways, was to provide company, conversation and support to seafarers. Lillie, Olive and their entire family were involved with the Mission over an extended period of time.Black and white photograph of Lillie Romana Duncan and Olive Harriet Duncan. Olive is on the left wearing a dark coloured dress with a 'V' neck, little coloured coat and gloves, carrying a clutch under her arm and wearing a dark hat. Olive (on the right) is wearing a ladies' suit and gloves, carrying a clutch under her arm, wearing a dark coloured hat and a brooch at her neck. The photograph has been turned into a postcard, complete with printed postcard division on reverse.In pencil on reverse: Lillie Morgan/Olive Hall/RHS/(DUNCAN) Printed: POST CARD/CORRESPONDENCE/ADDRESS -
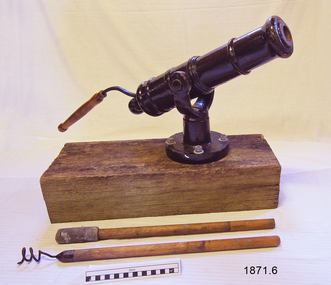 Flagstaff Hill Maritime Museum and Village
Weapon - Cannon, mid to late 19th century
The history of the Thunderchild gun is not known. It was presumably manufactured in Torquay in the second half of the 19th century. Such guns were often attached to a ship’s rail through the holes in the swivel base, as in the base of this gun. The guns fired grapeshot and were originally used on ships to repel boarders. They were also used to launch whaling harpoons and were sometimes employed for signalling. The relatively late date makes the latter application most likely. This Thunderchild gun is complete with ramrod and wad remover. It is in good working order and easily assembled. It is used locally for special ceremonies and for Whaleboat Races as a starting gun. (Guns and Cannon, South Wester Victoria, May 2008, ref W/F/03) The small bore cannon is part of a collection of nineteenth century Flagstaff Hill Guns and Cannon, which is classified as being a high level of significance, on State, National and World The nineteenth century artillery pieces are a very rare and representative collection of artillery of this era. The artillery pieces, individually and as a collection, are highly significant for historical, scientific and aesthetic reasons at the state, national and world levels. The artillery pieces are excellent examples of nineteenth century artillery designed for the shore defence of western Victoria in the mid to late 1800s. The collection demonstrates the system of nineteenth century Imperial Defence implemented by Britain and of the recycling of obsolete technology to the colonies by Britain. The collection represents the methods of artillery technology, its advancement and its modifications in order to remain active. It also illustrates the transference of defence technology from Britain to Australia and demonstrates the level of reliance Australia had on British defence equipment. The artillery pieces form prominent elements in their landscapes and, together with the batteries and sites in which they are located, create a strong visual link to the region’s defence history. Importantly the artillery pieces, individually and as a collection, represent a very rare and intact group of nineteenth century artillery. Very few examples of nineteenth century artillery have survived worldwide, the largest collections being sited in Canada. The collection is a rare collection of artillery which demonstrates the advancements made in artillery technology during the nineteenth century, and is one of the largest collections of nineteenth century artillery in Australia. Further, the collection is extremely intact, with most pieces retaining original carriages and many located within their original emplacement. This collection of artillery, with their carriages and in their locations, are of exceptional national significance as they represent the largest intact collection of artillery within a single defensive network, outside of major colonial ports. The collection of nineteenth century carriages and slides are in themselves an extremely rare and important collection, however their significance is enhanced by their placements within batteries and with guns. (Conservation Management Plan for Victorian Guns and Cannon, South Western Victoria, May 2008) Cannon; small 1pdr cast iron, smooth bore muzzle loading swivel gun, painted glass black. 19th century cannon has polished wood handle, two detachable metal stirrups and metal swivel base with cuff, attached to block of wood by four bolts. Accessories are a wood tamper and wood ramrod. Name on gun is Thunder-Child, Torquay, Vic. There are Maker’s Marks on the gun and base, and a number on the cannon.. Marks; Barrel "Thunder/ Child". Base cuff " THUNDER / -CHILD / TORQUAY / VIC ", Trunnion "2825/H"flagstaff hill, warrnambool, shipwrecked coast, flagstaff hill maritime museum, maritime museum, shipwreck coast, flagstaff hill maritime village, great ocean road, cannon, torquay, thunder child cannon, thunderchild cannon, signal cannon, muzzle loading cannon, ordinance, munitions -
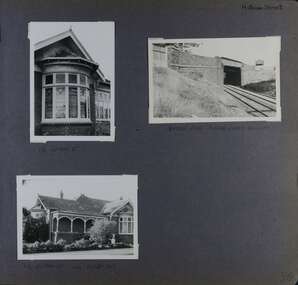 Glen Eira Historical Society
Album - Album page, Hotham Street, Circa 1972
This photograph is part of the Caulfield Historical Album 1972. This album was created in approximately 1972 as part of a project by the Caulfield Historical Society to assist in identifying buildings worthy of preservation. The album is related to a Survey the Caulfield Historical Society developed in collaboration with the National Trust of Australia (Victoria) and Caulfield City Council to identify historic buildings within the City of Caulfield that warranted the protection of a National Trust Classification. Principal photographer thought to be Trevor Hart, member of Caulfield Historical Society. Most photographs were taken between 1966-1972 with a small number of photographs being older and from unknown sources. All photographs are black and white except where stated, with 386 photographs over 198 pages.Victorian Heritage Database - Hotham Street Road Overbridge HO116 Heritage Overlay - City of Glen Eira https://vhd.heritagecouncil.vic.gov.au/places/43557 (as of 04/07/2021) The Hotham Street road overbridge is located on the Sandringham railway line between Ripponlea and Elsternwick railway stations. It is presumed to have been built by contractors Sharp and Campbell who signed a contract on 25th . November, 1881 to construct a second line of railway between Windsor and Elsternwick. This contract was completed during 1882 and the bridge may have been designed in the year when Robert Watson took over from William Elsdon as engineer in chief for the Victorian railways. It is historically, aesthetically and technically significant. It is historically significant (Criterion A) to the extent that it demonstrates the standards of construction adopted by the Victorian Railways Department when it rebuilt the lines acquired from the private railway companies, (compare the Geelong and Melbourne Railway Co's line from Newport to Geelong, acquired in 1860). It is aesthetically significant (Criterion E) as an intact nineteenth century structure of its type, many similar girder bridges having been renewed with concrete girders in recent years. The bluestone abutments demonstrate high standards of stone masonry and are representative of Departmental work of the period. This bridge forms one of a group of historic structures on the railway to Brighton Beach and therefore contributes to the line's cultural importance as a whole. The survival of the riveted iron girders with their bellied angle iron struts is important since these elements are representative of the civil engineering practices of the Victorian Railways at the time and constitute the technical significance (Criterion F) of the structure.Page 96 of Photograph Album with three photographs (one portrait and two landscape) from Hotham Street - two external views of one house and a railway bridge.Handwritten: Hotham Street [top right] / 112 HOTHAM ST [under top left photo] / BRIDGE OVER SANDRINGHAM RAILWAY [under top right photo] / 112 HOTHAM ST CNR MELBY AVE [under bottom left photo] / 96 [bottom right]trevor hart, elsternwick, hotham street, caulfield, houses, brick, bay windows, verandahs, railway bridges, tunnels, gardens, bluestone, civil engineering, victorian railways, sharp and campbell, contractors -
 Glen Eira Historical Society
Album - Album page, Murray Street, Circa 1972
This photograph is part of the Caulfield Historical Album 1972. This album was created in approximately 1972 as part of a project by the Caulfield Historical Society to assist in identifying buildings worthy of preservation. The album is related to a Survey the Caulfield Historical Society developed in collaboration with the National Trust of Australia (Victoria) and Caulfield City Council to identify historic buildings within the City of Caulfield that warranted the protection of a National Trust Classification. Principal photographer thought to be Trevor Hart, member of Caulfield Historical Society. Most photographs were taken between 1966-1972 with a small number of photographs being older and from unknown sources. All photographs are black and white except where stated, with 386 photographs over 198 pages. 63 and 117 Murray Street houses are extant (Google maps image capture Dec 2018).Victorian Heritage Database - HO131 63 Murray Street Caulfield https://vhd.heritagecouncil.vic.gov.au/places/35569 (as of 14/08/2021) "Marston" at no. 63 Murray Street, Caulfield South, was built by J.E. Guest, a contractor resident in nearby Downshire Road, in 1889-90, presumably as a speculative venture together with the extant house at adjoining No.61. It is aesthetically significant. It is aesthetically significant (Criterion E) as an exceptionally richly ornamented medium sized Boom period villa in Caulfield South, being unusual in this respect in its locale and comparing with nearby "Sprouston" at 19 Blanche Street (1887). Important contributory elements include the polychrome brickwork, frieze and verandah including the half timbered gablet which would have been stylistically innovative in its day.Page 139 of Photograph Album with two landscape photographs of two different houses in Murray Street. Handwritten: 63 MURRAY STREET [under top photo] / 117 MURRAY STREET [under bottom photo] / 139 [bottom left]trevor hart, garden, verandah, murray street, elsternwick, victorian style, houses, marston, house names, j e guest, verandahs, polychrome bricks, cast iron work, chimneys -
 Glen Eira Historical Society
Album - Album page, Balranald, Poath Road, Circa 1972
This photograph is part of the Caulfield Historical Album 1972. This album was created in approximately 1972 as part of a project by the Caulfield Historical Society to assist in identifying buildings worthy of preservation. The album is related to a Survey the Caulfield Historical Society developed in collaboration with the National Trust of Australia (Victoria) and Caulfield City Council to identify historic buildings within the City of Caulfield that warranted the protection of a National Trust Classification. Principal photographer thought to be Trevor Hart, member of Caulfield Historical Society. Most photographs were taken between 1966-1972 with a small number of photographs being older and from unknown sources. All photographs are black and white except where stated, with 386 photographs over 198 pages. Originally named Crofthead or The Croft Head, later changed to Balranald according to Melbourne Mansions database.From Victorian Heritage Database citation for HO136 13 Poath Street MURRUMBEENA https://vhd.heritagecouncil.vic.gov.au/places/35389 as at 30/10/2020 "Croft Head" is situated at no. 13 Poath Road, Murrumbeena, and was built in 1887 for the accountant Edward Tweddell. It is historically and aesthetically significant. It is historically significant (Criterion A) as a substantial and now rare (Criterion B) surviving late Victorian villa residence east of Booran Road within the Municipality and demonstrating the attraction of Melbourne's rural fringe as a residential location rendered accessible by the opening of the railway between South Yarra and Oakleigh in 1879. It is aesthetically significant (Criterion E) as one of the Municipality's finest late Victorian polychrome brick villas, comparing with ''Fresch'' and ''Monkleigh'' both erected in 1899 at nos. 11 and 12 Gladstone Parade, Elsternwick respectively, ''Hartington'' (1888) at 15 Gladstone Parade and ''Hengar'' (1889) at no. 356 Glen Eira Road, Caulfield South. Elements of stylistic significance include the ornamentation of the brickwork in polychrome work with tiled panels, the effect of the banding being especially striking and representative of the period.Page 166 of Photograph Album with three photographs of Balranald on Poath Road.Handwritten: "Balranald" 13 Poath Road [top right] / 166 [bottom right]trevor hart, decorative brackets, chimneys, verandah, porch, poath road, arches, cast iron columns, return verandah, croft head, balranald, victorian villa, restoration, 1880's, edward tweddell, murrumbeena, hughesdale, cast iron frieze, victorian style, cast iron work, rendered brick, house names, polychrome brick, poath street, crofthead, the croft head -
 Glen Eira Historical Society
Album - Album page, Glenmoore, St George's Road, Circa 1972
This photograph is part of the Caulfield Historical Album 1972. This album was created in approximately 1972 as part of a project by the Caulfield Historical Society to assist in identifying buildings worthy of preservation. The album is related to a Survey the Caulfield Historical Society developed in collaboration with the National Trust of Australia (Victoria) and Caulfield City Council to identify historic buildings within the City of Caulfield that warranted the protection of a National Trust Classification. Principal photographer thought to be Trevor Hart, member of Caulfield Historical Society. Most photographs were taken between 1966-1972 with a small number of photographs being older and from unknown sources. All photographs are black and white except where stated, with 386 photographs over 198 pages. From Victorian Heritage Database citation for HO59 Glenmoore, 1 St Georges Road Elsternwick https://vhd.heritagecouncil.vic.gov.au/places/35202 as at 30/10/2020 "Glenmoore" is locally significant as a surviving mid nineteenth century villa residence in the then fashionable bi-chromatic brick form. It is also important as the home of Hugh Moore who built several shops in nearby Glen Huntly Road and which remain as important contributors to the architectural character of the Elsternwick Shopping Centre.Victorian Heritage Database citation HO59 Glenmoore, 1 St Georges Road Elsternwick https://vhd.heritagecouncil.vic.gov.au/places/35202 An imposing two storeyed villa in bichrome brick with two storeyed timber posted verandah, coupled with cast iron lace frieze, spandrels and central tympanum enrichment. The hipped roof is in slate and has a prominent crean1 brick chimney stack forming part of the facade. Openings are flat arched although the entrance is round arched with a fan light. The south elevation has bayed windows. Two storeyed hip roofed additions are sympathetic and attached on the north side and at the rear. Inside, the staircase and stained glasswork with initials "HM" and family coat of arms are important surviving elements. INTEGRITY: Good, timber outbuildings of an early date, mature and spacious front garden includes early palm trees. Alterations include reconstruction of facade verandah including tiled pavement and front door on east side. Interior has a high level of integrity. Original grounds included adjoining "Carramar".Page 178 of Photograph Album with three photographs of Glenmoore, St Georges Road. Handwritten: "Glenmoore" 1 St George's Road [top right] / 178 [bottom right]trevor hart, chimneys, porch, mansion, slate roof, return verandah, stained glass, cast iron frieze, glenmoore, 1860's, hugh moore, glenmoore estate, double storey, elsternwick shops, st george's road, thomas watts, elsternwick, victorian style, protruding bay windows, cast iron work, bi-chromatic bricks, gardens, balconies, moore's buildings, glen huntly road, stairs, house names -
 Glen Eira Historical Society
Album - Album page, Alma Road, circa 1972
This photograph is part of the Caulfield Historical Album 1972. This album was created in approximately 1972 as part of a project by the Caulfield Historical Society to assist in identifying buildings worthy of preservation. The album is related to a Survey the Caulfield Historical Society developed in collaboration with the National Trust of Australia (Victoria) and Caulfield City Council to identify historic buildings within the City of Caulfield that warranted the protection of a National Trust Classification. Principal photographer thought to be Trevor Hart, member of Caulfield Historical Society. Most photographs were taken between 1966-1972 with a small number of photographs being older and from unknown sources. All photographs are black and white except where stated, with 386 photographs over 198 pages. Church of Christ, 514 Dandenong Rd, Caulfield https://vhd.heritagecouncil.vic.gov.au/places/43594 The Dandenong Road Church of Christ has regional importance as a landmark building along the Dandenong Road. It successfully addresses its triangular site by placing the belltower at the apex, deploying Romanesque and Gothic elements freely and to dramatic effect, heightened by the symbolism of the Cross (compare Robert Haddon's St Stephens in Balaclava Road of 1926).Page 4 of Photograph Album including three black and white photographs of properties on Alma Road. Two photographs are in the top half of the page and the third is in the bottom left hand side.Handwritten in black pen: Alma Road [top right of page] / 325 Alma Road [above top left photograph] / Church of Christ Caulfield North 14 Dec 1972 [above top right photograph] / 323-325 Alma Road [above bottom left photograph] / 4 [bottom right]caulfield north, trevor hart, alma road, houses, churches, church of christ caulfield north, dandenong road, bell towers, romanesque architectural style, gothic architectural style, bi-chromatic brickwork, cast iron work, verandahs, victorian architectural style -
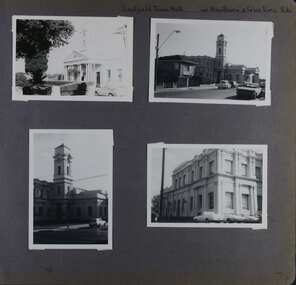 Glen Eira Historical Society
Album - Album page, Caulfield Town Hall cnr Hawthorn & Glen Eira Rds, Circa 1972
This photograph is part of the Caulfield Historical Album 1972. This album was created in approximately 1972 as part of a project by the Caulfield Historical Society to assist in identifying buildings worthy of preservation. The album is related to a Survey the Caulfield Historical Society developed in collaboration with the National Trust of Australia (Victoria) and Caulfield City Council to identify historic buildings within the City of Caulfield that warranted the protection of a National Trust Classification. Principal photographer thought to be Trevor Hart, member of Caulfield Historical Society. Most photographs were taken between 1966-1972 with a small number of photographs being older and from unknown sources. All photographs are black and white except where stated, with 386 photographs over 198 pages. Caulfield Town Hall is now known as Glen Eira Town Hall.From Victorian Heritage Database: Citation for Town Hall, Corner Glen Eira and Hawthorn Roads - HO106 https://vhd.heritagecouncil.vic.gov.au/places/43613 as at (19/10/2020) The former City of Caulfield (now City of Glen Eira) Municipal Offices, located at the south-west corner of Hawthorn and Glen Eira Roads, Caulfield South, were commenced for the Borough of Caulfield in 1884 when they also included a Post and Telegraph Office and Court of Petty Sessions. They were designed by the Borough surveyor, Sydney Smith. The hall was completed in 1890 to the design of Alexander Rankin and the present hall, foyer and portico completed to the design of Goldsmith and Jenkin, architects, in 1931. The complex is historically, aesthetically and socially significant. It is historically significant {Criterion A) as the centre of Local Government services in the area since 1885 and as a centre of post and telegraph and legal services for a period. Its association with architect and Borough surveyor, Sydney W. Smith is important in that the east elevation and facade (ground floor level only)as far west as the tower (lower two stages) survive as evidence of his work, the practice which his son continued after his death in 1886, becoming highly successful. The work of Goldsmith and Jenkin is historically important in that it indirectly demonstrates the growth of the City sustained during the Inter-war period, the work proceeding in spite of the Depression. It compares with other similar work of that time including the refurbishment of the Malvern Municipal Offices and Hall in 1927 (Hudson and Wardrop), the Melbourne Corporation Offices and Hall in 1925-28 (Stephenson and Meldrum, A. and K. Henderson) and the Camberwell Offices and Council Chamber in 1924 (Leighton Irwin and Roy Stevenson), other comparable municipal projects being undertaken during the 1930s. Finally, the Goldsmith and Jenkin works are important as a project of the Depression years organised specifically to alleviate unemployment problems in the Municipality. The complex is aesthetically important (Criterion E) as a prominent and imposing Classically derived complex of its type with individually noteworthy interior spaces being the entry hall and staircase, main Hall, Foyer and Council Chamber. The Adamesque plasterwork, timber panelling and furniture, Art Nouveaux enrichment and Classically derived treatment with sparing use of Australian decorative motifs are contributory elements. Exterior .elements of note include the remains of the original design prepared by Sydney Smith and the clock tower and portico which have come to symbolise important Municipal complexes erected prior to the Second World War. The complex is socially important (Criterion G) for the value placed on it by the community which has made use of it for activities including that of Local government for well over a century.Page 74 of Photograph Album with four photographs (three portrait and one landscape) of different views of the Caulfield Town Hall.Hand written: Caulfield Town Hall cnr Hawthorn & Glen Eira Rds [top right] / 74 [bottom right] trevor hart, caulfield, glen eira, caulfield town hall, sydney smith, sydney w smith, municipal, adamesque plasterwork, adamesque, art nouveaux, portico, council chambers, alexander rankin, foyer, local government, timber panelling, tower, unemployment, clock tower, hawthorn road, glen eira road, city of glen eira, municipal offices, post and telegraph office, goldsmith and jenkin, courthouses, surveyors, architects, classical architectural style, streetscapes, gardens, cars, glen eira town hall, depression 1929-1939 -
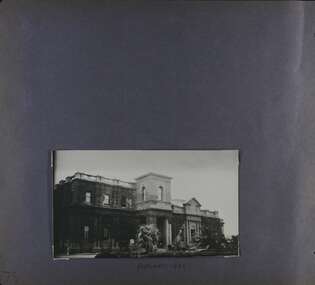 Glen Eira Historical Society
Album - Album page, Caulfield Town Hall cnr Hawthorn & Glen Eira Rds, Circa 1972
This photograph is part of the Caulfield Historical Album 1972 but is noted as taken in 1922. This album was created in approximately 1972 as part of a project by the Caulfield Historical Society to assist in identifying buildings worthy of preservation. The album is related to a Survey the Caulfield Historical Society developed in collaboration with the National Trust of Australia (Victoria) and Caulfield City Council to identify historic buildings within the City of Caulfield that warranted the protection of a National Trust Classification. Principal photographer thought to be Trevor Hart, member of Caulfield Historical Society. Most photographs were taken between 1966-1972 with a small number of photographs being older and from unknown sources. All photographs are black and white except where stated, with 386 photographs over 198 pages. Caulfield Town Hall is now known as Glen Eira Town Hall.From Victorian Heritage Database: Citation for Town Hall, Corner Glen Eira and Hawthorn Roads - HO106 https://vhd.heritagecouncil.vic.gov.au/places/43613 as at (19/10/2020) The former City of Caulfield (now City of Glen Eira) Municipal Offices, located at the south-west corner of Hawthorn and Glen Eira Roads, Caulfield South, were commenced for the Borough of Caulfield in 1884 when they also included a Post and Telegraph Office and Court of Petty Sessions. They were designed by the Borough surveyor, Sydney Smith. The hall was completed in 1890 to the design of Alexander Rankin and the present hall, foyer and portico completed to the design of Goldsmith and Jenkin, architects, in 1931. The complex is historically, aesthetically and socially significant. It is historically significant {Criterion A) as the centre of Local Government services in the area since 1885 and as a centre of post and telegraph and legal services for a period. Its association with architect and Borough surveyor, Sydney W. Smith is important in that the east elevation and facade (ground floor level only)as far west as the tower (lower two stages) survive as evidence of his work, the practice which his son continued after his death in 1886, becoming highly successful. The work of Goldsmith and Jenkin is historically important in that it indirectly demonstrates the growth of the City sustained during the Inter-war period, the work proceeding in spite of the Depression. It compares with other similar work of that time including the refurbishment of the Malvern Municipal Offices and Hall in 1927 (Hudson and Wardrop), the Melbourne Corporation Offices and Hall in 1925-28 (Stephenson and Meldrum, A. and K. Henderson) and the Camberwell Offices and Council Chamber in 1924 (Leighton Irwin and Roy Stevenson), other comparable municipal projects being undertaken during the 1930s. Finally, the Goldsmith and Jenkin works are important as a project of the Depression years organised specifically to alleviate unemployment problems in the Municipality. The complex is aesthetically important (Criterion E) as a prominent and imposing Classically derived complex of its type with individually noteworthy interior spaces being the entry hall and staircase, main Hall, Foyer and Council Chamber. The Adamesque plasterwork, timber panelling and furniture, Art Nouveaux enrichment and Classically derived treatment with sparing use of Australian decorative motifs are contributory elements. Exterior .elements of note include the remains of the original design prepared by Sydney Smith and the clock tower and portico which have come to symbolise important Municipal complexes erected prior to the Second World War. The complex is socially important (Criterion G) for the value placed on it by the community which has made use of it for activities including that of Local government for well over a century.Page 75 of Photograph Album with one portrait photograph of the exterior of Caulfield Town Hall taken in 1922.Hand written: FEBRUARY 1922 [under photo] / 75 [bottom left] trevor hart, caulfield, glen eira, caulfield town hall, sydney smith, sydney w smith, adamesque plasterwork, art nouveaux, portico, council chambers, alexander rankin, foyer, local government, timber panelling, tower, unemployment, clock tower, hawthorn road, glen eira road, city of glen eira, municipal offices, palms, gardens, post and telegraph offices, goldsmith and jenkin, architects, city of caulfield, ivy clad walls, surveyors, depression 1929-1939, glen eira town hall -
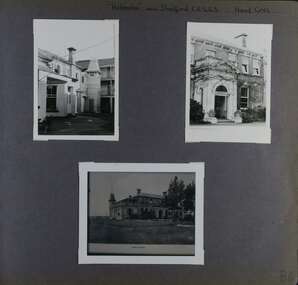 Glen Eira Historical Society
Album - Album page, Helenslea now Shelford CEGGS, Hood Crescent, Circa 1972
This photograph is part of the Caulfield Historical Album 1972. This album was created in approximately 1972 as part of a project by the Caulfield Historical Society to assist in identifying buildings worthy of preservation. The album is related to a Survey the Caulfield Historical Society developed in collaboration with the National Trust of Australia (Victoria) and Caulfield City Council to identify historic buildings within the City of Caulfield that warranted the protection of a National Trust Classification. Principal photographer thought to be Trevor Hart, member of Caulfield Historical Society. Most photographs were taken between 1966-1972 with a small number of photographs being older and from unknown sources. All photographs are black and white except where stated, with 386 photographs over 198 pages. The mansion has been the site of Shelford Church of England Girls’ Grammar School - now Shelford Girls’ Grammar School - since circa 1922.From Victorian Heritage Database citation for HO115: "Helenslea" 3 Hood Crescent, Caulfield North https://vhd.heritagecouncil.vic.gov.au/places/35212 as at 21/10/2020 ''Helenslea'' was built for Sir George Stephen, MLA, barrister and mining investor by 1863. It was built with an address to Glen Eira Road with the driveway gates close by the present Helenslea Road corner. The present address is no. 3 Hood Crescent, Caulfield North. It is historically, aesthetically and socially significant. It is historically significant (Criterion A) as the home of Sir George Stephen, MLA for Collingwood, barrister and mining investor and for its capacity to demonstrate Caulfield's early attraction as a residential retreat for Melbourne's eminent citizens. It is aesthetically significant (Criterion E) as a villa residence characteristic of the mid Victorian period, predating the use of cast iron and comparing in this respect with Charles Webb's "Farleigh" (1865) at 6 Farleigh Grove, Brighton. Its substantial nature causes it to be the earliest surviving mansion house in the Municipality. The porch, external austerity and opulent entrance hall and staircase are important contributory elements whilst the survival of the exterior surfaces predominantly in an unpainted state enhances its level of integrity. It is socially significant (Criterion G) for its association with Shelford C.E.G.G.S. since 1922. Page 86 of Photograph Album with three photographs (two portrait and one landscape ) of different views of Helenslea. One is a photo of a photograph.Handwritten: "Helenslea" now C.E.G.G.S Hood Cres [top right] / third photo is of a photograph titled "Shelford" / 86 [bottom right]trevor hart, hood crescent, helenslea, c.e.g.g.s., school, 1860's, sir george stephen, unpainted, mansion, shelford, villa residence, mid victorian, glen eira road, helenslea road, ceggs, porches, stairs, caulfield north, entrances, shelford church of england girls' grammar school, shelford girl's grammar, ivy -covered walls, caulfield -
Federation University Historical Collection
Book, Ballarat School of Mines Apprentices' Handbook, 1953, 1953
Apprentices' Handbook, Issued with the compliments of The Council and Staff of The Ballarat School of Mines and Industries. It contains a foreword from the Principal to apprentices. It states how they are taking the first step towards becoming a first class craftsman in their chosen field. The course is set down by the Victorian Apprenticeship Commission and consists of the practical experience obtained while on the job together with the subjects studied at this school. Page 26 gives the date the book was produced. From the diary of a service man dated January 25, 1913:- "Been filing crank pins all day. Hard to get a good job if they are much out of round, but it is the only practical way at present." That is 40 years ago and contrasts with today. (1953)Sixty-two page handbook with illustrations. .1: E J Tippett in blue ink on inside of front cover. Printer's name and emblem on last page. "John Fraser & Son Printers - Albert Street, Ballarat"ballarat school of mines, trades, apprenticeship, apprentice, electrical mechanics, motor mechanics, turning and fitting, plumbing and gasfitting, blacksmithing, printing, useful tables, mechanical and electrical unit equivalents, power consumption of electrical appliances, horse power to drive machinery, breakdown troubles of cars, pre-war post-war, table of chemical elements, screw gauges, welding tips -
Federation University Historical Collection
Book - Book - ledger, Ernest Pickering, Architectural Design by Ernest Pickering, 1941, 1941
Ernest Pickering was author of Architecture at the University of Cincinnati.Brown hard covered book. Contents include architectural influences, climate, topography, materials, social conditions, economic conditions, evolution of form, plan and volume, visible structure, materials, structure, creative principles, composition, design.architecture, decorative elements, principles of design, ernest pickering, ballarat scbool of mines library -
Federation University Historical Collection
Book, Introduction to Modern Inorganic Chemistry, 1924, 1924
Greeen hardcover book, 684 pagesIn pencil: Andrew A Quick, Inorganic Chemistry 1inorganic chemistry, j w mellor, andrew a quick, atmospheric air, ice, water, steam, compounds, atomic hypothesis, acids, bases, salts, gaseous oxides, combustion and flame, sulphur, nitric acid, ammonia, carbon, silocon, classification of elements -
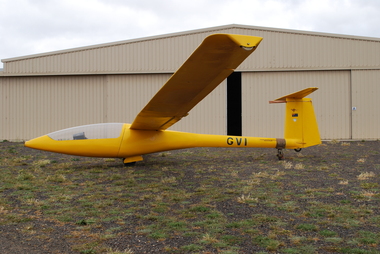 Australian Gliding Museum
Machine - Glider - Sailplane
MOBA2 is a 15 metre sailplane designed by Gary Sunderland, who was an aeronautical engineer working for the Department of Civil Aviation (Australia) and a member of the Victorian Motorless Flight Group (VMFG). The design gave effect to ideas that he developed circa 1970 for an aircraft that he could build himself. He entered a 13 metre wingspan version of his MOBA design (MOBA2B) in an Australian Gliding sailplane design competition that was announced in 1970. The competition called for sailplane designs with a maximum wingspan of 13 metres that could be built by amateurs in a small workshop with limited tools and facilities. In 1973, Gary’s MOBA was judged by the competition panel as equal best with the other outstanding submission, which were chosen from a field of 19 entrants. However, after gathering further information and deliberation by the competition panel neither of the two outstanding designs were chosen as the winner. Notwithstanding the outcome, in 1974 Gary proceeded built his glider to the original 15 metre design. The wing was equipped with camber changing flaps that were permitted under special standard class rules for the 1974 world championships. Changes were made along the way in the light of construction experience and the completed glider was given the designation MOBA2C. The glider first flew on 12 December 1979. It was never flown in standard class competition as by the time the glider was built the special 1974 rules were revoked and wing flaps were no longer permitted in that class. However, Gary flew MOBA2C in the Australian national gliding competitions held at Benalla in the summer of 1979 / 1980 competing in the open class. After adjustment to the aileron gearing during initial trials MOBA2C was found to fly well and in competition produced performances believed to be better than contemporary standard class sailplanes but not as good as the open class machines. The glider was later modified in a number of respects including amongst other things the installation of spoilers located just forward of the wing flaps and by increasing the chord marginally at the wing root. With these changes the glider type was given the designation MOBA2D. The last recorded flights occurred in February 1996 at which time MOBA2 had flown an aggregate of 401 hours and 59 minutes during its 297 launches. Its operational life was brought to an end due to expansion of the foam in the wings causing distortion of the wing surface.The MOBA2 is a notable home built 1970s sailplane design that featured a number of innovative elements including composite construction without the need for expensive jigs, nose cone canopy and asymmetrical placement of control column.Composite single seat glider / sailplane finished in bright yellowRegistration "GVI" on fuselage; Kangaroo, Australian Flag and VMFG decals on vertical stabiliseraustralian gliding, glider, sailplane, moba2b, moba2c, sunderland, moba2d, victorian motorless flight group, vmfg -
 Polish Museum & Archives in Australia
eagle from soldiers berret
worn by soldiers within the first Polish armoured division in Europeremaining elements of soldiers uniforms worn during world War twometal alloyworld war ii, first polish armoured division, eagle, beret -
 Polish Museum & Archives in Australia
Carpathian Brigade badge
military memorabilia from world War two. This brigade was initially stationed in the middle east, in particular in Syria Lebanon and eventually moved to North Africa where it took part in the battle of the Tobruk and subsequently in Italy where it took part in the battle of monte casinoone of the few remaining elements of this Brigades (in Australia.metal badge with green cypress tree being the symbol of the carpathian brigadecarpathian brigade, world war ii, military memorabilia