Showing 613 items matching "presentation photo"
-
 Bendigo Military Museum
Photograph - Army Survey Regiment – Defence Force Service Medal Presentations, c1967, c1976-1980
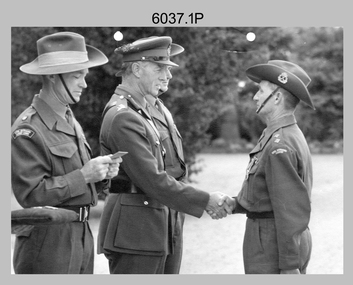
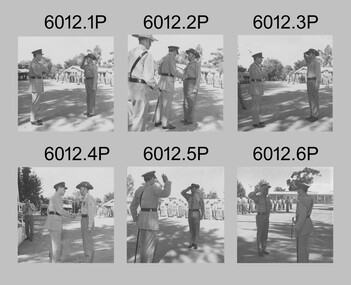
This is a set of nine photographs of medal presentations at the Army Survey Regiment, Fortuna, Bendigo. In photos .1P to .8P, the Defence Force Service Medal was presented to personnel in recognition of 15 years of efficient remunerated service, or the Clasp for each further 5-year period of service. The photos were taken on four separate occasions. Photos .1P to .3P were taken on the parade ground. LTCOL John Nolan was the CO of the Army Headquarters Survey Regiment from 1965 to 1969. He was subsequently promoted to COL and was the Director of Military Survey from 1972 to 1975. MAJ Lionel ‘Bill’ Sprenger MBE, MID was subsequently promoted to LTCOL and was the CO of the unit from 1969 to 1970. Photos .4P to .7P were taken in circa mid-1970s and Photo .8P was taken on Friday 21 October 1976. Photos .4P to .8P were taken next to the flagpole in Fortuna Villa’s front garden. This is a set of nine photographs of medal presentations at the Army Survey Regiment, Bendigo circa 1960s-1970s. The photographs were printed on photographic paper and are part of the Army Survey Regiment’s Collection. The photographs were scanned at 300 dpi. .1) - Photo, black & white, c1967. L to R: MAJ Lionel ‘Bill’ Sprenger MBE, MID; unidentified visiting General, CO LTCOL John Nolan, LT Jack McNeale. .2) - Photo, black & white, c1967. L to R: MAJ Lionel ‘Bill’ Sprenger MBE, MID; unidentified visiting General, CO LTCOL John Nolan, WO1 Jack Gore. .3) - Photo, black & white, c1967. L to R: MAJ Lionel ‘Bill’ Sprenger MBE, MID; unidentified visiting General, CO LTCOL John Nolan, WO2 Bob McGaritty. .4) & .5) - Photo, black & white, c1976. L to R: WO1 Don Taylor, BRIG Jim SHELTON DSO, MC, MID. .6) & .7) - Photo, black & white, c1976. L to R: SGT Syd Davis, Brigadier Jim SHELTON DSO, MC, MID. .8) - Photo, black & white, 1976. L to R: SSGT Gordon Haswell, WO1 Marj Knight, MAJGEN John Williamson AO, OBE GOC FF COMD. .9) - Photo, black & white, c1976-1980. L to R: unidentified (x2), WO2 John McCulloch, unidentified, WO1 Darby Munro, CO LTCOL Bob Skitch, unidentified visiting General..1P to .9P – no annotationsroyal australian survey corps, rasvy, army survey regiment, army svy regt, fortuna, asr -
 Bendigo Military Museum
Photograph - Army Survey Regiment GOC Parade Medal Presentations, 1969
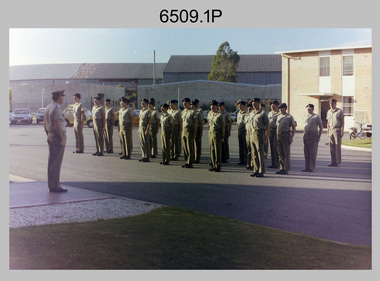
These photographs were taken at a GOC Parade at the Army Survey Regiment in 1969. MAJ GEN Robert William Knights CB, CBE formally presented the Defence Force Service Medal to personnel in recognition of 15 years of efficient remunerated service, or the Clasp for each further 5 year period of service.These 13 black and white photographs were taken at a GOC Parade Medal Presentation in 1969 at the Army Survey Regiment, Bendigo. The photographs were printed on photographic paper and are part of the Army Survey Regiment’s Collection. The photographs were scanned at 600 dpi. .1) - Photo, black & white, 1969. L to R: MAJ GEN Robert William Knights CB, CBE, unidentified recipient. .2) - Photo, black & white, 1969. L to R: MAJ GEN Robert William Knights CB, CBE, recipient – SGT Keith Harris. .3) to .5) - Photo, black & white, 1969. MAJ GEN Robert William Knights CB, CBE, unidentified recipient. .6) - Photo, black & white, 1969. L to R: unidentified recipient, MAJ GEN Robert William Knights CB, CBE. .7) - Photo, black & white, 1969. L to R: MAJ GEN Robert William Knights CB, CBE, unidentified recipient. .8) - Photo, black & white, 1969. L to R: MAJ GEN Robert William Knights CB, CBE, recipient – SGT Ben Williams. .9) - Photo, black & white, 1969. L to R: recipient – ex SGT Alan Pollard, MAJ GEN Robert William Knights CB, CBE. .10) - Photo, black & white, 1969. L to R recipient - WO1 Bill Miller, MAJ GEN Robert William Knights CB, CBE. .11) - Photo, black & white, 1969. L to R: recipient - WO1 Steve McConnachie, MAJ GEN Robert William Knights CB, CBE. .12) - Photo, black & white, 1969. L to R: recipient – SGT Ben Williams, MAJ GEN Robert William Knights CB, CBE. .13) - Photo, black & white, 1969. MAJ GEN Robert William Knights CB, CBE and family..9) Photo - SGT Alan Pollard identified on back .10) Photo - WO1 Bill Miller identified on back .11) Photo - WO1 Steve McConnachie identified on back royal australian survey corps, rasvy, fortuna, army survey regiment, army svy regt, asr -
 Melbourne Tram Museum
Certificate - Framed Certificate, Ormond Frames and Gifts, "Ron Scholten - This is your life", 2011
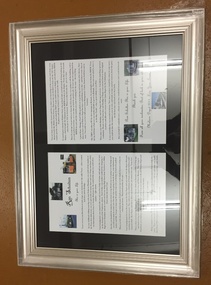
Framed certificate or presentation to Ron Scholten when he retired from Malvern depot in 2011 after 32 years of service for the tramways. Titled "Ron Scholten - This is your life", outline's Ron's tramway life as a young enthusiast, work at 332 Flinders St (the Shoe shop), TMSV, MMTB, trip to Germany for Siemens. Printed onto sheets with tram photos top or bottom, has been framed with a black cardboard trimmed for the sheets of paper. Frame from a silver finished timber frame (outside edge covered in plastic), Perspex cover, timber backing with tape around rear edges metal hanging strips, with plastic covered wire and black plastic bumpers in the lower corners.trams, tramways, certificates, presentations, malvern depot -
 Ballarat Tramway Museum
Photograph - Colour Photograph/s set of 5, Carolyn Dean, Museum Accreditation Presentation, 15/05/1998 12:00:00 AM
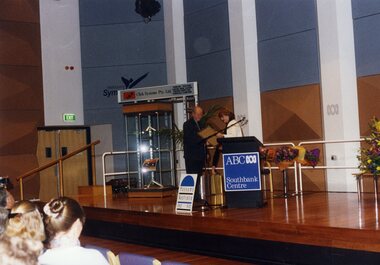
Set of five colour photographic prints of the presentation and btm reps attending the Museum Accreditation Presentation on 15 May 1998 at the ABC centre, Melbourne. 839.1 - Richard Gilbert accepting our certificate from Ms Lorraine Elliott, MLA. 839.2 - Richard Gilbert and Warren Doubleday, holding the framed certificate 839.3 - Peter Winspur, Greg Rodgers, Richard Gilbert and Warren Doubleday 839.4 - as for 839.2 839.5 - as for 839.4. All photos by Carolyn Dean. John Phillips also attended - video. All prints on AGFA paper See Letter from MAP, dated May 1998On rear of all prints "Photo by Carolyn Dean"btm, museum accreditation, awards, presentations -
 Melbourne Tram Museum
Magazine, Melbourne & Metropolitan Tramways Board (MMTB), "MMTB News", 1966
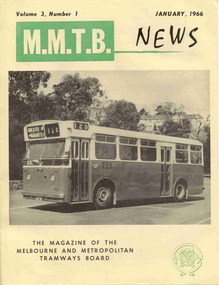
Eight issues of "MMTB News" - The Magazine of the Melbourne and Metropolitan Tramways Board. Two copies of each issue held. All issues printed with an cream colour paper cover with the rest of the magazine white glass paper. 1723.1 - Vol. 3, No. 1 - 16 pages, January 1966, with a photo of the Mark VI bus No. 702 on the front cover, notes on Traffic Congestion, motor cars and supermarkets, depot masters, engineering, bus maintenance, sports and social club news. On rear cover includes a photo of a Christmas function with past senior employees - left to right - H. R. Steains (architect), H. S. McComb (Chief Surveyor), Mr. Aird, Mr. P. M. Ireland (Rolling stock engineer), J Fisher (Civil Engineer) and H. A. Warner (Secretary) 1723.2 - Vol. 3, No. 2 - 16 pages, February 1966, with a photo of counting decimal coins, Tribute to the W2 class tram written by Norm Cross, (with photo), Hawthorn Clothing Depot, retirement of Harry Munroe, introduction of decimal currency, donation of 1B bogies to SPER, tramways band, death of Neil Olsen, sports and social club news. See btm2720i9.jpg for image of the Norm Cross photograph. 1723.3 - Vol. 3, No. 3 - 12 pages, March - April 1966, with a photo of Tramways Bowl Tournament presentation on the front cover, Recent developments in public transport in North America, Vera Cruz Mexico, cable cars at Rushworth, sports and social club news and photo of the Melbourne bogies under Sydney tram. 1723.4 - Vol. 3, No. 4 - 16 pages, May 1966, with a photo of W2 321being overhauled at Preston Workshops, change over to decimal currency for accounting machines, "Tram Driver Salutes the L class tram" - written by A. Bailey, Melbourne's New Trams, retirement of Gordon Wilson, sports and social club news. 1723.5 - Vol. 3, No. 5 - 16 pages, June 1966, with a photo of the track relaying in Camberwell Rd with Camberwell fire station in background, Melbourne cable tram routes, opening and closing dates, retirement of G. H. Box, visit of SPER members to Melbourne, memories of Malvern Depot, sports and social club news. Death of A L Robertson, rostering, sports, Sydney trams, Safety and excuses for accidents. Full pdf copy added 28/8/2019 1723.6 - Vol. 3, No. 6 - 16 pages, July - August 1966 with a photo of the view from the St Kilda Junction signal box, more trams for Russia, retirements of 31 Employees, a contest to win an old W2, St Kilda Road Junction box - and how it works - signalling and interlocking, closure of Port Melbourne bus depot, sports and social club news. 1723.7 - Vol. 3, No. 7 - 16 pages, September - October 1966 with a photo of 610 on the Maribyrnong River Bridge, during the SPER tour, "Public Transport in Big Cities" - R. Risson - with photo - see image i10, MMTB Ambulance division, new trams, trams or buses, death of Harry Hood, Chas Samuels, retirement of Jack Ferguson, Reg Maxwell, manufacture of trackwork, cable tram working, sports and social club news. 1723.8 - Vol. 3, No. 8 - 16 pages, November - December 1966 with a photo of a wedding party on a tram (Richards / Fuller), apprenticeship training, Christmas message from the Chairman, tramway canteens, art of rostering by R. Drummond, Wattle Park Chalet, clock and instrument shop at North Fitzroy, tramways band, sports and social club news.trams, tramways, mmtb, carlton control, buses, pcc 980, ballarat, new trams, are, tmsv -
 Melbourne Tram Museum
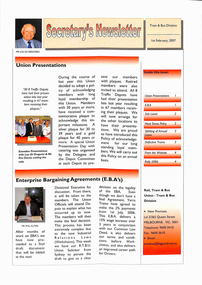
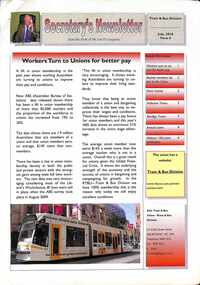
Newsletter, Rail Tram & Bus Union (RTBU), "Secretary's Newsletter 1st February 2007" & Nov. 2007, Feb. 2007
Newsletter - printed - printed full colour gloss paper A3 sheet folded to A4, titled "Secretary's Newsletter 1st February 2007", issued by the Tram and Bus division of the RTBU. Has a photo of Lou Di Gregorio. Story of Union presentations for members with 30 years of service or more, Enterprise Bargaining Agreements (EBA), sick leave, heat stress policy, splitting of annual leave, defective trams, national day of Protest and notes from the website. Includes an Advertisement from the Austral Credit Union, formerly Melbourne Credit Union. Has contact details. November 2007 issue 3 - State and Federal elections, re-tendering of the tram system franchise, Heat stress policy, PLD (Paid leave days) and distance between trams - number of incidents - photo of trams 2080 and 134. includes a photo of Bill Shorten Maribyrnong candidate visiting Essendon Depot Has photos of Lou Di Gregorio, Des Davies, Phil Altieri, Doug Brady, Ray Cooke, Ray Phillips, Greg Rogers.trams, tramways, rtbu, unions, yarra trams, presentations -
 Melbourne Tram Museum
Newspaper, Leigh Salter, Beat, "The Bedroom Philosopher" and "Songs from the 86 Tram", 29/09/2010 12:00:00 AM
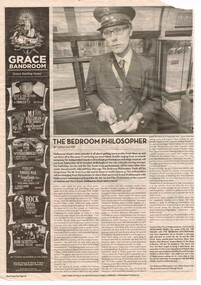
Newspaper clipping from Beat magazine about Justin Hazelwood and his music / CD / "The Bedroom Philosopher", dated 29/9/2010. The cover has a colour photo of Justin in a tramway uniform standing in front of a W class tram at Docklands. Page 26 - an article written by Leigh Salter, along with a photo of Justin, about the presentations of his music and others on their "Live On the Tracks" tram performance. Includes an interview with Justin. See Reg 789 for the poster and 1289 for the CD itself.trams, tramways, route 86, theatre, music, northcote -
 Melbourne Tram Museum
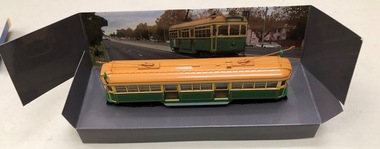
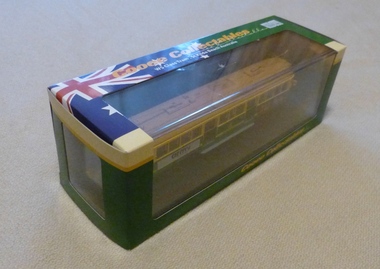
Leisure object - Model tram and presentation case, Cooee Concepts Pty Ltd, Model of Melbourne W7 1027, 2001
Model of Melbourne W7 1027 in a presentation cardboard box, made by Cooee Concepts Pty Ltd in China. Tram secured into the card box by two screws just behind the life guard. Made from plastic with trolley poles from metal (trolley poles can be moved) light brown or gold roof, green and yellow sides, black No. 15 truck The box sides provides details of the tram, scale and a photo of a tram running in the street. Box details the tram as a W6, but its number and history detail it as a W7.trams, tramways, models, cooee models, w7 class, tram 1027 -
 Melbourne Tram Museum
Leisure object - Model tram and presentation case, Cooee Concepts Pty Ltd, Model of ex Melbourne W6 976, in use as Bendigo "ninesevensix", c2010
Model of ex Melbourne W6 976, in use as Bendigo "ninesevensix" in a presentation cardboard box, made by Cooee Concepts Pty Ltd in China. Tram secured into the card box by two screws just behind the life guard. Made from plastic with trolley poles from metal (trolley poles can be moved) light black roof, red and gray sides, black No. 15 truck The box sides provides details of the tram, scale and a photo of a tram and its use in Bendigo firstly as a Cafe Tram then as a Restaurant Tram.trams, tramways, models, bendigo, restaurant tram, cooee models, w6 class, tram 976 -
 Melbourne Tram Museum
Newspaper, RMIT, Whitehorse Leader, Progress Leader, "Crisis warning on public transport", 4/2002 to 9/2002
Set of five newspaper clippings collected by Keith Kings in relation to his presentation of the Lecture "Has the wheel turned full circle for Melbourne's public transport system?" 1 - RMIT Media Alert - draft of 23/4/2002. 2 - RMIT letter to Keith Kings dated 15/5/2002 from Assoc Professor, Jennifer Morris thanking Keith. 3 - RMIT Open line June 2002 reporting on the event - whole issue retained. 4 - Newspaper cutting from Progress Leader 16/9/2002 reporting on Keith's presentation and discussing route 109. Has a photo of Keith standing alongside a tram. 'Swift tram rescue is cut to the quick" by Matthew Schultz. 5 - Newspaper cutting, from the Whitehorse Leader, 18/9/2002, "Crisis warning on public transport", by Matthew Schultz. Note: A version of the lecture also appeared in the September 2002 issue of Transit Australia magazine.In ink on both cuttings (4 and 5) date and the newspaper. On item 5 in ink Keith has a handwritten note on the item along with "For Many decades, not just one"trams, tramways, public transport, route 109, rmit, yarra trams -
 Melbourne Tram Museum
Newsletter, Rail Tram & Bus Union (RTBU), "Secretary's Newsletter June 2010", Jun. 2010
Newsletter titled "Secretary's Newsletter June 2010", Issue 6, issued by the Tram and Bus division of the RTBU. Has a photo of Lou Di Gregorio. Story of Union pay rates, retirements of Eamon Naughton, Kevin Sheehan, motor vehicle licenses and tram driver, defective trams, Bendigo Tramway, Malvern centenary and annual leave provisions.Yields information about the activities of the RTBU during 2010.Newsletter - folded A3 sheet, full colour.trams, tramways, rtbu, unions, yarra trams, presentations, bendigo, malvern depot, tram drivers, drivers, licence fees -
 Melbourne Tram Museum
Album - Robert Thomson Slide Collection - box 16
Photo - see pdf file for further information. Number Date Brief Description Box 16 RT372 23-1-1980 W2 271, High St Kew reconstruction trackwork – route 48 RT373 23-1-1980 W2 504 Burwood Road RT374 23-1-1980 Z7 East Burwood terminus RT375 23-1-1980 Z26 Burwood Highway, route 75 RT376 23-1-1980 W2 255 North Balwyn terminus, route 48 RT377 24-1-1980 W5 at North Coburg terminus – route 19 RT378 24-1-1980 Z37 (route 19) and a W route 20 at North Coburg terminus RT379 24-1-1980 W2 378? Park St St Kilda terminus, route 12 RT380 24-1-1980 Z121 route 88 at Bourke St terminus with Spencer St station in background RT381 25-1-1980 Z1 118 and another Z81? At East Preston terminus – both route 88 RT382 26-1-1980 SW5 812 route 67 at Carnegie terminus RT383 28-1-1980 MMTB Austerity bus No. 301 RT384 26-1-1980 SW5 818? And SW6 965 at Carnegie Glen Huntly Road at start of the single line Truganini Road – note the single track signs. Both route 67. RT385 26-1-1980 W2 504 at East Malvern Darling Road – route 3 RT386 26-1-1980 SW5 787 route 52, Mathews Ave. RT387 26-1-1980 SW5 684? Airport West terminus, route 52, RT388 26-1-1980 High St Kew track reconstruction, W6 986, route 48 RT389 26-1-1980 SW6 965 route 67, Glen Huntly Road level crossing RT390 27-1-1980 SW6 962 Collins St route 42 Spencer St terminus RT391 27-1-1980 Z3 121, route 88 Bourke St Mal with parked cars. RT392 27-1-1980 Z3 188? Bourke St route 96 RT393 27-1-1980 3MP tram Camberwell Route 72 at Gardiner level crossing RT394 28-1-1980 MMTB Bus 370, Leyland OPS1 on display RT395 28-1-1980 MAN Bus 103, on display showing Doncaster Depot Demonstrates the work of Robert Thomson in photography, collection and/or production of slidesAssembled album in a black presentation folder of 24 colour slides, collected or produced by Robert Thomson. A list of all photographs with details has been compiled. All rights reserved for all photos., melbourne, tramways, trams, tram 271, high st kew, trackworks, route 48, tram 504, tram 7, east burwood, tram 26, tram 255, north coburg, route 19, tram 37, park st st kilda, tram 121, bourke st, spencer st, tram 118, east preston, route 88, route 12, route 67, carnegie, tram 812, tram 67, buses, tram 965, truganini road, route 3, route 52, tram 787, tram 986, level crossings, glen huntly rd, matthews ave, tram 962, collins st, route 42, tram 188, route 72, gardiner -
 Melbourne Tram Museum
Album - Robert Thomson Slide Collection - box 17
Photo - see pdf file for further information. Number Date Brief Description Box 17 RT396 Nov. 99 A 239 arriving Batman Ave Route 70 RT397 Nov 99 W7 1012 running Special, Clarendon St RT398 Nov 99 A 300, Port Melbourne, Mont Albert route 109 RT399 Nov 99 A 286 Port Melbourne line, route 109 RT400 Nov 99 Z3 223 Carlisle St St Kilda, route 69 – with destination set for return Kew Cotham Road RT401 Nov 99 W7 1005 Swanston St route 8 with Christmas decorations – route 8 RT402 Nov 99 Z3 140 Swanston St route 8 with Christmas decorations – route 11 RT403 Nov 99 Z3 144 Swanston and Bourke with “Give way to passengers ”sign – route 1 RT404 Nov 99 Z3s 144 and 196 Swanston St – with sign “Tram stop ahead” RT405 Nov 99 W6 977 Swanston St – route 8 and Z1 72 RT406 Nov 99 11W and City Circle SW5 723 – Spencer and Collins Sts RT407 Nov 99 SW6 960 University terminus, route 16 RT408 Nov 99 SW6 960 University terminus with Z2 108 and other trams RT409 Nov. 99 A 234 Wattle Park terminus, route 70 RT410 Nov 99 New track docklands with old shipping shed in the view. RT411 Nov 99 Flinders St extension Docklands new track RT412 Nov 99 A 255 route 109 Port Melbourne terminus with former station building RT413 Nov 99 SW6 954 Route 16, Ackland St terminus with a Z3 behind. RT414 Nov 99 Restraurant tram 442, Esplanade. RT 415 Nov 2000 Z27 and Z1 Balaclava Junction RT416 Nov 2000 A 278 route 109 Port Melbourne terminus with former station building RT417 Nov 2001 B2 2010 in Yarra livery, Bourke St at Spencer St RT418 Nov 2001 B2 2108 turning from Bourke into Spencer St (route 96) followed by another B2 2048? RT 419 Nov 2001 Z 80 and another two Zs in Swanston St RT420 Nov 2001 Z137 and other Z’s in Swanston St RT421 Nov 2001 Z82 Swanston st RT422 Nov 2001 Z3 169 Wests Road, West Maribyrnong terminus with another Z arriving. Route 57 RT423 Nov 2001 West Maribyrnong terminus board with Swanston Trams signage RT424 Nov 2001 Z3 172 route 82, Wests Road RT425 Nov 2001 A class Flinders St extension route 48 in Yarra Trams livery RT426 Nov 2001 11W Bourke St with MTOCco building in the background. Demonstrates the work of Robert Thomson in photography, collection and/or production of slidesAssembled album in a black presentation folder of 31 colour slides, collected or produced by Robert Thomson. A list of all photographs with details has been compiled. All rights reserved for all photos., melbourne, tramways, trams, tram 239, route 70, batman ave, tram 1012, clarendon st, tram 300, port melbourne, route 109, tram 223, tram 69, tram 1005, route 8, swanston st, tram 140, tram 144, tram 196, tram 977, tram 72, tram 11w, tram 723, city circle, tram 960, tram 108, tram 234, wattle park, docklands, trackwork, flinders st, tram 255, tram 954, tram 442, tram 27, tram 1, tram 278, tram 2010, tram 2108, tram 80, tram 137, tram 82, tram 169, wests road, west maribyrnong, swanston trams, tram 172, route 82, route 48, bourke st, mtoco -
 Melbourne Tram Museum
Leisure object - Model tram and presentation case, Cooee Concepts Pty Ltd, Model of Melbourne City Circle tram No. 812, 2001
Model of Melbourne City Circle tram No. 812 in a presentation cardboard box, made by Cooee Concepts Pty Ltd in China. Tram secured into the card box by two screws just behind the life guard. Made from plastic with trolley poles from metal (trolley poles can be moved) light brown roof, green and yellow sides, black No. 15 trucks, advertising the Army and Haig Scotch Whiskey. The box sides provides details of the tram, scale and a photo of a tram with Luna Park in the background and interior view of a tram.trams, tramways, models, city circle, cooee models, sw5 class, tram 812 -
 Melbourne Tram Museum
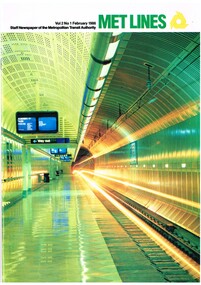
Magazine, Metropolitan Transit Authority (MTA), "Met Lines", 1986
Magazine, published by the Metropolitan Transit Authority of Victoria "Met Lines" (Metlines) - A4, printed on white gloss paper, with the MTA logo or symbol. Issued under the name of Kevin Shea as Chairman. References to Minister Tom Roper. Continues from Reg Item 1059 "Met Lines" - printed in an A4 version. Major tram and bus items listed. Tramway and bus names only listed, not railway. .1 - Vol 2 No. 1 - Feb. 1986 - front cover - Flagstaff station, St Kilda/Port Melbourne light rail system announced, police at Hawthorn learning about trams, Chinese delegation looking at Melbourne's trams, Elwood depot article with photos by Lloyd Rogers at time of Elwood depot coming part of The Met, promotional posters for tramcars, Tram cards, tram power supply upgraded (photo of Z129) - Brown Boveri equipment to Kew and Ascot Vale, memoirs of a tram conductress Nancy Scutt, item with photo of Conductor Jeff Harvey, employment notes, Preston Workshops Christmas party and presentation to Essendon depot tramway soccer champs by Norm Maddock. .2 - Vol 2, No. 2 - March 1986 - Jolimont workshops, modal interchange at Bundoora, Transport Information Centre, memoirs of a tram conductress continued, tram cricket matches, tramway bowls - photos and players listed, Harris trains to be phased out. .3 - Vol 2, No. 3 - April 1986 - front cover of a Met Tram overhead maintenance, linesmen training, new super scheme (old gratuity scheme), visit from ATMOEA NSW visit, Elwood bus depot 12 months with The Met, flying flags on trams, tramway bowls, cricket. .4 - Vol 2, No. 4, May 1986 - 20 pages - Met Information Centre - "Dreams of trams become a reality - driver Peter Gamble", tram tour for American visitors to the zoo, Harris trains, article and photos on Camberwell depot, pantographs on trams, face lift for trams (758) and new buses (182). .5 - Vol 2, No. 5, June/July 1986 - 40 pages - Clock shop, materials testing, lost property, chemical analysis - Preston Workshops, Bus Driving School, Munitions bus 301 at Hawthorn, AVM on trams (223), tram track repairs, relaying Preston workshops entrance for LRV's, new type of safety zones (967 and 871), Preston Workshops redevelopment for LRV's, tram shelters, transporting arts - new series, Michael Leunig, mentions Clifton Pugh tram 504, federal funding for trams, fitting air conditioners to trams. .6 - Vol 2, No. 6, August 1986 - 20 pages - front cover - rotary converter at Carlton, Doncaster bus depot celebrates 25 years, the day the rains came - Ray Marsh - 1972 floods, substations power tram network, Carlton, tram art of a different kind, launch of Leunig's tram. Doncaster party. .7 - Vol 2, No. 7, October 1986, 20 pages, artic buses start rolling (articulated), vandals, Robert Jacks tram launched, Peace tram 829,. .8 - Vol 2, No. 8, November 1986, 20 pages, MTA Annual report, Debbie Bateman Conductor thanked by passengers, Papal tour planning, MTA Ball, Frankston Neighbourhood launched, Essendon depot Soccer report. .9 - Vol. 2, No. 9, December 1986, 20 pages, Christmas issue, (has a $1.50 sticker on it), Met Lines year in review, Federal funding for more A class trams, Bundoora - La Trobe Uni bus interchanged opened, Domain Interchange opened, For next year 1987 - see Reg Item 1141 - Announced in December issue, Met Lines quarterly next year.trams, tramways, mta, the met, elwood depot, light rail, posters, power supply, kew, ascot vale, conductresses, sports, essendon depot, bundoora, jolimont workshops, tower truck, overhead, superannuation, flags, camberwell depot, drivers, trolley poles, pantographs, clocks, buses, avm, automatic vehicle monitoring, shelters, flooding, substation, carlton, transporting art, federal funding, a class, domain interchange, tram 2001, tram 129, tram 234, tram 50, tram 504, tram 871, tram 967, tram 223, tram 758 -
 Melbourne Tram Museum
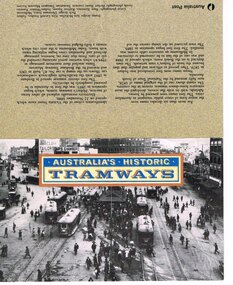
Administrative record - Folder stamps, Australia Post, "Australian Historic Tramways", 1989
Presentation folder of five stamps, 41c, to celebrate the launch of series of "Australian Historic Tramways" 11 October 1989 by Australia Post. Features a photograph of Hobart Electric trams on the inside cover, with the five stamps behind a plastic sheet. On the front is a photo of Railway Square Sydney, the rear cover has a description of the trams and of Australian tramways. Five stamps, all 41c: Adelaide Horse Tram Sydney Steam Tram Melbourne Cable Tram Hobart electric Tram Brisbane Electric Tram. See also Reg Item 471 to 474 for other examples and associated materials and 510 for a Poster. Second copy from donation of Shirley Ramsay, Hawthorn Historical Society added 15-1-2018. See Reg Item 4701 for a set of five blocks (4 stamps) of each.trams, tramways, stamps, australia post, cable trams, horse trams -
 Melbourne Tram Museum
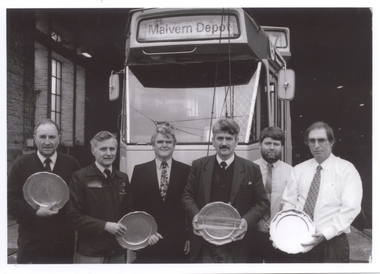
Photograph - Black & White Photograph/s, David Pollard, 2010
Black and white photograph of a presentation of 25 year plates to crews at Malvern Depot c1994. Left to right - , Ron Winters, Jack Pollard (family of donor), Russell Nathan - PTC, Phillip Guidice, Warren Peart, Ray Namour See Reg Item 204 for the plate. People in photo identified by Ron Scholten Jan. 2011. Copy print of original by David Pollard. See correspondence (pdf files) for further details of Jack.On rear of photo in ink "Jack Pollard (second person from the left), date of presentation would be around 1994. Jack retired in 1998, passed away 27 May 2010.trams, tramways, personnel, presentations, malvern depot, 25th anniversary, ptc -
 Melbourne Tram Museum
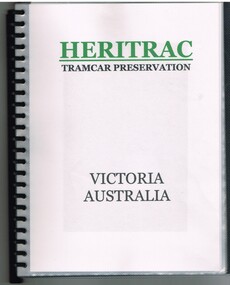
Book, Chris Treganowan, "Heritrac Tramcar Preservation Victoria Australia", c2002
Plastic Presentation folder - ring bound - 24 plastic sheets each with an A4 insert titled "Heritrac Tramcar Preservation Victoria Australia" giving details of the group headed by Chris Treganowan who had collected a number of ex Melbourne tramcars and their tramcar collection, their activities and their planning c2002. Has a photograph of each of their trams, an aerial photo of their storage shed near Seymour, including a list of requested trams.trams, tramways, melbourne, mmtb, museum, tramcars, heritrac -
 Melbourne Tram Museum
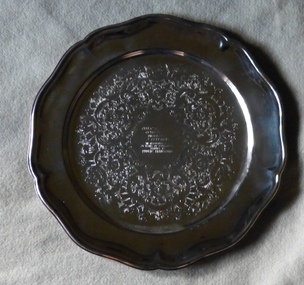
Ceremonial object - Silver Tray, Strachan Australia, J. Pollard, c1994
... . See Reg Item 182 for the Photo of the Presentation. Copy... Australia. See Reg Item 182 for the Photo of the Presentation ...Silver tray or plate - presentation for 25 years service to Jack Pollard, pressed silver plated metal with green rubber base, etched centre scroll work with details of the presentation in the centre. "PUBLIC TRANSPORT CORPORATION PRESENTED TO J. Pollard. IN RECOGNITION OF 25 YEARS OF CONTINUOUS SERVICE TO PUBLIC TRANSPORT". Made by Strachan Australia. See Reg Item 182 for the Photo of the Presentation. Copy print of original by David Pollard. See correspondence (pdf files) for further details of Jack. See also Reg Item 204 for another example.See above.trams, tramways, personnel, presentations, malvern depot, 25th anniversary, ptc, silverware -
 Bendigo Military Museum
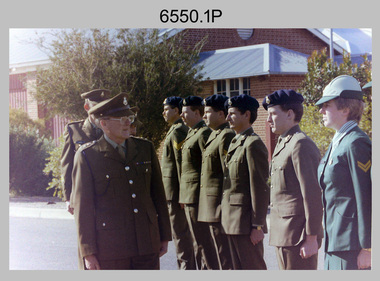
Photograph - 4th Field Survey Squadron OC’s Parades and Defence Force Service Medal Presentations, Keswick Barracks, Adelaide SA, 1987
... Killeen. .3) & .4) - Photo, colour, 1987. Presentations: OC MAJ...) & .7) - Photo, colour, 1987. Presentations: OC MAJ Peter Cates ...This is a set of 12 photographs of a 4th Field Survey Squadron OC’s parade at Keswick Barracks, Adelaide SA in 1987. The OC - MAJ Peter Cates presented the Defence Force Service Medal to personnel in recognition of 15 years of efficient remunerated service, or the Clasp for 5 years of additional service. This is a set of 12 photographs of a 4th Field Survey Squadron OC’s parade and the presentation of the Defence Force Service Medal, at Keswick Barracks, Adelaide SA in 1987. The colour photographs are on 35mm negative film and are part of the Army Survey Regiment’s Collection. The photographs were scanned at 96 dpi. .1) - Photo, colour, 1987. At left – SSM WO1 Bill Griggs. Front rank L to R: SPR Todd Hayley, CPL Roger Graf, CPL Jamie McRae, CPL Dave Irving, SPR Richard Cocker, LCPL Peter McCurdy, SPR Steve Ellis, CPL John Ratcliffe. Centre rank L to R: CPL Terry ‘TJ’ Wicker, SPR Perry Langeberg, unidentified, CPL Jeff Prince, SPR Bruce Graham. Rear rank L to R: SPR Shaun Hynes, SGT H. ‘Jock’ Young. Supernumerary on right: WO2 Brett ‘Dutchy’ Van Leeuwen. .2) - Photo, colour, 1987. Inspection L to R: SSM WO1 Bill Griggs, 2IC CAPT Terry Lord, OC MAJ Peter Cates. Front rank L to R: CPL Jamie McRae, SPR Richard Cocker, LCPL Peter McCurdy, SPR Steve Ellis. Centre rank L to R: SPR Perry Langeberg, CPL Peter Hardy, SPR Steve Nokes. Rear rank: SPR Damien Killeen. .3) & .4) - Photo, colour, 1987. Presentations: OC MAJ Peter Cates presents the Defence Force Service Medal to WO2 Brett ‘Dutchy’ Van Leeuwen. Background L to R: SSM WO1 Bill Griggs, SPR Todd Hayley, CPL Jamie McRae. .5) - Photo, colour, 1987. WO2 Brett ‘Dutchy’ Van Leeuwen departs with his Defence Force Service Medal. At far left – SSM WO1 Bill Griggs. Front rank L to R: SPR Todd Hayley, CPL Roger Graf, CPL Jamie McRae, CPL Dave Irving, SPR Richard Cocker. Centre rank L to R: CPL Terry ‘TJ’ Wicker, CPL Dave Longbottom, unidentified, Rear rank L to R: SGT Mick Hogan, SGT Stu Symonds. .6) & .7) - Photo, colour, 1987. Presentations: OC MAJ Peter Cates presents the Defence Force Service Medal to SGT H. ‘Jock’ Young. Background L to R: SSM WO1 Bill Griggs, SPR Todd Hayley, CPL Roger Graf, CPL Jamie McRae. .8) - Photo, colour, 1987. SGT H. ‘Jock’ Young departs with his Defence Force Service Medal. At far left – SSM WO1 Bill Griggs. Front rank L to R: SPR Todd Hayley, CPL Roger Graf, CPL Jamie McRae, CPL Dave Irving, SPR Richard Cocker. Centre rank L to R: CPL Terry ‘TJ’ Wicker, CPL Dave Longbottom, unidentified, Rear rank L to R: SGT Mick Hogan, SGT Stu Symonds. 9) - Photo, colour, 1987. Presentations: OC MAJ Peter Cates presents the Defence Force Service Medal to CPL John Ratcliffe. Background L to R: SSM WO1 Bill Griggs, SPR Todd Hayley, CPL Roger Graf, CPL Jamie McRae. 10) - Photo, colour, 1987. Presentations: OC MAJ Peter Cates presents the Defence Force Service Medal to CPL John Ratcliffe. Background L to R: SSM WO1 Bill Griggs, SPR Todd Hayley, CPL Roger Graf. .11) - Photo, colour, 1987. CPL John Ratcliffe departs with his Defence Force Service Medal. At far left – SSM WO1 Bill Griggs. Front rank L to R: SPR Todd Hayley, CPL Roger Graf, CPL Jamie McRae, CPL Dave Irving, SPR Richard Cocker. Centre rank L to R: CPL Terry ‘TJ’ Wicker, CPL Dave Longbottom, unidentified, Rear rank L to R: SGT Mick Hogan, SGT Stu Symonds. .12) - Photo, colour, 1987. Parade handover L to R: 2IC CAPT Terry Lord, OC MAJ Peter Cates. Background L to R: SSM WO1 Bill Griggs, Front rank: SPR Todd Hayley, CPL Roger Graf, CPL Jamie McRae..1P to .12P – There are no personnel identified. ‘Medal Presentation 1987 WO2 VAN LEEUWEN SGT YOUNG CPL RATCLIFFE’ annotated on negatives sleeve.royal australian survey corps, rasvy, 4 fd svy sqn -
 Bendigo Military Museum
Photograph - 4th Field Survey Squadron OC’s Parades and Defence Force Service Medal Presentations, Keswick Barracks, Adelaide SA, 1988
This is a set of eight photographs of a 4th Field Survey Squadron OC’s parade at Keswick Barracks, Adelaide SA in 1988. The Colonel Commandant (honorary appointment) of the Survey Corps - COL Clem Sargent (retired) presented the Defence Force Service Medal to personnel in recognition of 15 years of efficient remunerated service, or the Clasp for 5 years of additional service. This is a set of eight photographs of a 4th Field Survey Squadron OC’s parade and the presentation of the Defence Force Service Medal, at Keswick Barracks, Adelaide SA in 1987. The colour photographs are on 35mm negative film and are part of the Army Survey Regiment’s Collection. The photographs were scanned at 96 dpi. .1) - Photo, colour, 1988. L to R: COL Clem Sargent (retired), SSM WO1 Bill Griggs & OC MAJ Peter Cates (obscured), SGT Stu Symonds, SPR Wally Twidale, CPL Jamie McRae, SPR Owen Jones, SPR Steve Ellis, CPL Michelle Griffith. .2) - Photo, colour, 1988. L to R: CPL Peter Tuddenham, COL Clem Sargent (retired), CPL Peter Hardy, SGT Wally Chilcott, CPL Terry ‘TJ’ Wicker (foreground), SPR Steve Nokes, SSGT R. Marsh. .3) - Photo, colour, 1988. L to R: SSM WO1 Bill Griggs (obscured), COL Clem Sargent (retired), CPL Jim Humphrey, unidentified, CPL John Ratcliffe, SGT Wally Chilcott, SPR Cheryl Deluca-Cardillo, SSGT R. Marsh, unidentified. .4) - Photo, colour, 1988. L to R: CAPT Danny Galbraith, COL Clem Sargent (retired), OC MAJ Peter Cates. .5) - Photo, colour, 1988. L to R: SGT Derek Stanmore, COL Clem Sargent (retired), OC MAJ Peter Cates. .6) - Photo, colour, 1988. COL Clem Sargent (retired) at the flagpole. L to R: SPR Cheryl Deluca-Cardillo, CPL Ken Peters, SPR Steve Ellis, SSGT R. Marsh, 2IC CAPT Terry Lord, CPL Michelle Griffith, SPR Steve Nokes, SSGT Dennis Learmonth, SGT Gill Park, unidentified. .7) - Photo, colour, 1988. COL Clem Sargent (retired) at the flagpole. L to R: SPR Owen Jones, SPR Cheryl Deluca-Cardillo, CPL Ken Peters, SPR Steve Ellis, 2IC CAPT Terry Lord, CPL Michelle Griffith, SPR Steve Nokes, WO2 Bob Rogister, SGT Gill Park, unidentified. .8) - Photo, colour, 1988. 4 Fd Svy Sqn OC’s Parade ‘standing at ease’..1P to .8P – There are no personnel identified. ‘1988 Presentations’ annotated on negatives sleeve.royal australian survey corps, rasvy, 4 fd svy sqn -
 Bendigo Military Museum
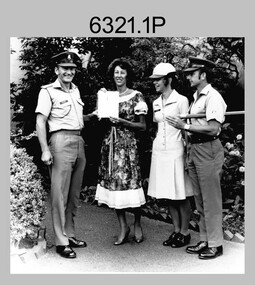
Photograph - Army Survey Regiment – Presentation to Charity Organisation, 1984
These photographs of a presentation to a charity organisation were taken in the grounds of Fortuna Villa, Army Survey Regiment in 1984. SPR Tracy (Parker) Ash was the unit’s Miss Golden North section entrant in the Miss Australia Quest. MAJ Bob Roche, RSM Bob Mason and SPR Parker presented a fundraising cheque to the unidentified representative from the Spastic Society. The the newspaper article is from the Bendigo Advertiser. The following wording is taken from the article: ‘Tracy Parker is a sapper in the Army, and a cartographic technician stationed at Fortuna, Bendigo. Originally from Melbourne, Tracy, 23, is the latest entrant in the Miss Golden North segment of the Miss Australia Quest. The highlight of Tracy’s quest will be an open day at Fortuna, once the magnificent home of Bendigo’s Quartz King, George Lansell. This open day at Fortuna, on Sunday, August 26, between 10 am and 4 pm, will give district residents a rare opportunity of inspecting this magnificent building and its gardens. Tracy said there will be handicrafts, rides, competitions and refreshments available at the open day. The main attraction, apart from the building and gardens, would be a hot air balloon. Admission to the open day would be: Adults $2, children and pensioners $1, family party $5. All proceeds from the open day at Fortuna will go to the Spastic Society. Tracy, like all other Miss Australia candidates work hard for the Spastic Society in fundraising activities. Getting further involved in fundraising, Tracy and her strong committee have organised a 6km fun run for Sunday August 19. Entry forms are available at Bendigo sports stores, and at the end of the fun run will be a barbecue. Apart from her vocation in the Army, and fundraising for the Spastic Society, Tracy Parker has a great love of horses, and associated activities of riding, jumping and showing her horses. Tracy is keen to do well in her fundraising, and with the Australian Army, or more particularly, the ranks of Fortuna behind her, Tracy looks like succeeding.’The first three items are photographs of a presentation to a charity organisation at the Army Survey Regiment, Bendigo in 1984. The fourth item is an article from the Bendigo Advertiser describing Army Survey Regiment’s fund-raising activities. The photographs were printed on photographic paper and are part of the Army Survey Regiment’s Collection. The photographic proof prints were scanned at 600 dpi. Photos .1P and .2P were scanned at 300 dpi. The newspaper article was scanned at 762 dpi. .1) to .3P) - Photo, black & white, 1984, L to R: MAJ Bob Roche, Regional Coordinator Mrs Jan Lamborn, SPR Tracy (Parker) Ash, RSM WO1 Bob Mason. .4) – Bendigo Advertiser newspaper article with photo, black & white, 1984, SPR Tracy (Parker) Ash. .1P to .2P – ‘Presentation of Certificate of Appreciation from Spastic Society. Presented by Regional Coordinator Mrs Jan Lamborn to MAJ Roche, SPR Tracy Ash (entrant in Miss Australia Quest (1984) and WO1 Mason.' .3P – No personnel identified. .4P – SPR Tracy Parker named in newspaper article.royal australian survey corps, rasvy, army survey regiment, army svy regt, fortuna, asr -
 Bendigo Military Museum
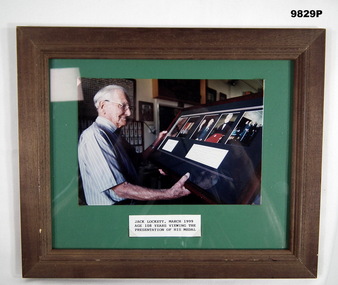
Photograph - PHOTOGRAPH, FRAMED, March 1999
... , viewing the presentation of his medal." Landscape photo of Jack ..."Jack Lockett" was a local identity who lived to 111 years and was one of the last surviving WW1 Veteran. At his death he was the oldest man ever in Australia.Landscape photo of Jack Lockett in March 1999, at the age of 108, viewing the Presentation of his medal. He was at the time one of few surviving WW1 Veterans. Photo is in colour and stuck to a green backboard. Within a brown wooden frame. Also a large label is stuck below the photo.Label on front: "Jack Lockett, March 1999, Age 108 years, viewing the presentation of his medal."jack lockett, framed photo, medal presentation -
 Bendigo Military Museum
Photograph - Army Survey Regiment – Commanding Officer Handover Parade, Fortuna, Bendigo, 1980
... . .21) - Photo, black & white, 1980. Medal presentation - L to R...) Bottomley. .22) - Photo, black & white, 1980. Medal presentation - L ...This photograph was taken at a Commanding Officer Handover Parade at the Army Survey Regiment, Bendigo in 1980. LTCOL Bob Skitch was the CO from 1976 to 1980 and handed over LTCOL Frank Thorogood SB St J. LTCOL Thorogood’s appointment was from 1980 to 1981.This is a set of 45 photographs taken at a Commanding Officer Handover Parade at the Army Survey Regiment, Bendigo in 1980. The photographs are on 35mm negative film and were scanned at 96 dpi. Photograph .34P is an enlargement printed on photographic paper and scanned at 300 dpi. They are part of the Army Survey Regiment’s Collection. .1) - Photo, black & white, 1980. Led by HQ Squadron, Army Survey Regiment marches onto the parade ground. .2) - Photo, black & white, 1980. Army Survey Regiment marches onto the parade ground. Drummers L to R: SSGT George Austen, CPL Di Chalmer, CPL Tony Lawler. .3) - Photo, black & white, 1980. Air Survey Squadron formed up. SSM WO1 Bob Mason at front. L to R: unidentified (x9), SPR Kristin (Isaac) Skidmore, unidentified, SPR Scheryl Delforce, unidentified (x2), SSGT Russell ‘Rusty’ Williams, SSGT Peter Warwick, SSGT Greg Buckenham, SGT Cliff Webb, SSGT Alan Derby, SSGT John Bennett, SSGT Bruce Gordon. .4) - Photo, black & white, 1980. Officers formed up before taking posts. L to R: CAPT Peter Searle - UK Exchange, unidentified, LT Ozzy Slade, CAPT Peter ‘Blue’ Blaskett, unidentified (x4), CAPT Bob Williams, MAJ David Bowen - US Exchange officer, unidentified (x3), RSM WO1 Aub Harvey. .5) - Photo, black & white, 1980. Officers salute before taking posts. L to R: CAPT Peter Searle - UK Exchange, unidentified, LT Ozzy Slade, CAPT Peter ‘Blue’ Blaskett, unidentified (x4), CAPT Bob Williams, MAJ David Bowen - US Exchange officer, unidentified (x3). .6) - Photo, black & white, 1980. Officers march to their posts. L to R: CAPT Bob Cooper, CAPT Mick Byrne, MAJ Robin Blackburn, unidentified. .7) & .8) - Photo, black & white, 1980. L to R: 2IC MAJ Don Swiney MBE hands over parade to CO LTCOL Bob Skitch. Cartographic Squadron - Centre rank L to R: CPL Paul Richards, SPR Megan (McBurney) Reynolds, SPR Jan (Crighton) Minchin, SPR Ilen Isaac, CPL Lynn Johnson, remainder unidentified. Front rank L to R: CPL Dennis Learmonth, CPL Roger Pearson, SPR Rod Skidmore, SPR John Martin, SGT Bob Bright, CPL Trevor Bottomley, SPR Gerry Gates, remainder unidentified, OC CAPT Bob Williams, Officer in far right: CAPT Bob Cooper. .9) - Photo, black & white, 1980. L to R: CO LTCOL Bob Skitch salutes reviewing officer - Commander 3MD BRIG Geoffrey Cohen AM. Cartographic Squadron in background L to R: CPL Trevor Bottomley, SPR Gerry Gates, SPR Peter Main, CPL John ‘Stormy’ Tempest, unidentified, OC CAPT Bob Williams, SSGT Gary Warnest. .10) - Photo, black & white, 1980. HQ Squadron inspection - L to R: unidentified (x5), CAPT Paddy Strunks, SPR Chris Ebeling, CO LTCOL Bob Skitch, BRIG Geoffrey Cohen AM, unidentified (x7), in foreground MAJ David Bowen - US Exchange officer, unidentified, CPL Phil McGuire, WO2 Ted Burgess. .11) - Photo, black & white, 1980. HQ Squadron in foreground L to R: MAJ David Bowen - US Exchange officer, unidentified, CPL Phil McGuire, WO2 Ted Burgess. Lithographic Squadron inspection L to R: CPL Paul Davis, CPL Le-Anne (Smallshaw) Shirely, CO LTCOL Bob Skitch, unidentified, OC MAJ Robin Blackburn, BRIG Geoffrey Cohen AM, SPR Jim Ash, unidentified, unidentified UK Exchange SNCO, SSGT Greg Francis-Wright, WO1 Doug Malligan, drummers SSGT George Austen, CPL Di Chalmer, CPL Tony Lawler, unidentified (x2). .12) - Photo, black & white, 1980. Air Survey Squadron inspection - L to R: LT Ozzy Slade, CAPT Peter ‘Blue’ Blaskett, unidentified officer, front rank L to R: SGT Cliff Webb, CO LTCOL Bob Skitch, CAPT Peter Searle - UK Exchange, unidentified, centre rank L to R: unidentified, SSGT Greg Buckingham, SSGT John Bennett, rear rank L to R: unidentified (x4), SPR Sharon (Jones) Treble, CPL Marrianne (Van De Zee) De Groot, SPR Ginny (Turner) Rowe, SSGT Kevin Kennedy, unidentified, SSGT Alan Derby. .13) - Photo, black & white, 1980. Air Survey Squadron inspection - Centre rank: SSGT John Bennett, CO LTCOL Bob Skitch, CAPT Peter Searle - UK Exchange, BRIG Geoffrey Cohen AM, rear rank L to R: SPR Ginny (Turner) Rowe, SSGT Kevin Kennedy, unidentified, SSGT Alan Derby, SSGT Bruce Gordon, supernumerary rank L to R: SSM WO1 Bob Mason, WO1 Bob Hayden, WO2 Peter Colwell, WO1 Chris Parkinson. Unidentified. .14) - Photo, black & white, 1980. Air Survey Squadron inspection - Centre rank: SSGT John Bennett, CO LTCOL Bob Skitch, CAPT Peter Searle - UK Exchange, BRIG Geoffrey Cohen AM, rear rank L to R: SPR Ginny (Turner) Rowe, SSGT Kevin Kennedy, unidentified, SSGT Alan Derby, SSGT Bruce Gordon, supernumerary rank L to R: SSM WO1 Bob Mason, WO1 Bob Hayden, WO2 Peter Colwell. .15) - Photo, black & white, 1980. Cartographic Squadron inspection – L to R: OC CAPT Bob Williams, CO LTCOL Bob Skitch, BRIG Geoffrey Cohen AM. Front rank L to R: CPL John ‘Stormy’ Tempest, unidentified (x2), SSGT Allan Adsett, SSGT Gary Warnest. Centre rank L to R: SPR Ilen Isaac, CPL Sue (Fryer) Bottomley, SPR Gina (Coore) Neilson, SPR Carla Dell, CPL Lynn Johnson, SPR Cathy Regan, unidentified, SSGT John ‘JB’ Barrie, SSGT Bob Scaddan. Rear rank L to R: CPL Terry Danger, CPL Brad Peppler. .16) & .17) - Photo, black & white, 1980. Cartographic Squadron inspection – L to R: OC CAPT Bob Williams, CO LTCOL Bob Skitch, BRIG Geoffrey Cohen AM. Front rank L to R: CPL Dennis Learmonth, CPL Roger Pearson, SPR Rod Skidmore, SPR John Martin, SGT Bob Bright, CPL Trevor Bottomley, SPR Gerry Gates, CPL John ‘Stormy’ Tempest, unidentified (x2), SSGT Allan Adsett, SSGT Gary Warnest. CO LTCOL Bob Skitch, CAPT Bob Cooper, BRIG Geoffrey Cohen AM. Centre rank L to R: SPR Ilen Isaac, CPL Sue (Fryer) Bottomley, SPR Gina (Coore) Neilson, SPR Carla Dell, SPR Cathy Regan, SSGT John ‘JB’ Barrie, SSGT Bob Scaddan. Rear rank L to R: CPL Terry Danger, CPL Brad Peppler, SGT Stu Thaxter, SGT Colin Cuskelly, SGT Bill Friswell. Far right: CAPT Peter Searle - UK Exchange, WO1 Jim ‘JJJ’ Jefferies. .18) - Photo, black & white, 1980. Cartographic Squadron inspection – Front rank: SSGT Gary Warnest. L to R: CO LTCOL Bob Skitch, CAPT Bob Cooper, BRIG Geoffrey Cohen AM. Centre rank L to R: SPR Ilen Isaac, CPL Sue (Fryer) Bottomley, SPR Gina (Coore) Neilson, SPR Carla Dell, SPR Cathy Regan, SSGT John ‘JB’ Barrie, SSGT Bob Scaddan. Rear rank L to R: CPL Terry Danger, CPL Brad Peppler, SGT Stu Thaxter, SGT Colin Cuskelly, SGT Bill Friswell. SSM WO1 Gordon Lowery. Far right: WO1 Jim ‘JJJ’ Jefferies, CAPT Peter Searle - UK Exchange, CAPT Peter ‘Blue’ Blaskett, LT Ozzy Slade. .19) - Photo, black & white, 1980. Medal presentation - L to R: CO LTCOL Bob Skitch, CAPT Bob Cooper. Cartographic Squadron – Front rank L to R: CPL Dennis Learmonth, CPL Roger Pearson, SPR Rod Skidmore, SGT Bob Bright, CPL Trevor Bottomley, SPR Gerry Gates, SPR Peter Main, CPL John ‘Stormy’ Tempest. Centre rank L to R: CPL Paul Richards, SPR Jan (Crighton) Minchin, SPR Ilen Isaac, SPR Carla Dell, CPL Lynn Johnson, SPR Cathy Regan. .20) - Photo, black & white, 1980. Medal presentation - L to R: CAPT Bob Cooper, BRIG Geoffrey Cohen AM. Cartographic Squadron – Front rank L to R: CPL Dennis Learmonth, CPL Roger Pearson, SPR Rod Skidmore, SPR John Martin, SGT Bob Bright, SPR Peter Main, CPL John ‘Stormy’ Tempest, SSGT Allan Adsett, SSGT Gary Warnest. Centre rank L to R: CPL Paul Richards, SPR Jan (Crighton) Minchin, SPR Ilen Isaac, CPL Sue (Fryer) Bottomley, SPR Gina (Coore) Neilson. .21) - Photo, black & white, 1980. Medal presentation - L to R: CAPT Bob Cooper, BRIG Geoffrey Cohen AM. Cartographic Squadron – Front rank L to R: CPL Dennis Learmonth, CPL Roger Pearson, SPR Rod Skidmore, SPR John Martin, SGT Bob Bright, SPR Peter Main, CPL John ‘Stormy’ Tempest, SSGT Gary Warnest. Centre rank L to R: CPL Paul Richards, SPR Jan (Crighton) Minchin, SPR Ilen Isaac, CPL Sue (Fryer) Bottomley. .22) - Photo, black & white, 1980. Medal presentation - L to R: CO LTCOL Bob Skitch, CAPT Bob Cooper, BRIG Geoffrey Cohen AM. Cartographic Squadron – Front rank L to R: CPL Dennis Learmonth, CPL Roger Pearson, SPR Rod Skidmore, SPR John Martin, SGT Bob Bright CPL Trevor Bottomley, SPR Gerry Gates, SPR Peter Main, CPL John ‘Stormy’ Tempest, CAPT Bob Williams, SSGT Allan Adsett. Centre rank L to R: CPL Paul Richards, SPR Jan (Crighton) Minchin, SPR Gina (Coore) Neilson, SPR Carla Dell, CPL Lynn Johnson, SPR Cathy Regan, unidentified, SSGT Bob Scaddan. Rear rank: CPL Stu Symonds. .23) - Photo, black & white, 1980. Presentation - L to R: CO LTCOL Bob Skitch, BRIG Geoffrey Cohen AM, ADJT CAPT John Harrison. Cartographic Squadron – Front rank L to R: CPL Dennis Learmonth, CPL Roger Pearson, SPR Rod Skidmore, SPR John Martin, SGT Bob Bright CPL Trevor Bottomley, SPR Gerry Gates, unidentified, CAPT Bob Williams, SSGT Allan Adsett, CAPT Bob Cooper. Centre rank L to R: SPR Jan (Crighton) Minchin, CPL Sue (Fryer) Bottomley, SPR Carla Dell, CPL Lynn Johnson, SPR Cathy Regan, unidentified, SSGT Bob Scaddan. .24) - Photo, black & white, 1980. Presentation - L to R: CO LTCOL Bob Skitch, BRIG Geoffrey Cohen AM, ADJT CAPT John Harrison. Cartographic Squadron – Front rank L to R: SPR Rod Skidmore, SPR John Martin, SGT Bob Bright CPL Trevor Bottomley, SPR Gerry Gates, unidentified, CAPT Bob Williams, CAPT Bob Cooper. Centre rank L to R: SPR Jan (Crighton) Minchin, CPL Sue (Fryer) Bottomley, SPR Carla Dell, CPL Lynn Johnson, SPR Cathy Regan, unidentified, SSGT Bob Scaddan. .25) - Photo, black & white, 1980. Presentation - L to R: CO LTCOL Bob Skitch, BRIG Geoffrey Cohen AM, ADJT CAPT John Harrison. Cartographic Squadron – Front rank L to R: CPL Roger Pearson, SPR Rod Skidmore, SPR John Martin, SGT Bob Bright CPL Trevor Bottomley, unidentified, CAPT Bob Williams, SSGT Allan Adsett, SSGT Gary Warnest. CAPT Bob Cooper, Centre rank L to R: CPL Sue (Fryer) Bottomley, SPR Gina (Coore) Neilson, SPR Carla Dell, CPL Lynn Johnson. .26) to .28) - Photo, black & white, 1980. Presentation - L to R: MAJ Robin Blackburn, BRIG Geoffrey Cohen AM, ADJT CAPT John Harrison. .29) to .31) - Photo, black & white, 1980. Presentation - L to R: SPR Penny Knott, CO LTCOL Bob Skitch. .32) - Photo, black & white, 1980. CO Handover - L to R: LTCOL Bob Skitch, LTCOL Frank Thorogood SB St J. Cartographic Squadron – Front rank L to R: CPL Dennis Learmonth, CPL Roger Pearson, SPR Rod Skidmore, SPR John Martin SPR Gerry Gates, SPR Peter Main, CPL John ‘Stormy’ Tempest, unidentified, CAPT Bob Williams, SSGT Allan Adsett, SSGT Gary Warnest. Centre rank L to R: SPR Ilan Isaac, CPL Sue (Fryer) Bottomley, SPR Gina (Coore) Neilson, SSGT Bob Scaddan at end. .33) & .34) - Photo, black & white, 1980. CO Handover - L to R: LTCOL Bob Skitch, LTCOL Frank Thorogood SB St J. Cartographic Squadron – Front rank L to R: CPL Dennis Learmonth, CPL Roger Pearson, SPR Rod Skidmore, SPR John Martin, SGT Bob Bright, SPR Gerry Gates, SPR Peter Main, CPL John ‘Stormy’ Tempest, unidentified, CAPT Bob Williams, SSGT Allan Adsett. Centre rank L to R: SPR Ilen Isaac, CPL Sue (Fryer) Bottomley, SPR Gina (Coore) Neilson, SSGT Bob Scaddan at end. .35) - Photo, black & white, 1980. CO Handover – March past L to R: BRIG Geoffrey Cohen AM, ADJT CAPT John Harrison. LTCOL Frank Thorogood SB St J, CO LTCOL Bob Skitch. L to R: RSM WO1 Aub Harvey, 2IC MAJ Don Swiney MBE. .36) - Photo, black & white, 1980. CO Handover March past L to R: BRIG Geoffrey Cohen AM, ADJT CAPT John Harrison. LTCOL Frank Thorogood SB St J, CO LTCOL Bob Skitch. HQ Squadron march past L to R: unidentified officer, MAJ MAJ David Bowen - US Exchange officer, CAPT Paddy Strunks. .37) - Photo, black & white, 1980. CO Handover March past L to R: BRIG Geoffrey Cohen AM, ADJT CAPT John Harrison. LTCOL Frank Thorogood SB St J, CO LTCOL Bob Skitch. HQ Squadron march past L to R: unidentified, SGT Rick Warren, remainder unidentified. .38) - Photo, black & white, 1980. CO Handover March past L to R: BRIG Geoffrey Cohen AM, ADJT CAPT John Harrison. LTCOL Frank Thorogood SB St J, CO LTCOL Bob Skitch. Cartographic Squadron march past L to R: CLP Paul Richards, CPL Dennis Learmonth, CAPT Bob Williams, CAPT Bob Cooper. .39) - Photo, black & white, 1980. CO Handover March past L to R: BRIG Geoffrey Cohen AM, ADJT CAPT John Harrison. LTCOL Frank Thorogood SB St J, CO LTCOL Bob Skitch. Cartographic Squadron march past L to R: SPR Greg Else, SPR Jan (Crighton) Minchin, SPR Rod Skidmore, unidentified, SPR Megan (McBurney) Reynolds, CPL Roger Pearson, CPL Stu Symonds, CPL Paul Richards. .40) - Photo, black & white, 1980. CO Handover March past L to R: BRIG Geoffrey Cohen AM, ADJT CAPT John Harrison. LTCOL Frank Thorogood SB St J, CO LTCOL Bob Skitch. Cartographic Squadron march past L to R: CPL Terry Danger, CPL Lynn Johnson, SPR Peter Main, unidentified, SPR Carla Dell, SPR Gerry Gates, SPR Bob Sheppard, SPR Gina (Coore) Neilson, CPL Trevor Bottomley, SPR Ian Fitzgerald, CPL Sue (Fryer) Bottomley, unidentified. .41) - Photo, black & white, 1980. CO Handover March past L to R: BRIG Geoffrey Cohen AM, ADJT CAPT John Harrison. LTCOL Frank Thorogood SB St J, CO LTCOL Bob Skitch. Lithographic Squadron march past L to R: CAPT Mick Byrne, MAJ Robin Blackburn. .42) - Photo, black & white, 1980. CO Handover March past L to R: BRIG Geoffrey Cohen AM, ADJT CAPT John Harrison. LTCOL Frank Thorogood SB St J, CO LTCOL Bob Skitch. Lithographic Squadron march past L to R: CPL Gary Kerr, SPR Brian Paul, SPR Brian Fauth, CPL Roy Hicks, SPR Per Andersen, CAPT Mick Byrne. .43) & .44) - Photo, black & white, 1980. CO Handover March past L to R: BRIG Geoffrey Cohen AM, ADJT CAPT John Harrison. LTCOL Frank Thorogood SB St J, CO LTCOL Bob Skitch. Lithographic Squadron march past. .45) - Photo, black & white, 1980. CO Handover March past L to R: BRIG Geoffrey Cohen AM, ADJT CAPT John Harrison. LTCOL Frank Thorogood SB St J, CO LTCOL Bob Skitch. Officer march past L to R: unidentified, CAPT Peter Searle - UK Exchange.No personnel are identified. Photo .34P is annotated on back ‘1981 LTCOL Bob Skitch handed over to LTCOL Thorogood.’ *Date is incorrect.royal australian survey corps, rasvy, army survey regiment, army svy regt, fortuna, asr -
 Falls Creek Historical Society
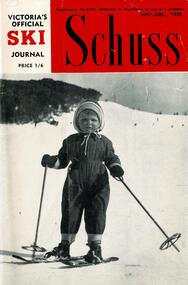
Journal - Schuss Vol. 24. No.8 November - December 1958
... includes a photo of the trophy presentation at the Falls Creek... season. Page 333 includes a photo of the trophy presentation ...Schuss was advertised as Victoria’s Official Ski Journal It was issued monthly from 1935 to 1961 except during the war when summer issues covered two months. This continued after the war, but it averaged 10 issues annually over its 25 year life. Schuss was published by the Ski Club of Victoria which had a membership of 38 Ski Clubs and demanded to be recognised as the prime authority on skiing in the state. The other 30 ski clubs with 85% of the members disagreed and the politics of skiing became heated. These clubs formed the Federation of Victorian Ski Clubs with their own journal, Ski Horizon. With the establishment of the Victorian Ski Association, Ski-Horizon published its last issue in Nov - Dec. 1955 and the role of the official journal was fully taken over by “Schuss”. This item is significant because it contains stories, images and information documenting the development of the ski facilities at Falls Creek.The journal features stories and events chronicling developments in Victoria and internationally. The cover features an Eric Burt photo Dannielle Forras of Mount Buller, daughter of Ernest Forras. The photo is titled "The right age to start". Page 332 mentions Cecil Dobson and Orest Frueauf plans to open a new chalet "Winter Haven" for the next season. Page 333 includes a photo of the trophy presentation at the Falls Creek Junior Championship in September 1958. Page 345 features results from the Albury Ski Club Racing Carnival and the two Myrtleford results held on the same day.schuss journal, albury ski club carnival, myrtleford ski club, cecil dobson, orest frueauf, winterhaven ski lodge -
 Bendigo Military Museum
Photograph - Army Survey Regiment Officers Mess Fundraising Presentation, Fortuna Villa, Bendigo, 1983
This Officers Mess Fundraising Presentation photograph was taken in the Army Survey Regiment’s Officers Mess Long Room, in Fortuna Villa, Bendigo on the 7th of October 1983. The President of the Mess Committee (PMC) MAJ Graham Baker presented a cheque amount of $1,150.00 to the Chairman of Bendigo’s Olympic Fundraising Committee Mr Neville Howell. The funds were probably raised by members of the Officers Mess at a dining-in night.This photograph of an Officers Mess Fundraising Presentation was taken in the Officers Mess Long Room at Fortuna Villa, Bendigo on the 7th of October 1983. The black & white photograph was printed on photographic paper and is part of the Army Survey Regiment’s Collection. The photograph was scanned at 300 dpi. .1) - Photo, black & white, 1983. L to R: Chairman of Bendigo’s Olympic Fundraising Committee Mr Neville Howell, PMC of the Officers Mess MAJ Graham Baker.Annotated on back of photo ‘Officers Mess Fortuna raised $1150.0. Mr Neville Howell Chairman of Bendigo’s Olympic Fundraising Committee and MAJ Baker PMC 7 Oct 83 Dining-In Night’.royal australian survey corps, rasvy, army survey regiment, army svy regt, fortuna -
 Port Melbourne Historical & Preservation Society
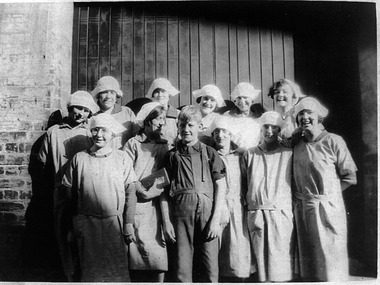
Photograph - Workers, Cardboard department, J Kitchen & Sons, 1920s
This photo has been in the Hegarty famly collection since the twenties. It shows a group of workers from the Cardbox Department of J Kitchen & Sons Pty Ltd, of Ingles Street, Port Melbourne. These workers made boxes for soap by hand, i.e. presentation boxes for Christmas gifts. There are three sets of sisters in this photo: Lily and Alma Eddy, who travelled from Coburg; Mabel and Florrie McPherson and Alice and Myrtle Mott, all of Cruikshank Street. Mrs Myrtle Mott Bennett of Box Hill, was able to identify Millie Robinson (front row, 2nd from left) of Graham Street, Alice Mott (back row, 3rd from left). She is 2nd from left in front row. After all these years, it was hard to remember who was who! Alice Mott started working at Kitchen's at 14 year old, and her younger sister Myrtle started there at 15 years, having worked for a year at Swallows. Myrtle was to spend 15 years there prior to her marriage in 1939, and received a gold watch for long service She feels that working at Kichens was a bit more prestigious than Swallows. John and Jim Bradley were the foremen and were real gentlemen!Copy of photo of twelve young workers from cardboard department of J Kitchen & Sons, Ingles Street. Also an attachment (.02) written by Barbara Gardiner which lists all the people in the photo.business and traders - soaps/candles, john bradley, jim bradley, j kitchen & sons pty ltd, myrtle bennett nee mott, alice mott, millie robinson, florrie mcpherson, mabel mcpherson, lily eddy, alma eddy, hegarty family -
 Ballarat Tramway Museum
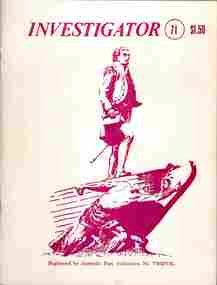
Document, John M Moore, "Investigator" - Geelong Historical Society - Geelong Tramways, 1983
1 - Investigator Journal of the Geelong Historical Society - issue 54 - March 1979 with an article on Geelong Street names 2 - ditto - issue 71 - with a detailed article on the formation history of Geelong Trams by John M Moore including photos. Establishment of MESCo, J J Jobbins, construction, tracks, buses, practical jokes, map, trams and decorated cars. Also has an article about Geelong Stret names 3 - Scan of issue 72 - Continued from item 2 - route descriptions, 1930s improvement, WW2, tram cars, staff changes, with photos. Report on the closure of the Geelong Tramway System in March 1956, including the presentation of conductor's bells from tram 23 to Cr Camereon and the Mayor of Geelong Cr Fidge. Gives notes on the replacement bus services, events of the last trams and those involved on the day such as Driver Stanley Parker and Conductor Eric Sweetten. See item 9117 for a bell presented to Depot Foremen S Irwin.Yields information about the history of Geelong tramways and its operations.Two copies of the Geelong Historical Society journal "investigator" Nos. 54 and 71 - printed A5 centre stapled and one A4 copy of issue 72 article on Geelong tramways.tramways, state electricity commission of victoria, geelong, tramcars, secv, closure, mesco -
 Ballarat Tramway Museum
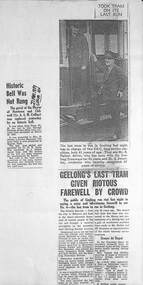
Newspaper, Geelong Advertiser, "Geelong's last tram given riotous farewell by crowd", 1956
Photocopy of an extract from the Geelong Advertiser 26/3/1956 about the closure of the Geelong tram system and the public participation. Has a photo of Mr S Parker driver and Mr E Sweeten, conductor on one of the last trams. Also has an item dated 27/3/1959 about the presentation of a bell taken from Geelong tram 38 and presented to former Mayoress Mrs H Jacobs by the Mayor of Newtown and Chilwell Cr A S M Collins.Yields information about the last day of Geelong trams.Set of two foolscap photocopies of extracts from the Geelong Advertiser.tramways, tramcars, geelong, closure, last tram, bells -
 Surrey Hills Historical Society Collection
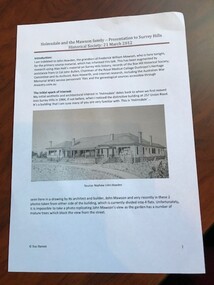
Vertical file, Frederick WiIliam Mawson of Surrey Hills, his family and descendants
Frederick William Mawson and his wife Mary (nee Mullard) and baby daughter, Beatrice Mary migrated to Victoria as steerage passengers, arriving in Melbourne on 1 July 1882 on the sailing ship the ‘Holmsdale’. They settled in Bona Vista Avenue, Surrey Hills (house demolished) and he established a jam factory in Boundary (Warrigal) Road. Further children of the family were Harriett, Muriel, Ethel, Winifred, John and Frederick William (Jnr). The later died in WW1 and there is a transcript of his diary in this collection. Four of the daughters became nurses, three serving in WW1. The other son John became a local builder, who after the war built 'Holmsdale' in Union Road as a convalescent home to be run by his sisters. After the death of his first wife Frederick (Snr) married Catherine Small, a widow with children of her own.The family were early settlers in Surrey Hills and their story in relation to the service of local men and women during WW1 is well documented.Vertical file of information related to the Mawson family which includes: 1. Notes and documents that came from John Howden via G Randy Johnston, his tenant at 257 Union Road, Surrey Hills. (6 pages in total): a. The Misses Mawson family history, written by John Howden (2 pages), b Note from G Randy Johnston, c. Passengers’ contract ticket for Fred, Mary & Beatrice Mawson on the ‘Holmsdale’, 1882, d. Photocopies of 2 photos of the ‘Holmsdale’, e. Invitation (blank photocopy) to the opening of ‘Holmsdale’ Convalescent Home, 257 Union Road, Surrey Hills, 14.3.1936. 2. Advertising brochure for ‘Holmsdale’ Convalescent Home (undated) (3 pages: original and photocopy x 2). 3. English family documents (8 pages): a. John Spensley Barnsdall bapt Mar 1818, b. John Spensley Barnsdall marriage registration, c. Census 1861 for John Mawson, Betsy Bradbury Mawson, Frederick William Mawson and George Barnesdale Mawson, d. Census 1871 for John Mawson, Betsy B. Mawson, Frederick W. Mawson and George B. Mawson and Arthur Mawson, e. Census 1881 for John Mawson, Betsy B. Mawson, Arthur Mawson and George Mawson, f. Census 1881 for Fredk W Mawson and Mary Mawson. 4. PROV Unassisted passenger list information for Mary Mawson 1882 (1 page). 5. Mawson family members notes compiled by Sue Barnett (2 pages). 6. Harriet Godden Mawson details including WW1 service details, Royal Military College of Australia certificate of service certificate, references from Duntroon and Gresswell Sanatorium (11 pages). 7. Beatrice Mawson details including WW1 service on the ‘Mongolia’ – Argus article 28 June 1917 and her account of the sinking of the ‘Mongolia’ published in Castlemaine newspaper, 18 August 1917 (4 pages). 8. Muriel Mawson details including WW1 service and evidence of her training at Castlemaine Hospital (5 pages). 9. F.W. Mawson Jr details including WW1 service including Red Cross Wounded and Missing Enquiry Bureau file and Dasey (misnamed photo of him) (8 pages, incl photo). 10. F.W. Mawson Snr details incl birth registration, 1871, marriage to Catherine Small, death registration, cemetery index (5 pages). 11. Betsy Bradbury Mawson death & burial details (2 pages). 12. John Mawson family: John Mawson probate notice, 24 Sept 1941; marriage of son Ivan to Joan Manning, 29/9/1945 (2 pages). 13. Arthur David Mawson details - extract from Ancestry.com family tree notated by Sue Barnett; death notice from The Argus, 24 oct 1939 (2 pages). 14. Holmsdale and the Mawson family - Presentation to Surrey Hills Historical Society: 21 March 2012 by Sue Barnett, 25 pages including photos. 15. Letter from John Howden to Sue Barnett, 1 April 2012. 16. Information re Dr James Moore Andrew of Yallourn.(mr) frederick william mawson, (mr) john howden, (mr) frederick william mawson jnr, aif, (miss) beatrice mary mawson, (miss) harriet godden mawson, (miss) muriel mawson, (mr) john mawson, (miss) ethel mawson, (miss) winifred sarah mawson, (mr) lyell mcalister howden, (miss) olive mabel garrett, (mrs) olive mabel mawson, garrett and mawson, 'holmsdale', holmsdale convalesent and rest home, 257 union road, 'erskine', 5a barloa road, 'carbethon', 50 churchill street, (mrs) mary mawson, box hill cemetery, (mrs) catherine small, (mrs) catherine mawson, 14 bona vista avenue, (mr) arthur david mawson, (mrs) betsy bradbury mawson, world war one, nurses, builders