Showing 733 items
matching turn of the century
-
 The Cyril Kett Optometry Museum
Book, A practical treatise on the diseases of the eye, 1854 (exact)
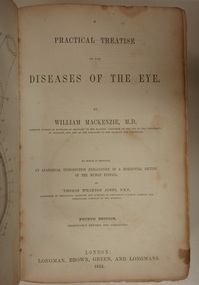
This is the 1854 fourth edition of a book on diseases of the eye by William MacKenzie (1791-1868) first published in 1830. William MacKenzie was surgeon oculist in Scotland to Her Majesty (Queen Victoria), lecturer in the University of Glasgow and a surgeon in the Glasgow Eye Infirmary. This fourth edition appeared just after Helmholtz's invention of the ophthalmoscope, but Mackenzie did not at this stage have much understanding of the internal diseases of the eye. Nor did he properly understand refractive errors which were soon to be elucidated by the work of Donders. MacKenzie did however recognise the hardness of the eye as being an essential sign of glaucoma.This book is significant historically as it shows contemporary understanding of eye disease in the early nineteenth century. It is not rare as copies still turn up at book markets and also are held in other Australian institutions.This book, bound in full calf leather (probably later 19th Century) with 1107 pages including an index and is followed by a publisher's catalogue. It is the 1854 fourth edition of William MacKenzie's 'A practical treatise on the diseases of the eye' first published in 1830. It has a long (32 pages) introductory section on the anatomy of the eye by Thomas Wharton Jones, FRS. There are 27 chapters on eye disease. Chapter 24 is on refractive errors and presbyopia.eye, ocular anatomy, ocular disease -
 Orbost & District Historical Society
black and white photographs, 1934
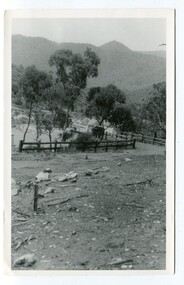
These photographs were taken just after the McKillop's Bridge was completed after the flood damage. The current McKillop’s Bridge was built by the Country Roads Board in two stages between 1931-36, during which its height was raised after the original bridge superstructure was washed away in record floods of January 1934, prior to its original official opening. In its reconstructed form the original concrete abutments were turned into additional piers and the welded-steel trusses were cantilevered back over them to meet the new higher road approaches. It is sited at McKillops Crossing, named after pioneer overlanding squatter George McKillop who crossed here in 1835. This was a stock crossing place for almost a century before the bridge was constructed. (info. from Victoria Heritage Register)This is a pictorial record of the history of McKillop's Bridge, in itself of historical significance for its association with Victoria's long and important pastoral history, its technicl significance and aesthetic significance.Three black / white photographs. 3133.1 shows the approach to a washed away bridge. 3133.2 is of a bridge over a river with men clearing debris. 3133.3 is a close-up showing the wreckage of the bridge.mckillop's-bridge snowy-river flood-damage-1934 -
 Orbost & District Historical Society
household items, 1935-1960s
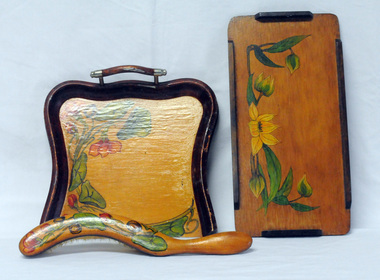
These items are from the estate of Norma Adelaide Scott (nee Johnston) ,January 2, 1925 - May 18, 2018 (93 years old) who died in Orbost. Norma was part of the Morris family who came to Newmerella in 1888, had land on Grandview Road and on the flats. Mr Morris had been a school teacher at Lake Tyers Mission before coming to Orbost. "Bobs y’r Uncle" was a nursery rhyme game designed by Frank H. Simpson for John Waddington Ltd. in 1935. The game was especially designed for children. The cards had scenes from nursery rhymes and six cards were needed to make up each rhyme in a set. Games turned out to become an important part in the progress of Waddingtons, who eventually acquired the rights to Monopoly in the UK, and then published Cluedo, opening the way for their supremacy in the toy industry These items are examples of common household items used in an Orbost family in the first - mid 20th century.3228.1 is a wooden tray with handles. The tray is lacquered and hand - painted with green leaves and orange flowers. 3228.2 is a brush with a curved wooden handle, lacquered and decorated in a similar pattern of green leaves and flowers. 3228.3 is a small wooden tray, lacquered and hand -painted with green leaves and yellow flowers. It is a rectangular shape with raised edging attached on the four sides. 3229.4 is a pack of cards in a red box with a cartoon type drawing of a man wearing a checked coat and hat holding two dogs on leashes.3228.5 is an orange / white cardboard box containing a pair of nylon stockings: box labelled " 'KOLOTEX/ Free-n-eezy" stockings.3228,5 - in orange and white print - "KOLOTEX/ Free-n-eezy/ Clings/ 40 denier/ SEAMLESS/ S-T-R-E-T-C-H" and in black - "NEW guaranteed never to ladder"scott-norma cards-playing hosiery-kolotex-stockings trays-wooden household -
 Orbost & District Historical Society
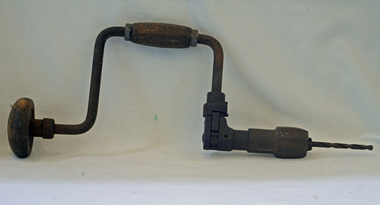
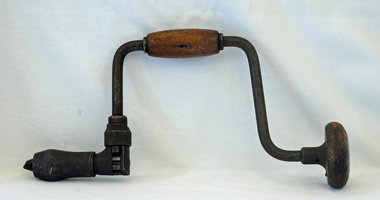
ratchet brace, first half 20th century
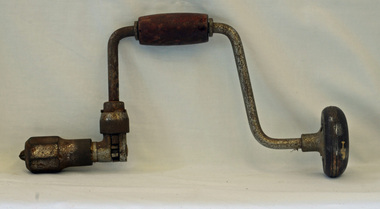
This carpenter's clamp would have been used in confined spaces where a full turn of the brace cannot be achieved. It is fitted with a pawl mechanism - a hinged or pivoted device adapted to fit into a notch of a ratchet wheel to impart forward motion or prevent backward motion. This item would have been used on a rural property in constructing or maintaining infrastructure.This item is an example of a woodworking tool used in the first half of the 20th century prior to the widespread use of power tools.A metal ratchet brace with a wooden handle grip. It has a hinged mechanism device which fits into the notches of the ratchet wheel - a pawl.woodwork tools brace-ratchet -
 Orbost & District Historical Society
brace and bit, first half 20th century
This carpenter's clamp would have been used in confined spaces where a full turn of the brace cannot be achieved. It is fitted with a pawl mechanism - a hinged or pivoted device adapted to fit into a notch of a ratchet wheel to impart forward motion or prevent backward motion. This item would have been used on a rural property in constructing or maintaining infrastructure.This item is an example of a woodworking tool used in the first half of the 20th century prior to the widespread use of power tools.A metal ratchet brace with a wooden handle grip. It has a hinged mechanism device which fits into the notches of the ratchet wheel - a pawl. The drill bit is jammed and the chuck is rusted.woodworking tool brace-and-bit carpentry -
 Orbost & District Historical Society
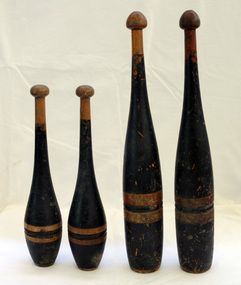
skittles, first half 20th century
Skittles or Nine Pins has been played since the 4th century. It is an old European lawn game. In general, players take turns to throw wooden balls down a lane at the end of which are several wooden skittles in an attempt to knock them all over. It evolved into ten pin bowling, one of the most popular pastimes around the world. This is an indoor children's toy probably played on a carpeted passage inside. Skittles was an indoor game which could be played by the whole family.This item reflects a time when simple games were enjoyed as a family. In rural areas where there was limited access to commercial recreation skittles would have been a popular pastime.Four wooden skittles. They are tapered with a knob at the top. All are painted black with two red bands towards the base. Two are smaller and have rounder bases. Under the bases are T-shaped ridges.recreation skittles indoor-games -
 Orbost & District Historical Society
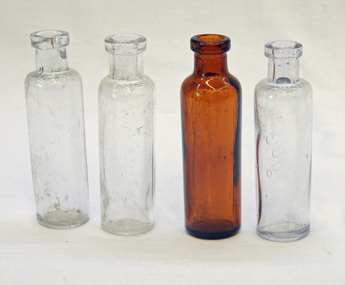
bottles, first half 20th century
... the turn of the 20th century and many bottles were made overseas ...Australia was not self sufficient in glass making until the turn of the 20th century and many bottles were made overseas and shipped to Australia with their contents and when emptied were re-filled with other company’s products. These bottles have an aesthetic element in that the shapes , colours and textures are visually appealing. They reflect the type of glassware that was in circulation in the first half of the 20th century.. Four glass bottles. Three are clear and one (1528.3) is brown. They have non threaded necks with molded rims.bottles -
 Orbost & District Historical Society
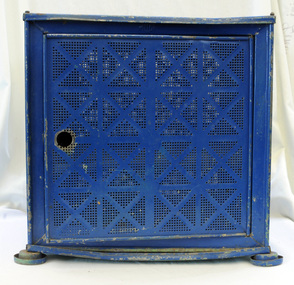
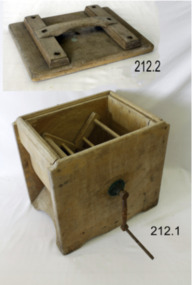
Coolgardie safe, first half 20th century
... chests from the turn of the twentieth century in cities ...Without refrigeration, storage of meat was difficult. Flies were a problem, and it was important to keep meat cool and out of the way of pests. One way of doing this was to use a meat safe: a kind of cupboard designed to store meat and keep it fresh enough to eat. Meat safes are ventilated. They were sometimes made with sides of wire mesh or perforated metal, so that air could circulate around the meat while keeping flies and other animals out.The Coolgardie safe was invented in the late 1890s by Arthur Patrick McCormick, who used the same principle as explorers and travelers in the Outback used to cool their canvas water bags Originally they were handmade using materials to hand. In the early 20th century, Coolgardie Safes were manufactured commercially across Australia, and found their way into homes in both rural and urban areas. These safes incorporated shelving and a door, had metal or wooden frames and Hessian bodies. The feet of the safe were usually placed in a tray of water to keep ants away. (refs ABC-Home; Museum Victoria)The Coolgardie safe was an Australian invention used especially in country areas from the 1890s until the mid 20th century. It began to be replaced by ice chests from the turn of the twentieth century in cities and country towns which had ice works. This item is an example of a domestic appliance commonly used before electricity was widely available for domestic use.A cube-shaped metal Coolgardie safe painted blue. It has a triangular hook on the top for hanging or lifting. There are small feet at bottom . The sides are perforated in a Above the door; Inside a rhomboid shape "WILLOW"food-storage coolgardie-safe domestic -
 Orbost & District Historical Society
dress, first half 20th century
This dress was a wedding dress. Horseshoes have always been a traditional symbol associated with good luck . . Because the horseshoe is " U " shaped, to retain the the good luck forever, it is essential that the horseshoe is hung by the ribbons which are attached to the shoulders. The horseshoe should not be turned upside down or else all the good luck of the marriage may fall out.This dress reflects the needlework skills of women in the first half of the 20th century.A hand-made white full length lace dress with a lace-covered horseshoe attached to the shoulder. It has lace cap sleeves. The dress is lined with cream coloured silk.costume-female dress-wedding needlecraft hand-made horseshoe -
 Orbost & District Historical Society
ratchet brace, first half 20th century
This carpenter's clamp would have been used in confined spaces where a full turn of the brace cannot be achieved. It is fitted with a pawl mechanism - a hinged or pivoted device adapted to fit into a notch of a ratchet wheel to impart forward motion or prevent backward motion. This item would have been used on a rural property in constructing or maintaining infrastructure. This item is an example of a woodworking tool used in the first half of the 20th century prior to the widespread use of power tools. A metal ratchet brace with a wooden handle grip. It has a hinged mechanism device which fits into the notches of the ratchet wheel - a pawl -
 Flagstaff Hill Maritime Museum and Village
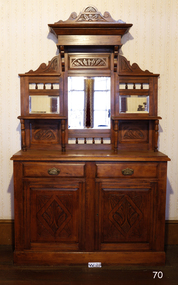
Furniture - Sideboard, Circa 1880
This sideboard was from the home of Henry and Mary Jane Giles, who lived in Mailor's Flat, Wangoom, and Purnim West, Victoria, and is part of the many 19th century items of furniture, linen, and crockery donated to Flagstaff Hill Maritime Village by, Vera and Aurelin Giles. The items are associated with Warrnambool and the Giles Family history. Items donated by the family have come to be known as the “Giles Collection”. Many items in the Lighthouse Keeper’s Cottage were donated by Vera and Aurelin Giles and mostly came from the home of Vera’s parents-in-law, Henry Giles, and his wife Mary Jane (nee Freckleton) who married in 1880 and whose photos are on display in the parlour. Henry was born at Tower Hill in 1858, and was a labourer on the construction of the Warrnambool Breakwater before leaving in 1895 for around seven years to build bridges in NSW. Mary Jane was born in 1860 at Cooramook and she attended Mailor’s Flat State School and where she eventually was to become a student-teacher. After which she became a governess at “Injemiara” where her grandfather, Francis Freckleton, had once owned land. Henry and Mary’s family consisted of six, some of the children were born at Mailor’s Flat, and later some children at Wangoom. They lived with their parents at Wangoom and Purnim west, and this is where Henry died in 1933 and Mary Jane in 1940.The Giles family collection is of social significance at a local level, because it not only illustrates the level of material support the Warrnambool community gave to Flagstaff Hill during it’s establishment. But the Giles collection also gives us today a snapshot into what domestic life was like in early colonial times prior to Federation.Kauri Pine Mirror Backed Sideboard, two drawers and two doors to the base, the doors being carved in the traditional manner with a leaf design, brass swing handles are fitted to each of the drawers. The back has two shelves each supported on two turned columns, three mirrors are fitted into carved panels matching design as doors.The pediment is also carved in the same manner finishing with scrolled edges. Circa 1880. This item is part of the Giles Collection.Marked "Villa Rica" "Ambassadors" "Claro" "50" In pencilflagstaff hill, warrnambool, shipwrecked coast, flagstaff hill maritime museum, shipwreck coast, flagstaff hill maritime village, sideboard, furniture, dresser, giles collection, henry giles, vera giles, tower hill, cooramook, mailor’s flat, wangoom, 19th century furniture, purnim west, 1880s furniture -
 Flagstaff Hill Maritime Museum and Village
Furniture - Chair, Late 19th to early 20th century
Originally the Bow Chair started off life with the name of the ‘Smoker’s Bow Chair’ where originally, it wasn’t designed for grandeur like many chairs of the time, but instead was designed for practicality and comfort. The original Smoker’s Bow Chair was a simple chunkier version of the Windsor Chair design which first appeared in the 1820’s. Although it lacked the high back found on any Windsor Chair of the time, it maintained a heavier, sturdier appearance. The main feature was a hoop or bow which was fashioned from steamed wood. This was then curved to make both the back support and arms. The chair also consisted of a wide seat, supported by 4 splayed, spindle legs. In its original form it was found in many country kitchens of the day as well as in many inns and public houses throughout the United Kingdom. Its name of the "Smoker’s Bow Chair" because the sweeping armrests were the perfect height to support a smokers arm when smoking a pipe.A significant piece of furniture from the late 19th century designed for a specific purpose, smoking. These chairs are now highly collectable and valuable today and avidly sought by collectors of antique furniture.Chair wooden dark brown "Smoker's Bow" chair, with wide and deep seat with broad arms, turned spindles and thick turned legs joined by a double stretcher.Noneflagstaff hill, warrnambool, shipwrecked-coast, flagstaff-hill-maritime-museum, maritime-museum, shipwreck-coast, flagstaff-hill-maritime-village, chair, furniture, captains chair -
 Flagstaff Hill Maritime Museum and Village
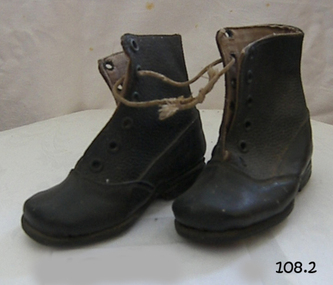
Footwear - Boots, 1900s
Boots are believed to be one of the earliest shoes created when the evolution of footwear had begun. Boots form the building blocks of modern footwear which were merely a two-piece unit covering the foot and lower leg, a century ago. Throughout history, the importance of boots has been about fulfilling the needs of the wearer to be in sync with the prevailing culture. Boots were initially made of various materials like cotton, wool, silk, fur, felt, and leather (including caribou hide and sealskin. Around1000 B.C.E., men wore simple boots made of untanned leather with the fur turned in against the leg to keep it warm. These baglike boots were simple in design and then leashed to the leg by just a thong of leather. A mass produced pair of children's boots from the first quarter of the 20th century no significance other than the items age giving a snapshot into footwear of the period. Boots are unable to be linked to a significant person, family or event.One pair of Antique Victorian/Edwardian young boys-young girls shoes / boots. The boots are a black leather which lace up the front, laces missing bottom soles are leatherNoneflagstaff hill, warrnambool, shipwrecked coast, flagstaff hill maritime museum, shipwreck coast, flagstaff hill maritime village, great ocean road, boots, children's boots, footware -
 Flagstaff Hill Maritime Museum and Village
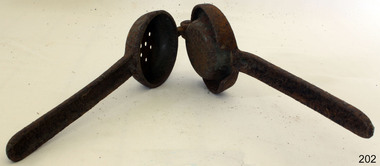
Domestic object - Fruit Press, 1890-1900
... Turkey, though during the 17th and 18th centuries they were ...The fruit juice or lemon squeezer is a small kitchen utensil designed to extract juice from lemons or other citrus fruit such as oranges, grapefruit, or lime. It is designed to separate and crush the pulp of the fruit in a way that is easy to operate. Lemon squeezers can be made from any solid, acid-resistant material, such as plastic, glass, metal (usually aluminum) or ceramic. The oldest known lemon squeezers were found in Kütahya, Turkey and date to the first quarter of the 18th century. These ceramic presses are in the traditional style of Turkish pottery of the 18th century and have a superficial resemblance to today's press equipment with cones, though they are designed differently. These examples were individually made, and specially designed for making the then popular citrus drink sorbet. Lemons are not native to northern Turkey, though during the 17th and 18th centuries they were imported in bulk to Constantinople.The fruit juice press is an example of early 20th century kitchen utensils and is not associated with an historical event, person or place, provenance is unable to be determined at this time and the item is believed to have been made around 1900. This item is currently being used in Flagstaffs Hill village display and regarded as significant as it demonstrates domestic kitchen utensils used around the turn of the 19th century and today is a collectable item. Vintage lemon/citrus fruits squeezer cast iron juicer with two sections hinged together strainer on one section has holes for letting liquid escape.Noneflagstaff hill, warrnambool, shipwrecked coast, flagstaff hill maritime museum, flagstaff hill maritime village, great ocean road, food press, food preparation, fruit juice press, kitchen utensil -
 Flagstaff Hill Maritime Museum and Village
Domestic object - Butter Churn, Late 19th to early 20th century
A butter churn is a device used to convert cream into butter. This is done through a mechanical process, frequently via a pole inserted through the lid of the churn, or via a crank used to turn a rotating device inside the churn. The use of butter is mentioned in biblical works and the earliest butter churn vessels belonging to Beersheba culture in Israel were found in Bir Abu Matar going back to Chalcolithic period between 6500–5500 BC. The butter churn in Europe may have existed as early as the 6th century AD, In the European tradition, the butter churn was primarily a device used by women, and the churning of butter was an essential responsibility along with other household chores. In earlier traditions of butter making, nomadic cultures placed milk in skin bags and produced butter either by shaking the bag manually, or possibly by attaching the bag to a pack animal, and producing butter simply through the movement of the animal. An item used to make butter in a domestic situation by turning a handle until the cream inside has turned to butter.Butter churn, wooden, lid pieces screwed or nailed together. Brass bearing on side with iron turning handle.Handle marked 28204 no other marks to indicate manufacturer or date of productionflagstaff hill, warrnambool, shipwrecked coast, flagstaff hill maritime museum, flagstaff hill maritime village, great ocean road, churn, butter churn, wooden churn, butter making, food, dairy, kitchen utensil -
 Flagstaff Hill Maritime Museum and Village
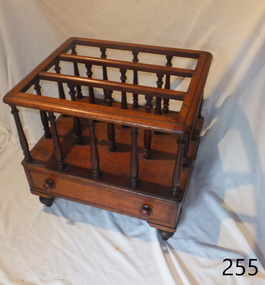
Functional object - Music stand, Early 19th Century before 1860
Thomas Sheraton (1751-1806) appears to have been the first to record the written term “Canterbury” music or magazine stand. In his Cabinet Dictionary of 1803 he refers to “a small music stand” with divisions for holding loose sheet or bound volumes of music. The music stand designed to hold sheet music came into fashion in the late 18th Century in England and was often crafted from mahogany, rosewood or walnut. They were seen as status symbols since music was practiced exclusively by the upper classes of society. In a period when printed music was more widely available and disseminated due to more affordable printing techniques, modern sheet music was very popular and therefore storage for such favoured tunes became a luxury and an opportunity for innovative design by cabinet makers. The Classical period of music, from about 1750 to 1820 and the Romantic Period from around 1815-1910 was the golden age of classical music. And it was at this time that The Canterbury often accompanied the piano in the parlour with styles ranging from Georgian simplicity to Victorian exuberance. Social activities of colonial Victoria would have included evening gatherings of family and friends around the piano to enjoy performances or sing along together with from old and up-to-date music sheets. The Canterbury would also be an elegant and practical place to also store newspapers, magazines, posters and drawings from overseas. The news from ‘home’ would be enjoyed by all. THE INSCRIPTION “Jack Morse” Morse. In 2010 Mr Jack Morse was recognised as one of the “people who have contributed to the long term development of Flagstaff Hill Maritime Village”. He was a member of the Flagstaff hill Planning board and a Current Life Member and had been awarded a Certificate of Service and the provision of an Annual Family Membership for life by Flagstaff Hill. The Morse’s family business, Morse’s Engineering, closed in 2010. It was considered “One of Warrnambool’s longest operating businesses with roots dating to 1883 with the design and manufacture of coaches and buggies, progressing to automotive repairs and later specialising in under-vehicle work” The Canterbury appears to have been handmade prior to 1860 as the dovetails are handmade and there are no saw marks on the drawer sides or back as well the sides. Also the back has small nicks indicating a hand plane or drawer knife was used rather than a saw blade to size the material. Additional indications are that the spindles are slightly different in size meaning they were handmade individually not mass produced. From these indicators the writer believes that the item was made before 1860 as machinery was only used after this date to produce furniture. As yet no individual maker can be attributed to this item, however it is a significant piece historically and is quite valuable if a known maker can be associated with the Canterbury. The item highlights a time in our social history when music played an everyday part in people’s lives as the only entertainment families could enjoy together in their own homes. A Canterbury music stand, having three compartments consisting of twenty turned spindles supporting the slat dividers. A drawer, with two turned wooden handles, is fitted below. The music stand has turnip style turned feet. The drawer front and carcass of the stand are veneered rosewood over a mahogany carcass. The underlined words "Jack Morse" are handwritten underneath the drawer bottom.Hand written inscription on underneath the drawer bottom "Jack Morse".flagstaff hill, warrnambool, shipwrecked-coast, flagstaff-hill, flagstaff-hill-maritime-museum, maritime-museum, shipwreck-coast, flagstaff-hill-maritime-village, canterbury, music rack, magazine rack, music stand, magazine stand, 19th century furniture, occasional furniture, frederick cornwallis, jack morse, morse’s undercar, music, thomas sheraton, regency furniture, music canterbury -
 Flagstaff Hill Maritime Museum and Village
Domestic object - Bowl, Late 19th or early 20th Century
The Process of Making Pottery Decorating, Firing, Glazing, Making, Technical There is a rhythm and flow to clay. It can’t be done all at once! Even the making process! It can take weeks to get everything done, especially if you can only work on your pottery once a week! Even though we have three hour classes, it’s often just not enough time! Here is an overview of some of the processes so you have a bit more grasp on some of the technical stuff! Step One – Design There are SO many ideas out there for making stuff in clay! From delicate porcelain jewellery, through to heavy sculptural work and everything in between. Deciding your direction is sometimes not that easy – when you first start, try everything, you will naturally gravitate to the style that you enjoy! The options and variations are endless and can get a wee bit overwhelming too! Check in with me before you start to ensure your ideas will work, what order you might do things, how you could achieve the look you are seeking and any other technical data required! Step Two – Making Clay is thixotropic. This means that as you work with it, the clay first gets sloppier and wetter, before is begins to dry in the atmosphere. For most things, you simply can’t do all parts of the project at once. An example of work order might look like: Get last weeks work out from the shelves Prepare clay for today’s work – roll your clay, prepare balls for throwing, make the first stage of a pinch pot) Clean up last week’s work and put it on the shelf for bisque firing Check that you have any glazing to do – and do enough of it that you will have time to finish your main project Do the next step of your next project – there might be a further step that can’t be complete immediately, in that case, wrap your work well and put onto the shelves. Letting your work rest for a while can really help keep your work clean and professional looking. Many things require bagging under plastic to keep it ready for work the next week – put your name on the outside of the bag so you can find your work easily. We have stickers and markers. Consider how you want to decorate your work – coloured slip can be applied at a fairly wet stage (remembering that it will make your work even wetter!). Trying to apply slip to dry clay won’t work! If you want to do sgraffito – you will need to keep the work leather hard (a state of dryness where you can still work the clay with a little effort and a little water and care). Step Three – Drying Most of the time your work can go into the rack uncovered to let it dry out for the following week. If you want to continue forming or shaping you will need to double bag your work – put your work on a suitable sized bat and put the bat in a bag so the base of the bag is under the bat, then put another bag over the top of the work and tuck the top of the bag under the bat. If you want to trim (or turn) your thrown work the following week, it should also be double bagged. If your work is large, delicate, or of uneven thicknesses, you should lightly cover your work for drying. When considering the drying process, bare in mind the weather, humidity and wind! The hotter and dryer, the faster things dry and work can dry unevenly in the shelves – this can lead to cracking – another time to lightly cover your work for drying. Step Four – Trimming and Cleaning Up Your work is dry! It is called greenware now and it is at it’s most fragile! Handle everything with two hands. I often refer to soft hands – keep everything gentle and with your fingers spread as much as possible. Try to not pick up things like plates too much, and always with both hands! Before your work can be bisque fired it should be “cleaned up”. You work won’t go into the kiln if it has sharp edges – when glazed, sharp edges turn into razor blades! Use a piece of fly wire to rub the work all over – this will scratch a little so be light handed. Use a knife or metal kidney to scrape any areas that require a bit more dynamic treatment than the fly wire offers! Finally, a very light wipe over with a slightly damp sponge can help soften and soothe all of your edges and dags! Trimming thrown work: If you are planning to trim (or turn) your thrown work (and you should be), make sure you bag it well – your work should be leather hard to almost dry for easiest trimming. Use this step to finish the work completely – use a metal kidney to polish the surface, or a slightly damp sponge to give a freshly thrown look. Wipe the sponge around the rim after trimming, and check the inside of the pot for dags! Trimming slip cast work: Usually I will trim the rims of your work on the wheel the following day to make that stage easier, however you will still need to check your work for lumps and bumps. Last but not least – check that your name is still clearly on the bottom of your work. Step Five – Bisque Firing When the work is completely dry it can go into the bisque kiln. The bisque kiln is fired to 1000°C. This process burns off the water in the clay as well as some of the chemically bound water. The structure of the clay is not altered that much at this temperature. Inside the bisque kiln, the work is stacked a little, small bowl inside a larger bowl and onto a heavy plate. Smaller items like decorations or drink coasters might get stacked several high. Consideration is paid to the weight of the stack and shape of the work. A bisque kiln can fire about one and a half times the amount of work that the glaze kiln can fire. The firing takes about 10 hours to complete the cycle and about two days to cool down. Once it has been emptied the work is placed in the glaze room ready for you to decorate! Step Six – Glazing Decorating your work with colour can be a lot of fun – and time consuming! There are three main options for surface treatment at this stage: Oxide Washes Underglazes Glazes Washes and underglazes do not “glaze” the work – It will still need a layer of glaze to fully seal the clay (washes don’t need glaze on surfaces not designed for food or liquid as they can gloss up a little on their own). Underglazes are stable colourants that turn out pretty much how they look in the jar. They can be mixed with each other to form other colours and can be used like water colours to paint onto your work. Mostly they should have a clear glaze on top to seal them. Oxides are a different species – the pink oxide (cobalt) wash turns out bright blue for instance. They don’t always need a glaze on top, and some glazes can change the colour of the wash! The glazes need no other “glaze” on top! Be careful of unknown glaze interactions – you can put any combination of glaze in a bowl or on a plate, but only a single glaze on the outside of any vertical surface! Glazes are a chemical reaction under heat. We don’t know the exact chemicals in the Mayco glazes we use. I can guess by the way they interact with each other, however, on the whole, you need to test every idea you have, and not run the test on a vertical surface! Simply put, glaze is a layer of glass like substance that bonds with the clay underneath. Clay is made of silica, alumina and water. Glaze is made of mostly silica. Silica has a melting point of 1700°C and we fire to 1240°C. The silica requires a “flux” to help it melt at the lower temperature. Fluxes can be all sorts of chemicals – a common one is calcium – calcium has a melting point of 2500°C, however, together they both melt at a much lower temperature! Colourants are metal oxides like cobalt (blue), chrome (green through black), copper (green, blue, even red!), manganese (black, purple and pink) iron (red brown), etc. Different chemicals in the glaze can have dramatic effects. for example, barium carbonate (which we don’t use) turns manganese bright pink! Other elements can turn manganese dioxide brown, blue, purple and reddish brown. Manganese dioxide is a flux in and of itself as well. So, glazes that get their black and purple colours, often interact with other glazes and RUN! Our mirror black is a good example – it mixes really well with many glazes because it fluxes them – causes them to melt faster. It will also bring out many beautiful colours in the glazes because it’s black colouring most definitely comes from manganese dioxide! Glaze chemistry is a whole subject on it’s own! We use commercial Mayco glazes on purpose – for their huge range of colour possibilities, stability, cool interactions, artistic freedom with the ability to easily brush the glazes on and ease of use. We currently have almost 50 glazes on hand! A major project is to test the interactions of all glazes with each other. That is 2,500 test tiles!!!! I’m going to make the wall behind the wheels the feature wall of pretty colours! Step Seven – Glaze (Gloss or sometimes called “Glost”) Firing Most of the time this is the final stage of making your creation (but not always!) The glaze kiln goes to 1240°C. This is called cone 6, or midrange. It is the low end of stoneware temperatures. Stoneware clays and glazes are typically fired at cone 8 – 10, that is 1260 – 1290°C. The energy requirement to go from 1240°C to 1280°C is almost a 30% more! Our clay is formulated to vitrify (mature, turn “glass-like”) at 1240°, as are our glazes. A glaze kiln take around 12 hours to reach temperature and two to three days to cool down. Sometimes a third firing process is required – this is for decoration that is added to work after the glaze firing. For example – adding precious metals and lustres. this firing temperature is usually around 600 – 800°C depending upon the techniques being used. There are many students interested in gold and silver trims – we will be doing this third type of firing soon! After firing your work will be in the student finished work shelves. Remember to pay for it before you head out the door! There is a small extra charge for using porcelain clay (it’s more than twice the price of regular clay), and for any third firing process! Once your work has been fired it can not turn back into clay for millennia – so don’t fire it if you don’t like it! Put it in the bucket for recycling. https://firebirdstudios.com.au/the-process-of-making-pottery/ The bowl is an example of kitchenware used in the 19th century and still in use today.Bowl white ceramic. Crack on side. Badly stained.Backstamp very faint and unable to be read.flagstaff hill, warrnambool, shipwrecked-coast, flagstaff-hill, flagstaff-hill-maritime-museum, maritime-museum, shipwreck-coast, flagstaff-hill-maritime-village, mixing bowl, food preparation, kitchen equipment, ceramic -
 Flagstaff Hill Maritime Museum and Village
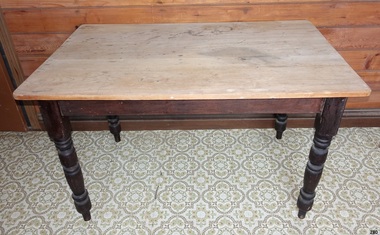
Furniture - Table
Some very early tables were made and used by the Ancient Egyptians around 2500 BC, using wood and alabaster. They were often little more than stone platforms used to keep objects off the floor, though a few examples of wooden tables have been found in tombs. Food and drinks were usually put on large plates deposed on a pedestal for eating. The Egyptians made use of various small tables and elevated playing boards. The Chinese also created very early tables in order to pursue the arts of writing and painting, as did people in Mesopotamia, where various metals were used. The Greeks and Romans made more frequent use of tables, notably for eating, although Greek tables were pushed under a bed after use. The Greeks invented a piece of furniture very similar to the guéridon. Tables were made of marble or wood and metal (typically bronze or silver alloys), sometimes with richly ornate legs. Later, the larger rectangular tables were made of separate platforms and pillars. The Romans also introduced a large, semicircular table to Italy, the mensa lunata. Plutarch mentions use of "tables" by Persians. Furniture during the Middle Ages is not as well known as that of earlier or later periods, and most sources show the types used by the nobility. In the Eastern Roman Empire, tables were made of metal or wood, usually with four feet and frequently linked by x-shaped stretchers. Tables for eating were large and often round or semicircular. A combination of a small round table and a lectern seemed very popular as a writing table. In western Europe, the invasions and internecine wars caused most of the knowledge inherited from the classical era to be lost. As a result of the necessary movability, most tables were simple trestle tables, although small round tables made from joinery reappeared during the 15th century and onward. In the Gothic era, the chest became widespread and was often used as a table. Refectory tables first appeared at least as early as the 17th century, as an advancement of the trestle table; these tables were typically quite long and wide and capable of supporting a sizeable banquet in the great hall or other reception room of a castle. https://en.wikipedia.org/wiki/Table_(furniture)The table is one of the most important items of furniture used in the home, including the kitchen.Table wooden with 4 wooden turned legs and unvarnished raw wood topNone flagstaff hill, warrnambool, shipwrecked-coast, flagstaff-hill, flagstaff-hill-maritime-museum, maritime-museum, shipwreck-coast, flagstaff-hill-maritime-village, table, kitchen furniture -
 Flagstaff Hill Maritime Museum and Village
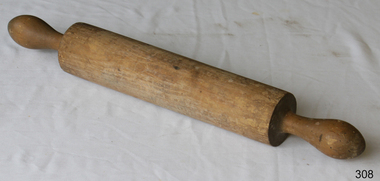
Domestic object - Wooden Rolling Pin, First half of 20th Century
A rolling pin is a simple tool used to flatten dough. The first civilisation known to have used the rolling pin was the Etruscans. Their advanced farming ability, along with a tendency to cultivate many plants and animals never before used as food and turn them into sophisticated recipes, were passed to invading Greeks, Romans, and Western Europeans. Thanks to the Etruscans, these cultures are associated with gourmet cooking. To prepare their inventive foods, the Etruscans also developed a wide range of cooking tools, including the rolling pin. Although written recipes did not exist until the fourth century B.C., the Etruscans documented their love of food and its preparation in murals, on vases, and on the walls of their tombs. Cooking wares are displayed with pride; rolling pins appear to have been used first to thin-roll pasta that was shaped with cutting wheels. They also used rolling pins to make bread (which they called puls) from the large number of grains they grew. Natives of the Americas used more primitive bread-making tools that are favoured and unchanged in many villages. Chefs who try to use genuine methods to preserve recipes are also interested in both materials and tools. Hands are used as "rolling pins" for flattening dough against a surface, but also for tossing soft dough between the cook's two hands until it enlarges and thins by handling and gravity. Tortillas are probably the most familiar bread made this way. Over the centuries, rolling pins have been made of many different materials, including long cylinders of baked clay, smooth branches with the bark removed, and glass bottles. As the development of breads and pastries spread from Southern to Western and Northern Europe, wood from local forests was cut and finished for use as rolling pins. The French perfected the solid hardwood pin with tapered ends to roll pastry that is thick in the middle; its weight makes rolling easier. The French also use marble rolling pins for buttery dough worked on a marble slab. Glass is still popular; in Italy, full wine bottles that have been chilled make ideal rolling pins because they are heavy and cool the dough. Countries known for their ceramics make porcelain rolling pins with beautiful decorations painted on the rolling surface; their hollow centres can be filled with cold water (the same principle as the wine bottle), and cork or plastic stoppers cap the ends. Designs for most rolling pins follow long-established practices, although some unusual styles and materials are made and used. Within the family of wooden rolling pins, long and short versions are made as well as those that are solid cylinders (one-piece rolling pins) instead of the familiar style with handles. Very short pins called mini rolling pins make use of short lengths of wood and are useful for one-handed rolling and popular with children and collectors. Mini pins ranging from 5 to 7 in (12.7-17.8 cm) in length are called texturing tools and are produced to create steam holes and decorations in pastry and pie crusts; crafters also use them to imprint clay for art projects. These mini pins are made of hardwoods (usually maple) or plastic. Wood handles are supplied for both wood and plastic tools, however. Blown glass rolling pins are made with straight walls and are solid or hollow. Ceramic rolling pins are also produced in hollow form, and glass and ceramic models can be filled with water and plugged with stoppers. Tapered glass rolling pins with stoppers were made for many centuries when salt imports and exports were prohibited or heavily taxed. The rolling pin containers disguised the true contents. The straight-sided cylinder is a more recent development, although tapered glass pins are still common craft projects made by cutting two wine bottles in half and sealing the two ends together so that the necks serve as handles at each end.Tiny rolling pins are also twisted into shape using formed wire. The pins will not flatten and smooth pastry, and the handles do not turn. The metal pins are popular as kitchen decorations and also to hang pots, pans, and potholders. https://www.encyclopedia.com/sports-and-everyday-life/food-and-drink/food-and-cooking/rolling-pinThe use of the rolling pin to make thin pastry or pasta.Wooden rolling pin with some damage on cylinder section.None.flagstaff hill, warrnambool, shipwrecked-coast, flagstaff-hill, flagstaff-hill-maritime-museum, maritime-museum, shipwreck-coast, flagstaff-hill-maritime-village, rolling pin, cooking, pastry -
 Flagstaff Hill Maritime Museum and Village
Domestic object - Bowl
The Process of Making Pottery Decorating, Firing, Glazing, Making, Technical There is a rhythm and flow to clay. It can’t be done all at once! Even the making process! It can take weeks to get everything done, especially if you can only work on your pottery once a week! Even though we have three hour classes, it’s often just not enough time! Here is an overview of some of the processes so you have a bit more grasp on some of the technical stuff! Step One – Design There are SO many ideas out there for making stuff in clay! From delicate porcelain jewellery, through to heavy sculptural work and everything in between. Deciding your direction is sometimes not that easy – when you first start, try everything, you will naturally gravitate to the style that you enjoy! The options and variations are endless and can get a wee bit overwhelming too! Check in with me before you start to ensure your ideas will work, what order you might do things, how you could achieve the look you are seeking and any other technical data required! Step Two – Making Clay is thixotropic. This means that as you work with it, the clay first gets sloppier and wetter, before is begins to dry in the atmosphere. For most things, you simply can’t do all parts of the project at once. An example of work order might look like: Get last weeks work out from the shelves Prepare clay for today’s work – roll your clay, prepare balls for throwing, make the first stage of a pinch pot) Clean up last week’s work and put it on the shelf for bisque firing Check that you have any glazing to do – and do enough of it that you will have time to finish your main project Do the next step of your next project – there might be a further step that can’t be complete immediately, in that case, wrap your work well and put onto the shelves. Letting your work rest for a while can really help keep your work clean and professional looking. Many things require bagging under plastic to keep it ready for work the next week – put your name on the outside of the bag so you can find your work easily. We have stickers and markers. Consider how you want to decorate your work – coloured slip can be applied at a fairly wet stage (remembering that it will make your work even wetter!). Trying to apply slip to dry clay won’t work! If you want to do sgraffito – you will need to keep the work leather hard (a state of dryness where you can still work the clay with a little effort and a little water and care). Step Three – Drying Most of the time your work can go into the rack uncovered to let it dry out for the following week. If you want to continue forming or shaping you will need to double bag your work – put your work on a suitable sized bat and put the bat in a bag so the base of the bag is under the bat, then put another bag over the top of the work and tuck the top of the bag under the bat. If you want to trim (or turn) your thrown work the following week, it should also be double bagged. If your work is large, delicate, or of uneven thicknesses, you should lightly cover your work for drying. When considering the drying process, bare in mind the weather, humidity and wind! The hotter and dryer, the faster things dry and work can dry unevenly in the shelves – this can lead to cracking – another time to lightly cover your work for drying. Step Four – Trimming and Cleaning Up Your work is dry! It is called greenware now and it is at it’s most fragile! Handle everything with two hands. I often refer to soft hands – keep everything gentle and with your fingers spread as much as possible. Try to not pick up things like plates too much, and always with both hands! Before your work can be bisque fired it should be “cleaned up”. You work won’t go into the kiln if it has sharp edges – when glazed, sharp edges turn into razor blades! Use a piece of fly wire to rub the work all over – this will scratch a little so be light handed. Use a knife or metal kidney to scrape any areas that require a bit more dynamic treatment than the fly wire offers! Finally, a very light wipe over with a slightly damp sponge can help soften and soothe all of your edges and dags! Trimming thrown work: If you are planning to trim (or turn) your thrown work (and you should be), make sure you bag it well – your work should be leather hard to almost dry for easiest trimming. Use this step to finish the work completely – use a metal kidney to polish the surface, or a slightly damp sponge to give a freshly thrown look. Wipe the sponge around the rim after trimming, and check the inside of the pot for dags! Trimming slip cast work: Usually I will trim the rims of your work on the wheel the following day to make that stage easier, however you will still need to check your work for lumps and bumps. Last but not least – check that your name is still clearly on the bottom of your work. Step Five – Bisque Firing When the work is completely dry it can go into the bisque kiln. The bisque kiln is fired to 1000°C. This process burns off the water in the clay as well as some of the chemically bound water. The structure of the clay is not altered that much at this temperature. Inside the bisque kiln, the work is stacked a little, small bowl inside a larger bowl and onto a heavy plate. Smaller items like decorations or drink coasters might get stacked several high. Consideration is paid to the weight of the stack and shape of the work. A bisque kiln can fire about one and a half times the amount of work that the glaze kiln can fire. The firing takes about 10 hours to complete the cycle and about two days to cool down. Once it has been emptied the work is placed in the glaze room ready for you to decorate! Step Six – Glazing Decorating your work with colour can be a lot of fun – and time consuming! There are three main options for surface treatment at this stage: Oxide Washes Underglazes Glazes Washes and underglazes do not “glaze” the work – It will still need a layer of glaze to fully seal the clay (washes don’t need glaze on surfaces not designed for food or liquid as they can gloss up a little on their own). Underglazes are stable colourants that turn out pretty much how they look in the jar. They can be mixed with each other to form other colours and can be used like water colours to paint onto your work. Mostly they should have a clear glaze on top to seal them. Oxides are a different species – the pink oxide (cobalt) wash turns out bright blue for instance. They don’t always need a glaze on top, and some glazes can change the colour of the wash! The glazes need no other “glaze” on top! Be careful of unknown glaze interactions – you can put any combination of glaze in a bowl or on a plate, but only a single glaze on the outside of any vertical surface! Glazes are a chemical reaction under heat. We don’t know the exact chemicals in the Mayco glazes we use. I can guess by the way they interact with each other, however, on the whole, you need to test every idea you have, and not run the test on a vertical surface! Simply put, glaze is a layer of glass like substance that bonds with the clay underneath. Clay is made of silica, alumina and water. Glaze is made of mostly silica. Silica has a melting point of 1700°C and we fire to 1240°C. The silica requires a “flux” to help it melt at the lower temperature. Fluxes can be all sorts of chemicals – a common one is calcium – calcium has a melting point of 2500°C, however, together they both melt at a much lower temperature! Colourants are metal oxides like cobalt (blue), chrome (green through black), copper (green, blue, even red!), manganese (black, purple and pink) iron (red brown), etc. Different chemicals in the glaze can have dramatic effects. for example, barium carbonate (which we don’t use) turns manganese bright pink! Other elements can turn manganese dioxide brown, blue, purple and reddish brown. Manganese dioxide is a flux in and of itself as well. So, glazes that get their black and purple colours, often interact with other glazes and RUN! Our mirror black is a good example – it mixes really well with many glazes because it fluxes them – causes them to melt faster. It will also bring out many beautiful colours in the glazes because it’s black colouring most definitely comes from manganese dioxide! Glaze chemistry is a whole subject on it’s own! We use commercial Mayco glazes on purpose – for their huge range of colour possibilities, stability, cool interactions, artistic freedom with the ability to easily brush the glazes on and ease of use. We currently have almost 50 glazes on hand! A major project is to test the interactions of all glazes with each other. That is 2,500 test tiles!!!! I’m going to make the wall behind the wheels the feature wall of pretty colours! Step Seven – Glaze (Gloss or sometimes called “Glost”) Firing Most of the time this is the final stage of making your creation (but not always!) The glaze kiln goes to 1240°C. This is called cone 6, or midrange. It is the low end of stoneware temperatures. Stoneware clays and glazes are typically fired at cone 8 – 10, that is 1260 – 1290°C. The energy requirement to go from 1240°C to 1280°C is almost a 30% more! Our clay is formulated to vitrify (mature, turn “glass-like”) at 1240°, as are our glazes. A glaze kiln take around 12 hours to reach temperature and two to three days to cool down. Sometimes a third firing process is required – this is for decoration that is added to work after the glaze firing. For example – adding precious metals and lustres. this firing temperature is usually around 600 – 800°C depending upon the techniques being used. There are many students interested in gold and silver trims – we will be doing this third type of firing soon! After firing your work will be in the student finished work shelves. Remember to pay for it before you head out the door! There is a small extra charge for using porcelain clay (it’s more than twice the price of regular clay), and for any third firing process! Once your work has been fired it can not turn back into clay for millennia – so don’t fire it if you don’t like it! Put it in the bucket for recycling. https://firebirdstudios.com.au/the-process-of-making-pottery/ This bowl is an example of kitchenware used in the 19th century and still in use today.Bowl white ceramic plain that has two sets of edging around lip. Inside bowl has plaster designed to look like cooking mixture.flagstaff hill, warrnambool, shipwrecked-coast, flagstaff-hill, flagstaff-hill-maritime-museum, maritime-museum, shipwreck-coast, flagstaff-hill-maritime-village, kitchen equipment, ceramic -
 Flagstaff Hill Maritime Museum and Village
Domestic object - Bowl, J & G Meakin, Late 19th or early 20th Century
The Process of Making Pottery Decorating, Firing, Glazing, Making, Technical There is a rhythm and flow to clay. It can’t be done all at once! Even the making process! It can take weeks to get everything done, especially if you can only work on your pottery once a week! Even though we have three hour classes, it’s often just not enough time! Here is an overview of some of the processes so you have a bit more grasp on some of the technical stuff! Step One – Design There are SO many ideas out there for making stuff in clay! From delicate porcelain jewellery, through to heavy sculptural work and everything in between. Deciding your direction is sometimes not that easy – when you first start, try everything, you will naturally gravitate to the style that you enjoy! The options and variations are endless and can get a wee bit overwhelming too! Check in with me before you start to ensure your ideas will work, what order you might do things, how you could achieve the look you are seeking and any other technical data required! Step Two – Making Clay is thixotropic. This means that as you work with it, the clay first gets sloppier and wetter, before is begins to dry in the atmosphere. For most things, you simply can’t do all parts of the project at once. An example of work order might look like: Get last weeks work out from the shelves Prepare clay for today’s work – roll your clay, prepare balls for throwing, make the first stage of a pinch pot) Clean up last week’s work and put it on the shelf for bisque firing Check that you have any glazing to do – and do enough of it that you will have time to finish your main project Do the next step of your next project – there might be a further step that can’t be complete immediately, in that case, wrap your work well and put onto the shelves. Letting your work rest for a while can really help keep your work clean and professional looking. Many things require bagging under plastic to keep it ready for work the next week – put your name on the outside of the bag so you can find your work easily. We have stickers and markers. Consider how you want to decorate your work – coloured slip can be applied at a fairly wet stage (remembering that it will make your work even wetter!). Trying to apply slip to dry clay won’t work! If you want to do sgraffito – you will need to keep the work leather hard (a state of dryness where you can still work the clay with a little effort and a little water and care). Step Three – Drying Most of the time your work can go into the rack uncovered to let it dry out for the following week. If you want to continue forming or shaping you will need to double bag your work – put your work on a suitable sized bat and put the bat in a bag so the base of the bag is under the bat, then put another bag over the top of the work and tuck the top of the bag under the bat. If you want to trim (or turn) your thrown work the following week, it should also be double bagged. If your work is large, delicate, or of uneven thicknesses, you should lightly cover your work for drying. When considering the drying process, bare in mind the weather, humidity and wind! The hotter and dryer, the faster things dry and work can dry unevenly in the shelves – this can lead to cracking – another time to lightly cover your work for drying. Step Four – Trimming and Cleaning Up Your work is dry! It is called greenware now and it is at it’s most fragile! Handle everything with two hands. I often refer to soft hands – keep everything gentle and with your fingers spread as much as possible. Try to not pick up things like plates too much, and always with both hands! Before your work can be bisque fired it should be “cleaned up”. You work won’t go into the kiln if it has sharp edges – when glazed, sharp edges turn into razor blades! Use a piece of fly wire to rub the work all over – this will scratch a little so be light handed. Use a knife or metal kidney to scrape any areas that require a bit more dynamic treatment than the fly wire offers! Finally, a very light wipe over with a slightly damp sponge can help soften and soothe all of your edges and dags! Trimming thrown work: If you are planning to trim (or turn) your thrown work (and you should be), make sure you bag it well – your work should be leather hard to almost dry for easiest trimming. Use this step to finish the work completely – use a metal kidney to polish the surface, or a slightly damp sponge to give a freshly thrown look. Wipe the sponge around the rim after trimming, and check the inside of the pot for dags! Trimming slip cast work: Usually I will trim the rims of your work on the wheel the following day to make that stage easier, however you will still need to check your work for lumps and bumps. Last but not least – check that your name is still clearly on the bottom of your work. Step Five – Bisque Firing When the work is completely dry it can go into the bisque kiln. The bisque kiln is fired to 1000°C. This process burns off the water in the clay as well as some of the chemically bound water. The structure of the clay is not altered that much at this temperature. Inside the bisque kiln, the work is stacked a little, small bowl inside a larger bowl and onto a heavy plate. Smaller items like decorations or drink coasters might get stacked several high. Consideration is paid to the weight of the stack and shape of the work. A bisque kiln can fire about one and a half times the amount of work that the glaze kiln can fire. The firing takes about 10 hours to complete the cycle and about two days to cool down. Once it has been emptied the work is placed in the glaze room ready for you to decorate! Step Six – Glazing Decorating your work with colour can be a lot of fun – and time consuming! There are three main options for surface treatment at this stage: Oxide Washes Underglazes Glazes Washes and underglazes do not “glaze” the work – It will still need a layer of glaze to fully seal the clay (washes don’t need glaze on surfaces not designed for food or liquid as they can gloss up a little on their own). Underglazes are stable colourants that turn out pretty much how they look in the jar. They can be mixed with each other to form other colours and can be used like water colours to paint onto your work. Mostly they should have a clear glaze on top to seal them. Oxides are a different species – the pink oxide (cobalt) wash turns out bright blue for instance. They don’t always need a glaze on top, and some glazes can change the colour of the wash! The glazes need no other “glaze” on top! Be careful of unknown glaze interactions – you can put any combination of glaze in a bowl or on a plate, but only a single glaze on the outside of any vertical surface! Glazes are a chemical reaction under heat. We don’t know the exact chemicals in the Mayco glazes we use. I can guess by the way they interact with each other, however, on the whole, you need to test every idea you have, and not run the test on a vertical surface! Simply put, glaze is a layer of glass like substance that bonds with the clay underneath. Clay is made of silica, alumina and water. Glaze is made of mostly silica. Silica has a melting point of 1700°C and we fire to 1240°C. The silica requires a “flux” to help it melt at the lower temperature. Fluxes can be all sorts of chemicals – a common one is calcium – calcium has a melting point of 2500°C, however, together they both melt at a much lower temperature! Colourants are metal oxides like cobalt (blue), chrome (green through black), copper (green, blue, even red!), manganese (black, purple and pink) iron (red brown), etc. Different chemicals in the glaze can have dramatic effects. for example, barium carbonate (which we don’t use) turns manganese bright pink! Other elements can turn manganese dioxide brown, blue, purple and reddish brown. Manganese dioxide is a flux in and of itself as well. So, glazes that get their black and purple colours, often interact with other glazes and RUN! Our mirror black is a good example – it mixes really well with many glazes because it fluxes them – causes them to melt faster. It will also bring out many beautiful colours in the glazes because it’s black colouring most definitely comes from manganese dioxide! Glaze chemistry is a whole subject on it’s own! We use commercial Mayco glazes on purpose – for their huge range of colour possibilities, stability, cool interactions, artistic freedom with the ability to easily brush the glazes on and ease of use. We currently have almost 50 glazes on hand! A major project is to test the interactions of all glazes with each other. That is 2,500 test tiles!!!! I’m going to make the wall behind the wheels the feature wall of pretty colours! Step Seven – Glaze (Gloss or sometimes called “Glost”) Firing Most of the time this is the final stage of making your creation (but not always!) The glaze kiln goes to 1240°C. This is called cone 6, or midrange. It is the low end of stoneware temperatures. Stoneware clays and glazes are typically fired at cone 8 – 10, that is 1260 – 1290°C. The energy requirement to go from 1240°C to 1280°C is almost a 30% more! Our clay is formulated to vitrify (mature, turn “glass-like”) at 1240°, as are our glazes. A glaze kiln take around 12 hours to reach temperature and two to three days to cool down. Sometimes a third firing process is required – this is for decoration that is added to work after the glaze firing. For example – adding precious metals and lustres. this firing temperature is usually around 600 – 800°C depending upon the techniques being used. There are many students interested in gold and silver trims – we will be doing this third type of firing soon! After firing your work will be in the student finished work shelves. Remember to pay for it before you head out the door! There is a small extra charge for using porcelain clay (it’s more than twice the price of regular clay), and for any third firing process! Once your work has been fired it can not turn back into clay for millennia – so don’t fire it if you don’t like it! Put it in the bucket for recycling. https://firebirdstudios.com.au/the-process-of-making-pottery/This bowl was made by renowned pottery company J & G Meakin of England. The firm was established in the mid-1800's. The bowl is an example of kitchenware used in the 19th century and still in use today.Bowl; white ceramic, round and tapering inwards towards base. Made by J and G Meakin England.On base, 'Ironstone China Reg SOL 391413' with symbolflagstaff hill, flagstaff hill maritime museum and village, warrnambool, maritime museum, maritime village, great ocean road, shipwreck coast, mixing bowl, food preparation, j & g meakin, pottery, stoke-on-trent, kitchen equipment, ceramic -
 Flagstaff Hill Maritime Museum and Village
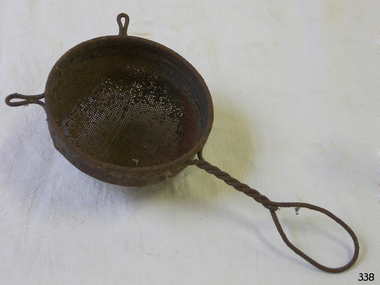
Domestic object - Strainer
Take a stroll through the average beverage aisle in your supermarket, and you might get the impression that tea has always come in small boxes with disposable tea bags. But before those easy to come by boxes, there was the rich and intriguing history of the tea strainer, a beautiful little tool that has helped our ancestors enjoy loose leaf tea for hundreds of years. Enjoying loose-leaf tea, and becoming familiar with this tool, can help spark an appreciation for your tea strainer and infuser collection, or simply inspire you to grow one. Documentation of tea tools such as the tea strainer appear in ancient history, the earliest models were likely made of bamboo, and later evolved into stainless steel, sterling silver, china, porcelain, silicon, and linen. During the Tang Dynasty in China, a small book called “Classic of Tea” was written describing tea utensils, and they were made to help Buddhist monks keep living things (such as small bugs) out of the drinking water. However, using a tea tool to keep run away tea leaves out of a cup did not become a cited use of the strainer until the 17th century when Dutch merchants made tea more readily available to those outside of the Chinese dynasty. British royals then increased the popularity of tea as their preferred beverage, and it was not long before a newfound fanaticism for tea in Great Britain spread to the American colonies, as did a growing demand for products that could separate loose tea leaves from liquid with ease and flair. Why did people use a strainer to separate out tea leaves in Great Britain and not in China? While the method of serving tea from a teapot with the tea loose in the pot was a practice used in both countries, the reason China may not have required a tool to remove leaves from their cup likely had to do with the types of tea leaves they were producing. The British owned tea plantations, in countries such as India, produced finer black tea leaves that did not require as much space to expand inside of a tea pot, where as the leaves prepared on the Chinese plantations would expand far more in the pot, and were therefore less likely to land or be bothersome inside a tea cup. This common approach to serving tea with smaller tea leaves required a solution to avoid ending up with a cup, and mouth, full of tea leaves. The obvious solution was a strainer basket. In the Victorian era, tea strainer baskets, similar to those still used in tea parlors today, were made to sit on top of the cup to capture the leaves when pouring the tea from a tea pot into the individual cups. Another solution was a tea-removing device called a mote spoon. Mote spoons act as search and rescue spoons to remove tea leaves from individual teacups. The tea would be brewed loose in the teapot, so any tea that ended up in the cup could be removed with a long handled spoon with holes in the spoon to remove rogue tea leaves and keep the steeped water in the cup. The handle also helped keep the teapot spout free of leaves and could help unclog any leaves trapped when pouring. Stainless steel tea strainers and tea infusers gained popularity in the late 19th century. Big name tea strainer producers, such as Tiffany and Gorham, could use fine silver to create quality, heavy, and sturdy strainers, for those who could afford it. There were many varieties of strainers at that time, but it was more likely that smaller designers who could not afford to mass-produce these quality strainers out of silver made them into unique shapes to attract consumers with lighter wallets. And borne was the tea strainer we are accustomed to today. Things took an unexpected turn for the tea strainer in the early 1900s when Thomas Sullivan, a tea merchant, shipped out tea samples in small silk bags. Customers did not realize that they were supposed to remove the tea from the bags, and instead boiled the tea, bag and all! The convenience of tossing out the leaves is obvious, and the popularity of tea bags is still seen today. Most premium bags of tea we are accustomed to today are frequently packaged loose for consumption, and when they are available in bags, the leaves are often crowded and do not have enough space to expand. While pyramid tea bags have become a more recent solution to this problem, due to the additional space at the top of the bag, enjoying a variety of quality tea is easier with a tea strainer in your arsenal. Besides, with the wide variety of strainers for your cup or pot in versatile materials such as mesh, silver, or a novelty silicone cartoon shape, loose tea can still reign supreme. Tea strainers sometimes do require more cleanup and measuring, but the experience and quality is always worth the effort. Besides, strainers also allow for mixing favorite tea blends together for an extra dose of delicious creativity! https://www.teamuse.com/article_170413.html The strainer provided the convenience of separating the tea leaves for disposal later.Metal strainer, bowl shaped, with mesh and twisted wire handle.Noneflagstaff hill, warrnambool, shipwrecked-coast, flagstaff-hill, flagstaff-hill-maritime-museum, maritime-museum, shipwreck-coast, flagstaff-hill-maritime-village, strainer -
 Flagstaff Hill Maritime Museum and Village
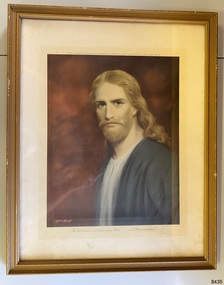
Print - Religious Portrait, Herbert Beecroft, artist, The Lord turned and looked upon Peter … and Peter remembered, 1947
This print of Christ is slightly smaller than the original 1927 oil painting by Herbert Beecroft, which is titled “Christ” and measures, in centimetres, 60 high by 50 wide. The original is displayed at John Wesley’s House & The Museum of Methodism in Islington, England. The title of the print is taken from the Holy Bible, from the New Testament book of Luke, chapter 22 verse 61, which is a famous Christian account of Jesus being betrayed by Peter, which leads to Jesus’ crucifixion; “And the Lord turned, and looked upon Peter. And Peter remembered the word of the Lord, how he had said unto him, Before the cock crow, thou shalt deny me thrice.”. The print was published in 1942 by the National Sunday School Union in England, now known as the National Christian Education Council. The NSSU was established in Britain in 1803 to promote Sunday Schools in Britain and overseas. The organisation produced many publications including training manuals and materials for Sunday School teachers. Herbert Beecroft 1864-1951, also known as Lawrence Herbert Beecroft, was an early 20th-century artist. He and his wife emigrated from England to Sydney, Australia, in 1905. He worked as a painter, illustrator, miniaturist ‘lightning cartoonist’, and lecturer. From 1927 Beecroft painted a series of portraits of Jesus Christ, prints of which made many worldwide sales. He entered a miniature portrait in the 1921 inaugural Archibald Prize competition. It was one of forty-one entries but the title was unknown. It is highly probable that it was JF Archibald, the person who endowed the prize, first awarded in 1921. This print of Christ, originally painted by Herbert Beecroft, represents the social movement in the early 20th century to educate all children in good morals and Christianity.A religious portrait of the artist’s impression of Jesus. The print is in a gilt timber frame behind glass. The frame has eyelets and wire for hanging. The backing paper lifts to reveal a handwritten pencil inscription. The portrait shows a male figure from the waist up facing the viewer but turned slightly to his right. He has long wavy blond hair, a moustache and a beard. He wears a blue-grey robe over a collarless white shirt. The background is red-brown. It is the artist’s impression of Jesus. The whole frame-mat has script text above and below the print, giving its title, and details of the publisher and producer. This print was produced from an original 1927 oil painting by Herbert Beecroft. It was published in 1942 by The National Sunday School Union in London and produced by Frost & Reed Ltd. England. Handwritten script on the mat; “Published in 1942 by the National Sunday School Union, 4 Black Friars Lane, London, EC4. Produced by Frost & Reed Ltd., Bristol & London. Printed in England. Copyright.” and, “The Lord turned and looked upon Peter … and Peter remembered” Signature on bottom left “Herbert Beecroft” In pencil on backboard under back paper “H 89 / 12”. Pen on white tape “155”flagstaff hill, warrnambool, maritime village, maritime museum, shipwreck coast, great ocean road, print, religious, vintage, 1942, herbert beecroft, lawrence herbert beecroft, archibald prize winner, early 20th-century, artist, oil painting, luke 22:61 -
 Blacksmith's Cottage and Forge
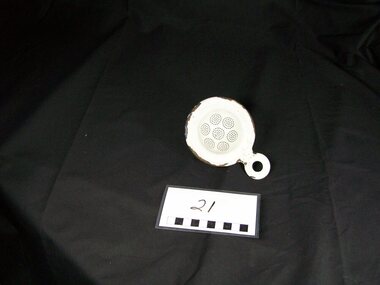
Strainer, Tea, 1920 (estimated); Approx. 1920
A tea strainer is a type of strainer that is placed over or in a teacup to catch tea leaves. When tea is brewed in the traditional manner in a teapot, the tea leaves are not contained in teabags, but rather are freely suspended in the water. As the leaves themselves may be distasteful, it is usual to filter them out with a tea strainer. Strainers usually fit into the top of the cup to catch the leaves as the tea is poured. Some deeper tea strainers can also be used to brew single cups of tea, much as teabags or brewing baskets are used - the strainer full of leaves is set in a cup to brew the tea, and then removed, along with the spent tea leaves, when the tea is ready to drink. By using a tea strainer in this way, the same leaves can be used to brew multiple cups. Tea strainer use declined in the 20th century with mass production of the tea bag, but is still preferred among connoisseurs who claim that keeping the leaves packed in a bag, rather than freely circulating, inhibits diffusion. Many assert that inferior ingredients, namely dust quality tea, are often used in tea bags. Tea strainers are usually either sterling silver, stainless steel, or china. Strainers often come in a set, with the strainer part and a small saucer for it to sit in between cups. Tea strainers in themselves have often been turned into artistic masterpieces of the silver- and goldsmith's craft, as well as rarer specimens of fine porcelain. Brewing baskets (or infusing baskets) resemble tea strainers, but are more typically put in the top of a teapot to contain the tea leaves during brewing. There is no definitive boundary between a brewing basket and a tea strainer, and the same tool might be used for both purposes. Tea strainers are also used by patients trying to pass a kidney stone. The patient urinates through the strainer, thereby ensuring that, if a stone is passed, it will be caught for evaluation and diagnosis. Source: www.wikipedia.net This item has historical significance in the evolution of Tea drinking.The Strainer being needed if a cup of tea was to be poured without tea leaves being present in the tea liquid.As Tea bags have been introduced into everyday life tea strainers are an item of the past. This particular tea strainer was an item for everyday useage.White enamel tea strainer, round in shape with flange edges, 7 small circle areas of perforations in the concave area of the utensil, a small perforated handle (same material) at one outer area of the item.domestic, kitchen, food, preparation, white, enamel, tea, strainer, beverage, perforated, utensil, round, flanges, leaves -
 Glen Eira Historical Society
Album - Album page, Bureel (Kooyong Road), Circa 1972
This photograph is part of the Caulfield Historical Album 1972. This album was created in approximately 1972 as part of a project by the Caulfield Historical Society to assist in identifying buildings worthy of preservation. The album is related to a Survey the Caulfield Historical Society developed in collaboration with the National Trust of Australia (Victoria) and Caulfield City Council to identify historic buildings within the City of Caulfield that warranted the protection of a National Trust Classification. Principal photographer thought to be Trevor Hart, member of Caulfield Historical Society. Most photographs were taken between 1966-1972 with a small number of photographs being older and from unknown sources. All photographs are black and white except where stated, with 386 photographs over 198 pages. From: Glen Eira Heritage Management Plan 1996 by Andrew Ward In 1856, John Allee, a builder from Brighton, purchased C.A. 37 on the south-west corner of Glenhuntly and Kooyong Roads. The land comprised just over 45 acres. By 1863, Francis John Sidney Stephen, a lawyer and cousin of J. Wilberforce Stephen, owned most of lot 37. By 1866, Stephen had a built a "small mansion" named ''Burreel". It was a brick house and Stephen lived there until 1882. By 1884, Mrs Buxton of Hillside Terrace, East Melbourne, had purchased the property. Richard Buxton, a gentleman was listed as occupant and the house described as "brick, eight rooms". NAV was £300. Richard Buxton continued residency in 1887 however in 1888, George Allen, music seller, became occupant. At that time the house had thirteen rooms on twenty-three acres of land. Twelve people lived there and NAV was £920. In 1900, Daniel Luxton, stock and sharebroker and the Honourable John Taverner, M.H.A. leased the property. Fourteen people lived there. Mrs Buxton continued as owner. By 1910, ownership had passed to Mrs Mary Neate, who converted the house to a nursing home. The land had been subdivided by 1913 and sold by ''Buxtons Estate". Burreel Avenue, Baxter, Buxton and Hoddle Streets were created. "Burreel" was rated to Burreel Avenue and stood on lot 13 with frontages to Burreel Avenue and Kooyong Road of 198' and 214'. The house had ten rooms. NAV was £60. Mary Neate, a nurse, continued as owner/ operator of ''Burreel" nursing home in 1927. At that time there were sixteen rooms and fourteen residents. NAV was £100. Mrs Neat remained there until 1947. In 1948, the house was turned into apartments. In the 1980's, the Alexander family purchased it and restored it to a private residence.Burreel 331 Kooyong Road, ELSTERNWICK VIC 3185 - Property No B4950 National Trust https://vhd.heritagecouncil.vic.gov.au/places/65648 This is a large and substantially intact example of the grand villas of nineteenth century Melbourne. The bulk of the house most probably was built in 1866-1868 for Francis John Sidney Stephen, a prominent and highly regarded Melbourne solicitor and a member of an illustrious legal family. Stephen conducted a lucrative private practice and in 1845 was appointed first solicitor to the City of Melbourne; a position he held until his death in 1895. He took an active part in the development of Caulfield and was Shire President in 1874 and 1877. He was a resident at Burreel from 1868 to 1882. The house has evolved in stages, the rear wings possibly remaining from a house built during the 1850s. The existing ornate cast iron verandah was probably built between 1882 and 1888 during the residence of Richard Buckhurst Buxted, a notable boom period auctioneer and real estate agent. George Allan, the founder of Allan's music store, was another important occupier from 1888 to 1991. Bureel's essentially residential quality has been retained and the interior has been well preserved. The significance of this building does not rest in any single unusual outstanding architectural feature, or in its association with a particularly prominent member of society in the past, but rather in the consistent integrity of both the interior and exterior, which results in the survival of an outstanding example of this type of residential building and its associations with two notable citizens. Classified:11/08/1990Page 113 of photograph album with 1 photograph of Burreel in its garden.Handwritten: Bureel [top left] / 113 [bottom left]trevor hart, caulfield, caulfield north, kooyong road, thomas king, mansion, 1860's, bureel, burreel, francis john sidney stephen, city of melbourne, shire president, 1850's, verandah, nursing home, john allee, ornamented corner stones, new orleans manner, plaster rendered, mrs luxton, vincent willis, alexander family, victorian architectural style, ornate cast iron work, lawyers, brick houses, richard buxton, richard buckhurst buxton, george allen, george leavis allan, allans music, daniel luxton, john taverner, mary neate, buxtons estate, land subdivision, mary neat, gardens -
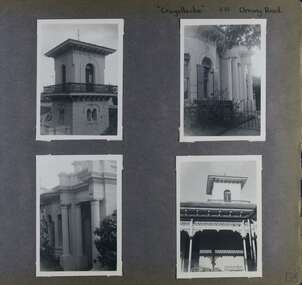 Glen Eira Historical Society
Album - Album page, Craigellachie, 273 Orrong Road, Circa 1972
... the turn of the twentieth century and occupied fifth place amongst ...This photograph is part of the Caulfield Historical Album 1972. This album was created in approximately 1972 as part of a project by the Caulfield Historical Society to assist in identifying buildings worthy of preservation. The album is related to a Survey the Caulfield Historical Society developed in collaboration with the National Trust of Australia (Victoria) and Caulfield City Council to identify historic buildings within the City of Caulfield that warranted the protection of a National Trust Classification. Principal photographer thought to be Trevor Hart, member of Caulfield Historical Society. Most photographs were taken between 1966-1972 with a small number of photographs being older and from unknown sources. All photographs are black and white except where stated, with 386 photographs over 198 pages. From Victorian Heritage Database citation HO40 Craigellachie 2b & 2c Lynedoch Avenue Caulfield North https://vhd.heritagecouncil.vic.gov.au/places/35209 as at (28/10/2020) Craigellachie" is situated at No. 2B Lynedoch Avenue, Caulfield North, and was built for the noted investor, pastoralist and politician, William Pearson, not earlier than 1864 and possible in 1876, undergoing several substantial and contributory extensions during the nineteenth century. It is historically and aesthetically significant. From Victorian Heritage Database citation for HO40 Craigellachie https://vhd.heritagecouncil.vic.gov.au/places/35209 as at (28/10/2020) It is historically significant (Criterion A) as the Melbourne home of William Pearson, MLA, MLC and principal shareholder in Walhalla's Long Tunnel Extended Gold Mining Co. which sustained the township well past the turn of the twentieth century and occupied fifth place amongst Victoria's richest mines. It is aesthetically significant (Criterion E) for its capacity to demonstrate Pearson's continuing financial success throughout the mid to late nineteenth century, the additions associated with the tower being most noteworthy as an example of the lasting appeal of the Italian Style, popularized in the pattern books of the day. The Ailanthus altissima (Tree of Heaven) is significant as an outstanding example of a species that is rare in cultivation, as well as for its very high aesthetic value. The Araucaria bidwilli is notable as a fine example of a species infrequently planted in Melbourne and rarely found in private suburban gardens.Page 156 of Photograph Album with four landscape photographs of Craigellachie - near views of architectural features. Handwritten: "Craigellachie" 273 Orrong Road [top right] / 156 [bottom right]trevor hart, verandah, orrong road, tower, curved windows, decorative brackets, italianate, mansion, 1870's, william pearson, inkerman street, apartments, spire, decorative plaster work, rendered walls, ornamentation, arched windows, moulded ornaments, 1860's, lynedoch avenue, classical style, caulfield north, craigellachie, cast iron work, victorian style, balaclava, st kilda east, gardens, ailanthus altissima, araucaria bidwilli, porches, trees -
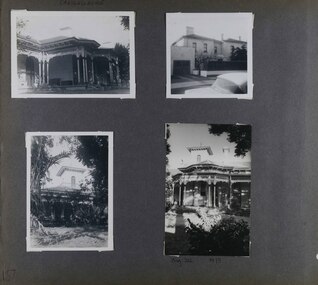 Glen Eira Historical Society
Album - Album page, Craigellachie, 273 Orrong Road, Circa 1972
... the turn of the twentieth century and occupied fifth place amongst ...This photograph is part of the Caulfield Historical Album 1972. This album was created in approximately 1972 as part of a project by the Caulfield Historical Society to assist in identifying buildings worthy of preservation. The album is related to a Survey the Caulfield Historical Society developed in collaboration with the National Trust of Australia (Victoria) and Caulfield City Council to identify historic buildings within the City of Caulfield that warranted the protection of a National Trust Classification. Principal photographer thought to be Trevor Hart, member of Caulfield Historical Society. Most photographs were taken between 1966-1972 with a small number of photographs being older and from unknown sources. All photographs are black and white except where stated, with 386 photographs over 198 pages. From Victorian Heritage Database citation for HO40 Craigellachie 2b & 2c Lynedoch Avenue Caulfield North https://vhd.heritagecouncil.vic.gov.au/places/35209 as at (28/10/2020) Craigellachie" is situated at No. 2B Lynedoch Avenue, Caulfield North, and was built for the noted investor, pastoralist and politician, William Pearson, not earlier than 1864 and possible in 1876, undergoing several substantial and contributory extensions during the nineteenth century. It is historically and aesthetically significant. From Victorian Heritage Database citation for HO40 Craigellachie https://vhd.heritagecouncil.vic.gov.au/places/35209 as at (28/10/2020) It is historically significant (Criterion A) as the Melbourne home of William Pearson, MLA, MLC and principal shareholder in Walhalla's Long Tunnel Extended Gold Mining Co. which sustained the township well past the turn of the twentieth century and occupied fifth place amongst Victoria's richest mines. It is aesthetically significant (Criterion E) for its capacity to demonstrate Pearson's continuing financial success throughout the mid to late nineteenth century, the additions associated with the tower being most noteworthy as an example of the lasting appeal of the Italian Style, popularized in the pattern books of the day. The Ailanthus altissima (Tree of Heaven) is significant as an outstanding example of a species that is rare in cultivation, as well as for its very high aesthetic value. The Araucaria bidwilli is notable as a fine example of a species infrequently planted in Melbourne and rarely found in private suburban gardens.Page 157 - four photographs of Craigellachie - exterior views. Handwritten: CRAIGELLACHIE [top left] / Neg 212 1973 [under bottom right photo] / 157 [bottom left]trevor hart, verandah, orrong road, tower, cast iron lacework, curved windows, decorative brackets, italianate, mansion, 1870's, william pearson, inkerman street, apartments, spire, decorative plaster work, rendered walls, arched windows, moulded ornaments, 1860's, lynedoch avenue, classical style, caulfield north, craigellachie, st kilda east, late victorian style, garages (private), gardens, cast iron work, ailanthus altissima, araucaria bidwilli, trees -
 Glen Eira Historical Society
Album - Album page, Craigellachie, 273 Orrong Road, Circa 1972
... the turn of the twentieth century and occupied fifth place amongst ...This photograph is part of the Caulfield Historical Album 1972. This album was created in approximately 1972 as part of a project by the Caulfield Historical Society to assist in identifying buildings worthy of preservation. The album is related to a Survey the Caulfield Historical Society developed in collaboration with the National Trust of Australia (Victoria) and Caulfield City Council to identify historic buildings within the City of Caulfield that warranted the protection of a National Trust Classification. Principal photographer thought to be Trevor Hart, member of Caulfield Historical Society. Most photographs were taken between 1966-1972 with a small number of photographs being older and from unknown sources. All photographs are black and white except where stated, with 386 photographs over 198 pages. From Victorian Heritage Database citation for HO40 Craigellachie 2b & 2c Lynedoch Avenue Caulfield North https://vhd.heritagecouncil.vic.gov.au/places/35209 as at (28/10/2020) Craigellachie" is situated at No. 2B Lynedoch Avenue, Caulfield North, and was built for the noted investor, pastoralist and politician, William Pearson, not earlier than 1864 and possible in 1876, undergoing several substantial and contributory extensions during the nineteenth century. It is historically and aesthetically significant. From Victorian Heritage Database citation for HO40 Craigellachie https://vhd.heritagecouncil.vic.gov.au/places/35209 as at (28/10/2020) It is historically significant (Criterion A) as the Melbourne home of William Pearson, MLA, MLC and principal shareholder in Walhalla's Long Tunnel Extended Gold Mining Co. which sustained the township well past the turn of the twentieth century and occupied fifth place amongst Victoria's richest mines. It is aesthetically significant (Criterion E) for its capacity to demonstrate Pearson's continuing financial success throughout the mid to late nineteenth century, the additions associated with the tower being most noteworthy as an example of the lasting appeal of the Italian Style, popularized in the pattern books of the day. The Ailanthus altissima (Tree of Heaven) is significant as an outstanding example of a species that is rare in cultivation, as well as for its very high aesthetic value. The Araucaria bidwilli is notable as a fine example of a species infrequently planted in Melbourne and rarely found in private suburban gardens.Page 158 of Photograph Album with one image of Craigellachie's exterior. Handwritten: "Craigellachie" 273 Orrong Road [top right] / 158 [bottom right]trevor hart, verandah, orrong road, tower, curved windows, decorative brackets, rendered, craigellache, italianate, mansion, 1870's, william pearson, inkerman street, apartments, spire, decorative plaster work, rendered walls, ornamentation, arched windows, moulded ornaments, 1860's, lynedoch avenue, classical style, caulfield north, craigellachie, land subdivision, gardens, late victorian style, cast iron work, st kilda east, ailanthus altissima, araucaria bidwilli, trees -
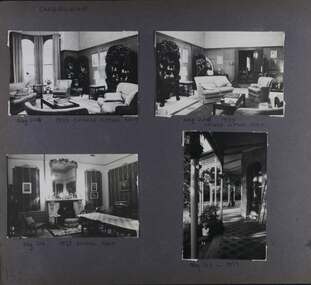 Glen Eira Historical Society
Album - Album page, Craigellachie, 273 Orrong Road, Circa 1972
... the turn of the twentieth century and occupied fifth place amongst ...This photograph is part of the Caulfield Historical Album 1972. This album was created in approximately 1972 as part of a project by the Caulfield Historical Society to assist in identifying buildings worthy of preservation. The album is related to a Survey the Caulfield Historical Society developed in collaboration with the National Trust of Australia (Victoria) and Caulfield City Council to identify historic buildings within the City of Caulfield that warranted the protection of a National Trust Classification. Principal photographer thought to be Trevor Hart, member of Caulfield Historical Society. Most photographs were taken between 1966-1972 with a small number of photographs being older and from unknown sources. All photographs are black and white except where stated, with 386 photographs over 198 pages. From Victorian Heritage Database citation for HO40 Craigellachie 2b & 2c Lynedoch Avenue Caulfield North https://vhd.heritagecouncil.vic.gov.au/places/35209 as at (28/10/2020) Craigellachie" is situated at No. 2B Lynedoch Avenue, Caulfield North, and was built for the noted investor, pastoralist and politician, William Pearson, not earlier than 1864 and possible in 1876, undergoing several substantial and contributory extensions during the nineteenth century. It is historically and aesthetically significant. From Victorian Heritage Database citation for HO40 Craigellachie https://vhd.heritagecouncil.vic.gov.au/places/35209 as at (28/10/2020) It is historically significant (Criterion A) as the Melbourne home of William Pearson, MLA, MLC and principal shareholder in Walhalla's Long Tunnel Extended Gold Mining Co. which sustained the township well past the turn of the twentieth century and occupied fifth place amongst Victoria's richest mines. It is aesthetically significant (Criterion E) for its capacity to demonstrate Pearson's continuing financial success throughout the mid to late nineteenth century, the additions associated with the tower being most noteworthy as an example of the lasting appeal of the Italian Style, popularized in the pattern books of the day. The Ailanthus altissima (Tree of Heaven) is significant as an outstanding example of a species that is rare in cultivation, as well as for its very high aesthetic value. The Araucaria bidwilli is notable as a fine example of a species infrequently planted in Melbourne and rarely found in private suburban gardens.Page 159 - four photographs of Craigellachie - three room interiors and along the verandah. Handwritten: CRAIGELLACHIE [top left] / Neg 224 1973 CHINESE SITTING ROOM [under top right photo] / Neg 226 1973 / CHINESE SITTING ROOM [under top right photo] / Neg 214 1973 DINING ROOM [under bottom left photo] / Neg 213 - 1973 [under bottom right photo] / 159 [bottom left]trevor hart, verandah, orrong road, tower, curved windows, decorative brackets, craigellache, italianate, mansion, 1870's, william pearson, inkerman street, apartments, spire, decorative plaster work, rendered walls, arched windows, moulded ornaments, 1860's, lynedoch avenue, classical style, caulfield north, craigellachie, land subdivision, gardens, late victorian style, cast iron work, st kilda east, dining rooms, sitting rooms, furnishings, tiles -
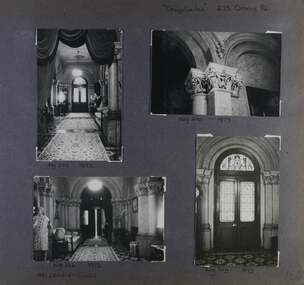 Glen Eira Historical Society
Album - Album page, Craigellachie, 273 Orrong Road, Circa 1972
... the turn of the twentieth century and occupied fifth place amongst ...This photograph is part of the Caulfield Historical Album 1972. This album was created in approximately 1972 as part of a project by the Caulfield Historical Society to assist in identifying buildings worthy of preservation. The album is related to a Survey the Caulfield Historical Society developed in collaboration with the National Trust of Australia (Victoria) and Caulfield City Council to identify historic buildings within the City of Caulfield that warranted the protection of a National Trust Classification. Principal photographer thought to be Trevor Hart, member of Caulfield Historical Society. Most photographs were taken between 1966-1972 with a small number of photographs being older and from unknown sources. All photographs are black and white except where stated, with 386 photographs over 198 pages. From Victorian Heritage Database citation for HO40 Craigellachie 2b & 2c Lynedoch Avenue Caulfield North https://vhd.heritagecouncil.vic.gov.au/places/35209 as at (28/10/2020) Craigellachie" is situated at No. 2B Lynedoch Avenue, Caulfield North, and was built for the noted investor, pastoralist and politician, William Pearson, not earlier than 1864 and possible in 1876, undergoing several substantial and contributory extensions during the nineteenth century. It is historically and aesthetically significant.From Victorian Heritage Database citation for HO40 Craigellachie https://vhd.heritagecouncil.vic.gov.au/places/35209 as at (28/10/2020) It is historically significant (Criterion A) as the Melbourne home of William Pearson, MLA, MLC and principal shareholder in Walhalla's Long Tunnel Extended Gold Mining Co. which sustained the township well past the turn of the twentieth century and occupied fifth place amongst Victoria's richest mines. It is aesthetically significant (Criterion E) for its capacity to demonstrate Pearson's continuing financial success throughout the mid to late nineteenth century, the additions associated with the tower being most noteworthy as an example of the lasting appeal of the Italian Style, popularized in the pattern books of the day. The Ailanthus altissima (Tree of Heaven) is significant as an outstanding example of a species that is rare in cultivation, as well as for its very high aesthetic value. The Araucaria bidwilli is notable as a fine example of a species infrequently planted in Melbourne and rarely found in private suburban gardens.Page 160 - four photographs of Craigellachie interiors. Handwritten: "Craigellachie" 273 Orrong Road [top right] / 156 [bottom right]trevor hart, orrong road, italianate, mansion, 1870's, william pearson, inkerman street, decorative plaster work, rendered walls, ornamentation, moulded ornaments, 1860's, lynedoch avenue, classical style, caulfield north, craigellachie, late victorian style, st kilda east, hallways, arched doors, stained glass, mrs francis, furnishings