Showing 7079 items
matching 17
-
 Flagstaff Hill Maritime Museum and Village
Teapot Spout
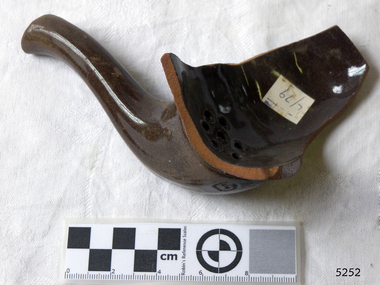
HISTORY OF THE LOCH ARD The LOCH ARD belonged to the famous Loch Line which sailed many ships from England to Australia. Built in Glasgow by Barclay, Curdle and Co. in 1873, the LOCH ARD was a three-masted square rigged iron sailing ship. The ship measured 262ft 7" (79.87m) in length, 38ft (11.58m) in width, 23ft (7m) in depth and had a gross tonnage of 1693 tons. The LOCH ARD's main mast measured a massive 150ft (45.7m) in height. LOCH ARD made three trips to Australia and one trip to Calcutta before its final voyage. LOCH ARD left England on March 2, 1878, under the command of Captain Gibbs, a newly married, 29 year old. She was bound for Melbourne with a crew of 37, plus 17 passengers and a load of cargo. The general cargo reflected the affluence of Melbourne at the time. On board were straw hats, umbrella, perfumes, clay pipes, pianos, clocks, confectionary, linen and candles, as well as a heavier load of railway irons, cement, lead and copper. There were items included that intended for display in the Melbourne International Exhibition in 1880. The voyage to Port Phillip was long but uneventful. At 3am on June 1, 1878, Captain Gibbs was expecting to see land and the passengers were becoming excited as they prepared to view their new homeland in the early morning. But LOCH ARD was running into a fog which greatly reduced visibility. Captain Gibbs was becoming anxious as there was no sign of land or the Cape Otway lighthouse. At 4am the fog lifted. A man aloft announced that he could see breakers. The sheer cliffs of Victoria's west coast came into view, and Captain Gibbs realised that the ship was much closer to them than expected. He ordered as much sail to be set as time would permit and then attempted to steer the vessel out to sea. On coming head on into the wind, the ship lost momentum, the sails fell limp and LOCH ARD's bow swung back. Gibbs then ordered the anchors to be released in an attempt to hold its position. The anchors sank some 50 fathoms - but did not hold. By this time LOCH ARD was among the breakers and the tall cliffs of Mutton Bird Island rose behind the ship. Just half a mile from the coast, the ship's bow was suddenly pulled around by the anchor. The captain tried to tack out to sea, but the ship struck a reef at the base of Mutton Bird Island, near Port Campbell. Waves broke over the ship and the top deck was loosened from the hull. The masts and rigging came crashing down knocking passengers and crew overboard. When a lifeboat was finally launched, it crashed into the side of LOCH ARD and capsized. Tom Pearce, who had launched the boat, managed to cling to its overturned hull and shelter beneath it. He drifted out to sea and then on the flood tide came into what is now known as LOCH ARD Gorge. He swam to shore, bruised and dazed, and found a cave in which to shelter. Some of the crew stayed below deck to shelter from the falling rigging but drowned when the ship slipped off the reef into deeper water. Eva Carmichael had raced onto deck to find out what was happening only to be confronted by towering cliffs looming above the stricken ship. In all the chaos, Captain Gibbs grabbed Eva and said, "If you are saved Eva, let my dear wife know that I died like a sailor". That was the last Eva Carmichael saw of the captain. She was swept off the ship by a huge wave. Eva saw Tom Pearce on a small rocky beach and yelled to attract his attention. He dived in and swam to the exhausted woman and dragged her to shore. He took her to the cave and broke open case of brandy which had washed up on the beach. He opened a bottle to revive the unconscious woman. A few hours later Tom scaled a cliff in search of help. He followed hoof prints and came by chance upon two men from nearby Glenample Station three and a half miles away. In a state of exhaustion, he told the men of the tragedy. Tom returned to the gorge while the two men rode back to the station to get help. By the time they reached LOCH ARD Gorge, it was cold and dark. The two shipwreck survivors were taken to Glenample Station to recover. Eva stayed at the station for six weeks before returning to Ireland, this time by steamship. In Melbourne, Tom Pearce received a hero's welcome. He was presented with the first gold medal of the Royal Humane Society of Victoria and a £1000 cheque from the Victorian Government. Concerts were performed to honour the young man's bravery and to raise money for those who lost family in the LOCH ARD disaster. Of the 54 crew members and passengers on board, only two survived: the apprentice, Tom Pearce and the young woman passenger, Eva Carmichael, who lost all of her family in the tragedy. Ten days after the LOCH ARD tragedy, salvage rights to the wreck were sold at auction for £2,120. Cargo valued at £3,000 was salvaged and placed on the beach, but most washed back into the sea when another storm developed. The wreck of LOCH ARD still lies at the base of Mutton Bird Island. Much of the cargo has now been salvaged and some was washed up into what is now known as LOCH ARD Gorge. Cargo and artefacts have also been illegally salvaged over many years before protective legislation was introduced. One of the most unlikely pieces of cargo to have survived the shipwreck was a Minton porcelain peacock - one of only nine in the world. The peacock was destined for the Melbourne International Exhibition in 1880. It had been well packed, which gave it adequate protection during the violent storm. Today, the Minton peacock can be seen at the Flagstaff Hill Maritime Museum in Warrnambool. From Australia's most dramatic shipwreck it has now become Australia's most valuable shipwreck artefact and is one of very few 'objects' on the Victorian State Heritage Register. Flagstaff Hill’s collection of artefacts from LOCH ARD is significant for being one of the largest collections of artefacts from this shipwreck in Victoria. It is significant for its association with the shipwreck, which is on the Victorian Heritage Register (VHR S417). The collection is significant because of the relationship between the objects, as together they have a high potential to interpret the story of the LOCH ARD. The LOCH ARD collection is archaeologically significant as the remains of a large international passenger and cargo ship. The LOCH ARD collection is historically significant for representing aspects of Victoria’s shipping history and its potential to interpret sub-theme 1.5 of Victoria’s Framework of Historical Themes (living with natural processes). The collection is also historically significant for its association with the LOCH ARD, which was one of the worst and best known shipwrecks in Victoria’s history. Ceramic teapot spout from the wreck of the Loch Ard. Brown in colour. Length 5¼". Artefact Reg No LA/79.flagstaff hill, warrnambool, shipwrecked coast, flagstaff hill maritime museum, maritime museum, shipwreck coast, flagstaff hill maritime village, great ocean road, loch line, loch ard, captain gibbs, eva carmichael, tom pearce, glenample station, mutton bird island, loch ard gorge, ceramic teapot, teapot -
 Flagstaff Hill Maritime Museum and Village
Calendar, T.S. McInnes, August 1923
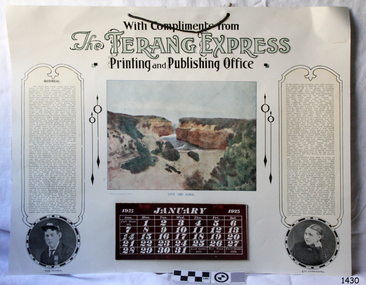
HISTORY OF THE LOCH ARD The LOCH ARD belonged to the famous Loch Line which sailed many ships from England to Australia. Built in Glasgow by Barclay, Curdle and Co. in 1873, the LOCH ARD was a three-masted square rigged iron sailing ship. The ship measured 262ft 7" (79.87m) in length, 38ft (11.58m) in width, 23ft (7m) in depth and had a gross tonnage of 1693 tons. The LOCH ARD's main mast measured a massive 150ft (45.7m) in height. LOCH ARD made three trips to Australia and one trip to Calcutta before its final voyage. LOCH ARD left England on March 2, 1878, under the command of Captain Gibbs, a newly married, 29 year old. She was bound for Melbourne with a crew of 37, plus 17 passengers and a load of cargo. The general cargo reflected the affluence of Melbourne at the time. On board were straw hats, umbrella, perfumes, clay pipes, pianos, clocks, confectionary, linen and candles, as well as a heavier load of railway irons, cement, lead and copper. There were items included that intended for display in the Melbourne International Exhibition in 1880. The voyage to Port Phillip was long but uneventful. At 3am on June 1, 1878, Captain Gibbs was expecting to see land and the passengers were becoming excited as they prepared to view their new homeland in the early morning. But LOCH ARD was running into a fog which greatly reduced visibility. Captain Gibbs was becoming anxious as there was no sign of land or the Cape Otway lighthouse. At 4am the fog lifted. A man aloft announced that he could see breakers. The sheer cliffs of Victoria's west coast came into view, and Captain Gibbs realised that the ship was much closer to them than expected. He ordered as much sail to be set as time would permit and then attempted to steer the vessel out to sea. On coming head on into the wind, the ship lost momentum, the sails fell limp and LOCH ARD's bow swung back. Gibbs then ordered the anchors to be released in an attempt to hold its position. The anchors sank some 50 fathoms - but did not hold. By this time LOCH ARD was among the breakers and the tall cliffs of Mutton Bird Island rose behind the ship. Just half a mile from the coast, the ship's bow was suddenly pulled around by the anchor. The captain tried to tack out to sea, but the ship struck a reef at the base of Mutton Bird Island, near Port Campbell. Waves broke over the ship and the top deck was loosened from the hull. The masts and rigging came crashing down knocking passengers and crew overboard. When a lifeboat was finally launched, it crashed into the side of LOCH ARD and capsized. Tom Pearce, who had launched the boat, managed to cling to its overturned hull and shelter beneath it. He drifted out to sea and then on the flood tide came into what is now known as LOCH ARD Gorge. He swam to shore, bruised and dazed, and found a cave in which to shelter. Some of the crew stayed below deck to shelter from the falling rigging but drowned when the ship slipped off the reef into deeper water. Eva Carmichael had raced onto deck to find out what was happening only to be confronted by towering cliffs looming above the stricken ship. In all the chaos, Captain Gibbs grabbed Eva and said, "If you are saved Eva, let my dear wife know that I died like a sailor". That was the last Eva Carmichael saw of the captain. She was swept off the ship by a huge wave. Eva saw Tom Pearce on a small rocky beach and yelled to attract his attention. He dived in and swam to the exhausted woman and dragged her to shore. He took her to the cave and broke open case of brandy which had washed up on the beach. He opened a bottle to revive the unconscious woman. A few hours later Tom scaled a cliff in search of help. He followed hoof prints and came by chance upon two men from nearby Glenample Station three and a half miles away. In a state of exhaustion, he told the men of the tragedy. Tom returned to the gorge while the two men rode back to the station to get help. By the time they reached LOCH ARD Gorge, it was cold and dark. The two shipwreck survivors were taken to Glenample Station to recover. Eva stayed at the station for six weeks before returning to Ireland, this time by steamship. In Melbourne, Tom Pearce received a hero's welcome. He was presented with the first gold medal of the Royal Humane Society of Victoria and a £1000 cheque from the Victorian Government. Concerts were performed to honour the young man's bravery and to raise money for those who lost family in the LOCH ARD disaster. Of the 54 crew members and passengers on board, only two survived: the apprentice, Tom Pearce and the young woman passenger, Eva Carmichael, who lost all of her family in the tragedy. Ten days after the LOCH ARD tragedy, salvage rights to the wreck were sold at auction for £2,120. Cargo valued at £3,000 was salvaged and placed on the beach, but most washed back into the sea when another storm developed. The wreck of LOCH ARD still lies at the base of Mutton Bird Island. Much of the cargo has now been salvaged and some was washed up into what is now known as LOCH ARD Gorge. Cargo and artefacts have also been illegally salvaged over many years before protective legislation was introduced. One of the most unlikely pieces of cargo to have survived the shipwreck was a Minton porcelain peacock - one of only nine in the world. The peacock was destined for the Melbourne International Exhibition in 1880. It had been well packed, which gave it adequate protection during the violent storm. Today, the Minton peacock can be seen at the Flagstaff Hill Maritime Museum in Warrnambool. From Australia's most dramatic shipwreck it has now become Australia's most valuable shipwreck artefact and is one of very few 'objects' on the Victorian State Heritage Register. Flagstaff Hill’s collection of artefacts from LOCH ARD is significant for being one of the largest collections of artefacts from this shipwreck in Victoria. It is significant for its association with the shipwreck, which is on the Victorian Heritage Register (VHR S417). The collection is significant because of the relationship between the objects, as together they have a high potential to interpret the story of the LOCH ARD. The LOCH ARD collection is archaeologically significant as the remains of a large international passenger and cargo ship. The LOCH ARD collection is historically significant for representing aspects of Victoria’s shipping history and its potential to interpret sub-theme 1.5 of Victoria’s Framework of Historical Themes (living with natural processes). The collection is also historically significant for its association with the LOCH ARD, which was one of the worst and best known shipwrecks in Victoria’s history. Calendar printed by Terang Express for August 1923 with picture of Loch Ard Gorge and survivors of wreck and also story of the episode. flagstaff hill, warrnambool, shipwrecked coast, flagstaff hill maritime museum, maritime museum, shipwreck coast, flagstaff hill maritime village, great ocean road, loch line, loch ard, captain gibbs, eva carmichael, tom pearce, glenample station, mutton bird island, terang express, calendar, 1923, calendar 1923, printer, newspaper, loch ard gorge -
 Flagstaff Hill Maritime Museum and Village
Print, Loch Ard
HISTORY OF THE LOCH ARD The LOCH ARD belonged to the famous Loch Line which sailed many ships from England to Australia. Built in Glasgow by Barclay, Curdle and Co. in 1873, the LOCH ARD was a three-masted square rigged iron sailing ship. The ship measured 262ft 7" (79.87m) in length, 38ft (11.58m) in width, 23ft (7m) in depth and had a gross tonnage of 1693 tons. The LOCH ARD's main mast measured a massive 150ft (45.7m) in height. LOCH ARD made three trips to Australia and one trip to Calcutta before its final voyage. LOCH ARD left England on March 2, 1878, under the command of Captain Gibbs, a newly married, 29 year old. She was bound for Melbourne with a crew of 37, plus 17 passengers and a load of cargo. The general cargo reflected the affluence of Melbourne at the time. On board were straw hats, umbrella, perfumes, clay pipes, pianos, clocks, confectionary, linen and candles, as well as a heavier load of railway irons, cement, lead and copper. There were items included that intended for display in the Melbourne International Exhibition in 1880. The voyage to Port Phillip was long but uneventful. At 3am on June 1, 1878, Captain Gibbs was expecting to see land and the passengers were becoming excited as they prepared to view their new homeland in the early morning. But LOCH ARD was running into a fog which greatly reduced visibility. Captain Gibbs was becoming anxious as there was no sign of land or the Cape Otway lighthouse. At 4am the fog lifted. A man aloft announced that he could see breakers. The sheer cliffs of Victoria's west coast came into view, and Captain Gibbs realised that the ship was much closer to them than expected. He ordered as much sail to be set as time would permit and then attempted to steer the vessel out to sea. On coming head on into the wind, the ship lost momentum, the sails fell limp and LOCH ARD's bow swung back. Gibbs then ordered the anchors to be released in an attempt to hold its position. The anchors sank some 50 fathoms - but did not hold. By this time LOCH ARD was among the breakers and the tall cliffs of Mutton Bird Island rose behind the ship. Just half a mile from the coast, the ship's bow was suddenly pulled around by the anchor. The captain tried to tack out to sea, but the ship struck a reef at the base of Mutton Bird Island, near Port Campbell. Waves broke over the ship and the top deck was loosened from the hull. The masts and rigging came crashing down knocking passengers and crew overboard. When a lifeboat was finally launched, it crashed into the side of LOCH ARD and capsized. Tom Pearce, who had launched the boat, managed to cling to its overturned hull and shelter beneath it. He drifted out to sea and then on the flood tide came into what is now known as LOCH ARD Gorge. He swam to shore, bruised and dazed, and found a cave in which to shelter. Some of the crew stayed below deck to shelter from the falling rigging but drowned when the ship slipped off the reef into deeper water. Eva Carmichael had raced onto deck to find out what was happening only to be confronted by towering cliffs looming above the stricken ship. In all the chaos, Captain Gibbs grabbed Eva and said, "If you are saved Eva, let my dear wife know that I died like a sailor". That was the last Eva Carmichael saw of the captain. She was swept off the ship by a huge wave. Eva saw Tom Pearce on a small rocky beach and yelled to attract his attention. He dived in and swam to the exhausted woman and dragged her to shore. He took her to the cave and broke open case of brandy which had washed up on the beach. He opened a bottle to revive the unconscious woman. A few hours later Tom scaled a cliff in search of help. He followed hoof prints and came by chance upon two men from nearby Glenample Station three and a half miles away. In a state of exhaustion, he told the men of the tragedy. Tom returned to the gorge while the two men rode back to the station to get help. By the time they reached LOCH ARD Gorge, it was cold and dark. The two shipwreck survivors were taken to Glenample Station to recover. Eva stayed at the station for six weeks before returning to Ireland, this time by steamship. In Melbourne, Tom Pearce received a hero's welcome. He was presented with the first gold medal of the Royal Humane Society of Victoria and a £1000 cheque from the Victorian Government. Concerts were performed to honour the young man's bravery and to raise money for those who lost family in the LOCH ARD disaster. Of the 54 crew members and passengers on board, only two survived: the apprentice, Tom Pearce and the young woman passenger, Eva Carmichael, who lost all of her family in the tragedy. Ten days after the LOCH ARD tragedy, salvage rights to the wreck were sold at auction for £2,120. Cargo valued at £3,000 was salvaged and placed on the beach, but most washed back into the sea when another storm developed. The wreck of LOCH ARD still lies at the base of Mutton Bird Island. Much of the cargo has now been salvaged and some was washed up into what is now known as LOCH ARD Gorge. Cargo and artefacts have also been illegally salvaged over many years before protective legislation was introduced. One of the most unlikely pieces of cargo to have survived the shipwreck was a Minton porcelain peacock - one of only nine in the world. The peacock was destined for the Melbourne International Exhibition in 1880. It had been well packed, which gave it adequate protection during the violent storm. Today, the Minton peacock can be seen at the Flagstaff Hill Maritime Museum in Warrnambool. From Australia's most dramatic shipwreck it has now become Australia's most valuable shipwreck artefact and is one of very few 'objects' on the Victorian State Heritage Register. Flagstaff Hill’s collection of artefacts from LOCH ARD is significant for being one of the largest collections of artefacts from this shipwreck in Victoria. It is significant for its association with the shipwreck, which is on the Victorian Heritage Register (VHR S417). The collection is significant because of the relationship between the objects, as together they have a high potential to interpret the story of the LOCH ARD. The LOCH ARD collection is archaeologically significant as the remains of a large international passenger and cargo ship. The LOCH ARD collection is historically significant for representing aspects of Victoria’s shipping history and its potential to interpret sub-theme 1.5 of Victoria’s Framework of Historical Themes (living with natural processes). The collection is also historically significant for its association with the LOCH ARD, which was one of the worst and best known shipwrecks in Victoria’s history. Reproduction 0620 of 1000 taken from the original painting of the Loch Ard by Neil Savage.flagstaff hill, warrnambool, shipwrecked coast, flagstaff hill maritime museum, maritime museum, shipwreck coast, flagstaff hill maritime village, great ocean road, loch line, loch ard, captain gibbs, eva carmichael, tom pearce, glenample station, mutton bird island, loch ard gorge, photograph, neil savage -
 Flagstaff Hill Maritime Museum and Village
Plaque, Loch Ard
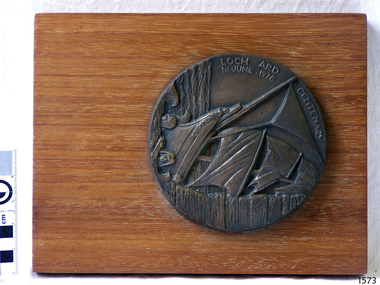
HISTORY OF THE LOCH ARD The LOCH ARD belonged to the famous Loch Line which sailed many ships from England to Australia. Built in Glasgow by Barclay, Curdle and Co. in 1873, the LOCH ARD was a three-masted square rigged iron sailing ship. The ship measured 262ft 7" (79.87m) in length, 38ft (11.58m) in width, 23ft (7m) in depth and had a gross tonnage of 1693 tons. The LOCH ARD's main mast measured a massive 150ft (45.7m) in height. LOCH ARD made three trips to Australia and one trip to Calcutta before its final voyage. LOCH ARD left England on March 2, 1878, under the command of Captain Gibbs, a newly married, 29 year old. She was bound for Melbourne with a crew of 37, plus 17 passengers and a load of cargo. The general cargo reflected the affluence of Melbourne at the time. On board were straw hats, umbrella, perfumes, clay pipes, pianos, clocks, confectionary, linen and candles, as well as a heavier load of railway irons, cement, lead and copper. There were items included that intended for display in the Melbourne International Exhibition in 1880. The voyage to Port Phillip was long but uneventful. At 3am on June 1, 1878, Captain Gibbs was expecting to see land and the passengers were becoming excited as they prepared to view their new homeland in the early morning. But LOCH ARD was running into a fog which greatly reduced visibility. Captain Gibbs was becoming anxious as there was no sign of land or the Cape Otway lighthouse. At 4am the fog lifted. A man aloft announced that he could see breakers. The sheer cliffs of Victoria's west coast came into view, and Captain Gibbs realised that the ship was much closer to them than expected. He ordered as much sail to be set as time would permit and then attempted to steer the vessel out to sea. On coming head on into the wind, the ship lost momentum, the sails fell limp and LOCH ARD's bow swung back. Gibbs then ordered the anchors to be released in an attempt to hold its position. The anchors sank some 50 fathoms - but did not hold. By this time LOCH ARD was among the breakers and the tall cliffs of Mutton Bird Island rose behind the ship. Just half a mile from the coast, the ship's bow was suddenly pulled around by the anchor. The captain tried to tack out to sea, but the ship struck a reef at the base of Mutton Bird Island, near Port Campbell. Waves broke over the ship and the top deck was loosened from the hull. The masts and rigging came crashing down knocking passengers and crew overboard. When a lifeboat was finally launched, it crashed into the side of LOCH ARD and capsized. Tom Pearce, who had launched the boat, managed to cling to its overturned hull and shelter beneath it. He drifted out to sea and then on the flood tide came into what is now known as LOCH ARD Gorge. He swam to shore, bruised and dazed, and found a cave in which to shelter. Some of the crew stayed below deck to shelter from the falling rigging but drowned when the ship slipped off the reef into deeper water. Eva Carmichael had raced onto deck to find out what was happening only to be confronted by towering cliffs looming above the stricken ship. In all the chaos, Captain Gibbs grabbed Eva and said, "If you are saved Eva, let my dear wife know that I died like a sailor". That was the last Eva Carmichael saw of the captain. She was swept off the ship by a huge wave. Eva saw Tom Pearce on a small rocky beach and yelled to attract his attention. He dived in and swam to the exhausted woman and dragged her to shore. He took her to the cave and broke open case of brandy which had washed up on the beach. He opened a bottle to revive the unconscious woman. A few hours later Tom scaled a cliff in search of help. He followed hoof prints and came by chance upon two men from nearby Glenample Station three and a half miles away. In a state of exhaustion, he told the men of the tragedy. Tom returned to the gorge while the two men rode back to the station to get help. By the time they reached LOCH ARD Gorge, it was cold and dark. The two shipwreck survivors were taken to Glenample Station to recover. Eva stayed at the station for six weeks before returning to Ireland, this time by steamship. In Melbourne, Tom Pearce received a hero's welcome. He was presented with the first gold medal of the Royal Humane Society of Victoria and a £1000 cheque from the Victorian Government. Concerts were performed to honour the young man's bravery and to raise money for those who lost family in the LOCH ARD disaster. Of the 54 crew members and passengers on board, only two survived: the apprentice, Tom Pearce and the young woman passenger, Eva Carmichael, who lost all of her family in the tragedy. Ten days after the LOCH ARD tragedy, salvage rights to the wreck were sold at auction for £2,120. Cargo valued at £3,000 was salvaged and placed on the beach, but most washed back into the sea when another storm developed. The wreck of LOCH ARD still lies at the base of Mutton Bird Island. Much of the cargo has now been salvaged and some was washed up into what is now known as LOCH ARD Gorge. Cargo and artefacts have also been illegally salvaged over many years before protective legislation was introduced. One of the most unlikely pieces of cargo to have survived the shipwreck was a Minton porcelain peacock - one of only nine in the world. The peacock was destined for the Melbourne International Exhibition in 1880. It had been well packed, which gave it adequate protection during the violent storm. Today, the Minton peacock can be seen at the Flagstaff Hill Maritime Museum in Warrnambool. From Australia's most dramatic shipwreck it has now become Australia's most valuable shipwreck artefact and is one of very few 'objects' on the Victorian State Heritage Register. Flagstaff Hill’s collection of artefacts from LOCH ARD is significant for being one of the largest collections of artefacts from this shipwreck in Victoria. It is significant for its association with the shipwreck, which is on the Victorian Heritage Register (VHR S417). The collection is significant because of the relationship between the objects, as together they have a high potential to interpret the story of the LOCH ARD. The LOCH ARD collection is archaeologically significant as the remains of a large international passenger and cargo ship. The LOCH ARD collection is historically significant for representing aspects of Victoria’s shipping history and its potential to interpret sub-theme 1.5 of Victoria’s Framework of Historical Themes (living with natural processes). The collection is also historically significant for its association with the LOCH ARD, which was one of the worst and best known shipwrecks in Victoria’s history. Plaque to commemorate the centenary of the wreck of the Loch Ard. Circular piece of bronze depicting a scene of the wreck set in a rectangular piece of varnished wood. Plaque is 9/50. Artist Michael Meszarosflagstaff hill, warrnambool, shipwrecked coast, flagstaff hill maritime museum, maritime museum, shipwreck coast, flagstaff hill maritime village, great ocean road, loch line, loch ard, captain gibbs, eva carmichael, tom pearce, glenample station, mutton bird island, loch ard gorge, plaque, loch ard, michael meszaros -
 The Beechworth Burke Museum Research Collection
Card - Index Card, George Tibbits, Ford Street, Beechworth, 1976
Property - Ford Street, Beechworth - Section 2, Town Allotments 4 - 100' x 250' - Note: (see also Town Allotment 5, 2-4/5-1, 2-4/5-2, 2-4/5-3 and 2-4/5-4) Ownership details and history - 28 Oct 1853 - W.H. Neuber 2-4+5 - 1861 - Wallace, Peter, unlisted, J.A. Wallace, I. 105'x165' Hotel 86'x21', 2 Stories WB. sh. rf. Dp. 84'x18' do----do. Theatre 75'x26' do. Office 18'x20' do, Billiard room 35'x22' sl. & sh. rf. Kitchen 45'x25' slabs, Back Bldg. 22'x15' do. Stables 60'6"x 20'6" do. 2-4 - 1861 - Hearn, William, unlisted, J. Gray, land 13'6"x25' shop 13'6"x25' plate glass fr. WB. + sh. rf. 2-4+5 - 1863/4 - Clark, J.S. Publican, same, land 105'x165' Hotel & bedrooms 105'x18', 2 stories WB. + sh. rf. Store at back 10'x24' Stables, slabs, battenwork, + sh. 113'x26' Kitchen 45'x25' slabs + bark rf. Store 14'x9' WB + bark, Ldry 11'x10' WB + sh. Theatre 75'x26' WB + sh. 2-4 - 1863/4 - Richter, A. Mrs Gray, bld 13'6"x25' shop as above 2-5 - 1866 - Brown, John, barber, J.S. Clark, shop + back rooms, 18'x16' part "Star Hotel Bldgs" £55 2-4 + 5 - 1866 - Clark, John Sitch, publican, same. land 105'x165' "Star Hotel" 61'x41' 2 stories bk bldg + sh. rf. Bedrooms from front along "Star Lane" 105'x18' 2 stories WB + sh. rf. In rear store 24'x10' slabs + sh. rf. Kitchen 45'x25' slabs + bark rf. Ldry 11'x10' WB + sh. Store 14'x9' W.B. + bark rf. £330 2-4 - 1866 Clark, J.S. Publican, same, 'Theatre" 75'x26' WB + sh. roof £70 2-4 + 5 - 1866 Crawford, Hiram Allen - also 16-17, Connolly, Michael, coach owners, J.S. Clark "Star" stables 120'x26' slabs trellis work & sh. rf. £30 2-4 - 1866 - Richter, Augustus, Watchmaker, William Telford, land + Prem as 1861 £52 no entry - 1871 - Isaacs, Alfred, Clothier, J.S. Clark, shop 18'x18'. part of Star Hotel Buildings 2-4 + 5 - 1871 - Clark, J.S. Publican, same hotel as 1866 £300 no entry - 1871 - Clark, J.S. Publican, same, coach office 14'x12' part of old Star Theatre £20 no entry - 1871 - Brasch, Morris, Clothier, J.S. Clark, shop 14'6'x50' part of old Star Theatre, £65 2-4 + 5 - 1871 - Clark, J.S. Publican, same, Stables 120'x26' slabs + sh. roof. £26 2-4 - Richter, A. Watchmaker, Wm. Telford, land + prem as 1861 £45 no entry - 1876 - Issacs, Alfred, tailor, F.K. Allen, shop and dwelling, part of Star Hotel Bldgs, £40 2-4 + 5 - 1876 - Allen, Frederick K. Hotelkeeper, same. land + hotel as 1866 + coach office part of old Theatre £160 2-5 - 1876 - Crawford, H.A. - Connolly, M. Coach Proprietors, F.K. Allen stables, 120'x26' slabs + sh. roof £78 no entry - 1876 - Galbraith, Andrew L. Confectioner, F.K. Allen, double shop 15'x50' part of old Star Theatre £65 no entry - 1876 - Richter, Augustus, Watchmaker, W. Telford, J.G. Orr. land + prem as 1861 £40 no entry - 1884 - O'Connor, David M. Hairdresser, shop + prem, portion of Hotel Bldg 2-4 + 5 - 1884 - Allen, F.K. Publican, same "Star Hotel" 2-4 - 1884 - William, Robert, Bootmaker, F.K. Allen - double shop 2-4 - 1889 - Crawford, Connolly & McCurdy, Coach Proprietors, F.K. Allen, Star Stables, Sheds + Land £60 2-4 - 1889 - Dunn, Fred, Bootmaker, F. Allen, shop, prem + land £15 2-4 + 5 - 1889 - Carroll, Wm. Hotelkeeper, F. Allen, Star Hotel. prem + land £135 2-4 - 1889 - Williams, Robert, Bootmaker, F. Allen, double shop + prem + land £40 2-4 - 1900 - Philips, William R. Blacksmith, Wm. Carroll, Star Stables and land £25 2-4 - 1900 - _unoccupied) , William Carroll, land £5 2-4 + 5 - 1900 - Lowe, John, Hotelkeeper, Wm. Carroll, Star Hotel premises £130 2-4 - 1900 - Vandenberg, George, Dentist, H. Vandenberg, surgery + land £10 2-4 - 1906 - Lod, Wm. G. Star Lane, Blacksmith, execs. W. Carroll, Star Stables and land £20 2-4 - 1906 - Dumbrell, Starr & Jarvis, Watchmakers, execs. W. Carroll, shop + land £40 2-4 + 5 - 1906 - Lowe, John. Hotelkeeper, W. Carroll execs. of Star Hotel and land £130 2-4 - 1906 - Vandenberg, Henry, not tenant issued, land £10 Note: execs. = executors 2-4 and 5 - 1976 2-4/5-1 - R. Rosen - Men's Hairdresser 2-4/5-2 - Star Youth Hostel 2-4/5-3 - G. Fendyk, Butcher 2-4/5-4 - Vacant Store Architectural Index Card - Brian Pump and Tony Dugan - Photographers beechworth, george tibbits -
 Flagstaff Hill Maritime Museum and Village
Book - Reference - history, Terang Express, Loch Ard Gorge, 1954
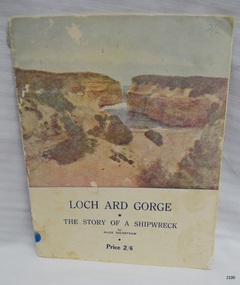
HISTORY OF THE LOCH ARD The LOCH ARD belonged to the famous Loch Line which sailed many ships from England to Australia. Built in Glasgow by Barclay, Curdle and Co. in 1873, the LOCH ARD was a three-masted square rigged iron sailing ship. The ship measured 262ft 7" (79.87m) in length, 38ft (11.58m) in width, 23ft (7m) in depth and had a gross tonnage of 1693 tons. The LOCH ARD's main mast measured a massive 150ft (45.7m) in height. LOCH ARD made three trips to Australia and one trip to Calcutta before its final voyage. LOCH ARD left England on March 2, 1878, under the command of Captain Gibbs, a newly married, 29 year old. She was bound for Melbourne with a crew of 37, plus 17 passengers and a load of cargo. The general cargo reflected the affluence of Melbourne at the time. On board were straw hats, umbrella, perfumes, clay pipes, pianos, clocks, confectionary, linen and candles, as well as a heavier load of railway irons, cement, lead and copper. There were items included that intended for display in the Melbourne International Exhibition in 1880. The voyage to Port Phillip was long but uneventful. At 3am on June 1, 1878, Captain Gibbs was expecting to see land and the passengers were becoming excited as they prepared to view their new homeland in the early morning. But LOCH ARD was running into a fog which greatly reduced visibility. Captain Gibbs was becoming anxious as there was no sign of land or the Cape Otway lighthouse. At 4am the fog lifted. A man aloft announced that he could see breakers. The sheer cliffs of Victoria's west coast came into view, and Captain Gibbs realised that the ship was much closer to them than expected. He ordered as much sail to be set as time would permit and then attempted to steer the vessel out to sea. On coming head on into the wind, the ship lost momentum, the sails fell limp and LOCH ARD's bow swung back. Gibbs then ordered the anchors to be released in an attempt to hold its position. The anchors sank some 50 fathoms - but did not hold. By this time LOCH ARD was among the breakers and the tall cliffs of Mutton Bird Island rose behind the ship. Just half a mile from the coast, the ship's bow was suddenly pulled around by the anchor. The captain tried to tack out to sea, but the ship struck a reef at the base of Mutton Bird Island, near Port Campbell. Waves broke over the ship and the top deck was loosened from the hull. The masts and rigging came crashing down knocking passengers and crew overboard. When a lifeboat was finally launched, it crashed into the side of LOCH ARD and capsized. Tom Pearce, who had launched the boat, managed to cling to its overturned hull and shelter beneath it. He drifted out to sea and then on the flood tide came into what is now known as LOCH ARD Gorge. He swam to shore, bruised and dazed, and found a cave in which to shelter. Some of the crew stayed below deck to shelter from the falling rigging but drowned when the ship slipped off the reef into deeper water. Eva Carmichael had raced onto deck to find out what was happening only to be confronted by towering cliffs looming above the stricken ship. In all the chaos, Captain Gibbs grabbed Eva and said, "If you are saved Eva, let my dear wife know that I died like a sailor". That was the last Eva Carmichael saw of the captain. She was swept off the ship by a huge wave. Eva saw Tom Pearce on a small rocky beach and yelled to attract his attention. He dived in and swam to the exhausted woman and dragged her to shore. He took her to the cave and broke open case of brandy which had washed up on the beach. He opened a bottle to revive the unconscious woman. A few hours later Tom scaled a cliff in search of help. He followed hoof prints and came by chance upon two men from nearby Glenample Station three and a half miles away. In a state of exhaustion, he told the men of the tragedy. Tom returned to the gorge while the two men rode back to the station to get help. By the time they reached LOCH ARD Gorge, it was cold and dark. The two shipwreck survivors were taken to Glenample Station to recover. Eva stayed at the station for six weeks before returning to Ireland, this time by steamship. In Melbourne, Tom Pearce received a hero's welcome. He was presented with the first gold medal of the Royal Humane Society of Victoria and a £1000 cheque from the Victorian Government. Concerts were performed to honour the young man's bravery and to raise money for those who lost family in the LOCH ARD disaster. Of the 54 crew members and passengers on board, only two survived: the apprentice, Tom Pearce and the young woman passenger, Eva Carmichael, who lost all of her family in the tragedy. Ten days after the LOCH ARD tragedy, salvage rights to the wreck were sold at auction for £2,120. Cargo valued at £3,000 was salvaged and placed on the beach, but most washed back into the sea when another storm developed. The wreck of LOCH ARD still lies at the base of Mutton Bird Island. Much of the cargo has now been salvaged and some was washed up into what is now known as LOCH ARD Gorge. Cargo and artefacts have also been illegally salvaged over many years before protective legislation was introduced. One of the most unlikely pieces of cargo to have survived the shipwreck was a Minton porcelain peacock - one of only nine in the world. The peacock was destined for the Melbourne International Exhibition in 1880. It had been well packed, which gave it adequate protection during the violent storm. Today, the Minton peacock can be seen at the Flagstaff Hill Maritime Museum in Warrnambool. From Australia's most dramatic shipwreck it has now become Australia's most valuable shipwreck artefact and is one of very few 'objects' on the Victorian State Heritage Register. Flagstaff Hill’s collection of artefacts from LOCH ARD is significant for being one of the largest collections of artefacts from this shipwreck in Victoria. It is significant for its association with the shipwreck, which is on the Victorian Heritage Register (VHR S417). The collection is significant because of the relationship between the objects, as together they have a high potential to interpret the story of the LOCH ARD. The LOCH ARD collection is archaeologically significant as the remains of a large international passenger and cargo ship. The LOCH ARD collection is historically significant for representing aspects of Victoria’s shipping history and its potential to interpret sub-theme 1.5 of Victoria’s Framework of Historical Themes (living with natural processes). The collection is also historically significant for its association with the LOCH ARD, which was one of the worst and best known shipwrecks in Victoria’s history. Book, Loch Ard Gorge: The Story of a Shipwreck by Alice Goldstraw. First published 1948, Third printing November 1954. Inscription inside front cover in blue pen, signed by the author. Soft covered book containing the story of the wreck of the Loch Ard, written in poetry. Each page has a decorative border. One page has photographs, black and white, of people and the Loch Ard Gorge cavesInside front cover, script in blue ink "To Mrs Slade, with kind regards, from Alice Goldstraw"flagstaff hill, warrnambool, shipwrecked coast, flagstaff hill maritime museum, maritime museum, shipwreck coast, flagstaff hill maritime village, great ocean road, loch line, loch ard, captain gibbs, eva carmichael, tom pearce, glenample station, mutton bird island, loch ard gorge, the story of a shipwreck, book, alice goldstraw, terang express press, loch ard gorge whipwreck, ship loch ard -
 Flagstaff Hill Maritime Museum and Village
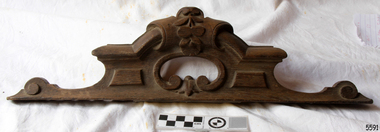
Furniture - Decorative Mount, ca. 1873
This hand carved wooden pediment may have originated from a mirror, cabinet, desk or similar piece of furniture. The LOCH ARD: - The Loch Ard got its name from ”Loch Ard” a loch which lies to the west of Aberfoyle, and the east of Loch Lomond. It means "high lake" in Scottish Gaelic. The vessel belonged to the famous Loch Line which sailed many vessels from England to Australia. The Loch Ard was built in Glasgow by Barclay, Curdle and Co. in 1873, the vessel was a three-masted square-rigged iron sailing ship that measured 79.87 meters in length, 11.58 m in width, and 7 m in depth with a gross tonnage of 1693 tons with a mainmast that measured a massive 45.7 m in height. Loch Ard made three trips to Australia and one trip to Calcutta before its fateful voyage. Loch Ard left England on March 2, 1878, under the command of 29-year-old Captain Gibbs, who was newly married. The ship was bound for Melbourne with a crew of 37, plus 17 passengers. The general cargo reflected the affluence of Melbourne at the time. Onboard were straw hats, umbrella, perfumes, clay pipes, pianos, clocks, confectionery, linen and candles, as well as a heavier load of railway irons, cement, lead and copper. There were other items included that were intended for display in the Melbourne International Exhibition of 1880. The voyage to Port Phillip was long but uneventful. Then at 3 am on June 1, 1878, Captain Gibbs was expecting to see land. But the Loch Ard was running into a fog which greatly reduced visibility. Captain Gibbs was becoming anxious as there was no sign of land or the Cape Otway lighthouse. At 4 am the fog lifted and a lookout aloft announced that he could see breakers. The sheer cliffs of Victoria's west coast came into view, and Captain Gibbs realised that the ship was much closer to them than expected. He ordered as much sail to be set as time would permit and then attempted to steer the vessel out to sea. On coming head-on into the wind, the ship lost momentum, the sails fell limp and Loch Ard's bow swung back towards land. Gibbs then ordered the anchors to be released in an attempt to hold its position. The anchors sank some 50 fathoms - but did not hold. By this time the ship was among the breakers and the tall cliffs of Mutton Bird Island rose behind. Just half a mile from the coast, the ship's bow was suddenly pulled around by the anchor. The captain tried to tack out to sea, but the ship struck a reef at the base of Mutton Bird Island, near Port Campbell. Waves subsequently broke over the ship and the top deck became loosened from the hull. The masts and rigging came crashing down knocking passengers and crew overboard. When a lifeboat was finally launched, it crashed into the side of Loch Ard and capsized. Tom Pearce, who had launched the boat, managed to cling to its overturned hull and shelter beneath it. He drifted out to sea and then on the flood tide came into what is now known as Loch Ard Gorge. He swam to shore, bruised and dazed, and found a cave in which to shelter. Some of the crew stayed below deck to shelter from the falling rigging but drowned when the ship slipped off the reef into deeper water. Eva Carmichael a passenger had raced onto the deck to find out what was happening only to be confronted by towering cliffs looming above the stricken ship. In all the chaos, Captain Gibbs grabbed Eva and said, "If you are saved Eva, let my dear wife know that I died like a sailor". That was the last Eva Carmichael saw of the captain. She was swept off the ship by a huge wave. Eva saw Tom Pearce on a small rocky beach and yelled to attract his attention. He dived in and swam to the exhausted woman and dragged her to shore. He took her to the cave and broke the open case of brandy which had washed up on the beach. He opened a bottle to revive the unconscious woman. A few hours later Tom scaled a cliff in search of help. He followed hoof prints and came by chance upon two men from nearby Glenample Station three and a half miles away. In a complete state of exhaustion, he told the men of the tragedy. Tom then returned to the gorge while the two men rode back to the station to get help. By the time they reached Loch Ard Gorge, it was cold and dark. The two shipwreck survivors were taken to Glenample Station to recover. Eva stayed at the station for six weeks before returning to Ireland by steamship. In Melbourne, Tom Pearce received a hero's welcome. He was presented with the first gold medal of the Royal Humane Society of Victoria and a £1000 cheque from the Victorian Government. Concerts were performed to honour the young man's bravery and to raise money for those who lost family in the disaster. Of the 54 crew members and passengers on board, only two survived: the apprentice, Tom Pearce and the young woman passenger, Eva Carmichael, who lost her family in the tragedy. Ten days after the Loch Ard tragedy, salvage rights to the wreck were sold at auction for £2,120. Cargo valued at £3,000 was salvaged and placed on the beach, but most washed back into the sea when another storm developed. The wreck of Loch Ard still lies at the base of Mutton Bird Island. Much of the cargo has now been salvaged and some items were washed up into Loch Ard Gorge. Cargo and artefacts have also been illegally salvaged over many years before protective legislation was introduced in March 1982. One of the most unlikely pieces of cargo to have survived the shipwreck was a Minton majolica peacock- one of only nine in the world. The peacock was destined for the Melbourne 1880 International Exhibition in. It had been well packed, which gave it adequate protection during the violent storm. Today the Minton peacock can be seen at the Flagstaff Hill Maritime Museum in Warrnambool. From Australia's most dramatic shipwreck, it has now become Australia's most valuable shipwreck artifact and is one of very few 'objects' on the Victorian State Heritage Register. Ref: LA 6 64 264 The shipwreck of the Loch Ard is of significance for Victoria and is registered on the Victorian Heritage Register ( S 417). Flagstaff Hill has a varied collection of artefacts from Loch Ard and its collection is significant for being one of the largest accumulation of artefacts from this notable Victorian shipwreck. The collections object is to also give us a snapshot into history so we can interpret the story of this tragic event. The collection is also archaeologically significant as it represents aspects of Victoria's shipping history that allows us to interpret Victoria's social and historical themes of the time. The collections historically significance is that it is associated unfortunately with the worst and best-known shipwreck in Victoria's history. Carved wooden furniture pediment or mount, recovered from the wreck of the Loch Ard. Inscribed plaque on underside. Handwriting on round sticker on edge.Plaque inscription "From Loch Ard wreck Port Campbell 1878 given by Haworth Bros to James Martin Snr Scarsdale" Diagonally on round sticker in pen "R 222A" flagstaff hill, warrnambool, shipwrecked coast, flagstaff hill maritime museum, maritime museum, shipwreck coast, flagstaff hill maritime village, great ocean road, loch line, loch ard, captain gibbs, eva carmichael, tom pearce, glenample station, mutton bird island, loch ard gorge, carved headpiece, furniture, haworth bros, james martin snr, scarsdale, pediment, decorative mount -
 Flagstaff Hill Maritime Museum and Village
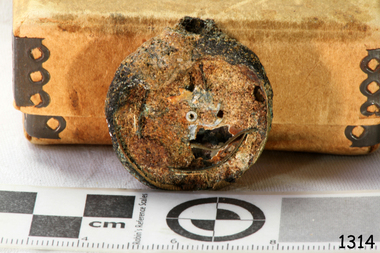
Instrument - Watch, ca 1878
HISTORY OF THE LOCH ARD The LOCH ARD belonged to the famous Loch Line which sailed many ships from England to Australia. Built in Glasgow by Barclay, Curdle and Co. in 1873, the LOCH ARD was a three-masted square rigged iron sailing ship. The ship measured 262ft 7" (79.87m) in length, 38ft (11.58m) in width, 23ft (7m) in depth and had a gross tonnage of 1693 tons. The LOCH ARD's main mast measured a massive 150ft (45.7m) in height. LOCH ARD made three trips to Australia and one trip to Calcutta before its final voyage. LOCH ARD left England on March 2, 1878, under the command of Captain Gibbs, a newly married, 29 year old. She was bound for Melbourne with a crew of 37, plus 17 passengers and a load of cargo. The general cargo reflected the affluence of Melbourne at the time. On board were straw hats, umbrella, perfumes, clay pipes, pianos, clocks, confectionary, linen and candles, as well as a heavier load of railway irons, cement, lead and copper. There were items included that intended for display in the Melbourne International Exhibition in 1880. The voyage to Port Phillip was long but uneventful. At 3am on June 1, 1878, Captain Gibbs was expecting to see land and the passengers were becoming excited as they prepared to view their new homeland in the early morning. But LOCH ARD was running into a fog which greatly reduced visibility. Captain Gibbs was becoming anxious as there was no sign of land or the Cape Otway lighthouse. At 4am the fog lifted. A man aloft announced that he could see breakers. The sheer cliffs of Victoria's west coast came into view, and Captain Gibbs realised that the ship was much closer to them than expected. He ordered as much sail to be set as time would permit and then attempted to steer the vessel out to sea. On coming head on into the wind, the ship lost momentum, the sails fell limp and LOCH ARD's bow swung back. Gibbs then ordered the anchors to be released in an attempt to hold its position. The anchors sank some 50 fathoms - but did not hold. By this time LOCH ARD was among the breakers and the tall cliffs of Mutton Bird Island rose behind the ship. Just half a mile from the coast, the ship's bow was suddenly pulled around by the anchor. The captain tried to tack out to sea, but the ship struck a reef at the base of Mutton Bird Island, near Port Campbell. Waves broke over the ship and the top deck was loosened from the hull. The masts and rigging came crashing down knocking passengers and crew overboard. When a lifeboat was finally launched, it crashed into the side of LOCH ARD and capsized. Tom Pearce, who had launched the boat, managed to cling to its overturned hull and shelter beneath it. He drifted out to sea and then on the flood tide came into what is now known as LOCH ARD Gorge. He swam to shore, bruised and dazed, and found a cave in which to shelter. Some of the crew stayed below deck to shelter from the falling rigging but drowned when the ship slipped off the reef into deeper water. Eva Carmichael had raced onto deck to find out what was happening only to be confronted by towering cliffs looming above the stricken ship. In all the chaos, Captain Gibbs grabbed Eva and said, "If you are saved Eva, let my dear wife know that I died like a sailor". That was the last Eva Carmichael saw of the captain. She was swept off the ship by a huge wave. Eva saw Tom Pearce on a small rocky beach and yelled to attract his attention. He dived in and swam to the exhausted woman and dragged her to shore. He took her to the cave and broke open case of brandy which had washed up on the beach. He opened a bottle to revive the unconscious woman. A few hours later Tom scaled a cliff in search of help. He followed hoof prints and came by chance upon two men from nearby Glenample Station three and a half miles away. In a state of exhaustion, he told the men of the tragedy. Tom returned to the gorge while the two men rode back to the station to get help. By the time they reached LOCH ARD Gorge, it was cold and dark. The two shipwreck survivors were taken to Glenample Station to recover. Eva stayed at the station for six weeks before returning to Ireland, this time by steamship. In Melbourne, Tom Pearce received a hero's welcome. He was presented with the first gold medal of the Royal Humane Society of Victoria and a £1000 cheque from the Victorian Government. Concerts were performed to honour the young man's bravery and to raise money for those who lost family in the LOCH ARD disaster. Of the 54 crew members and passengers on board, only two survived: the apprentice, Tom Pearce and the young woman passenger, Eva Carmichael, who lost all of her family in the tragedy. Ten days after the LOCH ARD tragedy, salvage rights to the wreck were sold at auction for £2,120. Cargo valued at £3,000 was salvaged and placed on the beach, but most washed back into the sea when another storm developed. The wreck of LOCH ARD still lies at the base of Mutton Bird Island. Much of the cargo has now been salvaged and some was washed up into what is now known as LOCH ARD Gorge. Cargo and artefacts have also been illegally salvaged over many years before protective legislation was introduced. One of the most unlikely pieces of cargo to have survived the shipwreck was a Minton porcelain peacock - one of only nine in the world. The peacock was destined for the Melbourne International Exhibition in 1880. It had been well packed, which gave it adequate protection during the violent storm. Today, the Minton peacock can be seen at the Flagstaff Hill Maritime Museum in Warrnambool. From Australia's most dramatic shipwreck it has now become Australia's most valuable shipwreck artefact and is one of very few 'objects' on the Victorian State Heritage Register. Flagstaff Hill’s collection of artefacts from LOCH ARD is significant for being one of the largest collections of artefacts from this shipwreck in Victoria. It is significant for its association with the shipwreck, which is on the Victorian Heritage Register (VHR S417). The collection is significant because of the relationship between the objects, as together they have a high potential to interpret the story of the LOCH ARD. The LOCH ARD collection is archaeologically significant as the remains of a large international passenger and cargo ship. The LOCH ARD collection is historically significant for representing aspects of Victoria’s shipping history and its potential to interpret sub-theme 1.5 of Victoria’s Framework of Historical Themes (living with natural processes). The collection is also historically significant for its association with the LOCH ARD, which was one of the worst and best known shipwrecks in Victoria’s history. Ladies fob watch, gold, covered in encrustation (small section has broken off to reveal the engraved surface). Face and hands are missing, revealing the workings. Found in the Loch Ard gorge and said to have been from the Loch Ard.flagstaff hill, warrnambool, shipwrecked coast, flagstaff hill maritime museum, maritime museum, shipwreck coast, flagstaff hill maritime village, great ocean road, loch line, loch ard, captain gibbs, eva carmichael, tom pearce, glenample station, mutton bird island, loch ard gorge, ladies fob watch, gold watch, fob watch, pocket watch, horology, accessory, time keeping, scientific instrument -
 Flagstaff Hill Maritime Museum and Village
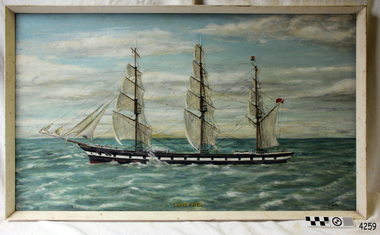
Painting - Vessel, Sailing Ship, C Smith, artist, Loch Ard, late 20th century
HISTORY OF THE LOCH ARD The LOCH ARD belonged to the famous Loch Line which sailed many ships from England to Australia. Built in Glasgow by Barclay, Curdle and Co. in 1873, the LOCH ARD was a three-masted square rigged iron sailing ship. The ship measured 262ft 7" (79.87m) in length, 38ft (11.58m) in width, 23ft (7m) in depth and had a gross tonnage of 1693 tons. The LOCH ARD's main mast measured a massive 150ft (45.7m) in height. LOCH ARD made three trips to Australia and one trip to Calcutta before its final voyage. LOCH ARD left England on March 2, 1878, under the command of Captain Gibbs, a newly married, 29 year old. She was bound for Melbourne with a crew of 37, plus 17 passengers and a load of cargo. The general cargo reflected the affluence of Melbourne at the time. On board were straw hats, umbrella, perfumes, clay pipes, pianos, clocks, confectionary, linen and candles, as well as a heavier load of railway irons, cement, lead and copper. There were items included that intended for display in the Melbourne International Exhibition in 1880. The voyage to Port Phillip was long but uneventful. At 3am on June 1, 1878, Captain Gibbs was expecting to see land and the passengers were becoming excited as they prepared to view their new homeland in the early morning. But LOCH ARD was running into a fog which greatly reduced visibility. Captain Gibbs was becoming anxious as there was no sign of land or the Cape Otway lighthouse. At 4am the fog lifted. A man aloft announced that he could see breakers. The sheer cliffs of Victoria's west coast came into view, and Captain Gibbs realised that the ship was much closer to them than expected. He ordered as much sail to be set as time would permit and then attempted to steer the vessel out to sea. On coming head on into the wind, the ship lost momentum, the sails fell limp and LOCH ARD's bow swung back. Gibbs then ordered the anchors to be released in an attempt to hold its position. The anchors sank some 50 fathoms - but did not hold. By this time LOCH ARD was among the breakers and the tall cliffs of Mutton Bird Island rose behind the ship. Just half a mile from the coast, the ship's bow was suddenly pulled around by the anchor. The captain tried to tack out to sea, but the ship struck a reef at the base of Mutton Bird Island, near Port Campbell. Waves broke over the ship and the top deck was loosened from the hull. The masts and rigging came crashing down knocking passengers and crew overboard. When a lifeboat was finally launched, it crashed into the side of LOCH ARD and capsized. Tom Pearce, who had launched the boat, managed to cling to its overturned hull and shelter beneath it. He drifted out to sea and then on the flood tide came into what is now known as LOCH ARD Gorge. He swam to shore, bruised and dazed, and found a cave in which to shelter. Some of the crew stayed below deck to shelter from the falling rigging but drowned when the ship slipped off the reef into deeper water. Eva Carmichael had raced onto deck to find out what was happening only to be confronted by towering cliffs looming above the stricken ship. In all the chaos, Captain Gibbs grabbed Eva and said, "If you are saved Eva, let my dear wife know that I died like a sailor". That was the last Eva Carmichael saw of the captain. She was swept off the ship by a huge wave. Eva saw Tom Pearce on a small rocky beach and yelled to attract his attention. He dived in and swam to the exhausted woman and dragged her to shore. He took her to the cave and broke open case of brandy which had washed up on the beach. He opened a bottle to revive the unconscious woman. A few hours later Tom scaled a cliff in search of help. He followed hoof prints and came by chance upon two men from nearby Glenample Station three and a half miles away. In a state of exhaustion, he told the men of the tragedy. Tom returned to the gorge while the two men rode back to the station to get help. By the time they reached LOCH ARD Gorge, it was cold and dark. The two shipwreck survivors were taken to Glenample Station to recover. Eva stayed at the station for six weeks before returning to Ireland, this time by steamship. In Melbourne, Tom Pearce received a hero's welcome. He was presented with the first gold medal of the Royal Humane Society of Victoria and a £1000 cheque from the Victorian Government. Concerts were performed to honour the young man's bravery and to raise money for those who lost family in the LOCH ARD disaster. Of the 54 crew members and passengers on board, only two survived: the apprentice, Tom Pearce and the young woman passenger, Eva Carmichael, who lost all of her family in the tragedy. Ten days after the LOCH ARD tragedy, salvage rights to the wreck were sold at auction for £2,120. Cargo valued at £3,000 was salvaged and placed on the beach, but most washed back into the sea when another storm developed. The wreck of LOCH ARD still lies at the base of Mutton Bird Island. Much of the cargo has now been salvaged and some was washed up into what is now known as LOCH ARD Gorge. Cargo and artefacts have also been illegally salvaged over many years before protective legislation was introduced. One of the most unlikely pieces of cargo to have survived the shipwreck was a Minton porcelain peacock - one of only nine in the world. The peacock was destined for the Melbourne International Exhibition in 1880. It had been well packed, which gave it adequate protection during the violent storm. Today, the Minton peacock can be seen at the Flagstaff Hill Maritime Museum in Warrnambool. From Australia's most dramatic shipwreck it has now become Australia's most valuable shipwreck artefact and is one of very few 'objects' on the Victorian State Heritage Register. Flagstaff Hill’s collection of artefacts from LOCH ARD is significant for being one of the largest collections of artefacts from this shipwreck in Victoria. It is significant for its association with the shipwreck, which is on the Victorian Heritage Register (VHR S417). The collection is significant because of the relationship between the objects, as together they have a high potential to interpret the story of the LOCH ARD. The LOCH ARD collection is archaeologically significant as the remains of a large international passenger and cargo ship. The LOCH ARD collection is historically significant for representing aspects of Victoria’s shipping history and its potential to interpret sub-theme 1.5 of Victoria’s Framework of Historical Themes (living with natural processes). The collection is also historically significant for its association with the LOCH ARD, which was one of the worst and best known shipwrecks in Victoria’s history. Painting of 1873 sailing ship the "Loch Ard". Oil painting on board behind glass, framed in white painted timber. Artist is C Smith. Inscription on back. "Loch Ard launched 1873, sunk near Pt Campbell, with loss of 52 lives 1878" "C. Smith" "Loch Ard" flagstaff hill, warrnambool, shipwrecked coast, flagstaff hill maritime museum, maritime museum, shipwreck coast, flagstaff hill maritime village, great ocean road, loch line, loch ard, captain gibbs, eva carmichael, tom pearce, loch ard gorge, maritime oil painting, c. smith, sailing vessel -
 Bendigo Military Museum
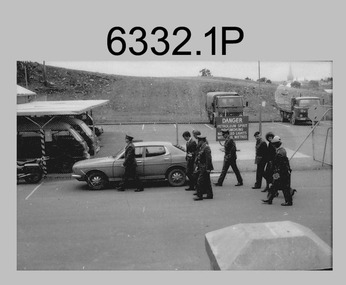
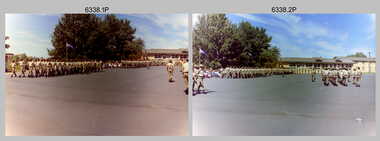
Photograph - Visit by the Minister for Defence to the Army Survey Regiment, Fortuna, Bendigo, c1984
This collection of 22 photos was most likely taken in 1984. Mr Gordon Scholes AO was the Minister for Defence in the Hawke Government from 1983 to 1984. It’s evident in these photos he was taken on a tour through the production areas. Mr John Brumby AO at this time was the Federal Member for Bendigo. He later moved on to Victorian state politics, serving as Treasurer from 2000 to 2007 and Premier from 2007 to 2010. Key Army Survey Regiment personnel identified include COL Alex Laing, the Director of Survey from 1983 to 1988 and CO LTCOL Jorge Gruszka who led the unit from 1982 to 1985. The rank of the senior officer is not known, however would have been a Major-General or above, due to the presence of the aide-de-camp (female captain). This is a set of 22 photographs of a visit to the Army Survey Regiment, Bendigo circa 1984, by Mr Gordon Scholes AO, who was the Minister for Defence. The photographs were printed on photographic paper and are part of the Army Survey Regiment’s Collection. Photographs .1P to .11P, .14P to .17P and .19P to .22P were scanned at 600 dpi. Photographs .12P to .13P and .18P were scanned at 300 dpi. .1) - Photo, black and white, c1984. L to R: unidentified, Mr John Brumby AO, Mr Gordon Scholes AO CO LTCOL Jorge Gruszka, unidentified, D-SVY COL Alex Laing, unidentified (x3). .2) - Photo, black and white, c1984. L to R: unidentified, CO LTCOL Jorge Gruszka AO, Mr John Brumby AO, Mr Gordon Scholes AO, unidentified (x4), D-SVY COL Alex Laing. .3) - Photo, black and white, c1984. L to R: unidentified (x2), Mr John Brumby, unidentified, CO LTCOL Jorge Gruszka AO, Mr Gordon Scholes AO, CAPT Danny Galbraith. .4) - Photo, black and white, c1984. L to R: unidentified, CO LTCOL Jorge Gruszka AO, Mr Gordon Scholes AO Mr John Brumby AO, unidentified. .5) - Photo, black and white, c1984. L to R: unidentified, Mr Gordon Scholes AO, unidentified, CO LTCOL Jorge Gruszka AO Mr John Brumby AO, unidentified. .6) - Photo, black and white, c1984. L to R: MAJ Daryl Hockings CSM, unidentified (x2). .7) - Photo, black and white, c1984. L to R: CAPT Danny Galbraith, unidentified (x2), Mr John Brumby AO, unidentified, CO LTCOL Jorge Gruszka AO, Mr Gordon Scholes AO, unidentified (x2). .8) - Photo, black and white, c1984. L to R: unidentified, Mr Gordon Scholes AO, CO LTCOL Jorge Gruszka AO, MAJ Daryl Hockings CSM, D-SVY COL Alex Laing, unidentified. .9) - Photo, black and white, c1984. L to R: unidentified, Mr John Brumby AO, CAPT Bob John, CO LTCOL Jorge Gruszka, Mr Gordon Scholes AO, unidentified (x2), MAJ Graham Baker, unidentified, MAJ Daryl Hockings CSM. .10) - Photo, black and white, c1984. L to R: Mr John Brumby AO, CAPT Bob John, Mr Gordon Scholes AO, unidentified (x2), MAJ Graham Baker, unidentified, MAJ Daryl Hockings CSM. .11) - Photo, black and white, c1984. L to R: unidentified, CO LTCOL Jorge Gruszka, Mr Gordon Scholes AO, unidentified (x2), MAJ Graham Baker, unidentified (x2). .12) - Photo, black and white, c1984. L to R: unidentified, CO LTCOL Jorge Gruszka, Mr Gordon Scholes AO. .13) - Photo, black and white, c1984. L to R: unidentified, Mr John Brumby AO, Mr Gordon Scholes AO, D-SVY COL Alex Laing, CO LTCOL Jorge Gruszka. .14) - Photo, black and white, c1984. L to R: unidentified, Mr Gordon Scholes AO, unidentified media, D-SVY COL Alex Laing, unidentified, CO LTCOL Jorge Gruszka, unidentified media (x2). .15) - Photo, black and white, c1984. L to R: unidentified, D-SVY COL Alex Laing, unidentified (x2), Mr Gordon Scholes AO, unidentified media (x3). .16) - Photo, black and white, c1984. L to R: unidentified (x5), CO LTCOL Jorge Gruszka, Mr Gordon Scholes AO. .17) - Photo, black and white, c1984. L to R: unidentified (x2), D-SVY COL Alex Laing, unidentified (x3), CO LTCOL Jorge Gruszka, Mr Gordon Scholes AO, Mr John Brumby AO. .18) - Photo, black and white, c1984. L to R: unidentified, CO LTCOL Jorge Gruszka, Mr Gordon Scholes AO. .19) - Photo, black and white, c1984. L to R: unidentified, CO LTCOL Jorge Gruszka, Mr John Brumby AO, D-SVY COL Alex Laing, unidentified, Mr Gordon Scholes AO, unidentified (x2). .20) - Photo, black and white, c1984. L to R: D-SVY COL Alex Laing, unidentified (x2). .21) - Photo, black and white, c1984. L to R: Mr John Brumby AO, unidentified, D-SVY COL Alex Laing, unidentified. .22) - Photo, black and white, c1984. L to R: unidentified (x3), Mr Gordon Scholes AO, Mr John Brumby AO, CO LTCOL Jorge Gruszka. .1P to .22P – no annotationsroyal australian survey corps, rasvy, army survey regiment, army svy regt, fortuna, asr -
 Bendigo Military Museum
Photograph - Army Survey Regiment – CO’s Parade and Defence Force Service Medal Presentations, c1987
These 34 photographs were taken at a CO’s parade at the Army Survey Regiment, Bendigo in c1987. The Colonel Commandant (honorary appointment) of the Survey Corps - COL Clem Sargent (Retd), presented the Defence Force Service Medal to four personnel in recognition of 15 years of efficient remunerated service, or the Clasp for 5 years of additional service. Recipients were WO1 Neville Stone and three unidentified support staff from the Australian Army Catering Corps, Royal Australian Electrical and Mechanical Engineers and the Royal Australian Corps of Transport. This is a set of 34 photographs of a CO’s parade and the presentation of the Defence Force Service Medal, at the Army Survey Regiment, Bendigo in c1987. The colour photographs are on 35mm negative film and are part of the Army Survey Regiment’s Collection. The photographs were scanned at 96 dpi. .1) to 2) - Photo, colour, c1987. Squadrons marching on parade ground. .3) to .4) - Photo, colour, c1987. Squadrons formed up on parade ground. RSM WO1 Jeff Lynch delivering orders. .5) - Photo, colour, c1987. Officers at ease in readiness to take posts. .6) - Photo, colour, c1987. Squadrons formed up on parade ground. RSM WO1 Jeff Lynch delivering orders. .7) - Photo, colour, c1987. RSM WO1 Jeff Lynch handing over to 2IC MAJ Terry Edwards. .8) - Photo, colour, c1987. Officers marching on to take posts. .9) - Photo, colour, c1987. L to R: CPL Paul Richards, SPR Todd Reynolds, SPR Eric Nicholson, MAJ Roger Rix, CPL Steve Hill, unidentified, CPL Russ Mollenhauer, remainder. .10) - Photo, colour, c1987. Guest of Honour - COL COMDT COL Clem Sargent arrives on parade ground, remainder unidentified. .11) - Photo, colour, c1987. Army Survey Regiment ready to salute Guest of Honour - COL COMDT COL Clem Sargent. .12) - Photo, colour, c1987, Guest of Honour - COL COMDT COL Clem Sargent returns salute. .13) - Photo, colour, c1987, L to R: 2IC MAJ Terry Edwards, SPR Eric Nicholson, COL COMDT COL Clem Sargent, SGT John ‘Stormy’ Tempest, unidentified (x2), SGT Mal Paterson, SGT Kevin Boehm, SSGT Peter Mustart, CPL Trevor Poll, SGT Terry Danger. .14) - Photo, colour, c1987, In left foreground MAJ Bob McHenry, unidentified personnel, unidentified officer, 2IC MAJ Terry Edwards, COL COMDT COL Clem Sargent, 3rd from right CAPT Graeme Wastell, CPL John Martin, SGT Martin Evans. .15) - Photo, colour, c1987, L to R: unidentified personnel, unidentified officer, 2IC MAJ Terry Edwards, COL COMDT COL Clem Sargent, SSGT Rick Van der Bom, CPL Paul Hunter, unidentified personnel, CAPT Graeme Wastell, SGT Paul Leskovec CSM, CPL John Martin, SGT Paul Cheater, SGT Martin Evans. .16) - Photo, colour, c1987, L to R: SGT Martin Evans. 2IC MAJ Terry Edwards, unidentified officer, COL COMDT COL Clem Sargent, unidentified personnel, SGT Paul Leskovec CSM, SGT Paul Cheater, SSGT Brian Collings, SSGT Ian ‘Rock’ Thistleton, WO1 Stevo Hinic. .17) - Photo, colour, c1987, L to R: unidentified personnel, 2IC MAJ Terry Edwards, COL COMDT COL Clem Sargent, SGT Roger Rees, unidentified female officer, SGT Phil Smalley, CPL Steve Coulsen, SPR Toni Wright, SGT Steve Gloster, SSGT Ken Talbot-Smith, CPL Darren Wilkinson, unidentified, SGT Paul Hopes. .18) - Photo, colour, c1987, L to R: unidentified female officer, COL COMDT COL Clem Sargent, unidentified, SGT Phil Smalley, CPL Steve Coulsen, SPR Toni Wright, CPL Steve Gloster, SSGT Ken Talbot-Smith, CPL Darren Wilkinson, SGT Paul Hopes. .19) - Photo, colour, c1987, L to R: unidentified personnel, CPL Peter ‘Jack’ Elverd, 2IC MAJ Terry Edwards, COL COMDT COL Clem Sargent, unidentified, SGT Stuart Hibbert, unidentified, Ted Burgess. .20) - Photo, colour, c1987, L to R: unidentified officer, COL COMDT COL Clem Sargent, 2IC MAJ Terry Edwards. .21) - Photo, colour, c1987, L to R: unidentified (x3), WO1 Neville Stone, COL COMDT COL Clem Sargent, SSGT Greg Anderson, unidentified officer, CAPT Graeme Wastell. .22) to .24) - Photo, colour, c1987, L to R: unidentified (x3), WO1 Neville Stone, COL COMDT COL Clem Sargent, SSGT Greg Anderson, unidentified officer. .25) to .26) - Photo, colour, c1987, L to R: unidentified, WO1 Neville Stone, unidentified, COL COMDT COL Clem Sargent, SSGT Greg Anderson, unidentified officer. .26) to 30) - Photo, colour, c1987, L to R: unidentified (x2), WO1 Neville Stone, COL COMDT COL Clem Sargent, SSGT Greg Anderson, unidentified officer. .31) to .34) - Photo, colour, c1987, L to R: unidentified, WO1 Neville Stone, COL COMDT COL Clem Sargent, unidentified officer..1P to .34P – There are no personnel identified.royal australian survey corps, rasvy, army survey regiment, army svy regt, fortuna, asr -
 Bendigo Historical Society Inc.
Document - Arthur T. Pattinson, 1962
10570 South African (Boer) War Memorial Bendigo. The monument commemorates those who died in service or were killed in action while serving in the South African (Boer) War. It is a bronze statue of a soldier on a granite base. Leader (Melbourne), 19 November 1904. “There was a large assemblage on the afternoon of 11th November, when the ceremony of unveiling the soldiers' memorial statue was performed by Brigadier-General Gordon in the presence of a muster of branches of the defence forces. The statue, which is in bronze, is mounted on a massive granite base, on the foot of which is the following inscription: — "Bendigo's tribute to the memory of the Australian soldiers who, in the South African war of 1899 - 1902 gave their lives for Queen and Empire. The statue was modelled by Mr. J. Walker, a young Bendigonian, who has been studying for two or three years under Mr. A. T. Woodward art instructor at the local school of mines.“ Ola Cohn recalled in her autobiography meeting John Walker as a sculpture student at the Bendigo School of Mines and that he had later received the commission for the Boer War Memorial although she neglects to mention its location. John Walker was born in Bendigo and first studied sculpture at the Bendigo School of Art. Walker, then went to England to study at the Royal College of Art London, and in Paris at the Académie Colarossi and Julian Academy. John Walker worked as a sculptor in both Bendigo and West Brunswick before turning to chicken farming in the Bendigo suburb of White Hills. The photo of A. T. Pattinson was taken by George Leake Massingham, a professional photographer, who had seven children, one of whom died at birth. After arriving in Australia from England, he established himself as a travelling photographer, an occupation he continued after his marriage. He travelled throughout country Queensland, Victoria and New South Wales, setting up studios along the way. The family ended up moving with him, travelling to Sydney, Narrandera, Bendigo, Newtown, Geelong and Deniliquin. Correspondence re Boer War Memorial Bendigo Boer War Memorial Bendigo. Letters and photo from and to Mrs Wilson, eldest daughter of Mr Arthur T. Pattinson who was a model for the Boer War sculpture. 10570a A black and white photo of Trooper Arthur T. Pattinson restored by BHS Volunteers. 10570b The original photo as sent by Mrs Wilson to Harold Curnow (Bendigo Historical Society) in 1962. The photo is mounted on heavy brown cardboard and has an old catalogue number of "P680" inscribed on it. The cardboard is torn and held together with sticky tape. On the front in italics is printed G.L. Massingham, Bendigo. 10570c Notes on the rear of the photo from Mrs Wilson state that "the photo is of Arthur T. Pattinson (Rusty), an Australian Light Horse trooper who served in the Boer War. The Boer War Memorial in Pall Mall Bendigo represents a trooper on guard. The sculptor was Jack Walker who used Pattinson as a model, and it is regarded as an excellent likeness." 10570d A letter from Harold Curnow back to Mrs Wilson on Jan 4th, 1963, acknowledging receipt of the photo and a letter received, noting the significance of the historical information. 10570e Handwritten letter 29/11/1962 from Mrs Wilson to Mr Curnow introducing herself as Mr. Pattinson's eldest daughter and answering the letter he wrote to her father. She mentions the bad health of her parents. Arthur modelled for the statue at least two to three times per week in a studio on the top floor of a building in Bull St. He was the original model to the best of her knowledge. Another model possibly Mr P. Handmear may have sat as a model for renovations (*). The rifle was a light horse rifle issued to Pattinson as he was still serving in 1904. Arthur and Handmear were boys together and very close. * Note - the plaster model was repaired prior to casting in metal. 10570f An obituary notice: 18/11/64 "On Nov. 17 at Frankston, Emma, wife of the late A. T. Pattinson (Rusty), late of Bendigo. 10570g Letter Nov. 20th, 1962, from Harold Curnow to Mr Arthur T. Pattinson, Kent St., Mornington, Vic. "Dear Mr Pattinson, Last week your brother, Brit., whom I have known for many years, supplied the Bendigo Advertiser with some interesting information regarding your role as the model for the late Jack Walker when he was making the statue for the Boer War Memorial here. Yesterday however, another claimant to the distinction of being the model was advanced in the Bendigo Advertiser by Mr Richard Marshall, of Moran Street, Bendigo who said that the soldier's model was Phillip Handmear. I understand that your brother has sent the newspaper cuttings on to you. When he called to see me yesterday, he suggested that I write to you for further particulars. Can you recall the discussion you had with Jack Walker when he approached you about acting as the model and do you remember how many times you posed for him, and whether the work was done in the house, in the yard, or in one of the outbuildings at Moran Street? In short, any details at all. At this point in time we are considering an interesting facet in Bendigo's history, so any seemingly unimportant incidents could really be useful if we knew about them. Have you any old newspaper cuttings mentioning your name in connection with the memorial? Do you remember any remarks that passed between you and Jack Walker during the long sessions you must have put in on this work? This could be very important. And do you recall where the rifle came from? Did you or Jack Walker borrow it from the military authorities? Back in 1934 Jack Walker recalled having had to pull the plaster model down and remake it when he discovered it was slightly off-balance and was slowly toppling forward. He told me he had to get his model to pose again. Do you know anything about this? Could it have been that he got Mr. Handmear in for the final stage of the work? That, of course, would apply only if you were not available. Incidentally, I never heard of Mr Handmear until I saw his name in yesterday's "Advertiser". In any case I intended contacting your brother or you to enquire whether any member of your family has an old photograph of you in your Boer War uniform, that is, one taken about the time of or just after the Boer War. I am sure that members of the Bendigo Branch of the Royal Historical Society would be most interested to see it. I hope you will have the time and inclination to consider the many points I have raised in this letter because the subject has aroused a lot of interest in Bendigo. Hoping you are well and quite as active as you wish, I remain, with all good wishes, Yours sincerely, Harold Curnow". john walker, jack walker, boer war memorial bendigo, arthur pattinson, soldiers' memorial bendigo -
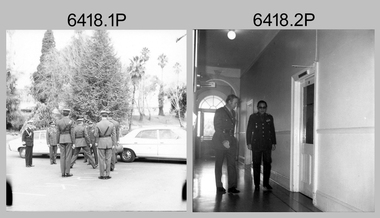 Bendigo Military Museum
Photograph - Visit by Thailand’s Director of Education to the Army Survey Regiment, Fortuna, Bendigo, c1977-1979
This is a set of 28 photographs of a visit to the Army Survey Regiment, Bendigo circa 1977-1979 by LT GEN Bulrit, who was Thailand’s Director of Education. It’s evident in these photos he was taken on a tour through the production areas of the Army Survey Regiment. The escorting Australian General is unidentified. LTCOL Bob Skitch was the CO of the Army Survey Regiment from 1976 to 1980.This is a set of 28 photographs of a visit to the Army Survey Regiment, Bendigo circa 1977-1979 by LT GEN Bulrit, who was Thailand’s Director of Education. The photographs were printed on photographic paper and are part of the Army Survey Regiment’s Collection. Photographs .1P to .26P are on three photo proof sheets and were scanned at 400 dpi. Photographs .27P and .28P were scanned at 300 dpi. .1) - Photo, black and white, c1977-1979. L to R: unidentified (x3), back of CO LTCOL Bob Skitch, unidentified, LT GEN Bulrit Thai Army, back of RSM WO1 Aub Harvey, unidentified. CO LTCOL Jorge Gruszka, unidentified, D-SVY COL Alex Laing, unidentified (x3). .2) to .4) - Photo, black and white, c1977-1979. L to R: CO LTCOL Bob Skitch, LT GEN Bulrit Thai Army. .5) to .6) - Photo, black and white, c1977-1979. L to R: MAJ Peter Eddy, LTCOL Bob Skitch, LT GEN Bulrit Thai Army. .7) - Photo, black and white, c1977-1979. L to R: unidentified (x2), MAJ Peter Eddy, LT GEN Bulrit Thai Army, unidentified. .8) - Photo, black and white, c1977-1979. L to R: unidentified Australian General, unidentified (x3), LT GEN Bulrit Thai Army, MAJ Peter Eddy. .9) - Photo, black and white, c1977-1979. L to R: unidentified (x4), LT GEN Bulrit Thai Army, unidentified Australian General. .10) - Photo, black and white, c1977-1979. L to R: unidentified (x2), LT GEN Bulrit Thai Army, MAJ Peter Eddy. .11) - Photo, black and white, c1977-1979. L to R: CAPT Bob Roche, unidentified, LT GEN Bulrit Thai Army. .12) - Photo, black and white, c1977-1979. L to R: CAPT Bob Roche, unidentified (x2), LT GEN Bulrit Thai Army. .13) - Photo, black and white, c1977-1979. L to R: unidentified Australian General, CO LTCOL Bob Skitch, LT GEN Bulrit Thai Army, unidentified (x2). .14) - Photo, black and white, c1977-1979. L to R: CAPT Bob Roche, LT GEN Bulrit Thai Army, unidentified. .15) - Photo, black and white, c1977-1979. L to R: LT GEN Bulrit Thai Army, MAJ Peter Eddy. .16) - Photo, black and white, c1977-1979. L to R: MAJ Peter Eddy, LT GEN Bulrit Thai Army, unidentified Australian General, unidentified. .17) - Photo, black and white, c1977-1979. L to R: MAJ Peter Eddy, LT GEN Bulrit Thai Army, unidentified Australian General. .18) - Photo, black and white, c1977-1979. L to R: LT GEN Bulrit Thai Army, unidentified, Mr M. Frazer, unidentified, CAPT Bob Roche, unidentified Australian General, unidentified. .19) - Photo, black and white, c1977-1979. L to R: LT GEN Bulrit Thai Army, unidentified Australian General, Miss Pochana, CO LTCOL Bob Skitch. .20) - Photo, black and white, c1977-1979. L to R: LT GEN Bulrit Thai Army, MAJ Sam Schwartz EXCH-US. .21) - Photo, black and white, c1977-1979. L to R: Miss Pochana, unidentified, MAJ Sam Schwartz EXCH-US, LT GEN Bulrit Thai Army. .22) - Photo, black and white, c1977-1979. L to R: LT GEN Bulrit Thai Army, MAJ Sam Schwartz EXCH-US, unidentified Australian General, CO LTCOL Bob Skitch, unidentified. .23) - Photo, black and white, c1977-1979. L to R: LT GEN Bulrit Thai Army, MAJ Sam Schwartz EXCH-US, unidentified (x2), unidentified Australian General, CAPT Terry Edwards, unidentified. .24) - Photo, black and white, c1977-1979. L to R: LT GEN Bulrit Thai Army, MAJ Sam Schwartz EXCH-US, unidentified (x3), unidentified Australian General. .25) - Photo, black and white, c1977-1979. LT GEN Bulrit Thai Army. .26) - Photo, black and white, c1977-1979. L to R: unidentified, LT GEN Bulrit Thai Army, MAJ Sam Schwartz EXCH-US. .27) - Photo, black and white, c1977-1979. L to R: unidentified, LT GEN Bulrit Thai Army, CAPT Bob Roche, unidentified Australian General, Miss Pochana, CO LTCOL Bob Skitch, SSGT Dick Manley. .28) - Photo, black and white, c1977-1979. L to R: CO LTCOL Bob Skitch, LT GEN Bulrit Thai Army, Miss Pochana, Mr M. Frazer..1P to .27P – no annotations .28P – ‘Lt. Gen Bulrit Director of Education THAI ARMY is greeted by MISS POTCHANA a ROTARY EXCHANGE student accompanied by MR M FRAZER’royal australian survey corps, rasvy, army survey regiment, army svy regt, fortuna, asr -
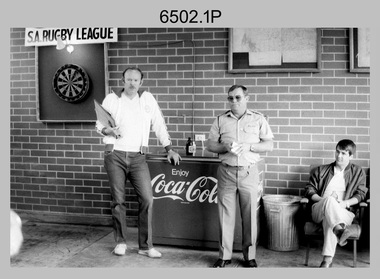 Bendigo Military Museum
Photograph - 4th Field Survey Squadron – MAJ Don Taylor Farewell, Keswick Barracks, Adelaide SA, 1986
This is a set of 21 photographs of a 4th Field Survey Squadron function held in 1986 to farewell its OC MAJ Don Taylor. MAJ Taylor served 27 years in the Australian Regular Army from 1960 to 1987.This is a set of 21 photographs of a 4th Field Survey Squadron function to farewell its OC MAJ Don Taylor, at Keswick Barracks, Adelaide SA in 1986. The black & white photographs are on 35mm negative film and are part of the Army Survey Regiment’s Collection. The photographs were scanned at 96 dpi. .1) - Photo, black & white, 1986. L to R: SSM WO1 Bill Griggs, OC MAJ Don Taylor, unidentified. .2) - Photo, black & white, 1986. Back row L to R: SGT Wally Chilcott, unidentified (x2), CPL Peter McCurdy, unidentified. Front row L to R: LT Greg Oaten CSC, LT Malcolm Hentschel, SPR Steve Nokes. At front L to R: CPL John Ratcliffe, OC MAJ Don Taylor, SSM WO1 Bill Griggs. .3) - Photo, black & white, 1986. L to R: SSM WO1 Bill Griggs, CPL John Ratcliffe, OC MAJ Don Taylor, George Ricketts, unidentified (x2). .4) - Photo, black & white, 1986. L to R: LT Malcolm Hentschel, unidentified (x2), CPL John Ratcliffe, CPL Peter Hardy, SSM WO1 Bill Griggs, OC MAJ Don Taylor. .5) - Photo, black & white, 1986. L to R: LT Greg Oaten CSC, LT Malcolm Hentschel, unidentified (x2), CPL John Ratcliffe, CPL Peter Hardy, SSM WO1 Bill Griggs, OC MAJ Don Taylor. .6) - Photo, black & white, 1986. L to R: SGT Bill Tewson, SGT Bob Croxton, CPL Dave Irving, WO2 Bob Rogister, unidentified (x3), SSGT Cam Chapman, Chris Hills, CPL Roger Graf. .7) - Photo, black & white, 1986. L to R: SSM WO1 Bill Griggs, LT Malcolm Hentschel, OC MAJ Don Taylor, SGT Mick Hogan. .8) - Photo, black & white, 1986. L to R: unidentified, LT Malcolm Hentschel, SSM WO1 Bill Griggs, Mick Hogan’s daughter? OC MAJ Don Taylor, SGT Mick Hogan. .9) - Photo, black & white, 1986. L to R: unidentified, SSM WO1 Bill Griggs, unidentified, SGT Bill Tewson, OC MAJ Don Taylor. .10) - Photo, black & white, 1986. L to R: unidentified, SGT Bill Tewson, SSM WO1 Bill Griggs, OC MAJ Don Taylor, SGT Mick Hogan and his wife. .11) - Photo, black & white, 1986. L to R: CAPT Steve Cooper, SSM WO1 Bill Griggs, OC MAJ Don Taylor. .12) - Photo, black & white, 1986. L to R: unidentified, CAPT Steve Cooper, SSM WO1 Bill Griggs, OC MAJ Don Taylor, SGT Mick Hogan. .13) - Photo, black & white, 1986. L to R: unidentified, CPL Peter McCurdy, SGT Bill Tewson, CAPT Steve Cooper, OC MAJ Don Taylor, SSM WO1 Bill Griggs. .14) - Photo, black & white, 1986. L to R: OC MAJ Don Taylor, unidentified (x5), CPL Chris ‘Charlie’ Brown, unidentified (seated), SPR Damian Killeen, remainder unidentified. .15) - Photo, black & white, 1986. L to R: unidentified, LT Malcolm Hentschel, SPR Steve Ellis, unidentified (x5), CPL Roger Graf. .16) - Photo, black & white, 1986. Unidentified personnel. SPR Richard Cocker takes aim at the dart board. 4 Fd Svy Sqn Farewell 1986. .20) - L to R: unidentified, CPL Peter Hardy, CPL Tracey (Beckwith) Phillips, unidentified (x4), CAPT Steve Cooper, Ken Jeffery, remainder unidentified. .21) - L to R: CPL C. Rimmington, SGT H. Young. .17) - Photo, black & white, 1986. L to R: SPR Steve Nokes, LT Greg Oaten CSC, SPR Simon Reynolds, Chris Hills, LT Malcolm Hentschel, SGT Wally Chilcott. .18) - Photo, black & white, 1986. L to R: unidentified, SPR Richard Cocker, CPL Peter McCurdy, LT Greg Oaten CSC, SPR Simon Reynolds, SGT Bob Croxton. .19) - Photo, black & white, 1986. L to R: CPL Chris ‘Charlie’ Brown, Mrs Kath Rogister, WO2 Bob Rogister, SSGT Cam Chapman, CAPT Terry Lord, unidentified. .20) - Photo, black & white, 1986. L to R: unidentified, CPL Peter Hardy, CPL Tracey (Beckwith) Phillips, unidentified (x4), CAPT Steve Cooper, Ken Jeffery, remainder unidentified. .21) - Photo, black & white, 1986. L to R: CPL C. Rimmington, SGT H. ’Jock’ Young..1P to .21P – There are no personnel identified. ‘MAJ Don Taylor’s SQN Farewell. 1986’ annotated on negatives sleeve.royal australian survey corps, rasvy, 4 fd svy sqn -
 Moorabbin Air Museum
Document (item) - Roland Jahne Collection - See Description for details
-
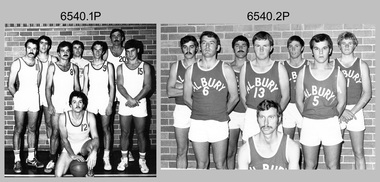 Bendigo Military Museum
Photograph - Annual Sport Competition: Flag Day - Army Survey Regiment Verses School of Military Survey, Bendigo, 1977
This set of 33 photographs of sports action was taken on Flag Day, an annual sports competition between the Army Survey Regiment (ASR) and the School of Military Survey (SMS), at Bendigo on the 13th of May 1977. Softball was held at Beischer Park Strathdale, sailing was most likely held at Lake Eppalock, rifle shooting at Wellsford Rifle Range and tug-of-war at Fortuna. The venues for basketball, golf, squash and volleyball are unknown. The two RA Svy units took turns each year to host the event. Personnel from the ASR’s Detachment located at Bonegilla were part of the SMS’s teams. The day competition usually comprised basketball, cross country, golf, sailing, squash softball, tennis, rifle shooting, touch football, tug-of-war and volleyball. The evening competition often included darts, carpet bowls, hookey, quoits and snooker. See items 6025.15P for photo proofs of sports action and 6326.25P for softball action and taken on the day. There are numerous duplicates previously published from these photo proofs; however they are inferior in quality.This is a set of 33 photographs of sports action was taken on Flag Day, Army Survey Regiment (ASR) versus the School of Military Survey (SMS), at Bendigo on the 13th of May 1977. The photographs were printed on photographic paper and are part of the Army Survey Regiment’s Collection. The black and white photographs were scanned at 300 dpi. .1) - Photo, black & white, 1977, Basketball. ASR Team Back row L to R: unidentified, Stuart Symonds, Bruce Gordon. Front row L to R: unidentified (x2), Bill Jones, unidentified. Sitting: unidentified. .2) - Photo, black & white, 1977, Basketball. SMS Team Back row L to R: Duncan Burns, Stuart Thaxter, unidentified (x2). Front row L to R: Owen Moss, unidentified, Steve Hansen. Sitting: unidentified. .3) to .5) - Photo, black & white, 1977. Basketball action. .6) - Photo, black & white, 1977, Golf - L to R: Kevin ‘Chuck’ Berry, George Austen, unidentified, Roy Morgan. .7) - Photo, black & white, 1977, Golf - L to R: Stan Vote, Gordon Lowery, Peter Warwick, John ‘JB’ Barrie. .8) & .9) - Photo, black & white, 1977, ASR Golf Team – Back row L to R: Peter Warwick, unidentified, Graeme Jeffers, John Sinclair. Front row L to R: Stan Vote, Roy Morgan, George Austen, Len Thirlwell. .10) & .11) - Photo, black & white, 1977, SMS Golf Team - Back row L to R: Kevin ‘Chuck’ Berry, unidentified, Gordon Lowery. Front row L to R: unidentified, Peter Hardy, unidentified, John ‘JB’ Barrie. .12) & .13) - Photo, black & white, 1977, Golf. Teeing off – unidentified. .14) - Photo, black & white, 1977, Golf. Teeing off – John Sinclair. .15) - Photo, black & white, 1977, Golf. Putting – Stan Vote. .16) - Photo, black & white, 1977, Golf. Putting - Peter Warwick. .17) - Photo, black & white, 1977, Golf. Putting – Roy Morgan. .18) - Photo, black & white, 1977, ASR Rifle Shooting Team - Back row L to R: Paul Davis, unidentified (x2), Max Neil, Rhys De Laine. Front row L to R: Tony Lawler, Rene van den Tol, unidentified, Warren ‘Waldo’ Shirley. .19) - Photo, black & white, 1977, ASR Rifle Shooting Team – L to R: unidentified (x4), 2nd back right: Tony Lawler, unidentified. .20) - Photo, black & white, 1977, SMS Rifle Shooting Team - Back row L to R: John Ashby, unidentified (x3). Front row L to R: Dave Murphy, Wolfgang Thun, John ‘Stormy’ Tempest, unidentified. .21) - Photo, black & white, 1977, Softball – L to R: Jenny Haddow, Debbie Brown, unidentified umpire. .22) - Photo, black & white, 1977, ASR & SMS Sailing Teams – Back row L to R: Chris Osborne, Josh De Groot, unidentified (x2), Greg Francis-Wright, Peter Breukel. 3rd row L to R: Marrianne (Van De Zee) De Groot, unidentified, Kim Reynolds, Alex Cairney, unidentified, Sam Chambers. 2nd row L to R: Les Dixon, Jim Macdonald, unidentified, George Graham, Ted ‘FOT’ Burgess. Front row L to R: Doug Carswell, Alan Adsett, Peter Mustart, Tony Waldon, Dave Miles. .23) - Photo, black & white, 1977, Sailing on Lake Eppalock, Victoria. .24) - Photo, black & white, 1977, SMS Squash Team – Back row L to R: Graham Squire, Peter Constantine AM, Peter Colwell, Bill Boyd OAM, Front row L to R: unidentified, Dick Barwald, Colin Darch, unidentified. .25) - Photo, black & white, 1977, ASR Squash Team – Back row L to R: Andy Wilson, Terry Danger, Errol Fletcher, Dennis Puniard. Front row L to R: Lynn Johnson, Kerry Browne. .26) - Photo, black & white, 1977, ASR Tug-of-War Team: Back row L to R: Russ Mollenhauer, Neville Stone, Jim Cook, Jeff Willey, unidentified (x3). Front row L to R: unidentified, John ‘Flash’ Anderson, Mick ‘Buddha’ Ellis, Ken ‘Sluggo’ Slater, Rob ‘Boges’ Bogumil, Frank Lenane, unidentified. .27) - Photo, black & white, 1977, SMS Tug-of-War Team: Back row L to R: unidentified, Stuart Thaxter, Steve Hansen, unidentified (x2). Front row L to R: Kim Lenson, unidentified (x4), Jamie ‘Fish’ McRae. .28) & .29) - Photo, black & white, 1977, ASR Tug-of-War Team in action. .30) - Photo, black & white, 1977, Volleyball action. .31) - Photo, black & white, 1977, Volleyball action. Chris Edwards blocking. .32) & .33) - Photo, black & white, 1977, Volleyball action..1P to .33P –No personnel are identified. ‘Regiment v School 13 May 1977’ annotated on cover sleeve.royal australian survey corps, rasvy, army survey regiment, army svy regt, fortuna, asr, school of military survey, flag day -
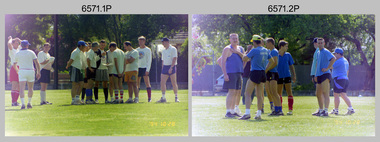 Bendigo Military Museum
Photograph - 4th Field Survey Squadron Soccer Match. Adelaide, SA, 1994
This is a selection of 30 photographs of 4th Field Survey Squadron personnel participating in a soccer game, between the Other Ranks (ORs) and Officers/Warrant Officers/Senior Non-Commissioned Officers (OFFR/SNCOs), at an unknown location in Adelaide, South Australia on the 28th of October 1994.This is a selection of 30 photographs of 4th Field Survey Squadron personnel participating in a soccer game at an unknown location in Adelaide, South Australia on the 28th of October 1994. The colour photographs are part of a set of 72 photographs on 35mm negative film and are part of the Army Survey Regiment’s Collection. The photographs were scanned at 96 dpi. .1) - Photo, colour, 1994. OFFR/SNCOs L to R: SSGT A. Simcock. WO2 Peter Hammer, SGT Peter Hardy, unidentified, SSGT Brian Collings, unidentified, WO2 Simon ‘Andy’ Capp, SGT H. Evertz, OC MAJ Peter Demaine, unidentified, CAPT Chris Topovsek. .2) - Photo, colour, 1994. ORs L to R: unidentified (x3), CPL Steve Wegener, CPL Dick Crawford, unidentified, LCPL Mitch Oake, unidentified. .3) - Photo, colour, 1994. L to R: CAPT Chris Topovsek, SGT Steve McGuiness, LCPL Mitch Oake, WO2 Simon ‘Andy’ Capp, unidentified. .4) - Photo, colour, 1994. L to R: unidentified, CPL Steve Wegener. .5) - Photo, colour, 1994. L to R: WO2 Simon ‘Andy’ Capp, SSGT Pat ‘Fuji’ Drover, unidentified. .6) - Photo, colour, 1994. L to R: unidentified (x2). .7) - Photo, colour, 1994. L to R: SSGT A. Simcock, SPR Mark Linwood, SPR Mark McInerney, unidentified, CPL Dick Crawford. .8) - Photo, colour, 1994. CPL Dick Crawford. .9) - Photo, colour, 1994. L to R: unidentified, SGT Steve McGuiness, SPR Mark Linwood, SPR Mark McInerney, SSGT A. Simcock. .10) - Photo, colour, 1994. CPL Dick Crawford taking an indirect penalty. The wall L to R: SGT H. Evertz, WO2 Simon ‘Andy’ Capp, SSGT Pat ‘Fuji’ Drover, SGT Dave Longbottom. .11) - Photo, colour, 1994. OFFR/SNCOs half time L to R: OC MAJ Peter Demaine, unidentified, SGT Dave Longbottom, SSGT A. Simcock, unidentified, SGT Steve McGuiness, unidentified, WO2 Peter Hammer. .12) - Photo, colour, 1994. ORs half time L to R: unidentified, SPR Mark Linwood, CPL Peter Ball, CPL Steve Wegener, unidentified. .13) - Photo, colour, 1994. L to R: unidentified (x2), SPR Fran Calvert. .14) - Photo, colour, 1994. L to R: Unidentified, SPR Fran Calvert. .15) - Photo, colour, 1994. L to R: CPL Phuc ‘Charlie’ Tran, SPR Fran Calvert. .16) - Photo, colour, 1994. L to R: unidentified, SPR Mark Linwood, CPL Peter Ball. .17) & .18) - Photo, colour, 1994. Attempted goal. .19) - Photo, colour, 1994. L to R: unidentified, (x2), CPL Peter Ball, LT Andrew Caudle, SGT Steve McGuiness, CPL Dick Crawford, SSGT Pat ‘Fuji’ Drover. .20) - Photo, colour, 1994. SPR Fran Calvert tackled from behind. .21) - Photo, colour, 1994. Attempted goal. L to R: CPL Phuc ‘Charlie’ Tran, SPR Fran Calvert, remainder unidentified. .22) - Photo, colour, 1994. Goal celebration. L to R: CPL Phuc ‘Charlie’ Tran, SPR Fran Calvert, remainder unidentified. .23) - Photo, colour, 1994. Attempted goal. L to R: SGT Steve McGuiness, CPL Phuc ‘Charlie’ Tran, CPL Peter Ball, SGT Dave Longbottom. .24) - Photo, colour, 1994. Attempted goal. Keeper CPL Steve Wegener under pressure. .25) - Photo, colour, 1994. Goal scored. L to R: CPL Dick Crawford, remainder unidentified. .26) - Photo, colour, 1994. Keeper clearance L to R: SGT Steve McGuiness, CPL Dick Crawford, SGT Dave Longbottom. .27) - Photo, colour, 1994. L to R: SGT Steve McGuiness, OC MAJ Peter Demaine, SGT H. Evertz, CPL Peter Ball, CPL Phuc ‘Charlie’ Tran (eyes not on the ball), SGT Dave Longbottom. .28) - Photo, colour, 1994. Keeper saves extreme pressure L to R: unidentified, (x2), Dick Crawford, SGT Dave Longbottom, CPL Steve Wegener, unidentified. In foreground: unidentified (x2). .29) - Photo, colour, 1994. Skilled footwork L to R: SSGT Brian Collings, SPR Fran Calvert, WO2 Simon ‘Andy’ Capp. In background: unidentified, SSGT Pat ‘Fuji’ Drover. .30) - Photo, colour, 1994. L to R: unidentified, CPL Dick Crawford, OC MAJ Peter Demaine, SGT Dave Longbottom..1P to .30P – There are no personnel identified. ‘1994 OCT SOCCER MATCH ORs v OFFR/SNCOs’ annotated on negatives sleeve.royal australian survey corps, rasvy, 4 fd svy sqn -
 Bendigo Military Museum
Photograph - Bones Day – Army Survey Regiment Verses RAAF School of Radio at Bendigo, Victoria, 1984
These 41 photographs were taken at Bones Day, an annual sports competition between the Army Survey Regiment and the RAAF School of Radio, at Bendigo on the 14th of November 1984. The two units took turns each year to host the event. The day competition usually comprised basketball, cricket, cross country, golf, pistol shooting, sailing, squash, rifle shooting, softball, tennis, touch football, tug-of-war and volleyball. The “big bone” trophy comprising a large bone from a beast housed inside a wooden framed glass case, was awarded to the winner of the day competition. The “O.H.A.R.A Rock” seen on the table in photo 6585.10P was awarded to the shooter with the lowest score in rifle shooting. The evening competition often included darts, carpet bowls, hookey, quoits and billiards/snooker. The “little bone” (a mounted chicken bone) was the consolation trophy awarded to the winner of the evening competition. The 3-hour bus trip for the visiting unit on their return was typically very raucous. The history of the Bones Day competition is best described in the booklet titled - Bones of Contention Souvenir Program. 1965. Refer to Item 6267. Photo 6585.41P is also published with Item 6276.5P.This item comprises the cover of a program booklet and a set of 40 photographs from Bones Day, an annual sports competition between the Army Survey Regiment and the RAAF School of Radio, held at Bendigo on the 14th of November 1984. The photographs were printed on photographic paper and are part of the Army Survey Regiment’s Collection. The colour A4 booklet cover and black and white photographs were scanned at 300 dpi. .1) – A5 size program booklet titled ‘The Bones of Contention’, buff card cover, graphics and internal text printed in purple. 32 pages dated 1984. .2) to .4) - Photo, black & white, 1984. Basketball. Army in darker tops, RAAF in white. .5) - Photo, black & white, 1984. Basketball. Unidentified participants from RAAF. .6) - Photo, black & white, 1984. Rifle Shooting. L to R: CPL Graham Johnston, unidentified. .7) & .8) - Photo, black & white, 1984. Rifle Shooting. Unidentified participants. .9) - Photo, black & white, 1984. Rifle Shooting. Unidentified officials at Range Control. .10) - Photo, black & white, 1984. Rifle Shooting. Unidentified participants from RAAF. The “O.H.A.R.A Rock” awarded to the shooter with the lowest score in rifle shooting is seen on the table. .11) - Photo, black & white, 1984. Pistol Shooting. Army CO LTCOL Jorge Gruszka. .12) - Photo, black & white, 1984. Pistol Shooting. L to R: Army CO LTCOL Jorge Gruszka, CPL Doug Home. .13) - Photo, black & white, 1984. Pistol Shooting. Army CO LTCOL Jorge Gruszka. .14) - Photo, black & white, 1984. Pistol Shooting. RAAF’s participants L to R: unidentified, CO WGCDR McCarthy, remainder unidentified. .15) - Photo, black & white, 1984. Pistol Shooting. ARMY’s participants L to R: CPL Doug Home, SSGT Davidson, SPR Andy Godden, CO LTCOL Jorge Gruszka. .16) & .17) - Photo, black & white, 1984. Pistol Shooting. ARMY and RAAF participants Back row L to R: CPL Doug Home, SSGT Davidson, unidentified RAAF participants (x2). Front row L to R: SPR Andy Godden, RAAF CO WGCDR McCarthy, Army CO LTCOL Jorge Gruszka. .18) to .25) - Photo, black & white, 1984. Softball. Unidentified ARMY & RAAF participants. .26) - Photo, black & white, 1984. Tennis. L to R: ARMY’s CPL John ‘Stormy’ Tempest, SPR Steve Coulson. .27) - Photo, black & white, 1984. Tennis. Unidentified participant. .28) - Photo, black & white, 1984. Tennis. CPL Ginny (Turner) Rowe, unidentified in background. .29) to .31) - Photo, black & white, 1984. Tennis. Unidentified participants. .32) - Photo, black & white, 1984. Tug-of-War. Army team lines up L to R: SPR Kerron South, CPL Leon Jackson, SPR Brett McAllister, CPL Jamie ‘Fish’ McRae, unidentified, CPL Roger Graf, CPL Peter Lefel. .33) - Photo, black & white, 1984. Tug-of-War. Army team pulling hard L to R: unidentified, CPL Jamie ‘Fish’ McRae, SPR Brett McAllister, CPL Leon Jackson, SPR Kerron South. .34) - Photo, black & white, 1984. Tug-of-War. Army and RAAF spectators. Centre foreground L to R: MAJ Bob Roche, Army CO LTCOL Jorge Gruszka, RAAF CO WGCDR McCarthy. .35) - Photo, black & white, 1984. Tug-of-War. RAAF team taking the strain on the rope. Unidentified participants. .36) - Photo, black & white, 1984. Tug-of-War. Army and RAAF teams shake hands after Army’s victory. .37) - Photo, black & white, 1984. Volleyball. Army’s team (light shirts) prepare to receive RAAF’s serve. L to R: CPL Rod Skidmore, CPL Ian Nichols, CPL Dan Cirsky, CPL Terry ‘TJ’ Wicker. .38) - Photo, black & white, 1984. Volleyball. Army’s CPL Rod Skidmore (light shirt) attempts to block a RAAF spike. Unidentified RAAF participants at left. Army team L to R: CPL Terry ‘TJ’ Wicker CPL Robin Marshall, CPL Dan Cirsky. .39) - Photo, black & white, Trophy presentation. L to R: RAAF CO WGCDR McCarthy presents ‘the Big Bone’ to Army’s CO LTCOL Jorge Gruszka. .40) - Photo, black & white, Trophy presentation. L to R: RAAF CO WGCDR McCarthy presents ‘the Little Bone’ to Army’s CO LTCOL Jorge Gruszka. .41) - Photo, black & white, Trophy presentation. L to R: RAAF CO WGCDR McCarthy presents an unidentified trophy to Army’s CO LTCOL Jorge Gruszka..1 - 'The Bones of Contention' title on booklet cover. '1984' hand written on top of cover Photos .2P to .41P – 'Bones Day 1984' annotated on cover sleeve.royal australian survey corps, rasvy, army survey regiment, army svy regt, fortuna, bones day -
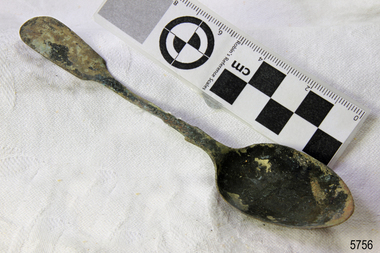 Flagstaff Hill Maritime Museum and Village
Domestic object - Spoon, c. 1878
Unrestored tea spoon from the wreck of the LOCH ARD. The spoon design has a flattened fiddle-back handle, with a thin stem or shank, flared collar, and elongated bowl. The spoons metallic composition is a thin layer of brass alloy which has partially corroded back to a nickel-silver base metal. HISTORY OF THE LOCH ARD The LOCH ARD belonged to the famous Loch Line which sailed many ships from England to Australia. Built in Glasgow by Barclay, Curdle and Co. in 1873, the LOCH ARD was a three-masted square rigged iron sailing ship. The ship measured 262ft 7" (79.87m) in length, 38ft (11.58m) in width, 23ft (7m) in depth and had a gross tonnage of 1693 tons. The LOCH ARD's main mast measured a massive 150ft (45.7m) in height. LOCH ARD made three trips to Australia and one trip to Calcutta before its final voyage. LOCH ARD left England on March 2, 1878, under the command of Captain Gibbs, a newly married, 29 year old. She was bound for Melbourne with a crew of 37, plus 17 passengers and a load of cargo. The general cargo reflected the affluence of Melbourne at the time. On board were straw hats, umbrella, perfumes, clay pipes, pianos, clocks, confectionary, linen and candles, as well as a heavier load of railway irons, cement, lead and copper. There were items included that intended for display in the Melbourne International Exhibition in 1880. The voyage to Port Phillip was long but uneventful. At 3am on June 1, 1878, Captain Gibbs was expecting to see land and the passengers were becoming excited as they prepared to view their new homeland in the early morning. But LOCH ARD was running into a fog which greatly reduced visibility. Captain Gibbs was becoming anxious as there was no sign of land or the Cape Otway lighthouse. At 4am the fog lifted. A man aloft announced that he could see breakers. The sheer cliffs of Victoria's west coast came into view, and Captain Gibbs realised that the ship was much closer to them than expected. He ordered as much sail to be set as time would permit and then attempted to steer the vessel out to sea. On coming head on into the wind, the ship lost momentum, the sails fell limp and LOCH ARD's bow swung back. Gibbs then ordered the anchors to be released in an attempt to hold its position. The anchors sank some 50 fathoms - but did not hold. By this time LOCH ARD was among the breakers and the tall cliffs of Mutton Bird Island rose behind the ship. Just half a mile from the coast, the ship's bow was suddenly pulled around by the anchor. The captain tried to tack out to sea, but the ship struck a reef at the base of Mutton Bird Island, near Port Campbell. Waves broke over the ship and the top deck was loosened from the hull. The masts and rigging came crashing down knocking passengers and crew overboard. When a lifeboat was finally launched, it crashed into the side of LOCH ARD and capsized. Tom Pearce, who had launched the boat, managed to cling to its overturned hull and shelter beneath it. He drifted out to sea and then on the flood tide came into what is now known as LOCH ARD Gorge. He swam to shore, bruised and dazed, and found a cave in which to shelter. Some of the crew stayed below deck to shelter from the falling rigging but drowned when the ship slipped off the reef into deeper water. Eva Carmichael had raced onto deck to find out what was happening only to be confronted by towering cliffs looming above the stricken ship. In all the chaos, Captain Gibbs grabbed Eva and said, "If you are saved Eva, let my dear wife know that I died like a sailor". That was the last Eva Carmichael saw of the captain. She was swept off the ship by a huge wave. Eva saw Tom Pearce on a small rocky beach and yelled to attract his attention. He dived in and swam to the exhausted woman and dragged her to shore. He took her to the cave and broke open case of brandy which had washed up on the beach. He opened a bottle to revive the unconscious woman. A few hours later Tom scaled a cliff in search of help. He followed hoof prints and came by chance upon two men from nearby Glenample Station three and a half miles away. In a state of exhaustion, he told the men of the tragedy. Tom returned to the gorge while the two men rode back to the station to get help. By the time they reached LOCH ARD Gorge, it was cold and dark. The two shipwreck survivors were taken to Glenample Station to recover. Eva stayed at the station for six weeks before returning to Ireland, this time by steamship. In Melbourne, Tom Pearce received a hero's welcome. He was presented with the first gold medal of the Royal Humane Society of Victoria and a £1000 cheque from the Victorian Government. Concerts were performed to honour the young man's bravery and to raise money for those who lost family in the LOCH ARD disaster. Of the 54 crew members and passengers on board, only two survived: the apprentice, Tom Pearce and the young woman passenger, Eva Carmichael, who lost all of her family in the tragedy. Ten days after the LOCH ARD tragedy, salvage rights to the wreck were sold at auction for £2,120. Cargo valued at £3,000 was salvaged and placed on the beach, but most washed back into the sea when another storm developed. The wreck of LOCH ARD still lies at the base of Mutton Bird Island. Much of the cargo has now been salvaged and some was washed up into what is now known as LOCH ARD Gorge. Cargo and artefacts have also been illegally salvaged over many years before protective legislation was introduced. One of the most unlikely pieces of cargo to have survived the shipwreck was a Minton porcelain peacock - one of only seven in the world. The peacock was destined for the Melbourne International Exhibition in 1880. It had been well packed, which gave it adequate protection during the violent storm. Today, the Minton peacock can be seen at the Flagstaff Hill Maritime Museum in Warrnambool. From Australia's most dramatic shipwreck it has now become Australia's most valuable shipwreck artefact and is one of very few 'objects' on the Victorian State Heritage Register. The LOCH ARD shipwreck is of State significance – Victorian Heritage Register S 417. Flagstaff Hill’s collection of artefacts from LOCH ARD is significant for being one of the largest collections of artefacts from this shipwreck in Victoria. It is significant for its association with the shipwreck, which is on the Victorian Heritage Register (VHR S417). The collection is significant because of the relationship between the objects, as together they have a high potential to interpret the story of the LOCH ARD. The LOCH ARD collection is archaeologically significant as the remains of a large international passenger and cargo ship. The LOCH ARD collection is historically significant for representing aspects of Victoria’s shipping history and its potential to interpret sub-theme 1.5 of Victoria’s Framework of Historical Themes (living with natural processes). The collection is also historically significant for its association with the LOCH ARD, which was one of the worst and best known shipwrecks in Victoria’s history. Unrestored tea spoon from the wreck of the LOCH ARD. The spoon design has a flattened fiddle-back handle, with a thin stem or shank, flared collar, and elongated bowl. The spoons metallic composition is a thin layer of brass alloy which has partially corroded back to a nickel-silver base metal. Approximately 35% of original electroplating remains, with some verdigris. Outlines of three makers marks are visible on the lower rear of handle (Circle, Circle, Diamond) and details of one are legible (Maltese Cross).flagstaff hill maritime museum, shipwreck coast, great ocean road, loch line, loch ard, mutton bird island, electroplated cutlery, loch ard shipwreck, nickel silver, william page & co, birmingham, brass plating, makers marks -
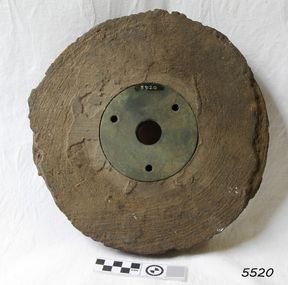 Flagstaff Hill Maritime Museum and Village
Functional object - Pulley Sheave, 1873
A sheave is a pulley with a grooved wheel for holding a belt, wire rope, or rope. The grooved wheel spins on an axle or bearing inside the frame of the block. This allows the wire or rope to move freely minimizing friction and wear on the cable. Sheaves can be used to redirect a cable or rope, lift loads, and transmit power. The words sheave and pulley are sometimes used interchangeably. The sheave was recovered at the time of the discovery of the Loch Ard wreck site in the 1970s. History of the Loch Ard: The Loch Ard got its name from ”Loch Ard” a loch that lies to the west of Aberfoyle, and the east of Loch Lomond. It means "high lake" in Scottish Gaelic. The vessel belonged to the famous Loch Line which sailed many vessels from England to Australia. The Loch Ard was built in Glasgow by Barclay, Curdle and Co. in 1873, the vessel was a three-masted square-rigged iron sailing ship that measured 79.87 meters in length, 11.58 m in width, and 7 m in depth with a gross tonnage of 1693 tons with a mainmast that measured a massive 45.7 m in height. Loch Ard made three trips to Australia and one trip to Calcutta before its fateful voyage. Loch Ard left England on March 2, 1878, under the command of 29-year-old Captain Gibbs, who was newly married. The ship was bound for Melbourne with a crew of 37, plus 17 passengers. The general cargo reflected the affluence of Melbourne at the time. Onboard were straw hats, umbrellas, perfumes, clay pipes, pianos, clocks, confectionery, linen and candles, as well as a heavier load of railway irons, cement, lead and copper. There were other items included that were intended for display in the Melbourne International Exhibition of 1880. The voyage to Port Phillip was long but uneventful. Then at 3 am on June 1, 1878, Captain Gibbs was expecting to see land. But the Loch Ard was running into a fog which greatly reduced visibility. Captain Gibbs was becoming anxious as there was no sign of land or the Cape Otway lighthouse. At 4 am the fog lifted and a lookout aloft announced that he could see breakers. The sheer cliffs of Victoria's west coast came into view, and Captain Gibbs realised that the ship was much closer to them than expected. He ordered as much sail to be set as time would permit and then attempted to steer the vessel out to sea. On coming head-on into the wind, the ship lost momentum, the sails fell limp and Loch Ard's bow swung back towards land. Gibbs then ordered the anchors to be released in an attempt to hold their position. The anchors sank some 50 fathoms - but did not hold. By this time the ship was among the breakers and the tall cliffs of Mutton Bird Island rose behind. Just half a mile from the coast, the ship's bow was suddenly pulled around by the anchor. The captain tried to tack out to sea, but the ship struck a reef at the base of Mutton Bird Island, near Port Campbell. Waves subsequently broke over the ship and the top deck became loosened from the hull. The masts and rigging came crashing down knocking passengers and crew overboard. When a lifeboat was finally launched, it crashed into the side of Loch Ard and capsized. Tom Pearce, who had launched the boat, managed to cling to its overturned hull and shelter beneath it. He drifted out to sea and then on the flood tide came into what is now known as Loch Ard Gorge. He swam to shore, bruised and dazed, and found a cave in which to shelter. Some of the crew stayed below deck to shelter from the falling rigging but drowned when the ship slipped off the reef into deeper water. Eva Carmichael a passenger had raced onto the deck to find out what was happening only to be confronted by towering cliffs looming above the stricken ship. In all the chaos, Captain Gibbs grabbed Eva and said, "If you are saved Eva, let my dear wife know that I died like a sailor". That was the last Eva Carmichael saw of the captain. She was swept off the ship by a huge wave. Eva saw Tom Pearce on a small rocky beach and yelled to attract his attention. He dived in and swam to the exhausted woman and dragged her to shore. He took her to the cave and broke the open case of brandy which had washed up on the beach. He opened a bottle to revive the unconscious woman. A few hours later Tom scaled a cliff in search of help. He followed hoof prints and came by chance upon two men from nearby Glenample Station three and a half miles away. In a complete state of exhaustion, he told the men of the tragedy. Tom then returned to the gorge while the two men rode back to the station to get help. By the time they reached Loch Ard Gorge, it was cold and dark. The two shipwreck survivors were taken to Glenample Station to recover. Eva stayed at the station for six weeks before returning to Ireland by steamship. In Melbourne, Tom Pearce received a hero's welcome. He was presented with the first gold medal of the Royal Humane Society of Victoria and a £1000 cheque from the Victorian Government. Concerts were performed to honour the young man's bravery and to raise money for those who lost family in the disaster. Of the 54 crew members and passengers on board, only two survived: the apprentice, Tom Pearce and the young woman passenger, Eva Carmichael, who lost her family in the tragedy. Ten days after the Loch Ard tragedy, salvage rights to the wreck were sold at auction for £2,120. Cargo valued at £3,000 was salvaged and placed on the beach, but most washed back into the sea when another storm developed. The wreck of Loch Ard still lies at the base of Mutton Bird Island. Much of the cargo has now been salvaged and some items were washed up into Loch Ard Gorge. Cargo and artefacts have also been illegally salvaged over many years before protective legislation was introduced in March 1982. One of the most unlikely pieces of cargo to have survived the shipwreck was a Minton majolica peacock- one of only nine in the world. The peacock was destined for the Melbourne 1880 International Exhibition. It had been well packed, which gave it adequate protection during the violent storm. Today the Minton peacock can be seen at the Flagstaff Hill Maritime Museum in Warrnambool. From Australia's most dramatic shipwreck it has now become Australia's most valuable shipwreck artifact and is one of very few 'objects' on the Victorian State Heritage Register. The shipwreck of the Loch Ard is of significance for Victoria and is registered on the Victorian Heritage Register ( S 417). Flagstaff Hill has a varied collection of artefacts from Loch Ard and its collection is significant for being one of the largest accumulation of artefacts from this notable Victorian shipwreck. The collections object is to also give us a snapshot into history so we can interpret the story of this tragic event. The collection is also archaeologically significant as it represents aspects of Victoria's shipping history that allows us to interpret Victoria's social and historical themes of the time. The collections historically significance is that it is associated unfortunately with the worst and best-known shipwreck in Victoria's history. Pulley sheave; round wooden block with metal disc in centre. Metal disc has large central machined hole and three equidistant small holes closer to the edge. Part of the rope groove is uneven. Recovered from the wreck of the Loch Ard. Noneflagstaff hill, warrnambool, shipwrecked coast, flagstaff hill maritime museum, maritime museum, shipwreck coast, flagstaff hill maritime village, great ocean road, loch line, loch ard, captain gibbs, eva carmichael, tom pearce, glenample station, mutton bird island, loch ard gorge, pulley sheave, pulley, ship rigging -
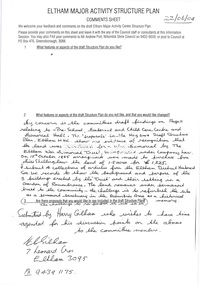 Eltham District Historical Society Inc
Folder, Material prepared by Harry Gilham pertaining to draft Eltham Major Activity Structure Plan, 2004, 2004
Specific focus on history of and impact to the Eltham War Memorial property. Contents: Eltham Major Activity Structure Plan Comments Sheet; Response by Harry Gilham, 22 June 2004 Minutes for the policy and Services Committee of Nillumbik Shire Council held Wednesday 11 August 2004 Photocopy of Eltham War Memorial Trust Booklet cover and Honour Roll Board in Eltham War Memorial Hall Photocopy of newsclippings - Eltham War Memorial Trust: Ready Now for Forward Movement; Acknowledgements £722; publication unknown, c.1946 and Eltham War Memorial Trust: "Garden of Remembrance"; Baby Health Centre First Building, The News: The Newspaper of the City of Heidelberg and of the Shire of Eltham, 11 April 1947 (EDHS_04588) Abbreviated notes of the Eltham War Memorial Trust, Harry Gilham, February 1997 Notes prepared by Harry Gilham pertaining to draft Eltham Major Activity Structure Plan, 2004 referencing Memorial Hall Site Title (p45), EGAG on heritage (p73) and Design Guidelines (p73) Copy of Certificate of Title issued to Eltham War Memorial Trust Ordinary Meeting of Council Agenda, 15 September 2004, p55 with notes on vote for motion that any reference to the sale of the War Memorial be removed Letter from Cr Tony Raunic, Mayor to Harry Gilham regarding Eltham Major Activity Centre Structure Plan advising the removal of any reference to sale of the War Memorial and detailed consultation to be held with stakeholders regarding the former Shire of Eltham Office site; 8 October 2004 Copy of fax sent by John Cohen, OAM, JP to Diamond Valley News, re his support for the appeal for protection of the Eltham War Memorial 3 July 2004 Copy of letter sent by John Cohen, OAM, JP to the CEO, RSL Victoria requesting their opposition to sale of the Eltham War Memorial, 19 August 2004 Copy of letter sent by John Cohen, OAM, JP to Brigadier J.R. Deighton, State Secretary, Victorian RSL re his comments in Diamond Valley Leader regarding the Eltham War Memorial, 27 August 2004 Copy of letter sent by John Cohen, OAM, JP to Brigadier J.R. Deighton, State Secretary, Victorian RSL advising the War Memorial had been removed from the wider proposal of the Eltham Activity Centre, 16 September 2004 Fax from Catherine Dale, CEO, Nillumbik Shire Council to John Cohen re Renovation and Maintenance of Victorian War Memorials, 6 October 2004 Letter from Barry Rosewall, President, Eltham RSL to John Cohen advising the sub-branch strongly opposes the sale of the Eltham War Memorial, 20 October 2004 Fax from Bill Forrest, Interim CEO, Nillumbik Shire Council to John Cohen re Renovation adn Maintenance of Victorian War Memorials, 8 November 2004 Copy of letter from John Cohen to Bill Forrest, Interim CEO, Nillumbik Shire Council re Maintenance of Eltham War Memorial, November 2004 Handwritten notes prepared by Harry Gilham in preparation of presentation to Council pertaining to draft Eltham Major Activity Structure Plan, 2004 Letter from Eric Mack to the Hon. Steve Herbert,, Member for Eltham regarding draft Major Activity Centre Structure Plan, 22 June 2004 Letter from Eric Mack to Nillumbik Shire Council CEO and Councillors regarding draft Major Activity Centre Structure Plan, 2004 Reply to Eric Mack from the Hon. Steve Herbert, Member for Eltham regarding his letter of 22 June, 27 July, 2004 Copy of letter from John Cohen to President and Exectuive of the Eltham RSL regarding the Eltham War Memorial, 16 July 2004 Notice issued by Cr Greg Johnson of 11 August meeting by Council's Policy and Services Committee to consider a proposal to sell the Eltham War memorial and old shire office properties, 6 August 2004 Letter from Harry Gilham, President, Eltham District Historical Society to Diamond Valley Leader wishing to correct a historical inaccuarcy being circulated in the Draft Structure Plan for the Elham Major Activity Centre, 17 June 2004 Newspaper clipping - Protect war memorial, Harry Gilham, President, Eltham District Horical Society; Letter, Diamond Valley Leader, June 30, 2004, p16 Newspaper clipping - Sell-off a betrayal of trust, Ken Eckersall; Letters, Diamond Valley Leader, c.2004 Newspaper clipping - Don't insult memory of fallen servicemen, John Cohen; Letters, Diamond Valley Leader, c.2004 Newspaper clipping - Up in arms against sell-off, Dave Crosswaite, Diamond Valley Leader, July 14, 2004, p5 (War veterans and local historians call upon Nillumbik Council to reject moves to sell Eltham War memorial buildings to a private developer. Features a picture of John Cohen, Harry Gilham and Dr Ken Eckersall. On same page - "First Aboriginal mural by trust opens" by Dave Crossthwaite about a mural celebrating stories and culture of the Wurundjeri people being unveiled at the YMCA-run Eltham Leisure Centre.) Newspaper clipping - Shire plan 'sacrilegious' by Dave Crossthwaite, Diamond Valley Leader, Wednesday, August 19, 2004, p1 (Residents fight war memorial sale) Newspaper clipping - Our say on sale of land; Have you say, Diamond Valley Leader, August 18, 2004, p22 Newspaper clipping - School hall is not ratepayers' worry; Have your Say, Diamond Valley Leader, August 18, 2004, p23 Newspaper clipping - Clash over land sale by Dave Crossthwaite, Diamond Valley Leader, August 25, 2004, p1 Newspaper clipping - Mayor beset over arts agenda claim by Dave Crossthwaite, Diamond Valley Leader, August 25, 2004, p5 Newspaper clipping - Public assets are not for sale; Letters, Diamond Valley Leader, August 25, 2004, p11 Newspaper clipping - A lot of work has gone into shire structure plan; Letters, Diamond Valley Leader, August 25, 2004, p10 Newspaper clipping - Don't let a dream stay hijacked; Letters, Diamond Valley Leader, September 1, 2004, p11 Newspaper clipping - Future of memorial site on hold until poll by Caroline Gonzalez, Diamond Valley Leader, September 20, 2004 Newspaper clipping - Troops enlist for campaign by Fiona Willan, Diamond Valley Leader, 18 July 200751 pages of various types, A4, printed, handwritten notes, letters and newspaper clippingscr. greg johnson, diamond valley leader, eltham district historical society, eltham leisure centre, eltham major activity structure plan, eltham rsl sub-branch, eltham war memorial, eric mack, harry gilham, john cohen, ken eckersall, letters, nillumbik shire council, protests, steve herbert mp, wurrundjeri -
 Federation University Historical Collection
Photograph - Photograph - Colour, Social Distancing Signs during the Covid-19 Pandemic, 2020, 06/04/2020
On 12 January, the World Health Organization (WHO) confirmed that a novel coronavirus was the cause of a respiratory illness in a cluster of people in Wuhan City, Hubei Province, China, who had initially come to the attention of the WHO on 31 December 2019. On 3 March, the Reserve Bank of Australia became the first central bank to cut interest rates in response to the outbreak. Official interest rates were cut by 0.25% (25 base points) to a record low of 0.5%. On 12 March, the Federal Government announced a A$17.6 billion stimulus package, the first since the 2008 GFC. he package consists of multiple parts, a one-off A$750 payment to around 6.5 million welfare recipients as early as 31 March 2020, small business assistance with 700,000 grants up to $25,000 and a 50% wage subsidy for 120,000 apprenticies or trainees for up to 9 months, 1 billion to support economically impacted sectors, regions and communities, and $700 million to increase tax write off and $3.2 billion to support short-term small and medium-sized business investment. On 16 March, Premier Dan Andrews and Minister for Health Jenny Mikakos declared a state of emergency for Victoria for at least four weeks. On 19 March, the Reserve Bank again cut interest rates by a further 0.25% to 0.25%, the lowest in Australian history. On 22 March, the government announced a second stimulus package of A$66bn, increasing the amount of total financial package offered to A$89bn. This included several new measures like doubling income support for individuals on Jobseeker's allowance, granting A$100,000 to small and medium-sized businesses and A$715 million to Australian airports and airlines. It also allowed individuals affected by the outbreak to access up to A$10,000 of their superannuation during 2019–2020 and also being able to take an additional same amount for the next year. on the same day Victorian Premier Daniel Andrews announced on 22 March that the state will bring the school holiday forwards to 24 March from 27 March. On 30 March, the Australian Federal Government announced a $130 billion "JobKeeper" wage subsidy program offering to pay employers up to $1500 a fortnight per full-time, part-time or casual employee that has worked for that business for over a year. For a business to be eligible, they must have lost 30% of turnover after 1 March of annual revenue up to and including $1 billion. For businesses with a revenue of over $1 billion, turnover must have decreased by 50%. Businesses are then required by law to pay the subsidy to their staff, in lieu of their usual wages. This response came after the enormous job losses seen just a week prior when an estimated 1 million Australians lost their jobs. This massive loss in jobs caused the myGov website to crash and lines out of Centrelink offices to run hundreds of metres long.The program was backdated to 1 March, to aim at reemploying the many people who had just lost their jobs in the weeks before. Businesses would receive the JobKeeper subsidy for six months. Victoria's "Second Wave" from Ballarat Courier, 05 August 2020 Wednesday, August 5: 725 cases, 15 deaths. A record figure reached yet again. Tuesday, August 4: 439 cases, 11 deaths. New fines introduced for COVID-infected people who aren't home. Monday, August 3: 429 cases, 13 deaths. Premier details mass industry shutdowns in Melbourne. Sunday, August 2: 671 cases, seven deaths as harsh new statewide lockdowns are announced Saturday, August 1: 397 new cases, three deaths Friday, July 31: 627 new cases, eight deaths. Premier says one in four Covid cases not home when checked. Thursday July 30: 723 cases, 13 deaths. Just when it was looking promising, alarming new record set. Wednesday July 29: 295 new cases, nine deaths as new cases drop below 300 for first time in nine days Tuesday July 28: 380 new cases, six deaths as aged care outbreaks continue to climb Monday July 27: 532 new cases as daily cases hits 500 for first time, six deaths Sunday July 26: 459 new cases as double-digit death toll is recorded for first time with 10 deaths Saturday July 25: 357 new cases, five new deaths Friday July 24: 300 cases, six deaths, ADF role expanded to help with contact tracing. Thursday July 23 - 403 cases, five deaths, worst day for fatalities in any state, masks now mandatory Wednesday July 22 - 484 cases, two deaths Tuesday July 21 - 374 cases, three deaths Monday July 20 - 275 cases, one death Sunday July 19 - 363 cases, three deaths, notice that masks will become mandatory in lockdown areas Saturday July 18 - 217 cases, three deaths, final Melbourne public housing tower released from hard lockdown Friday July 17 - 428 cases, three deaths Thursday July 16 - 317 cases, two deaths Wednesday July 15 - 238 cases, one death Tuesday July 14 - 270 cases, two deaths Monday July 13 - 177 cases Sunday July 12 - 273 cases, one death Saturday July 11 - 216 cases, one death Friday July 10 - 288 cases, a national daily record at the time Thursday July 9 - 165 cases, eight of nine Melbourne public housing towers released from hard lockdown Wednesday July 8 - 134 cases, new stage-three restrictions announced for metropolitan Melbourne and Mitchell Shire Tuesday July 7 - 191 cases Monday July 6 - 127 cases, two deaths, NSW border closed Sunday July 5 - 74 cases Saturday July 4 - 108 cases, immediate hard lockdown of nine Melbourne public housing towers Friday July 3 - 66 cases Thursday July 2 - 77 cases Wednesday July 1 - 73 casesColour photographs of social distancing signs during the Covid-19 Pandemic, on Chemist Warehouse in Sebastopol. On 06 April 2020 a maximum of 75 people were allowed in the chemist at one time, and those with syptoms of Covid-19 (fever, cough, shortness of breath) were asked to not enter without phone contact. Upon entering customers were directed to use hand sanitizer, and 1.5 metre markings were placed on the floor to enable legal social distancing.covid-19, corona virus, pandemic, chemist's warehouse, sebastopol, social distancing -
Federation University Historical Collection
Poster, Victorian Department of Health and Human Services, A number of Covid-19 Posters Produced by the Victorian Departent of Health and Human Services, 2021, 11/06/2021
On 12 January, the World Health Organization (WHO) confirmed that a novel coronavirus was the cause of a respiratory illness in a cluster of people in Wuhan City, Hubei Province, China, who had initially come to the attention of the WHO on 31 December 2019. On 3 March, the Reserve Bank of Australia became the first central bank to cut interest rates in response to the outbreak. Official interest rates were cut by 0.25% (25 base points) to a record low of 0.5%. On 12 March, the Federal Government announced a A$17.6 billion stimulus package, the first since the 2008 GFC. he package consists of multiple parts, a one-off A$750 payment to around 6.5 million welfare recipients as early as 31 March 2020, small business assistance with 700,000 grants up to $25,000 and a 50% wage subsidy for 120,000 apprenticies or trainees for up to 9 months, 1 billion to support economically impacted sectors, regions and communities, and $700 million to increase tax write off and $3.2 billion to support short-term small and medium-sized business investment. On 16 March, Premier Dan Andrews and Minister for Health Jenny Mikakos declared a state of emergency for Victoria for at least four weeks. On 19 March, the Reserve Bank again cut interest rates by a further 0.25% to 0.25%, the lowest in Australian history. On 22 March, the government announced a second stimulus package of A$66bn, increasing the amount of total financial package offered to A$89bn. This included several new measures like doubling income support for individuals on Jobseeker's allowance, granting A$100,000 to small and medium-sized businesses and A$715 million to Australian airports and airlines. It also allowed individuals affected by the outbreak to access up to A$10,000 of their superannuation during 2019–2020 and also being able to take an additional same amount for the next year. on the same day Victorian Premier Daniel Andrews announced on 22 March that the state will bring the school holiday forwards to 24 March from 27 March. On 30 March, the Australian Federal Government announced a $130 billion "JobKeeper" wage subsidy program offering to pay employers up to $1500 a fortnight per full-time, part-time or casual employee that has worked for that business for over a year. For a business to be eligible, they must have lost 30% of turnover after 1 March of annual revenue up to and including $1 billion. For businesses with a revenue of over $1 billion, turnover must have decreased by 50%. Businesses are then required by law to pay the subsidy to their staff, in lieu of their usual wages. This response came after the enormous job losses seen just a week prior when an estimated 1 million Australians lost their jobs. This massive loss in jobs caused the myGov website to crash and lines out of Centrelink offices to run hundreds of metres long.The program was backdated to 1 March, to aim at reemploying the many people who had just lost their jobs in the weeks before. Businesses would receive the JobKeeper subsidy for six months. Victoria's "Second Wave" from Ballarat Courier, 05 August 2020 Wednesday, August 5: 725 cases, 15 deaths. A record figure reached yet again. Tuesday, August 4: 439 cases, 11 deaths. New fines introduced for COVID-infected people who aren't home. Monday, August 3: 429 cases, 13 deaths. Premier details mass industry shutdowns in Melbourne. Sunday, August 2: 671 cases, seven deaths as harsh new statewide lockdowns are announced Saturday, August 1: 397 new cases, three deaths Friday, July 31: 627 new cases, eight deaths. Premier says one in four Covid cases not home when checked. Thursday July 30: 723 cases, 13 deaths. Just when it was looking promising, alarming new record set. Wednesday July 29: 295 new cases, nine deaths as new cases drop below 300 for first time in nine days Tuesday July 28: 380 new cases, six deaths as aged care outbreaks continue to climb Monday July 27: 532 new cases as daily cases hits 500 for first time, six deaths Sunday July 26: 459 new cases as double-digit death toll is recorded for first time with 10 deaths Saturday July 25: 357 new cases, five new deaths Friday July 24: 300 cases, six deaths, ADF role expanded to help with contact tracing. Thursday July 23 - 403 cases, five deaths, worst day for fatalities in any state, masks now mandatory Wednesday July 22 - 484 cases, two deaths Tuesday July 21 - 374 cases, three deaths Monday July 20 - 275 cases, one death Sunday July 19 - 363 cases, three deaths, notice that masks will become mandatory in lockdown areas Saturday July 18 - 217 cases, three deaths, final Melbourne public housing tower released from hard lockdown Friday July 17 - 428 cases, three deaths Thursday July 16 - 317 cases, two deaths Wednesday July 15 - 238 cases, one death Tuesday July 14 - 270 cases, two deaths Monday July 13 - 177 cases Sunday July 12 - 273 cases, one death Saturday July 11 - 216 cases, one death Friday July 10 - 288 cases, a national daily record at the time Thursday July 9 - 165 cases, eight of nine Melbourne public housing towers released from hard lockdown Wednesday July 8 - 134 cases, new stage-three restrictions announced for metropolitan Melbourne and Mitchell Shire Tuesday July 7 - 191 cases Monday July 6 - 127 cases, two deaths, NSW border closed Sunday July 5 - 74 cases Saturday July 4 - 108 cases, immediate hard lockdown of nine Melbourne public housing towers Friday July 3 - 66 cases Thursday July 2 - 77 cases Wednesday July 1 - 73 casesColour posters advising on safety measures for Victorian during the 2020-2021 Covid-19 Pandemic. The posters were made available by the Department of Health and Human Services and have been saved as PDFs, and printed off onot A4 paper.covid-19, corona virus, pandemic, posters, department of health and human services -
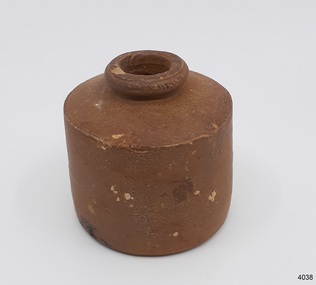 Flagstaff Hill Maritime Museum and Village
Container - Ink Bottle, Prior to 1878
This design of ink bottle was commonly referred to as a ‘penny ink well’ because it was very inexpensive to produce. It is also known as a dwarf ink bottle. Pen and ink has been in use for hand writing from about the seventh century up until the mid-20th century up until around the mid-19th century a quill pen made from a bird’s feather was used. In the 1850s the steel point pen was invented and could be manufactured on machines in large quantities. In the 1880s a successful portable fountain pen was designed, giving a smooth flowing ink and ease of use replacing the quill or dip pen. History of the Loch Ard: The Loch Ard got its name from "Loch Ard" a loch that lies to the west of Aberfoyle, and the east of Loch Lomond. It means "high lake" in Scottish Gaelic. The vessel belonged to the famous Loch Line which sailed many vessels from England to Australia. The Loch Ard was built in Glasgow by Barclay, Curle & Co. in 1873, the vessel was a three-masted square-rigged iron sailing ship that measured 79.87 meters in length, 11.58 m in width, and 7 m in depth with a gross tonnage of 1693 tons with a mainmast that measured a massive 45.7 m in height. Loch Ard made three trips to Australia and one trip to Calcutta before its fateful voyage. Loch Ard left England on March 2, 1878, under the command of 29-year-old Captain Gibbs, who was newly married. The ship was bound for Melbourne with a crew of 37, plus 17 passengers. The general cargo reflected the affluence of Melbourne at the time. Onboard were straw hats, umbrellas, perfumes, clay pipes, pianos, clocks, confectionery, linen, and candles, as well as a heavier load of railway irons, cement, lead, and copper. There were other items included that were intended for display in the Melbourne International Exhibition of 1880. The voyage to Port Phillip was long but uneventful. Then at 3 am on June 1, 1878, Captain Gibbs was expecting to see land. But the Loch Ard was running into a fog which greatly reduced visibility. Captain Gibbs was becoming anxious as there was no sign of land or the Cape Otway lighthouse. At 4 am the fog lifted and a lookout aloft announced that he could see breakers. The sheer cliffs of Victoria's west coast came into view, and Captain Gibbs realised that the ship was much closer to them than expected. He ordered as much sail to be set as time would permit and then attempted to steer the vessel out to sea. On coming head-on into the wind, the ship lost momentum, the sails fell limp and Loch Ard's bow swung back towards land. Gibbs then ordered the anchors to be released in an attempt to hold their position. The anchors sank some 50 fathoms - but did not hold. By this time the ship was among the breakers and the tall cliffs of Mutton Bird Island rose behind. Just half a mile from the coast, the ship's bow was suddenly pulled around by the anchor. The captain tried to tack out to sea, but the ship struck a reef at the base of Mutton Bird Island, near Port Campbell. Waves subsequently broke over the ship and the top deck became loosened from the hull. The masts and rigging came crashing down knocking passengers and crew overboard. When a lifeboat was finally launched, it crashed into the side of Loch Ard and capsized. Tom Pearce, who had launched the boat, managed to cling to its overturned hull and shelter beneath it. He drifted out to sea and then on the flood tide came into what is now known as Lochard Gorge. He swam to shore, bruised and dazed, and found a cave in which to shelter. Some of the crew stayed below deck to shelter from the falling rigging but drowned when the ship slipped off the reef into deeper water. Eva Carmichael a passenger had raced onto the deck to find out what was happening only to be confronted by towering cliffs looming above the stricken ship. In all the chaos, Captain Gibbs grabbed Eva and said, "If you are saved Eva, let my dear wife know that I died like a sailor". That was the last Eva Carmichael saw of the captain. She was swept off the ship by a huge wave. Eva saw Tom Pearce on a small rocky beach and yelled to attract his attention. He dived in and swam to the exhausted woman and dragged her to shore. He took her to the cave and broke the open case of brandy that had washed up on the beach. He opened a bottle to revive the unconscious woman. A few hours later Tom scaled a cliff in search of help. He followed hoof prints and came by chance upon two men from nearby Glenample Station three and a half miles away. In a complete state of exhaustion, he told the men of the tragedy. Tom then returned to the gorge while the two men rode back to the station to get help. By the time they reached Loch Ard Gorge, it was cold and dark. The two shipwreck survivors were taken to Glenample Station to recover. Eva stayed at the station for six weeks before returning to Ireland by steamship. In Melbourne, Tom Pearce received a hero's welcome. He was presented with the first gold medal of the Royal Humane Society of Victoria and a £1000 cheque from the Victorian Government. Concerts were performed to honour the young man's bravery and to raise money for those who lost families in the disaster. Of the 54 crew members and passengers on board, only two survived: the apprentice, Tom Pearce, and the young woman passenger, Eva Carmichael, who lost her family in the tragedy. Ten days after the Lochard tragedy, salvage rights to the wreck were sold at auction for £2,120. Cargo valued at £3,000 was salvaged and placed on the beach, but most washed back into the sea when another storm developed. The wreck of Lochard still lies at the base of Mutton Bird Island. Much of the cargo has now been salvaged and some items were washed up into Lochard Gorge. Cargo and artefact's have also been illegally salvaged over many years before protective legislation was introduced in March 1982. One of the most unlikely pieces of cargo to have survived the shipwreck was a Minton majolica peacock- one of only nine in the world. The peacock was destined for the Melbourne 1880 International Exhibition. It had been well packed, which gave it adequate protection during the violent storm. Today the Minton peacock can be seen at the Flagstaff Hill Maritime Museum in Warrnambool. From Australia's most dramatic shipwreck it has now become Australia's most valuable shipwreck artifact and is one of very few 'objects' on the Victorian State Heritage Register.This ink well is historically significant as it represents methods of hand written communication that were still common up until the mid-20th century, when fountain pens and ballpoint pens took over in popularity and convenience. The shipwreck of the Loch Ard is of significance for Victoria and is registered on the Victorian Heritage Register ( S 417). Flagstaff Hill has a varied collection of artefact's from Loch Ard and its collection is significant for being one of the largest accumulation of artefact's from this notable Victorian shipwreck of which the subject items are a small part. The collection's objects give us a snapshot of how we can interpret the story of this tragic event. The collection is also archaeologically significant as it represents aspects of Victoria's shipping history that allows us to interpret Victoria's social and historical themes of the time. Through is associated with the worst and best-known shipwreck in Victoria's history.Stoneware penny Ink bottle ironstone salt-glazed, stoneware cylindrical shape with small mouth and squat neck, broad shoulders brown colour, . with light coloured encrustation spots.flagstaff hill, warrnambool, flagstaff hill maritime museum, shipwreck coast, flagstaff hill maritime village, great ocean road, loch line, loch ard, captain gibbs, eva carmichael, tom pearce, glenample station, mutton bird island, loch ard gorge, penny ink well, writing equipment, domestic, stoneware, clay, ceramic, pottery, ink well, inkwell, ink bottle, dip pen, ink, hand writing, business, vintage, dwarf ink -
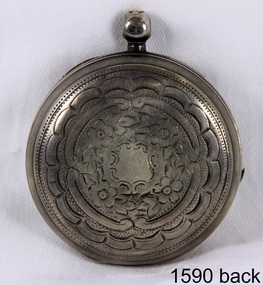 Flagstaff Hill Maritime Museum and Village
Instrument - Fob watch, 1882
The watch was given to William James Robe by the captain of the barque Fiji as a token for helping to save his life and that of the crew on September 6th 1891 when the steel barque Fiji had foundered off “wreck beach" near Moonlight Head Warrnambool during a voyage from Hamburg to Melbourne. William or Bill as he was called was the one who had hauled out the last man, the captain, after he had become tangled in the kelp. William along with many other onlookers on the beach at the time had taken it in turns to go into the surf and drag half-drowned seamen to safety. These rescuers along with William James Robe, included Edwin Vinge, Hugh Cameron, Fenelon Mott, Arthur Wilkinson and Peter Carmody. Years later Bill passed the watch on to his brother-in-law Gilbert Hulands as payment of a debt. The grandson of Gilbert Hulands, John Hulands, has donated this watch to Flagstaff Hill Maritime Museum. The Fiji Wreck: The three-masted iron barque Fiji had been built in Belfast, Ireland, in 1875 by Harland and Wolfe for a Liverpool based shipping company. The ship departed Hamburg on 22nd May 1891 bound for Melbourne, under the command of Captain William Vickers with a crew of 25. On September 5th, one hundred days out from Hamburg in squally and boisterous south-west winds the Cape Otway light was sighted on a bearing differing from Captain Vickers' calculation of his position. At about 2:30 am, Sunday 6th September 1891 land was reported 4-5 miles off the port bow. The captain tried to put the ship on the other tack, but she would not respond. He then tried to turn her the other way but just as the manoeuvre was being completed Fiji struck rock only 274 metres from shore. The place is known as Wreck Bay, Moonlight Head. Blue lights were burned and rockets fired whilst an effort was made to lower boats but all capsized or swamped and smashed to pieces. Two of the younger crewmen volunteered to swim for the shore, taking a line. One, a Russian named Daniel Carkland, drowned after he was swept away when the line broke. The other, 17-year-old able seaman Julius Gebauhr, a German, reached shore safely on his second attempt but without the line, which he had cut loose with his sheath-knife when it becomes tangled in kelp. He rested on the beach a while then climbed the cliffs in search of help. At about 10 am on Sunday a party of land selectors - including F. J. Stanmore, Leslie Dickson (or Dixon) and Mott - found Gebauhr. They were near Ryans Den, on their travels on horseback from Princetown towards Moonlight Head, and about 5km from the wreck. They found Gebauhr lying in scrub and a poor state, bleeding and scantly dressed and with a sheath-knife. At first, they were concerned about his appearance and gibberish speech, taking him to be an escaped lunatic. They were reassured after Gebauhr threw his knife away realising he was speaking half-English, half-German. They gave him food and brandy and some clothing and were then able to gain information about the wreck. Some of the men took him to Rivernook, a nearby guest house owned by John Evans, where he was cared for. Stansmore and Dickson rode off to try and summon help. Others went down to the site of the wreck. Messages for rescuing the rest of the crew were sent both to Port Campbell for the rocket rescue crew and to Warrnambool for the lifeboat. The S.S. Casino sailed from Portland towards the scene. After travelling the 25 miles to the scene, half of the Port Campbell rocket crew and equipment arrived and set up the rocket tripod on the beach below the cliffs. By this time the crew of Fiji had been clinging to the jib-boom for almost 15 hours, calling frantically for help. Mr Tregear from the Rocket Crew fired the line. The light line broke and the rocket was carried away. A second line was successfully fired across the ship and made fast. The anxious sailors then attempted to come ashore along the line but, with as many as five at a time, the line sagged considerably and some were washed off. Others, nearly exhausted, had to then make their way through masses of seaweed and were often smothered by waves. Only 14 of the 24 who had remained on the ship made it to shore. Many onlookers on the beach took it in turns to go into the surf and drag half-drowned seamen to safety. One of the rescuers Arthur Wilkinson, a 29-year-old land selector, swam out to the aid of one of the ship's crewmen, a carpenter named John Plunken who was attempting to swim to shore. Two or three times both men almost reached the shore but were washed back to the wreck, a line was thrown to them. It was thought that Wilkinson had struck his head on the anchor during the rescue and had remained unconscious, the carpenter survived this ordeal but Wilkinson died and his body was washed up the next day. The wreck of Fiji smashed apart within 20 minutes of the captain being brought ashore, and it finally settling in 6m of water. Of the 26 men on Fiji, 11 in total lost their lives. The remains of 7 bodies were washed onto the beach. They were buried on the clifftop above the wreck. Captain Vickers was severely reprimanded for his mishandling of the ship and his is Masters Certificate was suspended for 12 months. At the time there was also a great deal of public criticism at the slow and disorganised rescue attempt to save those on board. The important canvas ‘breech buoy’ or ‘bucket chair’ and the heavy line from the Rocket Rescue was in the half of the rocket outfit that didn’t make it in time for the rescue: they had been delayed at the Gellibrand River ferry. Communications to Warrnambool were down so the call for help didn’t get through on time and the two or three boats that had been notified of the wreck failed to reach it in time. Much looting occurred of the cargo that washed up on the shore, with nearly every visitor leaving the beach with bulky pockets. One looter was caught with a small load of red and white rubber balls, which were duly confiscated and he was 'detained' for 14 days. The essence of peppermint mysteriously turned up in many settlers homes. Sailcloth was salvaged and used for horse rugs and tent flies. Soon after the wreck "Fiji tobacco" was being advertised around Victoria. A Customs officer, trying to prevent some of the looting, was assaulted by looters and thrown over a cliff. He managed to cling to a bush lower down until rescued. Seaman Julius Gebauhr later gave his knife, in its hand crafted leather sheath, to F. J. Stansmore for caring for him when he came ashore. Flagstaff Hill’s Fiji collection is of historical significance at a State level because of its association with the wreck Fiji, which is on the Victorian Heritage Register (S 259). The collection also represents key aspects of Victoria’s shipping history and its items offer the potential to interpret maritime historical events and social history of the time. Along with the potential to yield information that will contribute to an understanding of Victoria’s cultural history.Sterling silver fob watch Fusee movement face has a white background with black Roman numerals on it. The minute hand is gold coloured with a leaf shape. Seconds dial is inset at position 6, with Arabic numerals around it. Watch has machine engraving flower pattern front and back. The spherical winder has a number and a symbol on the upper face and a hole through the centre, the ring for the chain is missing. Back of a the watch opens to reveal a concave cover with a winding hole, which has a border of overlapping crescent-shapes. Inside cover a diamond with initials “JR”(John Rotherham) inside, a date letter “G” (1882) with a Lion Passant (Sterling Silver) also 3 numbers “8 1 9“embossed beside each other. The clock face has “Rotherhams / London” printed on it. The winder is also marked with a maker and sterling silver mark. “Y” and numbers “688” “3 CI A” “3309” “819” “555 A” and other numbers including a set engraved around the edge possibly jewelers marks who did repairs or maintenance on the item over the years.1891, shipwrecked coast, flagstaff hill, flagstaff hill maritime museum, maritime museum, shipwrecked artefact, flagstaff hill maritime village, shipwreck coast, warrnambool, fiji, pocket watch, william vickers, william robe, bill robe, fiji watch -
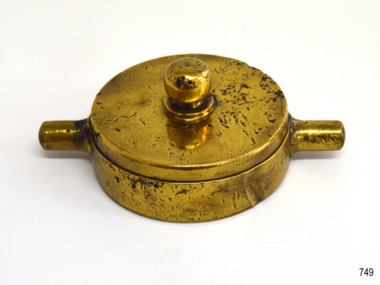 Flagstaff Hill Maritime Museum and Village
Functional object - Hydrant water Cover, Circa. 1873
The artefact is an impressively solid brass hydrant cap and was recovered from the wreck of the Loch Ard. It is believed to have been associated with the ship’s fresh water supply. Its polished appearance suggests it was also on display in a public part of the vessel, viewed by first and second class passengers as well as operated by the crew. The Loch Ard got its name from ”Loch Ard” a loch which lies to the west of Aberfoyle, and the east of Loch Lomond. It means "high lake" in Scottish Gaelic. The vessel belonged to the famous Loch Line which sailed many vessels from England to Australia. The Loch Ard was built in Glasgow by Barclay, Curdle and Co. in 1873, the vessel was a three-masted square-rigged iron sailing ship that measured 79.87 meters in length, 11.58 m in width, and 7 m in depth with a gross tonnage of 1693 tons with a mainmast that measured a massive 45.7 m in height. Loch Ard made three trips to Australia and one trip to Calcutta before its fateful voyage. Loch Ard left England on March 2, 1878, under the command of 29-year-old Captain Gibbs, who was newly married. The ship was bound for Melbourne with a crew of 37, plus 17 passengers. The general cargo reflected the affluence of Melbourne at the time. Onboard were straw hats, umbrella, perfumes, clay pipes, pianos, clocks, confectionery, linen and candles, as well as a heavier load of railway irons, cement, lead and copper. There were other items included that were intended for display in the Melbourne International Exhibition of 1880. The voyage to Port Phillip was long but uneventful. Then at 3 am on June 1, 1878, Captain Gibbs was expecting to see land. But the Loch Ard was running into a fog which greatly reduced visibility. Captain Gibbs was becoming anxious as there was no sign of land or the Cape Otway lighthouse. At 4 am the fog lifted and a lookout aloft announced that he could see breakers. The sheer cliffs of Victoria's west coast came into view, and Captain Gibbs realised that the ship was much closer to them than expected. He ordered as much sail to be set as time would permit and then attempted to steer the vessel out to sea. On coming head-on into the wind, the ship lost momentum, the sails fell limp and Loch Ard's bow swung back towards land. Gibbs then ordered the anchors to be released in an attempt to hold its position. The anchors sank some 50 fathoms - but did not hold. By this time the ship was among the breakers and the tall cliffs of Mutton Bird Island rose behind. Just half a mile from the coast, the ship's bow was suddenly pulled around by the anchor. The captain tried to tack out to sea, but the ship struck a reef at the base of Mutton Bird Island, near Port Campbell. Waves subsequently broke over the ship and the top deck became loosened from the hull. The masts and rigging came crashing down knocking passengers and crew overboard. When a lifeboat was finally launched, it crashed into the side of Loch Ard and capsized. Tom Pearce, who had launched the boat, managed to cling to its overturned hull and shelter beneath it. He drifted out to sea and then on the flood tide came into what is now known as Loch Ard Gorge. He swam to shore, bruised and dazed, and found a cave in which to shelter. Some of the crew stayed below deck to shelter from the falling rigging but drowned when the ship slipped off the reef into deeper water. Eva Carmichael a passenger had raced onto the deck to find out what was happening only to be confronted by towering cliffs looming above the stricken ship. In all the chaos, Captain Gibbs grabbed Eva and said, "If you are saved Eva, let my dear wife know that I died like a sailor". That was the last Eva Carmichael saw of the captain. She was swept off the ship by a huge wave. Eva saw Tom Pearce on a small rocky beach and yelled to attract his attention. He dived in and swam to the exhausted woman and dragged her to shore. He took her to the cave and broke the open case of brandy which had washed up on the beach. He opened a bottle to revive the unconscious woman. A few hours later Tom scaled a cliff in search of help. He followed hoof prints and came by chance upon two men from nearby Glenample Station three and a half miles away. In a complete state of exhaustion, he told the men of the tragedy. Tom then returned to the gorge while the two men rode back to the station to get help. By the time they reached Loch Ard Gorge, it was cold and dark. The two shipwreck survivors were taken to Glenample Station to recover. Eva stayed at the station for six weeks before returning to Ireland by steamship. In Melbourne, Tom Pearce received a hero's welcome. He was presented with the first gold medal of the Royal Humane Society of Victoria and a £1000 cheque from the Victorian Government. Concerts were performed to honour the young man's bravery and to raise money for those who lost family in the disaster. Of the 54 crew members and passengers on board, only two survived: the apprentice, Tom Pearce and the young woman passenger, Eva Carmichael, who lost her family in the tragedy. Ten days after the Loch Ard tragedy, salvage rights to the wreck were sold at auction for £2,120. Cargo valued at £3,000 was salvaged and placed on the beach, but most washed back into the sea when another storm developed. The wreck of Loch Ard still lies at the base of Mutton Bird Island. Much of the cargo has now been salvaged and some items were washed up into Loch Ard Gorge. Cargo and artefacts have also been illegally salvaged over many years before protective legislation was introduced in March 1982. One of the most unlikely pieces of cargo to have survived the shipwreck was a Minton majolica peacock- one of only nine in the world. The peacock was destined for the Melbourne 1880 International Exhibition in. It had been well packed, which gave it adequate protection during the violent storm. Today the Minton peacock can be seen at the Flagstaff Hill Maritime Museum in Warrnambool. From Australia's most dramatic shipwreck it has now become Australia's most valuable shipwreck artefact and is one of very few 'objects' on the Victorian State Heritage Register.The shipwreck of the Loch Ard is of significance for Victoria and is registered on the Victorian Heritage Register ( S 417). Flagstaff Hill has a varied collection of artefacts from Loch Ard and its collection is significant for being one of the largest accumulation of artefacts from this notable Victorian shipwreck. The collections object is to also give us a snapshot into history so we can interpret the story of this tragic event. The collection is also archaeologically significant as it represents aspects of Victoria's shipping history that allows us to interpret Victoria's social and historical themes of the time. The collections historically significance is that it is associated unfortunately with the worst and best-known shipwreck in Victoria's history. A brass water hydrant cover (or cap); round with a a central knob and two side stanchions for screwing on and off a pipe. the underside has a screw thread. the object was recovered from the wreck of the Loch Ard. Noneflagstaff hill, warrnambool, flagstaff hill maritime museum, shipwreck coast, flagstaff hill maritime village, great ocean road, loch line, loch ard, captain gibbs, eva carmichael, tom pearce, glenample station, mutton bird island, loch ard gorge, hydrant cap, hydrant cover, brass fitting -
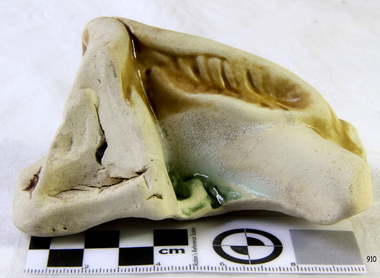 Flagstaff Hill Maritime Museum and Village
Ceramic - Ceramic Piece, Minton Potteries, ca. 1877
The ceramic piece is one of four porcelain fragments washed up from the Loch Ard wreck near Port Campbell Victoria. These shards resemble the foot and leg of a large bird and legend has it that another bird had drifted ashore at the same time the Loch Ard peacock. This figurine is on display at Flagstaff Hill Maritime Museum and regarded as the most valuable shipwreck relic. It is believed that all four fragments could belong to another peacock or a Minton porcelain stork that had been photographed in a Home Beautiful magazine in 1928. This stork appeared to be missing a leg and foot and experts have hypothesized that the four fragments could belong to this stork, the whereabouts of which are currently unknown. History of the Loch Ard: The Loch Ard got its name from ”Loch Ard” a loch which lies to the west of Aberfoyle, and the east of Loch Lomond. It means "high lake" in Scottish Gaelic. The vessel belonged to the famous Loch Line which sailed many vessels from England to Australia. The Loch Ard was built in Glasgow by Barclay, Curdle and Co. in 1873, the vessel was a three-masted square-rigged iron sailing ship that measured 79.87 meters in length, 11.58 m in width, and 7 m in depth with a gross tonnage of 1693 tons with a mainmast that measured a massive 45.7 m in height. Loch Ard made three trips to Australia and one trip to Calcutta before its fateful voyage. Loch Ard left England on March 2, 1878, under the command of 29-year-old Captain Gibbs, who was newly married. The ship was bound for Melbourne with a crew of 37, plus 17 passengers. The general cargo reflected the affluence of Melbourne at the time. Onboard were straw hats, umbrella, perfumes, clay pipes, pianos, clocks, confectionery, linen and candles, as well as a heavier load of railway irons, cement, lead and copper. There were other items included that were intended for display in the Melbourne International Exhibition of 1880. The voyage to Port Phillip was long but uneventful. Then at 3 am on June 1, 1878, Captain Gibbs was expecting to see land. But the Loch Ard was running into a fog which greatly reduced visibility. Captain Gibbs was becoming anxious as there was no sign of land or the Cape Otway lighthouse. At 4 am the fog lifted and a lookout aloft announced that he could see breakers. The sheer cliffs of Victoria's west coast came into view, and Captain Gibbs realised that the ship was much closer to them than expected. He ordered as much sail to be set as time would permit and then attempted to steer the vessel out to sea. On coming head-on into the wind, the ship lost momentum, the sails fell limp and Loch Ard's bow swung back towards land. Gibbs then ordered the anchors to be released in an attempt to hold its position. The anchors sank some 50 fathoms - but did not hold. By this time the ship was among the breakers and the tall cliffs of Mutton Bird Island rose behind. Just half a mile from the coast, the ship's bow was suddenly pulled around by the anchor. The captain tried to tack out to sea, but the ship struck a reef at the base of Mutton Bird Island, near Port Campbell. Waves subsequently broke over the ship and the top deck became loosened from the hull. The masts and rigging came crashing down knocking passengers and crew overboard. When a lifeboat was finally launched, it crashed into the side of Loch Ard and capsized. Tom Pearce, who had launched the boat, managed to cling to its overturned hull and shelter beneath it. He drifted out to sea and then on the flood tide came into what is now known as Loch Ard Gorge. He swam to shore, bruised and dazed, and found a cave in which to shelter. Some of the crew stayed below deck to shelter from the falling rigging but drowned when the ship slipped off the reef into deeper water. Eva Carmichael a passenger had raced onto the deck to find out what was happening only to be confronted by towering cliffs looming above the stricken ship. In all the chaos, Captain Gibbs grabbed Eva and said, "If you are saved Eva, let my dear wife know that I died like a sailor". That was the last Eva Carmichael saw of the captain. She was swept off the ship by a huge wave. Eva saw Tom Pearce on a small rocky beach and yelled to attract his attention. He dived in and swam to the exhausted woman and dragged her to shore. He took her to the cave and broke the open case of brandy which had washed up on the beach. He opened a bottle to revive the unconscious woman. A few hours later Tom scaled a cliff in search of help. He followed hoof prints and came by chance upon two men from nearby Glenample Station three and a half miles away. In a complete state of exhaustion, he told the men of the tragedy. Tom then returned to the gorge while the two men rode back to the station to get help. By the time they reached Loch Ard Gorge, it was cold and dark. The two shipwreck survivors were taken to Glenample Station to recover. Eva stayed at the station for six weeks before returning to Ireland by steamship. In Melbourne, Tom Pearce received a hero's welcome. He was presented with the first gold medal of the Royal Humane Society of Victoria and a £1000 cheque from the Victorian Government. Concerts were performed to honour the young man's bravery and to raise money for those who lost family in the disaster. Of the 54 crew members and passengers on board, only two survived: the apprentice, Tom Pearce and the young woman passenger, Eva Carmichael, who lost her family in the tragedy. Ten days after the Loch Ard tragedy, salvage rights to the wreck were sold at auction for £2,120. Cargo valued at £3,000 was salvaged and placed on the beach, but most washed back into the sea when another storm developed. The wreck of Loch Ard still lies at the base of Mutton Bird Island. Much of the cargo has now been salvaged and some items were washed up into Loch Ard Gorge. Cargo and artefacts have also been illegally salvaged over many years before protective legislation was introduced in March 1982. One of the most unlikely pieces of cargo to have survived the shipwreck was a Minton majolica peacock- one of only nine in the world. The peacock was destined for the Melbourne 1880 International Exhibition in. It had been well packed, which gave it adequate protection during the violent storm. Today the Minton peacock can be seen at the Flagstaff Hill Maritime Museum in Warrnambool. From Australia's most dramatic shipwreck it has now become Australia's most valuable shipwreck artefact and is one of very few 'objects' on the Victorian State Heritage Register.The shipwreck of the Loch Ard is of significance for Victoria and is registered on the Victorian Heritage Register ( S 417). Flagstaff Hill has a varied collection of artefacts from Loch Ard and its collection is significant for being one of the largest accumulation of artefacts from this notable Victorian shipwreck. The collections object is to also give us a snapshot into history so we can interpret the story of this tragic event. The collection is also archaeologically significant as it represents aspects of Victoria's shipping history that allows us to interpret Victoria's social and historical themes of the time. The collections historically significance is that it is associated unfortunately with the worst and best-known shipwreck in Victoria's history.Ceramic shard, broken piece of pottery with some diagonally carved features. It is possibly a peacock leg section and green foliage. The ceramic piece has remnants of a coloured glaze.flagstaff hill, flagstaff hill maritime museum and village, warrnambool, maritime museum, maritime village, great ocean road, shipwreck coast, ceramic, porcelain, piece, fragment, ceramic bird, loch ard, shipwreck, salvage, recover, 1877, 1878, minton, shard -
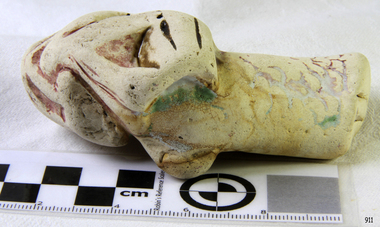 Flagstaff Hill Maritime Museum and Village
Ceramic - Ceramic Piece, Minton Potteries, ca 1877
The ceramic piece is one of four porcelain fragments washed up from the Loch Ard wreck near Port Campbell Victoria. These fragments resemble the foot and leg of a large bird and legend has it that another bird had drifted ashore at the same time the Loch Ard peacock. This figurine is on display at Flagstaff Hill Maritime Museum and regarded as the most valuable shipwreck relic. It is believed that all four fragments could belong to another peacock or a Minton porcelain stork that had been photographed in a Home Beautiful magazine in 1928. This stork appeared to be missing a leg and foot and experts have hypothesized that the four fragments could belong to this stork, the whereabouts of which are currently unknown. History of the Loch Ard: The Loch Ard got its name from ”Loch Ard” a loch which lies to the west of Aberfoyle, and the east of Loch Lomond. It means "high lake" in Scottish Gaelic. The vessel belonged to the famous Loch Line which sailed many vessels from England to Australia. The Loch Ard was built in Glasgow by Barclay, Curdle and Co. in 1873, the vessel was a three-masted square-rigged iron sailing ship that measured 79.87 meters in length, 11.58 m in width, and 7 m in depth with a gross tonnage of 1693 tons with a mainmast that measured a massive 45.7 m in height. Loch Ard made three trips to Australia and one trip to Calcutta before its fateful voyage. Loch Ard left England on March 2, 1878, under the command of 29-year-old Captain Gibbs, who was newly married. The ship was bound for Melbourne with a crew of 37, plus 17 passengers. The general cargo reflected the affluence of Melbourne at the time. Onboard were straw hats, umbrella, perfumes, clay pipes, pianos, clocks, confectionery, linen and candles, as well as a heavier load of railway irons, cement, lead and copper. There were other items included that were intended for display in the Melbourne International Exhibition of 1880. The voyage to Port Phillip was long but uneventful. Then at 3 am on June 1, 1878, Captain Gibbs was expecting to see land. But the Loch Ard was running into a fog which greatly reduced visibility. Captain Gibbs was becoming anxious as there was no sign of land or the Cape Otway lighthouse. At 4 am the fog lifted and a lookout aloft announced that he could see breakers. The sheer cliffs of Victoria's west coast came into view, and Captain Gibbs realised that the ship was much closer to them than expected. He ordered as much sail to be set as time would permit and then attempted to steer the vessel out to sea. On coming head-on into the wind, the ship lost momentum, the sails fell limp and Loch Ard's bow swung back towards land. Gibbs then ordered the anchors to be released in an attempt to hold its position. The anchors sank some 50 fathoms - but did not hold. By this time the ship was among the breakers and the tall cliffs of Mutton Bird Island rose behind. Just half a mile from the coast, the ship's bow was suddenly pulled around by the anchor. The captain tried to tack out to sea, but the ship struck a reef at the base of Mutton Bird Island, near Port Campbell. Waves subsequently broke over the ship and the top deck became loosened from the hull. The masts and rigging came crashing down knocking passengers and crew overboard. When a lifeboat was finally launched, it crashed into the side of Loch Ard and capsized. Tom Pearce, who had launched the boat, managed to cling to its overturned hull and shelter beneath it. He drifted out to sea and then on the flood tide came into what is now known as Loch Ard Gorge. He swam to shore, bruised and dazed, and found a cave in which to shelter. Some of the crew stayed below deck to shelter from the falling rigging but drowned when the ship slipped off the reef into deeper water. Eva Carmichael a passenger had raced onto the deck to find out what was happening only to be confronted by towering cliffs looming above the stricken ship. In all the chaos, Captain Gibbs grabbed Eva and said, "If you are saved Eva, let my dear wife know that I died like a sailor". That was the last Eva Carmichael saw of the captain. She was swept off the ship by a huge wave. Eva saw Tom Pearce on a small rocky beach and yelled to attract his attention. He dived in and swam to the exhausted woman and dragged her to shore. He took her to the cave and broke the open case of brandy which had washed up on the beach. He opened a bottle to revive the unconscious woman. A few hours later Tom scaled a cliff in search of help. He followed hoof prints and came by chance upon two men from nearby Glenample Station three and a half miles away. In a complete state of exhaustion, he told the men of the tragedy. Tom then returned to the gorge while the two men rode back to the station to get help. By the time they reached Loch Ard Gorge, it was cold and dark. The two shipwreck survivors were taken to Glenample Station to recover. Eva stayed at the station for six weeks before returning to Ireland by steamship. In Melbourne, Tom Pearce received a hero's welcome. He was presented with the first gold medal of the Royal Humane Society of Victoria and a £1000 cheque from the Victorian Government. Concerts were performed to honour the young man's bravery and to raise money for those who lost family in the disaster. Of the 54 crew members and passengers on board, only two survived: the apprentice, Tom Pearce and the young woman passenger, Eva Carmichael, who lost her family in the tragedy. Ten days after the Loch Ard tragedy, salvage rights to the wreck were sold at auction for £2,120. Cargo valued at £3,000 was salvaged and placed on the beach, but most washed back into the sea when another storm developed. The wreck of Loch Ard still lies at the base of Mutton Bird Island. Much of the cargo has now been salvaged and some items were washed up into Loch Ard Gorge. Cargo and artefacts have also been illegally salvaged over many years before protective legislation was introduced in March 1982. One of the most unlikely pieces of cargo to have survived the shipwreck was a Minton majolica peacock- one of only nine in the world. The peacock was destined for the Melbourne 1880 International Exhibition in. It had been well packed, which gave it adequate protection during the violent storm. Today the Minton peacock can be seen at the Flagstaff Hill Maritime Museum in Warrnambool. From Australia's most dramatic shipwreck it has now become Australia's most valuable shipwreck artifact and is one of very few 'objects' on the Victorian State Heritage Register.The shipwreck of the Loch Ard is of significance for Victoria and is registered on the Victorian Heritage Register ( S 417). Flagstaff Hill has a varied collection of artefacts from Loch Ard and its collection is significant for being one of the largest accumulation of artefacts from this notable Victorian shipwreck. The collections object is to also give us a snapshot into history so we can interpret the story of this tragic event. The collection is also archaeologically significant as it represents aspects of Victoria's shipping history that allows us to interpret Victoria's social and historical themes of the time. The collections historically significance is that it is associated unfortunately with the worst and best-known shipwreck in Victoria's history.Ceramic piece, broken, with remnants of burgundy, green and yellow glaze. The piece has been shaped. It could be a peacock leg section with green foliage with glaze. Noneflagstaff hill, flagstaff hill maritime museum and village, warrnambool, maritime museum, maritime village, great ocean road, shipwreck coast, ceramic, porcelain, piece, fragment, ceramic bird, loch ard, shipwreck, salvage, recover, 1877, 1878, minton, shard -
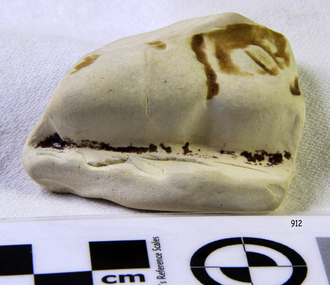 Flagstaff Hill Maritime Museum and Village
Ceramic - Ceramic Piece, Minton Potteries, ca 1877
The ceramic piece is one of four porcelain fragments washed up from the Loch Ard wreck near Port Campbell Victoria. These fragments resemble the foot and leg of a large bird and legend has it that another bird had drifted ashore at the same time the Loch Ard peacock. This figurine is on display at Flagstaff Hill Maritime Museum and regarded as the most valuable shipwreck relic. It is believed that all four fragments could belong to another peacock or a Minton porcelain stork that had been photographed in a Home Beautiful magazine in 1928. This stork appeared to be missing a leg and foot and experts have hypothesized that the four fragments could belong to this stork, the whereabouts of which are currently unknown. History of the Loch Ard: The Loch Ard got its name from ”Loch Ard” a loch which lies to the west of Aberfoyle, and the east of Loch Lomond. It means "high lake" in Scottish Gaelic. The vessel belonged to the famous Loch Line which sailed many vessels from England to Australia. The Loch Ard was built in Glasgow by Barclay, Curdle and Co. in 1873, the vessel was a three-masted square-rigged iron sailing ship that measured 79.87 meters in length, 11.58 m in width, and 7 m in depth with a gross tonnage of 1693 tons with a mainmast that measured a massive 45.7 m in height. Loch Ard made three trips to Australia and one trip to Calcutta before its fateful voyage. Loch Ard left England on March 2, 1878, under the command of 29-year-old Captain Gibbs, who was newly married. The ship was bound for Melbourne with a crew of 37, plus 17 passengers. The general cargo reflected the affluence of Melbourne at the time. Onboard were straw hats, umbrella, perfumes, clay pipes, pianos, clocks, confectionery, linen and candles, as well as a heavier load of railway irons, cement, lead and copper. There were other items included that were intended for display in the Melbourne International Exhibition of 1880. The voyage to Port Phillip was long but uneventful. Then at 3 am on June 1, 1878, Captain Gibbs was expecting to see land. But the Loch Ard was running into a fog which greatly reduced visibility. Captain Gibbs was becoming anxious as there was no sign of land or the Cape Otway lighthouse. At 4 am the fog lifted and a lookout aloft announced that he could see breakers. The sheer cliffs of Victoria's west coast came into view, and Captain Gibbs realised that the ship was much closer to them than expected. He ordered as much sail to be set as time would permit and then attempted to steer the vessel out to sea. On coming head-on into the wind, the ship lost momentum, the sails fell limp and Loch Ard's bow swung back towards land. Gibbs then ordered the anchors to be released in an attempt to hold its position. The anchors sank some 50 fathoms - but did not hold. By this time the ship was among the breakers and the tall cliffs of Mutton Bird Island rose behind. Just half a mile from the coast, the ship's bow was suddenly pulled around by the anchor. The captain tried to tack out to sea, but the ship struck a reef at the base of Mutton Bird Island, near Port Campbell. Waves subsequently broke over the ship and the top deck became loosened from the hull. The masts and rigging came crashing down knocking passengers and crew overboard. When a lifeboat was finally launched, it crashed into the side of Loch Ard and capsized. Tom Pearce, who had launched the boat, managed to cling to its overturned hull and shelter beneath it. He drifted out to sea and then on the flood tide came into what is now known as Loch Ard Gorge. He swam to shore, bruised and dazed, and found a cave in which to shelter. Some of the crew stayed below deck to shelter from the falling rigging but drowned when the ship slipped off the reef into deeper water. Eva Carmichael a passenger had raced onto the deck to find out what was happening only to be confronted by towering cliffs looming above the stricken ship. In all the chaos, Captain Gibbs grabbed Eva and said, "If you are saved Eva, let my dear wife know that I died like a sailor". That was the last Eva Carmichael saw of the captain. She was swept off the ship by a huge wave. Eva saw Tom Pearce on a small rocky beach and yelled to attract his attention. He dived in and swam to the exhausted woman and dragged her to shore. He took her to the cave and broke the open case of brandy which had washed up on the beach. He opened a bottle to revive the unconscious woman. A few hours later Tom scaled a cliff in search of help. He followed hoof prints and came by chance upon two men from nearby Glenample Station three and a half miles away. In a complete state of exhaustion, he told the men of the tragedy. Tom then returned to the gorge while the two men rode back to the station to get help. By the time they reached Loch Ard Gorge, it was cold and dark. The two shipwreck survivors were taken to Glenample Station to recover. Eva stayed at the station for six weeks before returning to Ireland by steamship. In Melbourne, Tom Pearce received a hero's welcome. He was presented with the first gold medal of the Royal Humane Society of Victoria and a £1000 cheque from the Victorian Government. Concerts were performed to honour the young man's bravery and to raise money for those who lost family in the disaster. Of the 54 crew members and passengers on board, only two survived: the apprentice, Tom Pearce and the young woman passenger, Eva Carmichael, who lost her family in the tragedy. Ten days after the Loch Ard tragedy, salvage rights to the wreck were sold at auction for £2,120. Cargo valued at £3,000 was salvaged and placed on the beach, but most washed back into the sea when another storm developed. The wreck of Loch Ard still lies at the base of Mutton Bird Island. Much of the cargo has now been salvaged and some items were washed up into Loch Ard Gorge. Cargo and artefacts have also been illegally salvaged over many years before protective legislation was introduced in March 1982. One of the most unlikely pieces of cargo to have survived the shipwreck was a Minton majolica peacock- one of only nine in the world. The peacock was destined for the Melbourne 1880 International Exhibition in. It had been well packed, which gave it adequate protection during the violent storm. Today the Minton peacock can be seen at the Flagstaff Hill Maritime Museum in Warrnambool. From Australia's most dramatic shipwreck it has now become Australia's most valuable shipwreck artifact and is one of very few 'objects' on the Victorian State Heritage Register.The shipwreck of the Loch Ard is of significance for Victoria and is registered on the Victorian Heritage Register ( S 417). Flagstaff Hill has a varied collection of artefacts from Loch Ard and its collection is significant for being one of the largest accumulation of artefacts from this notable Victorian shipwreck. The collections object is to also give us a snapshot into history so we can interpret the story of this tragic event. The collection is also archaeologically significant as it represents aspects of Victoria's shipping history that allows us to interpret Victoria's social and historical themes of the time. The collections historically significance is that it is associated unfortunately with the worst and best-known shipwreck in Victoria's history.Ceramic piece, broken with remnants of glaze. It has been shaped. It may be from a peacock leg section.Noneflagstaff hill, flagstaff hill maritime museum and village, warrnambool, maritime museum, maritime village, great ocean road, shipwreck coast, ceramic, porcelain, piece, fragment, ceramic bird, loch ard, shipwreck, salvage, recover, 1877, 1878, minton, shard -
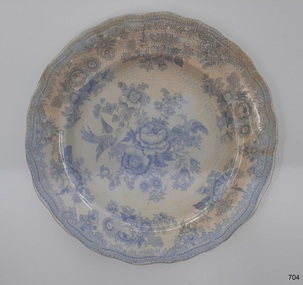 Flagstaff Hill Maritime Museum and Village
Domestic object - Dinner plate, William Adams, before 1863-1875
The Asiatic Pheasant pattern is a transfer design and was the most popular design of the 18th & 19th centuries and is still being produced today. The design was produced as high quality, decorative dinnerware by the potters in the Staffordshire area of England, from the late 1830’s, but no-one is sure exactly who the original designer was. This particular example was made by William Adams of Tunstall, Stoke-on-Trent, Staffordshire at the Greengates Potteries probably after or around 1863 and is believed to have been part of a passengers goods. The Adams family have a long line of making pottery since 1584 until 1966 when they were acquired by the Wedgewood group of companies. But this items pattern is attributed to the Adams potteries. History of the Loch Ard: The Loch Ard got its name from ”Loch Ard” a loch which lies to the west of Aberfoyle, and the east of Loch Lomond. It means "high lake" in Scottish Gaelic. The vessel belonged to the famous Loch Line which sailed many vessels from England to Australia. The Loch Ard was built in Glasgow by Barclay, Curle & Co. in 1873, the vessel was a three-masted square-rigged iron sailing ship that measured 79.87 meters in length, 11.58 m in width, and 7 m in depth with a gross tonnage of 1693 tons with a mainmast that measured a massive 45.7 m in height. Loch Ard made three trips to Australia and one trip to Calcutta before its fateful voyage. Loch Ard left England on March 2, 1878, under the command of 29-year-old Captain Gibbs, who was newly married. The ship was bound for Melbourne with a crew of 37, plus 17 passengers. The general cargo reflected the affluence of Melbourne at the time. Onboard were straw hats, umbrella, perfumes, clay pipes, pianos, clocks, confectionery, linen and candles, as well as a heavier load of railway irons, cement, lead and copper. There were other items included that were intended for display in the Melbourne International Exhibition of 1880. The voyage to Port Phillip was long but uneventful. Then at 3 am on June 1, 1878, Captain Gibbs was expecting to see land. But the Loch Ard was running into a fog which greatly reduced visibility. Captain Gibbs was becoming anxious as there was no sign of land or the Cape Otway lighthouse. At 4 am the fog lifted and a lookout aloft announced that he could see breakers. The sheer cliffs of Victoria's west coast came into view, and Captain Gibbs realised that the ship was much closer to them than expected. He ordered as much sail to be set as time would permit and then attempted to steer the vessel out to sea. On coming head-on into the wind, the ship lost momentum, the sails fell limp and Loch Ard's bow swung back towards land. Gibbs then ordered the anchors to be released in an attempt to hold its position. The anchors sank some 50 fathoms - but did not hold. By this time the ship was among the breakers and the tall cliffs of Mutton Bird Island rose behind. Just half a mile from the coast, the ship's bow was suddenly pulled around by the anchor. The captain tried to tack out to sea, but the ship struck a reef at the base of Mutton Bird Island, near Port Campbell. Waves subsequently broke over the ship and the top deck became loosened from the hull. The masts and rigging came crashing down knocking passengers and crew overboard. When a lifeboat was finally launched, it crashed into the side of Loch Ard and capsized. Tom Pearce, who had launched the boat, managed to cling to its overturned hull and shelter beneath it. He drifted out to sea and then on the flood tide came into what is now known as Lochard Gorge. He swam to shore, bruised and dazed, and found a cave in which to shelter. Some of the crew stayed below deck to shelter from the falling rigging but drowned when the ship slipped off the reef into deeper water. Eva Carmichael a passenger had raced onto the deck to find out what was happening only to be confronted by towering cliffs looming above the stricken ship. In all the chaos, Captain Gibbs grabbed Eva and said, "If you are saved Eva, let my dear wife know that I died like a sailor". That was the last Eva Carmichael saw of the captain. She was swept off the ship by a huge wave. Eva saw Tom Pearce on a small rocky beach and yelled to attract his attention. He dived in and swam to the exhausted woman and dragged her to shore. He took her to the cave and broke the open case of brandy which had washed up on the beach. He opened a bottle to revive the unconscious woman. A few hours later Tom scaled a cliff in search of help. He followed hoof prints and came by chance upon two men from nearby Glenample Station three and a half miles away. In a complete state of exhaustion, he told the men of the tragedy. Tom then returned to the gorge while the two men rode back to the station to get help. By the time they reached Loch Ard Gorge, it was cold and dark. The two shipwreck survivors were taken to Glenample Station to recover. Eva stayed at the station for six weeks before returning to Ireland by steamship. In Melbourne, Tom Pearce received a hero's welcome. He was presented with the first gold medal of the Royal Humane Society of Victoria and a £1000 cheque from the Victorian Government. Concerts were performed to honour the young man's bravery and to raise money for those who lost family in the disaster. Of the 54 crew members and passengers on board, only two survived: the apprentice, Tom Pearce and the young woman passenger, Eva Carmichael, who lost her family in the tragedy. Ten days after the Lochard tragedy, salvage rights to the wreck were sold at auction for £2,120. Cargo valued at £3,000 was salvaged and placed on the beach, but most washed back into the sea when another storm developed. The wreck of Lochard still lies at the base of Mutton Bird Island. Much of the cargo has now been salvaged and some items were washed up into Lochard Gorge. Cargo and artefacts have also been illegally salvaged over many years before protective legislation was introduced in March 1982. One of the most unlikely pieces of cargo to have survived the shipwreck was a Minton majolica peacock- one of only nine in the world. The peacock was destined for the Melbourne 1880 International Exhibition in. It had been well packed, which gave it adequate protection during the violent storm. Today the Minton peacock can be seen at the Flagstaff Hill Maritime Museum in Warrnambool. From Australia's most dramatic shipwreck it has now become Australia's most valuable shipwreck artifact and is one of very few 'objects' on the Victorian State Heritage Register. The shipwreck of the Loch Ard is of significance for Victoria and is registered on the Victorian Heritage Register ( S 417). Flagstaff Hill has a varied collection of artefacts from Loch Ard and its collection is significant for being one of the largest accumulation of artefacts from this notable Victorian shipwreck of which the subject items are a small part. The collections objects give us a snapshot of how we can interpret the story of this tragic event. The collection is also archaeologically significant as it represents aspects of Victoria's shipping history that allows us to interpret Victoria's social and historical themes of the time. Through is associated with the worst and best-known shipwreck in Victoria's history. Plate recovered from the wreck of the Loch Ard. Earthenware dinner plate with blue and white transfer design (Asiatic Pheasant) with a clear over-glaze. The outer rim is scalloped. Stickers with inscriptions "Rec 373 A" "L 102" "From Loch Ard Wreck (1878) - - -" Design logo [Floral wreath with ribbon and text "Asiatic Pheasant" and text below "- - - -"}flagstaff hill, warrnambool, flagstaff hill maritime museum, shipwreck coast, flagstaff hill maritime village, great ocean road, loch line, loch ard, captain gibbs, eva carmichael, tom pearce, glenample station, mutton bird island, loch ard gorge, asiatic pheasant, china dinner plate, earthenware plate, w adams potteries