Showing 309 items matching " ships light"
-
 Waverley RSL Sub Branch
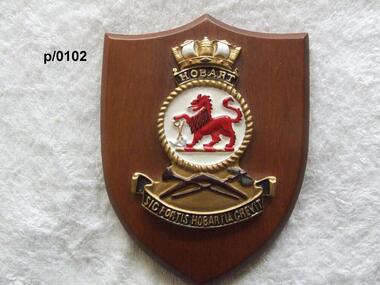
Plaque H.M.A.S. Hobart
HMAS Hobart (D63), a Leander class light cruiser acquired from the Royal Navy in 1938, and operating until 1962. HMAS Hobart (D 39), a Perth class guided missile destroyer commissioned in 1965 and decommissioned in 2000. HMAS Hobart (DDGH 39), lead ship of the Hobart class air warfare destroyers, scheduled to enter service in March 2016Wooden plaque with insignia of H.M.A.S. Hobarth.m.a.s. hobart -
 Waverley RSL Sub Branch
Spurs, 1914 to 1918
Spurs worn by Pte. Edward (Joe) Coughlan 17879 during World war one. Joe was a member of the 4th Light Horse. serving in Egypt with 4th Light Horse Field Ambulance and returned to Australia after serving 1060 days overseas in the troop ship Essex.This item is significant because Spurs have near original condition leather, and use the disk spur. Useage ceased in 1918.Pair of silver disk spurs with brown leather arch and instep straps . nilcavalry, light horse, spurs -
 Waverley RSL Sub Branch
Desk Set H.M.A.S. Sydney
HMAS Sydney was a Chatham class light cruiser of the Royal Australian Navy (RAN). Laid down in 1911 and launched in 1912, the cruiser was commissioned into the RAN in 1913. During the early stages of World War I, Sydney was involved in supporting the Australian Naval and Military Expeditionary Force, and escorting the first ANZAC convoy. On 9 November 1914, the cruiser defeated the German cruiser SMS Emden at the Battle of Cocos. During 1915 and 1916, Sydney operated on the North America and West Indies Station, before joining the 2nd Light Cruiser Squadron at Greenock, Scotland in November 1916. On 4 May 1917, the cruiser was involved in an inconclusive action against the German zeppelin L43; neither was damaged. During late 1917, Sydney became the first Australian warship to launch an aircraft, and the first warship to do so from a rotatable platform. After the war's end, Sydney spent a year in reserve before being reactivated to serve as Flagship of the RAN. The cruiser was decommissioned in 1928 and broken up for scrap. Several sections of the ship, including her bow and foremast, have been preserved as monuments, and three of the ship's main guns saw later use in shore fortifications.A number of these desk sets were manufactured and given to the Headmasters of selected schools throughout Australia in recognition of the efforts of school children in assisting the War effort during World War IMade from timber extracted from a companionway or staircase in the battle cruiser H.M.A.S. Sydney 2 x 5 cm.square glass containers are fitted. Blue attachment advising,wood from H.M.A.S. Sydney h.m.a.s. sydney, desk set, r.a.n -
 Lara RSL Sub Branch
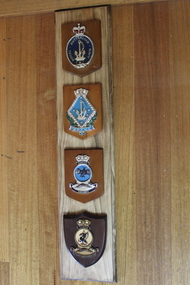
Plaques for Australian Navy 4 off, Australian Navy plaques - 1. Royal Australian Navy, 2. W.R.A.N.S.,3.HMAS Vampire, 4.HMAS Perth
Registered plaques representing R.A.N. , W.R.A.N.S. , H.M.A.S. Vampire, and H.M.A.S. Perth.Rare collection of Royal Australian Navy plaquesPine-board backing with 4 plaques mounted 1. Royal Australian Navy, 2. W.R.A.N.S.,3.HMAS Vampire, 4.HMAS Perth, The plaques are mounted on a wooden shields. 1. Royal Australian Navy plaque consists of an oval shape topped by a regal crown and bottom an anchor and chain, The center of the plaque is Black in color embossed in a ring of "Royal Australian Navy" the center of the plaque is a symbol of an anchor and chain. 2. W.R.A.N.S. Triangle shape with a Crown made-up from a sailing ship and the bottom a bow of blue ribbon. The lower half of the triangle is a wreath of leaves. the center of the triangle is painted light blue and has small stars one in each corner. In the center there is a ships anchor and chain. The bottom of the plaque is the initials "W.R.N.S." 3.HMAS Vampire A circular plaque a crown on the top a sailing ship in a crown format. Over a name of Vampire in gold on a black back ground the middle is a circle painted blue with a black Bat in the center. The bottom of the plaque is emblazoned with a boomerang, stone axe and aboriginal waddy followed by a banner "Audamus" meaning "we dare, we venture, we risk" 4.HMAS Perth, A circular plaque a crown on the top a sailing ship in a crown format. Over a name of Perth in gold on a black back ground. The middle is a circle painted gold with a black Griffen in the center. The bottom of the plaque is emblazoned with a boomerang, stone axe and aboriginal waddy followed by a banner "Fight and Flourish". motto.plaques, r.a.n., w.r.a.n., h.m.a.s. vampire -
 Lara RSL Sub Branch
Book, Dawn of D Day, 1959
This book was issued in 1960 and is an impression of the experience of the men who landed in the light of dawn on D Day. An impression of what it was like to be dropped from the sky at morning or ship to shore from a landing craft under fire.Historical recount of D-Day landings and subsequent battlesHardcover - dark blue Front Back and spine. The spine has the title printed. Inside front and back cover have illustrated maps by Charles Green. Photographs, maps and illustrations.wwii, d day, battle of normandy, air drop, american air drop, canadian troops, french civilians, invasion fleet, paratroopers, juno beach, invasion beaches, dropping zones, utah beach, omaha beach -
 Bendigo Military Museum
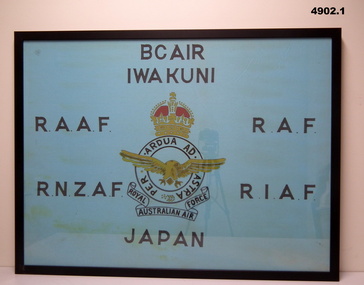
Banner - BCOF BANNERS, FRAMED, c1946 - Frame 2022
1. "I.W.A. KUNI" - City in Japan. 2. " B.C.O.F." - Japan 1946-48. British Commonwealth Occupation Forces (Japan).1. Banner - framed cotton fabric, light blue background with screen printing in black colour letters and centre unit insignia black, yellow and red colours. 2. Banner - framed cotton fabric, white background with screen printing in black colour letters and centre unit insignia red, yellow and blue colours. 1. & 2. Frames - timber, black colour paint, glass front, timber housing.Screen printing - black ink. 1. "BCAIR/IWA KUNI/ R.A.A.F./R.A.F./ R.N.2.A.F./R.I.A.F./JAPAN " Unit insignia 'ROYAL AUSTRALIAN AIR FORCE' 2. " R.A.N./H.M.A. SHIPS/ B.C.O.F./ AUSTRALIA - JAPAN/1946-1948"military, ww2, japan, banners -
 Bendigo Military Museum
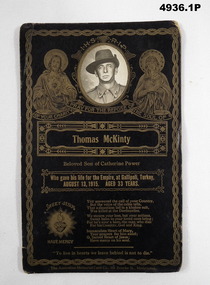
Photograph - CARD & PHOTOGRAPHS, AUST LIGHT HORSE WW1, The Australian Memorial Card Co
In WW1 the Australian Light Horse served from the Suez Canal right around through Palestine - Syria.1. Memorial Card. Black cardboard with gold printing. It is a religious article with images and prayers. In the top centre is an oval shaped hole with a B & W portrait of an Aust soldier. Slouch hat with side up. 2. Set of 31 B & W photos depicting scenes of light horse activity. Beaches - Middle East buildings - locals - repairing train lines - daily life - campsites - ships off shore etc.Thomas McGinty, Beloved son of Catherine Power. "Who gave his life for the Empire. At Gallipoli, Turkey, August 13 - 1915. Aged 33 years.ww1, middle east, light horse -
 Bendigo Military Museum
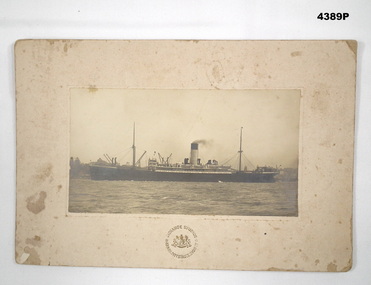
Photograph - PHOTOGRAPH NAVAL, MOUNTED, Exchange Studios, C.1900
The Steamer ASCANIUS became a troop Ship for the 1st AIF with the code name “HMAT A11”Photo B & W on light cream cardboard backing, photo is a 2 master, one funnel ship at sea, at the base is a Coat of Arms surrounded by the makers details in a circle. The rear has written details.On the rear in ink, “ ASCANIUS A11, Dear Exie, this is the old boat I am on, this photo was taken before she joined the Army”. On rear in pencil,” 9034. 1026 ........ 9 7/8. 6 3/4 .........”ascanius, troopships, aif -
 Lara RSL Sub Branch
Photograph, Set 4 photographs. and others for Torquay Light Horse camp, 1940
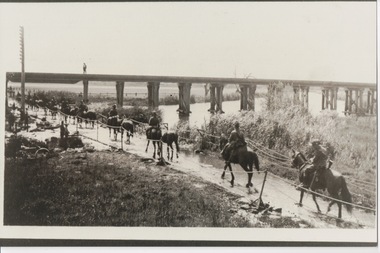
These images capture for all time Light Horsemen travelling through Geelong on their way to camp at Torquay for the last Group meeting in Australia . information following - details obtained from .........https://torquayhistory.com/light-horse-brigade/ On Australia Day, 1997, Sir John Young unveiled this plaque on Point Danger, Torquay. Torquay history, Light Horse Training Camp, WW2 Plaque at Pt. Danger Note----- (See images to view plaque) The plaque identifies a significant event in Torquay’s history and the sentiments of ‘change’ for the Light Horse Brigade – from horses to machines. In 1940 the four Light Horse Regiments (4th, 8th, 13th and 20th), some 5000 Light Horse and 2000 horses camped and trained at Torquay. Three other regiments, formerly mounted on horses, were also at Torquay ‘mounted’ on privately owned trucks and cars. Division troops included Artillery, Engineers, Signals, Field Ambulance and other branches of the Army necessary to enable a Division to function. It wasn’t just the sheer numbers of men coming to this little town that made the event significant, it was also the fact that the men of the Light Horse were dramatic, almost glamorous figures and it is easy to see their exploits as some splendid adventure. Horses have played a special role in the story of Australia. They were the only means of transport across this huge country, so it was necessary for everyone to have the ability to ride a horse. When war broke out in 1899 between Britain and the Boers of South Africa (“Boer” was Dutch for “farmer”) Australia sent troops to fight. At first Britain was wary of using untried, unprofessional colonial cavalrymen but soon saw that the slouch-hatted Australian “bushmen” were a match for the fast-moving and unconventional mounted commandos of the Boers. The Australians proved themselves to be expert rough-riding horsemen and good shots. Bush life had hardened them to go for long periods with little food and water. They also showed remarkable ability to find their way in a strange country and use its features for cover, in both attack and defence. By 1914, when Australia joined the war against Germany, there were 23 Light Horse regiments of militia volunteers. Many men from these units joined the Light Horse regiments of the Australian Imperial Force (AIF). Men were given remounts (if not using their own horses) – army horses bought by Commonwealth purchasing officers from graziers and breeders. These were called “walers” because they were a New South Wales stockhorse type – strong, great-hearted animals with the strains of the thoroughbred and semi-draught to give them speed, strength and stamina. On 1st November, 1914, Australia’s First Infantry Division and the first four Light Horse regiments sailed for England in a fleet of transport ships. The first of the Light Horse arrived at Gallipoli in May without their horses. Back with their horses after Gallipoli, they were formidable combatants across the Sinai and Palestine. Some British commanders observed that the light horseman moved with a “lazy, slouching gait, like that of a sleepy tiger” but described how the promise of battle “changes that careless gait, into a live athletic swing that takes him over the ground much quicker than other troops”. They had Light Horse, Torquay, training campdeveloped a reputation as formidable infantrymen. The Turks called them “the White Ghurkas” – a reference to their deadly skill with the bayonet. The Arabs called them “The Kings of the Feathers”. The plume had originally been a battle honour of the Queensland Mounted Infantry for their work in the shearer’s strike of 1891. During WW1 it was adopted by almost all the Light Horse Regiments. It was the proud badge of the light horseman. The most famous of their battles was the attack on Beersheba- the charge of the 4th Light Horse Brigade. Mounted infantrymen and their superb walers had carried out one of the most successful cavalry charges in history – against what seemed impossible odds. They surprised the Turks by charging cavalry-style, when they would normally have ridden close to an objective then dismounted to fight. The fall of Beersheba swung the battle tide against the Turks in Palestine; and changed the history of the Middle East. While 19 men from the Surf Coast Shire served with the 4th Light Horse over the course of WW1, only four were involved in the charge of Beersheba- John GAYLARD, Philip QUINN.(Winchelsea); Wallace FINDLAY (Anglesea); Harry TRIGG (Bambra). After the war, Light Horse units played a key role in the Australian Government’s compulsory military training programme. The Citizen Military Forces (C.M.F.) thrived on the glamour of the wartime Light Horse tradition, ignoring the possibility that motor vehicles would soon replace the horses. When training was no longer compulsory, the C.M.F. regiments declined and horses became more of a luxury during the 1930s depression years of poverty and unemployment. Some regiments were motorised. Then, in 1939, Australia joined Britain in another world war. Training was increased for the militia at both home bases and regional training camps. The camp at Torquay in 1940, commanded by Major General Rankin, was at Divisional strength. By the end of the camp some felt that the Division was ready for active service. Gradually, over the next four years, the Australian Light Horse units were mounted on wheels and tracks and the horses were retired. Six men enlisted at the Torquay camp and another 57 men and women enlisted at Torquay for service in WW2. Those who served in the Militia provided valuable Officers and NCOs and men for the armed services during the war. Each infantry division of the 2nd AIF had a Light Horse regiment attached to it. But the day of the Australian mounted soldier hadn’t quite passed. During World War II, Australia’s 6th Cavalry Regiment formed a mounted unit they called “The Kelly Gang” which did valuable scouting work. In New Guinea, a mounted Light Horse Troop did patrol duty and helped carry supplies. Some fully equipped walers were flown into Borneo for reconnaissance in rugged mountain country. But by the end of the war, in 1945, the horse had disappeared from the Australian Army. References: Australian Light Horse Association www.lighthorse.org.au National Australia Archives Australian War Memorial Surf Coast Shire WW1 memorials www.togethertheyserved.com The Light horse- a Cavalry under Canvas Light Horse, Training Camp, Torquay, WW2 Late in 1939 it was decided to set up a Lighthorse training camp in Torquay to train both men and horses for the battles of the Second World War. Horses, men and equipment came on special trains from all over Victoria and NSW, and as you would expect horseman came from areas such as Omeo and Sale, the Wimmera and the Western District. They arrived at the Geelong racecourse for watering in the Barwon River and then were ridden across the ford at the breakwater and began their 11 mile trek to Torquay. Light Horse, Training Camp, Torquay, WW2 Tent city By the end of January 1940 the camp at Torquay accommodated some 5000 men and 2500 horses of the Second Cavalry Division. The rows of horses, tents and huts near Blackgate Road were quite a sight. While the cavalrymen engaged in exercises on the land and on the beaches, many of the troops took over the Torquay School for special training of men and officers. Mr Bob Pettit local farmer and Councillor for the Barrabool Shire, wrote about the Light horse in the Surf Coast Community News in 1985 saying “They used to travel about the district riding four abreast in one long convoy. To my annoyance they went through my property and shut all the gates behind them. I had certain gates open to let stock in to the water holes and it would take me three -quarters of an hour to follow the horsemen up and put all the gates right again” he continued “the men from the Light Horse were here when the fire went through in March 1940. He recalled an incident when early one morning, as some one blew the bugle, a soldier putting a white sheet on the line frightened the horses. They panicked and ran off in all directions. Six went over the cliff near Bird Rock, five were never found, and the rest were gathered up after nearly a fortnight in the bush around Addiscott and Anglesea" Light Horse, Training Camp, Torquay, WW2, Geelong Parade Geelong parade The training camp culminated in a parade through the streets of Geelong on March 12th 1940. The salute was given at the Town Hall and the troops continued on a route to the You Yang’s for a training exercise. Note-----(see media section for photograph) The Camp was abandoned in mid 1940 as it was deemed unsuitable for training during winter and the cost of a permanent camp could not be justified if it could not be used all year. Historic.......Rare,,,Interpretive.Sepia photographs.set of four ....post card size ....Horses &LighthorsemenNo 1, Lighthorsemen Regiment Geelong 1940......No 2 Light Horse at Breakwater Geelong 1938 to 1940....No 3 Light Horse at Breakwater Geelong 1938 to 1940.....No 4 Light Horse crossing Breakwater camped at Geelong Showgrounds. These markings are on reverse of photographs.light horsemengeelong 1940., world war 2 -
 Lara RSL Sub Branch
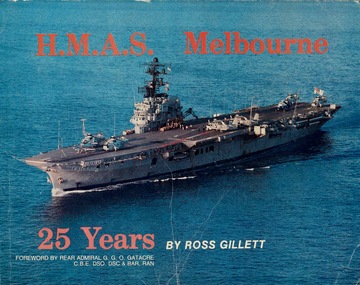
Book, Nautical Press, HMAS Melbourne 25 Years
HMAS Melbourne (R21) was a Majestic-class light aircraft carrier of the Royal Australian Navy (RAN). Operating from 1955 until 1982, she was the third and final conventional aircraft carrier to serve in the RAN. Melbourne was the only British Commonwealth naval vessel to sink two friendly warships in peacetime collisions. The ship was laid down for the British Royal Navy as the lead ship of the Majestic class in April 1943, and was launched as HMS Majestic (R77) in February 1945. At the end of World War II, work on the ship was suspended until she was purchased by the RAN in 1947. At the time of purchase, it was decided to incorporate new aircraft carrier technologies into the design, making Melbourne the third ship to be constructed with an angled flight deck. Delays in construction and integrating the enhancements meant that the carrier was not commissioned until 1955. Melbourne never fired a shot in anger during her career, having only peripheral, non-combat roles in relation to the Indonesia-Malaysia confrontation and the Vietnam War. However, she was involved in two major collisions with allied vessels. On the evening of 10 February 1964, Melbourne collided with and sank HMAS Voyager when the Daring class destroyer altered course across her bow. Eighty-two of Voyager's crew were killed, and two Royal Commissions were held to investigate the incident. The second collision occurred in the early morning of 3 June 1969, when Melbourne collided with and sank the Allen M. Sumner class destroyer USS Frank E. Evans in similar circumstances. Seventy-four United States Navy (USN) personnel died, and a joint USN–RAN Board of Inquiry was held. These incidents, along with several minor collisions, shipboard accidents, and aircraft losses, led to the reputation that Melbourne was jinxed. Melbourne was paid off from RAN service in 1982. A proposal to convert her for use as a floating casino failed, and a 1984 sale was cancelled, before she was sold in 1985 and towed to China for breaking. The scrapping was delayed so Melbourne could be studied by the People's Liberation Army Navy (PLAN) as part of a secret project to develop a Chinese aircraft carrier and used to train PLAN aviators in carrier flight operations. HMAS Melbourne was decommissioned on 30 June 1982, having spent 62,036 hours underway and having steamed 868,893 nautical miles. A proposal to convert her for use as a floating casino failed, and a 1984 sale was cancelled, before she was sold for scrap in 1985 and towed to China for breaking. The scrapping was delayed so Melbourne could be studied by the People's Liberation Army Navy (PLAN) as part of a secret project to develop a Chinese aircraft carrier and used to train PLAN aviators in carrier flight operations.The pictorial history of HMAS Melbourne with rare photos. Now a scarce title and highly desirable title that is now long out of print. Has provenance history of all ships movements from 1955 till decommissioned.HMAS Melbourne 25 YearsOn the front page is a picture of HMAS Melbourne with the words at top "H.M.A.S. Melbourne. At bottom are the words in orange, '25 Years'. In white, are the words 'by Ross Gillett' then 'Forward by Rear Admiral G.G.O. Gatacre C.B.E. DSO. DSC & Bar, RAN'. On the rear page is a list of all the Captains that served on the HMAS Melbourne between 1955-1980.hmas melbourne, aircraft carrier, royal australian navy, australian navy, westland whirlwind, sea venom, fairy gannet, bristol sycamore, westland wessex, douglas skyhawk, grumman tracker, westland sea king, fleet air arm, hmas albatross, nowra -
 Lara RSL Sub Branch
Photograph, H.M.A.S.ADELAIDE
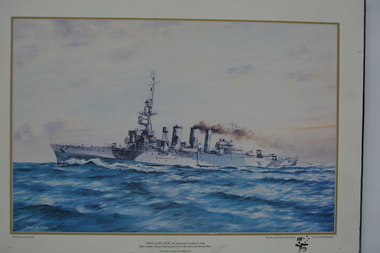
On 1 September 1939 Adelaide (I) commissioned for war service under the command of Captain HA Showers RAN, and operated on the Australian coast for defence of trade.This is a limited print of HMAS Adelaide. No 6 in a series of 25. Royal Australian Navy 75th Anniversary.White bordered coloured print mounted on M.D.F.board.H.M.A.S.ADELAIDE,an improved Chatham class light crusier,shown during service in the Second World War. No 6 in a series of 25 ROYAL AUSTRALIAN NAVY 75 TH ANNIVERSARYh.m.a.s., navy, royal australian navy, ship, cruiser, ww2, world war two, lara r.s.l. -
 Bendigo Military Museum
Education kit, Department of Veterans Affairs, WE REMEMBER ANZAC, 2) 2014, .4) 2014, .5) 2014, .6) 2014
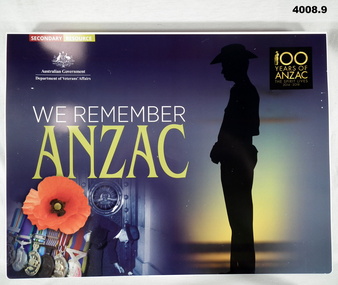
WE REMEMBER ANZAC - 100 years of ANZAC - THE SPIRIT LIVES 2014-2018 - SECONDARY RESOURCE .1) .2) 'WE REMEMBER ANZAC' .3) 'COMMEMORATIVE CEREMONY' .4) 'Memories & Memorabilia - Recognising and Preserving Australia's War Heritage' .5) 'Candour. Stories in the words of those who served 1914-1918.' .6) Over a Century of Service 2015 (Calendar) .7) 'ANZAC CENTENARY' .8) 'ANZAC PORTAL' .9) '2015 Anzac Day School's Awards'.1) Box folder - cardboard, white & gold print front, spine, back. Illustrated - collage colour photographs - medals, poppy, rising sun badge, soldier in silhouette. .2) Softcover, cardboard with fold in front flap, white & gold print, spiral bound, colour collage photographs - poppy, medals, troops. Pages - 86 pages, cut, plain, white, illustrated black & white, colour photographs, work sheets. .3) DVD inside cover flap. .4) Soft cover, cardboard, spiral bound, black, print front, illustrated sepia photograph soldier with letter and slouch hat. Pages - 88 pages, cut, plain, white, illustrated black & white, colour photographs, posters. .5) Soft cover, cardboard, white print front & back, illustrated - collage colour and sepia photographs of service personnel, letters, pens, brooch. Pages - 56 pages, cut, plain, white, illustrated colour, black & white photographs, medals, paintings. .6) Calender - soft cover, cardboard, light brown and black print front and back. Illustrated - sepia and colour - in silhouette - Troops of 1st Australian Division and members of 4 RAR. Pages - cut, plain, white, illustrated colour, black & white photographs from Boer War to Afghanistan. .7) .8) Card, cardboard with Webkey attached. Card - white & dark red print, small colour, sepia illustrations. .8) Key - metal with words printed - 'ANZAC PORTAL'. In plastic pocket. .9) Leaflet - lightweight cardboard black, white, yellow print front and back. Illustrated - black & white photograph of troop ship dockside. educational kit, anzac centenary -
 Bendigo Military Museum
Print - PRINT RAN, FRAMED, Post 1978
... is the flagship HMAS Australia with the light cruisers HMAS ships... is the flagship HMAS Australia with the light cruisers HMAS ships ...Painting courtesy of John Bastock.Colour print of the arrival of the first RAN fleet in Farm Cove, Sydney Harbour on 4.10.1913. In the foreground is the flagship HMAS Australia with the light cruisers HMAS ships Melbourne & Sydney. Photo is No 2 in a series of 25. Mounted with white border, gold metal frame with masonite backing & wire hanging strap. In print at bottom RHS: “ROYAL AUSTRALIAN NAVY 75TH ANNIVERSARY”print, 75th, anniversary, ran -
 Bendigo Military Museum
Postcard - POSTCARDS WW1, 1916, 1917
.1) - .6) & .8) These seven cards are from J.H. Robertson No. 4895, enlisted 20/09/1915 aged 25 years, embarked with 15th Reinforcements 6th Bn on 07/03/1916, transfers to the 59th Bn. Discharged medically unfit in 1918. The cards are all addressed to "Violet" and signed off "Jack". .3) dated 29.8.1916 .4) dated 7.12.17 ,7) This card is from "Bert to Violet" dated May 1916, and is possibly from Violet's brother. Robertson was married to "Sarah". No other information re "Violet". She could have been a friend or even a daughter..1) Post Card, silk, colour, Rising Sun, flags and shields. .2) Post Card, silk, colour, basket of flowers with "Fondest Love" in light blue. .3) Post Card, silk, colour, with pocket, shows flags and flowers, inside pocket small card with "Greetings from France". .4) Post Card, silk, colour with Rising Sun,flag and "Honour to Australia" in light blue. .5) Post Card, colour showing 8 flags, under "With all Good Wishes from Wareham". .6) Post Card, colour with flowers over a horse shoe, at the top "Best Birthday Wishes", at the bottom a small four line poem re birthday. .7) Post Card, black & white showing roses down one side, flags and ships at top. Main heading at top "Goodbye to my Dear Sister". Under a poem re leaving England for France. .8) Card, folding, colour, front has gold Rising Sun at top, bottom xmas decoration with "From one of the Australian Expeditionary Force". Inside a small poem and then xmas wishes. postcards, silk, 6th -
 Bendigo Military Museum
Legal record - WILLS & ENVELOPES
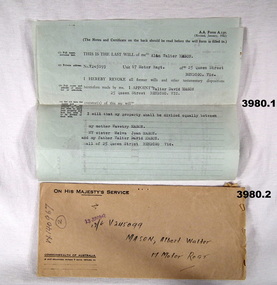
Both Wills are made out to his Father “Walter David”, Mother “Wavetree”, Sister “Melva Joan”. His Mother’s name is spelt “Wavetry on the other Will. Refer Cat No 3979.2 for Alans Service details..1) Will A.A.F.A 130 Australian Military Forces, blue fine paper, black printed with printed entries. .2) Envelope “On his Majesty’s service” brown colour to suit .1) .3) Will, A.A.F.A 130 Australian Military Forces, light fawn coloured paper, black printed with hand written entries in black pen. .4) Envelope A.A.Form A131 Australian Military Forces, brown colour, to suit .3)..1) Details; dated 10 March 1942, Alan Walter Mason V245099, 17th Motor Regt, 25 Queen St Bendigo. .2) On cover stamped in purple “13 June 1942”. Hand written in black, 13/6 V245099, Mason, Albert Walter, 17 Motor Regt. On Rear stamped “IDLE GOSSIP SINKS SHIPS”. .3) Details; dated 17 May 1943, Alan Walter Mason, V245099, 2/1st Aust DKS OPG COY RAE, 25 Queens St Bendigo. .4) On Cover stamped in purple. “11.June 1943”. Hand written; 11/6 V245099 Spr Alan Walter Mason 2/1st Aust Docks OPG Coy RAE 17.5.1943.wills, military, documents -
 Bendigo Military Museum
Postcard - POSTCARDS, PHOTOGRAPHIC WW1, 2.6.1915
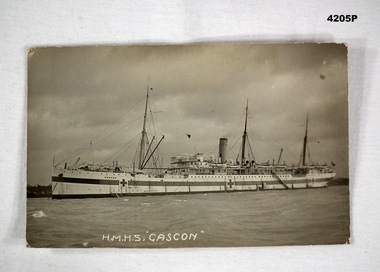
Letter content, “Dear Marjorie, This is a picture of the ship I was taken to when wounded. I am now in hospital and doing well. I was very lucky to get of so light. Sgt Major English and Sheehan were both wounded. I will write more as soon as I can use my right hand, Love to all from Chas”. Chas is, Charles Bowmont Taylor MC, No 99 A Coy 5th Batt AIF - 57th Batt AIF, WIA 25.4.1915 GSW to right hand. Sheehan is believed to be, Edward Robert Sheehan No 97 A Coy 5th Batt AIF, WIA 25.4.1915 BW to Knee (Bullet wound). He was WIA 3 times altogether. English is believed to be John Graham English No 51 A Coy 5th Batt AIF, WIA 25.4.1915 GSW to left foot. He was WIA once more. Refer also 4206.2. Photo print of the Hospital Ship HMHS “Gascon”. Black and white image, this is a three master one funnel with a large strip down the side broken by 3 crosses. The rear is correspondence and dated.On the rear in hand, “Hospital 2.6.15”hospital ships, postcards -
 Bendigo Military Museum
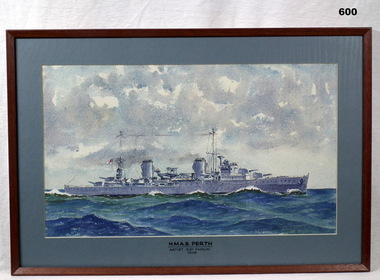
Painting - NAVY PAINTING, FRAMED, 1948
Painting is mounted with light blue border in a brown wooden frame with glass front, cream paper backing & a wire hanging strap. Water colour painting of a warship at sea. The ship is grey with 4 twin main gun turrets. It also holds an Albatross Aircraft, 2 funnels & 2 wireless masts. The painted sky shows patchy clouds, the sea is a blue green colour with small white waves. HMAS Perth Artist Ray Parkin 1948hmas perth, ww2, ran, paintings -
 Frankston RSL Sub Branch
Band, Cap
An embroidered cap band (known as a tally band) worn by sailors to identify the vessel on which they are serving. This black silk tally band is machine embroidered in gold thread with the following inscription : "Kreuzer Emden" . Kreuzer Emden was the third vessel to bear the name Emden. A light cruiser built for the German Reichsmarine in the early 1920s, Kreuzer Emden was commissioned into the German fleet in October 1925. The ship served during WW ll, was scuttled in 1945 and broken up for scrap in 1949.embroidered with the inscription : "Kreuzer Emden" -
 Frankston RSL Sub Branch
Booklet, Lest We Forget
A commemorative booklet about the role of nurses, in particular the nurses of the Australian Army Nursing Service, during WW2. The booklet has a light cardboard cover of buff colour and contains 28 pages. This booklet was published as a fund raiser for the "Centaur" War Nurses Memorial Fund.The booklet is entitled "Lest We Forget" and has the Red Cross symbol surrounded by an olive wreath printed, in colour, on the cover. There is an image of the hospital ship Centaur superimposed on the Red Cross symbol. Beneath the wreath there are the words ""CENTAUR" MEMORIAL SCHOLARSHIP". The words "AUSTRALIAN ARMY NURSING SERVICE" are printed across the bottom of the cover page and the price was 2/-. -
 Footscray Community Arts
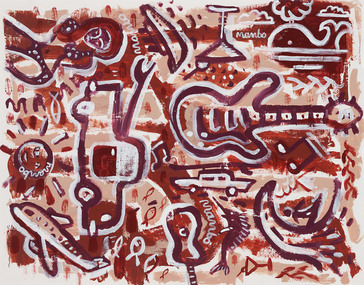
Holiday Yardage Mambo, David Bowers, (exact); 2003
MEDIUM: Acrylic on paper. DESCRIPTION: Image ranges from dark brown to pale brown with white. Light colored timber, outer frame with glass covering, white board and an inner frame. A very busy piece full of activity, starting from the bottom left we have an areoplane which is perhaps how this vacation begins, the sun sits above it and a bikini clad woman who has arrived to her destination is placed above the sun. There is cruise ship, a martini glass and a whale embracing the outer scene. Waves, a surfer, a marlin and a small guitar sit at the lower right. A large car takes the viewer to the centre of the picture where we come across a giant guitar. The music is what matters, this piece dances about the canvas in mushroom pinks and chocolates. Little outlines of fish fill the gaps. A very beachy scene. The image lyes quite flat to the eye, rough stick outlines of the images above. Signed proper left hand corner of image.bowers holiday, yardage, mambo acrylic -
4th/19th Prince of Wales's Light Horse Regiment Unit History Room
Painting, M R Taite, SS Wiltshire, est 1920
During WW1 the troop ship Wiltshire made many voyages carrying Light Horse troops to the war zoneFramed painting of Troop Ship SS WiltshireSS Wiltshire Troopship A18 Australian Expeditionary Forces 4th Victorian (sic) Light Horse -
4th/19th Prince of Wales's Light Horse Regiment Unit History Room
Diary, B N Sandilands, Gallipoli Diary 1915, 1915
Transcription from hand written diary of B N Sandilands, Wellington Mounted Rifles, kept during his time at Gallipoli, fighting in the trenches from 11 May 1915 until his time on the hospital ship en route to Malta in August 1915Photos of B N Sandilands, 1955 and 1902 -
 Flagstaff Hill Maritime Museum and Village
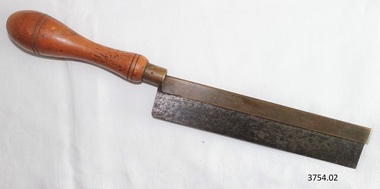
Tool - Saw, 1930-1955's
This tenon saw was used in the planning and making of components for the ship model Sovereign of the Seas. It is part of a collection of objects used by Jim Williams, maker of fine ship models from about 1930-1955. Most of the components for the models, as well as many of the tools, were handmade by Jim Williams. Jim’s family has donated the ship model “Sovereign of the Seas” and many tools, accessories and documents used in the making of this and other ship models have been donated to Flagstaff Hill Maritime Village. Ship model of HMS Sovereign of the Seas, scale model of 17th Century English war ship, was handmade and carved from plans, enclosed in airtight glass case. All components of that model, including even the smallest pulleys, were hand crafted using tools designed and made by Jim. Outstanding details include functional rigging and moving cannons. Please see our record 3732 of the mode Sovereign of the Seas for further details of the ship and the maker. This saw is connected with the hobby and skill of ship model making that has been crafted as a leisure activity for many generations. The hobby is often chosen by serving and retired mariners who appreciate the connection with maritime history. This saw was used by local Warrnambool man, Jim Williams, who was employed at Cramond and Dickson clothing store, and then at Fletcher Jones menswear for 27 years. It was used in making components for the model of the historic ship, the Sovereign of the Seas. The Sovereign of the Seas was a historic 17th century English war ship with important maritime heritage. Tenon aw. Hand saw with small-toothed metal blade set into a slotted brass back, attached to a round brass fitting in the light coloured, turned wooden handle. Top on handle is marked with two concentric rings scored into the wood. On top of blade is maker’s name Dennan & Robinson. This tenon saw is part of a collection of tools and accessories once used by Jim Williams, maker of a series of ship models 1930-1955 including “HMS Sovereign of the Seas”. "Dennan & Robinson"flagstaff hill, warrnambool, flagstaff hill maritime museum, maritime museum, shipwreck coast, flagstaff hill maritime village, great ocean road, jim williams, james bernard williams, ship model hobby, ship model tools, ship model making equipment, ship model making accessories, saw, wood cutting tool, tenon saw, carpenter's saw, dennan and robinson, sovereign of the sea, ship model, hobby, ship model tool -
 Flagstaff Hill Maritime Museum and Village
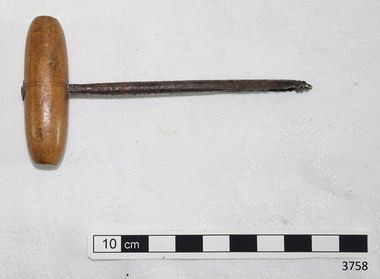
Tool - Auger, 1930-1955's
This auger was used in the making of components for the ship model Sovereign of the Seas. It is part of a collection of objects used by Jim Williams, maker of fine ship models from about 1930-1955. Most of the components for the models, as well as many of the tools, were handmade by Jim Williams. Jim’s family has donated the ship model “Sovereign of the Seas” and many tools, accessories and documents used in the making of this and other ship models have been donated to Flagstaff Hill Maritime Village. Ship model of HMS Sovereign of the Seas, scale model of 17th Century English war ship, was handmade and carved from plans, enclosed in airtight glass case. All components of that model, including even the smallest pulleys, were hand crafted using tools designed and made by Jim. Outstanding details include functional rigging and moving cannons. Please see our record 3732 of the mode Sovereign of the Seas for further details of the ship and the maker. This auger is connected with the hobby and skill of ship model making that has been crafted as a leisure activity for many generations. The hobby is often chosen by serving and retired mariners who appreciate the connection with maritime history. This auger was used by local Warrnambool man, Jim Williams, who was employed at Cramond and Dickson clothing store, and then at Fletcher Jones menswear for 27 years. It was used in making components for the model of the historic ship, the Sovereign of the Seas. The Sovereign of the Seas was a historic 17th century English war ship with important maritime heritage. Small auger, metal shank with threaded tip, and light coloured, oval shaped wooden handle. This auger is part of a collection of tools and accessories once used by Jim Williams, maker of a series of ship models 1930-1955 including “HMS Sovereign of the Seas”. flagstaff hill, warrnambool, flagstaff hill maritime museum, maritime museum, shipwreck coast, flagstaff hill maritime village, great ocean road, jim williams, james bernard williams, ship model hobby, ship model tools, ship model making equipment, ship model making accessories, auger, hand tool, sovereign of the sea, ship model, hobby, ship model tool, tool -
 Flagstaff Hill Maritime Museum and Village
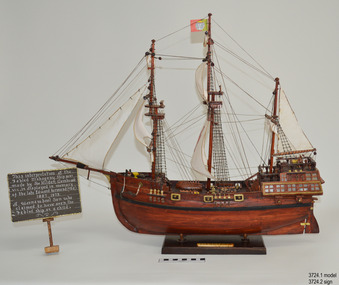
Craft - Ship Model, Portuguese Carvel, 1999
The Mahogany Ship is today regarded as a legend and refers to an ancient wreck that is purported to lie beneath the sand beside Armstrong Bay, several kilometres west of Warrnambool, Its location is currently unknown. For well over a century the mystery of this ship has fascinated Australians because the existence of such a vessel could throw a different light on the earliest phases of exploration of eastern Australia by Europeans. The story is that in January 1836 a party of whalers from Port Fairy travelled to the mouth of the Hopkins River in search of seals. Their boat overturned and one man was drowned. The three survivors were walking the 30 kilometres back to Port Fairy along the coast when, about halfway along, they discovered the wrecked ship in the dunes. It is said that Captain John Mills, who was in charge of the whaling station at Port Fairy promptly visited the wreck with several of his men, including Hugh Donnelly. Donnelly who was the originator of that version of events is now regarded as unreliable. Local history researcher Joan Fawcett believes Donnelly could not have visited the wreck in 1836 because he did not arrive in Victoria until 1841. The "mahogany" description can be traced to a letter from Port Fairy builder, architect and surveyor John Mason and published in the Melbourne Argus in 1876. He said he had seen the hull in 1846 and it "had the appearance of either cedar or mahogany." In 1884 Argus journalist `The Vagabond' wrote that the hull was built of "Spanish mahogany" and six years later Mason wrote another letter saying it might not have been mahogany but red gum or ironbark from New South Wales. He was too late with this new description as the wrecks mahogany tag was here to stay all through the hull was not visible as it had disappeared beneath the shifting sands by 1880. A more reliable account was later presented by the former editor of the Warrnambool Examiner, historian Richard Osburne, who wrote about the wreck in his book History of Warrnambool (published 1887). In it the author remembers to have noticed a wreck in the hummocks between Belfast and Warrnambool, in 1847 or 1848; he stated it was much nearer Warrnambool than Belfast, now known as Port Fairy, going on to state “in fact, it was only two or three miles from the former place, to the west of the big hummock which was supposed to fill Warrnambool Bay with drift sand washed by the Merri River before the cutting was made.” Osburne followed up with a letter to the Port Fairy Gazette on June 25, 1876, during a period of heightened interest in the wreck, although he was unsure of the provenance of the ship he went on to state in his letter. “The old wreck was, in fact, miles away from the Port Fairy beach, and only about four miles from Warrnambool. In the years 1847 and 1848. I have often seen the wreck and I regret to say I do not believe she was a foreign ship at all.”The ship model is significant for its association with the Warrnambool story of what is now referred to as the Mahogany Ship, an ancient shipwreck. The model is significant as it is an interpretation of a Portuguese caravel and possibly associated with the early history and exploration of Southern Australia. The model is a fine example of a hand crafted ship made from plans, not from a kit. Some of the materials used for the model are significant to the Gembrook community in that the timber used is a portion from a 30-meter pine tree that fell onto and destroyed the 120-year-old Gembrook church building. The model is also a dedication to Edward Kermond, who grew up in Warrnambool and claimed to have seen the shipwreck in the dunes when he was a lad in the late 19th century. (See note section of this document for further information on the creator and donation of the subject item).Ship model, an interpretation of a mahogany Portuguese carvel vessel in a glass display case with wood frame and a description plaque. Model is made from dark stained wood. The three masted vessel is fully rigged, with a Portuguese-like flag on mast. Plaque is rectangular, free standing on a pedestal. The model was handmade by Joe Hilder (Senior) in 1999 from flooring obtained from the Gembrook Uniting Church in Victoria. Inscriptions, hand written, under base of case and on plaque.Under base, black felt tip pen “Ship & Case made From / Flooring from Gembrook uniting Church, Flattened in 1999 / By Large Pine Tree.” On plaque, white paint "This interpretation of the Fabled Mahogany Ship was made by Joe Hilder, Gembrook Vic. is displayed in the memory of the late Edward Kermond (Ted) 1887-1973, a Warrnambool son who claimed to have seen the original ship as a child." flagstaff hill, warrnambool, flagstaff hill maritime museum, shipwreck coast, flagstaff hill maritime village, great ocean road, ship model, mahogany ship, mahogany ship story, portuguese caravel, joe hilder, edward kermond, ted kermond, gembrook uniting church, gembrook storm 1999, port fairy whalers, belfast whalers -
 Flagstaff Hill Maritime Museum and Village
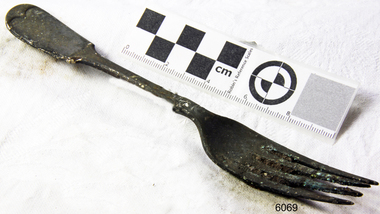
Domestic object - Fork, c. 19th century
HISTORY OF THE LOCH ARD The LOCH ARD belonged to the famous Loch Line which sailed many ships from England to Australia. Built in Glasgow by Barclay, Curdle and Co. in 1873, the LOCH ARD was a three-masted square rigged iron sailing ship. The ship measured 262ft 7" (79.87m) in length, 38ft (11.58m) in width, 23ft (7m) in depth and had a gross tonnage of 1693 tons. The LOCH ARD's main mast measured a massive 150ft (45.7m) in height. LOCH ARD made three trips to Australia and one trip to Calcutta before its final voyage. LOCH ARD left England on March 2, 1878, under the command of Captain Gibbs, a newly married, 29 year old. She was bound for Melbourne with a crew of 37, plus 17 passengers and a load of cargo. The general cargo reflected the affluence of Melbourne at the time. On board were straw hats, umbrella, perfumes, clay pipes, pianos, clocks, confectionary, linen and candles, as well as a heavier load of railway irons, cement, lead and copper. There were items included that intended for display in the Melbourne International Exhibition in 1880. The voyage to Port Phillip was long but uneventful. At 3am on June 1, 1878, Captain Gibbs was expecting to see land and the passengers were becoming excited as they prepared to view their new homeland in the early morning. But LOCH ARD was running into a fog which greatly reduced visibility. Captain Gibbs was becoming anxious as there was no sign of land or the Cape Otway lighthouse. At 4am the fog lifted. A man aloft announced that he could see breakers. The sheer cliffs of Victoria's west coast came into view, and Captain Gibbs realised that the ship was much closer to them than expected. He ordered as much sail to be set as time would permit and then attempted to steer the vessel out to sea. On coming head on into the wind, the ship lost momentum, the sails fell limp and LOCH ARD's bow swung back. Gibbs then ordered the anchors to be released in an attempt to hold its position. The anchors sank some 50 fathoms - but did not hold. By this time LOCH ARD was among the breakers and the tall cliffs of Mutton Bird Island rose behind the ship. Just half a mile from the coast, the ship's bow was suddenly pulled around by the anchor. The captain tried to tack out to sea, but the ship struck a reef at the base of Mutton Bird Island, near Port Campbell. Waves broke over the ship and the top deck was loosened from the hull. The masts and rigging came crashing down knocking passengers and crew overboard. When a lifeboat was finally launched, it crashed into the side of LOCH ARD and capsized. Tom Pearce, who had launched the boat, managed to cling to its overturned hull and shelter beneath it. He drifted out to sea and then on the flood tide came into what is now known as LOCH ARD Gorge. He swam to shore, bruised and dazed, and found a cave in which to shelter. Some of the crew stayed below deck to shelter from the falling rigging but drowned when the ship slipped off the reef into deeper water. Eva Carmichael had raced onto deck to find out what was happening only to be confronted by towering cliffs looming above the stricken ship. In all the chaos, Captain Gibbs grabbed Eva and said, "If you are saved Eva, let my dear wife know that I died like a sailor". That was the last Eva Carmichael saw of the captain. She was swept off the ship by a huge wave. Eva saw Tom Pearce on a small rocky beach and yelled to attract his attention. He dived in and swam to the exhausted woman and dragged her to shore. He took her to the cave and broke open case of brandy which had washed up on the beach. He opened a bottle to revive the unconscious woman. A few hours later Tom scaled a cliff in search of help. He followed hoof prints and came by chance upon two men from nearby Glenample Station three and a half miles away. In a state of exhaustion, he told the men of the tragedy. Tom returned to the gorge while the two men rode back to the station to get help. By the time they reached LOCH ARD Gorge, it was cold and dark. The two shipwreck survivors were taken to Glenample Station to recover. Eva stayed at the station for six weeks before returning to Ireland, this time by steamship. In Melbourne, Tom Pearce received a hero's welcome. He was presented with the first gold medal of the Royal Humane Society of Victoria and a £1000 cheque from the Victorian Government. Concerts were performed to honour the young man's bravery and to raise money for those who lost family in the LOCH ARD disaster. Of the 54 crew members and passengers on board, only two survived: the apprentice, Tom Pearce and the young woman passenger, Eva Carmichael, who lost all of her family in the tragedy. Ten days after the LOCH ARD tragedy, salvage rights to the wreck were sold at auction for £2,120. Cargo valued at £3,000 was salvaged and placed on the beach, but most washed back into the sea when another storm developed. The wreck of LOCH ARD still lies at the base of Mutton Bird Island. Much of the cargo has now been salvaged and some was washed up into what is now known as LOCH ARD Gorge. Cargo and artefacts have also been illegally salvaged over many years before protective legislation was introduced. One of the most unlikely pieces of cargo to have survived the shipwreck was a Minton porcelain peacock - one of only seven in the world. The peacock was destined for the Melbourne International Exhibition in 1880. It had been well packed, which gave it adequate protection during the violent storm. Today, the Minton peacock can be seen at the Flagstaff Hill Maritime Museum in Warrnambool. From Australia's most dramatic shipwreck it has now become Australia's shipwreck artefact and is one of very few 'objects' on the Victorian State Heritage Register most valuable. The LOCH ARD shipwreck is of State significance – Victorian Heritage Register S 417 Flagstaff Hill’s collection of artefacts from LOCH ARD is significant for being one of the largest collections of artefacts from this shipwreck in Victoria. It is significant for its association with the shipwreck, which is on the Victorian Heritage Register (VHR S417). The collection is significant because of the relationship between the objects, as together they have a high potential to interpret the story of the LOCH ARD. The LOCH ARD collection is archaeologically significant as the remains of a large international passenger and cargo ship. The LOCH ARD collection is historically significant for representing aspects of Victoria’s shipping history and its potential to interpret sub-theme 1.5 of Victoria’s Framework of Historical Themes (living with natural processes). The collection is also historically significant for its association with the LOCH ARD, which was one of the worst and best known shipwrecks in Victoria’s history. Silver plated copper alloy dessert fork from the wreck of the Loch Ard. , Covered in Silver oxide. Light encrustation on fork between tines.flagstaff hill maritime museum, shipwreck coast, great ocean road, loch line, loch ard, mutton bird island, loch ard gorge, electroplated cutlery, fork, dessert fork -
 Flagstaff Hill Maritime Museum and Village
Container - Try pot, c. 20th century
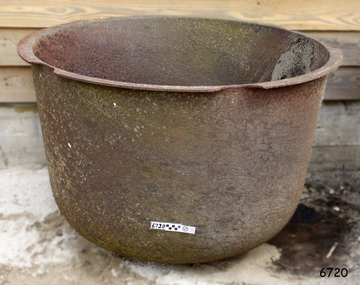
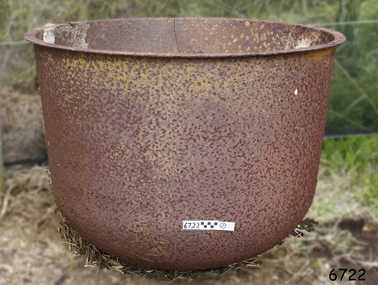
This try-pot is one of a set of three. Whalers used large iron pots, called try-pots to liquefy large chunks of whale blubber down into oil. Early on in the history of whaling, small whaling boats had no means to process blubber at sea and had to bring it into whaling stations for processing at shore-based try-works. Later, when bay whaling evolved and large scale vessel were utilised for hunting whales, try pots were mounted onto the top deck. This advance had its benefits as the processing facilities were mobile, whalers could move operations to follow whales and discover new whaling grounds. The deceased whale would be tied up alongside the ship, the crewmen cut away the blubber, or outer fat layer, in long strips. They hauled the strips aboard, cut them into smaller pieces, and tossed them into boiling cauldrons on deck to render the fat into oil. The whale oil was stored in barrels in the cargo hold, and brought to put for sale. The oil was much sought after as a good quality fuel tor heating, light and lubrication. Try pots were used in the whaling industry, one of the very early industries in Colonial Australia, including here on the southwest coast of Victoria. The high grade oil was a much sought after product and used for essential services such as fuelling the lights of the lighthouses. Commercial whaling ceased in Australia in 1979.Try pot, one of a set of three. A large cast-iron cauldron of about 200 gallons in capacity. Round metal container with rounded base and flat extended lip. flagstaff hill, warrnambool, maritime museum, shipwreck coast, try pot, trypot, cauldron, whale oil, whaling, fuel -
 Flagstaff Hill Maritime Museum and Village
Container - Try pot, c.20th century
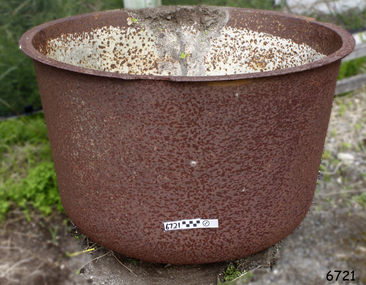
This try-pot is one of a set of three. Whalers used large iron pots, called try-pots to liquefy large chunks of whale blubber down into oil. Early on in the history of whaling, small whaling boats had no means to process blubber at sea and had to bring it into whaling stations for processing at shore-based try-works. Later, when bay whaling evolved and large scale vessel were utilised for hunting whales, try pots were mounted onto the top deck. This advance had its benefits as the processing facilities were mobile, whalers could move operations to follow whales and discover new whaling grounds. The deceased whale would be tied up alongside the ship, the crewmen cut away the blubber, or outer fat layer, in long strips. They hauled the strips aboard, cut them into smaller pieces, and tossed them into boiling cauldrons on deck to render the fat into oil. The whale oil was stored in barrels in the cargo hold, and brought to put for sale. The oil was much sought after as a good quality fuel tor heating, light and lubrication. Try pots were used in the whaling industry, one of the very early industries in Colonial Australia, including here on the southwest coast of Victoria. The high grade oil was a much sought after product and used for essential services such as fuelling the lights of the lighthouses. Commercial whaling ceased in Australia in 1979.Try pot, one of a set of three. A large cast-iron cauldron of about 200 gallons in capacity. Round metal container with rounded base and flat extended lip. It was used to heat whale blubber to remove the oil.flagstaff hill, warrnambool, maritime museum, shipwreck coast, try pot, trypot, cauldron, whale oil, whaling, fuel -
 Flagstaff Hill Maritime Museum and Village
Container - Try pot, c. 20th century
This try-pot is one of a set of three. Whalers used large iron pots, called try-pots to liquefy large chunks of whale blubber down into oil. Early on in the history of whaling, small whaling boats had no means to process blubber at sea and had to bring it into whaling stations for processing at shore-based try-works. Later, when bay whaling evolved and large scale vessel were utilised for hunting whales, try pots were mounted onto the top deck. This advance had its benefits as the processing facilities were mobile, whalers could move operations to follow whales and discover new whaling grounds. The deceased whale would be tied up alongside the ship, the crewmen cut away the blubber, or outer fat layer, in long strips. They hauled the strips aboard, cut them into smaller pieces, and tossed them into boiling cauldrons on deck to render the fat into oil. The whale oil was stored in barrels in the cargo hold, and brought to put for sale. The oil was much sought after as a good quality fuel tor heating, light and lubrication. Try pots were used in the whaling industry, one of the very early industries in Colonial Australia, including here on the southwest coast of Victoria. The high grade oil was a much sought after product and used for essential services such as fuelling the lights of the lighthouses. Commercial whaling ceased in Australia in 1979.Try pot, one of a set of three. A large cast-iron cauldron of about 180 gallons in capacity. Round metal container with rounded base and flat extended lip. It was used to heat whale blubber to remove the oil.flagstaff hill, warrnambool, maritime museum, shipwreck coast, try pot, trypot, cauldron, whale oil, whaling, fuel -
 Flagstaff Hill Maritime Museum and Village
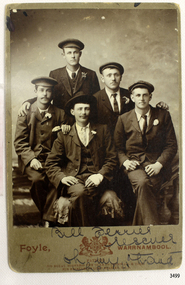
Postcard - People, Bill Ferrier - rescuer, 11th November, 1905
... to steer for the light. As the ship came round, a tremendous sea... to steer for the light. As the ship came round, a tremendous sea ...The postcard shows a photograph of William Ferrier, the 25-year-old Warrnambool fisherman from South Warrnambool whose rescue of two sailors from the wrecked La Bella made him an overnight National hero, quoted as “one of the most heroic rescues in Victoria’s shipwreck history”. The La Bella was wrecked on 10th November 1905 and the photograph was taken on the next day. In the photograph, William Ferrier is seated in the centre, with four of the five survivors beside him: (from left to right) Leonard Robertson, R. Payne, Oscar Rosenholme and Jack Noake. The photograph was taken by Foyle Photography Studio in Warrnambool, originally owned by James Charles Foyle. He previously had a photographic studio in Melbourne 1882 1887, then opened “Foyle’s Photo Card Studios” in Liebig St, Warrnambool. James Foyle died on 13th July 1905 and his son and daughter, Charles and Lilian Foyle continued on with the business until 1945. This photograph was most likely taken by either Charles or Lilian Foyle. The story of William Ferrier’s brave act follows on below … The ship from which the sailors were rescued was the three-masted, iron and steel barquentine the La Bella, built in Norway in 1893. She was one of two iron and steel ships by Johan Smith, the company was one of the leading shipping families in Tvedestrand, Norway. She was significant to Norwegian shipping, being one of only 27 iron and steel ships ever built in Norway. She was registered in New Zealand and engaged from 1902 in inter-colonial trading of timber in the Pacific, between New Zealand and Australia and was often in Port Phillip Bay, Victoria. On 5th October 1905, the twelve-year-old La Bella left Lyttleton, New Zealand carrying a cargo of timber bound for Warrnambool, Australia. She was manned by a crew of twelve: the Master, (Captain Mylius, previously 1st Mate of La Bella, appointed Captain to La Bella on 6th February 1903) 2 Mates, Cook, six able seamen, one ordinary seaman and a boy. Bad weather en route caused her to shelter at Burnie on Tasmania's North West coast. On November 10th, the 37th day of her journey, La Bella approached Warrnambool. Captain Mylius steered her towards Lady Bay Channel in heavy south-west seas and evening mist. He ordered the helmsman to steer for the light. As the ship came round, a tremendous sea struck her on the port quarter, causing her to breach broadside in a northwesterly direction into breakers. The helm was brought round twice more, but each time heavy seas broke over her, the third time throwing the La Bella on to a submerged reef in Lady Bay now known as La Bella Reef (about 100 yards from the Warrnambool breakwater). The sea was so rough that it even wrenched a one-and-a-half ton anchor from its fastenings and into the sea. As Captain Mylius headed to the steel wheelhouse, intending to send up a rocket flare, a huge sea slammed the steel door into him (resulting in massive bruising front and back) Despite his injuries he still managed to set off a blue light, which he held up in his hands. La Bella’s lifeboats were filled with seawater and broke up on their chocks. The blue light was the first indication to people on the shore that there was a ship in distress. The Harbour Master, Captain Roe (who lived in the Harbour Master’s House opposite Flagstaff Hill), organised a group of volunteers to crew the lifeboat because the trained crew was unavailable; the crewmen were working on a steamer in Port Fairy at the time. He then poured oil onto the water to try and smooth the sea. At around 11 pm three of the crew took shelter in the steel forecastle but the sea crashed into it and broke it up. While the rest of the crew and onlookers watched helplessly in the moonlight the bodies were washed away into the sea, never to be seen again. Some of the crew lashed themselves to the weather rail to keep from being washed away. Watson, the ordinary seaman, became tangled in the rigging lines and was too weak to move, so the 2nd Mate, Robertson, put a line onto him so that he wouldn’t wash off. Around 11 pm three of the crew were unconscious from exhaustion. The situation on La Bella was becoming dangerous. The 2nd Mate moved to the ‘house’ and soon afterwards the ship slipped in the heavy sea. The lashings of the 1st Mate and the ‘boy’ Denham had kept them safe until about 2 am when they were washed overboard; no one was able to help. One by one, the exhausted crew were being washed overboard, too weak to hold on any longer. During the night the La Bella had broken into two and the deckhouse ran out towards the sea. Two more men drowned when trying to reach the lifeboat. By sunrise, the only survivors of the twelve were the Master, 2nd Mate and three seamen. Early in the morning, Captain Roe used the rocket apparatus on shore to try and shoot a line to the ship for a safer rescue but each attempt fell short of the target. Several attempts were made by the lifeboat to rescue the stricken sailors, but the rough conditions made this difficult for the boat to get close enough to the ship and the lifeboat had to return to shore. During a final attempt to reach the ship Captain Mylius ordered his men to jump into the sea. Leonard Robertson, 2nd mate, jumped and swam towards the lifeboat, taking hold of the boat hook offered to him. Oscar Rosenholme managed to reach the boat floating on a piece of timber from the ship’s load and a third survivor, Noake, also made the boat. Along with the lifeboat rescue crew, 25-year-old William Ferrier rowed his small dingy through the heavy seas and managed to rescue the Captain, whom he landed on the breakwater. Ferrier then returned to the ship to attempt a final rescue, losing his oars and rowlocks into the high sea. Using just a spare paddle he skulled towards the La Bella, reaching her stern in time to cut loose the lone surviving sailor, Payne, from the lashing that held him to the ship; the terrified sailor dropped from the ship and into the dingy. Shortly after the last man was rescued, the La Bella was lifted by a huge wave and crashed back down on the reef; she broke up and sank. The ordeal had lasted ten hours. The survivors were taken to the nearby Bay View Hotel and gratefully received warm food and clothing, medical attention and a place to sleep. In the following days, an unidentified body of a young person had washed ashore; it was either Watson or Denham. The body was buried in the Warrnambool cemetery with an appropriate gravestone and inscription. William Ferrier became a national hero as news of the daring rescue spread. In recognition of his bravery in the two daring rescues, he was awarded the Silver Medal for Bravery by the Royal Humane Society and was honoured in the letter from the Prime Minister and the Parliament of the Commonwealth, telegrams and a cheque for £20 from the Governor-General, over £150 subscribed by the public, including Warrnambool and district and readers of The Argus, and a gold medal from the Glenelg Dinghy Club of South Australia. Ferrier’s rescue efforts are one of the most heroic in Victoria’s shipwreck history. (William Ferrier’s son, Frank, received a similar award almost fifty years later when he helped rescue four members of the crew on the yacht Merlan after it ran on to a reef near the Point Lonsdale Lighthouse. ) The wreck of La Bella now lies on her port side in 13 metres of sheltered water inside the reef she struck. The bow section is relatively intact and part of the stern has drifted north-easterly towards the mouth of the Hopkins River. The reef the La Bella struck now bears its name. Those five rescued from the La Bella were Captain George Mylius, Leonard Robertson (2nd Mate, 21 years old), R. Payne, Oscar Rosenholme and Jack Noake. Those seven who lost their lives were Mr Coulson (1st mate), Charles Jackman (cook) Gustave Johnson, Pierre Johann and Robert Gent (all able seamen), Harry Watson (ordinary seaman) and Jack Denham (ship’s boy), Captain Mylius was found guilty of careless navigation; he had sailed into the bay without the services of a pilot. His Master Certificate was suspended for twelve months. Later he was also charged with manslaughter of one of the crew who had died when the La Bella was wrecked but found not guilty. The event’s adverse publicity and damage to his career took a toll on his health and he died of a heart attack six months after the wreck; he was only thirty-seven. His body was buried in the Melbourne General Cemetery. The La Bella was “the best documented of all sailing ships owned in New Zealand”. Her record books, ship logs, correspondence and supporting papers are still available. At the time of the tragedy, she was owned by Messers David C.Turnbull and Co. of Timaru, New Zealand timber merchants and shipping agents, who had purchased her on 13th December 1901. A detailed account of the last journey of La Bella can be read in “Leonard Robertson, the Whangaroa & La Bella” written by Jack Churchouse, published in 1982 by Millwood Press Ltd, Wellington, NZ. As well as this postcard, Flagstaff Hill’s La Bella Collection includes a photograph of the wrecked La Bella, a brass rail holder and the letter from the Prime Minister and other Members of Parliament that was sent to William Ferrier to commend him for his bravery. Some 15 – 17 ships are believed to have sunk in Lady Bay, but only two have been discovered on the seafloor; the “La Bella” and the “Edinburgh Castle”. Both wrecks are popular diving sites and are preserved as significant historical marine and marine archaeological sites. This postcard is part of the La Bella Collection and is significant at both a local and state level. Its connection to the La Bella shipwreck and the rescue of five survivors highlights the dangers of Victoria’s Shipwreck Coast. The photograph of William Ferrier and four of the five survivors demonstrates the bravery of ordinary Australians who risked their lives to save victims of shipwrecks along the coast. The postcard is significant to the history of Warrnambool as it portrays William Ferrier, a local fisherman whose descendants continue to live in the area. It highlights the way of life of people who lived in coastal towns in 19th century Victoria and the effects of shipwrecks upon them. The postcard connects to the congratulatory letter which was sent to William Ferrier by the Prime Minister and Government of Australia and demonstrates the importance they attached to his efforts for Victoria and to Australia. The postcard is also an example of the photography of Foyle Photographers who were in the town of Warrnambool from the late 1800’s. Charles and Lillian Foyle took over the business when their father James died in 1905. Lillian Foyle is significant as the first woman photographer in Warrnambool. It is not known whether Charles of Lillian took this photograph. This postcard is significant because of its association with the sailing ship “La Bella”. The “La Bella” is of local and state and national significance. It is one of the only two shipwrecks discovered in Lady Bay, Warrnambool, out of the 15-17 shipwrecks in the bay. Sepia photograph of William (Bill) Ferrier (seated in the middle), heroic rescuer of two crew members of the La Bella, wrecked at Warrnambool. The photograph is a postcard and shows five men dressed formally in suits and hats. Printed below the photograph are the name and place of the photographer, a royal crest and the details of two patrons of the photographer. Also below the photograph are some handwritten words in black pen. On the back of the postcard is a handwritten message in the same writing as the front.Printed on the front of the card is “Foyle, WARRNAMBOOL” “PATRONS: / HIS ROYAL HIGHNESS THE DUKE OF CORNWALL & YORK. / HIS EXCELLENCY LORD BRAS_ EY, R.O.B.” Handwritten on the front of the card is “Bill Ferrier / rescuer / Oh my hero _ _ _ “ Handwritten on the back of the card is a message. “La Bella” Wrecked off W.Bool Breakwater Nov. 1906 (_ _ _ _ show night) Payne Noake Rosenholme Robertson and Capt Mylius (saved) (moonlight bright) Watson (_ _ _ _ boy) Richwoud [possibly Richmond] drowned” and signed “Desdewoua [possibly Desdemona] Slogos”la bella, foyle, william ferrier, bill ferrier, lady bay, 1905, 10th november 1905, 11th november 1905, parliament of the commonwealth, royal humane society medal, flagstaff hill, warrnambool, shipwrecked coast, flagstaff hill maritime museum, maritime museum, shipwreck coast, flagstaff hill maritime village