Showing 147 items
matching division in battle
-
 The Beechworth Burke Museum
Photograph
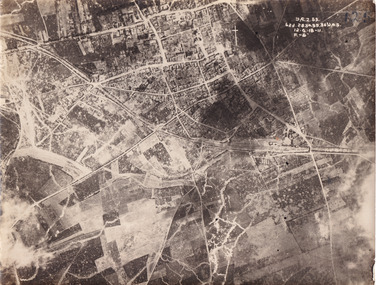
Taken some time between 1914-18, the photograph depicts an aerial view of Villers-Bretonneux in France, a region which was part of the Western Front during World War I. The image mostly shows rural landscape. The Western Front was the main theatre of war during World War I. Following the outbreak of war in August 1914, the German Army opened the Western Front by invading Luxembourg and Belgium, then gaining military control of important industrial regions in France. The German advance was halted with the Battle of the Marne. Following the Race to the Sea, both the French-British and German armies dug in along a meandering line of fortified trenches, stretching from the North Sea to the Swiss frontier with France. The First Battle of Villers-Bretonneux occurred between 30 March - 5 April 1918. It took place during Operation Michael, part of the German Spring Offensive on the Western Front. The offensive began against the British Fifth Army and the Third Army on the Somme, and pushed back the British and French reinforcements on the north side of the Somme. The capture of Villers-Bretonneux, close to Amiens, a strategically important road and rail-junction, would have brought the Germans within artillery-range. In late March, troops from the Australian Imperial Force were brought south from Belgium as reinforcements to help shore up the line. In early April, the Germans launched an attack to capture Villers-Bretonneux. After a determined defence by British and Australian troops, the attackers were close to success until a counter-attack by the 9th Australian Infantry Brigade and British troops late in the afternoon of 4 April restored the situation and halted the German advance on Amiens. The Second Battle of Villers-Bretonneux occurred between 24 - 27 April 1918, during the German Spring Offensive to the east of Amiens. It is notable for being the first occasion on which tanks fought against each other. A counter-attack by two Australian brigades and a British brigade during the night of 24 April partly surrounded Villers-Bretonneux, and on 25 April, the town was recaptured. On 26 April, the role of the Moroccan division of the French army was crucial in pushing back German units. Australian, British and French troops nearly restored the original front line by 27 April.The record is historically significant due to its connection to World War I. This conflict is integral to Australian culture as it was the single greatest loss of life and the greatest repatriation of casualties in the country's history. Australia’s involvement in the First World War began when the Australian government established the Australian Imperial Force (AIF) in August 1914. Immediately, men were recruited to serve the British Empire in the Middle East and on the Western Front. Additionally, the record's significance is enhanced by its depiction of Villers-Bretonneux. The battles that occurred in this town during World War I are especially historically significant to Australia as this is where the Australian Imperial Force had one their greatest World War I victories. An Australian flag still flies over Villers-Bretonneux in the present. Furthermore, a plaque outside the Villers-Bretonneux Town Hall recounts the battles fought to save the town in 1918. Kangaroos feature over the entrance to the Town Hall, and the main street is named Rue de Melbourne. More officially, recognition of the significance of the battle in Villers-Bretonneux is found at the Australian National Memorial, which was built just outside the town. It commemorates all Australians who fought in France and Belgium and includes the names of 10,772 who died in France and have no known grave. Each year, a small ceremony is held at the memorial to mark the sacrifice made by the soldiers. Lastly, the record has strong research potential. This is due to the ongoing public and scholarly interest in war, history, and especially the ANZAC legend, which is commemorated annually on 25 April, known as ANZAC Day.Sepia rectangular photograph printed on matte photographic paper.Obverse: yAE.2.35. / 125 / 62d.2834.35.36.VA.5. / 12.G.18-11 / F.-(?)" /military album, wwi, world war i, villers-bretonneux, australian imperial force, aif, france, war, army, conflict, germany, 1918, battle -
 The Beechworth Burke Museum
Photograph, c.1914
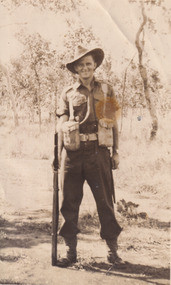
This photograph depicts a soldier, credited on the reverse as Fred Foster. The young man is dressed in military attire and is standing tall with a gun beside him. He is located in the Australian bush and the date of the photograph is unknown. Frederick “Fred” Arthur Foster was nephew to famous Bushranger Edward “Ned” Kelly. He was born on the 15th of March 1889 in Forbes, New South Wales. He was the eldest son of Catherine “Kate” Kelly and William Henry “Bricky” Foster. After the death of his mother in October of 1898 from apparent drowning, Foster (then aged 9) was raised by his grandmother Ellen Kelly (née Quinn) at Eleven Mile Creek in Victoria. On the 29th of June 1915, 26 year old Foster travelled to Melbourne, Victoria and enlisted in the Australian Army. He was a Private in the 17th Infantry Battalion (originally C.Company, 47th battalion). He previously was attached to the 55th Battalion but transferred in 1916. Prior to enlisting in the army, Foster worked as a Bee Keeper and served in the 16th Light Horse regiment at Benalla. Foster had blue eyes, brown hair and was of Presbyterian faith. On the 28th of February 1917, Foster travelled to France aboard SS “Golden Eagle”. He was killed in action in Lagnicourt, France on the 15th of April 1917 at 28 years old. The Battle in Lagnicourt France, on the Western Front, occurred from the 1st of March to the 30th of April of 1917 and was the location of fierce fighting between Germany and the British Empire. Germany became aware of a weakness they had along the Hindenburg Line, one of these weaknesses was located in Lagnicourt which is a small village in Northern France. Therefore, the Germans decided to launch a counter-attack in this area on the 15th of April at dawn. During this fight, German forces captured several batteries of the 1st Australian Division’s artillery but the Australians led a strong counter-attack by four of their battalions and recaptured the village and most of the guns from the German forces. German forces were forced into a premature withdrawal. This battle was not undertaken in typical WW1 “trench” style warfare. Instead, the battle was up on the ground in what was described as “old open style warfare”. In this battle, slightly more than 1000 casualties were Australian, with 300 of these prisoners of war. German forces suffered a loss of over 2300 casualties with 360 taken captive. Foster was one of 43 in his regiment who died, 87 were wounded and 51 reported missing. Foster was buried at location in Lagnicourt and whilst the grave was initially marked, it is now unknown. Foster’s service, alongside those who fell at Lagnicourt, is commemorated at the Australian National Memorial in Villers-Bretonneux, France along with other national Australian memorial sites.Photography played an important part in World War 1. Photographs of men in their military uniforms served as propaganda during the Great War to reassure civilians back at home of the military prowess of their nation and the bravery of their men. It did this while hiding the true horrors which faced the men in battle. These photographs, which includes those taken at home prior to embarking overseas like Fred Foster’s, act as censored memory for those who have lost a loved one at war. It enables families to remember their relatives in their youth and standing proudly rather than having to face the actual danger and horror which faced these men at the front line. The battle of Lagnicourt France was a victory for the European Empire and therefore, men who lost their lives protecting their countries became heroes and were awarded posthumous medals for their service. Photos of soldiers in their uniforms, were undertaken by men like Foster, so their families would be able to retain their memories and likeness before they embarked for war. Many men were killed or horribly wounded so these images were important for reminding families about their sons/ husbands/ brothers/ cousins and friends. This photo is a part of the Burke Museum Kelly album which includes numerous photographs relating to the Kelly Gang. As the son of Kate Kelly and William “Bricky” Foster, Fred Foster is an important part of the Kelly story after the execution of Edward “Ned” Kelly which has information it can impart relating to the history of the family after 1880. Whilst an important element of the Kelly Album, Foster’s photograph is also historically important in its own right for its connection to the Great War and the experiences of a soldier at the Western Front.Original sepia rectangular photograph developed on matte photographic paper, unmounted.Reverse: (Top right corner of reverse:) FRED FOSTER/ (Top centre of reverse:) Kate Kelly's son.kelly album, fred foster, kate kelly, photograph, australian soldier, the kelly gang, australian bush, burke museum, sepia photo, gum trees, family of the kelly gang, world war i, langnicourt, france, great war, 1917, ned kelly, frederick foster, william "bricky" foster, ellen kelly, military history, australian military -
 Bendigo Military Museum
Postcard - POSTCARDS - WATERLOO, BELGIUM, c.WW1
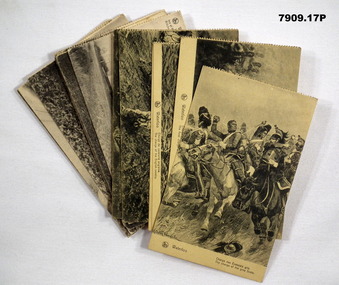
Postcards collected after WW1 by R.H. Baron whilst serving with 5th Divisional Headquarters (57 Batt) in Belgium. Part of the "Robert H. Baron (No. 3596) and Cooper Collections. See Catalogue No. 1981P for details of Baron's service.Seventeen black and white postcard scenes of the Battle of Waterloo and surrounds. Each has perforations down the LHS.robert h. baron, cooper collection, postcards, ww1, waterloo -
 Eltham District Historical Society Inc
Document (Item) - Article, The Eltham Roll of Honour: Second World War, 9 Aug 2020
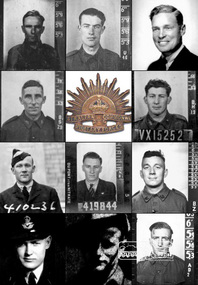
Information regarding the circumstances of the eleven men of the Shire of Eltham who died serving their country in the Second World War and for whom the Eltham War Memorial was dedicated. Their names are listed on the Eltham Roll of Honour in order of rank. The image portrayed shows the eleven men (left to right, top to bottom) by date of fatality: CASTLEDINE, George Ernest, Spr., VX10044 (KIA 18 Apr 1941, Greece) GAHAN, Studley Manston, Capt., VX48379 (KIA 17 May 1941, Tobruk, Libya) RUTTER, David, Flying Off., 833 (400833) (KIA 9 Dec 1941, Bir El Gubbi, Libya) CLERKE, Alfred Charles, Cpl., VX23112 (KIA 2 Feb 1942, Laha, Ambon Island) DUNLOP, Cuthbert Douglas, Sgt., VX15252 (KIA 22 Nov 1942, Gona, New Guinea) INGRAM, Lester Neil, Flt. Sgt., 410236 (DOD 22 Apr 1943, Longworth, England) McLEAN, Stanley, Flt. Sgt., 419844 (KIA 7 Oct 1944, Emmerich, Germany) FELDBAUER, Theodore, Sgt., VX51733 (DOD 27 Mar 1945, Borneo) RUTTER, Donald Hemphill, Flt. Lt., 410262 (KIA 5 Apr 1945, Varrelbusch, Germany) FIELD, Kevin Francis, Pte., VX144763 (KIA 28 Jun 1945, Bougainville, PNG) BUTHERWAY, Jack Herbert, Pte, VX37645 (DOD 8 Jul 1945, Borneo)eltham war memorial, roll of honour, second world war, eltham, eltham roll of honour, shire of eltham, 2/4 field workshop, 22 independent brigade group ordnance workshop, a.i.f., australian army ordnance corps, australian corps of electrical and mechanical engineers, changi, falkiner street, florence mary butherway, jack herbert butherway, prisoner of war (pow), ranau number 1 jungle camp, sandakan death march, singapore, thomas james butherway, vx37645, 2/2 field company, 6th division, abington, annie castledine, arthur frederick castledine, george ernest castledine, greece, jean simonson, lower plenty, old eltham road, royal australian engineers, vx10044 sapper g. e. castledine, 2/23 bn, derril, gahan house, main road, rats of tobruk, studley manston gahan, tobruk, vx48379, 3 squadron r.a.a.f., aboukir, alamein memorial, beulah alice (simpson) rutter, bir el gubbi, broken hill aero club, david rutter, egypt, hubert rutter, libya, yarra braes, 2/21 bn, 23rd australian infrantry brigade, 8th division, alfred charles clerke, ambon island, battle of ambon, bidgeland park estate, inga caroline (nicholls) clerke, inga mary nicholls, laha airfield, nora ann clerke, rose matilda clerke, vx23112, william charles clerke, 2/14 bn, 2/16 bn, 21st brigade, 7th division, cuthbert douglas dunlop, gona, gona war cemetery, henry street, janet dunlop, kokoda track, new guinea, palestine, papua new guinea, port moresby (bomana) war cemetery, reuben cuthbert dunlop, syria, vx15252, 10 operational training unit, 410236, ada (key) ingram, berkshire, bomber command, england, group no. 91, john ingram, lester neil ingram, longworth, n.1374, r.a.a.f., r.a.f., r.a.f. abington, research (vic.), whitley v bomber, 419844, 514 bomber squadron, emmerich, germany, gordon stanley mclean, ji-g2, kleve, lancaster lm735, lucy mclean, mount pleasant road, r.a.f. waterbeach, reichswald forest war cemetery, stanley mclean, 2/10 ordnance workshops, albert feldbauer, eltham cricket association, eltham girls club, frank street, henry feldbauer, jessie margarette feldbauer, june feldbauer, ken ingram, margaret (feldbauer) ingram, montmorency imperials, research cricket club, research state school, sandakan number 1 camp, sandakan number 2 camp, theodore albert feldbauer, valerie (feldbauer) waller, violet amelda (teagle) feldbauer, vx51733, 247 ‘china-british’ squadron, caithness, cloppenburg, donlad hemphill rutter, essen, gloucester, hanover war cemetery, hanover-limmer british military cemetery, holten-lochem, oldenburg, r.a.f. castletown, r.a.f. station lealing, stoppenburg, typhoon ib jp443, typhoon ib sw526, 15th australian infantry brigade, 1940 cup, 3rd division, 57th/60th bn, best and fairest, bougainville island, buin road, mary field, mayona road, mivo river, mobiai river, montmorency, vx144763, william field -
 Waverley RSL Sub Branch
Minefield Warning Flag
German Luftwaffe (Land Forces) minefield warning flag from WWII.originally intended to be gas markers, rather than mines, but as it turned out, the use changed .they were mounted on a red metal pole & there were 12 to a set in a leather pack. This Flag was presented to the Treasurer of Waverley RSL. It is a souvenir from Bardia in Libya The Battle of Bardia was fought over three days between 3 and 5 January 1941, as part of Operation Compass, the first military operation of the Western Desert Campaign of the Second World War. It was the first battle of the war in which an Australian Army formation took part, the first to be commanded by an Australian general and the first to be planned by an Australian staff. Major General Iven Mackay's 6th Division assaulted the strongly held Italian fortress of Bardia, Libya, assisted by air support and naval gunfire, and under the cover of an artillery barrage. The 16th Infantry Brigade attacked at dawn from the west, where the defences were known to be weak. Sappers blew gaps in the barbed wire with Bangalore torpedoes and filled in and broke down the sides of the anti-tank ditch with picks and shovels. This allowed the infantry and 23 Matilda II tanks of the 7th Royal Tank Regiment to enter the fortress and capture all their objectives, along with 8,000 prisoners. In the second phase of the operation, the 17th Infantry Brigade exploited the breach made in the perimeter, and pressed south as far as a secondary line of defences known as the Switch Line. On the second day, the 16th Infantry Brigade captured the township of Bardia, cutting the fortress in two. Thousands of prisoners were taken, and the Italian garrison now held out only in the northern and southernmost parts of the fortress. On the third day, the 19th Infantry Brigade advanced south from Bardia, supported by artillery and the Matilda tanks, now reduced in number to just six. Its advance allowed the 17th Infantry Brigade to make progress as well, and the two brigades reduced the southern sector of the fortress. Meanwhile, the Italian garrisons in the north surrendered to the 16th Infantry Brigade and the Support Group of the British 7th Armoured Division outside the fortress. In all, some 36,000 Italian prisoners were taken. The victory at Bardia enabled the Allied forces to continue the advance into Libya and ultimately capture almost all of Cyrenaica. In turn this would lead to German intervention in the fighting in North Africa, changing the nature of the war in that theatre. Bardia boosted the competence and reputation of the Australian Army. Perhaps most important of all, it raised confidence in the possibility of an ultimate Allied victory around the world, which would lead to the Lend-Lease Act being passed in the United States http://en.wikipedia.org/wiki/Battle_of_BardiaCloth Flag bearing a skull and cross Bones on a metal spike mounted on a square varnished wooden basebardia, land mine, marker flag, minefield, mustard gas -
 Waverley RSL Sub Branch
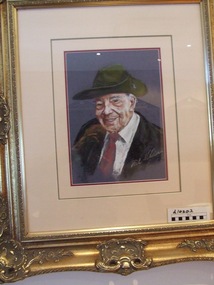
Painting Roy Longmore, RoyLongmore
Longmore set aside his life as a farm-hand in Geelong, Victoria, when he enlisted in the Australian Imperial Force at age 21. Private (Pte) Roy Longmore, 3rd Reinforcements, 21st Battalion, of Bannockburn, Victoria enlisted on 13 July 1915; and he embarked from Melbourne aboard HMAT Anchises on 26 August 1915.[2] After training in Egypt, was sent to the Battle of Gallipoli where he was a tunnel digger with the 2nd Division, burrowing underneath the Turkish positions and laying mines. After evacuation from Turkey, he fought at Pozières, Armentières, and Villers-Bretonneux.[1] He was wounded three times in France and was momentarily given up for dead when he was shot as the Armistice in November 1918, approached. He later recalled, "We were patrolling in a gully when suddenly half a dozen Germans appeared over a hill armed with machine guns and opened fire. Jerry riddled me, knocking me flat on my back, and the last I heard was 'Longy's had it, they got him.'" Fortunately, his fellow soldiers saw him move and rescued him.[3] Lance Sergeant (LSgt) and returned to Australia on 16 March 1919 as a member of the 2nd Pioneer Battalion.[2] Civilian life[edit] After returning to Australia in 1919, his injuries made returning to farm work impossible, so he drove a taxi in Melbourne. Another change caused by the war was more telling. Before, he had hunted rabbits; but he later explained that when he returned home, he no longer had an appetite for firing at anything alive.[3] Longmore married and had one son, Eric.[1] The one-time LSgt Longmore died peacefully in his sleep at a Burwood Nursing Home aged 107 on 21 June 2001. He was the second last Anzac to die.[2] At his death, Australia honored him one final time with a state funeral.[3] Australian "legend"[edit] In 2000, Longmore was recognized as one of the "Australian Legends." His name and photograph were honored as part of an annual series of commemorative postage stamps issued by Australia Post since 1997. The stamps commemorate living Australians "who have made lifetime contributions to the development of Australia's national identity and character".[4] Longmore lived to fully enjoy this honor.[3] Longmore's 45-cent Legend stamp displays the soldier's portrait as a young man, photographed just prior to his departure for Gallipoli. Formal photographs of the other two ANZAC centenarians complete this stamp set. In addition, a fourth stamp features the 1914-15 star medal which was presented to all those who fought in campaigns during those war years.[5] These stamps, designed by Cathleen Cram of the Australia Post Design Studio, commemorate the story of events and people shaping contemporary Australia.[6] The Longmore stamp honors him as an individual and as a representative of all 68,000 soldiers at Gallipoli whose actions affected Australia's evolving self-image.[7] http://en.wikipedia.org/wiki/Roy_LongmoreFramed painting of Roy Longmore wooden frame glass fronted -
 Lara RSL Sub Branch
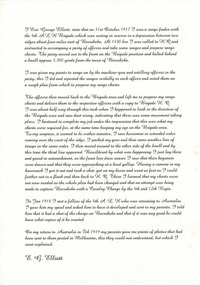
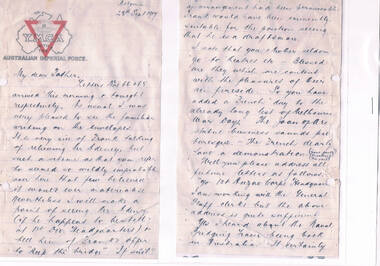
Statement By Eric George Elliott on the Light Horse Brigade charge at Beersheba
This statement by Eric George Elliott tells how The battle of Beersheba took place on 31 October 1917 as part of the wider British offensive collectively known as the third Battle of Gaza. The final phase of this all day battle was the famous mounted charge of the 4th Light Horse Brigade. Commencing at dusk, members of the brigade stormed through the Turkish defences and seized the strategic town of Beersheba. The capture of Beersheba enabled British Empire forces to break the Ottoman line near Gaza on 7 November and advance into Palestine.Decisive victory at Beersheba fell to one of the last great charges of mounted troops in history. As Australian Light Horse Divisions captured the town and secured crucial water wells, their success also marked the beginning of the end of the war in the Middle East. This end came exactly a year to the day after success at Beersheba.Rectangular shaped glass covered picture frame with a photocopy of his statement on the charge of Beersheba.ww!, beersheba, statement, photocopy, australian light horse brigade. -
 Lara RSL Sub Branch
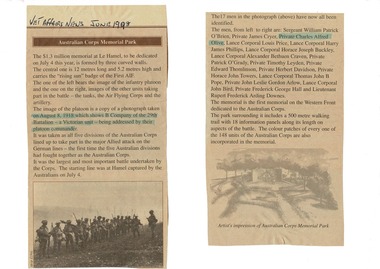
Veteran Affairs Newspaper article dated June 1998, Australian Corps Memorial Park - $1.3 million memorial at La Hamel for Australian World War 1 Soldiers
Article of World War 1 Refer to carved life size soldier with machine gun in foyer and photograph at its feet.A4 sheet of white paper has two cut-out sections of Veteran Affairs Newspaper article dated June 1998 glued on. Title Australian Corps Memorial Park. Article covers a Memorial cost $1.3 million dollars for dedication on 4th July 1998 consisting of three curved memorial walls for Australian soldiers that died during Wold War 2. The photograph included in the article was taken on August 8, 1918 which shows B company of the 29th Battalion - a Victorian Unit - being addressed by their platoon Commander. All 5 Australian Divisions took part in the major Allied attack on the German Lines - the first time the five Australian Divisions had fought together as the Australian Corps. (Under Australian Command) It is the First memorial on the Western Front dedicated to the Australian Corps. The park surrounding it includes a 500 meter walking tril with 18 information panels along its length on aspects of the battle.Article was found in Veteran Affairs News dated June 1998, heading - Australian Corps Memorial Park.veteran affairs news article, a4 paper sheet -
 Lara RSL Sub Branch
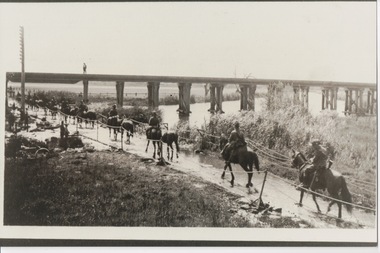
Photograph, Set 4 photographs. and others for Torquay Light Horse camp, 1940
These images capture for all time Light Horsemen travelling through Geelong on their way to camp at Torquay for the last Group meeting in Australia . information following - details obtained from .........https://torquayhistory.com/light-horse-brigade/ On Australia Day, 1997, Sir John Young unveiled this plaque on Point Danger, Torquay. Torquay history, Light Horse Training Camp, WW2 Plaque at Pt. Danger Note----- (See images to view plaque) The plaque identifies a significant event in Torquay’s history and the sentiments of ‘change’ for the Light Horse Brigade – from horses to machines. In 1940 the four Light Horse Regiments (4th, 8th, 13th and 20th), some 5000 Light Horse and 2000 horses camped and trained at Torquay. Three other regiments, formerly mounted on horses, were also at Torquay ‘mounted’ on privately owned trucks and cars. Division troops included Artillery, Engineers, Signals, Field Ambulance and other branches of the Army necessary to enable a Division to function. It wasn’t just the sheer numbers of men coming to this little town that made the event significant, it was also the fact that the men of the Light Horse were dramatic, almost glamorous figures and it is easy to see their exploits as some splendid adventure. Horses have played a special role in the story of Australia. They were the only means of transport across this huge country, so it was necessary for everyone to have the ability to ride a horse. When war broke out in 1899 between Britain and the Boers of South Africa (“Boer” was Dutch for “farmer”) Australia sent troops to fight. At first Britain was wary of using untried, unprofessional colonial cavalrymen but soon saw that the slouch-hatted Australian “bushmen” were a match for the fast-moving and unconventional mounted commandos of the Boers. The Australians proved themselves to be expert rough-riding horsemen and good shots. Bush life had hardened them to go for long periods with little food and water. They also showed remarkable ability to find their way in a strange country and use its features for cover, in both attack and defence. By 1914, when Australia joined the war against Germany, there were 23 Light Horse regiments of militia volunteers. Many men from these units joined the Light Horse regiments of the Australian Imperial Force (AIF). Men were given remounts (if not using their own horses) – army horses bought by Commonwealth purchasing officers from graziers and breeders. These were called “walers” because they were a New South Wales stockhorse type – strong, great-hearted animals with the strains of the thoroughbred and semi-draught to give them speed, strength and stamina. On 1st November, 1914, Australia’s First Infantry Division and the first four Light Horse regiments sailed for England in a fleet of transport ships. The first of the Light Horse arrived at Gallipoli in May without their horses. Back with their horses after Gallipoli, they were formidable combatants across the Sinai and Palestine. Some British commanders observed that the light horseman moved with a “lazy, slouching gait, like that of a sleepy tiger” but described how the promise of battle “changes that careless gait, into a live athletic swing that takes him over the ground much quicker than other troops”. They had Light Horse, Torquay, training campdeveloped a reputation as formidable infantrymen. The Turks called them “the White Ghurkas” – a reference to their deadly skill with the bayonet. The Arabs called them “The Kings of the Feathers”. The plume had originally been a battle honour of the Queensland Mounted Infantry for their work in the shearer’s strike of 1891. During WW1 it was adopted by almost all the Light Horse Regiments. It was the proud badge of the light horseman. The most famous of their battles was the attack on Beersheba- the charge of the 4th Light Horse Brigade. Mounted infantrymen and their superb walers had carried out one of the most successful cavalry charges in history – against what seemed impossible odds. They surprised the Turks by charging cavalry-style, when they would normally have ridden close to an objective then dismounted to fight. The fall of Beersheba swung the battle tide against the Turks in Palestine; and changed the history of the Middle East. While 19 men from the Surf Coast Shire served with the 4th Light Horse over the course of WW1, only four were involved in the charge of Beersheba- John GAYLARD, Philip QUINN.(Winchelsea); Wallace FINDLAY (Anglesea); Harry TRIGG (Bambra). After the war, Light Horse units played a key role in the Australian Government’s compulsory military training programme. The Citizen Military Forces (C.M.F.) thrived on the glamour of the wartime Light Horse tradition, ignoring the possibility that motor vehicles would soon replace the horses. When training was no longer compulsory, the C.M.F. regiments declined and horses became more of a luxury during the 1930s depression years of poverty and unemployment. Some regiments were motorised. Then, in 1939, Australia joined Britain in another world war. Training was increased for the militia at both home bases and regional training camps. The camp at Torquay in 1940, commanded by Major General Rankin, was at Divisional strength. By the end of the camp some felt that the Division was ready for active service. Gradually, over the next four years, the Australian Light Horse units were mounted on wheels and tracks and the horses were retired. Six men enlisted at the Torquay camp and another 57 men and women enlisted at Torquay for service in WW2. Those who served in the Militia provided valuable Officers and NCOs and men for the armed services during the war. Each infantry division of the 2nd AIF had a Light Horse regiment attached to it. But the day of the Australian mounted soldier hadn’t quite passed. During World War II, Australia’s 6th Cavalry Regiment formed a mounted unit they called “The Kelly Gang” which did valuable scouting work. In New Guinea, a mounted Light Horse Troop did patrol duty and helped carry supplies. Some fully equipped walers were flown into Borneo for reconnaissance in rugged mountain country. But by the end of the war, in 1945, the horse had disappeared from the Australian Army. References: Australian Light Horse Association www.lighthorse.org.au National Australia Archives Australian War Memorial Surf Coast Shire WW1 memorials www.togethertheyserved.com The Light horse- a Cavalry under Canvas Light Horse, Training Camp, Torquay, WW2 Late in 1939 it was decided to set up a Lighthorse training camp in Torquay to train both men and horses for the battles of the Second World War. Horses, men and equipment came on special trains from all over Victoria and NSW, and as you would expect horseman came from areas such as Omeo and Sale, the Wimmera and the Western District. They arrived at the Geelong racecourse for watering in the Barwon River and then were ridden across the ford at the breakwater and began their 11 mile trek to Torquay. Light Horse, Training Camp, Torquay, WW2 Tent city By the end of January 1940 the camp at Torquay accommodated some 5000 men and 2500 horses of the Second Cavalry Division. The rows of horses, tents and huts near Blackgate Road were quite a sight. While the cavalrymen engaged in exercises on the land and on the beaches, many of the troops took over the Torquay School for special training of men and officers. Mr Bob Pettit local farmer and Councillor for the Barrabool Shire, wrote about the Light horse in the Surf Coast Community News in 1985 saying “They used to travel about the district riding four abreast in one long convoy. To my annoyance they went through my property and shut all the gates behind them. I had certain gates open to let stock in to the water holes and it would take me three -quarters of an hour to follow the horsemen up and put all the gates right again” he continued “the men from the Light Horse were here when the fire went through in March 1940. He recalled an incident when early one morning, as some one blew the bugle, a soldier putting a white sheet on the line frightened the horses. They panicked and ran off in all directions. Six went over the cliff near Bird Rock, five were never found, and the rest were gathered up after nearly a fortnight in the bush around Addiscott and Anglesea" Light Horse, Training Camp, Torquay, WW2, Geelong Parade Geelong parade The training camp culminated in a parade through the streets of Geelong on March 12th 1940. The salute was given at the Town Hall and the troops continued on a route to the You Yang’s for a training exercise. Note-----(see media section for photograph) The Camp was abandoned in mid 1940 as it was deemed unsuitable for training during winter and the cost of a permanent camp could not be justified if it could not be used all year. Historic.......Rare,,,Interpretive.Sepia photographs.set of four ....post card size ....Horses &LighthorsemenNo 1, Lighthorsemen Regiment Geelong 1940......No 2 Light Horse at Breakwater Geelong 1938 to 1940....No 3 Light Horse at Breakwater Geelong 1938 to 1940.....No 4 Light Horse crossing Breakwater camped at Geelong Showgrounds. These markings are on reverse of photographs.light horsemengeelong 1940., world war 2 -
 Lara RSL Sub Branch
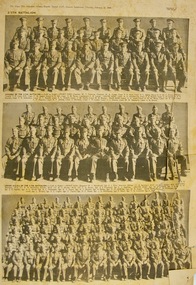
Newspaper, 17th Australian Infantry Brigade, February 22nd 1940
The 17th Australian Infantry Brigade was an infantry brigade in the Australian Army. First formed in 1917 during World War I, it did not see any action. Reformed during World War II, before being disbanded in 1946. Today, its name is perpetuated by the 17th Combat Service Support Brigade, which was raised as a logistics formation in May 2006. The 17th Brigade was reformed on 13 October 1939, again as part of the 6th Division, recruited from Victoria. The 17th Brigade fought in the Western Desert Campaign in Libya, the Battle of Greece, the Battle of Wau, the Salamaua-Lae campaign in Papua, and in the Aitape-Wewak campaign in New Guinea. The photographs are of national significance as they may reflect the only known photographs of individuals from WW2.4 page newspaper pictures of 17th Brigade, Second AIFThe Argus 17th Australian Infantry Brigade, Second AIF, Souvenir Supplement, Thursday, February 22, 1940 Page 1 2/5th Battalion - Picture 1 Officers of the 2/5th Battalion; Picture 2 Senior NCO's of the 2/5th Battalion; Picture 3 A Company 2/5th Battalion Page 2 B Company 2/5th Battalion; C Company 2/5th Battalion; D Company 2/5th Battalion Page 3 Headquarters 2/2nd Field Regiment 6th Divisional Artillery; 3rd Battery 2/2nd Field Regiment 6th Divisional Artillery Page 4 Officers, NCO's and men of 2/2nd Field Company, 6th Divisional Engineers; Officers NCO's and men 2/2nd Field Ambulance and 2/2nd Australian General Hospital 6th Divisional Australian Army Medical Corpsaif, army, 17th brigade, second aif, 2/5th battalion, australian army, australian infantry brigade, 2/2nd field aumbulance, 2/2nd australian general hospital, 6th divisional australian army medical corps, 6th divisional engineers -
 Lara RSL Sub Branch
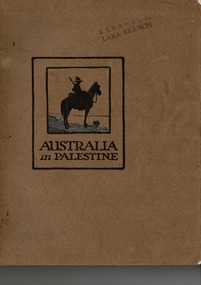
Book, Australia in Palestine, 1919
A soldier's book produced almost entirely by soldiers in the field under active service conditions to send to their friends in Australia and abroad. Australian Lighthorse men is a type peculiar his own and has no counterpart in h is NZ brother. His fearlessness, initiative and endurance, and his adaptability to almost any task, are due to the adventurous life he leads in his own country where he has been accustomed to long hours in the saddle, day and night, and to facing danger of all sorts from his earliest youth.Brown front and back hardcover with dark brown text 'Australia in Palestine' with a light horseman framed in centre of front cover. The spine is green with text Australia in Palestine, Angus and Robertson bottom of spine. Evidence of water on front cover. Silverfish have eaten top right hand corner of first two pages. Farm scene in four boxes with AR in the lower corner of each square. Inside front and back covers are illustrations of a camel train and came corps in the desert with the rising sun in the background with a mountain. There is a grave and white cross in their foreground right lower corner Illustrations, photographs, poems, short stories, Centre foldout of the Battle for Richon Le Zion and Battle of Beersheba and after the Battle of Bir El Abed To the memory of fallen comrades. Pen mark inside W. Mathews Larabattle of beersheba, battle of richon ze zion, battle of bir er abd, camel corps, lighthorse, slush light, sir h.g. chauvel, mounted division at kantara, medical services, signal engineers, katia oasis, new zealand mounted troops, sir edmund h allenby, walers story, 5th lighthorse, romani, ww1, world war 1, australian army -
 Lara RSL Sub Branch
Book, The Anzac Book Official History of Australia in theWar of 1914-18 Volume III The AIFin France 1916. Author C.E.W. Bean 6th Edition 1938
... canal camel train ferry post armentieres ypres aif battle ...The Australian Imperial Force in France 1916Historical chronology including colour patches. AIF in France 1916The Anzac Book - Printed 1916 Hardback cardboard Illustrations, maps and diagrams Chronology of 1916egypt, desert line, france, suez canal, camel train, ferry post, armentieres, ypres, aif, battle of fromelles, 5th division, pozieres, mouquet farm -
 Lara RSL Sub Branch
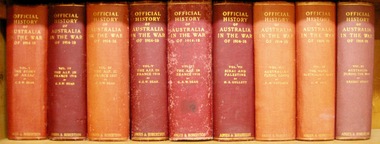
Book, Official History of Australia in the War of 1914-18 - Volume IV - The AIF in France 1917 Author C.E.W.Bean, Fifth edition 1937
This volume discovers four of the five Australian Infantry Divisions expecting relief after their most depressing experience, the winter of 1916-17on the Somme.Official History of Australia in the War of 1914-18 - Volume IV - The AIF in France 1917 Hardcover cardboard, Chronology, Maps, Illustrationsaustralian infantry divisions, british armies, hindenburg line, bullecourt, battle of messines, battle of passchendaele, polygon wood, france, ypres, broodseinde ridge, hill 60 -
 Lara RSL Sub Branch
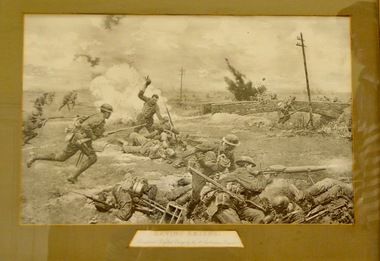
Photograph, Saving Amiens
The battle for Amiens,situated at Picardy, France, began on the 8th August,1918. This was the opening offensive of the "100 DAY Offensive " that ultimately led to the end of WW1. Consisting of four infantry battalions - the 33rd, 34th, 35th and 36th Battalions - the 9th Brigade was formed in 1916 and attached to the 3rd Division.Amiens was one of the first major battles involving armoured warfare and marked the end of trench warfare on the Western Front.Rectangular shaped glass covered photo frame showing the 9th Australian Brigade charging.Saving Amiens. A Brilliant Bayonet Charge by the 9th Australian Brigade.world war 1,photo, saving amiens, lara r.s.l. 9th australian brigade. -
 Lara RSL Sub Branch
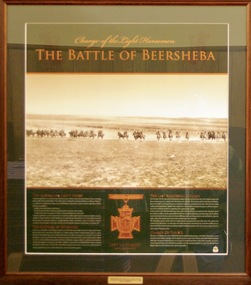
Photograph, Battle of Beersheba - Limited Edition of 1917, Rememberance Day 2008
The battle of Beersheba took place on 31 October 1917 as part of the wider British offensive collectively known as the third Battle of Gaza. The final phase of this all day battle was the famous mounted charge of the 4th Light Horse Brigade. Commencing at dusk, members of the brigade stormed through the Turkish defences and seized the strategic town of Beersheba. The capture of Beersheba enabled British Empire forces to break the Ottoman line near Gaza on 7 November and advance into Palestine.Decisive victory at Beersheba fell to one of the last great charges of mounted troops in history. As Australian Light Horse Divisions captured the town and secured crucial water wells, their success also marked the beginning of the end of the war in the Middle East. This end came exactly a year to the day after success at Beersheba.Rectangular shaped glass covered picture frame showing the Light Horsemen.Charge of the Light Horsemen The Battle of Beershebabeersheba, the light horse, lara r.s.l.,world war one, battle of beersheba, ww1 -
 Lara RSL Sub Branch
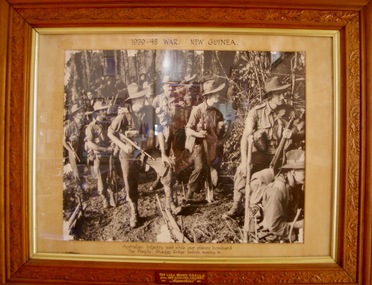
Photograph, Australian infantry in New Guinea 1939/45 war
The Battle of the Shaggy Ridge was part of the Markham and Ramu Valley – Finisterre Range campaign, consisting of a number of actions fought by Australian and Japanese troops in Papua New Guinea in World War II. Following the Allied capture of Lae and Nadzab, the Australian 9th Division had been committed to a quick follow up action on the Huon Peninsula in an effort to cut off the withdrawing Japanese. Once the situation on the Huon Peninsula stabilised in late 1943, the 7th Division had pushed into the Markham and Ramu Valleys towards the Finisterre Range with a view to pushing north towards the coast around Bogadjim, where they would meet up with Allied forces advancing around the coast from the Huon Peninsula, before advancing towards Madang.In late December 1943, the Australian offensive to take Shaggy Ridge began, focused on an attack on The Pimple.[13] The Pimple was one of three rocky outcrops, held by the Japanese on the ridge line.Framed Photograph of Australian infantry waiting while our planes" bombard the Pimple,"Shaggy Ridge before moving in. Australian infantry waiting while our planes" bombard the Pimple,"Shaggy Ridge before moving in. THE LARA BRANCH R.S.S.I.L.A. FROM MRS HAMILTON CALVERT =MEMORIES=ww2, papua new guinea, world war 2, lara r.s.l., photographs, australian infantry, shaggy ridge -
 Frankston RSL Sub Branch
Game, Chess, P N F Figurines, Charge of Beersheba
Chess game consisting of a set of miniature military chessmen and a glass chess board. The miniature chessmen depict the opponents involved in the historic World War 1 mounted attack and capture of the town of Beersheba, near Gaza in what was known as Palestine, The battle, known as the "Charge of Beersheba", was late in the day on 31st October, 1917. The chessmen are the Australian 4th Light Horse Brigade and the Turkish 27th Division.ww1, world war 1, palestine, beersheba, 4th australian light horse brigade, charge of beersheba, mounted charge, 4th light horse brigade -
4th/19th Prince of Wales's Light Horse Regiment Unit History Room
Booklet, Artillery Training Vol I Artillery in Battle Pam No 1 Organizational Command and Employment 1948, 1948
A soft covered booklet concerned primarily with the handling of artillery at the corps and divisional levelWO Code No 8288artillery command deployment -
 4th/19th Prince of Wales's Light Horse Regiment Unit History Room
Film - DVD, Vietnam War - Vol. 2
DVD in CaseVietnam War - Vol.2vietnam war - the battle for khe sanh. the 4th infantry division. the big picture -
 4th/19th Prince of Wales's Light Horse Regiment Unit History Room
Instrument - Trumpet, Cavalry, Couesnon Cie, 1901 (exact)
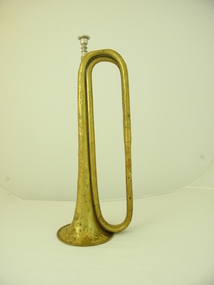
The 2nd Light Horse Regiment was raised at Enoggera in Queensland on 18 August 1914. Its recruits came mainly from Queensland but some hailed from the northern rivers district of New South Wales. The 2nd was one of three regiments of the 1st Light Horse Brigade – the first Australian mounted formation raised by Australia during the First World War. The regiment sailed from Brisbane on 25 September and disembarked in Egypt on 9 December. The 2nd Light Horse Regiment deployed to Gallipoli without its horses and landed there on 12 May 1915, joining the New Zealand and Australian Division. It played a defensive role for most of the campaign but did attack the Turkish trenches opposite Quinn’s Post, one of the most contested positions along the ANZAC Line. The first assault wave was mown down and fortunately the officer commanding the attack had the wisdom and courage to call it off. The 2nd was withdrawn from the front line in September and left the peninsula on 18 December. Back in Egypt, the 2nd Light Horse joined the ANZAC Mounted Division. Between January and May 1916, the regiment was deployed to protect the Nile valley from bands of pro-Turkish Senussi Arabs. On 18 May, as part of its parent brigade, it joined the forces defending the Suez Canal. The 1st Light Horse Brigade played a significant role in turning back the Turkish advance on the canal at the battle of Romani on 4 August. In ensuing days the regiments of the brigade participated in the immediate follow-up of the defeated Turks, but were soon withdrawn to rest. The 2nd Light Horse Regiment rejoined the Allied advance across the Sinai in November and was subsequently involved in the fighting to secure the Turkish outposts on the Palestine frontier – Maghdaba on 23 December 1916 and Rafa on 9 January 1917. A stint of protective duty along the line of communications through the Sinai followed. The 2nd’s next major engagement was the abortive second battle of Gaza on 19 April. Gaza finally fell on 7 November, after a wide outflanking move via Beersheba, in which the 1st Light Horse Brigade played a part. With the capture of Gaza, the Turkish position in southern Palestine collapsed. The 2nd Light Horse Regiment participated in the advance to Jaffa that followed, and was then committed to operations to clear and occupy the west bank of the Jordan River. It was involved in the Amman (24–27 February) and Es Salt (30 April–4 May) raids and the repulse of a major German and Turkish attack on 14 July 1918. The final British offensive of the campaign was launched along the Mediterranean coast on 19 September 1918, with the ANZAC Mounted Division taking part in a subsidiary effort east of the Jordan aimed at Amman. Turkey surrendered on 30 October 1918. The 2nd Light Horse Regiment sailed for Australia on 13 March 1919 without their horses, which were either shot or transferred to Indian cavalry units. Events in the daily routine of the soldier were signalled by bugle and trumpet calls. This trumpet is signicant because historically, it was issued to the 2nd Australian Light Horse Regiment in 1912. This Regiment served with distinction in Gallipoli and Palestine in World War 1. It is probable, but not confirmed, that tthe trumpet was used by the Regiment during these operations. Each light horse regiment was divided into four squadrons. Each squadron had a trumpeter sergeant, equipped with a cavalry trumpet, who was employed at the Squadron Headquarters Technically called a cavalry trumpet, this brass instrument can be described as a "simple trumpet" ie. the direct forerunner of the modern valve trumpet. It is in E flat not B flat as is the bugle. Both were carried slung over the player's body by means of green tasselled cords.Crest with inscription: "Exposition Universelle De Paris" with circular logo with inscribed "1900". "Hors Concours Membre De Jury". Logo formed of initials (not deciphered). "Couesnon Cie 94 Rue Dangouleme Paris". Bomb burst type logo with "01" in centre. "W H Paling & Co Ltd Sydney NSW Brisbane" On bell: "Mounted Rifles (2nd ALH)" trumpet, cavalry, musical instrument, 2nd light horse, mounted rifles -
4th/19th Prince of Wales's Light Horse Regiment Unit History Room
Field Sketch, The Battle of Beersheba, c. 31 Oct 1917
O Hewett was a NZ Sergeant attached to the ANZAC Mounted Division HQA field sketch, by Sgt Otho Hewett, looking toward Beersheba from the south-east from Khaslim Zana (a wadi). The sketch shows the position of 20th Corps Infantry, the rail bridge, various buildings within the town, the Gaza-Beersheba & Hebron roads, the aerodrome, the position of 4 Turkish guns and Tel el Saba trenchesbeersheba -
 Warrnambool RSL Sub Branch
MAP TO ACCOMPANY HEAVY ARTILLERY SCHEME FOR MOBILE WARFARE".....marked with 'Lanes' and Corps/Division Boundaries, Ordnance Survey, 1:40,000, France. Sheet 62c, Dec 1917. (centring on Peronne and Mont St Quentin), December 1917
Shows detail of Artillery Planning in the area of Peronne & Mont St Quentin. Inscribed "Map to accompany H.A. Scheme for Mobile Warfare". Marked with 'Lanes' and Corps/Division Boundaries.The donor, Staff Sergeant R.O. (Bob) Snape, Reg No 8651, enlisted as a Stretcher Bearer in 1915 but, because of his secretarial skills was employed in HQ positions as soon as he arrived in France and as a stenographer who worked as Confidential Clerk to General Sir John Monash from June to December 1918; and subsequently, for General Sir Talbot Hobbs until June 1919. The map was very likely directly used in the planning of the 1918 battles such as Mont St Quentin.Original Item recovered from possibly Australian Corps HQ, probably between the Armistice, 11 November 1918, and June 1919, when Staff Sergeant R.O.(Bob) Snape was repatriated. Shows detail of Artillery Planning in the area of Peronne & Mont St Quentin. Inscribed "Map to accompany H.A. Scheme for Mobile Warfare". Marked with 'Lanes' and Corps/Division Boundaries.snape collection -
 Warrnambool RSL Sub Branch
MUSIC, Bob's passion. He always carried his favourite music scores in his kit, including some hard cover grand operas. On leave, he saw as many operas as he could, taking the score along to each performance, keeping one eye on the show and the other on the music. On 29 November, 1916, while stationed at Vignacourt, Bob was given permission to play the church pipe organ for an hour or so (3 recent photos, courtesy Isabelle Godard, see attached). One day in September 1917, somewhere in Flanders, whilst visiting 2nd Division HQ, Bob had a chance meeting with the decorated infantry officer, Captain Rupert 'Sos' Wertheim (whose interrogation of German POWs crucially affected the Allies preparation for the Battle of Menin Road). He was the son of the German Jewish emigré who set up the famous Richmond-based Wertheim piano-factory in the early 1900s. Captain Wertheim asked Bob to play all the operatic pieces he could remember. (A few days later, a stray German shell hit the 2nd Div. HQ killing a number of officers)
snape collection -
 Australian Commando Association - Victoria
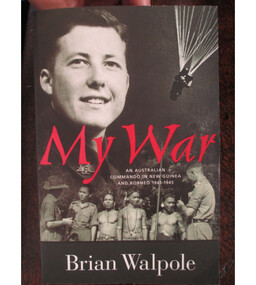
Book, My War: An Australian Commando in New Guinea and Borneo 1943 to 1945
Brian Walpole, the author, was a Australian Commando and special operations operative behind enemy lines in New Guinea and Borneo during WW2. Brian was a commando with the Australian 2/3 Independent Company. He went to New Guinea in January 1943 and remained until the fall of the Japanese base at Salamaua in September. He fought on the Bobdubi Ridge. His commanding officer was the well-regarded George Warfe, whose portrait was sketched by war artist Ivor Hele. Brian blazed a trail through the New Guinea jungle which appears on some maps as Walpole’s Track, discovering and naming the ambush site Goodview Junction. Soon afterwards (July 1943) Goodview Junction was the scene of a key campaign victory which contributed to George Warfe being awarded the Military Cross.Brian’s Special Operations training mostly took place at Careening Bay (Western Australia) and Fraser Island (Queensland). He arrived in Borneo at the time of the 9th Division’s landing at Labuan Island, and took part in two SRD operations – Colt and Semut 3. After the surrender, Walpole's work continued as many of the Japanese did not recognise the surrender and continued to fight on. Brian relates how on the 14th of September 1945 while still an operative in SRD he was able to save POWs from certain death and after a firefight arrested 10 Japanese soldiers at Simanggang Borneo. He was alone and had been assisted in the battle by 20 headhunters from the jungles along the Rejang River. One of the people saved was a young nurse in her 20s, Lena Ricketts. ww2, australian special operations, australian commando, new guinea, borneo, world war ii -
Glen Eira Historical Society
Article - Ormond Baseball Club
This file contains seven items. A stencilled letter from the Ormond Baseball club addressed to a member extending an invitation to a Reunion Smoke Night at the pavilion at Ormond Park, dated 28/07/2961 An article from the Caulfield/Port Phillip Leader on the division two standings where Ormond Glenhuntly Baseball Club was ranked twelve out of fourteen teams, 21/12/2010 An article from the Caulfield/Port Phillip Leader stating that Ormond Glenhuntly Baseball Club are one of three teams who are battling not to finish in last place, dated 11/01/2011 An article from the Caulfield/Port Phillip Leader in which Ormond Glenhuntly Baseball Club are ranked thirteen out of fourteen teams on the ladder, dated 11/01/2011 An article from the Caulfield/Port Phillip Leader in which Ormond Glenhuntly Baseball Club are said to be performing poorly, dated 15/02/2011 An article from the Caulfield/Port Phillip Leader in which Ormond Glenhuntly Baseball Club are ranked twelve out of fourteen teams on the ladder, dated 06/03/2012 A two-page extract from the pamphlet Community Snapshot produced by the Bendigo Bank on the records set by Ormond Glenhuntly Baseball Club in the 2012-13 season, dated May 2013ormond baseball club, baseball clubs, ormond, clubs, associations, sports, recreations, competitions, sporting clubs, leisure, cultural events, cultural associations, sports grounds, ovals, ormond glenhuntly baseball club, parks, reserves, sports people, summer league, armstrong ian, entertainment, oakleigh crescent, glenhuntly, caulfield/port phillip leader, bendigo bank, ogbc, hoenig jeff, ormond-mckinnon community bank, glen eira council, ee gunn reserve, lygris manny -
 Federation University Historical Collection
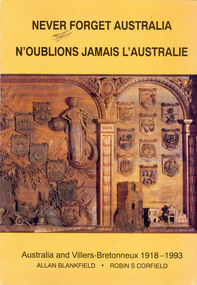
Book, Royal Victoria Pilgrimage Committee et al, Never Forget Australia: Australia and Villers-Bretonneux 1918-1993, 1994
Yellow soft covered book with the cover featuring a carved timber memorial.non-fictionvillers-brettonneux, world war 1, world war one, french, amiens, charles rosenthal, keith murdoch, henry rawlinson, hobbsm pompey elliott, ferdinand foch, john monash, red baron, von richthofen, tanks, 5th australia division, harold elliott, sadlier, marshall, aboriginal diggers, bill egan, australian armt band, ypres, robinvale, robin cuttle, frederick birks, gas, 58th battalion, tom brain, dick bowman, william james -
 Federation University Historical Collection
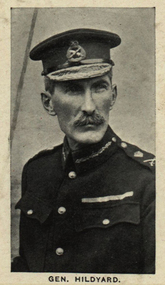
Photograph (black & White), General Sir Henry John Thoroton Hildyard - South Africa
During the Second Boer War Hildyard was posted to South Africa and commanded 2nd Brigade from 1899 to 1900. He saw active service at the Battle of Colenso. Hidyard remained in South Africa to command the 5th Division from 1900 to 1901 and took part in the Battle of the Tugela Heights. He was appointed as Director-General of Military Education from 1903 to 1904 and lieutenant general on the Imperial General Staff commanding the troops in South Africa from 1904 to 1905. He was General Officer Commanding-in-Chief, South Africa from 1905 to 1908. He retired in 1911. Awarded Companion of the Order of the Bath 1897, (Diamond Jubilee Honours); Knight Commander of the Order of the Bath 1900; Knight Grand Cross of the Order of the Bath 1911, (Coronation Honours)Individual image from photographed poster of tobacco and cigarette cards.sir henry hildyard, south africa, second boer war, battle of tugela heights, battle of colenso, military education, knight commander of the order of the bath, knight grand cross of the order of the bath -
 Federation University Historical Collection
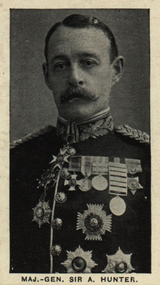
Photograph (black & White), Major-General Sir Archibald Hunter - South Africa
At the outbreak of the Second Boer War, Major General Hunter was on the staff of Sir George White's Natal Field Force during the Battle of Ladysmith in Natal. He led a small raid against some of the Boers' guns, disabled them and relieved the town. Promotion followed and he became General Officer Commanding 10th Division. The Division was sent to join Lord Roberts' army camped at the captured Orange Free State capital. Hunter led them in the march on Pretoria. Once Pretoria was captured they still had to deal with Guerrilla Warfare and Hunter was sent south as overall commander of five columns that converged on the Free State army camped at Brandwater Basin, forcing the surrender of 4,314 Boers led by Marthinus Prinsloo. He was awarded Knight Grand Cross of the Order of the Bath, Knight Grand Cross of the Royal Victorian Order, Territorial Decoration Legion of Honour (France)Individual image taken from photographed poster of tobacco and cigarette cardssecond boer war, major generl, archibald hunter, natal field force, battle of ladysmith, general officer commanding, sir george white, guerrilla warfare, orange free state, brandwater basin, marthinus prinsloo, knight grand cross of the order of the bath, knight grand crossof the royal victorian order, legion of honour (france) -
 Federation University Historical Collection
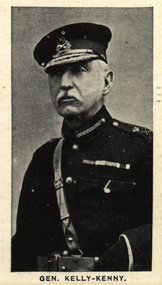
Photograph (black & White), General Sir Thomas Kelly-Kenny - South Africa Forces
As well as his army positions, Kelly-Kenny was very interested in politics in his native County Clare. In the Second Anglo-Boer War he was , as a Lieutenant-General, General Officer Commanding the 6th Division of the South African field forces. He was twice mentioned in dispatches and received the Queen's South African Medal with four clasps. He was involved in the relief of Kimberley, the battles of Paardeberg, Poplar Grove and Driefontein. Lieutenant-General Kitchener was appointed commander and over-ruled Kelly-Kenny's plan to besiege Cronji and bombard his force from a safe distance. Kitchener ordered an assault on the Boer trenches. The result was "Bloody Sunday" - an unnecessary sacrifice of hundreds of lives on the British side. Kelly-Kenny was involved in the engagements at Poplar Grove and Driefontein where the 6th Division distinguished itself. These were viewed as key to destroying the Boer morale and winning the war. General Kelly-Kenny was a close friend of King Edward VII. Appointments made, at the insistence of the King, were often challenged. Due to his loyalty and abilities Kelly-Kenny was appointed Knight Commander of the Order of the Bath and received a knighthood in a private audience. Once again others tried to have him moved from the War Office but the King intervened again and he remained in his position. He was conferred with the Knight Grand Cross of the Order of the Bath (1904), Grand Cross of the Red Eagle (1905 - Germany), Grand Cross of the Rising Sun (1906 - Japan) and on his return to Britain he received the Knight Grand Cross of the Royal Victorian Order (1906) Individual image taken from photographed poster of tobacco and cigarette cards.kell-kenny, county clare, lieutenant-general, kimberley, queen's south african medal, paardeberg, poplar grove, driefontein, kitchener, bloody sunday, cronji, boer war, trenches, knight commander of the order of the bath, war office, king, king edward vii, knight grand cross of the order of the bath, grand cross of the red eagle, grand cross of the rising sun, knight grand cross of the royal victorian order -
 Federation University Historical Collection
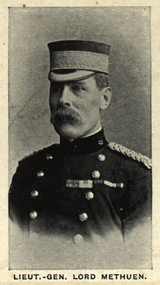
Photograph (black & White), Lieutenant-General Lord Methuen - South Africa
Paul Sanford Methuen became deputy adjutant-general in South Africa in 1888. He was promoted to major general in 1890 and succeeded his father as 3rd baron in 1891. He was promoted to Lieutenant General in 1898 and was given the command of the 1st Division on the outbreak of the Second Boer War. He suffered both defeats and successes during the war - the greatest defeat was at the Battle of Magersfontein, one of three defeats in "Black Week", which led to the dispatch of Lord Roberts to South Africa. During his career he was awarded Knight Grand Cross of the Order of the Bath, Knight Grand Cross of the Order of St Michael and St George and Knight Grand Cross of the Royal Victorian Order.Individual image from photographed poster of tobacco and cigarette cards.lord methuen, south africa, adjutant-general, major general, lieutenant general, second boer war, "black week", battle of magersfontein, lord roberts, knight grand cross of the order of the bath, knight grand cross of the order of st michael and st george, knight grand cross of the royal victorian order