Showing 9284 items matching " glenelg"
-
 Ballarat Tramway Museum
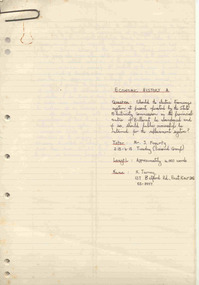
Literary work - Manuscript, Kevin Tierney, "Essay - abandonment of the Ballarat Tramway System", 1972
Has a strong association with the author who was interested in public transport and chose to write an economic history essay about the close of the Ballarat Tramway system and its substitution by buses and whether they should be government operated.Fifteen, lined or ruled foolscap page manuscript / Essay for a Melbourne University Economic History subject, 1972, written Kevin Tierney about the abandonment of the Ballarat Tramway System. Has a Synopsis, references and quotations from various sources. The question to be answered was "Should the electric tramways at present operated by the State Electricity Commission in the provincial centre of Ballarat be abandoned and if so, should public ownership be retained for the replacement system?" A photocopy on A4 paper was also donated by the author. Also donated two postcards with trams - Bendigo - line up of five Birney trams and H class 357 and 358 in Jetty Road Glenelg - see image files, providing information about the essay and contacts.trams, tramways, closure, ballarat, sec, buses -
 Melbourne Tram Museum
Ephemera - Ticket/s, Set of 9 loose tickets - non Melbourne, c1970 to 1990
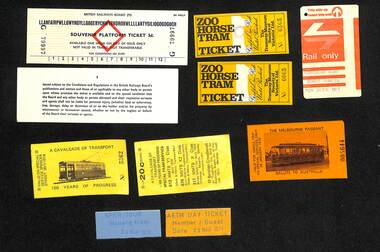
Set of 9 loose tickets 1 - British Railways platform ticket for LlanfairPG - the station with the longest name in the UK. 2 - two yellow tickets for the "A Cavalcade of Transport" 30/1/1978 - Nos 1823 and 5362 3 - set of 8 orange tickets in a block - The Melbourne Pageant 29/1/1979 - nos 5644 to 51. 4 - Set of two TMSV zoo horse tram tickets - Adult and Child - 0505 and 0005. 5 - NSW Railways ticket - Circular Quay to Bondi Junction - machine issued dated 26 Jul. 6 - Two tickets on cardboard for a SPER tour on the Glenelg tram 24/3/1974 and AETM 23/3/1974.trams, tramways, tickets, nsw, sper, aetm, tmsv, cavalcade, uk -
 Victorian Aboriginal Corporation for Languages
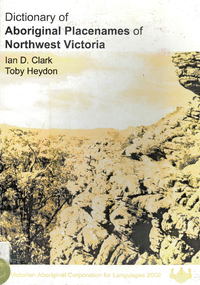
Book, Ian D Clark et al, Dictionary of Aboriginal placenames of Northwest Victoria, 2002
Dictionary including Indigenous and European place names. Origins are given.maps, b&w photographsgrampians, hindmarsh, horsham, ararat, gannawarra, mildura, swan hill, glenelg, djabwurrung, djadjawurrung, jardwadjali, dadidadi, wergaia, wembawemba, barababaraba, wadi wadi, wathawurrung, ladji ladji -
 Portland CEMA Inc (Council for Encouragement of Music and the Arts)
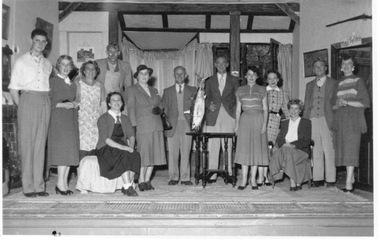
Document - Listening to the Voices - Transcriptions of Interviews Portland CEMA Inc, Olive Meissner interviewed by Lesley Jackson, 1 August 1983
Portland C.E.M.A. (Council for Encouragement of Music and the Arts) was formed in 1945. In 2025, as part of its 80th Birthday celebrations, a series of taped interviews from the 1980s and 1990s were digitised with the assistance of Glenelg Shire Community Grants. (Arts and Culture) The variable quality of the original recordings has meant digitisation has not been possible for all interviews. Transcripts have been provided where possible. Olive Meissner was a foundation member of C.E.M.A. and an active member of C.E.M.A. Dramatic Group for many years. She explains the quest to find a "clubrooms" for C.E.M.A. and chats about festivals and plays that she performed in. An entertaining story about visiting Ireland and meeting up with an adjudicator of a play festival concludes the interview. The series of oral history interviews (1983-1990) captured the memories of some active early members of the Portland Council for Encouragement of Music and the Arts. First hand memories of the formation of the organisation in 1945, early activities of its groups, fundraising and building of the CEMA Arts Centre provide a window into community life in Portland and District in the post WW2 era. Recent digitisation (2025) has preserved deteriorating cassette tape recordings.pdf documentcommunity arts., oral history - portland c.e.m.a. -
 Ambulance Victoria Museum
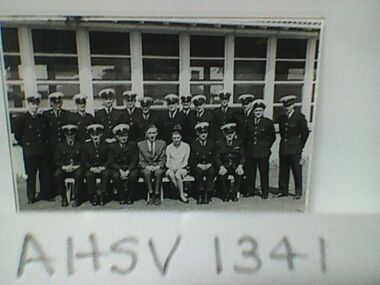
Photograph, Ambulance Officers Training School, Mayfield, Malvern, September 1964, 1964
Names of participants signed on reverse of photograph: Jim Mason, Goulburn Valley, Shepparton Trevor Jobling (?), Murray Valley, Swan Hill Alf Bainbridge (?), Glenelg Ambulance, Hamilton Keith Thomas, Victorian Civil Ambulance Service Ray Harris(?) , W.D.A.S., Horsham Stan Barnes, Geelong & District Ambulance Service Doug Harper (?), North Eastern, Wangaratta Jim Woolgoo (?), Penninsula, Dandenong Morrie Denham (?), St John, Adelaide Geoff Ryan, CVDAS, Bendigo Charlie James, Penninsula, Frankston Terry Edwards, V.C.A.S., Cheltenham Stewart Ferguson, Latrobe Valley, Morwell Ben Kingsley, V.C.A.S. Bert Cluff, Ballarat & District Ambulance Service Charlie Williams, South Gippsland, Korumburra Robert Stewart, V.C.A.S. Jack Bourke, Geelong Harold Berry, Training Officer Faye JamesonBlack and White photograph of ambulance officer trainees -
 Bendigo Historical Society Inc.
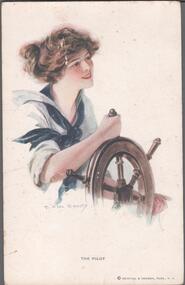
Postcard - Australia, Elliot Collection, 1895 - 1914
Thought to have originated in Austria in 1869, postcards first gained popularity in Australia in the 1890s.They were used to send short messages to friends and family. This collection was generated by Mary Emma Elliot of Talgarno. Talgarno is a rural locality in Victoria, Australia, situated on the southern shoreline of Lake Hume, about 23 km east of Albury-Wodonga. The collection contains postcards from across the world. Mary Emma Sibley was born in Ironbark, Bendigo in 1859. She married James Elliot in 1893 and they settled at “Kelso”, Talgarno. They had two children – Mona and Sibley. Mary Emma Elliot died in Melbourne in 1944, aged 84 years. Australian postcards collected by Mrs. James Elliot between 1898 and 1915. 1405.241 The Pilot 1405.242 St. Peter's Cathedral, Adelaide, South Australia 1405.243 Hindmarsh River, Victor Harbour, S. A. 1405.244 Breakers Ahead 1405.245 At Glenelg - Commemoration Day 1405.246 Pleasant Cove, Ocean Beach 1405.247 Millicent, S. A. 1405.248 Leg of Mutton Lake, Mount Gambier 1405.249 On the Torrens 1405.250 Bronte, Sydney 1405.251 Adelaide Hills, Montacute Rd 1405.252 Rough Seas, Australian Coast 1405.253 St. Leonards Road. Tasmania 1405.254 On the Gordon River, W. Coast. Tas. 1405.255 A Pretty Cascade. Sheffield Tas 1405.256 Floods 1929 1405.257 The Gorge at Launceston in Flood (1929) 1405.258 Lower End of Launceston during the Floods (1929) 1405.259 Beauty Point, River Tamar 1405.260 Hobart, Tasmaniapostcards, collecting, collections, talgarno -
 Glenelg Shire Council Cultural Collection
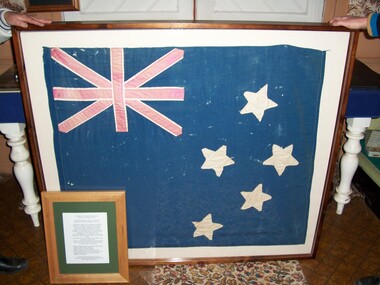
Flag - Flag - Pre-Federation Ensign Flag, c. 1880
The flag was donated by Mrs A. M. Mitchell Craigwood Convalescent Hospital Como WA "This flag was made by my Grandmother, Elizabeth Nicholls nee Tallack. It was used as a decoration to welcome Lord Hopeton (Hopetown) to Sandford sometime previous to 1883, when he was still a Viscount. I can't remember his name. No doubt Mr H.K. Kahan is no doubt quite correct in these dates and could find no record of the earlier visit. My mother Phillippa was a young girl at the time and sang at the concert in his honor "Will ye no come back again". It must have been before 1883 because in that year at the age of 18 she married. After the concert he asked that the young lady and her mother be presented. Next day he came to afternoon tea. A great honor in those days". Phillippa Tallack Nicholls was born 1865, Sandford, and married in 1883 to Patrick Maguire. (Digger Pioneer Index 1836 to 1888). There was a Royal Visit in 1881 by the Duke of Clarence and the Duke of York and their party to the district and this appears to be the visit that Mrs Mitchell is referring to. In 2005, Casterton and District Historical Society Inc. donated the flag to the Glenelg Shire Council Cultural Collection for the citizens of Casterton.Five 5-pointed stars forming the constellation of the Southern Cross on a field of royal blue. Four strips of red cloth edged in white form a Union Jack design in the upper left corner. Mounted on white cotton backing, under perspex in timber frame.flag, ensign, pre-federation -
 Ballarat Tramway Museum
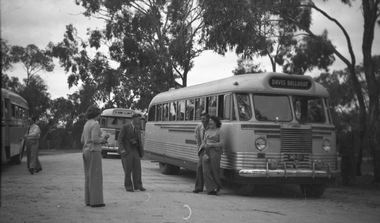
Photograph - B&W print of donated negative - set of 9, Ron E. Fluck
Black and white print of a donated negatives. Print made 8/1998. Various photos taken by Ron Fluck or other members of the Fluck family of Davis Buses while on tour during the late 1940's or the early 1950's. 885.1 - Davis bus MO 031 and bus owned by R.Dunn of Clunes - two Bedford buses at Sister Rocks Stawell, 1-10-1950. 885.2 - Davis bus MO 031by Shell petrol bowser, Halls Gap, Grampians - 1-10-1950. 885.3 - Davis bus RL726, Ford, at Casterton with Glenelg Hotel in background, 29-1-1951 885.4 - Davis bus NK 023, Cadillac bus, with Ron Fluck driver - photo by J.A.Fluck - at Queenscliff - 4-1-1953. 885.5 - Davis bus NK 023, as above, with J.A.Fluck standing in doorway. - 4-1-1953. 885.6 - Davis bus RL726, Ford, at Nelson, Vic. 28-1-1951. 885.7 - No entry 885.8 - Davis bus, NK023, Cadillac - Mt Dandenong, 27-8-1950 885.9 - Davis bus NK023, Cadillac - Sassafras - 27-8-1950. All images replaced by high res scan of the negatives 18/1/2019/tramways, trams, davis bus lines, ron fluck, casterton, sassafras -
 Victorian Aboriginal Corporation for Languages
Book, Sue Wesson et al, Aboriginal flora and fauna names of Victoria : as extracted from early surveyors' reports, 2001
The Flora and Fauna Names Project is an initiative of the Victorian Aboriginal Corporation for Languages and the Victorian Biodiversity Strategy. The researcher has examined material from the archives of the Department of Natural Resources and Environment (NRE), the State Library of Victoria, the Victorian Public Records Office and the Australian Archives Office. This first stage of the project focussed on the NRE archives, in particular the field notebooks of the earliest surveyors and their maps although other NRE resources, libraries and public records were accessed. A total of 3028 words were found of which a significant proportion have previously been unknown to linguists. It appears that the place names and word lists in early surveyors notebooks, the 1858 surveyors responses to the Surveyor General and an extensive Wiradjuri wordlist by James Baylis have not yet been widely used or published. Fifteen percent of these 3028 words describe flora and fauna and six percent describe habitat. Of particular interest is the evidence provided by these lists of the existence of fauna in the mid nineteenth century in regions where it is now extinct. For example, magpie geese, eastern quolls, bustards and pademelons were assigned names in the Jardwadjali language area of the upper Glenelg and Wimmera Rivers. The outcomes of this project may help to assist in ascertaining the distribution of flora and fauna assets in Victoria.maps, b&w photographs, colour photographs, illustrations, word listswiradjuri, jardwadjali, glenelg river, wimmera river -
 Ballarat Tramway Museum
Magazine, Shennan Publishing & Publicity, "Special 12th Anniversary Issue" - Truck & Bus Transportation - July 1948, 1948
Yields information about Australian transport history, transport at the time of publication and the development of buses and the Ansett organisation.Large format 208 page , July 1948 issue of Truck and Bus Transportation with colour cover, fold out and advertisements, colour printing, articles on buses, trucks, cable trams, Australian Transport, personnel in industry, Ansett, executives - special 12 the anniversary issue. See photocopy of title and contents pages with item notes. Notes on Truck & Bus Transportation - Special Anniversary Issue - July 1948, with particular relevance to BTM Archives Advertisements: White Bus Co - similarity to the US PCC Tram - inside front cover Ansett's and Ansair - p131 AC buses - p162 Articles: Has Australia's Railways Reach the Doldrums? - p38 Modem Street Transit Authorities Announce Development Policy - p42 (includes photos of Sydney, Adelaide Glenelg H class, Bourke St, trams etc, being replaced by buses) These were the Events that made our Headlines (war years - photos included - p61 Riding the Rattlers behind Horses, Ropes and Billies - cable trams, horse and steam trams p66. - demise of Melbourne cable cars. Tracing the development of the Motor Bus in Aust. - p73. Australian Transport Administrations - whose , photos, responsibilities, liquid fuel control (petrol rationing), Australian Road Transport Associations, executives etc. - pl16 onwards Ansett organisation - p 1 72 onwards trams, tramways, trucks, buses, cable trams, road transport -
 Victoria Police Museum
Police Stations (Ararat)
Ararat is a city in south-west Victoria, Australia, about 198 kilometres west of Melbourne, on the Western Highway on the eastern slopes of the Ararat Hills and Cemetery Creek valley between Victoria's Western District and the Wimmera. It is named after Mount Ararat 10 kilometres south-west of the town. A police station opened in Ararat in 1859, though there was a police presence in the area formerly known as Cathcart, Canton Lead and later Mount Ararat. In 1861 staff consisted of 1 Superintendent, 2 Mounted Constables, 1 Sergeant 2nd class, 1 Senior Constable, 8 Constables. The police reserve was on land bounded by Ligar Street, Barkley Street, Ingor Street and High Street. In 1930 the police station was described as a six-room brick dwelling with a slate roof, situated on one quarter acre of land. There was also a bathroom, wash-house, pantry, office, muster room and quarters for a single constable, stables with three stalls, and a lock-up consisting of two six-person cells. Later residences were located at 3 Ligar Street (brick veneer with a tile roof); 32A High Street (brick veneer with tile roof); and 3 Tobin Street (wood with an iron roof). A new, purpose built police station was opened in October 2010 at 77 Barkly Street. The Ararat Police District was reformed into the Wimmera Police District in 1870. Ararat Police Station became part of "R" (Glenelg) District in January 1948 and "M" (Highlands/Wimmera) District from March 1990. A list of police stationed at Ararat from 1903 - 1930 is available from the Victoria Police Museum8 photos comprising: 7 black & white photos 1 colour photopolice stations; ararat police station -
 Flagstaff Hill Maritime Museum and Village
Photograph - William Ferrier, Henna Street Picture Framers, 2005
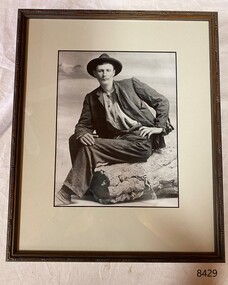
The photograph of William Ferrier was given to Avis Quarrell by Lewis Ferrier, 3rd youngest son of William during the centenary of the wreck of the La Bella. The photograph was framed by the Henna Street Picture Framers, Warrnambool in 2005. The photograph is of William Ferrier, the 25-year-old fisherman from South Warrnambool, whose rescue of two sailors from the wrecked La Bella made him an overnight national hero. The La Bella was wrecked on 10th November 1905,and the remains of the vessel now lie on her port side in 13 metres of sheltered water inside the reef she struck. The bow section is relatively intact and part of the stern has drifted north-easterly towards the mouth of the Hopkins River. The reef the La Bella struck now bears its name. Several attempts were made by the Warrnambool lifeboat crew to rescue the stricken sailors on the La Bella, but the rough conditions made this difficult for the boat to get close enough to the ship and the lifeboat had to return to shore. A another rescue attempt was made by Ferrier who rowed a small dingy through the heavy seas and managed to rescue the Captain George Mylius, whom he landed on the breakwater. Ferrier then returned to the ship to attempt a final rescue, losing his oars and rowlocks into the high sea. Using just a spare paddle he swam towards the La Bella, reaching her stern in time to cut loose the lone surviving sailor, Payne, from the ropes and debris that held him to the ship; the terrified sailor dropped from the ship and into the dingy. Shortly after the last man was rescued, the La Bella was lifted by a huge wave and crashed back down on the reef; she broke up and sank. The survivors were taken to the nearby Bay View Hotel and gratefully received warm food and clothing, medical attention and a place to sleep. William Ferrier became a national hero as news of the daring rescue spread. In recognition of his bravery in the two daring rescues, he was awarded the Silver Medal for Bravery by the Royal Humane Society and was honoured in the letter from the Prime Minister and the Parliament of the Commonwealth, telegrams and a cheque for £20 from the Governor-General, over £150 subscribed by the public, including Warrnambool and district and readers of The Argus, and a gold medal from the Glenelg Dinghy Club of South Australia. Ferrier’s rescue efforts are one of the most heroic in Victoria’s shipwreck history.This photograph is significant at both a local and state level. Its connection to the La Bella shipwreck and the rescue of survivors highlights the dangers of Victoria’s Shipwreck Coast and demonstrates the bravery of ordinary Australians like William Ferrier who risked their lives to save victims of shipwrecks along the coast. Moreover, the photograph has an association with the sailing ship ‘La Bella’, as it is one of the only two shipwrecks discovered in Lady Bay, Warrnambool, out of the 15-17 shipwrecks known to have been wrecked in the bay.Framed sepia photograph, mounted behind glass. Portrait of a man seated on a log. He is wearing a brimmed hat, dark coloured jacket and trousers, and a light coloured collarless shirt with buttons. The figure in the photograph is William Ferrier.flagstaff hill, warrnambool, maritime museum, shipwreck coast, la bella, william ferrier, rescue, hero william ferrier -
 Federation University Art Collection
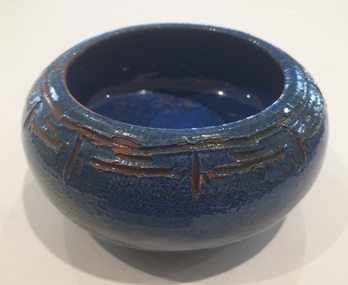
Ceramic, Gladys Reynell et al, Blue Bowl By Osrey, 1923
Gladys REYNELL (04/091881 - 16/11/1956) Born Glenelg, South Australia Gladys Reynell was South Australia's first studio potter and the first Australian artist to apply modernist principles to the crafts. For four years she worked from Ballarat. Osrey Pottery Ballarat operated between 1922 and 1926 by Gladys Reynell and George Osborne. The name of the pottery was an acronym formed from their surnames. Gladys Reynell, her sister Emily and brothers Rupert and Carew supported the war effort during World War One. Rupert Reynell was a neurologist who valued handicrafts in the rehabilitation of shell-shocked soldiers. He influenced Gladys and Margaret Rose (Rose) McPherson (later known as Margaret Preston) to learn pottery at the Camberwell School of Arts and Crafts, London, in 1916. Next year a friend sent Gladys some Kangaroo Island clay which excited her: 'I thought then that it could be the most delightful thing on earth to make pots in Australia from virgin clay'. In 1918 Gladys and Rose began teaching pottery to soldiers at Seale Hayne Neurological Hospital, Devon. In September 1919 Gladys Reynell came home in September due to her father's illness. She established the Reynella Pottery and became responsible for all stages of pottery production. Using a seasoned dump of buff-coloured clay from a well at nearby McLaren Vale Gladys Reynell built and fired her own kiln; threw simple, robust forms based on early European folk pottery; and decorated them with designs inspired by both Aboriginal art—one of the earliest to use this as a source. Gladys Reynell decorated her earthenware pottery with the characteristic rich 'Reynella blue' slip. On 14 August 1922 at St Mary's Church, Edwardstown, Gladys married George Samuel Osborne, an ex-serviceman and gardener at Reynella; they had no children. Between 1922 and 1926 they set up Osrey Pottery In Ballarat. Gladys produced pottery for sale at fairs with George as her assistant. She would throw her pots in the street, causing a sensation. In 1926 George contracted lead poisoning from lead in the glazes. They moved to rural Curdievale where Gladys resumed painting and making woodcuts. From 1939 Gladys and George lived in Melbourne. In World War II she worked in the army pay corps, in the Taxation Office, and as a translator of French. Gladys died of cancer on 16 November 1956; her husband scattered her ashes at Reynella. Her ceramics, the work of one of Australia's earliest studio potters, have been avidly collected since the late 1960s and are in most major art galleries. Small blue glazed ceramic bowl incised around the top with a decorative frieze. Incised on the base "(Dam Clay) Ballarat 1923, Osrey"gladys reynell, osrey pottery, blue bowl, incised bowl, australian studio pottery, ceramics, native clay -
 City of Melbourne Libraries
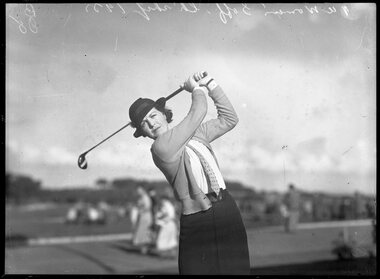
Photograph, Miss Katherine Rymill
Photographer notations on slide: "Vic Womens Golf Ch'ship 1935 B98" Published: The Age 29 August 1935 p. 11 Published title: SIX STATE CHAMPIONS IN NATIONAL GOLF CHAMPIONSHIP. Published caption: Six State champions for the first time in the history of women’s golf are competing in the matches for the Australian title. — 1. Miss B. Sale (Tas.). 2. Miss J. Hood-Hammond (N.S.W.). 3. Miss J. Gardiner (Qld,) 4. Miss K. Rymill (S.A.). 5. Mrs. O. J. Negus (W.A.). 6. Mrs. S. Morpeth (Vic.) RESEARCHER'S NOTE: The Age listed Golfer 1 as Miss B. Sale and Golfer 4 as Miss K. Rymill. We verified that these should in fact be the other way around: 1 is Miss K. Rymill, 4 is Miss B. Sale. Trove article identifier: http://nla.gov.au/nla.news-article203982049 Description: Action shot of woman driving golf ball Research by project volunteer, Fiona Collyer: MISS KATHERINE LUCY RYMILL (1913–2008) Katherine was a champion South Australian golfer. She won the Royal Adelaide championships in 1934, 1935 and 1937. She competed in the Australian Women’s Golf Championships at Royal Melbourne in 1935 against British women golfers and was eliminated by Mrs T S McKay nee Odette Lebebvre. Katherine was from a prominent and wealthy Adelaide family and her social activities and golfing career was closely followed in the local papers. Her mother, Shylee Rymill, was the S.A. Girl Guides’ Commissioner from 1935-1950. Her father H.L. (Cargie) Rymill grew up in a Dutch Renaissance style mansion called “The Firs” in East Terrace, Adelaide (now called Rymill House and State heritage listed), and designed Kooyonga, Seaton, Grange, Glenelg and Mount Lofty golf courses. Both parents were champion golfers and have tournaments named after them. Katherine worked for the Red Cross during WWII. In 1935, for the first time in NSW, the Ladies Golf Union (L.G.V.) enforced their rule regarding the wearing of stockings in official associates’ golf matches. Though the Long Reef competitor’s long skirt and golf socks almost hid her sun-tanned legs from view, an eagle-eyed official had noticed the absence of regulation covering and she and her partner were disqualified. Commenting on the Long Reef “no stockings” controversy, Katherine said “In England, players are allowed to appear without stockings in summer and to wear “slacks” in the winter.” “Playing without stockings makes no difference to one’s performance and it is certainly cooler. However, rules which are formed must be obeyed and that seems all there is to say about it.” Katherine continued to play golf throughout her life and died in 2008. Sources: 'SIX STATE CHAMPIONS IN NATIONAL GOLF CHAMPIONSHIP', The Age, 29 August 1935, p. 11, http://nla.gov.au/nla.news-article203982049 'Stockings Or Not, for Golf?' The Mail, 12 January 1935, p. 2, http://nla.gov.au/nla.news-article58858987golf, women golfers, royal melbourne golf club -
 Halls Gap & Grampians Historical Society
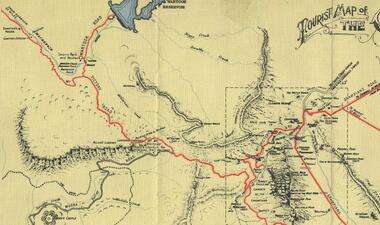
Map - Coloured
Background on Bridle Path up Stony Creek Gorge Pre 1840 C. B. Hall, squatter on Mokepilly Run 1841-1842, first European to discover the Fyans Creek valley, the entrance of which became known as Hall's Gap. He later recorded that he followed a number of tracks which he assumed had been made by the Aboriginies and described one as "leading up a wild romantic glen and over on to the source of the Glenelg River". This could well have been the route taken up Stony Creek gorge by the first timber-cutters in this part of the Grampians to the saddle between the Wonderland and Mt. Difficult ranges known as Valley Gap 1850s/60s Timber cutters and shingle splitters were reported to be moving into the eastern side of the Grampians and by the mid 1860s there were a number of families connected to the supplying of timber to Pleasant Creek living in the "Hall's Gap ranges". John Wakeham, the first store owner in Pleasant Creek in 1854, established a timer-mill in upper Stony Creek Gorge in the late 1850s. Wakeham is credited for the clearing and levelling of the first bridle-path up the gorge. 1870s By the mid 1870s the track had been extended over Valley Gap to the Victoria Forest (the upper region of the Victoria Valley). McKeon's bullock team was known to have hauled red gum from the Valley to Stawell in the late 1870s and the 1880s. 1880s In 1887 an article in the Pleasant Creek news describes the Stony Creek Gorge track as "being a ledge alongside the mountain range, formed in the early days with the aid of earth and timber, along which the bullock teams used to travel to Horsham and plains of the Wimmera beyond." 1890s Gold was discovered in the catchment area of Stony Creek and by the end of the 1890s a new track was built from "near the junction of Fyan's and Stony Creeks, up the gorge to the diggings settlement. The mining Department had paid L300 for its construction and, when completed, the track was "three miles and 30 chains in length, the side cuttings at the narrowest part being 10 feet between" and "the watercourses which cross the track at various points" having been "filled up with rocks rolled down the sides of the hills, and consequently there can be no damage caused by bushfires which destroyed the former wooden bridges erected on the old track to Wakeham's saw-mill, the remains of which are still to be seen at the side of the diggings" The article goes on to further describe the track as one which "can with ease travel with a two horse conveyance either up or down" and that the workmen engaged in the construction of the track would be attending "a ball that night at McKeon's farm near the mouth of the gap to celebrate the successful completion of the undertaking". 1900s At what time the bridle path was extended beyond Valley Gap to the Wartook basin on the Mt. Difficult Range has not yet been determined. However, it is known that, by the turn of the century, people were travelling between Halls Gap and the caretakers' residence at Wartook Reservoir along what was now known as the "Bluff Road. Wartook's embankment had been constructed in 1887 and at that time there was already a track from Rosebrook Station homestead (near the present day Wartook Pottery) to the reservoir. Philip Rose owned both Rosebrook and Wartook Stations from the mid 1840s to the late 1850s and had regularly leased the Wartook basin to Cobb & Co. to rest horses there. 1920s Following the war of 1914-1918, tourism really took off in the Grampians, and Halls Gap rapidly grew. People would travel as far as they could on the many tracks then hike to the many lookouts being discovered by local tour guides. This led to the need for access across the range so that horse riders and the increasing number of vehicles could travel between Horsham and Halls Gap. To this end, the Bluff Road was improved and extended on 1929 and at its opening in March, 1930, by Lady Somers it was renamed the Mt. Victory Road.Map of Mt Victory Road and othersaccess routes, mt victory rd, bridle path, roads -
 Eltham District Historical Society Inc
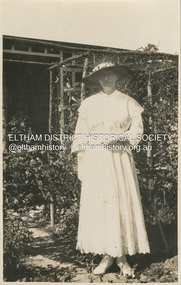
Photograph, Ellen Sweeney in Mrs Cox's garden, Eltham, Easter Sunday, April 16, 1922
Jackson St Casterton Aug 18. 23 Dear Girls, I was very pleased to receive your nice letters with news of your doings in Eltham. You put Casterton S.A., so your letters were a long time reaching me. As I hope to see you all very soon I shall just send a p.c. of me taken in Mrs Cox’s garden Easter Sunday 12 months ago. The river here has been in flood twice and people who lived along its banks had to move. I believe the Eltham PS is greatly improved. Betty says I shall get lost there now. Casterton is on the Glenelg R. in Vic so you will remember that next time. Best wishes to you all. From E. Hooley Ellen Sweeney was a former student of Eltham State School in the 1880s, She became a teacher at the school from 1891-1898. She returned in 1915 until her marriage to William Hooley of Casterton at St Marys, Eltham, Tuesday, April 24, 1923. Wedding at Eltham. (1923, April 27). Advertiser (Hurstbridge, Vic. : 1922 - 1939), p. 2 (AFTERNOON). Retrieved February 14, 2023, from http://nla.gov.au/nla.news-article56655781 Wedding at Eltham PRESENTATIONS TO MISS SWEENEY. On Tuesday last. Miss Sweeney (a member of an old and respected Eltham family), who recently resigned her position as assistant teacher at the Eltham State School to marry Mr. W. Hooley, of Casterton, was presented with a handsome gold wristlet watch. The headmaster, Mr. Dudtield, in making the presentation on behalf of the school committee, parents, and children paid a high tribute to the excellent work done by Miss Sweeney during her connection with the school, and in asking her acceptance of the present, expressed on behalf of all the fullest measure of happiness to Miss Sweeney in her married life. On Thursday evening, a social evening was tendered to Miss Sweeney, at Mrs. T. Jewell's residence Main street, by the choir and parishioners of St. Mary's Church, Eltham, where Miss Sweeney has for some years acted as choir mistress. Mr. Harold Cox, in handing her a handsome gold and oak silver salad bowl and service, expressed the heartiest good wishes to one who had not only labored so strenuously in organising the choir, but had been always foremost in promoting church and public movements in the community. Congratulatory addresses were also contributed by the Rev. F. Norris and Mr. W. P. McMahon. Miss Sweeney sincerely thanked the donors for their beautiful present, and the speakers for the many kind things said in her regard. She felt very much severing her connection with Eltham. She would carry away many happy-. recollections of her old home, and the kindly people of the town. She hoped after some years to return to Eltham. permanently. (Applause.) On Saturday morning. the marriage ceremony was performed at St. Mary's in the presence of a large number of friends. During the nuptial Mass, celebrated by the Rev. F. Parker. (North Fitzroy), assisted-by the Rev. F. Morris .(Eltham). The choral part of the service including the Wedding March, was very efficiently rendered by the choir. MRS HOOLEY (1940, May 10).Eltham and Whittlesea Shires Advertiser (Vic. : 1940 - 1942), p. 4. Retrieved February 14, 2023, from http://nla.gov.au/nla.news-article57491650 MRS HOOLEY Sincere regret was felt, in Eltham and district at the death of Mrs. W. Hooley (nee Miss Ellen Sweeney) a very dear and capable teacher at State Schools in Eltham and other districts, including the Western District. The deceased was one of Nature's ladies, and was a native of Eltham having been born in the historic home, Culla Hill, one of the first settlements on the Yarra. She passed peacefully away on Anzac Day, April 26. The. funeral was the largest and most impressive ever seen in Eltham, and left St. Mary's Church after a requiem mass conducted by Rev. Father Morrison and Father Hollis. The pall bearers were mostly girlhood friends. Deceased leaves a husband, two brothers, Mr. Tom Sweeney of Kew, and Mr. Frank Sweeney of Western Australia and sisters (Mrs. Lane, of W.A., and Mrs. M. Carringham, of Dalton St, Eltham.) POSTCARD 1905-1940s Like the carte-de-visite, postcards enjoyed a collecting craze by large numbers of people, and were often kept in albums through which the interested visitor could browse. Postcards were posted or exchanged in huge numbers. Postal authorities in Australia only allowed the private printing of postcards from 1898. At this time the back of the card was reserved for the address and postage stamp, and the front was used for the message and a picture. In 1902 British authorities allowed a "divided back", so that the left side could be used for the message, the right side for the address and stamp, and the whole of the front was devoted to the picture. France followed suit in 1904, Germany and Australia in 1905, and the United States in 1907. - Frost, Lenore; Dating Family Photos 1850-1920; Valiant Press Pty. Ltd., Berwick, Victoria 1991marg ball collection, postcard, 1922, 1923, ellen hooley (nee sweeney), ellen sweeney, eltham, mrs cox -
 Ballarat Tramway Museum
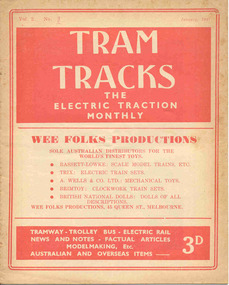
Magazine, Jack Richardson, "Tram Tracks - The Electric Traction Monthly", Jan to June 1947
Six issues of "Tram Tracks - The Electric Traction Monthly" of the Australian Electric Traction Association. Each issue has a standard cover, of the magazine name etc, featuring "Wee Folks Productions" models but are in different colours, all have been saddled stapled with two staples, except No. 6. The Volume and date details have been over printed. Back covers inside back covers have the same advertisements but the font varies vary. The six issues contain advertisements for the Wee Folks productions, Hartleys Sports store, Hearns Hobbies, Wattle Park, Johnson's Variety Store, Barnes Tennis Centre, The Model Dockyard, Robilt Models, Meadmore Model Engineering and Austral Bronze Pty Ltd, Hearns Hobbies, Christie Scale Model Railway and Equipment, Herbert Small (Meccano), the American Subscription Agency, Manufacturers' Mutual Insurance Ltd. 2465.1 - Vol. 2 No. 1 - 16 pages, Jan 1947, with cover printed in red. Has articles on the tram / car debate, Dunedin Tramways, Overlapping fare sections, type of trucks under Sydney tramcars, Brisbane Electric Railway (Power station), The Balmain Counterweight and Trolley buses in Australia. News items include Brisbane, Newcastle, Sydney, Melbourne, SEC, Hobart, VR, Adelaide, Kalgoorlie, Broome, electric trains in Melbourne and Sydney, and AETA notes. Photos include Sydney O, OP and P, VR PERM 63 and interior photo of a MMTB W4 class tram. 2465.2 - Vol. 2, No. 2 - 16 pages, Feb. 1947, with cover printed in dark blue. Has articles on Brisbane 400 class tramcar, Adelaide to Glenelg Brighton - Le Sands tramway, Melbourne Suburban railways, Diesel Electrics on the Southern Railway (US)and Birney Safety Car. News items include Brisbane, Sydney, Melbourne, VR, Fremantle and AETA notes. 2465.3 - Vol. 2, No. 3 - 12 pages, Mar. 1947, with cover printed in brown. Has articles on why NSW trams lose money, Duncan and Frazer, new trams in Johannesburg, Melbourne Suburban railways, and Sydney New Railway (Eastern Suburbs). News items Sydney, Melbourne, SEC, VR and Adelaide and AETA notes. 2465.4 - Vol. 2, No. 4 - 16 pages, Apr. 1947, with cover printed in green. Has articles on Duncan and Fraser (continued), In search of Ancient Warriors (old trams), Brisbane Electric Railway and some unusual fares arrangements. News items include Brisbane, Newcastle, Melbourne, Sydney, SEC, Launceston, Kalgoorlie, overseas, and AETA notes. Editorial looks at claims that the SW6 cars are the finest in the world, back numbers (notes that Tram Tracks started with a mimeographed club news sheet and now have circulation of nearly 200), costs of production etc. Has photographs of the interior of a SW6 850, a plan for Melbourne underground railway, the VR power operations room at Flinders St., Hobart trolley bus and a cartoon about Sydney traffic. 2465.5 - Vol. 2, No. 5 - 16 pages, May 1947, with cover printed in red. Has articles on Australian Light railways, Sydney's relief lines and the start of an article on NSWGT 600/1200V tramcars. Has news items on Brisbane, Sydney, MMTB, VR, Geelong, Ballarat, Launceston, Hobart and AETA notes. Editorial notes the first anniversary of the magazine and has a number of letters regarding this, content and the tram/car debate. 2465.6 - Vol. 2, No. 6 - 20 pages, June 1947, with cover printed in blue. Has articles on Cremorne bridge replacement (with photos), Neutral bay line and Tramcar transmission gears. News items include photos of MMTB track replacements, crowded trams, Brisbane, Sydney, Melbourne, and a photo of a Sydney tram passing under the new bridge work for Circular Quay station. 2465.7 - Vol. 2, No. 12 - pages 1-12, cover has an advert for Hartley Sporting Goods. Has cartoon on fares on Sydney trams by Peterson, not regarding retirement of Mr. H. Bell of MMTB, Melbourne Latrobe St and bus construction, Sydney tram cartoons from Emile Mercier, electric trains and other tramway news. (Item added 24-3-18 - from consolidation of Melbourne Tram Museum and BTM collections) trams, tramways, electric traction, aeta, models, australian tramways, duncan fraser, cartoons -
 Ballarat Tramway Museum
Album - Postcards & Photographs - Vic Solomons and others - Australian Tramways, Vic Solomons, 2023
Contains 184 images of postcards and photographs collected primarily by Vic Solomons of Sydney, with others from the collection of Wal Jack and Warren Doubleday. Covers almost all of Australia's tramway systems. 1 Post Card Hay St Perth Looking East No 3 Unknown Perth 2 Post Card Cars 30 & 90 both on Route 19 pass in Barrack St looking South Perth WA 1935.02.18 Perth 3 Post Card Hay St Looking East Perth WA Unknown Perth 4 Post Card William St Perth WA Unknown Perth 5 Post Card Perth from Shaftsbury Hotel Unknown Perth 6 Post Card Hay St Perth WA Looking East Unknown Perth 7 Post Card Barrack St Perth Unknown Perth 8 Post Card Murray Views No 3 High St Showing Town Hall Fremantle WA Unknown Fremantle 9 Post Card High St Fremantle WA Unknown Fremantle 10 Post Card View of Bolder City Golden Mile in the Background (Section No 1) 1908.08.20 Kalgoolie 11 Post Card Hannan St Kalgoolie 1900.08.19 Kalgoolie 12 Post Card Hannan St Kalgoolie WA (No 2) Unknown Kalgoolie 13 Post Card Intersection Hannan & Maritana Sts Kalgoolie WA Unknown Kalgoolie 14 Post Card Hannan St Kalgoolie Unknown Kalgoolie 15 Post Card Lane Street Bolder City Unknown Kalgoolie 16 Post Card Hobart Double Deck Tram Unknown Hobart 17 Post Card Macquarie St Hobart Unknown Hobart 18 Photo Liverpool Street Hobart Unknown Hobart 19 Photo Hobart 21 Unknown Hobart 20 Photo Hobart 14 in Elizabeth St Hobart Unknown Hobart 21 Post Card Macquarie St Hobart Unknown Hobart 22 Post Card Macquarie St Hobart Tas Unknown Hobart 23 Photo Double Decker Tram 3 at G.P.O. Hobart Tas No 31 Unknown Hobart 24 Post Card Double Decker Tram 19 Hobart Tas A B Series No 24 Unknown Hobart 25 Photo Hobart Municipal Tramways Tas No 95 Unknown Hobart 26 Post Card Elizabeth St Hobart Unknown Hobart 27 Post Card Elizabeth St Hobart Unknown Hobart 28 Post Card Elizabeth St Hobart Unknown Hobart 29 Post Card Elizabeth St Hobart Tas Unknown Hobart 30 Post Card HMT 21 with crew at Beach Road Terminus Unknown Hobart 31 Post Card HMT 9 & another with crew at Beach Road Terminus. Front cover photo of Destination GPO 1921.01.00 Hobart 32 Post Card Cascade Road and Mount Wellington Hobart Unknown Hobart 33 Post Card Elizabeth St Hobart Unknown Hobart 34 Post Card Elizabeth St Hobart Unknown Hobart 35 Post Card Elizabeth St Hobart 1915.04.07 Hobart 36 Post Card Macquarie St Hobart Tas Unknown Hobart 37 Post Card Macquarie St showing Post Office Hobart 1908.03.12 Hobart 38 Post Card Hobart Municipal Tramways 21 Unknown Hobart 39 Post Card Elizabeth St Hobart Tas Unknown Hobart 40 Post Card Liverpool Street Hobart Unknown Hobart 41 Post Card Electric Tram Launceston Tas 446 W J Little Photo 1919.02.08 Launbceston 42 Post Card Launceston Tram no 3 1911.08.30 Launbceston 43 Post Card Launceston Tram no 3 passes tram No 1 Unknown Launbceston 44 Post Card Tram 6 at Trevallyn a popular suburb Launceston Tasmania Unknown Launbceston 45 Post Card Tram 7 at Trevallyn Road Terminus Launceston Tasmania Unknown Launbceston 46 Post Card Tram 4 in Brisbane St Launceston Unknown Launbceston 47 Post Card Tram 9 in Brisbane St Launceston Tasmania Unknown Launbceston 48 Post Card Camerom Street Launceston Tasmania Unknown Launbceston 49 Post Card Murray Views No 15 Jetty Road Glenelg Terminus 1962-02-08 Adelaide 50 Post Card Bay Tram at Jetty Road Terminus Glenelg SA Unknown Adelaide 51 Post Card Tram 3 in King William Street Adelaide S Aust Unknown Adelaide 52 Post Card Valentine Series No 3065 The Old Horse Tram Victor Harbour Unknown Victor Harbour 53 Post Card Bourke Street Melbourne with Cable Car Looking East 1904.04.25 Melbourne 54 Post Card Opening of New Electric Tramway Elsternwick 1913-11-13 Melbourne 55 Post Card Cable trams in Clarendon St Sth Melb Unknown Melbourne 56 Post Card Pall Mall from Charing Cross Bendigo Unknown Bendigo 57 Post Card Tram 4 & 7 pass at The Fountain and Mitchell Street Bendigo Vic Rose Series P 3198 Unknown Bendigo 58 Post Card M&MTB 133 at Charing Cross bound for Eaglehawk Bendigo Vic Murray Views No 45 Unknown Bendigo 59 Post Card Pall Mall Bendigo Vic Unknown Bendigo 60 Post Card Charing Cross & Mitchell St Bendigo Trams passing 1919.00.00 Bendigo 61 Post Card Pall Mall Looking East Unknown Bendigo 62 Post Card Electric Trams and City Hotel Bendigo Vic Unknown Bendigo 63 Post Card Moorabool Street Geelong V 23 Unknown Geelong 64 Post Card Murray Views No 3 Moorabool Street Geelong Vic Unknown Geelong 65 Post Card The Rose Series P 2487 Ryrie Street Geelong Vic Unknown Geelong 66 Post Card Southern Cross Series 2696 Ryrie Stret Geelong Vic Unknown Geelong 67 Post Card The Rose Series P 1490 Ryrie Street Geelong Vic 1920-03-04 Geelong 68 Post Card Valentine Series No 1568 Lower Sturt Street Ballarat Unknown Ballarat 69 Post Card Rose Series P 1710 Sturt Street Ballarat Victoria Unknown Ballarat 70 Post Card Sturt Street Ballarat Victoria Unknown Ballarat 71 Post Card Horse Tram In Sturt Street Ballarat 1905.11.10 Ballarat 72 Post Card Sturt Street Ballarat Looking North-West Unknown Ballarat 73 Post Card Shoppes Square Sturt Street Ballarat Looking North Unknown Ballarat 74 Post Card Junction Sturt and Lydiard Streets Ballarat 1909-09-01 Ballarat 75 Post Card The Electric Supply Co Souvenir Tram Ticket No 3085of the opening of Electric System August 18 1905 1905.08.18 Ballarat 76 Post Card Sturt Street Ballarat Victoria 1907.11.25 Ballarat 77 Post Card Off to the Gardens Electric Tram Ballarat Unknown Ballarat 78 Post Card Sturt Street Ballarat 1907.04.16 Ballarat 79 Post Card Sturt Street Ballarat Looking East Electric tram with Double Deck Trailer 1911.04.17 Ballarat 80 Post Card Sturt Street Ballarat Looking East Unknown Ballarat 81 Post Card Sturt Street Ballarat Looking West 1911.03.01 Ballarat 82 Post Card Town Hall and Sturt Street Ballarat Unknown Ballarat 83 Post Card Lydiard Street Ballarat 1906.11.23 Ballarat 84 Post Card Looking North along Adelaide Street from George Street Brisbane Sidues Series No 764 Unknown Brisbane 85 Post Card Looking South along Queen Street from the Creek Street Intersection Brisbane Qld Sirues Series No 1379 Unknown Brisbane 86 Post Card George Street from near Supreme Court Brisbane Unknown Brisbane 87 Post Card Queen and Eagle Streets Brisbane 1907.07.04 Brisbane 88 Post Card Queen Street showing His Majesty’s Theatre Brisbane Unknown Brisbane 89 Post Card Queen Street Treasury Building 1908.01.20 Brisbane 90 Post Card G P O and Queen Street Brisbane Unknown Brisbane 91 Post Card Queen Street Brisbane Looking from Wharf Street Unknown Brisbane 92 Post Card Customs House Brisbane 1905.02.16 Brisbane 93 Post Card Queen St Brisbane 1905.09.16 Brisbane 94 Post Card Queen St Brisbane 1907.11.19 Brisbane 95 Post Card Treasury Buildings Brisbane Unknown Brisbane 96 Post Card Queen and Eagle Streets Brisbane Unknown Brisbane 97 Post Card The Valley Corner Brisbane Unknown Brisbane 98 Post Card Brisbane Queen Street opposite General Post Office Unknown Brisbane 99 Post Card North Quay and Milton Beach Brisbane Q Unknown Brisbane 100 Post Card Victoria Bridge Brisbane South Side 1907.08.14 Brisbane 101 Post Card Victoria Bridge Brisbane Unknown Brisbane 102 Post Card Breakfast Creek Bridge Brisbane Q Unknown Brisbane 103 Post Card Melbourne Street Station South Brisbane Queensland Unknown Brisbane 104 Post Card General Post Office Queen Street Brisbane 1955.09.23 Brisbane 105 Post Card Customs House Brisbane 1904.11.04 Brisbane 106 Post Card Queen St Brisbane 1919.11.00 Brisbane 107 Post Card Queen St Brisbane Sidues Series No 627 Unknown Brisbane 108 Post Card Creek Street Brisbane Queensland Unknown Brisbane 109 Post Card Customs House and Garden Reach Brisbane Queensland 1910.00.08 Brisbane 110 Post Card Queen and Creek Streets Brisbane 1909.06.07 Brisbane 111 Post Card Queensland National Bank andd Queen Street Brisbane Queensland Unknown Brisbane 112 Post Card Queen Street and Treasury Buildings Brisbane 0000.09.07 Brisbane 113 Post Card Queen Street showing “Courier” Buildings Brisbane Unknown Brisbane 114 Post Card Intersection George & Roma Streets Brisbane Q 1916.05.11 Brisbane 115 Post Card Adelaide Street Brisbane Q Unknown Brisbane 116 Post Card G P O Queen Street Brisbane Q Unknown Brisbane 117 Post Card Treasury Building Brisbane 1906.03-20 Brisbane 118 Post Card Queen and Eagle Streets Brisbane 1907.02.01 Brisbane 119 Post Card Queen St Brisbane Unknown Brisbane 120 Post Card Queen St Brisbane Q Unknown Brisbane 121 Post Card Victoria Bridge Brisbane 1906.07.30 Brisbane 122 Post Card An Unusual View showing Head of Queen Street Victoria Bridge & South SideSuburbs Brisbane Q Unknown Brisbane 123 Post Card Petries Bight Brisbane Q Unknown Brisbane 124 Post Card South End Victoria Bridge Brisbane Q Unknown Brisbane 125 Post Card Customs House Brisbane Unknown Brisbane 126 Post Card Photo of toastrack car circa 1910 Unknown Brisbane 127 Post Card Treasury Buildings Brisbane Unknown Brisbane 128 Post Card East Street Rockhampton with Steam Tram & trailer Unknown Rockhampton 129 Post Card Post Office Rockhampton with steam tram Unknown Rockhampton 130 Post Card East Street Rockhampton with Steam Trams Rose Series P 7154 Unknown Rockhampton 131 Post Card William Street Rockhampton Rose Series P 7156 Unknown Rockhampton 132 Post Card Central East Street Rockhampton Q with Steam Trams Unknown Rockhampton 133 Photo Sturt St Ballarat Unknown Ballarat 134 Photo Bridge Street Ballarat Unknown Ballarat 135 Post Card George St Sydney Unknown Sydney 136 Post Card Elizabeth St Sydney Unknown Sydney 137 Post Card Railway Square Unknown Sydney 138 Post Card Sydney Harbor Bridge - pending receipt 139 Post Card Kings Cross - Mowbray Series with description on rear from C Roy G Field Unknown Sydney 140 Post Card Kings Cross - Mowbray Series with description on rear from C Roy G Field Unknown Sydney 141 Post Card Central Railway Station Sydney - Rose Series P6033 1954-01-26 Sydney 142 Post card William Street Darlinghurst looking towards City - Rose Series P6602 unknown Sydney 143 Post Card Circular Quay Sydney - Rose Series P6680 Unknown Sydney 144 Post Card View at Manly NSW - Rose Series B1003 Unknown Sydney 145 Post Card Hunter St Newcastle NSW - Rose Series P7843 Unknown Newcastle 146 Post Card Bank Corner Newcastle NSW - Mowbray Series No. 155 Unknown Newcastle 147 Post Card Hunter St Newcastle NSW Unknown Newcastle 148 Post Card Criterion Hotel Hunter St Newcastle NSW Unknown Newcastle 149 Photo Horse tram at Newtown Station 1894 to 1898 - PTC photo c1894 Newtown 150 Photo Steam tram motor No 3 at Railway Square 1879 1879 Sydney 151 Photo Railway steam tram c1900 with a horse drawn double deck bus c1900 Sydney 152 Photo Steam motor 5A and doubled deck bus Unknown Sydney 153 Photo Steam motor 53A with detail notes on rear 1922 Sydney 154 Photo Cable tram set at Milsons Point ferry terminal c1900 Sydney 155 Photo Early Sydney electric car - Ocean St - Rose Bay Unknown Sydney 156 Photo George St looking souoth c1905 c1905 Sydney 157 Photo Tram 165 at Circular Quay Unknown Sydney 158 Photo Tramcar ferry or transporter at The Spit Unknown Sydney 159 Photo tram 882 George St at Marti Place, 1937 1937 Sydney 160 Photo Tram 826 Railway Sq area Unknown Sydney 161 Photo Railway Sq in background, Broadway with double decker bus and toastrack car late 1930s Sydney 162 Photo Coupled St Pitt St? - photo Ben Parle Feb. 1950 Sydney 163 Photo Electric tram No. 2 - North Sydney with side trolley pole running Unknown Sydney 164 Photo George St - Horden's Corner Unknown Sydney 165 Photo George St at Martin Place c1920 Sydney 166 Photo Castlereagh St Sydney c1928 c1928 Sydney 167 Photo Railway Sqare c1920 c1920 Sydney 168 Photo Darling St Countereweight Unknown Sydney 169 Photo Trolley bus depot Unknown Sydney 170 Photo Trolley bus No. 14 Unknown Sydney 171 Photo Newcastle Railway Station with steam tram - Wharf Road?? Unknown Newcastle 172 Photo High St West Maitland - steam tram Unknown Maitland 173 Photo High St West Maitland - steam tram Unknown Maitland 174 Post Card Argent St near tram terminal Broken Hill NSW c1900 Broken Hill 175 postcard Argent St looking south Broken Hill - with Ken Magor's notes on rear Unknown Broken Hill 176 Photo Toronto - steam tram 61A Unknown Toronto 177 Photo 124A trial run 1911? Sutherland - Cronulla line 1911 Sutherland 178 Photo 103A at a tram stop Unknown Sydney 179 Photo Cable tram set at Crows Nest terminus grip car 12, trailer 22 Unknown Sydney 180 Photo Cable tram Queens Square Sydney 1903 Sydney 181 Photo cars 2078 and 2077 Chatswood late 1950s Sydney 182 Photo car 1877 Balmain area late 1950s Sydney 183 Photo Trolley bus - Rockdale destination Late 1950s Sydney 184 Photo Broken Hill steam tram - motor 18A North Tram Unknown Broken Hill 185 Photo Millars Point Sydney NSW - ferry/tram interchange, unknown Sydney All items imaged including the rear or back where there was writing of information. All files stored on the Museum's Photo Collections directory. Demonstrates through the medium of many images, Australian tramway systems and Ballarat's place in them.Album - heavy card covers, plastic lined with postcard or 6x4 photo sleeves.australia, tramways, postcards, photographs, steam trams, horse trams, cable trams, trolley buses -
 Flagstaff Hill Maritime Museum and Village
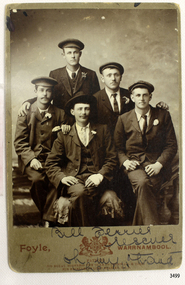
Postcard - People, Bill Ferrier - rescuer, 11th November, 1905
The postcard shows a photograph of William Ferrier, the 25-year-old Warrnambool fisherman from South Warrnambool whose rescue of two sailors from the wrecked La Bella made him an overnight National hero, quoted as “one of the most heroic rescues in Victoria’s shipwreck history”. The La Bella was wrecked on 10th November 1905 and the photograph was taken on the next day. In the photograph, William Ferrier is seated in the centre, with four of the five survivors beside him: (from left to right) Leonard Robertson, R. Payne, Oscar Rosenholme and Jack Noake. The photograph was taken by Foyle Photography Studio in Warrnambool, originally owned by James Charles Foyle. He previously had a photographic studio in Melbourne 1882 1887, then opened “Foyle’s Photo Card Studios” in Liebig St, Warrnambool. James Foyle died on 13th July 1905 and his son and daughter, Charles and Lilian Foyle continued on with the business until 1945. This photograph was most likely taken by either Charles or Lilian Foyle. The story of William Ferrier’s brave act follows on below … The ship from which the sailors were rescued was the three-masted, iron and steel barquentine the La Bella, built in Norway in 1893. She was one of two iron and steel ships by Johan Smith, the company was one of the leading shipping families in Tvedestrand, Norway. She was significant to Norwegian shipping, being one of only 27 iron and steel ships ever built in Norway. She was registered in New Zealand and engaged from 1902 in inter-colonial trading of timber in the Pacific, between New Zealand and Australia and was often in Port Phillip Bay, Victoria. On 5th October 1905, the twelve-year-old La Bella left Lyttleton, New Zealand carrying a cargo of timber bound for Warrnambool, Australia. She was manned by a crew of twelve: the Master, (Captain Mylius, previously 1st Mate of La Bella, appointed Captain to La Bella on 6th February 1903) 2 Mates, Cook, six able seamen, one ordinary seaman and a boy. Bad weather en route caused her to shelter at Burnie on Tasmania's North West coast. On November 10th, the 37th day of her journey, La Bella approached Warrnambool. Captain Mylius steered her towards Lady Bay Channel in heavy south-west seas and evening mist. He ordered the helmsman to steer for the light. As the ship came round, a tremendous sea struck her on the port quarter, causing her to breach broadside in a northwesterly direction into breakers. The helm was brought round twice more, but each time heavy seas broke over her, the third time throwing the La Bella on to a submerged reef in Lady Bay now known as La Bella Reef (about 100 yards from the Warrnambool breakwater). The sea was so rough that it even wrenched a one-and-a-half ton anchor from its fastenings and into the sea. As Captain Mylius headed to the steel wheelhouse, intending to send up a rocket flare, a huge sea slammed the steel door into him (resulting in massive bruising front and back) Despite his injuries he still managed to set off a blue light, which he held up in his hands. La Bella’s lifeboats were filled with seawater and broke up on their chocks. The blue light was the first indication to people on the shore that there was a ship in distress. The Harbour Master, Captain Roe (who lived in the Harbour Master’s House opposite Flagstaff Hill), organised a group of volunteers to crew the lifeboat because the trained crew was unavailable; the crewmen were working on a steamer in Port Fairy at the time. He then poured oil onto the water to try and smooth the sea. At around 11 pm three of the crew took shelter in the steel forecastle but the sea crashed into it and broke it up. While the rest of the crew and onlookers watched helplessly in the moonlight the bodies were washed away into the sea, never to be seen again. Some of the crew lashed themselves to the weather rail to keep from being washed away. Watson, the ordinary seaman, became tangled in the rigging lines and was too weak to move, so the 2nd Mate, Robertson, put a line onto him so that he wouldn’t wash off. Around 11 pm three of the crew were unconscious from exhaustion. The situation on La Bella was becoming dangerous. The 2nd Mate moved to the ‘house’ and soon afterwards the ship slipped in the heavy sea. The lashings of the 1st Mate and the ‘boy’ Denham had kept them safe until about 2 am when they were washed overboard; no one was able to help. One by one, the exhausted crew were being washed overboard, too weak to hold on any longer. During the night the La Bella had broken into two and the deckhouse ran out towards the sea. Two more men drowned when trying to reach the lifeboat. By sunrise, the only survivors of the twelve were the Master, 2nd Mate and three seamen. Early in the morning, Captain Roe used the rocket apparatus on shore to try and shoot a line to the ship for a safer rescue but each attempt fell short of the target. Several attempts were made by the lifeboat to rescue the stricken sailors, but the rough conditions made this difficult for the boat to get close enough to the ship and the lifeboat had to return to shore. During a final attempt to reach the ship Captain Mylius ordered his men to jump into the sea. Leonard Robertson, 2nd mate, jumped and swam towards the lifeboat, taking hold of the boat hook offered to him. Oscar Rosenholme managed to reach the boat floating on a piece of timber from the ship’s load and a third survivor, Noake, also made the boat. Along with the lifeboat rescue crew, 25-year-old William Ferrier rowed his small dingy through the heavy seas and managed to rescue the Captain, whom he landed on the breakwater. Ferrier then returned to the ship to attempt a final rescue, losing his oars and rowlocks into the high sea. Using just a spare paddle he skulled towards the La Bella, reaching her stern in time to cut loose the lone surviving sailor, Payne, from the lashing that held him to the ship; the terrified sailor dropped from the ship and into the dingy. Shortly after the last man was rescued, the La Bella was lifted by a huge wave and crashed back down on the reef; she broke up and sank. The ordeal had lasted ten hours. The survivors were taken to the nearby Bay View Hotel and gratefully received warm food and clothing, medical attention and a place to sleep. In the following days, an unidentified body of a young person had washed ashore; it was either Watson or Denham. The body was buried in the Warrnambool cemetery with an appropriate gravestone and inscription. William Ferrier became a national hero as news of the daring rescue spread. In recognition of his bravery in the two daring rescues, he was awarded the Silver Medal for Bravery by the Royal Humane Society and was honoured in the letter from the Prime Minister and the Parliament of the Commonwealth, telegrams and a cheque for £20 from the Governor-General, over £150 subscribed by the public, including Warrnambool and district and readers of The Argus, and a gold medal from the Glenelg Dinghy Club of South Australia. Ferrier’s rescue efforts are one of the most heroic in Victoria’s shipwreck history. (William Ferrier’s son, Frank, received a similar award almost fifty years later when he helped rescue four members of the crew on the yacht Merlan after it ran on to a reef near the Point Lonsdale Lighthouse. ) The wreck of La Bella now lies on her port side in 13 metres of sheltered water inside the reef she struck. The bow section is relatively intact and part of the stern has drifted north-easterly towards the mouth of the Hopkins River. The reef the La Bella struck now bears its name. Those five rescued from the La Bella were Captain George Mylius, Leonard Robertson (2nd Mate, 21 years old), R. Payne, Oscar Rosenholme and Jack Noake. Those seven who lost their lives were Mr Coulson (1st mate), Charles Jackman (cook) Gustave Johnson, Pierre Johann and Robert Gent (all able seamen), Harry Watson (ordinary seaman) and Jack Denham (ship’s boy), Captain Mylius was found guilty of careless navigation; he had sailed into the bay without the services of a pilot. His Master Certificate was suspended for twelve months. Later he was also charged with manslaughter of one of the crew who had died when the La Bella was wrecked but found not guilty. The event’s adverse publicity and damage to his career took a toll on his health and he died of a heart attack six months after the wreck; he was only thirty-seven. His body was buried in the Melbourne General Cemetery. The La Bella was “the best documented of all sailing ships owned in New Zealand”. Her record books, ship logs, correspondence and supporting papers are still available. At the time of the tragedy, she was owned by Messers David C.Turnbull and Co. of Timaru, New Zealand timber merchants and shipping agents, who had purchased her on 13th December 1901. A detailed account of the last journey of La Bella can be read in “Leonard Robertson, the Whangaroa & La Bella” written by Jack Churchouse, published in 1982 by Millwood Press Ltd, Wellington, NZ. As well as this postcard, Flagstaff Hill’s La Bella Collection includes a photograph of the wrecked La Bella, a brass rail holder and the letter from the Prime Minister and other Members of Parliament that was sent to William Ferrier to commend him for his bravery. Some 15 – 17 ships are believed to have sunk in Lady Bay, but only two have been discovered on the seafloor; the “La Bella” and the “Edinburgh Castle”. Both wrecks are popular diving sites and are preserved as significant historical marine and marine archaeological sites. This postcard is part of the La Bella Collection and is significant at both a local and state level. Its connection to the La Bella shipwreck and the rescue of five survivors highlights the dangers of Victoria’s Shipwreck Coast. The photograph of William Ferrier and four of the five survivors demonstrates the bravery of ordinary Australians who risked their lives to save victims of shipwrecks along the coast. The postcard is significant to the history of Warrnambool as it portrays William Ferrier, a local fisherman whose descendants continue to live in the area. It highlights the way of life of people who lived in coastal towns in 19th century Victoria and the effects of shipwrecks upon them. The postcard connects to the congratulatory letter which was sent to William Ferrier by the Prime Minister and Government of Australia and demonstrates the importance they attached to his efforts for Victoria and to Australia. The postcard is also an example of the photography of Foyle Photographers who were in the town of Warrnambool from the late 1800’s. Charles and Lillian Foyle took over the business when their father James died in 1905. Lillian Foyle is significant as the first woman photographer in Warrnambool. It is not known whether Charles of Lillian took this photograph. This postcard is significant because of its association with the sailing ship “La Bella”. The “La Bella” is of local and state and national significance. It is one of the only two shipwrecks discovered in Lady Bay, Warrnambool, out of the 15-17 shipwrecks in the bay. Sepia photograph of William (Bill) Ferrier (seated in the middle), heroic rescuer of two crew members of the La Bella, wrecked at Warrnambool. The photograph is a postcard and shows five men dressed formally in suits and hats. Printed below the photograph are the name and place of the photographer, a royal crest and the details of two patrons of the photographer. Also below the photograph are some handwritten words in black pen. On the back of the postcard is a handwritten message in the same writing as the front.Printed on the front of the card is “Foyle, WARRNAMBOOL” “PATRONS: / HIS ROYAL HIGHNESS THE DUKE OF CORNWALL & YORK. / HIS EXCELLENCY LORD BRAS_ EY, R.O.B.” Handwritten on the front of the card is “Bill Ferrier / rescuer / Oh my hero _ _ _ “ Handwritten on the back of the card is a message. “La Bella” Wrecked off W.Bool Breakwater Nov. 1906 (_ _ _ _ show night) Payne Noake Rosenholme Robertson and Capt Mylius (saved) (moonlight bright) Watson (_ _ _ _ boy) Richwoud [possibly Richmond] drowned” and signed “Desdewoua [possibly Desdemona] Slogos”la bella, foyle, william ferrier, bill ferrier, lady bay, 1905, 10th november 1905, 11th november 1905, parliament of the commonwealth, royal humane society medal, flagstaff hill, warrnambool, shipwrecked coast, flagstaff hill maritime museum, maritime museum, shipwreck coast, flagstaff hill maritime village -
 Flagstaff Hill Maritime Museum and Village
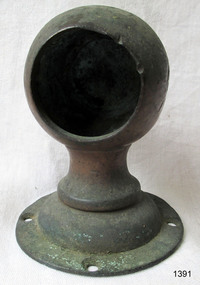
Functional object - Rail holder, About 1893, when the ship was made
This brass rail holder fixture would have been used to hold the end of a rail in place. There is no information as to where the fitting or rail would have been placed on the ship; sailing ships had many brass fittings. It was recovered from the wreck of the La Bella, which lies at the bottom of the Warrnambool Harbour. Some 15 ships are believed to have been wrecked in Lady Bay, but only two have been discovered on the sea floor; the La Bella and the Edinburgh Castle. Both wrecks are popular diving sites and are preserved as significant historical marine and marine archaeological sites. The story of the final voyage of the La Bella is summarised as follows … The ship from which the sailors were rescued was the three-masted, iron and steel barquentine the La Bella, built in Norway in 1893. She was one of two iron and steel ships by Johan Smith, the company being one of the leading shipping families in Tvedestrand, Norway. She was significant to Norwegian shipping, being one of only 27 iron and steel ships ever built in Norway. She was registered in New Zealand and engaged from 1902 in inter-colonial trading of timber in the pacific, between New Zealand and Australia and was often in Port Phillip Bay, Victoria. On 5th October, 1905, the twelve year old La Bella left Lyttleton, New Zealand carrying a cargo of timber bound for Warrnambool, Australia . She was manned by a crew of twelve: the Master, (Captain Mylius, previously 1st Mate of La Bella, appointed Captain to La Bella on 6th February 1903) 2 Mates, Cook, six able seamen, one ordinary seaman and a boy. . Bad weather en route caused her to shelter at Burnie on Tasmania's North West coast. On November 10th, the 37th day of her journey, La Bella approached Warrnambool. Captain Mylius steered her towards Lady Bay Channel in heavy south-west seas and evening mist. He ordered the helmsman to steer for the light. As the ship came round, a tremendous sea struck her on the port quarter, causing her to breach broadside in a north-westerly direction into breakers. The helm was brought round twice more, but each time heavy seas broke over her, the third time throwing the La Bella on to a submerged reef in Lady Bay now known as La Bella Reef (about 100 yards from the Warrnambool breakwater). The sea was so rough that it even wrenched a one-and-a-half ton anchor from its fastenings and into the sea. As Captain Mylius headed to the steel wheelhouse, intending to send up a rocket flare, a huge sea slammed the steel door into him (resulting in massive bruising front and back) Despite his injuries he still managed to set off a blue light, which he held up in his hands. La Bella’s lifeboats were filled with sea water and broke up on their chocks. The blue light was the first indication to people on shore that there was a ship in distress. The Harbour Master, Captain Roe (who lived in the Harbour Master’s House opposite Flagstaff Hill), organised a group of volunteers to crew the lifeboat because the trained crew was unavailable; the crewmen were working on a steamer in Port Fairy at the time. He then poured oil onto the water to try and smooth the sea. At around 11pm three of the crew took shelter in the steel forecastle but the sea crashed into it and broke it up. While the rest of the crew and onlookers watched helplessly in the moonlight the bodies were washed away into the sea, never to be seen again. Some of the crew lashed themselves to the weather rail to keep from being washed away. Watson, the ordinary seaman, became tangled in the rigging lines and was too weak to move, so the 2nd Mate, Robertson, put a line onto him so that he wouldn’t wash off. Around 11pm three of the crew were unconscious from exhaustion. The situation on La Bella was becoming dangerous. The 2nd Mate moved to the ‘house’ and soon afterwards the ship slipped in the heavy sea. The lashings of the 1st Mate and the ‘boy’ Denham had kept them safe until about 2am when they were washed overboard; no one was able to help. One by one, the exhausted crew were being washed overboard, too weak to hold on any longer. During the night the La Bella had broken into two and the deckhouse ran out towards the sea. Two more men drowned when trying to reach the lifeboat. By sunrise the only survivors of the twelve were the Master, 2nd Mate and three seamen. Early in the morning Captain Roe used the rocket apparatus on shore to try and shoot a line to the ship for a safer rescue but each attempt fell short of the target. Several attempts were made by the lifeboat to rescue the stricken sailors, but the rough conditions made this difficult for the boat to get close enough to the ship and the lifeboat had to return to shore. During a final attempt to reach the ship Captain Mylius ordered his men to jump into the sea. Leonard Robertson, 2nd mate, jumped and swam towards the lifeboat, taking hold of the boat hook offered to him. Oscar Rosenholme managed to reach the boat floating on a piece of timber from the ship’s load and a third survivor, Noake, also made the boat. Along with the lifeboat rescue crew, 25 year old William Ferrier rowed his small dingy through the heavy seas and managed to rescue the Captain, whom he landed on the breakwater. Ferrier then returned to the ship to attempt a final rescue, losing his oars and rowlocks into the high sea. Using just a spare paddle he skulled towards the La Bella, reaching her stern in time to cut loose the lone surviving sailor, Payne, from the lashing that held him to the ship; the terrified sailor dropped from the ship and into the dingy. Shortly after the last man was rescued, the La Bella was lifted by a huge wave and crashed back down on the reef; she broke up and sank. The ordeal had lasted ten hours. The survivors were taken to the nearby Bay View Hotel and gratefully received warm food and clothing, medical attention and a place to sleep. In the following days an unidentified body of a young person was washed ashore; it was either Watson or Denham. The body was buried in the Warrnambool cemetery with an appropriate gravestone and inscription. William Ferrier became a national hero as news of the daring rescue spread. In recognition of his bravery in the two daring rescues he was awarded the Silver Medal for Bravery by the Royal Humane Society and was honoured in the letter from the Prime Minister and the Parliament of the Commonwealth, telegrams and a cheque for £20 from the Governor General, over £150 subscribed by the public, including Warrnambool and district and readers of The Argus, and a gold medal from the Glenelg Dinghy Club of South Australia. Ferrier’s rescue efforts are one of the most heroic in Victoria’s shipwreck history. (William Ferrier’s son, Frank, received a similar award almost fifty years later, when he helped rescue four members of the crew on the yacht Merlan, after it ran on to a reef near the Point Lonsdale Lighthouse. ) The wreck of La Bella now lies on her port side in 13 metres of sheltered water inside the reef she struck. The bow section is relatively intact and part of the stern has drifted north-easterly towards the mouth of the Hopkins River. The reef the La Bella struck now bears its name. Those five rescued from the La Bella were Captain George Mylius, Leonard Robertson (2nd Mate, 21 years old), R. Payne, Oscar Rosenholme and Jack Noake. Those seven who lost their lives were Mr Coulson (1st mate), Charles Jackman (cook) Gustave Johnson, Pierre Johann and Robert Gent (all able seamen), Harry Watson (ordinary seaman) and Jack Denham (ship’s boy), Captain Mylius was found guilty of careless navigation; he had sailed into the bay without the services of a pilot. His Master Certificate was suspended for twelve months. Later he was also charged with manslaughter of one of the crew who had died when the La Bella was wrecked, but found not guilty. The event’s adverse publicity and damage to his career took a toll on his health and he died of a heart attack six months after the wreck; he was only thirty-seven. His body was buried in the Melbourne General Cemetery. The La Bella was “the best documented of all sailing ships owned in New Zealand”. Her record books, ship logs, correspondence and supporting papers are still available. At the time of the tragedy, she was owned by Messers David C.Turnbull and Co. of Timaru, New Zealand timber merchants and shipping agents, who had purchased her on 13th December 1901. A detailed account of the last journey of La Bella can be read in “Leonard Robertson, the Whangaroa & La Bella” written by Jack Churchouse, published in 1982 by Millwood Press Ltd, Wellington, NZ. Some 15 – 17 ships are believed to have sunk in Lady Bay, but only two have been discovered on the seafloor; the “La Bella” and the “Edinburgh Castle”. Both wrecks are popular diving sites and are preserved as significant historical marine and marine archaeological sites. As well as this letter, Flagstaff Hill’s La Bella Collection includes a photograph of the wrecked La Bella, a brass rail holder and a postcard of William Ferrier with four of the survivors. This original congratulatory letter sent to William Ferrier by the Prime Minister and Government of Australia demonstrates the importance attached to his efforts for Victoria and to Australia. The letter is part of the La Bella Collection and is significant at both a local and state level. Its connection to the La Bella shipwreck and the rescue of five survivors highlights the dangers of Victoria’s Shipwreck Coast. The letter to William Ferrier from the Australian Government acknowledges the bravery of ordinary Australians who risked their lives to save victims of shipwrecks along the coast. The letter is significant to the history of Warrnambool as it honours William Ferrier, a local fisherman whose descendants continue to live in the area. It highlights the way of life of people who lived in coastal towns in 19th century Victoria and the effects of shipwrecks upon them. The letter connects to the postcard of William Ferrier with four of the five rescued crew, the photograph of the wreck of the La Bella and the artefact from the wreck, the rail holder. This item is significant because of its association with the sailing ship “La Bella” . the “La Bella” is of local and state and national significance. It is one of the only two shipwrecks discovered in Lady Bay, Warrnambool, out of the 15-17 shipwrecks in the bay. Brass rail holder from the wreck "La Bella". This rail holder would have been used as a fitting for the end of a rail. It is made up of two parts and looks a little like a goblet in shape. The top is a hollow spherical shape with a circular hole cut out on one side, into which the end of a round rail would fit. There are two gouge marks close to each other on one side of the hole, about one centimetre apart, at 1 and 2 o’clock position. The sphere has a hollow pipe-like stem with a screw thread turned into the outside of the lower section and the bottom of the stem has been flared out after having the base fitted. The base is round and has a mound in the centre. The edge has four evenly spaced fixture holes around its edge. The metal shows signs of pitting and has mild encrustation. The fitting of the base is loose, allowing it to swivel in a complete circle. The top of the sphere is rough and has a dent in it. Underneath the base there is verdigris; some has flaked off and reveals a bright golden colour underneath. rail holder, brass rail holder, la bella, lady bay, norway, 1893, new zealand, captain mylius, william ferrier, flagstaff hill, warrnambool, shipwrecked coast, flagstaff hill maritime museum, maritime museum, shipwreck coast, flagstaff hill maritime village -
 Flagstaff Hill Maritime Museum and Village
Letter - William Ferrier, 14th November 1905
The letter to William Ferrier of South Warrnambool from the Prime Minister and the Parliament of the Commonwealth recognised the significance of William’s brave and courageous lifesaving act to the people of Australia; “They all feel that your conduct was worthy of the best deeds done by British sailors in the past and they are proud to know that Australia can produce such as you.” The story of that brave rescue follows on below … The ship from which the sailors were rescued was the three-masted, iron and steel barquentine the La Bella, built in Norway in 1893. She was one of two iron and steel ships by Johan Smith, The company was one of the leading shipping families in Tvedestrand, Norway. She was significant to Norwegian shipping, being one of only 27 iron and steel ships ever built in Norway. She was registered in New Zealand and engaged from 1902 in inter-colonial trading of timber in the Pacific, between New Zealand and Australia and was often in Port Phillip Bay, Victoria. On 5th October 1905, the twelve-year-old La Bella left Lyttleton, New Zealand carrying a cargo of timber bound for Warrnambool, Australia. She was manned by a crew of twelve: the Master, (Captain Mylius, previously 1st Mate of La Bella, appointed Captain to La Bella on 6th February 1903) 2 Mates, Cook, six able seamen, one ordinary seaman and a boy. Bad weather en route caused her to shelter at Burnie on Tasmania's North West coast. On November 10th, the 37th day of her journey, La Bella approached Warrnambool. Captain Mylius steered her towards Lady Bay Channel in heavy south-west seas and evening mist. He ordered the helmsman to steer for the light. As the ship came round, a tremendous sea struck her on the port quarter, causing her to breach broadside in a north-westerly direction into breakers. The helm was brought round twice more, but each time heavy seas broke over her, the third time throwing the La Bella on to a submerged reef in Lady Bay now known as La Bella Reef (about 100 yards from the Warrnambool breakwater). The sea was so rough that it even wrenched a one-and-a-half ton anchor from its fastenings and into the sea. As Captain Mylius headed to the steel wheelhouse, intending to send up a rocket flare, a huge sea slammed the steel door into him (resulting in massive bruising front and back) Despite his injuries he still managed to set off a blue light, which he held up in his hands. La Bella’s lifeboats were filled with seawater and broke up on their chocks. The blue light was the first indication to people on the shore that there was a ship in distress. The Harbour Master, Captain Roe (who lived in the Harbour Master’s House opposite Flagstaff Hill), organised a group of volunteers to crew the lifeboat because the trained crew was unavailable; the crewmen were working on a steamer in Port Fairy at the time. He then poured oil onto the water to try and smooth the sea. At around 11 pm three of the crew took shelter in the steel forecastle but the sea crashed into it and broke it up. While the rest of the crew and onlookers watched helplessly in the moonlight the bodies were washed away into the sea, never to be seen again. Some of the crew lashed themselves to the weather rail to keep from being washed away. Watson, the ordinary seaman, became tangled in the rigging lines and was too weak to move, so the 2nd Mate, Robertson, put a line onto him so that he wouldn’t wash off. Around 11 pm three of the crew were unconscious from exhaustion. The situation on La Bella was becoming dangerous. The 2nd Mate moved to the ‘house’ and soon afterwards the ship slipped in the heavy sea. The lashings of the 1st Mate and the ‘boy’ Denham had kept them safe until about 2 am when they were washed overboard; no one was able to help. One by one, the exhausted crew were being washed overboard, too weak to hold on any longer. During the night the La Bella had broken into two and the deckhouse ran out towards the sea. Two more men drowned when trying to reach the lifeboat. By sunrise, the only survivors of the twelve were the Master, 2nd Mate and three seamen. Early in the morning, Captain Roe used the rocket apparatus on shore to try and shoot a line to the ship for a safer rescue but each attempt fell short of the target. Several attempts were made by the lifeboat to rescue the stricken sailors, but the rough conditions made this difficult for the boat to get close enough to the ship and the lifeboat had to return to shore. During a final attempt to reach the ship Captain Mylius ordered his men to jump into the sea. Leonard Robertson, 2nd mate, jumped and swam towards the lifeboat, taking hold of the boat hook offered to him. Oscar Rosenholme managed to reach the boat floating on a piece of timber from the ship’s load and a third survivor, Noake, also made the boat. Along with the lifeboat rescue crew, 25-year-old William Ferrier rowed his small dingy through the heavy seas and managed to rescue the Captain, whom he landed on the breakwater. Ferrier then returned to the ship to attempt a final rescue, losing his oars and rowlocks into the high sea. Using just a spare paddle he skulled towards the La Bella, reaching her stern in time to cut loose the lone surviving sailor, Payne, from the lashing that held him to the ship; the terrified sailor dropped from the ship and into the dingy. Shortly after the last man was rescued, the La Bella was lifted by a huge wave and crashed back down on the reef; she broke up and sank. The ordeal had lasted ten hours. The survivors were taken to the nearby Bay View Hotel and gratefully received warm food and clothing, medical attention and a place to sleep. In the following days, an unidentified body of a young person has washed ashore; it was either Watson or Denham. The body was buried in the Warrnambool cemetery with an appropriate gravestone and inscription. William Ferrier became a national hero as news of the daring rescue spread. In recognition of his bravery in the two daring rescues, he was awarded the Silver Medal for Bravery by the Royal Humane Society and was honoured in the letter from the Prime Minister and the Parliament of the Commonwealth, telegrams and a cheque for £20 from the Governor-General, over £150 subscribed by the public, including Warrnambool and district and readers of The Argus, and a gold medal from the Glenelg Dinghy Club of South Australia. Ferrier’s rescue efforts are one of the most heroic in Victoria’s shipwreck history. (William Ferrier’s son, Frank, received a similar award almost fifty years later when he helped rescue four members of the crew on the yacht Merlan after it ran on to a reef near the Point Lonsdale Lighthouse. ) The wreck of La Bella now lies on her port side in 13 metres of sheltered water inside the reef she struck. The bow section is relatively intact and part of the stern has drifted north-easterly towards the mouth of the Hopkins River. The reef the La Bella struck now bears its name. Those five rescued from the La Bella were Captain George Mylius, Leonard Robertson (2nd Mate, 21 years old), R. Payne, Oscar Rosenholme and Jack Noake. Those seven who lost their lives were Mr Coulson (1st mate), Charles Jackman (cook) Gustave Johnson, Pierre Johann and Robert Gent (all able seamen), Harry Watson (ordinary seaman) and Jack Denham (ship’s boy), Captain Mylius was found guilty of careless navigation; he had sailed into the bay without the services of a pilot. His Master Certificate was suspended for twelve months. Later he was also charged with the manslaughter of one of the crew who had died when the La Bella was wrecked but found not guilty. The event’s adverse publicity and damage to his career took a toll on his health and he died of a heart attack six months after the wreck; he was only thirty-seven. His body was buried in the Melbourne General Cemetery. The La Bella was “the best documented of all sailing ships owned in New Zealand”. Her record books, ship logs, correspondence and supporting papers are still available. At the time of the tragedy, she was owned by Messers David C.Turnbull and Co. of Timaru, New Zealand timber merchants and shipping agents, who had purchased her on 13th December 1901. A detailed account of the last journey of La Bella can be read in “Leonard Robertson, the Whangaroa & La Bella” written by Jack Churchouse, published in 1982 by Millwood Press Ltd, Wellington, NZ. As well as this letter, Flagstaff Hill’s La Bella Collection includes a photograph of the wrecked La Bella, a brass rail holder and a postcard of William Ferrier with four of the survivors. Some 15 – 17 ships are believed to have sunk in Lady Bay, but only two have been discovered on the seafloor; the “La Bella” and the “Edinburgh Castle”. Both wrecks are popular diving sites and are preserved as significant historical marine and marine archaeological sites. This original congratulatory letter sent to William Ferrier by the Prime Minister and Government of Australia demonstrates the importance attached to his efforts for Victoria and to Australia. The letter is part of the La Bella Collection and is significant at both a local and state level. Its connection to the La Bella shipwreck and the rescue of five survivors highlights the dangers of Victoria’s Shipwreck Coast. The letter to William Ferrier from the Australian Government acknowledges the bravery of ordinary Australians who risked their lives to save victims of shipwrecks along the coast. The letter is significant to the history of Warrnambool as it honours William Ferrier, a local fisherman whose descendants continue to live in the area. It highlights the way of life of people who lived in coastal towns in 19th century Victoria and the effects of shipwrecks upon them. The letter connects to the postcard of William Ferrier with four of the five rescued crew, the photograph of the wreck of the La Bella and the artefact from the wreck, the rail holder. This letter is significant because of its association with the sailing ship “La Bella”. The “La Bella” is of local and state and national significance. It is one of the only two shipwrecks discovered in Lady Bay, Warrnambool, out of the 15-17 shipwrecks in the bay. Letter to William Ferrier of South Warrnambool from the Prime Minister and Members of Parliament commending him on his bravery. The printed letterhead includes a coat of arms in the top centre and the official address. The letter is very neatly hand written in black pen and includes 4 signatures of Members of Parliament. The rectangular paper is cream coloured with some yellow/brown discolouring. It has the letterhead on the right hand side of it and the written letter begins below the letterhead. The paper has been folded so that the right side becomes the cover page of the letter. The writing is continued onto the inside right hand page of the folded paper and the writing ends here. There is more recent writing on the bottom right hand corner of the back page. The paper has been officially folded in half a total 3 times and there is heavy discolouration on the sections that form the front and back of the folded letter. There is a 4th fold line that is less pronounced that the other folds and would make the paper the size to fit into a pocket. At several fold creases the paper has worn through. The edges of the paper have minor tears. The printed coat of arms is that of the House of Representatives. Underneath is printed “The Parliament of the Commonwealth, / Parliament House / Melbourne”. The hand written, letter is dated “14th November, 1905” and addressed to “Mr. William Ferrier / South Warrnambool” The letter begins “The Speaker, the Prime Minister and Members of the Ministry and its supporters, the Leader and Members of the Opposition, the Leader and Members of the Labour Party, being all the Members of the House of Representatives of the Federal Parliament of Australia” … It continues “desire to express to you their appreciation of your bravery in skulling out to the wreck of the “La Bella” at Warrnambool on Saturday, 11th November, 1905, and recovering therefrom two of the crew who were in imminent danger of their lives. They all feel that your conduct was worthy of the best deeds done by British sailors in the past and they are proud to know that Australia can produce such as you.” The letter is “Signed on behalf of the Members – Speaker (Frederick Holder ), Deputy Leader of the Opposition (Joseph Cook ), Prime Minister (Alfred Deakin), Leader of the Labour Party ( J.C. Watson)” On the back of the letter is blue ink handwriting “OWNER / G. FERRIER / TO. BE. PHOTOGRAPHED / 27-4-76”la bella, william ferrier, bill ferrier, lady bay, 1905, 10th november 1905, 11th november 1905, parliament of the commonwealth, prime minister, australian government, new zealand, flagstaff hill, warrnambool, shipwrecked coast, flagstaff hill maritime museum, maritime museum, shipwreck coast, flagstaff hill maritime village -
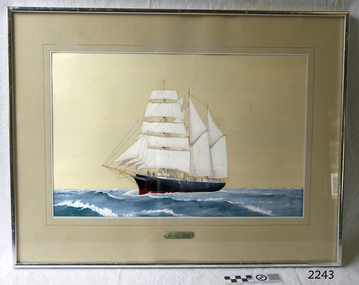 Flagstaff Hill Maritime Museum and Village
Painting - Maritime painting, The La Bella, 1980s
This painting of the “La Bella” is associated with Flagstaff Hill’s collection of artefacts from the wreck of the “La Bella”. It was painted around the 1980s by maritime artist Philip J. Gray. Some 15 – 17 ships are believed to have sunk in Lady Bay, but only two have been discovered on the seafloor; the “La Bella” and the “Edinburgh Castle”. Both wrecks are popular diving sites and are preserved as significant historical marine and marine archaeological sites. The Kosnar Picture Framing and Mirrors Shop identified the "GRAY 3135, Y04/111" as their job number for the framing and said that the label "ANOTHER KOSNAR FEATURE" was last used before about 1990. About artist Philip J. Gray “Philip is one of Australia’s leading maritime artists and his meticulous research and social commentary paintings of ships, such as, the Loch Ard and Schomberg form an important part of Warrnambool’s Flagstaff Hill Maritime Museum.” [Dr Marion Manifold, Artist and Art Historian, 2014] Philip James Gray was born in London but has lived most of his life in Australia. He graduated from a London school of art as an illustrator, specialising in technical and scientific illustration as well as other commercial and applied art. He was also a student for a time of Fyffe Christie - British figurative artist, mural painter and humanitarian – who had a great influence on his career. Philip has always worked as a professional artist and illustrator. Many publications on maritime history have featured his work. His paintings have been released and sold all over the world as limited edition prints. The State Library of Victoria’s ‘Latrobe Collection’ holds two of his paintings. His street painting of ‘The Ashes Contest’ decorates the brick wall of Old Bakery Laneway in Sunbury and a Sunbury café owner commissioned him to paint the ‘Sunbury Pop Festival’ as a remembrance of local history. Philip has been an active member of the Sunbury Art Society in Victoria for several years, serving on the committee for some of that time and being involved in exhibitions. He enjoys helping new artists and sharing his skills and experience. About the “La Bella” The wreck of the La Bella lies at the bottom of the Warrnambool Harbour in Lady Bay. Some 15 ships are believed to have been wrecked there but only two have been discovered on the sea floor; the La Bella and the Edinburgh Castle. Both wrecks are popular diving sites and are preserved as significant historical marine and marine archaeological sites. The story of the final voyage of the La Bella is summarised as follows … The ship from which the sailors were rescued was the three-masted, iron and steel barquentine the La Bella, built in Norway in 1893. She was one of two iron and steel ships by Johan Smith, the company being one of the leading shipping families in Tvedestrand, Norway. She was significant to Norwegian shipping, being one of only 27 iron and steel ships ever built in Norway. La Bella was registered in New Zealand and engaged from 1902 in inter-colonial trading of timber in the pacific, between New Zealand and Australia and was often in Port Phillip Bay, Victoria. On 5th October 1905 the twelve year old La Bella left Lyttleton, New Zealand carrying a cargo of timber bound for Warrnambool, Australia . She was manned by a crew of twelve: the Master, (Captain Mylius, previously 1st Mate of La Bella, appointed Captain to La Bella on 6th February 1903) 2 Mates, Cook, six able seamen, one ordinary seaman and a boy. Bad weather en-route caused her to shelter at Burnie on Tasmania's North West coast. On November 10th, the 37th day of her journey, La Bella approached Warrnambool. Captain Mylius steered her towards Lady Bay Channel in heavy south-west seas and evening mist. He ordered the helmsman to steer for the light. As the ship came round, a tremendous sea struck her on the port quarter, causing her to breach broadside in a north-westerly direction into breakers. The helm was brought round twice more, but each time heavy seas broke over her, the third time throwing the La Bella on to a submerged reef in Lady Bay now known as La Bella Reef (about 100 yards from the Warrnambool breakwater). The sea was so rough that it even wrenched a one-and-a-half ton anchor from its fastenings and into the sea. As Captain Mylius headed to the steel wheelhouse, intending to send up a rocket flare, a huge sea slammed the steel door into him (resulting in massive bruising front and back) Despite his injuries he still managed to set off a blue light, which he held up in his hands. La Bella’s lifeboats were filled with sea water and broke up on their chocks. The blue light was the first indication to people on shore that there was a ship in distress. The Harbour Master, Captain Roe (who lived in the Harbour Master’s House opposite Flagstaff Hill), organised a group of volunteers to crew the lifeboat because the trained crew was unavailable; the crewmen were working on a steamer in Port Fairy at the time. He then poured oil onto the water to try and smooth the sea. At around 11pm three of the crew took shelter in the steel forecastle but the sea crashed into it and broke it up. While the rest of the crew and onlookers watched helplessly in the moonlight the bodies were washed away into the sea, never to be seen again. Some of the crew lashed themselves to the weather rail to keep from being washed away. Watson, the ordinary seaman, became tangled in the rigging lines and was too weak to move, so the 2nd Mate, Robertson, put a line onto him so that he wouldn’t wash off. Around 11pm three of the crew were unconscious from exhaustion. The situation on La Bella was becoming dangerous. The 2nd Mate moved to the ‘house’ and soon afterwards the ship slipped in the heavy sea. The lashings of the 1st Mate and the ‘boy’ Denham had kept them safe until about 2am when they were washed overboard; no one was able to help. One by one, the exhausted crew were being washed overboard, too weak to hold on any longer. During the night the La Bella had broken into two and the deckhouse ran out towards the sea. Two more men drowned when trying to reach the lifeboat. By sunrise the only survivors of the twelve were the Master, 2nd Mate and three seamen. Early in the morning Captain Roe used the rocket apparatus on shore to try and shoot a line to the ship for a safer rescue but each attempt fell short of the target. Several attempts were made by the lifeboat to rescue the stricken sailors, but the rough conditions made this difficult for the boat to get close enough to the ship and the lifeboat had to return to shore. During a final attempt to reach the ship Captain Mylius ordered his men to jump into the sea. Leonard Robertson, 2nd mate, jumped and swam towards the lifeboat, taking hold of the boat hook offered to him. Oscar Rosenholme managed to reach the boat floating on a piece of timber from the ship’s load and a third survivor, Noake, also made the boat. Along with the lifeboat rescue crew, 25 year old William Ferrier rowed his small dingy through the heavy seas and managed to rescue the Captain, whom he landed on the breakwater. Ferrier then returned to the ship to attempt a final rescue, losing his oars and rowlocks into the high sea. Using just a spare paddle he skulled towards the La Bella, reaching her stern in time to cut loose the lone surviving sailor, Payne, from the lashing that held him to the ship; the terrified sailor dropped from the ship and into the dingy. Shortly after the last man was rescued, the La Bella was lifted by a huge wave and crashed back down on the reef; she broke up and sank. The ordeal had lasted ten hours. The survivors were taken to the nearby Bay View Hotel and gratefully received warm food and clothing, medical attention and a place to sleep. In the following days an unidentified body of a young person was washed ashore; it was either Watson or Denham. The body was buried in the Warrnambool cemetery with an appropriate gravestone and inscription. William Ferrier became a national hero as news of the daring rescue spread. In recognition of his bravery in the two daring rescues he was awarded the Silver Medal for Bravery by the Royal Humane Society and was honoured in the letter from the Prime Minister and the Parliament of the Commonwealth, telegrams and a cheque for £20 from the Governor General, over £150 subscribed by the public, including Warrnambool and district and readers of The Argus, and a gold medal from the Glenelg Dinghy Club of South Australia. Ferrier’s rescue efforts are one of the most heroic in Victoria’s shipwreck history. (William Ferrier’s son, Frank, received a similar award almost fifty years later, when he helped rescue four members of the crew on the yacht Merlan, after it ran on to a reef near the Point Lonsdale Lighthouse. ) The wreck of La Bella now lies on her port side in 13 metres of sheltered water inside the reef she struck. The bow section is relatively intact and part of the stern has drifted north-easterly towards the mouth of the Hopkins River. The reef the La Bella struck now bears its name. Those five rescued from the La Bella were Captain George Mylius, Leonard Robertson (2nd Mate, 21 years old), R. Payne, Oscar Rosenholme and Jack Noake. Those seven who lost their lives were Mr Coulson (1st mate), Charles Jackman (cook) Gustave Johnson, Pierre Johann and Robert Gent (all able seamen), Harry Watson (ordinary seaman) and Jack Denham (ship’s boy). Captain Mylius was found guilty of careless navigation; he had sailed into the bay without the services of a pilot. His Master Certificate was suspended for twelve months. Later he was also charged with manslaughter of one of the crew who had died when the La Bella was wrecked, but found not guilty. The event’s adverse publicity and damage to his career took a toll on his health and he died of a heart attack six months after the wreck; he was only thirty-seven. His body was buried in the Melbourne General Cemetery. The La Bella was “the best documented of all sailing ships owned in New Zealand”. Her record books, ship logs, correspondence and supporting papers are still available. At the time of the tragedy she was owned by Messers David C.Turnbull and Co. of Timaru, New Zealand timber merchants and shipping agents, who had purchased her on 13th December 1901. A detailed account of the last journey of La Bella can be read in “Leonard Robertson, the Whangaroa & La Bella” written by Jack Churchouse, published in 1982 by Millwood Press Ltd, Wellington, NZ.This painting of the La Bella by Philip J. Gray is part of the La Bella Collection and is significant at both a local and state level. Its connection to the La Bella shipwreck and the rescue of five survivors highlights the dangers of Victoria’s Shipwreck Coast. The painting connects with other objects and artefacts associated with the wreck of the La Bella. This painting is significant because of its association with the sailing ship “La Bella” . the “La Bella” is of local and state and national significance. It is one of the only two shipwrecks discovered in Lady Bay, Warrnambool, out of the 15-17 shipwrecks in the bay. Large framed painting of the three masted barquentine "La Bella" fully rigged. Painted by Phillip J Gray. A fine printed line squares off the painting. Beneath painting and line is a gold plate with black copper plate designating "La Bella" is encased in glass, surrounded by a silver-metal frame. Yellow and brown paper label is adhered to back of painting. Picture framed by Kosnar in Melbourne."The La Bella" on gold plaque Logo of "K" inside a brown square. "GRAY 3135, Y04/111", "ANOTHER KOSNAR FEATURE" flagstaff hill, warrnambool, shipwrecked-coast, flagstaff-hill, flagstaff-hill-maritime-museum, maritime-museum, shipwreck-coast, flagstaff-hill-maritime-village, painting, la bella, artist phillip j gray, maritime painting, lady bay warrnambool -
 Federation University Historical Collection
Book - Book - Scrapbook, Ballarat School of MInes: Scrapbook of Newspaper Cuttings, Book 4, March 1978 - February 1979
Collection of newspaper articles related to Ballarat School Of Mines.They cover activities and advertisements for staff. The papers concerned are The Courier, Ballarat, The Australian, The Age over the period of 2 March 1978 to 7 February 1979.Book with deep red and white cover back and front, spiral bound. staffing advertisements, norton villiers motor presented to smb, british student counsellor visits smb, far-reaching consequences says barker, engineers and surveyors plan new courses, first technical college in australia, historic timetable, physical education students, canoe trip down glenelg river, complex opened -regional education offices, rex hollioake new president of smb council, director of mount isa mines smb student, john middlin, school began with gold -
Glenelg Shire Council Cultural Collection
Photograph - Photograph - Lou Moulton's Farewell from Portland Harbour Trust, n.d
Back: Lou Moulton's farewell (lower left, pen)port of portland -
Glenelg Shire Council Cultural Collection
Print - Reduction Linocut, Bob Stone, Working Tug II, c. 2015
Reduction linocut, blue, grey, white, red, green, black; white mount, blondewood frame, reflective glasss. Hanging wire across width of frame, on backFront: '1/7 linocut Working Tug II Bob Stone 2015 Back: Holland's Picture Framing, black stamp, lower left corner -
Glenelg Shire Council Cultural Collection
Booklet, Community Meeting 17 July 1976 Portland Looks To The Future, c. 1976
A record of a community meeting outcomes, including list of attendees and supporters. -
Glenelg Shire Council Cultural Collection
Slide - Slide - Construction of Portland Cashmore Airport, 1980s
Port of Portland Authority -
Glenelg Shire Council Cultural Collection
Tool - Blacksmith's Tongs, n.d
Port of Portland Collection -
Glenelg Shire Council Cultural Collection
Administrative record - Police Report - Hamilton Police, 1914, 07/09/1914
Barry was a police officer stationed at Portland 1969 - 71. Stables were to be demolished. he was instructed to clean them out, and take the contents to the tip. He retained these documents and donated them to the Cultural Collection.police archives, police report, crime, hamilton -
Glenelg Shire Council Cultural Collection
Administrative record - Stage 1 of the development of the Port of Portland Report, The Port of Portland, 1957-1958
port of portland