Showing 735 items matching "empty"
-
 Flagstaff Hill Maritime Museum and Village
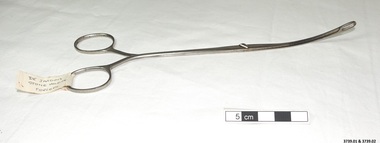
Equipment - Forceps, 20th century
The gallbladder is a small sac that holds bile, a digestive juice produced by the liver that is used in the breakdown of dietary fats. The gallbladder extracts water from its store of bile until the liquid becomes highly concentrated. The presence of fatty foods triggers the gallbladder to squeeze its bile concentrate into the small intestine. Gallstones (biliary calculi) are small stones made from cholesterol, bile pigment and calcium salts, usually in a mixture that forms in the gallbladder. They are a common disorder of the digestive system, and affect around 15% of people aged 50 years and over. Some things that may cause gallstones to form include the crystallisation of excess cholesterol in bile and the failure of the gallbladder to empty completely. In most cases, gallstones don’t cause any problems. However, you might need prompt treatment if stones block ducts and cause complications such as infections or inflammation of the pancreas (pancreatitis). Surgeons may remove your gallbladder (called a cholecystectomy) if gallstones (or other types of gallbladder disease) are causing problems. Techniques include laparoscopic (‘keyhole’) cholecystectomy or open surgery. The gallbladder is not a vital organ, so your body can cope quite well without it. https://www.betterhealth.vic.gov.au/health/conditionsandtreatments/gallbladder-gallstones-and-surgery This set of forceps was donated to Flagstaff Hill Maritime Village by the family of Doctor William Roy Angus, Surgeon and Oculist. It is part of the “W.R. Angus Collection” that includes historical medical equipment, surgical instruments and material once belonging to Dr Edward Ryan and Dr Thomas Francis Ryan, (both of Nhill, Victoria) as well as Dr Angus’ own belongings. The Collection’s history spans the medical practices of the two Doctors Ryan, from 1885-1926 plus that of Dr Angus, up until 1969. ABOUT THE “W.R.ANGUS COLLECTION” Doctor William Roy Angus M.B., B.S., Adel., 1923, F.R.C.S. Edin.,1928 (also known as Dr Roy Angus) was born in Murrumbeena, Victoria in 1901 and lived until 1970. He qualified as a doctor in 1923 at University of Adelaide, was Resident Medical Officer at the Royal Adelaide Hospital in 1924 and for a period was house surgeon to Sir (then Mr.) Henry Simpson Newland. Dr Angus was briefly an Assistant to Dr Riddell of Kapunda, then commenced private practice at Curramulka, Yorke Peninsula, SA, where he was physician, surgeon and chemist. In 1926, he was appointed as new Medical Assistant to Dr Thomas Francis Ryan (T.F. Ryan, or Tom), in Nhill, Victoria, where his experiences included radiology and pharmacy. In 1927 he was Acting House Surgeon in Dr Tom Ryan’s absence. Dr Angus had become engaged to Gladys Forsyth and they decided he further his studies overseas in the UK in 1927. He studied at London University College Hospital and at Edinburgh Royal Infirmary and in 1928, was awarded FRCS (Fellow from the Royal College of Surgeons), Edinburgh. He worked his passage back to Australia as a Ship’s Surgeon on the on the Australian Commonwealth Line’s T.S.S. Largs Bay. Dr Angus married Gladys in 1929, in Ballarat. (They went on to have one son (Graham 1932, born in SA) and two daughters (Helen (died 12/07/1996) and Berenice (Berry), both born at Mira, Nhill According to Berry, her mother Gladys made a lot of their clothes. She was very talented and did some lovely embroidery including lingerie for her trousseau and beautifully handmade baby clothes. Dr Angus was a ‘flying doctor’ for the A.I.M. (Australian Inland Ministry) Aerial Medical Service in 1928. Its first station was in the remote town of Oodnadatta, where Dr Angus was stationed. He was locum tenens there on North-South Railway at 21 Mile Camp. He took up this ‘flying doctor’ position in response to a call from Dr John Flynn; the organisation was later known as the Flying Doctor Service, then the Royal Flying Doctor Service. A lot of his work during this time involved dental surgery also. Between 1928-1932 he was surgeon at the Curramulka Hospital, Yorke Peninsula, South Australia. In 1933 Dr Angus returned to Nhill and purchased a share of the Nelson Street practice and Mira hospital (a 2 bed ward at the Nelson Street Practice) from Dr Les Middleton one of the Middleton Brothers, the current owners of what previously once Dr Tom Ryan’s practice. Dr Tom and his brother had worked as surgeons included eye surgery. Dr Tom Ryan performed many of his operations in the Mira private hospital on his premises. He had been House Surgeon at the Nhill Hospital 1902-1926. Dr Tom Ryan had one of the only two pieces of radiology equipment in Victoria during his practicing years – The Royal Melbourne Hospital had the other one. Over the years Dr Tom Ryan had gradually set up what was effectively a training school for country general-practitioner-surgeons. Each patient was carefully examined, including using the X-ray machine, and any surgery was discussed and planned with Dr Ryan’s assistants several days in advance. Dr Angus gained experience in using the X-ray machine there during his time as assistant to Dr Ryan. When Dr Angus bought into the Nelson Street premises in Nhill he was also appointed as the Nhill Hospital’s Honorary House Surgeon 1933-1938. His practitioner’s plate from his Nhill surgery is now mounted on the doorway to the Port Medical Office at Flagstaff Hill Maritime Village, Warrnambool. When Dr Angus took up practice in the Dr Edward and Dr Tom Ryan’s old premises he obtained their extensive collection of historical medical equipment and materials spanning 1884-1926. A large part of this collection is now on display at the Port Medical Office at Flagstaff Hill Maritime Village in Warrnambool. In 1939 Dr Angus and his family moved to Warrnambool where he purchased “Birchwood,” the 1852 home and medical practice of Dr John Hunter Henderson, at 214 Koroit Street. (This property was sold in1965 to the State Government and is now the site of the Warrnambool Police Station and an ALDI sore is on the land that was once their tennis court). The Angus family was able to afford gardeners, cooks and maids; their home was a popular place for visiting dignitaries to stay whilst visiting Warrnambool. Dr Angus had his own silk worm farm at home in a Mulberry tree. His young daughter used his centrifuge for spinning the silk. Dr Angus was appointed on a part-time basis as Port Medical Officer (Health Officer) in Warrnambool and held this position until the 1940’s when the government no longer required the service of a Port Medical Officer in Warrnambool; he was thus Warrnambool’s last serving Port Medical Officer. (Masters of immigrant ships arriving in port reported incidents of diseases, illness and death and the Port Medical Officer made a decision on whether the ship required Quarantine and for how long, in this way preventing contagious illness from spreading from new immigrants to the residents already in the colony.) Dr Angus was a member of the Australian Medical Association, for 35 years and surgeon at the Warrnambool Base Hospital 1939-1942, He served with the Australian Department of Defence as a Surgeon Captain during WWII 1942-45, in Ballarat, Victoria, and in Bonegilla, N.S.W., completing his service just before the end of the war due to suffering from a heart attack. During his convalescence he carved an intricate and ‘most artistic’ chess set from the material that dentures were made from. He then studied ophthalmology at the Royal Melbourne Eye and Ear Hospital and created cosmetically superior artificial eyes by pioneering using the intrascleral cartilage. Angus received accolades from the Ophthalmological Society of Australasia for this work. He returned to Warrnambool to commence practice as an ophthalmologist, pioneering in artificial eye improvements. He was Honorary Consultant Ophthalmologist to Warrnambool Base Hospital for 31 years. He made monthly visits to Portland as a visiting surgeon, to perform eye surgery. He represented the Victorian South-West subdivision of the Australian Medical Association as its secretary between 1949 and 1956 and as chairman from 1956 to 1958. In 1968 Dr Angus was elected member of Spain’s Barraquer Institute of Barcelona after his research work in Intrasclearal cartilage grafting, becoming one of the few Australian ophthalmologists to receive this honour, and in the following year presented his final paper on Living Intrasclearal Cartilage Implants at the Inaugural Meeting of the Australian College of Ophthalmologists in Melbourne In his personal life Dr Angus was a Presbyterian and treated Sunday as a Sabbath, a day of rest. He would visit 3 or 4 country patients on a Sunday, taking his children along ‘for the ride’ and to visit with him. Sunday evenings he would play the pianola and sing Scottish songs to his family. One of Dr Angus’ patients was Margaret MacKenzie, author of a book on local shipwrecks that she’d seen as an eye witness from the late 1880’s in Peterborough, Victoria. In the early 1950’s Dr Angus, painted a picture of a shipwreck for the cover jacket of Margaret’s book, Shipwrecks and More Shipwrecks. She was blind in later life and her daughter wrote the actual book for her. Dr Angus and his wife Gladys were very involved in Warrnambool’s society with a strong interest in civic affairs. He had an interest in people and the community. They were both involved in the creation of Flagstaff Hill, including the layout of the gardens. After his death (28th March 1970) his family requested his practitioner’s plate, medical instruments and some personal belongings be displayed in the Port Medical Office surgery at Flagstaff Hill Maritime Village, and be called the “W. R. Angus Collection”. The W.R. Angus Collection is significant for still being located at the site it is connected with, Doctor Angus being the last Port Medical Officer in Warrnambool. The collection of medical instruments and other equipment is culturally significant, being an historical example of medicine, administration, household equipment and clothing from late 19th to mid-20th century. Dr Angus assisted Dr Tom Ryan, a pioneer in the use of X-rays and in ocular surgery. De Jardin's Stone Holding Forceps from the W.R. Angus Collection. flagstaff hill, warrnambool, shipwrecked coast, flagstaff hill maritime museum, maritime museum, shipwreck coast, flagstaff hill maritime village, great ocean road, dr w r angus, dr ryan, surgical instrument, t.s.s. largs bay, warrnambool base hospital, nhill base hospital, mira hospital, flying doctor, department of defence australia, australian army, army uniform, medical treatment, medical history, medical education, forceps, de jardins stone holding forceps, gallbladder, kidney stones -
 Flagstaff Hill Maritime Museum and Village
Domestic object - Bowl, Late 19th or early 20th Century
The Process of Making Pottery Decorating, Firing, Glazing, Making, Technical There is a rhythm and flow to clay. It can’t be done all at once! Even the making process! It can take weeks to get everything done, especially if you can only work on your pottery once a week! Even though we have three hour classes, it’s often just not enough time! Here is an overview of some of the processes so you have a bit more grasp on some of the technical stuff! Step One – Design There are SO many ideas out there for making stuff in clay! From delicate porcelain jewellery, through to heavy sculptural work and everything in between. Deciding your direction is sometimes not that easy – when you first start, try everything, you will naturally gravitate to the style that you enjoy! The options and variations are endless and can get a wee bit overwhelming too! Check in with me before you start to ensure your ideas will work, what order you might do things, how you could achieve the look you are seeking and any other technical data required! Step Two – Making Clay is thixotropic. This means that as you work with it, the clay first gets sloppier and wetter, before is begins to dry in the atmosphere. For most things, you simply can’t do all parts of the project at once. An example of work order might look like: Get last weeks work out from the shelves Prepare clay for today’s work – roll your clay, prepare balls for throwing, make the first stage of a pinch pot) Clean up last week’s work and put it on the shelf for bisque firing Check that you have any glazing to do – and do enough of it that you will have time to finish your main project Do the next step of your next project – there might be a further step that can’t be complete immediately, in that case, wrap your work well and put onto the shelves. Letting your work rest for a while can really help keep your work clean and professional looking. Many things require bagging under plastic to keep it ready for work the next week – put your name on the outside of the bag so you can find your work easily. We have stickers and markers. Consider how you want to decorate your work – coloured slip can be applied at a fairly wet stage (remembering that it will make your work even wetter!). Trying to apply slip to dry clay won’t work! If you want to do sgraffito – you will need to keep the work leather hard (a state of dryness where you can still work the clay with a little effort and a little water and care). Step Three – Drying Most of the time your work can go into the rack uncovered to let it dry out for the following week. If you want to continue forming or shaping you will need to double bag your work – put your work on a suitable sized bat and put the bat in a bag so the base of the bag is under the bat, then put another bag over the top of the work and tuck the top of the bag under the bat. If you want to trim (or turn) your thrown work the following week, it should also be double bagged. If your work is large, delicate, or of uneven thicknesses, you should lightly cover your work for drying. When considering the drying process, bare in mind the weather, humidity and wind! The hotter and dryer, the faster things dry and work can dry unevenly in the shelves – this can lead to cracking – another time to lightly cover your work for drying. Step Four – Trimming and Cleaning Up Your work is dry! It is called greenware now and it is at it’s most fragile! Handle everything with two hands. I often refer to soft hands – keep everything gentle and with your fingers spread as much as possible. Try to not pick up things like plates too much, and always with both hands! Before your work can be bisque fired it should be “cleaned up”. You work won’t go into the kiln if it has sharp edges – when glazed, sharp edges turn into razor blades! Use a piece of fly wire to rub the work all over – this will scratch a little so be light handed. Use a knife or metal kidney to scrape any areas that require a bit more dynamic treatment than the fly wire offers! Finally, a very light wipe over with a slightly damp sponge can help soften and soothe all of your edges and dags! Trimming thrown work: If you are planning to trim (or turn) your thrown work (and you should be), make sure you bag it well – your work should be leather hard to almost dry for easiest trimming. Use this step to finish the work completely – use a metal kidney to polish the surface, or a slightly damp sponge to give a freshly thrown look. Wipe the sponge around the rim after trimming, and check the inside of the pot for dags! Trimming slip cast work: Usually I will trim the rims of your work on the wheel the following day to make that stage easier, however you will still need to check your work for lumps and bumps. Last but not least – check that your name is still clearly on the bottom of your work. Step Five – Bisque Firing When the work is completely dry it can go into the bisque kiln. The bisque kiln is fired to 1000°C. This process burns off the water in the clay as well as some of the chemically bound water. The structure of the clay is not altered that much at this temperature. Inside the bisque kiln, the work is stacked a little, small bowl inside a larger bowl and onto a heavy plate. Smaller items like decorations or drink coasters might get stacked several high. Consideration is paid to the weight of the stack and shape of the work. A bisque kiln can fire about one and a half times the amount of work that the glaze kiln can fire. The firing takes about 10 hours to complete the cycle and about two days to cool down. Once it has been emptied the work is placed in the glaze room ready for you to decorate! Step Six – Glazing Decorating your work with colour can be a lot of fun – and time consuming! There are three main options for surface treatment at this stage: Oxide Washes Underglazes Glazes Washes and underglazes do not “glaze” the work – It will still need a layer of glaze to fully seal the clay (washes don’t need glaze on surfaces not designed for food or liquid as they can gloss up a little on their own). Underglazes are stable colourants that turn out pretty much how they look in the jar. They can be mixed with each other to form other colours and can be used like water colours to paint onto your work. Mostly they should have a clear glaze on top to seal them. Oxides are a different species – the pink oxide (cobalt) wash turns out bright blue for instance. They don’t always need a glaze on top, and some glazes can change the colour of the wash! The glazes need no other “glaze” on top! Be careful of unknown glaze interactions – you can put any combination of glaze in a bowl or on a plate, but only a single glaze on the outside of any vertical surface! Glazes are a chemical reaction under heat. We don’t know the exact chemicals in the Mayco glazes we use. I can guess by the way they interact with each other, however, on the whole, you need to test every idea you have, and not run the test on a vertical surface! Simply put, glaze is a layer of glass like substance that bonds with the clay underneath. Clay is made of silica, alumina and water. Glaze is made of mostly silica. Silica has a melting point of 1700°C and we fire to 1240°C. The silica requires a “flux” to help it melt at the lower temperature. Fluxes can be all sorts of chemicals – a common one is calcium – calcium has a melting point of 2500°C, however, together they both melt at a much lower temperature! Colourants are metal oxides like cobalt (blue), chrome (green through black), copper (green, blue, even red!), manganese (black, purple and pink) iron (red brown), etc. Different chemicals in the glaze can have dramatic effects. for example, barium carbonate (which we don’t use) turns manganese bright pink! Other elements can turn manganese dioxide brown, blue, purple and reddish brown. Manganese dioxide is a flux in and of itself as well. So, glazes that get their black and purple colours, often interact with other glazes and RUN! Our mirror black is a good example – it mixes really well with many glazes because it fluxes them – causes them to melt faster. It will also bring out many beautiful colours in the glazes because it’s black colouring most definitely comes from manganese dioxide! Glaze chemistry is a whole subject on it’s own! We use commercial Mayco glazes on purpose – for their huge range of colour possibilities, stability, cool interactions, artistic freedom with the ability to easily brush the glazes on and ease of use. We currently have almost 50 glazes on hand! A major project is to test the interactions of all glazes with each other. That is 2,500 test tiles!!!! I’m going to make the wall behind the wheels the feature wall of pretty colours! Step Seven – Glaze (Gloss or sometimes called “Glost”) Firing Most of the time this is the final stage of making your creation (but not always!) The glaze kiln goes to 1240°C. This is called cone 6, or midrange. It is the low end of stoneware temperatures. Stoneware clays and glazes are typically fired at cone 8 – 10, that is 1260 – 1290°C. The energy requirement to go from 1240°C to 1280°C is almost a 30% more! Our clay is formulated to vitrify (mature, turn “glass-like”) at 1240°, as are our glazes. A glaze kiln take around 12 hours to reach temperature and two to three days to cool down. Sometimes a third firing process is required – this is for decoration that is added to work after the glaze firing. For example – adding precious metals and lustres. this firing temperature is usually around 600 – 800°C depending upon the techniques being used. There are many students interested in gold and silver trims – we will be doing this third type of firing soon! After firing your work will be in the student finished work shelves. Remember to pay for it before you head out the door! There is a small extra charge for using porcelain clay (it’s more than twice the price of regular clay), and for any third firing process! Once your work has been fired it can not turn back into clay for millennia – so don’t fire it if you don’t like it! Put it in the bucket for recycling. https://firebirdstudios.com.au/the-process-of-making-pottery/ The bowl is an example of kitchenware used in the 19th century and still in use today.Bowl white ceramic. Crack on side. Badly stained.Backstamp very faint and unable to be read.flagstaff hill, warrnambool, shipwrecked-coast, flagstaff-hill, flagstaff-hill-maritime-museum, maritime-museum, shipwreck-coast, flagstaff-hill-maritime-village, mixing bowl, food preparation, kitchen equipment, ceramic -
 Flagstaff Hill Maritime Museum and Village
Domestic object - Bowl
The Process of Making Pottery Decorating, Firing, Glazing, Making, Technical There is a rhythm and flow to clay. It can’t be done all at once! Even the making process! It can take weeks to get everything done, especially if you can only work on your pottery once a week! Even though we have three hour classes, it’s often just not enough time! Here is an overview of some of the processes so you have a bit more grasp on some of the technical stuff! Step One – Design There are SO many ideas out there for making stuff in clay! From delicate porcelain jewellery, through to heavy sculptural work and everything in between. Deciding your direction is sometimes not that easy – when you first start, try everything, you will naturally gravitate to the style that you enjoy! The options and variations are endless and can get a wee bit overwhelming too! Check in with me before you start to ensure your ideas will work, what order you might do things, how you could achieve the look you are seeking and any other technical data required! Step Two – Making Clay is thixotropic. This means that as you work with it, the clay first gets sloppier and wetter, before is begins to dry in the atmosphere. For most things, you simply can’t do all parts of the project at once. An example of work order might look like: Get last weeks work out from the shelves Prepare clay for today’s work – roll your clay, prepare balls for throwing, make the first stage of a pinch pot) Clean up last week’s work and put it on the shelf for bisque firing Check that you have any glazing to do – and do enough of it that you will have time to finish your main project Do the next step of your next project – there might be a further step that can’t be complete immediately, in that case, wrap your work well and put onto the shelves. Letting your work rest for a while can really help keep your work clean and professional looking. Many things require bagging under plastic to keep it ready for work the next week – put your name on the outside of the bag so you can find your work easily. We have stickers and markers. Consider how you want to decorate your work – coloured slip can be applied at a fairly wet stage (remembering that it will make your work even wetter!). Trying to apply slip to dry clay won’t work! If you want to do sgraffito – you will need to keep the work leather hard (a state of dryness where you can still work the clay with a little effort and a little water and care). Step Three – Drying Most of the time your work can go into the rack uncovered to let it dry out for the following week. If you want to continue forming or shaping you will need to double bag your work – put your work on a suitable sized bat and put the bat in a bag so the base of the bag is under the bat, then put another bag over the top of the work and tuck the top of the bag under the bat. If you want to trim (or turn) your thrown work the following week, it should also be double bagged. If your work is large, delicate, or of uneven thicknesses, you should lightly cover your work for drying. When considering the drying process, bare in mind the weather, humidity and wind! The hotter and dryer, the faster things dry and work can dry unevenly in the shelves – this can lead to cracking – another time to lightly cover your work for drying. Step Four – Trimming and Cleaning Up Your work is dry! It is called greenware now and it is at it’s most fragile! Handle everything with two hands. I often refer to soft hands – keep everything gentle and with your fingers spread as much as possible. Try to not pick up things like plates too much, and always with both hands! Before your work can be bisque fired it should be “cleaned up”. You work won’t go into the kiln if it has sharp edges – when glazed, sharp edges turn into razor blades! Use a piece of fly wire to rub the work all over – this will scratch a little so be light handed. Use a knife or metal kidney to scrape any areas that require a bit more dynamic treatment than the fly wire offers! Finally, a very light wipe over with a slightly damp sponge can help soften and soothe all of your edges and dags! Trimming thrown work: If you are planning to trim (or turn) your thrown work (and you should be), make sure you bag it well – your work should be leather hard to almost dry for easiest trimming. Use this step to finish the work completely – use a metal kidney to polish the surface, or a slightly damp sponge to give a freshly thrown look. Wipe the sponge around the rim after trimming, and check the inside of the pot for dags! Trimming slip cast work: Usually I will trim the rims of your work on the wheel the following day to make that stage easier, however you will still need to check your work for lumps and bumps. Last but not least – check that your name is still clearly on the bottom of your work. Step Five – Bisque Firing When the work is completely dry it can go into the bisque kiln. The bisque kiln is fired to 1000°C. This process burns off the water in the clay as well as some of the chemically bound water. The structure of the clay is not altered that much at this temperature. Inside the bisque kiln, the work is stacked a little, small bowl inside a larger bowl and onto a heavy plate. Smaller items like decorations or drink coasters might get stacked several high. Consideration is paid to the weight of the stack and shape of the work. A bisque kiln can fire about one and a half times the amount of work that the glaze kiln can fire. The firing takes about 10 hours to complete the cycle and about two days to cool down. Once it has been emptied the work is placed in the glaze room ready for you to decorate! Step Six – Glazing Decorating your work with colour can be a lot of fun – and time consuming! There are three main options for surface treatment at this stage: Oxide Washes Underglazes Glazes Washes and underglazes do not “glaze” the work – It will still need a layer of glaze to fully seal the clay (washes don’t need glaze on surfaces not designed for food or liquid as they can gloss up a little on their own). Underglazes are stable colourants that turn out pretty much how they look in the jar. They can be mixed with each other to form other colours and can be used like water colours to paint onto your work. Mostly they should have a clear glaze on top to seal them. Oxides are a different species – the pink oxide (cobalt) wash turns out bright blue for instance. They don’t always need a glaze on top, and some glazes can change the colour of the wash! The glazes need no other “glaze” on top! Be careful of unknown glaze interactions – you can put any combination of glaze in a bowl or on a plate, but only a single glaze on the outside of any vertical surface! Glazes are a chemical reaction under heat. We don’t know the exact chemicals in the Mayco glazes we use. I can guess by the way they interact with each other, however, on the whole, you need to test every idea you have, and not run the test on a vertical surface! Simply put, glaze is a layer of glass like substance that bonds with the clay underneath. Clay is made of silica, alumina and water. Glaze is made of mostly silica. Silica has a melting point of 1700°C and we fire to 1240°C. The silica requires a “flux” to help it melt at the lower temperature. Fluxes can be all sorts of chemicals – a common one is calcium – calcium has a melting point of 2500°C, however, together they both melt at a much lower temperature! Colourants are metal oxides like cobalt (blue), chrome (green through black), copper (green, blue, even red!), manganese (black, purple and pink) iron (red brown), etc. Different chemicals in the glaze can have dramatic effects. for example, barium carbonate (which we don’t use) turns manganese bright pink! Other elements can turn manganese dioxide brown, blue, purple and reddish brown. Manganese dioxide is a flux in and of itself as well. So, glazes that get their black and purple colours, often interact with other glazes and RUN! Our mirror black is a good example – it mixes really well with many glazes because it fluxes them – causes them to melt faster. It will also bring out many beautiful colours in the glazes because it’s black colouring most definitely comes from manganese dioxide! Glaze chemistry is a whole subject on it’s own! We use commercial Mayco glazes on purpose – for their huge range of colour possibilities, stability, cool interactions, artistic freedom with the ability to easily brush the glazes on and ease of use. We currently have almost 50 glazes on hand! A major project is to test the interactions of all glazes with each other. That is 2,500 test tiles!!!! I’m going to make the wall behind the wheels the feature wall of pretty colours! Step Seven – Glaze (Gloss or sometimes called “Glost”) Firing Most of the time this is the final stage of making your creation (but not always!) The glaze kiln goes to 1240°C. This is called cone 6, or midrange. It is the low end of stoneware temperatures. Stoneware clays and glazes are typically fired at cone 8 – 10, that is 1260 – 1290°C. The energy requirement to go from 1240°C to 1280°C is almost a 30% more! Our clay is formulated to vitrify (mature, turn “glass-like”) at 1240°, as are our glazes. A glaze kiln take around 12 hours to reach temperature and two to three days to cool down. Sometimes a third firing process is required – this is for decoration that is added to work after the glaze firing. For example – adding precious metals and lustres. this firing temperature is usually around 600 – 800°C depending upon the techniques being used. There are many students interested in gold and silver trims – we will be doing this third type of firing soon! After firing your work will be in the student finished work shelves. Remember to pay for it before you head out the door! There is a small extra charge for using porcelain clay (it’s more than twice the price of regular clay), and for any third firing process! Once your work has been fired it can not turn back into clay for millennia – so don’t fire it if you don’t like it! Put it in the bucket for recycling. https://firebirdstudios.com.au/the-process-of-making-pottery/ This bowl is an example of kitchenware used in the 19th century and still in use today.Bowl white ceramic plain that has two sets of edging around lip. Inside bowl has plaster designed to look like cooking mixture.flagstaff hill, warrnambool, shipwrecked-coast, flagstaff-hill, flagstaff-hill-maritime-museum, maritime-museum, shipwreck-coast, flagstaff-hill-maritime-village, kitchen equipment, ceramic -
 Flagstaff Hill Maritime Museum and Village
Domestic object - Bowl, J & G Meakin, Late 19th or early 20th Century
The Process of Making Pottery Decorating, Firing, Glazing, Making, Technical There is a rhythm and flow to clay. It can’t be done all at once! Even the making process! It can take weeks to get everything done, especially if you can only work on your pottery once a week! Even though we have three hour classes, it’s often just not enough time! Here is an overview of some of the processes so you have a bit more grasp on some of the technical stuff! Step One – Design There are SO many ideas out there for making stuff in clay! From delicate porcelain jewellery, through to heavy sculptural work and everything in between. Deciding your direction is sometimes not that easy – when you first start, try everything, you will naturally gravitate to the style that you enjoy! The options and variations are endless and can get a wee bit overwhelming too! Check in with me before you start to ensure your ideas will work, what order you might do things, how you could achieve the look you are seeking and any other technical data required! Step Two – Making Clay is thixotropic. This means that as you work with it, the clay first gets sloppier and wetter, before is begins to dry in the atmosphere. For most things, you simply can’t do all parts of the project at once. An example of work order might look like: Get last weeks work out from the shelves Prepare clay for today’s work – roll your clay, prepare balls for throwing, make the first stage of a pinch pot) Clean up last week’s work and put it on the shelf for bisque firing Check that you have any glazing to do – and do enough of it that you will have time to finish your main project Do the next step of your next project – there might be a further step that can’t be complete immediately, in that case, wrap your work well and put onto the shelves. Letting your work rest for a while can really help keep your work clean and professional looking. Many things require bagging under plastic to keep it ready for work the next week – put your name on the outside of the bag so you can find your work easily. We have stickers and markers. Consider how you want to decorate your work – coloured slip can be applied at a fairly wet stage (remembering that it will make your work even wetter!). Trying to apply slip to dry clay won’t work! If you want to do sgraffito – you will need to keep the work leather hard (a state of dryness where you can still work the clay with a little effort and a little water and care). Step Three – Drying Most of the time your work can go into the rack uncovered to let it dry out for the following week. If you want to continue forming or shaping you will need to double bag your work – put your work on a suitable sized bat and put the bat in a bag so the base of the bag is under the bat, then put another bag over the top of the work and tuck the top of the bag under the bat. If you want to trim (or turn) your thrown work the following week, it should also be double bagged. If your work is large, delicate, or of uneven thicknesses, you should lightly cover your work for drying. When considering the drying process, bare in mind the weather, humidity and wind! The hotter and dryer, the faster things dry and work can dry unevenly in the shelves – this can lead to cracking – another time to lightly cover your work for drying. Step Four – Trimming and Cleaning Up Your work is dry! It is called greenware now and it is at it’s most fragile! Handle everything with two hands. I often refer to soft hands – keep everything gentle and with your fingers spread as much as possible. Try to not pick up things like plates too much, and always with both hands! Before your work can be bisque fired it should be “cleaned up”. You work won’t go into the kiln if it has sharp edges – when glazed, sharp edges turn into razor blades! Use a piece of fly wire to rub the work all over – this will scratch a little so be light handed. Use a knife or metal kidney to scrape any areas that require a bit more dynamic treatment than the fly wire offers! Finally, a very light wipe over with a slightly damp sponge can help soften and soothe all of your edges and dags! Trimming thrown work: If you are planning to trim (or turn) your thrown work (and you should be), make sure you bag it well – your work should be leather hard to almost dry for easiest trimming. Use this step to finish the work completely – use a metal kidney to polish the surface, or a slightly damp sponge to give a freshly thrown look. Wipe the sponge around the rim after trimming, and check the inside of the pot for dags! Trimming slip cast work: Usually I will trim the rims of your work on the wheel the following day to make that stage easier, however you will still need to check your work for lumps and bumps. Last but not least – check that your name is still clearly on the bottom of your work. Step Five – Bisque Firing When the work is completely dry it can go into the bisque kiln. The bisque kiln is fired to 1000°C. This process burns off the water in the clay as well as some of the chemically bound water. The structure of the clay is not altered that much at this temperature. Inside the bisque kiln, the work is stacked a little, small bowl inside a larger bowl and onto a heavy plate. Smaller items like decorations or drink coasters might get stacked several high. Consideration is paid to the weight of the stack and shape of the work. A bisque kiln can fire about one and a half times the amount of work that the glaze kiln can fire. The firing takes about 10 hours to complete the cycle and about two days to cool down. Once it has been emptied the work is placed in the glaze room ready for you to decorate! Step Six – Glazing Decorating your work with colour can be a lot of fun – and time consuming! There are three main options for surface treatment at this stage: Oxide Washes Underglazes Glazes Washes and underglazes do not “glaze” the work – It will still need a layer of glaze to fully seal the clay (washes don’t need glaze on surfaces not designed for food or liquid as they can gloss up a little on their own). Underglazes are stable colourants that turn out pretty much how they look in the jar. They can be mixed with each other to form other colours and can be used like water colours to paint onto your work. Mostly they should have a clear glaze on top to seal them. Oxides are a different species – the pink oxide (cobalt) wash turns out bright blue for instance. They don’t always need a glaze on top, and some glazes can change the colour of the wash! The glazes need no other “glaze” on top! Be careful of unknown glaze interactions – you can put any combination of glaze in a bowl or on a plate, but only a single glaze on the outside of any vertical surface! Glazes are a chemical reaction under heat. We don’t know the exact chemicals in the Mayco glazes we use. I can guess by the way they interact with each other, however, on the whole, you need to test every idea you have, and not run the test on a vertical surface! Simply put, glaze is a layer of glass like substance that bonds with the clay underneath. Clay is made of silica, alumina and water. Glaze is made of mostly silica. Silica has a melting point of 1700°C and we fire to 1240°C. The silica requires a “flux” to help it melt at the lower temperature. Fluxes can be all sorts of chemicals – a common one is calcium – calcium has a melting point of 2500°C, however, together they both melt at a much lower temperature! Colourants are metal oxides like cobalt (blue), chrome (green through black), copper (green, blue, even red!), manganese (black, purple and pink) iron (red brown), etc. Different chemicals in the glaze can have dramatic effects. for example, barium carbonate (which we don’t use) turns manganese bright pink! Other elements can turn manganese dioxide brown, blue, purple and reddish brown. Manganese dioxide is a flux in and of itself as well. So, glazes that get their black and purple colours, often interact with other glazes and RUN! Our mirror black is a good example – it mixes really well with many glazes because it fluxes them – causes them to melt faster. It will also bring out many beautiful colours in the glazes because it’s black colouring most definitely comes from manganese dioxide! Glaze chemistry is a whole subject on it’s own! We use commercial Mayco glazes on purpose – for their huge range of colour possibilities, stability, cool interactions, artistic freedom with the ability to easily brush the glazes on and ease of use. We currently have almost 50 glazes on hand! A major project is to test the interactions of all glazes with each other. That is 2,500 test tiles!!!! I’m going to make the wall behind the wheels the feature wall of pretty colours! Step Seven – Glaze (Gloss or sometimes called “Glost”) Firing Most of the time this is the final stage of making your creation (but not always!) The glaze kiln goes to 1240°C. This is called cone 6, or midrange. It is the low end of stoneware temperatures. Stoneware clays and glazes are typically fired at cone 8 – 10, that is 1260 – 1290°C. The energy requirement to go from 1240°C to 1280°C is almost a 30% more! Our clay is formulated to vitrify (mature, turn “glass-like”) at 1240°, as are our glazes. A glaze kiln take around 12 hours to reach temperature and two to three days to cool down. Sometimes a third firing process is required – this is for decoration that is added to work after the glaze firing. For example – adding precious metals and lustres. this firing temperature is usually around 600 – 800°C depending upon the techniques being used. There are many students interested in gold and silver trims – we will be doing this third type of firing soon! After firing your work will be in the student finished work shelves. Remember to pay for it before you head out the door! There is a small extra charge for using porcelain clay (it’s more than twice the price of regular clay), and for any third firing process! Once your work has been fired it can not turn back into clay for millennia – so don’t fire it if you don’t like it! Put it in the bucket for recycling. https://firebirdstudios.com.au/the-process-of-making-pottery/This bowl was made by renowned pottery company J & G Meakin of England. The firm was established in the mid-1800's. The bowl is an example of kitchenware used in the 19th century and still in use today.Bowl; white ceramic, round and tapering inwards towards base. Made by J and G Meakin England.On base, 'Ironstone China Reg SOL 391413' with symbolflagstaff hill, flagstaff hill maritime museum and village, warrnambool, maritime museum, maritime village, great ocean road, shipwreck coast, mixing bowl, food preparation, j & g meakin, pottery, stoke-on-trent, kitchen equipment, ceramic -
 Flagstaff Hill Maritime Museum and Village
Domestic object - Plate
The Process of Making Pottery Decorating, Firing, Glazing, Making, Technical There is a rhythm and flow to clay. It can’t be done all at once! Even the making process! It can take weeks to get everything done, especially if you can only work on your pottery once a week! Even though we have three hour classes, it’s often just not enough time! Here is an overview of some of the processes so you have a bit more grasp on some of the technical stuff! Step One – Design There are SO many ideas out there for making stuff in clay! From delicate porcelain jewellery, through to heavy sculptural work and everything in between. Deciding your direction is sometimes not that easy – when you first start, try everything, you will naturally gravitate to the style that you enjoy! The options and variations are endless and can get a wee bit overwhelming too! Check in with me before you start to ensure your ideas will work, what order you might do things, how you could achieve the look you are seeking and any other technical data required! Step Two – Making Clay is thixotropic. This means that as you work with it, the clay first gets sloppier and wetter, before is begins to dry in the atmosphere. For most things, you simply can’t do all parts of the project at once. An example of work order might look like: Get last weeks work out from the shelves Prepare clay for today’s work – roll your clay, prepare balls for throwing, make the first stage of a pinch pot) Clean up last week’s work and put it on the shelf for bisque firing Check that you have any glazing to do – and do enough of it that you will have time to finish your main project Do the next step of your next project – there might be a further step that can’t be complete immediately, in that case, wrap your work well and put onto the shelves. Letting your work rest for a while can really help keep your work clean and professional looking. Many things require bagging under plastic to keep it ready for work the next week – put your name on the outside of the bag so you can find your work easily. We have stickers and markers. Consider how you want to decorate your work – coloured slip can be applied at a fairly wet stage (remembering that it will make your work even wetter!). Trying to apply slip to dry clay won’t work! If you want to do sgraffito – you will need to keep the work leather hard (a state of dryness where you can still work the clay with a little effort and a little water and care). Step Three – Drying Most of the time your work can go into the rack uncovered to let it dry out for the following week. If you want to continue forming or shaping you will need to double bag your work – put your work on a suitable sized bat and put the bat in a bag so the base of the bag is under the bat, then put another bag over the top of the work and tuck the top of the bag under the bat. If you want to trim (or turn) your thrown work the following week, it should also be double bagged. If your work is large, delicate, or of uneven thicknesses, you should lightly cover your work for drying. When considering the drying process, bare in mind the weather, humidity and wind! The hotter and dryer, the faster things dry and work can dry unevenly in the shelves – this can lead to cracking – another time to lightly cover your work for drying. Step Four – Trimming and Cleaning Up Your work is dry! It is called greenware now and it is at it’s most fragile! Handle everything with two hands. I often refer to soft hands – keep everything gentle and with your fingers spread as much as possible. Try to not pick up things like plates too much, and always with both hands! Before your work can be bisque fired it should be “cleaned up”. You work won’t go into the kiln if it has sharp edges – when glazed, sharp edges turn into razor blades! Use a piece of fly wire to rub the work all over – this will scratch a little so be light handed. Use a knife or metal kidney to scrape any areas that require a bit more dynamic treatment than the fly wire offers! Finally, a very light wipe over with a slightly damp sponge can help soften and soothe all of your edges and dags! Trimming thrown work: If you are planning to trim (or turn) your thrown work (and you should be), make sure you bag it well – your work should be leather hard to almost dry for easiest trimming. Use this step to finish the work completely – use a metal kidney to polish the surface, or a slightly damp sponge to give a freshly thrown look. Wipe the sponge around the rim after trimming, and check the inside of the pot for dags! Trimming slip cast work: Usually I will trim the rims of your work on the wheel the following day to make that stage easier, however you will still need to check your work for lumps and bumps. Last but not least – check that your name is still clearly on the bottom of your work. Step Five – Bisque Firing When the work is completely dry it can go into the bisque kiln. The bisque kiln is fired to 1000°C. This process burns off the water in the clay as well as some of the chemically bound water. The structure of the clay is not altered that much at this temperature. Inside the bisque kiln, the work is stacked a little, small bowl inside a larger bowl and onto a heavy plate. Smaller items like decorations or drink coasters might get stacked several high. Consideration is paid to the weight of the stack and shape of the work. A bisque kiln can fire about one and a half times the amount of work that the glaze kiln can fire. The firing takes about 10 hours to complete the cycle and about two days to cool down. Once it has been emptied the work is placed in the glaze room ready for you to decorate! Step Six – Glazing Decorating your work with colour can be a lot of fun – and time consuming! There are three main options for surface treatment at this stage: Oxide Washes Underglazes Glazes Washes and underglazes do not “glaze” the work – It will still need a layer of glaze to fully seal the clay (washes don’t need glaze on surfaces not designed for food or liquid as they can gloss up a little on their own). Underglazes are stable colourants that turn out pretty much how they look in the jar. They can be mixed with each other to form other colours and can be used like water colours to paint onto your work. Mostly they should have a clear glaze on top to seal them. Oxides are a different species – the pink oxide (cobalt) wash turns out bright blue for instance. They don’t always need a glaze on top, and some glazes can change the colour of the wash! The glazes need no other “glaze” on top! Be careful of unknown glaze interactions – you can put any combination of glaze in a bowl or on a plate, but only a single glaze on the outside of any vertical surface! Glazes are a chemical reaction under heat. We don’t know the exact chemicals in the Mayco glazes we use. I can guess by the way they interact with each other, however, on the whole, you need to test every idea you have, and not run the test on a vertical surface! Simply put, glaze is a layer of glass like substance that bonds with the clay underneath. Clay is made of silica, alumina and water. Glaze is made of mostly silica. Silica has a melting point of 1700°C and we fire to 1240°C. The silica requires a “flux” to help it melt at the lower temperature. Fluxes can be all sorts of chemicals – a common one is calcium – calcium has a melting point of 2500°C, however, together they both melt at a much lower temperature! Colourants are metal oxides like cobalt (blue), chrome (green through black), copper (green, blue, even red!), manganese (black, purple and pink) iron (red brown), etc. Different chemicals in the glaze can have dramatic effects. for example, barium carbonate (which we don’t use) turns manganese bright pink! Other elements can turn manganese dioxide brown, blue, purple and reddish brown. Manganese dioxide is a flux in and of itself as well. So, glazes that get their black and purple colours, often interact with other glazes and RUN! Our mirror black is a good example – it mixes really well with many glazes because it fluxes them – causes them to melt faster. It will also bring out many beautiful colours in the glazes because it’s black colouring most definitely comes from manganese dioxide! Glaze chemistry is a whole subject on it’s own! We use commercial Mayco glazes on purpose – for their huge range of colour possibilities, stability, cool interactions, artistic freedom with the ability to easily brush the glazes on and ease of use. We currently have almost 50 glazes on hand! A major project is to test the interactions of all glazes with each other. That is 2,500 test tiles!!!! I’m going to make the wall behind the wheels the feature wall of pretty colours! Step Seven – Glaze (Gloss or sometimes called “Glost”) Firing Most of the time this is the final stage of making your creation (but not always!) The glaze kiln goes to 1240°C. This is called cone 6, or midrange. It is the low end of stoneware temperatures. Stoneware clays and glazes are typically fired at cone 8 – 10, that is 1260 – 1290°C. The energy requirement to go from 1240°C to 1280°C is almost a 30% more! Our clay is formulated to vitrify (mature, turn “glass-like”) at 1240°, as are our glazes. A glaze kiln take around 12 hours to reach temperature and two to three days to cool down. Sometimes a third firing process is required – this is for decoration that is added to work after the glaze firing. For example – adding precious metals and lustres. this firing temperature is usually around 600 – 800°C depending upon the techniques being used. There are many students interested in gold and silver trims – we will be doing this third type of firing soon! After firing your work will be in the student finished work shelves. Remember to pay for it before you head out the door! There is a small extra charge for using porcelain clay (it’s more than twice the price of regular clay), and for any third firing process! Once your work has been fired it can not turn back into clay for millennia – so don’t fire it if you don’t like it! Put it in the bucket for recycling. https://firebirdstudios.com.au/the-process-of-making-pottery/Ceramics have evolved over thousands of years.White earthenware dinner plate. Crazing evident all over.Backstamped ‘Made in England S LTD’flagstaff hill, warrnambool, shipwrecked-coast, flagstaff-hill, flagstaff-hill-maritime-museum, maritime-museum, shipwreck-coast, flagstaff-hill-maritime-village, ceramics, tableware -
 Flagstaff Hill Maritime Museum and Village
Domestic object - Plate, Johnson Bros
The Process of Making Pottery Decorating, Firing, Glazing, Making, Technical There is a rhythm and flow to clay. It can’t be done all at once! Even the making process! It can take weeks to get everything done, especially if you can only work on your pottery once a week! Even though we have three hour classes, it’s often just not enough time! Here is an overview of some of the processes so you have a bit more grasp on some of the technical stuff! Step One – Design There are SO many ideas out there for making stuff in clay! From delicate porcelain jewellery, through to heavy sculptural work and everything in between. Deciding your direction is sometimes not that easy – when you first start, try everything, you will naturally gravitate to the style that you enjoy! The options and variations are endless and can get a wee bit overwhelming too! Check in with me before you start to ensure your ideas will work, what order you might do things, how you could achieve the look you are seeking and any other technical data required! Step Two – Making Clay is thixotropic. This means that as you work with it, the clay first gets sloppier and wetter, before is begins to dry in the atmosphere. For most things, you simply can’t do all parts of the project at once. An example of work order might look like: Get last weeks work out from the shelves Prepare clay for today’s work – roll your clay, prepare balls for throwing, make the first stage of a pinch pot) Clean up last week’s work and put it on the shelf for bisque firing Check that you have any glazing to do – and do enough of it that you will have time to finish your main project Do the next step of your next project – there might be a further step that can’t be complete immediately, in that case, wrap your work well and put onto the shelves. Letting your work rest for a while can really help keep your work clean and professional looking. Many things require bagging under plastic to keep it ready for work the next week – put your name on the outside of the bag so you can find your work easily. We have stickers and markers. Consider how you want to decorate your work – coloured slip can be applied at a fairly wet stage (remembering that it will make your work even wetter!). Trying to apply slip to dry clay won’t work! If you want to do sgraffito – you will need to keep the work leather hard (a state of dryness where you can still work the clay with a little effort and a little water and care). Step Three – Drying Most of the time your work can go into the rack uncovered to let it dry out for the following week. If you want to continue forming or shaping you will need to double bag your work – put your work on a suitable sized bat and put the bat in a bag so the base of the bag is under the bat, then put another bag over the top of the work and tuck the top of the bag under the bat. If you want to trim (or turn) your thrown work the following week, it should also be double bagged. If your work is large, delicate, or of uneven thicknesses, you should lightly cover your work for drying. When considering the drying process, bare in mind the weather, humidity and wind! The hotter and dryer, the faster things dry and work can dry unevenly in the shelves – this can lead to cracking – another time to lightly cover your work for drying. Step Four – Trimming and Cleaning Up Your work is dry! It is called greenware now and it is at it’s most fragile! Handle everything with two hands. I often refer to soft hands – keep everything gentle and with your fingers spread as much as possible. Try to not pick up things like plates too much, and always with both hands! Before your work can be bisque fired it should be “cleaned up”. You work won’t go into the kiln if it has sharp edges – when glazed, sharp edges turn into razor blades! Use a piece of fly wire to rub the work all over – this will scratch a little so be light handed. Use a knife or metal kidney to scrape any areas that require a bit more dynamic treatment than the fly wire offers! Finally, a very light wipe over with a slightly damp sponge can help soften and soothe all of your edges and dags! Trimming thrown work: If you are planning to trim (or turn) your thrown work (and you should be), make sure you bag it well – your work should be leather hard to almost dry for easiest trimming. Use this step to finish the work completely – use a metal kidney to polish the surface, or a slightly damp sponge to give a freshly thrown look. Wipe the sponge around the rim after trimming, and check the inside of the pot for dags! Trimming slip cast work: Usually I will trim the rims of your work on the wheel the following day to make that stage easier, however you will still need to check your work for lumps and bumps. Last but not least – check that your name is still clearly on the bottom of your work. Step Five – Bisque Firing When the work is completely dry it can go into the bisque kiln. The bisque kiln is fired to 1000°C. This process burns off the water in the clay as well as some of the chemically bound water. The structure of the clay is not altered that much at this temperature. Inside the bisque kiln, the work is stacked a little, small bowl inside a larger bowl and onto a heavy plate. Smaller items like decorations or drink coasters might get stacked several high. Consideration is paid to the weight of the stack and shape of the work. A bisque kiln can fire about one and a half times the amount of work that the glaze kiln can fire. The firing takes about 10 hours to complete the cycle and about two days to cool down. Once it has been emptied the work is placed in the glaze room ready for you to decorate! Step Six – Glazing Decorating your work with colour can be a lot of fun – and time consuming! There are three main options for surface treatment at this stage: Oxide Washes Underglazes Glazes Washes and underglazes do not “glaze” the work – It will still need a layer of glaze to fully seal the clay (washes don’t need glaze on surfaces not designed for food or liquid as they can gloss up a little on their own). Underglazes are stable colourants that turn out pretty much how they look in the jar. They can be mixed with each other to form other colours and can be used like water colours to paint onto your work. Mostly they should have a clear glaze on top to seal them. Oxides are a different species – the pink oxide (cobalt) wash turns out bright blue for instance. They don’t always need a glaze on top, and some glazes can change the colour of the wash! The glazes need no other “glaze” on top! Be careful of unknown glaze interactions – you can put any combination of glaze in a bowl or on a plate, but only a single glaze on the outside of any vertical surface! Glazes are a chemical reaction under heat. We don’t know the exact chemicals in the Mayco glazes we use. I can guess by the way they interact with each other, however, on the whole, you need to test every idea you have, and not run the test on a vertical surface! Simply put, glaze is a layer of glass like substance that bonds with the clay underneath. Clay is made of silica, alumina and water. Glaze is made of mostly silica. Silica has a melting point of 1700°C and we fire to 1240°C. The silica requires a “flux” to help it melt at the lower temperature. Fluxes can be all sorts of chemicals – a common one is calcium – calcium has a melting point of 2500°C, however, together they both melt at a much lower temperature! Colourants are metal oxides like cobalt (blue), chrome (green through black), copper (green, blue, even red!), manganese (black, purple and pink) iron (red brown), etc. Different chemicals in the glaze can have dramatic effects. for example, barium carbonate (which we don’t use) turns manganese bright pink! Other elements can turn manganese dioxide brown, blue, purple and reddish brown. Manganese dioxide is a flux in and of itself as well. So, glazes that get their black and purple colours, often interact with other glazes and RUN! Our mirror black is a good example – it mixes really well with many glazes because it fluxes them – causes them to melt faster. It will also bring out many beautiful colours in the glazes because it’s black colouring most definitely comes from manganese dioxide! Glaze chemistry is a whole subject on it’s own! We use commercial Mayco glazes on purpose – for their huge range of colour possibilities, stability, cool interactions, artistic freedom with the ability to easily brush the glazes on and ease of use. We currently have almost 50 glazes on hand! A major project is to test the interactions of all glazes with each other. That is 2,500 test tiles!!!! I’m going to make the wall behind the wheels the feature wall of pretty colours! Step Seven – Glaze (Gloss or sometimes called “Glost”) Firing Most of the time this is the final stage of making your creation (but not always!) The glaze kiln goes to 1240°C. This is called cone 6, or midrange. It is the low end of stoneware temperatures. Stoneware clays and glazes are typically fired at cone 8 – 10, that is 1260 – 1290°C. The energy requirement to go from 1240°C to 1280°C is almost a 30% more! Our clay is formulated to vitrify (mature, turn “glass-like”) at 1240°, as are our glazes. A glaze kiln take around 12 hours to reach temperature and two to three days to cool down. Sometimes a third firing process is required – this is for decoration that is added to work after the glaze firing. For example – adding precious metals and lustres. this firing temperature is usually around 600 – 800°C depending upon the techniques being used. There are many students interested in gold and silver trims – we will be doing this third type of firing soon! After firing your work will be in the student finished work shelves. Remember to pay for it before you head out the door! There is a small extra charge for using porcelain clay (it’s more than twice the price of regular clay), and for any third firing process! Once your work has been fired it can not turn back into clay for millennia – so don’t fire it if you don’t like it! Put it in the bucket for recycling. https://firebirdstudios.com.au/the-process-of-making-pottery/Ceramics have evolved over thousands of years.A white earthenware side plate with a gadroon edge. Has water marks and chips on front.‘Johnson Bros England Reg No 15587’flagstaff hill, warrnambool, shipwrecked-coast, flagstaff-hill, flagstaff-hill-maritime-museum, maritime-museum, shipwreck-coast, flagstaff-hill-maritime-village, johnson bros, ceramics, tableware -
 Flagstaff Hill Maritime Museum and Village
Domestic object - Plate, Alfred Meakin
The Process of Making Pottery Decorating, Firing, Glazing, Making, Technical There is a rhythm and flow to clay. It can’t be done all at once! Even the making process! It can take weeks to get everything done, especially if you can only work on your pottery once a week! Even though we have three hour classes, it’s often just not enough time! Here is an overview of some of the processes so you have a bit more grasp on some of the technical stuff! Step One – Design There are SO many ideas out there for making stuff in clay! From delicate porcelain jewellery, through to heavy sculptural work and everything in between. Deciding your direction is sometimes not that easy – when you first start, try everything, you will naturally gravitate to the style that you enjoy! The options and variations are endless and can get a wee bit overwhelming too! Check in with me before you start to ensure your ideas will work, what order you might do things, how you could achieve the look you are seeking and any other technical data required! Step Two – Making Clay is thixotropic. This means that as you work with it, the clay first gets sloppier and wetter, before is begins to dry in the atmosphere. For most things, you simply can’t do all parts of the project at once. An example of work order might look like: Get last weeks work out from the shelves Prepare clay for today’s work – roll your clay, prepare balls for throwing, make the first stage of a pinch pot) Clean up last week’s work and put it on the shelf for bisque firing Check that you have any glazing to do – and do enough of it that you will have time to finish your main project Do the next step of your next project – there might be a further step that can’t be complete immediately, in that case, wrap your work well and put onto the shelves. Letting your work rest for a while can really help keep your work clean and professional looking. Many things require bagging under plastic to keep it ready for work the next week – put your name on the outside of the bag so you can find your work easily. We have stickers and markers. Consider how you want to decorate your work – coloured slip can be applied at a fairly wet stage (remembering that it will make your work even wetter!). Trying to apply slip to dry clay won’t work! If you want to do sgraffito – you will need to keep the work leather hard (a state of dryness where you can still work the clay with a little effort and a little water and care). Step Three – Drying Most of the time your work can go into the rack uncovered to let it dry out for the following week. If you want to continue forming or shaping you will need to double bag your work – put your work on a suitable sized bat and put the bat in a bag so the base of the bag is under the bat, then put another bag over the top of the work and tuck the top of the bag under the bat. If you want to trim (or turn) your thrown work the following week, it should also be double bagged. If your work is large, delicate, or of uneven thicknesses, you should lightly cover your work for drying. When considering the drying process, bare in mind the weather, humidity and wind! The hotter and dryer, the faster things dry and work can dry unevenly in the shelves – this can lead to cracking – another time to lightly cover your work for drying. Step Four – Trimming and Cleaning Up Your work is dry! It is called greenware now and it is at it’s most fragile! Handle everything with two hands. I often refer to soft hands – keep everything gentle and with your fingers spread as much as possible. Try to not pick up things like plates too much, and always with both hands! Before your work can be bisque fired it should be “cleaned up”. You work won’t go into the kiln if it has sharp edges – when glazed, sharp edges turn into razor blades! Use a piece of fly wire to rub the work all over – this will scratch a little so be light handed. Use a knife or metal kidney to scrape any areas that require a bit more dynamic treatment than the fly wire offers! Finally, a very light wipe over with a slightly damp sponge can help soften and soothe all of your edges and dags! Trimming thrown work: If you are planning to trim (or turn) your thrown work (and you should be), make sure you bag it well – your work should be leather hard to almost dry for easiest trimming. Use this step to finish the work completely – use a metal kidney to polish the surface, or a slightly damp sponge to give a freshly thrown look. Wipe the sponge around the rim after trimming, and check the inside of the pot for dags! Trimming slip cast work: Usually I will trim the rims of your work on the wheel the following day to make that stage easier, however you will still need to check your work for lumps and bumps. Last but not least – check that your name is still clearly on the bottom of your work. Step Five – Bisque Firing When the work is completely dry it can go into the bisque kiln. The bisque kiln is fired to 1000°C. This process burns off the water in the clay as well as some of the chemically bound water. The structure of the clay is not altered that much at this temperature. Inside the bisque kiln, the work is stacked a little, small bowl inside a larger bowl and onto a heavy plate. Smaller items like decorations or drink coasters might get stacked several high. Consideration is paid to the weight of the stack and shape of the work. A bisque kiln can fire about one and a half times the amount of work that the glaze kiln can fire. The firing takes about 10 hours to complete the cycle and about two days to cool down. Once it has been emptied the work is placed in the glaze room ready for you to decorate! Step Six – Glazing Decorating your work with colour can be a lot of fun – and time consuming! There are three main options for surface treatment at this stage: Oxide Washes Underglazes Glazes Washes and underglazes do not “glaze” the work – It will still need a layer of glaze to fully seal the clay (washes don’t need glaze on surfaces not designed for food or liquid as they can gloss up a little on their own). Underglazes are stable colourants that turn out pretty much how they look in the jar. They can be mixed with each other to form other colours and can be used like water colours to paint onto your work. Mostly they should have a clear glaze on top to seal them. Oxides are a different species – the pink oxide (cobalt) wash turns out bright blue for instance. They don’t always need a glaze on top, and some glazes can change the colour of the wash! The glazes need no other “glaze” on top! Be careful of unknown glaze interactions – you can put any combination of glaze in a bowl or on a plate, but only a single glaze on the outside of any vertical surface! Glazes are a chemical reaction under heat. We don’t know the exact chemicals in the Mayco glazes we use. I can guess by the way they interact with each other, however, on the whole, you need to test every idea you have, and not run the test on a vertical surface! Simply put, glaze is a layer of glass like substance that bonds with the clay underneath. Clay is made of silica, alumina and water. Glaze is made of mostly silica. Silica has a melting point of 1700°C and we fire to 1240°C. The silica requires a “flux” to help it melt at the lower temperature. Fluxes can be all sorts of chemicals – a common one is calcium – calcium has a melting point of 2500°C, however, together they both melt at a much lower temperature! Colourants are metal oxides like cobalt (blue), chrome (green through black), copper (green, blue, even red!), manganese (black, purple and pink) iron (red brown), etc. Different chemicals in the glaze can have dramatic effects. for example, barium carbonate (which we don’t use) turns manganese bright pink! Other elements can turn manganese dioxide brown, blue, purple and reddish brown. Manganese dioxide is a flux in and of itself as well. So, glazes that get their black and purple colours, often interact with other glazes and RUN! Our mirror black is a good example – it mixes really well with many glazes because it fluxes them – causes them to melt faster. It will also bring out many beautiful colours in the glazes because it’s black colouring most definitely comes from manganese dioxide! Glaze chemistry is a whole subject on it’s own! We use commercial Mayco glazes on purpose – for their huge range of colour possibilities, stability, cool interactions, artistic freedom with the ability to easily brush the glazes on and ease of use. We currently have almost 50 glazes on hand! A major project is to test the interactions of all glazes with each other. That is 2,500 test tiles!!!! I’m going to make the wall behind the wheels the feature wall of pretty colours! Step Seven – Glaze (Gloss or sometimes called “Glost”) Firing Most of the time this is the final stage of making your creation (but not always!) The glaze kiln goes to 1240°C. This is called cone 6, or midrange. It is the low end of stoneware temperatures. Stoneware clays and glazes are typically fired at cone 8 – 10, that is 1260 – 1290°C. The energy requirement to go from 1240°C to 1280°C is almost a 30% more! Our clay is formulated to vitrify (mature, turn “glass-like”) at 1240°, as are our glazes. A glaze kiln take around 12 hours to reach temperature and two to three days to cool down. Sometimes a third firing process is required – this is for decoration that is added to work after the glaze firing. For example – adding precious metals and lustres. this firing temperature is usually around 600 – 800°C depending upon the techniques being used. There are many students interested in gold and silver trims – we will be doing this third type of firing soon! After firing your work will be in the student finished work shelves. Remember to pay for it before you head out the door! There is a small extra charge for using porcelain clay (it’s more than twice the price of regular clay), and for any third firing process! Once your work has been fired it can not turn back into clay for millennia – so don’t fire it if you don’t like it! Put it in the bucket for recycling. https://firebirdstudios.com.au/the-process-of-making-pottery/Ceramics have evolved over thousands of years.Earthenware dessert plate, cream colour. Made by Alfred Meakin, England. Backstamped ‘Alfred Meakin England’. flagstaff hill, warrnambool, shipwrecked-coast, flagstaff-hill, flagstaff-hill-maritime-museum, maritime-museum, shipwreck-coast, flagstaff-hill-maritime-village, alfred meakin, ceramics, earthenware, kitchenware -
 Flagstaff Hill Maritime Museum and Village
Domestic object - Jug
The Process of Making Pottery Decorating, Firing, Glazing, Making, Technical There is a rhythm and flow to clay. It can’t be done all at once! Even the making process! It can take weeks to get everything done, especially if you can only work on your pottery once a week! Even though we have three hour classes, it’s often just not enough time! Here is an overview of some of the processes so you have a bit more grasp on some of the technical stuff! Step One – Design There are SO many ideas out there for making stuff in clay! From delicate porcelain jewellery, through to heavy sculptural work and everything in between. Deciding your direction is sometimes not that easy – when you first start, try everything, you will naturally gravitate to the style that you enjoy! The options and variations are endless and can get a wee bit overwhelming too! Check in with me before you start to ensure your ideas will work, what order you might do things, how you could achieve the look you are seeking and any other technical data required! Step Two – Making Clay is thixotropic. This means that as you work with it, the clay first gets sloppier and wetter, before is begins to dry in the atmosphere. For most things, you simply can’t do all parts of the project at once. An example of work order might look like: Get last weeks work out from the shelves Prepare clay for today’s work – roll your clay, prepare balls for throwing, make the first stage of a pinch pot) Clean up last week’s work and put it on the shelf for bisque firing Check that you have any glazing to do – and do enough of it that you will have time to finish your main project Do the next step of your next project – there might be a further step that can’t be complete immediately, in that case, wrap your work well and put onto the shelves. Letting your work rest for a while can really help keep your work clean and professional looking. Many things require bagging under plastic to keep it ready for work the next week – put your name on the outside of the bag so you can find your work easily. We have stickers and markers. Consider how you want to decorate your work – coloured slip can be applied at a fairly wet stage (remembering that it will make your work even wetter!). Trying to apply slip to dry clay won’t work! If you want to do sgraffito – you will need to keep the work leather hard (a state of dryness where you can still work the clay with a little effort and a little water and care). Step Three – Drying Most of the time your work can go into the rack uncovered to let it dry out for the following week. If you want to continue forming or shaping you will need to double bag your work – put your work on a suitable sized bat and put the bat in a bag so the base of the bag is under the bat, then put another bag over the top of the work and tuck the top of the bag under the bat. If you want to trim (or turn) your thrown work the following week, it should also be double bagged. If your work is large, delicate, or of uneven thicknesses, you should lightly cover your work for drying. When considering the drying process, bare in mind the weather, humidity and wind! The hotter and dryer, the faster things dry and work can dry unevenly in the shelves – this can lead to cracking – another time to lightly cover your work for drying. Step Four – Trimming and Cleaning Up Your work is dry! It is called greenware now and it is at it’s most fragile! Handle everything with two hands. I often refer to soft hands – keep everything gentle and with your fingers spread as much as possible. Try to not pick up things like plates too much, and always with both hands! Before your work can be bisque fired it should be “cleaned up”. You work won’t go into the kiln if it has sharp edges – when glazed, sharp edges turn into razor blades! Use a piece of fly wire to rub the work all over – this will scratch a little so be light handed. Use a knife or metal kidney to scrape any areas that require a bit more dynamic treatment than the fly wire offers! Finally, a very light wipe over with a slightly damp sponge can help soften and soothe all of your edges and dags! Trimming thrown work: If you are planning to trim (or turn) your thrown work (and you should be), make sure you bag it well – your work should be leather hard to almost dry for easiest trimming. Use this step to finish the work completely – use a metal kidney to polish the surface, or a slightly damp sponge to give a freshly thrown look. Wipe the sponge around the rim after trimming, and check the inside of the pot for dags! Trimming slip cast work: Usually I will trim the rims of your work on the wheel the following day to make that stage easier, however you will still need to check your work for lumps and bumps. Last but not least – check that your name is still clearly on the bottom of your work. Step Five – Bisque Firing When the work is completely dry it can go into the bisque kiln. The bisque kiln is fired to 1000°C. This process burns off the water in the clay as well as some of the chemically bound water. The structure of the clay is not altered that much at this temperature. Inside the bisque kiln, the work is stacked a little, small bowl inside a larger bowl and onto a heavy plate. Smaller items like decorations or drink coasters might get stacked several high. Consideration is paid to the weight of the stack and shape of the work. A bisque kiln can fire about one and a half times the amount of work that the glaze kiln can fire. The firing takes about 10 hours to complete the cycle and about two days to cool down. Once it has been emptied the work is placed in the glaze room ready for you to decorate! Step Six – Glazing Decorating your work with colour can be a lot of fun – and time consuming! There are three main options for surface treatment at this stage: Oxide Washes Underglazes Glazes Washes and underglazes do not “glaze” the work – It will still need a layer of glaze to fully seal the clay (washes don’t need glaze on surfaces not designed for food or liquid as they can gloss up a little on their own). Underglazes are stable colourants that turn out pretty much how they look in the jar. They can be mixed with each other to form other colours and can be used like water colours to paint onto your work. Mostly they should have a clear glaze on top to seal them. Oxides are a different species – the pink oxide (cobalt) wash turns out bright blue for instance. They don’t always need a glaze on top, and some glazes can change the colour of the wash! The glazes need no other “glaze” on top! Be careful of unknown glaze interactions – you can put any combination of glaze in a bowl or on a plate, but only a single glaze on the outside of any vertical surface! Glazes are a chemical reaction under heat. We don’t know the exact chemicals in the Mayco glazes we use. I can guess by the way they interact with each other, however, on the whole, you need to test every idea you have, and not run the test on a vertical surface! Simply put, glaze is a layer of glass like substance that bonds with the clay underneath. Clay is made of silica, alumina and water. Glaze is made of mostly silica. Silica has a melting point of 1700°C and we fire to 1240°C. The silica requires a “flux” to help it melt at the lower temperature. Fluxes can be all sorts of chemicals – a common one is calcium – calcium has a melting point of 2500°C, however, together they both melt at a much lower temperature! Colourants are metal oxides like cobalt (blue), chrome (green through black), copper (green, blue, even red!), manganese (black, purple and pink) iron (red brown), etc. Different chemicals in the glaze can have dramatic effects. for example, barium carbonate (which we don’t use) turns manganese bright pink! Other elements can turn manganese dioxide brown, blue, purple and reddish brown. Manganese dioxide is a flux in and of itself as well. So, glazes that get their black and purple colours, often interact with other glazes and RUN! Our mirror black is a good example – it mixes really well with many glazes because it fluxes them – causes them to melt faster. It will also bring out many beautiful colours in the glazes because it’s black colouring most definitely comes from manganese dioxide! Glaze chemistry is a whole subject on it’s own! We use commercial Mayco glazes on purpose – for their huge range of colour possibilities, stability, cool interactions, artistic freedom with the ability to easily brush the glazes on and ease of use. We currently have almost 50 glazes on hand! A major project is to test the interactions of all glazes with each other. That is 2,500 test tiles!!!! I’m going to make the wall behind the wheels the feature wall of pretty colours! Step Seven – Glaze (Gloss or sometimes called “Glost”) Firing Most of the time this is the final stage of making your creation (but not always!) The glaze kiln goes to 1240°C. This is called cone 6, or midrange. It is the low end of stoneware temperatures. Stoneware clays and glazes are typically fired at cone 8 – 10, that is 1260 – 1290°C. The energy requirement to go from 1240°C to 1280°C is almost a 30% more! Our clay is formulated to vitrify (mature, turn “glass-like”) at 1240°, as are our glazes. A glaze kiln take around 12 hours to reach temperature and two to three days to cool down. Sometimes a third firing process is required – this is for decoration that is added to work after the glaze firing. For example – adding precious metals and lustres. this firing temperature is usually around 600 – 800°C depending upon the techniques being used. There are many students interested in gold and silver trims – we will be doing this third type of firing soon! After firing your work will be in the student finished work shelves. Remember to pay for it before you head out the door! There is a small extra charge for using porcelain clay (it’s more than twice the price of regular clay), and for any third firing process! Once your work has been fired it can not turn back into clay for millennia – so don’t fire it if you don’t like it! Put it in the bucket for recycling. https://firebirdstudios.com.au/the-process-of-making-pottery/The form of the jug has been in use for many centuries.Stoneware jug. Two tone brown glaze with pierced lip behind spout. Spout chipped.None.flagstaff hill, warrnambool, shipwrecked-coast, flagstaff-hill, flagstaff-hill-maritime-museum, maritime-museum, shipwreck-coast, flagstaff-hill-maritime-village, jug, ceramic jug -
 Melton City Libraries
Photograph, Wendy Barrie, Unknown
Eldest daughter of Edna and Bon Barrie, born on 03 November 1943 in Melbourne, Victoria, Memoirs of Wendy Barrie, recalling the early formative years of life in Melton: In 1949 I started school at Melton State School no 430 and was driven the 2½ miles to there by my parents at first. Later we walked home in the afternoons or were picked up by car as we made our way home along the Western Highway. In 1956 I went to Bacchus Marsh High School. There were 4 students in grade 6 and 3 of us went to the High School. The students from Melton, Melton South and Toolern Vale State Schools went by bus to Bacchus Marsh High School as far a fifth form. My parents drove me to the pick up point and during the five years of travel to High School. The bus travelled via Toolern Vale and later went through Exford and through Parwan. On the return journey in the afternoon the bus went in the reverse direction. The bridge at Exford was an old narrow wooden one, and the students had to get off the bus and walk across, with the driver crossing in the empty bus for safety reasons. There was a travelling allowance paid to parents and it was estimated from the distance the crow flies, a straight line. We lived a Ferris Lane, just where the Harness Racing entrance is now situated about 2 ½ miles by road to school too close to qualify for the subsidy. While at State School Melton we would walk home in a group with the Nixon and Gillespie children, along the main road over the bridge near the Shire Offices and down a hill. I was being dinked on Joyce Gillespie’s bike while holding onto the seat, toppled off the bike striking my chin and teeth on the bitumen and cracking my jaw. I was about 9 years old and stayed a couple of days in the Quamby Hospital in Bacchus Marsh, it seemed like and eternity at the time and quite traumatic being separated from my family. I can remember contemplating how I could get out of the window and run away but realised it was too far to walk home. Often we would cut across the Common on our way home from school picking up stray golf balls and collecting them from the creek when it dried out. We were warned about not accepting lifts from strangers passing along the Melbourne/ Ballarat Road. The only danger we faced was being swooped by the magpies particularly on the open ground on the Common. We were also fairly cautious when the Gypsies camped on the Common in the area just about opposite the small reservoir. “Mum” grandma Myers loved to have us call in on our way home, and usually would cut a slice of Jongebloed’s bread and spread it with home made butter. Sometimes we waited there until we were collected by car, usually driven by our mother. Margaret Nixon and Joyce Gillespie were a few grades ahead of me and Barbara Nixon was born just two months earlier than me. Our mothers were great friends for over 6o years, born in the same month three years apart. They lived within a few days of the same age as each other at the time their deaths. Dad and George Nixon attended Melton school at the same time. Sarah nee Hornbuckle Nixon and my grandfather Frederick Myers Snr were at school together at the same in the 1880s. The Nixon family lived in Keilor Road just past the Toolern Creek near the turnoff. Tom and Ann Collins lived on the southern side of the Western highway and Keilor road intersection. Jim and Ruby Gillespie’s house was further long Keilor road on the right. They backed onto the Myers who lived on the north side of Western Highway east of Myers Gully (Ryans Creek). The Bridge over the Toolern Creek as very narrow and as truck traffic increased there were accidents. One truck took out the side railing and plunged upside down into the bank and into the shallow water. Another fatal accident happened between a car and a truck right in front of the Myers house. Grandfather Fred had been a bike rider all his life, as far as the Riverina in his younger years, wryly made the comment about the drivers the speeding along the Ballarat Road were setting out to kill themselves. The road was busy particularly after the Races at Ballarat when the crowds were hurrying home to Melbourne. Train travel had changed very little from the time my mothers generation to mine. The timetable meant the usual rush to Melton South by bike in her case and if she was running late the train pulled up on the crossing. I was driven to the Station from home past Keith and Mary Gillespie’s house near the Ferris Road rail crossing to Bridge road to Melton South for the 7.32 train. While attending Sunshine High School in 1961 I would meet up with three other students, two of whom I knew from Bacchus Marsh High School days. We usually got into the same compartment on the train, it was a typical country train with a corridor along the side and compartments with a door, roof racks and sometimes heated metal containers for the feet in the winter. Some of the trains came through from Horsham and Ballarat, and the Overland from Adelaide passed through in the evening, we could hear it in the distance from the Ferris Lane home. The carriages had 1st and economy class compartments showing photographs of county scenes and holiday destinations. The engine was the large A class diesel. They are still running to Bacchus Marsh 50 years later, due to the need for the greatly increased number of commuters travelling to work in the city. Sometimes the carriages were pull by a Steam engine, these were a problem in the summer time because the sparks caused fires along the train lines and then quickly spread into the dry grass, crops and stubble. The Motor Train left Spencer Street at 4.23 pm and was the best train for me to catch. Ferris Road was a designated stop and train pulled up on the road crossing. It had steps at the door and rungs to hold while alighting to the ground. The ballast along the tracks was rough and uneven and awkward to land on. The train was painted blue and yellow with the letters VR pained on the front. This saved may parents the afternoon trip to collect me from the Station. On the walk home on the gravel road I would pass Uncle Tom and Aunty May’s house before reaching home. Melva Gillespie was studying at Sunshine Technical School and we sometimes both got off the train at the same time. On other occasions the Motor Train was replaced with a diesel engine with carriages, it was also required to stop and the driver had to be notified in advance. This meant getting into the guards van a Rockbank. It was more difficult alighting from the carriage as the gap was greater and more precarious to swing out and land on the ground. A few times in my last year of study at Melbourne Teachers College in Grattan Street Carlton. I managed to catch the 2.30 pm train to Serviceton, it was express to Melton and was very quick trip. The last train, was the 5.25 pm diesel to Ballarat and I usually caught this train to Melton South Station. On one occasion after being held up on the tram in Bourke street I had to make a mad dash to the platform chasing the train as it was just moving off and yelling to the guard, fortunately I was noticed and the train ground to halt. I scrambled into the end door and took most of the journey home to recover. After the last year at High School I continued to travel on the train, 2 years to Prahran Technical School changing at North Melbourne. There were a lot school children travelling to private schools and some at the primary level and mainly from Bacchus Marsh. Rockbank children also travelled by train from the beginning of their high school years, quite a few went to Sunshine High School. During my third year of teacher training I travelled to Flinders Street to RMIT for ceramics classes and Grattan St Teachers College located in the grounds of Melbourne University. There were many teachers being trained at the Secondary Teachers College due to the baby bulge creating a great shortage of teachers. Sunshine High School was very well represented amongst the different courses in Primary, Secondary and Art and Crafts. I attended Melbourne University lectures, studying a Fine Art subject. Bernard Smith was the most notable of the lecturers. he replaced Professor Joseph Bourke who had taken leave for the years. In 1962 he published the art book “Australian Painting”. The secondary art and craft student teachers from the College were in the majority, taking this subject and were well regarded due to their practical art and craft methods and their teaching round experience. In December 1964 I graduated as a Trained Secondary Teacher – Art and Crafts. The graduating ceremony was held at Wilson Hall. I received my appointment to work at Maryborough High School. Uncle Max and Aunty Rosemary Myers arranged my accommodation. Uncle Max was a teacher at the Maryborough Technical School fat the time. The appointment was suddenly changed when just before the school year was about to start when I received notification that I was now required to move to Warracknabeal High School. I was subject to a bond for the three years of training and three years of teaching and was under an obligation to comply with the directive of the Education Department. My father stood as guarantor when I was accepted as student at the Melbourne Teachers’ College, thus enabling me to receive my teacher training, and a 5 pounds a week allowance for expenses. After teaching for two years at Warracknabeal High School I was fortunate enough the gain a transfer to Sunshine West High School, returning to live at home in Melton and travelling by car to work with a fellow colleague, Jock Smith who lived at Station road Melton. I completed bond obligation and resigned at the end of the year. The employment regulations at that time did not allow the option of leave of absence for, indefinite overseas travel. I returned to Australia in October 1969. Visiting Arthur Hart the Principal of Sunshine High School he arranged with the Education Department for my re-employment at Sunshine High School until the end of the year. In 1970 I was transferred, and returned to Sunshine West High School where I worked for the next three years. In January 1968 I sailed on the “Oriana” to South Hampton with two teaching friends from Warracknabeal High School on a travelling and working holiday. Doreen Kiely, a former Bacchus Marsh High student and fellow train traveller from Bacchus Marsh, was already working in London, had arranged our accommodation at the London Travellers Club Hotel, Braham Gardens, Earls Court SW5. We based our stay at this address in London and travelled around Scotland, Ireland and England. In the summer we took a four month trip around the Continent and the Mediterranean. I registered with The Royal Borough Of Kingston Upon Thames as a Supply teacher, and worked at Chessington School form autumn to spring the following year and living with Mrs Rose Gillies at Kinross Avenue, Worcester Park, Surrey. In the spring of 1969 visiting Norway, Sweden and Finland joining an organised camping group to the Artic Circle, entered Russia at Leningrad (St Petersburg) Moscow, Minsk, to Poland and Czechoslovakia. In August returning to Worcester Park for the flight to Montreal to stay with cousin Lynette and husband Jurgen. A side trip was taken to Toronto, Niagara Falls and New York. The flight home from Montreal to Melbourne took 52 hours. A ½ day break in Vancouver before boarding the Qantas boeing 707 via San Francisco, Honolulu, Fiji, Sydney to Melbourne. Around the world in 21 months. Photographs of Wendy local identities -
 Southern Sherbrooke Historical Society Inc.
File, "Carlotta Tye Ladies Guild Correspondence"
A folder of correspondence of the Carlotta Tye Memorial's Ladies Guild. Includes: -Letter from A.F Brockoff and Co Pty Ltd Biscuits, 10/10/1939, willing to donate biscuits and face masks. --Order form from A.F Brockoff./-Letter from the Rosella Preserving and Manufacturing Co. Ltd, 10/10/1939, willing to give product samples to the church./-Letter from Nicholas Limited, 11/10/1939, offering samples of Aspro./-Letter from Robur Tea Company Limited, 12/10/1939, giving advice on who can provide samples to the church./-Letter from The Kiwi Polish Co, 16/10/1939, regretably informing Gwen that they cannot provide any samples./-Letter from Nugget Polish Pty.Ltd, 16/10/1939, informing Gwen they cannot provide samples for the church./-Receipt from AF Brockoff and Co. Pty. Ltd, dated 31/10/1939./-Letter from Bushells to Gwen Thomas, 16/11/1939, willing to donate tea to the guild./-Form from Entertainments Tax Assessment Act 1942, dated 17/9/1946, registering entertainment for the Parish Hall, Selby. Comes with attached envelope./-Invitation to Annual Anglican Ball, 11/10/1946./-Letter from Bushells, 26/3/1947, refusing a request to provide samples. Attached is a small letter from the Secretary, dated 23/5/1947./-Letter from Ferntree Gully Shire Council to Gwen Thomas, 24/8/1947. Says that the Shire president Violet B.Lambert is willing to come to "Australian Tea" at Parish Hall, Selby./-Handwritten letter from Mr and Mrs H.W Shepherd, 9/9/1947./-Handwritten letter to Gwen, from "A.Grace(?)", dated 14/9/1947./-Handwritten shopping list, undated./-Handwritten letter to Gwen, from Mrs Langford, 14/9/1947, with attached envelope./-Handwritten letter to Gwen, from G.Coling, 19/9/1947, with attached envelope./-Handwritten letter (2 pages) to Gwen, from M.Allchurch(?), 1/11/1947./-Handwritten letter from W.Tompkins, 8/11/1947./-Handwritten letter to Gwen, from Emily Noble, 10/7/1948, with attached envelope./-Handwritten letter to Gwen, from Hadwen and Houghton (specialists in church furniture), 2/11/1949./-Handwritten letter to Mrs Pearce from Majorie Tye, 7/3/1951./-Handwritten letter to Gwen, from G.Waring Lee(?), 18/6/1951./-Handwritten letter to Gwen, from Iris Wood, with attached shopping list, 2/12/1952./-Handwritten letter to Gwen from N.R Geffery, 23/7/1954./-Letter of appreciation from the family of the 'late Mrs Ruby Clinton Cartledge'. Attached envelope says the date 6/4/1955./-Typed letter to Gwen, from R.K Sutherland, 14/1/1957./-Handwritten letter to Gwen, from R.K Sutherland, 9/2/1959./-Handwritten letter (on card) to Gwen, from Violet Lambal 16/6/1959./-Handwritten letter (2 pages on folded piece of paper) to Gwen from Mary H Chessell, 4/7/1959./-Handwritten letter from St Pauls Vicarage, 6/7/1959./-Handwritten letter to Gwen, from Faye Gronlund, 8/7/1960, with attched envelope./-Handwritten letter to Gwen, from Majorie Cromie, with attached envelope with the date 1/8/1960./-Handwritten letter to Gwen from the Church Missionary Society, 18/4/1962./-Letter of sympathy for the death of Percival William Stephenson on 29/5/1962./-Handwritten letter from Miss Thomas to Edna Lindsay, 29/8/1962./-Letter to Gwen from Moran and Cato Pty. Ltd., 19/6/1963./-Handwritten letter to Selby Church of England Guild from a "Martin", 25/6/1963./-Handwritten letter to Gwen from Doris Pearce, 25/6/1963, with attached envelope./-Handwritten letter to Gwen from Dorothy M Donnelly, 1/7/1963, with attached envelope./-Handwritten letter to Gwen from Violet Lambal, 6/7/1963, with attached envelope./-Undated small card to Gwen, from Marjorie Cromie (circa 1963 as it mentions the guild's 25th anniversary)./-Letter to Gwen from Textile Promotions Pty. Ltd., 29/11/1965, promoting Fashion Fabrics Demonstration for 15/6/1966./-Handwritten letter to Gwen, 14/2/1966./-Letter to Gwen from R.K Sutherland, 12/4/1966./-Handwritten letter to Gwen from Kathleen Sutherland, 13/4/1966./-Letter to Gwen from Holdenson and Nielson Marketing Pty. Ltd., 29/4/1966. Written on date says 'April 10th 1967'./-Handwritten letter from Sean Buckley to Gwen Thomas thanking her for an invitation to her guild, with envelope attached, 14/6/1966./ -2 Handwritten letters from Beatrice Thomson to Gwen Thomas, 22/6/1966 and 23/6/1966. Has an attached envelope./-Handwritten letter from L.E.Heard(?) to Gwen Thomas, 4/7/1966. Has an attached envelope./-Handwritten letter from Eva Blyth(?) to Gwen Thomas, 13/7/1966. Has attached envelope./-Handwritten card to Gwen Thomas from Violet Allen and Mr R.Allen. Attached envelope dates the message as 18/7/1966./-2 page handwritten letter to Ladies Guild from H.R and J.E Herod, 24/7/1966./-Handwritten letter to Gwen Thomas from D.Dickinson (Mrs D.Dickinson), 10/8/1966./-Invitation from the St Cuthbert's Church of England Ladies Guild, Menzies Creek to celebrate their birthday on 20/9/1966. Handwritten financial calculations on the back./-3 page handwritten letter (photocopied) from 'The Most Reverend D.J Penman' to the Ladies Guild. Attached is a note saying "Gwen, Please read this and get back to me if you need to. I will get it typed on Thursday, 24/11/1987'./-Handwritten letter from Majorie Cromie to 'Friends of All Saints Tye Memorial Church', 20/4/1996. With envelope attached./-Letter from The Mission of St.James and St.John, promoting donations for homeless children and families, 28/5/1996. Comes with envelope and donation card./-Undated handwritten note on the back of a Cadbury's advertisement./-Card of acceptance of an invitation signed by Emily Buckley, undated. (?)/-Handwritten note, dated 'March 26th', from Majorie Cromie to Mrs Pearce./-Card of two birds on branches, written to Gwen Thomas hoping to see Gwen at a special occasion on October 11th (year unknown)./-Card with purple flowers on the front cover, written to Gwen from Winnie Dea(?)./-Card of roses on the cover, written by Mrs Cromie as she accepts an invitation to the Selby Ladies Guild's 21st birthday./-Handwritten note, consisting of the address of Gwen Simpson./-Letter (typed and handwritten), to Gwen Thomas from Eva Blyth, inviting the president and members of the ladies guild to a group meeting with the Women's Fellowship of the Union Church, Belgrave./-Invitation card from Violet Allen to the Ladies Guild, for a party on 26th July (year unknown)./-Card with roses on it from Gwen Thomas to Majorie Cromie, July 20th (year unknown), thanking Gwen for a recent visit./-Handwritten note to Gwen (authors name hard to read), on Parish of Belgrave paper./-Handwritten letter to Gwen from L.E Herod, date unknown./-2 envelopes to Gwen Thomas. Both are empty but years unknown./-Card with illustration of Carlotta Tye Memorial Church to Susan, Marian and Peter, from 'Julie', November 4th 2009. -
Mission to Seafarers Victoria
Article, A Woman's Melbourne Letter
A detailed description of the Mission and its activities written by a woman: Western Mail (Perth, WA : 1885 - 1954), Friday 13 December 1918, page 34 A WOMAN'S MELBOURNE LETTER. Melbourne, Dec. 4. There is an idea abroad, which as regards Melbourne, at any rate, is quite erroneous, that our sailors are not as well looked after as our soldiers, and that the noble men of the Mercantile Marine are much neglected ! For once, perhaps, my readers will pardon a letter dealing with only one subject, but the steady, unostentatious work done by the Ladies' Harbour Light Guild, in connection with the mission to seamen in Melbourne could not be adequately explained if dismissed in the usual short paragraph. Some of the most prominent names in Melbourne are associated with this guild and with the Mission Chaplain, and Mrs. Gurney Goldsmith, the members have made the Seamen's Institute a real home for those sailors of the Mercantile Marine, who touch our port. What we as a community owe to those men by their heroism in recent hostilities is certainly more understood by this band of enthusiastic workers than by the community generally. By using their unflagging energies, and influence on the sailor's behalf they endeavour to discharge a debt to which in some way or other we could and should all contribute. Even the most casual person can, if he thinks at all, sum up a few of the things our sailors - other than those belonging to our glorious navy - have done for us. On the spur of the moment we remember that those of the Mercantile Marine, are the men who manned our transports, who carried our wheat and wool, to oversea markets; who kept us in touch with our loved ones abroad; who kept the fires going in the furnaces of the great leviathans, bringing our wounded soldiers home again; who never flinched when self-sacrifice was demanded; who cared, with that tenderness, innate in all sailors, for the women and children, when the passenger ships were struck a dastardly blow by the wicked enemy; who, mocking death, gave up life with a heroism all the more heroic because it was always taken as a matter of course! Is it any wonder, then, that the members of the Ladies' Harbour Light Guild make it their business to provide a bright, homelike, spot in Melbourne, where the sailors are always certain of a cherry welcome ashore? The members of the guild are admirably drafted! The 360 non-workers each pay £1 1s. per annum. The workers, of whom there are between 700 and 800, donate 2s. 6d. and school members - it is confidently hoped that gradually all the schools will take an active interest in the mission - 1s. a year. The knights of the guild - as the men members are designated - are responsible for any sum they wish to name, from 5s. a year upwards. Everything is paid for out of these revenues, with the exception of a small grant from the Home Mission Fund - and such is the organisation, and management, that the entire concern is quite free from debt. The Seamen's Church and Institute, where the "Harbour Lights" gleam so brightly, is situated right in the midst of all the bustle and turmoil of the wharves, at the end of Flinders-street. The building, comprising chapel, and institute under the one red tiled roof, is grey stuccoed, with a small tower, from which flaunts the flag of 'The Flying Angel" - the badge of the guild. A visit to the institute makes one fully appreciate the boon the place must be to the voyage worn, weary, sailor. The atmosphere is eminently social in its best sense. While the architecture imparts an elegance, and quiet dignity which soothes by the very subtlety of its charm. With its comfortable furniture, its wealth of flowers, and the happy, wholesome, feminine influence which prevails everywhere, the quality which stands for the magic word "home" abounds. The Chaplain in the course of conversation said: -"We try to make this really a free club for sailors." But the habitues would probably tell you it was far more than that to them. The Institute is excellently appointed, and every little corner seems to have its particular history. It was built after the model of one of the old mission churches in California, and retains something of the old world attraction, while yet it combines all the advantages of modern, practical, conveniences. On entering the door the first thing, one notices is a huge compass, inlaid upon the floor, evidently to indicate one's proper bearings for it points due north - to the chapel! Only one other seamen's mission in the world boasts such a compass. As the sailor swings through the entrance he finds the office on his right, and there is, here, always a smiling face to welcome the shy, or timid, new comer. Quite a real post office is staffed by members of the guild, and all the letters received are listed alphabetically. Therefore, the expectant sailor has just to run his eye down the list, and he can immediately see whether there is a letter for him or not. If he is fortunate, he comes up to the member in charge, who unlocks the box, and produces the longed for missive. The boys are always encouraged to answer letters - and to write them. Often a few words about their mother, and their own home, will provoke a sleeping memory into activity. The writing room is well stocked with paper, envelopes, pens, and ink. The tables are so divided to ensure the utmost privacy, and through a calculated chain of circumstances, many an anxious mother receives a letter from her sailor lad, who, perhaps, might not have written but for these kindly inducements. The central hall - where social evenings are held every other night besides two special concerts a week - is inviting in the extreme. A handsome piano affords opportunity for those musically inclined. The tables are strewn with papers. The walls are bright with pictures, and here, and there, is a carved model, of a ship. One, of especial interest, is a model of "The Roon" carved, and presented by a French sailor. This German vessel will always be remembered in Australia. For it was across her bows that the first hostile shot was ever fired in Australian waters. In the corner is the canteen. It was fitted up entirely from the proceeds of a quotation calendar compiled by one of the members. The sailors may at any time, get a teapot of tea, or a tray of eatables, at a nominal cost. Before the canteen was in existence they had to go out for refreshments! - and sometimes they did not come back! Groups of sailors sit chatting at the tables. Half a dozen Swedes laugh and talk among themselves, for the simple reason they know no other language than their own. Several British sailors cluster about a dark-eyed Welsh lad - a perfect Celtic type - who, although only about twenty years of age, has been the victim of the Hun five times. Mines and torpedoes sank the ships he was in, either in the Channel or off the English coast, four times; and it is to his fifth experience, when the Inverness was wrecked, that everyone is eagerly listening. "We were in the boats eight days," he was saying, "I was pretty well mangled when they picked me up. The sufferings we endured were awful. At last we managed to reach Rapa, a Hawaiian island. The natives thought we were Germans, and came at us with spears. When they found we were British, they were awfully good to us. They even cried when we left, and the day before the rescue boat arrived they begged us to go into the hills and hide." At another table a Canadian lad - once a sailor - then a soldier, who trained at the Broadmeadows camp - was telling his experiences : - "The voyage which will always stick in my memory," he said, "was to a place which must be nameless. We left the United States not knowing whether we were bound, or what we were going to do. After some weeks we sighted a group of wonderfully beautiful islands, and we headed for the most remote and most lovely of them all. Then, and only then, we learned our mission from the skipper. We were taking their year's supply to a leprosy station! Oh no! I don't blame the skipper for not telling us ! Someone has to do these things, you know. A naval guard saw they didn't come near - and we all got sixty dollars extra. When the job was over we were quarantined on another island for two months, and one little chap - the baby of the crew, not eighteen - developed leprosy, and died before we left. Yes! I'll never forget that voyage, mates! Sometimes, I seem to see Leper's Island yet, with its lavish tropical vegetation and the gorgeous sunsets which stained all the water with blood. Then, too" - here the voice deepened - "there was an English girl - a leper - there. We heard she used to be an actress, and she contracted the disease somehow or other. She was always alone, and always watching us. In the distance we could see her come to the water's edge, and from there she would watch. Just watch . .. . watch . . .watch. ..." "Here come a couple of North Sea chaps," broke in an elderly man after pause. "One of them wounded, too, poor lad." It is not strange that all the sailors flock to the Institute. It is so comfortable, and essentially inviting, besides being full of human interest. The men's quarters comprise reading, writing and dressing rooms - hot and cold baths are always available - billiard room, and a special baggage room, where any sailor may leave his kit for as long as he likes. The payment of 3d. covers its complete insurance. Upstairs are the officers' quarters. These also have their own billiard room, writing and reading rooms, bath and dressing rooms. Just close are the apprentices' quarters - "The Half Deck," as popular parlance has it! The lads also have a billiard room of their own, and indulge in an easy armchair - amongst others - which was a donation from the Milverton School branch of the Guild. It is hoped by the committee to some day utilise the huge empty rooms, which run the length of the whole building. Their ultimate intention is to fit them up as cubicles, or "cabins," as they are to be called. They trust these "cabins" will be donated, either in memory, or in honour, of someone dear to the donor. Another forward movement soon to be put in hand, now that materials are available, is the establishment of "Norla Gymnasium." In a sailors' club such facility for exercise is absolutely essential. The men both need, and miss, exertion. As one boy, who had been backsliding, once said pathetically : -"If only there was something to do to get me into a good sweat, I would be all right." Soon such an one will be helped to swing from the trapese of the Norla Gymnasium into the right track! Sunday is always a fete day at the Institute, for 40 or 50 sailors generally come into tea. The up-to-date kitchen, which is fitted with every labour-saving appliance - all paid for out of working members' half crowns - is then a hive of animation, and methodical order. A formidable row of teapots await filling. Mrs. Goldsmith -, the chaplain's wife - rightly thinks it is far more homely to pour out the tea from a pot, than to serve it straight from the urns. So tea is poured out by a member, who sits at the head of a table gay with flowers, and chats to the guests. These latter are of all nationalities. But the French, the Spanish, Scandinavian, Norwegian - or any other sailor is equally welcome with the British. Two enthusiasts belonging to the Guild actually learnt Norwegian, so that men of this nation would have someone to talk to, and so be less lonely when they reached this, to them, foreign port ! The members of the Guild have their own private suite where they arrange the flow-err and do other necessary odds and ends undisturbed. No one appreciates flowers like a sailor, and the earliest and most beautiful may always be seen adorning the tables and rooms. Teas are served and lectures are held in the "Celia Little Hall," one of the most beautiful portions of the institute. It was erected by the chaplain in memory of his aunt from whom the hall takes its name. The Gothic windows open upon the cloisters, where, in the hot weather, the sailors enjoy their meals out of doors. The cloisters, indeed, form an exquisite spot. They are between a series of sweeping arches which lead to the chapel, and are sheltered by the open balcony of the chaplain's quarters. Grace of contour marks the architecture on every turn. Just around the corner is the chaplain's garden - a patch of green and colour, transformed from a desert waste, by a well-known woman horticulturist. The book room is a department especially valued by the sailors. There are two secretaries, one for home and the other for foreign literature. Books in French, English, Spanish, Scandinavian, Norwegian, and German may be found on the shelves. Each week about 36 convenient parcels of reading stuff are made up. These contain illustrated papers, books in various languages, and magazines. These parcels are eagerly accepted by the sailor with a long monotonous voyage before him. But complete as is every corner of the institute, no part is so well equipped as the memorial chapel erected by the Ladies' Harbour Light Guild, in memory of the officers and men, who have lost their lives during the war. St Peter's - for it is called after the sailor's patron saint - with its hallowed gentle dignity is a veritable sanctuary of peace, perhaps all the more so because it sprang out of war. The fittings are entirely of Australian wood. The pews, given in memory of some loved one by one of the members, are of Tasmanian hardwood. The reredos and altar chairs of carved blackwood. The rich carpet was provided by the members' magical half-crowns. Already this chapel holds memorials of peculiar historical interest. The altar lectern was given in memory of Commander Elwell, who, it will be remembered, was killed at Rabaul, in the early part of the war. The font commemorates two heroes - Nigel Hockley and Fred Hyde, who lost their lives at the hands of the Germans, although they survived the actual torpedoing of their ships, the Galgorn Castle off the coast of Ireland. The mother of one of them wrote out that her son had died as an Englishman should - fighting for the right. This noble sentiment is suitably paraphrased upon the inscription engraved upon the font. Practically every-hing enshrined in the chapel has its own sentimental value. The alms salver of beaten copper, studded with agate, is fragrant with the memory of a saintly woman.The eye of the sailor is caught and held by the pulpit, which is fashioned like a ship's hull and only a twist of rope guides the chaplain up the steps. For the last 13 years the Rev. A. Gurney Goldsmith, M.A., has acted as chaplain to the Seamen's Mission in Melbourne. Before that he and his wife worked in China. Mr Goldsmith visits all the boats and gets in touch personally with the sailor, over whom he has great influence. He is not only their chaplain and friend, but, amongst a wide range of other things, their banker besides. An exchange system exists between the various Missions, and the sailor who has "banked" his money with the chaplain, upon going away, receives a cheque which is cashed - minus exchange - by the chaplain of the next port. Mr. Goldsmith will tell you he has a soft spot in his heart for on old sailor he calls "Paddy." This ancient mariner has been wrecked ten times. It was a long time before the chaplain prevailed upon "Paddy" to partake of the spiritual and secular advantages afforded by the institute. He would not come, he said, until he could do so "with a good heart." Finally he frankly admitted that he had no "friends like those of 'the Flying Angel,' " and that he eventually proved his own "good heart" will be shown in this story. One day he came in to the chaplain and said bluffly, "Well, sir, I've been payin' off some old scores up Carlton way, an' I tells yer, plain, sir, not one of 'em would have seen a penny of their money but for the Mission." The Ladies' Harbour Light Guild has over thirty working suburban branches, and the excellent results achieved at the Institute now will no doubt be considerably augmented in the future. The practical actions of the members do more than anything else to convey the subtle meaning of the name of the Guild. To the visiting sailors the word "ladies" signifies the bread givers; "harbour" safety ; "lights" welcome; "guild" the welding of fraternity, and they one and all tell you the ideals thus embodied are unselfishly carried out by all the ladies who have banded together to care for the sailors' welfare.The article describes the Mission and the use of several spaces a year after its opening and gives details about the daily activities.Digital copy of an article published in the Western Mail on the 13th of December 1918. 717 flinders street, seamen's mission, norla dome, lhlg, reverend alfred gurney goldsmith, celia little room, garden, frederica godfrey -
 Federation University Historical Collection
Letter - Correspondence, Walter M. Hitchcock, Letters from Walter M. Hitchcock concerning a model of a Ballarat tent (and more), 1911, 1911 (exact)
The tent model mentioned in the letters was displayed in the Ballarat School of Mines Museum. During the 1960s it was transferred to the Ballarat Historical Society. Two handwritten letters on paper with black mourning edge written by Walter M. Hitchcock to the Ballarat School of Mines, and another written by Walter's brother George M. Hitchcock.Letter transcription follow: Letter from Walter M. Hitchcock regarding the death of James Oddie and early gold mining at Ballarat, 1910 and 1911 48 The Memorial Hall Farringdon St London Dec1/10 The Secretary Ballarat Museum Dear Sir, I am just now sending you this line, i anticipation of further correspondence later on, simply to forward you a Post Card of the 1st mining tent erected 1851 on the site of he then newly proclaimed Township of Ballarat, which, as the sole survivor of the party who built the original, I have had the pleasure in making, and have decided to present it to your museum, Sir Jno Lasenor out Agent General for Victoria came to a Bazaar recently held in London. where I had it on view in the museum from 3 days, - and desired I would allow its [ ? ] exhibited in the first large window of the beautiful new building of the Victoria Agency situate in the Strand. It is there for the past few days and he may wish it to remain a week or two longer, I know of no other exhibition of it to delay it being packed and shipped to my relatives in Geelong (Mr [?] Bright of Hitchock's Firm) who may wish to show it in one of their windows before forwarding it to your museum - I have had an itemised pane glass case made for it with drop down end and [?} it stands on a plateau of moss, to represent grass 32 x 13 x 13 high and chimney 14 1/2 - the case is made 34 x 26 x 20 high inside - I shall have it very carefully packed - tent emptied tools, beds, &c &c in separate packing and insured for 50 pounds - I will send you full details later on. I hope and believe your President will accept it in due time Meantime believe me to be very truly Cat Walter Hitchcock G.F.B. 48 The Memorial Hall Farringdon St London March 15th 1911 The Secretary Ballarat School of Mines Dear Sir, Thanks for your letter received last week – I have unaccountably mislaid it, so cannot address you personally, shall no doubt find it among office papers. The model is being fetched today from Victorian Agent General’s (Sir John [Lavernor?] office window in the Strand where many thousands, he tells me, have stopped in passing to see it (their first peep of Ballaarat). It will be on view at Blackheath (Kent) for a week, then packed and shipped without further delay. I shall enclose in the glass case (which is 26 x 34 x 16 in high) some spare minced moss and gas (smoke) in case in transit the plateau suffers by shaking (though it is well glued down). All the tools, mining appliances, cradle, windlass, &c will be separately packed enclosed – which you can easily place in respective positions. HRH Prince of Wales has graciously accepted a photo of it – and in my letter to him when sending it for his acceptance I said – as he would probably ere long visit Australia as did his grandfather and father, which ought to (and certainly will) include at least a day or two in seeing your beautiful City, and also something of your mines &c instead of the hurried visit of his father (2 hours) when he, as Duke of York, unveiled a statue to the memory of those slain in the sad Boer War, which now is admitted by almost everybody to have been a big political mistake, - though in the future with England’s present wise policy towards that country it will prove for Africa’s welfare. It may interest you to know that when I ascertained that Geelong was not to be visited by the Royal Pair – I went up to St James’s Palace by appointed time the Duke’s private Secy Sir Arthur Bigge – taking with me a specially illustrated paper issued in Melb. showing many pictures of the beauties and industries of Geelong – Sir Arthur was impressed but said all the arrangements for the Royal stay in Victoria (10 days) were made locally, by Lord Hopetoun and collegues and committee, and were practically closed – which meant that only a brief trip to Ballarat to uncover the memorial was intended outside Melbourne. Perhaps if we were Melbourne residents we should have succumbed to the prevailing spirit of selfishness – forgetting (or trying to forget) that there are many beauty spots in Victoria and centres of great interest - Ballarat, Geelong, Bendigo, &c that ought to have been visited instead of Melbourne only. Finding Sir Arthur favorably impressed about Geelong I thanked him and returned to City work again. I at once called to Geelong whose mayor and friends had been twice unsuccessful in trying for the Melbourne functions programme being altered to include a visit to Geelong and lovely spots in the Western District, reporting my interview with Sir A B and his favourable reception of my representations, but that any alteration to the programme of engagements during the Royal visit must be made locally and by the local authorities. This had the desired success for on receipt of my message the Geelong mayor and colleagues again reopened the question and went to Melbourne, resulting in a concession (but what an altogether inadequate one) and they graciously ? consented to the train, on its way with the Duke and Duchess to your city, to stop at the Geelong stn (15 minutes) and so it came about that by a hasty local effort, 3,000 school children, and not a few of the leading people including the Mayor &c were gathered to welcome them in Geelong. The National anthem being sung, an Address read and presented and kindly replied to. Now Ballarat should doubtless has influence. See to it when our P. Of Wales visits Victoria – an unselfish ¬ programme is fixed up – and HRH afforded ample opportunity of visiting leisurely your city, Geelong, Bendigo and other centres of beauty and importance. The Prince himself will be the gainer by such an equitable and enlightened programme, - and come back with all the more favourable views of the marvellous development ever since our family first settled in Geelong in 1850. A far preferable result of such a visit than night after night having Melbourne Banquets and the visiting of its undoubted attractions - whilst all the rest of the State remained unvisited. Such an official mistake must not be made again. I will write you again, stating name of steamer of which the model is shipped and date of departure – it is firmly built on a backing of 3/8 in oak tall uprights so through the 7/8 in plateau and am entrusting the packing be very careful. I expressed firm – so that except possibly any breakage in glass case – it should reach you in due time all right. The top of case will be screwed so that it can be readily removed temporarily to enable my [ ? ] firm to show it in one of their windows. Believe me Yours very truly Captn Walter M. Hitchcock My brother will deliver it on my a/c – all carriage paid. Mt very kind regards to my friend since 1850 Jas Oddie. University of Ballarat Historical Collection Cat. No. 8133.3 & .4 Letter from Walter M. Hitchcock regarding the death of James Oddie and early gold mining at Ballarat, 1911 48 The Memorial Hall Farringdon St London April 20th 1911 My Dear Sir, It is with no ordinary feeling of regret that I received the tidings of the death of my good friend, your fellow citizen for many years, Mr James Oddie. Living at Geelong from March 1850 I came to know him there as carrying on a foundry business in Ashby. With the discovery of gold at Ballarat started off almost of the working people, as well as of all other classes of the male population. Mr Oddie arrived in Ballarat I believe on or about September 1st 1851. My three comrades and I arrived October 1st 1851 – among the many thousands soon gathered within a mile or so of Golden Point – my friend Oddie and I often met. I returning to Geelong after a year mining – my friend on the other hand remaining at Ballarat ever since – a marvellous record, and I am sure his life has been one of unique value to your City in many ways, - his age (87) naturally prepared me for his call home – and only two mails before the news came I received from him on of his kindly chatty letters in which amongst other things – he referred with pleasure to having received from me two 10 x 12 photos – one being of my model and that he was arranging to have it placed in a shop window in your city. I am interested in the fact of your having known each of my three comrades of 1851/52. It was J.M. Garrett and I who got permission to conduct public Sunday morning service in their large Marquee – used all the week for issue of Licenses in the absence of any church buildings, and it being on wet Sundays impossible to have services as usual under the trees – Ballarat then was more like a Gentleman’s Park – than bush country – but the axe soon did its work – and all were felled for our cooking, and hencewith to make our kindling etc. Shafting of holes not being at first done because too shallow – our deepest (at Eureka) was only 115 ft. Bendigo I hear had now mines of 4,000 ft in depth (deeper than our tin or coal mines here). I fortunately have, in excellent state of preservation, my last of 12 licenses dated October 1 1852 and have recently purchased here a Miner’s Right dated 1864, to that when explaining on matters re Gold Licensing I can show sample of each. With kind regards Believe me Yours sincerely Walter M. Hitchcock Geelong June 20/11 Dear Sir, By rail to day through Messrs Bannister I send the model of miner’s tent packed in a case 50 donated by my brother Captain Walter M. Hitchcock of London. This model was made by my brother and represents the tent he worked in on the Ballarat Gold Fields in the year 1851 or 2. In a separate parcel a few extras omitted from the case. Please send me receipts in duplicate, one for my brother, the other for the Customs, Geelong, as being donated to your institution, after some little correspondence it was admitted [??] any payment for duty. You probably have my brother’s address and would like to acknowledge its arrival, direct. I hope it is in good order. I did not open it for show in Geelong, as there would be less risk of breakage on repacking. With kind remembrances. I am Yours Faithfully Geo. M. Hitchcock. A Mr G. F. B. Sharick who is living near my home called in to see my model – he said he knew FM [Fred Martell] and was lately at Ballaratballarat school of mines, frederick martell, fred martell, james oddie, walter m hitchcock, walter hitchcock, f m garratt, george hitchcock, hitchcock, golden point, gold discovery, j m garrett, gold license, j.m. garrett, t.m. hall, george m. hitchcock, f.m. garratt, walter m. hitchcock -
 Orbost & District Historical Society
bottle, first half 20th century
The raised dots texture of this bottle clearly distinguishes the bottle as a poison. Poison bottles were often brown.Australia was not self sufficient in glass making until the turn of the 20th century and many bottles were made overseas and shipped to Australia with their contents and when emptied were re-filled with other company’s products. This bottle has an aesthetic element in that the shapes, colour and texture are visually appealing. They reflect the type of glassware used for poisonous contents that was in circulation in the first half of the 20th century. A brown glass bottle with angled sides and raised dimples on two sides. One side has "NOT TO BE TAKEN". It has a screw thread.On base -M On side NOT TO BE TAKENbottle container poison -
 Orbost & District Historical Society
bottle, first half 20th century
Australia was not self sufficient in glass making until the turn of the 20th century and many bottles were made overseas and shipped to Australia with their contents and when emptied were re-filled with other company’s products. This bottle has an aesthetic element in that the shapesis visually appealing. It reflects the type of glassware that was in circulation in the first half of the 20th century. A narrow clear glass bottle with a short neck and a moulded rim.5 3bottle container -
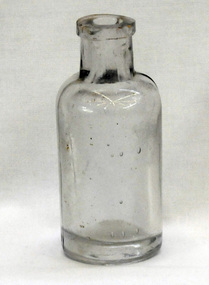 Orbost & District Historical Society
bottle, 1920's
Australia was not self sufficient in glass making until the turn of the 20th century and many bottles were made overseas and shipped to Australia with their contents and when emptied were re-filled with other company’s products. This bottle reflecs the type of glassware that was in circulation in the 1920's.A heavy, thick, clear glass round bottle with a short neck which has a moulded rim for a cork stopper. It is very solid. There are some bubbles in the glass.Mbottle container -
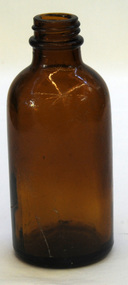 Orbost & District Historical Society
bottle, first half 20th century
Australia was not self sufficient in glass making until the turn of the 20th century and many bottles were made overseas and shipped to Australia with their contents and when emptied were re-filled with other company’s products. This bottle has an aesthetic element in that the shape and colour are visually appealing. It reflects the type of glassware that was in circulation in the first 20th century. A brown glass bottle which has a screw thread on the top of the neck.On the base - M684bottle container glassware -
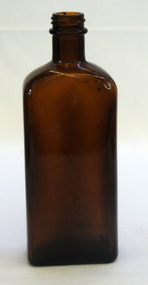 Orbost & District Historical Society
bottle, first half 20th century
Australia was not self sufficient in glass making until the turn of the 20th century and many bottles were made overseas and shipped to Australia with their contents and when emptied were re-filled with other company’s products. This bottle has an aesthetic element in that the shapes and colourare visually appealing. The item reflects the type of glassware that was in circulation in the 20th century.A rectangular brown glass bottle with a screw thread at top of neck.On the base -J 826bottle container brown-glass -
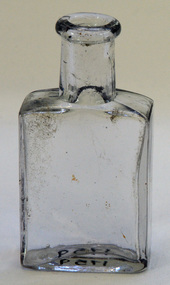 Orbost & District Historical Society
bottle, first half 20th century
Australia was not self sufficient in glass making until the turn of the 20th century and many bottles were made overseas and shipped to Australia with their contents and when emptied were re-filled with other company’s products. This item reflects the type of glassware that was in circulation in the first half of the 20th century.A small clear glass bottle which is a flat rectangular shape. The top has a lip.bottle glass container -
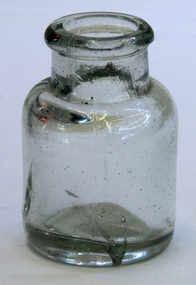 Orbost & District Historical Society
bottle, 1920-1940
Australia was not self sufficient in glass making until the turn of the 20th century and many bottles were made overseas and shipped to Australia with their contents and when emptied were re-filled with other company’s products. This bottle has an aesthetic element in that the shapes is visually appealing. It reflects the type of glassware that was in circulation in the first half of the 20th century. A small round clear glass bottle which has a mould seam from the rim to the base. The neck is lipped.bottle glass container -
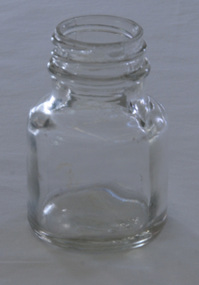 Orbost & District Historical Society
bottle, first half 20th century
Australia was not self sufficient in glass making until the turn of the 20th century and many bottles were made overseas and shipped to Australia with their contents and when emptied were re-filled with other company’s products. This bottle have an aesthetic element in that the shapes is visually appealing. It reflects the type of glassware that was in circulation in the first half of the 20th century. A small clear glass bottle with a threaded neck. It has a mould seam from the rim to the base.On the base - 049 F1020bottle glass container -
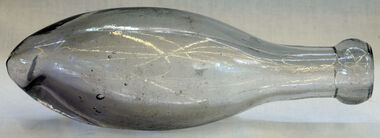 Orbost & District Historical Society
bottle, late 19th - early 20th century
Donor was grand-daughter of Jonathon Cameron of Genoa. Mother was Jane Elizabeth.Australia was not self sufficient in glass making until the turn of the 20th century and many bottles were made overseas and shipped to Australia with their contents and when emptied were re-filled with other company’s products. This bottles have an aesthetic element in that the shape is unusual and visually appealing. It reflect the type of glassware that was as a beverage container in the early 20th century. Small clear oval lemonade bottle. One flat side. A torpedo bottlebottle -
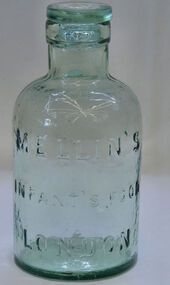 Orbost & District Historical Society
bottle, 1900's
Australia was not self sufficient in glass making until the turn of the 20th century and many bottles were made overseas and shipped to Australia with their contents and when emptied were re-filled with other company’s products. These bottles have an aesthetic element in that the shapes , colours and textures are visually appealing. They reflect the type of glassware that was used for food containers in the early 20th century. Moulded baby food bottle. Squat and round with green glass stopper. Moulded writing on front. The thick glass has a slight blue-green tinge to it.Bottom -M4 Front- Mellin's Infants' Food, LOndonbottle glass food -container -
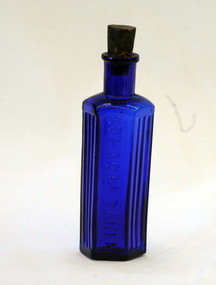 Orbost & District Historical Society
bottle, first half 20th century
Australia was not self sufficient in glass making until the turn of the 20th century and many bottles were made overseas and shipped to Australia with their contents and when emptied were re-filled with other company’s products. This bottle has an aesthetic element in that the shape , colour and texture are visually appealing. It reflects the type of glassware that was in circulation at that time in history. Small blue hexagonal sided bottle with cork. Not to be takenglass bottle container -
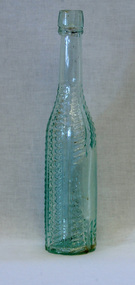 Orbost & District Historical Society
bottle, first half 20th century
Australia was not self sufficient in glass making until the turn of the 20th century and many bottles were made overseas and shipped to Australia with their contents and when emptied were re-filled with other company’s products. This bottle has an aesthetic element in that the shape and texturesare visually appealing. This item reflects the type of food container glassware that was in circulation in the first half of the 20th century. Salad oil bottle. Narrow with grooved sides.glass bottle container food-container -
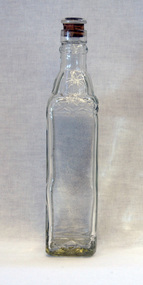 Orbost & District Historical Society
bottle, first half 20th century
Australia was not self sufficient in glass making until the turn of the 20th century and many bottles were made overseas and shipped to Australia with their contents and when emptied were re-filled with other company’s products. This bottle has an aesthetic element in that the shape isvisually appealing It reflects the type of glassware that was in circulation in the first half of the 2oth century.Cook & Sons clear glass bottle with cork.glass bottle container -
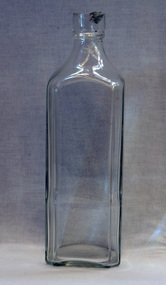 Orbost & District Historical Society
bottle, first half 20th century
Australia was not self sufficient in glass making until the turn of the 20th century and many bottles were made overseas and shipped to Australia with their contents and when emptied were re-filled with other company’s products. This bottle has an aesthetic element in that the shapesis visually appealing. This item reflects the type of glassware that was in circulation in the first half of the 20th century. Tall clear square-shaped glass bottle with small pouring lip. glass bottle container -
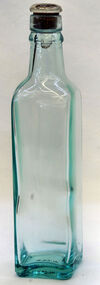 Orbost & District Historical Society
bottle, first half 20th century
Australia was not self sufficient in glass making until the turn of the 20th century and many bottles were made overseas and shipped to Australia with their contents and when emptied were re-filled with other company’s products. This bottle has an aesthetic element in that the shape is visually appealing. It reflects the type of glassware that was in circulation in the first half 20th century.Square bottle with glass stopper and cork.glass bottle container -
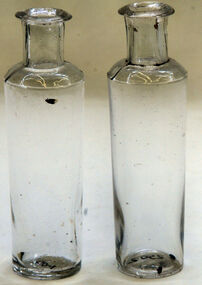 Orbost & District Historical Society
bottles, first half 20th century
Australia was not self sufficient in glass making until the turn of the 20th century and many bottles were made overseas and shipped to Australia with their contents and when emptied were re-filled with other company’s products. These bottles have an aesthetic element in that the shapes are visually appealing. They reflect the type of glassware that was in circulation in the first half of the 20th century.Two very small clear glass vial bottles with flat rims. Possibly had cork stoppers.glass bottle vial -
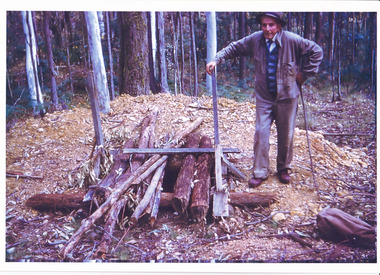 The Beechworth Burke Museum
Photograph
The date this photograph was taken is unknown. Estimated date 1960-70s. The gentleman in the photograph and location the photograph was taken are also unknown. Perhaps in the Beechworth or Stanley area. The photo is associated to another record, 6856 as it has the same elderly gentlemen in the image. He is able to be identified through wearing the same clothes and distinctive hat in both photographs. The photograph is associated to mining as the gentleman is standing next to a small mine site where perhaps a windless or whip was mounted over the entrance of the shaft. The windless was a structure mounted over the shaft, fitted with a hand-cranked winch, which was usually constructed from wood that would have been found in the surrounding area. Colour rectangular photograph printed on glossy photographic paper.Obverse: Reverse: 6856/ mining, windlass, whip, empty record -
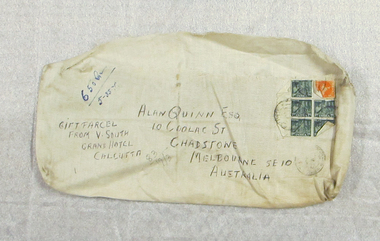 Mission to Seafarers Victoria
Functional object - Empty material postal bag from Calcutta to Melbourne
This was a gift sent to Alan QuinnThis is of historical significance as it paints a picture of what Quinn had sent back home from India.This bag was posted in Calcutta, possibly in 1952 though the date is indecipherable. On one side: Alan Quinn, Coolac St, Chadstone, Melbourne, Australia. Customs declaration: Handloom tablemats. No commercial value. RM South, Grand Hotel, Calcutta. On the reverse: the address is repeated and: Gift parcel, from V. South, Grand Hotel, Calcutta. There are six stamps with an indecipherable franking stamp on them.