Showing 1369 items
matching centre 5
-
 Ballarat Masonic Centre - Roger Porteous Library and Robert Bell Archive
Journal, The Victorian Freemason January 10th 1884, Publication Date 10/1/1884
Vol 2 No 5 The Victorian Freemason Journal "January 10th 1884, Melbourne Victoriajournal, the victorian freemason -
 Ballarat RSL Sub-Branch Inc.
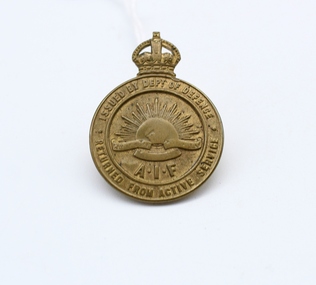
Badge - Returned from Active Service
This object relates to Herbert Swain GREENING. He was born on 1/01/1891 in Ballarat, VIC. Herbert Swain served in the AIF (3292) enlisting on, 13/07/1915 in Ballarat, VIC before being discharged from duties with the 5 BATTALION as a Army Non-Commissioned Private (PTE) on 15/02/1918. Herbert Swain GREENING was not a prisoner of war. His next of kin is Mrs. M. Greening - Mother. Herbert Greening was awarded the 1914-1915 Star, British War Medal, Victory Medal.Brass coloured, circular badge with a crown protruding from the top centre. The symbol of the rising sun can be seen at the centre of the badge in relief with the letters A I F written just below. One line of text follows the top perimeter of the badge, while another line of text follows the lower perimeter (also in relief). On the back of the badge are two eyelets and a pin, as well as engravings.Front of badge (top perimeter): "ISSUED BY DEPT OF DEFENCE" Front of badge (bottom perimeter): "RETURNED FROM ACTIVE SERVICE" Back of badge: "54676" and "6TOKF68SON?" / "MFL8"first world war (ww1), 1914 - 1918, personal items, ballarat rsl, ballarat -
 Ballarat RSL Sub-Branch Inc.
1914 - 1915 Star
This object relates to Herbert Swain GREENING. He was born on 1/01/1891 in Ballarat, VIC. Herbert Swain served in the AIF (3292) enlisting on, 13/07/1915 in Ballarat, VIC before being discharged from duties with the 5 BATTALION as a Army Non-Commissioned Private (PTE) on 15/02/1918. Herbert Swain GREENING was not a prisoner of war. His next of kin is Mrs. M. Greening - Mother. Herbert Greening was awarded the 1914-1915 Star, British War Medal, Victory Medal.Brass colour medal hanging from a red, white and blue ribbon (in order left to right). The medal is in relief - a wreath is overlaying two crossed swords with a banner in the very centre that reads "1914-15". At the left, right and bottom of the wreath are triangular shapes, and a crown can be seen protruding from the very top that attaches to an eyelet through which the ribbon is fed. Also at the bottom of the wreath is the letter "C" with a "V" in the centre of it. The medal is also missing a fastening pin, so the material is fraying.Back of the medallion: "3292" / "PTE H.S. GREENING" / "5 BN. A.I.F"medals, ballarat rsl, ballarat -
 Ballarat RSL Sub-Branch Inc.
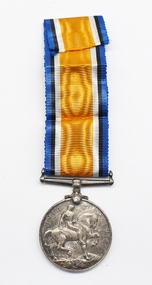
British War Medal 1914-20
This object relates to James Joseph WATSON. He was born on 24/10/1923 in Binalong, NSW. James Joseph served in the Army (NX117008) enlisting on, 19/09/1942 in Binalong, NSW before being discharged from duties with the 5 AUST PACK TRANS COY as a Army Non-Commissioned DVR (GNR) on 25/09/1944. James Joseph WATSON was not a prisoner of war. His next of kin is James WATSON. James Watson was awarded the 1939-1945 Star, Defence Medal, Pacific Star, War Medal 1939-1945.Silver medal hanging from a coloured ribbon. The ribbon has a thick centre band of orange with three thinner bands appearing on either side, which are in order from centre to outwards of white, black and blue. The ribbon is also missing a pin at the top, so the material is open-ended. The front side of the medal depicts a relief (elevated from the surface) of a bearded man's face facing to the left side, and Latin text also in relief follows the top perimeter of the medal. The reverse side of the medal is a relief of a man on a horse carrying a sword. The horse can be seen standing on a shield with a skull visible just to the left side of it, and water can be seen on the horizon. The dates 1914 and 1918 have been written on the left and right side of the medal, as well.Front of medal: "GEORGIVS V BRITT OMN: REX ET IND IMP" Back of medal: "1914 1918"first world war (ww1), 1914 - 1918, medals, ballarat rsl, ballarat -
 Mt Dandenong & District Historical Society Inc.
Photograph, Maypole Dance at Olinda, c1911
Olinda girls practising the Maypole Dance under the tuition of Vera Devine in the grounds of 'Hillcrest', the home of Devine in 1911. Starting with the small girl left of centre pole and going in an anti clockwise direction the names are: Amy Allen, Jessie Ebbels, Faith Beatty, Vera Devine, Maggie Schneider, Vera Watson, Hope Barrow, Jessie Wyles, Dolly Witt (obscured), Lois Lyons, Edie Jackson, Beth Barrow, Phyllis Murray. This photograph has a detailed inscription on the back handwritten by John Lundy-Clarke in c1974.Olinda girls practising the maypole dance under the tuition of Vera Devine in the grounds of 'Hillcrest', the home of Devine in 1911. Girls, starting from left and circling across the front then round the back to finish at the left are - 1. Lois Lyons 2. Edie Jackson 3. Beth Barrow 4. Phyllis Murray 5. Amy Allen 6. Jessie Ebbels 7. Faith Barrow 8. Vera Devine 9. Maggie Schneider 10. Vera Watson 11. Hope Barrow 12. Jessie Wyles 13. Dolly Witt barely seen, the tallest there.lois lyons, edie jackson, beth barrow, phyllis murray, amy allen, jessie ebbels, faith beatty, vera devine, maggie schneider, vera watson, hope barrow, jessie wyles, dolly witt, olinda, maypole, hillcrest, john lundy-clarke -
 8th/13th Victorian Mounted Rifles Regimental Collection
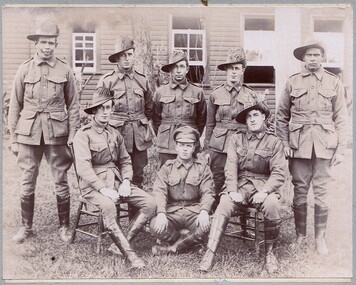
photograph
Remount Units were an important Support Unit supplying replacement horses to Light Horse regiments.Black and white photograph mounted on card of 8 soldiers believed to be members of 1st Remount Unit located at Broadmeadows Camp 1915.Centre front row wearing a cap is robably Veterinary Officer. standing either end are two soldiers of Aboriginal appearance.On reverse " Remount Depo: Mr. J. Bell. Box 5 Wangaratta." -
 Tennis Australia
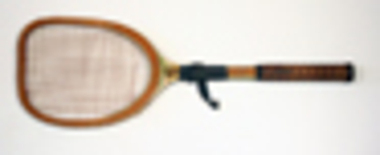
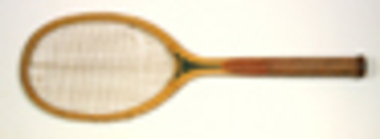
Racquet, Circa 1920
... and shaft. Purchased for $5 from Wagga Antique Centre, Fitzmaurice... and white paint on throat and shaft. Purchased for $5 from Wagga ...'Slazengers' brand, 'Player' model wood tennis racquet. Flat or tilt top head. Leather taped grip. Black cloth tape wrapped around throat. Peeling green and white paint on throat and shaft. Purchased for $5 from Wagga Antique Centre, Fitzmaurice St, Wagga. Purchase date unknown, but probably between 1990 and 2005. Materials: Wood, Gut, Paint, Leather, Cloth tapetennis -
 Tennis Australia
Racquet, Circa 1925
... surface. Swing tag indicates purchased for $5 from Wagga Antique... for $5 from Wagga Antique Centre, Fitzmaurice St, Wagga. Purchase ...'Tournament' model wood tennis racquet. Made by A.J.Reach Company, Philadelphia, USA. Leather strip around butt. String whipping around shoulders. Squaed wooden handle with grooved surface. Swing tag indicates purchased for $5 from Wagga Antique Centre, Fitzmaurice St, Wagga. Purchase date unknown. Materials: Wood, Gut, Paint, Leathertennis -
Southern Sherbrooke Historical Society Inc.
Documents - Belgrave South & Heights Youth Club, 1972-2002
Articles donated to Southern Sherbrooke Historical Society by Jack Weir.Yellow, plastic folder containing items relating to the Belgrave South and Heights Youth Club. Contents: -photos of Youth Club activities and building extension. -An unattributed article from 1986 "Service awards for top citizens". -Budget from Belgrave South and Heights Youth Club, December 1997. -Cheque split up from 1998. -Minute book of Belgrave South and Heights Youth Club, 2-5-1972 to 1-7-1980. -2 page extract draft of "History of Belgrave South and Heights Youth Centre". -3 copies of a 3 page letter to secretary of Youth Advisory Council, 7-4-1972. -Handwritten letter from Rob Quincey to Shire of yarra Ranges, 18-8-2002. -Typed letter from Alison Cran to R.C.Quincey, 17-9-2002. -4 typed copies of a 2 page extract "The Formation of the Belgrave Heights and South Youth Centre". -2 page handwritten note on Youth club activities 20-11-1973. -Drawing of plans, "Proposed Toilet Block Addition to Belgrave South Youth Club Hall, September 1978.belgrave south and heights youth club, rc quiney, kenneth weir -
 Royal District Nursing Service (now known as Bolton Clarke)
Photograph - Photograph, black and white, 11.1953
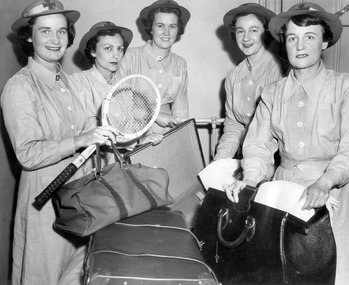
The MDNS Sisters are packing their belongs ready to move from their current Nurses Home at 39 Victoria Parade, Collingwood to their new Nurses Home and Headquarters situated at 452 St Kilda Road, Melbourne, then known as 'Airlie'. From its founding in 1885 until 1891 the Trained nurses (Nurses) of the Melbourne District Nursing Society (MDNS) worked from their own homes which were located in the vicinity of their areas (districts). The Committee meetings were held at the Religious Tract Society rooms at Queen’s walk, off Swanston Street and then at the Library Room at the Melbourne Town Hall. The Annual General Meeting was held at the Town Hall. In November 1891 MDNS was able to rent a two story terraced house at 66 Cardigan Street, Carlton, at £65 a year, which contained accommodation for three Nurses and one pupil nurse as well as being used as their Headquarters. They left from their Nurses Home each morning and returned at the end of their shift to write up their book work before retiring for the day. Three years later they moved into a larger terraced house at 49 Drummond Street Carlton which was rented at ‘a very moderate rental’. There was a Board room, apartments for the Nurses and pupil nurse, a large dispensary which patients could attend each evening to have prescriptions signed and bottles refilled with ‘homely remedies’ and elixirs, which were administered for e.g. to Consumptive cases. Doctor’s prescriptions were filled at the Pharmacy. Cupboards containing donated blankets and bedclothes for needy patients were kept in this room, and it was here where the Nurses kept their nursing bags which were refilled at the end of each shift ready for any emergency and for the next day. A list of Doctors the Nurses could call was kept by the telephone. The home also had a kitchen where nourishing soup was made and distributed twice a week to the needy. Milk was also distributed when needed. In 1902 they moved into rented premises at 188 Leicester Street, Carlton and two years later, in 1904, to premises at 5 Royal Terrace, Nicholson Street, Fitzroy where they remained for ten years. In June 1914 at last the Society had sufficient funds to purchase their own terraced premises, ‘Floraston’ 39 Victoria Parade, Collingwood which was their Headquarters and Nurses Home. In 1926 the After-Care Home for recovering patients, (later called After-Care Hospital) was built by the Society next door, running from 41-47 Victoria Parade (became No. 45). There were now two divisions with the After Care having their owned Trained nurses (Sisters) and the District Division of Trained nurses (Sisters) who continued to live at No. 39. In November 1953 the Sisters working in the District Nursing Division moved into their new Headquarters and Nurses Home at 452 St. Kilda Road, Melbourne. In 1957 this Division changed its name to the Melbourne District Nursing Service when it separated from the After-Care Hospital. It was given Royal patronage in 1966 and became Royal District Nursing Service (RDNS). As it expanded, and now with Centres opening throughout the suburbs, the Nurses Home at 452 closed and those rooms used for administrative purposes. It now had outlying districts to service, and with a full fleet of District cars, the Sisters lived in their own homes and visited their closest District Centre each morning to collect their work for the day and returned there at the end of their community duties to do their administrative work. On April the 1st 1996 RDNS Head Office relocated to 31 Alma Road, St. Kilda. Standing in a semi circle of this photograph are 5 Melbourne District Nursing Society (MDNS) Sisters in their long sleeve grey uniform dresses which have a belt, peaked collars and white buttons down the centre. They are wearing their grey brimmed hats with a central Maltese cross on the light colour headband over their short dark curled hair. From Left to Right are Sisters Marianne Metcalf who is smiling and is holding a tennis racket and soft sided oblong travel bag which has two leather straps and handle in her right hand; it is resting on a closed case, which has two leather straps across the lid; this sits in front of her. Next is Gerda Oppenheim who is looking serious and has her right hand on the top of the lid of an open case in front of her, then Beryl Rowley, who is smiling and has her hands on a narrow white metal horizontal pole which has a vertical pole attached. Next is Marcia Parrat who is smiling and is holding a piece of white linen on the open case, and next, on the far right, is Florence Hoey who is holding a piece of white linen on top of an open hard leather travelling bag which is sitting in front of her next to the closed case. melbourne district nursing society, mdns, mdns headquarters, sister marianne metcalf, sister gerda oppenheim, sister beryl rowley, sister marcia parrat, sister florence hoey, royal district nursing service, rdns -
 Melbourne Legacy
Programme, Melbourne Junior Legatees welcomes you to their annual demonstration 1961, 1961
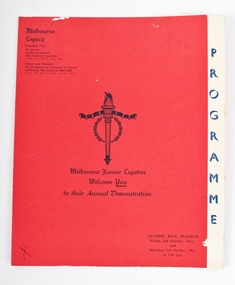
A programme for a Legacy Demonstration at the Olympic Pool Stadium in 1961. Throughout the year Melbourne Legacy provided classes for Junior Legatees such as dancing, gymnastics and eurythmics, the Demonstration was an annual event to showcase their skills. Melbourne Legacy conducted Annual Demonstrations / Parades from 1928 through to 1980s, usually held at Melbourne Town Hall or Olympic Pool Stadium. The beautiful costumes were made by members of the Junior Legacy Mothers' Club and the Melbourne Legacy Wives' Association.A record of a Junior Legacy Demonstration in 1961.Three documents relating to 1961 Annual Demonstration. 00052.1 Programme for the Melbourne Junior Legatees Annual Demonstration, held at the Olympic Pool Stadium on Friday, 6th October 1961 and Saturday, 7th October 1961. Red paper front and back with black printing, 2 centre pages are white with blue printing. 00052.2 Folded Flyer ‘Supplement to Melbourne Legacy Weekly Bulletin No 1663 of 5/9/1961'. 00052.3 Invitation acceptance. 00052.1 178 x 123 mm, 00052.2 260 x 205 mm, 00052.3 210 x 165 mmannual demonstration, junior legatee -
 Melbourne Legacy
Furniture, Table and Chairs, Not known, believed to be during the 1920's
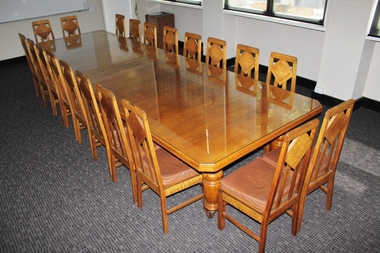
The table and chairs once belonged to the Officers' Mess, 24th Battalion. From 1928 - 1936 the CO 24th Battallion was Lt Col S.G. Savige, DSO MC. It was during this time that the chairs were made and used for dining-in nights. During the a ceremony of remembrance, each officer stood behind his chair and called the name on its back as a mark of respect for those KIA during WW1. At the inaugural meeting of the Club, from which arose Melbourne Legacy in September 1923, eight of the fourteen members had worn the colour patch of 24th Battalion.The connection to Savige and the fact that many of his officers from 24th Battalion became members of Melbourne Legacy. This table and its chairs were formally gifted to Melbourne Legacy on 9th May 1956 when the Club moved to Legacy House. They have been used since in the Club's Board Room, now located on level 1, Legacy House, 293 Swanston Street, Melbourne. Two Legatees were responsible for fully refurbishing the table and chairs - Legatee Gordon Beith (Morrabbin Branch) and Legatee Ted McKenzie (Footscray/Sunshine Branch) Board Room Table - Clear varnished timber table with a two piece glass top Table legs are turned timber on wheels x 5. Two at each end and one in the centre. Chairs - Clear varnished timber with leather cushions x 20. Each chair has an engraved plaque with an officer's name from 24th Battalion. With the exception of one who died shortly after returning to Australia all were KIA in various battles during WW1. The 24th Battalion (the Kooyong Regiment) Robinson Road, Surrey Hills. Vic Names inscribed on each chair: Lt A.L. Bacon, 2Lt W.A. Baldie, Capt J.C.L. Biggsley, Lt P.S. Carne MSM, Lt J.B.N. Carvick MC, Lt J.R. Clarke, 2Lt F.M. Coffee, Lt P.G. Denton-Fethers, Lt W.S. Finlay, Capt J.H. Fletcher, Lt A.C. Fogarty, 2Lt A.G. Gilchrist, Lt J. Harris, Lt A.J. Kerr, Maj. C.E. Manning, Capt G.L. Maxfield MC, 2Lt H.L. Rhynehart, Capt W.H. Tatnall, 2Lt R.N. Thomas, Capt C.M. Williams MC furniture, 24th battalion -
 Melbourne Legacy
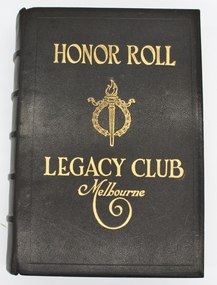
Book, Honor Roll Legacy Club Melbourne
This book is a record, made in honour of deceased Legatees, who have given service to the cause of Legacy. This is labeled Book 3. There are two similar books on display at Legacy House Melbourne.This is a record of Legatees who have given up their spare time to assist the families of deceased service personnel.Black hardcover book, white pages with floral border. Back cover has some scuff marks at the top. Inside front and back cover is decorated with a coloured pattern.Front cover, title and Legacy logo embossed in gold, thin indented rectangular border. Spine has 5 raised horizontal bars set at equal distance down the spine. The raised bars have an indented, horizontal thin line along the top centre and bottom of each bar. These raised bars are interspersed with an indented floral arrangement. At the top and bottom of the spine are two horizontal indented thin lines (2mm apart). Back cover has a thin indented rectangle line as a border. Inside front and back cover, gold embossed border. Pages 4-5 three poems "In Flanders Fields" by Col. John McCrae, KIA Flanders 1916. "The Torch" (The Badge of Legacy). "The Spirit of Legacy". Honor Roll consists of fifty eight pages of deceased Legatees names written boldly, and date of death, in black ink. Thirty two pages pencilled in names of deceased Legatees, waiting to be inked. Remainder of Honor Roll is blank. All pages have a coloured floral border in red with the Legacy logo at the top, centre of the border. honour roll, legatees -
 Moorabbin Air Museum
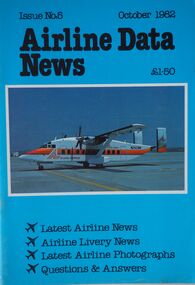
Magazine (item) - Airline Data News: Issue 5 through 14, The Aviation Data Centre Ltd
-
 Ballarat Tramway Museum
Photograph - Digital image Set of 7, Chris Phillips, early 1960's
Yields information about tramway operations in Sturt St c1970.Set of 7 digital images of trams in Sturt St, c1970 - Photos by Chris Phillips. .1 - No. 26, in bound near Armstrong St - destination of Mt Pleasant St. Has the Commercial Bank of Australia building in the background - CBC .2 - No. 26 in bound to City, near Hospital Corner. .3 - No. 17 near the Doveton St intersection, has a roof advert "Make Bliss Not Love". Has the State Savings Bank, CAGA Finance, CBC bank buildings in the background. .4 - No. 12 in bound with the destination of Gardens via Sturt St West, at the corner of Dawson and Sturt St. Shows the tram stop. Has the R. E. Hayden Real Estate building in the background. .5 - No. 39 inbound at Hospital corner. .6 - No. 39 at the City terminus with the Post Office in the background. .7 - No. 43 outbound to the Gardens Via Sturt St west near Drummond St. Has the Marshall battery centre, Morris Ellis & Sons, Pope Mowers and The Ballarat Modern Diary in the background. Also a sign for AWA car radio.trams, tramways, sturt st, hospital corner, doveton st, dawson st, tram stops, tram 26, tram 17, tram 12, tram 39 -
 Ballarat Tramway Museum
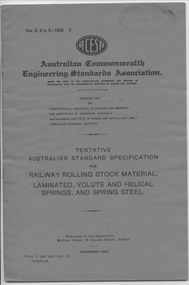
Book, Australian Commonwealth Engineering Standards Association, Set of 5 Australian Standards, 1925 & 1940
Australian standards for rolling stock issued by the Australian Commonwealth Engineering Standards Association.Gives details of the 1920s standards in Australia for railway rolling stock.1 - Book - 20 pages + light grey cover, side stapled, issued by the Australian Commonwealth Engineering Standards Association tentative standard E2 to E5 - for Railway Rolling stock material, laminated volute and helical springs and spring steel, dated Dec. 1925. .2 - Book - 40 pages + light grey cover, side stapled, issued by the Australian Commonwealth Engineering Standards Association tentative standard E16 to E21 - for Railway Rolling stock material, steel blooms for railway forgings, axles, locomotive crank axles, wagon and engine tender axles - dated Dec. 1927. .3 - Book - 24 pages + light grey cover, side stapled, issued by the Australian Commonwealth Engineering Standards Association tentative standard E8 to E12 for Railway Rolling stock material - copper plates, rods, tubes and pipes and brass tubes. Dated Dec. 1925 .4 - Book - 20 pages + light grey cover, side stapled, issued by the Australian Commonwealth Engineering Standards Association tentative standard E6 and E7 - railway rolling stock material - steel plates, angles and rivets for locomotives; steel castings. Dated December 1925. .5 - Book - 12 pages + grey covers, centre stapled issued by Standards Association of Australia, standards H13 and H14 - Bronze (Gun Metal) ingots and castings for General engineering purposes Dated 1940..trams, tramways, standards, rolling stock, axles -
 Ballarat Tramway Museum
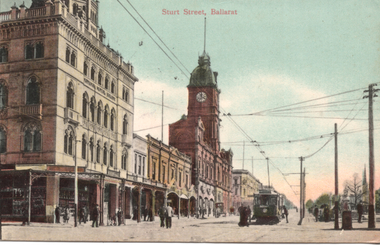
Postcard, JE, "Sturt Street Ballarat", 1909
Coloured postcard of an ESCo tram westbound at the intersection of Sturt and Lydiard St. Ballarat, c1906 - 7 - has a destination box. There are several pedestrians in the picture. Taken from the east side of the intersection, looking towards the Town Hall, with the National Mutual Insurance building and Snows in the photo. Also shows the overhead arrangements - two wire for Sturt St, single for Lydiard St, coming into the intersection. On the rear of the postcard are the initials "JE" in the top centre, a 1d Victorian stamp, cancelled 5/4/1909, addressed to a Mrs Sproston of Skeleton Cottage Avoca with a message from her granddaughters - Fervie and Edith. See item 3279 for a black-and-white version. Yields information about Sturt St at Lydiard St looking west and the tramway overhead.Printed colour postcard titled Postcard - "Sturt Street Ballarat" used - 1909See image i2 for letter and posting details.trams, tramways, esco, sturt st, postcards, overhead, town hall -
 Ballarat Tramway Museum
Document - Letter/s, Bill Kingsley, 1986
Yields information about the set out and dimensions of various track points or turnouts and their use in Ballarat and Bendigo.Letter and list from Bill Kingsley dated 28-5-1986 to Warren Doubleday regarding points and turnouts for tramways looking at various track centres, leads, and dimensions as calculated for 1 in 6 crossings in Ballarat and Bendigo, 1 in 5 crossing in Ballarat, Brisbane and 1 in 8, AETM Adelaide.trams, tramways, points, trackwork, crossover, crossing loop -
 Ballarat Tramway Museum
Slide - 35mm slide/s - set of 20, Noel Simons, 21/05/1971 12:00:00 AM
Set of 20 transparencies taken on 21/5/1971 on Kodak mounts. 1197.1 - Bendigo No. 5 en route to Eaglehawk at Creeth St Long Gully. Tram has a SEC roof ad and Cinzano roof ad. 1197.2 - No 5 approaching Needle Loop between Long Gully and California Gully. On left hand side is the City of Bendigo sign, indicating city boundary. 1197.3 - As for 1197.2 but actually entering loop. Photo taken after tram has passed photographer. 1197.4 - No. 26 bound for Eaglehawk descending the railway bridge near Eaglehawk, at Jobs Gully. 1197.5 - as for 1197.4, but after crossing bridge, now ascending a hill. Photo taken after tram has passed photographer. 1197.6 - No. 26 climbing High St. hill Eaglehawk, nearing end of Double track, bound for Quarry Hill. Shows centre of the road poles. 1197.7 - As for 1197.6, with tram entering single track section. Photo taken after tram has passed photographer. Has a BP service station in the background. 1197.8 - No. 26 (bound for Quarry Hill) crossing No. 17 (Eaglehawk) at Job's Gully Loop. 1197.9 - No. 17 climbing railway bridge at Job's Gully, en route to Eaglehawk. Photo taken after tram has passed photographer. 1197.10 - No.26 bound for Quarry Hill, leaving Long Gully Loop? Has the Creeth St. church in l197.l in the far background. Photo taken after tram has passed photographer. 1197.11 - Tramway Point work at the northern end of Long Gully Loop. 1197.12 - No. 17 en route for Quarry Hill turning into View St. from Bamard St. Tram has SEC roof ads "Everything fine in my all electric Kitchen' and 'Electric Cooking is Matchless'. 1197.13 - as for 1197.12, but tram has turned into View St and about to enter the double line track. Photo taken after tram has passed photographer. 1197.14 - No. 21 enters Nolan St after turning from MacRae St. en route to Bendigo. Note sign on its own post noting tram turns "Beware Tram Turns" and stop sign on adjacent pole "Trams stop on Request". No. 21 has two SEC roof ads. 1197.15 - No. 21 in Nolan St. after turning from Bridge St. (White Hills Road). Note signal light for Bridge St. loop on pole corner of street. Photo taken after tram has passed photographer. 1197.16 - No. 2 bound for Eaglehawk at unknown location. 1197.17 - Tram stop sign on a pole "CARS STOP BY REQUEST" 1197.18 - No. 5 in Carpenter St.? en route to Quarry Hill. 1197.19 - No. 28 has just arrive at Golden Square terminus, passengers are disembarking and the trolley pole is being turned. Golden Square Hotel in the background. 1197.20 - No. 28 at Golden Square terminus. Has a "Nothing beats Briquettes for hear roof ad. Information written on in black ink and date stamped on purple ink. 1197.1 - "No. 5 at Creeth St. Long Gully" 1197.2 - "No. 5 approaching Needle Loop between Long Gully and California Gully" 1197.3 - "No. 5 at Needle Loop between Long Gully and California Gully" 1197.4 - "No. 26 crossing railway bridge at Job's Gully near Eaglehawk" 1197.5 - "No. 26 just after crossing railway bridge at Job's Gully near Eaglehawk/ 1197.6 - "No. 26 in High St. Eaglehawk" 1197.7 - "No. 26 at end of double track in High St. Eaglehawk" 1197.8 - "Nos. 26 and 17 crossing at Job's Gully Loop" 1197.9 - "No. 17 crossing railway bridge at Job's Gully near Eaglehawk". 1197.10 - "No. 26 at Long Gully" 1197.11 - 'Northern end of points at Long Gully Loop". 1197.12 - "No. 17 turning into View St. from Bamard St. Bendigo". 1197.13 -'No. 17 at beginning of double track in View St. after leaving Bamard St. Bendigo. 1197.14 - "No. 21 enters Nolan St. from MacRae St. Bendigo." 1197.15 - "No. 21 in Nolan St. Bendigo just after leaving White Hills Road." 1197.16 - "No. 2" 1197.18 - "No. 5" 1197.19 - "Birney car No. 28 at Golden Square Terminus" 1197.20 "Birney car No. 28 at Golden Square Terminus" tramways, trams, bendigo, long gully, railway bridge, jobs gully, trackwork, nolan st, quarry hill, tram stops, golden square, tram 2, tram 5, tram 17, tram 21, tram 26, tram 28 -
 Ballarat Tramway Museum
Slide - 35mm slide/s - set of 13, Noel Simons, 24/05/1971 12:00:00 AM
Set of 13 transparencies taken on 24/5/1971 on Kodak mounts. 1200.1 - No. 7 en route to Golden Square turning from Bridge St. into Nolan St. Photo taken after tram has passed photographer. Tram has a briquettes roof ad. 1200.2 - No. 21 in McCrae St. just before Nolan St. Photo taken after tram has passed photographer. 1200.3 - No. 7 in Nolan St at corner with McCrae St. Passenger boarding tram at a tram stop. 1200.4 - No 7 turning from Nolan into McCrae St. with Golden Fleece service station in background. 1200.5 - No. 7 in Thunder St en route to North Bendigo. Photo taken after tram has passed photographer. 1200.6 - No. 5 en route to Eaglehawk just after leaving Needle Loop between Long Gully and California Gully. 1200.7 - No. 5 at the start of the double track in High St. Eaglehawk. 1200.8 - No. 5 at Eaglehawk terminus showing "Depot" with Leo A Hughes Photographer advertisement on building in background. 1200.9 - No. 5 at Eaglehawk terminus. Has two SEC roof ads 'Everything's fine in my all electric kitchen' and 'Electricity best for cooking'. 1200.10 - No. 5 at Eaglehawk terminus, with canon, war memorial outside Town Hall and Leo A Hughes Photographer advertisement on building in background. 1200.11 - No. 5 in McCrae St. about to enter Arnold St. and depot. Tram showing depot, has driver changing points. 1200.12 - No. 5 in Arnold St. Photo taken looking up the centre of the access track - shows the overhead at depot junction. 1200.13 - Depot entrance with signage at depot entrance and depot building in background.Information written on in black ink and date stamped on purple ink. 1200.1 - "No. 7 entering Nolan St. from Bridge St." 1200.2 -"No. 21 in McRae St. about to turn into Nolan St." 1200.3 - "No. 7 in Nolan St. at corner of McRae St." 1200.4 - "No. 7 turning from Nolan St. into McRae St." 1200.5 - "No. 7 in Thunder St. just after turning from Caledonia St." 1200.6 - "No. 5 just after leaving Needle Loop between Long Gully and California Gully. 1200.7 - "No. 5 in High St. Eaglehawk at start of double track." 1200.8 - "No. 5 at Eaglehawk terminus" 1200.9 - "No. 5 at Eaglehawk terminus" 1200.10 - "No. 5 at Eaglehawk terminus."\ 1200.11 - "No. 5 in McCrae St. about to enter Arnold St." 1200.12 - "No. 5 in Arnold St." 1200.13 - "Entrance to Bendigo Tram Depot, No. 5 running into shed."tramways, trams, bendigo, mccrae st, north bendigo, california gully, eaglehawk, depot, tram 5, tram 7, tram 21 -
 Ballarat Tramway Museum
Slide - 35mm slide/s - set of 32, Noel Simons, 25/02/1971 12:00:00 AM
Set of 31 transparencies taken on 25/2/1972 on Kodak mounts. 1201.1 - Bendigo No. 26 in Bond St. just after leaving Long Gully en route for Quarry Hill. Has Norris Supermarket in background. Has two SEC roof ads. 1201.2 - No. 26 climbing View St. from Charing Cross en route to Eaglehawk. Has ANZ bank and AMOCO service station in background. 1201.3 - as for 1201.3, but after tram has passed photographer. Has buildings west of Mackenzie St. in photograph. 1201.4 - Tram stop and centre of the road pole with two "CARS STOP BY REQUEST" signs mounted on pole at the corner of Mackenzie St. 1201.5 - same position as for 1201.3, but with No. 5 descending the street. 1201.6 - same position as for 1201.2, but with No. 5 descending the street. Photo taken after tram has passed photographer. 1201.7 - No. 7 in Nolan St. from across the park at Lake Weeroona. 1201.8 - No. 7 entering McCrae St from Nolan St. - distant view. Note "TRAM "sign on left hand side under tree and overhead in McCrae St. from former track that once was in this street. 1201.9 - No. 7 in High St. with Cathedral in background. Tram en route to North Bendigo. Note scaffolding around Cathedral main spire area. 1201.10 - No. 7 crossing Bendigo Creek bridge in High St. near Golden Square. Has a Caltex Service station in the background. 1201.11 - No. 7 at Golden Square terminus with Sunburst Fruit Juices and a Peters Ice cream delivery vans alongside. 1201.12 - as for 1201.11 but photo taken from behind tram, with the end of the rails in the photograph. 1201.13 - No. 7 and 21 in Pall Mall at Charing Cross with No. 5 in the background. Taken some distance away from the location. 1201.14 - No. 7 at Golden Square terminus, taken a short distance from the tram terminus. Shows Milk Bar on right hand side and the hotel on the left hand side. Taken from the south side of the roadway. 1201.15 - as from 1201.14 but taken from the north side of the roadway. 1201.16 - No 5 waiting at California Gully loop. Distant photo showing surrounds 1201.17 - No. 5 en route for Quarry Hill crossing No. 26 at California Gully. 1201.18 - No. 26 at Eaglehawk terminus with Eaglehawk Town Hall and Post Office in background. 1201.19 - No. 21 arriving at Charing Cross en route to North Bendigo. Has Alexandra Fountain in the background, ANZ bank RACV building, and other buildings on the north side of Pall Mall or Nolan St. 1201.20 - No. 26 en route for Quarry Hill at Charing Cross, with crew standing by front door. Has Colonial Mutual life building, Armstrong Tyre Service (Firestone) and a sign for Cohns Drinks in the background. 1201.21 - as for 1201.20 but with No. 5 en route to Eaglehawk now in photograph. 1201.22 - No. 26 at Quarry Hill terminus. 1201.23 - No. 26 at Quarry Hill terminus, view of front portion of tram only from a gate at the Bendigo cemetery. 1201.24 - Track at the end of the Quarry Hill line showing the point blades of the former "Y" terminus and the overhead for this. 1201.25 - No. 2 at the Quarry Hill terminus, looking along the former Trackwork. 1201.26 - as for 1201.25 1201.27 - number not used. 1201.28 - Golden Square terminus from some distance from the actual terminus, showing the Warning sign "TRAM" for motorists from the south. No. 7 at the terminus. 1201.29 - No. 7 passing through the Golden Square shopping centre. Numerous cars and pedestrians. Tram en route for North Bendigo. 1201.30 - No. 7 in High St. Golden Square, en route for North Bendigo. Photo taken after tram has passed photographer. 1201.31 - No. 7 in High St. just past Wattle St. with the Cathedral in the background. Tram has two SEC roof ads good side on photo, 'Everything's fine in my all electric kitchen' and 'Electrical cooking - clean, quick, economical'. 1201.32 - No. 7 in High St. nearing Wattle St. Has Cathedral in the background. Photo taken after tram has passed photographer.Information written on in black ink and date stamped on purple ink. 1201.1 - "No. 26 in Bond St just after leaving Long Gully" 1201.2 - "No. 26 climbing View St. from Charing Cross" 1201.3 - "No. 26 ascending View St. from Charing Cross (At Mackenzie St.)" 1201.4 - "View St. & Mackenzie St." 1201.5 - "No. 5 in View St. near Mackenzie St." 1201.6 - "No. 5 in View St. nearing Charing Cross." 1201.7 - "No. 7 in Nolan St. seen from Lake Weeroona Park." 1201.8 - "No. 7 entering McRae St. from Nolan St. Note "TRAM" warning sign on left. 1201.9 - "No. 7 in High St. passing Short St." 1201.10 - "No. 7 crossing Bendigo Creek bridge in High St. near Golden Square." 1201.11 - "No. 7 at Golden Square terminus" 1201.12 - "No. 7 at Golden Square terminus" 1201.13 - "No 7, 21 and 5 at Charing Cross" 1201.14 - "No. 7 at Golden Square terminus" 1201.15 - "No. 7 at Golden Square terminus" 1201.16 - "No 5 waiting at California Gully loop." 1201.17 - "Nos. 5 and 26 crossing at California Gully loop" 1201.18 - "No. 26 at Eaglehawk terminus" 1201.19 - "No. 21 arriving at Charing Cross from Golden Square" 1201.20 - "No. 26 at Charing Cross" 1201.21 - "Nos. 5 and 26 at Charing Cross." 1201.22 - "No. 26 at Quarry Hill terminus" 1201.23 - "No. 26 at Quarry Hill terminus seen through the gates of the Bendigo Cemetery." 1201.24 - "Quarry Hill terminus showing remains for former double track layout abandoned before 1964." 1201.25 - "No. 2 at Quarry Hill terminus" 1201.26 - "No. 2 at Quarry Hill terminus" 1201.28 - "The Southern approach to Golden Square with No. 7 standing at the terminus, "TRAM" warning sign on the left. 1201.29 - "No. 7 passing through Golden Square Shopping Centre" 1201.30 - "No. 7 in High St. Golden Square" 1201.31 - "No. 7 in High St. passing Wattle St." 1201.32 - "No. 7 in High St. nearing Wattle St."tramways, trams, bendigo, bond st., view st., nolan st., high st., eaglehawk, california gully, charing cross, quarry hill, trackwork, tram 2, tram 5, tram 7, tram 21, tram 26 -
 Ballarat Tramway Museum
Slide - 35mm slide/s - set of 6, Noel Simons, 28 Feb. 1972
Set of 6 transparencies taken on 28/2/1972 on Kodak mounts. 1206.1 - Bendigo No. 5 at Hayes St. Loop, en route for Quarry Hill. 1206.2 - No. 5 at Garden Gully Loop, Mt. Korong road, Ironbark. en route to Quarry Hill. Note the water column in the background. 1206.3 - No. 5 in View St. Bendigo, with the Commodore Motel in the background. 1206.4 - No. 6 en route for Golden Square in Fire Station loop, with the fire station building in the background. Photo taken after tram has passed photographer. 1206.5 - No. 6 in High St., running through Golden Square Shopping Centre, en route for Golden Square. Photo taken after tram has passed photographer. 1206.6 - No. 6 arriving at Charing Cross, bound for North Bendigo, with the City Family Hotel, ANZ bank and the Cenotaph (war memorial) in the background.Information written on in blue ink and date stamped on purple ink. 1206.1 - "No. 5 at Hayes Loop, Ironbark." 1206.2 - "No. 5 at Garden Gully Loop, Mt. Korong road, Ironbark." 1206.3 - "No. 5 in View St. just after start of double track near Barnard St." 1206.4 - "No. 6 in High St. at Fire Station loop." 1206.5 - "No. 6 in High St. running through Golden Square shopping centre." 1206.6 - "No. 6 arriving at Charing Cross from Golden Square."tramways, trams, bendigo, hayes st. loop, garden gully loop, view st., golden square, charing cross, tram 5, tram 6 -
 Ballarat Tramway Museum
Slide - 35mm slide/s - set of 12, Noel Simons, 28 Feb. 1972
Set of 12 transparencies taken on 28/2/1972 on Kodak mounts. 1207.1 - Bendigo 26 and 2 at Charing Cross. 26 en route for Eaglehawk, 2 for Quarry Hill. Has the Colonial Mutual Life, Armstrong Tyre Service, and Australian Mutual Provident Society buildings and a Cohns Drinks ad. in the background. 1207.2 - as for 1207.1 but with Alexandra fountain in the foreground. 1207.3 - No. 2 in Mitchell St. heading for Quarry Hill. Photo taken after tram has passed photographer. Has buildings on either side of Mitchell St. in the background, including the Plaza Theatre. 1207.4 - No. 6 en route for Golden Square departing Charing Cross. Has the RACV and ANZ bank in the background. 1207.5 - No. 2 crossing Pall Mall to enter Charing Cross ex Quarry Hill, with the Fountain Plaza in the background. 1207.6 - No. 6 arriving Charing Cross ex Golden Square with No. 21 alongside. No. 21 has the SEC ad. 'Everything's fine in my all electric kitchen.' Has the City Family Hotel and the Fountain Plaza shopping centre in the background. 1207.7 - No. 5 at Charing Cross en route for Quarry Hill with No. 2 behind. No. 2 has two SEC roof ads, 'Everything s fine in my all electric kitchen' and 'Electricity best for cooking'. RACV building in the background. Tram crews are discussing the day in the front of the tram. 1207. 8 - No. 21 in High St. Bendigo with the Cathedral in the background. No. 21 has two SEC roof ads, 'Everything's fine in my all electric kitchen' and 'Electricity best for cooking'. 1207.9 - No. 6 in High St. Bendigo with the Cathedral in the background. 1207.10 - No. 6 in High St. Bendigo, just past Wattle St. Photo taken after the tram has passed the photographer from within the Highway Car Sales yard. 1207.11 - No. 26 bound for Eaglehawk at the end of the double track in View St., note signal contactors, tram stop and section signs mounted on pole. 1207.12 - No. 26 turning from View St. into Barnard St.Information written on in blue ink and date stamped on purple ink. 1207. 1- "Nos. 26 and 2 at Charing Cross." 1207.2 - "Nos. 26 and 2 at Charing Cross." 1207.3 - "No. 2 in Mitchell St. just after leaving Charing Cross." 1207.4 - "No.6 leaving Charing Cross for Golden Square." 1207.5 - "No. 2 arriving at Charing Cross from Quarry Hill." 1207.6 - "No. 21 waits at Charing Cross as No. 6 arrives from Golden Square." 1207.7 - "No 5 at Charing Cross with No. 2 lurking behind." 1207.8 - "No. 21 in High St. at cnr of Wattle St." 1207.9 - "No. 6 in High St. at cnr of Wattle St." 1207.10 - "No. 6 in High St. between Wattle and Vine Sts." 1207.11 - "No. 26 at end of double track in View St. near Barnard. St. 1207.12 - "No. 26 seen at dusk turning from View St. into Barnard St."tramways, trams, bendigo, charing cross, high st, view st., tram 2, tram 5, tram 6, tram 21, tram 26 -
 Ballarat Tramway Museum
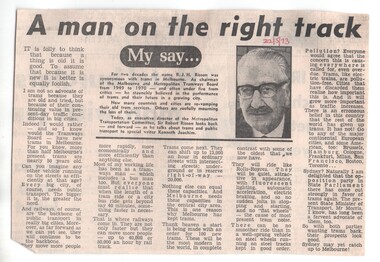
Newspaper, "A man on the right track", 22/05/1973 12:00:00 AM
Newspaper Clipping from a Melbourne newspaper dated 22 May 1973 about a discussion between Sir Robert Risson with writer Kenneth Joachim Sir Robert Risson was the executive Director of the Metropolitan Transportation Committee at the time. Looks at the trams running in Melbourne, new trams for the city and other tramways cities. Includes a photo of Sir Robert.In top centre right of the Clipping "22/5/73" in red ink.trams, tramways, mmtb, sir robert risson, new tramcars, melbourne transportation committee -
 Ballarat Tramway Museum
Magazine, Association of Railway Enthusiasts (ARE), "Australian Railway Enthusiast - Vol 9, No. 4, December 1971", Dec. 1971
Copy of the Australian Railway Enthusiast - Vol 9, No. 4, December 1971, which contains seven photographs of the closure of the Ballarat Tramway System on 19/9/1971 by Greg Triplett. Item 579 refers for centre page photograph. Magazine has articles on the Beech Forest Narrow Gauge, The Atjeh Tram (Indonesia), cable cars preserved in Melbourne and a derailment at Yering Vic. in 1900. Ballarat Photos 1 - 40 in Lydiard St. 2 - Bogie car in Wendouree Parade from the wheat silos 3 - Intersection of Sturt and Lydiard Street from the Town Hall 4 - Tram at City Centre with Boer War (?) statue in front of the tram - night photo 5 - 35 at Sebastopol Terminus - night photo 6 - 42 at the Lydiard Street terminus - night photo 7 - 40 leaving Sebastopol as the last tram - night photo (see item 579) Second copy added 31-8-2017. Second copy has a "Technical Book & Mag. Co." yellow label on the front cover.trams, tramways, ballarat, closure, lydiard st, sturt st, sebastopol -
 Ballarat Tramway Museum
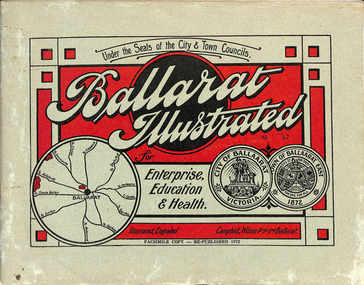
Book, "Ballarat Illustrated", 1972
Original c 1914 (see below), facsimile copy - re-published 1972. Original features photos of Ballarat City and Town, its buildings, parks and the various industries and organisations that were in Ballarat at the time of publication, including ESCo. Many photos features ESCo trams. Photos sepia toned. Has some red colour block printing on the front cover and rear, for Star Oil Engines. On inside back cover is a map with the places of interest and tram route map, marked in red. Pages are un-numbered. Original published by Ballarat East Town Council and Ballaarat City Council. On cover has number stamped in black in, "No. 87" (assume facsimile copy No.). Photos with publication show tram No. 21, built 1913 and ESCo photo page shows Mr. Pringle as Manager. Mr Pringle became manager in January 1911, As there is no photos of the "Avenue of Honour", or other mention of the first world war, assume original published about 1913 or 1914. Original shows Engravings and printing by "Campbell Wilson Prop Ltd, Ballarat". See Other Information as well for more listing details. High Resolution image added 31/8/2012 of i2 of ESCo page and i3 for Ballarat identies and sheet i4 extracted for Mr Pringle. PDF scan of full document added 21/5/2019 - see images btm633-1i.pdf and btm633-2i.pdf Notes on "Ballarat Illustrated" Reg. Item No. 733 From notes made by Neville Gower 12/1/1997 Cover: Inside front cover: Last paragraph, "Facilities for Travelling" - Electric trams serve all parts of Ballarat. Page 3: Street Scene, Municipal Town Hall, showing tram wiring Page 7: Street Scene, Lydiard St. North, intersection and tramway centre, with ESCo tram No. 21 in the bottom photo. Other photos features trams as well in Sturt St and Lydiard St. North. Page 9: Street Scene, Top photo of Sturt St. from Lydiard St. looking east, shows piles on right-hand side of road. Car parked by Post Office has a car registration number "9007". Bottom photo, an tram climbing hill, shows double trolley in the street, with early English type of pull offs. Page 13: Street Scenes and Historic Buildings: One of five photos, shows Victoria St. looking East, with tram track prominent in photo and how stone work was set up about the rails and overhead poles. Page 23: Street scene, Gardens North Entrance gates, shows details of gates near St. Aidans Drive. Note double trolley wire on poles, and style of insulators. No trams in photo, three ladies walking down the track. Page 37: Street Scene; Lydiard St views, top left hand photo, shows Railway station and railway gates with signal gantry and horse drawn vehicles. Tram tracks apparent. Bottom left hand photo shows Lydiard St. North, near Post Office, double track with centre poles - Single wire per track. Top right hand photo, showing Cemetery gates in background. Bottom right hand photo - from north end of Lydiard St. South, looking north, with an ESCo tram in background. Also has a parked car on left hand side. Page 45: Street Scenes - Bridge St; top photo at west end of Bridge St. with ESCo No. 11 with possibly double trolley wire in photo. Bottom photo at east end of Bridge St. with tram in background, shows junction. Double trolley heading out to Mt. Pleasant, single trolley for Victoria St. Page 45: Street Scenes - Bridge St; top photo at west end of Bridge St. with ESCo No. 11 with possibly double trolley wire in photo. Bottom photo at east end of Bridge St. with tram in background, shows junction. Double trolley heading out to Mt. Pleasant, single trolley for Victoria St. Page 61: Street Scenes and Historic Buildings - Public Institutions Ballarat - top left hand photo of the Hospital shows some tram track in foreground, with double trolley wire. Top right photo is of the Orphanage, the name of the tram terminus for many years. Page 68: Electric Supply Co. of Victoria's pages - top photo showing powerhouse in background, across the lake, can hardly see anything for the trees, except for the chimney. Bottom photos of the steam Turbo Generators and the switchboard. Gives Mr. P.J. Pringle as Chief Engineer and General Manager. He took over in Jan. 1911. Page 69: Ballarat East Views - features photo of Black Hill open cut, Ballarat East Railway Station, Ballarat Fire Station and "Victoria St. looking East", repeat of photo printed on page 12, but slightly darker. Image on system includes fire station and railway station, - Ballarat East. Page 78: Series of photos of various Ballarat VIP's of the era, fourth one in on top line features "P.J.Pringle, Electric Supply Co." Inside Back cover - map of Ballarat including tram lines and places of interest marked in red. Gives a detailed photographic presentation of Ballarat in 1914.80 page book with, in addition, light green card covers, titled "Ballarat Illustrated". Loose copy of page 9 and 10 held.trams, tramways, ballarat, local history, heritage buildings, esco -
 Ballarat Tramway Museum
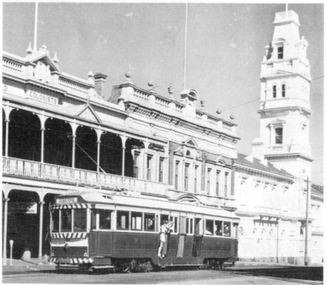
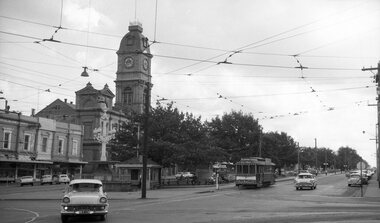
Photograph - B&W print of donated negative, Ron E. Fluck, 1968
Black and white print of a donated negative. Print made 8/1998. Photo of SEC single trucker tram No. 21 at the intersection of Sturt and Lydiard Streets. Tram has destination of "Lydiard St. Nth". Good photograph of intersection with Town Hall in background, a few cars and tram stop arrangement. Also shows festoon lighting along the north side of the centre median in Sturt. St. Photo taken from the Post Office corner, during 1968. Negative rescanned 9-5-2020 and image updated.tramways, trams, town hall, 21, ballarat, sturt st., tram 21 -
Ballarat Tramway Museum
Magazine, Australian Electric Traction Association (AETA), "Electric Traction", 1951, 1953
Ten issues of "Electric Traction" of the Australian Electric Traction Association. 1303.1 - Vol VI, No. 4, April 1951 - printed covers with four pages of duplicated notes - in poor condition, torn along centre and some edge damage. Page 3 includes notes on the Provincial systems about bogie cars going to Ballarat, Bendigo and Geelong. 1303.2 - Vol VI, No. 5, May 1951- printed covers with four pages of duplicated notes - in fair condition - covers have yellowed. 1303.3 - Vol VI, No. 6, June 1951 - as for 1303.2 - in good condition - some foxing on covers. 1303.4 - Vol VI, No. 7, July 1951 - as for 1303.2 - in good condition, though the insert pages have suffered some edge damage as slightly larger in size than the printed covers. 1303.5 - Vol VI, No. 8 - August 1951 - as for 1303.2 - in good condition - includes an article on page 3 about Ballarat news - including relaying of Sturt and Drummond Sts junction, service cuts, fare increase, No. 23, and extension of the depot to accommodate bogie cars. 1303.6 - Vol VI, No. 9 - September 1951 - 8 pages all printed - includes on page 3 - item re Ballarat No. 23 withdrawn for scrapping, and bogie cars at Geelong. In good condition. 1303.7 - Vol VI, No. 12 - December 1951 - 6 printed pages - includes items re bogie cars at Ballarat, Bendigo and Geelong. In good condition. 1303.8 - Vol VIII, No. 8 - August 1953 - 6 printed pages with green title details - has an item that Wal Jack was recently given a front page write up in the Courier. Shown as being printed by "Traction Press" of the same address as the publisher - Traction Publications. In good condition. 1303.9 - Vol VIII, No. 9 - September 1953 - 8 printed pages with black title details, page 3 has map of Sydney printed in red and page 6, Sydney rail system. Page 4 has item re the Geelong system and a forthcoming Transport Regulation Board inquiry. In good condition though has been folded in the middle. Printer as for 1303.8 1303.10 - Vol VIII No. 2 - February 1953 - 6 printed pages - includes Tramways of Collie WA, Sydney News, Melbourne cable car conversion dates, electric railway news and branch news and notes Basil Miller has been appointed as an Inspector in Bendigo. 1303.10 - added 28/3/2010 - sourced from donations to the Museum by R. Elliston 28-3-16.Items 1303.2 to 1303.7 - have the stamp of the "The New Zealand Railway & Locomotive Society" on the front cover.trams, tramways, electric traction, aeta, ballarat, australian tramways, bendigo, cable trams -
 Ballarat Tramway Museum
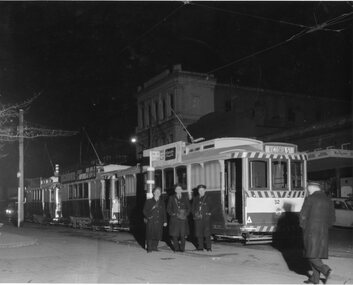
Photograph - Black & White Photograph/s, R.G. Vanselow, 30/08/1968 12:00:00 AM
Black and white photograph of SEC No. 32 and two other single truckers at the City Centre in Sturt St, on the north side. Photographed by R.G. Vanselow at 11.05pm on 30/8/1968. The three crew members (drivers) are standing by the tram stop pole while an Inspector walks towards them. Photo has the SEC building in the background. Tram 32 has a Wilkinson Sword razor blade roof ad. The 2nd tram has a roof ad for Myers Pixietown. Tram 32 showing destination of "Victoria St." Colour photocopy, laminated, of this photograph on display 5/2000 at 02-02-06 1380 Copy 2 - made by enlarging photo to an approx. A4 print by colour photocopying and laminated for display purposes. Made July 2000 for the Trams at Night exhibition in the depot. Made by W.Doubleday. Has four Velcro dots on rear. Overall size 210H x 272W. Stored in same box at rear of large photos area in an A4 plastic folder.On rear in pencil "Approx. 11.05pm, Fri 30 August 1968 / City Centre, Sturt St, / Ballarat" and in bottom right hand corner, in ink "With Compliments / R.G." and stamped in black ink "Vanselow".trams, tramways, city centre, sturt st, night photo, tram 32 -
 Ballarat Tramway Museum
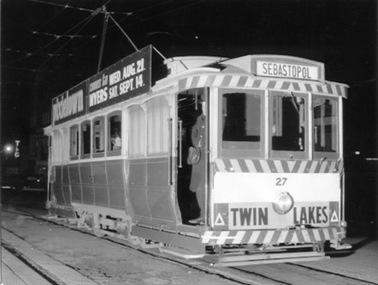
Photograph - Black & White Photograph/s, R.G. Vanselow, 30/08/1968 12:00:00 AM
Black and white photograph of SEC No. 27 with destination of Sebastopol waiting at the City terminus on Friday 30 August 1968. Has driver standing in doorway, looking very cold and one passenger in saloon looking at photographer. Tram has a "Twin Lakes" advertisement on the drivers cab panel and "Pixietown" and "comes to Myers Wed. August 21 - Sat. Sept. 14" roof advertisements. Illuminated T&G sign in the background. Copy 1 - Colour photocopy, laminated, of this photograph on display 5/2000 at 02-02-06 Copy 2 - made by enlarging photo to an approx. A4 print by colour photocopying and laminated for display purposes. Made July 2000 for the Trams at Night exhibition in the depot. Made by W.Doubleday. Has four Velcro dots on rear. Overall size 210H x 275W. Stored in same box at rear of large photos area in an A4 plastic folder.On rear in pencil "Approx. 11.05pm, Fri 30 August 1968 / City Centre, Sturt St, / Ballarat" and in bottom right hand corner, in ink "With Compliments / R.G." and stamped in black ink "Vanselow".trams, tramways, city centre, sturt st, night photo, tram 27