Showing 10685 items matching "projects"
-
 Australian Army Museum of Western Australia
Queen's Colour - 11th Australian Infantry Regiment (Perth Regiment)
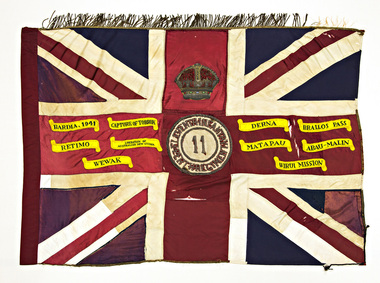
This former King's Colour was originally authorised by King George V in 1919 in recognition of services of 11th Battalion (AIF) during the Great War. Presented by HE the Governor General Sir Ronald Munro-Ferguson, PC, CGMG at a parade in King's Park on 2 October 1920 and handed over to 2nd Battalion, 11th Infantry Regiment (Perth Regiment) of the Citizen Forces. In 1921 this unit became re-designated 11th Battalion (The Perth Regiment) (The title was changed to "The City of Perth Regiment" in 1933). Subsequently consecrated by the Chaplain General, Archbishop COL Riley, OBE, VD, DD at a parade on the Esplanade, Perth, 15 November 1924. At the time of presentation this colour was a plain union flag with no central devices or other distinctions included on it. Following Military Board approval given in 1925 the centre circle and Crown were later added, in accordance with the approved design for a King's Colour. With the re-activation of the Citizen Military Forces (CMF) following the Second World War, the 11th/44th Infantry Battalion (The City of Perth Regiment) was raised as a linked battalion in 1948 to carry on the identity and traditions of the pre-war 11th and 44th Battalions respectively. The King's and Regimental Colours formerly held by these two battalions were passed on to the new battalion who paraded them in rotation on ceremonial occasions. With the accession of HM Queen Elizabeth II to the throne in 1953, all Colours that had originally been presented as King's Colours, and were still carried by units on the current Order of Battle, were automatically deemed to be Queen's Colours. Under major reorganisation of the CMF in 1960, all individual infantry battalions that existed at the time within each State were amalgamated to form State regiments, taking effect from 1 July 1960. Thus from that date the 11/44th, 16th and 28th Infantry Battalions were amalgamated to form The Royal Western Australia Regiment. In September 1960, at a ceremonial parade held at Northam Camp, the Colours carried by all former battalions were handed over for safe keeping by the new regiment. Battle Honours for the Second World War were promulgated under Australian Army Order 135/1961 and the 10 selected honours approved for emblazoning on the Queen's Colour were subsequently added in 1962 These former colours were subsequently laid up in the undercroft at the State War Memorial, King's Park on 29 November 1964. These were transferred to the Army Museum of WA in 1988 as part of the Bicentenary Colours Project. Union flag with gold fringes. In the centre the Arabic numeral "11" on a red background within a gold circle inscribed "ELEVENTH INFANTRY - PERTH REGIMENT", surmounted by the Crown. Emblazoned on the colour are the following Second World War Battle Honours:- BARDIA 1941, CAPTURE OF TOBRUK, DERNA, BRALLOS PASS, RETIMO, LIBERATION OF AUSTRALIAN NEW GUINEA, MATAPAU, ABAU-MALIN, WEWAK, WIRUI MISSION -
 Glen Eira City Council History and Heritage Collection
Document (Item) - Newspaper (digital), Caulfield Contact
The Caulfield Contact was the official newspaper of the City of Caulfield from 1976-1994. The City of Caulfield was the Municipal Council for an area of the South Eastern suburbs of Melbourne, including Brighton East, Carnegie, Caulfield, Elsternwick, Gardenvale, Glen Huntly, McKinnon, Murrumbeena, Ormond and St Kilda East. Following Amalgamation of City of Caulfield and parts of the City of Moorabbin in 1994, the Caulfield Contact was followed by the Glen Eira News. Contains References to the following Freedom of Entry to 3rd ordinance of the RAAOC, visit by Sir Zelman Cowen, Return to Rosstown, A 'spacy new home' (nursery at Caulfield Park), Profile on Gus Theobold, Meals on Wheels Aviary completed Caulfield Park. Profile resident Gus Theobold. Cr Irene Capek win Herald Australia Day essay prize. Caulfields Meals on Wheels set Victorian record. Historical feature Return to Rosstown. New ambulance station Glenhuntly and Clarinda roads opens. Volume 4 Number 5 Date 03 August 1978 Features Where and How to Vote in council election. Cr Irene Capek retires from council. Profiles election candidates. Image: Image Cr Irene Capek. Images of election candidates. Volume 5 Number 1 Date 14 September 1978 Freedom of Entry to 3rd ordinance of the RAAOC, visit by Sir Zelman Cowen, Subjects from Carol: GG Sir Zelman Cowen and Lady Cowen offical visit. Off street carpark project underway Pyne St and Hawthorn Rd. City Manager Graeme Caldwell submits plans for Townhall renovations. Action plan for development of Elsternwich Shopping precint to be developed. Freedom of Entry ceremony. Profile Rosemary Keppel. Booran Motors Glenhuntly donate dual control Holden Gemini to Caulfield Tech school pre-driver education program. council election results. Comments from elected Crs Jack Campell, Bob Baxter, Dorothy Ford, Brian Rudzki. Promotion of Caulfield Institute of Technology and TAFE. Image: Image Sir Zelman Cowen, Lady Cowen. Images Freedom of Entry ceremony and citizens attending. Image Rosemary Keppel. Cartoon pre-driver education program. Image Mayor Cr Geoff Patience in robes. Volume 5 Number 2 Date 26 October 1978 Rate rise 5.73% announced. Readership of Caulfield Contact surveyed. Caulfield ranger Reg Dixon and members of works dept rescue duck family from drain and reinstate them to Caulfield Racecourse dam. Profile resident and teacher Claire Manning. Image: Image of Reg Dixon and the rescued ducks. Image Claire Manning and students at Waverley Private school. city of caulfield, caulfield, glen eira, city of glen eira, caulfield contact, freedom of entry to 3rd ordinance of the raaoc, visit by sir zelman cowen, return to rosstown, a 'spacy new home' (nursery at caulfield park), profile on gus theobold, meals on wheels -
 Melton City Libraries
Document, West Melton: A preview of tomorrow, c.1969
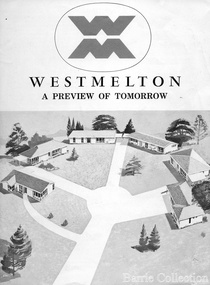
"In April 1969, the first major residential development in Melton began with the release of 148 homes for purchase. This was the first stage of a staggered release of a planned 30,000 homes for 100,000 people by 1990. The development, called Westmelton Satellite City, was described as ‘a preview of tomorrow’.101 It was the first estate built in a ‘modern’ style, with curved streets, and dozens of culs de sac. Westmelton was also the first major development in Victoria to build all the supply lines to the houses – including electricity and telephone lines – underground. The six different home designs in Westmelton were ‘specially designed for the future’, and with allotments ten feet wider than regulations required, there was plenty of ‘space for gracious living’ and for a family swimming pool. The developers of this new estate were active in promoting Westmelton as a new community within the Shire of Melton. By 1971, the Westmelton City News reported that Ian McIntosh, General Manager of Westmelton, had given away $100,000 on behalf of the company ‘to aid community projects’. This included a $72,000 donation towards building a community centre in Westmelton, and $25,000 for the shire’s Olympic-sized swimming pool. Ian McIntosh and his family moved to Melton and Ian said he was ‘very much aware of the needs of [the] Westmelton community’. By the end of 1971, Westmelton was home to 100 new families. The modern residences were obviously an appealing drawcard, but so was the country feel that characterised Melton. Mrs C. Allen, described as a ‘housewife’, said she and her husband chose to move to Westmelton because of ‘the quality homes ... and we both love the clean, fresh, natural environment that surrounds us’. Similarly, Mr W. Coxhead, insurance consultant, moved to Westmelton because of the ‘clean, fresh country air’. Accountant Mr B. Swanton echoed their sentiments, describing Westmelton as ‘far enough away from the industrial pollution carried over Melbourne suburbs by prevailing westerly winds’. The new development attracted an increasing number of young, professional couples and families, representing the beginning of a significant shift from the predominantly rural and farming community of the district’s past. The Westmelton development had four different ‘neighbourhoods’ designed to cater to a variety of different lifestyle needs. Westmelton was the first to be established, followed by Brookfield, which offered ‘superb land in a rustic setting’. Brookfield Acres offered ‘wide open spaces with lots of room for a pool and even a tennis court’ on huge one-acre blocks, while Westlake was an innovative development with ‘different sized homesites’ and ‘lakeside living’.Westmelton was the first of many residential developments that would come to play a huge role in shaping the shire in the decades to follow".A marketing brochure for the Westmelton Satellite City developmentlocal significant events, council -
 Melton City Libraries
Photograph, Melton Uniting Church Opportunity Shop volunteers, 1993
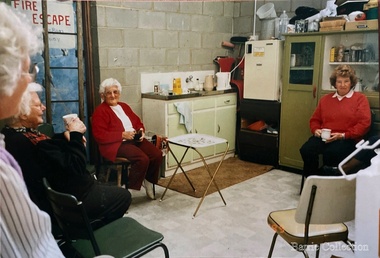
In the early l 970's , when our population was increasing rapidly and resident ministers were needed at both Melton and Bacchus Marsh, and after discussion between both denominations over many months a decision was reached , that in both areas they would unite and be known as Methodist - Presbyterian joint parishes. In 1972 Ministers were appointed, and Melton's minister occupied one of the Bacchus Marsh Manses during the building of Melton's church residence in Y uille Street. Services were held at Scots Presbyterian Church Melton. Youth Club and church meetings were held in the Methodist Church at Brooklyn Road, Melton South. At a joint Parish Committee Meeting held in May 1975 at Melton South - a major item of business was finance, to meet the repayments on the recently built Church Manse and the minister's Stipend. The meeting closed without any solution to this problem being made. As the men restacked the chairs Maisie and I viewed the building with the possibility of opening an Opp Shop on the premises. We then made the suggestion to the other members and during the forthcoming weeks investigations concerning the feasibility of this idea were made, volunteers recruited and the shop opened in July 1975. The first contribution to the Church funds of $1,600 was made in 1976 and was followed by regular contributions to the church budget each year. In 1981 a 30'x 20' steel garage costing $2,000 was erected adjacent to the original Methodist Church to provide more space. Meanwhile an Opp Shop was opened in Melton Markets and operated from 1981 to 1985. Further accommodation was needed at Yuille Street and the Atco Hall was installed at the rear of the Bluestone Church (known as Melton Uniting Church - 1977). A large proportion of finance for this project was contributed by the Opp Shop $16,000. Simultaneously finance was being built up to provide further facilities at Brooklyn Rd, resulting in the commencement of a concrete block masonry and steel extension, with facilities & fittings, being commenced during 1986 & completed in 1989. The approximate total cost of this structure was $60,000. Over the 16 years, members and friends of our church have contributed many many hours to staff the shop and many other supportive works. As an acknowledgement of their efforts, our Minister prepared Certificates for Service and Dedication which were presented to 75 supporters at a special Church Service in June 1991. The assistance that has been given to the community of Melton & District has been extensive and much appreciated by many families. In addition many appeals for goods and clothing have been received and packages sent to many outside supportive agencies. Three volunteers having a tea break in the staffroom of the Op Shoplocal identities, churches -
 Melbourne Legacy
Pamphlet, The Legacy Club of Melbourne 1930-31 : A brief account of its ideals and works (H7), 1930
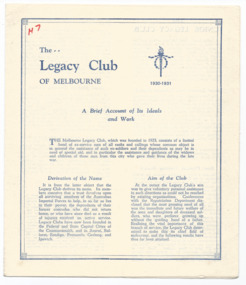
A brochure explaining 'A brief account of its ideals and work' in 1930. The notation H4 in red pen shows that it was part of the archive project that was trying to capture the history of Legacy. The brochure mentions clubs had started in the Federal and state capitals, and Geelong, Ararat, Ballarat, Fremantle, Ipswich and Bendigo. Members were all men who had served in the forces of the British Empire during the war. It shows the work of Legacy as : Junior Legacy Club - which had been running for 5 years, for sons (aged 9 to 21) of deceased soldiers. Members of the Legacy Club were in constant touch and acted as Big Brothers. Boys' Literary and Debating Branch - approximately 95 boys attended weekly meetings of a debating society at Anzac House. Boys' Physical Training Branch - for the boys physical welfare classes and conducted weekly by a permanent instructor (paid by Legacy). There were 270 boys attending. Also cricket, football, Lacrosse and swimming clubs, all supervised and coached. 'A permanent camp has been erected at Balnarring East, and this is occupied by the boys at the Christmas vacation under the control of Legatee Stan Savige, and the girls at Easter, with Mrs Gilles in charge. The value of these camps in enabling Junior Legatees to become better acquainted and in the development of character and the Legacy spirit cannot be overestimated'. Girls' Physical Training Branch - started in 1927 and now over 200 girls were being instructed by Mrs AM Gilles (the wife of a Legatee). Lending Library of over 600 books. Vocational placements for junior legatees. Meetings were held in the Victoria Palace Hotel, Little Collins St, on Tuesdays and included an informative lecture. The policy and objectives were laid out including to preserve the memory of fallen comrades and to assist their dependents, particularly the children. Also to maintain a spirit of comradeship, and to safeguard the good standing and interests of ex-servicemen in the community. The brochure shows activities as: Employment Committee, Comradeship Committee, a pledge to assist the National War Memorial being established on the Domain site, and for the children the 'Deceased Soldiers' Children's Welfare Committee. Also picnics, Christmas camp, cycle club, and rambles as arranged. There is help for vocational options for the children. It is mentioned during 1930 which consisted of 'a hospital ward, mess room seating 80, a kitchen and storeroom. Also tent frames and necessary offices are provided and the total value of the building and equipment owned by the Club is our £600.' See also 01478 for a copy from 1928.This is one of the first documents that promotes Legacy and summarises its objective and services. Brochure describing the ideal and activities of the Legacy Club in 1930.Handwritten H4 in red pen.legacy promotion, history, goals, objectives -
 Kew Historical Society Inc
Biographical information, Ronald Horace Setford (1915–1988)
Ronald Horace Setford was born in April 1915 at 18 Church Street, Hawthorn, at his family’s home above their decorator shop. He was the second of three sons born to Horace Turner Setford (1880-1944) and Mabel Crofts (1887-1943). He attended Hawthorn West Primary School and then Swinburne before beginning work in his family’s business ‘Setford and Son’ in October 1930. This was formalised in April 1931 when he became a carpentry and joinery apprentice. In 1934 he graduated as a grade four carpenter. Ron worked in the family business until 1964 and then worked at J S Kidd and Co Pty Ltd as a storeman until his retirement in December 1973. Ron married Grace Muriel Agnes Perrey (1915-2001) in 1936 and they first lived in Kew around 1940, at 38 Marshall Avenue. Ron served in the Citizen Military Forces as a sapper with the 9 Australian Army Transport Company, Royal Australian Engineers, signing up a week after Darwin had been bombed. He spent time in Darwin, Wayville (South Australia), Herberton and Grovely (Queensland). Afterwards he refused to eat rice, never spoke of the war, nor took part in any ANZAC day proceedings. In 1941, Ron and Grace bought their block of land at 9 Tanner Avenue, East Kew, part of the Old Golf Links Estate, for £225. It was not until December 1945 that Ron started building their home and they moved in during May 1947. Ron and Grace remained there for thirty-seven years until the house was sold to their nephew in 1984. It has since been demolished. Ron’s great passion was photography and in the early 1960s he purchased his Minolta camera. Slide evenings at Tanner Avenue were a regular occurrence. Ron made his own title slides, interval slides and end slides. As well as many holiday photos (around Australia and their world trip in 1966), he enjoyed photographing local landmarks, flowers, insects and family. One of Ron’s photography projects was to record the progress of the building of the Eastern Freeway. This was near their home, and he’d walk down to the works on a regular basis, dressed smartly, with his camera in hand. The workers thought he was an official photographer, and he was allowed on site to take his photos. In 1984, Ron and Grace downsized and moved to Bayswater. Ron passed away on 31 October 1988 at the Maroondah Hospital in Ringwood East, at age 73. His ashes were spread on his beloved rose bushes at Tanner Avenue. Lauren Thomson, 2025ron setford, 9 tanner avenue -- kew east (vic, setford and son -- 18 church st (hawthorn), grace muriel agnes perrey, 9 australian army transport company, j s kidd and co pty ltd, eastern freeway, f19 freeway -
 The Beechworth Burke Museum
Photograph
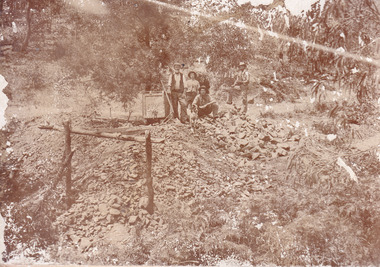
This image is a reproduction of an 1899 original depicting the 'Williams Good Luck Mine' on the Mopoke Reef (also called 'Morepork Gully') in the Dingle Ranges, approximately three miles from Beechworth. A large opening to a mine can be seen behind the men in the photograph, with a wheeled cart on a track leading to the men's position, where the soil and rocks have been hauled away. This photograph interestingly contains dogs alongside the miners. While dogs have been recorded as deterrents to thieves in the Victorian goldfields, these dogs appear as companions to these men. Following the discovery of gold at Beechworth in 1852, rushes quickly followed at surrounding creeks and gullies in the district. In the late nineteenth and early twentieth centuries, small syndicates of miners continued to work old or abandoned quartz reefs, often persisting without the assistance of heavy machinery to remove the large amounts of rock, in order to obtain yields at ever greater depths. The group of miners in this photograph are Mr. Roger Williams and Sons, who revived operations at the ‘Old Good Luck’ mine on the Mopoke Reef in the Dingle Range near Beechworth around 1892, working the site for more than two decades. An emigrant from Cornwall with experience in the tin mining industry, 19 year old Roger Williams senior sailed to New Zealand in 1840, then to Australia where he spent time in the Bendigo Gold Fields before settling in Beechworth in the early 1860s. Mr Williams senior worked on various mining activities in the district, including the Rocky Mountain Tunnel project. Conversant with the character of gold-bearing reefs in the area, the syndicate dug an eight hundred foot tunnel, digging down as far down as two hundred feet with little capital save their labour, to connect and provide better working access to the mass of reefs and veins in the vicinity. Progress was hampered by poor air quality charged with fumes from dynamite and large quantities of rock had to be crushed to obtain payable yields. The Victorian Goldfields are filled with ruins and remnants of the area's rich mining history, ranging from small alluvial diggings to the remains of huge mining companies. Site names often changed several times throughout the nineteenth and twentieth centuries. Some sites were abandoned and forgotten, others were worked continuously over many decades. The names of mines were often repeated at different locations throughout the Victorian Goldfields. For example, there is a Mopoke Gully heritage mine near Fryers Creek, Victoria. 'Mopoke' is a common onomatopoeic name for Morepork and Australian Boobook owls.This image has historical, social and research significance for patterns of emigration during of the Victorian Gold Rush, and the historical, social and environmental impacts of mining at Beechworth at the turn of the nineteenth and twentieth centuries. As gold became scarce and government support and large company investment waned, poor hard-working miners laboured intensively to make a living through periods of high unemployment. This image can be compared and studied alongside other historical mining photographs and objects in the Burke Museum Collection. It has potential to improve our understanding of miners working conditions and the shifting character of mining in the Beechworth district.Sepia coloured rectangular photograph printed on gloss photographic paper mounted on card. Obverse: Williams/ Good/ Luck Reverse: A02498/ 1997. 2498/ Good Luck/ Mine/ 1899/ Mopoke. burke museum, beechworth museum, beechworth, gold fields, gold rush, victorian gold rush, gold ming history, colonial australia, australian gold rushes, mining technology, beechworth historic district, indigo gold trail, migration, indigo shire, good luck gold mine, victorian goldfields, mining syndicates, gold fever, quartz-mining, small-scale mining, old good luck mine, mopoke gully, quartz reefs beechworth -
 The Beechworth Burke Museum
Photograph
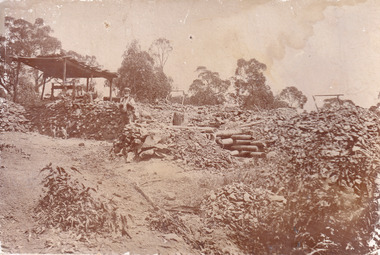
This image is a reproduction of an 1899 original depicting the 'Williams Good Luck Mine' on the Mopoke Reef (also called 'Morepork Gully') in the Dingle Ranges, approximately three miles from Beechworth. The foreground of the image is littered with piles of smashed rock and detritus, known as ‘mullock’, beside a reinforced mine shaft, a vertical access passageway allowing miners to enter the mine and haul ore out using lifting technology such as a poppet heads, whims or windlasses. A group of miners and a dog appear close to an open-sided miner’s hut. Following the discovery of gold at Beechworth in 1852, rushes quickly followed at surrounding creeks and gullies in the district. In the late nineteenth and early twentieth centuries, small syndicates of miners continued to work old or abandoned quartz reefs, often persisting without the assistance of heavy machinery to remove the large amounts of rock, in order to obtain yields at ever greater depths. The group of miners in this photograph are Mr. Roger Williams and Sons, who revived operations at the ‘Old Good Luck’ mine on the Mopoke Reef in the Dingle Range near Beechworth around 1892, working the site for more than two decades. An emigrant from Cornwall with experience in the tin mining industry, 19 year old Roger Williams senior sailed to New Zealand in 1840, then to Australia where he spent time in the Bendigo Gold Fields before settling in Beechworth in the early 1860s. Mr Williams senior worked on various mining activities in the district, including the Rocky Mountain Tunnel project. Conversant with the character of gold-bearing reefs in the area, the syndicate dug an eight hundred foot tunnel, digging down as far down as two hundred feet with little capital save their labour, to connect and provide better working access to the mass of reefs and veins in the vicinity. Progress was hampered by poor air quality charged with fumes from dynamite and large quantities of rock had to be crushed to obtain payable yields. The Victorian Goldfields are filled with ruins and remnants of the area's rich mining history, ranging from small alluvial diggings to the remains of huge mining companies. Site names often changed several times throughout the nineteenth and twentieth centuries. Some sites were abandoned and forgotten, others were worked continuously over many decades. The names of mines were often repeated at different locations throughout the Victorian Goldfields. For example, there is a Mopoke Gully heritage mine near Fryers Creek, Victoria. 'Mopoke' is a common onomatopoeic name for Morepork and Australian Boobook owls.This image has historical, social and research significance for patterns of emigration during of the Victorian Gold Rush, and the historical, social and environmental impacts of mining at Beechworth at the turn of the nineteenth and twentieth centuries. As gold became scarce and government support and large company investment waned, poor hard-working miners laboured intensively to make a living through periods of high unemployment. This image can be compared and studied alongside other historical mining photographs and objects in the Burke Museum Collection. It has potential to improve our understanding of miners working conditions and the shifting character of mining in the Beechworth district.Sepia coloured rectangular photograph printed on gloss photographic paper mounted on card.Obverse: Reverse: A02497/ 1997.2497/ 'Good/ Luck/ Mine'/ Morepork/ Gully/ Mrs Joyce/ Bright/ Tunnel/ 800 ft/ 1899. burke museum, beechworth museum, beechworth, gold fields, gold rush, victorian gold rush, gold ming history, colonial australia, australian gold rushes, mining technology, beechworth historic district, indigo gold trail, migration, indigo shire, good luck gold mine, victorian goldfields, mining syndicates, gold fever, quartz-mining, small-scale mining, old good luck mine, mopoke gully, quartz reefs beechworth -
 City of Melbourne Libraries
Photograph (item), Miss Jessie Anderson
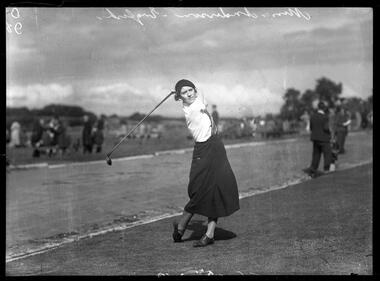
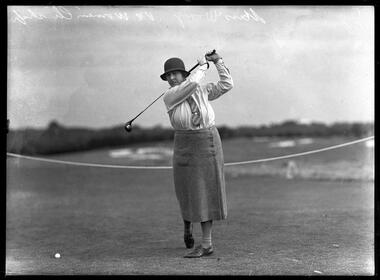
In 1937, Miss Jessie Anderson (1915-2006) was the world’s number one ranking women’s golfer. She had been playing golf since she was five years old and designed golf clubs especially for women. During WWII, Jessie enlisted in the Auxiliary Territorial Service (ATS) driving army ambulances, and her fiancée George Valentine, was a POW in Eichstat, Germany. They married once he was freed, in 1945. Jessie was awarded the MBE for services to golf in 1959. Photographer notations on slide: "Miss Anderson - English B98" Description: Woman golfer hitting off. . Research by project volunteer, Fiona Collyer: Janet "Jessie" Anderson (1915-2006) was a Scottish golf champion, nicknamed “Wee Jessie” for her small stature. She was also nicknamed “Fairway Maid of Perth”, a play on Sir Walter Scott’s “Fair Maid of Perth”. . In 1937, Jessie was the world’s number one ranking woman golfer. Her main wins included the British Women's Amateur Championship (1937, 1955, 1958), the Scottish Women's Amateur Championship (1938, 1939, 1951, 1953, 1955, 1958), the New Zealand Women's Golf Championship (1935) and the French Women's Golf Tournament (1936). . Jessie was part of the British golf team who competed in the Australian Women’s Golf Championship against an Australian team at Royal Melbourne Golf Club in 1935, which the British team won. The Australian press said, “Hats off to the British women, sparkle, sportsmanship and the fighting spirit that thrills, they had the last word.” . Jessie’s father, Joe, a pro-golfer, owned a sports equipment store in St John’s Street, Perth and he designed and manufactured golf clubs under the OK brand. Jessie designed golf clubs especially for women. . In 1939 Jessie became engaged to George Valentine. In 1940, George enlisted in the British army and Jessie in the Auxiliary Territorial Service (ATS), the women’s branch of the British Army, driving army ambulances. George was a POW at Eichstat, Germany, and they were unable to marry until he was freed in 1945. Jessie continued to play championship golf until 1960. They had one son, Francis Iain, born 1948. . Jessie was awarded the MBE for services to golf in 1959. She was inducted into the Scottish Sports Hall of Fame in 2003. In 2019, Perth Museum and Art Gallery held a retrospective exhibition of her life and career. A biography, “Wee Jessie: Jessie Valentine, whose golf swing lasted a lifetime” by Dr Eve Soulsby, was published in 2019. golf, women golfers, royal melbourne golf club -
 City of Melbourne Libraries
Photograph (item), Miss Leonora Wray
Miss Leonora “Leo” Wray MBE Leonora “Leo” Wray (1886-1979) was a champion NSW golfer, regarded as the “mother” of Australian golf. She won state and national titles multiple times across three decades. The Leonora Wray Trophy is awarded to the No. 1 player in Australia in national stroke average. Regarding her golf game Leo remarked, “Never a chance thrown away, or a single shot played without a definite object.” She was said to be commanding in “stature and mien” – a raconteur with a deep, booming voice who inspired in young players “a mixture of fear and awe, respect and affection”. In 1909 she contracted typhoid fever and was unable to play for 10 years. She was awarded an MBE in 1968 for her services to golf and inducted into the Sport Australian Hall of Fame in 1985. Photographer notations on slide: "Miss Wray. Vic Women's Ch'ship B98" Description: Golfer Leonora Wray swings her driver. She is wearing a tiepin and cufflinks. . Research by project volunteer, Fiona Collyer: Leonora Wray AKA “Leo” was a champion NSW golfer who is regarded as the “Mother” of Australian women’s golf. She won the NSW State Championships (1906, 1907, 1908) and the Australian title (1907, 1908). In 1909 she contracted typhoid fever and was unable to play for 10 years. Leonora regained the national title in 1929 and the NSW Championship in 1930. She was the champion women’s player of the Australian club ten times between 1907 and 1938 and five times champion at the Royal Sydney Golf Club between 1924 and 1933. She competed in the Australian Women’s Golf Championship at Royal Melbourne against the British team in 1935. During WWII, Leonora worked for the ANZAC Buffet Ladies Auxiliary in Hyde Park, Sydney. Regarding her golf game, she remarked, “Never a chance thrown away, or a single shot played without a definite object.” Leo was said to be commanding in “stature and mien” – a raconteur with a deep, booming voice who inspired in young players “a mixture of fear and awe, respect and affection.” Her portrait by Henry Hanke is held by the Australian Golf Club. Women’s Golf NSW holds its annual Leonora Wray Scratch Teams event and the Leonora Wray Trophy is awarded to the No. 1 player in Australia in national stroke average. In 1968 she was awarded an MBE for her services to women’s golf. In 1985 Leo was inducted into the Sport Australia Hall of Fame.golf, women golfers, royal melbourne golf club -
 Flagstaff Hill Maritime Museum and Village
Domestic object - Bowl, Late 19th or early 20th Century
The Process of Making Pottery Decorating, Firing, Glazing, Making, Technical There is a rhythm and flow to clay. It can’t be done all at once! Even the making process! It can take weeks to get everything done, especially if you can only work on your pottery once a week! Even though we have three hour classes, it’s often just not enough time! Here is an overview of some of the processes so you have a bit more grasp on some of the technical stuff! Step One – Design There are SO many ideas out there for making stuff in clay! From delicate porcelain jewellery, through to heavy sculptural work and everything in between. Deciding your direction is sometimes not that easy – when you first start, try everything, you will naturally gravitate to the style that you enjoy! The options and variations are endless and can get a wee bit overwhelming too! Check in with me before you start to ensure your ideas will work, what order you might do things, how you could achieve the look you are seeking and any other technical data required! Step Two – Making Clay is thixotropic. This means that as you work with it, the clay first gets sloppier and wetter, before is begins to dry in the atmosphere. For most things, you simply can’t do all parts of the project at once. An example of work order might look like: Get last weeks work out from the shelves Prepare clay for today’s work – roll your clay, prepare balls for throwing, make the first stage of a pinch pot) Clean up last week’s work and put it on the shelf for bisque firing Check that you have any glazing to do – and do enough of it that you will have time to finish your main project Do the next step of your next project – there might be a further step that can’t be complete immediately, in that case, wrap your work well and put onto the shelves. Letting your work rest for a while can really help keep your work clean and professional looking. Many things require bagging under plastic to keep it ready for work the next week – put your name on the outside of the bag so you can find your work easily. We have stickers and markers. Consider how you want to decorate your work – coloured slip can be applied at a fairly wet stage (remembering that it will make your work even wetter!). Trying to apply slip to dry clay won’t work! If you want to do sgraffito – you will need to keep the work leather hard (a state of dryness where you can still work the clay with a little effort and a little water and care). Step Three – Drying Most of the time your work can go into the rack uncovered to let it dry out for the following week. If you want to continue forming or shaping you will need to double bag your work – put your work on a suitable sized bat and put the bat in a bag so the base of the bag is under the bat, then put another bag over the top of the work and tuck the top of the bag under the bat. If you want to trim (or turn) your thrown work the following week, it should also be double bagged. If your work is large, delicate, or of uneven thicknesses, you should lightly cover your work for drying. When considering the drying process, bare in mind the weather, humidity and wind! The hotter and dryer, the faster things dry and work can dry unevenly in the shelves – this can lead to cracking – another time to lightly cover your work for drying. Step Four – Trimming and Cleaning Up Your work is dry! It is called greenware now and it is at it’s most fragile! Handle everything with two hands. I often refer to soft hands – keep everything gentle and with your fingers spread as much as possible. Try to not pick up things like plates too much, and always with both hands! Before your work can be bisque fired it should be “cleaned up”. You work won’t go into the kiln if it has sharp edges – when glazed, sharp edges turn into razor blades! Use a piece of fly wire to rub the work all over – this will scratch a little so be light handed. Use a knife or metal kidney to scrape any areas that require a bit more dynamic treatment than the fly wire offers! Finally, a very light wipe over with a slightly damp sponge can help soften and soothe all of your edges and dags! Trimming thrown work: If you are planning to trim (or turn) your thrown work (and you should be), make sure you bag it well – your work should be leather hard to almost dry for easiest trimming. Use this step to finish the work completely – use a metal kidney to polish the surface, or a slightly damp sponge to give a freshly thrown look. Wipe the sponge around the rim after trimming, and check the inside of the pot for dags! Trimming slip cast work: Usually I will trim the rims of your work on the wheel the following day to make that stage easier, however you will still need to check your work for lumps and bumps. Last but not least – check that your name is still clearly on the bottom of your work. Step Five – Bisque Firing When the work is completely dry it can go into the bisque kiln. The bisque kiln is fired to 1000°C. This process burns off the water in the clay as well as some of the chemically bound water. The structure of the clay is not altered that much at this temperature. Inside the bisque kiln, the work is stacked a little, small bowl inside a larger bowl and onto a heavy plate. Smaller items like decorations or drink coasters might get stacked several high. Consideration is paid to the weight of the stack and shape of the work. A bisque kiln can fire about one and a half times the amount of work that the glaze kiln can fire. The firing takes about 10 hours to complete the cycle and about two days to cool down. Once it has been emptied the work is placed in the glaze room ready for you to decorate! Step Six – Glazing Decorating your work with colour can be a lot of fun – and time consuming! There are three main options for surface treatment at this stage: Oxide Washes Underglazes Glazes Washes and underglazes do not “glaze” the work – It will still need a layer of glaze to fully seal the clay (washes don’t need glaze on surfaces not designed for food or liquid as they can gloss up a little on their own). Underglazes are stable colourants that turn out pretty much how they look in the jar. They can be mixed with each other to form other colours and can be used like water colours to paint onto your work. Mostly they should have a clear glaze on top to seal them. Oxides are a different species – the pink oxide (cobalt) wash turns out bright blue for instance. They don’t always need a glaze on top, and some glazes can change the colour of the wash! The glazes need no other “glaze” on top! Be careful of unknown glaze interactions – you can put any combination of glaze in a bowl or on a plate, but only a single glaze on the outside of any vertical surface! Glazes are a chemical reaction under heat. We don’t know the exact chemicals in the Mayco glazes we use. I can guess by the way they interact with each other, however, on the whole, you need to test every idea you have, and not run the test on a vertical surface! Simply put, glaze is a layer of glass like substance that bonds with the clay underneath. Clay is made of silica, alumina and water. Glaze is made of mostly silica. Silica has a melting point of 1700°C and we fire to 1240°C. The silica requires a “flux” to help it melt at the lower temperature. Fluxes can be all sorts of chemicals – a common one is calcium – calcium has a melting point of 2500°C, however, together they both melt at a much lower temperature! Colourants are metal oxides like cobalt (blue), chrome (green through black), copper (green, blue, even red!), manganese (black, purple and pink) iron (red brown), etc. Different chemicals in the glaze can have dramatic effects. for example, barium carbonate (which we don’t use) turns manganese bright pink! Other elements can turn manganese dioxide brown, blue, purple and reddish brown. Manganese dioxide is a flux in and of itself as well. So, glazes that get their black and purple colours, often interact with other glazes and RUN! Our mirror black is a good example – it mixes really well with many glazes because it fluxes them – causes them to melt faster. It will also bring out many beautiful colours in the glazes because it’s black colouring most definitely comes from manganese dioxide! Glaze chemistry is a whole subject on it’s own! We use commercial Mayco glazes on purpose – for their huge range of colour possibilities, stability, cool interactions, artistic freedom with the ability to easily brush the glazes on and ease of use. We currently have almost 50 glazes on hand! A major project is to test the interactions of all glazes with each other. That is 2,500 test tiles!!!! I’m going to make the wall behind the wheels the feature wall of pretty colours! Step Seven – Glaze (Gloss or sometimes called “Glost”) Firing Most of the time this is the final stage of making your creation (but not always!) The glaze kiln goes to 1240°C. This is called cone 6, or midrange. It is the low end of stoneware temperatures. Stoneware clays and glazes are typically fired at cone 8 – 10, that is 1260 – 1290°C. The energy requirement to go from 1240°C to 1280°C is almost a 30% more! Our clay is formulated to vitrify (mature, turn “glass-like”) at 1240°, as are our glazes. A glaze kiln take around 12 hours to reach temperature and two to three days to cool down. Sometimes a third firing process is required – this is for decoration that is added to work after the glaze firing. For example – adding precious metals and lustres. this firing temperature is usually around 600 – 800°C depending upon the techniques being used. There are many students interested in gold and silver trims – we will be doing this third type of firing soon! After firing your work will be in the student finished work shelves. Remember to pay for it before you head out the door! There is a small extra charge for using porcelain clay (it’s more than twice the price of regular clay), and for any third firing process! Once your work has been fired it can not turn back into clay for millennia – so don’t fire it if you don’t like it! Put it in the bucket for recycling. https://firebirdstudios.com.au/the-process-of-making-pottery/ The bowl is an example of kitchenware used in the 19th century and still in use today.Bowl white ceramic. Crack on side. Badly stained.Backstamp very faint and unable to be read.flagstaff hill, warrnambool, shipwrecked-coast, flagstaff-hill, flagstaff-hill-maritime-museum, maritime-museum, shipwreck-coast, flagstaff-hill-maritime-village, mixing bowl, food preparation, kitchen equipment, ceramic -
 Flagstaff Hill Maritime Museum and Village
Domestic object - Bowl
The Process of Making Pottery Decorating, Firing, Glazing, Making, Technical There is a rhythm and flow to clay. It can’t be done all at once! Even the making process! It can take weeks to get everything done, especially if you can only work on your pottery once a week! Even though we have three hour classes, it’s often just not enough time! Here is an overview of some of the processes so you have a bit more grasp on some of the technical stuff! Step One – Design There are SO many ideas out there for making stuff in clay! From delicate porcelain jewellery, through to heavy sculptural work and everything in between. Deciding your direction is sometimes not that easy – when you first start, try everything, you will naturally gravitate to the style that you enjoy! The options and variations are endless and can get a wee bit overwhelming too! Check in with me before you start to ensure your ideas will work, what order you might do things, how you could achieve the look you are seeking and any other technical data required! Step Two – Making Clay is thixotropic. This means that as you work with it, the clay first gets sloppier and wetter, before is begins to dry in the atmosphere. For most things, you simply can’t do all parts of the project at once. An example of work order might look like: Get last weeks work out from the shelves Prepare clay for today’s work – roll your clay, prepare balls for throwing, make the first stage of a pinch pot) Clean up last week’s work and put it on the shelf for bisque firing Check that you have any glazing to do – and do enough of it that you will have time to finish your main project Do the next step of your next project – there might be a further step that can’t be complete immediately, in that case, wrap your work well and put onto the shelves. Letting your work rest for a while can really help keep your work clean and professional looking. Many things require bagging under plastic to keep it ready for work the next week – put your name on the outside of the bag so you can find your work easily. We have stickers and markers. Consider how you want to decorate your work – coloured slip can be applied at a fairly wet stage (remembering that it will make your work even wetter!). Trying to apply slip to dry clay won’t work! If you want to do sgraffito – you will need to keep the work leather hard (a state of dryness where you can still work the clay with a little effort and a little water and care). Step Three – Drying Most of the time your work can go into the rack uncovered to let it dry out for the following week. If you want to continue forming or shaping you will need to double bag your work – put your work on a suitable sized bat and put the bat in a bag so the base of the bag is under the bat, then put another bag over the top of the work and tuck the top of the bag under the bat. If you want to trim (or turn) your thrown work the following week, it should also be double bagged. If your work is large, delicate, or of uneven thicknesses, you should lightly cover your work for drying. When considering the drying process, bare in mind the weather, humidity and wind! The hotter and dryer, the faster things dry and work can dry unevenly in the shelves – this can lead to cracking – another time to lightly cover your work for drying. Step Four – Trimming and Cleaning Up Your work is dry! It is called greenware now and it is at it’s most fragile! Handle everything with two hands. I often refer to soft hands – keep everything gentle and with your fingers spread as much as possible. Try to not pick up things like plates too much, and always with both hands! Before your work can be bisque fired it should be “cleaned up”. You work won’t go into the kiln if it has sharp edges – when glazed, sharp edges turn into razor blades! Use a piece of fly wire to rub the work all over – this will scratch a little so be light handed. Use a knife or metal kidney to scrape any areas that require a bit more dynamic treatment than the fly wire offers! Finally, a very light wipe over with a slightly damp sponge can help soften and soothe all of your edges and dags! Trimming thrown work: If you are planning to trim (or turn) your thrown work (and you should be), make sure you bag it well – your work should be leather hard to almost dry for easiest trimming. Use this step to finish the work completely – use a metal kidney to polish the surface, or a slightly damp sponge to give a freshly thrown look. Wipe the sponge around the rim after trimming, and check the inside of the pot for dags! Trimming slip cast work: Usually I will trim the rims of your work on the wheel the following day to make that stage easier, however you will still need to check your work for lumps and bumps. Last but not least – check that your name is still clearly on the bottom of your work. Step Five – Bisque Firing When the work is completely dry it can go into the bisque kiln. The bisque kiln is fired to 1000°C. This process burns off the water in the clay as well as some of the chemically bound water. The structure of the clay is not altered that much at this temperature. Inside the bisque kiln, the work is stacked a little, small bowl inside a larger bowl and onto a heavy plate. Smaller items like decorations or drink coasters might get stacked several high. Consideration is paid to the weight of the stack and shape of the work. A bisque kiln can fire about one and a half times the amount of work that the glaze kiln can fire. The firing takes about 10 hours to complete the cycle and about two days to cool down. Once it has been emptied the work is placed in the glaze room ready for you to decorate! Step Six – Glazing Decorating your work with colour can be a lot of fun – and time consuming! There are three main options for surface treatment at this stage: Oxide Washes Underglazes Glazes Washes and underglazes do not “glaze” the work – It will still need a layer of glaze to fully seal the clay (washes don’t need glaze on surfaces not designed for food or liquid as they can gloss up a little on their own). Underglazes are stable colourants that turn out pretty much how they look in the jar. They can be mixed with each other to form other colours and can be used like water colours to paint onto your work. Mostly they should have a clear glaze on top to seal them. Oxides are a different species – the pink oxide (cobalt) wash turns out bright blue for instance. They don’t always need a glaze on top, and some glazes can change the colour of the wash! The glazes need no other “glaze” on top! Be careful of unknown glaze interactions – you can put any combination of glaze in a bowl or on a plate, but only a single glaze on the outside of any vertical surface! Glazes are a chemical reaction under heat. We don’t know the exact chemicals in the Mayco glazes we use. I can guess by the way they interact with each other, however, on the whole, you need to test every idea you have, and not run the test on a vertical surface! Simply put, glaze is a layer of glass like substance that bonds with the clay underneath. Clay is made of silica, alumina and water. Glaze is made of mostly silica. Silica has a melting point of 1700°C and we fire to 1240°C. The silica requires a “flux” to help it melt at the lower temperature. Fluxes can be all sorts of chemicals – a common one is calcium – calcium has a melting point of 2500°C, however, together they both melt at a much lower temperature! Colourants are metal oxides like cobalt (blue), chrome (green through black), copper (green, blue, even red!), manganese (black, purple and pink) iron (red brown), etc. Different chemicals in the glaze can have dramatic effects. for example, barium carbonate (which we don’t use) turns manganese bright pink! Other elements can turn manganese dioxide brown, blue, purple and reddish brown. Manganese dioxide is a flux in and of itself as well. So, glazes that get their black and purple colours, often interact with other glazes and RUN! Our mirror black is a good example – it mixes really well with many glazes because it fluxes them – causes them to melt faster. It will also bring out many beautiful colours in the glazes because it’s black colouring most definitely comes from manganese dioxide! Glaze chemistry is a whole subject on it’s own! We use commercial Mayco glazes on purpose – for their huge range of colour possibilities, stability, cool interactions, artistic freedom with the ability to easily brush the glazes on and ease of use. We currently have almost 50 glazes on hand! A major project is to test the interactions of all glazes with each other. That is 2,500 test tiles!!!! I’m going to make the wall behind the wheels the feature wall of pretty colours! Step Seven – Glaze (Gloss or sometimes called “Glost”) Firing Most of the time this is the final stage of making your creation (but not always!) The glaze kiln goes to 1240°C. This is called cone 6, or midrange. It is the low end of stoneware temperatures. Stoneware clays and glazes are typically fired at cone 8 – 10, that is 1260 – 1290°C. The energy requirement to go from 1240°C to 1280°C is almost a 30% more! Our clay is formulated to vitrify (mature, turn “glass-like”) at 1240°, as are our glazes. A glaze kiln take around 12 hours to reach temperature and two to three days to cool down. Sometimes a third firing process is required – this is for decoration that is added to work after the glaze firing. For example – adding precious metals and lustres. this firing temperature is usually around 600 – 800°C depending upon the techniques being used. There are many students interested in gold and silver trims – we will be doing this third type of firing soon! After firing your work will be in the student finished work shelves. Remember to pay for it before you head out the door! There is a small extra charge for using porcelain clay (it’s more than twice the price of regular clay), and for any third firing process! Once your work has been fired it can not turn back into clay for millennia – so don’t fire it if you don’t like it! Put it in the bucket for recycling. https://firebirdstudios.com.au/the-process-of-making-pottery/ This bowl is an example of kitchenware used in the 19th century and still in use today.Bowl white ceramic plain that has two sets of edging around lip. Inside bowl has plaster designed to look like cooking mixture.flagstaff hill, warrnambool, shipwrecked-coast, flagstaff-hill, flagstaff-hill-maritime-museum, maritime-museum, shipwreck-coast, flagstaff-hill-maritime-village, kitchen equipment, ceramic -
 Flagstaff Hill Maritime Museum and Village
Domestic object - Bowl, J & G Meakin, Late 19th or early 20th Century
The Process of Making Pottery Decorating, Firing, Glazing, Making, Technical There is a rhythm and flow to clay. It can’t be done all at once! Even the making process! It can take weeks to get everything done, especially if you can only work on your pottery once a week! Even though we have three hour classes, it’s often just not enough time! Here is an overview of some of the processes so you have a bit more grasp on some of the technical stuff! Step One – Design There are SO many ideas out there for making stuff in clay! From delicate porcelain jewellery, through to heavy sculptural work and everything in between. Deciding your direction is sometimes not that easy – when you first start, try everything, you will naturally gravitate to the style that you enjoy! The options and variations are endless and can get a wee bit overwhelming too! Check in with me before you start to ensure your ideas will work, what order you might do things, how you could achieve the look you are seeking and any other technical data required! Step Two – Making Clay is thixotropic. This means that as you work with it, the clay first gets sloppier and wetter, before is begins to dry in the atmosphere. For most things, you simply can’t do all parts of the project at once. An example of work order might look like: Get last weeks work out from the shelves Prepare clay for today’s work – roll your clay, prepare balls for throwing, make the first stage of a pinch pot) Clean up last week’s work and put it on the shelf for bisque firing Check that you have any glazing to do – and do enough of it that you will have time to finish your main project Do the next step of your next project – there might be a further step that can’t be complete immediately, in that case, wrap your work well and put onto the shelves. Letting your work rest for a while can really help keep your work clean and professional looking. Many things require bagging under plastic to keep it ready for work the next week – put your name on the outside of the bag so you can find your work easily. We have stickers and markers. Consider how you want to decorate your work – coloured slip can be applied at a fairly wet stage (remembering that it will make your work even wetter!). Trying to apply slip to dry clay won’t work! If you want to do sgraffito – you will need to keep the work leather hard (a state of dryness where you can still work the clay with a little effort and a little water and care). Step Three – Drying Most of the time your work can go into the rack uncovered to let it dry out for the following week. If you want to continue forming or shaping you will need to double bag your work – put your work on a suitable sized bat and put the bat in a bag so the base of the bag is under the bat, then put another bag over the top of the work and tuck the top of the bag under the bat. If you want to trim (or turn) your thrown work the following week, it should also be double bagged. If your work is large, delicate, or of uneven thicknesses, you should lightly cover your work for drying. When considering the drying process, bare in mind the weather, humidity and wind! The hotter and dryer, the faster things dry and work can dry unevenly in the shelves – this can lead to cracking – another time to lightly cover your work for drying. Step Four – Trimming and Cleaning Up Your work is dry! It is called greenware now and it is at it’s most fragile! Handle everything with two hands. I often refer to soft hands – keep everything gentle and with your fingers spread as much as possible. Try to not pick up things like plates too much, and always with both hands! Before your work can be bisque fired it should be “cleaned up”. You work won’t go into the kiln if it has sharp edges – when glazed, sharp edges turn into razor blades! Use a piece of fly wire to rub the work all over – this will scratch a little so be light handed. Use a knife or metal kidney to scrape any areas that require a bit more dynamic treatment than the fly wire offers! Finally, a very light wipe over with a slightly damp sponge can help soften and soothe all of your edges and dags! Trimming thrown work: If you are planning to trim (or turn) your thrown work (and you should be), make sure you bag it well – your work should be leather hard to almost dry for easiest trimming. Use this step to finish the work completely – use a metal kidney to polish the surface, or a slightly damp sponge to give a freshly thrown look. Wipe the sponge around the rim after trimming, and check the inside of the pot for dags! Trimming slip cast work: Usually I will trim the rims of your work on the wheel the following day to make that stage easier, however you will still need to check your work for lumps and bumps. Last but not least – check that your name is still clearly on the bottom of your work. Step Five – Bisque Firing When the work is completely dry it can go into the bisque kiln. The bisque kiln is fired to 1000°C. This process burns off the water in the clay as well as some of the chemically bound water. The structure of the clay is not altered that much at this temperature. Inside the bisque kiln, the work is stacked a little, small bowl inside a larger bowl and onto a heavy plate. Smaller items like decorations or drink coasters might get stacked several high. Consideration is paid to the weight of the stack and shape of the work. A bisque kiln can fire about one and a half times the amount of work that the glaze kiln can fire. The firing takes about 10 hours to complete the cycle and about two days to cool down. Once it has been emptied the work is placed in the glaze room ready for you to decorate! Step Six – Glazing Decorating your work with colour can be a lot of fun – and time consuming! There are three main options for surface treatment at this stage: Oxide Washes Underglazes Glazes Washes and underglazes do not “glaze” the work – It will still need a layer of glaze to fully seal the clay (washes don’t need glaze on surfaces not designed for food or liquid as they can gloss up a little on their own). Underglazes are stable colourants that turn out pretty much how they look in the jar. They can be mixed with each other to form other colours and can be used like water colours to paint onto your work. Mostly they should have a clear glaze on top to seal them. Oxides are a different species – the pink oxide (cobalt) wash turns out bright blue for instance. They don’t always need a glaze on top, and some glazes can change the colour of the wash! The glazes need no other “glaze” on top! Be careful of unknown glaze interactions – you can put any combination of glaze in a bowl or on a plate, but only a single glaze on the outside of any vertical surface! Glazes are a chemical reaction under heat. We don’t know the exact chemicals in the Mayco glazes we use. I can guess by the way they interact with each other, however, on the whole, you need to test every idea you have, and not run the test on a vertical surface! Simply put, glaze is a layer of glass like substance that bonds with the clay underneath. Clay is made of silica, alumina and water. Glaze is made of mostly silica. Silica has a melting point of 1700°C and we fire to 1240°C. The silica requires a “flux” to help it melt at the lower temperature. Fluxes can be all sorts of chemicals – a common one is calcium – calcium has a melting point of 2500°C, however, together they both melt at a much lower temperature! Colourants are metal oxides like cobalt (blue), chrome (green through black), copper (green, blue, even red!), manganese (black, purple and pink) iron (red brown), etc. Different chemicals in the glaze can have dramatic effects. for example, barium carbonate (which we don’t use) turns manganese bright pink! Other elements can turn manganese dioxide brown, blue, purple and reddish brown. Manganese dioxide is a flux in and of itself as well. So, glazes that get their black and purple colours, often interact with other glazes and RUN! Our mirror black is a good example – it mixes really well with many glazes because it fluxes them – causes them to melt faster. It will also bring out many beautiful colours in the glazes because it’s black colouring most definitely comes from manganese dioxide! Glaze chemistry is a whole subject on it’s own! We use commercial Mayco glazes on purpose – for their huge range of colour possibilities, stability, cool interactions, artistic freedom with the ability to easily brush the glazes on and ease of use. We currently have almost 50 glazes on hand! A major project is to test the interactions of all glazes with each other. That is 2,500 test tiles!!!! I’m going to make the wall behind the wheels the feature wall of pretty colours! Step Seven – Glaze (Gloss or sometimes called “Glost”) Firing Most of the time this is the final stage of making your creation (but not always!) The glaze kiln goes to 1240°C. This is called cone 6, or midrange. It is the low end of stoneware temperatures. Stoneware clays and glazes are typically fired at cone 8 – 10, that is 1260 – 1290°C. The energy requirement to go from 1240°C to 1280°C is almost a 30% more! Our clay is formulated to vitrify (mature, turn “glass-like”) at 1240°, as are our glazes. A glaze kiln take around 12 hours to reach temperature and two to three days to cool down. Sometimes a third firing process is required – this is for decoration that is added to work after the glaze firing. For example – adding precious metals and lustres. this firing temperature is usually around 600 – 800°C depending upon the techniques being used. There are many students interested in gold and silver trims – we will be doing this third type of firing soon! After firing your work will be in the student finished work shelves. Remember to pay for it before you head out the door! There is a small extra charge for using porcelain clay (it’s more than twice the price of regular clay), and for any third firing process! Once your work has been fired it can not turn back into clay for millennia – so don’t fire it if you don’t like it! Put it in the bucket for recycling. https://firebirdstudios.com.au/the-process-of-making-pottery/This bowl was made by renowned pottery company J & G Meakin of England. The firm was established in the mid-1800's. The bowl is an example of kitchenware used in the 19th century and still in use today.Bowl; white ceramic, round and tapering inwards towards base. Made by J and G Meakin England.On base, 'Ironstone China Reg SOL 391413' with symbolflagstaff hill, flagstaff hill maritime museum and village, warrnambool, maritime museum, maritime village, great ocean road, shipwreck coast, mixing bowl, food preparation, j & g meakin, pottery, stoke-on-trent, kitchen equipment, ceramic -
 Flagstaff Hill Maritime Museum and Village
Domestic object - Plate
The Process of Making Pottery Decorating, Firing, Glazing, Making, Technical There is a rhythm and flow to clay. It can’t be done all at once! Even the making process! It can take weeks to get everything done, especially if you can only work on your pottery once a week! Even though we have three hour classes, it’s often just not enough time! Here is an overview of some of the processes so you have a bit more grasp on some of the technical stuff! Step One – Design There are SO many ideas out there for making stuff in clay! From delicate porcelain jewellery, through to heavy sculptural work and everything in between. Deciding your direction is sometimes not that easy – when you first start, try everything, you will naturally gravitate to the style that you enjoy! The options and variations are endless and can get a wee bit overwhelming too! Check in with me before you start to ensure your ideas will work, what order you might do things, how you could achieve the look you are seeking and any other technical data required! Step Two – Making Clay is thixotropic. This means that as you work with it, the clay first gets sloppier and wetter, before is begins to dry in the atmosphere. For most things, you simply can’t do all parts of the project at once. An example of work order might look like: Get last weeks work out from the shelves Prepare clay for today’s work – roll your clay, prepare balls for throwing, make the first stage of a pinch pot) Clean up last week’s work and put it on the shelf for bisque firing Check that you have any glazing to do – and do enough of it that you will have time to finish your main project Do the next step of your next project – there might be a further step that can’t be complete immediately, in that case, wrap your work well and put onto the shelves. Letting your work rest for a while can really help keep your work clean and professional looking. Many things require bagging under plastic to keep it ready for work the next week – put your name on the outside of the bag so you can find your work easily. We have stickers and markers. Consider how you want to decorate your work – coloured slip can be applied at a fairly wet stage (remembering that it will make your work even wetter!). Trying to apply slip to dry clay won’t work! If you want to do sgraffito – you will need to keep the work leather hard (a state of dryness where you can still work the clay with a little effort and a little water and care). Step Three – Drying Most of the time your work can go into the rack uncovered to let it dry out for the following week. If you want to continue forming or shaping you will need to double bag your work – put your work on a suitable sized bat and put the bat in a bag so the base of the bag is under the bat, then put another bag over the top of the work and tuck the top of the bag under the bat. If you want to trim (or turn) your thrown work the following week, it should also be double bagged. If your work is large, delicate, or of uneven thicknesses, you should lightly cover your work for drying. When considering the drying process, bare in mind the weather, humidity and wind! The hotter and dryer, the faster things dry and work can dry unevenly in the shelves – this can lead to cracking – another time to lightly cover your work for drying. Step Four – Trimming and Cleaning Up Your work is dry! It is called greenware now and it is at it’s most fragile! Handle everything with two hands. I often refer to soft hands – keep everything gentle and with your fingers spread as much as possible. Try to not pick up things like plates too much, and always with both hands! Before your work can be bisque fired it should be “cleaned up”. You work won’t go into the kiln if it has sharp edges – when glazed, sharp edges turn into razor blades! Use a piece of fly wire to rub the work all over – this will scratch a little so be light handed. Use a knife or metal kidney to scrape any areas that require a bit more dynamic treatment than the fly wire offers! Finally, a very light wipe over with a slightly damp sponge can help soften and soothe all of your edges and dags! Trimming thrown work: If you are planning to trim (or turn) your thrown work (and you should be), make sure you bag it well – your work should be leather hard to almost dry for easiest trimming. Use this step to finish the work completely – use a metal kidney to polish the surface, or a slightly damp sponge to give a freshly thrown look. Wipe the sponge around the rim after trimming, and check the inside of the pot for dags! Trimming slip cast work: Usually I will trim the rims of your work on the wheel the following day to make that stage easier, however you will still need to check your work for lumps and bumps. Last but not least – check that your name is still clearly on the bottom of your work. Step Five – Bisque Firing When the work is completely dry it can go into the bisque kiln. The bisque kiln is fired to 1000°C. This process burns off the water in the clay as well as some of the chemically bound water. The structure of the clay is not altered that much at this temperature. Inside the bisque kiln, the work is stacked a little, small bowl inside a larger bowl and onto a heavy plate. Smaller items like decorations or drink coasters might get stacked several high. Consideration is paid to the weight of the stack and shape of the work. A bisque kiln can fire about one and a half times the amount of work that the glaze kiln can fire. The firing takes about 10 hours to complete the cycle and about two days to cool down. Once it has been emptied the work is placed in the glaze room ready for you to decorate! Step Six – Glazing Decorating your work with colour can be a lot of fun – and time consuming! There are three main options for surface treatment at this stage: Oxide Washes Underglazes Glazes Washes and underglazes do not “glaze” the work – It will still need a layer of glaze to fully seal the clay (washes don’t need glaze on surfaces not designed for food or liquid as they can gloss up a little on their own). Underglazes are stable colourants that turn out pretty much how they look in the jar. They can be mixed with each other to form other colours and can be used like water colours to paint onto your work. Mostly they should have a clear glaze on top to seal them. Oxides are a different species – the pink oxide (cobalt) wash turns out bright blue for instance. They don’t always need a glaze on top, and some glazes can change the colour of the wash! The glazes need no other “glaze” on top! Be careful of unknown glaze interactions – you can put any combination of glaze in a bowl or on a plate, but only a single glaze on the outside of any vertical surface! Glazes are a chemical reaction under heat. We don’t know the exact chemicals in the Mayco glazes we use. I can guess by the way they interact with each other, however, on the whole, you need to test every idea you have, and not run the test on a vertical surface! Simply put, glaze is a layer of glass like substance that bonds with the clay underneath. Clay is made of silica, alumina and water. Glaze is made of mostly silica. Silica has a melting point of 1700°C and we fire to 1240°C. The silica requires a “flux” to help it melt at the lower temperature. Fluxes can be all sorts of chemicals – a common one is calcium – calcium has a melting point of 2500°C, however, together they both melt at a much lower temperature! Colourants are metal oxides like cobalt (blue), chrome (green through black), copper (green, blue, even red!), manganese (black, purple and pink) iron (red brown), etc. Different chemicals in the glaze can have dramatic effects. for example, barium carbonate (which we don’t use) turns manganese bright pink! Other elements can turn manganese dioxide brown, blue, purple and reddish brown. Manganese dioxide is a flux in and of itself as well. So, glazes that get their black and purple colours, often interact with other glazes and RUN! Our mirror black is a good example – it mixes really well with many glazes because it fluxes them – causes them to melt faster. It will also bring out many beautiful colours in the glazes because it’s black colouring most definitely comes from manganese dioxide! Glaze chemistry is a whole subject on it’s own! We use commercial Mayco glazes on purpose – for their huge range of colour possibilities, stability, cool interactions, artistic freedom with the ability to easily brush the glazes on and ease of use. We currently have almost 50 glazes on hand! A major project is to test the interactions of all glazes with each other. That is 2,500 test tiles!!!! I’m going to make the wall behind the wheels the feature wall of pretty colours! Step Seven – Glaze (Gloss or sometimes called “Glost”) Firing Most of the time this is the final stage of making your creation (but not always!) The glaze kiln goes to 1240°C. This is called cone 6, or midrange. It is the low end of stoneware temperatures. Stoneware clays and glazes are typically fired at cone 8 – 10, that is 1260 – 1290°C. The energy requirement to go from 1240°C to 1280°C is almost a 30% more! Our clay is formulated to vitrify (mature, turn “glass-like”) at 1240°, as are our glazes. A glaze kiln take around 12 hours to reach temperature and two to three days to cool down. Sometimes a third firing process is required – this is for decoration that is added to work after the glaze firing. For example – adding precious metals and lustres. this firing temperature is usually around 600 – 800°C depending upon the techniques being used. There are many students interested in gold and silver trims – we will be doing this third type of firing soon! After firing your work will be in the student finished work shelves. Remember to pay for it before you head out the door! There is a small extra charge for using porcelain clay (it’s more than twice the price of regular clay), and for any third firing process! Once your work has been fired it can not turn back into clay for millennia – so don’t fire it if you don’t like it! Put it in the bucket for recycling. https://firebirdstudios.com.au/the-process-of-making-pottery/Ceramics have evolved over thousands of years.White earthenware dinner plate. Crazing evident all over.Backstamped ‘Made in England S LTD’flagstaff hill, warrnambool, shipwrecked-coast, flagstaff-hill, flagstaff-hill-maritime-museum, maritime-museum, shipwreck-coast, flagstaff-hill-maritime-village, ceramics, tableware -
 Flagstaff Hill Maritime Museum and Village
Domestic object - Plate, Johnson Bros
The Process of Making Pottery Decorating, Firing, Glazing, Making, Technical There is a rhythm and flow to clay. It can’t be done all at once! Even the making process! It can take weeks to get everything done, especially if you can only work on your pottery once a week! Even though we have three hour classes, it’s often just not enough time! Here is an overview of some of the processes so you have a bit more grasp on some of the technical stuff! Step One – Design There are SO many ideas out there for making stuff in clay! From delicate porcelain jewellery, through to heavy sculptural work and everything in between. Deciding your direction is sometimes not that easy – when you first start, try everything, you will naturally gravitate to the style that you enjoy! The options and variations are endless and can get a wee bit overwhelming too! Check in with me before you start to ensure your ideas will work, what order you might do things, how you could achieve the look you are seeking and any other technical data required! Step Two – Making Clay is thixotropic. This means that as you work with it, the clay first gets sloppier and wetter, before is begins to dry in the atmosphere. For most things, you simply can’t do all parts of the project at once. An example of work order might look like: Get last weeks work out from the shelves Prepare clay for today’s work – roll your clay, prepare balls for throwing, make the first stage of a pinch pot) Clean up last week’s work and put it on the shelf for bisque firing Check that you have any glazing to do – and do enough of it that you will have time to finish your main project Do the next step of your next project – there might be a further step that can’t be complete immediately, in that case, wrap your work well and put onto the shelves. Letting your work rest for a while can really help keep your work clean and professional looking. Many things require bagging under plastic to keep it ready for work the next week – put your name on the outside of the bag so you can find your work easily. We have stickers and markers. Consider how you want to decorate your work – coloured slip can be applied at a fairly wet stage (remembering that it will make your work even wetter!). Trying to apply slip to dry clay won’t work! If you want to do sgraffito – you will need to keep the work leather hard (a state of dryness where you can still work the clay with a little effort and a little water and care). Step Three – Drying Most of the time your work can go into the rack uncovered to let it dry out for the following week. If you want to continue forming or shaping you will need to double bag your work – put your work on a suitable sized bat and put the bat in a bag so the base of the bag is under the bat, then put another bag over the top of the work and tuck the top of the bag under the bat. If you want to trim (or turn) your thrown work the following week, it should also be double bagged. If your work is large, delicate, or of uneven thicknesses, you should lightly cover your work for drying. When considering the drying process, bare in mind the weather, humidity and wind! The hotter and dryer, the faster things dry and work can dry unevenly in the shelves – this can lead to cracking – another time to lightly cover your work for drying. Step Four – Trimming and Cleaning Up Your work is dry! It is called greenware now and it is at it’s most fragile! Handle everything with two hands. I often refer to soft hands – keep everything gentle and with your fingers spread as much as possible. Try to not pick up things like plates too much, and always with both hands! Before your work can be bisque fired it should be “cleaned up”. You work won’t go into the kiln if it has sharp edges – when glazed, sharp edges turn into razor blades! Use a piece of fly wire to rub the work all over – this will scratch a little so be light handed. Use a knife or metal kidney to scrape any areas that require a bit more dynamic treatment than the fly wire offers! Finally, a very light wipe over with a slightly damp sponge can help soften and soothe all of your edges and dags! Trimming thrown work: If you are planning to trim (or turn) your thrown work (and you should be), make sure you bag it well – your work should be leather hard to almost dry for easiest trimming. Use this step to finish the work completely – use a metal kidney to polish the surface, or a slightly damp sponge to give a freshly thrown look. Wipe the sponge around the rim after trimming, and check the inside of the pot for dags! Trimming slip cast work: Usually I will trim the rims of your work on the wheel the following day to make that stage easier, however you will still need to check your work for lumps and bumps. Last but not least – check that your name is still clearly on the bottom of your work. Step Five – Bisque Firing When the work is completely dry it can go into the bisque kiln. The bisque kiln is fired to 1000°C. This process burns off the water in the clay as well as some of the chemically bound water. The structure of the clay is not altered that much at this temperature. Inside the bisque kiln, the work is stacked a little, small bowl inside a larger bowl and onto a heavy plate. Smaller items like decorations or drink coasters might get stacked several high. Consideration is paid to the weight of the stack and shape of the work. A bisque kiln can fire about one and a half times the amount of work that the glaze kiln can fire. The firing takes about 10 hours to complete the cycle and about two days to cool down. Once it has been emptied the work is placed in the glaze room ready for you to decorate! Step Six – Glazing Decorating your work with colour can be a lot of fun – and time consuming! There are three main options for surface treatment at this stage: Oxide Washes Underglazes Glazes Washes and underglazes do not “glaze” the work – It will still need a layer of glaze to fully seal the clay (washes don’t need glaze on surfaces not designed for food or liquid as they can gloss up a little on their own). Underglazes are stable colourants that turn out pretty much how they look in the jar. They can be mixed with each other to form other colours and can be used like water colours to paint onto your work. Mostly they should have a clear glaze on top to seal them. Oxides are a different species – the pink oxide (cobalt) wash turns out bright blue for instance. They don’t always need a glaze on top, and some glazes can change the colour of the wash! The glazes need no other “glaze” on top! Be careful of unknown glaze interactions – you can put any combination of glaze in a bowl or on a plate, but only a single glaze on the outside of any vertical surface! Glazes are a chemical reaction under heat. We don’t know the exact chemicals in the Mayco glazes we use. I can guess by the way they interact with each other, however, on the whole, you need to test every idea you have, and not run the test on a vertical surface! Simply put, glaze is a layer of glass like substance that bonds with the clay underneath. Clay is made of silica, alumina and water. Glaze is made of mostly silica. Silica has a melting point of 1700°C and we fire to 1240°C. The silica requires a “flux” to help it melt at the lower temperature. Fluxes can be all sorts of chemicals – a common one is calcium – calcium has a melting point of 2500°C, however, together they both melt at a much lower temperature! Colourants are metal oxides like cobalt (blue), chrome (green through black), copper (green, blue, even red!), manganese (black, purple and pink) iron (red brown), etc. Different chemicals in the glaze can have dramatic effects. for example, barium carbonate (which we don’t use) turns manganese bright pink! Other elements can turn manganese dioxide brown, blue, purple and reddish brown. Manganese dioxide is a flux in and of itself as well. So, glazes that get their black and purple colours, often interact with other glazes and RUN! Our mirror black is a good example – it mixes really well with many glazes because it fluxes them – causes them to melt faster. It will also bring out many beautiful colours in the glazes because it’s black colouring most definitely comes from manganese dioxide! Glaze chemistry is a whole subject on it’s own! We use commercial Mayco glazes on purpose – for their huge range of colour possibilities, stability, cool interactions, artistic freedom with the ability to easily brush the glazes on and ease of use. We currently have almost 50 glazes on hand! A major project is to test the interactions of all glazes with each other. That is 2,500 test tiles!!!! I’m going to make the wall behind the wheels the feature wall of pretty colours! Step Seven – Glaze (Gloss or sometimes called “Glost”) Firing Most of the time this is the final stage of making your creation (but not always!) The glaze kiln goes to 1240°C. This is called cone 6, or midrange. It is the low end of stoneware temperatures. Stoneware clays and glazes are typically fired at cone 8 – 10, that is 1260 – 1290°C. The energy requirement to go from 1240°C to 1280°C is almost a 30% more! Our clay is formulated to vitrify (mature, turn “glass-like”) at 1240°, as are our glazes. A glaze kiln take around 12 hours to reach temperature and two to three days to cool down. Sometimes a third firing process is required – this is for decoration that is added to work after the glaze firing. For example – adding precious metals and lustres. this firing temperature is usually around 600 – 800°C depending upon the techniques being used. There are many students interested in gold and silver trims – we will be doing this third type of firing soon! After firing your work will be in the student finished work shelves. Remember to pay for it before you head out the door! There is a small extra charge for using porcelain clay (it’s more than twice the price of regular clay), and for any third firing process! Once your work has been fired it can not turn back into clay for millennia – so don’t fire it if you don’t like it! Put it in the bucket for recycling. https://firebirdstudios.com.au/the-process-of-making-pottery/Ceramics have evolved over thousands of years.A white earthenware side plate with a gadroon edge. Has water marks and chips on front.‘Johnson Bros England Reg No 15587’flagstaff hill, warrnambool, shipwrecked-coast, flagstaff-hill, flagstaff-hill-maritime-museum, maritime-museum, shipwreck-coast, flagstaff-hill-maritime-village, johnson bros, ceramics, tableware -
 Flagstaff Hill Maritime Museum and Village
Domestic object - Plate, Alfred Meakin
The Process of Making Pottery Decorating, Firing, Glazing, Making, Technical There is a rhythm and flow to clay. It can’t be done all at once! Even the making process! It can take weeks to get everything done, especially if you can only work on your pottery once a week! Even though we have three hour classes, it’s often just not enough time! Here is an overview of some of the processes so you have a bit more grasp on some of the technical stuff! Step One – Design There are SO many ideas out there for making stuff in clay! From delicate porcelain jewellery, through to heavy sculptural work and everything in between. Deciding your direction is sometimes not that easy – when you first start, try everything, you will naturally gravitate to the style that you enjoy! The options and variations are endless and can get a wee bit overwhelming too! Check in with me before you start to ensure your ideas will work, what order you might do things, how you could achieve the look you are seeking and any other technical data required! Step Two – Making Clay is thixotropic. This means that as you work with it, the clay first gets sloppier and wetter, before is begins to dry in the atmosphere. For most things, you simply can’t do all parts of the project at once. An example of work order might look like: Get last weeks work out from the shelves Prepare clay for today’s work – roll your clay, prepare balls for throwing, make the first stage of a pinch pot) Clean up last week’s work and put it on the shelf for bisque firing Check that you have any glazing to do – and do enough of it that you will have time to finish your main project Do the next step of your next project – there might be a further step that can’t be complete immediately, in that case, wrap your work well and put onto the shelves. Letting your work rest for a while can really help keep your work clean and professional looking. Many things require bagging under plastic to keep it ready for work the next week – put your name on the outside of the bag so you can find your work easily. We have stickers and markers. Consider how you want to decorate your work – coloured slip can be applied at a fairly wet stage (remembering that it will make your work even wetter!). Trying to apply slip to dry clay won’t work! If you want to do sgraffito – you will need to keep the work leather hard (a state of dryness where you can still work the clay with a little effort and a little water and care). Step Three – Drying Most of the time your work can go into the rack uncovered to let it dry out for the following week. If you want to continue forming or shaping you will need to double bag your work – put your work on a suitable sized bat and put the bat in a bag so the base of the bag is under the bat, then put another bag over the top of the work and tuck the top of the bag under the bat. If you want to trim (or turn) your thrown work the following week, it should also be double bagged. If your work is large, delicate, or of uneven thicknesses, you should lightly cover your work for drying. When considering the drying process, bare in mind the weather, humidity and wind! The hotter and dryer, the faster things dry and work can dry unevenly in the shelves – this can lead to cracking – another time to lightly cover your work for drying. Step Four – Trimming and Cleaning Up Your work is dry! It is called greenware now and it is at it’s most fragile! Handle everything with two hands. I often refer to soft hands – keep everything gentle and with your fingers spread as much as possible. Try to not pick up things like plates too much, and always with both hands! Before your work can be bisque fired it should be “cleaned up”. You work won’t go into the kiln if it has sharp edges – when glazed, sharp edges turn into razor blades! Use a piece of fly wire to rub the work all over – this will scratch a little so be light handed. Use a knife or metal kidney to scrape any areas that require a bit more dynamic treatment than the fly wire offers! Finally, a very light wipe over with a slightly damp sponge can help soften and soothe all of your edges and dags! Trimming thrown work: If you are planning to trim (or turn) your thrown work (and you should be), make sure you bag it well – your work should be leather hard to almost dry for easiest trimming. Use this step to finish the work completely – use a metal kidney to polish the surface, or a slightly damp sponge to give a freshly thrown look. Wipe the sponge around the rim after trimming, and check the inside of the pot for dags! Trimming slip cast work: Usually I will trim the rims of your work on the wheel the following day to make that stage easier, however you will still need to check your work for lumps and bumps. Last but not least – check that your name is still clearly on the bottom of your work. Step Five – Bisque Firing When the work is completely dry it can go into the bisque kiln. The bisque kiln is fired to 1000°C. This process burns off the water in the clay as well as some of the chemically bound water. The structure of the clay is not altered that much at this temperature. Inside the bisque kiln, the work is stacked a little, small bowl inside a larger bowl and onto a heavy plate. Smaller items like decorations or drink coasters might get stacked several high. Consideration is paid to the weight of the stack and shape of the work. A bisque kiln can fire about one and a half times the amount of work that the glaze kiln can fire. The firing takes about 10 hours to complete the cycle and about two days to cool down. Once it has been emptied the work is placed in the glaze room ready for you to decorate! Step Six – Glazing Decorating your work with colour can be a lot of fun – and time consuming! There are three main options for surface treatment at this stage: Oxide Washes Underglazes Glazes Washes and underglazes do not “glaze” the work – It will still need a layer of glaze to fully seal the clay (washes don’t need glaze on surfaces not designed for food or liquid as they can gloss up a little on their own). Underglazes are stable colourants that turn out pretty much how they look in the jar. They can be mixed with each other to form other colours and can be used like water colours to paint onto your work. Mostly they should have a clear glaze on top to seal them. Oxides are a different species – the pink oxide (cobalt) wash turns out bright blue for instance. They don’t always need a glaze on top, and some glazes can change the colour of the wash! The glazes need no other “glaze” on top! Be careful of unknown glaze interactions – you can put any combination of glaze in a bowl or on a plate, but only a single glaze on the outside of any vertical surface! Glazes are a chemical reaction under heat. We don’t know the exact chemicals in the Mayco glazes we use. I can guess by the way they interact with each other, however, on the whole, you need to test every idea you have, and not run the test on a vertical surface! Simply put, glaze is a layer of glass like substance that bonds with the clay underneath. Clay is made of silica, alumina and water. Glaze is made of mostly silica. Silica has a melting point of 1700°C and we fire to 1240°C. The silica requires a “flux” to help it melt at the lower temperature. Fluxes can be all sorts of chemicals – a common one is calcium – calcium has a melting point of 2500°C, however, together they both melt at a much lower temperature! Colourants are metal oxides like cobalt (blue), chrome (green through black), copper (green, blue, even red!), manganese (black, purple and pink) iron (red brown), etc. Different chemicals in the glaze can have dramatic effects. for example, barium carbonate (which we don’t use) turns manganese bright pink! Other elements can turn manganese dioxide brown, blue, purple and reddish brown. Manganese dioxide is a flux in and of itself as well. So, glazes that get their black and purple colours, often interact with other glazes and RUN! Our mirror black is a good example – it mixes really well with many glazes because it fluxes them – causes them to melt faster. It will also bring out many beautiful colours in the glazes because it’s black colouring most definitely comes from manganese dioxide! Glaze chemistry is a whole subject on it’s own! We use commercial Mayco glazes on purpose – for their huge range of colour possibilities, stability, cool interactions, artistic freedom with the ability to easily brush the glazes on and ease of use. We currently have almost 50 glazes on hand! A major project is to test the interactions of all glazes with each other. That is 2,500 test tiles!!!! I’m going to make the wall behind the wheels the feature wall of pretty colours! Step Seven – Glaze (Gloss or sometimes called “Glost”) Firing Most of the time this is the final stage of making your creation (but not always!) The glaze kiln goes to 1240°C. This is called cone 6, or midrange. It is the low end of stoneware temperatures. Stoneware clays and glazes are typically fired at cone 8 – 10, that is 1260 – 1290°C. The energy requirement to go from 1240°C to 1280°C is almost a 30% more! Our clay is formulated to vitrify (mature, turn “glass-like”) at 1240°, as are our glazes. A glaze kiln take around 12 hours to reach temperature and two to three days to cool down. Sometimes a third firing process is required – this is for decoration that is added to work after the glaze firing. For example – adding precious metals and lustres. this firing temperature is usually around 600 – 800°C depending upon the techniques being used. There are many students interested in gold and silver trims – we will be doing this third type of firing soon! After firing your work will be in the student finished work shelves. Remember to pay for it before you head out the door! There is a small extra charge for using porcelain clay (it’s more than twice the price of regular clay), and for any third firing process! Once your work has been fired it can not turn back into clay for millennia – so don’t fire it if you don’t like it! Put it in the bucket for recycling. https://firebirdstudios.com.au/the-process-of-making-pottery/Ceramics have evolved over thousands of years.Earthenware dessert plate, cream colour. Made by Alfred Meakin, England. Backstamped ‘Alfred Meakin England’. flagstaff hill, warrnambool, shipwrecked-coast, flagstaff-hill, flagstaff-hill-maritime-museum, maritime-museum, shipwreck-coast, flagstaff-hill-maritime-village, alfred meakin, ceramics, earthenware, kitchenware -
 Flagstaff Hill Maritime Museum and Village
Domestic object - Jug
The Process of Making Pottery Decorating, Firing, Glazing, Making, Technical There is a rhythm and flow to clay. It can’t be done all at once! Even the making process! It can take weeks to get everything done, especially if you can only work on your pottery once a week! Even though we have three hour classes, it’s often just not enough time! Here is an overview of some of the processes so you have a bit more grasp on some of the technical stuff! Step One – Design There are SO many ideas out there for making stuff in clay! From delicate porcelain jewellery, through to heavy sculptural work and everything in between. Deciding your direction is sometimes not that easy – when you first start, try everything, you will naturally gravitate to the style that you enjoy! The options and variations are endless and can get a wee bit overwhelming too! Check in with me before you start to ensure your ideas will work, what order you might do things, how you could achieve the look you are seeking and any other technical data required! Step Two – Making Clay is thixotropic. This means that as you work with it, the clay first gets sloppier and wetter, before is begins to dry in the atmosphere. For most things, you simply can’t do all parts of the project at once. An example of work order might look like: Get last weeks work out from the shelves Prepare clay for today’s work – roll your clay, prepare balls for throwing, make the first stage of a pinch pot) Clean up last week’s work and put it on the shelf for bisque firing Check that you have any glazing to do – and do enough of it that you will have time to finish your main project Do the next step of your next project – there might be a further step that can’t be complete immediately, in that case, wrap your work well and put onto the shelves. Letting your work rest for a while can really help keep your work clean and professional looking. Many things require bagging under plastic to keep it ready for work the next week – put your name on the outside of the bag so you can find your work easily. We have stickers and markers. Consider how you want to decorate your work – coloured slip can be applied at a fairly wet stage (remembering that it will make your work even wetter!). Trying to apply slip to dry clay won’t work! If you want to do sgraffito – you will need to keep the work leather hard (a state of dryness where you can still work the clay with a little effort and a little water and care). Step Three – Drying Most of the time your work can go into the rack uncovered to let it dry out for the following week. If you want to continue forming or shaping you will need to double bag your work – put your work on a suitable sized bat and put the bat in a bag so the base of the bag is under the bat, then put another bag over the top of the work and tuck the top of the bag under the bat. If you want to trim (or turn) your thrown work the following week, it should also be double bagged. If your work is large, delicate, or of uneven thicknesses, you should lightly cover your work for drying. When considering the drying process, bare in mind the weather, humidity and wind! The hotter and dryer, the faster things dry and work can dry unevenly in the shelves – this can lead to cracking – another time to lightly cover your work for drying. Step Four – Trimming and Cleaning Up Your work is dry! It is called greenware now and it is at it’s most fragile! Handle everything with two hands. I often refer to soft hands – keep everything gentle and with your fingers spread as much as possible. Try to not pick up things like plates too much, and always with both hands! Before your work can be bisque fired it should be “cleaned up”. You work won’t go into the kiln if it has sharp edges – when glazed, sharp edges turn into razor blades! Use a piece of fly wire to rub the work all over – this will scratch a little so be light handed. Use a knife or metal kidney to scrape any areas that require a bit more dynamic treatment than the fly wire offers! Finally, a very light wipe over with a slightly damp sponge can help soften and soothe all of your edges and dags! Trimming thrown work: If you are planning to trim (or turn) your thrown work (and you should be), make sure you bag it well – your work should be leather hard to almost dry for easiest trimming. Use this step to finish the work completely – use a metal kidney to polish the surface, or a slightly damp sponge to give a freshly thrown look. Wipe the sponge around the rim after trimming, and check the inside of the pot for dags! Trimming slip cast work: Usually I will trim the rims of your work on the wheel the following day to make that stage easier, however you will still need to check your work for lumps and bumps. Last but not least – check that your name is still clearly on the bottom of your work. Step Five – Bisque Firing When the work is completely dry it can go into the bisque kiln. The bisque kiln is fired to 1000°C. This process burns off the water in the clay as well as some of the chemically bound water. The structure of the clay is not altered that much at this temperature. Inside the bisque kiln, the work is stacked a little, small bowl inside a larger bowl and onto a heavy plate. Smaller items like decorations or drink coasters might get stacked several high. Consideration is paid to the weight of the stack and shape of the work. A bisque kiln can fire about one and a half times the amount of work that the glaze kiln can fire. The firing takes about 10 hours to complete the cycle and about two days to cool down. Once it has been emptied the work is placed in the glaze room ready for you to decorate! Step Six – Glazing Decorating your work with colour can be a lot of fun – and time consuming! There are three main options for surface treatment at this stage: Oxide Washes Underglazes Glazes Washes and underglazes do not “glaze” the work – It will still need a layer of glaze to fully seal the clay (washes don’t need glaze on surfaces not designed for food or liquid as they can gloss up a little on their own). Underglazes are stable colourants that turn out pretty much how they look in the jar. They can be mixed with each other to form other colours and can be used like water colours to paint onto your work. Mostly they should have a clear glaze on top to seal them. Oxides are a different species – the pink oxide (cobalt) wash turns out bright blue for instance. They don’t always need a glaze on top, and some glazes can change the colour of the wash! The glazes need no other “glaze” on top! Be careful of unknown glaze interactions – you can put any combination of glaze in a bowl or on a plate, but only a single glaze on the outside of any vertical surface! Glazes are a chemical reaction under heat. We don’t know the exact chemicals in the Mayco glazes we use. I can guess by the way they interact with each other, however, on the whole, you need to test every idea you have, and not run the test on a vertical surface! Simply put, glaze is a layer of glass like substance that bonds with the clay underneath. Clay is made of silica, alumina and water. Glaze is made of mostly silica. Silica has a melting point of 1700°C and we fire to 1240°C. The silica requires a “flux” to help it melt at the lower temperature. Fluxes can be all sorts of chemicals – a common one is calcium – calcium has a melting point of 2500°C, however, together they both melt at a much lower temperature! Colourants are metal oxides like cobalt (blue), chrome (green through black), copper (green, blue, even red!), manganese (black, purple and pink) iron (red brown), etc. Different chemicals in the glaze can have dramatic effects. for example, barium carbonate (which we don’t use) turns manganese bright pink! Other elements can turn manganese dioxide brown, blue, purple and reddish brown. Manganese dioxide is a flux in and of itself as well. So, glazes that get their black and purple colours, often interact with other glazes and RUN! Our mirror black is a good example – it mixes really well with many glazes because it fluxes them – causes them to melt faster. It will also bring out many beautiful colours in the glazes because it’s black colouring most definitely comes from manganese dioxide! Glaze chemistry is a whole subject on it’s own! We use commercial Mayco glazes on purpose – for their huge range of colour possibilities, stability, cool interactions, artistic freedom with the ability to easily brush the glazes on and ease of use. We currently have almost 50 glazes on hand! A major project is to test the interactions of all glazes with each other. That is 2,500 test tiles!!!! I’m going to make the wall behind the wheels the feature wall of pretty colours! Step Seven – Glaze (Gloss or sometimes called “Glost”) Firing Most of the time this is the final stage of making your creation (but not always!) The glaze kiln goes to 1240°C. This is called cone 6, or midrange. It is the low end of stoneware temperatures. Stoneware clays and glazes are typically fired at cone 8 – 10, that is 1260 – 1290°C. The energy requirement to go from 1240°C to 1280°C is almost a 30% more! Our clay is formulated to vitrify (mature, turn “glass-like”) at 1240°, as are our glazes. A glaze kiln take around 12 hours to reach temperature and two to three days to cool down. Sometimes a third firing process is required – this is for decoration that is added to work after the glaze firing. For example – adding precious metals and lustres. this firing temperature is usually around 600 – 800°C depending upon the techniques being used. There are many students interested in gold and silver trims – we will be doing this third type of firing soon! After firing your work will be in the student finished work shelves. Remember to pay for it before you head out the door! There is a small extra charge for using porcelain clay (it’s more than twice the price of regular clay), and for any third firing process! Once your work has been fired it can not turn back into clay for millennia – so don’t fire it if you don’t like it! Put it in the bucket for recycling. https://firebirdstudios.com.au/the-process-of-making-pottery/The form of the jug has been in use for many centuries.Stoneware jug. Two tone brown glaze with pierced lip behind spout. Spout chipped.None.flagstaff hill, warrnambool, shipwrecked-coast, flagstaff-hill, flagstaff-hill-maritime-museum, maritime-museum, shipwreck-coast, flagstaff-hill-maritime-village, jug, ceramic jug -
 Melbourne Athenaeum Archives
Video - ABC 7.30 Report: The Athenaeum 's 170th birthday, Australian Broadcasting Corporation, Melbourne, Athenaeum building celebrates 170 years, 11/11/2009
Transcript: Athenaeum building celebrates 170 years Australian Broadcasting Corporation Broadcast: 11/11/2009 Reporter: Lisa Whitehead Tomorrow marks the 170th birthday of one of the nation's historic cultural landmarks. Melbourne’s Athenaeum building has, in one form or other, provided education and entertainment for the Victorian colony as it became a city; and along the way, documented its growth. Transcript KERRY O’BRIEN, PRESENTER: Tomorrow marks the 170th birthday of one of the nation's historic cultural landmarks. Melbourne's Athenaeum building has, in one form or another, provided education and entertainment. For the Victorian colonies it became a city and along the way documented its growth. The building's original library and theatre still draw devotees and as Lisa Whitehead reports, a loyal band of volunteers. KEVIN QUIGLEY, ATHENAEUM PRESIDENT: There's nothing like us that has been here from day one, four years after the boat pushed ashore, here we are. It's a thread that runs through the life of Melbourne. LISA WHITEHEAD, REPORTER: In the heart of Melbourne's CBD, the Athenaeum is a celebrity in disguise, the oldest cultural icon in the city, but barely noticed. MARJORIE DALVEAN, VOLUNTEER HISTORIAN: People of Melbourne walk past this area and they have no idea what it is. RAY LAWLER, PLAYWRIGHT: It seemed to me to be a place that absolutely, or breathes Melbourne, I suppose, culture. LISA WHITEHEAD: Just four years after Melbourne was founded, the colony built a Mechanic's Institution, one of the first in the world, a place where the working class could meet and learn. KEVIN QUIGLEY: People think of it as Wild West sort of place where these hearty types drank and rushed about, but Melbourne was freely settled. It was a city of people who wanted to better themselves - entrepreneurs. And the Mechanic's Institution was that innovative idea that had grown up in Edinburgh and London about providing an opportunity for education for the working people. LISA WHITEHEAD: Mark Twain lectured there. Later, other buildings were added and a theatre to host classic plays. And it adopted its more bourgeois friendly title of the Athenaeum. Crucially from the start there was the library, the first to offer affordable lending to the working man. And it still attracts devotees. Former University lecturer Margaret Bowman, 89, comes in every Wednesday, along with her dog to join an enthusiastic band of volunteers sorting through the archives. MARGARET BOWMAN, FORMER UNIVERSITY LECTURER: Doing research is something that I find actually I enjoy more than anything. Every old lady needs to have a project and now I've got a project. MARJORIE DALVEAN: Margaret, Christine has just found out that Alfred Deakin was a member here from 1874 to 1877. This place is not flashy, we've never been flashy. But book lovers walk in here and they know this is the place for them. ARCHIVAL FOOTAGE: Old times and old names. The Athenaeum theatre in Melbourne for more than 40 years has been one of the city's best known cinemas. LISA WHITEHEAD: In the 20th century, the theatre surrendered to the new craze of talking pictures, and one particular fan was famous Australian playwright Ray Lawler. At 13, he dropped out of school to work in a Footscray factory and two years later his first trip to the glamorous Athenaeum cinema hinted at the education he was missing. RAY LAWLER: It just had a style about it which I responded to, I think. I was looking for something and this seemed to be part of it. Ray Lawler went on to write "Summer of the Seventeenth Doll" and found literary fame overseas. About a century after it had started as an educational place for the working man, Ray Lawler had, in effect, become an Athenaeum graduate. RAL LAWLER: If they had been looking for the sort of person that they were hoping to encourage along the way, I suppose I would have been somebody that might have fitted the mould, you know. LISA WHITEHEAD: In time, the cinema was returned to its theatrical roots. FRANK THRING, 1977: It has a great resemblance to the Theatre Royal in Hobart which Larry Olivier has called the best theatre he's ever worked in. And it's almost identical. It is the true Victorian playhouse. The horseshoe shaped thing: stalls, dress circle and gallery. And you're close to the audience and they're close to you. Marvellous feeling. LISA WHITEHEAD: Today, it's still a theatre. But time has brought compromises. The once vaunted art gallery has now covered its windows and become a comedy club and performance space. TV and suburban life have eaten away at the library membership. It offers an online service now, and a recent federal government grant will pay for the upkeep of its gracious interior, including the 1930s elevator Ray Lawler used to ride. For him, it's money well spent on history quietly made and discreetly observed. RAY LAWLER: It's the lack of awareness, I think, that people don't know what they've got here. They've really got the whole history of Melbourne almost. KEVIN QUIGLEY: It was a similar organisation in Sydney but we are the only one that's got a continual lineage on the same spot. We started here and we're still here and we'll be here for another 100 years. KERRY O'BRIEN: Lisa Whitehead on a great Melbourne landmark. © 2010 ABC | Privacy Policy Beginning as the Melbourne Mechanics' Institution in 1839, the Melbourne Athenaeum has a long history that reflects the cultural and social development of Melbourne. It continues to be managed as a not-for-profit organisation by a volunteer board, with a subscription library (maintained since 1839) and a leased theatre.Video broadcast ABC 7:30 Report for 11/11/2009. "Tomorrow marks the 170th birthday of one of the nation's historic cultural landmarks. Melbourne’s Athenaeum building has, in one form or other, provided education and entertainment for the Victorian colony as it became a city; and along the way, documented its growth."athenaeum, australian broadcasting corporation, kerry o’brien, kevin quigley, lisa whitehead, marjorie dalvean, ray lawler, margaret bowman, frank thring. -
 Victorian Aboriginal Corporation for Languages
Periodical, Australian Institute of Aboriginal and Torres Strait Islander Studies, Australian Aboriginal studies : journal of the Australian Institute of Aboriginal and Torres Strait Islander Studies, 2007
1. The moral lexicon of the Warlpiri people of central Australia LR Hiatt This paper discusses words that match ?Good? and ?Bad?; examples of ?Good? and ?Bad? behaviour; morality and law; and egalitarianism and dominance. It also presents a comparison with Gidjingarli (Burarra). 2. Mobs and bosses: Structures of Aboriginal sociality Patrick Mullins (Mount Druitt, NSW) A commonality of Aboriginal social organisation exists across the continent in communities as different as those from the Western Desert across to Cape York, from the towns of New South Wales and Western Australia to cities like Adelaide. This is found in the colloquial expressions ?mob? and ?boss?, which are used in widely differing contexts. Mobbing is the activity where relatedness, in the sense of social alliances, is established and affirmed by virtue of a common affiliation with place, common experience and common descent, as well as by the exchange of cash and commodities. Bossing is the activity of commanding respect by virtue of one?s capacity to bestow items of value such as ritual knowledge, nurturance, care, cash and commodities. Mobbing and bossing are best understood as structures in Giddens? sense of sets of rules and resources involved in the production of social systems, in this case social alliances. Mobbing and bossing imply a concept of a person as a being in a relationship. Attention needs to be given to the way these structures interact with institutions in the wider Australian society. 3. Recognising victims without blaming them: A moral contest? About Peter Sutton?s ?The Politics of Suffering: Indigenous Policy in Australia since the 1970s? and Gillian Cowlishaw?s replies Ma�a Ponsonnet (Universit� Paris- 8-Saint-Denis) Peter Sutton?s texts on Aboriginal violence, health and their politicisation are replied to using his methodology, and acknowledging his convincing points. Sutton rightly denounces a lack of lucidity and scientific objectivity in anthropological debates. These inadequacies impede identification of what Aboriginal groups can do to improve their situations for fear that this identification would lead to blame the victims. At the other end of the ethical spectrum, those who advocate a broader use of what I will call a ?resistance interpretation? of violence fail to recognise victims as such, on the implicit grounds that seeing victims as victims would deprive them of any agency, on the one hand, and entail blame, on the other hand. I aim to define a middle road between those views: the idea that victims should be acknowledged as such without being denied their agency and without being blamed for their own condition. This middle road allows identification of the colonisers? responsibilities in the contemporary situation of Indigenous communities in Australia, and to determine who can do what. Secondly, I show that Sutton?s texts convey, through subtle but recurrent remarks, an ideology of blame rather than a mere will to identify practical solutions. As a consequence, some of his proposals do not stand on a solid and objective causal analysis. 4. 'You would have loved her for her lore?: The letters of Daisy Bates Bob Reece (Murdoch University) Daisy Bates was once an iconic figure in Australia but her popular and academic reputation became tarnished by her retrograde views. Her credibility was also put in doubt through the exposure of her fictionalised Irish background. In more recent times, however, her ethnographic data on the Aborigines of Western Australia has been an invaluable source for Native Title claims, while her views on Aboriginal extinction, cannibalism and ?castes? are being seen as typical of her time. This article briefly reviews what has been the orthodox academic opinion of her scientific achievement before summarising what is reliably known of her early history and indicating what kind of person is revealed in the 3000 or more letters that she left behind. 5. What potential might Narrative Therapy have to assist Indigenous Australians reduce substance misuse? Violet Bacon (Curtin University of Technology) Substance misuse is associated with adverse consequences for many Australians including Aboriginal and Torres Strait Islander peoples. Extensive research has been conducted into various intervention, treatment and prevention programs to ascertain their potential in reducing substance misuse within Aboriginal and non-Aboriginal communities. I explore the potential of Narrative Therapy as a counselling intervention for assisting Indigenous Australians reduce the harm associated with substance misuse. 6. Bone points from the Adelaide River, Northern Territory Sally Brockwell (University of Canberra) and Kim Akerman (Moonah) Large earth mounds located next to the vast floodplains of the lower Adelaide River, one of the major tropical rivers draining the flat coastal plains of northern Australia, contain cultural material, including bone points. The floodplains of the north underwent dynamic environmental change from extensive mangrove swamps in the mid-Holocene, through a transition phase of variable estuarine and freshwater mosaic environments, to the freshwater environment that exists today. This geomorphological framework provides a background for the interpretation of the archaeology, which spans some 4000 years. 7. A different look: Comparative rock-art recording from the Torres Strait using computer enhancement techniques Liam M Brady (Monash University) In 1888 and 1898, Cambridge University?s Alfred C Haddon made the first recording of rock-art from the Torres Strait islands using photography and sketches. Systematic recording of these same paintings and sites was carried out from 2000 to 2004 by archaeologists and Indigenous Torres Strait Islander and Aboriginal communities as part of community-based rock-art recording projects. Computer enhancement techniques were used to identify differences between both sets of recordings, to reveal design elements that Haddon missed in his recordings, and to recover images recorded by Haddon that are today no longer visible to the naked eye. Using this data, preliminary observations into the antiquity of Torres Strait rock-art are noted along with recommendations for future Torres Strait region rock-art research and baseline monitoring projects. 8. Sources of bias in the Murray Black Collection: Implications for palaeopathological analysis Sarah Robertson (National Museum of Australia) The Murray Black collection of Aboriginal skeletal remains has been a mainstay of bio-anthropological research in Australia, but relatively little thought has been given to how and why this collection may differ from archaeologically obtained collections. The context in which remains were located and recovered has created bias within the sample, which was further skewed within the component of the collection sent to the Australian Institute of Anatomy, resulting in limitations for the research potential of the collection. This does not render all research on the collection unviable, but it demonstrates the importance of understanding the context of a skeletal collection when assessing its suitability for addressing specific research questions.maps, b&w photographs, colour photographs, illustrations, graphs, chartswarlpiri, sociology, daisy bates, substance abuse, narrative therapy, rock art, technology and art, murray black collection, pleistocene sites, watarrka plateau -
Eltham District Historical Society Inc
Document - Folder, Mackenzie, Andrew
Andrew Mackenzie OAM (1952-), librarian, expert on the life and paintings of Walter Withers and Frederick McCubbin; compiler of "The Etchings, Lecture Notes and Writings of Victor Cobb" and "Walter Withers: The Forgotten Manuscripts", author (for the Famous Australian Art Series) of "Hans Heysen", "Albert Namatjira" and "Walter Withers"; author of "Holesch 1910-1983: Horse Paintings" and of "Frederick McCubbin 1855-1917:"The Proff' and his art"; curator of exhibition "A Tribute to Victor Cobb" and exhibition of artworks of City of Box Hill; co-curator of exhibition "Snugglepot and Cuddlepie and other Fairy Folk of the Australian Bush"; member of the Victorian Artists' Society, Old Water Colour Society's Club and Pastel Society of Victoria. Contents Letter from Andrew Mackenzie to Russell Yeoman, 19 December 1987, regarding planned exhibition of Walter Withers material and lecture to Eltham Historical Society. Nomination from Sue Law, President Eltham Historical Society, 23 January 1990, for Andrew Mackenzie to receive an Australian Heritage Award. Newspaper article: "Eltham honors artist", Diamond Valley News, 16 October 1990, re unveiling of commemorative plaque to Walter Withers in Eltham, designed by John Ebell. CV for Andrew Mackenzie undated but post 1990. Newspaper article: "Artist's mystery pioneer revealed", The Australian, 6 July 1991, Andrew Mackenzie identified the bushman, wife and child in the second panel of Frederick McCubbin's triptych "On the Wallaby Track"; the bushman model was James Edward; McCubbin's daughter Kathleen Mangan said her mother Annie McCubbin was the woman in the second panel; the baby was Jimmy Watson, nephew of Patrick Watson. Newspaper article: "McCubbin talk of immense interest", The Courier Ballarat, 9 January 1992, report of lecture at Ballarat Fine Art Gallery by Andrew Mackenzie on Frederick McCubbin. Magazine article: "Art on show", The Australian Women's Weekly, January 1993, photographs of people attending exhibition of works of Frederick McCubbin, Queensland Art Gallery, including Andrew Mackenzie author of a new limited edition book on McCubbin. Newspaper article: "Meet Andrew Mackenzie", The Heidelberger 23 February 1994, his background and interests, his next project to research Hayward Veal. Letter from John Withers to Sue Law (Eltham Historical Society), 4 August 1994, notifying that he had nominated Andrew Mackenzie for a future Australia Day Award (attaching his documentation). Newspaper article: "Artist's portrait of tragic child is a special find", no publication details, details of forthcoming Sotheby sale which included Frederick McCubbin's portrait of daughter Mary who died in 1894 following an accident, with comment by Andrew Mackenzie. Notice of General Meeting of Eltham District Historical Society, 10 September 2014, speaker Andrew Mackenzie on Walter Withers. Newspaper clippings, A4 photocopies, etcwalter withers, frederick mccubbin, annie mccubbin, mary mccubbin, john withers, john ebell, kathleen mangan, james edward, on the wallaby track, fontainbleau eltham, william mcgregor of mount macedon, patrick watson, ballarat fine art gallery, margaret rich, sotheby's, justin miller, russell drysdale's "the outrider", hugh ramsay's "portrait of a young girl", benjamin duterrau's "portrait of matilda stanfield", eugene von guerard's western district landscape, jimmy watson, queensland art gallery, shirley florence, bettina macaulay, graham drummong, valerie drummond, susan anderson, jane henderson, maria poulos, hayward veal, andrew mackenzie -
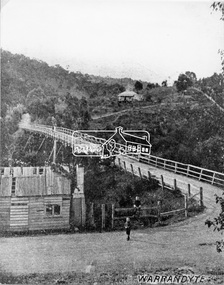 Eltham District Historical Society Inc
Negative - Photograph, Warrandyte Bridge over River Yarra, c.1910
View of the 1875 timber trestle bridge over the Yarra River reproduced from a newsprint image. Also known as Anderson's Creek (Road) Bridge A contract was accepted for William Elliot to erect a bridge over the Yarra River at Warrandyte on Anderson's Creek Road and other improvements for £1,331.6.2 - Gazette No. 143. Tuesday, November 13th 1860 - http://gazette.slv.vic.gov.au/view.cgi?year=1860&class=general&page_num=2161&state=V&classNum=G143&id=). The bridge was washed away by floods in 1863. It was replaced with a taller timber trestle structure in October 1875, designed and built by C.S. Wingrove, Shire Clerk, Engineer and Surveyor for Eltham Shire Council. A replacement for this bridge was commenced in 1955 to cope with increasing traffic and this structure was widened in 2018 to meet further traffic demands. Argus (Melbourne, Vic. : 1848 - 1957), Thursday 23 September 1875, page 7 ________________________________________ THE WARRANDYTE BRIDGE. The ceremony of formally opening the newly erected bridge over the Yarra at Ander-son's Creek was performed on Monday last, in the presence of the members of the Eltham and Bulleen shire councils whose territories it joins, and a goodly number of the residents of the district. The task was delegated to Mr. Cameron, M.L.A., who, after a few introductory remarks declared the bridge to be opened, and christened it the " Warrandyte Bridge." The party then adjourned to Grant's Hotel, where a cold collation had been prepared. The chair was taken by the president of the Eltham shire (Mr. John Bell) and the vice chair by Mr. Kent, a member of the Bulleen council. Mr Robert Williamson proposed "Success to the bridge," coupling with it the name of Mr. Cameron, to whose exertions was in the main to be attributed the erection of that structure which was an ornament to the district and would prove of great service to both sides of the river. Mr. Cameron, in responding, alluded to the great difficulties, mainly of a pecuniary nature, that had been encountered in carrying out the project, and which had only been got over by their united efforts and by the liberal spirit in which the late Commissioner of Roads had dealt with the case. The healths of the contractor and the engineer were also drunk. The bridge is a trussed timber one, resting on yellow box piles sunk into the solid rock, each pier being weighted with 50 tons of stone. The abutments consist of dry stone walls, 6ft. thick at the base, and tapering to 3ft. on the top, the face of the work having a batter of 1 to 1. The length of the bridge is 308ft., there being four openings in the centre of 66ft. each, and two at the ends of 20ft. each. The width in the clear is 9½ft., and the height from the bed of the river about 33ft. The approaches comprise 1,100 cubic yards of earthwork, and the formation of 48 chains of sideling, the whole cost of the work, which was carried out under the direction of the engineer to the Eltham Shire Council, being £1,413.This photo forms part of a collection of photographs gathered by the Shire of Eltham for their centenary project book,"Pioneers and Painters: 100 years of the Shire of Eltham" by Alan Marshall (1971). The collection of over 500 images is held in partnership between Eltham District Historical Society and Yarra Plenty Regional Library (Eltham Library) and is now formally known as the 'The Shire of Eltham Pioneers Photograph Collection.' It is significant in being the first community sourced collection representing the places and people of the Shire's first one hundred years.Digital image 4 x 5 inch B&W Neg B&W Print 12.5 x 9 cmsepp, shire of eltham pioneers photograph collection, warrandyte, bridge -
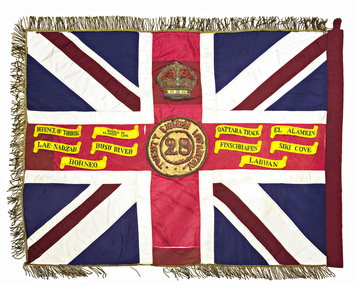 Australian Army Museum of Western Australia
Queen's Colour - 28th Battalion (The Swan Regiment)
This former King's Colour was originally authorised by King George V in 1919 in recognition of services of 28th Battalion (AIF) during the Great War. Presented by HE the Governor General Sir Ronald Munro-Ferguson, PC, CGMG at a parade in King's Park on 2 October 1920 and handed over to 2nd Battalion, 28th Infantry Regiment of the Citizen Forces. This colour was passed on to 28th Battalion, which was created, from other units in 1921. The colour was subsequently consecrated by the Chaplain General, Archbishop COL Riley, OBE, VD,DD at a parade on the Esplanade, Perth, 15 November 1924. At the time of presentation this colour was a plain union flag with no central devices or other distinctions included on it. Following Military Board approval given in 1925 the centre circle and Crown were later added, in accordance with the approved design for a King's Colour. With the re-activation of the Citizen Military Forces (CMF) following the Second World War, the 16th/28th Infantry Battalion (The Cameron Highlanders of Western Australia) was raised as a linked battalion in 1948 to carry on the identity and traditions of the pre-war 16th and 28th Battalions respectively. The King's and Regimental Colours formerly held by these two battalions were passed on to the new battalion who paraded them in rotation on ceremonial occasions. The above battalion became unlinked in March 1952 and 28th Infantry Battalion (The Swan Regiment) became an independent battalion within its own right. The former colours of 28th Battalion were handed back at a parade at Northam Camp on 24 August 1952. With the accession of HM Queen Elizabeth II to the throne in 1953, all Colours that had originally been presented as King's Colours, and were still carried by units on the current Order of Battle, were automatically deemed to be Queen's Colours. Under major reorganisation of the CMF in 1960, all individual infantry battalions that existed at the time within each State were amalgamated to form State regiments, taking effect from 1 July 1960. Thus from that date the 11/44th, 16th and 28th Infantry Battalions were amalgamated to form The Royal Western Australia Regiment. In September 1960, at a ceremonial parade held at Northam Camp, the Colours carried by all former battalions were handed over for safe keeping by the new regiment. Battle Honours for the Second World War were promulgated under Australian Army Order 135/1961 and the 10 selected honours approved for emblazoning on the Queen's Colour were subsequently added in 1962 These former colours were subsequently laid up in the undercroft at the State War Memorial, King's Park on 29 November 1964. These were transferred to the Army Museum of WA in 1988 as part of the Bicentenary Colours Project. Union flag with gold fringes. In the centre the Arabic numeral "28" on a red background within a circle inscribed "TWENTY EIGHTH INFANTRY ", surmounted by the Crown. Emblazoned on the colour are the following Second World War Battle Honours:- DEFENCE OF TOBRUK, DEFENCE OF ALAMEIN LINE, QATTARA TRACK, EL ALAMEIN, LAE-NADZAB, BUSU RIVER, FINSCHHAFEN, SIKI COVE, BORNEO, LABUAN -
 Surrey Hills Historical Society Collection
photograph, Dr Una Porter
Dr Unice (Una) Beatrice Porter, OBE, CBE (1900 - 1996) Una Porter was the youngest daughter of Frederick John Cato and his wife Fanny (née Bethune). She had 3 sisters and 4 brothers. Her father was of course the prominent businessman and co-founder of the Moran & Cato grocery company who was known for his generosity and commitment to the Methodist Church. Given this background it is not surprising that Una inherited a deep and lasting Christian faith that would become the driving force behind her own career and philanthropic activities. Una was educated at Methodist Ladies College and the English boarding school "Farringtons" however her formal education ended at the age of 14 due to ill health. By the outbreak of the First World War her sisters were married and her brothers enlisted. Una became very close to her father and assisted him in establishing hospitals and missions in Arnhem Land, Fiji and India. Una returned to formal study and matriculated at the age of 30. A niece with diabetes was the catalyst which led Una to study medicine. She enrolled at the University of Melbourne in 1933 and subsequently specialised in psychiatry with training at Prince Henry's Hospital, the Royal Park Mental Hospital and the Children's Hospital. In 1946 she took a post at the Ballarat Mental Hospital. Here she was the first female member of staff, overseeing 512 female patients. She later worked in private practice and was instrumental in the establishment of a psychiatric clinic at the Queen Victoria Hospital. Throughout her life, Una maintained a strong link with the Young Women's Christian Association (YWCA) and in 1963 was elected as the World President of this organisation and in 1964 she was elected Woman of the Year. Una's philanthropic work was extensive. In addition to administering the F.J. Cato Charitable and Benevolent Trust and later the James and Una Porter Trust Fund, she made substantial personal donations to hospitals, universities and community organisations including the University of Melbourne, Monash University, Epworth Hospital, Methodist Ladies College, Cato College, Queen Victoria Hospital and the YWCA. It is estimated that she gave over $1 million to various hospitals and institutions. Some of her projects included establishing a scholarship for rural female students to attend university, a Chair in Psychiatry, and extensive research into early childhood development. Una B. Porter was appointed O.B.E. (1961) and C.B.E. (1968) in recognition of her services to the community. At the age of 46 Una married James Roland Porter, an ex-RAAF squadron leader and a lifelong friend. Until this time, Dr Porter had lived at the Cato family home, ‘Kawarau’ at 192-198 Tooronga Road, Hawthorn (later Stephanie’s restaurant). In spite of having qualified as a doctor and with all her philanthropic activities, at age 43 the electoral rolls give her status as ‘home duties’! Dr Porter’s connection with Surrey Hills came after her marriage. In 1948 she and her husband bought 8 Kent Road. A black and white photograph of a screened image of a lady sitting in a winged-back chair. She is wearing a knee length dress with three-quarter length sleeves, and beads around her neck and wrist.psychiatrist, philanthropist, queen victoria hospital, mont albert, surrey hills, 8 kent road, dr una porter, mr james porter, dr unice beatrice porter, mr frederick cato, miss unice beatrice cato, mrs fanny cato, miss fanny bethune, young women's christian association, fj cato charitable and benevolent trust, james and una porter trust fund, methodist ladies college -
 Bendigo Military Museum
Document - Disbandment of Army Survey Regiment Planning 1995, Army Survey Regiment, Bendigo, December 1995
.1 Disbandment of Army Survey Regiment (ASR) Planning19 May 1995. Reference A - DCGS Directive /95 Implementation of the In-house option for the provision of Digital Topographic Support to the ADF. Reference B - Army Svy Regt 623-11-02 262/95 ADF Contingency Capability for the Provision of Topographic Data during the transition ASR to ATSE dated 12 May 1995. Reference A directs the ASR to be disbanded by 1 Dec 1996. Planning for the Disbandment is to consist of the following: Phase 1 - Development of Draft Outline Plan (1) Determine the Aim, Limitations and factors to be considered in the appreciation into the disbandment, (2) Conduct an appreciation to determine the best course of action, (3) Develop an Outline Plan for the Best Course of Action. (4) Brief DSVY-A and staff on the proposed Outline Plan. Phase 2 - Review of the Outline Plan by DSVY-A and issue further guidance. Phase 3 - Develop the Detailed plan including project management strategy. The disbandment is to achieve the smooth transition of operational responsibility to ATSE. The responsibility and resources to maintain the Minimum Operational Capability outlined in Reference B is to be formally passed to ATSE prior to disbandment. Proposed timings: Phase 1 completed by 1 Jun 95, Phase 2 completed by 15 Jun 95, Phase 3 complete d by 30 Jun 95, Disbandment completed by no later than 1 Dec 96 (Executive Order). All postings, administration and stores and equipment returns are to be completed by this date. .2 Disbandment of Army Survey Regiment Planning Report 26 May 1995 - Develop possible courses of action for the disbandment of ASR with reference to Technical, Historical and Union Issues by 6 Jun 95. .3 Disbandment of Army Survey Regiment Disbandment Team 26 May 1995 - Allocation of Team Members and responsibilities. .4 Disbandment of Army Survey Regiment May 1995 - Minimum Contingency Technical Equipment List for transition to ATSE. .5 Disbandment of Army Survey Regiment Plan 23 Aug 1995 - During the transition period (1 Jul 95 - 1 Dec 1996) leading to the full implementation of the Preferred In House Option (PIHO) Army Svy Regt and ATSE will at all times operate concurrently whilst Army Svy Regt scales down production and progressively transfers all technical functions to ATSE. Army Svy Regt will continue programmed production activities at best endeavor until declared operationally ineffective. During the transition to ATSE a contingency mapping capability is to be maintained. .6 Directorate of Survey - Army Commercial Support Program Digital Topographic Support to the ADF In-House Option Directive Dec 95. This directive defines the CSP contract management arrangements between the contract Administrator (DSVY-A) and the Contractor (ATSE) for the implementation and operation of the IHO for digital Topographic support to the ADF. .1 Disbandment of Army Survey Regiment Planning19 May 1995 - A4 paper clipped document, 4 x hole punched, 21 pages, diagrams and typed and hand written. .2 Disbandment of Army Survey Regiment Planning Report 26 May 1995 - A4 paper stapled document, 4 x hole punched, 9 pages, diagrams and typed and hand written. .3 Disbandment of Army Survey Regiment Disbandment Team 26 May 1995 - A4 paper stapled document, 4 x hole punched, 2 pages, typed. .4 Disbandment of Army Survey Regiment May 1995 - Minimum Contingency Technical Equipment for transition. A4 paper stapled document, 4 x hole punched, 2 pages, typed. .5 Disbandment of Army Survey Regiment Plan 23 Aug 1995 - A4 paper stapled document, 4 x hole punched, 10 pages, diagrams and typed. .6 Directorate of Survey - Army Commercial Support Program Digital Topographic Support to the ADF In-House Option Directive Dec 95. A4 paper clipped document, 4 x hole punched, 16 pages, diagrams and typed, hand written notes. royal australian survey corps, rasvy, fortuna, army survey regiment, army svy regt, atse, asr -
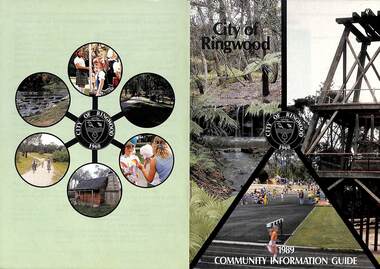 Ringwood and District Historical Society
Booklet, City of Ringwood 1989 Community Information Guide, 1989
Community information booklet issued by City of Ringwood for 1989 - covering the facilities and activities of the Ringwood Council and other local organisations and associations. Cover photographs: Front - Fern Gully at Ringwood Lake, Poppett Head at rear of Lake, Athletics Track. Back - Highland Carnival, Wombalano Park, Miners Cottage at Ringwood Lake, Bike Path, Water Cascade at rear of Lake.CONTENTS: (page no.) 1. COUNCIL SERVICES After School Activities Programme 29 Aged Services 31, 32 & 33 Aquatic Centre 20 & 21 Budget 14 Building Information 16 By-Laws 26 Chief Executive's Message 9 Children's Services 29 Civic Centre 4 Committees of Council 5 Common Questions 36 Community Plan 10 & 11 Council Meeting Dates 4 Council Representatives 8 Councillors 6 & 7 Dogs 26 Dual Occupancy 12 Emergency Telephone Numbers 63 Family Day Care 29 Fire Hazards 27 Garbage 34 & 35 Golf Course 24 Home Handyman Services 31 Home Help 31 Incinerators 26 Knaith Road Child Care Centre 29 Library 23 Maternal and Child Health 28 Mayoral Message – Cr. R. Gardini 3 Meals on Wheels 31 Members of Parliament 62 Parks and Gardens 18 Rates 25 Residential Development Provisions 12 & 13 Ringwood Bypass Road 13 Ringwood Convention Centre & Performing Arts Centre 22 Ringwood District Centre 14 Staff 10 Town Planning 17 Works Depot 30 Youth Outreach Worker 33 2. LOCAL COMMUNITY SERVICES Accommodation 37 Alcoholism 37 Birthright 38 Blind 38 Care Force 39 Catholic Family Welfare Bureau 39 Central Ringwood Community Centre 39 Childbirth and Parenting Association 39 & 40 Churches 40 & 41 Community Services Victoria 42 Day Centres and Drop In Centres 43 Do Care 43 Drugs 43 Elderly Day Care 44 Emergency Housing 45 Family Planning Services 45 Financial Counselling 46 Hearing Aid Service 47 Hospitals 47 Housing 48 Information 48 Legal 49 Literacy 50 Lone Parents 50 Marriage Celebrants 50 Maroondah Social Health Centre 51 Neighbourhood Mediation Centre - Outer East 51 North Ringwood Community House 52 Nursing 52 Optometric Services 52 Playgroups 53 Podiatry 53 Pre-Schools 54 Red Cross 55 Retirement 55 Ringwood Croydon Advisory Service 55 Schools 56 & 57 Senior Citizens' Centres 58 Transport 59 Twins 59 Unemployment 60 Volunteering 60 Youth Accommodation Project (Maroondah). 60 Youth Emergency Accommodation Services... 60 rinx -
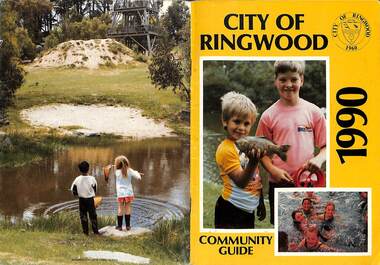 Ringwood and District Historical Society
Booklet, City of Ringwood 1990 Community Guide, 1990
Community information booklet issued by City of Ringwood for 1990 - covering the facilities and activities of the Ringwood Council and other local organisations and associations.CONTENTS: (page no.) 1. COUNCIL SERVICES After School Programme 33 Aged Services 33, 34,35 Aquatic Centre 15,16,17 Aquatic Centre Bonus Vouchers 17 Biological Wasp Control 24 Budget 13,14 Building information 26 By-Laws 29 Chief Executive's Message 9 Children's Services 44 Citizenship 35 Civic Centre 4 Committees of Council 5 Common Questions 39 Council Meeting Dates 4 Council Representatives 8 Councillors 6,7 Dogs 29 Emergency Telephone Numbers 67 Family Day Care 32 Fire Hazards 29 Garbage 37 Golf Course 19 Health and Environmental Services 24 Home Handyman Services 54 Home Help 33 Immunisation 25 incinerators 29 Knaith Road Child Care Centre 32 Library 22 Library Service Senior Citizens 34 Maternal and Child Health 31 Mayoral Message - Cr. Lillian Rosewarne 3 Meals on Wheels 33 Members of Parliament 40 Parks and Gardens 22,23 Rates 28 Residential Development Provisions 12 Ringwood Bypass Road 11 Ringwood Convention Centre & Performing Arts Centre 20 Ringwood District Centre 13 Ringwood Festival 21 Shopping Bus 34 Staff 10 Town Planning 26 Works Depot 36 Youth Outreach Worker 36 2. LOCAL COMMUNITY SERVICES Accommodation 42 Aged Accommodation 42 Alcoholism 42 Arthritis Foundation 43 Arts and Crafts 43 Blind 43 Care Force 43 Catholic Family Welfare Bureau 43 Central Ringwood Community Centre 43 Childbirth and Parenting Association 44 Churches 45 Community Services Victoria 47 Day Centres and Drop-in Centres 48 Disabled Facilities 49 Do Care 50 Drugs 50 Elderly Day Care 50 Emergency Housing 51 Family Planning Services 51 Financial Counselling 52 Hearing Aid Service 53 Hospitals 54 Housing 54 Information 55 Legal 55 Literacy 55 Lone Parents 57 Marriage Celebrants 57 Maroondah Social Health Centre 57 Neighbourhood Mediation Centre - Outer East 57 North Ringwood Community House 53 Nursing 59 Optometric Services 59 Playgroups 60 Pre-Schools 60 Red Cross 61 Retirement 62 Ringwood Croydon Advisory Service 62 Schools 63 Senior Citizens' Centres 65 Transport 66 Twins 66 Unemployment 66 Volunteering 66 Youth Accommodation Project (Maroondah) 67 Youth Emergency Services 67 rinx -
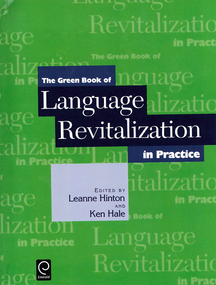 Victorian Aboriginal Corporation for Languages
Book, Leanne Hinton, The green book of Language revitalization in practice, 2008
1. Language Revitalization: An Overview /? Leanne Hinton 2. Diversity in Local Language Maintenance and Restoration: A Reason For Optimism /? Anna Ash, Jessie Little Doe Fermino and Ken Hale 3. Federal Language Policy and Indigenous Languages in the United States /? Leanne Hinton 4. "... To Help Assure the Survival and Continuing Vitality of Native American Languages" /? Robert D. Arnold 5. Language Planning /? Leanne Hinton Introduction to the Pueblo Languages /? Leanne Hinton 6. Native Language Planning: A Pilot Process in the Acoma Pueblo Community /? Christine P. Sims 7. The Key To Cultural Survival: Language Planning and Revitalization in the Pueblo de Cochiti /? Regis Pecos and Rebecca Blum-Martinez The Navajo Language: I /? Ken Hale 8. Navajo Head Start Language Study /? Paul R. Platero 9. Introduction to Revitalization of National Indigenous Languages /? Leanne Hinton Introduction to the Welsh Language /? Leanne Hinton 10. Welsh: A European Case of Language Maintenance /? Gerald Morgan Introduction to the Maori Language /? Ken Hale 11. Te Kohanga Reo: Maori Language Revitalization /? Jeanette King An Introduction to the Hawaiian Language /? Leanne Hinton 12. The Movement to Revitalize Hawaiian Language and Culture /? Sam L. No'Eau Warner 13. "Mai Loko Mai O Ka 'I'ini: Proceeding from a Dream": The 'Aha Punana Leo Connection in Hawaiian Language Revitalization /? William H. Wilson and Kauanoe Kamana 14. Teaching Methods /? Leanne Hinton The Karuk Language /? Leanne Hinton 15. Teaching Well, Learning Quickly: Communication-Based Language Instruction /? Terry Supahan and Sarah E. Supahan The Navajo Language: II /? Ken Hale 16. Tsehootsooidi Olta'gi Dine Bizaad Bihoo'aah: A Navajo Immersion Program at Fort Defiance, Arizona /? Marie Arviso and Wayne Holm 17. The Master-Apprentice Language Learning Program /? Leanne Hinton 18. Linguistic Aspects of Language Teaching and Learning in Immersion Contexts /? Ken Hale 19. New Writing Systems /? Leanne Hinton An Introduction to Paiute /? Leanne Hinton and Ken Hale 20. Language Revitalization in the San Juan Paiute Community and the Role of a Paiute Constitution /? Pamela Bunte and Robert Franklin 21. Audio-Video Documentation /? Leanne Hinton Australian Languages /? Ken Hale 22. Strict Locality in Local Language Media: An Australian Example /? Ken Hale The Arapaho Language /? Ken Hale 23. Reflections on the Arapaho Language Project, or When Bambi Spoke Arapaho and Other Tales of Arapaho Language Revitalization Efforts /? Stephen Greymorning Irish /? Ken Hale 24. Continuity and Vitality: Expanding Domains through Irish-Language Radio /? Colleen Cotter The Mono Language /? Ken Hale 25. On Using Multimedia in Language Renewal: Observations from Making the CD-ROM Taitaduhaan /? Paul V. Kroskrity and Jennifer F. Reynolds 26. Can the Web Help Save My Language? /? Laura Buszard-Welcher 27. Training People to Teach Their Language /? Leanne Hinton Inuttut and Innu-aimun /? Ken Hale 28. The Role of the University in the Training of Native Language Teachers: Labrador /? Alana Johns and Irene Mazurkewich Languages of Arizona, Southern California, and Oklahoma /? Leanne Hinton 29. Indigenous Educators as Change Agents: Case Studies of Two Language Institutes /? Teresa L. McCarty, Lucille J. Watahomigie and Akira Y. Yamamoto /? [et al.] The Navajo Language: III /? Ken Hale 30. Promoting Advanced Navajo Language Scholarship /? Clay Slate 31. Sleeping Languages: Can They Be Awakened? /? Leanne Hinton 32. The Use of Linguistic Archives in Language Revitalization: The Native California Language Restoration Workshop /? Leanne Hinton The Ohlone Languages /? Leanne Hinton 33. New Life for a Lost Language /? Linda Yamane.Maps, b&w photographs, tables, word listslanguage policy, language planning, language maintenance, language revitalization, language immersion, language literacy, media and technology, language education and training, sleeping languages, navajo, arapaho -
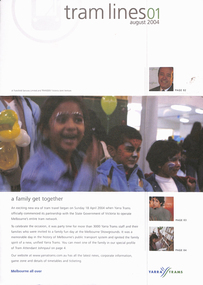 Melbourne Tram Museum
Magazine, Yarra Trams, "Tramlines", 2004 - 2009
Set of 15 issues of Yarra Trams Magazine "Tramlines" All folded A3 unless noted otherwise. 1 - Issue 1 - August 2004 - staff event, message from CEO Hubert Guyot, new control centre, route 96, Olympic torch relay, tram 431, new livery, meet Johnpaul tram attendant. .1A - Issue 2 - December 2004 - customer satisfaction, tram attendants, remembrance day, CEO message, new routes, Camberwell depot, staff profile and tramways band. .2 - issue 3 - May 2005 - Fleet operations control centre opens, (photo), Balaclava Junction upgrade, grand union, Melbourne Uni superstop, fund raising. .3 - issue 4 - August 2005 - Congratulations to Lenny Bates 50, departure of Hubert, route 75 extended to Vermont South, fare evasion, trackwork and Superstops in Flinders St and Bourke St, East Preston Depot and think tram project. .4 - Issue 5 - December 2005 - folded A3 sheet, plain paper, colour photos - with articles on congestion, advertising campaign success re fare evaders, new platform stops in Flinders St, Network improvements and getting ready for the 2006 Commonwealth games featuring a cartoon poster of a tram in a race (see Reg item 1235 for the actual poster). Has a message from Dennis Cliche - new CEO. .5 - Issue 6 - May 2006 - folded A2 sheet, gloss paper, items re Commonwealth games, Karachi W-11 tram, Remembrance day, network improvements, Grand Prix, good Friday appeal, and the forthcoming centenary celebrations. Centre page spread has a large number of photos of staff during the Commonwealth Games. .6 - Issue 7 - October 2006 - folded A2 sheet, gloss paper, colour photos of the Centenary Art Tram (5006), Myki, network improvements, memories of 1906, Luna Party Tram (1011) with centre page spread of a photo of 5006 outside Luna Park, and the various tram images featured on the tramcar. See also Reg Item 864 for details of the making of the art work. .7 - Issue 8 - December 2006 - folded A3 sheet, gloss paper, colour photos of the "Tram It 2006" event, light rail, TramTracker being launched, Essendon, Centenary celebrations and "for the love of trams". .8 - Issue 9 - May 2007 - six pages - traffic condition, green depots, Joyce Barry, plaque at Brunswick Depot, fund raising, platform stops, trackwork, TramTracker, Police tram. .9 - Issue 10 - September 2007 - MSO tram, students travels, Transport Challenge 2007, website, TramTracker by SMS. .10 - Issue 11 - Melbourne trams a heritage icon, fund raising, TramTracker, cable tram tracks in Abbotsford St, route 86 to the Waterfront City Docklands, hailing trams. 11 - Issue 12 - Mulhouse tram, Bumblebee, on the docks, fundraising, St Kilda Road upgrades, TramTracker. .12 - Issue 13 - Bumblebee C2 class trams, traffic congestion, wind power tram, Flinders St trackwork. .13 - Issue 14 - Silver Paralympians on tram, green wind powered trams. .14 - Issue 15 - TramTracker Jake, film festival, Public Transport Ombudsman - Simon Cohen, Operations Centre, .15 - Issue 16 - 6 pages - tram performance, TramTracker at tram stops and iPhones, Mike Talks, Myki. All have the Yarra Trams logo on the front cover.trams, tramways, yarra trams, tickets, commonwealth games, flinders st, grand prix, karachi w-11 tram, construction, luna park, essendon depot, centenary, tramtracker, olympic games, control centre, balaclava junction, trackwork, grand union, melbourne university, superstops, vermont south, route 75, flinders st, bourke st, brunswick depot, cable trams, docklands, mulhouse, c2 class, flinders st, environment, ombudsman, myki, tramways band -
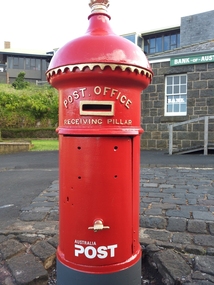 Flagstaff Hill Maritime Museum and Village
Functional object - Post Office Receiving Pillar, 1885
Post Office Receiving Pillar was Collected from Warrnambool City Council’s Scott Street Depot and transported to Flagstaff Hill, stored in the Barracks area Friends of Flagstaff Hill began the project of restoring the Post Office Receiving Pillar in early 2011. The replacement dome required a pattern to be made from paper, then timber, then someone to manufacture it. The cast iron body required sand blasting and undercoating. The pillar was installed in Flagstaff Hill Maritime Village in March 2014. A specialist visited the Village and painted the pillar with 7 coats of ‘post office red’ then completed the job with gold paint on the details. In 2015 an information plate of brass was fitted to the Pillar in the position that would have originally announced the clearing times. It was originally manufactured by G Couch, Engineer, Alliance Iron Works, Melbourne. Gordon Couch passed away in June 1896 and his Works were offered for auction in November 1897. HISTORY OF POST OFFICE RECEIVING PILLARS In 1851 ‘pillar boxes’ were installed at roadside locations in the island of Jersey, England; they had already been successful in several European countries. The use of new prepaid, adhesive postage stamps as well as the roadside pillar boxes meant there was no need for the public to take a trip to the Post Office just to post a letter. By 1855 London had installed its first six Pillar Boxes. In 1856 the pillar boxes were first introduced in Sydney. These were circular with a crown on the dome, supported by leaves. Early Victoria Mail was originally collected by ‘letter carriers’, first appointed in Melbourne in 1841, equipped with leather bag and hand bell. He wore a red coat with brass buttons and a black top hat! In 1844 two wooden receiving boxes were erected in Melbourne. The first cast iron boxes were installed in South Melbourne (Emerald Hill) and were still in service until 1967. They were a fluted circular design and made in England. In the early 1860’s the ‘low door round’ design posting box was introduced, being circular and surrounded by a crown, with two broad embossed bands around its circumference. The clearance door was in front of the box and low down. These were made in Australia. In the early 1870’s square boxes with a tapering top were being used. These too were made in Australia by different manufacturers with slight variations on style such as the orientation and number of slots. Next came the circular boxes again, similar to the ‘low door round’ but with the clearance door extending to just below the posting slot, often referred to as ‘high door round’. These boxes did not have embossed bands. In 1887 small cast iron boxes were introduced, attached to posts and poles and called ‘lamp post receivers’. Around 1930 a ‘London’ model was used in Victoria. It was copied from the flat-domed type in London but made in Tasmania. … [References: Flagstaff Hill Maritime Village records, The Argus, 11th April, 1890, The Argus, 2nd July, 1896, The Argus, 30th Nov. 1897, “Stamps.Au” http://www.stampsau.com, 4th April 2011 (Extracted from “Australian Street Posting Boxes” by Ken Sparks – out of print)] Post Office Receiving Pillar, or letterbox.1885 "High Door Round" design, restored 2014 Tall cast iron sylinder with decorative dome cap, slot in side, hinged door with handle shaped as a fist. Painted red with gold trip..Reconditioned barrel, reconstructed dome. Restored by Friends of Flagstaff Hill, 2014. Now a working letterbox. Made in Melbourne.Oval maker's plate “ - G. COUCH - / ENGINEER / ALLIANCE IRON / WORKS / MELBOURNE”flagstaff hill, warrnambool, shipwrecked coast, flagstaff hill maritime museum, maritime museum, shipwreck coast, flagstaff hill maritime village, great ocean road, post office receiving pillar, letterbox, mailbox, australia post -
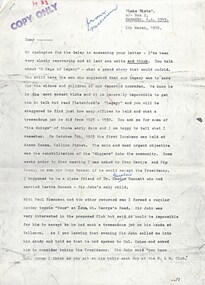 Melbourne Legacy
Document, History (H33) By Frank Meldrum, 1976
A document written in 1976 by Legatee Frank Meldrum containing his account of the start of Legacy. He was responding to a request for information about the history of Legacy that the archive committee was collating. He mentions several key members by name and what they achieved. As with other similar accounts he mentions the original objective was to see diggers placed in employment. When two years later the focus changed to the families 'thanks to Frank Doolan Legacy found its SOUL'. Many other accounts have also used the term 'soul' when referring to Frank's suggestion. It seems many Legatees had been quietly helping families of their comrades; Frank 'said he was helping a widow with two children of an old army mate. It was discovered that several of the Board were doing the same. Stan Savige had taken over the care of his widowed sister and her two boys, whose father had died at Passchendale. I had a widow with two little ones whose father was one of my best mates at Anzac. He died of flu virus after returning to Australia. I think eleven members of the Board or Committees were already giving similar service. Frank's proposal caught on immediately. Legacy had found its Soul!' 'Harold Peters started his Lit and Debating Class and I was asked by Stan to find a PT instructor', Frank Meldrum asked for the 'Billy' Williams to helped, and a cobber from Anzac, Louis Vavjanezki, to take on boxing and wrestling classes. 'All committees carried their own expenses amongst themselves - nothing was charged to JLC. Hugh Brain started the Education Committee and was given a donation, I think of $1000 (a heck of a lot in those days) by the Ballieu Bros.' He also mentions 'For the first 5-10 years practically all administrative costs were borne by the members.' 'Stan Savige was, of course a tremendous driving force in all the work for the Juniors. He put on a Christmas Camp at Balnarring on his own property and was Camp Commandant and Camp Cook.' Legatee Keith Mitchell helped Frank Meldrum in doing a dental examination of all children in the classes and then Frank did the necessary treatments in his rooms. When it was known they were treating over 400 children and their mums, Syd Birrell then got the board to co-opt two more dentists into the Club and form a Dental Clinic. Syd Birrell also started a Legal Committee to provide free legal advice. 'Committees quietly vied with each other to give better services to the Juniors and their mums. It was an atmosphere that was unbelievably happy - SERVCE WITHOUT SELF'. He mentions picnics, including one at Grimwade house - photos are at 01382 - where legatees were dressed up. The first demonstration was held in the 'Playhouse, just over Princes Bridge and was a great success.' Aaron Beattie and Mrs Gilles were mentioned. The notation H33 in red pen shows that it was part of the archive project that was trying to capture the history of Legacy. A summary of the first fifty years of Legacy written by a key founding member.White foolscap paper with black type x 6 pages of Frank Meldrum's account of Legacy's history dated 6 March 1976.Handwritten H33 in red pen and 'from Meldrum' in blue pen on first page. Stamped 'COPY ONLY' in purple ink.history, founding legatee, frank meldrum