Showing 8190 items
matching this england
-
 Mont De Lancey
Book, W. Fream, LL.D, Elements of Agriculture A Textbook, 1892
An English textbook for elementary work on Agriculture adapted for use in rural and other schools and classes.A plain blue hardcover textbook, Elements of Agriculture by W. Fream, LL.D. The spine has the title, author symbol for The Royal Agricultural Society of England, price 2/6 and the publisher John Murray written in gold lettering. it has three parts to the contents, the soil, the plant and the animal along with an Index of plants and a general index. At the back there are listed pamphlets published by the Society and books relevant to the topic. Diagrams, illustrations, tables and charts are included. 450p.non-fictionAn English textbook for elementary work on Agriculture adapted for use in rural and other schools and classes.agriculture, farming -
 Glenelg Shire Council Cultural Collection
Souvenir - Souvenir Butter Dish - Portland Lighthouse, 1930s
Owned by James and Ada Brimblecombe, Heywood. Later owned by Merle Lewis, Mt. Gambier. R.H. Plant founded Tuscan Fine China in 1878 in Staffordshire. This area known as the Potteries, was England’s centre for the production of china. The Plant family already had a long history in producing china. Tuscan specialized in decorative fine bone china dinnerware that is very fine and light. Despite their reputation for quality, the company suffered the fate of the other potteries with lower sales and higher costs after WW2. Wedgwood purchased the company in 1967. However, Wedgwood continued producing china under the Tuscan name. However, in 1967 the new owners added the Royal prefix to the name. Despite this production ceased in 2006.Leaf-shaped butter dish of white glazed china, edged in gold. Black and white image of a lighthouse on a cliff with a tall flagpole behind it. There is a broken fence running to the edge of the cliff in the right foreground.Front: Lighthouse Bluff, Portland, Victoria (printed with image in centre of dish) Back: Tuscan China/England (stamped logo, green)souvenir of portland, portland harbour, whalers bluff, domestic item, butter dish -
 Bendigo Historical Society Inc.
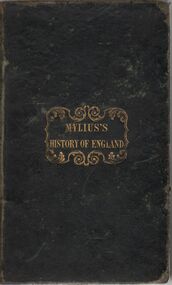
Book - HARRIS COLLECTION: MYLIUS'S HISTORY OF ENGLAND
Book, black cover gold writing ' Mylius's History of England' written on front cover. 425 pages. Inside on fly leaf 'an abridged History of England for the use of schools' Handwritten on page 2 ' George Samuel Harris, Avondale Farm, Axedale, Nr (near) Bendigo' On back page in pencil coloured in frame ' G.S. Harris, Axedale'T. Jones, 63, Paternoster Row, Dublin. 1844. -
 Surrey Hills Historical Society Collection
Photograph, Church of England Boys' Society at Mornington, Dec-16
An accompanying note reads: " SURREY HILLS CHURCH OF ENGLAND BOYS SOCIETY HOLIDAYS AT MORNINGTON 1916 / THOSE IN PHOTO:- / BACK ROW FROM LEFT:- / ERIC COLLINS / WALTER FROGLEY / REG DAY / H. (BERT) HUNT / CENTRE / FRANK SMITH / ROY SMITH / FRONT / STAN SMITH / ERIC SIMPSON / 1916."Black and white photo of members of the Church of England Boys' Society on holiday at Mornington in 1916. They are standing in front of a beach box and are identified as: Back row from left: Eric Collins, Walter Frogley, Reg Day, H (Bert) Smith Middle row: Frank Smith, Roy Smith Front row: Stan Smith, Eric SimpsonBlack and white photo - original and copy by Ken hall which measures 7" x 10"; original is mounted on maroon card.Front top of original in pen: " C.E.B.S. Camp Mornington 1916 / Xmas" Diagonally across front bottom RH cnr in pen "Yours truly / H.W.L. Hunt / 1917" Back top in ink: "C.E.B.S. XMAS CAMP MORNINGTON 1916 / Property now owned by MYERS" Centre: "STAN SMITH / 6 LONGVIEW ROAD / NTH BALWYN"church of england boys' society, sports and recreations, swimming, bathing costume, simpson, eric collins, walter frogley, reg day, bert hunt, herbert hunt, frank smith, roy smith, eric simpson, stan smith, 1910-1919, mornington -
 Orbost & District Historical Society
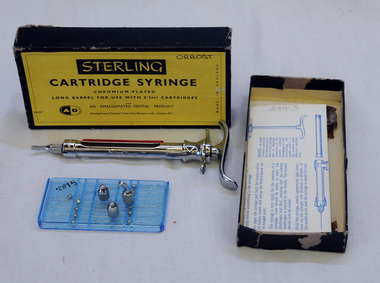
syringe, Amalgamated Dental Trade Distributors Ltd, 1977
Chromium plated dentist's syringe with original box, needles and instructions.Front of syringe -"Sterling Ash. England"syringe dentistry -
 Warrnambool and District Historical Society Inc.
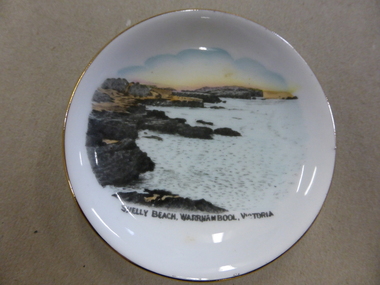
China, Saucer, Mid 20th century
This is a dish or pin tray sold in Warrnambool as a souvenir of the city. It features Shelly Beach, one of the popular picnic spots, especially in the first half of the 20th century. This dish was made by Royal Stafford China and was presumably produced with a plain centre so that an illustration of a tourist spot in Australia could be reproduced on the dish. There were many similar items produced by Royal Stafford China that featured Warrnambool scenes and were selling in Warrnambool in the 1930s, 40s and 50s. They were all good quality items and so many have survived today. They were useful as well as decorative – vases, plates, cups and saucers etc. Some business houses in Warrnambool also had Royal Stafford China souvenir items featuring the business name to sell or give away to customers. Tourism in Warrnambool has always been an important aspect of the city and this souvenir dish is a good example of the souvenir items on sale in the first five or six decades of the 20th century. It will be useful for display. This is a small white china dish or pin tray with a colour sketch (taken from a photograph?) of Shelly Beach in Warrnambool. The illustration covers most of the dish which has a gold edging. The bottom of the dish has the name and symbol of its maker. ‘Royal Stafford China Made in England’ tourism in warrnambool, royal stafford china -
 Waverley RSL Sub Branch
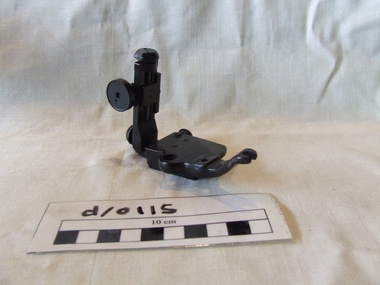
Sight for 40 Cal Deck Gun
On 2nd July 1955 Warramunga and Arunta became the first RAN Ships to join the force countering communism during The Malayan Emergency. Other ships which served during the emergency were HMA Ships Quickmatch, Queenborough, Anzac, Tobruk, Vampire, Vendetta, Voyager, Melbourne and Quadrant. Some of which took part in Bombardments against the CT's in Johore State.Identified by Barry McKilop ex RANBlack painted metal object with 4 thumb screws adjustments and 2 vernier scales. Mounting has one cut out and 2 screw or pin guide holesParkerdale England Mk VII PH5Agun sight, deck gun -
 City of Moorabbin Historical Society (Operating the Box Cottage Museum)
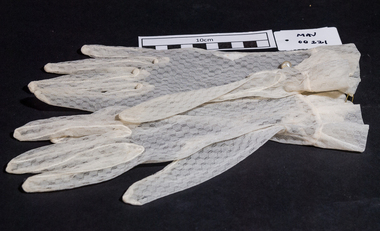
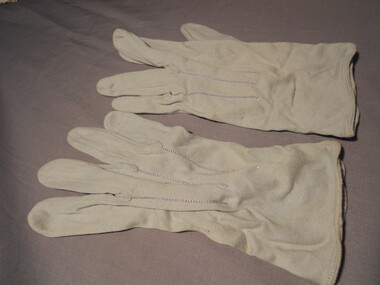
Accessory - Clothing, lady's nylon short gloves, c1950
Ladies' gloves for formal and semi-formal wear come in three lengths for women: wrist, elbow, and opera or full-length (over the elbow, usually reaching to the biceps but sometimes to the full length of the arm). In the late 19thC and early 20thC Gloves were expected to be worn for both daytime and evening wear with most types of outfits. The most expensive gloves are custom-made of kid leather.The Box family were early settlers in Moorabbin Shire and resided in 'Box Cottage' 1865 -1913 The Eldridge family were early settlers in Moorabbin Shire Carol Eldridge was the Daughter in law of Alf and Avis Box, descendants of John Box 1841-1913 A pair of lady's cream, nylon, wrist length gloves with a pearl buttonALL NYLON / MADE IN ENGLAND / 7clothing, gloves, nylon, england, moorabbin, bentleigh, brighton, box elizabeth, box william, box avis, eldridge carol, early settlers, pioneers, market gardeners, box john, sheldrake martha, box alonzo -
 Kiewa Valley Historical Society
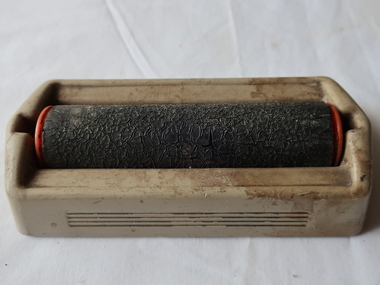
Stamp and Envelope Sealers, Office Equipment
A quick and easy addition to officesUsed by SECV staff in the office during construction of the Kiewa Hydro Electric SchemeGrey plastic oblong with black roller inside it.Underneath: 'No. 1365 Moistener/ Made in England'stamp sealer, envelope sealer, office equipment -
 Ringwood and District Historical Society
Photograph, Ringwood, England - Street View. (undated)
Catalogue card reads, "Ringwood, England." -
 Orbost & District Historical Society
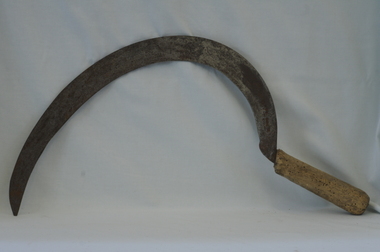
sickle, late 19th -early 20th century
A hand sickle is typically used for harvesting grain crops or cutting succulent forage chiefly for feeding livestock (either freshly cut or dried as hay). this one was used for cutting back bracken fern.Sickles were not used as often on farms after the mechanisation of harvesting. They were still used for cutting awkward shaped small plots, for opening a path for the tractors and for clearing bracken. This item is an example of a tool used by the early settlers of the Orbost district.A wooden handled sickle used for fern cutting. It has a steel curved blade.Stamped on blade - RY4 MADE IN ENGLANDtool farming-implement sickle -
 Cheese World Museum
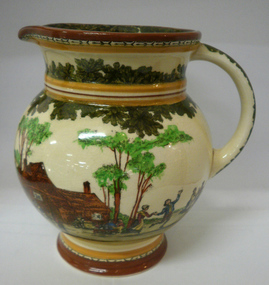
Jug, Royal Doulton
The Percy Uebergang family lived at Tooram Park, Allansford from 1912 until 1992. The jug was part of the collection of kitchen items given into the care of the Cheese World Museum. Uebergang catalogue No.H553Royal Doulton china jug with a shallow pouring lip and cream handle. The outside is fully decorated in brown and green colours with a leaf pattern around the neck and below is a wooden building among trees with figures dancing around.Royal Doulton/D2780/England/H553domestic items, food & drink consumption, allansford, uebergang, royal doulton, jugs, crockery -
Bright & District Historical Society operating the Bright Museum
Box Sewing, Kirby, Beard and Co. Ltd
Black box with lid and compartments for needles, threads and other sewing requirements. Velvet lined lid. Contains a tin box of pins, an assortment of needles, a button hook, a small reel of green cotton thread.Kirby, Beard and Co. Ltd. Englandsewing, box, craft, handcraft -
 Flagstaff Hill Maritime Museum and Village
Domestic object - Plate
The Process of Making Pottery Decorating, Firing, Glazing, Making, Technical There is a rhythm and flow to clay. It can’t be done all at once! Even the making process! It can take weeks to get everything done, especially if you can only work on your pottery once a week! Even though we have three hour classes, it’s often just not enough time! Here is an overview of some of the processes so you have a bit more grasp on some of the technical stuff! Step One – Design There are SO many ideas out there for making stuff in clay! From delicate porcelain jewellery, through to heavy sculptural work and everything in between. Deciding your direction is sometimes not that easy – when you first start, try everything, you will naturally gravitate to the style that you enjoy! The options and variations are endless and can get a wee bit overwhelming too! Check in with me before you start to ensure your ideas will work, what order you might do things, how you could achieve the look you are seeking and any other technical data required! Step Two – Making Clay is thixotropic. This means that as you work with it, the clay first gets sloppier and wetter, before is begins to dry in the atmosphere. For most things, you simply can’t do all parts of the project at once. An example of work order might look like: Get last weeks work out from the shelves Prepare clay for today’s work – roll your clay, prepare balls for throwing, make the first stage of a pinch pot) Clean up last week’s work and put it on the shelf for bisque firing Check that you have any glazing to do – and do enough of it that you will have time to finish your main project Do the next step of your next project – there might be a further step that can’t be complete immediately, in that case, wrap your work well and put onto the shelves. Letting your work rest for a while can really help keep your work clean and professional looking. Many things require bagging under plastic to keep it ready for work the next week – put your name on the outside of the bag so you can find your work easily. We have stickers and markers. Consider how you want to decorate your work – coloured slip can be applied at a fairly wet stage (remembering that it will make your work even wetter!). Trying to apply slip to dry clay won’t work! If you want to do sgraffito – you will need to keep the work leather hard (a state of dryness where you can still work the clay with a little effort and a little water and care). Step Three – Drying Most of the time your work can go into the rack uncovered to let it dry out for the following week. If you want to continue forming or shaping you will need to double bag your work – put your work on a suitable sized bat and put the bat in a bag so the base of the bag is under the bat, then put another bag over the top of the work and tuck the top of the bag under the bat. If you want to trim (or turn) your thrown work the following week, it should also be double bagged. If your work is large, delicate, or of uneven thicknesses, you should lightly cover your work for drying. When considering the drying process, bare in mind the weather, humidity and wind! The hotter and dryer, the faster things dry and work can dry unevenly in the shelves – this can lead to cracking – another time to lightly cover your work for drying. Step Four – Trimming and Cleaning Up Your work is dry! It is called greenware now and it is at it’s most fragile! Handle everything with two hands. I often refer to soft hands – keep everything gentle and with your fingers spread as much as possible. Try to not pick up things like plates too much, and always with both hands! Before your work can be bisque fired it should be “cleaned up”. You work won’t go into the kiln if it has sharp edges – when glazed, sharp edges turn into razor blades! Use a piece of fly wire to rub the work all over – this will scratch a little so be light handed. Use a knife or metal kidney to scrape any areas that require a bit more dynamic treatment than the fly wire offers! Finally, a very light wipe over with a slightly damp sponge can help soften and soothe all of your edges and dags! Trimming thrown work: If you are planning to trim (or turn) your thrown work (and you should be), make sure you bag it well – your work should be leather hard to almost dry for easiest trimming. Use this step to finish the work completely – use a metal kidney to polish the surface, or a slightly damp sponge to give a freshly thrown look. Wipe the sponge around the rim after trimming, and check the inside of the pot for dags! Trimming slip cast work: Usually I will trim the rims of your work on the wheel the following day to make that stage easier, however you will still need to check your work for lumps and bumps. Last but not least – check that your name is still clearly on the bottom of your work. Step Five – Bisque Firing When the work is completely dry it can go into the bisque kiln. The bisque kiln is fired to 1000°C. This process burns off the water in the clay as well as some of the chemically bound water. The structure of the clay is not altered that much at this temperature. Inside the bisque kiln, the work is stacked a little, small bowl inside a larger bowl and onto a heavy plate. Smaller items like decorations or drink coasters might get stacked several high. Consideration is paid to the weight of the stack and shape of the work. A bisque kiln can fire about one and a half times the amount of work that the glaze kiln can fire. The firing takes about 10 hours to complete the cycle and about two days to cool down. Once it has been emptied the work is placed in the glaze room ready for you to decorate! Step Six – Glazing Decorating your work with colour can be a lot of fun – and time consuming! There are three main options for surface treatment at this stage: Oxide Washes Underglazes Glazes Washes and underglazes do not “glaze” the work – It will still need a layer of glaze to fully seal the clay (washes don’t need glaze on surfaces not designed for food or liquid as they can gloss up a little on their own). Underglazes are stable colourants that turn out pretty much how they look in the jar. They can be mixed with each other to form other colours and can be used like water colours to paint onto your work. Mostly they should have a clear glaze on top to seal them. Oxides are a different species – the pink oxide (cobalt) wash turns out bright blue for instance. They don’t always need a glaze on top, and some glazes can change the colour of the wash! The glazes need no other “glaze” on top! Be careful of unknown glaze interactions – you can put any combination of glaze in a bowl or on a plate, but only a single glaze on the outside of any vertical surface! Glazes are a chemical reaction under heat. We don’t know the exact chemicals in the Mayco glazes we use. I can guess by the way they interact with each other, however, on the whole, you need to test every idea you have, and not run the test on a vertical surface! Simply put, glaze is a layer of glass like substance that bonds with the clay underneath. Clay is made of silica, alumina and water. Glaze is made of mostly silica. Silica has a melting point of 1700°C and we fire to 1240°C. The silica requires a “flux” to help it melt at the lower temperature. Fluxes can be all sorts of chemicals – a common one is calcium – calcium has a melting point of 2500°C, however, together they both melt at a much lower temperature! Colourants are metal oxides like cobalt (blue), chrome (green through black), copper (green, blue, even red!), manganese (black, purple and pink) iron (red brown), etc. Different chemicals in the glaze can have dramatic effects. for example, barium carbonate (which we don’t use) turns manganese bright pink! Other elements can turn manganese dioxide brown, blue, purple and reddish brown. Manganese dioxide is a flux in and of itself as well. So, glazes that get their black and purple colours, often interact with other glazes and RUN! Our mirror black is a good example – it mixes really well with many glazes because it fluxes them – causes them to melt faster. It will also bring out many beautiful colours in the glazes because it’s black colouring most definitely comes from manganese dioxide! Glaze chemistry is a whole subject on it’s own! We use commercial Mayco glazes on purpose – for their huge range of colour possibilities, stability, cool interactions, artistic freedom with the ability to easily brush the glazes on and ease of use. We currently have almost 50 glazes on hand! A major project is to test the interactions of all glazes with each other. That is 2,500 test tiles!!!! I’m going to make the wall behind the wheels the feature wall of pretty colours! Step Seven – Glaze (Gloss or sometimes called “Glost”) Firing Most of the time this is the final stage of making your creation (but not always!) The glaze kiln goes to 1240°C. This is called cone 6, or midrange. It is the low end of stoneware temperatures. Stoneware clays and glazes are typically fired at cone 8 – 10, that is 1260 – 1290°C. The energy requirement to go from 1240°C to 1280°C is almost a 30% more! Our clay is formulated to vitrify (mature, turn “glass-like”) at 1240°, as are our glazes. A glaze kiln take around 12 hours to reach temperature and two to three days to cool down. Sometimes a third firing process is required – this is for decoration that is added to work after the glaze firing. For example – adding precious metals and lustres. this firing temperature is usually around 600 – 800°C depending upon the techniques being used. There are many students interested in gold and silver trims – we will be doing this third type of firing soon! After firing your work will be in the student finished work shelves. Remember to pay for it before you head out the door! There is a small extra charge for using porcelain clay (it’s more than twice the price of regular clay), and for any third firing process! Once your work has been fired it can not turn back into clay for millennia – so don’t fire it if you don’t like it! Put it in the bucket for recycling. https://firebirdstudios.com.au/the-process-of-making-pottery/Ceramics have evolved over thousands of years.White earthenware dinner plate. Crazing evident all over.Backstamped ‘Made in England S LTD’flagstaff hill, warrnambool, shipwrecked-coast, flagstaff-hill, flagstaff-hill-maritime-museum, maritime-museum, shipwreck-coast, flagstaff-hill-maritime-village, ceramics, tableware -
 Flagstaff Hill Maritime Museum and Village
Domestic object - Plate, Johnson Bros
The Process of Making Pottery Decorating, Firing, Glazing, Making, Technical There is a rhythm and flow to clay. It can’t be done all at once! Even the making process! It can take weeks to get everything done, especially if you can only work on your pottery once a week! Even though we have three hour classes, it’s often just not enough time! Here is an overview of some of the processes so you have a bit more grasp on some of the technical stuff! Step One – Design There are SO many ideas out there for making stuff in clay! From delicate porcelain jewellery, through to heavy sculptural work and everything in between. Deciding your direction is sometimes not that easy – when you first start, try everything, you will naturally gravitate to the style that you enjoy! The options and variations are endless and can get a wee bit overwhelming too! Check in with me before you start to ensure your ideas will work, what order you might do things, how you could achieve the look you are seeking and any other technical data required! Step Two – Making Clay is thixotropic. This means that as you work with it, the clay first gets sloppier and wetter, before is begins to dry in the atmosphere. For most things, you simply can’t do all parts of the project at once. An example of work order might look like: Get last weeks work out from the shelves Prepare clay for today’s work – roll your clay, prepare balls for throwing, make the first stage of a pinch pot) Clean up last week’s work and put it on the shelf for bisque firing Check that you have any glazing to do – and do enough of it that you will have time to finish your main project Do the next step of your next project – there might be a further step that can’t be complete immediately, in that case, wrap your work well and put onto the shelves. Letting your work rest for a while can really help keep your work clean and professional looking. Many things require bagging under plastic to keep it ready for work the next week – put your name on the outside of the bag so you can find your work easily. We have stickers and markers. Consider how you want to decorate your work – coloured slip can be applied at a fairly wet stage (remembering that it will make your work even wetter!). Trying to apply slip to dry clay won’t work! If you want to do sgraffito – you will need to keep the work leather hard (a state of dryness where you can still work the clay with a little effort and a little water and care). Step Three – Drying Most of the time your work can go into the rack uncovered to let it dry out for the following week. If you want to continue forming or shaping you will need to double bag your work – put your work on a suitable sized bat and put the bat in a bag so the base of the bag is under the bat, then put another bag over the top of the work and tuck the top of the bag under the bat. If you want to trim (or turn) your thrown work the following week, it should also be double bagged. If your work is large, delicate, or of uneven thicknesses, you should lightly cover your work for drying. When considering the drying process, bare in mind the weather, humidity and wind! The hotter and dryer, the faster things dry and work can dry unevenly in the shelves – this can lead to cracking – another time to lightly cover your work for drying. Step Four – Trimming and Cleaning Up Your work is dry! It is called greenware now and it is at it’s most fragile! Handle everything with two hands. I often refer to soft hands – keep everything gentle and with your fingers spread as much as possible. Try to not pick up things like plates too much, and always with both hands! Before your work can be bisque fired it should be “cleaned up”. You work won’t go into the kiln if it has sharp edges – when glazed, sharp edges turn into razor blades! Use a piece of fly wire to rub the work all over – this will scratch a little so be light handed. Use a knife or metal kidney to scrape any areas that require a bit more dynamic treatment than the fly wire offers! Finally, a very light wipe over with a slightly damp sponge can help soften and soothe all of your edges and dags! Trimming thrown work: If you are planning to trim (or turn) your thrown work (and you should be), make sure you bag it well – your work should be leather hard to almost dry for easiest trimming. Use this step to finish the work completely – use a metal kidney to polish the surface, or a slightly damp sponge to give a freshly thrown look. Wipe the sponge around the rim after trimming, and check the inside of the pot for dags! Trimming slip cast work: Usually I will trim the rims of your work on the wheel the following day to make that stage easier, however you will still need to check your work for lumps and bumps. Last but not least – check that your name is still clearly on the bottom of your work. Step Five – Bisque Firing When the work is completely dry it can go into the bisque kiln. The bisque kiln is fired to 1000°C. This process burns off the water in the clay as well as some of the chemically bound water. The structure of the clay is not altered that much at this temperature. Inside the bisque kiln, the work is stacked a little, small bowl inside a larger bowl and onto a heavy plate. Smaller items like decorations or drink coasters might get stacked several high. Consideration is paid to the weight of the stack and shape of the work. A bisque kiln can fire about one and a half times the amount of work that the glaze kiln can fire. The firing takes about 10 hours to complete the cycle and about two days to cool down. Once it has been emptied the work is placed in the glaze room ready for you to decorate! Step Six – Glazing Decorating your work with colour can be a lot of fun – and time consuming! There are three main options for surface treatment at this stage: Oxide Washes Underglazes Glazes Washes and underglazes do not “glaze” the work – It will still need a layer of glaze to fully seal the clay (washes don’t need glaze on surfaces not designed for food or liquid as they can gloss up a little on their own). Underglazes are stable colourants that turn out pretty much how they look in the jar. They can be mixed with each other to form other colours and can be used like water colours to paint onto your work. Mostly they should have a clear glaze on top to seal them. Oxides are a different species – the pink oxide (cobalt) wash turns out bright blue for instance. They don’t always need a glaze on top, and some glazes can change the colour of the wash! The glazes need no other “glaze” on top! Be careful of unknown glaze interactions – you can put any combination of glaze in a bowl or on a plate, but only a single glaze on the outside of any vertical surface! Glazes are a chemical reaction under heat. We don’t know the exact chemicals in the Mayco glazes we use. I can guess by the way they interact with each other, however, on the whole, you need to test every idea you have, and not run the test on a vertical surface! Simply put, glaze is a layer of glass like substance that bonds with the clay underneath. Clay is made of silica, alumina and water. Glaze is made of mostly silica. Silica has a melting point of 1700°C and we fire to 1240°C. The silica requires a “flux” to help it melt at the lower temperature. Fluxes can be all sorts of chemicals – a common one is calcium – calcium has a melting point of 2500°C, however, together they both melt at a much lower temperature! Colourants are metal oxides like cobalt (blue), chrome (green through black), copper (green, blue, even red!), manganese (black, purple and pink) iron (red brown), etc. Different chemicals in the glaze can have dramatic effects. for example, barium carbonate (which we don’t use) turns manganese bright pink! Other elements can turn manganese dioxide brown, blue, purple and reddish brown. Manganese dioxide is a flux in and of itself as well. So, glazes that get their black and purple colours, often interact with other glazes and RUN! Our mirror black is a good example – it mixes really well with many glazes because it fluxes them – causes them to melt faster. It will also bring out many beautiful colours in the glazes because it’s black colouring most definitely comes from manganese dioxide! Glaze chemistry is a whole subject on it’s own! We use commercial Mayco glazes on purpose – for their huge range of colour possibilities, stability, cool interactions, artistic freedom with the ability to easily brush the glazes on and ease of use. We currently have almost 50 glazes on hand! A major project is to test the interactions of all glazes with each other. That is 2,500 test tiles!!!! I’m going to make the wall behind the wheels the feature wall of pretty colours! Step Seven – Glaze (Gloss or sometimes called “Glost”) Firing Most of the time this is the final stage of making your creation (but not always!) The glaze kiln goes to 1240°C. This is called cone 6, or midrange. It is the low end of stoneware temperatures. Stoneware clays and glazes are typically fired at cone 8 – 10, that is 1260 – 1290°C. The energy requirement to go from 1240°C to 1280°C is almost a 30% more! Our clay is formulated to vitrify (mature, turn “glass-like”) at 1240°, as are our glazes. A glaze kiln take around 12 hours to reach temperature and two to three days to cool down. Sometimes a third firing process is required – this is for decoration that is added to work after the glaze firing. For example – adding precious metals and lustres. this firing temperature is usually around 600 – 800°C depending upon the techniques being used. There are many students interested in gold and silver trims – we will be doing this third type of firing soon! After firing your work will be in the student finished work shelves. Remember to pay for it before you head out the door! There is a small extra charge for using porcelain clay (it’s more than twice the price of regular clay), and for any third firing process! Once your work has been fired it can not turn back into clay for millennia – so don’t fire it if you don’t like it! Put it in the bucket for recycling. https://firebirdstudios.com.au/the-process-of-making-pottery/Ceramics have evolved over thousands of years.A white earthenware side plate with a gadroon edge. Has water marks and chips on front.‘Johnson Bros England Reg No 15587’flagstaff hill, warrnambool, shipwrecked-coast, flagstaff-hill, flagstaff-hill-maritime-museum, maritime-museum, shipwreck-coast, flagstaff-hill-maritime-village, johnson bros, ceramics, tableware -
 Federation University Historical Collection
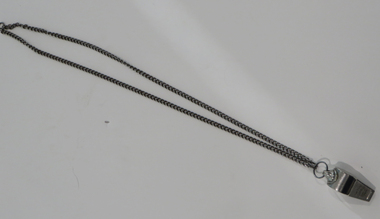
Equipment - Object, Whistle used by Margaret Bennett
Margaret Bennett was a student at the Ballarat Teachers' College in 1949. She was Drum Major for the Ballarat Ladies' Pipe Band from 1950-1975.Metal whistle on a long metal chain. Engraved with 'The Acme Thunderer', Made in Englandballarat, margaret bennett, alumni, whistle, metal whistle -
 Federation University Historical Collection
Scientific Object, Scales
Used at Ballarat School of Mines / University of Ballarat2 pound weigh scale; yellow gold gunmetal base, brass pans. Black pointer indicates balance."AVERY" and "TO WEIGH 2LB MADE IN ENGLAND".scales, brass, avery, england, weight, weigh, ballarat school of mines, university of ballarat, school of business, office equipment -
 City of Moorabbin Historical Society (Operating the Box Cottage Museum)
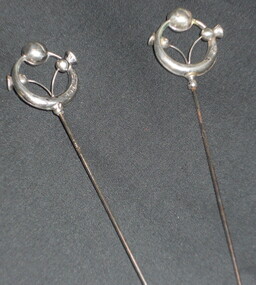
Accessory - Jewellery , lady's silver hatpins, Circa 1910
Hat-pins were worn to anchor hats to the head and could be considered a functional piece of jewellery. Traditionally inserted into the crown of the hat and through the hair piled atop the head.Hat-pins were needed to secure the large, lady’s hats fashionable at the time. The Maggs family were early settlers in Moorabbin Shirec1910, 2 lady's silver hat-pins, with hollow circular silver surround, around a thistle flowerHallmark Birmingham Assay Office Englandjewellery, clothing, dressmaking, craftwork, silversmiths, maggs geoff, early settlers, market gardeners, moorabbin, bentleigh, cheltenham, brighton -
 City of Moorabbin Historical Society (Operating the Box Cottage Museum)
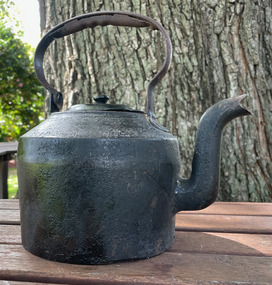
Functional object - Cast iron Kettle, T & C Clark & Sons
Kettle used by a pioneer family in the City of Moorabbin.Made by T & C Clarke & Sons.Cast iron kettle T & C Kelly & Sons - Englandcooking, cast iron pot, moorabbin, pioneers -
 Bendigo Historical Society Inc.
Clothing - WEDDING GLOVES - MALE, 06-02-1960
Grey cotton, fastened at wrist with a grey pearl button 1.5 cm in diameter. Three double rows of stitching in a V Shape on the back of the hand.Dent's Cotton Made in England 9costume accessories, male, gloves -
 Bendigo Historical Society Inc.
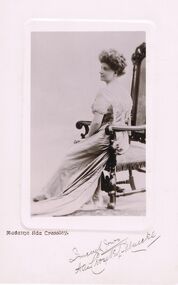
Postcard - PETHARD COLLECTION: MADAME ADA CROSSLEY POSTCARD
Mauve coloured postcard. Image shows woman, hair up, dressed in long dress, sitting on a high back cane insert wooden chair. Written on bottom ' Madame Ada Crossley' Handwritten 'sincerely yours, Ada Crossley - Muecke ? ( unclear )Semco Series, no 201, Printed in Englandperson, individual, ada crossley, pethard, chancellor, sandhurst, ada crossley -
 Bendigo Historical Society Inc.
Accessory - CUT THROAT RAZOR
Invicta cut throat razor in box, ivory coloured handle marked Invicta.E M Dickins Sheffield Englandpersonal effects, shaving -
 Coal Creek Community Park & Museum
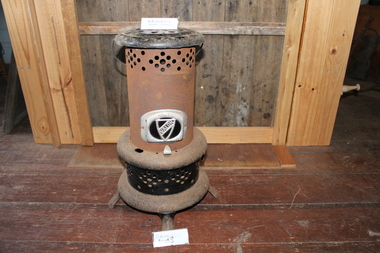
Heater (Oil)
Metal handle Clipped for taking offValor Junior No. Made in England 565 -
 Coal Creek Community Park & Museum
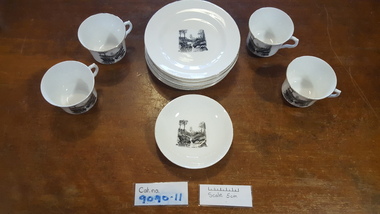
Tea set, 1932
Presented to Olive Cassell in 1932 on the occasion of her marriage to Clive Jarvis, by her brother Leonard, son of local butcher Milton Cassell. The tea set was bought at O.Gilpins store in Korumburra . It was donated by Leonard Cassell on 22nd September 2011. White chin tea set with a black printed transfer of Korumburra Public Park as the decoration on each item. 9090.1 - 9090.4 Four tea cups 9090.5 Saucer 9090.6 - 9090.11 Six side platesOn bottom of each SHEFFIELD MADE IN ENGLAND -
 Coal Creek Community Park & Museum
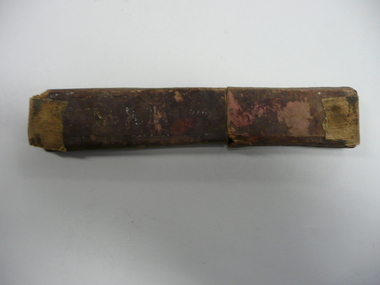
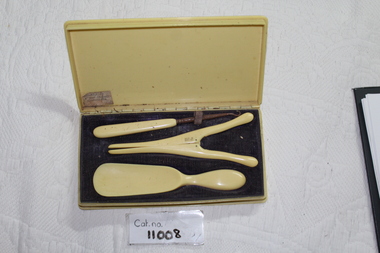
Case
Cream yellow box with three objects and a velvet blue lining. 11008.1 - box is yellow cream with blue velvet and a rusted ribbon (black). 11008.2 - cream yellow dome handle. 11008.3 - cream yellow large tweezers - is rusted on the ring that opens object. 11008.4 - large handle with rusted hook and small design on bottom.Made in England 11008.1 - who it was donated by. -
Coal Creek Community Park & Museum
Box, nibs
Small rectangular red coloured box with blue label with white text.Iridinoid Incorrodable Pens. Made in England -
 Bendigo Historical Society Inc.
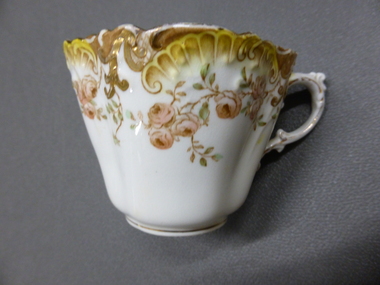
Domestic Object - CHINA TEA CUP
English china tea cup by Aynsley with frilled top and decorated with flowers coloured in tones of pink, lemon and brown with gilding.11557 a crown above Aynsley Englanddomestic equipment, table setting, cups -
 Myrtleford and District Historical Society
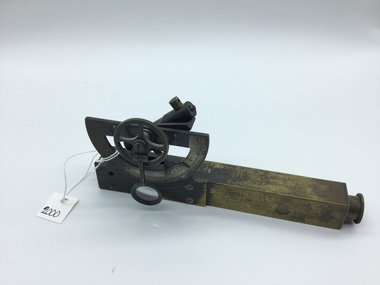
Inclinometer, Early 20th Century
Provenance not clear. Leather case has 'MMBW' inscribed in black pen, indicating an association with Melbourne Metropolitan Board of Works. Item has been in the possession of Terry McCormack since 1972Hand held brass pocket inclonometer level, circa 1920. Leather case for safe storage. Semi circular graduated dial with 90 degree vernier scale with a small (20mm) magnifying glass to aid reading the vernier scale. Above the body, mounted at the rear of the graduated dial, is a spirit level tube which is tilted by finger movement to the milled hand wheel. The height to be determined is sighted through the instrument eyepiece and the bubble tube is tilted until the bubble, viewed in the mirror inside the sighting tube, is brought level with the graticule sighted at the top of the subject object. An angle is thus obtained and by measuring the distance on the ground to the object, trigonometry can be applied to determine the height of the object.Herga & Co. BRISBANE. Made in England -
 Wannon Water
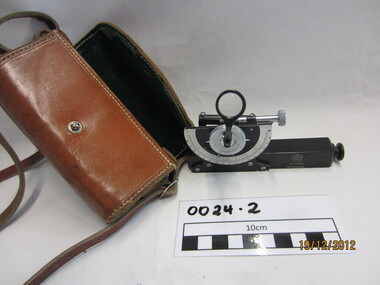
Clinometre / Abney Level, E. R. Watts & Son, Clinometre
Abney Level / Clinometer is an accurate surveying tool used to measure degrees, percent of grade and topographic elevation. Used for surveying pipe lines.Instrument which consists of a fixed sighting tube, a movable spirit level connected to a pointing arm which turns and pivots. Adjustment knob/screw on top turns to rotate the compass indicator and bubble level. Arched scale graduated 0 to 90 degrees in both directions. Clinometer is housed in a brown leather case with a long leather strap for carrying around the neck.Watts London / No 70131 / Made in England -
Clunes Museum
Functional object - Silver Coin Holder
.1 Silver coin holder. Holder made to hold 3d,6d,1s,2s,2/6 coins. Ring on holder to attach to watch chain. .2 3d piece 1951 (Contained in holder)Best Nickel Plated Made in Englandcoins, silver coin holder, nickel plated, pre decimal currency