Showing 224 items matching " 'as we like it'."
-
 Bendigo Historical Society Inc.
Document - ANZAC MEMORIAL SERVICE, 25 April, 1922
... And, we beseech Thee, give us that due sense of all Thy mercies, that our hearts may be unfeignedly thankful, and that we show forth Thy praise, not onlu with our lips, but with our lives; by giving up purselves to Thy sevice, and by walking before Thee in holiness and righteousness all our days; thriough Jesus Christ our Lord; to Whom with Thee and the Holy Spirit ba all honour and glory, world without end. Amen. 12. Nearer My God to Thee. Mearer my God to Thee, Mearer to Thee; E'en though it be a cross That raiseth me; Still all my song shall be. Nearer, my God, to Thee, Nearer to Thee. Though like...And, we beseech Thee, give us that due sense of all Thy mercies, that our hearts may be unfeignedly thankful, and that we show forth Thy praise, not onlu with our lips, but with our lives; by giving up purselves to Thy sevice, and by walking before Thee in holiness and righteousness all our days; thriough Jesus Christ our Lord; to Whom with Thee and the Holy Spirit ba all honour and glory, world without end. Amen. 12. Nearer My God to Thee. Mearer my God to Thee, Mearer to Thee; E'en though it be a cross That raiseth me; Still all my song shall be. Nearer, my God, to Thee, Nearer to Thee. Though like ...Anzac Memorial Service. Lest We Forget. Upper Reserve, Bendigo. Tuesday, April, 25, 1922.At 3 o'clock. Order of Service April 25, 1922. His Worship the Mayor (Cr. J E Holland) presiding. 1. Invocation and Lord's Prayer, Rev W Bennett. (President of Ministers Association) 2. National Anthem 3. Prayer for the King, Queen, and the Royal Family Rev. L W Lee. O! God who rulest over Thy people in love, we beseech Thee to bless Thy Servant, our King, that under him this nation may be wisely governed, and Thy Church may serve Thee in all godly quietness, Grant that the King, the Prince, and the people, being devoted to these with all their hearts, and preserving in good works to the end, may, by Thy guidance, come to Thine everlasting Kingdom, through Jesus Christ our Lord. Amen. 4. Hymn- 'All people that on Earth do Dwell' All people that on earth do dwell, Sing to the Lord with cheerful voice. Him serve with mirth, His praise forth tell, Come ye before Him and rejoice. Know that the Lord is God indeed; Without ou aid He did us make; We are His flock; He doth us feed. And for His sheep He doth us take. O enter then His gates with praise, Approach with joy His courts unto; Praise, laud and bless His name always, For it is seemly so to do. For why! The Lord our God is good, His mercy is for ever sure; His truth at all times firmly stood, And shall from age to age endure. 5. Prayers Rev W J Holt. Almighty God, who hast tought us in Thy Holy Word to perpetuate the memory of brave men and great deliverance, give to this nation grace not to forget the men who died for their fellow men; keep, we beseech thee, their memory fresh and green in the hearts of Thy people, and make us more worthy of the sacrafices they offered for us, through Jesus Christ our Lord. Amen. O! Merciful and Loving Father Who dost not willinglu afflict the children of men, but chasten tem for their profit, have mercy upon Thy bereaved and sorrowing servants who mourn for those they have lost in battle (especially those for whom our [rayers are asled). And as Thou dost sanctity muman love and felloship here upon earth, so grant them and us a happy re-union with those whom we love in Thy eternal peace and joy; throught Jesus Christ our Lord. Amen 6. Scripture Lesson- Rev. S E Doman 7. 1st Address- The Very Rev. The Dean of Bendigo 8. Presentation of Medals 9. Hymn- Kipling's Recessional. God of our fathers, known of old, Lord of the far-flung battle line, Beneath whose awful hand we hold Dominion over palm and pine- Lord God of hosts, be with us yet, Lest we forget-lest we forget! Far-called, our navies melt away, On dune and headland sinks the fire; Lo, all our pomp of yesterday. Is one with Nineveh and Tyre Judge of the nations, spare us yet, Lest we forget- - lest we forget. If, drunk with sight of power, we loose Wild tongues, that have not Thee in awe Still boasting, as the Gentiles use, Or lesser breeds, without the Law- Lord God of hosts, lest we forget! For heathen heart that puts her trust In reeking tube and iron shard, All valiant dust that builds on dust, And guarding, calls not Thee to to guard, For frantic boast and foolish word, Thy mercy on Thy people, Lord! 10. Address Rev. B W Heath. 11. General Thanksgiving Ven. Archdeacon Haynes. Almighty God, Father of all mercies! We, Thine unworthy servants, do give Thee most humble and hearty thanks for all Thy goodness and loving kindness to us, and to all men. We bless Thee for out creation, preservation, and all the blessings of this life; but, above all, for Thine inestimale love in the redemption of the world by our Lord Jesus Christ; for the means of grace, and for the hope and the glory. And, we beseech Thee, give us that due sense of all Thy mercies, that our hearts may be unfeignedly thankful, and that we show forth Thy praise, not onlu with our lips, but with our lives; by giving up purselves to Thy sevice, and by walking before Thee in holiness and righteousness all our days; thriough Jesus Christ our Lord; to Whom with Thee and the Holy Spirit ba all honour and glory, world without end. Amen. 12. Nearer My God to Thee. Mearer my God to Thee, Mearer to Thee; E'en though it be a cross That raiseth me; Still all my song shall be. Nearer, my God, to Thee, Nearer to Thee. Though like the wanderer, The sun gone down, Darkness comes over me, My rest a stone, Yet in my dreams I'd be Nearer my God to Thee, Nearer to Thee. There let my may way appear Steps unto Heav'n, All that thou sendest me In mercy given. Angels to beckon me Nearer, my God, to Thee, Nearer to Thee. Then, with my waking thoughts, Bright with Thy Praise, Out of my stony griefs Berhel I'll raise; So by my woes to be Nearer to Thee. Amen. 13. Last Post. Everybody is requested to rise and stand revernt in memory of our illustrious dead. 14. Benediction. The singing will be led by the Children from the State Schools.Cambridge Pres, Print, Bendigoevent, official, anzac memorial service, anzac memorial service. lest we forget. upper reserve, bendigo. tuesday, april, 25, 1922.at 3 o'clock. order of service april 25, 1922. his worship the mayor (cr. j e holland) presiding. 1. invocation and lord's prayer, rev w bennett. (president of ministers association) 2. national anthem 3. prayer for the king, queen, and the royal family rev. l w lee. 4. hymn- 'all people that on earth do dwell' 5. prayers rev w j holt. 6. scripture lesson- rev. s e doman 7. 1st address- the very rev. the dean of bendigo 8. presentation of medals 9. hymn- kipling's recessional. 10. address rev. b w heath. 11. general thanksgiving ven. archdeacon haynes. 12. nearer my god to thee. 13. last post. everybody is requested to rise and stand revernt in memory of our illustrious dead. 14. benediction. the singing will be led by the children from the state schools. -
 Bendigo Historical Society Inc.
Postcard - WES HARRY COLLECTION: 8 POSTCARDS, 1907 - 09
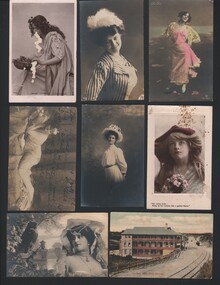
... (a) Maud Jeffreys , (b) Unknown Actress , (c) Hand Tinted Photo, unknown , (d) unknown , (e) unknown lady , (f) ' Her sunny locks hang on her temples like a golden fleece , (g) The Back Beach Hotel Sorrento , (h) unknown lady. Postcard WES HARRY COLLECTION: 8 POSTCARDS ...Eight postcards, all but one are depicting Theatre Actresses of the early 1900's. All are addressed to Mrs. Hands, 164 Lygon Street Carlton and Mrs. A. Stephens of the same address. (a) Maud Jeffreys , (b) Unknown Actress , (c) Hand Tinted Photo, unknown , (d) unknown , (e) unknown lady , (f) ' Her sunny locks hang on her temples like a golden fleece , (g) The Back Beach Hotel Sorrento , (h) unknown lady.postcard, actresses, theatre actresses -
Bendigo Historical Society Inc.
Document - A SOUVENIR OF 'THE GLAMOUR GIRLS' REVUE 'THEN AND NOW' 1944, 1944
... I would however, like you to accept this souvenir as a small token of gratitude for the great pleasure it has given my wife and I to have been associated with each and everyone of you as a team. May we...I would however, like you to accept this souvenir as a small token of gratitude for the great pleasure it has given my wife and I to have been associated with each and everyone of you as a team. May we ...A Souvenir of 'The Glamour Girls' Revue 'Then and Now' 1944. From Mr & Mrs C Clark. Page 1, Bendigo presents 'The Glamour Girls' in Their Hit Revue 'Then & Now' a Pot Pourri of Dances and Fun, Produced and created by the Team Spirit of Peggy Hinsley, Elaine O'Shea, Joan Albert, Gladys Jordon, Amba Harrington, Moira Knowles. Doris Clow, Betty Angel, Cath Mc Queenie, Thelma Cochrane, Mona Roberts. Under Direction of C Clark. Musical Direction, Edward Thomas. Accompaniste, Leila Camp, Vida Roberts. Violinists, Honor Allfrey, Edgar Jarrett. Drums, Frank Kennedy, Andy Beattie. Costumes, Tivoli Theatres. Page 3/ In lending your personality, your charm and your talent to help raise Funds for the Returned Soldiers' Relief Appeal, you have given not only to the soldiers, but to the Nation a great service. As the producer and originator of the 'Glamour Girl Revue' I wish to place on record my personal thanks to the noble part you have played in making this show the financial success it has proved to be. You will appreciate that no remuneration has given by the Committee for your services, with this decision I am sure you fully concur. I would however, like you to accept this souvenir as a small token of gratitude for the great pleasure it has given my wife and I to have been associated with each and everyone of you as a team. May we have future successes in our services to those in need. Yours truly, (signed) C Clark. Page 5/ Photograph of Mr and Mrs C Clark signed; Sincerely M & C Clark. Extra page has been added here and a black and white photograph of the cast on stage attached using photograph corners. Page 5/ Photo of Peggy. Page 7. Page 9 photo of Elaine. Page 11 photo Joan. Page 13 Gladys. Page 15 Amba. Page 17 Moira. Page 19 Doris. Page 21 Betty. Page 23 Cath. Page 25 Thelma. Page 27 Mona. Page 29 Autographs: Betty Angell, Thelma Crochrane, S M Grossmann, Vida Roberts, Mona Roberts, G E Thomas, J Albert, H M Allfrey, J J Monte, Elaine O'Shea, Andrew Beattie, Moira Knowle, Teen Armstrong, C M McQueenie, Peg Hainsly, Doris Blow, Amba Harrington, J N Armstrong, M Clark, C Clark (autographs in copy A only.) Page 31. ''1940 - Never have so many owed so much to so few.'' - Winston Churchill. A Friend Who Understands. You've shared the joys and troubles The Laughter and the tears, And you've given loyal friendship Through the Changing Varied years, Your voice has been beside me Whispering courage for the day, And you've helped and blessed and cheered me Making glad the uphill way, And of all the many blessings That have reached me from God's hands, There's no gift more sweet and precious Than the Friend - who understands. 1944 ''Never have so few needed so much from so many'' - Returned Soldiers' Relief Appeal. Copy A/ Inscription on front cover To 'YACK'. Signed on page 3, C Clark. Signed on page 5 Sincerely M & C Clark. Page 29 Autographs: Betty Angell, Thelma Crochrane, S M Grossmann, Vida Roberts, Mona Roberts, G E Thomas, J Albert, H M Allfrey, J J Monte, Elaine O'Shea, Andrew Beattie, Moira Knowle, Teen Armstrong, C M McQueenie, Peg Hainsly, Doris Blow, Amba Harrington, J N Armstrong, M Clark, C Clark. Orange ribbon is faded. Copy B/ markings: front cover - Royal Historical Society of Victoria Bendigo Branch stamp, sticker - D1729. Cover and white sticker with D1729 on top right corner. First 2 sheets are torn at top hole punch. Orange ribbon is worn at the back.program, theatre, the glamour girls, a souvenir of 'the glamour girls' revue 'then and now' 1944. from mr & mrs c clark. their hit revue 'then & now' a pot pourri of dances and fun, produced and created peggy hinsley, elaine o'shea, joan albert, gladys jordon, amba harrington, moira knowles. doris clow, betty angel, cath mc queenie, thelma cochrane, mona roberts. under direction of c clark. musical direction, edward thomas. accompaniste, leila camp, vida roberts. violinists, honor allfrey, edgar jarrett. drums, frank kennedy, andy beattie. costumes, tivoli theatres. raise funds for the returned soldiers' relief appeal. as the producer and originator my personal thanks to the part you have this show a success. no remuneration has given by for your services. accept this souvenir as a token of. c clark. photograph of mr and mrs c clark signed; sincerely m & c clark. black and white photograph of the cast, peggy, elaine, joan, gladys, amba, moira, doris, betty, cath, thelma, mona, autographs: betty angell, thelma crochrane, s m grossmann, vida roberts, mona roberts, g e thomas, j albert, h m allfrey, j j monte, elaine o'shea, andrew beattie, moira knowle, teen armstrong, c m mcqueenie, peg hainsly, doris blow, amba harrington, j n armstrong, m clark, c clark. 'yack'. -
 Flagstaff Hill Maritime Museum and Village
Photograph - Mr Henry Giles, International Art Company, Circa 1880
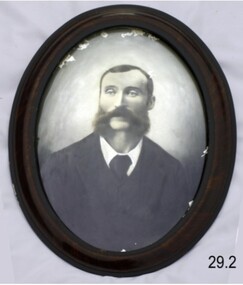
... But the Giles collection also gives us today a snapshot into what domestic life was like in early colonial times prior to Federation. The photograph itself is of added significance as we can see the faces of the family whose lives the collection represents . warrnambool shipwrecked coast flagstaff hill maritime museum shipwreck coast flagstaff hill maritime village photograph late 1800s oval wooden frame portrait mrs mary jane giles of woodford victoria giles collection henry giles tower hill cooramook warrnambool breakwater mailor’s flat wangoom 19th century personal effects mary giles christine giles Inscription on back of frame "International Art Company 30/-" "Rosewood" This photograph is a portrait mounted in an oval rosewood frame, one of a pair. ...The pair of photographs of Mr Henry and Mrs Mary Jane Giles was made by the International Art Company, the price was 30 shillings and the choice of frame was Rosewood. It is part of the Giles Collection, which also includes a photograph of the couple's daughter Christina Giles, who died in 1899 aged seven years. There are many 19th century items of furniture, linen and crockery donated to Flagstaff Hill Maritime Village by, Vera and Aurelin Giles. The items are associated with Warrnambool and the Giles Family history. Items donated by the family have come to be known as the “Giles Collection”. Many items in the Lighthouse Keeper’s Cottage were donated by Vera and Aurelin Giles and mostly came from the home of Vera’s parents-in-law, Henry Giles and his wife Mary Jane (nee Freckleton) who married in 1880 and whose photos are on display in the parlour. Henry was born at Tower Hill in 1858, and was a labourer on the construction of the Warrnambool Breakwater before leaving in 1895 for around seven years to build bridges in NSW. Mary Jane was born in 1860 at Cooramook and she attended Mailor’s Flat State School and where she eventually was to become a student teacher. After which she became a governess at “Injemiara” where her grandfather, Francis Freckleton, had once owned land. Henry and Mary’s family consisted of six, some of the children were born at Mailor’s Flat and later some children at Wangoom. They lived with their parents at Wangoom and Purnim west, and this is where Henry died in 1933 and Mary Jane in 1940.This photograph is locally significant due to its association with a local pioneering family. The Giles family collection is of social significance at a local level, because it not only illustrates the level of material support the Warrnambool community gave to Flagstaff Hill during it’s establishment. But the Giles collection also gives us today a snapshot into what domestic life was like in early colonial times prior to Federation. The photograph itself is of added significance as we can see the faces of the family whose lives the collection represents . This photograph is a portrait mounted in an oval rosewood frame, one of a pair. This photograph is Henry Giles, dressed formally and showing a moustache and side-burns. The couple in the pair of photographs is Mr and Mrs Giles of Woodford, Victoria. The photographic studio was the International Art Company. It is part of the Giles Collection.Inscription on back of frame "International Art Company 30/-" "Rosewood"warrnambool, shipwrecked coast, flagstaff hill maritime museum, shipwreck coast, flagstaff hill maritime village, photograph late 1800s, oval wooden frame, portrait, mrs mary jane giles of woodford victoria, giles collection, henry giles, tower hill, cooramook, warrnambool breakwater, mailor’s flat, wangoom, 19th century personal effects, mary giles, christine giles -
Ringwood and District Historical Society
Document - Handout, Ringwood Garden Club, Handout for the Beautiful Gardens of Ringwood Competition, 19th and 20th September, 1987, 1987
... The Committee of the Ringwood Garden Club would like to extend a very warm welcome to all who have joined us on today's tour. We hope you enjoy the best six of the winning gardens from the 16 entries we received. ...The Committee of the Ringwood Garden Club would like to extend a very warm welcome to all who have joined us on today's tour. We hope you enjoy the best six of the winning gardens from the 16 entries we received. ...Handout for the Beautiful Gardens of Ringwood Competition, 19th and 20th September, 1987.Foolscap typed sheet.BEAUTIFUL GARDENS OF RINGWOOD COMPETITION. 19th. & 20th. September, 1987. The Committee of the Ringwood Garden Club would like to extend a very warm welcome to all who have joined us on today's tour. We hope you enjoy the best six of the winning gardens from the 16 entries we received. Signs in the winning gardens indicate what prizes have been awarded as well as on your programme. After the tour, we hope you will join in Afternoon Tea, kindly prepared by the ladies of our Committee. Following afternoon tea, the coaches will return to Eastland Carpark. 1st. Stop: Section 4: Individual Garden in Home Units or Flats. 1st. Prize: Mr. & Mrs.C. & B. Harris, Unit 6, 32 Wilana St., Ringwood. 2nd. Prize: Mr. & Mrs. W. & T. Wilson, Unit 5, 32 Wilana St., Ringwood. 2nd. Stop: Section 3: Home Garden - Viewed from the Street. 1st. Prize: Mr. L. Sperling, 4 Lorienne Rd., Heathmont. 3rd. Stop: Section 1: Home Garden, Street Frontage exceeding 65 ft. (20 m) 2nd. Prize: Mr. K. Clark, 42 Bronhill Rd., Ringwood East. 4th. Stop: Section 3: Home Garden - Front Only. 2nd. Prize: Mr. H. Smit, 21 Unsworth Rd., Ringwood. 5th. Stop: Section 2: Home Garden, Street Frontage not exceeding 65 ft. (20 m.) 6th. Stop: Section 1: Home Garden - Street Frontage exceeding 65 ft. (20 m) 1st Prize: Mr. B. Wheatley, 57 Oliver St., Ringwood. 7th. Stop: Afternoon Tea at the Ringwood Senior Citzens Clubrooms, Greenwood Ave., Ringwood. 8th. Stop: Eastland Carpark. We hope you have enjoyed our tour this afternoon and hope you will visit our Club's Spring Flower and Floral Art Show, which will be staged on Saturday 10th, & Sunday 11th. of October in the Ringwood Uniting Church Hall, Cnr. Station St. & Greenwood Ave., Ringwood. The show will be open on Saturday from 2.00 p.m. till 5.30 and on Sunday from 1.00 till 4.30 p.m. Entry is $1.00. Schedules and all Show information are available from the Show Secretary, Clive Manly on 873-2264. Prize Winners for the Garden Competition will receive their Certificates at the Show at the Official Opening by the Mayor of Ringwood at 3.00 p.m. on Saturday. Our show will feature displays of Cut Flowers & Shrubs, Plants in Containers, Floral Art, Cookery and Children's sections. Our Plant Stall will be operating during the days of the show and an excellent afternoon tea is available. COME TO THE SHOW AND BRING A FRIEND. OOOoooOOOoooOOO -
Ringwood and District Historical Society
Biography, Ringwood and District Historical Society, Interview notes - short biography on Miss Daisy Paddock, teacher at Ringwood State School, circa 1970s, c.1970s
... we managed to manouver through the bullrushes into the middle. The only thing that I forgot about was that I had a d<^ that went everywhere with me and, rather than bark from the bank, he swam over to us and tried to get aboard. Bath tubs are not known for their seaworthness and he tipped us all in the drink. Of course the bath sank like...we managed to manouver through the bullrushes into the middle. The only thing that I forgot about was that I had a d<^ that went everywhere with me and, rather than bark from the bank, he swam over to us and tried to get aboard. Bath tubs are not known for their seaworthness and he tipped us all in the drink. Of course the bath sank like ...Single page of notes/interview record of Miss Daisy Paddock, teacher at the Ringwood State School in Greenwood Avenue (now Federation Estate) - Interview write-up by Ringwood History Group.Transcript: "Miss Janet Daisy Paddock She was an extremely well-liked and well-regarded teacher at the old RW State School in Greenwood Ave (Now Federation Estate). She taught between the years of 1927 until 1941, then again after the war from 1951 until final retirement in 1961. In fact she was so liked that her former pupils formed "The 2997 Club" , which met in her honour every year for a meal (and, of course, their guest of honour). 2997 was the RW SS number. In some of her letters about early life in RW, she recalls the RW Mail being produced and printed in a small wooden building in Adelaide St. [Adelaide St is officially no longer on the RW map but it went from the highway nearly to Mullum Creek, between Melbourne St and Warrandyte Road.^ In fact there is an unmarked 100 metres of road that is on the west side of Officeworks that ends in a roundabout at the bottom of Eastland carpark. I don't believe it is exactly in the same position as the old Adelaide Street but it pretty close. That would put the old Mail office in the vicinity of the Maroondah Council service centre in Eastland.] She also recalls that there were nearly a dam on every corner. In fact, I recall in my 1950s/60s childhood that there were still many dams around. As I previously mentioned, with the RW-Mitcham claybelt, there wasn't much top soil and the orange clay is very fine, so when the banks of the dam get wet, it wass very slippery. I often remember playing around in those dams, as most boys did in those days. A friend and I spied an old bath used to water some horses so after some trial and errors we made it waterproof and fashioned a couple of paddles out of wooden fence pailings. The first launch in the local dam was fine and we managed to manouver through the bullrushes into the middle. The only thing that I forgot about was that I had a d<^ that went everywhere with me and, rather than bark from the bank, he swam over to us and tried to get aboard. Bath tubs are not known for their seaworthness and he tipped us all in the drink. Of course the bath sank like a rock. We scrambled on the bank and he added insult to injury when, as all dogs do, gave the usual shake and sprayed us with water. My mind often comes back to one dam right next to the Croydon pub - that provided water to the Magg's orchard - dug in the usual fashion on about 3 metres deep scraped in the local clay, it was at this dam in the early sixties that a young boy drowned. After that we were pretty careful around dams. Going back to Daisy's memories, she recalls that the kids often started late on Monday mornings as Monday was Market Day at RW. They used to watch the stock being herded into the yards and people getting off the steam trains. Her family home was at Gruyere and her father used to drive to RW market and stop midway at the Burnt Bridge hotel and rest the horses. [I suspect that he may have watered other things besides the horses.] They eventually moved to RW in Thanet St. Miss Paddock still remembers the old RW school at the corner of RW St and Whitehorse Road, it was very small so they built the new school in Greenwood Ave. RW had a population of around 2,(K)0 when Daisy became an Assistant Class Five. She used to walk through the open paddocks, surrounded by bush and orchards. She goes on to say that the bush was alive with wildlife and a natural playground for the children. Miss Paddock was a member of the Soroptomist Club in RW (equivalent to Rotary), active in the church and local community. At our archives, we have a plaque that grac^ the entrance to the school, naming it the Miss Daisy Paddock library, in honour of a great woman in our city." -
 Flagstaff Hill Maritime Museum and Village
Domestic object - Plate
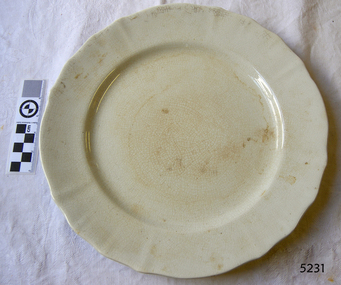
... we use. I can guess by the way they interact with each other, however, on the whole, you need to test every idea you have, and not run the test on a vertical surface! Simply put, glaze is a layer of glass like...we use. I can guess by the way they interact with each other, however, on the whole, you need to test every idea you have, and not run the test on a vertical surface! Simply put, glaze is a layer of glass like ...The Process of Making Pottery Decorating, Firing, Glazing, Making, Technical There is a rhythm and flow to clay. It can’t be done all at once! Even the making process! It can take weeks to get everything done, especially if you can only work on your pottery once a week! Even though we have three hour classes, it’s often just not enough time! Here is an overview of some of the processes so you have a bit more grasp on some of the technical stuff! Step One – Design There are SO many ideas out there for making stuff in clay! From delicate porcelain jewellery, through to heavy sculptural work and everything in between. Deciding your direction is sometimes not that easy – when you first start, try everything, you will naturally gravitate to the style that you enjoy! The options and variations are endless and can get a wee bit overwhelming too! Check in with me before you start to ensure your ideas will work, what order you might do things, how you could achieve the look you are seeking and any other technical data required! Step Two – Making Clay is thixotropic. This means that as you work with it, the clay first gets sloppier and wetter, before is begins to dry in the atmosphere. For most things, you simply can’t do all parts of the project at once. An example of work order might look like: Get last weeks work out from the shelves Prepare clay for today’s work – roll your clay, prepare balls for throwing, make the first stage of a pinch pot) Clean up last week’s work and put it on the shelf for bisque firing Check that you have any glazing to do – and do enough of it that you will have time to finish your main project Do the next step of your next project – there might be a further step that can’t be complete immediately, in that case, wrap your work well and put onto the shelves. Letting your work rest for a while can really help keep your work clean and professional looking. Many things require bagging under plastic to keep it ready for work the next week – put your name on the outside of the bag so you can find your work easily. We have stickers and markers. Consider how you want to decorate your work – coloured slip can be applied at a fairly wet stage (remembering that it will make your work even wetter!). Trying to apply slip to dry clay won’t work! If you want to do sgraffito – you will need to keep the work leather hard (a state of dryness where you can still work the clay with a little effort and a little water and care). Step Three – Drying Most of the time your work can go into the rack uncovered to let it dry out for the following week. If you want to continue forming or shaping you will need to double bag your work – put your work on a suitable sized bat and put the bat in a bag so the base of the bag is under the bat, then put another bag over the top of the work and tuck the top of the bag under the bat. If you want to trim (or turn) your thrown work the following week, it should also be double bagged. If your work is large, delicate, or of uneven thicknesses, you should lightly cover your work for drying. When considering the drying process, bare in mind the weather, humidity and wind! The hotter and dryer, the faster things dry and work can dry unevenly in the shelves – this can lead to cracking – another time to lightly cover your work for drying. Step Four – Trimming and Cleaning Up Your work is dry! It is called greenware now and it is at it’s most fragile! Handle everything with two hands. I often refer to soft hands – keep everything gentle and with your fingers spread as much as possible. Try to not pick up things like plates too much, and always with both hands! Before your work can be bisque fired it should be “cleaned up”. You work won’t go into the kiln if it has sharp edges – when glazed, sharp edges turn into razor blades! Use a piece of fly wire to rub the work all over – this will scratch a little so be light handed. Use a knife or metal kidney to scrape any areas that require a bit more dynamic treatment than the fly wire offers! Finally, a very light wipe over with a slightly damp sponge can help soften and soothe all of your edges and dags! Trimming thrown work: If you are planning to trim (or turn) your thrown work (and you should be), make sure you bag it well – your work should be leather hard to almost dry for easiest trimming. Use this step to finish the work completely – use a metal kidney to polish the surface, or a slightly damp sponge to give a freshly thrown look. Wipe the sponge around the rim after trimming, and check the inside of the pot for dags! Trimming slip cast work: Usually I will trim the rims of your work on the wheel the following day to make that stage easier, however you will still need to check your work for lumps and bumps. Last but not least – check that your name is still clearly on the bottom of your work. Step Five – Bisque Firing When the work is completely dry it can go into the bisque kiln. The bisque kiln is fired to 1000°C. This process burns off the water in the clay as well as some of the chemically bound water. The structure of the clay is not altered that much at this temperature. Inside the bisque kiln, the work is stacked a little, small bowl inside a larger bowl and onto a heavy plate. Smaller items like decorations or drink coasters might get stacked several high. Consideration is paid to the weight of the stack and shape of the work. A bisque kiln can fire about one and a half times the amount of work that the glaze kiln can fire. The firing takes about 10 hours to complete the cycle and about two days to cool down. Once it has been emptied the work is placed in the glaze room ready for you to decorate! Step Six – Glazing Decorating your work with colour can be a lot of fun – and time consuming! There are three main options for surface treatment at this stage: Oxide Washes Underglazes Glazes Washes and underglazes do not “glaze” the work – It will still need a layer of glaze to fully seal the clay (washes don’t need glaze on surfaces not designed for food or liquid as they can gloss up a little on their own). Underglazes are stable colourants that turn out pretty much how they look in the jar. They can be mixed with each other to form other colours and can be used like water colours to paint onto your work. Mostly they should have a clear glaze on top to seal them. Oxides are a different species – the pink oxide (cobalt) wash turns out bright blue for instance. They don’t always need a glaze on top, and some glazes can change the colour of the wash! The glazes need no other “glaze” on top! Be careful of unknown glaze interactions – you can put any combination of glaze in a bowl or on a plate, but only a single glaze on the outside of any vertical surface! Glazes are a chemical reaction under heat. We don’t know the exact chemicals in the Mayco glazes we use. I can guess by the way they interact with each other, however, on the whole, you need to test every idea you have, and not run the test on a vertical surface! Simply put, glaze is a layer of glass like substance that bonds with the clay underneath. Clay is made of silica, alumina and water. Glaze is made of mostly silica. Silica has a melting point of 1700°C and we fire to 1240°C. The silica requires a “flux” to help it melt at the lower temperature. Fluxes can be all sorts of chemicals – a common one is calcium – calcium has a melting point of 2500°C, however, together they both melt at a much lower temperature! Colourants are metal oxides like cobalt (blue), chrome (green through black), copper (green, blue, even red!), manganese (black, purple and pink) iron (red brown), etc. Different chemicals in the glaze can have dramatic effects. for example, barium carbonate (which we don’t use) turns manganese bright pink! Other elements can turn manganese dioxide brown, blue, purple and reddish brown. Manganese dioxide is a flux in and of itself as well. So, glazes that get their black and purple colours, often interact with other glazes and RUN! Our mirror black is a good example – it mixes really well with many glazes because it fluxes them – causes them to melt faster. It will also bring out many beautiful colours in the glazes because it’s black colouring most definitely comes from manganese dioxide! Glaze chemistry is a whole subject on it’s own! We use commercial Mayco glazes on purpose – for their huge range of colour possibilities, stability, cool interactions, artistic freedom with the ability to easily brush the glazes on and ease of use. We currently have almost 50 glazes on hand! A major project is to test the interactions of all glazes with each other. That is 2,500 test tiles!!!! I’m going to make the wall behind the wheels the feature wall of pretty colours! Step Seven – Glaze (Gloss or sometimes called “Glost”) Firing Most of the time this is the final stage of making your creation (but not always!) The glaze kiln goes to 1240°C. This is called cone 6, or midrange. It is the low end of stoneware temperatures. Stoneware clays and glazes are typically fired at cone 8 – 10, that is 1260 – 1290°C. The energy requirement to go from 1240°C to 1280°C is almost a 30% more! Our clay is formulated to vitrify (mature, turn “glass-like”) at 1240°, as are our glazes. A glaze kiln take around 12 hours to reach temperature and two to three days to cool down. Sometimes a third firing process is required – this is for decoration that is added to work after the glaze firing. For example – adding precious metals and lustres. this firing temperature is usually around 600 – 800°C depending upon the techniques being used. There are many students interested in gold and silver trims – we will be doing this third type of firing soon! After firing your work will be in the student finished work shelves. Remember to pay for it before you head out the door! There is a small extra charge for using porcelain clay (it’s more than twice the price of regular clay), and for any third firing process! Once your work has been fired it can not turn back into clay for millennia – so don’t fire it if you don’t like it! Put it in the bucket for recycling. https://firebirdstudios.com.au/the-process-of-making-pottery/Ceramics have evolved over thousands of years.White earthenware dinner plate. Crazing evident all over.Backstamped ‘Made in England S LTD’flagstaff hill, warrnambool, shipwrecked-coast, flagstaff-hill, flagstaff-hill-maritime-museum, maritime-museum, shipwreck-coast, flagstaff-hill-maritime-village, ceramics, tableware -
 Flagstaff Hill Maritime Museum and Village
Domestic object - Plate, Johnson Bros
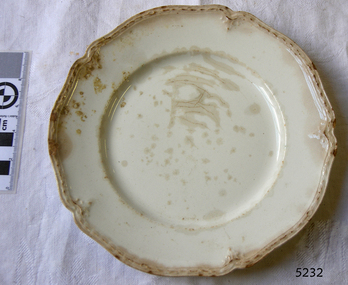
... we use. I can guess by the way they interact with each other, however, on the whole, you need to test every idea you have, and not run the test on a vertical surface! Simply put, glaze is a layer of glass like...we use. I can guess by the way they interact with each other, however, on the whole, you need to test every idea you have, and not run the test on a vertical surface! Simply put, glaze is a layer of glass like ...The Process of Making Pottery Decorating, Firing, Glazing, Making, Technical There is a rhythm and flow to clay. It can’t be done all at once! Even the making process! It can take weeks to get everything done, especially if you can only work on your pottery once a week! Even though we have three hour classes, it’s often just not enough time! Here is an overview of some of the processes so you have a bit more grasp on some of the technical stuff! Step One – Design There are SO many ideas out there for making stuff in clay! From delicate porcelain jewellery, through to heavy sculptural work and everything in between. Deciding your direction is sometimes not that easy – when you first start, try everything, you will naturally gravitate to the style that you enjoy! The options and variations are endless and can get a wee bit overwhelming too! Check in with me before you start to ensure your ideas will work, what order you might do things, how you could achieve the look you are seeking and any other technical data required! Step Two – Making Clay is thixotropic. This means that as you work with it, the clay first gets sloppier and wetter, before is begins to dry in the atmosphere. For most things, you simply can’t do all parts of the project at once. An example of work order might look like: Get last weeks work out from the shelves Prepare clay for today’s work – roll your clay, prepare balls for throwing, make the first stage of a pinch pot) Clean up last week’s work and put it on the shelf for bisque firing Check that you have any glazing to do – and do enough of it that you will have time to finish your main project Do the next step of your next project – there might be a further step that can’t be complete immediately, in that case, wrap your work well and put onto the shelves. Letting your work rest for a while can really help keep your work clean and professional looking. Many things require bagging under plastic to keep it ready for work the next week – put your name on the outside of the bag so you can find your work easily. We have stickers and markers. Consider how you want to decorate your work – coloured slip can be applied at a fairly wet stage (remembering that it will make your work even wetter!). Trying to apply slip to dry clay won’t work! If you want to do sgraffito – you will need to keep the work leather hard (a state of dryness where you can still work the clay with a little effort and a little water and care). Step Three – Drying Most of the time your work can go into the rack uncovered to let it dry out for the following week. If you want to continue forming or shaping you will need to double bag your work – put your work on a suitable sized bat and put the bat in a bag so the base of the bag is under the bat, then put another bag over the top of the work and tuck the top of the bag under the bat. If you want to trim (or turn) your thrown work the following week, it should also be double bagged. If your work is large, delicate, or of uneven thicknesses, you should lightly cover your work for drying. When considering the drying process, bare in mind the weather, humidity and wind! The hotter and dryer, the faster things dry and work can dry unevenly in the shelves – this can lead to cracking – another time to lightly cover your work for drying. Step Four – Trimming and Cleaning Up Your work is dry! It is called greenware now and it is at it’s most fragile! Handle everything with two hands. I often refer to soft hands – keep everything gentle and with your fingers spread as much as possible. Try to not pick up things like plates too much, and always with both hands! Before your work can be bisque fired it should be “cleaned up”. You work won’t go into the kiln if it has sharp edges – when glazed, sharp edges turn into razor blades! Use a piece of fly wire to rub the work all over – this will scratch a little so be light handed. Use a knife or metal kidney to scrape any areas that require a bit more dynamic treatment than the fly wire offers! Finally, a very light wipe over with a slightly damp sponge can help soften and soothe all of your edges and dags! Trimming thrown work: If you are planning to trim (or turn) your thrown work (and you should be), make sure you bag it well – your work should be leather hard to almost dry for easiest trimming. Use this step to finish the work completely – use a metal kidney to polish the surface, or a slightly damp sponge to give a freshly thrown look. Wipe the sponge around the rim after trimming, and check the inside of the pot for dags! Trimming slip cast work: Usually I will trim the rims of your work on the wheel the following day to make that stage easier, however you will still need to check your work for lumps and bumps. Last but not least – check that your name is still clearly on the bottom of your work. Step Five – Bisque Firing When the work is completely dry it can go into the bisque kiln. The bisque kiln is fired to 1000°C. This process burns off the water in the clay as well as some of the chemically bound water. The structure of the clay is not altered that much at this temperature. Inside the bisque kiln, the work is stacked a little, small bowl inside a larger bowl and onto a heavy plate. Smaller items like decorations or drink coasters might get stacked several high. Consideration is paid to the weight of the stack and shape of the work. A bisque kiln can fire about one and a half times the amount of work that the glaze kiln can fire. The firing takes about 10 hours to complete the cycle and about two days to cool down. Once it has been emptied the work is placed in the glaze room ready for you to decorate! Step Six – Glazing Decorating your work with colour can be a lot of fun – and time consuming! There are three main options for surface treatment at this stage: Oxide Washes Underglazes Glazes Washes and underglazes do not “glaze” the work – It will still need a layer of glaze to fully seal the clay (washes don’t need glaze on surfaces not designed for food or liquid as they can gloss up a little on their own). Underglazes are stable colourants that turn out pretty much how they look in the jar. They can be mixed with each other to form other colours and can be used like water colours to paint onto your work. Mostly they should have a clear glaze on top to seal them. Oxides are a different species – the pink oxide (cobalt) wash turns out bright blue for instance. They don’t always need a glaze on top, and some glazes can change the colour of the wash! The glazes need no other “glaze” on top! Be careful of unknown glaze interactions – you can put any combination of glaze in a bowl or on a plate, but only a single glaze on the outside of any vertical surface! Glazes are a chemical reaction under heat. We don’t know the exact chemicals in the Mayco glazes we use. I can guess by the way they interact with each other, however, on the whole, you need to test every idea you have, and not run the test on a vertical surface! Simply put, glaze is a layer of glass like substance that bonds with the clay underneath. Clay is made of silica, alumina and water. Glaze is made of mostly silica. Silica has a melting point of 1700°C and we fire to 1240°C. The silica requires a “flux” to help it melt at the lower temperature. Fluxes can be all sorts of chemicals – a common one is calcium – calcium has a melting point of 2500°C, however, together they both melt at a much lower temperature! Colourants are metal oxides like cobalt (blue), chrome (green through black), copper (green, blue, even red!), manganese (black, purple and pink) iron (red brown), etc. Different chemicals in the glaze can have dramatic effects. for example, barium carbonate (which we don’t use) turns manganese bright pink! Other elements can turn manganese dioxide brown, blue, purple and reddish brown. Manganese dioxide is a flux in and of itself as well. So, glazes that get their black and purple colours, often interact with other glazes and RUN! Our mirror black is a good example – it mixes really well with many glazes because it fluxes them – causes them to melt faster. It will also bring out many beautiful colours in the glazes because it’s black colouring most definitely comes from manganese dioxide! Glaze chemistry is a whole subject on it’s own! We use commercial Mayco glazes on purpose – for their huge range of colour possibilities, stability, cool interactions, artistic freedom with the ability to easily brush the glazes on and ease of use. We currently have almost 50 glazes on hand! A major project is to test the interactions of all glazes with each other. That is 2,500 test tiles!!!! I’m going to make the wall behind the wheels the feature wall of pretty colours! Step Seven – Glaze (Gloss or sometimes called “Glost”) Firing Most of the time this is the final stage of making your creation (but not always!) The glaze kiln goes to 1240°C. This is called cone 6, or midrange. It is the low end of stoneware temperatures. Stoneware clays and glazes are typically fired at cone 8 – 10, that is 1260 – 1290°C. The energy requirement to go from 1240°C to 1280°C is almost a 30% more! Our clay is formulated to vitrify (mature, turn “glass-like”) at 1240°, as are our glazes. A glaze kiln take around 12 hours to reach temperature and two to three days to cool down. Sometimes a third firing process is required – this is for decoration that is added to work after the glaze firing. For example – adding precious metals and lustres. this firing temperature is usually around 600 – 800°C depending upon the techniques being used. There are many students interested in gold and silver trims – we will be doing this third type of firing soon! After firing your work will be in the student finished work shelves. Remember to pay for it before you head out the door! There is a small extra charge for using porcelain clay (it’s more than twice the price of regular clay), and for any third firing process! Once your work has been fired it can not turn back into clay for millennia – so don’t fire it if you don’t like it! Put it in the bucket for recycling. https://firebirdstudios.com.au/the-process-of-making-pottery/Ceramics have evolved over thousands of years.A white earthenware side plate with a gadroon edge. Has water marks and chips on front.‘Johnson Bros England Reg No 15587’flagstaff hill, warrnambool, shipwrecked-coast, flagstaff-hill, flagstaff-hill-maritime-museum, maritime-museum, shipwreck-coast, flagstaff-hill-maritime-village, johnson bros, ceramics, tableware -
 Flagstaff Hill Maritime Museum and Village
Domestic object - Plate, Alfred Meakin
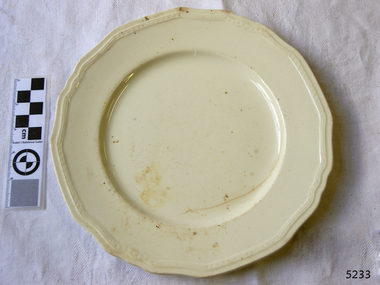
... we use. I can guess by the way they interact with each other, however, on the whole, you need to test every idea you have, and not run the test on a vertical surface! Simply put, glaze is a layer of glass like...we use. I can guess by the way they interact with each other, however, on the whole, you need to test every idea you have, and not run the test on a vertical surface! Simply put, glaze is a layer of glass like ...The Process of Making Pottery Decorating, Firing, Glazing, Making, Technical There is a rhythm and flow to clay. It can’t be done all at once! Even the making process! It can take weeks to get everything done, especially if you can only work on your pottery once a week! Even though we have three hour classes, it’s often just not enough time! Here is an overview of some of the processes so you have a bit more grasp on some of the technical stuff! Step One – Design There are SO many ideas out there for making stuff in clay! From delicate porcelain jewellery, through to heavy sculptural work and everything in between. Deciding your direction is sometimes not that easy – when you first start, try everything, you will naturally gravitate to the style that you enjoy! The options and variations are endless and can get a wee bit overwhelming too! Check in with me before you start to ensure your ideas will work, what order you might do things, how you could achieve the look you are seeking and any other technical data required! Step Two – Making Clay is thixotropic. This means that as you work with it, the clay first gets sloppier and wetter, before is begins to dry in the atmosphere. For most things, you simply can’t do all parts of the project at once. An example of work order might look like: Get last weeks work out from the shelves Prepare clay for today’s work – roll your clay, prepare balls for throwing, make the first stage of a pinch pot) Clean up last week’s work and put it on the shelf for bisque firing Check that you have any glazing to do – and do enough of it that you will have time to finish your main project Do the next step of your next project – there might be a further step that can’t be complete immediately, in that case, wrap your work well and put onto the shelves. Letting your work rest for a while can really help keep your work clean and professional looking. Many things require bagging under plastic to keep it ready for work the next week – put your name on the outside of the bag so you can find your work easily. We have stickers and markers. Consider how you want to decorate your work – coloured slip can be applied at a fairly wet stage (remembering that it will make your work even wetter!). Trying to apply slip to dry clay won’t work! If you want to do sgraffito – you will need to keep the work leather hard (a state of dryness where you can still work the clay with a little effort and a little water and care). Step Three – Drying Most of the time your work can go into the rack uncovered to let it dry out for the following week. If you want to continue forming or shaping you will need to double bag your work – put your work on a suitable sized bat and put the bat in a bag so the base of the bag is under the bat, then put another bag over the top of the work and tuck the top of the bag under the bat. If you want to trim (or turn) your thrown work the following week, it should also be double bagged. If your work is large, delicate, or of uneven thicknesses, you should lightly cover your work for drying. When considering the drying process, bare in mind the weather, humidity and wind! The hotter and dryer, the faster things dry and work can dry unevenly in the shelves – this can lead to cracking – another time to lightly cover your work for drying. Step Four – Trimming and Cleaning Up Your work is dry! It is called greenware now and it is at it’s most fragile! Handle everything with two hands. I often refer to soft hands – keep everything gentle and with your fingers spread as much as possible. Try to not pick up things like plates too much, and always with both hands! Before your work can be bisque fired it should be “cleaned up”. You work won’t go into the kiln if it has sharp edges – when glazed, sharp edges turn into razor blades! Use a piece of fly wire to rub the work all over – this will scratch a little so be light handed. Use a knife or metal kidney to scrape any areas that require a bit more dynamic treatment than the fly wire offers! Finally, a very light wipe over with a slightly damp sponge can help soften and soothe all of your edges and dags! Trimming thrown work: If you are planning to trim (or turn) your thrown work (and you should be), make sure you bag it well – your work should be leather hard to almost dry for easiest trimming. Use this step to finish the work completely – use a metal kidney to polish the surface, or a slightly damp sponge to give a freshly thrown look. Wipe the sponge around the rim after trimming, and check the inside of the pot for dags! Trimming slip cast work: Usually I will trim the rims of your work on the wheel the following day to make that stage easier, however you will still need to check your work for lumps and bumps. Last but not least – check that your name is still clearly on the bottom of your work. Step Five – Bisque Firing When the work is completely dry it can go into the bisque kiln. The bisque kiln is fired to 1000°C. This process burns off the water in the clay as well as some of the chemically bound water. The structure of the clay is not altered that much at this temperature. Inside the bisque kiln, the work is stacked a little, small bowl inside a larger bowl and onto a heavy plate. Smaller items like decorations or drink coasters might get stacked several high. Consideration is paid to the weight of the stack and shape of the work. A bisque kiln can fire about one and a half times the amount of work that the glaze kiln can fire. The firing takes about 10 hours to complete the cycle and about two days to cool down. Once it has been emptied the work is placed in the glaze room ready for you to decorate! Step Six – Glazing Decorating your work with colour can be a lot of fun – and time consuming! There are three main options for surface treatment at this stage: Oxide Washes Underglazes Glazes Washes and underglazes do not “glaze” the work – It will still need a layer of glaze to fully seal the clay (washes don’t need glaze on surfaces not designed for food or liquid as they can gloss up a little on their own). Underglazes are stable colourants that turn out pretty much how they look in the jar. They can be mixed with each other to form other colours and can be used like water colours to paint onto your work. Mostly they should have a clear glaze on top to seal them. Oxides are a different species – the pink oxide (cobalt) wash turns out bright blue for instance. They don’t always need a glaze on top, and some glazes can change the colour of the wash! The glazes need no other “glaze” on top! Be careful of unknown glaze interactions – you can put any combination of glaze in a bowl or on a plate, but only a single glaze on the outside of any vertical surface! Glazes are a chemical reaction under heat. We don’t know the exact chemicals in the Mayco glazes we use. I can guess by the way they interact with each other, however, on the whole, you need to test every idea you have, and not run the test on a vertical surface! Simply put, glaze is a layer of glass like substance that bonds with the clay underneath. Clay is made of silica, alumina and water. Glaze is made of mostly silica. Silica has a melting point of 1700°C and we fire to 1240°C. The silica requires a “flux” to help it melt at the lower temperature. Fluxes can be all sorts of chemicals – a common one is calcium – calcium has a melting point of 2500°C, however, together they both melt at a much lower temperature! Colourants are metal oxides like cobalt (blue), chrome (green through black), copper (green, blue, even red!), manganese (black, purple and pink) iron (red brown), etc. Different chemicals in the glaze can have dramatic effects. for example, barium carbonate (which we don’t use) turns manganese bright pink! Other elements can turn manganese dioxide brown, blue, purple and reddish brown. Manganese dioxide is a flux in and of itself as well. So, glazes that get their black and purple colours, often interact with other glazes and RUN! Our mirror black is a good example – it mixes really well with many glazes because it fluxes them – causes them to melt faster. It will also bring out many beautiful colours in the glazes because it’s black colouring most definitely comes from manganese dioxide! Glaze chemistry is a whole subject on it’s own! We use commercial Mayco glazes on purpose – for their huge range of colour possibilities, stability, cool interactions, artistic freedom with the ability to easily brush the glazes on and ease of use. We currently have almost 50 glazes on hand! A major project is to test the interactions of all glazes with each other. That is 2,500 test tiles!!!! I’m going to make the wall behind the wheels the feature wall of pretty colours! Step Seven – Glaze (Gloss or sometimes called “Glost”) Firing Most of the time this is the final stage of making your creation (but not always!) The glaze kiln goes to 1240°C. This is called cone 6, or midrange. It is the low end of stoneware temperatures. Stoneware clays and glazes are typically fired at cone 8 – 10, that is 1260 – 1290°C. The energy requirement to go from 1240°C to 1280°C is almost a 30% more! Our clay is formulated to vitrify (mature, turn “glass-like”) at 1240°, as are our glazes. A glaze kiln take around 12 hours to reach temperature and two to three days to cool down. Sometimes a third firing process is required – this is for decoration that is added to work after the glaze firing. For example – adding precious metals and lustres. this firing temperature is usually around 600 – 800°C depending upon the techniques being used. There are many students interested in gold and silver trims – we will be doing this third type of firing soon! After firing your work will be in the student finished work shelves. Remember to pay for it before you head out the door! There is a small extra charge for using porcelain clay (it’s more than twice the price of regular clay), and for any third firing process! Once your work has been fired it can not turn back into clay for millennia – so don’t fire it if you don’t like it! Put it in the bucket for recycling. https://firebirdstudios.com.au/the-process-of-making-pottery/Ceramics have evolved over thousands of years.Earthenware dessert plate, cream colour. Made by Alfred Meakin, England. Backstamped ‘Alfred Meakin England’. flagstaff hill, warrnambool, shipwrecked-coast, flagstaff-hill, flagstaff-hill-maritime-museum, maritime-museum, shipwreck-coast, flagstaff-hill-maritime-village, alfred meakin, ceramics, earthenware, kitchenware -
 Flagstaff Hill Maritime Museum and Village
Container - Medical container, Late 19th century or early 20th century
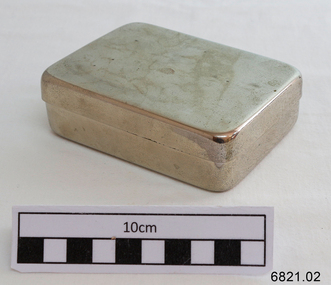
... The second point is that stainless steel wasn’t truly defined until 1911, so are we to cast aside those chromium-iron alloys that don’t quite meet the minimum requirement of 10.5% chromium? It seems like...The second point is that stainless steel wasn’t truly defined until 1911, so are we to cast aside those chromium-iron alloys that don’t quite meet the minimum requirement of 10.5% chromium? It seems like ...THE DISCOVERY OF STAINLESS STEEL Harry Brearley Since the dawn of man colonies have raced against each other to uncover new technologies, to be the first to stamp their names on a discovery, and although we’ve evolved over millions of years, the urge to be the first remains at the very core of our nature. This sense of passion and pride can lead some of the more unscrupulous humans to claim others discoveries as their own. Of course many breakthroughs are genuinely made in tandem, or are simultaneously occurring, but unless you can categorically prove that you were the pioneer of these incredible findings, then the other party involved will always dispute the fact. And so we come to stainless steel. The first point to note is that ‘inventor’ is a very ambiguous term. Is this the first person to think, to document, to patent, or to produce? The second point is that stainless steel wasn’t truly defined until 1911, so are we to cast aside those chromium-iron alloys that don’t quite meet the minimum requirement of 10.5% chromium? It seems like anyone and everyone has a different claim to being labelled the ‘inventor’ of stainless steel; from Britain, Germany, France, Poland, the U.S.A., and even Sweden. The cogs were set in motion by Englishmen Stoddart and Faraday circa 1820 and Frenchman Pierre Berthier in 1821. These scientists, among others, noted that iron-chromium alloys were more resistant to attack by certain acids, but tests were only carried out on low chromium content alloys. Attempts to produce higher chromium alloys failed primarily because of scientists not understanding the importance of low carbon content. In 1872 another pair of Englishmen, Woods and Clark, filed for patent of an acid and weather resistant iron alloy containing 30-35% chromium and 2% tungsten, effectively the first ever patent on what would now be considered a stainless steel. However, the real development came in 1875 when a Frenchman named Brustlein detailed the importance of low carbon content in successfully making stainless steel. Brustlein pointed out that in order to create an alloy with a high percentage of chromium, the carbon content must remain below around 0.15%. Thus ensued two decades of stagnation for the development of stainless steel, and while many scientists attempted to create a low carbon stainless steel, none succeeded. Hans Goldschmidt It wasn’t until 1895, when Hans Goldschmidt of Germany developed the aluminothermic reduction process for producing carbon-free chromium, that development of stainless steels became a reality. In 1904 French Scientist Leon Guillet undertook extensive research on many iron-chromium alloys. Guillet’s work included studies on the composition of what would now be known as 410, 420, 442, 446 and 440-C. In 1906 Guillet went on to analyse iron-nickel-chrome alloys, which would now be considered the basics of the 300 series. However, while noting the chemical composition of his alloys, Guillet failed to acknowledge the potential corrosion resistance of his materials. Albert Portevin In 1909 Englishman Giesen published an in-depth work regarding chromium-nickel steels, while the French national, Portevin, studied what is now regarded as 430 stainless steel. However, it wasn’t until 1911 that the importance of a minimum chromium content was discovered by Germans P. Monnartz and W. Borchers. Monnartz and Borchers discovered the correlation between chromium content and corrosion resistance, stating that there was a significant boost in corrosion resistance when at least 10.5% chromium was present. The pair also published detailed works on the effects of molybdenum on corrosion resistance. It is at this point we introduce Harry Brearley, born in Sheffield, England in 1871, he was appointed lead researcher at Brown Firth Laboratories in 1908. In 1912 Brearley was given a task by a small arms manufacturer who wished to prolong the life of their gun barrels which were eroding away too quickly. Brearley set out to create an erosion resistant steel, not a corrosion resistant one, and began experimenting with steel alloys containing chromium. During these experiments Brearley made several variations of his alloys, ranging from 6% to 15% chromium with differing levels of carbon. On the 13th August 1913 Brearley created a steel with 12.8% chromium and 0.24% carbon, argued to be the first ever stainless steel. The circumstances in which Brearley discovered stainless steel are covered in myth; some enchanted tales of Brearley recite him tossing his steel into the rubbish, only to notice later that the steel hadn’t rusted to the extent of its counterparts, much like Alexander Fleming’s experience 15 years later. Other more plausible, (but less attractive), accounts claim it was necessary for Brearley to etch his steels with nitric acid and examine them under a microscope in order to analyse their potential resistance to chemical attack. Brearley found that his new steel resisted these chemical attacks and proceeded to test the sample with other agents, including lemon juice and vinegar. Brearley was astounded to find that his alloys were still highly resistant, and immediately recognised the potential for his steel within the cutlery industry. The Half Moon Brearley struggled to win the support of his employers, instead choosing to produce his new steel at local cutler R. F. Mosley. He found difficulty producing knife blades in the new steel that did not rust or stain and turned to his old school friend, Ernest Stuart, Cutlery Manager at Mosley’s Portland Works, for help. Within 3 weeks, Stuart had perfected the hardening process for knives. Brearley had initially decided to name his invention ‘Rustless Steel’, but Stuart, dubbed it ‘Stainless Steel’ after testing the material in a vinegar solution, and the name stuck. And that’s how Harry Brearley discovered stainless steel…. well, not quite… During the 5 year period between 1908 and Brearley’s discovery in 1913 many other scientists and metallurgists have potential claims to Brearley’s title. In 1908 the Germans entered the fray, the Krupp Iron Works in Germany produced a chrome-nickel steel for the hull of the Germania yacht. The Half Moon, as the yacht is now known, has a rich history and currently lies on the seabed off the east coast of Florida. Whether the steel contains the minimum 10.5% chromium content remains inconclusive. Employees of the Krupp works, Eduard Maurer and Benno Strauss, also worked from 1912-1914 on developing austenitic steels using <1% carbon, <20% nickel and 15-40% chromium. Not happy with Europe hogging the glory, the USA got in on the act. Firstly, Elwood Haynes, after becoming disenchanted at his rusty razor, set out to create a corrosion resistant steel, which he supposedly succeeded in doing during 1911. Two other Americans, Becket and Dantsizen, worked on ferritic stainless steels, containing 14-16% chromium and 0.07-0.15% carbon, in the years 1911-1914. Elwood Haynes During 1912 Max Mauermann of Poland is rumoured to have created the first stainless steel, which he later presented to the public during the Adria exhibition in Vienna, 1913. Finally, a recently discovered article, which was published in a Swedish hunting and fishing magazine in 1913, discusses a steel used for gun barrels, (sound familiar?), which seems to resemble stainless steel. Although this is purely speculation, the Swedes have still made an audacious claim that they were in fact responsible for the first practical application for stainless steel. That concludes the shambolic discovery of stainless steel! Although there is much mystery and speculation behind the discovery of this wonderful material, there is no question that without the combined effort of all the above scientists and metallurgists, (and all the many more that were not mentioned), we would not have such a rich and versatile metal at our fingertips. https://bssa.org.uk/bssa_articles/the-discovery-of-stainless-steel/#:~:text=On%20the%2013th%20August%201913,the%20first%20ever%20stainless%20steel. This stainless steel container was donated to Flagstaff Hill Maritime Village by the family of Doctor William Roy Angus, Surgeon and Oculist. It is part of the “W.R. Angus Collection” that includes historical medical equipment, surgical instruments and material once belonging to Dr Edward Ryan and Dr Thomas Francis Ryan, (both of Nhill, Victoria) as well as Dr Angus’ own belongings. The Collection’s history spans the medical practices of the two Doctors Ryan, from 1885-1926 plus that of Dr Angus, up until 1969. ABOUT THE “W.R.ANGUS COLLECTION” Doctor William Roy Angus M.B., B.S., Adel., 1923, F.R.C.S. Edin.,1928 (also known as Dr Roy Angus) was born in Murrumbeena, Victoria in 1901 and lived until 1970. He qualified as a doctor in 1923 at University of Adelaide, was Resident Medical Officer at the Royal Adelaide Hospital in 1924 and for a period was house surgeon to Sir (then Mr.) Henry Simpson Newland. Dr Angus was briefly an Assistant to Dr Riddell of Kapunda, then commenced private practice at Curramulka, Yorke Peninsula, SA, where he was physician, surgeon and chemist. In 1926, he was appointed as new Medical Assistant to Dr Thomas Francis Ryan (T.F. Ryan, or Tom), in Nhill, Victoria, where his experiences included radiology and pharmacy. In 1927 he was Acting House Surgeon in Dr Tom Ryan’s absence. Dr Angus had become engaged to Gladys Forsyth and they decided he would take time to further his studies overseas in the UK in 1927. He studied at London University College Hospital and at Edinburgh Royal Infirmary and in 1928, was awarded FRCS (Fellow from the Royal College of Surgeons), Edinburgh. He worked his passage back to Australia as a Ship’s Surgeon on the on the Australian Commonwealth Line’s T.S.S. Largs Bay. Dr Angus married Gladys in 1929, in Ballarat. (They went on to have one son (Graham 1932, born in SA) and two daughters (Helen (died 12/07/1996) and Berenice (Berry), both born at Mira, Nhill ) Dr Angus was a ‘flying doctor’ for the A.I.M. (Australian Inland Ministry) Aerial Medical Service in 1928 . The organisation began in South Australia through the Presbyterian Church in that year, with its first station being in the remote town of Oodnadatta, where Dr Angus was stationed. He was locum tenens there on North-South Railway at 21 Mile Camp. He took up this ‘flying doctor’ position in response to a call from Dr John Flynn; the organisation was later known as the Flying Doctor Service, then the Royal Flying Doctor Service. A lot of his work during this time involved dental surgery also. Between 1928-1932 he was surgeon at the Curramulka Hospital, Yorke Peninsula, South Australia. In 1933 Dr Angus returned to Nhill where he’d previously worked as Medical Assistant and purchased a share of the Nelson Street practice and Mira hospital from Dr Les Middleton one of the Middleton Brothers, the current owners of what was once Dr Tom Ryan’s practice. Dr L Middleton was House Surgeon to the Nhill Hospital 1926-1933, when he resigned. [Dr Tom Ryan’s practice had originally belonged to his older brother Dr Edward Ryan, who came to Nhill in 1885. Dr Edward saw patients at his rooms, firstly in Victoria Street and in 1886 in Nelson Street, until 1901. The Nelson Street practice also had a 2 bed ward, called Mira Private Hospital ). Dr Edward Ryan was House Surgeon at the Nhill Hospital 1884-1902 . He also had occasions where he successfully performed veterinary surgery for the local farmers too. Dr Tom Ryan then purchased the practice from his brother in 1901. Both Dr Edward and Dr Tom Ryan work as surgeons included eye surgery. Dr Tom Ryan performed many of his operations in the Mira private hospital on his premises. He too was House Surgeon at the Nhill Hospital 1902-1926. Dr Tom Ryan had one of the only two pieces of radiology equipment in Victoria during his practicing years – The Royal Melbourne Hospital had the other one. Over the years Dr Tom Ryan gradually set up what was effectively a training school for country general-practitioner-surgeons. Each patient was carefully examined, including using the X-ray machine, and any surgery was discussed and planned with Dr Ryan’s assistants several days in advance. Dr Angus gained experience in using the X-ray machine there during his time as assistant to Dr Ryan. Dr Tom Ryan moved from Nhill in 1926. He became a Fellow of the Royal Australasian College of Surgeons in 1927, soon after its formation, a rare accolade for a doctor outside any of the major cities. He remained a bachelor and died suddenly on 7th Dec 1955, aged 91, at his home in Ararat. Scholarships and prizes are still awarded to medical students in the honour of Dr T.F. Ryan and his father, Dr Michael Ryan, and brother, John Patrick Ryan. ] When Dr Angus bought into the Nelson Street premises in Nhill he was also appointed as the Nhill Hospital’s Honorary House Surgeon 1933-1938. His practitioner’s plate from his Nhill surgery states “HOURS Daily, except Tuesdays, Fridays and Saturday afternoons, 9-10am, 2-4pm, 7-8pm. Sundays by appointment”. This plate is now mounted on the doorway to the Port Medical Office at Flagstaff Hill Maritime Village, Warrnambool. Dr Edward Ryan and Dr Tom Ryan had an extensive collection of historical medical equipment and materials spanning 1884-1926 and when Dr Angus took up practice in their old premises he obtained this collection, a large part of which is now on display at the Port Medical Office at Flagstaff Hill Maritime Village in Warrnambool. During his time in Nhill Dr Angus was involved in the merging of the Mira Hospital and Nhill Public Hospital into one public hospital and the property titles passed on to Nhill Hospital in 1939. In 1939 Dr Angus and his family moved to Warrnambool where he purchased “Birchwood,” the 1852 home and medical practice of Dr John Hunter Henderson, at 214 Koroit Street. (This property was sold in1965 to the State Government and is now the site of the Warrnambool Police Station. ). The Angus family was able to afford gardeners, cooks and maids; their home was a popular place for visiting dignitaries to stay whilst visiting Warrnambool. Dr Angus had his own silk worm farm at home in a Mulberry tree. His young daughter used his centrifuge for spinning the silk. Dr Angus was appointed on a part-time basis as Port Medical Officer (Health Officer) in Warrnambool and held this position until the 1940’s when the government no longer required the service of a Port Medical Officer in Warrnambool; he was thus Warrnambool’s last serving Port Medical Officer. (The duties of a Port Medical Officer were outlined by the Colonial Secretary on 21st June, 1839 under the terms of the Quarantine Act. Masters of immigrant ships arriving in port reported incidents of diseases, illness and death and the Port Medical Officer made a decision on whether the ship required Quarantine and for how long, in this way preventing contagious illness from spreading from new immigrants to the residents already in the colony.) Dr Angus was a member of the Australian Medical Association, for 35 years and surgeon at the Warrnambool Base Hospital 1939-1942, He served as a Surgeon Captain during WWII1942-45, in Ballarat, Victoria, and in Bonegilla, N.S.W., completing his service just before the end of the war due to suffering from a heart attack. During his convalescence he carved an intricate and ‘most artistic’ chess set from the material that dentures were made from. He then studied ophthalmology at the Royal Melbourne Eye and Ear Hospital and created cosmetically superior artificial eyes by pioneering using the intrascleral cartilage. Angus received accolades from the Ophthalmological Society of Australasia for this work. He returned to Warrnambool to commence practice as an ophthalmologist, pioneering in artificial eye improvements. He was Honorary Consultant Ophthalmologist to Warrnambool Base Hospital for 31 years. He made monthly visits to Portland as a visiting surgeon, to perform eye surgery. He represented the Victorian South-West subdivision of the Australian Medical Association as its secretary between 1949 and 1956 and as chairman from 1956 to 1958. In 1968 Dr Angus was elected member of Spain’s Barraquer Institute of Barcelona after his research work in Intrasclearal cartilage grafting, becoming one of the few Australian ophthalmologists to receive this honour, and in the following year presented his final paper on Living Intrasclearal Cartilage Implants at the Inaugural Meeting of the Australian College of Ophthalmologists in Melbourne In his personal life Dr Angus was a Presbyterian and treated Sunday as a Sabbath, a day of rest. He would visit 3 or 4 country patients on a Sunday, taking his children along ‘for the ride’ and to visit with him. Sunday evenings he would play the pianola and sing Scottish songs to his family. One of Dr Angus’ patients was Margaret MacKenzie, author of a book on local shipwrecks that she’d seen as an eye witness from the late 1880’s in Peterborough, Victoria. In the early 1950’s Dr Angus, painted a picture of a shipwreck for the cover jacket of Margaret’s book, Shipwrecks and More Shipwrecks. She was blind in later life and her daughter wrote the actual book for her. Dr Angus and his wife Gladys were very involved in Warrnambool’s society with a strong interest in civic affairs. Their interests included organisations such as Red Cross, Rostrum, Warrnambool and District Historical Society (founding members), Wine and Food Society, Steering Committee for Tertiary Education in Warrnambool, Local National Trust, Good Neighbour Council, Housing Commission Advisory Board, United Services Institute, Legion of Ex-Servicemen, Olympic Pool Committee, Food for Britain Organisation, Warrnambool Hospital, Anti-Cancer Council, Boys’ Club, Charitable Council, National Fitness Council and Air Raid Precautions Group. He was also a member of the Steam Preservation Society and derived much pleasure from a steam traction engine on his farm. He had an interest in people and the community He and his wife Gladys were both involved in the creation of Flagstaff Hill, including the layout of the gardens. After his death (28th March 1970) his family requested his practitioner’s plate, medical instruments and some personal belongings be displayed in the Port Medical Office surgery at Flagstaff Hill Maritime Village, and be called the “W. R. Angus Collection”. The W.R. Angus Collection is significant for still being located at the site it is connected with, Doctor Angus being the last Port Medical Officer in Warrnambool. The collection of medical instruments and other equipment is culturally significant, being an historical example of medicine from late 19th to mid-20th century. Dr Angus assisted Dr Tom Ryan, a pioneer in the use of X-rays and in ocular surgery. Medical box; rectangular stainless steel base and separate lid, from the W.R. Angus Collection.warrnambool, flagstaff hill maritime museum, great ocean road, dr w r angus, dr ryan, surgical instrument, t.s.s. largs bay, warrnambool base hospital, nhill base hospital, mira hospital, flying doctor, medical treatment, stainless steel medical container, medical container, stainless steel -
 Glenelg Shire Council Cultural Collection
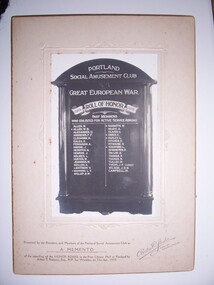
Photograph - Photograph - Portland Social Amusement Club, n.d
... we celebrate." To Mr D. McDonald the toast of the Absent and Foundation members was entrusted, and as usual, that veteran discharged his duty well. II i cferred to the fact that of the 34 foundation members who started the Club in 1897,only five were present that evening. Mr W. T. Bennett, as one of the five referred to, responded, and hoped that in the glorious future that appeared before Portland, the Club, which had been started in the days of its adversity, would flourish in a like manner. ...we celebrate." To Mr D. McDonald the toast of the Absent and Foundation members was entrusted, and as usual, that veteran discharged his duty well. II i cferred to the fact that of the 34 foundation members who started the Club in 1897,only five were present that evening. Mr W. T. Bennett, as one of the five referred to, responded, and hoped that in the glorious future that appeared before Portland, the Club, which had been started in the days of its adversity, would flourish in a like manner. ...The Portland Social Amusement Club was founded in 1897. Taken from Trove. Portland Guardian Monday May 26 1913: Portland Social Amusement Club. The members of the above Club celebrated the 16th anniversary of its foundation on Tuesday evening last, when the usual banquet. and social gathering was held. During the afternoon, a numerous band of the lady members attended at the, Free Library Hall and made the necessary arrangements, so that on arrival at the scene at 8 p.m. those attending were very pleasurably surprised to find most taste fully decorated tables actually groaning with the weight of all those good things which appeal so strongly, it is said, to the average man, and perhaps we may also add, woman also. At any rate, he would indeed be hard to please, who was not fully satisfied with all that was placed before him on that eventful evening. The attendance this year overtopped that of previous years, as over 80 ladies and gentlemen took part in what must be considered as one of the most successful of the many 'successful gatherings that have taken place. This 16th anniversary was the 431st ordinary gathering that had occurred, and, as the President (Mr. F. A.Row) justly said, it would appear that the Club, which many years ago was given but six months live, had proved the falsity of the attempted prophecy. After the principal business of the gathering had been transacted, the usual Club dinner speeches were made. The President gave "The King," which after being duly honored, was followed by the principal toast of the evening, "The day we celebrate." To Mr D. McDonald the toast of the Absent and Foundation members was entrusted, and as usual, that veteran discharged his duty well. II i cferred to the fact that of the 34 foundation members who started the Club in 1897,only five were present that evening. Mr W. T. Bennett, as one of the five referred to, responded, and hoped that in the glorious future that appeared before Portland, the Club, which had been started in the days of its adversity, would flourish in a like manner. Mr Grant proposed the toast of "Our Visitors." and in the name of the Club welcomed them to this the most important gathering of the year. Mr J. R. Woods responded in his usual happy way, and acknowledged that, until he had been the Club's guest during the years of his mayoralty of the town, he had no idea that it had enrolled among its members the number of ladies and gentlemen that it had or that its functions were upon the scale that he had since found to be the case. Mr G. H. .ennett upheld the claims of the ladies, especially those belonging to the Club. He evidently spoke with much feeling, and. waxed more than usually poetical in his eulogy of the graces and skill of the gentler sex. He rather upset the equilibrium of three of the younger portion of the gentlemen present by asking them to respond, but they all managed to "upstand" and make their acknowledgments. Mr T. F. Cruse was particularly happy in proposing the toast of. "The President and Members of Committee," who, he claimed, had done so much towards the success of the Club, and were deserving of the best that the members could give. Mr T. E. C. Henry, upon the invitation of the .President, responded,-end pointed out that [whilst it might appear that the work of the committee was light, it was not so in reality, as any member who desired a seat upon the Board would soon find out after.his or her election. The singing of Auld Lang Syne brought this portion of the entertainment to a close. In the dance which followed, some opportunity to view the ladies' dresses was afforded, and it could then be easily seen that the anniversary gathering of the Club was considered by the lady members at least, if not .by others, to be important enough to demand special treatment in the matter of dress. Many elaborate and beautiful costumes graced the scene, and everyone appeared to thoroughly enjoy themselves. The function was kept going merrily until about 2 a.m.; when the break up occurred. During the gathering telegrams of con gratulation were received from Mr W. B. Shevill and also from Mr Jno. Homers, both old members, the former a foundation one. Mr O'Donnell apologised for his own and Mrs O'Donnell's absence.Photograph of Portland Social Amusement Club -
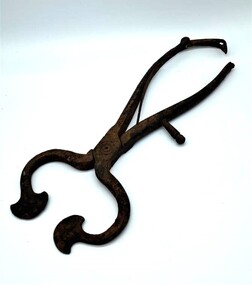 Glenelg Shire Council Cultural Collection
Tool - Sugar Cutters, late 1800s - early 1900s
... we do today. Instead, it came in large cone shapes, wrapped in paper, called sugar-loaves. These were made from sugar grown on plantations in the Americas. Sugar nippers like...we do today. Instead, it came in large cone shapes, wrapped in paper, called sugar-loaves. These were made from sugar grown on plantations in the Americas. Sugar nippers like ...In the 18th century people did not buy sugar as granules or lumps as we do today. Instead, it came in large cone shapes, wrapped in paper, called sugar-loaves. These were made from sugar grown on plantations in the Americas. Sugar nippers like these were used for cutting off small pieces from sugar-loaves for domestic use. This pair looks to be made by a blacksmith.Iron tool with two handles. The tool has a pincer type end with opposing blades - each prong having a flat spade type shape to the end. There is also a protruding piece of metal about half way up the tool and a hinged piece and the top of one of the handles. The metal is rusted.tools, portland, household provisions, groceries, glenelg shire council cultural collection -
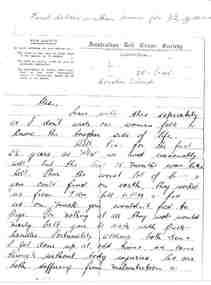 Red Cliffs Military Museum
Letter
... /Well Alex for the first/ 2 1/2 years as POWs we lived reasonably/ well, but the last 15 months was like /hell. Heres the worst lot of b-s/ you could find on earth, they worked /us from 7AM till 6 PM, & fed/ us on muck you wouldn't feed to/ Pigs. .../Well Alex for the first/ 2 1/2 years as POWs we lived reasonably/ well, but the last 15 months was like /hell. Heres the worst lot of b-s/ you could find on earth, they worked /us from 7AM till 6 PM, & fed/ us on muck you wouldn't feed to/ Pigs. ...Letter written from (unknown) POW imprisioned by the Japanese on Morotai Island from 1942 - 1945 to (unknown) friend. Descriptive of life and treatment in POW camp. The island was captured by the Japanese in early 1942. Morotai's southern plain was taken by American forces in September 1944 during the Battle of Morotai, and used as a staging point for the Allied invasion of the Philippines in early 1945, and of Borneo in May and June of that year. Japanese soldier Teruo Nakamura was discovered in the Morotai jungle in 1974, as one of the WWII Japanese soldiers who held out subsequent to the Japanese military's surrender.Photocopy of letter, 4 pages, originally written in ink on (unofficial) Australian Red Cross form.Added to head of letter at a later date is inscription ' First letter written home for 3 1/2 years'.Top left hand- FOR SAFETY/ IN YOUR LETTERS DO NOT REFER TO:-/ The name of your ship or other ships in the convoy, or its escorts./The date of sailing, ports of call, or probable destination./ The description of troops, their loca-/tion or any other information/ which, if intercepted, would be of/ value to the enemy. In your Top right hand- Australian Red Cross Society/ (UNOFFICIAL)/ 25-8-45/ (added at later date 'Morotri Island')/ Alex, Have witten this especially/ as i don't wish our women folk to know the tougher side of life./Well Alex for the first/ 2 1/2 years as POWs we lived reasonably/ well, but the last 15 months was like /hell. Heres the worst lot of b-s/ you could find on earth, they worked /us from 7AM till 6 PM, & fed/ us on muck you wouldn't feed to/ Pigs. I'm nothing at all they would 2, pow, morotri island, morotai island, world war, prisoner of war, australian red cross society -
 Orbost & District Historical Society
poem, We Come, early 20th century
... liked Orbost and returned there, its first doctor, until his death in 1928. Hilda was sometimes referred to as 'Mrs Dr Kerr.' She and her sisters Mabel Stewart Temple and Margaret Ferrie Temple were all talented writers and musicians. This poem is an example of the talent of Hilda Temple Kerr. Hilda Temple Kerr (1874-1956) grew up in Orbost. She was very talented and published several books. It is reflective of the style of poetry in the early 19th century. poetry literature kerr-hilda-temple A rectangular piece of paper with a typed poem titled, "We ...Hilda Kerr was the daughter of George Temple and Mary McAuslane of Castlemaine, later Orbost. Hilda married James Kerr in 1893 and lived at 'Lincluden,' Raymond Street, Orbost. Her husband, Dr James Kerr, was a Scot who had come to Australia as a ship's doctor and practised in NSW before visiting Orbost on a government vaccination programme. He liked Orbost and returned there, its first doctor, until his death in 1928. Hilda was sometimes referred to as 'Mrs Dr Kerr.' She and her sisters Mabel Stewart Temple and Margaret Ferrie Temple were all talented writers and musicians. This poem is an example of the talent of Hilda Temple Kerr. Hilda Temple Kerr (1874-1956) grew up in Orbost. She was very talented and published several books. It is reflective of the style of poetry in the early 19th century.A rectangular piece of paper with a typed poem titled, "We Come" by Hilda C. Temple-Kerr.poetry literature kerr-hilda-temple -
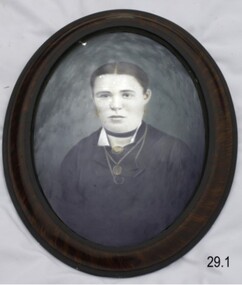 Flagstaff Hill Maritime Museum and Village
Photograph - Mrs Mary Jane Giles of Woodford, International Art Company, Circa 1880
... But the Giles collection also gives us today a snapshot into what domestic life was like in early colonial times prior to Federation. The photograph itself is of added significance as we can see the faces of the family whose lives the collection represents . flagstaff hill warrnambool shipwrecked coast flagstaff hill maritime museum shipwreck coast flagstaff hill maritime village great ocean road photograph late 1800s oval wooden frame portrait mrs mary jane giles of woodford victoria giles collection henry giles tower hill cooramook warrnambool breakwater mailor’s flat wangoom 19th century personal effects mary giles christine giles Inscription on back of frame "International Art Company 30/-" "Rosewood" Portrait photograph mounted in an oval rosewood frame, one of a pair. ...The pair of photographs of Mr Henry and Mrs Mary Jane Giles was made by the International Art Company, the price was 30 shillings and the choice of frame was Rosewood. It is part of the Giles Collection, which also includes a photograph of the couple's daughter Christina Giles, who died in 1899 aged seven years. There are many 19th century items of furniture, linen and crockery donated to Flagstaff Hill Maritime Village by, Vera and Aurelin Giles. The items are associated with Warrnambool and the Giles Family history. Items donated by the family have come to be known as the “Giles Collection”. Many items in the Lighthouse Keeper’s Cottage were donated by Vera and Aurelin Giles and mostly came from the home of Vera’s parents-in-law, Henry Giles and his wife Mary Jane (nee Freckleton) who married in 1880 and whose photos are on display in the parlour. Henry was born at Tower Hill in 1858, and was a labourer on the construction of the Warrnambool Breakwater before leaving in 1895 for around seven years to build bridges in NSW. Mary Jane was born in 1860 at Cooramook and she attended Mailor’s Flat State School and where she eventually was to become a student teacher. After which she became a governess at “Injemiara” where her grandfather, Francis Freckleton, had once owned land. Henry and Mary’s family consisted of six, some of the children were born at Mailor’s Flat and later some children at Wangoom. They lived with their parents at Wangoom and Purnim west, and this is where Henry died in 1933 and Mary Jane in 1940.This photograph is locally significant due to its association with a local pioneering family. The Giles family collection is of social significance at a local level, because it not only illustrates the level of material support the Warrnambool community gave to Flagstaff Hill during it’s establishment. But the Giles collection also gives us today a snapshot into what domestic life was like in early colonial times prior to Federation. The photograph itself is of added significance as we can see the faces of the family whose lives the collection represents . Portrait photograph mounted in an oval rosewood frame, one of a pair. This photograph is Mary Jane Giles, dressed formally showing chest to head. Her hair is tied back hair and she has a neck band. The couple in the pair of photographs is Mr and Mrs Giles of Woodford, Victoria. The photographic studio was the International Art Company. It is part of the Giles Collection.Inscription on back of frame "International Art Company 30/-" "Rosewood"flagstaff hill, warrnambool, shipwrecked coast, flagstaff hill maritime museum, shipwreck coast, flagstaff hill maritime village, great ocean road, photograph late 1800s, oval wooden frame, portrait, mrs mary jane giles of woodford victoria, giles collection, henry giles, tower hill, cooramook, warrnambool breakwater, mailor’s flat, wangoom, 19th century personal effects, mary giles, christine giles -
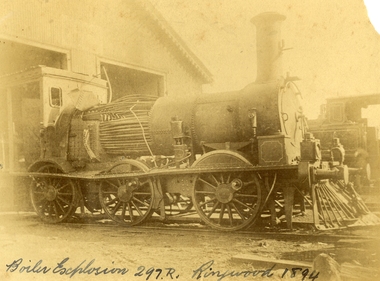 Ringwood and District Historical Society
Photograph, Boiler explosion at Ringwood station 20th June 1894 for engine 297R. "Heard in Box Hill"
... This is the first we have had so bad like that, to my knowledge. You attributed this to bad water. ...This is the first we have had so bad like that, to my knowledge. You attributed this to bad water. ...Black and white photographs - 2 copiesTyped below photograph, "Boiler explosion at Ringwood station 20/6/1894. Heard in Box Hill". Article from newspapers:- Weekly Times (Melbourne, Vic. : 1869 - 1954), Saturday 27 January 1894, page 21 Official enquiry. The Board of Enquiry appointed by the Railway Commissioners to enquire into the causes of the boiler explosion which shattered the locomotive at Ringwood on Saturday night, assembled at the Railway department on Wednesday to commence its deliberations, The board consisted of Mr R. Fulton, engineer, C. W. McLean; engineer to the Marine Board, and Mr Mephan Ferguson, iron-founder. There is some difficulty at the outset about the constitution of the board; It was suggested that the Apt of Parliament contemplated that boards of experts, after the manner of the present one, needed, to have their appointments confirmed by the Governor-in-Council. The point, however, was not considered sufficiently important to prevent the board from proceeding with evidence. Robert Greyford, stationmaster at Ringwood, was the first witness. He said he saw the explosion on Saturday night at about twenty minutes to 8. There was a rush to the engine to see what had happened, and the driver and fireman were both found on the platform of the engine. The driver seemed badly hurt, but the fireman, to all appearances, was not so badly injured. They were both attended to and sent up to Melbourne by the last suburban train. Witness had a look at the engine and found the dome and all the plates round the boiler blown clean, away. The springs were also blown clean away. The Chairman (Mr Fulton) : Did you measure the distance ? Witness: Yes; one of the plates was 209 yards away. A piece from the top of the boiler 15 pounds in weight he found driven into the hard beaten track 410 yards away. Several pieces of boiler plate were found scattered at various distances. The buildings roundabout were injured. The Chairman; Did you notice anything peculiar about either of the driver or the fireman ? — No ; nothing wrong, with either of them. If the engine was blowing off at all, it must have been very light. In your opinion, were they perfectly sober ? — Perfectly. In approaching the station, is there a down or an up grade? — A very slight down grade. How is the road from Healesville ? — Up and down all the way. It is down, grade for about 200 yards coming into Ringwood station. They shut off ; steam about a quarter of a mile away, and come in at a good pace. They generally put on 15 pounds of steam while they are in the station. Mr Ferguson : Had the driver the usual load on ? — Yes ; about the usual load. Witness added that he had known the driver personally for about 10 years, and he had always been a careful, steady, sober man. He did not know the fireman so well. John Palmer, porter at Ringwood station, also saw the explosion. He was attending to the train on its arrival. He was knocked down by the force of the explosion. When he got up he saw the engine driver being carried into the office covered in blood. He noticed nothing peculiar about the driver and fireman, nor about the engine. Mr McLean : How far were you from the engine when you were knocked down ? — From ten to fifteen yards. William Paul, the guard of the train to which the injured locomotive Was attached, said he was looking at the engine at the very moment the explosion occurred. It seemed to come from exactly under the dome. The force of it took him off his feet. He was about 15 yards from the tender. When he rose he tried to reach the engine, but could not do so on account of the steam and coal dust. He called out to know whether any of the passengers were injured, and got no response, so that he concluded they were all right. All the lamps but about half dozen were extinguished by the force of the explosion, although the glass was not broken. He could testify most distinctly that the driver and fireman were both sober. The driver was a man who never drank. The steam started to blow off about a minute and a half before the explosion took place. The last place at which the engine took water was Healesville. The Chairman : Do yon know anything of the quality of the water there ? Is it creek water ? — Yes ; it comes from the Graceburn River. You never heard of its quality ?— No. How long have you known this engine on the road— About 13 months. Hew long have you known the driver on this line ? — About six weeks. I have known the fireman several years. The driver was a strict teetotaller, and I never saw the fireman take anything to drink in his life. Mr T. H, Woodroffe, chief mechanical engineer of the Victorian Railways, produced a report he had written to the secretary, about this explosion. The document gave facts concerning the engine and the explosion. It stated that the rapture seemed to have occurred at the rim of the plates adjoining the fire box. The engine was built at the Phoenix Foundry, Ballarat, in 1883. It was repaired at various times, the last time being in July of last year when it was sent to the Port Melbourne shops, and was then tested to a cold water pressure of 195 and found all right. It was the custom to overhaul all locomotives about every five years. The Chairman : There were no very heavy repairs in July, 1893; were there? — Not to the boilers. The shop manager's report says that the plug and safety tap holes were repaired, five new copper studs put in firebox, ash-pan door repaired, tender cleaned and overhauled, and studs re-rivetted, and boiler tested to pressure of 195, cold water. Mr Woodroffe read the report of the repairs effected to the boiler in December, 1888. That would be the time the plate was put in the boiler. On that occasion three new plates were put in the bottom and the boiler tested up to 195. The Chairman: Do you keep a record of the water used ?— Yes, the water in this case, I think, came from the Maroondah scheme. Mr Woodroffe said boilers were examined front time to time in the running sheds. In his opinion every possible care had been taken to keep the engine in proper care. There might, however, be lessons learnt from this. The Chairman: No doubt. From his examination of the plates [the] witness did not think the state of them could have been detected from the outside. There were no signs of leakage or sweating or anything of that sort. The next witness- was Walter Stinton, workshop manager at Newport and he said that the injured engine had been repeatedly repaired under his charge. He gave a technical account of the repairs effected on various occasions. The testing of locomotives was under his special notice. They had a high pressure pipe running; round the works, and a pump set at 2001b. When the boiler was pumped full of water the pressure when applied up to 1951b. The board appointed by the department to inquire into the Ringwood locomotive boiler explosion sat again at Spencer street on 25th inst. Mr R. Fulton presided and the other members of the board were. Mr Mephan Ferguson and Mr C. W. McLean. Charles Grubb, foreman of the boiler-makers at the Newport workshops, said he had inspected the pieces of plate that had been blown out of the engine, and after examining them, pointed out to the Chief Mechanical Engineer the portion where the plate had started to burst. It was under the lap, on the right hand side of the boiler. The grooving might be accounted for by bad water. During the past twenty years he had examined all the boilers that came into the Williamstown workshops, and while some were hardly marked at all, others were very badly eaten away. The practice was to cut out the defective portions. In this case the boiler was repaired in a similar manner. The Chairman : Can you suggest any other way of repairing so as to prevent accident ? — No, unless by taking out a plate on one side from the joint, and carrying it further up so as to avoid the joints meeting, or by taking out the plate altogether. What would.be the cost .of putting in a new " plate I—Perhaps about double the price; but I wouldn't recommend that course. It would be putting a new plate against plates that have been in use ten years or so and that would not be advisable. I think the present system better. I consider the present system of repairing the best. This is the first we have had so bad like that, to my knowledge. You attributed this to bad water. Is there no other probable cause ? — Well; unless the iron be bad. This was Lowmoor iron. I think this accident was caused by the eating away of plates. This one was the worst I have seen, for the short time it had been running. We use three classes of iron — Lowmoor, Monkbridge and Bowling. By Mr Woodroffe (Chief Mechanical Engineer) ; There are engines still running that were repaired at the same time as this one, in 1888, and. in the same way. These are engines 339 and 333. They have been recently examined and are in splendid order. What in your experience, is the age of a boiler on the Victorian railways? — From 17 to 20 years our earlier boilers stood. The later boilers don't stand so well. How is that? — There is difference in construction, and the material is lighter. The old boilers had thicker plates. Have you been asked in any way to curtail boiler affairs? — No, sir; nor in any way. You have never hesitated to carry out any necessary repairs? — Never. Our orders have been to exercise every care in examining, repairing and renewing boilers. Witness said that his practice was when an engine came into the workshop to find out how long she had been running. If over five years, he informed the workshop manager, and they thought it necessary the tubes were taken nut. If everything was in good order witness reported to the manager. The cost of taking out the tubes and putting them in again was about L20. Mr Woodroffe : Have you ever hesitated to repair a boiler on the score of expense ? — No, never. Mr McLean : Hew do yon ascertain whether a boiler requires repairs?— I keep a record of every boiler examined. From every boiler that comes in I have the dome covers taken off, and when it is practical I get inside. l can almost tell from the top of a boiler what the bottom is like. If there is any doubt about it I have the tubes taken out. If I have suspicion of defective plate I cause to have bored a triangle in the plate at the point where there is the most wear. There is a travelling inspector who visits all the running sheds of the colony except Port Melbourne and tests the boilers. He reports to us and we note what he points out. Alfred Thompson, locomotive inspector of the eastern section, said he knew this engine, 297R. He read a list of her repairs. He heard of the accident on Saturday night and went up to Ringwood. The Chairman : Did you ever notice anything peculiar about the engine? — No, I considered her A1 and would not have hesitated to have put on 140lb pressure owing to the repairs she had undergone. Witness considered that the explosion was caused by the expansion and contraction of the plates ; and, no doubt, the plate had been eaten away through bad water. The other side of the boiler showed: signs of corrosion: By Mr Woodroffe ; Is every care taken with the boilers ? — Yes, every possible care is taken for the safety of boilers, Weekly Times (Melbourne, Vic. : 1869 - 1954), Saturday 27 January 1894, page 7 EXPLOSION OF A LOCOMOTIVE BOILER, NARROW ESACPE FROM FATALITIES. THE DAMAGED ENGINE. [See drawing of loco – saved in “Railways” folder] The explosion of a locomotive boiler at Ringwood on Saturday evening, formed the subject of much discussion in railway circles on Monday. The Minister arrived at the office at an unusually early hour and immediately entered into a consultation with the acting chairman, Mr Kibble, and Mr Commissioner Murray. As the result of the interview it was resolved to ask three gentlemen of acknowledged engineering experience to sib as a board with the . object of inquiring into the cause of the accident and furnishing a report. Mr Richardson and the Commissioners are tally seized of the importance of having a searching investigation into the accident, and, with Mr Murray, the former went to Ringwood to inspect the scene of the disaster. They will he accompanied by Mr Woodroffe. During the morning no official report had come to hand from the driver or fireman of the engine in reference to the accident, but that is thought to be due to the circumstance that they have not sufficiently recovered to be able to give a circumstantial account of what occurred. The engine was one of the old R's, and, Mr Kibble pronounced them to be about the best class of engines used. So far nothing can be said as to the probable cause of the accident, as the broken plating of the engine has not been submitted to the inspection of experts. Weekly Times (Melbourne, Vic. : 1869 - 1954), Saturday 27 January 1894, page 7 STATEMENT BY THE FIREMAN. This morning Thomas Miles, fireman on the engine the boiler of which exploded on Saturday night, is suffering from an injury to the spine, as well as a very severe shaking to the system. He states that he was fireman on the engine attached to the train which left Healesville on Saturday evening, at ten minutes to 8. Everything went all right until Ringwood was reached, when, .just as the train was about to continue its journey, a load explosion took place and Miles remembers nothing more until he was picked np on the platform ; and found himself suffering from a pain in the back, and an injury to his arm. He cannot think of any reason which could have caused the explosion, as there was plenty of water in the boiler, and everything seemed working all right. Mr R. Fulton, consulting engineer, of Queen street; Mr McLean, a member of the Marine Board ; and Mr Mephan Ferguson, engineer, have consented to act as a board to inquire into the cause of the engine boiler explosion at Ringwood on Saturday evening. The board has been appointed under section 117 of Act 1135, which provides that the Governor-in-Council may direct the taking of a such a step. Mr1 Fulton will act as chairman of the board, which met for the first time at the railway offices, Spencer street, this forenoon. Before separating the members of the Board paid a visit to the Prince's Bridge locomotive sheds in company with Mr Woodroffe, the chief mechanical engineer, for the purpose of inspecting the shattered boiler. It has been stated that the explosion is known to have been caused by a flaw in a plate which was put on the boiler about four years ago, but enquiries have tailed to elicit anything in support of that view. The engineers connected with the department are not inclined to say anything on the subject. Weekly Times (Melbourne, Vic. : 1869 - 1954), Saturday 14 April 1894, page 20 The Ringwood Boiler Explosion, The Minister of Railways has received the supplementary report of the board appointed by him to investigate the circumstances connected with the explosion of a locomotive boiler at Ringwood. In their first report the board did not attach blame to anyone. Mr Richardson felt satisfied that the responsibility of having the engines properly inspected and overhauled periodically could be fixed if the inquiry were extended. He therefore referred the matter again to the Board, who took further evidence. In the report now furnished, the Board hold Loco. Inspector Thompson blameable, but point out as a mitigating circumstance that he had not received "written instructions" respecting inspections and overhauls. Weekly Times (Melbourne, Vic. : 1869 - 1954), Saturday 7 July 1894, page 32 The Ringwood Boiler Explosion. The Minister of Railways takes exception to the tone of a paragraph appearing in a morning contemporary respecting the Ringwood boiler explosion. It makes it appear that Mr Richardson has referred the report of the board which considered the facts connected with the explosion to the Crown solicitor simply because he differed from the finding of the board. The Minister explains that when he received the report he found that the responsibility for having boilers properly inspected and overhauled had not been clearly fixed. He personally obtained farther evidence on that point, and arrived at a conclusion, from which the commissioners differed. As he did not like to take upon himself the responsibility of deciding upon the effect of the evidence, he submitted the matter to the Crown Solicitor, but that officer did not furnish him with the information sought. He has, therefore, referred the question to the Attorney-General, together with the draft of a regulation respecting boiler inspections and overhauls in the future. Mr Richardson says that his whole aim is to have the responsibility positively fixed. Weekly Times (Melbourne, Vic. : 1869 - 1954), Saturday 28 April 1894, page 23 The Minister of Railways has completed his consideration of the supplementary report received by him from the Ringwood Boiler Explosion Board. The report, it will be remembered, held Loco-Inspector Thompson blameable for the non-inspection of the boiler, but considered there was extenuating circumstances. There was a certain amount of doubt as to the absolute instructions given for overhauling engines periodically. Mr. Richardson is sending the report on to the Commissioners with instructions that the responsibility respecting inspection of boilers shall be made clear for the future. -
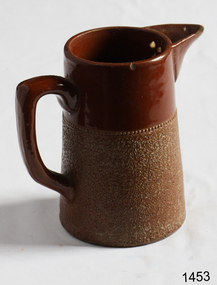 Flagstaff Hill Maritime Museum and Village
Domestic object - Jug
... we use. I can guess by the way they interact with each other, however, on the whole, you need to test every idea you have, and not run the test on a vertical surface! Simply put, glaze is a layer of glass like...we use. I can guess by the way they interact with each other, however, on the whole, you need to test every idea you have, and not run the test on a vertical surface! Simply put, glaze is a layer of glass like ...The Process of Making Pottery Decorating, Firing, Glazing, Making, Technical There is a rhythm and flow to clay. It can’t be done all at once! Even the making process! It can take weeks to get everything done, especially if you can only work on your pottery once a week! Even though we have three hour classes, it’s often just not enough time! Here is an overview of some of the processes so you have a bit more grasp on some of the technical stuff! Step One – Design There are SO many ideas out there for making stuff in clay! From delicate porcelain jewellery, through to heavy sculptural work and everything in between. Deciding your direction is sometimes not that easy – when you first start, try everything, you will naturally gravitate to the style that you enjoy! The options and variations are endless and can get a wee bit overwhelming too! Check in with me before you start to ensure your ideas will work, what order you might do things, how you could achieve the look you are seeking and any other technical data required! Step Two – Making Clay is thixotropic. This means that as you work with it, the clay first gets sloppier and wetter, before is begins to dry in the atmosphere. For most things, you simply can’t do all parts of the project at once. An example of work order might look like: Get last weeks work out from the shelves Prepare clay for today’s work – roll your clay, prepare balls for throwing, make the first stage of a pinch pot) Clean up last week’s work and put it on the shelf for bisque firing Check that you have any glazing to do – and do enough of it that you will have time to finish your main project Do the next step of your next project – there might be a further step that can’t be complete immediately, in that case, wrap your work well and put onto the shelves. Letting your work rest for a while can really help keep your work clean and professional looking. Many things require bagging under plastic to keep it ready for work the next week – put your name on the outside of the bag so you can find your work easily. We have stickers and markers. Consider how you want to decorate your work – coloured slip can be applied at a fairly wet stage (remembering that it will make your work even wetter!). Trying to apply slip to dry clay won’t work! If you want to do sgraffito – you will need to keep the work leather hard (a state of dryness where you can still work the clay with a little effort and a little water and care). Step Three – Drying Most of the time your work can go into the rack uncovered to let it dry out for the following week. If you want to continue forming or shaping you will need to double bag your work – put your work on a suitable sized bat and put the bat in a bag so the base of the bag is under the bat, then put another bag over the top of the work and tuck the top of the bag under the bat. If you want to trim (or turn) your thrown work the following week, it should also be double bagged. If your work is large, delicate, or of uneven thicknesses, you should lightly cover your work for drying. When considering the drying process, bare in mind the weather, humidity and wind! The hotter and dryer, the faster things dry and work can dry unevenly in the shelves – this can lead to cracking – another time to lightly cover your work for drying. Step Four – Trimming and Cleaning Up Your work is dry! It is called greenware now and it is at it’s most fragile! Handle everything with two hands. I often refer to soft hands – keep everything gentle and with your fingers spread as much as possible. Try to not pick up things like plates too much, and always with both hands! Before your work can be bisque fired it should be “cleaned up”. You work won’t go into the kiln if it has sharp edges – when glazed, sharp edges turn into razor blades! Use a piece of fly wire to rub the work all over – this will scratch a little so be light handed. Use a knife or metal kidney to scrape any areas that require a bit more dynamic treatment than the fly wire offers! Finally, a very light wipe over with a slightly damp sponge can help soften and soothe all of your edges and dags! Trimming thrown work: If you are planning to trim (or turn) your thrown work (and you should be), make sure you bag it well – your work should be leather hard to almost dry for easiest trimming. Use this step to finish the work completely – use a metal kidney to polish the surface, or a slightly damp sponge to give a freshly thrown look. Wipe the sponge around the rim after trimming, and check the inside of the pot for dags! Trimming slip cast work: Usually I will trim the rims of your work on the wheel the following day to make that stage easier, however you will still need to check your work for lumps and bumps. Last but not least – check that your name is still clearly on the bottom of your work. Step Five – Bisque Firing When the work is completely dry it can go into the bisque kiln. The bisque kiln is fired to 1000°C. This process burns off the water in the clay as well as some of the chemically bound water. The structure of the clay is not altered that much at this temperature. Inside the bisque kiln, the work is stacked a little, small bowl inside a larger bowl and onto a heavy plate. Smaller items like decorations or drink coasters might get stacked several high. Consideration is paid to the weight of the stack and shape of the work. A bisque kiln can fire about one and a half times the amount of work that the glaze kiln can fire. The firing takes about 10 hours to complete the cycle and about two days to cool down. Once it has been emptied the work is placed in the glaze room ready for you to decorate! Step Six – Glazing Decorating your work with colour can be a lot of fun – and time consuming! There are three main options for surface treatment at this stage: Oxide Washes Underglazes Glazes Washes and underglazes do not “glaze” the work – It will still need a layer of glaze to fully seal the clay (washes don’t need glaze on surfaces not designed for food or liquid as they can gloss up a little on their own). Underglazes are stable colourants that turn out pretty much how they look in the jar. They can be mixed with each other to form other colours and can be used like water colours to paint onto your work. Mostly they should have a clear glaze on top to seal them. Oxides are a different species – the pink oxide (cobalt) wash turns out bright blue for instance. They don’t always need a glaze on top, and some glazes can change the colour of the wash! The glazes need no other “glaze” on top! Be careful of unknown glaze interactions – you can put any combination of glaze in a bowl or on a plate, but only a single glaze on the outside of any vertical surface! Glazes are a chemical reaction under heat. We don’t know the exact chemicals in the Mayco glazes we use. I can guess by the way they interact with each other, however, on the whole, you need to test every idea you have, and not run the test on a vertical surface! Simply put, glaze is a layer of glass like substance that bonds with the clay underneath. Clay is made of silica, alumina and water. Glaze is made of mostly silica. Silica has a melting point of 1700°C and we fire to 1240°C. The silica requires a “flux” to help it melt at the lower temperature. Fluxes can be all sorts of chemicals – a common one is calcium – calcium has a melting point of 2500°C, however, together they both melt at a much lower temperature! Colourants are metal oxides like cobalt (blue), chrome (green through black), copper (green, blue, even red!), manganese (black, purple and pink) iron (red brown), etc. Different chemicals in the glaze can have dramatic effects. for example, barium carbonate (which we don’t use) turns manganese bright pink! Other elements can turn manganese dioxide brown, blue, purple and reddish brown. Manganese dioxide is a flux in and of itself as well. So, glazes that get their black and purple colours, often interact with other glazes and RUN! Our mirror black is a good example – it mixes really well with many glazes because it fluxes them – causes them to melt faster. It will also bring out many beautiful colours in the glazes because it’s black colouring most definitely comes from manganese dioxide! Glaze chemistry is a whole subject on it’s own! We use commercial Mayco glazes on purpose – for their huge range of colour possibilities, stability, cool interactions, artistic freedom with the ability to easily brush the glazes on and ease of use. We currently have almost 50 glazes on hand! A major project is to test the interactions of all glazes with each other. That is 2,500 test tiles!!!! I’m going to make the wall behind the wheels the feature wall of pretty colours! Step Seven – Glaze (Gloss or sometimes called “Glost”) Firing Most of the time this is the final stage of making your creation (but not always!) The glaze kiln goes to 1240°C. This is called cone 6, or midrange. It is the low end of stoneware temperatures. Stoneware clays and glazes are typically fired at cone 8 – 10, that is 1260 – 1290°C. The energy requirement to go from 1240°C to 1280°C is almost a 30% more! Our clay is formulated to vitrify (mature, turn “glass-like”) at 1240°, as are our glazes. A glaze kiln take around 12 hours to reach temperature and two to three days to cool down. Sometimes a third firing process is required – this is for decoration that is added to work after the glaze firing. For example – adding precious metals and lustres. this firing temperature is usually around 600 – 800°C depending upon the techniques being used. There are many students interested in gold and silver trims – we will be doing this third type of firing soon! After firing your work will be in the student finished work shelves. Remember to pay for it before you head out the door! There is a small extra charge for using porcelain clay (it’s more than twice the price of regular clay), and for any third firing process! Once your work has been fired it can not turn back into clay for millennia – so don’t fire it if you don’t like it! Put it in the bucket for recycling. https://firebirdstudios.com.au/the-process-of-making-pottery/The form of the jug has been in use for many centuries.Stoneware jug. Two tone brown glaze with pierced lip behind spout. Spout chipped.None.flagstaff hill, warrnambool, shipwrecked-coast, flagstaff-hill, flagstaff-hill-maritime-museum, maritime-museum, shipwreck-coast, flagstaff-hill-maritime-village, jug, ceramic jug -
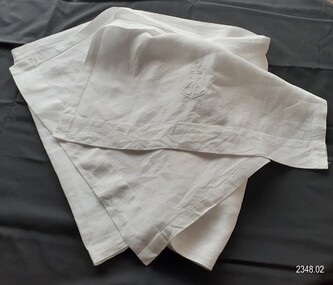 Flagstaff Hill Maritime Museum and Village
Textile - Altar Cloth
... like a ‘plus’ sign with anchor flukes at the base and a ring at the top. The anchor is one of the earliest symbols used in Christianity and represents faith, hope and salvation in times of trial. The Mariner’s Cross is linked to the scripture in Hebrews 6:19, which says, “Which hope we...like a ‘plus’ sign with anchor flukes at the base and a ring at the top. The anchor is one of the earliest symbols used in Christianity and represents faith, hope and salvation in times of trial. The Mariner’s Cross is linked to the scripture in Hebrews 6:19, which says, “Which hope we ...This altar cloth is representative of ecclesiastical linen in use in the early to mid-20th century. It is decorated with the Mariner's Cross symbol, connecting it to the history of the early Christian church. The cover for the cloth shows the respect the maker had for the cloth and what it stands for. The Mariner's Cross symbol also makes it appropriate as an altar cloth for the St Nicholas Seamen's Church at Flagstaff Hill Maritime Village. MARINER'S CROSS symbol: - The symbol of an anchor that also looks like a cross is called the Mariner’s Cross (also called the Anchored Cross or Cross of Hope). It looks like a ‘plus’ sign with anchor flukes at the base and a ring at the top. The anchor is one of the earliest symbols used in Christianity and represents faith, hope and salvation in times of trial. The Mariner’s Cross is linked to the scripture in Hebrews 6:19, which says, “Which hope we have as an anchor of the soul, both sure and steadfast, and which entereth into that within the veil”. This particular Mariner’s Cross also has the letter ‘X’ under the post of the anchor. In Greek, the language of the New Testament, the word for Christ is ‘Christos’, which begins with the Greek letter ‘X’ or ‘Chi’. Together, the elements on this Mariner’s Cross - anchor, cross and ‘X’ - symbolise to the Christian that Jesus Christ the Saviour gives security and safety, hope and salvation. Many church organisations still use various forms of the Mariner’s Cross. THE MISSIONS TO SEAMEN (Brief History): - The Missions to Seamen was an Anglican charity that has served seafarers of the world since 1856 in Great Britain. Its symbol is a Flying Angel, inspired by a Bible verse. Today, there are centres in over 200 ports worldwide where seamen of all backgrounds are offered a warm welcome and provided with a wide range of facilities. In Victoria, the organisation began in Williamstown in 1857 as a Sailors’ Church, also known as ‘Bethel’ or the ‘Floating Church’ in an old hulk floating in Hobson’s Bay, Port of Melbourne. It soon became part of the Missions to Seamen, Victoria. In the year 2000, the organisation, now named Mission to Seafarers, still operated locally in Melbourne, Portland, Geelong and Hastings. The Ladies’ Harbour Lights Guild was formed in 1906 to support the Missions to Seamen in Melbourne and other centres, such as Williamstown. Two of the most significant ladies of the Guild were founder Ethel Augusta Godfrey and foundation member Alice Sibthorpe Tracy (who established a branch of the Guild in Warrnambool in 1920). The Guild continued its work until the 1960s. In 1943, a former Williamstown bank was purchased for the Missions to Seaman Club. The chapel was named St Nicholas’ Seamen’s Church and was supported by the Ladies’ Harbour Lights Guild, the Williamstown Lightkeepers’ Auxiliary and the League of Soldiers’ and Sailors’ Friends. It ceased operation in 1966. A Missions to Seamen Chapel and Recreation Room was a significant feature of ports during the late 1800s and into the 1900s. It seemed appropriate for Flagstaff Hill to include such a representation within the new Maritime Village, so the Melbourne Board of Management of Missions to Seamen Victoria gave its permission on 21st May 1979 for the entire furnishings of the Williamstown chapel to be transferred to Flagstaff Hill. The St Nicholas Seamen’s Church was officially opened on October 11, 1981, and closely resembles the Williamstown chapel. The altar cloth is representative of the ecclesiastical linen in use in the early to mid-20th century, when the original St Nicholas Seamen's Church was opened in Williamstown, Victoria. The Mariner's Cross embroidered onto the altar cloth gives it a connection with the early Christian church and with the Missions to Seamen. The fine hand stitching and embroidery are examples of traditional handcraft skills used over the centuries and continuing in use today.Altar cloth, white linen, with custom-made white cotton cover. The long rectangular cloth has the symbol of a Mariner's Cross (anchor and cross) embroidered with white silk thread on each short end. The wide hems are hand-stitched. The cover has two white tape ties and embroidered text in blue silk thread. This cloth and cover is part of the St. Nicholas Seamen's Church Collection. On cloth: symbol of (anchor with an 'X' stitched behind the centre of it). On cover, text "FLAGSTAFF/ HILL" flagstaff hill, warrnambool, shipwrecked coast, flagstaff hill maritime museum, maritime museum, shipwreck coast, flagstaff hill maritime village, great ocean road, religion, religious service, st nicholas seamen’s church flagstaff hill, altar cloth, church linen, ecclesiastical linen, mariner’s cross, anchor cross, cross of hope, symbol of christianity, anchored cross, flagstaff hill maritime museum and village, maritime village, religious worship, worship service, st nicholas seamen’s church, williamstown, missions to seamen victoria, mission to seafarers, st nicholas missions to seamen’s church williamstown, missions to seamen, st nicholas missions to seamen’s church flagstaff hill, 139 nelson place williamstown, anglican church -
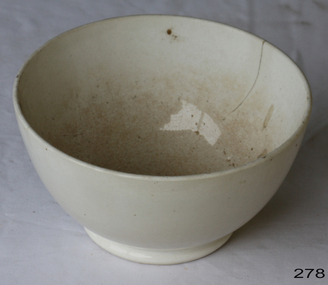 Flagstaff Hill Maritime Museum and Village
Domestic object - Bowl, Late 19th or early 20th Century
... we use. I can guess by the way they interact with each other, however, on the whole, you need to test every idea you have, and not run the test on a vertical surface! Simply put, glaze is a layer of glass like...we use. I can guess by the way they interact with each other, however, on the whole, you need to test every idea you have, and not run the test on a vertical surface! Simply put, glaze is a layer of glass like ...The Process of Making Pottery Decorating, Firing, Glazing, Making, Technical There is a rhythm and flow to clay. It can’t be done all at once! Even the making process! It can take weeks to get everything done, especially if you can only work on your pottery once a week! Even though we have three hour classes, it’s often just not enough time! Here is an overview of some of the processes so you have a bit more grasp on some of the technical stuff! Step One – Design There are SO many ideas out there for making stuff in clay! From delicate porcelain jewellery, through to heavy sculptural work and everything in between. Deciding your direction is sometimes not that easy – when you first start, try everything, you will naturally gravitate to the style that you enjoy! The options and variations are endless and can get a wee bit overwhelming too! Check in with me before you start to ensure your ideas will work, what order you might do things, how you could achieve the look you are seeking and any other technical data required! Step Two – Making Clay is thixotropic. This means that as you work with it, the clay first gets sloppier and wetter, before is begins to dry in the atmosphere. For most things, you simply can’t do all parts of the project at once. An example of work order might look like: Get last weeks work out from the shelves Prepare clay for today’s work – roll your clay, prepare balls for throwing, make the first stage of a pinch pot) Clean up last week’s work and put it on the shelf for bisque firing Check that you have any glazing to do – and do enough of it that you will have time to finish your main project Do the next step of your next project – there might be a further step that can’t be complete immediately, in that case, wrap your work well and put onto the shelves. Letting your work rest for a while can really help keep your work clean and professional looking. Many things require bagging under plastic to keep it ready for work the next week – put your name on the outside of the bag so you can find your work easily. We have stickers and markers. Consider how you want to decorate your work – coloured slip can be applied at a fairly wet stage (remembering that it will make your work even wetter!). Trying to apply slip to dry clay won’t work! If you want to do sgraffito – you will need to keep the work leather hard (a state of dryness where you can still work the clay with a little effort and a little water and care). Step Three – Drying Most of the time your work can go into the rack uncovered to let it dry out for the following week. If you want to continue forming or shaping you will need to double bag your work – put your work on a suitable sized bat and put the bat in a bag so the base of the bag is under the bat, then put another bag over the top of the work and tuck the top of the bag under the bat. If you want to trim (or turn) your thrown work the following week, it should also be double bagged. If your work is large, delicate, or of uneven thicknesses, you should lightly cover your work for drying. When considering the drying process, bare in mind the weather, humidity and wind! The hotter and dryer, the faster things dry and work can dry unevenly in the shelves – this can lead to cracking – another time to lightly cover your work for drying. Step Four – Trimming and Cleaning Up Your work is dry! It is called greenware now and it is at it’s most fragile! Handle everything with two hands. I often refer to soft hands – keep everything gentle and with your fingers spread as much as possible. Try to not pick up things like plates too much, and always with both hands! Before your work can be bisque fired it should be “cleaned up”. You work won’t go into the kiln if it has sharp edges – when glazed, sharp edges turn into razor blades! Use a piece of fly wire to rub the work all over – this will scratch a little so be light handed. Use a knife or metal kidney to scrape any areas that require a bit more dynamic treatment than the fly wire offers! Finally, a very light wipe over with a slightly damp sponge can help soften and soothe all of your edges and dags! Trimming thrown work: If you are planning to trim (or turn) your thrown work (and you should be), make sure you bag it well – your work should be leather hard to almost dry for easiest trimming. Use this step to finish the work completely – use a metal kidney to polish the surface, or a slightly damp sponge to give a freshly thrown look. Wipe the sponge around the rim after trimming, and check the inside of the pot for dags! Trimming slip cast work: Usually I will trim the rims of your work on the wheel the following day to make that stage easier, however you will still need to check your work for lumps and bumps. Last but not least – check that your name is still clearly on the bottom of your work. Step Five – Bisque Firing When the work is completely dry it can go into the bisque kiln. The bisque kiln is fired to 1000°C. This process burns off the water in the clay as well as some of the chemically bound water. The structure of the clay is not altered that much at this temperature. Inside the bisque kiln, the work is stacked a little, small bowl inside a larger bowl and onto a heavy plate. Smaller items like decorations or drink coasters might get stacked several high. Consideration is paid to the weight of the stack and shape of the work. A bisque kiln can fire about one and a half times the amount of work that the glaze kiln can fire. The firing takes about 10 hours to complete the cycle and about two days to cool down. Once it has been emptied the work is placed in the glaze room ready for you to decorate! Step Six – Glazing Decorating your work with colour can be a lot of fun – and time consuming! There are three main options for surface treatment at this stage: Oxide Washes Underglazes Glazes Washes and underglazes do not “glaze” the work – It will still need a layer of glaze to fully seal the clay (washes don’t need glaze on surfaces not designed for food or liquid as they can gloss up a little on their own). Underglazes are stable colourants that turn out pretty much how they look in the jar. They can be mixed with each other to form other colours and can be used like water colours to paint onto your work. Mostly they should have a clear glaze on top to seal them. Oxides are a different species – the pink oxide (cobalt) wash turns out bright blue for instance. They don’t always need a glaze on top, and some glazes can change the colour of the wash! The glazes need no other “glaze” on top! Be careful of unknown glaze interactions – you can put any combination of glaze in a bowl or on a plate, but only a single glaze on the outside of any vertical surface! Glazes are a chemical reaction under heat. We don’t know the exact chemicals in the Mayco glazes we use. I can guess by the way they interact with each other, however, on the whole, you need to test every idea you have, and not run the test on a vertical surface! Simply put, glaze is a layer of glass like substance that bonds with the clay underneath. Clay is made of silica, alumina and water. Glaze is made of mostly silica. Silica has a melting point of 1700°C and we fire to 1240°C. The silica requires a “flux” to help it melt at the lower temperature. Fluxes can be all sorts of chemicals – a common one is calcium – calcium has a melting point of 2500°C, however, together they both melt at a much lower temperature! Colourants are metal oxides like cobalt (blue), chrome (green through black), copper (green, blue, even red!), manganese (black, purple and pink) iron (red brown), etc. Different chemicals in the glaze can have dramatic effects. for example, barium carbonate (which we don’t use) turns manganese bright pink! Other elements can turn manganese dioxide brown, blue, purple and reddish brown. Manganese dioxide is a flux in and of itself as well. So, glazes that get their black and purple colours, often interact with other glazes and RUN! Our mirror black is a good example – it mixes really well with many glazes because it fluxes them – causes them to melt faster. It will also bring out many beautiful colours in the glazes because it’s black colouring most definitely comes from manganese dioxide! Glaze chemistry is a whole subject on it’s own! We use commercial Mayco glazes on purpose – for their huge range of colour possibilities, stability, cool interactions, artistic freedom with the ability to easily brush the glazes on and ease of use. We currently have almost 50 glazes on hand! A major project is to test the interactions of all glazes with each other. That is 2,500 test tiles!!!! I’m going to make the wall behind the wheels the feature wall of pretty colours! Step Seven – Glaze (Gloss or sometimes called “Glost”) Firing Most of the time this is the final stage of making your creation (but not always!) The glaze kiln goes to 1240°C. This is called cone 6, or midrange. It is the low end of stoneware temperatures. Stoneware clays and glazes are typically fired at cone 8 – 10, that is 1260 – 1290°C. The energy requirement to go from 1240°C to 1280°C is almost a 30% more! Our clay is formulated to vitrify (mature, turn “glass-like”) at 1240°, as are our glazes. A glaze kiln take around 12 hours to reach temperature and two to three days to cool down. Sometimes a third firing process is required – this is for decoration that is added to work after the glaze firing. For example – adding precious metals and lustres. this firing temperature is usually around 600 – 800°C depending upon the techniques being used. There are many students interested in gold and silver trims – we will be doing this third type of firing soon! After firing your work will be in the student finished work shelves. Remember to pay for it before you head out the door! There is a small extra charge for using porcelain clay (it’s more than twice the price of regular clay), and for any third firing process! Once your work has been fired it can not turn back into clay for millennia – so don’t fire it if you don’t like it! Put it in the bucket for recycling. https://firebirdstudios.com.au/the-process-of-making-pottery/ The bowl is an example of kitchenware used in the 19th century and still in use today.Bowl white ceramic. Crack on side. Badly stained.Backstamp very faint and unable to be read.flagstaff hill, warrnambool, shipwrecked-coast, flagstaff-hill, flagstaff-hill-maritime-museum, maritime-museum, shipwreck-coast, flagstaff-hill-maritime-village, mixing bowl, food preparation, kitchen equipment, ceramic -
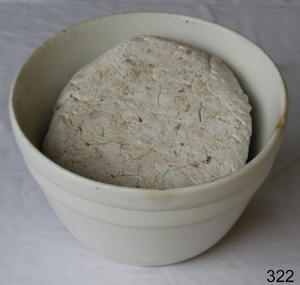 Flagstaff Hill Maritime Museum and Village
Domestic object - Bowl
... we use. I can guess by the way they interact with each other, however, on the whole, you need to test every idea you have, and not run the test on a vertical surface! Simply put, glaze is a layer of glass like...we use. I can guess by the way they interact with each other, however, on the whole, you need to test every idea you have, and not run the test on a vertical surface! Simply put, glaze is a layer of glass like ...The Process of Making Pottery Decorating, Firing, Glazing, Making, Technical There is a rhythm and flow to clay. It can’t be done all at once! Even the making process! It can take weeks to get everything done, especially if you can only work on your pottery once a week! Even though we have three hour classes, it’s often just not enough time! Here is an overview of some of the processes so you have a bit more grasp on some of the technical stuff! Step One – Design There are SO many ideas out there for making stuff in clay! From delicate porcelain jewellery, through to heavy sculptural work and everything in between. Deciding your direction is sometimes not that easy – when you first start, try everything, you will naturally gravitate to the style that you enjoy! The options and variations are endless and can get a wee bit overwhelming too! Check in with me before you start to ensure your ideas will work, what order you might do things, how you could achieve the look you are seeking and any other technical data required! Step Two – Making Clay is thixotropic. This means that as you work with it, the clay first gets sloppier and wetter, before is begins to dry in the atmosphere. For most things, you simply can’t do all parts of the project at once. An example of work order might look like: Get last weeks work out from the shelves Prepare clay for today’s work – roll your clay, prepare balls for throwing, make the first stage of a pinch pot) Clean up last week’s work and put it on the shelf for bisque firing Check that you have any glazing to do – and do enough of it that you will have time to finish your main project Do the next step of your next project – there might be a further step that can’t be complete immediately, in that case, wrap your work well and put onto the shelves. Letting your work rest for a while can really help keep your work clean and professional looking. Many things require bagging under plastic to keep it ready for work the next week – put your name on the outside of the bag so you can find your work easily. We have stickers and markers. Consider how you want to decorate your work – coloured slip can be applied at a fairly wet stage (remembering that it will make your work even wetter!). Trying to apply slip to dry clay won’t work! If you want to do sgraffito – you will need to keep the work leather hard (a state of dryness where you can still work the clay with a little effort and a little water and care). Step Three – Drying Most of the time your work can go into the rack uncovered to let it dry out for the following week. If you want to continue forming or shaping you will need to double bag your work – put your work on a suitable sized bat and put the bat in a bag so the base of the bag is under the bat, then put another bag over the top of the work and tuck the top of the bag under the bat. If you want to trim (or turn) your thrown work the following week, it should also be double bagged. If your work is large, delicate, or of uneven thicknesses, you should lightly cover your work for drying. When considering the drying process, bare in mind the weather, humidity and wind! The hotter and dryer, the faster things dry and work can dry unevenly in the shelves – this can lead to cracking – another time to lightly cover your work for drying. Step Four – Trimming and Cleaning Up Your work is dry! It is called greenware now and it is at it’s most fragile! Handle everything with two hands. I often refer to soft hands – keep everything gentle and with your fingers spread as much as possible. Try to not pick up things like plates too much, and always with both hands! Before your work can be bisque fired it should be “cleaned up”. You work won’t go into the kiln if it has sharp edges – when glazed, sharp edges turn into razor blades! Use a piece of fly wire to rub the work all over – this will scratch a little so be light handed. Use a knife or metal kidney to scrape any areas that require a bit more dynamic treatment than the fly wire offers! Finally, a very light wipe over with a slightly damp sponge can help soften and soothe all of your edges and dags! Trimming thrown work: If you are planning to trim (or turn) your thrown work (and you should be), make sure you bag it well – your work should be leather hard to almost dry for easiest trimming. Use this step to finish the work completely – use a metal kidney to polish the surface, or a slightly damp sponge to give a freshly thrown look. Wipe the sponge around the rim after trimming, and check the inside of the pot for dags! Trimming slip cast work: Usually I will trim the rims of your work on the wheel the following day to make that stage easier, however you will still need to check your work for lumps and bumps. Last but not least – check that your name is still clearly on the bottom of your work. Step Five – Bisque Firing When the work is completely dry it can go into the bisque kiln. The bisque kiln is fired to 1000°C. This process burns off the water in the clay as well as some of the chemically bound water. The structure of the clay is not altered that much at this temperature. Inside the bisque kiln, the work is stacked a little, small bowl inside a larger bowl and onto a heavy plate. Smaller items like decorations or drink coasters might get stacked several high. Consideration is paid to the weight of the stack and shape of the work. A bisque kiln can fire about one and a half times the amount of work that the glaze kiln can fire. The firing takes about 10 hours to complete the cycle and about two days to cool down. Once it has been emptied the work is placed in the glaze room ready for you to decorate! Step Six – Glazing Decorating your work with colour can be a lot of fun – and time consuming! There are three main options for surface treatment at this stage: Oxide Washes Underglazes Glazes Washes and underglazes do not “glaze” the work – It will still need a layer of glaze to fully seal the clay (washes don’t need glaze on surfaces not designed for food or liquid as they can gloss up a little on their own). Underglazes are stable colourants that turn out pretty much how they look in the jar. They can be mixed with each other to form other colours and can be used like water colours to paint onto your work. Mostly they should have a clear glaze on top to seal them. Oxides are a different species – the pink oxide (cobalt) wash turns out bright blue for instance. They don’t always need a glaze on top, and some glazes can change the colour of the wash! The glazes need no other “glaze” on top! Be careful of unknown glaze interactions – you can put any combination of glaze in a bowl or on a plate, but only a single glaze on the outside of any vertical surface! Glazes are a chemical reaction under heat. We don’t know the exact chemicals in the Mayco glazes we use. I can guess by the way they interact with each other, however, on the whole, you need to test every idea you have, and not run the test on a vertical surface! Simply put, glaze is a layer of glass like substance that bonds with the clay underneath. Clay is made of silica, alumina and water. Glaze is made of mostly silica. Silica has a melting point of 1700°C and we fire to 1240°C. The silica requires a “flux” to help it melt at the lower temperature. Fluxes can be all sorts of chemicals – a common one is calcium – calcium has a melting point of 2500°C, however, together they both melt at a much lower temperature! Colourants are metal oxides like cobalt (blue), chrome (green through black), copper (green, blue, even red!), manganese (black, purple and pink) iron (red brown), etc. Different chemicals in the glaze can have dramatic effects. for example, barium carbonate (which we don’t use) turns manganese bright pink! Other elements can turn manganese dioxide brown, blue, purple and reddish brown. Manganese dioxide is a flux in and of itself as well. So, glazes that get their black and purple colours, often interact with other glazes and RUN! Our mirror black is a good example – it mixes really well with many glazes because it fluxes them – causes them to melt faster. It will also bring out many beautiful colours in the glazes because it’s black colouring most definitely comes from manganese dioxide! Glaze chemistry is a whole subject on it’s own! We use commercial Mayco glazes on purpose – for their huge range of colour possibilities, stability, cool interactions, artistic freedom with the ability to easily brush the glazes on and ease of use. We currently have almost 50 glazes on hand! A major project is to test the interactions of all glazes with each other. That is 2,500 test tiles!!!! I’m going to make the wall behind the wheels the feature wall of pretty colours! Step Seven – Glaze (Gloss or sometimes called “Glost”) Firing Most of the time this is the final stage of making your creation (but not always!) The glaze kiln goes to 1240°C. This is called cone 6, or midrange. It is the low end of stoneware temperatures. Stoneware clays and glazes are typically fired at cone 8 – 10, that is 1260 – 1290°C. The energy requirement to go from 1240°C to 1280°C is almost a 30% more! Our clay is formulated to vitrify (mature, turn “glass-like”) at 1240°, as are our glazes. A glaze kiln take around 12 hours to reach temperature and two to three days to cool down. Sometimes a third firing process is required – this is for decoration that is added to work after the glaze firing. For example – adding precious metals and lustres. this firing temperature is usually around 600 – 800°C depending upon the techniques being used. There are many students interested in gold and silver trims – we will be doing this third type of firing soon! After firing your work will be in the student finished work shelves. Remember to pay for it before you head out the door! There is a small extra charge for using porcelain clay (it’s more than twice the price of regular clay), and for any third firing process! Once your work has been fired it can not turn back into clay for millennia – so don’t fire it if you don’t like it! Put it in the bucket for recycling. https://firebirdstudios.com.au/the-process-of-making-pottery/ This bowl is an example of kitchenware used in the 19th century and still in use today.Bowl white ceramic plain that has two sets of edging around lip. Inside bowl has plaster designed to look like cooking mixture.flagstaff hill, warrnambool, shipwrecked-coast, flagstaff-hill, flagstaff-hill-maritime-museum, maritime-museum, shipwreck-coast, flagstaff-hill-maritime-village, kitchen equipment, ceramic -
 Flagstaff Hill Maritime Museum and Village
Domestic object - Bowl, J & G Meakin, Late 19th or early 20th Century
... we use. I can guess by the way they interact with each other, however, on the whole, you need to test every idea you have, and not run the test on a vertical surface! Simply put, glaze is a layer of glass like...we use. I can guess by the way they interact with each other, however, on the whole, you need to test every idea you have, and not run the test on a vertical surface! Simply put, glaze is a layer of glass like ...The Process of Making Pottery Decorating, Firing, Glazing, Making, Technical There is a rhythm and flow to clay. It can’t be done all at once! Even the making process! It can take weeks to get everything done, especially if you can only work on your pottery once a week! Even though we have three hour classes, it’s often just not enough time! Here is an overview of some of the processes so you have a bit more grasp on some of the technical stuff! Step One – Design There are SO many ideas out there for making stuff in clay! From delicate porcelain jewellery, through to heavy sculptural work and everything in between. Deciding your direction is sometimes not that easy – when you first start, try everything, you will naturally gravitate to the style that you enjoy! The options and variations are endless and can get a wee bit overwhelming too! Check in with me before you start to ensure your ideas will work, what order you might do things, how you could achieve the look you are seeking and any other technical data required! Step Two – Making Clay is thixotropic. This means that as you work with it, the clay first gets sloppier and wetter, before is begins to dry in the atmosphere. For most things, you simply can’t do all parts of the project at once. An example of work order might look like: Get last weeks work out from the shelves Prepare clay for today’s work – roll your clay, prepare balls for throwing, make the first stage of a pinch pot) Clean up last week’s work and put it on the shelf for bisque firing Check that you have any glazing to do – and do enough of it that you will have time to finish your main project Do the next step of your next project – there might be a further step that can’t be complete immediately, in that case, wrap your work well and put onto the shelves. Letting your work rest for a while can really help keep your work clean and professional looking. Many things require bagging under plastic to keep it ready for work the next week – put your name on the outside of the bag so you can find your work easily. We have stickers and markers. Consider how you want to decorate your work – coloured slip can be applied at a fairly wet stage (remembering that it will make your work even wetter!). Trying to apply slip to dry clay won’t work! If you want to do sgraffito – you will need to keep the work leather hard (a state of dryness where you can still work the clay with a little effort and a little water and care). Step Three – Drying Most of the time your work can go into the rack uncovered to let it dry out for the following week. If you want to continue forming or shaping you will need to double bag your work – put your work on a suitable sized bat and put the bat in a bag so the base of the bag is under the bat, then put another bag over the top of the work and tuck the top of the bag under the bat. If you want to trim (or turn) your thrown work the following week, it should also be double bagged. If your work is large, delicate, or of uneven thicknesses, you should lightly cover your work for drying. When considering the drying process, bare in mind the weather, humidity and wind! The hotter and dryer, the faster things dry and work can dry unevenly in the shelves – this can lead to cracking – another time to lightly cover your work for drying. Step Four – Trimming and Cleaning Up Your work is dry! It is called greenware now and it is at it’s most fragile! Handle everything with two hands. I often refer to soft hands – keep everything gentle and with your fingers spread as much as possible. Try to not pick up things like plates too much, and always with both hands! Before your work can be bisque fired it should be “cleaned up”. You work won’t go into the kiln if it has sharp edges – when glazed, sharp edges turn into razor blades! Use a piece of fly wire to rub the work all over – this will scratch a little so be light handed. Use a knife or metal kidney to scrape any areas that require a bit more dynamic treatment than the fly wire offers! Finally, a very light wipe over with a slightly damp sponge can help soften and soothe all of your edges and dags! Trimming thrown work: If you are planning to trim (or turn) your thrown work (and you should be), make sure you bag it well – your work should be leather hard to almost dry for easiest trimming. Use this step to finish the work completely – use a metal kidney to polish the surface, or a slightly damp sponge to give a freshly thrown look. Wipe the sponge around the rim after trimming, and check the inside of the pot for dags! Trimming slip cast work: Usually I will trim the rims of your work on the wheel the following day to make that stage easier, however you will still need to check your work for lumps and bumps. Last but not least – check that your name is still clearly on the bottom of your work. Step Five – Bisque Firing When the work is completely dry it can go into the bisque kiln. The bisque kiln is fired to 1000°C. This process burns off the water in the clay as well as some of the chemically bound water. The structure of the clay is not altered that much at this temperature. Inside the bisque kiln, the work is stacked a little, small bowl inside a larger bowl and onto a heavy plate. Smaller items like decorations or drink coasters might get stacked several high. Consideration is paid to the weight of the stack and shape of the work. A bisque kiln can fire about one and a half times the amount of work that the glaze kiln can fire. The firing takes about 10 hours to complete the cycle and about two days to cool down. Once it has been emptied the work is placed in the glaze room ready for you to decorate! Step Six – Glazing Decorating your work with colour can be a lot of fun – and time consuming! There are three main options for surface treatment at this stage: Oxide Washes Underglazes Glazes Washes and underglazes do not “glaze” the work – It will still need a layer of glaze to fully seal the clay (washes don’t need glaze on surfaces not designed for food or liquid as they can gloss up a little on their own). Underglazes are stable colourants that turn out pretty much how they look in the jar. They can be mixed with each other to form other colours and can be used like water colours to paint onto your work. Mostly they should have a clear glaze on top to seal them. Oxides are a different species – the pink oxide (cobalt) wash turns out bright blue for instance. They don’t always need a glaze on top, and some glazes can change the colour of the wash! The glazes need no other “glaze” on top! Be careful of unknown glaze interactions – you can put any combination of glaze in a bowl or on a plate, but only a single glaze on the outside of any vertical surface! Glazes are a chemical reaction under heat. We don’t know the exact chemicals in the Mayco glazes we use. I can guess by the way they interact with each other, however, on the whole, you need to test every idea you have, and not run the test on a vertical surface! Simply put, glaze is a layer of glass like substance that bonds with the clay underneath. Clay is made of silica, alumina and water. Glaze is made of mostly silica. Silica has a melting point of 1700°C and we fire to 1240°C. The silica requires a “flux” to help it melt at the lower temperature. Fluxes can be all sorts of chemicals – a common one is calcium – calcium has a melting point of 2500°C, however, together they both melt at a much lower temperature! Colourants are metal oxides like cobalt (blue), chrome (green through black), copper (green, blue, even red!), manganese (black, purple and pink) iron (red brown), etc. Different chemicals in the glaze can have dramatic effects. for example, barium carbonate (which we don’t use) turns manganese bright pink! Other elements can turn manganese dioxide brown, blue, purple and reddish brown. Manganese dioxide is a flux in and of itself as well. So, glazes that get their black and purple colours, often interact with other glazes and RUN! Our mirror black is a good example – it mixes really well with many glazes because it fluxes them – causes them to melt faster. It will also bring out many beautiful colours in the glazes because it’s black colouring most definitely comes from manganese dioxide! Glaze chemistry is a whole subject on it’s own! We use commercial Mayco glazes on purpose – for their huge range of colour possibilities, stability, cool interactions, artistic freedom with the ability to easily brush the glazes on and ease of use. We currently have almost 50 glazes on hand! A major project is to test the interactions of all glazes with each other. That is 2,500 test tiles!!!! I’m going to make the wall behind the wheels the feature wall of pretty colours! Step Seven – Glaze (Gloss or sometimes called “Glost”) Firing Most of the time this is the final stage of making your creation (but not always!) The glaze kiln goes to 1240°C. This is called cone 6, or midrange. It is the low end of stoneware temperatures. Stoneware clays and glazes are typically fired at cone 8 – 10, that is 1260 – 1290°C. The energy requirement to go from 1240°C to 1280°C is almost a 30% more! Our clay is formulated to vitrify (mature, turn “glass-like”) at 1240°, as are our glazes. A glaze kiln take around 12 hours to reach temperature and two to three days to cool down. Sometimes a third firing process is required – this is for decoration that is added to work after the glaze firing. For example – adding precious metals and lustres. this firing temperature is usually around 600 – 800°C depending upon the techniques being used. There are many students interested in gold and silver trims – we will be doing this third type of firing soon! After firing your work will be in the student finished work shelves. Remember to pay for it before you head out the door! There is a small extra charge for using porcelain clay (it’s more than twice the price of regular clay), and for any third firing process! Once your work has been fired it can not turn back into clay for millennia – so don’t fire it if you don’t like it! Put it in the bucket for recycling. https://firebirdstudios.com.au/the-process-of-making-pottery/This bowl was made by renowned pottery company J & G Meakin of England. The firm was established in the mid-1800's. The bowl is an example of kitchenware used in the 19th century and still in use today.Bowl; white ceramic, round and tapering inwards towards base. Made by J and G Meakin England.On base, 'Ironstone China Reg SOL 391413' with symbolflagstaff hill, flagstaff hill maritime museum and village, warrnambool, maritime museum, maritime village, great ocean road, shipwreck coast, mixing bowl, food preparation, j & g meakin, pottery, stoke-on-trent, kitchen equipment, ceramic -
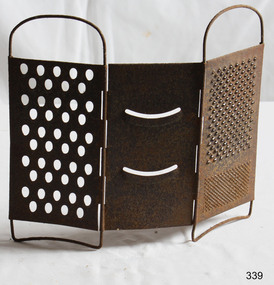 Flagstaff Hill Maritime Museum and Village
Domestic object - Grater
... like more filling food during difficult economic times. Taylor read about Boullier’s invention and made his own by sharpening the holes of a metal shower drain. For the last century, many companies have tried to improve the cheese grater and invent a new “latest” one that we all must-have. ...like more filling food during difficult economic times. Taylor read about Boullier’s invention and made his own by sharpening the holes of a metal shower drain. For the last century, many companies have tried to improve the cheese grater and invent a new “latest” one that we all must-have. ...François Boullier of France and Isaac Hunt of England both took credit for inventing the cheese grater in the 1540s. Ingredient supplies, mainly milk, ebbed and flowed in both France and England, as they have in the United States during this coronavirus pandemic. Boullier originally aimed to use up an overabundance of cheese in Paris. An avoidance of meat led French farmers to convert their meat herds (often boys) to dairy-producers (girls), which led to more milk and even too much milk, which led to a market flooded with cheese. Boullier made his first cheese grater out of pewter to grate hard, sometimes dried out cheeses, which turned them into a sort of condiment. Pewter is known as a rather soft metal, and Boullier’s original grater is reportedly on display in a museum in Le Havre, France. Isaac Hunt wanted to stretch cheese due to a shortage in England, so he grated and melted it for Welsh rarebit and other dishes. Grating cheese allowed more even distribution of the cheese to melt it in cooking and still does. During the Great Depression of the 1930s, Philadelphia cheesemonger and entrepreneur Jeffrey Taylor also wanted to stretch cheese for to bulk up cheese features, including vegetables, to make them look like more filling food during difficult economic times. Taylor read about Boullier’s invention and made his own by sharpening the holes of a metal shower drain. For the last century, many companies have tried to improve the cheese grater and invent a new “latest” one that we all must-have. Graters are now made of all sorts of materials including bamboo, wood, and various metals. Some are decorated with clowns’ heads, some are shaped like plastic frogs, while others bear knuckle protectors. They vary in size, shape, and function. Grating slots come with different angles and shapes of slots and can grate everything from zucchini, onions and cheese, to cooked eggs, coconut, potatoes, cabbage, and lemon and orange peel, and possibly even create wood shavings. Smaller graters grate ginger and garlic. https://www.cheeseprofessor.com/blog/antique-cheese-gratersThe grater has been used for hundreds of years and has proved its worth in the kitchen throughout history.Grater metal (3 parts) Tripartite with hinges for folding.None.flagstaff hill, warrnambool, shipwrecked-coast, flagstaff-hill, flagstaff-hill-maritime-museum, maritime-museum, shipwreck-coast, flagstaff-hill-maritime-village, grater -
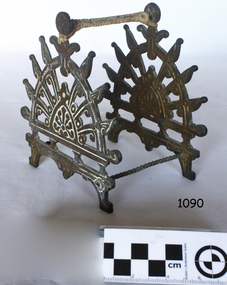 Flagstaff Hill Maritime Museum and Village
Pen Rack
... we need to understand the development of the pen itself. Before the early 19th-century steel pens were almost universally all barrel pens affixed to a holder pretty permanently. Pens were also not disposable. There were even steel pen repair services, just like...we need to understand the development of the pen itself. Before the early 19th-century steel pens were almost universally all barrel pens affixed to a holder pretty permanently. Pens were also not disposable. There were even steel pen repair services, just like ...The origins of the pen rack probably began when quill pens were being replaced by steel nib pens that were held at oblique angles for writing this method of writing started to gain popularity around 1820-1860. To understand the development of display racks to hold pens on a desk we need to understand the development of the pen itself. Before the early 19th-century steel pens were almost universally all barrel pens affixed to a holder pretty permanently. Pens were also not disposable. There were even steel pen repair services, just like the same services around at the time to repair you're fine quills. Individual slip nib pens which fit into a holder were originally pieces of a quill which came in a box of nibs and fit into a holder. These were disposable and meant to obviate the need to mend your quills. By 1831 you start to see more what they called “slip nib pens” or “portable pens” (easier to carry than a long barrel pen), but the idea of holding the nib at an oblique angle in the holder was an idea new enough that it warranted a patent. In 1831, an enterprising and very successful stationer and inventor, Sampson Mordan (inventor of the silver mechanical pencil) combined with one William Brockedon to patent the first oblique pen and oblique holder. In the patent application, they mention as the benefits that this would allow the writer to hold the pen more comfortably as well as it should allow the pen to last longer since both tines will be moving across the paper evenly. It appears at the time the idea of holding a pen obliquely was new. As a result of the popularity of the oblique pen many different designs of pen desk holders were being made, to keep pens suspended on a rack alleviated the possibility that the expensive new steel nibs with their holder could be damaged if left in a desk draw with other items.Double sided Pen Rack, decorative metal with four metal legsflagstaff hill, warrnambool, shipwrecked-coast, flagstaff-hill, flagstaff-hill-maritime-museum, maritime-museum, shipwreck-coast, flagstaff-hill-maritime-village -
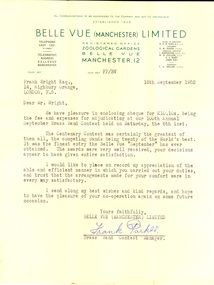 Federation University Historical Collection
Letter - Correspondence, Frank Parker, 16/10/1952
... We have pleasure in enclosing cheque for 10 pounds 10 shillings being the fee and expenses for adjudicating at our 100th Annual September Brass Band Contest held on Saturday, the 6th inst. The Centenary Contest was certainly the greatest of them all, the competing Bands being twenty of the World's best. It was the finest entry the Belle Vue "September" has ever obtained. The awards were very well received, your decisions appear to have given entire satisfaction. I would like...We have pleasure in enclosing cheque for 10 pounds 10 shillings being the fee and expenses for adjudicating at our 100th Annual September Brass Band Contest held on Saturday, the 6th inst. The Centenary Contest was certainly the greatest of them all, the competing Bands being twenty of the World's best. It was the finest entry the Belle Vue "September" has ever obtained. The awards were very well received, your decisions appear to have given entire satisfaction. I would like ...Frank Wright was a renown resident of Smeaton, where he was born on 2 August 1901. He lived at Laura Villa, and attended Smeaton State School. His father William was a gold miner and his mother's name was Sarah. Their family won many singing and instrumental awards. Frank was tutored by Percy Code and was awarded a gold medal for the highest marks in the ALCM examinations in the British Colonies at the age of seventeen years. He became the Australian Open Cornet Champion by the age of eighteen. A year later, Frank conducted the City of Ballarat Band, and later the Ballarat Soldiers’ Memorial Band. He formed the Frank Wright Frisco Band and Frank Wright and his Coliseum Orchestra. These bands won many South Street awards, and Frank as conductor won many awards in the Australian Band Championship contest. In 1933 Frank Wright sailed to England to conduct the famous St Hilda’s Band and was later appointed Musical Director of the London County Council, where he organized many amazing concerts in parks, in and around the London district. He was made Professor of Brass and Military Band Scoring and conducted at the Guildhall of Music and Drama. Frank was often invited to adjudicate Brass Band Championships around Europe, in Australia, including South Street and in New Zealand. The Frank Wright Medal at the Royal South Street competition is awarded to an individual recognized as making an outstanding contribution to brass music in Australia.Letter from Frank Packer of Belle Vue (Manchester) Limited to Frank Wright, 1952Frank Wright Esq., 14, Highbury Grange, London, N.5. Dear Mr. Wright, We have pleasure in enclosing cheque for 10 pounds 10 shillings being the fee and expenses for adjudicating at our 100th Annual September Brass Band Contest held on Saturday, the 6th inst. The Centenary Contest was certainly the greatest of them all, the competing Bands being twenty of the World's best. It was the finest entry the Belle Vue "September" has ever obtained. The awards were very well received, your decisions appear to have given entire satisfaction. I would like ot place on record my appreciation of the able and efficient manner in which you carried out your duties, and trust that the arrangements made for your comfort were in every wat satisfactory. I send along my best wishes and kind regards, and hope to have the pleasure of your co-operation again on some future occasion. Yours faithfully, Belle Vue (Manchester) Limited Frank Parker Brass Band Contest Manager. belle vue, frank wright, letter, adjudicator, brass band -
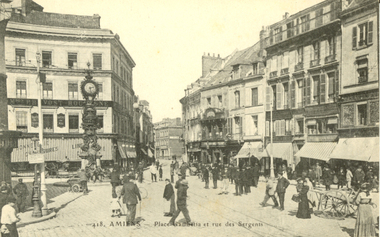 Federation University Historical Collection
Postcards - black and white, L. Caron, Amiens, c1917, c1915
... Am sending you these cards, as we have heard that cares are going to be prohibited from being sent home, so would like you o have these before we are stopped. ...Am sending you these cards, as we have heard that cares are going to be prohibited from being sent home, so would like you o have these before we are stopped. ...Seventeen black and white postcards showing Amiens, France during World War Oneverso of .9) Chapelle d'Armentieres, 19 March 1915 "Dear Mary, Hope my letter reaches you safely. Wrote Vic to-day. Am sending you these cards, as we have heard that cares are going to be prohibited from being sent home, so would like you o have these before we are stopped. Good-bye once more with love and best wishes From Gordon." (Gordon Spittle)chatham family archive, amiens, france, world war, world war one, ascot -
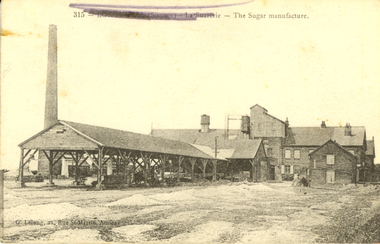 Federation University Historical Collection
Postcard, G. Lelong, The Sugar Manufacture, Somme, France, c1917, c1917
... By all of your letters you are all looking forward to the day we return 9as we are). I wouldn't like to bet too much that we would be home by this time next year [ ? ...By all of your letters you are all looking forward to the day we return 9as we are). I wouldn't like to bet too much that we would be home by this time next year [ ? ...This postcard was sent from France during World War One WW1 to Violet Holmes [mother and aunty of other WW1 soldiers], by the son of a neighbouring Ascot Tourello District Family, the Wrigley Family. Violet inherited "Sauchieburn" an Ascot property on the death of her husband William Holmes in 1914. On her death this property was to be left to their 4 children and administered by a relative till the youngest child turned 27. As young boys, Violet's husband William, and his brother Henry, lived with their Aunt Catherine Coghill and Uncle William Coghill at ‘Sauchieburn’ Ascot. The Coghills had no children of their own. He and his brother Edward started a stock and station business at Clunes. Henry and Violet Holmes subsequently inherited "Sauchieburn" from Catherine (nee Holmes) and William Coghill, direct descendants of the Coghills Creek, Ascot, Tourello pioneer settler Captain William Coghill [Jane Dyer, May 2024] Catherine and her brother Edward Carter Holmes drowned at sea.This is an extract from the Korumburra Times, Wednesday June 6, 1956: The fated travellers wrecked off N.S.W. ‘On May 29th, 1886 in bright moonlight the Ly-e-Moon, the pride of the Australian coastal fleet, broke her back on the treacherous rocks of Green Cape, off the NSW coast. Eighty souls perished within range of the beacon rays of the lighthouse, including representatives of the earliest families ever to settle in Poowong. The passengers. On the main deck, Mr Edward Holmes, a Poowong grazier and former owner of ‘Wombalano’. He had sold this property with the object of going to Queensland and settling there. The proceeds of sale amounting to 1,200 pounds in gold sovereigns were under lock and key in the Purser's Office. Mr Holmes, although advanced in years, had unformed plans to invest his money in some Queensland enterprise. In the meantime he would visit his married daughter and [his] two sons, who had previously settled in Queensland. With him on board was his widowed sister Mrs Coghill who had also accepted an invitation to go north. News of the shipwreck, means of communication being slow, did not reach Korumburra for nearly a week. By then all hope had been abandoned for the missing. Relations and friends thronged the Melbourne shipping office, but the answer was always the same - All passengers unaccounted for were presumed drowned. Black and white postcard of a sugar refinery in The Somme, France. The name of the town has been scrubbed out in purple pencil by a censor during World War One. The back of the card is written on in pencil,Written on back of card: Dear Violet, received photos and letters and thank you for forwarding same. Are we having lovely spell of weather. This morning is quite warm and pleasant. The photo of you all standing in front of your house is a good one and you all look to be getting enough to eat. Mother looks as if she it getting stronger after her severe illness. Your concert party will be broken up through the Vale girls leaving but you should have no difficulty in finding volunteers to fill the ranks. By all of your letters you are all looking forward to the day we return 9as we are). I wouldn't like to bet too much that we would be home by this time next year [ ? ] by the way fritz is fighting lately he would very much like to get [peace?] I think we will give him all he wants this summer. J. Waller was here last night is looking well. With best wished to you all. I am sincerely. [W.Wrigbee? Wrigley]somme, la suererie, chatham family collection, amiens, france, world war 1, postcard, ly-ee-moon, william coghill junior, ascot victoria, pioneers of ascot, shipwreck -
 Federation University Historical Collection
Booklet, Threshold: The Magazine of the Ballarat Girls' Technical School, 1959, 1959
... We were both teachers, and I said to Ron, “Well, you got married – where’s your letter?!” That really clarified that the world wasn’t quite even, even in this profession that I’d always wanted and loved. I didn’t get superannuation – I think I got something like...We were both teachers, and I said to Ron, “Well, you got married – where’s your letter?!” That really clarified that the world wasn’t quite even, even in this profession that I’d always wanted and loved. I didn’t get superannuation – I think I got something like ...1959 was the first issue of 'Threshold'. In 1951 thirty girls started a junior technical course for the first time in Ballarat, under the Principal of the Ballarat School of Mines. By 1959 it had increased enormously with an enrolment of 284 students, and its own headmistress. The early school took place in the Dana Street Primary School and a large portion of the Ballarat Technical Art School. It was not thought necessary for girls to produce a magazine, but Joan Hood (Kirner) was determined that the girls would have the same opportunity as the boys. “When I went out teaching, I went to Ballarat Girls Tech, where I met [husband] Ron who was at Ballarat Boys Tech. They were seen as tough schools, and I saw the disadvantage faced by these girls who were at the lowest of the low of the education rung – and yet there were some fantastic girls there who needed equal opportunity. So I think it was teaching that cemented in my mind that people don’t get an even go – and in particular girls. It didn’t take me too long to realise blokes were largely empowered. And it was teaching that cemented how equity and empowerment for women could be achieved through education.” Sarah Capper: You graduated from Melbourne University in 1958, and as mentioned, began work as a teacher in Ballarat. You married Ron in 1960 and received one of those government letters asking you to resign - JK: Yes, I think it burnt a hole in my pocket when I brought it home! We were both teachers, and I said to Ron, “Well, you got married – where’s your letter?!” That really clarified that the world wasn’t quite even, even in this profession that I’d always wanted and loved. I didn’t get superannuation – I think I got something like 100 pounds as pay in lieu of permanent service. And that wasn’t just me – that was a whole generation. Fancy that – that’s what it said – “pay in lieu of permanent service”. So that made me livid. If I hadn’t been a feminist before then, I certainly was by then. I realised the distribution of power was different for women and men. http://sheilas.org.au/2014/02/a-bonza-joan-kirner/, accessed 06/06/2015 The four houses of the Ballarat Girls' Technical School were Bass House, Sturt House, Flinders House and Mitchell House. Orange and green soft covered magazine of 24 pages. Includes a message from the headmistress, Fay Moore, and a photograph of the Magazine Committee featuring teacher Joan Hook (later Joan Kirner, Premier of Victoria). Information and a photograph is given for the following personalities: Sandra McHenry, Sylvia Rowe, Heather Young, Beverley Davis, Lorna Robertson, Janice Hunter, Margaret Ayars, Margaret Veal, Heather O'Brien, Hilary Batt, Leone Davies, Marlene Drever, Janet Smith.ballarat girls' technical school, joan hood, joan kirner, fay moore, i.e. harris, faye hilton, marilyn miller, lesley cutts, margaret jones, moira blair, rosemary davies, lorraine button, vivienne guy, lorraine krankovich, loralie crabbe, beverley davis, shirley dean, lorrice campbell, hilary batt, valerie stewat, sandra mchenry, joy henderson -
 Narre Warren and District Family History Group
Book, Sheila Scotter, Sheila Scotter : snaps, secrets and stories from my life, 1998
... we find out how she came to live in Australia in the first place and why she has made Melbourne her home. Not surprisingly, the book reflects the personal contradictoriness of its author/subject on the one hand an aristocrat, on the other a rogue who does not respect rank; blithely mixing innate feminism with blatant coquettishness; outrageous yet scrupulously stylish; in the know yet discrete; courting notoriety while at the same time needing solitude a Like all celebrity autobiographers Sheila reserves her right to privacy while basking in the limelight. ...There is no other store like David Jones... and there is no other consultant like Sheila Scotter! Known variously as the Kangaroo editor (by Diana Vreeland), the black and white lady from Albert Park, and the Silver Duchess, this is the autobiography, scrapbook-style, of one of Australia's doyennes of style. For Sheila Scotter's seventeenth birthday her parents put on a 'coming out ball' in the United Services Club in Calcutta, where they lived at the time. The teenager wore a pale turquoise silk taffeta ball gown. Sheila no longer remembers what happened to that dress, but she does know that it is responsible for the black-and-white wardrobe that has been her hallmark ever since, with the exception of one occasion and one occasion only. For her seventieth birthday party, close friend John Truscott conned her into wearing red, insisting that the theme for the event was all red. And what did the guests all wear? Black and white! This anecdote lite, stylish, idiosyncratic is typical of the many that make up Sheila Scotter's autobiographical assortment. Most Australian women know Sheila Scotter through her Women's Weekly column 'Sheila Scotter Suggests' which ran between 1975 and 1980 and totalled some 235 instalments. The fact that this column is still vividly remembered 17 years later attests to the sacred place it held in every Australian household. A feminist before the word was invented, Sheila has had a formidable career. Two chapters are devoted to her career in fashion, including her time as the editor-in-chief of Vogue and founding editor of Vogue Living. The art of fundraising is also treated in some depth. In snippets, we hear of her love of cricket (which she once played); we find out how she came to live in Australia in the first place and why she has made Melbourne her home. Not surprisingly, the book reflects the personal contradictoriness of its author/subject on the one hand an aristocrat, on the other a rogue who does not respect rank; blithely mixing innate feminism with blatant coquettishness; outrageous yet scrupulously stylish; in the know yet discrete; courting notoriety while at the same time needing solitude a Like all celebrity autobiographers Sheila reserves her right to privacy while basking in the limelight. But she has used this book to set the record straight on a number of issues, including why she left Vogue, her many romantic involvements, her much-publicised spat with socialite Lillian Frank, and what was wrong with David Jones, to whom she consulted during 1994-95. The book contains the expected wining, dining and partying, as well as the inside story on some recent scandals. Sheila Scotter is glamorous and alluring, a forthright mover and shaker who inspires fear in some, awe and respect in others, and admiration and loyalty in most. No matter what you think of her, you simply cannot ignore her. Friends and enemies alike are awaiting this book with bated breath for one reason: when Sheila Scotter speaks, people listen. Contents Foreword (by Ruth Cracknell, a personal friend) Before I Begin a (explaining the rationale for the book) 1 Thursday's Child (birthdays) 2 Christmases to Remember 3 In Fashion (career in fashion) 4 A Matter of Style (Vogue Living and its influence) 5 Marriage and Other Liaisons 6 A Mixed Salad of Letters (letters, personal and business, from prominent people) 7 Fundraising: Are Committees Really Necessary? 8 Loved Ones Departed (or Why I Envy the Angels) 9 Disappointments and Other Disasters (scandals and inside stories) 10 London, Paris, Sydney, Melbourne (the places she has lived) 11 Not the Last Instalment (a look ahead) Postscript (a tribute to some special men read between the lines) Source: Publisher253 p.; 25 cmnon-fictionThere is no other store like David Jones... and there is no other consultant like Sheila Scotter! Known variously as the Kangaroo editor (by Diana Vreeland), the black and white lady from Albert Park, and the Silver Duchess, this is the autobiography, scrapbook-style, of one of Australia's doyennes of style. For Sheila Scotter's seventeenth birthday her parents put on a 'coming out ball' in the United Services Club in Calcutta, where they lived at the time. The teenager wore a pale turquoise silk taffeta ball gown. Sheila no longer remembers what happened to that dress, but she does know that it is responsible for the black-and-white wardrobe that has been her hallmark ever since, with the exception of one occasion and one occasion only. For her seventieth birthday party, close friend John Truscott conned her into wearing red, insisting that the theme for the event was all red. And what did the guests all wear? Black and white! This anecdote lite, stylish, idiosyncratic is typical of the many that make up Sheila Scotter's autobiographical assortment. Most Australian women know Sheila Scotter through her Women's Weekly column 'Sheila Scotter Suggests' which ran between 1975 and 1980 and totalled some 235 instalments. The fact that this column is still vividly remembered 17 years later attests to the sacred place it held in every Australian household. A feminist before the word was invented, Sheila has had a formidable career. Two chapters are devoted to her career in fashion, including her time as the editor-in-chief of Vogue and founding editor of Vogue Living. The art of fundraising is also treated in some depth. In snippets, we hear of her love of cricket (which she once played); we find out how she came to live in Australia in the first place and why she has made Melbourne her home. Not surprisingly, the book reflects the personal contradictoriness of its author/subject on the one hand an aristocrat, on the other a rogue who does not respect rank; blithely mixing innate feminism with blatant coquettishness; outrageous yet scrupulously stylish; in the know yet discrete; courting notoriety while at the same time needing solitude a Like all celebrity autobiographers Sheila reserves her right to privacy while basking in the limelight. But she has used this book to set the record straight on a number of issues, including why she left Vogue, her many romantic involvements, her much-publicised spat with socialite Lillian Frank, and what was wrong with David Jones, to whom she consulted during 1994-95. The book contains the expected wining, dining and partying, as well as the inside story on some recent scandals. Sheila Scotter is glamorous and alluring, a forthright mover and shaker who inspires fear in some, awe and respect in others, and admiration and loyalty in most. No matter what you think of her, you simply cannot ignore her. Friends and enemies alike are awaiting this book with bated breath for one reason: when Sheila Scotter speaks, people listen. Contents Foreword (by Ruth Cracknell, a personal friend) Before I Begin a (explaining the rationale for the book) 1 Thursday's Child (birthdays) 2 Christmases to Remember 3 In Fashion (career in fashion) 4 A Matter of Style (Vogue Living and its influence) 5 Marriage and Other Liaisons 6 A Mixed Salad of Letters (letters, personal and business, from prominent people) 7 Fundraising: Are Committees Really Necessary? 8 Loved Ones Departed (or Why I Envy the Angels) 9 Disappointments and Other Disasters (scandals and inside stories) 10 London, Paris, Sydney, Melbourne (the places she has lived) 11 Not the Last Instalment (a look ahead) Postscript (a tribute to some special men read between the lines) Source: Publishersheila scotter, fashion -
 Narre Warren and District Family History Group
Book, Graeme C Legge, The Fleur-De-Lis, Khaki Shorts and Me: A Logbook of My Adventures in Scouting, 2022
... Graeme shares his early Scouting travel experiences in the 1950s to Fraser Island in Queensland, to the Pieman River in western Tasmania, to Jamborees at Wonga Park, Victoria in 1948, Greystanes, Sydney in 1952 and Clifford Park, Victoria, 1956 as something we the readers can contrast with how Scouting does such adventures today.He outlines four months of overseas travel to the UK in 1951 as part of the “Sun” newspaper Youth Travel scheme where he met some fellow Scouts who, like him, were chosen to represent their local Shire and he visited places and experiences which clearly had an impact on his future Scouting journey. ...'This Log Book is much more than its title suggests. This is the story of Scouting and of community service in and around Emerald, Victoria and ref lects the impact of Scouting in a semi-rural part of Victoria and Graeme’s role in moulding a part of it. It commences through the eyes of a youth, Graeme Legge, who joined the re-established Emerald Scout Group as a 12 year old in 1948 and recounts his leadership and support to youth and community of his town, its Scout District and Cardinia Shire over more than seven decades. Graeme shares his early Scouting travel experiences in the 1950s to Fraser Island in Queensland, to the Pieman River in western Tasmania, to Jamborees at Wonga Park, Victoria in 1948, Greystanes, Sydney in 1952 and Clifford Park, Victoria, 1956 as something we the readers can contrast with how Scouting does such adventures today.He outlines four months of overseas travel to the UK in 1951 as part of the “Sun” newspaper Youth Travel scheme where he met some fellow Scouts who, like him, were chosen to represent their local Shire and he visited places and experiences which clearly had an impact on his future Scouting journey. He captures the mood and the energy of his years of Scouting Leadership, as when he met Lady Baden-Powell in Emerald, illustrated through his photos, clippings and graphics which are drawn from his personal collection and research of local newspapers in the Victorian Scout Magazine, all befitting the method of a teaching and educational professional."--Foreword.159 p.non-fiction'This Log Book is much more than its title suggests. This is the story of Scouting and of community service in and around Emerald, Victoria and ref lects the impact of Scouting in a semi-rural part of Victoria and Graeme’s role in moulding a part of it. It commences through the eyes of a youth, Graeme Legge, who joined the re-established Emerald Scout Group as a 12 year old in 1948 and recounts his leadership and support to youth and community of his town, its Scout District and Cardinia Shire over more than seven decades. Graeme shares his early Scouting travel experiences in the 1950s to Fraser Island in Queensland, to the Pieman River in western Tasmania, to Jamborees at Wonga Park, Victoria in 1948, Greystanes, Sydney in 1952 and Clifford Park, Victoria, 1956 as something we the readers can contrast with how Scouting does such adventures today.He outlines four months of overseas travel to the UK in 1951 as part of the “Sun” newspaper Youth Travel scheme where he met some fellow Scouts who, like him, were chosen to represent their local Shire and he visited places and experiences which clearly had an impact on his future Scouting journey. He captures the mood and the energy of his years of Scouting Leadership, as when he met Lady Baden-Powell in Emerald, illustrated through his photos, clippings and graphics which are drawn from his personal collection and research of local newspapers in the Victorian Scout Magazine, all befitting the method of a teaching and educational professional."--Foreword. scouting, emerald (vic.), graeme legge -
Coal Creek Community Park & Museum
Music Sheets
... We Were Young 24 - Who Do You Think You Saw Last Night? / You're Lovely Madam 25 - Thanks For Everything / I Found My Yellow Basket 27 - Josephine / I'm Singing a Song for the Old Folks 30 - Romany / The Park Parade 31 - A Song of Old Hawaii / So little Time 83 - A Pretty Girl is like a Melody / You 101 - One Never Knows, Does One / Goodnight My love 103 - Someone to Care For Me / Rainbow on the Rive 105 - Miracles Sometimes Happen / I Want the Whole World to Love You 112 - The Coronation Waltz 116 - Looking Around Corners For You / There's That Look in Your Eyes Again 117 - May I Have The Next Romance With You? ...We Were Young 24 - Who Do You Think You Saw Last Night? / You're Lovely Madam 25 - Thanks For Everything / I Found My Yellow Basket 27 - Josephine / I'm Singing a Song for the Old Folks 30 - Romany / The Park Parade 31 - A Song of Old Hawaii / So little Time 83 - A Pretty Girl is like a Melody / You 101 - One Never Knows, Does One / Goodnight My love 103 - Someone to Care For Me / Rainbow on the Rive 105 - Miracles Sometimes Happen / I Want the Whole World to Love You 112 - The Coronation Waltz 116 - Looking Around Corners For You / There's That Look in Your Eyes Again 117 - May I Have The Next Romance With You? ...A selection of 36 music sheets. Numbers against each song title has been written by the original owner. 1 - Ginger Headed Feller 2 - Dreamy Hawaiian Moon 3 - Small Fry 4 - A Little Kiss At Twilight 7 - Musical Comedy Favourites Pt 1 & 2 9 - Moonlight in Waikiki 12 - You're Pretty as a Picture / My Own 19 - Sweethearts and Wooden Shoes (2 Copies) 20 - One Day When We Were Young 24 - Who Do You Think You Saw Last Night? / You're Lovely Madam 25 - Thanks For Everything / I Found My Yellow Basket 27 - Josephine / I'm Singing a Song for the Old Folks 30 - Romany / The Park Parade 31 - A Song of Old Hawaii / So little Time 83 - A Pretty Girl is like a Melody / You 101 - One Never Knows, Does One / Goodnight My love 103 - Someone to Care For Me / Rainbow on the Rive 105 - Miracles Sometimes Happen / I Want the Whole World to Love You 112 - The Coronation Waltz 116 - Looking Around Corners For You / There's That Look in Your Eyes Again 117 - May I Have The Next Romance With You? / Head Over Heels in Love 118 - Harbour Lights / There's Yoo-hoo in Your Eyes 146 - Its The Natural Thing to Do / The Moon Got In My Eyes 150 - The Little Boy Santa Forgot / Have You Ever Been In Heaven 152 - Where an Old Spanish Town Used To Be / Once In A While 154 - You're a Sweetheart / My Fine Feathered Friend 157 - Sweet Someone / Broadway's Gone Hawaii 158 - Always and Always / A Gypsy Told Me 160 - Got A Pair Of New Shoes / A Serenade to the Stars 161 - Down Where the Trade Winds Blow / Hawaii Calls 163 - More Than Ever / Let's Give love Another Chance 165 - A Foggy Day / Rosalie 166 - Who Are We To Say / Shadows on the Moon 169 - Melody Farm / The One I Love 170 - Moonshine Over Kentucky / An Old Straw Hat 175 - On The Sentimental Side / My Heart is Taking Lessonspencil and blue ink numbering system.