Showing 173 items matching " tram 69"
-
 Melbourne Tram Museum
Ephemera - Timetable, The Met, Set of 18 Tram Timetables, produced by The Met, 1986 - 1988
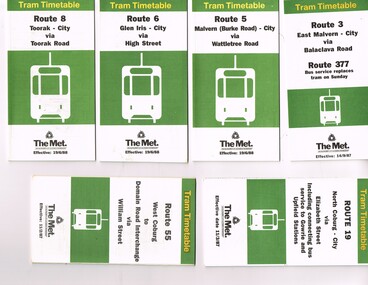
Set of 18 Tram Timetables, produced by The Met for various routes, white cover with two green, multi fold horizontal sheet, giving a route map, description, notes, time points, information contact details and types of tickets (Neighbourhood and Travelcards) and where they could be purchased. .1 - Route 3 - East Malvern - City via Balaclava Road - replaced by bus 377 on Sundays - dated 14/9/1987 .2 - Route 5 - Malvern Burke Road - City via Wattletree Road - 19/6/1988 .3 - Route 6 - Glen Iris - City via High St - 19/6/1988 .4 - Route 8 - Toorak - City via Toorak Road - 19/6/1988 .5 - Route 19 - North Coburg - City via Elizabeth St including connecting bus service to Gowrie and Upfield stations - 11/3/1987 .6 - Route 55 - West Coburg - Domain Interchange via William St - 11/2/1987 .7 - Route 57 - West Maribyrnong - City via North Melbourne - Route 357 bus replaces tram on Sunday - 1/12/1986 .8 - Route 59 - Airport West - City via Essendon -1/12/1986 .9 - Route 64 - East Brighton - City via Hawthorn Road - 14/9/1987 .10 - Route 67 - Carnegie - City via Glenhuntly Road - 14/9/1987 .11 - Route 69 - Kew (Cotham Road) - St Kilda Beach via Glenferrie Road - 19/6/1988 .12- Route 72 - Camberwell - City via Malvern Road - 19/6/1988 .13 - Route 75 - East Burwood - City via Flinders St - 15/2/1988 .14 - Route 78, Route 79, North Richmond - Prahran via Chapel St and North Richmond - St Kilda Beach via Chapel St - 13/7/1987 .15 - Route 82 - Footscray Moonee Ponds via Highpoint City and Route 223 bus replacement for Saturday afternoon and all day Sunday. 3/8/1987 .16 - Route 88 - Bundoora - City via Preston .17 - Route 96 - East Brunswick - St Kilda Beach via Bourke St City - 22/11/1987 .18 - Route 111 - Royal Exhibition Buildings - Port Melbourne via Bourke St City - 20/12/1987. (2nd copy added 1/4/20201( .19 - Route 600 - St Kilda - Middle Brighton via Elwood - 1/12/1986 Full Image of .5 added 9/4/17 following a query about route 19 timetables - see image i6.trams, tramways, timetables, tickets, tram services, route 3, route 5, route 6, route 19, route 55, route 57, route 59, route 64, route 8, route 67, route 69, route 72, route 75, route 78, route 78, route 79, route 82, route 88, route 86, route 111, route 600 -
 Melbourne Tram Museum
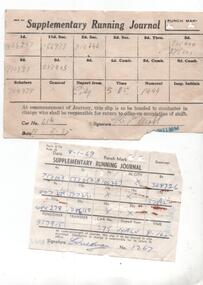
Document - Form/s, Melbourne & Metropolitan Tramways Board (MMTB), "Supplementary Running Journal", 1935 and 1969
Set of two ""Supplementary Running Journal", used by Conductors to enable the checking of tickets by Examiners. Was to be filled out prior to the commencement of journey and placed in the clip provided. Has space for date, punch mar, each fare time and Signature and Number. Both have punch marks .1 - Used 11-8-1935, possibly on a cable car, signed at R. Elliott, completed in pencil, car 476. Has part of a depot stamp in the bottom right hand corner. .2 - Form 3/134, Aug 66, used 8-1-69 by conductor No. 1267, ? from Malvern Depot, car 275. Completed in ink. Has the Malvern depot stamp on the rear. Re item 1 - Andrew Cox investigated this and found that W2 456 was at Coburg at the time and that though very fuzzy, could be Coburg depot stamp.trams, tramways, tickets, conductors, revenue journal, inspectors, cable trams, coburg depot -
 Melbourne Tram Museum
Ephemera - Timetable/s, Melbourne & Metropolitan Tramways Board (MMTB), "MMTB Tram Timetables", 1977 to 1978
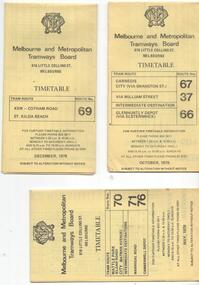
Set of 6 MMTB Tram timetables, folded sheets, 8 sections, providing timetables for specific routes, day of week giving information on tram times at specific time points, route map, sections and fares and organisation address - 616 Little Collins St. Melbourne. All printed on yellow paper. 1. - Route 67, 37 and 66 - Carnegie - City via Swanston St (67), via William St (37) and Glenhuntly Depot (66) - dated Oct. 1978. .2 - Route 69 - Kew Cotham Road - St Kilda Beach dated Dec. 1978 .3 - Route 70, 71 and 76 - Wattle Park - Batman Ave, Arraign Road (Route 71) and Camberwell Depot (Route 76), dated May 1978 .4 - Route 72, 32 and 73 - Camberwell City via Swanston St (72), via William St (32) and Camberwell Junction (73) dated Sept, 1978. .5 - Route 82 - Moonee Ponds - Footscray - Highpoint West - dated Sept. 1977 .6 - Route 88, 14, 89 and 90, 96, 95 and 97 - East Preston via Bourke St (88), via Latrobe St (14), East Preston Bell St (89) and Northcote Dundas St (90) to the city and East Brunswick (96), Exhibition (95) and North Fitzroy (Park St), dated May 1978. .7 - Routes 48, 24, 40, 41, 29, 74, 76. 28 - July 1978 .8 - ditto - Weekends, July 1978, printed on green paper. .9 - Bus routes 284 (East Kew - Doncaster North) and 270 (East Kew - Shoppingtown) - dated August 1978trams, tramways, mmtb, timetables, melbourne, fares, route 14, route 32, route 37, route 66, route 67, route 69, route 70, route 71, route 72, route 73, route 76, route 82, route 88, route 89, route 90, route 95, route 96, route 97, route 48, route 24, route 40, route 41, route 29, route 74, route 76, route 28, route 284, route 270 -
 Melbourne Tram Museum
Pamphlet, The Met, "Travel back in Time - Vintage Trams", c1995
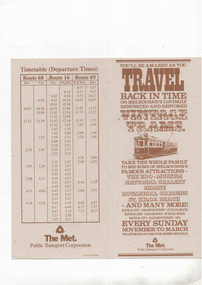
Pamphlet - 2 fold DL printed on light card with a fawn colour, titled "Travel back in Time - Vintage Trams", giving details of the Vintage Tram services, mid 1990's using the L class trams. Has map and timetables for route 68 to the Zoo, Route 16 to St Kilda Beach and Route 69 to Kew from the City. Has The Met logo and contact details.trams, tramways, ptc, vintage trams, the met, route 68, route 16, route 69, l class -
 Melbourne Tram Museum
Map, Royal Automobile club of Victoria (RACv), "Melbourne and Suburbs", late 1960's
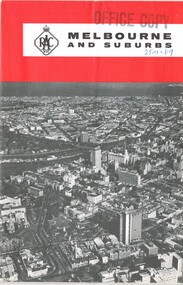
Map - folded 8 folds or sections, printed in two colours titled "Melbourne and Suburbs", published by the RACV late 1960's, giving a map of Melbourne and its suburbs, shows all tram and rail lines, highways, freeways under construction, has a detailed index and map of the city or CBD area, shows one way streets and churches, clubs etc.On front cover stamped "Office Copy" and hand written date of "28-1-69"trams, tramways, racv, melbourne, map, tramways, timetables -
 Melbourne Tram Museum
Ephemera - Timetable/s, Melbourne & Metropolitan Tramways Board (MMTB), "MMTB Tram Timetables", 1980
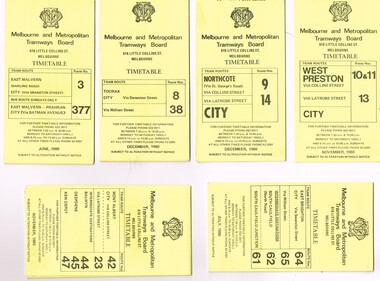
Set of 12 MMTB Tram timetables, folded sheets, generally 10 sections, providing timetables for specific routes, day of week giving information on tram times at specific time points, route map, sections and fares and organisation address - 616 Little Collins St. Melbourne. All printed on yellow paper unless noted otherwise. .1 - Route 3 - East Malvern and Route 377 - Bus on Sunday only - June 1980 .2 - Route 8 and 88 Toorak - December 1980 .3 - Route 9 and 14 - Northcote - City - Dec. 1980 .4 - Route 42, 23, 44, 45, 47 - Mont Albert - City - Nov. 1980 .5 - Route 61, 62, 64, 64 - East Brighton - City - July 1980 .6 - Route 37, 66 and 67 - Carnegie - City - July 1980 .7 - Route 10, 11, 13 - West Preston - City - November 1980 .8 - Route 69 - St Kilda Beach - Kew - Nov. 1980 .9 - Route 75, 74, 76 and 28 - East Burwood - City - Oct. 1980 .10 - Route 96, 95, 97 - East Brunswick - City - September 1980. .11 - Route 15, 22 - Moreland - City - December 1980 ,12 - Route 1 & 21 - East Coburg - City - December 1980trams, tramways, mmtb, timetables, melbourne, fares, bus replacement, route 1, route 3, route 8, route 9, route 10, route 11, route 13, route 14, route 15, route 21, route 22, route 23, route 28, route 37, route 38, route 42, route 44, route 45, route 47, route 61, route 62, route 64, route 61, route 66, route 67, route 69, route 74, route 75, route 76, route 95, route 96, route 97, route 377 -
 Melbourne Tram Museum
Book, Jan-Werner Hente, "Talking Trams", 1973
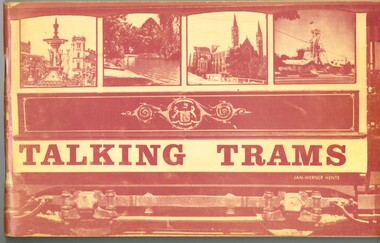
... with reference points. Pages 52 - 69 - "If only all trams could talk... - 69 - "If only all trams could talk" - the story of the trams ...Ninety six page book stapled with a heavy card cover, saddle stapled, printed on matt paper, titled "Talking Trams" and written by Jan-Werner Hente. Has a number of pages of light manila colour paper stock printed with a sepia ink. Many black and white photographs. Major Sections include: Pages 7 - 24 - text as if on a "Talking Tram" tram tour of the Bendigo Trust tram., with relevant photographs. Pages 26 - 47 - details briefly the history of each tramcar in the fleet at the time and some scrapped trams. Pages 48 - 49 - map of the route with reference points. Pages 52 - 69 - "If only all trams could talk" - the story of the trams in Bendigo and its mining history, including horse, battery, steam and electric trams, Victorian Railways impact and some of the personalities of the Bendigo Tramways. Pages 70 - 92 - the SEC era and closure and the early Bendigo Trust days Pages 93 - 96 - provides a rolling stock listing - all Bendigo trams. Has a Corrigenda sheet glued to the inside of the front cover.The Corrigenda has a blue tick and "1-10" in the top right hand corner of the first page.trams, tramways, bendigo trust, bendigo, secv, tourist trams -
 Melbourne Tram Museum
Newspaper, The Herald, untitled, 29/09/1969 12:00:00 AM
Newspaper clipping untitled. The Herald 29/9/69 Photo and text of tram crash with petrol tanker in North Fitzroy Tram driver jumped for his life seconds before tram crashed into empty Golden Fleece petrol tanker in North Fitzroy. Tram driver Arthur Smart taken to hospital with cuts and bruises Only passenger on tram taken to hospital with shock. East Preston tram.trams, tramways, collision, accidents, trucks -
Melbourne Tram Museum
Newspaper, The Herald, “And Four Were Hurt”, 13/02/1969 12:00:00 AM
“And Four Were Hurt” Photos and text from the Herald 13/2/69 showing damage to bus and tram. Tram crash Holden St, North Fitzroy Four people were treated at St Vincent's Hospital, tram had no passengers and was on the way to Preston Workshops, possibly tram 907, could be 807trams, tramways, accidents, collision, holden st, buses, preston workshops, tram 907? -
 Melbourne Tram Museum
Document - Memorandum, Melbourne & Metropolitan Tramways Board (MMTB), HMAS Ships at Port Melbourne, 8/02/1946 12:00:00 AM
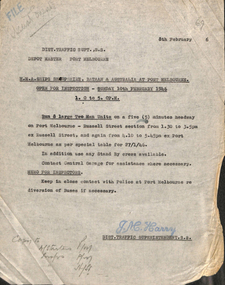
HMAS Ships Shropshire, Bataan & Australia at Port Melbourne Open for Inspection - Sunday 10th February 1946 1:00PM to 5:00PM Bus and Tram arrangements for this event. Memo from JM Harry, Dist Traffic Supt SS to Depot Master Port Melbourne. Memo dated 8th February 1946."Special Events" written in pencil, with blue stamped "FILE" top left corner. "69" in pencil top right corner. "Copy to All Starters PM, Inspectors PM... written in pencil bottom left corner.trams, tramways, events, inspection, port melbourne, port melbourne depot, buses -
 Melbourne Tram Museum
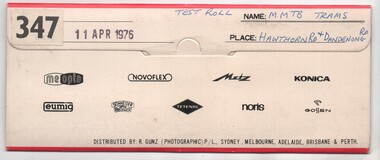
Negative, Bruce Herbert, "MMTB Trams - Hawthorn and Dandenong Road", 11/04/1976 12:00:00 AM
... 69 R10 vehicle Railways tram 901 tram 959 tram 947 AEC MMTB ...Negative folder - made by SAGA Japan, containing 8 no. 120 film negatives 60mm x 90mm of MMTB Trams at the intersection of Hawthorn and Dandenong Road 11 April 1976, marked "Test Film" and stamped "347". .1 - Harris Train at ? .2 - 901 - route 64, City .3 - 959 - route 69 - Kew Cotham Road - with a CP Air advert .4 - Tramway Emergency Vehicle .5 - 947 - route 64 Three negs not scanned.trams, tramways, sw6 class, dandenong rd, hawthorn rd, route 64, route 69, r10 vehicle, railways, tram 901, tram 959, tram 947, aec, mmtb -
 Melbourne Tram Museum
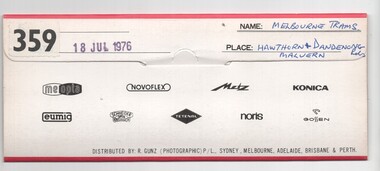
Negative, Bruce Herbert, "Melbourne Trams - Hawthorn and Dandenong Road", 18/07/1976 12:00:00 AM
... 69 W2 class Railways tram 899 tram 905 tram 1021 tram 904 W7 ...Negative folder - made by SAGA Japan, containing 11 no. 120 film negatives 60mm x 60mm of Melbourne Trams at the intersection of Hawthorn and Dandenong Road 18 Jul 1976, stamped "359". .1 - Harris train at Malvern station area. .2 - Neerim Road Caulfield level crossing .3 - Caulfield - Glenhuntly sidings .4 - 899, route 69, Kew Cotham Road, with an Army advert. .5 - ditto, out of focused. .6 - 905 route 64 .7 - 1021 - route 64 - has a Kodak advert. .8 - 805, Dandenong Road, route 64 .9 - 904 route 64 .10 - W2 331? running a special Three megs not scanned.trams, tramways, sw6 class, dandenong rd, hawthorn rd, route 64, route 69, w2 class, railways, tram 899, tram 905, tram 1021, tram 904, w7 class, w5 class, mmtb -
 Melbourne Tram Museum
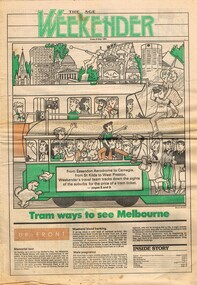
Newspaper, The Age, "Tram ways to see Melbourne", 8/05/1981 12:00:00 AM
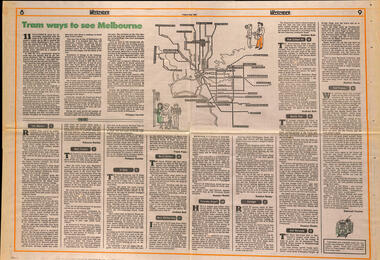
Newspaper - The Age Weekender - Fri 8/5/1981, titled "Tram ways to see Melbourne" looking at various ways and routes to see Melbourne by various Age writers, including Andrew Bolt. Principle item written by Phillippa Hawker. Looks at routes 3, 10, 12, 48, 57, 59, 67, 69, 70, 75 and 88. Has a map of the routes taken in the middle page spread and a cartoon of people on a W and Z class trams.trams, tramways, cartoons, melbourne, tramways, route 3, route 10, route 12, route 48, route 57, route 59, route 67, route 69, route 70, route 75, route 88 -
 Melbourne Tram Museum
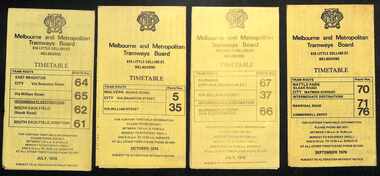
Ephemera - Timetables - MMTB trams - set of 8, Melbourne & Metropolitan Tramways Board (MMTB), 1976
Timetables - provide information on ticketing, fares, and timing points, with a description of the route and a map. Not all services had been allocated a route number at the time. 1 - East Brighton - City and via William St - routes 64, 65, 62 and 61 - July 1976 2 - Malvern (Burke Rd) to City and via Wiliam St - routes 5 and 35 - Oct. 1976 3 - Carnegie - City and via William St - routes 67, 37, and 66 - July 1976 4 - Wattle Parke - City and Camberwell depot - routes 70, 71 and 76 - Sept. 1976 5 - Kew - Cotham Road to St Kilda Beach - route 69 - August 1976 6 - East Preston - via Bourke or La Trobe, and East Brunswick - routes 88, 14, 89. 90, 96, 95, and 97 - Feb. 1976 7 - Toorak - City and via William St - routes 8 and 38 - August 1976 8 - St Kilda Beach and South Melbourne Beach and via William St - routes 15, 16, 53, 55, 1, 2 and 4 - Sept. 1976 Yields information about MMTB tram services during the 1970s. Set of 8 MMTB tram timetables - multifolded printed on yellow paper.timetable, mmtb, wattle park, east brighton, malvern, carnegie, kew, east brunswick, toorak, st kilda beach, south melbourne beach, route 64, route 65, route 62, route 61, roure 5, route 35, route 67, route 37, route 66, route 70, route 71, route 76, route 69, route 88, route 96, route 8, route 38, route 15, route 1, route 2, route 55, route 53 -
 Melbourne Tram Museum
Map, Melbourne & Metropolitan Tramways Board (MMTB), Set of 15 tram route maps, 1977 to 1979
Series of 15 colour route maps for various tram lines or groups of tram lines for the MMTB. Some have the Transport Information Centre telephone printed on them, others have a label stuck on. Some are finished with a plastic laminate finish on either one or both sides. Show the major cross streets, parks, schools, other tram routes, major stop numbers and railway lines. Two copies of each held unless noted otherwise. .1 - Mont - Albert City - R11/77, shows routes 43. 47. 45. 44 .2 - Malvern, East Malvern, Carnegie and East Brighton Tram Routes (from St Kilda Junction) - R1/79 - shows routes 5, 3, 67, 66, 61, 62 and 64. .3 - Swanston St tram guide - R1/79 - lists all routes and route numbers that branch or cross Swanston St between Grattan St and St Kilda Junction. .4 - St Kilda Rd Tram Routes R12/77 - details South Melbourne Beach, route 1 and route 2 and St Kilda Beach routes 15, 16 and 55 otherwise shows were the various routes branch off St Kilda Road. Copy 1 has "P14909" in pencil in the bottom right hand corner. .5 - Kew - St Kilda Beach - R1/79 - Route 69. .6 - Footscray - Moonee Ponds - R3/81 - Route 82 .7 - Flinders St tram routes - R5/78 - North Balwyn, East Burwood, routes 48, 40, 41, Hartwell, 28, 74 and 75 .8 - William St tram routes - Route 55, 56 and 63 - South Melbourne Depot and Domain. copy 2 has "P14913" in bottom right hand corner. .9 - Toorak Camberwell and Glen Iris tram routes with Camberwell Junction and Malvern Town Hall, R1/79, routes 8, 7, 6, 72 and 73 shown. .10 - Swanston St tram routes - R12/77 - shows all the Swanston St routes, including East Coburg and Moreland. .11 - Bourke St tram routes - R4/77 - East Brunswick Blyth St and East Preston Tyler St and intermediate routes, routes 95, 96, 97, 90, 89 and 88. .12 - as for .11, dated 1/85, showing extension to La Trobe University - has Metropolitan Transit logo. Only 1 copy held. Also shows route 92 and 87. .13 - Batman Ave tram routes - R9/77 - Wattle Park, North Richmond and Prahran - routes 70, 71, 78 and 79. .14 - City route guide - R9/77 - showing all route numbers and destinations that passed through the CBD. .15 - Elizabeth St tram routes - R12/77 - Essendon Airport, West Maribyrnong, North Coburg lines, routes 50, 58, 60, 54, 57, 52. 49, 59, 18, 20 and 19. Copy 1 has "P14905" in pencil in bottom left hand corner.trams, tramways, maps, route guide, route numbers, routes, mont albert, route 43, route 47, route 45, route 44, route 42, malvern burke rd, east preston, carnegie, east brighton, south caulfield, route 5, route 3, route 67, route 62, route 64, route 66, glenhuntly tram depot, swanston st, st kilda rd, south melbourne beach, st kilda beach, route 1, route 2, route 15, route 16, route 55, kew- cotham road, route 69, route 79, route 82, footscray, moonee ponds, flinders st, north balwyn, kew, east burwood, burwood, hartwell, richmond, route 48, route 40, route 41, route 28, route 74, route 75, route 56, route 63, william st, west coburg, toorak, camberwell, glen iris, malvern town hall, route 72, route 73, route 7, route 8, bourke st, route 6, route 95, route 96, route 97, route 90, route 89, route 89, east preston, east brunswick, la trobe university, clifton hill, route 92, route 87, route 70, route 71, route 78, route 79, north richmond, prahran, wattle park, essendon airport, west maribyrnong, north coburg, route 50, route 58, route 60, route 54, route 57, route 52, route 49, route 59, route 18, route 20, route 19, batman ave -
 Melbourne Tram Museum
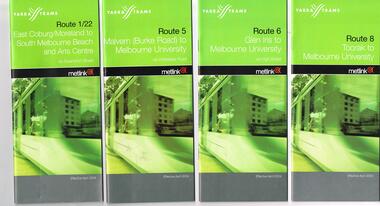
Ephemera - Timetable, Yarra Trams, Set of 22 Yarra Trams timetables, 2003 and 2004
Set of 22 Yarra Trams timetables, green grey cover with route number on cover, giving details of popular destination, check points, use of Metcards and contact details, tram hire, frequency, a Welcome to Swanston Trams, description of route and route map. .1 - Route 1/22 - East Coburg / Moreland - South Melbourne Beach and Arts Centre - April 2004 - 36 pages. .2 - Route 5 - Malvern (Burke Rd) - University - April 2004 - 32 pages. .3 - Route 6 - Glen Iris - City - April 2004 - 20 pages. .4 - Route 8 - Toorak - April 2004 - 20 pages. .5 - Route 16 - St Kilda Beach - University - April 2004 - 24 pages. .6 - Route 48 - North Balwyn to Docklands - May 2003 - 28 pages .7 - Route 57 - West Maribyrnong - City - April 2004 - 28 pages. .8 - Route 59 - Airport West - City - April 2004 - 32 pages. .9 - Route 64 - East Brighton - University - April 2004 - 28 pages. .10 - Route 67 - Carnegie - City - April 2004 - 20 pages. .11 - Route 70 - Wattle Park - City - May 2003 - 24 pages .12 - Route 72 - Camberwell - University - April 2004 - 28 pages. .13 - Route 78/79 - North Richmond - Prahran or St Kilda Beach - April 2004 - 20 pages .14 - Route 82 - Moonee Pond - Footscray - April 2004 - 20 pages. .15 - Route 109 - Port Melbourne to Box Hill - May 2003 - 28 pages. .16 - Route 112 - Sth Melbourne/St Kilda Beach to West Preston - May 2003 - 44 pages. .17 - Route 3 - East Malvern to Melbourne University - April 2004 - 20 pages .18 - Route 16 - Melbourne University to Kew - Oct. 2004 - 40 pages with fold out map .19 - Route 24 - North Balwyn to LaTrobe St and Route 30 - St Vincent's Plaza to Flinders St via Docklands - 8 pages. .20 - Route 69 - Kew (Cotham Road) to St Kilda Beach - April 2004 .21 - Route 86 - Bundoora to Central Pier - May 2003 .22 - Route 96 - St Kilda Beach to East Brunswick - Sept 2002Some have number notes and notes written inside about changes or errors in ink. See History.trams, tramways, yarra trams, tram services, timetables, route 1, route 3, route 22, route 5, route 6, route 8, route 16, route 24, route 30, route 48, route 57, route 59, route 64, route 67, route 69, route 70, route 72, route 78, route 79, route 86, route 96, route 109, route 112 -
 Melbourne Tram Museum
Document - List, Bob Prentice, "MMTB Works Cars - 4/69 Data Sheets" "Final Mileages", Apr. 1969
Handwritten list on ruled paper. The first titled "MMTB Works Cars - 4/69 Data Sheets" lists the motors fitted to work cars 8, 9, 15, 16, 17 and 19 and some motor history. The second part "Final Mileages", lists mileages for trams 180, 182, 468, 217, 218 and 680. Assumed prepared by Bob Prentice.trams, tramways, workshop records, work trams, mileages, scrubber tram, freight tram -
 Melbourne Tram Museum
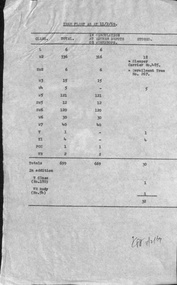
Document - Report, Melbourne & Metropolitan Tramways Board (MMTB), "Tram Fleet as at 11/2/69", 11/02/1969 12:00:00 AM
... . Initialled K. T. Hall as Works Manager 11/2/69 "Tram Fleet as at 11/2 ...Single foolscap carbon copy titled "Tram Fleet as at 11/2/69", listing the class, total, in circulation at either depots or workshops and stored. Also lists the body of VR54. At the time 699 cars total, 669 in use 30 stored. Initialled K. T. Hall as Works Manager 11/2/69Various hand written notations by the applicant. stamped "86009" in the top right hand corner.trams, tramways, tramcars, mmtb, lists, stored trams -
 Melbourne Tram Museum
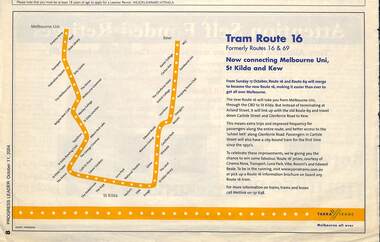
Newspaper, Progress Leader, "Tram Route 16", 11/10/2004 12:00:00 AM
... Trams tramways Route 69 Route 16 Kew Newspaper clipping titled ...Newspaper clipping titled "Tram Route 16", advert in the Progress Leader 11/10/2004 about the combining of routes 69 and 16 Melbourne University St Kilda and Kew from 17/10/2004. Has a Map of the route, Metlink contact details and Yarra Trams logo.trams, tramways, route 69, route 16, kew -
 Melbourne Tram Museum
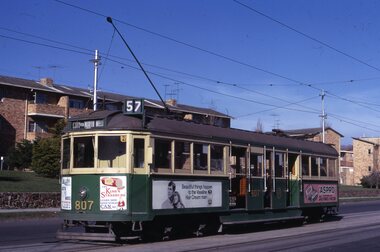
Slide, Keith Kings, 7/07/1969 12:00:00 AM
35mm Kodak white cardboard colour slide by Keith Kings of - W5 807, fitted with square windshields on a route 57, City via North Melbourne in Union Road at cnr of Geddes St, 7/7/1969. Trams adverts for Aspro, Vaseline Hair Cream, Kings StrasburgKeith Kings stamp and number "56-26", with details of exposure. in ink "MMTB W5 with square cornered glass windshield, Union Road, cnr Geddes St Ascot Vale 7/7/69"trams, tramways, w5 class, union road, route 57, city via north melbourne, tram 807 -
 Melbourne Tram Museum
Slide, Keith Kings, 7/06/1969 12:00:00 AM
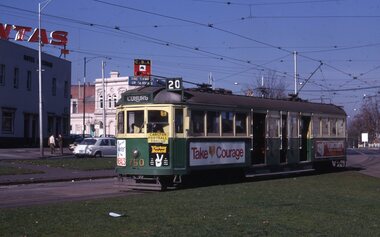
35mm Kodak white cardboard colour slide by Keith Kings of W5 760 at Haymarket Junction, Royal Parade, with the destination of Coburg, Route 20 with an auxiliary board for Carlton Football Ground.. Has adverts for Neals, Victor Board and Courage beer and Vincents headache powders. In the background are adverts for Qantas and the CBA Bank. Taken 7/6/1969 See inscriptions re the tram.Keith Kings stamp and number "56-23", with details of exposure. W5 760 with half drop windshield, Sydney Rd cnr Flemington Road 7/6/69"trams, tramways, w5 class, haymarket, coburg, route 20, royal parade, tram 760 -
 Melbourne Tram Museum
Newspaper, The Age, "Tram ways to see Melbourne", 8/5/1981
Newspaper clipping, from The Age, Weekender, Friday 8/5/1981 titled "Tram ways to see Melbourne", with a number of writers giving a short piece on a particular line. Has a Map of the Melbourne system with destination and route numbers. Has an introduction written by Phillipa Hawker which looks at the history, its place in Melbourne, and possibilities for the future. Written just before the MTA came into existence. Items: East Malvern, Route 3, Rebecca Batties West Preston Route 10, Phillipa Hawker St Kilda, Route 12, Frank Prain North Balwyn, route 48, Andrew Bolt West Maribyrnong route 57, Rosslyn Beeby Essendon Airport, Route 59, Rosslyn Beeby Carnegie, Route 67, Andrew Bolt Kew Cotham Rd, route 69, Andrew Bolt Wattle Park, route 70, Rosslyn Beeby East Burwood, route 75, Rosslyn Beeby East Preston, route 88, Deborah Forster Has some sketches of trams and people.trams, tramways, melbourne, people and places, tourism, east malvern, west preston, st kilda, north balwyn, west maribyrnong, essendon airport, carnegie, kew- cotham rd, wattle park, east burwood, east preston, route 3, route 10, route 12, route 48, route 57, route 59, route 67, route 69, route 70, route 75, route 88, maps -
 Melbourne Tram Museum
Slide, John Webster, 15/03/1960 12:00:00 AM
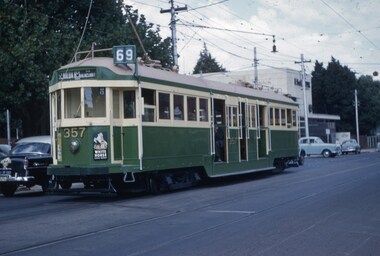
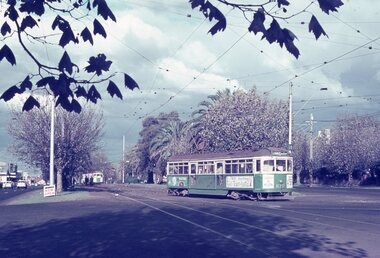
Colour slide, Kodak, white cardboard of Tram W2 357, with the number above the headlight, route 69, St Kilda Beach via Balaclava in Glenferrie Road Malvern. Has advert for White Horse Whiskey. Slide dated 15-3-60.Hand writing on rear in ink "15-3-60 - Tram 357, number raised, Glenferrie Road, Malvern Vic>"trams, tramways, st kilda beach, route 69, w2 class, glenferrie rd, tram 357 -
 Melbourne Tram Museum
Negative, Wal Jack, 4/01/1943 12:00:00 AM
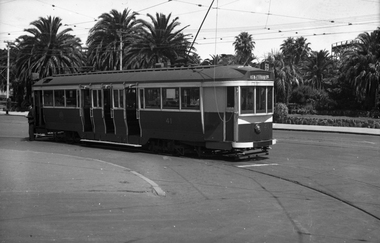
Black and white negative, by Wal Jack, of maximum traction tram E41 on the turning loop at St Kilda with the O'Donnell Gardens in the background. Tram has the destination of Kew Cotham Road, route 69. The driver is standing at the front of the tram. Photo dated 4-1-43 in the Wal Jack album along with details of the location and the tramcar.trams, tramways, st kilda, the esplanade, route 69, carlisle st, e class, tram 41 -
 Melbourne Tram Museum
Negative, Wal Jack, 4/01/1943 12:00:00 AM
Black and white negative, by Wal Jack, of maximum traction tram N 118 (Kew Cotham Rd Route 69) and possibly CW5 682 passing. The driver of 118 has his handles and point bar in hand while attending to the pole. N 118 is on turning loop track at the intersection of Carlisle St and The Esplanade. Photo dated 4-1-43 in the Wal Jack album along with details of the location and the tramcar.trams, tramways, st kilda, the esplanade, route 69, carlisle st, n class, tram 118, cw5 class, tram 682, world war ii -
 Melbourne Tram Museum
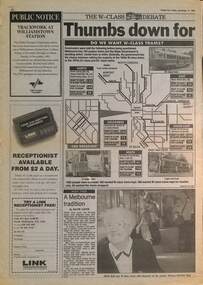
Newspaper, Herald Sun, "Thumbs down for old trams", 12/11/1993
Gives the result of a Herald Sun survey with a map - People were asked: 1 - Want to keep the W class trams 2 - Want W class for Tourism 3 - Want W class withdrawn Survey involved the Airport West, North Coburg, Mont Albert, South East (route 8 and 69, and city streets. The choice included retiring the early Z class trams, that were not even 20 years old. Includes an interview with Jean Geil by David Jarvis on the trams and with Lisa Fabian who did not like the W. Item written by Damon Johnston, Transport Reporter.Demonstrates The Herald Sun investigation into W class trams during 1993.Newspaper clipping from The Herald Sun, Friday 12/11/1993, titled partly ""Thumbs down for old trams" spread over two pages.trams, tramways, w class, surveys, public transport, state transport authority, ptc -
 Melbourne Tram Museum
Negative, Wal Jack, 9/02/1951 12:00:00 AM
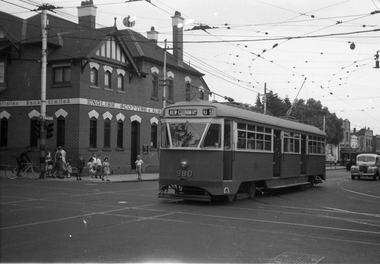
... Trams tramways PCC Class Glenferrie Road Route 69 Kew- Cotham Rd ...Black and white negative, by Wal Jack, of PCC 980, northbound bound in Glenferrie Road at High Street with the destination of Kew Cotham Road. The Bank was replaced by a more modern looking building during the 1970's. In the background is the ES&A bank on the corner. Jane Nigro advised 9/9/2020: "1907 Photo of the E. S. & A. Bank on the corner of High Street and Glenferrie Road, Malvern. In 1885 land on corner of Glenferrie Road & High St. (40' x 150') was purchased by E.S. & A. Bank. A condition of sale was that the bank erect on the land a 'substantial brick building to be used as a branch bank', within 24 months. The E.S. & A. Bank, single-storey four roomed brick, was built in 1888. The first manager was Frederick Leonard. In 1907 a second storey, including residential quarters for the manager, was added to bank at a cost of £1400.The Bank was demolished in 1958-9and replaced with present building."trams, tramways, pcc class, glenferrie road, route 69, kew- cotham rd, tram 980 -
 Melbourne Tram Museum
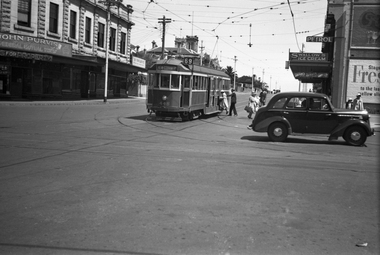
Negative, Wal Jack, 19/01/1941 12:00:00 AM
... - Cotham Rd Route 69 Passengers tram 448 Black and white negative ...Black and white negative by Wal Jack of W2 448 at the intersection of Glenferrie Road and Riversdale Road tram stop, with passengers boarding or having left the tram. Note the tram stop sign on the shop verandah. In the background is the building advertising John Purvis, Property sales and Federal Mutual life insurance. ON the opposite side is a Milk bar, advertising Swallow's Ice creamtrams, tramways, glenferrie road, riversdale road, w2 class, kew- cotham rd, route 69, passengers, tram 448 -
 Melbourne Tram Museum
Album - Robert Thomson Slide Collection, "Melbourne 1968"
4182 - Box 2 - Melbourne 1968 (RT033-054) RT033 Dandenong Rd - tram 870 - "St Kilda Bch - Balaclava Rd" - route 69 RT034 St Kilda Rd - tram 262 - "South Melb Beach" - route 2A RT035 Sth Melb Beach Ter - tram 262 - "City" - route 2A RT036 Wallen Rd - tram 923 - "City" - route 70 RT037 Dandenong Rd - tram 438 - "Malvern - Burke Rd" - route 5 RT038 Batman Ave Ter - tram 851 - "Wattle Park Warrigal Rd" - route 70 RT039 Batman Ave - tram 864 - "City" - route 70 RT040 Princes Bridge - tram 874 - "Moreland" - route 15 RT041 E Brunswick Ter - tram 1038 - "City - Spencer St" - route 96 RT042 Victoria Pde - tram 673 - "South Melb & St Kilda Beach" - route 12 RT043 Dandenong Rd at St Kilda Junction? RT044 Dandenong Rd at St Kilda Junction? RT045 St Kilda Jct? RT046 Wellington St - tram 811 - "City" - route 64 RT047 St Kilda Jct RT048 St Kilda Jct? - trams 968 & 902 - "Carnegie" & "City" route 4 RT049 St Kilda Jct? - trams 968 & 902 - "Carnegie" & "City" route 4 RT050 Carnegie Single Line - tram 774 - "City" - route 4 RT051 Nth Fitzroy Depot - buses RT052 Wattle Park Single Line - tram 823 - "Wattle Park Elgar Rd" - route 70 RT053 Wattle Park Single Line - tram 371 - "Wattle Park Elgar Rd" - route 70 RT054 Essendon Reserved Track - tram 449 - "City" - route 59Demonstrates the work of Robert Thomson in photography, collection and/or production of slidesAssembled album in a black presentation folder of 22 colour slides, collected or produced by Robert Thomson. All photographs have been scanned and placed on the Museum's G drive. A list of all photographs with details has been compiled. melbourne, tramways, trams, track construction -
 Melbourne Tram Museum
Album - Robert Thomson Slide Collection, AETA Convention 1978 Melbourne
Photo - see pdf file for further information. Number Brief Description RT175 St Kilda Carlisle St - tram 966 - "Kew Cotham Rd" - route 69 RT176 Pantograph W Class RT177 Z Class 91 Preston 28-3-78 - tram 91 - " Northcote Dundas St via High St" RT178 Z Class cars Preston 28-3-78 RT179 Wheel Transport Car 16W "Q" Class Preston 28-3-78 RT180 Z Class 51 Royal Park Res Track 27-3-78 - tram 51 -"Special" RT181 W6 - 990 - Glen Iris Terminus 26-3-78 "City" - route 6 RT182 w7-1007 Elizabeth Street Terminus 24-3-73 "Essendon Airport" - route 59 RT183 Z Class 51 Napier St Siding Essendon 27-3-78 - "City" RT184 Volvo Bus Swanston - Flinders 24-3-78 - "Bulleen via North Kew" - route 202 RT185 W6 - 878 Burwood Old Terminus 26-3-78 - "Spencer St" - route 74 RT186 W6 - 878 Burwood Old Terminus 26-3-78 - "Spencer St" - route 75 RT187 East Burwood Andrews Street 26-3-78 RT188 East Burwood Elgar Road 26-3-78 RT189 East Burwood Reservation Parer Street 26-3-78 RT190 East Burwood Terminus 26-3-78 RT191 East Burwood Terminus 26-3-78 RT192 "6" RT193 "5" RT194 "4" RT195 "3" RT196 "2" RT197 "1" Z Cars under constructionDemonstrates the work of Robert Thomson in photography, collection and/or production of slidesAssembled album in a black presentation folder of 23 colour slides, collected or produced by Robert Thomson. All photographs have been scanned and placed on the Museum's G drive. A list of all photographs with details has been compiled. melbourne, tramways, trams