Showing 172 items matching "gold processing"
-
 Flagstaff Hill Maritime Museum and Village
Domestic object - Plate, Johnson Bros
The Process of Making Pottery Decorating, Firing, Glazing, Making, Technical There is a rhythm and flow to clay. It can’t be done all at once! Even the making process! It can take weeks to get everything done, especially if you can only work on your pottery once a week! Even though we have three hour classes, it’s often just not enough time! Here is an overview of some of the processes so you have a bit more grasp on some of the technical stuff! Step One – Design There are SO many ideas out there for making stuff in clay! From delicate porcelain jewellery, through to heavy sculptural work and everything in between. Deciding your direction is sometimes not that easy – when you first start, try everything, you will naturally gravitate to the style that you enjoy! The options and variations are endless and can get a wee bit overwhelming too! Check in with me before you start to ensure your ideas will work, what order you might do things, how you could achieve the look you are seeking and any other technical data required! Step Two – Making Clay is thixotropic. This means that as you work with it, the clay first gets sloppier and wetter, before is begins to dry in the atmosphere. For most things, you simply can’t do all parts of the project at once. An example of work order might look like: Get last weeks work out from the shelves Prepare clay for today’s work – roll your clay, prepare balls for throwing, make the first stage of a pinch pot) Clean up last week’s work and put it on the shelf for bisque firing Check that you have any glazing to do – and do enough of it that you will have time to finish your main project Do the next step of your next project – there might be a further step that can’t be complete immediately, in that case, wrap your work well and put onto the shelves. Letting your work rest for a while can really help keep your work clean and professional looking. Many things require bagging under plastic to keep it ready for work the next week – put your name on the outside of the bag so you can find your work easily. We have stickers and markers. Consider how you want to decorate your work – coloured slip can be applied at a fairly wet stage (remembering that it will make your work even wetter!). Trying to apply slip to dry clay won’t work! If you want to do sgraffito – you will need to keep the work leather hard (a state of dryness where you can still work the clay with a little effort and a little water and care). Step Three – Drying Most of the time your work can go into the rack uncovered to let it dry out for the following week. If you want to continue forming or shaping you will need to double bag your work – put your work on a suitable sized bat and put the bat in a bag so the base of the bag is under the bat, then put another bag over the top of the work and tuck the top of the bag under the bat. If you want to trim (or turn) your thrown work the following week, it should also be double bagged. If your work is large, delicate, or of uneven thicknesses, you should lightly cover your work for drying. When considering the drying process, bare in mind the weather, humidity and wind! The hotter and dryer, the faster things dry and work can dry unevenly in the shelves – this can lead to cracking – another time to lightly cover your work for drying. Step Four – Trimming and Cleaning Up Your work is dry! It is called greenware now and it is at it’s most fragile! Handle everything with two hands. I often refer to soft hands – keep everything gentle and with your fingers spread as much as possible. Try to not pick up things like plates too much, and always with both hands! Before your work can be bisque fired it should be “cleaned up”. You work won’t go into the kiln if it has sharp edges – when glazed, sharp edges turn into razor blades! Use a piece of fly wire to rub the work all over – this will scratch a little so be light handed. Use a knife or metal kidney to scrape any areas that require a bit more dynamic treatment than the fly wire offers! Finally, a very light wipe over with a slightly damp sponge can help soften and soothe all of your edges and dags! Trimming thrown work: If you are planning to trim (or turn) your thrown work (and you should be), make sure you bag it well – your work should be leather hard to almost dry for easiest trimming. Use this step to finish the work completely – use a metal kidney to polish the surface, or a slightly damp sponge to give a freshly thrown look. Wipe the sponge around the rim after trimming, and check the inside of the pot for dags! Trimming slip cast work: Usually I will trim the rims of your work on the wheel the following day to make that stage easier, however you will still need to check your work for lumps and bumps. Last but not least – check that your name is still clearly on the bottom of your work. Step Five – Bisque Firing When the work is completely dry it can go into the bisque kiln. The bisque kiln is fired to 1000°C. This process burns off the water in the clay as well as some of the chemically bound water. The structure of the clay is not altered that much at this temperature. Inside the bisque kiln, the work is stacked a little, small bowl inside a larger bowl and onto a heavy plate. Smaller items like decorations or drink coasters might get stacked several high. Consideration is paid to the weight of the stack and shape of the work. A bisque kiln can fire about one and a half times the amount of work that the glaze kiln can fire. The firing takes about 10 hours to complete the cycle and about two days to cool down. Once it has been emptied the work is placed in the glaze room ready for you to decorate! Step Six – Glazing Decorating your work with colour can be a lot of fun – and time consuming! There are three main options for surface treatment at this stage: Oxide Washes Underglazes Glazes Washes and underglazes do not “glaze” the work – It will still need a layer of glaze to fully seal the clay (washes don’t need glaze on surfaces not designed for food or liquid as they can gloss up a little on their own). Underglazes are stable colourants that turn out pretty much how they look in the jar. They can be mixed with each other to form other colours and can be used like water colours to paint onto your work. Mostly they should have a clear glaze on top to seal them. Oxides are a different species – the pink oxide (cobalt) wash turns out bright blue for instance. They don’t always need a glaze on top, and some glazes can change the colour of the wash! The glazes need no other “glaze” on top! Be careful of unknown glaze interactions – you can put any combination of glaze in a bowl or on a plate, but only a single glaze on the outside of any vertical surface! Glazes are a chemical reaction under heat. We don’t know the exact chemicals in the Mayco glazes we use. I can guess by the way they interact with each other, however, on the whole, you need to test every idea you have, and not run the test on a vertical surface! Simply put, glaze is a layer of glass like substance that bonds with the clay underneath. Clay is made of silica, alumina and water. Glaze is made of mostly silica. Silica has a melting point of 1700°C and we fire to 1240°C. The silica requires a “flux” to help it melt at the lower temperature. Fluxes can be all sorts of chemicals – a common one is calcium – calcium has a melting point of 2500°C, however, together they both melt at a much lower temperature! Colourants are metal oxides like cobalt (blue), chrome (green through black), copper (green, blue, even red!), manganese (black, purple and pink) iron (red brown), etc. Different chemicals in the glaze can have dramatic effects. for example, barium carbonate (which we don’t use) turns manganese bright pink! Other elements can turn manganese dioxide brown, blue, purple and reddish brown. Manganese dioxide is a flux in and of itself as well. So, glazes that get their black and purple colours, often interact with other glazes and RUN! Our mirror black is a good example – it mixes really well with many glazes because it fluxes them – causes them to melt faster. It will also bring out many beautiful colours in the glazes because it’s black colouring most definitely comes from manganese dioxide! Glaze chemistry is a whole subject on it’s own! We use commercial Mayco glazes on purpose – for their huge range of colour possibilities, stability, cool interactions, artistic freedom with the ability to easily brush the glazes on and ease of use. We currently have almost 50 glazes on hand! A major project is to test the interactions of all glazes with each other. That is 2,500 test tiles!!!! I’m going to make the wall behind the wheels the feature wall of pretty colours! Step Seven – Glaze (Gloss or sometimes called “Glost”) Firing Most of the time this is the final stage of making your creation (but not always!) The glaze kiln goes to 1240°C. This is called cone 6, or midrange. It is the low end of stoneware temperatures. Stoneware clays and glazes are typically fired at cone 8 – 10, that is 1260 – 1290°C. The energy requirement to go from 1240°C to 1280°C is almost a 30% more! Our clay is formulated to vitrify (mature, turn “glass-like”) at 1240°, as are our glazes. A glaze kiln take around 12 hours to reach temperature and two to three days to cool down. Sometimes a third firing process is required – this is for decoration that is added to work after the glaze firing. For example – adding precious metals and lustres. this firing temperature is usually around 600 – 800°C depending upon the techniques being used. There are many students interested in gold and silver trims – we will be doing this third type of firing soon! After firing your work will be in the student finished work shelves. Remember to pay for it before you head out the door! There is a small extra charge for using porcelain clay (it’s more than twice the price of regular clay), and for any third firing process! Once your work has been fired it can not turn back into clay for millennia – so don’t fire it if you don’t like it! Put it in the bucket for recycling. https://firebirdstudios.com.au/the-process-of-making-pottery/Ceramics have evolved over thousands of years.A white earthenware side plate with a gadroon edge. Has water marks and chips on front.‘Johnson Bros England Reg No 15587’flagstaff hill, warrnambool, shipwrecked-coast, flagstaff-hill, flagstaff-hill-maritime-museum, maritime-museum, shipwreck-coast, flagstaff-hill-maritime-village, johnson bros, ceramics, tableware -
 Flagstaff Hill Maritime Museum and Village
Domestic object - Plate, Alfred Meakin
The Process of Making Pottery Decorating, Firing, Glazing, Making, Technical There is a rhythm and flow to clay. It can’t be done all at once! Even the making process! It can take weeks to get everything done, especially if you can only work on your pottery once a week! Even though we have three hour classes, it’s often just not enough time! Here is an overview of some of the processes so you have a bit more grasp on some of the technical stuff! Step One – Design There are SO many ideas out there for making stuff in clay! From delicate porcelain jewellery, through to heavy sculptural work and everything in between. Deciding your direction is sometimes not that easy – when you first start, try everything, you will naturally gravitate to the style that you enjoy! The options and variations are endless and can get a wee bit overwhelming too! Check in with me before you start to ensure your ideas will work, what order you might do things, how you could achieve the look you are seeking and any other technical data required! Step Two – Making Clay is thixotropic. This means that as you work with it, the clay first gets sloppier and wetter, before is begins to dry in the atmosphere. For most things, you simply can’t do all parts of the project at once. An example of work order might look like: Get last weeks work out from the shelves Prepare clay for today’s work – roll your clay, prepare balls for throwing, make the first stage of a pinch pot) Clean up last week’s work and put it on the shelf for bisque firing Check that you have any glazing to do – and do enough of it that you will have time to finish your main project Do the next step of your next project – there might be a further step that can’t be complete immediately, in that case, wrap your work well and put onto the shelves. Letting your work rest for a while can really help keep your work clean and professional looking. Many things require bagging under plastic to keep it ready for work the next week – put your name on the outside of the bag so you can find your work easily. We have stickers and markers. Consider how you want to decorate your work – coloured slip can be applied at a fairly wet stage (remembering that it will make your work even wetter!). Trying to apply slip to dry clay won’t work! If you want to do sgraffito – you will need to keep the work leather hard (a state of dryness where you can still work the clay with a little effort and a little water and care). Step Three – Drying Most of the time your work can go into the rack uncovered to let it dry out for the following week. If you want to continue forming or shaping you will need to double bag your work – put your work on a suitable sized bat and put the bat in a bag so the base of the bag is under the bat, then put another bag over the top of the work and tuck the top of the bag under the bat. If you want to trim (or turn) your thrown work the following week, it should also be double bagged. If your work is large, delicate, or of uneven thicknesses, you should lightly cover your work for drying. When considering the drying process, bare in mind the weather, humidity and wind! The hotter and dryer, the faster things dry and work can dry unevenly in the shelves – this can lead to cracking – another time to lightly cover your work for drying. Step Four – Trimming and Cleaning Up Your work is dry! It is called greenware now and it is at it’s most fragile! Handle everything with two hands. I often refer to soft hands – keep everything gentle and with your fingers spread as much as possible. Try to not pick up things like plates too much, and always with both hands! Before your work can be bisque fired it should be “cleaned up”. You work won’t go into the kiln if it has sharp edges – when glazed, sharp edges turn into razor blades! Use a piece of fly wire to rub the work all over – this will scratch a little so be light handed. Use a knife or metal kidney to scrape any areas that require a bit more dynamic treatment than the fly wire offers! Finally, a very light wipe over with a slightly damp sponge can help soften and soothe all of your edges and dags! Trimming thrown work: If you are planning to trim (or turn) your thrown work (and you should be), make sure you bag it well – your work should be leather hard to almost dry for easiest trimming. Use this step to finish the work completely – use a metal kidney to polish the surface, or a slightly damp sponge to give a freshly thrown look. Wipe the sponge around the rim after trimming, and check the inside of the pot for dags! Trimming slip cast work: Usually I will trim the rims of your work on the wheel the following day to make that stage easier, however you will still need to check your work for lumps and bumps. Last but not least – check that your name is still clearly on the bottom of your work. Step Five – Bisque Firing When the work is completely dry it can go into the bisque kiln. The bisque kiln is fired to 1000°C. This process burns off the water in the clay as well as some of the chemically bound water. The structure of the clay is not altered that much at this temperature. Inside the bisque kiln, the work is stacked a little, small bowl inside a larger bowl and onto a heavy plate. Smaller items like decorations or drink coasters might get stacked several high. Consideration is paid to the weight of the stack and shape of the work. A bisque kiln can fire about one and a half times the amount of work that the glaze kiln can fire. The firing takes about 10 hours to complete the cycle and about two days to cool down. Once it has been emptied the work is placed in the glaze room ready for you to decorate! Step Six – Glazing Decorating your work with colour can be a lot of fun – and time consuming! There are three main options for surface treatment at this stage: Oxide Washes Underglazes Glazes Washes and underglazes do not “glaze” the work – It will still need a layer of glaze to fully seal the clay (washes don’t need glaze on surfaces not designed for food or liquid as they can gloss up a little on their own). Underglazes are stable colourants that turn out pretty much how they look in the jar. They can be mixed with each other to form other colours and can be used like water colours to paint onto your work. Mostly they should have a clear glaze on top to seal them. Oxides are a different species – the pink oxide (cobalt) wash turns out bright blue for instance. They don’t always need a glaze on top, and some glazes can change the colour of the wash! The glazes need no other “glaze” on top! Be careful of unknown glaze interactions – you can put any combination of glaze in a bowl or on a plate, but only a single glaze on the outside of any vertical surface! Glazes are a chemical reaction under heat. We don’t know the exact chemicals in the Mayco glazes we use. I can guess by the way they interact with each other, however, on the whole, you need to test every idea you have, and not run the test on a vertical surface! Simply put, glaze is a layer of glass like substance that bonds with the clay underneath. Clay is made of silica, alumina and water. Glaze is made of mostly silica. Silica has a melting point of 1700°C and we fire to 1240°C. The silica requires a “flux” to help it melt at the lower temperature. Fluxes can be all sorts of chemicals – a common one is calcium – calcium has a melting point of 2500°C, however, together they both melt at a much lower temperature! Colourants are metal oxides like cobalt (blue), chrome (green through black), copper (green, blue, even red!), manganese (black, purple and pink) iron (red brown), etc. Different chemicals in the glaze can have dramatic effects. for example, barium carbonate (which we don’t use) turns manganese bright pink! Other elements can turn manganese dioxide brown, blue, purple and reddish brown. Manganese dioxide is a flux in and of itself as well. So, glazes that get their black and purple colours, often interact with other glazes and RUN! Our mirror black is a good example – it mixes really well with many glazes because it fluxes them – causes them to melt faster. It will also bring out many beautiful colours in the glazes because it’s black colouring most definitely comes from manganese dioxide! Glaze chemistry is a whole subject on it’s own! We use commercial Mayco glazes on purpose – for their huge range of colour possibilities, stability, cool interactions, artistic freedom with the ability to easily brush the glazes on and ease of use. We currently have almost 50 glazes on hand! A major project is to test the interactions of all glazes with each other. That is 2,500 test tiles!!!! I’m going to make the wall behind the wheels the feature wall of pretty colours! Step Seven – Glaze (Gloss or sometimes called “Glost”) Firing Most of the time this is the final stage of making your creation (but not always!) The glaze kiln goes to 1240°C. This is called cone 6, or midrange. It is the low end of stoneware temperatures. Stoneware clays and glazes are typically fired at cone 8 – 10, that is 1260 – 1290°C. The energy requirement to go from 1240°C to 1280°C is almost a 30% more! Our clay is formulated to vitrify (mature, turn “glass-like”) at 1240°, as are our glazes. A glaze kiln take around 12 hours to reach temperature and two to three days to cool down. Sometimes a third firing process is required – this is for decoration that is added to work after the glaze firing. For example – adding precious metals and lustres. this firing temperature is usually around 600 – 800°C depending upon the techniques being used. There are many students interested in gold and silver trims – we will be doing this third type of firing soon! After firing your work will be in the student finished work shelves. Remember to pay for it before you head out the door! There is a small extra charge for using porcelain clay (it’s more than twice the price of regular clay), and for any third firing process! Once your work has been fired it can not turn back into clay for millennia – so don’t fire it if you don’t like it! Put it in the bucket for recycling. https://firebirdstudios.com.au/the-process-of-making-pottery/Ceramics have evolved over thousands of years.Earthenware dessert plate, cream colour. Made by Alfred Meakin, England. Backstamped ‘Alfred Meakin England’. flagstaff hill, warrnambool, shipwrecked-coast, flagstaff-hill, flagstaff-hill-maritime-museum, maritime-museum, shipwreck-coast, flagstaff-hill-maritime-village, alfred meakin, ceramics, earthenware, kitchenware -
 Flagstaff Hill Maritime Museum and Village
Freezer, circa 1930's
This ice cream freezer, manufactured in South Australia in the 1930's, was advertised to "keep the contents of the cream compartment frozen for many hours". It was promoted for use at picnics to keep salads cool. Its design is very similar to other freezers of The Frigid name which were made in 1939; those freezers were all one colour whereas this one is blue around the top and bottom of the barrel and cream in the centre with blue/green lettering. The process of making ice cream was to pack the outer chamber full with a combination of 3 parts ice cubes of about 1 inch (2.cm) to one part coarse salt, then pour into the chamber about 1 cup of cold water. After this, the ingredients for ice cream or sorbet were poured into the inner chamber, then attach the lid and turn The Frigid freezer upside down for about 40 minutes or until the right consistency is reached. Advice as given to open the freezer every 20 minutes and stir around the contents that were frozen against the sides of the inner chamber. The ingredients for the ice cream could include cream, sugar, vanilla and eggs. The label on the box of The Frigid shows the address of A Simpson and Son to be at Pirie Street, Adelaide. This address was used as early as 1876 and later catalogues, 1931 - 1960 still show this address. Alfred Simpson and his family emigrated from England, arriving in South Australia in 1849. He had already completed his apprenticeship as a tinplate worker but he tried various other occupations, including trying out the gold mines in Victoria, before he established himself as a tinsmith in 1853. His products included many agricultural items. His son, Alfred Muller Simpson, joined the business when he turned 21. In the 1860 Simpson's products included 'explosion proof' safes. In the late 1880's A Simpson and Son manufactured munitions and mines for the war. At the time of Alfred's death in 1891, A Simpson and Son had the largest metal manufacturing plant in Australia. From 1898 the company's reputation grew from the process of enamel plating with porcelain. During the First World War, Simpsons returned to the manufacture of munitions. Alfred M. Simpson's sons (Alfred Allen, known as Allen, and Fredrick Neighbour) joined the company when they finished their schooling. Allen was also associated with the Royal Geological Society over many years and when the CT Madigan surveyed Central Australia in 1929, the Simpson Desert was named in his honour. Cape Simpson in Antarctica is also named after him due to his assistance to Douglas Mawson. A new factory was opened at Dudley Park in the 1940s and the company began the manufacture of whitegoods. In 1963 A. Simpson and Son merged with Pope Industries to form Simpson Pope Holdings. Alfred Simpson became chairman of the board of Simpson Pope Holdings. The Simpson brand, now owned by Electrolux, continues to produce a variety of household appliances. (Reference: State Library of South Australia) A Simpson and Son was an early colonial business that has lasted well into the 20th century and the name Simpson is still associated with whitegoods. Freezer, 2 quart (1.8 litre) capacity, made by A Simpson and Son Ltd, marked "The Frigid". Cylinder shaped, constructed from enamelled sheet metal, has two catches one on the base and one on top. Inner cylinder for holding contents for freezing. Slightly rusted. Freezer is inside original cardboard box with yellow label showing manufacturer details. Circa 1930'sOutside of freezer is printed in blue"The Frigid". Box includes "THE "FRIGID" FREEZER" and branded "S & S" inside a circle.flagstaff hill, warrnambool, shipwrecked-coast, flagstaff-hill, flagstaff-hill-maritime-museum, maritime-museum, shipwreck-coast, flagstaff-hill-maritime-village, a. simpson & son limited, manufacturer, foundry, freezer, 2 quart freezer, portable freezer, kitchen appliance, the frigid, ice cream freezer, ice cream maker 1930's -
 Flagstaff Hill Maritime Museum and Village
Domestic object - Jug
The Process of Making Pottery Decorating, Firing, Glazing, Making, Technical There is a rhythm and flow to clay. It can’t be done all at once! Even the making process! It can take weeks to get everything done, especially if you can only work on your pottery once a week! Even though we have three hour classes, it’s often just not enough time! Here is an overview of some of the processes so you have a bit more grasp on some of the technical stuff! Step One – Design There are SO many ideas out there for making stuff in clay! From delicate porcelain jewellery, through to heavy sculptural work and everything in between. Deciding your direction is sometimes not that easy – when you first start, try everything, you will naturally gravitate to the style that you enjoy! The options and variations are endless and can get a wee bit overwhelming too! Check in with me before you start to ensure your ideas will work, what order you might do things, how you could achieve the look you are seeking and any other technical data required! Step Two – Making Clay is thixotropic. This means that as you work with it, the clay first gets sloppier and wetter, before is begins to dry in the atmosphere. For most things, you simply can’t do all parts of the project at once. An example of work order might look like: Get last weeks work out from the shelves Prepare clay for today’s work – roll your clay, prepare balls for throwing, make the first stage of a pinch pot) Clean up last week’s work and put it on the shelf for bisque firing Check that you have any glazing to do – and do enough of it that you will have time to finish your main project Do the next step of your next project – there might be a further step that can’t be complete immediately, in that case, wrap your work well and put onto the shelves. Letting your work rest for a while can really help keep your work clean and professional looking. Many things require bagging under plastic to keep it ready for work the next week – put your name on the outside of the bag so you can find your work easily. We have stickers and markers. Consider how you want to decorate your work – coloured slip can be applied at a fairly wet stage (remembering that it will make your work even wetter!). Trying to apply slip to dry clay won’t work! If you want to do sgraffito – you will need to keep the work leather hard (a state of dryness where you can still work the clay with a little effort and a little water and care). Step Three – Drying Most of the time your work can go into the rack uncovered to let it dry out for the following week. If you want to continue forming or shaping you will need to double bag your work – put your work on a suitable sized bat and put the bat in a bag so the base of the bag is under the bat, then put another bag over the top of the work and tuck the top of the bag under the bat. If you want to trim (or turn) your thrown work the following week, it should also be double bagged. If your work is large, delicate, or of uneven thicknesses, you should lightly cover your work for drying. When considering the drying process, bare in mind the weather, humidity and wind! The hotter and dryer, the faster things dry and work can dry unevenly in the shelves – this can lead to cracking – another time to lightly cover your work for drying. Step Four – Trimming and Cleaning Up Your work is dry! It is called greenware now and it is at it’s most fragile! Handle everything with two hands. I often refer to soft hands – keep everything gentle and with your fingers spread as much as possible. Try to not pick up things like plates too much, and always with both hands! Before your work can be bisque fired it should be “cleaned up”. You work won’t go into the kiln if it has sharp edges – when glazed, sharp edges turn into razor blades! Use a piece of fly wire to rub the work all over – this will scratch a little so be light handed. Use a knife or metal kidney to scrape any areas that require a bit more dynamic treatment than the fly wire offers! Finally, a very light wipe over with a slightly damp sponge can help soften and soothe all of your edges and dags! Trimming thrown work: If you are planning to trim (or turn) your thrown work (and you should be), make sure you bag it well – your work should be leather hard to almost dry for easiest trimming. Use this step to finish the work completely – use a metal kidney to polish the surface, or a slightly damp sponge to give a freshly thrown look. Wipe the sponge around the rim after trimming, and check the inside of the pot for dags! Trimming slip cast work: Usually I will trim the rims of your work on the wheel the following day to make that stage easier, however you will still need to check your work for lumps and bumps. Last but not least – check that your name is still clearly on the bottom of your work. Step Five – Bisque Firing When the work is completely dry it can go into the bisque kiln. The bisque kiln is fired to 1000°C. This process burns off the water in the clay as well as some of the chemically bound water. The structure of the clay is not altered that much at this temperature. Inside the bisque kiln, the work is stacked a little, small bowl inside a larger bowl and onto a heavy plate. Smaller items like decorations or drink coasters might get stacked several high. Consideration is paid to the weight of the stack and shape of the work. A bisque kiln can fire about one and a half times the amount of work that the glaze kiln can fire. The firing takes about 10 hours to complete the cycle and about two days to cool down. Once it has been emptied the work is placed in the glaze room ready for you to decorate! Step Six – Glazing Decorating your work with colour can be a lot of fun – and time consuming! There are three main options for surface treatment at this stage: Oxide Washes Underglazes Glazes Washes and underglazes do not “glaze” the work – It will still need a layer of glaze to fully seal the clay (washes don’t need glaze on surfaces not designed for food or liquid as they can gloss up a little on their own). Underglazes are stable colourants that turn out pretty much how they look in the jar. They can be mixed with each other to form other colours and can be used like water colours to paint onto your work. Mostly they should have a clear glaze on top to seal them. Oxides are a different species – the pink oxide (cobalt) wash turns out bright blue for instance. They don’t always need a glaze on top, and some glazes can change the colour of the wash! The glazes need no other “glaze” on top! Be careful of unknown glaze interactions – you can put any combination of glaze in a bowl or on a plate, but only a single glaze on the outside of any vertical surface! Glazes are a chemical reaction under heat. We don’t know the exact chemicals in the Mayco glazes we use. I can guess by the way they interact with each other, however, on the whole, you need to test every idea you have, and not run the test on a vertical surface! Simply put, glaze is a layer of glass like substance that bonds with the clay underneath. Clay is made of silica, alumina and water. Glaze is made of mostly silica. Silica has a melting point of 1700°C and we fire to 1240°C. The silica requires a “flux” to help it melt at the lower temperature. Fluxes can be all sorts of chemicals – a common one is calcium – calcium has a melting point of 2500°C, however, together they both melt at a much lower temperature! Colourants are metal oxides like cobalt (blue), chrome (green through black), copper (green, blue, even red!), manganese (black, purple and pink) iron (red brown), etc. Different chemicals in the glaze can have dramatic effects. for example, barium carbonate (which we don’t use) turns manganese bright pink! Other elements can turn manganese dioxide brown, blue, purple and reddish brown. Manganese dioxide is a flux in and of itself as well. So, glazes that get their black and purple colours, often interact with other glazes and RUN! Our mirror black is a good example – it mixes really well with many glazes because it fluxes them – causes them to melt faster. It will also bring out many beautiful colours in the glazes because it’s black colouring most definitely comes from manganese dioxide! Glaze chemistry is a whole subject on it’s own! We use commercial Mayco glazes on purpose – for their huge range of colour possibilities, stability, cool interactions, artistic freedom with the ability to easily brush the glazes on and ease of use. We currently have almost 50 glazes on hand! A major project is to test the interactions of all glazes with each other. That is 2,500 test tiles!!!! I’m going to make the wall behind the wheels the feature wall of pretty colours! Step Seven – Glaze (Gloss or sometimes called “Glost”) Firing Most of the time this is the final stage of making your creation (but not always!) The glaze kiln goes to 1240°C. This is called cone 6, or midrange. It is the low end of stoneware temperatures. Stoneware clays and glazes are typically fired at cone 8 – 10, that is 1260 – 1290°C. The energy requirement to go from 1240°C to 1280°C is almost a 30% more! Our clay is formulated to vitrify (mature, turn “glass-like”) at 1240°, as are our glazes. A glaze kiln take around 12 hours to reach temperature and two to three days to cool down. Sometimes a third firing process is required – this is for decoration that is added to work after the glaze firing. For example – adding precious metals and lustres. this firing temperature is usually around 600 – 800°C depending upon the techniques being used. There are many students interested in gold and silver trims – we will be doing this third type of firing soon! After firing your work will be in the student finished work shelves. Remember to pay for it before you head out the door! There is a small extra charge for using porcelain clay (it’s more than twice the price of regular clay), and for any third firing process! Once your work has been fired it can not turn back into clay for millennia – so don’t fire it if you don’t like it! Put it in the bucket for recycling. https://firebirdstudios.com.au/the-process-of-making-pottery/The form of the jug has been in use for many centuries.Stoneware jug. Two tone brown glaze with pierced lip behind spout. Spout chipped.None.flagstaff hill, warrnambool, shipwrecked-coast, flagstaff-hill, flagstaff-hill-maritime-museum, maritime-museum, shipwreck-coast, flagstaff-hill-maritime-village, jug, ceramic jug -
 Federation University Historical Collection
Booklet, Berry Anderson & Co, Ballarat School of Mines Student's Magazine, Fourth Term, 1907, 1907
Table of contents: Editorial, A motor problem, Electricity in mining, The wet assay of tin, Sintering slimes at the Broken Hill Pty Works, Smokeless cities, An unusual process for the treatment of concentrates, Diamond drilling, E. M. Weston, Recent advancements in the treatment of slimes from the reduction of gold bearing ores, Norman Stuckey, W. T. Cronow, The gold miner and the prospector, Cornish mining, A trip to the North-East, New Zealand coal, Rich mine water, Making standard solution of alkalies, Notes on the refining of base bullion, Pipe lines for corrosive liquors, Electro-galvanising, Ankylostomiasis or earth eating disease, News and notes, Method of preparing blue paper, Past students, Correspondence, Answers to correspondents, Magazine balance sheet, Editorial notices.Peach coloured booklet of 28 pages.Signed on front cover by Les? M. Deaneballarat school of mines, students' magazine, oliver wendell holmes, a. e. c. kerr, t. w. gronow, norman stuckey, e, m. weston, j. h. collins, s. b. vial,, t. w. hood, o. e. jager, hubert krause, s. j. lindsay, fred nettle, a. w. parramore, e. prendergast, basil a. reid, g. m. roberts, h. c. valentine, r. vaughan,, w. j. lakeland, d. scott, dave thomas, a. d. turner, tom williams, w. b. tucker, percy millar, o. c. witherden, john adam, h. f. denny, g. a. denny,, w. a. gosman, hilary dowling, d. m. deane, cecil eeles, j. o'farrell, t. f. fleetwood, miles a. gabriel, a. a. gibson, t. j. andrews, t. brennan, j. a. reid. -
Federation University Historical Collection
Document, Albert W. Strange, Ballarat Historical Park Description of Mining Processes & Equipment as a Guide to the Diggings and Quartz Mine, 1970, 02/1970
A guide to teh Sovereign Hill Diggings and Quartz MineSix typed pages including information onf the North Normanby Mine, deep leads at Ballarat, alluvial diggingsbert strange, sovereign hill, ballarat historical park, gold diggings, quartz mine, north normanby mine, cornish boiler, deep leads, ballarat east, windlass, alluvial diggings, wash paddock, windsail, shanty, quartz mining, puddling machine, hand whip, horse drawn whip, horse drawn whim, albert strange -
 City of Moorabbin Historical Society (Operating the Box Cottage Museum)
Book, Banister, Judith, English Silver Hall-marks: Including the Marks of Origin on Scottish & Irish Silver Plate, Gold, Platinum & Sheffield Plate with 300 of the More Important Makers Marks from 1697-1900, with Lists of English, Scottish, and Irish Hall-marks and Makers' Marks from Circa 1554, 1990
It contains hundreds of silver marks making the process of identifying that special item you have found- quick and easy. A practical guide used by antique dealers world wide for years118 pages, illustratednon-fictionIt contains hundreds of silver marks making the process of identifying that special item you have found- quick and easy. A practical guide used by antique dealers world wide for yearsenglish silver, scottish silver, irish silver, hall-marks, makers marks -
 Bendigo Historical Society Inc.
Book - AUSTRALIAN MINING HISTORY MONOGRAPHS, NUMBER 7, THE ROLE OF MINERALS SEPARATION LTD. IN THE DEVELOPMENT OF THE FLOTATION PROCESS, c2000
Australian Mining History Monographs Number 7, The Role of Minerals Separation in the Development of the Flotation Process. Paper presented at the Australian Mining History Association meeting, Adelaide 5 July 2000. Publisher: Zlota, Strathfieldsaye, Victoria. 45 pages.Ralph W Birrellgold, goldfields, gold, mineral separation, mining history, australia, minerals separation, flotation process -
 Bendigo Historical Society Inc.
Document - BILL ASHMAN COLLECTION: CORRESPONDENCE
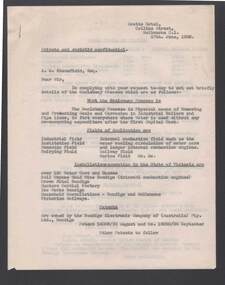
Carbon copy of a letter dated 27 June, 1938. Letter is to A. S. Bloomfield, Esq. No name of who it is from. Items mentioned are: What the Scalebuoy Process is, Fields of Application, Installations operating in the State of Victoria, Patents, Gross Margin of Profits, Promotion and Finance, Manufacture and Working Capital.sciences, instruments - general, scalebuoy, bill ashman collection - correspondence, scotts hotel, a s bloomfield esq, nell gwynne gold mine bendigo, crown hotel bendigo, hunters cordial factory, ice works bendigo, victorian railways, bendigo electronic company of (australia) pty ltd, r h s abbott, h a abbott -
 Bendigo Historical Society Inc.
Book - MINING & GEOLOGICAL JOURNAL, 1940
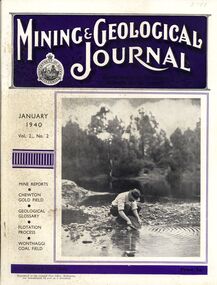
Mining & Geological Journal January 1940 Vol.2 No.2 Mine reports Chewton Gold Field, Geological Glossary, Flotation Process, Wonthaggi Coal Field published hald yearly by he Department of Mines Victoria contains photographs, maps and illustrations.gold, mining, journal -
 Bendigo Historical Society Inc.
Document - BILL ASHMAN COLLECTION: LETTER
Four page carbon copy of a list of shares detailing the shares at £1 each and 5/- each. Mentioned is the countries where the Scalebuoys were used and some of the companies in England, United States, Canada and New Zealand who used them. In Bendigo they could be inspected at the Crown Hotel, Central Nell Gwynne Gold Mine and Hunters Cordial Works. Also mentioned is what Scalebuoys are, What they do, How Scalebuoys Function, Prospects and Sale Purchase Conditions.sciences, instruments-general, scalebuoy, bill ashman collection, victorian scalebuoy company, bendigo electronic process, crown hotel, central nell gwynne gold mine, hunters cordial works, victorian railways, bendigo electronic company -
 Bendigo Historical Society Inc.
Document - FOSTERVILLE GOLD MINE COLLECTION: FOSTERVILLE GOLD PROJECT UPGRADE EXECUTIVE SUMMARUY
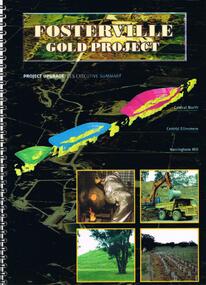
Black cover book, wire binding, 13 pages of text and maps. On front: Fosterville Gold Project' Map of ore body on cover - Central North, Central Ellesmere, Harringtons Hill. Contents include: open pits, heap leaching, waste dumps, estimated project life, changes from previously approved project, estimated project life, main project components, expanded open pits and underground mines, processing sulphide ore, tailings storages, waste rock dumps. Principles of rehabilitation, site preparation, rehabilitation activities during operation and decommissioning activities. Environmental issues, and summary of proposed new operating conditions.bendigo, mining, fosterville gold mine -
 Bendigo Historical Society Inc.
Document - FOSTERVILLE GOLD MINE COLLECTION: OPEN DAY 2019
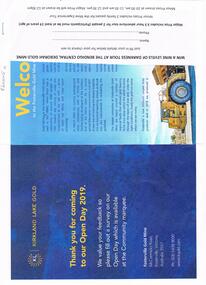
Two page document for Kirkland Lake Gold Open day 2019. Open Day activities include: bus tours, technical services display, geology, exploration, processing, community and environment display, minerals council of Australia, Swick drilling, Central Deborah Gold Mine, Face painting, Goldfields Re-vegetation, Delecca's hire equipment, MacMahon underground mining services, Sandvik, and ISH24 safety specialists. Map of 'Fosterville Gold Mine Site Map' with activities highlighted. Fosterville is Victoria's larges gold producer and in 2918 a records 356,230 ounces at an average grade of 24.9 g per tonne. The mine has over 600 full time employees in 2019. Entry for '9 levels of darkness' tour at Central Deborah Mine attached.bendigo, mining, fosterville gold mine -
 Bendigo Historical Society Inc.
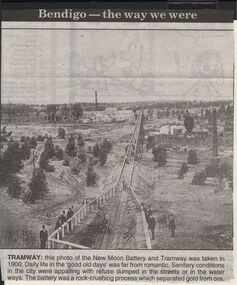
Newspaper - JENNY FOLEY COLLECTION: TRAMWAY
... process which separated gold from ore.... or in the water ways. The battery was a rock crushing process which ...Bendigo Advertiser "The way we were" from 1999. Tramway: this photo of the New Moon Battery and Tramway was taken in 1900. Daily life in the 'good old days' was far from romantic. Sanitary conditions in the city were appalling, with refuse dumped in the streets or in the water ways. The battery was a rock crushing process which separated gold from ore.newspaper, bendigo advertiser, the way we were -
 Bendigo Historical Society Inc.
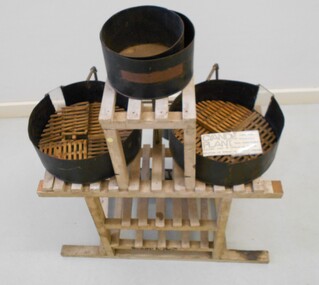
Leisure object - WOODEN MODEL CYANIDE PLANT
... Gold cyanidation (also known as the cyanide process or the.... It is the most commonly used leaching process for gold extraction ...Wooden model of a cyanide plant. A cyanide plant was used for dissolving gold from finely divided ores by means of dilute solutions of sodium or potassium cyanides. The model has five metal bins, there is some rust on the bins and scorch mark on the wooden base.mining, equipment, cyanide plant, gold cyanidation (also known as the cyanide process or the macarthur-forrest process) is a hydrometallurgical technique for extracting gold from low-grade ore by converting the gold to a water-soluble coordination complex. it is the most commonly used leaching process for gold extraction. the ore is comminuted using grinding machinery. depending on the ore, it is sometimes further concentrated by froth flotation or by centrifugal (gravity) concentration. water is added to produce a slurry or pulp. the basic ore slurry can be combined with a solution of sodium cyanide or potassium cyanide, however many operations utilize calcium cyanide, which is more cost effective. to prevent the creation of toxic hydrogen cyanide during processing, slaked lime (calcium hydroxide) or soda (sodium hydroxide) is added to the extracting solution to ensure that the acidity during cyanidation is maintained over ph 10.5 - strongly basic. lead nitrate can improve gold leaching speed and quantity recovered, particularly in processing partially oxidized ores. -
 Bendigo Historical Society Inc.
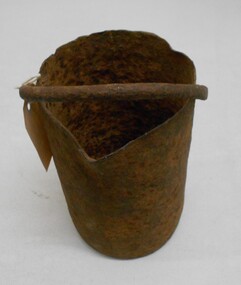
Tool - MERCURY BUCKET
... thus losing a certain amount of gold in the process... with the tailings thus losing a certain amount of gold in the process ...Cast iron mercury bucket, used to hold mercury, potentially in the process of recovering minute pieces of gold mixed in soil and sediments. See research page for description of one process of using mercury to extract gold.gold mines, mining equipment, mercury bucket, miners used mercury in a number of ways to amalgamate gold, with each mill or battery operator having their preferred method depending on the nature of the ore. by the late 1850s the most common way of crushing goldbearing quartz ores or consolidated alluvial cements was in a stamp battery. the battery featured heavy iron stamp heads held in a frame, with each head often weighing up to 500 pounds (226 kg) or more (see msv 1880, page 45) (birrell 2005). stamp heads were lifted and dropped by a rotating overhead cam shaft driven by a steam engine or water wheel. ore was fed into a large cast-iron battery box, mixed with a steady stream of water, and pulverised by the stamp heads. in some batteries, mercury was placed in the base of the boxes to amalgamate with freed gold. the violent agitation of the mercury in the mortar box, however, could cause the mercury to break into myriad tiny globules that were carried away by the water with the tailings, thus losing a certain amount of gold in the process (thompson 1867; ritchie & hooker 1997). the water and sand slurry was splashed by the falling stamps from the box through fine mesh screens and onto inclined wooden tables below the mortar box (figure 2). the tables were covered with copper sheets or plates coated with mercury, which caught and amalgamated with a portion of the gold. the grey putty-like amalgam was periodically scraped off the sheets and retorted in a furnace to collect the gold and recover the mercury for reuse. mercury was inevitably lost from the plates, while poor maintenance resulted in further losses of gold and mercury in the tailings. mercury use and loss from gold mining in 19th century victoria. peter davies1, susan lawrence, and jodi turnbull, department of archaeology and history, la trobe university. -
 St Kilda Historical Society
Ephemera - Invitation, Official Opening of the 'Monohearth' Mechanised Refuse Destructo Units and Ashphalt Mixing Plants, 1953
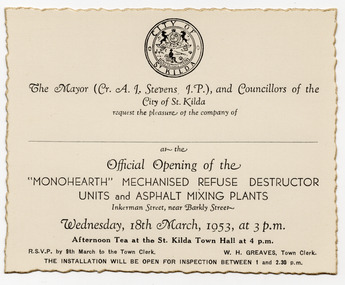
Invitation to the official opening of refuse destructor units and asphalt mixing plants at Inkerman Street, St Kilda, on 18 March 1953. The destructor units replaced a garbage incinerator that had been operating at the site for thirty years and had become obsolete. They were expected to serve St. Kilda's requirements for the next 80-100 years. In 1994, as a result of the local government amalgamation process combining the former Cities of Port Melbourne, South Melbourne and St Kilda, the new City of Port Phillip owned three municipal depots. The St Kilda municipal depot site became surplus to requirements and, in 1996, the City of Port Phillip resolved to use the site for a community housing project under the City of Port Phillip Housing Program. White card printed in black, with gold jagged edges. Shows St Kilda logo.monohearth, st kilda municipal depot -
 El Dorado Museum Association Inc.
Photograph (item) - Digital Image
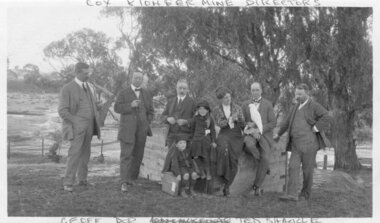
Image of Cocks Pioneer Gold & Tin Mines NL directors with Mrs Molly Moline and children, Dorothy and Geoff. Taken at Sherwood - the mine manager's residence. (1914) Cocks Pioneer Electric Gold & Tin Mine Company was formed in 1899. The company's first power station, located at the eastern end of the valley began operating with its 340 Kilowatt steam-powered generator. By 1909, from 2,500,000 cubic yards worked, reported recovery was 17,284 ounces of gold and 224 tons of tin ore. By 1909, Cocks Pioneer’s power plant had become inadequate and uneconomical. The barge was floated downstream about a mile, but lost time caused the operations to cease. Following testing, a new mine was established by diverting Reid's Creek at a cost of £25 000. Settling dams were built, one of which held 1,935,900 cubic feet. Sold earth banks, built against a wall of stringy bark saplings constructed and laced with vertical props, were built. In 1914, the company was reformed as Cock’s Pioneer Gold and Tin Mines NL, another power station was constructed at the western end of the township, near the junction of Clear and Reid's Creeks. From 6,800,000 cubic yards of material processed, the returns were 64,397 ounces of gold and 855 ton of tin. Cocks Pioneer mine then moved the barge downs stream and continued sluicing. In 1929 Cocks Pioneer Electric Gold and Tin Mining Company ceased operations due to a drop in values. Cock’s Pioneer Gold and Tin Mines NL carried on large-scale hydraulic sluicing operations until 1941. "COX PIONEER MINE DIRECTORS" top "GEOFF DOR (unclear) TED SHACKLE" bottommine, gold, tin, gold mining, tin mining, cockatoos, sluicing, men, women, children, cocks pioneer, el dorado, eldorado -
 El Dorado Museum Association Inc.
Photograph (item) - Digital Image
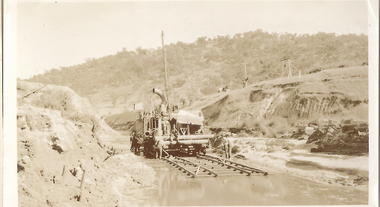
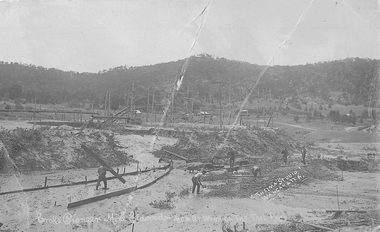
Altering course of Reedy Creek, El Dorado. Cocks Pioneer Electric Gold & Tin Mine Company was formed in 1899. The company's first power station, located at the eastern end of the valley began operating with its 340 Kilowatt steam-powered generator. By 1909, from 2,500,000 cubic yards worked, reported recovery was 17,284 ounces of gold and 224 tons of tin ore. By 1909, Cocks Pioneer’s power plant had become inadequate and uneconomical. The barge was floated downstream about a mile, but lost time caused the operations to cease. Following testing, a new mine was established by diverting Reid's Creek at a cost of £25 000. Settling dams were built, one of which held 1,935,900 cubic feet. Sold earth banks, built against a wall of stringy bark saplings constructed and laced with vertical props, were built. In 1914, the company was reformed as Cock’s Pioneer Gold and Tin Mines NL, another power station was constructed at the western end of the township, near the junction of Clear and Reid's Creeks. From 6,800,000 cubic yards of material processed, the returns were 64,397 ounces of gold and 855 ton of tin. Cocks Pioneer mine then moved the barge downs stream and continued sluicing. In 1929 Cocks Pioneer Electric Gold and Tin Mining Company ceased operations due to a drop in values. Cock’s Pioneer Gold and Tin Mines NL carried on large-scale hydraulic sluicing operations until 1941. Handwritten across the front: 'Altering course of creek. Eldorado'mining, gold, tin, sluicing, reedy creek, cocks pioneer, el dorado, eldorado, men, horses -
 El Dorado Museum Association Inc.
Photograph (item) - Digital Image
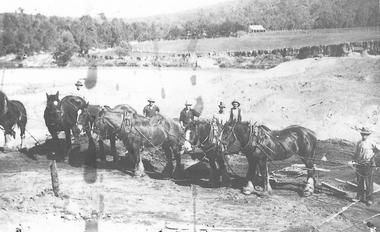
Horse team , Cocks Pioneer Cocks Pioneer Electric Gold & Tin Mine Company was formed in 1899. The company's first power station, located at the eastern end of the valley began operating with its 340 Kilowatt steam-powered generator. By 1909, from 2,500,000 cubic yards worked, reported recovery was 17 284 ounces of gold and 224 tons of tin ore. By 1909, Cocks Pioneer’s power plant had become inadequate and uneconomical. The barge was floated downstream about a mile, but lost time caused the operations to cease. Following testing, a new mine was established by diverting Reid's Creek at a cost of £25,000. Settling dams were built, one of which held 1,935,900 cubic feet. Sold earth banks, built against a wall of stringy bark saplings constructed and laced with vertical props, were built. In 1914, the company was reformed as Cock’s Pioneer Gold and Tin Mines NL, another power station was constructed at the western end of the township, near the junction of Clear and Reid's Creeks. From 6,800,000 cubic yards of material processed, the returns were 64,397 ounces of gold and 855 ton of tin. Cocks Pioneer mine then moved the barge downs stream and continued sluicing. In 1929 Cocks Pioneer Electric Gold and Tin Mining Company ceased operations due to a drop in values. Cock’s Pioneer Gold and Tin Mines NL carried on large-scale hydraulic sluicing operations until 1941. mining, gold, tin, sluicing, men, cocks pioneer, el dorado, eldorado, horses, gold mining, tin mining -
 El Dorado Museum Association Inc.
Photograph (item) - Digital Image
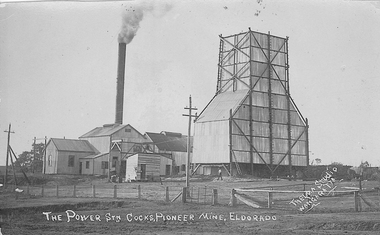
Cocks Pioneer Mine El Dorado, Power Station No. 2 was established in 1914 and located near junction of Reid's and Clear Creeks, Byawatha. Cocks Pioneer Electric Gold & Tin Mine Company was formed in 1899. The company's first power station, located at the eastern end of the valley began operating with its 340 Kilowatt steam-powered generator. By 1909, from 2,500,000 cubic yards worked, reported recovery was 17,284 ounces of gold and 224 tons of tin ore. By 1909, Cocks Pioneer’s power plant had become inadequate and uneconomical. The barge was floated downstream about a mile, but lost time caused the operations to cease. Following testing, a new mine was established by diverting Reid's Creek at a cost of £25,000. Settling dams were built, one of which held 1,935,900 cubic feet. Sold earth banks, built against a wall of stringy bark saplings constructed and laced with vertical props, were built. In 1914, the company was reformed as Cock’s Pioneer Gold and Tin Mines NL, another power station was constructed at the western end of the township, near the junction of Clear and Reid's Creeks. From 6,800,000 cubic yards of material processed, the returns were 64,397 ounces of gold and 855 ton of tin. Cocks Pioneer mine then moved the barge downs stream and continued sluicing. In 1929 Cocks Pioneer Electric Gold and Tin Mining Company ceased operations due to a drop in values. Cock’s Pioneer Gold and Tin Mines NL carried on large-scale hydraulic sluicing operations until 1941. Handwritten on front: 'THE POWER STN COCKS, PIONEER MINE, ELDORADO' / 'THELMA STUDIO / [underlined] WANGARATTA'mining, gold, tin, cocks pioneer, power, sluicing, el dorado, eldorado, byawatha, thelma studios, wangaratta, gold mining, tin mining, reid's creek, clear creek -
 El Dorado Museum Association Inc.
Photograph (item) - Digital Image
Cocks Pioneer Creek Diversion. Cocks Pioneer Electric Gold & Tin Mine Company was formed in 1899. The company's first power station, located at the eastern end of the valley began operating with its 340 Kilowatt steam-powered generator. By 1909, from 2,500,000 cubic yards worked, reported recovery was 17,284 ounces of gold and 224 tons of tin ore. By 1909, Cocks Pioneer’s power plant had become inadequate and uneconomical. The barge was floated downstream about a mile, but lost time caused the operations to cease. Following testing, a new mine was established by diverting Reid's Creek at a cost of £25,000. Settling dams were built, one of which held 1,935,900 cubic feet. Sold earth banks, built against a wall of stringy bark saplings constructed and laced with vertical props, were built. In 1914, the company was reformed as Cock’s Pioneer Gold and Tin Mines NL, another power station was constructed at the western end of the township, near the junction of Clear and Reid's Creeks. From 6,800,000 cubic yards of material processed, the returns were 64,397 ounces of gold and 855 ton of tin. Cocks Pioneer mine then moved the barge downs stream and continued sluicing. In 1929 Cocks Pioneer Electric Gold and Tin Mining Company ceased operations due to a drop in values. Cock’s Pioneer Gold and Tin Mines NL carried on large-scale hydraulic sluicing operations until 1941. mining, gold, tin, cocks pioneer, creek, gold mining, tin mining, el dorado, eldorado -
 El Dorado Museum Association Inc.
Photograph (item) - Digital Image
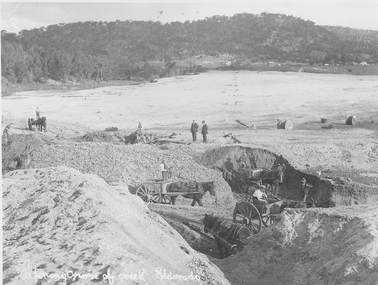
Men at Work on the Tail Race, Cocks Pioneer Mine, El Dorado. Cocks Pioneer Electric Gold & Tin Mine Company was formed in 1899. The company's first power station, located at the eastern end of the valley began operating with its 340 Kilowatt steam-powered generator. By 1909, from 2,500,000 cubic yards worked, reported recovery was 17,284 ounces of gold and 224 tons of tin ore. By 1909, Cocks Pioneer’s power plant had become inadequate and uneconomical. The barge was floated downstream about a mile, but lost time caused the operations to cease. Following testing, a new mine was established by diverting Reid's Creek at a cost of £25,000. Settling dams were built, one of which held 1,935,900 cubic feet. Sold earth banks, built against a wall of stringy bark saplings constructed and laced with vertical props, were built. In 1914, the company was reformed as Cock’s Pioneer Gold and Tin Mines NL, another power station was constructed at the western end of the township, near the junction of Clear and Reid's Creeks. From 6,800,000 cubic yards of material processed, the returns were 64,397 ounces of gold and 855 ton of tin. Cocks Pioneer mine then moved the barge downs stream and continued sluicing. In 1929 Cocks Pioneer Electric Gold and Tin Mining Company ceased operations due to a drop in values. Cock’s Pioneer Gold and Tin Mines NL carried on large-scale hydraulic sluicing operations until 1941. Handwritten across the front: 'Cocks Pioneer Mine Eldorado MEN AT WORK ON THE TAIL RACE' / 'THELMA STUDIO / [underlined] WANGARATTA.mining, gold, tin, gold mining, tin mining, cocks pioneer, men, thelma studios, wangaratta, el dorado, eldorado -
 El Dorado Museum Association Inc.
Photograph (item) - Digital Image
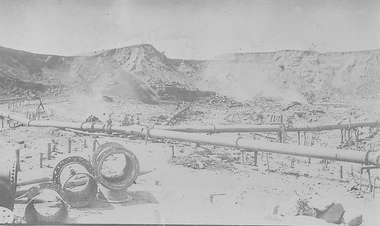
Cocks Pioneer Pipes and Open Cut. Cocks Pioneer Electric Gold & Tin Mine Company was formed in 1899. The company's first power station, located at the eastern end of the valley began operating with its 340 Kilowatt steam-powered generator. By 1909, from 2,500,000 cubic yards worked, reported recovery was 17,284 ounces of gold and 224 tons of tin ore. By 1909, Cocks Pioneer’s power plant had become inadequate and uneconomical. The barge was floated downstream about a mile, but lost time caused the operations to cease. Following testing, a new mine was established by diverting Reid's Creek at a cost of £25,000. Settling dams were built, one of which held 1,935,900 cubic feet. Sold earth banks, built against a wall of stringy bark saplings constructed and laced with vertical props, were built. In 1914, the company was reformed as Cock’s Pioneer Gold and Tin Mines NL, another power station was constructed at the western end of the township, near the junction of Clear and Reid's Creeks. From 6,800,000 cubic yards of material processed, the returns were 64 397 ounces of gold and 855 ton of tin. Cocks Pioneer mine then moved the barge downs stream and continued sluicing. In 1929 Cocks Pioneer Electric Gold and Tin Mining Company ceased operations due to a drop in values. Cock’s Pioneer Gold and Tin Mines NL carried on large-scale hydraulic sluicing operations until 1941. mining, gold, tin, open cut, sluicing, gold mining, tin mining, cocks pioneer, el dorado, eldorado -
 El Dorado Museum Association Inc.
Photograph (item) - Digital Image
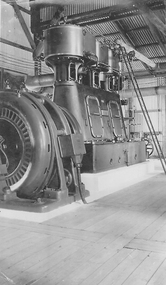
Cocks Pioneer New Engines, c. 1934. Cocks Pioneer Electric Gold & Tin Mine Company was formed in 1899. The company's first power station, located at the eastern end of the valley began operating with its 340 Kilowatt steam-powered generator. By 1909, from 2,500,000 cubic yards worked, reported recovery was 17,284 ounces of gold and 224 tons of tin ore. By 1909, Cocks Pioneer’s power plant had become inadequate and uneconomical. The barge was floated downstream about a mile, but lost time caused the operations to cease. Following testing, a new mine was established by diverting Reid's Creek at a cost of £25,000. Settling dams were built, one of which held 1,935,900 cubic feet. Sold earth banks, built against a wall of stringy bark saplings constructed and laced with vertical props, were built. In 1914, the company was reformed as Cock’s Pioneer Gold and Tin Mines NL, another power station was constructed at the western end of the township, near the junction of Clear and Reid's Creeks. From 6,800,000 cubic yards of material processed, the returns were 64 397 ounces of gold and 855 ton of tin. Cocks Pioneer mine then moved the barge downs stream and continued sluicing. In 1929 Cocks Pioneer Electric Gold and Tin Mining Company ceased operations due to a drop in values. Cock’s Pioneer Gold and Tin Mines NL carried on large-scale hydraulic sluicing operations until 1941. mining, gold, tin, engine, electricity, gold mining, tin mining, cocks pioneer, el dorado, eldorado -
 El Dorado Museum Association Inc.
Photograph (item) - Digital Image
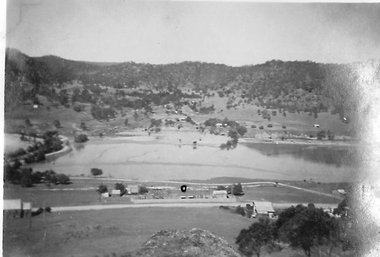
Cocks Pioneer Ponds, c. 1930s. Cocks Pioneer Electric Gold & Tin Mine Company was formed in 1899. The company's first power station, located at the eastern end of the valley began operating with its 340 Kilowatt steam-powered generator. By 1909, from 2,500,000 cubic yards worked, reported recovery was 17,284 ounces of gold and 224 tons of tin ore. By 1909, Cocks Pioneer’s power plant had become inadequate and uneconomical. The barge was floated downstream about a mile, but lost time caused the operations to cease. Following testing, a new mine was established by diverting Reid's Creek at a cost of £25,000. Settling dams were built, one of which held 1,935,900 cubic feet. Sold earth banks, built against a wall of stringy bark saplings constructed and laced with vertical props, were built. In 1914, the company was reformed as Cock’s Pioneer Gold and Tin Mines NL, another power station was constructed at the western end of the township, near the junction of Clear and Reid's Creeks. From 6,800,000 cubic yards of material processed, the returns were 64 397 ounces of gold and 855 ton of tin. Cocks Pioneer mine then moved the barge downs stream and continued sluicing. In 1929 Cocks Pioneer Electric Gold and Tin Mining Company ceased operations due to a drop in values. Cock’s Pioneer Gold and Tin Mines NL carried on large-scale hydraulic sluicing operations until 1941. mining, gold, tin, gold mining, tin mining, cocks pioneer, el dorado, eldorado -
 El Dorado Museum Association Inc.
Photograph (item) - Digital Image
Cocks Pioneer Ponds from Monument Hill. Cocks Pioneer Electric Gold & Tin Mine Company was formed in 1899. The company's first power station, located at the eastern end of the valley began operating with its 340 Kilowatt steam-powered generator. By 1909, from 2,500,000 cubic yards worked, reported recovery was 17,284 ounces of gold and 224 tons of tin ore. By 1909, Cocks Pioneer’s power plant had become inadequate and uneconomical. The barge was floated downstream about a mile, but lost time caused the operations to cease. Following testing, a new mine was established by diverting Reid's Creek at a cost of £25,000. Settling dams were built, one of which held 1,935,900 cubic feet. Sold earth banks, built against a wall of stringy bark saplings constructed and laced with vertical props, were built. In 1914, the company was reformed as Cock’s Pioneer Gold and Tin Mines NL, another power station was constructed at the western end of the township, near the junction of Clear and Reid's Creeks. From 6,800,000 cubic yards of material processed, the returns were 64,397 ounces of gold and 855 ton of tin. Cocks Pioneer mine then moved the barge downs stream and continued sluicing. In 1929 Cocks Pioneer Electric Gold and Tin Mining Company ceased operations due to a drop in values. Cock’s Pioneer Gold and Tin Mines NL carried on large-scale hydraulic sluicing operations until 1941. mining, gold, tin, hydraulic, sluicing, gold mining, tin mining, monument hill, cocks pioneer, el dorado, eldorado -
 El Dorado Museum Association Inc.
Photograph (item) - Digital Image
Cocks Pioneer Barge. Cocks Pioneer Electric Gold & Tin Mine Company was formed in 1899. The company's first power station, located at the eastern end of the valley began operating with its 340 Kilowatt steam-powered generator. By 1909, from 2,500,000 cubic yards worked, reported recovery was 17,284 ounces of gold and 224 tons of tin ore. By 1909, Cocks Pioneer’s power plant had become inadequate and uneconomical. The barge was floated downstream about a mile, but lost time caused the operations to cease. Following testing, a new mine was established by diverting Reid's Creek at a cost of £25,000. Settling dams were built, one of which held 1,935,900 cubic feet. Sold earth banks, built against a wall of stringy bark saplings constructed and laced with vertical props, were built. In 1914, the company was reformed as Cock’s Pioneer Gold and Tin Mines NL, another power station was constructed at the western end of the township, near the junction of Clear and Reid's Creeks. From 6,800,000 cubic yards of material processed, the returns were 64,397 ounces of gold and 855 ton of tin. Cocks Pioneer mine then moved the barge downs stream and continued sluicing. In 1929 Cocks Pioneer Electric Gold and Tin Mining Company ceased operations due to a drop in values. Cock’s Pioneer Gold and Tin Mines NL carried on large-scale hydraulic sluicing operations until 1941. mining, gold, tin, barge, sluicing, gold mining, tin mining, cocks pioneer, el dorado, eldorado -
 El Dorado Museum Association Inc.
Photograph (item) - Digital Image
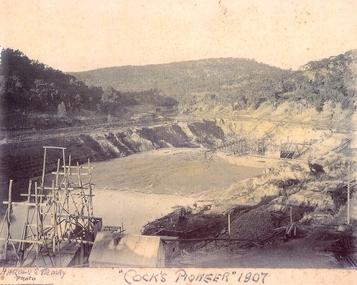
Cocks Pioneer, 1907. Cocks Pioneer Electric Gold & Tin Mine Company was formed in 1899. The company's first power station, located at the eastern end of the valley began operating with its 340 Kilowatt steam-powered generator. By 1909, from 2,500,000 cubic yards worked, reported recovery was 17,284 ounces of gold and 224 tons of tin ore. By 1909, Cocks Pioneer’s power plant had become inadequate and uneconomical. The barge was floated downstream about a mile, but lost time caused the operations to cease. Following testing, a new mine was established by diverting Reid's Creek at a cost of £25,000. Settling dams were built, one of which held 1,935,900 cubic feet. Sold earth banks, built against a wall of stringy bark saplings constructed and laced with vertical props, were built. In 1914, the company was reformed as Cock’s Pioneer Gold and Tin Mines NL, another power station was constructed at the western end of the township, near the junction of Clear and Reid's Creeks. From 6,800,000 cubic yards of material processed, the returns were 64,397 ounces of gold and 855 ton of tin. Cocks Pioneer mine then moved the barge downs stream and continued sluicing. In 1929 Cocks Pioneer Electric Gold and Tin Mining Company ceased operations due to a drop in values. Cock’s Pioneer Gold and Tin Mines NL carried on large-scale hydraulic sluicing operations until 1941. Handwritten across front: 'HAROLD S. TEMBY / Photo'; '"COCKS PIONEER" 1907'.mining, gold, tin, open cut, barge, gold mining, tin mining, cocks pioneer, el dorado, eldorado -
 El Dorado Museum Association Inc.
Photograph (item) - Digital Image
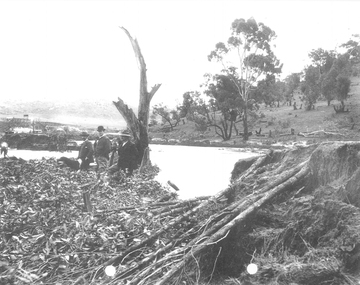
Cocks Pioneer after Flood. Cocks Pioneer Electric Gold & Tin Mine Company was formed in 1899. The company's first power station, located at the eastern end of the valley began operating with its 340 Kilowatt steam-powered generator. By 1909, from 2,500,000 cubic yards worked, reported recovery was 17,284 ounces of gold and 224 tons of tin ore. By 1909, Cocks Pioneer’s power plant had become inadequate and uneconomical. The barge was floated downstream about a mile, but lost time caused the operations to cease. Following testing, a new mine was established by diverting Reid's Creek at a cost of £25,000. Settling dams were built, one of which held 1,935,900 cubic feet. Sold earth banks, built against a wall of stringy bark saplings constructed and laced with vertical props, were built. In 1914, the company was reformed as Cock’s Pioneer Gold and Tin Mines NL, another power station was constructed at the western end of the township, near the junction of Clear and Reid's Creeks. From 6,800,000 cubic yards of material processed, the returns were 64,397 ounces of gold and 855 ton of tin. Cocks Pioneer mine then moved the barge downs stream and continued sluicing. In 1929 Cocks Pioneer Electric Gold and Tin Mining Company ceased operations due to a drop in values. Cock’s Pioneer Gold and Tin Mines NL carried on large-scale hydraulic sluicing operations until 1941. mining, gold, tin, barge, floods, gold mining, tin mining, cocks pioneer, el dorado, eldorado, men