Showing 125 items
matching tactical
-
 National Vietnam Veterans Museum (NVVM)
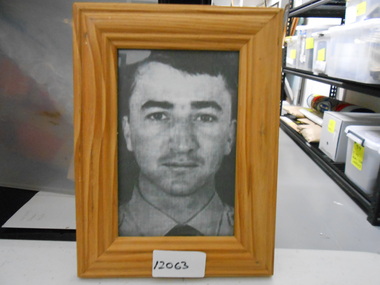
Photograph, Pilot Officer Robert Charles Carver (MIA)
Pilot Officer Robert Charles CARVER, 24was a career air force officer in No. 2 Squadron, RAAF. On 3 November 1970 the Canberra bomber he was in disappeared from a radar screen while returning from a night bombing mission in the northern I Corps Tactical Zone of South Vietnam. An extensive aerial search of the area failed to find any trace of the aircraft or crew and was called off after three days. In April 2009 the wreckage of the Canberra bomber was located in thick jungle in Quang Nam Province near the Laotian border. Human remains discovered near the site were identified in July 2009 as those of Carver and his crew and were repatriated to Australia on 31 August 2009 for burial in separate military funerals.Framed black and white head and shoulders photo of P.O. Carver (Missing In Action) in dress shirtphotograph, missing in action, p.o. robert carver, mia, no 2 squadron', canberra bomber, quang nam province, laotian border, royal australian air force, 0119223 -
 National Vietnam Veterans Museum (NVVM)
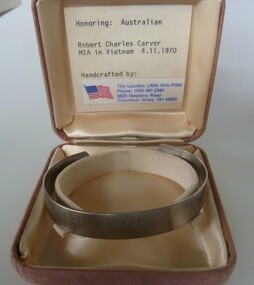
Ceremonial object - Bracelet, Missing in Action (MIA) - Pilot Officer Robert Charles CARVER
Pilot Officer Robert Charles CARVER, 24, and Flying Officer Michael Patrick John HERBERT, 24, were both career air force officers in No. 2 Squadron, RAAF. On 3 November 1970 their Canberra bomber disappeared from a radar screen while returning from a night bombing mission in the northern I Corps Tactical Zone of South Vietnam. An extensive aerial search of the area failed to find any trace of the aircraft or crew and was called off after three days. In April 2009 the wreckage of the Canberra bomber was located in thick jungle in Quang Nam Province near the Laotian border. Human remains discovered near the site were identified in July 2009 as those of Carver and Herbert and were repatriated to Australia on 31 August 2009 for burial in separate military funerals.Stainless steel open-ended bracelet engraved with missing serviceman's full name and date missing. In a buff square velvet satin-lined box.Robert Charles Carver, 04/11/70mia, robert charles carver, mia 4/11/1970, robert carver mia, royal australian air force, 0119223, pilot officer, no 2 squadron', 1 corps tactical zone, canberra bomber, laotian border, quang nam province -
 National Vietnam Veterans Museum (NVVM)
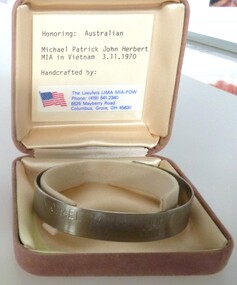
Ceremorial Object - MIA Bracelet - Flying Officer Michael Patrick John Herbert, The Laeufers LIMA MIA-POW
Pilot Officer Robert Charles CARVER, 24, and Flying Officer Michael Patrick John HERBERT, 24, were both career air force officers in No. 2 Squadron, RAAF. On 3 November 1970 their Canberra bomber disappeared from a radar screen while returning from a night bombing mission in the northern I Corps Tactical Zone of South Vietnam. An extensive aerial search of the area failed to find any trace of the aircraft or crew and was called off after three days. In April 2009 the wreckage of the Canberra bomber was located in thick jungle in Quang Nam Province near the Laotian border. Human remains discovered near the site were identified in July 2009 as those of Carver and Herbert and were repatriated to Australia on 31 August 2009 for burial in separate military funerals.Stainless steel open ended bracelet engraved with missing servicemen's full name and date missing. In a buff square velvet satin-lined box. Date, 03/11/70 on the bracelet.Michael Patrick John Herbert 03/11/70mia, michael patrick john herbert, flying officer michael patrick john herbert, royal australian air force, 044310, pilot, no 2 squadron' -
 Federation University Historical Collection
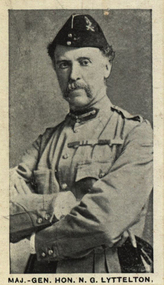
Photograph (black & White), Major-General, Honorable Neville Gerald Lyttelton - South Africa
Lyttelton served in the Second Boer War as Commander of the 4th Brigade from 1899. He temporarily became General Officer Commanding the 2nd Division and the commanded the 4th Division. The Division was involved in the Battle of Spion Kop and the Battle of Vaal Krantz, leading to the Relief of Ladysmith 1900. Lord Roberts referred to Lyttelton as an officer "with great coolness under fire, and considerable tactical knowledge and resource........an excellent commander in the field." Following the end of the Boer War in 1902, Lyttelton became Commander-in-Chief of the whole of South Africa. He and his wife sought to repair relations with the Boer community. In the South Africa honours of 1902 Lyttelton was knighted as Knight Commander of the Order of the Bath. He retired in 1912 and under insistence by the King was appointed as Governor of the Royal Hospital Chelsea from that time until his death there in 1931. Other awards received were Knight Grand Cross of the Order of the Bath; Knight Grand Cross of the Royal Victorian Order; Order of Osmanieh (Ottoman Empire)Individual image taken from photographed poster of tobacco and cigarette cards.neville gerald lyttelton, second boer war, commander, 4th brigade, battle of spion kop, battle of vaal krantz, relief of ladysmith, lord roberts, commander-in-chief, south africa, knight commander of the order of the bath, royal hospital chelsea, order of osmanieh (ottoman empire), knight grand cross of the royal victorian order -
 National Vietnam Veterans Museum (NVVM)
Pamphlet, A Summary of the War Situation in the country over the past days
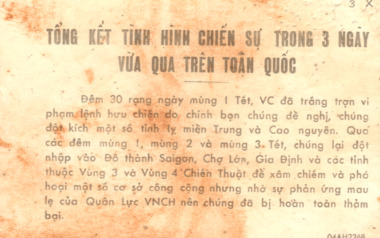
From the 30th to the 1st day of Tet (Lunar New Year), the VC have shamelessly violated the truce that they themselves proposed. The have attacked a number of town in Central Vietnam and in the Highlands. On the nights of the 1st, 2nd, and 3rd of Tet, they have taken advantage to infiltrate into the capital, Saigon - and into Gia Dinh and Cho Lon. They have also attacked in the provinces of the 3rd and the 4th Tactical Zones to destroy infrastructure and public utilities. However, thanks to the rapid reaction of the Republic of Vietnam Armed Forces, they have been completely and humiliatingly defeated. (1968) On the reverse side reads: Herewith are the casualty rates of us and the enemy: Period: 30-01-68 - Our causalities 282 killed and wounded. Enemy 2,338 killed on the spot, 182 captured. Period 1-02-68 - Our soldiers: 203 killed and wounded. Enemy 2,617 killed, 198 captured. Period 2-02-68 to 12 midday: Our soldiers 211 killed and wounded. enemy 2,112 killed, 119 captured. Summary: Our casualties: 706, Enemy casualties 7,561. Enemy weapons captured: 144 crew-served weapon; 2,253 individual weapons.TONG KET TINH HINH CHIEN SU TRON 3 NGAY - VUA QUA TREN TOAN QUOC - A Summary of the war situation in the country over the past days: On one side there is information in Vietnamese and on the reverse side the information is in a table format.pamphlet, psycological warfare, propaganda, nva/vc, viet cong, 7th battalion, 1st battalion, the royal australian regiment, terry michael collie, 2790361, lunar new year, central vietnam, saigon, gia dinh, cho lon -
 National Vietnam Veterans Museum (NVVM)
Medal - Medal Replica - Distinguished Flying Cross
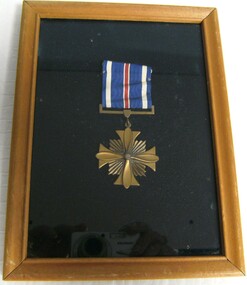
Squadron Leader Alan Reed from the Royal Australian Air Force 052363 served in Vietnam from 26 May 1968 until 20 November 1968. He spent most of his tour detached to the 12th Tactical Reconnaissance Squadron, US Air Force. He was made an Officer of the Order of Australia (AO) in June 1989 for his service to the RAAF as Air Officer Commanding, Support Command. For his service with the USAF, Alan Reed was awarded the United States Distinguished Flying Cross with oak leaf cluster. His final rank with the Air Force was Air Vice Marshal and his last posting was with Headquarters, Australian Force Vietnam (RAAF Element) The Distinguished Flying Cross (DFC) is a military decoration of the United States Armed Forces. The medal was established on July 2, 1926, and is currently awarded to any persons who, after April 6, 1917, distinguish themselves by single acts of heroism or extraordinary achievement while participating in aerial flight. Both heroism and extraordinary achievement are entirely distinctive, involving operations that are not routine. The medal may be awarded to friendly foreign military members in ranks equivalent to U.S. Pay Grade of O-6 and below, in combat in support operations.Distinguished Flying Cross medal in a wooden frame with glass front. Gold coloured medal described as "First Oak Leaf Cluster" attached to blue, white and red striped ribbon mounted on navy blue velvet.distinguished flying cross, alan reed, united states air force, vietnam, squadron leader alan reed, royal australian air force, 052363, 12th tactical reconnaissance squadron, officer of the order of australia, raaf, usaf, air vice marshall allan reed, headquarters, australian force vietnam, raaf element -
 National Vietnam Veterans Museum (NVVM)
Photograph - Photograph of SQN LDR Alan Reed receiving a citation to accompany Distinguished Flying Cross, C.1968
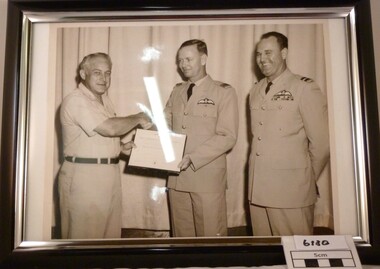
CITATION TO ACCOMPANY THE AWARD OF THE DISTINGUISHED FLYING CROSS (First Oak Leaf Cluster) Squadron leader Alan R Reed distinguished himself by extraordinary achievement while participating in aerial flight as and RD-4C Aircraft Commander in Southeast Asia on 24 August 1968. On that date, he flew his aircraft repeatedly through intense hostile ground fire to obtain complete photographic coverage of the target. In addition, he voluntarily remained in that hostile environment for as long as fuel would allow, to act as a spotter and to pass firing corrections to friendly artillery. The professional competence, aerial skill, and devotion to duty displayed by Squadron Leader Reed reflect great credit upon himself and the United States Air Force. Squadron Leader Alan Reed from the Royal Australian Air Force 052363 served in Vietnam from 26 May 1968 until 20 November 1968. He spent most of his tour detached to the 12th Tactical Reconnaissance Squadron, US Air Force. He was made an Officer of the Order of Australia (AO) in June 1989 for his service to the RAAF as Air Officer Commanding, Support Command. For his service with the USAF, Alan Reed was awarded the United States Distinguished Flying Cross with oak leaf cluster. His final rank with the Air Force was Air Vice Marshal and his last posting was with Headquarters, Australian Force Vietnam (RAAF Element) Black and White photo in black and white frame of SQN LDR Alan Reed receiving a citation to accompany Distinguished Flying Cross 21 /08 /1968. with supporting info.photograph, alan reed, squadron leader alan reed, royal australian air force, raaf, 052363, 12th tactical reconnaissance squadron, united states air force, usaf, officer of the order of australia, air vice marshall allan reed, headquarters, australian force vietnam -
 National Vietnam Veterans Museum (NVVM)
Photograph, C.2015
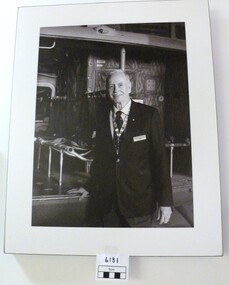
AVM Alan Reed AO, Tan Son Nhut, Saigon, June - November 1968. I was an Australian exchange officer flying RF4C Phantoms and training United States Air Force (USAF) pilots and navigators to go to Vietnam. I felt I needed some Vietnam experience if I were to do my job as an instructor. I managed to persuade both the US and Australian Governments to let me go the the war. I claim to be one of the few people 'invited' to the war because, for protocol reasons. the USAF could not order me to go. I was on exchange with the USAF from 1967 to 1970. My job was to fly reconnaissance missions in South and North Vietnam. My navigator was from North Carolina so we named our aircraft the 'Carolina Kangaroo'. All up, I flew 100 missions in Vietnam. Squadron Leader Alan Reed from the Royal Australian Air Force 052363 served in Vietnam from 26 May 1968 until 20 November 1968. He spent most of his tour detached to the 12th Tactical Reconnaissance Squadron, US Air Force. He was made an Officer of the Order of Australia (AO) in June 1989 for his service to the RAAF as Air Officer Commanding, Support Command. For his service with the USAF, Alan Reed was awarded the United States Distinguished Flying Cross with oak leaf cluster. His final rank with the Air Force was Air Vice Marshal and his last posting was with Headquarters, Australian Force Vietnam (RAAF Element) Black and white photo of Alan Reed Sqdr Ldr Pilot at the N.V.V.M. 2015 with supporting info.pilot, alan reed, tan son nhut, saigon, phantom rf4c, united states air force, usaf, "carolina kangaroo"., squadron leader alan reed, royal australian air force, 052363, 12th tactical reconnaissance squadron, officer of the order of australia, raaf, distinguished flying cross, air vice marshall allan reed, headquarters, australian force vietnam -
 The Beechworth Burke Museum
Photograph, 1910
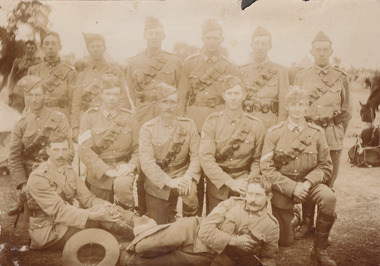
Lord Kitchener visited Seymour as part of his review of Australia's military capabilities. Lord Kitchener was Commander-in-Chief of the British Army at the time of his visit. At the invitation of Prime Minister Alfred Deakin, Kitchener visited Australia in 1909 to inspect the existing state of defence preparedness of the Commonwealth, and advise on the best means of providing Australia with a land defence. Kitchener’s report, submitted in February 1910, recommended the introduction of compulsory military training which was immediately adopted, as was the establishment of the Military College, Duntroon: It has been definitely decided that Seymour will be the site of the Kitchener camp. The troops which will make the strongest muster at the camp will be the Light Horse. This being so, the suitability of the chosen area for cavalry operations has necessarily had to be considered in selecting the site, and an additional factor is that Seymour is practically in the centre of the Light Horse districts. The country round Seymour is also suitable for artillery manoeurves, and there is no available area in the vicinity of Melbourne where these could be so well carried out. As it is considered that Field-Marshal Lord Kitchener will desire to see the troops on the move, the reason for choosing such a district as Seymour is apparent. The eight days to be devoted to the camp will be mainly occupied in moving the troops over a considerable area, and in carrying out certain tactical operations. Many of the sites recommended have been inspected by officers of the head quarter staff, and all that now remains is that the exact situation for the main camp should be selected, Major Luscombe will visit Seymour on Saturday to inspect the surround country, and select the most suitable places. The intention will be directed to sites closer to the town. Yea Chronicle (Yea, Vic), 9 December 1909. Black and white rectangular photograph printed on matte photographic paper and mounted on board.Obverse: Beechworth Light Horse (pen) / Kitchener Camp / Seymour / 1910 / Reverse: 8743 / Mrs R Scott / military album, burke museum, burke, beechworth, beechworth light horse, light horse, world war one, wwi, 1910 -
 8th/13th Victorian Mounted Rifles Regimental Collection
Photograph
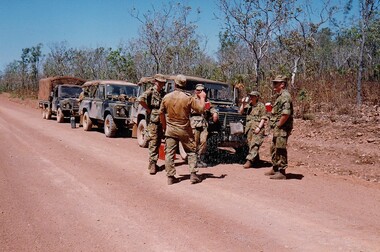
The Dibb Report into mainland defence of Australia,1986, among other things identified the requirement for protection of key assets in Northern Australia and the possibility of involving Army Reserve (Ares) units in this thus releasing regular forces for offensive operations. Dibb also pointed out that this defined role would result in a huge lift in Ares morale. In June 1988, the 3rd Division (3Div) conducted a Tactical Exercise without Troops (TEWT), Exercise ‘Distant Trumpet’ in the Katherine- Darwin area to study problems associated with defence against low level incursions against Tindal RAAF Base. Exercise ‘Northern Explorer’ followed in October of that year when units of the 3Div including A Squadron 8/13 Victorian Mounted Rifles sent patrol groups to get a first taste of environment and conditions. Post-Exercise reports had to include recommendations re: health, equipment and adaptation of Standing Operating Procedures (SOPs) in preparation for the new role deploying to Northern Australia. The first deployment by 8/13 Victorian Mounted Rifles was in 1988. Deployments continued in following years. In September 1993, 3 Troop (Wangaratta) VMR Squadron 4/19 PWLH commanded by Captain Kelvin Robertson deployed to NT. The training began with airfield defence at Tindal followed by a 1000km recon into Arnhem Land in four Landrovers. The troop reported on the conditions of the roads, airfields, bridges (mainly causeways) resources such as fuel supplies in the towns and infrastructure. Each troop taking different route. 3 Troop had the Northern route through Kakadu National park across the East Alligator River to Oenpelli then to Maningrida and Ramangining and south to the Central Arnhem Road and back to Tindal Air force Base. Colour photograph of five soldiers and three vehicles of VMR Squadron,4/19 Prince of Wales's Light Horse on roadside during annual exercise in Northern Territory 1994.military, vehicles, soldiers, northern territory, training, vmr -
 8th/13th Victorian Mounted Rifles Regimental Collection
Photograph
The Dibb Report into mainland defence of Australia,1986, among other things identified the requirement for protection of key assets in Northern Australia and the possibility of involving Army Reserve (Ares) units in this thus releasing regular forces for offensive operations. Dibb also pointed out that this defined role would result in a huge lift in Ares morale. In June 1988, the 3rd Division (3Div) conducted a Tactical Exercise without Troops (TEWT), Exercise ‘Distant Trumpet’ in the Katherine- Darwin area to study problems associated with defence against low level incursions against Tindal RAAF Base. Exercise ‘Northern Explorer’ followed in October of that year when units of the 3Div including A Squadron 8/13 Victorian Mounted Rifles sent patrol groups to get a first taste of environment and conditions. Post-Exercise reports had to include recommendations re: health, equipment and adaptation of Standing Operating Procedures (SOPs) in preparation for the new role deploying to Northern Australia. The first deployment by 8/13 Victorian Mounted Rifles was in 1988. Deployments continued in following years. In September 1993, 3 Troop (Wangaratta) VMR Squadron 4/19 PWLH commanded by Captain Kelvin Robertson deployed to NT. The training began with airfield defence at Tindal followed by a 1000km recon into Arnhem Land in four Landrovers. The troop reported on the conditions of the roads, airfields, bridges (mainly causeways) resources such as fuel supplies in the towns and infrastructure. Each troop taking different route. 3 Troop had the Northern route through Kakadu National park across the East Alligator River to Oenpelli then to Maningrida and Ramangining and south to the Central Arnhem Road and back to Tindal Air force Base. Colour photograph of group of soldiers of VMR Squadron 4/19Prince of Wales's Light Horse studying maps on bonnet of Land Rover during annual exercise in Northern Territory 1994.Major M. Annett wearing slouch hat, Sergeant Gary Wynn,without hat,,on his left. -
 8th/13th Victorian Mounted Rifles Regimental Collection
Photograph
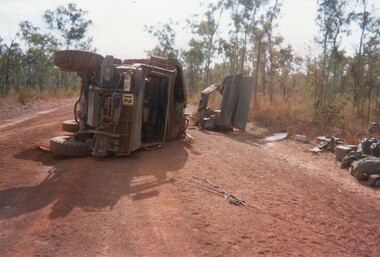
The Dibb Report into mainland defence of Australia,1986, among other things identified the requirement for protection of key assets in Northern Australia and the possibility of involving Army Reserve (Ares) units in this thus releasing regular forces for offensive operations. Dibb also pointed out that this defined role would result in a huge lift in Ares morale. In June 1988, the 3rd Division (3Div) conducted a Tactical Exercise without Troops (TEWT), Exercise ‘Distant Trumpet’ in the Katherine- Darwin area to study problems associated with defence against low level incursions against Tindal RAAF Base. Exercise ‘Northern Explorer’ followed in October of that year when units of the 3Div including A Squadron 8/13 Victorian Mounted Rifles sent patrol groups to get a first taste of environment and conditions. Post-Exercise reports had to include recommendations re: health, equipment and adaptation of Standing Operating Procedures (SOPs) in preparation for the new role deploying to Northern Australia. The first deployment by 8/13 Victorian Mounted Rifles was in 1988. Deployments continued in following years. In September 1993, 3 Troop (Wangaratta) VMR Squadron 4/19 PWLH commanded by Captain Kelvin Robertson deployed to NT. The training began with airfield defence at Tindal followed by a 1000km recon into Arnhem Land in four Landrovers. The troop reported on the conditions of the roads, airfields, bridges (mainly causeways) resources such as fuel supplies in the towns and infrastructure. Each troop taking different route. 3 Troop had the Northern route through Kakadu National park across the East Alligator River to Oenpelli then to Maningrida and Ramangining and south to the Central Arnhem Road and back to Tindal Air force Base. Two colour photographs of vehicle mishap during VMR Squadron 4/19Prince of Wales's Light Horse annual exercise in Northern Territory 1994.Second photo shows driver receiving medical attention. -
 8th/13th Victorian Mounted Rifles Regimental Collection
Photograph
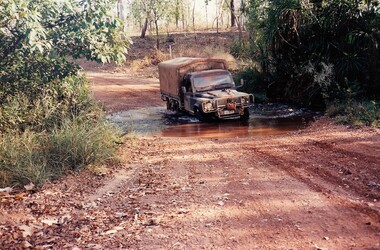
The Dibb Report into mainland defence of Australia,1986, among other things identified the requirement for protection of key assets in Northern Australia and the possibility of involving Army Reserve (Ares) units in this thus releasing regular forces for offensive operations. Dibb also pointed out that this defined role would result in a huge lift in Ares morale. In June 1988, the 3rd Division (3Div) conducted a Tactical Exercise without Troops (TEWT), Exercise ‘Distant Trumpet’ in the Katherine- Darwin area to study problems associated with defence against low level incursions against Tindal RAAF Base. Exercise ‘Northern Explorer’ followed in October of that year when units of the 3Div including A Squadron 8/13 Victorian Mounted Rifles sent patrol groups to get a first taste of environment and conditions. Post-Exercise reports had to include recommendations re: health, equipment and adaptation of Standing Operating Procedures (SOPs) in preparation for the new role deploying to Northern Australia. The first deployment by 8/13 Victorian Mounted Rifles was in 1988. Deployments continued in following years. In September 1993, 3 Troop (Wangaratta) VMR Squadron 4/19 PWLH commanded by Captain Kelvin Robertson deployed to NT. The training began with airfield defence at Tindal followed by a 1000km recon into Arnhem Land in four Landrovers. The troop reported on the conditions of the roads, airfields, bridges (mainly causeways) resources such as fuel supplies in the towns and infrastructure. Each troop taking different route. 3 Troop had the Northern route through Kakadu National park across the East Alligator River to Oenpelli then to Maningrida and Ramangining and south to the Central Arnhem Road and back to Tindal Air force Base. Two colour photographs of creek crossings, one more challenging than the other,during the annual exercise in Northern Territory, conducted by VMR Squadron 4/19 Prince of Wales's Light horse, 1994. -
 Running Rabbits Military Museum operated by the Upwey Belgrave RSL Sub Branch
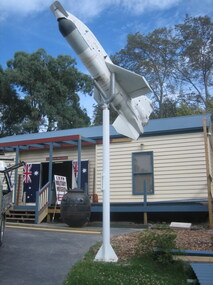
Ikara Missile, Maribyrnong Ordinance Factory in Victoria. et al, 1965
During the 1950’s, the growing threat from Submarines, led the Royal Australian Navy to consider a quick reaction, long range ASW torpedo delivery system as an alternative to the USN’s ASROC and the RN’s Match. Full scale research and development began in 1960 using the Turana target drone as the basis for the delivery platform. Shipboard tests began in 1963 and the Government Aircraft Factory (GAF) began production of three variants M3, M4 and M5 in 1965. The M4 variant had a guidance system designed to interface to a full tactical data handling system while the M3 and M5 variants used a simpler system with a dedicated fire control system. The IKARA is an unmanned miniature aircraft with clip on upper and lower stabilizers and wings. The upper stabilizer (SVU) housed and electronic package that transmitted flight data back to the launch platform and received updated target acquisition data during flight. Flight maneuverability was provided by elevons fitted into the trailing edge of each wing, these were operated by an actuator system that received flight correction data transmitted to the autopilot from the fire control system. The payload, either the Mk44 or Mk46 lightweight torpedo was suspended to the underside of the airframe and faired into the body to provide and aerodynamic shape. The forward section of the body housed the autopilot and the thermal battery unit. Propulsion was provided by the MURAWA steel cased, solid propellant rocket motor with a combined boost and sustainer stage. IKARA was capable of engaging a target to the maximum range of the ships sonar, regardless of weather conditions. Target information is fed into the fire control system, which calculated to drop zone for the torpedo taking into account speed and direction of launch platform and target, win speed etc, then tracking the missile to the drop zone where command signals initiate torpedo release. The IKARA is an unmanned miniature aircraft with clip on upper and lower stabilizers and wings. navy, torpedo, rocket, submarine, missile -
 8th/13th Victorian Mounted Rifles Regimental Collection
Photograph
The Dibb Report into mainland defence of Australia,1986, among other things identified the requirement for protection of key assets in Northern Australia and the possibility of involving Army Reserve (Ares) units in this thus releasing regular forces for offensive operations. Dibb also pointed out that this defined role would result in a huge lift in Ares morale. In June 1988, the 3rd Division (3Div) conducted a Tactical Exercise without Troops (TEWT), Exercise ‘Distant Trumpet’ in the Katherine- Darwin area to study problems associated with defence against low level incursions against Tindal RAAF Base. Exercise ‘Northern Explorer’ followed in October of that year when units of the 3Div including A Squadron 8/13 Victorian Mounted Rifles sent patrol groups to get a first taste of environment and conditions. Post-Exercise reports had to include recommendations re: health, equipment and adaptation of Standing Operating Procedures (SOPs) in preparation for the new role deploying to Northern Australia. The first deployment by 8/13 Victorian Mounted Rifles was in 1988. Deployments continued in following years. In September 1993, 3 Troop (Wangaratta) VMR Squadron 4/19 PWLH commanded by Captain Kelvin Robertson deployed to NT. The training began with airfield defence at Tindal followed by a 1000km recon into Arnhem Land in four Landrovers. The troop reported on the conditions of the roads, airfields, bridges (mainly causeways) resources such as fuel supplies in the towns and infrastructure. Each troop taking different route. 3 Troop had the Northern route through Kakadu National park across the East Alligator River to Oenpelli then to Maningrida and Ramangining and south to the Central Arnhem Road and back to Tindal Air force Base Major Annett later commanded 4/19 Prince of Wales's Light Horse, and later again 4th Brigade 2nd Division.. Colour photograph of Major M. Annett, Officer Commanding VMR Squadron 4/19Prince of Wales's Light Horse during annual exercise Northern Territory 1994. -
 Flagstaff Hill Maritime Museum and Village
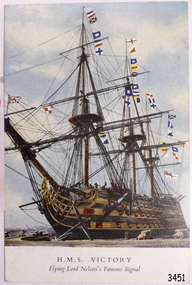
Postcard - Vessel, Sailing Ship, after October 1805
The British Royal Navy’s warship HMS Victory was once Lord Nelson’s flagship. The HMS Victory was built in 1765 and after serving active duty is now, in 2019, still a ship of the Royal Navy, in dry dock undergoing continuous restoration to preserve her for display as a museum ship, due to the vessel’s significant naval history. Battle of Trafalgar: On October 21, 1805, twenty-seven British ships of the line, led by Admiral Lord Nelson aboard HMS Victory, defeated thirty-three French and Spanish ships of the line under French Admiral Villeneuve. The battle took place in the Atlantic Ocean off the southwest coast of Spain, just west of Cape Trafalgar, near the town of Los Caños de Meca. The victory confirmed the naval supremacy Britain had established during the course of the eighteenth century and it was achieved in part through Nelson's departure from the prevailing naval tactical orthodoxy of the day. Conventional practice at the time was for opposing fleets to engage each other in single parallel lines, in order to facilitate signalling and disengagement and to maximise fields of fire and target areas. Nelson instead arranged his ships into two columns to sail perpendicularly into the enemy fleet's line. During the battle, Nelson was shot by a French musketeer and he died shortly before the battle ended. Villeneuve was captured, along with his ship Bucentaure. He later attended Nelson's funeral while a captive on parole in Britain. Admiral Federico Gravina, the senior Spanish flag officer, escaped with the remnant of the fleet. He died five months later from wounds sustained during the battle. It was prior to this battle that Nelson had issued his now-famous final orders to his ships in 12 separate flag-hoists “England expects that every man will do his duty”. This wood sample is historically significant for its association with Admiral Lord Nelson the Battle of Trafalgar. Through Nelson’s leadership and unorthodox battle tactics, he secured not only a victory against the French and Spanish but reaffirmed Britain's naval supremacy opening the way for Britain to continuing the policy of colonisation of many countries including Australia.A coloured postcard of a sailing ship, warship or battleship, deck cannons on the ship and in the foreground, many signal flags flying from the masts. Printed on the front "H.M.S. Victory Flying Lord Nelson Famous Signal". The signal was given by Lord Nelson in 1805.Printed on the front "H.M.S. Victory / Flying Lord Nelson Famous Signal"flagstaff hill, warrnambool, shipwrecked-coast, flagstaff-hill, flagstaff-hill-maritime-museum, maritime-museum, shipwreck-coast, flagstaff-hill-maritime-village, post card, postcard, sailing ship, vice-admiral lord nelson, horatio nelson, lord nelson, oak piece, piece of oak, nelson, battle of trafalgar, maritime technology, ship relics, 18th century warship, british royal navy, sir home popham’s telegraphic code, admiralty official day signal book, october 21, 1805, admiral lord nelson, french and spanish navies, nelson's famous signal, england expects that every man will do his duty, hms victory, nelson collection at lloyd's, lloyd’s of london, lloyd’s patriotic fund, napoleonic battles, british naval history, 18th century warship, 18th century battleship -
 Federation University Art Collection
Ceramic - Artwork - Ceramics, Ray Hearn, 'End Game' by Ray Hearn
Dr Ray HEARN (1943- ) Born Stawell, Victoria Ray Hearn graduated from the Ballarat School of Mines Technical Art School with a Diploma of Art (Ceramics) in 1970, followed by an Master of Fine Art from Regina Canada in 1976. He holds a PhD in Anthropology from Northern Territory, Darwin in 2003, with field work, exhibitions and teaching in Thailand since 1996. He has completed his MA in art curatorship from the University of Melbourne, with a thesis on Sidney Nolan and Ned Kelly.From Above and beyond function: Ray Hearn explains the reasons behind his useless ceramics:- "End Game suggests a climax of a tactical and intellectual struggle, in ceramics or chess, but it is also about beginnings and endings, for in chess the king can never be captured--one game ends and the board is reset so the next can begin. I made this piece at the start of my PhD work, acknowledging then that as there were once potters so too there are potters today--and tomorrow. The ceramic pieces were all collected in Tanon Suthep, one of Chiang Mai's streets. The board is a fragment of white tiles from a pharmacy building being remodelled, the bowl is a broken fast food noodle bowl from the ubiquitous street stalls, and the new small blue and white jars purchased from a market stall. Typical of my work, the objects are familiar--they might be just like ones we have at home today, had but threw away only yesterday, or objects we might purchase tomorrow. Clay lives on, and the ceramic 'game' starts again too. As it transpires End Game is about my own work too. All research degrees require an end--a thesis must reach a conclusion, and like a game of chess, start again. The sculptural potential of clay is unlimited, and in theory functional clay wares' aesthetic potential unlimited too, from a classic Song celadon to Arneson's genital encrusted teapots (which I first saw illustrated in Craft Horizons 1971). West Coast funk with its kitschy teapots and cups were vehicles for sculptural objects never meant to be drunk from, and a genre of useless functional wares emerged. Nothing could be more useless in a practical sense than a work of art, especially a painting--yet most craftwork has a passing reference at least to function." ( https://www.thefreelibrary.com/Above+and+beyond+function%3A+Ray+Hearn+explains+the+reasons+behind+his...-a0172598257, accessed 07 February 2018:)ray hearn, ballarat school of mines, ballarat technical art school, alumni, ceramics -
Moorabbin Air Museum
Document (item) - Bill Prowse Collection WP14 See details in Description, Bill Prowse Collection WP14
-
 Flagstaff Hill Maritime Museum and Village
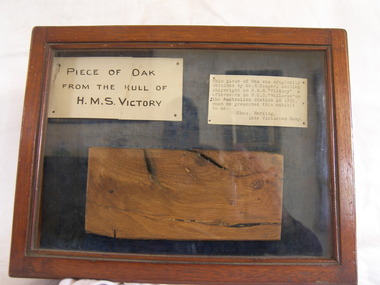
Plant specimen - Wood Sample, Herbst, 1759-1765
The piece of oak wood sample inside the case was obtained from Mr. H Cooper during the time he served as a shipwright for the British Royal Navy on Nelson’s flagship, HMS Victory, in 1891. By that time the H.M.S. Victory was around 100 years old having been built in 1765 and was currently in dry dock undergoing restoration. Cooper’s skills as a shipwright would have been well employed during this period. HMS Victory was and still does undergoing continuous restoration to preserve her for display as a museum ship, due to the vessel's significant naval history. It was during that time of early restoration that Cooper obtained the piece of Oak from HMS Victory believed to be from the ships hull. Cooper was in Australia in September 1891 serving on the HMS Wallaroo, a British Auxiliary Squadron commissioned to serve as part of the British Royal Navy contingent, tasked to operate in Australian waters. The photograph included with the donation of the wood sample is a portrait of Mr H Cooper taken in 1895 in Sydney. The inscription on the photograph describes him as a skilled shipwright from the H.M.S. Wallaroo, depicting Cooper as a young man in Royal Navy uniform, with the emblem of a petty officer third class. While Cooper was stationed on the H.M.S. Wallaroo in Sydney he presented the display case, containing the wood sample from H.M.S. Victory, as well as the exhibit labels to Charles Harding, ("Chas") late of the Royal Australian Navy. Harding had been based at the H M Naval Torpedo Depot at Williamstown, Victoria. Although not mentioned, it is believed the two men met whilst serving together in Australia in their respective assignments. It could have been a retirement gift from Cooper to Harding with the photograph of Cooper likely included with the case, and gifted to Harding in 1895, as the date on the photograph indicates. One of the exhibits labels indicates that Harding had the item on display whilst serving at the Naval Torpedo Depot in Williamstown. The label indicates: "This piece of Oak is part of the hull of H.M.S. “Victory” Lord Nelson’s renowned Flag Ship, which took such a prominent part in the Battle of Trafalgar. 21st October 1805. Exhibited by Charles Harding, H.M.V. Naval Torpedo Depot, Williamstown.” After Charles Harding died in 1931 the case containing the sample of oak from H.M.S. Victory was donated by his son Reg Harding to Mr. Murphy in 1962. The display case has since become a treasured item at Flagstaff Hill. A newspaper article dated 1905 included with the donation mentions that the city of Hamilton in Victoria was shortly expecting a mounted piece of the H.M.S. Victory, to be included in the city’s commemoration of the centenary of the "Battle of Trafalgar". Battle of Trafalgar: On October 21, 1805, twenty-seven British ships of the line led by Admiral Lord Nelson aboard HMS Victory defeated thirty-three French and Spanish ships of the line under French Admiral Villeneuve. The battle took place in the Atlantic Ocean off the southwest coast of Spain, just west of Cape Trafalgar, near the town of Los Caños de Meca. The victory confirmed the naval supremacy Britain had established during the course of the eighteenth century and it was achieved in part through Nelson's departure from the prevailing naval tactical orthodoxy of the day. Conventional practice at the time was for opposing fleets to engage each other in single parallel lines, in order to facilitate signalling and disengagement, and to maximise fields of fire and target areas. Nelson instead arranged his ships into two columns to sail perpendicularly into the enemy fleet's line. During the battle, Nelson was shot by a French musketeer and he died shortly before the battle ended. Villeneuve was captured, along with his ship Bucentaure. He later attended Nelson's funeral while a captive on parole in Britain. Admiral Federico Gravina, the senior Spanish flag officer, escaped with the remnant of the fleet. He died five months later from wounds sustained during the battle. It was prior to this battle that Nelson had issued his now-famous final orders to his ships in 12 separate flag-hoists “England expects that every man will do his duty”. This wood sample is historically significant for its association with Admiral Lord Nelson the Battle of Trafalgar. Through Nelson’s leadership and unorthodox battle tactics, he secured not only a victory against the French and Spanish but reaffirmed Britain's naval supremacy opening the way for Britain to continuing the policy of colonisation of many countries including Australia.Wood sample adhered to the base of a hinged wood and glass display case. Wood is a sample of oak taken from the hull of Vice-Admiral Lord Nelson's flagship, the HMS Victory, built in 1765. The case also contain two exhibit labels pinned above the wood sample. Other items donated with the display case, and relating to the wood sample: an 1895 photograph, a 1905 newspaper clipping, a 1962 donor's letter (two pages), and a handwritten exhibit label with a border of red lines. Photograph Front: printed- "Herbst" "28 Oxford Street, Hyde Park, Sydney", handwritten - "Mr Cooper", "see back". Back: handwritten - "Mr H Cooper, skilled shipwright, H.M.S. Wallaroo 1895" Exhibit labels still in the case: Left: handwritten- “PIECE OF OAK FROM THE HULL OF H.M.S. VICTORY”, Right: typewritten- “This piece of Oak was originally obtained by Mr. H. Cooper, skilled shipwright on H.M.S. “Victory” & afterwards on H.M.S. “Wallaroo” on the Australian Station in 1895, when he presented this exhibit to me. Chas. Harding, Late Victorian Navy.”flagstaff hill, warrnambool, shipwrecked-coast, flagstaff-hill, flagstaff-hill-maritime-museum, maritime-museum, shipwreck-coast, flagstaff-hill-maritime-village, oak, hms victory, vice-admiral lord nelson, horatio nelson, lord nelson, oak piece, piece of oaknelson, battle of trafalgar, maritime technology, ship relics, 18th century warship, british royal navy, h cooper shipwright, hms wallaroo, herbst hyde park sydney, charles harding, hmv naval orpedo depot williamstown, sir home popham’s telegraphic code, admiralty official day signal book -
Moorabbin Air Museum
Archive (Item) - Box WP2 Prowse Collection See details under Description
Description: Defence Instruction Air Force AAP 7213.003-3MB2 Mirage Airctraft Metal Repairs - Book 2 of 2 Augusta-109-Hirundo - Preliminary General Description Sky Van: Military - Shorts Sky Van: Multi-Role Aircraft Sky Van: Civil VFW - Fokker VF Level of Importance: State. -
 8th/13th Victorian Mounted Rifles Regimental Collection
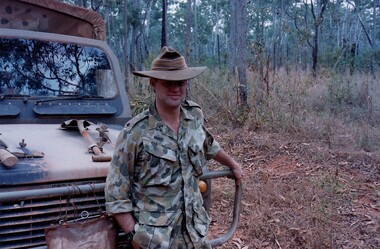
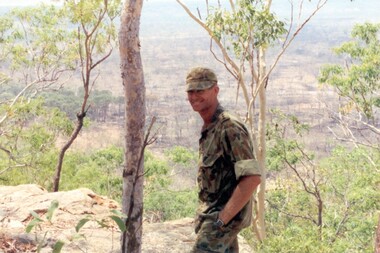
Born digital image, September 1993
The Dibb Report into mainland defence of Australia,1986, among other things identified the requirement for protection of key assets in Northern Australia and the possibility of involving Army Reserve (Ares) units in this thus releasing regular forces for offensive operations. Dibb also pointed out that this defined role would result in a huge lift in Ares morale. In June 1988, the 3rd Division (3Div) conducted a Tactical Exercise without Troops (TEWT), Exercise ‘Distant Trumpet’ in the Katherine- Darwin area to study problems associated with defence against low level incursions against Tindal RAAF Base. Exercise ‘Northern Explorer’ followed in October of that year when units of the 3Div including A Squadron 8/13 Victorian Mounted Rifles sent patrol groups to get a first taste of environment and conditions. Post-Exercise reports had to include recommendations re: health, equipment and adaptation of Standing Operating Procedures (SOPs) in preparation for the new role deploying to Northern Australia. The first deployment by 8/13 Vistorian Mounted Rifles was in 1988. Deployments continued i following years. In September 1993, 3 Troop (Wangaratta) VMR Squadron 4/19 PWLH commanded by Captain Kelvin Robertson deployed to NT. The training began with airfield defence at Tindal followed by a 1000km recon into Arnhem Land in four Landrovers. The troop reported on the conditions of the roads, airfields, bridges (mainly causeways) resources such as fuel supplies in the towns and infrastructure. Each troop taking different route. 3 Troop had the Northern route through Kakadu National park across the East Alligator River to Oenpelli then to Maningrida and Ramangining and south to the Central Arnhem Road and back to Tindal Air force Base. Kelvin Robertson enlisted on 6 April 1981 at Cobram where Lieutenant Dan Wyborn was the troop leader at 2 Troop A Squadron 8th/13th Victorian Mounted Rifles (2TP A SQN 8/13 VMR). He completed the Initial Employment Training Course (IET) and then an M113A1 driver’s course in March 1982. Course Senior Instructor (SI) was Captain (CAPT) John McLean and wing instructor Warrant Officer Class 2 (WO2) Mick Baxter (ex-Driving & Servicing Wing instructor at the School of Armour). He served with 2TP at Cobram as a trooper Driver/Signaller until June 1982 when he was selected for officer training. He served two years as an Officer Cadet in Course 21 at Officer Cadet Training Unit (OCTU) graduating in June 1984. He returned to 8/13 VMR and completed the 1/85 Army Reserve (ARES) Regimental Officers Basic Course (ROBC Reconnaissance), then was posted immediately as 1 TP LDR for the Hay Booligal Annual Field Exercise (AFX). In 1985 he took command of 2TP at Cobram until Nov 1987 when he transferred to C Squadron First Armoured Regiment (CSQN 1AR). This began six months full time duty in which Lieutenant (LT) Robertson completed the regular army 1/88 (ROBC Tank), and then served as CSQN's first and only ARES Leopard Tank TP LDR until the next ARES LT was trained up as 2TP LDR. He later served as the CSQN Liaison Officer (LO) on the First Brigade (1 Bde) exercise ‘Predators Advance’ and as a staff officer on a Second Division (2Div) exercise. In Jan 1991 he studied at the Reserve Command and Staff College (RCSC). Upon completion of Grade 3 he was promoted to CAPT and transferred back to a reconnaissance troop, 3TP VMR SQN 4th/19th Prince of Wales’s Light Horse (4/19PWLH) at Wangaratta. CAPT Robertson transferred to the Inactive List in 1994, but in 2011 returned to the Active List serving as Operations Captain (OPS CAPT) at Regimental Headquarters (RHQ) 12th/16th Hunter River Lancers (12/16 HRL)and later Second-In-Command (2IC) Tamworth-based Operations Support Squadron (OPSPT SQN), and at 9 day exercises at Singleton range and an exercise at Townville High Range in Protective Mobility Vehicle (PMV) Bushmasters. In 2013 after completing the ARES Grade 3 Staff Officers course in Brisbane he returned home to Jerilderie and served as 2IC A SQN 4/19 PWLH based at Latchford Barracks Bonegilla. He was awarded the Defence Long Service Medal (DLSM) in 2014. Highlights of his career included being Parade Commander for the 75th anniversary Beersheba parade in Canberra on 31 October 1992. The guard, drawn from the VMR SQN 4/19 PWLH represented the 4th Light Horse Regiment, a participant of the Charge. Then twenty years later, 2012, he was invited to speak at the Quirindi Anzac Day ceremony. On this occasion he was serving with 12/16 HRL, so in two ceremonies, 20 years apart, he had represented both the 4th LHR and the 12th LHR, the two lead Regiments that charged Beersheba. CAPT Robertson was placed on the Inactive List again in 2015. Illustrates Reserve training in NT.Colour image of soldier with landscape in background being Captain Kelvin Robertson 3 Troop Leader (Wangaratta) VMR Squadron 4th/19th Prince of Wales’s Light Horse Regiment looking out over the Arafura swamp near the Maningrida to Ramingining road in Arnhem Land during exercise in the Northern Territory, September 1993.tindal, robertson -
 Monbulk RSL Sub Branch
Book, Pen & Sword Military, Hamilton and Gallipoli : British command in an age of military transformation, 2015
This is a study of Sir Ian Hamilton VCs command of the Gallipoli campaign. Appointed by Kitchener after the failure of the initial Allied naval offensive in the Dardanelles, Hamilton was to lead the ambitious amphibious landings that were intended to open the way to Constantinople. In the event, however, opportunities immediately after the landings were squandered and, in the face of unexpectedly effective Turkish resistance, soon stalled in attritional trench warfare like that on the Western Front. Hamilton has often been criticized for this failure and in many ways seen to typify the stereotype of a British general clinging to outdated Victorian thinking. Yet this fresh reappraisal, drawing on original archival research, shows that Hamilton did display some progressive ideas and a realization that warfare was rapidly changing. Like all generals of this period he faced the challenge of unprecedented technological and tactical revolution as well as the political and media battle.Index, bib, ill, map, p.230.non-fictionThis is a study of Sir Ian Hamilton VCs command of the Gallipoli campaign. Appointed by Kitchener after the failure of the initial Allied naval offensive in the Dardanelles, Hamilton was to lead the ambitious amphibious landings that were intended to open the way to Constantinople. In the event, however, opportunities immediately after the landings were squandered and, in the face of unexpectedly effective Turkish resistance, soon stalled in attritional trench warfare like that on the Western Front. Hamilton has often been criticized for this failure and in many ways seen to typify the stereotype of a British general clinging to outdated Victorian thinking. Yet this fresh reappraisal, drawing on original archival research, shows that Hamilton did display some progressive ideas and a realization that warfare was rapidly changing. Like all generals of this period he faced the challenge of unprecedented technological and tactical revolution as well as the political and media battle.world war 1914-1918 - campaigns - gallipoli, generals - great britain - biography -
 Monbulk RSL Sub Branch
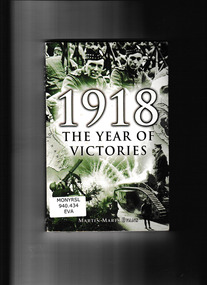
Book, Arcturus Publishing, 1918 : the year of victories, 2003
At the outset of 1918 Germany faced certain defeat as a result of Allied technical innovation in tanks and aircraft, and the American entry into the war. Victory could only be gained by the immediate application of overwhelming force in new tactical form; the 'fire-waltz' artillery barrage and the storm-trooper infantry attack. 1918 examines both the Germans' tactics and the Allies' preferred solution to fighting this war, the combination of artillery, tanks, infantry and aircraft, and argues that this reached a level of sophistication in command and control never before achieved. The war of attrition was far from over, but as more Americans arrived in France the ghastly cost became affordable. For the Germans, it became a question of whether they could negotiate an armistice before their armies were utterly destroyed.Index, bib, maps, p.235.non-fictionAt the outset of 1918 Germany faced certain defeat as a result of Allied technical innovation in tanks and aircraft, and the American entry into the war. Victory could only be gained by the immediate application of overwhelming force in new tactical form; the 'fire-waltz' artillery barrage and the storm-trooper infantry attack. 1918 examines both the Germans' tactics and the Allies' preferred solution to fighting this war, the combination of artillery, tanks, infantry and aircraft, and argues that this reached a level of sophistication in command and control never before achieved. The war of attrition was far from over, but as more Americans arrived in France the ghastly cost became affordable. For the Germans, it became a question of whether they could negotiate an armistice before their armies were utterly destroyed.world war 1914-1918 - history, world war 1914-1918 - campaigns - france -
 Monbulk RSL Sub Branch
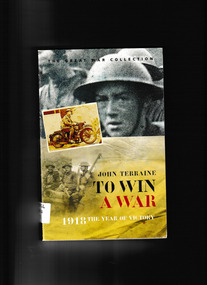
Book, Cassell, To win a war : 1918, the year of victory, 2008
At the outset of 1918 Germany faced certain defeat as a result of Allied technical innovation in tanks and aircraft, and the American entry into the war. Victory could only be gained by the immediate application of overwhelming force in new tactical form; the 'fire-waltz' artillery barrage and the storm-trooper infantry attack. 1918 examines both the Germans' tactics and the Allies' preferred solution to fighting this war, the combination of artillery, tanks, infantry and aircraft, and argues that this reached a level of sophistication in command and control never before achieved. The war of attrition was far from over, but as more Americans arrived in France the ghastly cost became affordable. For the Germans, it became a question of whether they could negotiate an armistice before their armies were utterly destroyed.Index, bib, ill, p.283.non-fictionAt the outset of 1918 Germany faced certain defeat as a result of Allied technical innovation in tanks and aircraft, and the American entry into the war. Victory could only be gained by the immediate application of overwhelming force in new tactical form; the 'fire-waltz' artillery barrage and the storm-trooper infantry attack. 1918 examines both the Germans' tactics and the Allies' preferred solution to fighting this war, the combination of artillery, tanks, infantry and aircraft, and argues that this reached a level of sophistication in command and control never before achieved. The war of attrition was far from over, but as more Americans arrived in France the ghastly cost became affordable. For the Germans, it became a question of whether they could negotiate an armistice before their armies were utterly destroyed.world war 1914-1918 - history, world war 1914-1918 - campaigns - france -
Moorabbin Air Museum
Manual (Item) - Evaluation Summary Of Tactical Transport Aircraft For RAAF
Description: 200 pages. Published by DOWTY. Published on unknown date. Dowty Hydraulic System and Undercarriage Fitted to Armstrong Whitworth Argosy Course Notes General Guide Level of Importance: . -
Moorabbin Air Museum
Document (Item) - The Role Of Science & Technology In Selection Of Australias New Tactical Fighter
Description: Date: 30/8/1978 Author: E. H. Boullioun Pages: 9 Binding: Loose Leaf - Envelope Keywords: Presented at Financial Times World Aerospace Conference, London Level of Importance: World. -
Koorie Heritage Trust
Book, Robinson, Fergus et al, The Black Resistance : an introduction to the history of the Aborigines' struggle against British Colonialism, 1977
Using materiqal largely ignored by historians, this book traces the dispossession of the Aboriginal people and records the strategic and tactical objectives of tribal defence as well as the aims and methods of the British invaders.137 p. : maps ; refs.; 22 cm.Using materiqal largely ignored by historians, this book traces the dispossession of the Aboriginal people and records the strategic and tactical objectives of tribal defence as well as the aims and methods of the British invaders.race relations. australia, 1788-ca.1900. | aboriginal australians -- government relations. | aboriginal australians -- history. | australia -- history -- 1788-1900. | race discrimination -- australia -- history. | race relations - violent - massacres, murders, poisonings etc. - to 1900 -
Moorabbin Air Museum
Manual (Item) - RAAF ASD246 Vol 3 Part 1 Bloodhound Mk 1 Weaopon System Tactical Control Radar (AF/TPS/801) and Data Handling and Data Link System (AF/TSA/801) Equipment and Spares Schedule
-
Moorabbin Air Museum
Document (Item) - FA 18 L specifications tactical data Northrop, FA18
-
Moorabbin Air Museum
Manual (item) - CAC Tactical Fighter and Australian Industry Participation, T.F.F. and A.I.P. - Problem or Opportunity ?
CAC Collection