Showing 1935 items
matching jack white
-
 Ballarat Heritage Services
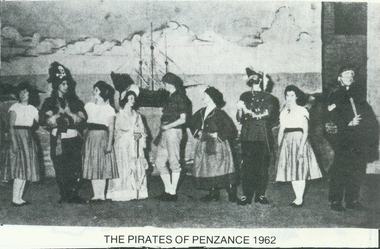
Photograph - Photograph - Black and White, Pirates of Penzance 1962, 1962
Left to right: Glenda Felstead, Alan Gregory (Pirate King - teacher), Dorothy Kinnane, Lynette Coulson (lead soprano), Garry Dark (Frederick - lead tenor), Robynne Dale (Ruth), Jack Youens (Major General), Cheryl Ford, Policeman? The operetta was performed at Her Majesty's Theatre. The cast and crew used to meet at a cafe in Unicorn Lane called "The Hide-away" after the show, and after rehearsals. "The Hide-away" was in the basement, down stairs, dimly lit, and catered for coffee and food.Digital copy of photograph black and whitedorothy kinnane, lynette coulson, garry dark, robynne dale, jack youens, cheryl ford, theatre, pirates of penzance -
 Ballarat Heritage Services
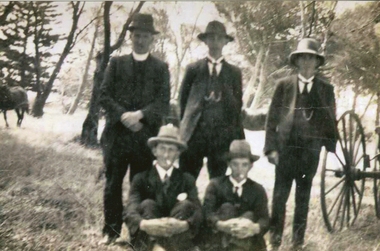
Photograph - Photograph - Black and White, Fr Michael Shanley, Michael Farley, Jack Farley, Patrick Edmund Carroll, (Park Farley?)
Back row: Fr Michael Shanley, Michael Farley, Jack Farley Front Row: Patrick Edmund Carroll, (Park Farley?)patrick edmund carroll, father michael shanley, michael farley -
 Ballarat Heritage Services
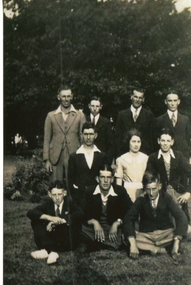
Photograph - Photograph - black and white, Toolong Tennis Team
Photograph of the Toolong Tennis Team including Jack Farley, Rita Farley, Tom Dalton, Tom Fitzgerald (middle row on right)toolong tennis team, moyne, jack farley, rita farley, tom dalton, tom fitzgerald -
 Ballarat Heritage Services
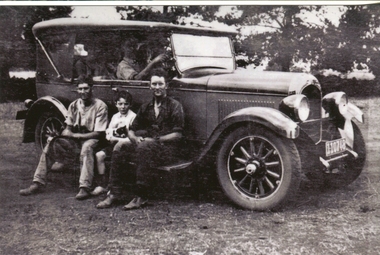
Photograph - black and white, Carroll Family and their First Car
Jack, Jim and Patrick Edmund Carroll sitting on the step, with other members of the family sitting inside their first car. The car registration is 110748.patrick edmund carroll, jack carroll, jim carroll, car -
 Lions Club of Maldon Inc.
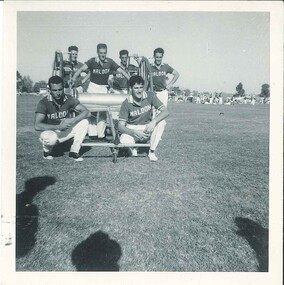
Photographs, Maldon Fire Brigade Running Team 1959-1960, 1959-1960
Black and white photograph containing 6 members of the Maldon Fire Brigade Running Team Back Row: Paull Lahn, Bruce McGregor, Jack Shearer, Roy Baxter (Barney) Front Row: John Hughes, Eddie Williams (Chisel)maldon fire brigade running team -
 Lions Club of Maldon Inc.
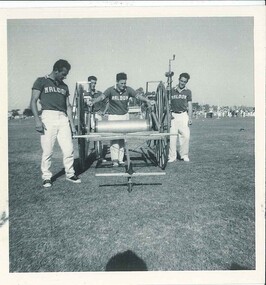
Photographs, Maldon Fire Brigade Running Team 1959-1960, 1959-1960
Black and White Photograph with four men. Maldon Fire Brigade Running Team Members. L-R: John Hughes, Jack Shearer, Paull Lahn, Roy Baxtermaldon fire brigade running team -
 Ringwood RSL Sub-Branch
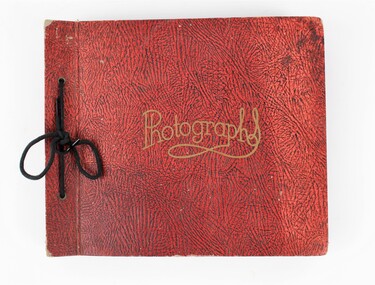
Photo Album, 'Photo Album'
Album full of personal photographs of war experiences for soldier Jack Devlin. Morron covered photograph album with 19 loose pages. Front and back cardboard and leather cover seperate, no spine. Pages held in place by black shoe lace tied on left side. Photographs glued into album on both sides of pages. Total of 103 photos, black and white, 4 photos loose. Each photo has corresponding short handwritten description below or beside it. Album photos range from 1942 - 1945 in locations ranging from Port Moresby, Darwin and Cairns and relate to a soldiers war experiences. Photographs include local people, vehicles, cemetary, bombed out planes, villages. One photo in particular has photo portrait of Jack, serial number VX 142005.Jack Devlin/ 15 Mine Road/ Korumburra/ Vic. Handwritten inside cover. Attached with tape on loose card is another name Mr Lyle Stephenson/ 1 Bayonet/ 1 photo Album. (Posssibly referring to donor.) -
 Ringwood RSL Sub-Branch
Photos, Batch, c. WW2
Set of photographs documenting ‘pin up’ nose artwork on American bombers in the Pacific theatre. 27 black and white photographs of aircraft nose artwork. .1) ‘Officers Mess’ .2) ‘The Strip Polka’ .3) ‘Lazy Lady’ .4) ‘Norma’ .5) ‘ The Rube’ .6) ‘Bubbles’ .7) ‘Cookie’ .8) ? .9) ‘Windy City Kitty’ .10) ‘Heaven Can Wait’ .11) ‘Baby’ .12) ‘Jose’s El D’ablo’ .13) ‘Pride of the Yanks’ .14) ‘Nobody’s Baby’ .15) ‘Pistol Packin’ Mama .16) “Target for Tonight’ .17) ‘Louisiana Lullaby’ .18) ‘Jack Pot’ .19) ‘The Lonesome Angel’ .20) ‘Whooo’ .21) ‘Sky Witch’ .22) ‘ Flying High’ .23) ‘Yankee Doodle Dandy’ .24) ‘Margie’ .25) ‘Twin Nifty’s’ .26) ‘Blonde Baby Eva’ .27) No name .28) No Name .29) Un redable .30) ‘Gone With the Wind’ .31) ‘The Strip Polka’On Back of .1) Coulsan, 120 Hampden Road, Artarmon, NSW, 2064pin up art -
 Ringwood RSL Sub-Branch
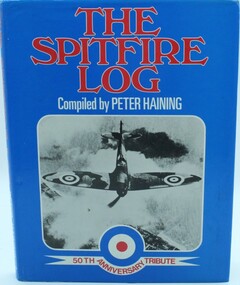
Book Spitfire Log, The Spitfire Log - 50 Anniversary Tribute, 1985
Hard cover book with dust jacked on Spitfires complied by Peter Haining. 144 printed pages with text and black and white photos. -
 Whitehorse Historical Society Inc.
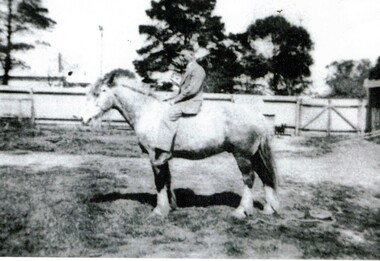
Photograph - Black and white photograph, Jack Davin on his horse called Bluey
... Black and white photograph of Jack Davin on his horse 'Old... and white photograph of Jack Davin on his horse 'Old Bluey ...Black and white photograph of Jack Davin on his horse 'Old Bluey' in the backyard of their dairy at 204 Mitcham Roaddavin, jack, 'old bluey', mitcham model dairy -
 Whitehorse Historical Society Inc.
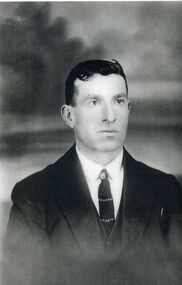
Photograph, Patrick Joseph Davin
Patrick Joseph Davin established the Mitcham Model Dairy in 1926. It operated on two sites on Mitcham Rd. The milk came from farms in Lilydale and Coldstream and was renowned for its richness. In time Jack, Bill and Tim Davin came into the business. the Davin family sold out to Model Dairies in 1956.Black and white photograph of Patrick Joseph Davin in a suit and tie.davin patrick joseph, dairies, dairying -
 Whitehorse Historical Society Inc.
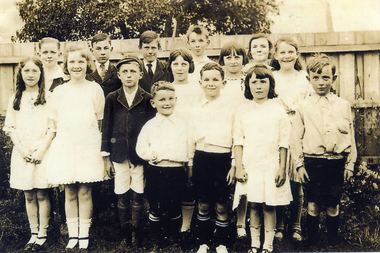
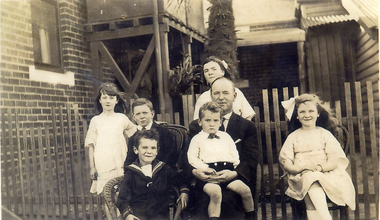
Photograph, McDonnell Family children, c1925
Black and white photograph of some of the McDonnell family children and their friends. Left to right back - Jack, Cecil Hill, ? Belamy, Ken, Mollie|Front - Mary Marson, Eileen, ? Belamy, Leo, Betty McDonald, ?, ?, Jean, Margaret and Archie in c1925 Original on CD ROMmcdonnell, jack, ken, mollie, eileen, margaret, leo, jean, archie, hill, cecil, marson, mary, mcdonald, betty, belamy ? -
 Whitehorse Historical Society Inc.
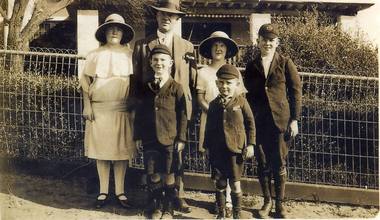
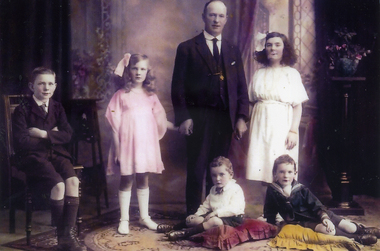
Photograph, Michael McDonnell and Family, c1925
Black and white photo of Michael McDonnell and his family outside their family home in Whitehorse Road (south side, four blocks from Rooks Road.) c1925. Molly (mother) and Michael and their four children - Leo, Eileen, Jack and Frank in front .|Original on CD ROMmcdonnell, family, michael, molly -
 Whitehorse Historical Society Inc.
Photograph, Michael McDonnell & family, c1922
Black and white photograph of Michael McDonnell and his family c1922 - family portrait.L to R:- Jack, Eileen, Michael, Leo (on floor), Molly and Frank (on floor) Original on CDROMmcdonnell, jack, eileen, michael, leo, molly, frank -
 Whitehorse Historical Society Inc.
Photograph, Michael McDonnell & family, 1926
Black and white photograph of Michael McDonnell and family, taken c1926 L-R: - ? , Jack and Frank, Michael (father), Molly (at back), Michael on his dad's lap and Eileen Original on CDROMmcdonnell, michael, jack, frank, michael jr., molly, eileen -
 Unions Ballarat
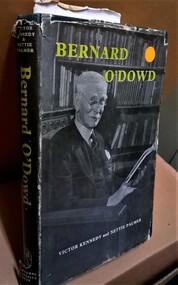
Bernard O'Dowd, 1954
Bernard O'Dowd was an Australian poet and anarchist. He was born in Beaufort in 1866 and worked at different times as a teacher, librarian and parliamentary draftsman. He was dismissed from his position at St Alipius' school in Ballarat for heresy. He had a particular interest in the Federation of Australia and formation of the Constitution, which features in his poem "Australia". O'Dowd co-edited Tocsin with Jack Andrews. Tocsin was a labor newspaper in Melbourne. Others involved with the newspaper include Edward Findley and, for a short time, Norman Lindsay. Tocsin's platform is available in PDF format online http://www.reasoninrevolt.net.au/objects/pdf/a000808.pdf Areas of interest included the constitution, federation and workers' industrial rights (e.g. eight hour day, pensions and arbitration for labour disputes).Biographical interest. Literary interest. Pertinent to Ballarat. Pertinent to constitutional history and industrial relations. Pertinent to labor publications, history and literature.Hardcover - book. Cover dust jacket: black and white photograph of Bernard O'Dowd on front, yellow and white lettering; back is yellow. Cover without dust jacket: green cloth; gold lettering.Cover without dust jacket: authors' names and title on the spine. Cover with dust jacket: authors' names and title on front cover and spine. Inside page: Inscribed in ink, "Happy Birthday Dad from Lorna and John (Sept 17 1960).btlc, ballarat trades and labour council, ballarat trades hall, o'dowd, bernard, writers - poets, newspaper, tocsin, lindsay, norman, andrews, jack, findley, edward, anarchists, biography, palmer, nettie, st alipius school, ballarat, o'dowd, bernard, 1866-1953, industrial relations -
 Unions Ballarat
Dismissal of a premier: the Philip Game papers (Don Woodward Collection), Foott, Bethia, 1968
... Book; 223 pages. Front cover: blue and white background... and white background; photograph of Jack Lang, Sir Philip Game ...Jack Lang was a former NSW ALP state treasurer and was elected Premier on two occasions. His government was dismissed in his second term of government by the State Governor due to his defying the Commonwealth Government's financial agreements' legislation. Sir Philip Game was the State Governor who dismissed Lang. The author of this book is the daughter of the secretary to the Philip Game. Unlike Sir John Kerr (who dismissed Prime Minister Whitlam in 1975), Game expressed some uncertainty about whether his decision to sack Lang's government was sound: "In spite of the popular endorsement of my assassin's stroke, I am still wondering if I did right. I still believe that Lang has a great deal of right on his side, that a lot of what he advocates will have come to pass, and that the extremists on the other side are a greater danger than extreme Labour." (From a personal letter written by Sir Philip Game on July 2nd, 1932.)" (Back dust jacket.)Political and social history.Book; 223 pages. Front cover: blue and white background; photograph of Jack Lang, Sir Philip Game and one other; black lettering; author's name and title. Dust jacket. Back cover: various quotations from Jack Lang, Philip Game, the author and Lady Game.Price: in pencil, $6.btlc, ballarat trades hall, ballarat trades and labour council, game, sir philip, lang, jt, lang, jack, treasurer - nsw, finances - federal government australia, state governors - nsw, history - australia, politics and government, premier - nsw -
Unions Ballarat
Enoch Powell on immigration (Don Woodward Collection), Smithies, Bill et al, 1969
Enoch Powell was a Conservative Member of Parliament 1950–74 and later represented the Ulster Unionist Party 1974–87. He made four controversial statements on immigration; the book provides critical analysis of Powell's statements, his reasoning and the statistics he uses. Political analysis/criticism.Book; 158 pages. Front cover: white background; black, red and white lettering; image of Union Jack; authors' names and title.Two red remainder sale marks.btlc, ballarat trades hall, ballarat trades and labour council;, politics and government, conservative party - united kingdom, house of commons - united kingdom, powell, enoch, ulster unionist party - united kingdom, immigration - united kingdom -
Unions Ballarat
The Jack Dyer story: The legend of captain blood (Don Woodward Collection), Hansen, Brian, 1996
Jack Dyer played for Richmond Football Club (VFL) between for 21 years. He was inducted into the Australian Football Hall of Fame and later became a coach and then a media commentator. A biography, as told to Brian Hansen.Sports - Australian Rules Football. Biographical interest.Book; 342 pages. Cover: artistic impression of Richmond and Essendon players; red and white lettering; author's name and title.btlc, ballarat trades and labour council, ballarat trades hall, sports - australian rules football, dyer, jack, captain blood, media, biography -
 Ballarat Heritage Services
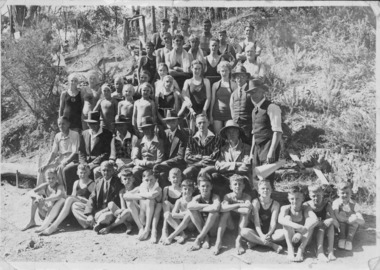
Photograph - Black and White, Hepburn Springs Swimming Club
Members of the Hepburn Springs Swimming Club at the Hepburn Poolhepburn springs swimming pool, hepburn springs, hepburn pool, marie perini, marie butler, winsome moffatt, jack sullivan, ernest ridgley, rickfield, ted smith, andy rodoni, betty olcorn, heath murphy, jack mckinnon, jack o'sullivan, molly mckinnon, blair llewellyn, arthur ritchie, victor milesi, leo milesi -
Unions Ballarat
The turbulent years: The autobiography of JT Lang (Don Woodward Collection), Lang, JT, 1970
Autobiography of Jack Lang's political career. Lang is a former NSW ALP state treasurer and was elected Premier on two occasions. His government was dismissed in his second term of government by the State Governor due to his defying the Commonwealth Government's financial agreements' legislation. Relevant to the history of the ALP in NSW and the labour movement. Autobiographical interest - Jack Lang.Book; 323 pages. Dustjacket: light blue background; black and white photograph of JT Lang; red and white lettering. Cover: grey background; green lettering; author's name and title.In blue ink: "Pop, Happy Birthday. Mary, Murray, Christopher. 8:10:70" (Copy 1)btlc, ballarat trades hall, ballarat trades and labour council, alp, australian labor party, new south wales, politics, government, premier, autobiography, lang, jt, lang, jack -
Unions Ballarat
Eureka : The songs that made Australia, 31 cm
Songs of Australian heritage for voice. Melody line only with chord symbols. Includes guitar tablature for chords. Convicts, transportation and sea shanties. Pioneering, goldrush days and bushrangers. Shearers, drovers and bush life. Swagmen, Victorian expansion, sporting life and disasters. Contents: • According to the Act • The Albury ram • Another fall of rain • Australia's on the Wallaby • The bald-headed end of the broom • The ballad of Ben Hall • The ballad of the Kelly Gang • The banks of the Condamine • The big-gun shearer • The black velvet band • The blackboys Waltzing Matilda • Bluey Brink • Bold Jack Donohue • Bound for Botany Bay • Brisbane ladies • Cain killed Abel • The cane-cutter's lament • The carrier's song • The Catalpa • Charlie Mopps • Click go the shears • The cockies of Bungaree • Colonial experience • Coming down the flat • The convict maid • The currency lasses • The death of Alec Robertson • The death of Ben Hall • The death of Willie Stone • Denis O'Reilly • The drover's dream • The dying aviator • The dying stockman • Eight little cylinders • The Eldorado mining disaster • The exile of Erin • Farewell to Greta • Flash Jack from Gundagai • The flash stockman • Frank Gardiner • The freehold on the plain • The gaol song • The girls of the Shamrock Shores • The golden gullies of the Palmer • The gumtree canoe • The Hamfat man • Heenan and Sayers • Henry's downfall • Here's adieu to all judges and juries • I've been to Australia, Oh • Jim Jones at Botany Bay • Jog along til shearing • John Kanaka • The Lachlan Tigers • Leave her, jollies, leave her • Les Darcy • The limejuice tub • Look out below • Maggie May • Maids of Australia • Man of the Earth • The Maryborough miner • Moreton Bay • The morning of the fray • Morrisey and the Russian sailor • Musselman • The mustering song • My name is Edward Kelly • Nails • The new chum Chinaman • Nine miles from Gundagai • The nose on my old man • Oh, give me a hut • The old bark hut • The old bullock dray • One of the has-beens • The overlanders • Pint Pot and Billy • Pity poor labourers • Radcliffe Highway • The rigs of the time • Rolling home • The Ryebuck shearer • Sam Holt • Sign-on day • Sixteen thousand miles from home • South Australia • The springtime it brings on the shearing • The stockman's last bed • The Sunshine Railway disaster • Tambaroora Ted • The tattooed lady • Ten thousand miles away • The tent poles are rotten • Travelling down the Castlereagh • Tumba-bloody-Rumba • The two professional hums • Van Diemen's Land • The wallaby brigade • When we get our tuppence back • The wild colonial boy • Woolloomooloo Australian culture, folklore and history in songs.Paper; paperback book. Front cover: multicoloured background; picture of swaggy with guitar; picture of Eureka flag; black and green lettering. Back cover: red, orange and white background; Eureka flag; picture of a shearer with sheep; picture of a person in Ned Kelly armour playing a guitar on a horse; picture of woman facing the Ned Kelly figure; brand with the message "unsurpassed Australian made".Front cover: author's name and title. Back cover: author bio; praise from Jack Pobar, swagman.songs, btlc, ballarat trades and labour council, ballarat trades hall, convicts, transportation, sea shanties, pioneering, gold, goldrush, bushrangers, shearers, drovers, bush life, sporting life, disasters, music -
 Whitehorse Historical Society Inc.
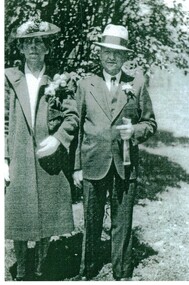
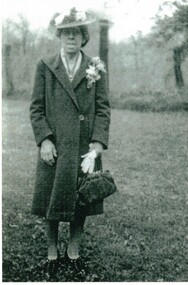
Photograph, Emil & Mary Jack
... ) to America. Jack Emil Jack Mary Black & White photograph of a man ...The man & woman in the photograph are Emil & Mary Jack (nee Schwerkolt) Mary was the daughter of August Schwerkolt and Wilhelmina (nee Oppel, nee Both, nee Kruse). After August died, Wilhelmina took her children (Mary & John) to America.Black & White photograph of a man and woman dressed as if attending a wedding. The woman is carrying flowers and the man has a flower in his buttonhole.jack emil, jack mary -
 Whitehorse Historical Society Inc.
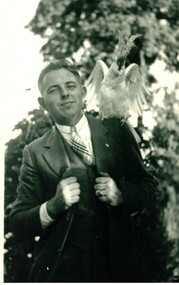
Photograph, Walter Jack
Walter Jack was the only child of Emil Jack & Mary Schwerkolt and grandson of August Schwerkolt. He lived in the USA.Black & white photograph of a man with a cockatoo on his left shoulder.jack walter, jack emil, jack mary (nee schwerkolt) -
 Whitehorse Historical Society Inc.
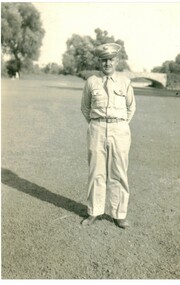
Photograph, Walter Jack
Walter Jack was the only child of Emil and Mary Jack (nee Schwerkolt) He was a grandson of August Schwerkolt and a member of the USA Army.Black & White photograph of a man standing on a grassed area and wearing a uniform.jack walter, jack emil, jack mary (nee schwerkolt) -
 Whitehorse Historical Society Inc.
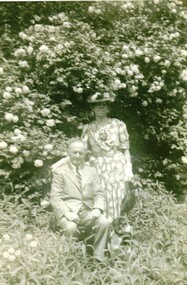
Photograph, Mary and Emil Jack
... Mitcham melbourne Jack Emil Jack Mary Black and white photograph ...Black and white photograph of Emil & Mary Jack (Jackschowsky) in a garden. Emil is seated. Mary is the daughter of August Schwerkolt and his second wife Wilhelmena.jack emil, jack mary -
 Whitehorse Historical Society Inc.
Photograph, Mary Jack
... Black and white photograph of Mary Jack (Jackschowsky) nee... Schwerkolt Family Black and white photograph of Mary Jack ...Mary Jack is the child of August Schwerkolt and his second wife Wilhelmina (Kruse) Wilhelmina had previously been married to Franz Both and Johannes Oppel.Black and white photograph of Mary Jack (Jackschowsky) nee Schwerkolt. Photo taken outside. Dressed in overcoat with hat. Floral sprayjack mary, schwerkolt family -
 International House, The University of Melbourne
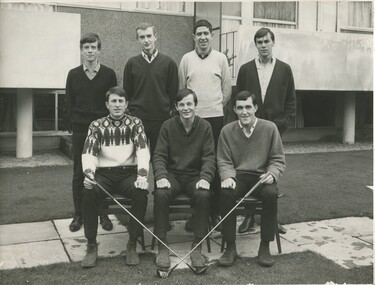
Photograph (Item), Golf team, International House
Inscribed in black ink on reverse: 'Back - L-R Geoff Moir, Julian Gardner, John Fenton, Bert Middleton. Front L-R Randall Bell, John McLaren, Ian Spottiswood.' -
 Old Castlemaine Schoolboys Association Inc.
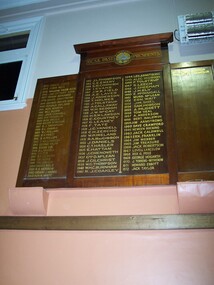
Honour Board, Past Presidents
1912 – J. L. Thompson 1913 – G. E. Emery 1914 – S.M. Cornish 1915 – 1916 – I. Evans 1917 – J. W. B. Field 1918 – A. E. Laver 1919 – J. Anderson 1920 – T. Holmes 1921 – J. Tolstrup 1922 – A. Callaway 1923 – W. H. Seddon 1924 – J. W. McCay 1925 – H.S.W. Lawson 1926 – C. Courtney 1927 – G. Leaney 1928 – F. Tate 1929 – J.G. Yandell 1930 – C.H. Zercho 1931 – W.P. Ireland 1932 – R.A. MacGibbon 1933 – J. Daniels 1934 – A.T. Hasler 1935 – E. Hattam 1936 – J. Chenoweth 1937 – George D. McLean 1938 – J. Gilchrist 1939 – W.G. Thompson 1940 – W.H.C. Burnham 1941 – R. J. Coakley 1942 – 1943 – 1944 – Les Armstrong 1945 – Alec McGibbon 1946 – F. Tolstrup 1947 – S. Leech 1948 – J. Sheehan 1949 – J.H. Ely 1950 – E. McDougall 1951 – Murd McLean 1952 – Ern. Wait 1953 – Jim Shiel 1954 – Sam Hobson 1955 – A Mussett 1956 – Tom Veal 1957 – A. Anderson 1958 – Bert Baldwin 1959 – Jim Armstrong 1960 – Dave Crawford 1961 – Newlyn Hocking 1962 – Jack Caldwell 1963 – Ern. Franklin 1964 – Jim Webber 1965 – Jim Treasure 1966 – Jack Robertson 1967 – Lovell Langslow 1968 – Rex G. Peile 1969 – George Hogarth 1970 – J. Torrens-Witherow 1971 – Howard Ebbott 1972 – Jack Taylor 1973 – Samuel Leech 1974 – Edwin Rees 1975 – William Webb B.E.M. 1976 – Jim Ottery Q.P.M. 1977 – Frank Edwards 1978 – Geoff. Armstrong 1979 – George Archer M.B.E 1980 – Donald Ireland 1981 – Ken Martin 1982 – Bill Blume 1983 – Jack Connell 1984 – Ian Franklin 1985 – Bob Welch 1986 – Kelvin McMeekin 1987 – Edwin J Thompson 1988 – Don. L. Gamble 1989 – V.J. Pollard 1990 – B.N. Priest 1991 – R.A. Phillips 1992 – T. Williamson 1993 – George Ralph 1994 – Edgar Cue 1995 – A. L. Hassell 1996 – J.K. Cue 1997 – Richard P. Desmond 1998 – Cec. Kuhle 1999 – Trevor Cue 2000 – David A. Bailie 2001 – R.A. Morrow 2002 – Gregory J. Hughes 2003 – Ron. N. White 2004 – Terry Robinson 2005 – Peter J. Thompson 2006 – M. J. Murphy 2007 – Alan Paull 2008 – D. W. Burgess 2009 – K. F. McShanag 2010 – Steven Norris 2011 – Len Weston 2012 – Jim Chaplin 2013 – Dennis Green 2014 – Neville Cooper 2015 – Peter Cole 2016 – William Sikora -
 Geelong Football Club
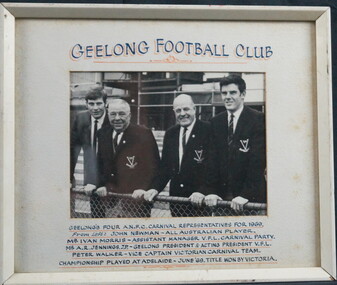
Photograph of Geelong Football Club's Four A.N.F.C. Carnival Representatives, 1969
... morris a.r. jack jennings White painted wooden frame with glass ...Championship played at Adelaide in June 1969, Title won by Victoria. Peter Walker Born: 12/06/1942 From: Beeac Height: 183cm Weight: 76kg Natural kicking foot: Right Guernsey number: 34 First senior match: Round 3, 1960 v Fitzroy at the Brunswick Street Oval After taking time to settle at senior level, he found his rightful place on the half-back line. Once he gained confidence, he became a champion, dashing player who could mark above taller opponents and swing Geelong into attack instantly with fine disposal. His duels with Darrel Baldock of St Kilda were outstanding during the 1960s. He always played the game fairly and followed coaches’ instructions to the letter. Total Brownlow Medal votes: 32 Premiership team selection: 1963 Captain: 2 matches (1969) Club Best & Fairest: 1965 Runner-up in club B&F count: 1963 Third in club B&F count: 1967 Fifth in club B&F count: 1968, 1969 Eighth in club B&F count: 1964 (equal) GFC Hall of Fame inductee (2002) GFC Life Membership (1968) Career span: 1960-69; 1971 Total matches: Premiership 159, Interstate 9 Total goals: Premiership 1, Interstate 0 Finals matches: 15 Finals goals: 0 Last senior match: Round 11, 1971 v Richmond at Kardinia Park Died: 08/07/2010 John ‘Sam’ Newman Born: 22/12/1945 From: Geelong Grammar Height: 189cm Weight: 94kg Natural kicking foot: Right Guernsey number: 17 First senior match: Round 3, 1964 v Fitzroy at the Brunswick St Oval The champion ruckman/forward-pocket/back-pocket became a valuable centre half-forward late in his career. He was a magnificent high mark and a great handball exponent. His ability to maneuver his body into correct position at ruck contests and in marking duels was equal to that of Graham Farmer. He worked hard to overcome severe kidney and ankle injuries to play 300 matches for Geelong in a magnificent 17-season span. Total Brownlow Medal votes: 85 Captain: 41 matches (1974-75) Club Best & Fairest: 1968, 1975 Runner-up in club B&F count: 1974 Third in club B&F count: 1965, 1970, 1976 Fourth in club B&F count: 1969 Fifth in club B&F count: 1973, 1979 Seventh in club B&F count: 1967, 1977 All Australian selection: 1969 GFC Team of the 20th Century selection (back pocket) GFC Hall of Fame inductee (2002) GFC Hall of Fame Legend GFC Life Membership (1971) Career span: 1964-80 Total matches: Premiership 300, Night/Pre-Season Series 4, Interstate 8 Total goals: Premiership 110, Night/Pre-Season Series 4, Interstate 1 Finals matches: 12 Finals goals: 4 Last senior match: Second Semi Final, 1980 v Richmond at Waverley Park Information provided by Mr Col Hutchinson GFC HistorianWhite painted wooden frame with glass front. White mounting card surrounds the photograph. Black and white photograph of John 'Sam' Newman, Ivan Morris, A.R. Jack Jennings and Peter Walker standing in front of a wire fence. Above on the mounting card states "GEELONG FOOTBALL CLUB" and the supporting text below provides context for the photograph. Wire on the back for hanging.peter walker, john newman, sam newman, ivan morris, a.r. jack jennings