Showing 1487 items matching "famous australians"
-
 Flagstaff Hill Maritime Museum and Village
Domestic object - Glass Decanter Stopper, 1850+
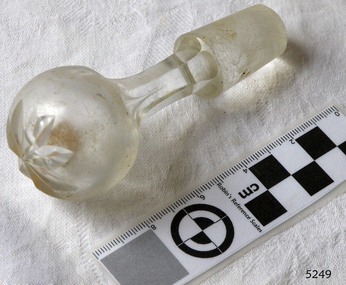
History of the Loch Ard: The Loch Ard got it’s name from ”Loch Ard” a loch which lies to the west of Aberfoyle, and to the east of Loch Lomond. It means "high lake" in Scottish Gaelic.The vessel belonged to the famous Loch Line which sailed many vessels from England to Australia. The Loch Ard was built in Glasgow by Barclay, Curdle and Co. in 1873, the vessel was a three-masted square-rigged iron sailing ship that measured 79.87 meters in length, 11.58 m in width, and 7 m in depth with a gross tonnage of 1693 tons with a mainmast that measured a massive 45.7 m in height. Loch Ard made three trips to Australia and one trip to Calcutta before its fateful voyage. Loch Ard left England on March 2, 1878, under the command of 29-year-old Captain Gibbs, who was newly married. The ship was bound for Melbourne with a crew of 37, plus 17 passengers. The general cargo reflected the affluence of Melbourne at the time. Onboard were straw hats, umbrella, perfumes, clay pipes, pianos, clocks, confectionery, linen and candles, as well as a heavier load of railway irons, cement, lead and copper. There were other items included that were intended for display in the Melbourne International Exhibition of 1880. The voyage to Port Phillip was long but uneventful. Then at 3 am on June 1, 1878, Captain Gibbs was expecting to see land. But the Loch Ard was running into a fog which greatly reduced visibility. Captain Gibbs was becoming anxious as there was no sign of land or the Cape Otway lighthouse. At 4 am the fog lifted and a lookout aloft announced that he could see breakers. The sheer cliffs of Victoria's west coast came into view, and Captain Gibbs realised that the ship was much closer to them than expected. He ordered as much sail to be set as time would permit and then attempted to steer the vessel out to sea. On coming head-on into the wind, the ship lost momentum, the sails fell limp and Loch Ard's bow swung back towards land. Gibbs then ordered the anchors to be released in an attempt to hold its position. The anchors sank some 50 fathoms - but did not hold. By this time the ship was among the breakers and the tall cliffs of Mutton Bird Island rose behind. Just half a mile from the coast, the ship's bow was suddenly pulled around by the anchor. The captain tried to tack out to sea, but the ship struck a reef at the base of Mutton Bird Island, near Port Campbell. Waves subsequently broke over the ship and the top deck became loosened from the hull. The masts and rigging came crashing down knocking passengers and crew overboard. When a lifeboat was finally launched, it crashed into the side of Loch Ard and capsized. Tom Pearce, who had launched the boat, managed to cling to its overturned hull and shelter beneath it. He drifted out to sea and then on the flood tide came into what is now known as Loch Ard Gorge. He swam to shore, bruised and dazed, and found a cave in which to shelter. Some of the crew stayed below deck to shelter from the falling rigging but drowned when the ship slipped off the reef into deeper water. Eva Carmichael a passenger had raced onto the deck to find out what was happening only to be confronted by towering cliffs looming above the stricken ship. In all the chaos, Captain Gibbs grabbed Eva and said, "If you are saved Eva, let my dear wife know that I died like a sailor". That was the last Eva Carmichael saw of the captain. She was swept off the ship by a huge wave. Eva saw Tom Pearce on a small rocky beach and yelled to attract his attention. He dived in and swam to the exhausted woman and dragged her to shore. He took her to the cave and broke the open case of brandy which had washed up on the beach. He opened a bottle to revive the unconscious woman. A few hours later Tom scaled a cliff in search of help. He followed hoof prints and came by chance upon two men from nearby Glenample Station three and a half miles away. In a complete state of exhaustion, he told the men of the tragedy. Tom then returned to the gorge while the two men rode back to the station to get help. By the time they reached Loch Ard Gorge, it was cold and dark. The two shipwreck survivors were taken to Glenample Station to recover. Eva stayed at the station for six weeks before returning to Ireland by steamship. In Melbourne, Tom Pearce received a hero's welcome. He was presented with the first gold medal of the Royal Humane Society of Victoria and a £1000 cheque from the Victorian Government. Concerts were performed to honour the young man's bravery and to raise money for those who lost family in the disaster. Of the 54 crew members and passengers on board, only two survived: the apprentice, Tom Pearce and the young woman passenger, Eva Carmichael, who lost her family in the tragedy. Ten days after the Loch Ard tragedy, salvage rights to the wreck were sold at auction for £2,120. Cargo valued at £3,000 was salvaged and placed on the beach, but most washed back into the sea when another storm developed. The wreck of Loch Ard still lies at the base of Mutton Bird Island. Much of the cargo has now been salvaged and some items were washed up into Loch Ard Gorge. Cargo and artefacts have also been illegally salvaged over many years before protective legislation was introduced in March 1982. One of the most unlikely pieces of cargo to have survived the shipwreck was a Minton majolica peacock- one of only nine in the world. The peacock was destined for the Melbourne 1880 International Exhibition in. It had been well packed, which gave it adequate protection during the violent storm. Today the Minton peacock can be seen at the Flagstaff Hill Maritime Museum in Warrnambool. From Australia's most dramatic shipwreck it has now become Australia's most valuable shipwreck artifact and is one of very few 'objects' on the Victorian State Heritage Register. The shipwreck of the Loch Ard is of significance for Victoria and is registered on the Victorian Heritage Register ( S 417). Flagstaff Hill has a varied collection of artefacts from Loch Ard and its collection is significant for being one of the largest accumulation of artefacts from this notable Victorian shipwreck. The collections object is to also give us a snapshot into history so we are able to interpret the story of this tragic event. The collection is also archaeologically significant as it represents aspects of Victoria's shipping history that allows us to interpret Victoria's social and historical themes of the time. The collections historically significance is that it is associated unfortunately with the worst and best-known shipwreck in Victoria's history. Glass decanter stopper; hand blown. The bulbous glass head has floral motif, neck is six-sided, base has textured surface. The stopper was, recovered from the wreck of the Loch Ard. flagstaff hill, warrnambool, shipwrecked coast, flagstaff hill maritime museum, maritime museum, shipwreck coast, flagstaff hill maritime village, great ocean road, loch line, loch ard, captain gibbs, eva carmichael, tom pearce, glenample station, mutton bird island, loch ard gorge, decanter stopper, stopper, hand blown, bottle stopper -
 Flagstaff Hill Maritime Museum and Village
Light Fitting
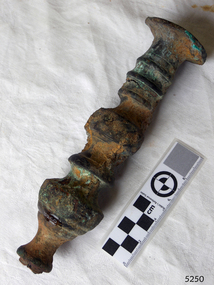
HISTORY OF THE LOCH ARD The LOCH ARD belonged to the famous Loch Line which sailed many ships from England to Australia. Built in Glasgow by Barclay, Curdle and Co. in 1873, the LOCH ARD was a three-masted square rigged iron sailing ship. The ship measured 262ft 7" (79.87m) in length, 38ft (11.58m) in width, 23ft (7m) in depth and had a gross tonnage of 1693 tons. The LOCH ARD's main mast measured a massive 150ft (45.7m) in height. LOCH ARD made three trips to Australia and one trip to Calcutta before its final voyage. LOCH ARD left England on March 2, 1878, under the command of Captain Gibbs, a newly married, 29 year old. She was bound for Melbourne with a crew of 37, plus 17 passengers and a load of cargo. The general cargo reflected the affluence of Melbourne at the time. On board were straw hats, umbrella, perfumes, clay pipes, pianos, clocks, confectionary, linen and candles, as well as a heavier load of railway irons, cement, lead and copper. There were items included that intended for display in the Melbourne International Exhibition in 1880. The voyage to Port Phillip was long but uneventful. At 3am on June 1, 1878, Captain Gibbs was expecting to see land and the passengers were becoming excited as they prepared to view their new homeland in the early morning. But LOCH ARD was running into a fog which greatly reduced visibility. Captain Gibbs was becoming anxious as there was no sign of land or the Cape Otway lighthouse. At 4am the fog lifted. A man aloft announced that he could see breakers. The sheer cliffs of Victoria's west coast came into view, and Captain Gibbs realised that the ship was much closer to them than expected. He ordered as much sail to be set as time would permit and then attempted to steer the vessel out to sea. On coming head on into the wind, the ship lost momentum, the sails fell limp and LOCH ARD's bow swung back. Gibbs then ordered the anchors to be released in an attempt to hold its position. The anchors sank some 50 fathoms - but did not hold. By this time LOCH ARD was among the breakers and the tall cliffs of Mutton Bird Island rose behind the ship. Just half a mile from the coast, the ship's bow was suddenly pulled around by the anchor. The captain tried to tack out to sea, but the ship struck a reef at the base of Mutton Bird Island, near Port Campbell. Waves broke over the ship and the top deck was loosened from the hull. The masts and rigging came crashing down knocking passengers and crew overboard. When a lifeboat was finally launched, it crashed into the side of LOCH ARD and capsized. Tom Pearce, who had launched the boat, managed to cling to its overturned hull and shelter beneath it. He drifted out to sea and then on the flood tide came into what is now known as LOCH ARD Gorge. He swam to shore, bruised and dazed, and found a cave in which to shelter. Some of the crew stayed below deck to shelter from the falling rigging but drowned when the ship slipped off the reef into deeper water. Eva Carmichael had raced onto deck to find out what was happening only to be confronted by towering cliffs looming above the stricken ship. In all the chaos, Captain Gibbs grabbed Eva and said, "If you are saved Eva, let my dear wife know that I died like a sailor". That was the last Eva Carmichael saw of the captain. She was swept off the ship by a huge wave. Eva saw Tom Pearce on a small rocky beach and yelled to attract his attention. He dived in and swam to the exhausted woman and dragged her to shore. He took her to the cave and broke open case of brandy which had washed up on the beach. He opened a bottle to revive the unconscious woman. A few hours later Tom scaled a cliff in search of help. He followed hoof prints and came by chance upon two men from nearby Glenample Station three and a half miles away. In a state of exhaustion, he told the men of the tragedy. Tom returned to the gorge while the two men rode back to the station to get help. By the time they reached LOCH ARD Gorge, it was cold and dark. The two shipwreck survivors were taken to Glenample Station to recover. Eva stayed at the station for six weeks before returning to Ireland, this time by steamship. In Melbourne, Tom Pearce received a hero's welcome. He was presented with the first gold medal of the Royal Humane Society of Victoria and a £1000 cheque from the Victorian Government. Concerts were performed to honour the young man's bravery and to raise money for those who lost family in the LOCH ARD disaster. Of the 54 crew members and passengers on board, only two survived: the apprentice, Tom Pearce and the young woman passenger, Eva Carmichael, who lost all of her family in the tragedy. Ten days after the LOCH ARD tragedy, salvage rights to the wreck were sold at auction for £2,120. Cargo valued at £3,000 was salvaged and placed on the beach, but most washed back into the sea when another storm developed. The wreck of LOCH ARD still lies at the base of Mutton Bird Island. Much of the cargo has now been salvaged and some was washed up into what is now known as LOCH ARD Gorge. Cargo and artefacts have also been illegally salvaged over many years before protective legislation was introduced. One of the most unlikely pieces of cargo to have survived the shipwreck was a Minton porcelain peacock - one of only nine in the world. The peacock was destined for the Melbourne International Exhibition in 1880. It had been well packed, which gave it adequate protection during the violent storm. Today, the Minton peacock can be seen at the Flagstaff Hill Maritime Museum in Warrnambool. From Australia's most dramatic shipwreck it has now become Australia's most valuable shipwreck artefact and is one of very few 'objects' on the Victorian State Heritage Register. Flagstaff Hill’s collection of artefacts from LOCH ARD is significant for being one of the largest collections of artefacts from this shipwreck in Victoria. It is significant for its association with the shipwreck, which is on the Victorian Heritage Register (VHR S417). The collection is significant because of the relationship between the objects, as together they have a high potential to interpret the story of the LOCH ARD. The LOCH ARD collection is archaeologically significant as the remains of a large international passenger and cargo ship. The LOCH ARD collection is historically significant for representing aspects of Victoria’s shipping history and its potential to interpret sub-theme 1.5 of Victoria’s Framework of Historical Themes (living with natural processes). The collection is also historically significant for its association with the LOCH ARD, which was one of the worst and best known shipwrecks in Victoria’s history. Section of ornate light fitting, brass stem is cracked. Slight encrustation and verdigris. Recovered from the wreck of the Loch Ard. Artefact Rego No LA/??.flagstaff hill, warrnambool, shipwrecked coast, flagstaff hill maritime museum, maritime museum, shipwreck coast, flagstaff hill maritime village, great ocean road, loch line, loch ard, captain gibbs, eva carmichael, tom pearce, glenample station, mutton bird island, loch ard gorge, light fitting -
 Flagstaff Hill Maritime Museum and Village
Domestic object - Wine Glass Stem and Base, ca 1878
The wine glass has been handblown, as shown by the ripple effect in the stem and base. A brief history of the Loch Ard (1873-1878): - The sailing ship Loch Ard was one of the famous Loch Line ships that sailed from England to Australia. Barclay, Curdle and Co. built the three-masted iron vessel in Glasgow in 1873. It had sailed three trips to Australia and one trip to Calcutta before its fateful voyage. Loch Ard left England on March 2, 1878, under the command of recently married, 29-year-old Captain Gibbs. It was bound for Melbourne with a crew of 37, plus 17 passengers. The general cargo reflected the affluence of Melbourne at the time. Onboard were straw hats, umbrellas, perfumes, clay pipes, pianos, clocks, confectionery, linen and candles, and a heavier load of railway irons, cement, lead and copper. Other cargo included items intended for display in the Melbourne International Exhibition of 1880. The Loch Ard had been sailing for three months and was close to its destination on June 1, 1878. Captain Gibbs had expected to see land at about 3 am but the Loch Ard ran into a fog that greatly reduced visibility and there was no sign of land or the Cape Otway lighthouse. The fog lifted at 4 am and the sheer cliffs of Victoria's west coast were much closer to them than Captain Gibbs expected. He tried to manage the vessel but failed and the ship struck a reef at the base of Mutton Bird Island, near Port Campbell. The top deck loosened from the hull, and the masts and rigging crashed down, knocking passengers and crew overboard. The lifeboat was launched by Tom Pearce but crashed into the side of Loch Ard and capsized. He clung onto its overturned hull and sheltered under it. He drifted out to sea and the tide brought him back to what is now called Loch Ard Gorge. He swam to shore and found a cave for shelter. A passenger, Eva Carmichael, had raced onto the deck to find out what was happening and was confronted by towering cliffs above the ship. She was soon swept off the ship by a huge wave. Eva saw Tom Pearce on a small rocky beach and yelled to attract his attention. He swam out and dragged her to the shelter of the cave. He revived her with a bottle of brandy from a case that had washed up on the beach. Tom scaled a cliff in search of help and followed some horse hoof prints. He came from two men from Glenample Station, three and a half miles away. He told the men of the tragedy and then returned to the gorge while the two men rode back to the station to get help. They reached Loch Ard Gorge and took the two shipwreck survivors to Glenample Station to recover. Eva stayed at the station for six weeks before returning to Ireland by steamship. In Melbourne, Tom Pearce received a hero's welcome and was presented with a medal and some money. Of the 54 crew members and passengers on board, only two survived: the apprentice, Tom Pearce and the young woman passenger, Eva Carmichael, who lost her family in the tragedy. The shipwreck of the Loch Ard is of significance for Victoria and is registered on the Victorian Heritage Register ( S 417). Flagstaff Hill has a varied collection of artefacts from Loch Ard and its collection is significant for being one of the largest accumulation of artefacts from this notable Victorian shipwreck. The collections object is to also give us a snapshot into history so we are able to interpret the story of this tragic event. The collection is also archaeologically significant as it represents aspects of Victoria's shipping history that allows us to interpret Victoria's social and historical themes of the time. The collections historically significance is that it is associated unfortunately with the worst and best-known shipwreck in Victoria's history. Wine glass part, stem and base only. Glass has been hand blown. Recovered from the Loch Ard wreck.Noneflagstaff hill, warrnambool, shipwrecked coast, flagstaff hill maritime museum, maritime museum, shipwreck coast, flagstaff hill maritime village, great ocean road, loch line, loch ard, captain gibbs, eva carmichael, tom pearce, glenample station, mutton bird island, loch ard gorge, wine glass, handmade drinking glass, blown glass -
 Flagstaff Hill Maritime Museum and Village
Teapot Spout
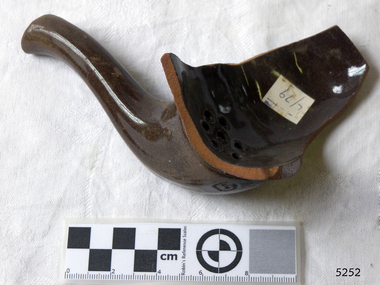
HISTORY OF THE LOCH ARD The LOCH ARD belonged to the famous Loch Line which sailed many ships from England to Australia. Built in Glasgow by Barclay, Curdle and Co. in 1873, the LOCH ARD was a three-masted square rigged iron sailing ship. The ship measured 262ft 7" (79.87m) in length, 38ft (11.58m) in width, 23ft (7m) in depth and had a gross tonnage of 1693 tons. The LOCH ARD's main mast measured a massive 150ft (45.7m) in height. LOCH ARD made three trips to Australia and one trip to Calcutta before its final voyage. LOCH ARD left England on March 2, 1878, under the command of Captain Gibbs, a newly married, 29 year old. She was bound for Melbourne with a crew of 37, plus 17 passengers and a load of cargo. The general cargo reflected the affluence of Melbourne at the time. On board were straw hats, umbrella, perfumes, clay pipes, pianos, clocks, confectionary, linen and candles, as well as a heavier load of railway irons, cement, lead and copper. There were items included that intended for display in the Melbourne International Exhibition in 1880. The voyage to Port Phillip was long but uneventful. At 3am on June 1, 1878, Captain Gibbs was expecting to see land and the passengers were becoming excited as they prepared to view their new homeland in the early morning. But LOCH ARD was running into a fog which greatly reduced visibility. Captain Gibbs was becoming anxious as there was no sign of land or the Cape Otway lighthouse. At 4am the fog lifted. A man aloft announced that he could see breakers. The sheer cliffs of Victoria's west coast came into view, and Captain Gibbs realised that the ship was much closer to them than expected. He ordered as much sail to be set as time would permit and then attempted to steer the vessel out to sea. On coming head on into the wind, the ship lost momentum, the sails fell limp and LOCH ARD's bow swung back. Gibbs then ordered the anchors to be released in an attempt to hold its position. The anchors sank some 50 fathoms - but did not hold. By this time LOCH ARD was among the breakers and the tall cliffs of Mutton Bird Island rose behind the ship. Just half a mile from the coast, the ship's bow was suddenly pulled around by the anchor. The captain tried to tack out to sea, but the ship struck a reef at the base of Mutton Bird Island, near Port Campbell. Waves broke over the ship and the top deck was loosened from the hull. The masts and rigging came crashing down knocking passengers and crew overboard. When a lifeboat was finally launched, it crashed into the side of LOCH ARD and capsized. Tom Pearce, who had launched the boat, managed to cling to its overturned hull and shelter beneath it. He drifted out to sea and then on the flood tide came into what is now known as LOCH ARD Gorge. He swam to shore, bruised and dazed, and found a cave in which to shelter. Some of the crew stayed below deck to shelter from the falling rigging but drowned when the ship slipped off the reef into deeper water. Eva Carmichael had raced onto deck to find out what was happening only to be confronted by towering cliffs looming above the stricken ship. In all the chaos, Captain Gibbs grabbed Eva and said, "If you are saved Eva, let my dear wife know that I died like a sailor". That was the last Eva Carmichael saw of the captain. She was swept off the ship by a huge wave. Eva saw Tom Pearce on a small rocky beach and yelled to attract his attention. He dived in and swam to the exhausted woman and dragged her to shore. He took her to the cave and broke open case of brandy which had washed up on the beach. He opened a bottle to revive the unconscious woman. A few hours later Tom scaled a cliff in search of help. He followed hoof prints and came by chance upon two men from nearby Glenample Station three and a half miles away. In a state of exhaustion, he told the men of the tragedy. Tom returned to the gorge while the two men rode back to the station to get help. By the time they reached LOCH ARD Gorge, it was cold and dark. The two shipwreck survivors were taken to Glenample Station to recover. Eva stayed at the station for six weeks before returning to Ireland, this time by steamship. In Melbourne, Tom Pearce received a hero's welcome. He was presented with the first gold medal of the Royal Humane Society of Victoria and a £1000 cheque from the Victorian Government. Concerts were performed to honour the young man's bravery and to raise money for those who lost family in the LOCH ARD disaster. Of the 54 crew members and passengers on board, only two survived: the apprentice, Tom Pearce and the young woman passenger, Eva Carmichael, who lost all of her family in the tragedy. Ten days after the LOCH ARD tragedy, salvage rights to the wreck were sold at auction for £2,120. Cargo valued at £3,000 was salvaged and placed on the beach, but most washed back into the sea when another storm developed. The wreck of LOCH ARD still lies at the base of Mutton Bird Island. Much of the cargo has now been salvaged and some was washed up into what is now known as LOCH ARD Gorge. Cargo and artefacts have also been illegally salvaged over many years before protective legislation was introduced. One of the most unlikely pieces of cargo to have survived the shipwreck was a Minton porcelain peacock - one of only nine in the world. The peacock was destined for the Melbourne International Exhibition in 1880. It had been well packed, which gave it adequate protection during the violent storm. Today, the Minton peacock can be seen at the Flagstaff Hill Maritime Museum in Warrnambool. From Australia's most dramatic shipwreck it has now become Australia's most valuable shipwreck artefact and is one of very few 'objects' on the Victorian State Heritage Register. Flagstaff Hill’s collection of artefacts from LOCH ARD is significant for being one of the largest collections of artefacts from this shipwreck in Victoria. It is significant for its association with the shipwreck, which is on the Victorian Heritage Register (VHR S417). The collection is significant because of the relationship between the objects, as together they have a high potential to interpret the story of the LOCH ARD. The LOCH ARD collection is archaeologically significant as the remains of a large international passenger and cargo ship. The LOCH ARD collection is historically significant for representing aspects of Victoria’s shipping history and its potential to interpret sub-theme 1.5 of Victoria’s Framework of Historical Themes (living with natural processes). The collection is also historically significant for its association with the LOCH ARD, which was one of the worst and best known shipwrecks in Victoria’s history. Ceramic teapot spout from the wreck of the Loch Ard. Brown in colour. Length 5¼". Artefact Reg No LA/79.flagstaff hill, warrnambool, shipwrecked coast, flagstaff hill maritime museum, maritime museum, shipwreck coast, flagstaff hill maritime village, great ocean road, loch line, loch ard, captain gibbs, eva carmichael, tom pearce, glenample station, mutton bird island, loch ard gorge, ceramic teapot, teapot -
 Flagstaff Hill Maritime Museum and Village
Plate, before 1878
This earthenware dinner plate fragment is very similar to others recovered from the wreck of the LOCH ARD. It is uncertain whether the plates were personal belongings or part of the cargo. The Asiatic Pheasant pattern is a transfer design and was the most popular design of the 19th century Victorian era. It is still being produced today. The design was produced as high quality, decorative dinnerware by the potters in the Staffordshire, England, area from the late 1830’s, but no-one is sure exactly who the original designer was. The industrial age made production of this design more affordable to the ordinary person who purchased and proudly displayed settings in their homes. The high demand for production resulted in loss of quality in both potting and design, particularly between 1860-1914 when the design reached its height of popularity, and the results were often a poor match for the earlier pieces’ quality and detail. Some engravers would make copies of the Asiatic Pheasant design (and other designs) onto copper plates and sell them to more than one pottery producer (the Copyright Act of 1842 was intended to control this very thing). Consequently the list of Makers’ Marks associated with the Asiatic Pheasant is well over 100. A single pottery factory could have several owners, all with their own Marks. These factors all make the dating of pieces difficult. Also, after 1891, pieces produced for the export were required to be stamped with “ENGLAND”, but pieces produced for the domestic market in England did not need this stamp, so early pieces and pieces produced for the domestic marked would all be without the “ENGLAND” stamp, confusing the matter. Over time the body shape of the pieces changed, the feathered, curved and fluted edges giving way to the simpler, cheaper oblong shapes. The LOCH ARD belonged to the famous Loch Line which sailed many ships from England to Australia. Built in Glasgow by Barclay, Curdle and Co. in 1873, the LOCH ARD was a three-masted square rigged iron sailing ship. The ship measured 262ft 7" (79.87m) in length, 38ft (11.58m) in width, 23ft (7m) in depth and had a gross tonnage of 1693 tons. The LOCH ARD's main mast measured a massive 150ft (45.7m) in height. LOCH ARD made three trips to Australia and one trip to Calcutta before its final voyage. LOCH ARD left England on March 2, 1878, under the command of Captain Gibbs, a newly married, 29 year old. She was bound for Melbourne with a crew of 37, plus 17 passengers and a load of cargo. The general cargo reflected the affluence of Melbourne at the time. On board were straw hats, umbrella, perfumes, clay pipes, pianos, clocks, confectionary, linen and candles, as well as a heavier load of railway irons, cement, lead and copper. There were items included that intended for display in the Melbourne International Exhibition in 1880. The voyage to Port Phillip was long but uneventful. At 3am on June 1, 1878, Captain Gibbs was expecting to see land and the passengers were becoming excited as they prepared to view their new homeland in the early morning. But LOCH ARD was running into a fog which greatly reduced visibility. Captain Gibbs was becoming anxious as there was no sign of land or the Cape Otway lighthouse. At 4am the fog lifted. A man aloft announced that he could see breakers. The sheer cliffs of Victoria's west coast came into view, and Captain Gibbs realised that the ship was much closer to them than expected. He ordered as much sail to be set as time would permit and then attempted to steer the vessel out to sea. On coming head on into the wind, the ship lost momentum, the sails fell limp and LOCH ARD's bow swung back. Gibbs then ordered the anchors to be released in an attempt to hold its position. The anchors sank some 50 fathoms - but did not hold. By this time LOCH ARD was among the breakers and the tall cliffs of Mutton Bird Island rose behind the ship. Just half a mile from the coast, the ship's bow was suddenly pulled around by the anchor. The captain tried to tack out to sea, but the ship struck a reef at the base of Mutton Bird Island, near Port Campbell. Waves broke over the ship and the top deck was loosened from the hull. The masts and rigging came crashing down knocking passengers and crew overboard. When a lifeboat was finally launched, it crashed into the side of LOCH ARD and capsized. Tom Pearce, who had launched the boat, managed to cling to its overturned hull and shelter beneath it. He drifted out to sea and then on the flood tide came into what is now known as LOCH ARD Gorge. He swam to shore, bruised and dazed, and found a cave in which to shelter. Some of the crew stayed below deck to shelter from the falling rigging but drowned when the ship slipped off the reef into deeper water. Eva Carmichael had raced onto deck to find out what was happening only to be confronted by towering cliffs looming above the stricken ship. In all the chaos, Captain Gibbs grabbed Eva and said, "If you are saved Eva, let my dear wife know that I died like a sailor". That was the last Eva Carmichael saw of the captain. She was swept off the ship by a huge wave. Eva saw Tom Pearce on a small rocky beach and yelled to attract his attention. He dived in and swam to the exhausted woman and dragged her to shore. He took her to the cave and broke open case of brandy which had washed up on the beach. He opened a bottle to revive the unconscious woman. A few hours later Tom scaled a cliff in search of help. He followed hoof prints and came by chance upon two men from nearby Glenample Station three and a half miles away. In a state of exhaustion, he told the men of the tragedy. Tom returned to the gorge while the two men rode back to the station to get help. By the time they reached LOCH ARD Gorge, it was cold and dark. The two shipwreck survivors were taken to Glenample Station to recover. Eva stayed at the station for six weeks before returning to Ireland, this time by steamship. In Melbourne, Tom Pearce received a hero's welcome. He was presented with the first gold medal of the Royal Humane Society of Victoria and a £1000 cheque from the Victorian Government. Concerts were performed to honour the young man's bravery and to raise money for those who lost family in the LOCH ARD disaster. Of the 54 crew members and passengers on board, only two survived: the apprentice, Tom Pearce and the young woman passenger, Eva Carmichael, who lost all of her family in the tragedy. Ten days after the LOCH ARD tragedy, salvage rights to the wreck were sold at auction for £2,120. Cargo valued at £3,000 was salvaged and placed on the beach, but most washed back into the sea when another storm developed. The wreck of LOCH ARD still lies at the base of Mutton Bird Island. Much of the cargo has now been salvaged and some was washed up into what is now known as LOCH ARD Gorge. Cargo and artefacts have also been illegally salvaged over many years before protective legislation was introduced. One of the most unlikely pieces of cargo to have survived the shipwreck was a Minton porcelain peacock - one of only nine in the world. The peacock was destined for the Melbourne International Exhibition in 1880. It had been well packed, which gave it adequate protection during the violent storm. Today, the Minton peacock can be seen at the Flagstaff Hill Maritime Museum in Warrnambool. From Australia's most dramatic shipwreck it has now become Australia's most valuable shipwreck artefact and is one of very few 'objects' on the Victorian State Heritage Register. [References: Flagstaff Hill Maritime Village information sheets and documents, http://www.asiaticpheasants.co.uk/index.html ]Flagstaff Hill’s collection of artefacts from LOCH ARD is significant for being one of the largest collections of artefacts from this shipwreck in Victoria. It is significant for its association with the shipwreck, which is on the Victorian Heritage Register (VHR S417). The collection is significant because of the relationship between the objects, as together they have a high potential to interpret the story of the LOCH ARD. The LOCH ARD collection is archaeologically significant as the remains of a large international passenger and cargo ship. The LOCH ARD collection is historically significant for representing aspects of Victoria’s shipping history and its potential to interpret sub-theme 1.5 of Victoria’s Framework of Historical Themes (living with natural processes). The collection is also historically significant for its association with the LOCH ARD, which was one of the worst and best known shipwrecks in Victoria’s history. Fragment of earthenware dinner plate recovered from the wreck of the Loch Ard. White glazed porcelain with blue Asiatic Pheasant design; this piece shows a pheasant. Sticker underneath has blue pen handwriting "L/58". Asiatic Pheasant Cartouche has Maker’s name (hard to decipher). Stamped underneath "0 1 2 8 1 (or 9)" Sticker underneath has blue pen handwriting "L/58". Asiatic Pheasant Cartouche has Maker’s name (hard to decipher). Stamped underneath "0 1 2 8 1 (or 9)" flagstaff hill, warrnambool, shipwrecked coast, flagstaff hill maritime museum, maritime museum, shipwreck coast, flagstaff hill maritime village, great ocean road, loch line, loch ard, captain gibbs, eva carmichael, tom pearce, glenample station, mutton bird island, loch ard gorge, dinner plate, asiatic pheasant, loch ard, plate -
 Flagstaff Hill Maritime Museum and Village
Calendar, T.S. McInnes, August 1923
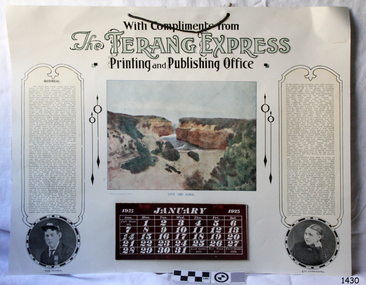
HISTORY OF THE LOCH ARD The LOCH ARD belonged to the famous Loch Line which sailed many ships from England to Australia. Built in Glasgow by Barclay, Curdle and Co. in 1873, the LOCH ARD was a three-masted square rigged iron sailing ship. The ship measured 262ft 7" (79.87m) in length, 38ft (11.58m) in width, 23ft (7m) in depth and had a gross tonnage of 1693 tons. The LOCH ARD's main mast measured a massive 150ft (45.7m) in height. LOCH ARD made three trips to Australia and one trip to Calcutta before its final voyage. LOCH ARD left England on March 2, 1878, under the command of Captain Gibbs, a newly married, 29 year old. She was bound for Melbourne with a crew of 37, plus 17 passengers and a load of cargo. The general cargo reflected the affluence of Melbourne at the time. On board were straw hats, umbrella, perfumes, clay pipes, pianos, clocks, confectionary, linen and candles, as well as a heavier load of railway irons, cement, lead and copper. There were items included that intended for display in the Melbourne International Exhibition in 1880. The voyage to Port Phillip was long but uneventful. At 3am on June 1, 1878, Captain Gibbs was expecting to see land and the passengers were becoming excited as they prepared to view their new homeland in the early morning. But LOCH ARD was running into a fog which greatly reduced visibility. Captain Gibbs was becoming anxious as there was no sign of land or the Cape Otway lighthouse. At 4am the fog lifted. A man aloft announced that he could see breakers. The sheer cliffs of Victoria's west coast came into view, and Captain Gibbs realised that the ship was much closer to them than expected. He ordered as much sail to be set as time would permit and then attempted to steer the vessel out to sea. On coming head on into the wind, the ship lost momentum, the sails fell limp and LOCH ARD's bow swung back. Gibbs then ordered the anchors to be released in an attempt to hold its position. The anchors sank some 50 fathoms - but did not hold. By this time LOCH ARD was among the breakers and the tall cliffs of Mutton Bird Island rose behind the ship. Just half a mile from the coast, the ship's bow was suddenly pulled around by the anchor. The captain tried to tack out to sea, but the ship struck a reef at the base of Mutton Bird Island, near Port Campbell. Waves broke over the ship and the top deck was loosened from the hull. The masts and rigging came crashing down knocking passengers and crew overboard. When a lifeboat was finally launched, it crashed into the side of LOCH ARD and capsized. Tom Pearce, who had launched the boat, managed to cling to its overturned hull and shelter beneath it. He drifted out to sea and then on the flood tide came into what is now known as LOCH ARD Gorge. He swam to shore, bruised and dazed, and found a cave in which to shelter. Some of the crew stayed below deck to shelter from the falling rigging but drowned when the ship slipped off the reef into deeper water. Eva Carmichael had raced onto deck to find out what was happening only to be confronted by towering cliffs looming above the stricken ship. In all the chaos, Captain Gibbs grabbed Eva and said, "If you are saved Eva, let my dear wife know that I died like a sailor". That was the last Eva Carmichael saw of the captain. She was swept off the ship by a huge wave. Eva saw Tom Pearce on a small rocky beach and yelled to attract his attention. He dived in and swam to the exhausted woman and dragged her to shore. He took her to the cave and broke open case of brandy which had washed up on the beach. He opened a bottle to revive the unconscious woman. A few hours later Tom scaled a cliff in search of help. He followed hoof prints and came by chance upon two men from nearby Glenample Station three and a half miles away. In a state of exhaustion, he told the men of the tragedy. Tom returned to the gorge while the two men rode back to the station to get help. By the time they reached LOCH ARD Gorge, it was cold and dark. The two shipwreck survivors were taken to Glenample Station to recover. Eva stayed at the station for six weeks before returning to Ireland, this time by steamship. In Melbourne, Tom Pearce received a hero's welcome. He was presented with the first gold medal of the Royal Humane Society of Victoria and a £1000 cheque from the Victorian Government. Concerts were performed to honour the young man's bravery and to raise money for those who lost family in the LOCH ARD disaster. Of the 54 crew members and passengers on board, only two survived: the apprentice, Tom Pearce and the young woman passenger, Eva Carmichael, who lost all of her family in the tragedy. Ten days after the LOCH ARD tragedy, salvage rights to the wreck were sold at auction for £2,120. Cargo valued at £3,000 was salvaged and placed on the beach, but most washed back into the sea when another storm developed. The wreck of LOCH ARD still lies at the base of Mutton Bird Island. Much of the cargo has now been salvaged and some was washed up into what is now known as LOCH ARD Gorge. Cargo and artefacts have also been illegally salvaged over many years before protective legislation was introduced. One of the most unlikely pieces of cargo to have survived the shipwreck was a Minton porcelain peacock - one of only nine in the world. The peacock was destined for the Melbourne International Exhibition in 1880. It had been well packed, which gave it adequate protection during the violent storm. Today, the Minton peacock can be seen at the Flagstaff Hill Maritime Museum in Warrnambool. From Australia's most dramatic shipwreck it has now become Australia's most valuable shipwreck artefact and is one of very few 'objects' on the Victorian State Heritage Register. Flagstaff Hill’s collection of artefacts from LOCH ARD is significant for being one of the largest collections of artefacts from this shipwreck in Victoria. It is significant for its association with the shipwreck, which is on the Victorian Heritage Register (VHR S417). The collection is significant because of the relationship between the objects, as together they have a high potential to interpret the story of the LOCH ARD. The LOCH ARD collection is archaeologically significant as the remains of a large international passenger and cargo ship. The LOCH ARD collection is historically significant for representing aspects of Victoria’s shipping history and its potential to interpret sub-theme 1.5 of Victoria’s Framework of Historical Themes (living with natural processes). The collection is also historically significant for its association with the LOCH ARD, which was one of the worst and best known shipwrecks in Victoria’s history. Calendar printed by Terang Express for August 1923 with picture of Loch Ard Gorge and survivors of wreck and also story of the episode. flagstaff hill, warrnambool, shipwrecked coast, flagstaff hill maritime museum, maritime museum, shipwreck coast, flagstaff hill maritime village, great ocean road, loch line, loch ard, captain gibbs, eva carmichael, tom pearce, glenample station, mutton bird island, terang express, calendar, 1923, calendar 1923, printer, newspaper, loch ard gorge -
 Flagstaff Hill Maritime Museum and Village
Container - Box for seeds, ca. 1880s
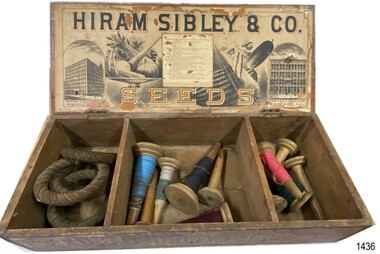
This seed box was made for Hiram Sibley for his seed house business. He sold seeds priced by the weight or the space they took up e.g. bushel. This box allowed for seeds to be divided by type, size or even date. The box was strong and easy to cart and store. It was also a handy item to 'recycle' as a storage container for other items. The Sibley seed box is a desirable collectors' item. A large variety of sizes and shapes are still available today in various stages of condition. Hiram Sibley developed seeds that were strong and the plants that grew from these seeds produced many seeds. Varieties of Sibley seeds and plants are still advertised for sale in modern times. HIRAM SIBLEY (1807-1888) - Hiram Sibley was born in America. He had a natural mechanical ability and became skilled in many trades. He and his partner Don Watson opened a sawmill then a machine shop and foundry. He became involved with Alfred Vale and Samuel Morse and their work on the telegraph. Eventually he became the first president of the Western Union Telegraph Company. Later, after leaving Western Union in the early 1860s, Sibley bought and sold railroads, manufactured sold, ran timber mills, and became involved in farming and seed supply. In this area he used his skills to engineer seeds that were stronger and develop plants that produced more seeds. The production of seeds became his main business. He bought land cheaply and improved to soil so that he could produce seed and grain, and graze herds of cattle. He became the owner of 14 large farms. Hiram Sibley earned the reputation "as the most extensive farmer and seedsman in this country". The business of Hiram Sibley & Co. was conducted his warehouse in Rochester and his seed house in Chicago. One department of the business sold farming equipment, another department imported ornamental plants from overseas countries Sibley went on to invest a large amount of money in a bank, and to be financially involved in the community by making large donations to public services such as a library and a school of music. At one point he was the richest man in Monroe county.This box is significant for its historic connection with Hiram Sibley, who is famous for many reasons, among which is his very profitable business of seed engineering to improve the production of crops. This box also represents the value of containers used for selling products in the 1880s, being re-used for other useful purposes. The box is an example of goods imported for use in Australia. The text and images of the box are an example of 1880s advertisingBox, wooden, with two brass hinges joining lid to base. Base has two wooden partitions, divided into three unequal sized compartments. Lid's underside has label with drawings of buildings and produce, text with maker's name and description of vegetables. Front edge of box has stencilled text and diagrams. Outside lid, and the other three sides, have no inscriptions. Made by Hiram Sibley & Co., USA. (Box is currently used to store quoits 1436.2 and cones of cotton thread 1436.3.)Marked "HIRAM SIBLEY & CO / SEEDS", "WAREHOUSE - "ROCHESTER N.Y. ", "SEED HOUSE - CHICARGO, ILL.", "SEEDS BY WEIGHT & MEASURE", "PUT UP BY / HIRAM SIBLEY & CO. / ROCHESTER, N.Y. AND CHICARGO, ILL."flagstaff hill, warrnambool, maritime village, maritime museum, flagstaff hill maritime museum & village, hiram sibley & co, rochester n.y., seeds, wooden seed box, seed box, seedsmen, arable farming, chicargo illinois, seed house, seed engineering, seed distribution, seeds by weight and measure -
 Flagstaff Hill Maritime Museum and Village
Print, Loch Ard
HISTORY OF THE LOCH ARD The LOCH ARD belonged to the famous Loch Line which sailed many ships from England to Australia. Built in Glasgow by Barclay, Curdle and Co. in 1873, the LOCH ARD was a three-masted square rigged iron sailing ship. The ship measured 262ft 7" (79.87m) in length, 38ft (11.58m) in width, 23ft (7m) in depth and had a gross tonnage of 1693 tons. The LOCH ARD's main mast measured a massive 150ft (45.7m) in height. LOCH ARD made three trips to Australia and one trip to Calcutta before its final voyage. LOCH ARD left England on March 2, 1878, under the command of Captain Gibbs, a newly married, 29 year old. She was bound for Melbourne with a crew of 37, plus 17 passengers and a load of cargo. The general cargo reflected the affluence of Melbourne at the time. On board were straw hats, umbrella, perfumes, clay pipes, pianos, clocks, confectionary, linen and candles, as well as a heavier load of railway irons, cement, lead and copper. There were items included that intended for display in the Melbourne International Exhibition in 1880. The voyage to Port Phillip was long but uneventful. At 3am on June 1, 1878, Captain Gibbs was expecting to see land and the passengers were becoming excited as they prepared to view their new homeland in the early morning. But LOCH ARD was running into a fog which greatly reduced visibility. Captain Gibbs was becoming anxious as there was no sign of land or the Cape Otway lighthouse. At 4am the fog lifted. A man aloft announced that he could see breakers. The sheer cliffs of Victoria's west coast came into view, and Captain Gibbs realised that the ship was much closer to them than expected. He ordered as much sail to be set as time would permit and then attempted to steer the vessel out to sea. On coming head on into the wind, the ship lost momentum, the sails fell limp and LOCH ARD's bow swung back. Gibbs then ordered the anchors to be released in an attempt to hold its position. The anchors sank some 50 fathoms - but did not hold. By this time LOCH ARD was among the breakers and the tall cliffs of Mutton Bird Island rose behind the ship. Just half a mile from the coast, the ship's bow was suddenly pulled around by the anchor. The captain tried to tack out to sea, but the ship struck a reef at the base of Mutton Bird Island, near Port Campbell. Waves broke over the ship and the top deck was loosened from the hull. The masts and rigging came crashing down knocking passengers and crew overboard. When a lifeboat was finally launched, it crashed into the side of LOCH ARD and capsized. Tom Pearce, who had launched the boat, managed to cling to its overturned hull and shelter beneath it. He drifted out to sea and then on the flood tide came into what is now known as LOCH ARD Gorge. He swam to shore, bruised and dazed, and found a cave in which to shelter. Some of the crew stayed below deck to shelter from the falling rigging but drowned when the ship slipped off the reef into deeper water. Eva Carmichael had raced onto deck to find out what was happening only to be confronted by towering cliffs looming above the stricken ship. In all the chaos, Captain Gibbs grabbed Eva and said, "If you are saved Eva, let my dear wife know that I died like a sailor". That was the last Eva Carmichael saw of the captain. She was swept off the ship by a huge wave. Eva saw Tom Pearce on a small rocky beach and yelled to attract his attention. He dived in and swam to the exhausted woman and dragged her to shore. He took her to the cave and broke open case of brandy which had washed up on the beach. He opened a bottle to revive the unconscious woman. A few hours later Tom scaled a cliff in search of help. He followed hoof prints and came by chance upon two men from nearby Glenample Station three and a half miles away. In a state of exhaustion, he told the men of the tragedy. Tom returned to the gorge while the two men rode back to the station to get help. By the time they reached LOCH ARD Gorge, it was cold and dark. The two shipwreck survivors were taken to Glenample Station to recover. Eva stayed at the station for six weeks before returning to Ireland, this time by steamship. In Melbourne, Tom Pearce received a hero's welcome. He was presented with the first gold medal of the Royal Humane Society of Victoria and a £1000 cheque from the Victorian Government. Concerts were performed to honour the young man's bravery and to raise money for those who lost family in the LOCH ARD disaster. Of the 54 crew members and passengers on board, only two survived: the apprentice, Tom Pearce and the young woman passenger, Eva Carmichael, who lost all of her family in the tragedy. Ten days after the LOCH ARD tragedy, salvage rights to the wreck were sold at auction for £2,120. Cargo valued at £3,000 was salvaged and placed on the beach, but most washed back into the sea when another storm developed. The wreck of LOCH ARD still lies at the base of Mutton Bird Island. Much of the cargo has now been salvaged and some was washed up into what is now known as LOCH ARD Gorge. Cargo and artefacts have also been illegally salvaged over many years before protective legislation was introduced. One of the most unlikely pieces of cargo to have survived the shipwreck was a Minton porcelain peacock - one of only nine in the world. The peacock was destined for the Melbourne International Exhibition in 1880. It had been well packed, which gave it adequate protection during the violent storm. Today, the Minton peacock can be seen at the Flagstaff Hill Maritime Museum in Warrnambool. From Australia's most dramatic shipwreck it has now become Australia's most valuable shipwreck artefact and is one of very few 'objects' on the Victorian State Heritage Register. Flagstaff Hill’s collection of artefacts from LOCH ARD is significant for being one of the largest collections of artefacts from this shipwreck in Victoria. It is significant for its association with the shipwreck, which is on the Victorian Heritage Register (VHR S417). The collection is significant because of the relationship between the objects, as together they have a high potential to interpret the story of the LOCH ARD. The LOCH ARD collection is archaeologically significant as the remains of a large international passenger and cargo ship. The LOCH ARD collection is historically significant for representing aspects of Victoria’s shipping history and its potential to interpret sub-theme 1.5 of Victoria’s Framework of Historical Themes (living with natural processes). The collection is also historically significant for its association with the LOCH ARD, which was one of the worst and best known shipwrecks in Victoria’s history. Reproduction 0620 of 1000 taken from the original painting of the Loch Ard by Neil Savage.flagstaff hill, warrnambool, shipwrecked coast, flagstaff hill maritime museum, maritime museum, shipwreck coast, flagstaff hill maritime village, great ocean road, loch line, loch ard, captain gibbs, eva carmichael, tom pearce, glenample station, mutton bird island, loch ard gorge, photograph, neil savage -
 Flagstaff Hill Maritime Museum and Village
Plant specimen - Wood Sample, Herbst, 1759-1765
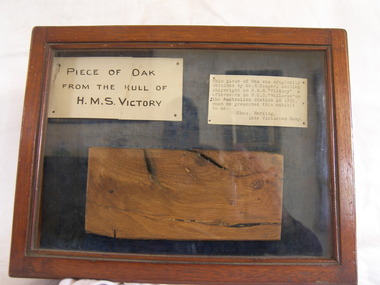
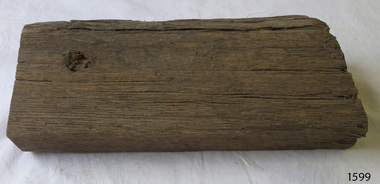
The piece of oak wood sample inside the case was obtained from Mr. H Cooper during the time he served as a shipwright for the British Royal Navy on Nelson’s flagship, HMS Victory, in 1891. By that time the H.M.S. Victory was around 100 years old having been built in 1765 and was currently in dry dock undergoing restoration. Cooper’s skills as a shipwright would have been well employed during this period. HMS Victory was and still does undergoing continuous restoration to preserve her for display as a museum ship, due to the vessel's significant naval history. It was during that time of early restoration that Cooper obtained the piece of Oak from HMS Victory believed to be from the ships hull. Cooper was in Australia in September 1891 serving on the HMS Wallaroo, a British Auxiliary Squadron commissioned to serve as part of the British Royal Navy contingent, tasked to operate in Australian waters. The photograph included with the donation of the wood sample is a portrait of Mr H Cooper taken in 1895 in Sydney. The inscription on the photograph describes him as a skilled shipwright from the H.M.S. Wallaroo, depicting Cooper as a young man in Royal Navy uniform, with the emblem of a petty officer third class. While Cooper was stationed on the H.M.S. Wallaroo in Sydney he presented the display case, containing the wood sample from H.M.S. Victory, as well as the exhibit labels to Charles Harding, ("Chas") late of the Royal Australian Navy. Harding had been based at the H M Naval Torpedo Depot at Williamstown, Victoria. Although not mentioned, it is believed the two men met whilst serving together in Australia in their respective assignments. It could have been a retirement gift from Cooper to Harding with the photograph of Cooper likely included with the case, and gifted to Harding in 1895, as the date on the photograph indicates. One of the exhibits labels indicates that Harding had the item on display whilst serving at the Naval Torpedo Depot in Williamstown. The label indicates: "This piece of Oak is part of the hull of H.M.S. “Victory” Lord Nelson’s renowned Flag Ship, which took such a prominent part in the Battle of Trafalgar. 21st October 1805. Exhibited by Charles Harding, H.M.V. Naval Torpedo Depot, Williamstown.” After Charles Harding died in 1931 the case containing the sample of oak from H.M.S. Victory was donated by his son Reg Harding to Mr. Murphy in 1962. The display case has since become a treasured item at Flagstaff Hill. A newspaper article dated 1905 included with the donation mentions that the city of Hamilton in Victoria was shortly expecting a mounted piece of the H.M.S. Victory, to be included in the city’s commemoration of the centenary of the "Battle of Trafalgar". Battle of Trafalgar: On October 21, 1805, twenty-seven British ships of the line led by Admiral Lord Nelson aboard HMS Victory defeated thirty-three French and Spanish ships of the line under French Admiral Villeneuve. The battle took place in the Atlantic Ocean off the southwest coast of Spain, just west of Cape Trafalgar, near the town of Los Caños de Meca. The victory confirmed the naval supremacy Britain had established during the course of the eighteenth century and it was achieved in part through Nelson's departure from the prevailing naval tactical orthodoxy of the day. Conventional practice at the time was for opposing fleets to engage each other in single parallel lines, in order to facilitate signalling and disengagement, and to maximise fields of fire and target areas. Nelson instead arranged his ships into two columns to sail perpendicularly into the enemy fleet's line. During the battle, Nelson was shot by a French musketeer and he died shortly before the battle ended. Villeneuve was captured, along with his ship Bucentaure. He later attended Nelson's funeral while a captive on parole in Britain. Admiral Federico Gravina, the senior Spanish flag officer, escaped with the remnant of the fleet. He died five months later from wounds sustained during the battle. It was prior to this battle that Nelson had issued his now-famous final orders to his ships in 12 separate flag-hoists “England expects that every man will do his duty”. This wood sample is historically significant for its association with Admiral Lord Nelson the Battle of Trafalgar. Through Nelson’s leadership and unorthodox battle tactics, he secured not only a victory against the French and Spanish but reaffirmed Britain's naval supremacy opening the way for Britain to continuing the policy of colonisation of many countries including Australia.Wood sample adhered to the base of a hinged wood and glass display case. Wood is a sample of oak taken from the hull of Vice-Admiral Lord Nelson's flagship, the HMS Victory, built in 1765. The case also contain two exhibit labels pinned above the wood sample. Other items donated with the display case, and relating to the wood sample: an 1895 photograph, a 1905 newspaper clipping, a 1962 donor's letter (two pages), and a handwritten exhibit label with a border of red lines. Photograph Front: printed- "Herbst" "28 Oxford Street, Hyde Park, Sydney", handwritten - "Mr Cooper", "see back". Back: handwritten - "Mr H Cooper, skilled shipwright, H.M.S. Wallaroo 1895" Exhibit labels still in the case: Left: handwritten- “PIECE OF OAK FROM THE HULL OF H.M.S. VICTORY”, Right: typewritten- “This piece of Oak was originally obtained by Mr. H. Cooper, skilled shipwright on H.M.S. “Victory” & afterwards on H.M.S. “Wallaroo” on the Australian Station in 1895, when he presented this exhibit to me. Chas. Harding, Late Victorian Navy.”flagstaff hill, warrnambool, shipwrecked-coast, flagstaff-hill, flagstaff-hill-maritime-museum, maritime-museum, shipwreck-coast, flagstaff-hill-maritime-village, oak, hms victory, vice-admiral lord nelson, horatio nelson, lord nelson, oak piece, piece of oaknelson, battle of trafalgar, maritime technology, ship relics, 18th century warship, british royal navy, h cooper shipwright, hms wallaroo, herbst hyde park sydney, charles harding, hmv naval orpedo depot williamstown, sir home popham’s telegraphic code, admiralty official day signal book -
 Flagstaff Hill Maritime Museum and Village
Wood Sample, c. 1854
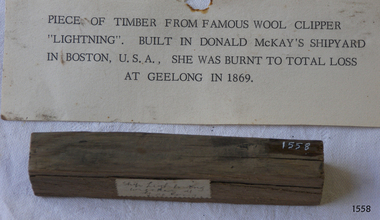
This piece of wood is from the American clipper ship LIGHTNING was a 3 masted, fully rigged extreme clipper ship. She was commissioned by James Baines, of the Black Ball Line in Liverpool, England, during the time of the Australian Gold Rush for the trade of passengers and cargo between England and Australia. Her cargo listed early consignments of livestock and animals, including rabbits sent to Thomas Austin of Barwon Park, Winchelsea, Victoria. The LIGHTNING was built in 1854 by shipbuilder Donald McKay, of East Boston, USA. She was described as spacious and comfortable, and one of the smartest ships known. The LIGHTNING set many speed records for her sea crossings, and became one of the most famous of the racing clippers and one of the fastest ever launched. In 1854, with Captain ‘Bully’ Forbes and Mate ‘Bully’ Bragg, LIGHTNING made the return trip from Melbourne to Liverpool in only 64 days, 3 hours and 10 minutes; a record for all time. Captain Enright became the new Master of LIGHTNING soon afterwards. He has been described as one of the finest mariners in the Australian trade. One of Captain Enright’s innovations was to publish a ship’s paper called The Lightning Gazette. (Captain Forbes had left to captain the SCHOMBERG.) In January 1855 Capt. Enright sailed the LIGHTNING from Liverpool with over 700 passengers and returned home carrying gold as her cargo. In 1857, for a very brief time under Capt. Byrne the LIGHTNING was used as a troop ship, taking British officers and soldiers, stores and ammunition, to fight in India. In 1859 she then returned to her run between Liverpool and Melbourne, apart from 1867 when she made a special trip between Melbourne and Port Chalmers in New Zealand. In 1869 the LIGHTNING was sold to Thomas Harrison of Liverpool, and she continued to sail for the Black Ball Line. Master of LIGHTNING, Captain Henry Jones, sailed her to Geelong in October 1869, and whilst docked, he had her loaded with a cargo of wool, copper, wire, tallow and other goods. At about 1am on 31st October 1869, whilst still docked and fully laden, a fire was noticed on the LIGHTNING. Efforts to extinguished the fire were unsuccessful, so she was towed to the shoals in Corio Bay, where she eventually sank, losing all cargo but no lives. The area is now known as Lightning Shoals. The LIGHTNING is listed on the Victorian Heritage Register VHR S415. She is historically significant for being one of the fastest wooden ships ever built, the first clipper built in the USA for British owners and being the worst shipping disaster in Geelong's history. It spent its whole career carrying cargo and immigrants from England to Australia.Sample of wood from the wool clipper LIGHTNING, 1854-1869, The sample has a label and a card with information about the ship and a person. Card, typewritten, "PIECE OF TIMBER FROM FAMOUS WOOL CLIPPER / "LIGHTNING". BUILD IN DONALD McKAY'S SHIPYARD / IN BOSTON, U.S.A.. SHE WAS BURNT TO TOTAL LOSS / IN GEELONG IN 1869"flagstaff hill, warrnambool, shipwrecked-coast, flagstaff-hill, flagstaff-hill-maritime-museum, maritime-museum, shipwreck-coast, flagstaff-hill-maritime-village, sailing ship lightning, extreme clipper ship, american clipper ship, record breaking clipper ship, james baines, black ball line, donald mckay shipbuilder, captain ‘bully’ forbes, australian immigration, liverpool to melbourne migration, captain enright, captain byrne, captain henry jones, lightning shoals geelong, rabbits introduced to australia, wood sample from lightning -
 Flagstaff Hill Maritime Museum and Village
Plaque, Loch Ard
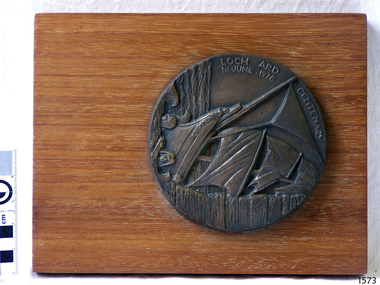
HISTORY OF THE LOCH ARD The LOCH ARD belonged to the famous Loch Line which sailed many ships from England to Australia. Built in Glasgow by Barclay, Curdle and Co. in 1873, the LOCH ARD was a three-masted square rigged iron sailing ship. The ship measured 262ft 7" (79.87m) in length, 38ft (11.58m) in width, 23ft (7m) in depth and had a gross tonnage of 1693 tons. The LOCH ARD's main mast measured a massive 150ft (45.7m) in height. LOCH ARD made three trips to Australia and one trip to Calcutta before its final voyage. LOCH ARD left England on March 2, 1878, under the command of Captain Gibbs, a newly married, 29 year old. She was bound for Melbourne with a crew of 37, plus 17 passengers and a load of cargo. The general cargo reflected the affluence of Melbourne at the time. On board were straw hats, umbrella, perfumes, clay pipes, pianos, clocks, confectionary, linen and candles, as well as a heavier load of railway irons, cement, lead and copper. There were items included that intended for display in the Melbourne International Exhibition in 1880. The voyage to Port Phillip was long but uneventful. At 3am on June 1, 1878, Captain Gibbs was expecting to see land and the passengers were becoming excited as they prepared to view their new homeland in the early morning. But LOCH ARD was running into a fog which greatly reduced visibility. Captain Gibbs was becoming anxious as there was no sign of land or the Cape Otway lighthouse. At 4am the fog lifted. A man aloft announced that he could see breakers. The sheer cliffs of Victoria's west coast came into view, and Captain Gibbs realised that the ship was much closer to them than expected. He ordered as much sail to be set as time would permit and then attempted to steer the vessel out to sea. On coming head on into the wind, the ship lost momentum, the sails fell limp and LOCH ARD's bow swung back. Gibbs then ordered the anchors to be released in an attempt to hold its position. The anchors sank some 50 fathoms - but did not hold. By this time LOCH ARD was among the breakers and the tall cliffs of Mutton Bird Island rose behind the ship. Just half a mile from the coast, the ship's bow was suddenly pulled around by the anchor. The captain tried to tack out to sea, but the ship struck a reef at the base of Mutton Bird Island, near Port Campbell. Waves broke over the ship and the top deck was loosened from the hull. The masts and rigging came crashing down knocking passengers and crew overboard. When a lifeboat was finally launched, it crashed into the side of LOCH ARD and capsized. Tom Pearce, who had launched the boat, managed to cling to its overturned hull and shelter beneath it. He drifted out to sea and then on the flood tide came into what is now known as LOCH ARD Gorge. He swam to shore, bruised and dazed, and found a cave in which to shelter. Some of the crew stayed below deck to shelter from the falling rigging but drowned when the ship slipped off the reef into deeper water. Eva Carmichael had raced onto deck to find out what was happening only to be confronted by towering cliffs looming above the stricken ship. In all the chaos, Captain Gibbs grabbed Eva and said, "If you are saved Eva, let my dear wife know that I died like a sailor". That was the last Eva Carmichael saw of the captain. She was swept off the ship by a huge wave. Eva saw Tom Pearce on a small rocky beach and yelled to attract his attention. He dived in and swam to the exhausted woman and dragged her to shore. He took her to the cave and broke open case of brandy which had washed up on the beach. He opened a bottle to revive the unconscious woman. A few hours later Tom scaled a cliff in search of help. He followed hoof prints and came by chance upon two men from nearby Glenample Station three and a half miles away. In a state of exhaustion, he told the men of the tragedy. Tom returned to the gorge while the two men rode back to the station to get help. By the time they reached LOCH ARD Gorge, it was cold and dark. The two shipwreck survivors were taken to Glenample Station to recover. Eva stayed at the station for six weeks before returning to Ireland, this time by steamship. In Melbourne, Tom Pearce received a hero's welcome. He was presented with the first gold medal of the Royal Humane Society of Victoria and a £1000 cheque from the Victorian Government. Concerts were performed to honour the young man's bravery and to raise money for those who lost family in the LOCH ARD disaster. Of the 54 crew members and passengers on board, only two survived: the apprentice, Tom Pearce and the young woman passenger, Eva Carmichael, who lost all of her family in the tragedy. Ten days after the LOCH ARD tragedy, salvage rights to the wreck were sold at auction for £2,120. Cargo valued at £3,000 was salvaged and placed on the beach, but most washed back into the sea when another storm developed. The wreck of LOCH ARD still lies at the base of Mutton Bird Island. Much of the cargo has now been salvaged and some was washed up into what is now known as LOCH ARD Gorge. Cargo and artefacts have also been illegally salvaged over many years before protective legislation was introduced. One of the most unlikely pieces of cargo to have survived the shipwreck was a Minton porcelain peacock - one of only nine in the world. The peacock was destined for the Melbourne International Exhibition in 1880. It had been well packed, which gave it adequate protection during the violent storm. Today, the Minton peacock can be seen at the Flagstaff Hill Maritime Museum in Warrnambool. From Australia's most dramatic shipwreck it has now become Australia's most valuable shipwreck artefact and is one of very few 'objects' on the Victorian State Heritage Register. Flagstaff Hill’s collection of artefacts from LOCH ARD is significant for being one of the largest collections of artefacts from this shipwreck in Victoria. It is significant for its association with the shipwreck, which is on the Victorian Heritage Register (VHR S417). The collection is significant because of the relationship between the objects, as together they have a high potential to interpret the story of the LOCH ARD. The LOCH ARD collection is archaeologically significant as the remains of a large international passenger and cargo ship. The LOCH ARD collection is historically significant for representing aspects of Victoria’s shipping history and its potential to interpret sub-theme 1.5 of Victoria’s Framework of Historical Themes (living with natural processes). The collection is also historically significant for its association with the LOCH ARD, which was one of the worst and best known shipwrecks in Victoria’s history. Plaque to commemorate the centenary of the wreck of the Loch Ard. Circular piece of bronze depicting a scene of the wreck set in a rectangular piece of varnished wood. Plaque is 9/50. Artist Michael Meszarosflagstaff hill, warrnambool, shipwrecked coast, flagstaff hill maritime museum, maritime museum, shipwreck coast, flagstaff hill maritime village, great ocean road, loch line, loch ard, captain gibbs, eva carmichael, tom pearce, glenample station, mutton bird island, loch ard gorge, plaque, loch ard, michael meszaros -
 Flagstaff Hill Maritime Museum and Village
Wood Sample, c. 1854
This sample of wood is from the American clipper ship LIGHTNING was a 3 masted, fully rigged extreme clipper ship. She was commissioned by James Baines, of the Black Ball Line in Liverpool, England, during the time of the Australian Gold Rush for the trade of passengers and cargo between England and Australia. Her cargo listed early consignments of livestock and animals, including rabbits sent to Thomas Austin of Barwon Park, Winchelsea, Victoria. The LIGHTNING was built in 1854 by shipbuilder Donald McKay, of East Boston, USA. She was described as spacious and comfortable, and one of the smartest ships known. The LIGHTNING set many speed records for her sea crossings, and became one of the most famous of the racing clippers and one of the fastest ever launched. In 1854, with Captain ‘Bully’ Forbes and Mate ‘Bully’ Bragg, LIGHTNING made the return trip from Melbourne to Liverpool in only 64 days, 3 hours and 10 minutes; a record for all time. Captain Enright became the new Master of LIGHTNING soon afterwards. He has been described as one of the finest mariners in the Australian trade. One of Captain Enright’s innovations was to publish a ship’s paper called The Lightning Gazette. (Captain Forbes had left to captain the SCHOMBERG.) In January 1855 Capt. Enright sailed the LIGHTNING from Liverpool with over 700 passengers and returned home carrying gold as her cargo. In 1857, for a very brief time under Capt. Byrne the LIGHTNING was used as a troop ship, taking British officers and soldiers, stores and ammunition, to fight in India. In 1859 she then returned to her run between Liverpool and Melbourne, apart from 1867 when she made a special trip between Melbourne and Port Chalmers in New Zealand. In 1869 the LIGHTNING was sold to Thomas Harrison of Liverpool, and she continued to sail for the Black Ball Line. Master of LIGHTNING, Captain Henry Jones, sailed her to Geelong in October 1869, and whilst docked, he had her loaded with a cargo of wool, copper, wire, tallow and other goods. At about 1am on 31st October 1869, whilst still docked and fully laden, a fire was noticed on the LIGHTNING. Efforts to extinguished the fire were unsuccessful, so she was towed to the shoals in Corio Bay, where she eventually sank, losing all cargo but no lives. The area is now known as Lightning Shoals. The LIGHTNING is listed on the Victorian Heritage Register VHR S415. She is historically significant for being one of the fastest wooden ships ever built, the first clipper built in the USA for British owners and being the worst shipping disaster in Geelong's history. It spent its whole career carrying cargo and immigrants from England to Australia.Sample wooden rectangular from the clipper Lightning, which burned out at Geelong 31 Oct 1869.flagstaff hill, warrnambool, shipwrecked-coast, flagstaff-hill, flagstaff-hill-maritime-museum, maritime-museum, sailing ship lightning, extreme clipper ship, american clipper ship, record breaking clipper ship, james baines, black ball line, donald mckay shipbuilder, captain ‘bully’ forbes, australian immigration, liverpool to melbourne migration, captain enright, captain byrne, captain henry jones, lightning shoals geelong, rabbits introduced to australia, wood from sailing ship, shipwreck-coast, flagstaff-hill-maritime-village, lightning -
 Federation University Historical Collection
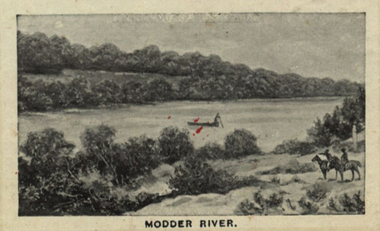
Photograph (black & White), Modder River - South Africa
When war broke out in 1899, and early target for the Boers was the diamond-mining centre of Kimberley. This was located near the point where the Transvaal, Orange Free State and Cape Colony met. General Sir Redvers Buller detached the 1st Division under Lieutenant General Lord Methuen to relieve the Siege of Kimberley. This decision was made partly for reasons of prestige. To capture Kimberley (which contained the famous imperialist and former Prime Minister of Cape Colony, Cecil Rhodes) would be a major propaganda victory for the British. Methuen's force advanced north and won two engagements against the Boers of the Orange Free State. Reinforcements from Transvaal under General Koos de la Rey arrived and he convinced the Boers to follow his plans for attacking the British. Instead of relying on the hills for protection and missing their targets, de la Rey proposed they make use of the flat veld and introduced them to the Mauser rifle with its flat trajectory. Trenches were built in the banks of the Modder River from which they could sweep the veld for a great distance. The trenches were built on the south side of the river and on the smaller Riet River where they meet at Modder River Station. Methuen's force began advancing towards the Modder planning to cross the river. The Boers opened fire and the British troops were unable to find cover on the veld. They had to lay flat so as not to be seen or hit. The British guns pounded the buildings near Modder River Station and the north bank of the river, missing the trenches on the south bank. The battle became a stalemate. The British found an opening on the Boer's right flank at Rosmead ford downstream and drove the Boers out of Rosmead. De la Rey drove them back into a small insecure bridgehead. The Boers feared they were vulnerable and withdrew during the night. Methuen reported that the battle had been "one of the hardest and most trying fights in the annals of the British army". Individual image from photographed poster of tobacco and cigarette cards.boers, diamind-mining, kimberley, transvaal, orange free state, cape colony, sir rdvers buller, lieutenant general lord methuen, siege of kimberley, cecil rhodes, general koos dde la rey, mauser rifle, veld, modder river, modder river station, trenches, riet river, rosmead -
 Federation University Historical Collection
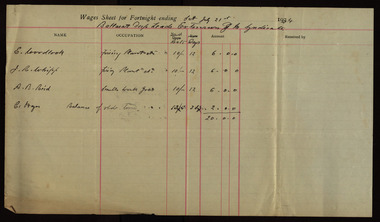
Document, Ballarat School of Mines Wages Sheet, 1934, 1934
Richard Squire was noted personality in the Ballarat region as a miner. He was interested in a number of mines, including the famous Madame Berry Lead. He was born in Richmond, and finished his education at the Ballarat School of Mines. He became manager of his first mine at the age of 23 years at Ararat Grand Junction. Later he spent two years mining in Malaya. On his return he became interested in mines at Allendale. In 1905 Richard Squire was manager of the West Berry Consols at Allendale, and developed an improved system of mine ventilation. He was successful in combating and remedying the gas and ventilation troubles of the Deep Mines of Creswick and Allendale Districts. He spent much of his latter years at Mt Mercer mine sites.Two pages of Wages Sheets listing names, occupations and amount paid in 1934Hand written entries on wages sheets, one on Sat 21st July 1934 and one on Sat 14th April 1934wages, e. woodlock, j.r. whipp, c. hayes, ballarat deep leads extension j m syndicate, richard squire, a b reid, wages sheet, mining, ballarat school of mines -
 Federation University Historical Collection
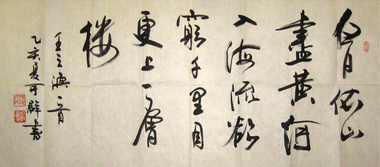
Banner, Chinese Calligraphic Banner, 10/08/1995
Presented to the Ballarat School of Mines from Changzhou Educaiton Delegation. A Chinese calligraphic banne a a famous poem 'On the Stork Tower' written in the Tang Dynesty by Wang Zhihuan. The Sun along the mountains bows; The yellow river seawards flows. You will enjoy a grander sight; By climbing to a greater height. wang zhihuan, poem, tang dynasty, stork tower, changzhou, chine, calligraphy -
 Federation University Historical Collection
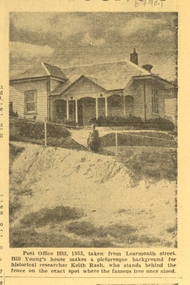
Photograph - Newsclipping, Post Office Hillm Golden Point, Ballarat
Newspaper clipping of a building and yard at Post Office Hill, Ballarat.Post Office Hill, 1955, taken from Learmonth street, Bill Young's House makes a picturesque background for historical researcher Keith Rash, who stands behind the fence in the exact sport were the famous tree once stood."post office hill, ballarat, gaol tree, post office hill camp, learmonth street, bill young, keith rash, gaol tree -
 Australian Commando Association - Victoria
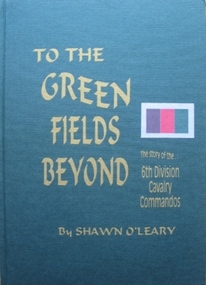
Book - 6th Div, Shawn OLeary, To The Green Fields Beyond:The story of the 6th Division Cavalry Commandos
... of Australia’s most famous fighting regiments during World War II ...The comprehensive history of the 6th Australian Division Cavalry Commandos – a (now out of print) reprint of one of the rarer Armoured unit history books. This is the story of one of Australia’s most famous fighting regiments during World War II. As an armoured cavalry unit it fought the Italians and Germans in the sands of the African desert and the Vichy French in the mountains of Syria. Later as a dismounted commando unit it fought the Japanese in the terrifying jungles of New Guinea. The heroism of the men in its ranks and the actions in which they engaged are portrayed in a way which makes battle deeds leap realistically from the pages. “To The Green Fields Beyond” is a documented and detailed book which is of value to everyone who is interested in Australia’s story. Seldom before has such a contribution been made to record of our national history. The book has been approved and sponsored by the Australian War Memorial. The 6th Division Cavalry Regiment was formed in November 1939 and, just two months later, was sent overseas to the Middle East in January 1940. Arriving in Egypt, the regiment immediately went to Palestine, where it joined the rest of the 6th Division and trained using machine-gun carriers and, from October, six old Vickers light tanks. At the end of the year the regiment moved into the Western Desert, where it joined British forces ready for the major offensive to commence on 9 December. Two days later the regiment became the first unit of the 2nd Australian Imperial Force (AIF) to go into action when one of its squadron fought a sharp action against the Italians holding Garn el Grein and Fort Maddalina on 11 and 12 December. By 21 December British forces had captured Sidi Barrrani and the desert was now open for the 6th Division’s advance along the Libyan coast. On 3 January 1941 the division attacked and captured the Italian fort of Bardia. The regiment’s A Squadron, under the command of Major Denzil Macarthur-Onslow, who went on to command the 4th Armoured Brigade, supported the attack. Tobruk was the next Italian fort to be captured, with the regiment again in support and covering the 19th Brigade’s advance. The regiment, though, was under-equipped and without its full compliment of vehicles, using only machine gun carriers. To compensate for this, A Squadron was parity re-equipped with captured Italian light tanks, which had large kangaroos painted on the hulls and turrets to distinguish them from enemy vehicles. After Tobruk, the regiment was used as part of the advance guard in the capture of Derna and then Benghazi. In April the unit moved to Helwan, where it was equipped with Vickers light tanks and machine-gun carriers, and operated with British troops in capturing Sollum. Towards the end of May the regiment moved to Palestine, where it came under the command of the 7th Division for the imminent invasion of Syria. The regiment experienced its heaviest fighting during the Syrian campaign, which began on 7 June. A Squadron was attached to the 21st Brigade and advanced along the coast, where the rugged hills made it difficult to manoeuvre the tanks and carriers. The squadron was relieved by one of the 9th Division Cavalry Regiment’s squadrons on 13 and 14 June. C Squadron, meanwhile, was with the 25th Brigade, and advanced along the Rosh Pinna road, engaging strong enemy defences at Fort Khirbe. C Squadron was relieved by B Squadron, which was later attacked by Vichy French tanks that were supported by heavy artillery and machine-gun fire, which forced the Australians to withdrawal. Always willing or needing to improvise during the campaign, A and B Squadrons both operated three captured French R35 Renault light tanks, while C Squadron provided personnel for a horse troop, quickly nicknamed the “Kelly Gang”, to patrol the high, rugged hills near the Mardjayoun–Banis Road. The regiment remained in Syria as part of the occupation force and returned to Australia in March 1942. It was sent to the Adelaide River, in the Northern Territory, and then later to Murgon, in Queensland. In 1943 and 1944 divisional cavalry regiments were reorganised into cavalry (commando) regiments. In January 1944 the 6th Division Cavalry Regiment became the 2/6th Cavalry (Commando) Regiment. The regiment lost its vehicles and became the administrative headquarters for the 2/7th, 2/9th, and 2/10th Commando Squadrons. The regiment remained with the 6th Division and participated in the Aitpae–Wewak campaign, in New Guinea, during 1945. Includes Nominal Rollnon-fictionThe comprehensive history of the 6th Australian Division Cavalry Commandos – a (now out of print) reprint of one of the rarer Armoured unit history books. This is the story of one of Australia’s most famous fighting regiments during World War II. As an armoured cavalry unit it fought the Italians and Germans in the sands of the African desert and the Vichy French in the mountains of Syria. Later as a dismounted commando unit it fought the Japanese in the terrifying jungles of New Guinea. The heroism of the men in its ranks and the actions in which they engaged are portrayed in a way which makes battle deeds leap realistically from the pages. “To The Green Fields Beyond” is a documented and detailed book which is of value to everyone who is interested in Australia’s story. Seldom before has such a contribution been made to record of our national history. The book has been approved and sponsored by the Australian War Memorial. The 6th Division Cavalry Regiment was formed in November 1939 and, just two months later, was sent overseas to the Middle East in January 1940. Arriving in Egypt, the regiment immediately went to Palestine, where it joined the rest of the 6th Division and trained using machine-gun carriers and, from October, six old Vickers light tanks. At the end of the year the regiment moved into the Western Desert, where it joined British forces ready for the major offensive to commence on 9 December. Two days later the regiment became the first unit of the 2nd Australian Imperial Force (AIF) to go into action when one of its squadron fought a sharp action against the Italians holding Garn el Grein and Fort Maddalina on 11 and 12 December. By 21 December British forces had captured Sidi Barrrani and the desert was now open for the 6th Division’s advance along the Libyan coast. On 3 January 1941 the division attacked and captured the Italian fort of Bardia. The regiment’s A Squadron, under the command of Major Denzil Macarthur-Onslow, who went on to command the 4th Armoured Brigade, supported the attack. Tobruk was the next Italian fort to be captured, with the regiment again in support and covering the 19th Brigade’s advance. The regiment, though, was under-equipped and without its full compliment of vehicles, using only machine gun carriers. To compensate for this, A Squadron was parity re-equipped with captured Italian light tanks, which had large kangaroos painted on the hulls and turrets to distinguish them from enemy vehicles. After Tobruk, the regiment was used as part of the advance guard in the capture of Derna and then Benghazi. In April the unit moved to Helwan, where it was equipped with Vickers light tanks and machine-gun carriers, and operated with British troops in capturing Sollum. Towards the end of May the regiment moved to Palestine, where it came under the command of the 7th Division for the imminent invasion of Syria. The regiment experienced its heaviest fighting during the Syrian campaign, which began on 7 June. A Squadron was attached to the 21st Brigade and advanced along the coast, where the rugged hills made it difficult to manoeuvre the tanks and carriers. The squadron was relieved by one of the 9th Division Cavalry Regiment’s squadrons on 13 and 14 June. C Squadron, meanwhile, was with the 25th Brigade, and advanced along the Rosh Pinna road, engaging strong enemy defences at Fort Khirbe. C Squadron was relieved by B Squadron, which was later attacked by Vichy French tanks that were supported by heavy artillery and machine-gun fire, which forced the Australians to withdrawal. Always willing or needing to improvise during the campaign, A and B Squadrons both operated three captured French R35 Renault light tanks, while C Squadron provided personnel for a horse troop, quickly nicknamed the “Kelly Gang”, to patrol the high, rugged hills near the Mardjayoun–Banis Road. The regiment remained in Syria as part of the occupation force and returned to Australia in March 1942. It was sent to the Adelaide River, in the Northern Territory, and then later to Murgon, in Queensland. In 1943 and 1944 divisional cavalry regiments were reorganised into cavalry (commando) regiments. In January 1944 the 6th Division Cavalry Regiment became the 2/6th Cavalry (Commando) Regiment. The regiment lost its vehicles and became the administrative headquarters for the 2/7th, 2/9th, and 2/10th Commando Squadrons. The regiment remained with the 6th Division and participated in the Aitpae–Wewak campaign, in New Guinea, during 1945. Includes Nominal Rollww2, australian commandos, australian special forces, world war 2 -
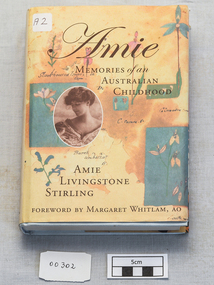 City of Moorabbin Historical Society (Operating the Box Cottage Museum)
Book, Stirling, Amie Livingstone, Amie, Memories of an Australian Childhood, 1980
Amie Livingston Stirling 1880-1945 recorded her memories of growing up in Omeo, Elwood and San Remo in Victoria and in 1880s and '90s. About her father James Stirling, the famous coal-mining pioneer and geologist. Her grand-daughter Linda Harrison compiled her writings and added stories from her later life in Paris and North Africa274 p. : ill., ports., tables ; Pale blue hardback book of the childhood memories of Amie Livingston Stirling1880- 1945, compiled by her grand-daughter Linda Harrison in1980 non-fictionAmie Livingston Stirling 1880-1945 recorded her memories of growing up in Omeo, Elwood and San Remo in Victoria and in 1880s and '90s. About her father James Stirling, the famous coal-mining pioneer and geologist. Her grand-daughter Linda Harrison compiled her writings and added stories from her later life in Paris and North Africastirling james, reid elizabeth, early settlers, pioneers, surveyors, geologists, gippsland, omeo, elwood, melbourne, victoria, geelong, mining, botany, von mueller baron, elster creek, brighton, moorabbin, howitt alfred william, murray r a f, goodsir agnes, amie stirling -
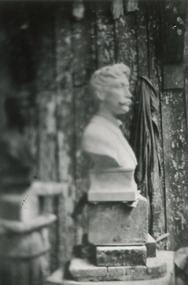 City of Moorabbin Historical Society (Operating the Box Cottage Museum)
Photograph x 1 B/W 'MacRobertson' Bust , Letter, Envelope 1922 August Rietmann sculptor, 1922
1922 August Rietmann was commissioned to sculpt a bust of Sir MacPherson Robertson 1859-1945, confectionery maker, ( famous for Freddo Frogs and Cherry Ripe chocolate bar). The Bust was installed at Mac Robertson Girls High School for which he had donated funds for the building. 'MacRob' also funded the bridge over the Yarra River and the herbarium in the Botanical Gardens that all bear his name. August Rietmann (1877-1951) of Lustdorf ,Switzerland, married Maria Frieda Oesschlager (2/2/1878- 22/7/1942) of Baden Baden, Germany on 6/8/1910 In August 8th 1915 August and his wife Frieda migrated to Melbourne, Victoria, Australia sailing on the Steam Ship ‘Osterley’ from Marseilles to Melbourne They leased Box Cottage, Ormond in 1917 and raised two children, Stefanie (1918 -2006) and William (1920- 1997). 1935 August purchased the property and the family used the Cottage during the day and slept in the Front House. August was a monumental mason, potter and sculptor, and was employed at Corbens Ltd Clifton Hill, to carve war memorials in Victoria post WW1 c 1915-1922. During the 1920's August set up his own business in pressed cement making pot plants, columns,paving slabs and lampstands. He continued to carve headstones and figures and took contract work for Artists eg Paul Mountford. He built a workshop in the Barn and used the Cottage for plaster moulding. His son William joined the business and and the family continued to use the site after August died in 1951. Rietmann Landscaping Ltd moved to Bay Road Highett in 1953 and later to Carrum. The land, containing the Box Cottage, was sold to Lewis Timber Pty Ltd in 1970 and Mr Lewis proposed that Moorabbin City Council should preserve the heritage Cottage. In 1984 the Cottage was dismantled and reconstructed in the adjacent Joyce Park. The Rietman family is an example of the diverse nationalities that lived and worked productively in Moorabbin Shire 1871–1933 , the City of Moorabbin 1934-1994 and continues today in the Cities of Glen Eira, Kingston, Bayside, and Monash. August, a sculptor and stone mason, was employed by Corben Pty Ltd Clifton Hill to carve WW1 Memorials before establishing his own successful masonry business in the Box Cottage during the latter 1920s. After becoming interested in pressed cement casting, he took on apprentices (1930s Depression) and among his products were garden furniture, pots and also street lamp standards, some of which were installed in St Kilda Road. After August’s death in 1951, his family continued the business ‘Rietman’s Landscaping Ltd.’, at Highett and Carrum.Photograph x 1 Black & White Sculptured bust of Sir MacPherson Robertson c 1922; b) Letter, printed , typed from Sir MacPherson Robertson to August Rietmann (Richman) with payment for the Bust - £65-5-0 - ; c) Envelope, printed, typed addressed to Mr Rietmann { Richman) at Corbens Ltd.; d) reverse of envelope printed a) 1922; b) printed letter MacRobertson Pty Ltd ; c) printed envelope MacRobertson Ltdmacrobertson chocolate ltd., macrobertson girls high school, fitzroy town hall, rietmann august, rietman august, rietmann frieda, rietman frieda, stonnington city town hall, war memorials, world war 1 1914-1918, rietman stefanie, rennick stefanie, francis stefanie, rietman william, rietman ray, mountford paul, malvern city town hall, box cottage museum ormond, box william, box elizabeth, joyce park ormond, rietman's landscaping pty ltd, bay road highett, macrobertson pty ltd, coleraine soldier memorial 1921, box cottage ormond, freddo frog chocolate, cherry ripe chocolate bar, cadbury schweppes ltd., robertson sir macpherson 1859-1945, confectionery, chocolate -
 City of Moorabbin Historical Society (Operating the Box Cottage Museum)
Book, Carroll, Brian, Early Melbourne sketchbook, 1977
In 1839 a runaway horse crashed into a tree stump that stood in the middle of Bourke Street; and in 1840 there were holes in Collins Street so deep that a child was nearly drowned in one. Early Melbourne Sketchbook recaptures the exciting early days of the city, days when rainy weather rendered Elizabeth Street impassable without a punt, and when Melbourne's first city councillor was elected on the promise of free beer to his constituents. Brian Carroll has sought out an interesting collection of contemporary illustrations to take us back to the beginning of Melbourne, from the original discovery of Port Phillip in 1802. David Collins' abortive settlement at Sullivan's Bay was abandoned in 1803, and it was not until 1835 that John Batman settled on his now famous 'place for a village'. Here are fascinating stories of the men who founded and shaped Victoria's capital city: Batman, Fawkner, Bourke, La Trobe. In addition, there is a wealth of information about Melbourne's buildings and landmarks - places such as St Francis', the Post Office, the Town Hall, Princes Bridge, and Young and Jackson's. Early Melbourne Sketchbook describes vividly the historical development and cultural growth of the city that was to become Australia's financial capital and its second largest city. (Inside cover)62 pages : illustratednon-fictionIn 1839 a runaway horse crashed into a tree stump that stood in the middle of Bourke Street; and in 1840 there were holes in Collins Street so deep that a child was nearly drowned in one. Early Melbourne Sketchbook recaptures the exciting early days of the city, days when rainy weather rendered Elizabeth Street impassable without a punt, and when Melbourne's first city councillor was elected on the promise of free beer to his constituents. Brian Carroll has sought out an interesting collection of contemporary illustrations to take us back to the beginning of Melbourne, from the original discovery of Port Phillip in 1802. David Collins' abortive settlement at Sullivan's Bay was abandoned in 1803, and it was not until 1835 that John Batman settled on his now famous 'place for a village'. Here are fascinating stories of the men who founded and shaped Victoria's capital city: Batman, Fawkner, Bourke, La Trobe. In addition, there is a wealth of information about Melbourne's buildings and landmarks - places such as St Francis', the Post Office, the Town Hall, Princes Bridge, and Young and Jackson's. Early Melbourne Sketchbook describes vividly the historical development and cultural growth of the city that was to become Australia's financial capital and its second largest city. (Inside cover)melbourne, historic buildings -
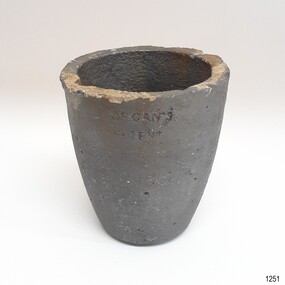 Flagstaff Hill Maritime Museum and Village
Functional object - Crucible, The Patent Plumbago Crucible Company, circa 1873
Crucibles are used for heating and pouring molten metal. The set of six crucibles was raised from the wreck of the Loch Ard and includes a range of sizes, now in the Flagstaff Hill collection. All were manufactured by the Morgan brothers who founded the Patent Plumbago Crucible Company in 1856, making crucibles in a small factory in Battersea London. A crucible is a container used for purifying and melting metals so that they can be cast in a mould to a predetermined shape and use. They must withstand extremely high temperatures, and abrupt cooling, and shed their contents with minimal adherence. The addition of graphite to the traditional firing clays greatly enhanced the durability of industrial crucibles this technique was pioneered by the Morgan Bros thereby making a significant technological advance in foundry technology and metallurgy. The Morgans first noticed the advantages of graphite crucibles at the Great Exhibition held in London in 1851. Initially, they contracted to be sole selling agents for the American-made products of Joseph Dixon and Co. from New Jersey, but in 1856 they obtained that firm's manufacturing rights and began producing their graphite crucibles from the South London site. The Morgans imported crystalline graphite in 4-5 cwt casks from the British colony of Ceylon (now Sri Lanka) and mixed it with conventional English (Stourbridge) clays to be fired in kilns. Their products were purchased by the Royal Mints in London and India and exported to official mints in France and Germany. They were successful exhibitors of their crucibles and furnaces at the London Exhibition held in 1861 (Class 1, Mining, quarrying, metallurgy and mineral products, Exhibit 265, Patent Plumbago Crucible Co). The range of sizes represented by the six crucibles retrieved from the Loch Ard suggests they may have been part of a sample shipment intended for similar promotion in the Australian colonies or at Melbourne's International Exhibition to be held in 1880. A newspaper account of an 1864 tour of the Morgan brothers' 'Black Potteries' at Battersea indicates: "All the pots were numbered according to their contents, each number standing for one kilogram or a little over two pounds; a No. 2 crucible contains two kilograms; a No. 3, three kilograms, and so on." These numbers are obscured by marine sediment on three of the crucibles in the Flagstaff Hill collection, but those legible on the remaining three are 5, 6, and 8. None of the six is of the same size. A brief history of the Loch Ard (1873-1878): - The sailing ship Loch Ard was one of the famous Loch Line of ships that sailed the long voyage from England to Australia. Barclay, Curdle and Co. built the three-masted iron vessel in Glasgow in 1873. It had sailed three trips to Australia and one trip to Calcutta before its fateful voyage. Loch Ard left England on March 2, 1878, under the command of recently married, 29-year-old Captain Gibbs. It was bound for Melbourne with a crew of 37, plus 17 passengers. The general cargo reflected the affluence of Melbourne at the time. Onboard were straw hats, umbrellas, perfumes, clay pipes, pianos, clocks, confectionery, linen and candles, and a heavier load of railway irons, cement, lead and copper. Other cargo included items intended for display in the Melbourne International Exhibition of 1880. The Loch Ard had been sailing for three months and was close to its destination on June 1, 1878. Captain Gibbs had expected to see land at about 3 am but the Loch Ard ran into a fog that greatly reduced visibility and there was no sign of land or the Cape Otway lighthouse. The fog lifted at 4 am and the sheer cliffs of Victoria's west coast were much closer to them than Captain Gibbs expected. He tried to manage the vessel but failed and the ship struck a reef at the base of Mutton Bird Island, near Port Campbell. The top deck loosened from the hull, and the masts and rigging crashed down, knocking passengers and crew overboard. The lifeboat was launched by Tom Pearce but crashed into the side of Loch Ard and capsized. He clung onto its overturned hull and sheltered under it. He drifted out to sea and the tide brought him back to what is now called Loch Ard Gorge. He swam to shore and found a cave for shelter. A passenger, Eva Carmichael, had raced onto the deck to find out what was happening and was confronted by towering cliffs above the ship. She was soon swept off the ship by a huge wave. Eva saw Tom Pearce on a small rocky beach and yelled to attract his attention. He swam out and dragged her to the shelter of the cave. He revived her with a bottle of brandy from a case that had washed up on the beach. Tom scaled a cliff in search of help and followed some horse hoof prints. He came from two men from Glenample Station, three and a half miles away. He told the men of the tragedy and then returned to the gorge while the two men rode back to the station to get help. They reached Loch Ard Gorge and took the two shipwreck survivors to Glenample Station to recover. Eva stayed at the station for six weeks before returning to Ireland by steamship. In Melbourne, Tom Pearce received a hero's welcome and was presented with a medal and some money. Of the 54 crew members and passengers on board, only two survived: the apprentice, Tom Pearce and the young woman passenger, Eva Carmichael, who lost her family in the tragedy. The shipwreck of the Loch Ard is of significance for Victoria and is registered on the Victorian Heritage Register ( S 417). Flagstaff Hill has a varied collection of artefacts from Loch Ard and its collection is significant for being one of the largest accumulation of artefacts from this notable Victorian shipwreck of which the subject items are a small part. The collection's objects give us a snapshot of how we can interpret the story of this tragic event. The collection is also archaeologically significant as it represents aspects of Victoria's shipping history that allows us to interpret Victoria's social and historical themes of the time. Through is associated with the worst and best-known shipwreck in Victoria's history.This crucible is the smallest of three nested crucibles, or fluxing pots, numbered according to their size. These containers rise slightly from a smaller flat base to a wider open top with a lip for pouring. They were recovered from the wreck of the Loch Ard. The crucibles have a coating of sediment that obscures some of their numerical specifications of size and capacity. Made by the Patent Plumbago Crucible Company at the Battersea Works in London. The number on this crucible is obscured by the sticker.Stamped into side "MORGAN'S PATENT" Stemped into base "MORGAN'S PATENT" "THE PATENT PLUMBAGO CRUCIBLE COMPANY" Sticker "L 96"flagstaff hill, warrnambool, graphite crucible, plumbago crucible, morgan's crucible company, loch ard, morgan potteries, crucible, fluxing pot, nested crucibles, heat proof container, metal worker, maritime museum, shipwreck coast, flagstaff hill maritime village, great ocean road, loch line, morgans crucible company, flagstaff hill maritime museum and village, fluxing pots, morgan’s patent, morgan brothers, patent plumbago crucible co, battersea works, london, loch ard gorge, port campbell -
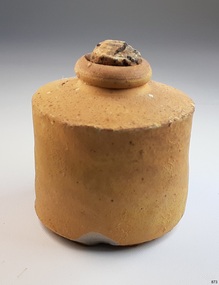 Flagstaff Hill Maritime Museum and Village
Container - Ink Bottle, Prior to 1878
This design of ink bottle was commonly referred to as a ‘penny ink well’ because it was very inexpensive to produce. It is also known as a dwarf ink bottle. Pen and ink has been in use for hand writing from about the seventh century up until the mid-20th century up until around the mid-19th century a quill pen made from a bird’s feather was used. In the 1850s the steel point pen was invented and could be manufactured on machines in large quantities. In the 1880s a successful portable fountain pen was designed, giving a smooth flowing ink and ease of use replacing the quill or dip pen. History of the Loch Ard: The Loch Ard got its name from "Loch Ard" a loch that lies to the west of Aberfoyle, and the east of Loch Lomond. It means "high lake" in Scottish Gaelic. The vessel belonged to the famous Loch Line which sailed many vessels from England to Australia. The Loch Ard was built in Glasgow by Barclay, Curle & Co. in 1873, the vessel was a three-masted square-rigged iron sailing ship that measured 79.87 meters in length, 11.58 m in width, and 7 m in depth with a gross tonnage of 1693 tons with a mainmast that measured a massive 45.7 m in height. Loch Ard made three trips to Australia and one trip to Calcutta before its fateful voyage. Loch Ard left England on March 2, 1878, under the command of 29-year-old Captain Gibbs, who was newly married. The ship was bound for Melbourne with a crew of 37, plus 17 passengers. The general cargo reflected the affluence of Melbourne at the time. Onboard were straw hats, umbrellas, perfumes, clay pipes, pianos, clocks, confectionery, linen, and candles, as well as a heavier load of railway irons, cement, lead, and copper. There were other items included that were intended for display in the Melbourne International Exhibition of 1880. The voyage to Port Phillip was long but uneventful. Then at 3 am on June 1, 1878, Captain Gibbs was expecting to see land. But the Loch Ard was running into a fog which greatly reduced visibility. Captain Gibbs was becoming anxious as there was no sign of land or the Cape Otway lighthouse. At 4 am the fog lifted and a lookout aloft announced that he could see breakers. The sheer cliffs of Victoria's west coast came into view, and Captain Gibbs realised that the ship was much closer to them than expected. He ordered as much sail to be set as time would permit and then attempted to steer the vessel out to sea. On coming head-on into the wind, the ship lost momentum, the sails fell limp and Loch Ard's bow swung back towards land. Gibbs then ordered the anchors to be released in an attempt to hold their position. The anchors sank some 50 fathoms - but did not hold. By this time the ship was among the breakers and the tall cliffs of Mutton Bird Island rose behind. Just half a mile from the coast, the ship's bow was suddenly pulled around by the anchor. The captain tried to tack out to sea, but the ship struck a reef at the base of Mutton Bird Island, near Port Campbell. Waves subsequently broke over the ship and the top deck became loosened from the hull. The masts and rigging came crashing down knocking passengers and crew overboard. When a lifeboat was finally launched, it crashed into the side of Loch Ard and capsized. Tom Pearce, who had launched the boat, managed to cling to its overturned hull and shelter beneath it. He drifted out to sea and then on the flood tide came into what is now known as Loch Ard Gorge. He swam to shore, bruised and dazed, and found a cave in which to shelter. Some of the crew stayed below deck to shelter from the falling rigging but drowned when the ship slipped off the reef into deeper water. Eva Carmichael a passenger had raced onto the deck to find out what was happening only to be confronted by towering cliffs looming above the stricken ship. In all the chaos, Captain Gibbs grabbed Eva and said, "If you are saved Eva, let my dear wife know that I died like a sailor". That was the last Eva Carmichael saw of the captain. She was swept off the ship by a huge wave. Eva saw Tom Pearce on a small rocky beach and yelled to attract his attention. He dived in and swam to the exhausted woman and dragged her to shore. He took her to the cave and broke the open case of brandy that had washed up on the beach. He opened a bottle to revive the unconscious woman. A few hours later Tom scaled a cliff in search of help. He followed hoof prints and came by chance upon two men from nearby Glenample Station three and a half miles away. In a complete state of exhaustion, he told the men of the tragedy. Tom then returned to the gorge while the two men rode back to the station to get help. By the time they reached Loch Ard Gorge, it was cold and dark. The two shipwreck survivors were taken to Glenample Station to recover. Eva stayed at the station for six weeks before returning to Ireland by steamship. In Melbourne, Tom Pearce received a hero's welcome. He was presented with the first gold medal of the Royal Humane Society of Victoria and a £1000 cheque from the Victorian Government. Concerts were performed to honour the young man's bravery and to raise money for those who lost families in the disaster. Of the 54 crew members and passengers on board, only two survived: the apprentice, Tom Pearce, and the young woman passenger, Eva Carmichael, who lost her family in the tragedy. Ten days after the Loch Ard tragedy, salvage rights to the wreck were sold at auction for £2,120. Cargo valued at £3,000 was salvaged and placed on the beach, but most washed back into the sea when another storm developed. The wreck of Loch Ard still lies at the base of Mutton Bird Island. Much of the cargo has now been salvaged and some items were washed up into Loch Ard Gorge. Cargo and artefact's have also been illegally salvaged over many years before protective legislation was introduced in March 1982. One of the most unlikely pieces of cargo to have survived the shipwreck was a Minton majolica peacock- one of only nine in the world. The peacock was destined for the Melbourne 1880 International Exhibition. It had been well packed, which gave it adequate protection during the violent storm. Today the Minton peacock can be seen at the Flagstaff Hill Maritime Museum in Warrnambool. From Australia's most dramatic shipwreck it has now become Australia's most valuable shipwreck artefact and is one of very few 'objects' on the Victorian State Heritage Register.This ink bottle is historically significant as it represents methods of hand written communication that were still common up until the mid-20th century, when fountain pens and ballpoint pens took over in popularity and convenience. The shipwreck of the Loch Ard is of significance for Victoria and is registered on the Victorian Heritage Register ( S 417). Flagstaff Hill has a varied collection of artefact's from Loch Ard and its collection is significant for being one of the largest accumulation of artefact's from this notable Victorian shipwreck of which the subject items are a small part. The collection's objects give us a snapshot of how we can interpret the story of this tragic event. The collection is also archaeologically significant as it represents aspects of Victoria's shipping history that allows us to interpret Victoria's social and historical themes of the time. Through is associated with the worst and best-known shipwreck in Victoria's history.Stoneware penny ink bottle; ironstone salt-glazed stoneware, cylindrical shape with small mouth and squat neck, broad shoulders, brown colour. Bottle still has cork in neck. Dark encrustations on body and base.Sticker "L/62"flagstaff hill, warrnambool, flagstaff hill maritime museum, shipwreck coast, flagstaff hill maritime village, great ocean road, loch line, loch ard, penny ink well, writing equipment, domestic, stoneware, clay, ceramic, pottery, ink well, inkwell, ink bottle, dip pen, ink, hand writing, business, vintage, dwarf ink -
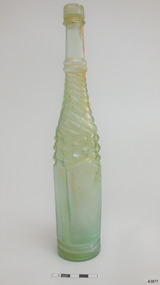 Flagstaff Hill Maritime Museum and Village
Container - Bottle, 1870s-1910s
This clear, green tinged, Half Whirley (or Whirly) salad oil bottle has been handmade by a glassblower from 1870s-1910s. A bottle with such elaborate decoration would have been sought after as there was no need to decant the sauce into another jug or bottle to make it acceptable for table service. It is possible that this bottle was recovered from the Loch Ard, wrecked in 1878. A diver found the bottle on a shipwreck in the coastal waters of Victoria about 100 years from when it was made. The diver who found this bottle has recovered objects from several different shipwrecks between the late 1950s and early 1970s. A sizeable proportion of those objects was from the wreck of the famous clipper ship Loch Ard. This salad oil bottle may very well have been amongst that ship’s cargo. It is part of the John Chance Collection. A paper titled ‘Glass Bottles from the Loch Ard Shipwreck (1878): A Preliminary Study’ by Iain Stuart, (published in Australian Historical Archaeology, 9, 1991) included a study of twelve salad oil bottles from the wreck of the Loch Ard. The bottles were of this same Half Whirley design (half meaning that it was Whirley on the upper half but not on the lower half of the body), as well as the same colour and size. A diagram of one of these twelve bottles matches the bottle in our collection. The paper mentions that eleven of the twelve bottles have a number on their base, just as this one has. It is estimated that foreign and salad oil bottles totalled four percent of all of the bottles carried as cargo on the ship. The Half Whirley bottle has side seams from below the lip to the base, indicating that the bottle was made in a two-piece mould that included the heel, body, shoulder and neck. The fancy ‘whirly’ twist pattern and panelled sides would have been cut into the mould’s inner surface. The uneven thickness of the ridge around the base comes from adding a separately moulded and embossed base after the bottle was removed from the mould. The applied finish (mouth and lip) was also added to the bottle. The elongated bubbles in the glass are evidence of the glass being mouth blown into the mould, thus forming the shape and pattern from the inside shape of the mould. The bottle probably had a glass stopper with a round top and wedge-shaped shank with a ground surface, allowing the bottle to be re-sealed. The ring between upper and lower lip allows the closure to be sealed and anchored. The embossed numbers are either “133” or “833” and may represent a particular bottle pattern, manufacturer or filler. Although the bottle is not currently linked to a particular shipwreck, it is recognised as being historically significant as an example of bottles imported for use in Colonial Victoria in the mid-to-late 19th century. This whirley salad oil bottle is matches the whirley salad oil bottles recovered from the Loch Ard in the 1990s, adding depth of interpretation to the array of salvaged Loch Ard artefacts in Flagstaff Hill’s collection. The salad oil bottle is an example of the type of food condiment containers that were used in Victoria’s early days. The bottle is also significant as it was recovered by John Chance, a diver in Victoria’s coastal waters in the late 1960s to early 1970s. Items that come from several wrecks, including the Loch Ard, have since been donated to the Flagstaff Hill Maritime Village’s museum collection by his family, illustrating this item’s level of historical value. Bottle; glass Half Whirley salad oil bottle, green-tinged, with some opalescence. Handmade, elaborately decorated bottle with round neck and base, and five-sided body. Applied double lip; straight upper, flared lower. The lower neck and shoulder have twisted spiral whirley patterns in the glass. The body tapers slightly inwards towards the base. It has five plain panels, one wider than the others. Side seams run from below the lip to the heel. The heel of the bottle is uneven in width, height and density where it joins the body of the bottle. The base is not level. Embossed characters on base. Glass has elongated bubbles towards the base and orange-brown sediment inside, on one side. Embossed "133" or “833” (the first character may be an “8”) flagstaff hill, warrnambool, flagstaff hill maritime museum, maritime museum, shipwreck coast, flagstaff hill maritime village, great ocean road, shipwreck artefact, john chance, glass bottle, antique bottle, handmade, mouth blown, blown bottle, 19th century bottle, collectable, bottle, green glass, tinged green, two piece mould, food bottle, oil bottle, salad oil bottle, whirley, whirly, half whirley, condiment bottle -
 Flagstaff Hill Maritime Museum and Village
Vehicle - Furphy Water Cart, J. Furphy & Sons, c. 1942
... significance as it represents a famous Australian time-saving ...This horse-drawn, two-wheeled cart with a tank, is known as a Furphy Farm Water Cart that was made in Shepparton, northern Victoria, c. 1942. John Furphy (1842-1920) was born in Moonee Ponds, in 1842 to Irish immigrant parents and subsequently raised in the Yarra Valley before the family moved to Kyneton in central Victoria, where he completed an apprenticeship with the firm Hutcheson and Walker. Murphy began operations of his own at a site on Piper Street in Kyneton in 1864. He relocated for a business opportunity and founded the first blacksmiths and wheelwrights shop in the newly surveyed town of Shepparton in 1873. Furphy invented many farming tools and machines including a patented grain-stripper, and won awards at the 1888-89 Melbourne International Exhibition. His most famous invention is the Furphy Farm Water Cart, designed in the 1880s, at a time when water for most households and farms was carted on wagons in wooden barrels. The Furphy’s water cart is a single item that combines a water metal tank and a cart. The design of the cart was simple yet effective, and became popular very quickly and established itself as a vital piece of farming equipment. The water cart has had a number of words cast into its ends over many years. References to the foundry’s location in Shepparton, as well as advertising of other products also manufactured by J. Furphy & Sons were present on the ends. However, the most significant set of words to feature on the tank, was a poem encouraging continual improvement: ‘Good Better Best, Never Let it Rest, Until your Good is Better, And your Better Best’. During The Great War (1914-1918), the water cart was used by the Australian militarily at a large AIF (Australian Imperial Force) camp in Broadmeadows (Melbourne) where thousands of men were camped for months, before being transported aboard. Furphy Water Carts provided water to the troops, and were usually placed near the camp latrines, which was one of the few places the troops could share gossip and tall tales away from the prying eyes and ears of their officers. The water cart drivers were also notorious sources of information, despite most of their news being hearsay, or totally unreliable. By the time the men of the AIF were in engaged in combat on the Gallipoli Peninsula and the Western Front, the carts used for water supply had no markings and became simply referred to as Furphys. This owed as much to the coining of the term ‘Furphy’, Australian slang for suspect information or rumour. After a number of decades as principally a soldier’s word, 'Furphy' entered the broader Australian vernacular and was used mainly by the political class until recently when the term was taken up by a Australian brewer as a beer brand. This Furphy Water Cart was purchased by Friends of Flagstaff Hill in 2014. The support of local individuals, organisations and businesses enabled its restoration and later its installation alongside the existing late-19th century water pipe stand and 1940s hand pump The Furphy Farm Water Cart is of historical significance as it represents a famous Australian time-saving and energy-saving invention of the 1880s, replacing the labour intensive activity of collecting and dispensing water from barrels and casks on the back of carts. The water cart’s connection with manufacturing companies J. Furphy & Sons and Furphy Foundry are significant for being early Australian businesses that are still in operation today. Furphy carts are of military significance for the role they played during The Great War (1914-1918) in Australian army camps, and theatres of war in Europe and the Middle East, to supply the AIF troops with fresh water. A wooden framed, two-wheeled, horse-drawn cart, fitted with a horizontally mounted, cylindrical metal tank. The tank is made of rolled, sheet steel with a riveted seam, and cast iron ends with cast iron ends. The spoked metal wheels have fitted flat iron tyres and metal hubs. A metal pipe is joined to the outlet. The tank is silver coloured, the ends, wheels and trims are crimson, and the script lettering on tank sides is black. There are inscriptions on the tank, ends, and hubs. The water tank was made in 1942 in Shepparton, Australia, by J. Furphy & Sons and has a capacity of 180 gallons (848 litres). Hub perimeter, embossed “J. FURPHY & SONS” “KEEP THE / BOLTS TIGHT” Hub centre embossed [indecipherable] Tank, each side, painted “J. FURPHY & SONS / Makers / SHEPPARTON” Tank ends, embossed – “FURPHY’S FARM WATER CART” “BORN ABOUT 1880 – STILL ‘GOING STRONG’ 1942” “j. FURPHY & SONS / MAKERS / SHEPPARTON - VIC “ “S - - - - - L MANUFACTURERS” [SPECIAL] “SPIKE ROLLERS” “SINGLE TREES” “PLOUGH WHEELS” “IRON CASTINGS” “LAND GRADERS” “STEEL DELVERS” “CAST IRON PIG” “CHAIN YOKES” “GOOD – BETTER – BEST / NEVER LET IT REST / TILL YOUR GOOD IS BETTER / AND YOUR BETTER – BEST” Image [Stork carrying a baby] above shorthand, transcribed "Produce and populate or perish" Image [Furphy Pig Feeder] beside ‘Cast Iron Pig’ Shorthand, transcribed “"Water is the gift of God but beer and whiskey are concoctions of the Devil, come and have a drink of water"warrnambool, flagstaff hill maritime museum, water cart, furphy cart, furphy tank, furphy farm water cart, furphy, john furphy, john furphy & sons, furphy foundry, kyneton, shepparton, mobile water tank, jinker, hutchinson & walker, blacksmith, farm equipment, implement maker, tool maker, horse drawn, stork and baby, good, better, best, barrel, tank, first world war, wwi, eastern front, gallipoli, j furphy & sons -
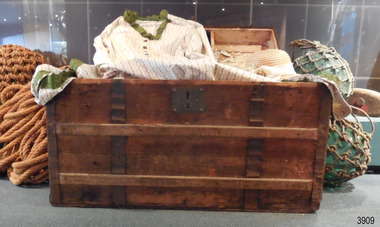 Flagstaff Hill Maritime Museum and Village
Functional object - Trunk, late-19th to mid-20th century
Trunk is made strong for long journeys and rough use. Tray compartments would have been fitted inside the lid for storage of smaller items such as hats, umbrellas and underclothing. The illustration pasted inside the lid is similar to those shown in women's fashion journals of the 1880s and 1890s. A similar trunk was found in the catalogue of Anthony Hordern & Sons, a large and famous late 19th to mid 20th century retailer in Sydney,.This trunk is an example of the typical travel luggage of people migrating to the Colony of Australia in the late 19th century.Wooden cabin trunk, rectangular, brown in colour. Lid has arched top, front has a strong padlock, sides have leather strap handles. Corners and edges are reinforced with iron, iron bands and extra wooden slats. Lid is divided into tray compartments. A print of a female in 19th century costume is attached to the inside the lid in one compartment. flagstaff hil, warrnambool, flagstaff hill maritime museum, maritime museum, shipwreck coast, flagstaff hill maritime village, great ocean road, trunk, cabin trunk, travel trunk, cargo, storage, women's fashion, late 19th century fashion, travel luggage, travel goods -
 Flagstaff Hill Maritime Museum and Village
Tool - Draw knife, C Johnson (Christopher Johnson), 1855-1879
A draw knife is a hand tool that has a long straight blade between two handles. As implied by its name. it is drawn like a knife across the wood. It is used to prepare the timber for the next step of the process, removing loose wood and bark and giving a start to making the wood into a round or cylindrical shape. Then a finer smoother finish is given with a spokeshave, which has a shorter, curved blade. A draw knife could be used for the wooden spokes for cart, wagon and carriage wheels as well as for ladder staves and ship wheels. Features of a good draw knife include tight handles, a blade with plenty of metal to it and a blade length of 20 to 24 centimetres. This draw knife was likely made at least 150 years ago by C Johnson of Sheffield, who used the Trade Mark “C.J.” within a flag. Christopher Johnson began work as a cutler, making knives, pocket knives and tableware in his works at Howard Street in Sheffield. In the book ‘Hand-Saw Makers of Britain by Schaeffer and McConnel, Johnson is listed in 1855 as a saw maker. A later reference has the business name of Johnson & Company, Sheffield in 1879-1882. Australia was one of the company’s markets. The company continued until its closure in 1955.This draw knife is significant for being made in Sheffield, a location famous for steel and silver manufacturers. It is significant because of its age, being made no later than 1879, which is the time period of our maritime Village. It is a tool most suitable for the blacksmith's or a ship' smith's workshop for making spokes for the wheels of wagons and carts, and for making ship's wheels.. It is also significant for being made by C Johnson, who was well known for his good workmanship. Draw knife; flat cast steel fixed blade with rotating wooden handles each end. Round bulbous handles have two parallel scored lines around the end furthest from the blade and a brass collar between the handle and blade. A logo and inscription are cast into the centre front of the blade. Made by C Johnson. of Sheffield.Cast into steel blade: Sideways Image “C.J.” within {flag}, “JOHNSON / CAST STEEL”flagstaff hill, warrnambool, maritime village, maritime museum, shipwreck coast, great ocean road, spokes, wagon maker, blacksmith, cart maker, cart wheel maker, blacksmith tool, wagon wheel, c johnson, sheffield, wheelright, craftsman, woodwork, carriage wheel, ship wheels, shipwright, wooden spokes, ladder staves, draw knife -
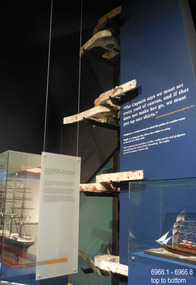 Flagstaff Hill Maritime Museum and Village
Equipment - Rudder Pintles and Gudgeons, Alexander Hall and Son, ca. 1855
This set of pairs of pintles and gudgeons was recovered from the wreck of the sailing ship Schomberg and was part of its rudder steering system. A reconstruction that includes four pairs is currently on display at Flagstaff Hill. The rudder installation of the Schomberg was almost seven metres tall. A pintle and gudgeon pair is a mechanical fitting that works like a pair of door hinges. One of the uses for this type of fitting is for ships’ rudders. On a ship, one or several gudgeons would be attached to the vertical rudder stempost on the rear of the ship’s hull. On the ship's rudder, an equal number of pintles would be fitted onto it. The rudder assembly would then fit down into the gudgeons on the ship and would be connected to its steering mechanism, allowing it to be moved from side to side and steer the vessel. The SCHOMBERG- The three-masted clipper ship Schomberg was built in 1855 by Alexander Hall and Co in Aberdeen, Scotland, for James Baines' famous Black Ball line. It measured 288 feet (88 meters) in length, with a beam of 45 feet (14 meters), a depth of 29.5 feet (8.99 meters) and 2,284 tons. The mainmast was 210 feet (64 meters) high and the ship carried 3.3 acres of sail. The wooden vessel was constructed with three skins; one planked fore and aft, and two diagonally planked. All skins were fastened together with screw-threaded trunnels (wooden rails). The Schomberg was one of only three clippers wrecked in Victorian waters that operated the England-to-Australia run. It was built to outrun Donald MacKay’s two American-built ships, the Empress of the Sea and the Lightning. It was hoped that Schomberg would make Liverpool to Melbourne voyage in sixty days, setting a record for the voyage. The Schomberg sailed from Liverpool on 6 October 1855 on her maiden voyage, under the command of Captain James Forbes. Her general cargo for Australia included jewellery, spirits, machinery, and 2,000 tons of iron rails and equipment for building the Melbourne to Geelong Railway and a bridge over the Yarra from Melbourne to Hawthorn, and17,000 letters and 31,800 newspapers. She also carried a cow for fresh milk, pens for fowls and pigs, plus 90,000 gallons of water for washing and drinking on board. There were approximately 473 passengers, including migrants for Australia, and a crew of 105. Light winds encountered at the equator dashed the expectations of a record-breaking voyage. On Christmas day the ship sighted Moonlight Head in southwest Victoria and even though there was a deadly combination of wind, currents and unmarked sand spits, the vessel continued on. Then the next day, December 26th 1855, the huge ship gently ran aground on a spit that juts into Newfield Bay, east of Curdies Inlet and the present town of Peterborough. Fortunately, the coastal trader, SS Queen, was nearby and managed to save all passengers and crew. In 1975 Flagstaff Hill’s former Director Peter Ronald and the team of divers recovered many objects and artefacts from the wreck of the Schomberg such as the ship’s fittings, equipment and personal effects including a diamond hidden for years in a communion set. This set of pintles and gudgeons is an example of steering equipment used on ships over 150 years ago, equipment that is still in use in today's shipping industry as well as many other everyday hardware applications.. The equipment is significant for its association with the ill-fated vessel Schomberg, which was wrecked in the local water in 1855 on its maiden voyage. The ship was built for speed and luxury, to sail on journeys with passengers, including migrants, travelling from Liverpool to Melbourne.Pintles and gudgeons, six pairs, plus one single pintle, from the wreck of the SCHOMBERG. Cast iron horse-shoe-shaped fittings with tapered ends. each with metal bars between the long sides. One piece of each pair has a round hollow cylinder and the other has a round solid shank. The single pintle has a tall shank with a pintle hook through it. Some pieces have remnants of grey paint.flagstaff hill, warrnambool, maritime village, maritime museum, shipwreck coast, great ocean road, schomberg, shipwreck, pintles, gudgeons, ship's rudder, ship's steering, clipper ship, james bain, black ball line, alexander hall and co., capt. james bully forbes, rudder pintles and gudgeons, rudder steering, pintles and braces, immigrant ship, maiden voyage, peterborough, 1855, marine technology -
 Bendigo Historical Society Inc.
Book - HISTORICAL GUIDE TO BENDIGO
Five copies of ' The Royal Historical Society of Victoria Bendigo Branch Historical Guide to Bendigo. Including Self Tours of Bendigo's Famous Goldfields' .Cambridge Press, Bendigo.' maps, photos, illustrations. Three copies do not contain maps, however, these three copies have number stickers on the bott left front ccover, 0064.2 PAR, 0064.3 PAR, 0064.4 PAR.bendigo, history, gold mining, book, books, bendigo, bendigo history, history, gold mining, mines, the royal historical society of victoria bendigo branch, victoria, goldfields, victorian history, australian history -
 Bendigo Historical Society Inc.
Book - HISTORICAL GUIDE TO BENDIGO
Five copies of 'The Royal Historical Society of Victoria Bendigo Branch Historical Guide to Bendigo. Including Self Tours of Bendigo's Famous Goldfields.' Revised Edition. Printed by Cambridge Press, Bendigo 1968. photos, maps, illustrations. Two copies only have WITH FREE MAP stamped on the front cover.bendigo, history, gold mining, book, books, bendigo, history, royal historical society of victoria bendigo branch, gold, goldfields, victoria, victorian history, gold mines, gold, australian history, gold discoveries, mining. sticker bottom left front cover of two copies only 0064.5 par. 0064.6 par -
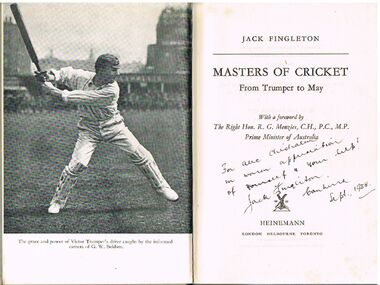 Bendigo Historical Society Inc.
Book - ALEC H CHISHOLM COLLECTION: BOOK ''MASTERS OF CRICKET'' BY JACK FINGLETON
Book. ALEC H CHISHOLM COLLECTION. 260 page hardcover book on famous cricketers from Victor Trumper to Peter May. Authored by Jack Fingleton and illustrated with 18 B & W photos. Foreward by the Rt. Hon. R. G. Menzies, P.M. of Australia. Published in 1958 by Heinemann Ltd and printed by Billing & Sons Ltd, Guildford and London. Catalogue sticker ''2197 FIN'' on spine. Handwritten in ink on title page ''For Alec Chisholm in warm appreciation of yourself and help Jack Fingleton Canberra Sept 1958''.Jack Fingletonbooks, collections, sport, alec h chisholm collection, jack fingleton, cricket, cricketers