Showing 147 items
matching bridge mall
-
 Bendigo Historical Society Inc.
Document - COHN BROTHERS COLLECTION: SPECIFICATIONS AND DESIGNS NEON SIGNS
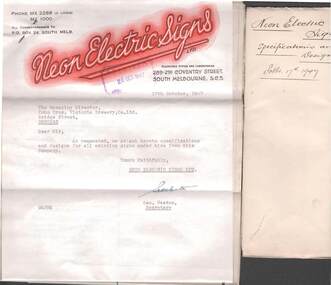
Specifications and Designs of all existing neon signs pinned together and contained within manilla envelope [e] captioned in handwriting 'Neon Electric Signs, specifications and designs. Covering letter enclosed dated 17th Oct 1947 addressed to the Managing Director , Cohn Bros Victoria Brewery, Bridge St Bendigo pinned together with drawing paper designs of neon signs located on various freehold properties. A, Design specifications [Six O'clock Lager] of Mr Marowa above verandah at Ultima. B. Six O Clock Lager, R Veal Confectioner, 5 Alley St Ironbark. C . Six O'Clock Lager, Webb Premises, Pall Mall Bendigo. D. Six O'Clock Lager at Harcourt, Mr J Ely.bendigo, industry, cohn bros brewery -
 Bendigo Historical Society Inc.
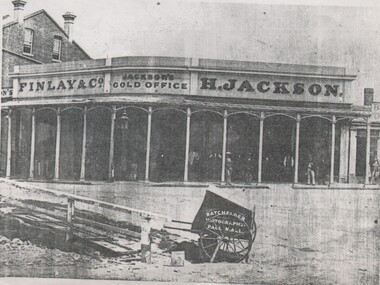
Photograph - HENRY JACKSON, GOLD BUYER OF VIEW POINT, CHARING CROSS, 1861
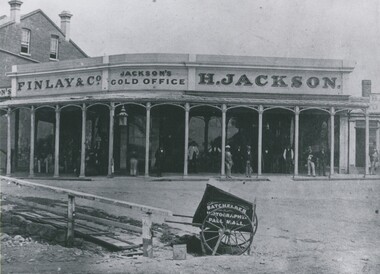
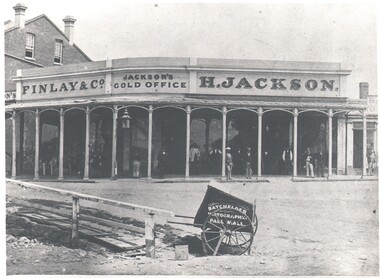
Black and white photograph. Single storey building with verandah. Two storey brick building at L. At least 12 adult males standing under verandah. L foreground wooden bridge / walkway. Photographer's car CF. In image on building 'Finlay & Co/Jackson's Gold Office, H Jackson'. On cart in image 'Photographer, Pall Mall'. Inclusion in envelope - typewritten is 'Henry Jackson, gold buyer of View Point, Charing Cross where Aussie Disposals are now operating. On the right is the first building of the Bank of New South Wales. The railing marked where the creek then meandered. Photograph by Batchelder, taken in 1861. (Bendigo Historical Society Inc.) History of object James Lerk 28.2.2000 Batchelder photo (copy) 1861, View Point. See Mosaic 1228 for further information.buildings, commercial, henry jackson, gold buyer -
 Bendigo Historical Society Inc.
Photograph - BRIDGE STREET: SANDHURST, 1861
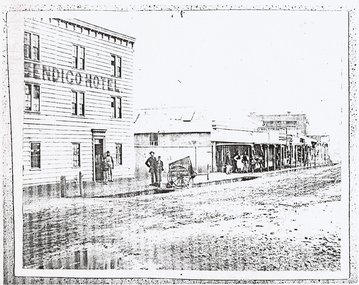
... PLACE Streetscape bridge street Batchelder, Pall Mall Copy ...Copy of black and white photo: Bridge Street streetscape near site of the present Chinese Museum. Showing Bendigo Hotel at left,. 'Crossingham & Goodman, Saddlers ' ' J. Holdsworth', 'Glass and Chines Warehouse'. 'Batchelder, Photographer, Pall Mall' handcart in foreground. 3 storey weatherboard building with 3 males at door, 2 males and photographers cart in front of fence. Row of single storey buildings with verandahs, some with business signs. 2 storey building at back. Deep gutters with foot bridges over. On back in grey lead '12' Note: Batchelder and his assistant are standing at the hardcart' ( James Lerk 22.9.2000 }Batchelder, Pall Mallplace, streetscape, bridge street -
 Bendigo Historical Society Inc.
Photograph - BENDIGO HOTEL C 1861, 1861 ?
Black and white photocopy: 2 storey wooden hotel structure 'Bendigo Hotel',286 Bridge Street, Bendigo. Photographers cart 'Batchelders Photographer Pall Mall'. Groups of people on street scene. Shop signs 'glass and china warehouse' on 2 storey building. RHS 'J. Holdsworth' on verandah roof.Batchelder Photographer, Pall Mallorganization, business, bendigo hotel -
 Bendigo Historical Society Inc.
Photograph - BASIL MILLER COLLECTION: CHARING CROSS AND BRIDGE WORKS
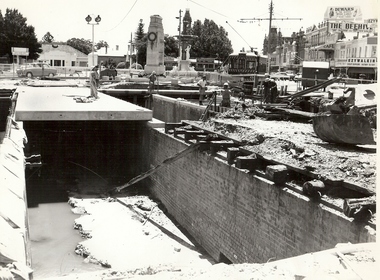
Black and white photo of Charing Cross showing bridge works over creek. Two trams visible, Burnie 'Safety Car' (right) and Bogie Car (left). Baby Health Centre (extreme left), War memorial, Alexandra Fountain (centre), various Pall Mall businesses and Shamrock Hotel (top Right). '31/12/2773' written in pencil on back of photo.person, individual, basil miller -
 Bendigo Historical Society Inc.
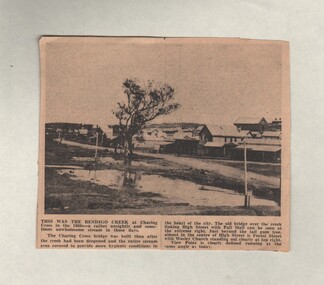
Document - BASIL MILLER COLLECTION: TRAMS - BENDIGO CREEK AT CHARING CROSS
Newspaper clipping, date unknown, with photograph taken in the 1860's. Shows old bridge over creek linking High Street and Pall Mall. Indicates location of Forest Street, and shows Wesley Church to the in centre left background.person, individual, basil miller -
 Bendigo Historical Society Inc.
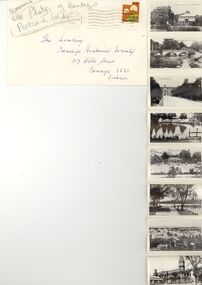
Photograph - BENDIGO PHOTOGRAPHS
Eleven Folder Views of Bendigo. 6cm X 3.5cm. Conservatoty & Gardens, Bridge near Lake, Hospital, Baths & Lake, Bowling Green, Lake Weeroona, View from Fire Tower, Town Hall, Charing Cross, Pall Mall, Post Office, Stored in 1976 dated envelope.Valentine Publishing Cobendigo, buildings, heritage buildings -
 Bendigo Historical Society Inc.
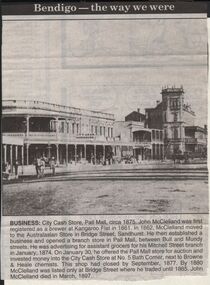
Newspaper - JENNY FOLEY COLLECTION: BUSINESS
Bendigo Advertiser "The way we were" from 1999. Business: City Cash Store, circa 1875. John McClelland was first registered as a brewer at Kangaroo Flat in 1861. In 1862, McClelland moved to the Australasian Store in Bridge Street, Sandhurst. He then established a business and opened a branch store in Pall Mall, between Bull and Mundy streets. He was advertising for assistant grocers for his Mitchell Street branch in January, 1874. On January 30, he offered the Pall Mall store for auction and invested money into the City Cash Store at No. 5 Bath Corner, next to Browne & Heale chemists. This shop had closed by September 1877. By 1880 McClelland was listed only at Bridge Street where he traded until 1885. John McClelland died in March, 1897.newspaper, bendigo advertiser, the way we were -
 Bendigo Historical Society Inc.
Photograph - HARRY BIGGS COLLECTION: HENRY JACKSON VIEW POINT, c1861
Photograph. Harry Biggs Collection. 1 photocopy of photo of Henry Jackson's Store, View Point, Sandhurst. Also included is the shop of Finlay & Co. There is also a sign Jackson's Gold Office. In the foreground is a small bridge which is going over the Bendigo Creek. Also there is a cart with the advertisement Batchelder Photographer Pall Mall. People can be vaguely seen under the verandah. See Mosaic 1228 for further information.place, building, commercial, harry biggs collection, henry jackson viewpoint -
 Bendigo Historical Society Inc.
Photograph - HARRY BIGGS COLLECTION: HENRY JACKSON, VIEW POINT, c1861 (Aug)
Photograph. Harry Biggs Collection. 1 black & white photo of Henry Jackson's Store, View Point, Sandhurst. Also included is the shop of Finlay & Co. On the verandah are people & in the foreground is the cart belonging to the photographer, Batchelder Photographer Pall Mall. Also in the foreground is a small bridge which was going over the Bendigo Creek. There is also a sign - Jackson's Gold Office. See Mosaic 1228 for further information.Batchelder Photographer Pall Mall.photograph, streetscape, sandburst, harry biggs collection, henry jackson viewpoint, jackson's gold office, finlay & co., batchelder photographer pall mall -
 Ballarat Tramway Museum
Photograph - Digital image, Paul McConville, Removal of Bridge St track, July 2023
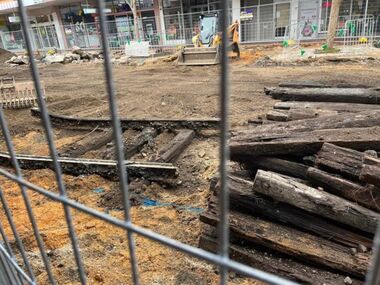
Set of five digital images of the removal of track in Bridge St Ballarat as part of the redevelopment of the area and its reopening to motor car traffic July 2023. See also August 2023 issue of Fares Please! page 15 for other photos and page 4 for a short item. Photos by Paul McConville and Richard Gilbert.Yields information about the redevelopment of Bridge St Ballarat from a Mall back to an open road.Set of five digital images showing the removal of the track in Bridge St Ballarat.tramways, ballarat, bridge st, track removal -
 Ballarat Tramway Museum
Slide - 35mm slide/s, Noel Simons, 21/11/1962 12:00:00 AM
Set of 6 transparencies taken on 21/11/1962 on Kodak mounts. 1189.1 - Bendigo No.11 at Quarry Hill terminus. Photo taken looking in along the route. Tram has destination of North Bendigo. 1189.2 - No. 21 in Pall Mall bound for North Bendigo. Tram has roof ads for Mamouney's furniture and SEC. In the background are the National Bank building, Dad and Dave's Cafe and the Beehive Buildings and the London Pharmacy. 1189.3 - No. 2 in Mitchell St, just after crossing over railway bridge. Photo taken after tram has passed photographer. Has what appears to be an SEC road works crew in the background. Has destination of Quarry Hill. 1189.4 - No. 17 climbing Mitchell St. on the start of the single track section, just before crossing the railway bridge. Has destination of Quarry Hill and the large Maples building sign in the background. 1189.5 - as for 1189.4 but after tram has passed photographer. Has an Ilford film roof ad and an SEC roof ad. Railway bridge in the background. 1189.6 - No. 21 at Charing Cross with passengers boarding. Tram has destination of North Bendigo and roof ads for SEC 'Electric Cooking' and Sandhurst Milk. In background are the buildings on the south side of High St. Also has a SEC worker in white overalls sweeping the track.Information written on in black ink and date stamped on purple ink. 1189.1 - "Birney car No. 11 in High St. Bendigo at Golden Square terminus" 1189.2 - "No. 21 in Pall Mall Bendigo near Charing Cross" 1189.3 - "No. 2 in Mitchell St. Bendigo, just after crossing bridge over railway line (Quarry Hill route)" 1189.4 - "No. 17 in Mitchell St. Bendigo, climbing the hill the bridge over the railway line. (Quarry Hill route)" 1189.5 - "No. 17 in Mitchell St., Bendigo approaching bridge over Railway line (Quarry Hill route)" 1189.6 - "No. 21 at Charing Cross, Bendigo"tramways, trams, bendigo, golden square, pall mall, mitchell st., quarry hill, tram 2, tram 11, tram 17, tram 21 -
 Ballarat Tramway Museum
Slide - 35mm slide/s - set of 4, Noel Simons, Apr. 1967
Set of 2 slides made from the Association of Railway Enthusiast Provincial Tramways film strip, possibly during April 1967. 1192.1 and 1192.3 mounted in Kodak Ready Mounts. The others in plain white mounts. Slides dated Dec. 1968. 1192.1 - No. 21 out bound to Golden Square in High St., between Wattle and Vine Streets. Photo taken after tram has passed photographer. Has a sign for "Reid's Furnituorium" in the background. 1192.2 - Bendigo No. 28 dressed up as Myers Christmas tram, passing the Post Office and Courts in Pall Mall. 1192.3 - Bendigo No. 23 at Needle Loop en route to Eaglehawk. Tram has two SEC roof ads, one "Electric Cooking" and the other "Everything fine in my all electric kitchen". 1192.4 - Bendigo scrubber parked at the end of the main depot lead, alongside the depot office buildings.Details in blue ink, date hand stamped in purple ink. 1192.1 - "No. 21 heads along High St for Golden Square between Wattle and Vine Streets." 1192.2 - "Birney No. 28 in Christmas Garb, traverses Pall Mall en route to North Bendigo". 1192.3 - "No. 23 at Needle Loop on its run to Eaglehawk". 1192.4 - "Scrubber car at Bendigo Depot".tramways, trams, north bendigo, bendigo, bridge st loop, depot, tram 21, tram 23, tram 28, tram scrubber -
 Ballarat Tramway Museum
Slide - 35mm slide/s - set of 32, Noel Simons, 25/02/1971 12:00:00 AM
Set of 31 transparencies taken on 25/2/1972 on Kodak mounts. 1201.1 - Bendigo No. 26 in Bond St. just after leaving Long Gully en route for Quarry Hill. Has Norris Supermarket in background. Has two SEC roof ads. 1201.2 - No. 26 climbing View St. from Charing Cross en route to Eaglehawk. Has ANZ bank and AMOCO service station in background. 1201.3 - as for 1201.3, but after tram has passed photographer. Has buildings west of Mackenzie St. in photograph. 1201.4 - Tram stop and centre of the road pole with two "CARS STOP BY REQUEST" signs mounted on pole at the corner of Mackenzie St. 1201.5 - same position as for 1201.3, but with No. 5 descending the street. 1201.6 - same position as for 1201.2, but with No. 5 descending the street. Photo taken after tram has passed photographer. 1201.7 - No. 7 in Nolan St. from across the park at Lake Weeroona. 1201.8 - No. 7 entering McCrae St from Nolan St. - distant view. Note "TRAM "sign on left hand side under tree and overhead in McCrae St. from former track that once was in this street. 1201.9 - No. 7 in High St. with Cathedral in background. Tram en route to North Bendigo. Note scaffolding around Cathedral main spire area. 1201.10 - No. 7 crossing Bendigo Creek bridge in High St. near Golden Square. Has a Caltex Service station in the background. 1201.11 - No. 7 at Golden Square terminus with Sunburst Fruit Juices and a Peters Ice cream delivery vans alongside. 1201.12 - as for 1201.11 but photo taken from behind tram, with the end of the rails in the photograph. 1201.13 - No. 7 and 21 in Pall Mall at Charing Cross with No. 5 in the background. Taken some distance away from the location. 1201.14 - No. 7 at Golden Square terminus, taken a short distance from the tram terminus. Shows Milk Bar on right hand side and the hotel on the left hand side. Taken from the south side of the roadway. 1201.15 - as from 1201.14 but taken from the north side of the roadway. 1201.16 - No 5 waiting at California Gully loop. Distant photo showing surrounds 1201.17 - No. 5 en route for Quarry Hill crossing No. 26 at California Gully. 1201.18 - No. 26 at Eaglehawk terminus with Eaglehawk Town Hall and Post Office in background. 1201.19 - No. 21 arriving at Charing Cross en route to North Bendigo. Has Alexandra Fountain in the background, ANZ bank RACV building, and other buildings on the north side of Pall Mall or Nolan St. 1201.20 - No. 26 en route for Quarry Hill at Charing Cross, with crew standing by front door. Has Colonial Mutual life building, Armstrong Tyre Service (Firestone) and a sign for Cohns Drinks in the background. 1201.21 - as for 1201.20 but with No. 5 en route to Eaglehawk now in photograph. 1201.22 - No. 26 at Quarry Hill terminus. 1201.23 - No. 26 at Quarry Hill terminus, view of front portion of tram only from a gate at the Bendigo cemetery. 1201.24 - Track at the end of the Quarry Hill line showing the point blades of the former "Y" terminus and the overhead for this. 1201.25 - No. 2 at the Quarry Hill terminus, looking along the former Trackwork. 1201.26 - as for 1201.25 1201.27 - number not used. 1201.28 - Golden Square terminus from some distance from the actual terminus, showing the Warning sign "TRAM" for motorists from the south. No. 7 at the terminus. 1201.29 - No. 7 passing through the Golden Square shopping centre. Numerous cars and pedestrians. Tram en route for North Bendigo. 1201.30 - No. 7 in High St. Golden Square, en route for North Bendigo. Photo taken after tram has passed photographer. 1201.31 - No. 7 in High St. just past Wattle St. with the Cathedral in the background. Tram has two SEC roof ads good side on photo, 'Everything's fine in my all electric kitchen' and 'Electrical cooking - clean, quick, economical'. 1201.32 - No. 7 in High St. nearing Wattle St. Has Cathedral in the background. Photo taken after tram has passed photographer.Information written on in black ink and date stamped on purple ink. 1201.1 - "No. 26 in Bond St just after leaving Long Gully" 1201.2 - "No. 26 climbing View St. from Charing Cross" 1201.3 - "No. 26 ascending View St. from Charing Cross (At Mackenzie St.)" 1201.4 - "View St. & Mackenzie St." 1201.5 - "No. 5 in View St. near Mackenzie St." 1201.6 - "No. 5 in View St. nearing Charing Cross." 1201.7 - "No. 7 in Nolan St. seen from Lake Weeroona Park." 1201.8 - "No. 7 entering McRae St. from Nolan St. Note "TRAM" warning sign on left. 1201.9 - "No. 7 in High St. passing Short St." 1201.10 - "No. 7 crossing Bendigo Creek bridge in High St. near Golden Square." 1201.11 - "No. 7 at Golden Square terminus" 1201.12 - "No. 7 at Golden Square terminus" 1201.13 - "No 7, 21 and 5 at Charing Cross" 1201.14 - "No. 7 at Golden Square terminus" 1201.15 - "No. 7 at Golden Square terminus" 1201.16 - "No 5 waiting at California Gully loop." 1201.17 - "Nos. 5 and 26 crossing at California Gully loop" 1201.18 - "No. 26 at Eaglehawk terminus" 1201.19 - "No. 21 arriving at Charing Cross from Golden Square" 1201.20 - "No. 26 at Charing Cross" 1201.21 - "Nos. 5 and 26 at Charing Cross." 1201.22 - "No. 26 at Quarry Hill terminus" 1201.23 - "No. 26 at Quarry Hill terminus seen through the gates of the Bendigo Cemetery." 1201.24 - "Quarry Hill terminus showing remains for former double track layout abandoned before 1964." 1201.25 - "No. 2 at Quarry Hill terminus" 1201.26 - "No. 2 at Quarry Hill terminus" 1201.28 - "The Southern approach to Golden Square with No. 7 standing at the terminus, "TRAM" warning sign on the left. 1201.29 - "No. 7 passing through Golden Square Shopping Centre" 1201.30 - "No. 7 in High St. Golden Square" 1201.31 - "No. 7 in High St. passing Wattle St." 1201.32 - "No. 7 in High St. nearing Wattle St."tramways, trams, bendigo, bond st., view st., nolan st., high st., eaglehawk, california gully, charing cross, quarry hill, trackwork, tram 2, tram 5, tram 7, tram 21, tram 26 -
 Ballarat Tramway Museum
Photograph - Illustration/s, Ballarat Views, 1950's mid
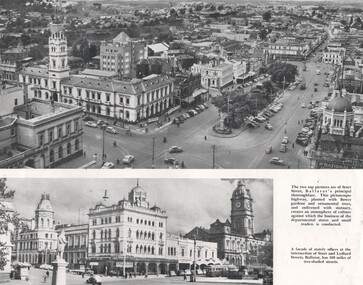
Single sheet of printed paper, collected from a magazine (p59/60) with two black and white photos of Ballarat and one colour of Bendigo. Photo 1 - 260mm long x 122mm high, photo of north east Ballarat from Town Hall, looking out to Black Hill. Photo similar to Reg. No. 102, but buildings on corner of Grenville and Bridge St has a Plume sign instead of a Mobilgas Ad. This indicates early to mid 1950's. One tram in loop in one in Bridge St. Also has a "Neptune" sign in photograph. Photo 2 - 195mm long x 75mm high - from north east corner of Sturt and Lydiard Sts looking towards Town Hall and Craig's Hotel. Photo includes SEC bogie at tram stop and the front end of bus travelling east in Sturt St. Photo 3 - 230mm long x 156mm high - colour printed photo of Pall Mall, Bendigo from west side (by Post Office), looking towards the Shamrock Hotel. Photo includes signs for "COR Motor Spirit", "Tanox Paint" and the rear of a Bendigo to Huntly bus. See item Reg. No. 102trams, tramways, ballarat, bendigo, pall mall, oil companies -
 Ballarat Tramway Museum
Newspaper, The Courier Ballarat, "Cover seal for Bridge St. tram lines", 23/02/1972 12:00:00 AM
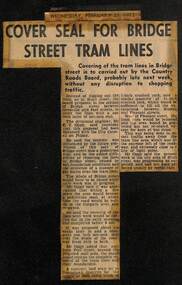
Newspaper clipping from The Courier, Ballarat, dated 23/2/1972, titled "Cover seal for Bridge St. tram lines". Reports on the proposal of the CRB to cover the tram lines in Bridge St. late next week. Advises that the track would not be dug out, but covered with a hot mix seal. Quotes CRB Divisional Engineer Mr. E. Oppy. Were a number of problems in removing the lines from Bridge St., and proposal of Council to convert it to a pedestrian mall. Also noted proposal to remove lines in Sturt St. West and work was proceeding in Sturt St. track removal, tram track removal, crb, sturt st, bridge st -
 Ballarat Tramway Museum
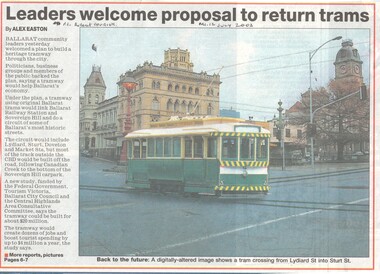
Newspaper, The Courier Ballarat, "Leaders welcome proposal to return trams", "Romantic image captures the city's imagination", 12/07/2002 12:00:00 AM
Set of three cuttings from The Courier, Ballarat dated Thursday 11/7/2002 regarding the reintroduction of trams to Ballarat. 2241.1 - Page 1 of The Courier, with page 1 titled "Leaders welcome proposal to return trams" with a digitally constructed image of No. 13 crossing Sturt St from Lydiard St. North. The item looks at the overall outcomes of the study and who funded it. See image No. 1. Text written by Alex Easton. 2241.2 - page 6 of The Courier, which joins with page 7 using the titled "Romantic image captures the city's imagination" reviewing reactions to the proposals from various politicians, business and community groups. Includes comments from Judy Verlin, former Mayor and impacts on traffic and parking issues. Also summarises in a Section "At a Glance" the pros and cons of the proposal. Has a photo of No. 31 at the intersection of Bridge, Victoria and Main Streets. Cartoon by Inkcinct, about the City Tramway and Sturt St redevelopment also on the page. 2241.3 - page 7 of The Courier, has Sections detailing the benefits of the proposals, inviting people to have their say and further summary information. Has a photo of Bendigo 5 in Pall Mall with destination of Eaglehawk and a photo of Christchurch No. 11 noting the economic benefits of trams in that city over the last seven years. Full Image and 2nd copy of sheets added 12-1-2016 from donation of Kathy Stanley. Second copy - Has date and page number written in under headline in ink.ballarat revival, christchurch, bendigo, ballarat city tramway -
 Ballarat Tramway Museum
Slide - 35mm slide/s - set of 13, Carolyn Dean, 24/09/1970 12:00:00 AM
Set of photographs of operations, including special tram, track work by SEC prior to the Bendigo system closing closing.Set of 13 Agfa slides, blue and white plastic base of Bendigo trams. Taken 24.9.1970 by Carolyn Dean. .1 - "5" - No. 7 at Golden Square terminus, with Golden Square Hotel in background. .2 - "6" - No. 7 passing SEC workmen replacing a broken joint, in McCrae St. Piece of rail alongside tram. .3 - "7" - No. 7 crossing No. 29 at start of double track with Hotel in background .4 - "8" - No. 29 running special at depot junction. .5 - "9" - No. 29 turning from Nolan into Bridge St. .6 - "10" - ditto, passing old loop .7 - "12" - ditto, turning from Caledonia into Thunder St .8 - "13" - ditto, southbound in Pall Mall near Bull St. .9 - "16" - ditto, crossing bridge into tram depot, with tram depot in background. .10 - "17" - ditto, entering depot. .11 - "18" - No. 26 entering the Eaglehawk terminus, High St. with Leo A Hughes photographer shop in background. .12 - "19" - No. 26 at terminus, showing "Quarry Hill", with High St in the background. .13 - "21" - No. 26 after leaving terminus, travelling in High St with shops n the background.Each slide has in corner a number in pencil and the first one the date of "24-9-70".tramways, trams, bendigo, tram 7, tram 29, tram 26 -
 Ballarat Tramway Museum
Slide - 35mm slide/s - set of 11, Eldon Hogan, mid 1960's to early 1970's
Set of 11 Agfa Plastic mounted slides - from the Eldon Hogan collection - possibly on an ARE Bendigo tours - mid 1960's (black destination rolls) and late 1960's or early 1970's. Scanned on the Canon scanner at the depot 15/12/1971 at the time of the installation of the scanner. .1 - front of depot -26, 19, 24, 29 and 28 amongst those present. .2 - ditto .3 - 24 departing depot .4 - 26 at Eaglehawk .5 - No. 5 turning from Pall Mall into Mitchell St with town hall in background. .6 - No. 5 using crossover in Mitchell St - with Maples, CBA Bank, Astor, Homecrafts, Roger David shops or signs in the background. .7 - ditto .8 - bogie car at Charing Cross with the Fountain Plaza shopping centre in the background. .9 - Charing Cross, with the fountain in the foreground, The Beehive and three trams in the view. .10 - No. 24 outbound, Golden Square line crossing the bridge over the creek, adjacent to the discovery of Gold Monument. .11 - ditto. tramways, trams, bendigo, eaglehawk, depot, charing cross, golden square, tram 26, tram 19, tram 24, tram 29, tram 28, tram 26, tram 5 -
 Ballarat Tramway Museum
Photograph - Black & White Photograph/s - set of 7, Keith Kings, 20/10/1962 12:00:00 AM
Black and White print contained within the Wal Jack Bendigo and Geelong Album, see Reg Item 5003 for more details. Set of seven images of the ARHS Special tour of Bendigo on 20-10-1962. .1 - Trams 28, 30, 21, 7 and 19 in Pall Mall .2 - 18, 26, 29, 11 and 5 at the Bridge St loop on the North Bendigo line. .3 - 28, 30, 21, 7, 19 on "down" line and 18, 26, 29, 11, 5 and service car 3 on "up" line, View St Opposite Oval .4 - 28, 30, 21, 7, and 19 at Eaglehawk .5 - 28, 30, 21 in North Bendigo siding and 7 and 9 in Thunder St - photo taken in Thunder St. .6 - ditto photo taking from vacant land on the south side of the terminus, along with No. 6 the service tram. .7 - 28, 30, 21, 7, 19 in View St with Goodyear and Caltex signs in the photo and the Commercial Banking Company of Australia building in the background. Most printed on Ilford paper.On rear in ink. .1 - "28, 30, 21, 7, 19 Pall Mall 20-10-62" .2 - "Bendigo ARHS Convoy "A" on Bridge St loop, Nos. 18, 26, 29, 11, 5 20/10/62" with Keith Kings copy right stamp printed in top right hand corner and number "N(y)(12)" written in. .3 - "18, 26, 29, 11, 5 and service car 3 on "up" line, 28, 30, 21, 7, 19 on "down" View St 20-8-62" .4 - "28, 30, 21, 7, and 19 Eaglehawk 20-10-62" .5 - "19, 7 in, 28, 30, 21 in spur siding Nth Bendigo 20/10/62" .6 - "28, 30, 21, 7, 19 plus No. 6 service car Nth B/go 20/10/62" .7 - "Bendigo ARHS Convoy "B" - 28, 30, 21, 7, 19 Charing Cross, 20/10/62" with Keith Kings copy right stamp printed in top right hand corner and number "N(y)(14)" written in.trams, tramways, bendigo, arhs, tours, eaglehawk, north bendigo, view st, tram 28, tram 30, tram 21, tram 7, tram 19, tram 6, tram 18, tram 26, tram 29, tram 11, tram 3 -
 Melbourne Tram Museum
Album - Charles Craig - part 1 of 2, 1950s to 1970s
Photo - see pdf file for further information. Number Brief Description CC1 S178 at Elsternwick level crossing track works CC2 Building East Preston Depot 1955 CC3 Camberwell depot – post WW2 – lots of trams and a black cat CC4 W2 584 and SW6 958 northbound – Chapel St and Brighton Road CC5 W2 357 – southbound, Chapel St Brighton Road CC6 Pascoe Vale Road, Raceday working – note the signal CC7 The Preston Workshops - The Argus, post WW2, 223, 647 et al CC8 923 or is it 922 being built at Preston – The Argus photo - CC8A 832 being positioned onto trucks at Preston after an overhaul – Argus Photo – see also CC306 CC9 Footscray depot` CC10 W5 797 in St Kilda Road during track works – 1950s CC11 W2 457 at Kew Post Office CC12 Wellington Parade – W2 432, 492 and 337 – special event CC13 Swan St line up of trams – football? Or other special event – Sinclair’s bus on the right side. CC14 W2 630 being washed at a depot – The Argus photo CC15 Royal Park line at Flemington Road – W2 355 and W5 786 CC16 Nicholson St track construction from a tram cab CC17 T181 on tour at Gordon St CC18 T181 on Maribyrnong Bridge CC19 Ditto at River St just off bridge CC20 As for CC18 CC21 At Raleigh Rd CC22 T181 at Footscray depot CC23 Track construction, Nicholson, just north of Gertrude CC24 Commissioning overhead Bourke St tram 988 CC25 Queens Parade – 997 and 994 CC26 Swapping trolley wheel to skid – commissioning CC27 Track construction in Gertrude St CC28 985 in Queens Parade running special CC29 997 in Queens Parade CC30 1033 at North Fitzroy – AETA Special CC31 Bourke St at Elizabeth St – has passengers on board CC32 W6 985, 996 Queens Parade, Mk 3 bus 333 CC33 As above CC34 Showing construction at Nicholson & Gertrude – Bourke St CC35 W2 223 on Burnley temporary bridge – VR track expansion CC36 W5 823 – ditto CC37 Tram on old bridge prior to removal CC38 W2 433 on temporary bridge with new bridge beams and old track CC39 Looking down showing temporary single track – Swan St CC40 Tait train passing under tram bridge CC41 SW6 on single line – off loading CC42 W2 547 at City Road Junction CC43 City Road Jtn – 1969 – 596 and 771 CC44 City Road Jtn – 1969 – 596 and 771 (same as CC45 438 in Flinders St CC46 355 somewhere CC47 552 somewhere CC47A 364 at Preston Workshops? CC48 W2 334 on Traverser – Preston Workshops CC49 Wellington pade – large line up of trams, c1950 925, and 611 CC50 W2 493 Franklin st – advertising for Savings Certificates CC51 Possibly 551 with advertising for fund raising for Blind institute CC52 249 at Hawthorn – Riversdale Junction – with a Tally Ho and Village Fair Aux. board CC53 MMTB Postcard of 511 CC54 Wattle Park terminus with Single line warning sign CC55 Wattle Park Duplication CC56 36 at Domain Junction – 833 CC57 36 at Domain Junction CC58 36 at Domain Junction with 810 and 833 CC59 36 in Swanston by Flinders St Station CC60 36 in Spencer St at A’Beckett CC61 36 crossing Collins St CC62 36 crossing Collins St CC63 36 northbound in St Kilda Road with Shrine in background CC64 36 northbound in Swanston St at Flinders St CC65 Postcard – Ballarat 36 in Domain Road CC66 Postcard - Stampshow – Hawthorn Horse tram CC67 Postcard - Stampshow – Peace cable tram CC68 Postcard - 1041 and cable car set 1 at Preston CC69 Postcard - Colins & Elizabeth – greetings from old Melbourne CC70 Postcard - Cable car set at Preston CC71 Postcard - Twentyman’s cable cars CC72 Postcard - Nu-color-vue – horse tram 256 CC73 Cable car set – Market & Flinders CC74 Cable trams at Twentymans’ in their shed CC75 Cable tram track at Bourke & Spencer prior to removal CC76 Cable tram bogie at Preston Workshops – used as a dolly CC77 Cable trams at Twentymans’ CC78 Postcard - Valentines – Bourke looking west from Swanston CC79 Postcard - Rose 3938 – Bourke at Swanston – the Leviathan building CC80 Postcard - Valentines – Elizabeth St looking south from Collins – No. 19 CC81 Postcard - Rose P4765 – Bourke St Melbourne CC82 Postcard - Rose 4090 – cable tram passing Parliament house CC83 Postcard - Valentines – GPO Elizabeth St CC84 Interior of cable trailer with clothing on a set CC85 Elizabeth St looking north CC86 Cigarette card - Collins St No. 41- WD HO Wills CC87 Postcard - Rialto building with cable set CC88 Postcard - Valentines - Swanston at Flinders looking north CC89 CC90 Q 150 Hanna St – dated on rear CC91 176 turning – photo ex Alan Jungworth CC92 161 on Princes Bridge – minimum fare 4d sign and Inspector CC93 459 at Point Ormond CC94 158 at Gordon St – side on view CC95 X 217 in Swanston St CC96 X 217 in Swanston St with an East Brighton destination CC97 T177 CC98 T177 Peel St – no destination roll – being transferred? CC99 X1 462 in Glenhuntly Road to Point Ormond CC100 X1 462 in Glenhuntly Road to Elsternwick Rly Station CC101 X1 462 in Glenhuntly Road to Point Ormond CC102 Q 150 Hanna St CC103 190 at Camberwell Depot CC104 T182 at Footscray CC105 X1 466 and W2 at Footscray CC106 190 at Camberwell Depot CC107 X1 467 Barkly St Footscray CC108 X2 679 turning into William St from La Trobe St CC109 X2 677 Glenhuntly Road with Point Ormond Destination CC110 Postcard T180 CC111 Postcard format – X1 467 on a truck – see also CC178 CC112 Postcard format – X1 467 at Wantirna South CC113 Q200 and SW6 896 at Thornbury – has labels on rear CC114 T177, Ballarat Road – has labels on rear CC115 T178 at Point Ormond CC116 Postcard X1 465 and 466 CC117 Postcard – X2 676 CC118 Postcard – TMSV X2 217 CC119 810 on temporary bridging – 24-12-67 CC120 W2 575 – Queens Parade junction in, still temporary bridging, substation under construction CC121 Forming Queens Parade Junction base slab CC122 W2 596 prior to tramway works – all tracks still in position CC123 It’s a mass of reinforcing – bridging being formed CC124 Looking north with substation being built CC125 Looking east with some rather tight curves, Wellington St still in use CC126 SW6 958 ex Wellington St with all tracks and signal box and buildings. CC127 Victoria Pde at Gisborne looking east – at least 4 cars CC128 SW6 893? With dash canopy lights and SW6 862 and a man with a newspaper CC129 SW6 894 on the S curves, with tram in Wellington St CC130 Similar photo CC131 W2 564 turning into Wellington St – the concrete tracks are not that old CC132 W2 552 running out of Wellington St CC133 W5 732 from Fitzroy St into St Kilda Road with next iteration in position – very wonky CC134 W5 764 turning into Fitzroy St CC135 SW6 947 turning from Wellington St CC136 W2 586 running out of High St CC137 W2 500 turning into Wellington St CC138 W2 543 in Wellington St inbound CC139 L103 with St Kilda Junction destination, and a tower truck on right CC140 Workmen – new track in Queensway in use CC141 Ditto CC142 L103 in Queensway, and another car in bound CC143 Looking east along Wellington St which has been taken out of use. Also a MMTB Roller CC144 W5 824 and a W2 and all types of wobbly temporary track CC145 W2 354 to High St CC146 Sw6 947 on the S bends CC147 W2 500 looking north – tram on the S bends CC148 SW6 896 leaving the S bend CC149 W2 357 and a MMTB City bus with trees/gardens on the side CC150 W5 817 Elliot Ave – see also CC302 CC151 W2 552 – note the large trolley bridge CC152 W2 550 at depot or workshops CC153 1B truck CC154 SW2 432 CC155 W2 155 at Glenhuntly CC156 SW6 937 on AETA tour? CC157 X2 677 on Footscray service – Ballarat Rd? CC158 W2 641 – High St Kew? CC159 SW6 847 – Power St Hawthorn CC160 Simpson St – big line up CC161 W2 546 truck No. 1? CC162 W2s at Glenhuntly depot CC163 No. 15 truck under 899 CC164 206 and other junk at Preston Workshops CC165 W in Swanston St Melbourne – Rose series card CC166 Y1 613 Batman Ave?? or William St at Collins CC167 Tram plans CC168 X 217 Swanston St – see also 95 and 96 CC169 217 in Swanston St – same as 95 CC169A 192 in St Kilda Road at Princes bridge CC170 192 in St Kilda Road at Princes bridge CC171 Bendigo 3 arriving Malvern depot – being unloaded CC172 Ditto CC173 T180 at a depot CC174 X1 463 wheel set CC175 C30 – dog car side view – close up CC176 C30 dog car CC177 206 and 30 at Preston Workshops CC178 X1 467 on a truck – see CC111 also CC179 42 CC180 42 at a depot, no destination box CC181 W2 556 1A type truck CC182 Flinders St Station – Rose Series CC183 W7 1035 Spring – Nicholson St CC184 W7 1022 MMTB Post Card CC185 Adelaide 178 – has on rear – R. Lilburn 4/82 CC186 Adelaide 175 – has on rear – R. Lilburn 4/82 CC187 Y1 610 on AETA tour CC188 Y1 610 on AETA tour with large group – Point Ormond CC189 AETA display – has GH55-32 in pencil on rear CC190 AETA display – has GH55-29 in pencil on rear CC191 Y1 610 on AETA tour with large group – Point Ormond CC192 VR 53 at Footscray CC193 VR cars 40 and 34 at Elwood wash dock CC194 W7 1024 as the 1970 Christmas tram CC195 Geelong – loading a set of 22E trucks CC196 Geelong 10 and 23 running an AETA special CC197 Geelong – AETA special CC198 Geelong 7 at Junction CC199 Geelong 10, in the city CC200 Geelong 33 with Belmont destination CC201 Geelong 15 Eastern Park destination 29-3-1948 CC202 Geelong 23 at Railway Station – 29-3-1948 CC203 Geelong 23 at Railway Station – 29-3-1948 CC204 Geelong – loading a bogie tram CC205 Geelong – loading a bogie tram CC206 Geelong 40 – loaded on truck CC207 Geelong 40 – on jacks CC208 Geelong 40 on jacks – 19 behind CC209 Geelong 38 with two workers on either side CC210 – 214 Australian Historic Tramways stamp folder and set CC215 Bendigo 17 at depot – has dup JBS on rear CC216 Bendigo 20, 29 bogie and straight sill car at Charing Cross CC217 Bendigo one man bogie Pall Mall CC218 Bendigo – Bogie 23, other cars and welding truck at depot CC219 Bendigo 7 with Quarry Hill destination CC220 Bendigo 21 with Lake Weerona destination CC221 ESCo 18 Ballarat CC222 Ballarat bogie 22 on AETA special CC223 Ditto CC224 Ballarat 34 at Stones Corner – R Lilburn CC225 Ballarat 15 in Bridge St – R Lilburn CC226 Ballarat 40 at Gardens – R Lilburn CC227 Ballarat 37 running out of depot – R Lilburn CC228 Postcard – Valentines – Sturt St with loaded horse tram trailer CC229 AETA Geelong tram tour ticket – 29-3-1948 CC230 Postcard – Geelong – Valentine 2114 – T&G building CC231 Postcard – PMTT ! – High St Malvern CC232 Postcard – Empire – Glenferrie Road, Malvern at Wattletree Rd CC233 Postcard Y469, MMTB CC234 Postcard Z2 Spring St CC235 Postcard – Z1 MMTB CC236 Postcard – Stamp Show W1 431 CC237 Postcard – Stamp show B2005 CC238 Postcard – Stamp show W6 982 CC239 Postcard – Valentines 1264 – Johnstone Park with tram in distance CC240 Postcard – Rose 10711 – Swanston and Lonsdale – Hospital and W232 CC241 Postcard – Rose 4827 – Fitzroy St St Kilda W2 362 and 548 CC242 Postcard – Valentines – 939 – St Kilda War Memorial, W and a R? CC243 Postcard – Valentines – 572 – St Kilda War Memorial, W 413 and 140? CC244 Postcard – Valentines – 938 – Uper and Lower Esplanade – L 104 CC245 Postcard – St Kilda Rd at Princes Bridge Y1 and W CC246 Postcard – Biscay BG82 – W5 814 - CC247 Postcard – Biscay 796112 – Bourke St looking west CC248 Postcard – Biscay 796109 – Bourke St looking east CC249 Postcard – Biscay 2AUS58 – Z5 Bourke St CC250 Postcard – Biscay BG 249 – Swanston St CC251 Postcard – National View – St Kilda Rd – shrine and Prince Henrys W2 405 CC252 Postcard – Nu color vue – 11 ML 156 – St Kilda Rd CC253 Postcard – Nu color vue – 11 ML 153 – Swanston St CC254 Postcard – Nu Color vue – Collins St 442 CC255 Postcard – Pitt card – Adelaide – H 364 at Victoria St CC256 Postcard – SPER L/P 154 CC257 Postcard – BTMS – 550 CC258 Postcard – SPER – Brisbane 295 CC259 Adelaide 131 at Burnside – has R Lilburn on card, c1911 CC260 Adelaide 194 CC261 Adelaide 235, with two crew, The News photo CC262 Rockhampton, outside post office – has source of photo details CC263 Sydney – 2086 and 2062 arriving Circular Quay CC264 Sydney – P class – Pitt St? CC265 Sydney – 1610 at Circular Quay CC266 Brisbane 99 and 468 CC267 Sydney with bridge behind CC268 Steam tram Paramatta Park – 103 CC269 Sydney – Museum Station =- Elizabeth St CC270 Sydney – weed burner 137S at a loop Demonstrates the work of Charles Craig in photography and collection of prints.Assembled album in a black presentation folder of 270 photographs from the Charles Craig Collection - 86 sleeves - part 1 of 2. All photographs have been scanned and placed on the Museum's G drive. A list of all photographs with details where possible has been compiled. Victorian Provincial, Launceston, Hobart and Sydney tram photos have been transferred to other Museums, image files retained.melbourne, tramways, tramcars, trams, charles craig, st kilda junction, trackworks -
 Bendigo Historical Society Inc.
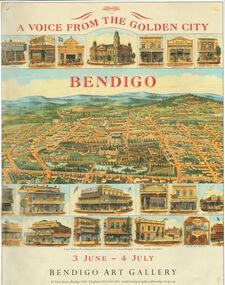
Document - BENDIGO ART GALLERY A VOICE FROM THE GOLDEN CITY EXHIBITION 2001, 1877
Chromolithograph Sandhurst in detail 1877 by Francis Williams Niven. View Point icons including George S. Bissett Draper, Clothing & Millinery, Manning & Co. Drapers, Milliners and Tailors; Pall Mall icons Bent Photographers, W. Lunn Painter and Decorator, J.B. Edwards Watchmakers, John Ingram Hatter and Lyceum Mutual Store & Co; High Street icons T.J. Connelly & Co. Ironmongers; McCrae Street icons Rea & Co Locksmiths and Gun Makers; Williamson Street icons Albert Bush Groicer and Tea Merchant; Bridge Street icons Cohn Brothers Soft Drink and Confectionery; Mitchell Street icons, MA Palk & Co Mourning Attire.Francis Williams Niven, Sandhurst.bendigo, history, mid to late 19th century bendigo -
 Melbourne Tram Museum
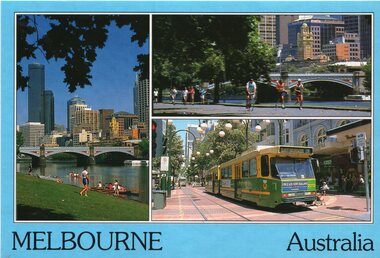
Postcard, Bartel Postcards, three photos of Melbourne scenes, early 1990's
Colour postcard 3 photo panels, blue border, divided back - Bartel Postcards: 1 - View of Melbourne over the Yarra River 2 - Princes Bridge 3 - B2 2013 in Bourke St, East Brunswick, Route 96 Back has space for name and address, stamp and a message and details of the postcard. Produced by Bartel Postcards possibly early 1990's Card No. BG318 Has "Melbourne Australia" along the bottom edge. Two copies held.trams, tramways, bourke st, mall, b class, tram 2013 -
 Melbourne Tram Museum
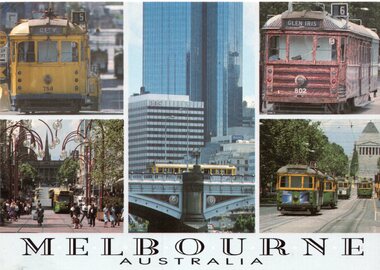
Postcard, Steve Parish Paddington Qld, Five views of Melbourne trams, late 1980's
Colour postcard 5 panel featuring Melbourne trams - SW5 758 (Route 5), 802 (Glen Iris Route 6) (both Transporting Art), Bourke St Mall and 847 in St Kilda Road with the Shrine in the background. The middle one is Princes Bridge with the City Skyline. Back has space for name and address, stamp and a message and details of the postcard. Produced by Steve Parish Postcards. Card No. PC311 and a historical note regarding trams on the back. Has "Melbourne Australia" along the bottom edge.trams, tramways, princes bridge, sw5 class, route 5, route 6, transporting art, tram 758, tram 802, tram 847 -
 Melbourne Tram Museum
Album - Robert Thomson Slide Collection, "Melbourne 14/9/91 to 21/9/91 16.11.1997 to 23.11.1997"
Photo - see pdf file for further information. Number Brief Description RT229 1997, Carlisle St, tram 129 - "Kew - Cotham Rd" - route 69 & tram 905 - "St Kilda Beach" - route 16 RT230 1997, Dandenong Rd, tram 86 - "Melbourne" - route 69 RT231 1997, Victoria Pde, tram 856 - "City Circle" - route 00 RT232 1997, Spring St, tram 909 - "City Circle" - route 00 RT233 1997, Swanston St, tram 982 - "University" - route 72 RT234 1997, Swanston St, tram 949 - "Glen Iris" - route 6 & tram 852 - "St Kilda Beach" - route 16 RT235 1997, Swanston St, tram 845 - "University" - route 16 RT236 1997, Swanston St, tram 951 - "?" - route 8 RT237 1997, Flinders St, tram 925 - "City Circle" - route 00 7 tram 2034 - "City La Trobe St" RT238 1997, Tram Defect, tram 98 RT239 1997, Flinders St Station, tram 785 - "?" - route 8 RT240 1997, Flinders St Station, tram 211 - "Moreland" - route ? RT241 Bourke St, tram 2059 - "City Spencer St"- route 87 RT242 St Georges Rd Preston, tram 1003 - "Preston" via St Georges Rd"- route 9 RT243 West Preston Terminus - tram 943 - "St Kilda Beach" - route 10 RT244 Princes Bridge , tram 950 - "City" - route 72 RT245 1997 Port Melb Ter, tram 265 - "Mont Albert" - route 109 RT246 1997 Port Melb Terminus RT247 1997 Port Melb Terminus, tram 285 - "Mont Albert" - route 109 RT248 North Balwyn Terminus, tram 244 - "City Lonsdale St" - route 48 RT249 1997 Bourke St mall, tram 2127 - "Bundoora RMIT" - route 86 RT250 1997 Bourke St mall, tram 2028 - "St Kilda Beach" - route 96 RT251 1997 Batman Ave, tram 239 - "Princes Bridge" - route 70 RT252 1997 Batman Ave Ter, tram 233 - "Wattle Park" - route 70 RT253 Princes Bridge , tram 960 - "City" - route 64 RT254 Swanston St at Flinders St, tram 776 - "Glen Iris" - route 6 & tram 809 - "Toorak" - route 8 RT255 Swanston St at Bourke St, tram 978 - "City" - route 64 RT256 Bourke St at Swanston St, tram 112 - "City" - route 86 RT257 South Melbourne Beach terminus, tram 818, - "East Coburg" - route 1 RT258 Carlisle St, tram 925 - "Kew Cotham Rd" - route 69 RT259 Acland St Terminus, tram 2018 - "East Brunswick" - route 98 RT260 St Kilda Rd Princes Bridge, "St Kilda Beach" - route 15 RT261 Batman Avenue Terminus, tram 24 "Special" & tram 22 - "Wattle park Elgar Rd" - route 70 RT262 Acland St Terminus, tram 646 - "City" - route 16 RT263 Bundoora Terminus - tram 2023 - "Bundoora" - route 86 Demonstrates the work of Robert Thomson in photography, collection and/or production of slidesAssembled album in a black presentation folder of 35 colour slides, collected or produced by Robert Thomson. All photographs have been scanned and placed on the Museum's G drive. A list of all photographs with details has been compiled. melbourne, tramways, trams -
 Bendigo Historical Society Inc.
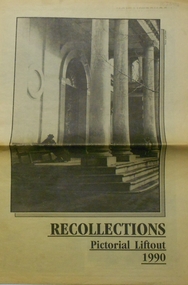
Newspaper - PETER ELLIS COLLECTION: RECOLLECTIONS PICTORIAL LIFTOUT
Historical lift out. Newspaper. Titled RECOLLECTIONS Pictorial Lift out 1990.1 looking down Mitchell St. from Railway Bridge. 2 Original railway station viewed from Mitchell St. bridge. 3 The great extended Hustlers mine. 4 1873 photo recently extended town hall with corn exchange at front left. 5 looking north westerly from city rec reserve at royal hustlers. 6 children play on mullock heap in front of a view of westerly quarter of Sandhurst. 7 Bank of Victoria, Mitchell St. left is Bendigo's original post office. 8 Looking down from what is now Rosalind Park. Shamrock Hotel can be seen on corner of Williamson St. and Pall Mall. This photo predates the construction of post office and law courts. 9 girl eating fairy floss. 10 4 kids on 1 horse in procession. 11 monkey and pedal car, a novelty attraction 1940's. 12 pony rides. 13 flying horses (ride). 14 processions past city hall. 15 Original ANZ bank corner Williamson St. & Pall Mall. 16 Chinese Dragons Bendigo Easter Fair 1940's. 17 City Hall viewed from Bull St. 18 City Hall original ceiling. 19 new town hall 1861. Mike Butcher, local historian. 21 Interior plan of city hall (ground floor) 22 circa 1920's 23 Tattered fragment original architect's drawing. 24 original assembly room. 25 Camp Hill PS Shamrock hotel without top story 27 shop with signage advertising Bushells, Bex and Swallow's Biscuits. 28 View from where fountain is now. 29 Hargreaves St. Looking south, now Hargreaves mall. Horse drawn water tank watering down road. 30 Central Deborah Gold mine poppet head. 31 Borough town hall, tram ways. 32 Original ANZ Bank corner Williamson St. and Pall Mall, demolished in mid 1960's. 33 Bush's store corner Williamson and Myer streets.34 Men on boat, don't know what or where. 35 Shearers. 36 men on a three wheeled bike. 37 4 Gold miners with shovels. 38 6pm closing, no trade Sundays, no women in main bar. 39 Peaceful scene Castlemaine 1940's Photographer Alan Doney. 40 Qantas Jet the City of Bendigo Tullamarine Airport. BCV-8 camera man & Advertiser photographer. 41 Ladies. 42 Tennis -> men and women (women in hats). 43 Sandhurst footy team. 44 Early school photos.bendigo, history, photographic history -
 Bendigo Historical Society Inc.
Negative - Photos of Bendigo - Glass Plate Negatives, Early 1900s
Three Boxes of Glass Plate Negatives and six black and white photos. 1. Box 1 Eight whole plate negatives of Pall Mall, Bendigo. Copies from original photos, or negatives made by the Army Survey Regiment stationed at Fortuna Villa. The original photos were taken by Alan Fox in 1857 and are in the State library of Victoria - currently being scanned. 2. Box 2 Fourteen half plate glass negatives collected from Bartlett's (Vincent Kelly) studio, Pall Mall, Bendigo by Mike Butcher. Many other negatives went to the State Library of Victoria - currently being scanned. 11072.1k Group of men and Children, and dog at a cricket match at the side of a sports pavilion. Group of men, maybe a team of runners. Child in clothing with Kentish Flour sew-ons and hat with wheat on the top. Miss Cohn, 6/7/1911 Mr A Robinson, 31/3/1904 Mr Ah Hoy, 19/4/1903 Mr Ah Gay, 19/11/1903 Mr Ah Gay and one other, 19/1/1903 Mr Ah Hoy, 22/12/1902 Mr Ah Hoy, 22/12/1902 Mr Kim Ah Hoy, 22/12/1902 Mr Kim Ah Hoy, 22/12/1904 Mr Deravin, 5/6/1902 3. Box 3 Bendigo Railway Station and Encroachments - 9 Quarter glass lead Plates in a box labelled "Kahland Collection. Content railway station, locomotives and signal box, Bendigo Railway Station. 11072.a Bendigo Railway Station from the Mitchell Street Bridge 4. Six black and white photos printed taken by Allan Doney - currently being scanned. 11072.1af Bendigo Arcade Pall Mall next to Myers. 11072.1ag Easter 1955 Junior Fire Brigade pulling fire cart with portrait of Queen Elizabeth 2 on the corner of Park Road and Bridge Street. 11072.1ah School of Mines Float Easter procession 1954. 11072.1ai Hustlers Terrace Bendigo 11072.1aj Limerick Castle Hotel Williamson St Bendigo 11072.1ak Christian Science Society 15 McKenzie St., Bendigo, on the left at 11 McKenzie St., formerly "Legacy House", now the Bendigo Historical Society. On the extreme left is the rear of the Princess theatre in View St. photos, bendigo, bendigo railway yards, mike butcher collection