Showing 2104 items
matching british museums
-
 Flagstaff Hill Maritime Museum and Village
Marble Tile, circa 1878
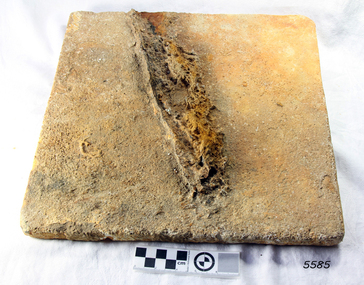
The artefact is a white marble tile raised from the wreck of the LOCH ARD (1878). The cargo manifest of the sunken vessel has the entry “Marble £400”. This is placed directly following the entry “Glass (604 cases)”. This conjunction suggests the marble tile was originally part of a consignment intended for use in a ‘high end’ residential or public building project in the gold and wool rich Colony of Victoria. Traditionally, white or cream marble was imported into Britain from the Mediterranean region of Europe, where beds of sedimentary limestone (calcium and magnesium carbonate) had been buried over a long geological period of time. Deep in the earth’s crust, it had been subjected to immense pressures and high temperatures, sufficient to completely re-crystallise the original deposits. Marble beds began as layers of sediment at the bottom of ancient tropical seas, forming from the skeletal remains of calcareous fossils, shell, and coral fragments. The metamorphic process of prolonged compression and heating recrystallised this skeletal material, destroying all signs of the original sedimentary fabric. The resulting ‘true’ marbles of, for example, White Carrara (Tuscany, Italy), Verdi (green) Antico (Thessaly, Greece), and Rouge (red) Languadoc (Carcassone, France), were highly prized in classical decoration (sculpture and friezes) and architecture (temples and arches). Marble was found in nineteenth century Australia, but in small, uneconomic deposits, not suitable for commercial quarrying. The comparative expense of imported marble restricted its use in colonial buildings to carved fireplaces and mantel pieces, or outdoor ornaments such as fountains, statuary and grave stones. If Carrara marble floor tiles were used, they were used sparingly, as an arresting feature in entrance halls for instance. However, most prominent private and public construction used timber flooring, waxed or ‘jappaned’, with carpet runners and rugs (for example the Austin’s Barwon Park Mansion, 1871), or laid tessellated and ceramic tiles of baked clay infused with colour (for example the Chirnside’s Werribee Park Mansion, 1878). HISTORY OF THE LOCH ARD The LOCH ARD belonged to the famous Loch Line which sailed many ships from England to Australia. Built in Glasgow by Barclay, Curdle and Co. in 1873, the LOCH ARD was a three-masted square rigged iron sailing ship. The ship measured 262ft 7" (79.87m) in length, 38ft (11.58m) in width, 23ft (7m) in depth and had a gross tonnage of 1693 tons. The LOCH ARD's main mast measured a massive 150ft (45.7m) in height. LOCH ARD made three trips to Australia and one trip to Calcutta before its final voyage. LOCH ARD left England on March 2, 1878, under the command of Captain Gibbs, a newly married, 29 year old. She was bound for Melbourne with a crew of 37, plus 17 passengers and a load of cargo. The general cargo reflected the affluence of Melbourne at the time. On board were straw hats, umbrella, perfumes, clay pipes, pianos, clocks, confectionary, linen and candles, as well as a heavier load of railway irons, cement, lead and copper. There were items included that intended for display in the Melbourne International Exhibition in 1880. The voyage to Port Phillip was long but uneventful. At 3am on June 1, 1878, Captain Gibbs was expecting to see land and the passengers were becoming excited as they prepared to view their new homeland in the early morning. But LOCH ARD was running into a fog which greatly reduced visibility. Captain Gibbs was becoming anxious as there was no sign of land or the Cape Otway lighthouse. At 4am the fog lifted. A man aloft announced that he could see breakers. The sheer cliffs of Victoria's west coast came into view, and Captain Gibbs realised that the ship was much closer to them than expected. He ordered as much sail to be set as time would permit and then attempted to steer the vessel out to sea. On coming head on into the wind, the ship lost momentum, the sails fell limp and LOCH ARD's bow swung back. Gibbs then ordered the anchors to be released in an attempt to hold its position. The anchors sank some 50 fathoms - but did not hold. By this time LOCH ARD was among the breakers and the tall cliffs of Mutton Bird Island rose behind the ship. Just half a mile from the coast, the ship's bow was suddenly pulled around by the anchor. The captain tried to tack out to sea, but the ship struck a reef at the base of Mutton Bird Island, near Port Campbell. Waves broke over the ship and the top deck was loosened from the hull. The masts and rigging came crashing down knocking passengers and crew overboard. When a lifeboat was finally launched, it crashed into the side of LOCH ARD and capsized. Tom Pearce, who had launched the boat, managed to cling to its overturned hull and shelter beneath it. He drifted out to sea and then on the flood tide came into what is now known as LOCH ARD Gorge. He swam to shore, bruised and dazed, and found a cave in which to shelter. Some of the crew stayed below deck to shelter from the falling rigging but drowned when the ship slipped off the reef into deeper water. Eva Carmichael had raced onto deck to find out what was happening only to be confronted by towering cliffs looming above the stricken ship. In all the chaos, Captain Gibbs grabbed Eva and said, "If you are saved Eva, let my dear wife know that I died like a sailor". That was the last Eva Carmichael saw of the captain. She was swept off the ship by a huge wave. Eva saw Tom Pearce on a small rocky beach and yelled to attract his attention. He dived in and swam to the exhausted woman and dragged her to shore. He took her to the cave and broke open case of brandy which had washed up on the beach. He opened a bottle to revive the unconscious woman. A few hours later Tom scaled a cliff in search of help. He followed hoof prints and came by chance upon two men from nearby Glenample Station three and a half miles away. In a state of exhaustion, he told the men of the tragedy. Tom returned to the gorge while the two men rode back to the station to get help. By the time they reached LOCH ARD Gorge, it was cold and dark. The two shipwreck survivors were taken to Glenample Station to recover. Eva stayed at the station for six weeks before returning to Ireland, this time by steamship. In Melbourne, Tom Pearce received a hero's welcome. He was presented with the first gold medal of the Royal Humane Society of Victoria and a £1000 cheque from the Victorian Government. Concerts were performed to honour the young man's bravery and to raise money for those who lost family in the LOCH ARD disaster. Of the 54 crew members and passengers on board, only two survived: the apprentice, Tom Pearce and the young woman passenger, Eva Carmichael, who lost all of her family in the tragedy. Ten days after the LOCH ARD tragedy, salvage rights to the wreck were sold at auction for £2,120. Cargo valued at £3,000 was salvaged and placed on the beach, but most washed back into the sea when another storm developed. The wreck of LOCH ARD still lies at the base of Mutton Bird Island. Much of the cargo has now been salvaged and some was washed up into what is now known as LOCH ARD Gorge. Cargo and artefacts have also been illegally salvaged over many years before protective legislation was introduced. One of the most unlikely pieces of cargo to have survived the shipwreck was a Minton porcelain peacock - one of only nine in the world. The peacock was destined for the Melbourne International Exhibition in 1880. It had been well packed, which gave it adequate protection during the violent storm. Today, the Minton peacock can be seen at the Flagstaff Hill Maritime Museum in Warrnambool. From Australia's most dramatic shipwreck it has now become Australia's most valuable shipwreck artefact and is one of very few 'objects' on the Victorian State Heritage Register. HISTORY OF THE LOCH ARD The LOCH ARD belonged to the famous Loch Line which sailed many ships from England to Australia. Built in Glasgow by Barclay, Curdle and Co. in 1873, the LOCH ARD was a three-masted square rigged iron sailing ship. The ship measured 262ft 7" (79.87m) in length, 38ft (11.58m) in width, 23ft (7m) in depth and had a gross tonnage of 1693 tons. The LOCH ARD's main mast measured a massive 150ft (45.7m) in height. LOCH ARD made three trips to Australia and one trip to Calcutta before its final voyage. LOCH ARD left England on March 2, 1878, under the command of Captain Gibbs, a newly married, 29 year old. She was bound for Melbourne with a crew of 37, plus 17 passengers and a load of cargo. The general cargo reflected the affluence of Melbourne at the time. On board were straw hats, umbrella, perfumes, clay pipes, pianos, clocks, confectionary, linen and candles, as well as a heavier load of railway irons, cement, lead and copper. There were items included that intended for display in the Melbourne International Exhibition in 1880. The voyage to Port Phillip was long but uneventful. At 3am on June 1, 1878, Captain Gibbs was expecting to see land and the passengers were becoming excited as they prepared to view their new homeland in the early morning. But LOCH ARD was running into a fog which greatly reduced visibility. Captain Gibbs was becoming anxious as there was no sign of land or the Cape Otway lighthouse. At 4am the fog lifted. A man aloft announced that he could see breakers. The sheer cliffs of Victoria's west coast came into view, and Captain Gibbs realised that the ship was much closer to them than expected. He ordered as much sail to be set as time would permit and then attempted to steer the vessel out to sea. On coming head on into the wind, the ship lost momentum, the sails fell limp and LOCH ARD's bow swung back. Gibbs then ordered the anchors to be released in an attempt to hold its position. The anchors sank some 50 fathoms - but did not hold. By this time LOCH ARD was among the breakers and the tall cliffs of Mutton Bird Island rose behind the ship. Just half a mile from the coast, the ship's bow was suddenly pulled around by the anchor. The captain tried to tack out to sea, but the ship struck a reef at the base of Mutton Bird Island, near Port Campbell. Waves broke over the ship and the top deck was loosened from the hull. The masts and rigging came crashing down knocking passengers and crew overboard. When a lifeboat was finally launched, it crashed into the side of LOCH ARD and capsized. Tom Pearce, who had launched the boat, managed to cling to its overturned hull and shelter beneath it. He drifted out to sea and then on the flood tide came into what is now known as LOCH ARD Gorge. He swam to shore, bruised and dazed, and found a cave in which to shelter. Some of the crew stayed below deck to shelter from the falling rigging but drowned when the ship slipped off the reef into deeper water. Eva Carmichael had raced onto deck to find out what was happening only to be confronted by towering cliffs looming above the stricken ship. In all the chaos, Captain Gibbs grabbed Eva and said, "If you are saved Eva, let my dear wife know that I died like a sailor". That was the last Eva Carmichael saw of the captain. She was swept off the ship by a huge wave. Eva saw Tom Pearce on a small rocky beach and yelled to attract his attention. He dived in and swam to the exhausted woman and dragged her to shore. He took her to the cave and broke open case of brandy which had washed up on the beach. He opened a bottle to revive the unconscious woman. A few hours later Tom scaled a cliff in search of help. He followed hoof prints and came by chance upon two men from nearby Glenample Station three and a half miles away. In a state of exhaustion, he told the men of the tragedy. Tom returned to the gorge while the two men rode back to the station to get help. By the time they reached LOCH ARD Gorge, it was cold and dark. The two shipwreck survivors were taken to Glenample Station to recover. Eva stayed at the station for six weeks before returning to Ireland, this time by steamship. In Melbourne, Tom Pearce received a hero's welcome. He was presented with the first gold medal of the Royal Humane Society of Victoria and a £1000 cheque from the Victorian Government. Concerts were performed to honour the young man's bravery and to raise money for those who lost family in the LOCH ARD disaster. Of the 54 crew members and passengers on board, only two survived: the apprentice, Tom Pearce and the young woman passenger, Eva Carmichael, who lost all of her family in the tragedy. Ten days after the LOCH ARD tragedy, salvage rights to the wreck were sold at auction for £2,120. Cargo valued at £3,000 was salvaged and placed on the beach, but most washed back into the sea when another storm developed. The wreck of LOCH ARD still lies at the base of Mutton Bird Island. Much of the cargo has now been salvaged and some was washed up into what is now known as LOCH ARD Gorge. Cargo and artefacts have also been illegally salvaged over many years before protective legislation was introduced. One of the most unlikely pieces of cargo to have survived the shipwreck was a Minton porcelain peacock - one of only nine in the world. The peacock was destined for the Melbourne International Exhibition in 1880. It had been well packed, which gave it adequate protection during the violent storm. Today, the Minton peacock can be seen at the Flagstaff Hill Maritime Museum in Warrnambool. From Australia's most dramatic shipwreck it has now become Australia's most valuable shipwreck artefact and is one of very few 'objects' on the Victorian State Heritage Register. The wreck of the LOCH ARD is of State significance — Victorian Heritage Register S417 Flagstaff Hill’s collection of artefacts from LOCH ARD is significant for being one of the largest collections of artefacts from this shipwreck in Victoria. It is significant for its association with the shipwreck, which is on the Victorian Heritage Register (VHR S417). The collection is significant because of the relationship between the objects, as together they have a high potential to interpret the story of the LOCH ARD. The LOCH ARD collection is archaeologically significant as the remains of a large international passenger and cargo ship. The LOCH ARD collection is historically significant for representing aspects of Victoria’s shipping history and its potential to interpret sub-theme 1.5 of Victoria’s Framework of Historical Themes (living with natural processes). The collection is also historically significant for its association with the LOCH ARD, which was one of the worst and best known shipwrecks in Victoria’s history. A square marble tile retrieved from the wreck of the LOCH ARD. Most of its surface is covered by a thin layer of limestone and marine growth encrustation that is stained rust-red. There is a piece of corroded iron encrusted at an oblique angle on the tile’s rear face. The tile is ‘rough-worked’, cut to shape and size, but not smoothed or polished. There is a companion tile in similar condition in the Flagstaff Hill collection. From visual observation of the original surface (at low magnification) the tile appears to be of white Carrara-type marble.flagstaff hill, warrnambool, shipwrecked coast, flagstaff hill maritime museum, maritime museum, shipwreck coast, flagstaff hill maritime village, great ocean road, loch line, loch ard, captain gibbs, eva carmichael, tom pearce, glenample station, mutton bird island, loch ard gorge, white marble, marble tile, carrara marble, colonial architecture, victorian building materials -
 Flagstaff Hill Maritime Museum and Village
Deadeye, circa 1873
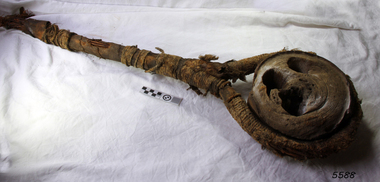
This example of a sailing ship’s ‘dead-eye’ is from the wreck of the LOCH ARD, which sank near Port Campbell in 1878. The vessel was an iron hulled clipper ship constructed for the Loch Line in 1873. It was part of a fleet of similar merchant ships owned by that company, which specialised in bringing passengers and goods from London via the Great Circle route to Melbourne, and returning to Britain via Cape Horn with the colony’s wool clip. Deadeyes were a common feature of sailing ship technology in the nineteenth century. They were a simple, cheap, and hard-wearing device that, in conjunction with another deadeye, provided an effective means of levering, or tightening, attached ropes and stays. Lower deadeyes were fixed to the sides of the ship by an encircling metal collar (inset in a flattish groove chiselled around the outer circumference of the disc), which was bolted to iron bars attached to the hull (called chain-plates). Upper deadeyes were looped by a strong hemp or wire rope (inset in a rounded groove carved around the outer circumference of the disc), which was joined to the bottom ends of the rigging which reached up to secure the masts into position (called shrouds or stays). Connecting a Lower deadeye to its corresponding Upper deadeye was a rope (called a lanyard) which looped up and down through the three “eyes” of each disc, to form a pulley system. The hitching of the two deadeyes with a looped lanyard provided the means of tightening, or loosening, the tension on the mast rigging ― essentially by pulling against the chain-plates bolted to the outside of the hull. It was a procedure that could be performed by sailors at sea and in emergencies. For example, after a gale the stays may have stretched and the masts worked loose, requiring retightening. Or, in the extreme circumstance of shipwreck, the lanyards might need to be released on the weather side, so that the masts fall away from the stricken vessel. HISTORY OF THE LOCH ARD The LOCH ARD belonged to the famous Loch Line which sailed many ships from England to Australia. Built in Glasgow by Barclay, Curdle and Co. in 1873, the LOCH ARD was a three-masted square rigged iron sailing ship. The ship measured 262ft 7" (79.87m) in length, 38ft (11.58m) in width, 23ft (7m) in depth and had a gross tonnage of 1693 tons. The LOCH ARD's main mast measured a massive 150ft (45.7m) in height. LOCH ARD made three trips to Australia and one trip to Calcutta before its final voyage. LOCH ARD left England on March 2, 1878, under the command of Captain Gibbs, a newly married, 29 year old. She was bound for Melbourne with a crew of 37, plus 17 passengers and a load of cargo. The general cargo reflected the affluence of Melbourne at the time. On board were straw hats, umbrella, perfumes, clay pipes, pianos, clocks, confectionary, linen and candles, as well as a heavier load of railway irons, cement, lead and copper. There were items included that intended for display in the Melbourne International Exhibition in 1880. The voyage to Port Phillip was long but uneventful. At 3am on June 1, 1878, Captain Gibbs was expecting to see land and the passengers were becoming excited as they prepared to view their new homeland in the early morning. But LOCH ARD was running into a fog which greatly reduced visibility. Captain Gibbs was becoming anxious as there was no sign of land or the Cape Otway lighthouse. At 4am the fog lifted. A man aloft announced that he could see breakers. The sheer cliffs of Victoria's west coast came into view, and Captain Gibbs realised that the ship was much closer to them than expected. He ordered as much sail to be set as time would permit and then attempted to steer the vessel out to sea. On coming head on into the wind, the ship lost momentum, the sails fell limp and LOCH ARD's bow swung back. Gibbs then ordered the anchors to be released in an attempt to hold its position. The anchors sank some 50 fathoms - but did not hold. By this time LOCH ARD was among the breakers and the tall cliffs of Mutton Bird Island rose behind the ship. Just half a mile from the coast, the ship's bow was suddenly pulled around by the anchor. The captain tried to tack out to sea, but the ship struck a reef at the base of Mutton Bird Island, near Port Campbell. Waves broke over the ship and the top deck was loosened from the hull. The masts and rigging came crashing down knocking passengers and crew overboard. When a lifeboat was finally launched, it crashed into the side of LOCH ARD and capsized. Tom Pearce, who had launched the boat, managed to cling to its overturned hull and shelter beneath it. He drifted out to sea and then on the flood tide came into what is now known as LOCH ARD Gorge. He swam to shore, bruised and dazed, and found a cave in which to shelter. Some of the crew stayed below deck to shelter from the falling rigging but drowned when the ship slipped off the reef into deeper water. Eva Carmichael had raced onto deck to find out what was happening only to be confronted by towering cliffs looming above the stricken ship. In all the chaos, Captain Gibbs grabbed Eva and said, "If you are saved Eva, let my dear wife know that I died like a sailor". That was the last Eva Carmichael saw of the captain. She was swept off the ship by a huge wave. Eva saw Tom Pearce on a small rocky beach and yelled to attract his attention. He dived in and swam to the exhausted woman and dragged her to shore. He took her to the cave and broke open case of brandy which had washed up on the beach. He opened a bottle to revive the unconscious woman. A few hours later Tom scaled a cliff in search of help. He followed hoof prints and came by chance upon two men from nearby Glenample Station three and a half miles away. In a state of exhaustion, he told the men of the tragedy. Tom returned to the gorge while the two men rode back to the station to get help. By the time they reached LOCH ARD Gorge, it was cold and dark. The two shipwreck survivors were taken to Glenample Station to recover. Eva stayed at the station for six weeks before returning to Ireland, this time by steamship. In Melbourne, Tom Pearce received a hero's welcome. He was presented with the first gold medal of the Royal Humane Society of Victoria and a £1000 cheque from the Victorian Government. Concerts were performed to honour the young man's bravery and to raise money for those who lost family in the LOCH ARD disaster. Of the 54 crew members and passengers on board, only two survived: the apprentice, Tom Pearce and the young woman passenger, Eva Carmichael, who lost all of her family in the tragedy. Ten days after the LOCH ARD tragedy, salvage rights to the wreck were sold at auction for £2,120. Cargo valued at £3,000 was salvaged and placed on the beach, but most washed back into the sea when another storm developed. The wreck of LOCH ARD still lies at the base of Mutton Bird Island. Much of the cargo has now been salvaged and some was washed up into what is now known as LOCH ARD Gorge. Cargo and artefacts have also been illegally salvaged over many years before protective legislation was introduced. One of the most unlikely pieces of cargo to have survived the shipwreck was a Minton porcelain peacock - one of only nine in the world. The peacock was destined for the Melbourne International Exhibition in 1880. It had been well packed, which gave it adequate protection during the violent storm. Today, the Minton peacock can be seen at the Flagstaff Hill Maritime Museum in Warrnambool. From Australia's most dramatic shipwreck it has now become Australia's most valuable shipwreck artefact and is one of very few 'objects' on the Victorian State Heritage Register. The shipwreck of the LOCH ARD is of State significance. Victorian Heritage Register S417. Flagstaff Hill’s collection of artefacts from LOCH ARD is significant for being one of the largest collections of artefacts from this shipwreck in Victoria. It is significant for its association with the shipwreck, which is on the Victorian Heritage Register (VHR S417). The collection is significant because of the relationship between the objects, as together they have a high potential to interpret the story of the LOCH ARD. The LOCH ARD collection is archaeologically significant as the remains of a large international passenger and cargo ship. The LOCH ARD collection is historically significant for representing aspects of Victoria’s shipping history and its potential to interpret sub-theme 1.5 of Victoria’s Framework of Historical Themes (living with natural processes). The collection is also historically significant for its association with the LOCH ARD, which was one of the worst and best known shipwrecks in Victoria’s history. A reasonably well-preserved ship’s deadeye with rust-stained wire loop-rope still attached. It retains portions of its original hemp cord and hessian wrapping. The flat sides of this thick wooden disc have three holes drilled through in a triangular configuration. The artefact is from the shipwreck of the LOCH ARD (1878). The survival of the loop-rope (wire cable) indicates it was an Upper Deadeye, connected to the shrouds (mast rigging).flagstaff hill, warrnambool, shipwrecked coast, flagstaff hill maritime museum, maritime museum, shipwreck coast, flagstaff hill maritime village, great ocean road, loch line, loch ard, captain gibbs, eva carmichael, tom pearce, glenample station, mutton bird island, loch ard gorge, deadeye, rigging -
 Upper Yarra Museum
Clothing Accessory
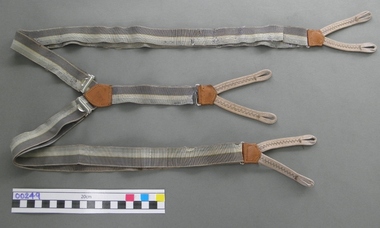
Braces - straps worn over shoulders for holding up trousers http://en.wikipedia.org/wiki/Suspenders Suspenders (Am. English) or braces (British English) are fabric or leather straps worn over the shoulders to hold up trousers. Straps may be elasticated, either entirely or only at attachment ends and most straps are of woven cloth forming an X or Y shape at the back. Braces are typically attached to trousers with buttons using leather tabs at the ends or, incorrectly according to traditional protocol, clips.. HISTORY the modern type were first invented in 1822 by Albert Thurston and were once almost universally worn due to the high cut of mid-nineteenth and early twentieth century trousers, a cut that made a belt impractical. After losing popularity in the first World War, as men became accustomed to uniform belts, suspenders were still standard throughout the 1920s. TODAY http://www.fabsugar.co.uk/Love-Hate-Trousers-Braces-1585776 Androgynous fashion nearly always appears on the catwalk and trousers with braces made an appearance this season at Paul Smith...Grey Elastic braces forming a y shape at the back, with leather tabs to hold clips and braided loops to attach to buttons on trousers. trousers, braces, straps -
 Bendigo Military Museum
Photograph - PHOTOGRAPH, AIR CREW 466 SQD, C. Originals 1944
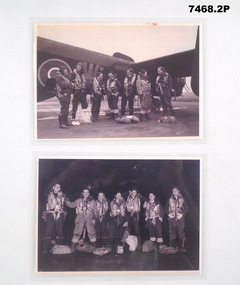
Items in the collection re "Jack Mitchell". It is not sure if .1) was taken before the Mission. As per .2) The target was Berlin on 21.1.1944. There was 769 Aircraft on the mission which included 264 Halifax's of which 22 were lost. The Crew; Roger John Evans No 410202, Flt/Sgt, enlisted 5.12.1941 age 31 years. (refer Cat No 7467) John Henry Maunder No 412562, Flt/Sgt, (refer Cat No 7467) Jack Mitchell, Flt/Sgt, (refer Cat No 7467) F. Greenwood Sgt British RAF. Sidney Robert McDonald No 413239, P/O, enlisted16.8.1941 age 19 years 3 months. Keith Mossman Tranent No 426402, Flt/Sgt, enlisted 20.6.1942 age 19 years 2 months. (refer Cat No 7467) Patrick John Bourke No 426822, Flt/Sgt, enlisted 11.8.1942 age 21 years. (Later KIA on 11.4.1944, craft No HX274) Black & white photographs laminated. .1) Day light photo shows 7 Aircrew standing beside a Halifax Bomber before take off. .2) Night time photo showing 7 Aircrew standing beside a Halifax Bomber on return from a mission..1) "Jack Evans Flt/Sgt DFC, Jack Maunder Flt/Sgt KIA, Jack Mitchell Flt/Sgt POW, Frank Greenwood Sgt RAF, Bob McDonald Flt/Sgt, Keith Tranent Flt/Sgt POW, Pat Bourke Flt/Sgt KIA". .2) "Back from a raid on Berlin 21.1.1944. Same names but in a different order"photographs, 466, raaf, berlin -
 Bendigo Military Museum
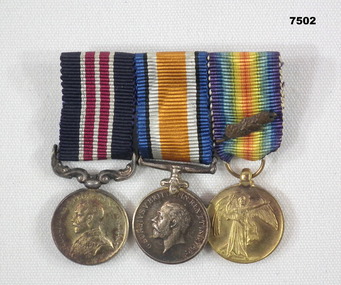
Award - MEDAL SET, MINIATURE, WW1, Post 1918
Miniatures re: “Augustus PEGLER MM", No. 967 C. Coy 38th Bn, rank Sgt. Awarded MM 31/8/1918. See Cat No 7501P for his full service details.Medal set miniatures, metal plate mounted. 1. Military Medal. 2. British War Medal 1914-18. 3. Victory Medal with clasp "MID” ww1, medals, augustus pegler -
 Bendigo Military Museum
Book - AUSTRALIAN MILITARY HAND BOOK, Angus & Robertson Ltd, The Fighting Soldier, 1941
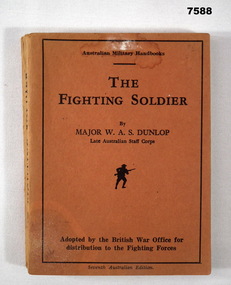
Written by Major W.A.S. Dunlop (late Australian Staff Corps) this book is noted as "Adopted by British War Office for distribution to the Fighting Forces". This is a pocket handbook. It has a thin cardboard cover, orange in colour. Black printing. In the centre is a silhouette of a charging soldier with bayonet. It has 202 pages of text.ww2, infantry training -
 Bendigo Military Museum
Poster - B.C.O.F. POSTER, BCOF Association of Australia, Australian BCOF Contingent Poster
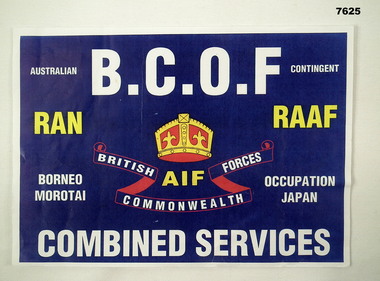
Item is part of the BCOF Association collection related to this Cat No 7625.This is a simple A4 sheet of paper on which is printed the title of BCOF. In the centre is a stylised crown. under the crown is the phrase AIF. Under that is a banner with the phrase:- 'BRITISH COMMONWEALTH FORCES" Under that, at the bottom is the phrase "Combined Services". RAN, RAAF are included in yellow ink. On left side are the places Borneo and Morotai. On right side are the words "Occupation Japan".bcof, poster -
 Bendigo Military Museum
Book - BOOK ABOUT JAPAN 1945-1948, The Rodney Press, British Commonwealth Occupation Forces - Know Japan
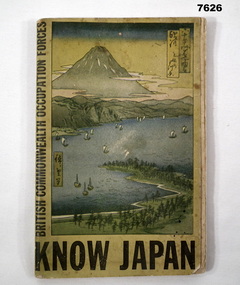
Australia was part of the British Commonwealth Occupation Forces in Japan after their surrender. Item s pat of the BCOF Association Collection, refer Cat No 7625.This is a cardboard covered book. There is a large image of Japan on front cover in colour. It shows a volcano mountain range - numerous boats on seaways. In the foreground is a thin pine plantation. It has 95 pages of text, charts and photos about Japanese history and culture.Inside front cover is modern price of $18.00.ww2, japan, 1945 on -
 Bendigo Military Museum
Booklet - OCCUPATION OF JAPAN, Brief History of Australia's Participation of Japan 1945 - 1952
After the Japanese surrender in WW2 the Allies (inc Australia) occupied Japan. Australia was part of the BCOF contingent. (British Commonwealth Occupation Force) one of the man Aimee was the disarmament of the Military. Item is part of the BCOF Association Collection, refer Cat No 7625.This is a fairly modern local production (it had an internet address at the top). It has six pages, printed in black ink. Fastened with one staple.ww2, japan, ocupation -
 Bendigo Military Museum
Photograph - Directors of Survey Army Headquarters, c1942-1967
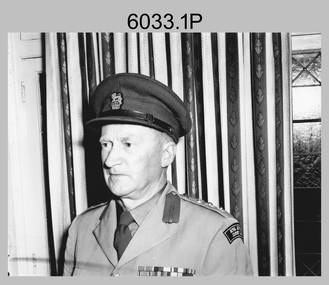
This is a set of two photographs of Directors of Survey Army Headquarters circa 1942 to 1967. COL Lawrence FitzGerald OBE was Director from 1942 to 1960. He received the Order of the British Empire in 1948 for his service in WW2. Although it is not known when BRIG Lawrence FitzGerald OBE was promoted to Brigadier, it is possibly an honorary promotion on his retirement in 1960. He served in the Australian Army from 03 September 1923 to 05 January 1960. COL Lawrence FitzGerald OBE was succeeded by COL Donald Macdonald AM, whose appointment to Director was from 1960 to 1967. COL Macdonald AM was promoted to Brigadier on his retirement before assuming the honorary position of Colonel Commandant of the Royal Australian Survey Corps. He served in the Australian Army from 01 January 1936 to 22 March 1960.This is a set of two photographs of Directors of Survey Army Headquarters circa 1942 to 1967.The photographs were printed on photographic paper and are part of the Army Survey Regiment’s Collection. They were scanned at 300 dpi. .1) - Photo, black and white, c1950s. D-SVY COL Lawrence FitzGerald OBE. .2) - Photo, black and white, c1960s. D-SVY COL Don Macdonald AM, MID. .1P to .2P – no annotationsroyal australian survey corps, rasvy, army survey regiment, army svy regt, fortuna, asr -
 Bendigo Military Museum
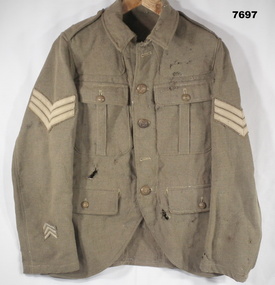
Uniform - JACKET, BATTLE DRESS, ARMY WW1, Australian Defence Industries, 1914-18
Jacket, Khaki colour, wool serge fabric. Battle dress style. Metal buttons with shank with split ring or safety pin. Buttons have raised emblem and letters -"LONDON ENGLAND" - appear to be British. Two buttons missing. Collar, shoulder epaulettes, four front pockets with button down flaps. White cotton fabric pocket lining. Two rank insignia top of sleeves, three stripes - Sergeant. Lower right sleeve, three chevrons; denotes overseas service. Right pocket lining - handwritten writing.Right pocket lining - handwritten black ink - writing illegible.uniform, army, battle dress, ww1 -
 Bendigo Military Museum
Book - AIRCRAFT IDENTIFICATION, Temple Press Ltd
Books were used as references for aircraft spotter on the home front and in battle during WW2.1. 64 page book outlining descriptions of British monoplanes. Front cover predominately black with red writing. Pictures of a plane in a search light over a city landscape. 2. 64 page book outlining descriptions of German warplane. Front cover predominately black with green writing with same background.1. Title "AIRCRAFT IDENTIFICATION" - British. 2. Title - "AIRCRAFT IDENTIFICATION" - German.german aircraft, british aircaft, books, ww2 -
 Bendigo Military Museum
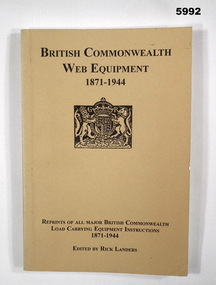
Book - BOOK, REFERENCE, Rick LANDERS, " BRITISH COMMONWEALTH WEB EQUIPMENT 1871-1944", 2005
Peter Ball collection, refer Cat No 4704.Soft cover book. Cover - cardboard, black print on front and spine, beige background, small illustration. British Coat of Arms. 192 pages, cut, plain, white paper. Illustrated black and white illustration, diagrams and photographs. Handwritten - signature of author and owner's name.Handwritten signatures - front end paper - owner "Peter C Ball". Title page - author - "Rick Landers".books, reference guide, history, military accoutrements, british -
 Bendigo Military Museum
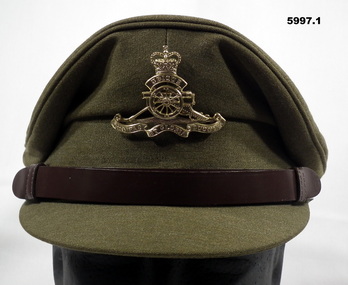
Uniform - SERVICE DRESS, ARMY, Aust Govt Clothing Factory, Fletcher Jones, ADA, 1. Hat 1988, 2. 1995. 3. ADI 1991. 4. - 5. 2006
Belonged to Craig Triffett No 326845/8253666 Enlisted: 27 .3.1985 Discharged: 9.2.2005 Unit/Corps: RAA Rank - Warrant Officer Class 2 Served tour with British Forces - Bosnia, Herzegovina 1997.1. Khaki peaked cap with Royal Aust Artillery Badge. 2. Jacket - Khaki with RAA Collar badges, white lanyard, WO2 and parachute badges, Australian Army Rising Sun Badge top of left arm. 3. Trousers - Khaki - (polyester). 4. Tie - khaki (polyester). 5. Tie - khaki (polyester). The ribbons are; The Australian Service medal. Long Service Medal with 20 years service. Australian Service Medal. Nato Medal (Bosnia Herzegovina)1. Written inside is "326845 Triffett". 2 - 3. Nil. 4. Written on small end is "326845 Triffett". 5. Nil.dress uniform, australian army, raa -
 Bendigo Military Museum
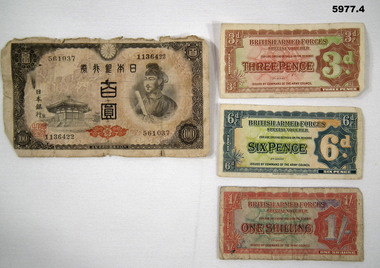
Currency - PAPER CURRENCY, Imperial Japanese Govt, 1. Asian. 2. 3. 4. British Army Forces, cWW2
1. Old Japanese 100 year old note. Black and Red printing on face, blue ink on rear side. Face side has image of a building and traditional man. rear side images has buildings and two dragons. NRS: 561037 1136422. 2. British Armed Forces - Special voucher. Three pence. printing on front is in brown green and red ink. rear side, brown ink. 3. British Armed Forces - Special voucher. Six pence. Printing on front is in blue, orange and green ink - rearside in blue ink. 4. British Armed Forces - Special voucher. One shilling. Printing on front is in red, blue and green ink - rearside in red ink.army overseas, barracks money, japan, britian -
 Bendigo Military Museum
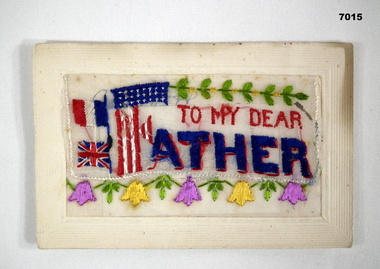
Postcard - POSTCARD WW1, EMBROIDERED, 1917-18
Sent by Cpl William Edward WENNERBOM Reg'n 2249, 3 October 1918. E. Coy, 12th Battn, Oct 1914, Discharged Dec 1919.Postcard - Cream cardboard, coloured thread embroidery, red, blue, white, green, yellow, purple.“To My Dear Father” French, British, American Flags, Flowers, Leaves.postcard, ww1 -
 Bendigo Military Museum
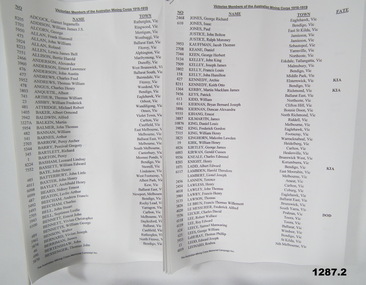
Administrative record - ADMINISTRATIVE RECORD, WW1, The Australian Mining Corps Memorial Campaign Inc, "Victorian Members of the Australian Mining Corps 1916-1919", unknown
"Victorian Members of the Australian Mining Corps 1916 - 1919". The 4 mining units formed by the Royal Australian Engineers for the British Expeditionary Force departed Australia for the United Kingdom 1916. After May 1916 the four constituent companies of the Australian Mining Corps were deployed directly as part of the Tunnelling Companies of the Royal Engineers. list produced by "The Australian Mining Corps Memorial Campaign Inc".1. & 2. Record document - facsimile copy of names. Black print on white paper. Both 8 pages - printed on one side, white paper. Stapled top left corner.records, royal australian engineers, tunnellers, ww1 -
 Bendigo Military Museum
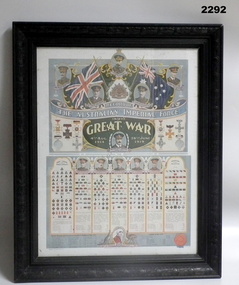
Poster - POSTER, FRAMED WW1, Osboldstone & Co Pty Ltd, Post WW1
Original Poster. Poster - colour print on paper. Top depicts British and Australian Flags with portraits of "H.M.KING GEORGE V" and four AIF Generals. Middle section - Honours and Decorations awarded to Members of the AIF with portrait of one AIF Major General. Lower Section - Portraits of five AIF Major Generals above seven columns of Unit Colour Patches of AIF Divisions, Corps, Troops and miscellaneous. Below - portrait of a Nurse within Kangaroo/emu emblem. Frame - timber with black/brown finish and decorative moulding. Glass front and brown paper backing over timber backing board.Heading on Poster - "RECORD OF/ THE AUSTRALIAN IMPERIAL FORCE/ IN THE/ GREAT WAR/ 4TH AUG/ 1914/ 28TH JUNE/ 1919" poster, framed accessories, ww1, aif -
 Bendigo Military Museum
Photograph - Army Survey Regiment’s Rifle Shooting Team, Fortuna, Bendigo, c1979
This set of 10 photographs of the Army Survey Regiment’s victorious rifle shooting team was taken outside the Tavern at Fortuna, Bendigo in c1979. The rifle shooting competition was the ‘Irwin Trophy for Shooting’, a contest with the British Army’s 42nd Engineer Regiment, the equivalent military geographic mapping unit at the time to the Army Survey Regiment. The bent .303 rifle seen in photo .3P was retrieved from the bottom of Fortuna’s lake when it was drained for restoration. It is believed an excavator drove over the rifle before it was retrieved.This set of 10 photographs of the Army Survey Regiment’s rifle shooting team was taken at Fortuna, Bendigo in c1979. The photographs were printed on photographic paper and are part of the Army Survey Regiment’s Collection. The 35mm positive photographic proofs were scanned at 600 dpi. Larger prints of .1P, .3P and .10P were scanned at 300 dpi. .1) & 2) - Photo, black & white, c1979, Rifle Shooting Team - L to R: Warren ‘Waldo’ Shirley, John Waight, Peter Searle UK Exchange, CO LTCOL Bob Skitch, Jim Macdonald, John Harrison, Max Neil, Stan Vote. .3) - Photo, black & white, c1979, Rifle Shooting Team - L to R: Stan Vote, John Harrison, Max Neil, Warren ‘Waldo’ Shirley, Jim Macdonald, John Waight. .4) - Photo, black & white, c1979, Rifle Shooting Team - L to R: CO LTCOL Bob Skitch, Jim Macdonald, Stan Vote. .5) - Photo, black & white, c1979, Rifle Shooting Team - L to R: John Waight, Warren ‘Waldo’ Shirley. .6) - Photo, black & white, c1979, Rifle Shooting Team - L to R: Warren ‘Waldo’ Shirley, CO LTCOL Bob Skitch. .7) - Photo, black & white, c1979, Rifle Shooting Team - L to R: CO LTCOL Bob Skitch, Warren ‘Waldo’ Shirley, Stan Vote, Jim Macdonald, Max Neil. .8) - Photo, black & white, c1979, Rifle Shooting Team - L to R: Jim Macdonald, Max Neil, Stan Vote. .9) - Photo, black & white, c1979, Rifle Shooting Team - L to R: CO LTCOL Bob Skitch, Peter Searle UK Exchange, Warren ‘Waldo’ Shirley. .10) - Photo, black & white, c1979, Irwin Trophy for Shooting..1P to .10P –No personnel are identified.royal australian survey corps, rasvy, army survey regiment, army svy regt, fortuna, asr -
 Bendigo Military Museum
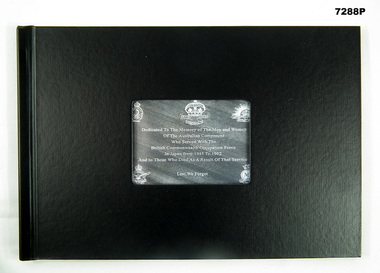
Album - ALBUM, PHOTOGRAPHIC, March 2018
Reunion held at Junee in NSW for those that served in Japan as part of occupational forces of the Commonwealth from 1945-52. Item in the collection of Richard William McGILVERY, RAAF. Refer Cat No.7287P for Service details, photos and awards.Hard cover black photo album for British Commonwealth Occupational Forces of Japan Reunion in 2018. Album contains photos and a newspaper article relating to reunion at Junee. Photos, actual part of a booklet on glossy coloured paper. 10 pages, both sides. Cover has a window into the first page highlighting a memorial statement to those that served. A plastic isert is at the front and back of the inside pages. Inside is a separate A4 page with photo print of a ceremony at the War Memorial.On front cover, a dedication to Australian Forces who served from 1945-52.japanese occupational forces, photo album, bcof -
 Bendigo Military Museum
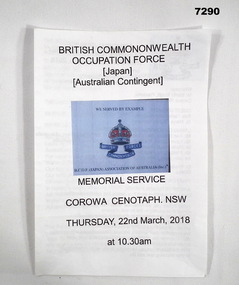
Programme - PROGRAMME, BCOF
For Memorial Service held at Corowa Cenotaph of Thursday 22 March 2018 to Celebrate the Australian Contingent of BCOF in occupying Japan Post WW2. Items in the collection of Richard William McGILVERY, RAAF. refer Cat No. 7287P for his service details, photos and awards. Folded white paper, A5 size of programme for memorial service at Corowa Cenotaph NSW. Black writing on front and inside. Blue square in middle of front with British Forces Commonwealth Emblem. Emblem is "British Forces Commonwealth" written on a dark blue ribbon with a blue and red crown on top.Header - "British Commonwealth Occupation Forces (Japan) Australian Contingent. Bottom '(Memorial Service Corowa Cenotaph, NSW. Thursday 22 March 2018 at 10.30 pm).bcof, japanese occupational forces -
 Bendigo Military Museum
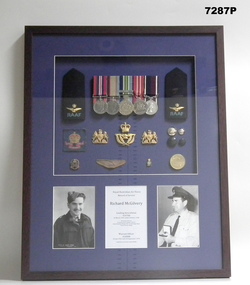
Photograph - PHOTOGRAPH, MEMORABILIA FRAMED, Accent Framing Ballarat, Post 1970
Richard William McGilvery. Enlisted No. 450708 in the RAAF on 20/3/45, age 19 years. Served with BCOF in Japan post War, discharged on 16/10/1948, re enlisted 1950, discharged 30.9.1970 with the rank of Warrant Officer, awarded the "Long Service & Good Conduct Medal.Framed memorabilia, frame brown timber, Memorabilia has blue inset backing, there are 4 inserts. Top insert has, 2 x RAAF shoulder epaulettes, 2. Shoulder patches "British Commonwealth Forces" 3. 2 x badges with lion and horse. 4. 1 x RAAF hat badge. 5. 4 x uniform buttons. 6. 1 x badge "British Commonwealth Forces Association". 7. 1 x brown shoulder wings. 8. 1 x miniature badge "Air Training Corps Australia". 9. Set of medals mounted. (1) Defence medal 1939-45. (2) Australian Service Medal. (3) Australian Defence Medal. (4) Long Service and good conduct medal. 10. Medallion 60 years 1945 - 2005. Photo insert showing portrait of "McGilvery" in Japan. Centre insert: Details re McGilvery with "Long Service & Good conduct Medal". "memorabilia, photographs, bcof -
 Bendigo Military Museum
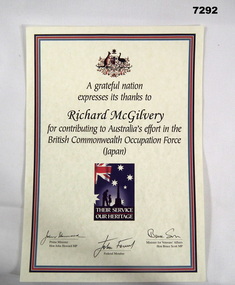
Certificate - CERTIFICATE - BCOF
Certificate issued to Australian Serviceman for their contribution towards BCOF. Signed by Prime Minister John Howard and VA Minister Bruce Scott so would be circa 1996-2001. Items in the collection of Richard William McGilvery, RAAF. Refer No.7287P for his service details, photo and awards.Hard cardboard, yellow pages with thin black, red and blue lines. Commonwealth Government emblem at top, a message of thanks and signatures at bottom. Also stylised picture of Australian Flag and image of child and man in front of a cenotaph.Says " A grateful nation expresses it's thanks to Richard McGilvery for contributing to Australia's effort in the British Commonwealth Occupation Forces (Japan). Signed by Prime Minister, His local MP & Minister for Veteran Affairs.bcof, certificate -
 Bendigo Military Museum
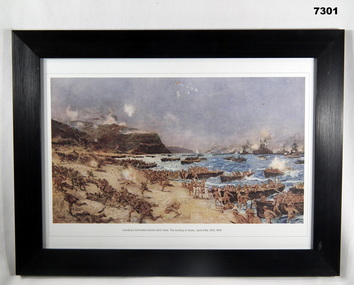
Print - PRINT, FRAMED WW1, Reader's Digest (Australia) Pty Limited, 2015
From information Book - "Readers Digest/Gallipoli/ 25th April 1915 - 9th January 1916/ Centenary Commemorative Prints". Collection of 20 prints. Refer Cat No. 7300. Framed print. Print - colour print on paper. Copy of an oil painting, depicting colour, the dawn landing of Australian and New Zealand troops at Anzac Cove. Frame - black plastic framing with glass front and MDF board backing with adhered black paper.Details below print - in black ink. "CHARLES EDWARD DIXON (1872-1934). The Landing at Anzac. April 25th 1915". 1915. Successful British Maritime Painter.framed accessories, prints, ww1, gallipoli, centenary -
 Bendigo Military Museum
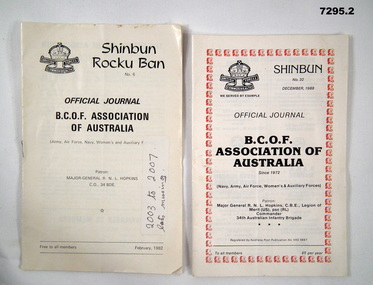
Booklet - BOOKLETS - BCOF, BCOF Association of Australia, 1. "SHINBUN ROCKU BAN" 2. "SHIBUN', 1982 and 1988
Booklets are the "OFFICIAL JOURNAL/ B.C.O.F. ASSOCIATION OF AUSTRALIA / since 1972/ Navy, Army, Air Force, Woman's & Auxiliary Forces." BOOKLETS - Items in the Collection of Richard William McGILVERY, RAAF. refer Cat No. 7287P for his service details, photo, awards.SOFT COVER BOOKLET. Cover - paper, black print on front and back on white paper. 2, Red print decorative frame/ border. Illustrated with the "BRITISH COMMONWEALTH FORCES", logo with crown. 1. 14 pages - cut, plain, white paper. Illustrated black and white photographs. 2. 40 pages, cut, plain, white paper. Illustrated - black and white photographs and cartoons.1. Front cover - white adhesive label, handwritten black ink "2003 to 2007/ lots missing". 1. "Shinbun Rocku Ban" No. 6 February 1982. 2. "Shinbun" No. 32 December 1988.history, booklets, bcof -
 Bendigo Military Museum
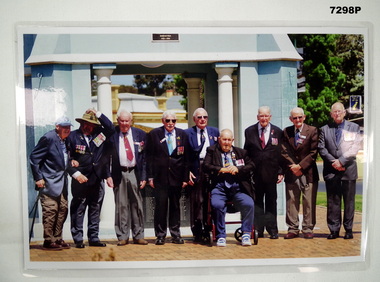
Photograph - PHOTOGRAPH, BCOF, 2018
Photo taken in 2018 when reunion held for BCOF (British Commonwealth Occupation Forces) 1945-52. Shows surviving servicemen in attendance. Items in the collection of Richard William McGILVERY, RAAF. Ref Cat. No 7287P for his service details, photos and awards.Large laminated landscape photo of members of BCOF. Picture of 9 Ex- servicemen in civilian clothes, wearing their service ribbons and standing in front of cenotaph at Corowa. Picture laminated in hard plastic on both sides.bcof, reunion, richard william mcgilvery -
 Bendigo Military Museum
Book - BOOK, BCOF, The Rodney Press, "KNOW JAPAN", C.1946
Purpose of the book was to provide members with some background to an understanding of the Japanese People to help the fit into the democratic world. Item in the collection of Richard William McGILVERY, RAAF. refer Cat No. 7287P for his service details, photos and awards.Cover - yellow/ orange colour - book of 96 pages. Title on front with picture of landscape of a bay with some ships and mountain in background in various pale pastel colours.Title of book "KNOW JAPAN"/ On side " BRITISH COMMONWEALTH OCCUPATIONAL FORCES" Inside back cover is some pencil notations and numbers. bcof, book, history, richard william mcgilvery -
 Bendigo Military Museum
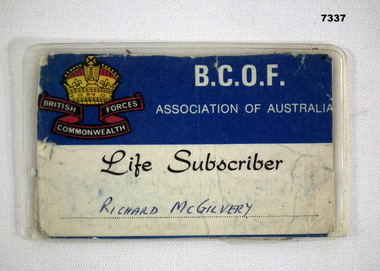
Card - CARD, BCOF SUBSCRIBER
Australian Membership card Occupational Forces from Commonwealth in Japan. A life Subscriber was a person who paid many years of membership ahead usually at a cheaper membership amount. Re collection of Richard William McGILVERY, RAAF. Refer Cat No.7287P for his service details, photos and awards.Small card, blue and white on front, wrapped in hard plastic. On front emblem of British Forces Commonwealth. Richard McGILVERY name on front. On back - membership No. and name and address of Mrs. W.E. McGILVERY and her signature.Titles "BCOF Association of Australia, Life Subscriber" and Richard McGILVERY's name. On back membership No. 16343.bcof, japan, richard william mcgilvery -
 Bendigo Military Museum
Poster - POSTER - FRAMED, Aust Govt, Department of Veteran's Affairs, 2016
Acknowledgment of Centenary of ANZAC Day. "Almost 300.000 Australians served on the Western Front in France and Flanders, taking part in every major British offensive between 1916 and the Armistice in 1918. More than 46,000 lost their lives of whom some 18,000 have no known grave. Behind the front line they took every opportunity to rest and recover, including these three men of the 1st Division, photographed in Vignacourt, France.Poster - Sepia coloured. Cream coloured border, dark brown plastic material frame. Glass protection.“ANZAC DAY 25 April 2016” “Centenary of the Somme”, “Three Men of the 1 Division". poster, centenary of the somme -
 Bendigo Military Museum
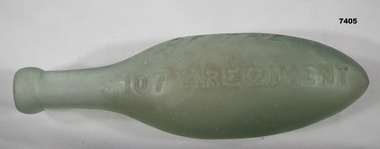
Container - BOTTLE, Unknown
Glass bottle - torpedo shape, oval shaped, with painted base and narrow neck. Green coloured glass. Bottle to be stored on its side. Information - markings on side of bottle. British.Information on bottle - "THE PROPERTY OF THE 107th REGIMENT". containers, glass, britain, 107th regiment